 UPDF for Windows
 UPDF for Mac
 UPDF for iPhone/iPad
 UPDF for Android
 Nomostar
 UPDF AI Online
 UPDF Sign
 IvyCraft
 Edit PDF
 Annotate PDF
 Create PDF
 PDF Form
 Edit links
 Convert PDF
 OCR
OCR PDF to Word
 PDF to Image
 PDF to Excel
 Organize PDF
 Merge PDF
 Split PDF
 Crop PDF
 Rotate PDF
 Protect PDF
 Sign PDF
 Redact PDF
 Sanitize PDF
 Remove Security
 Read PDF
 UPDF Cloud
 Compress PDF
 Print PDF
 Batch Process
 About UPDF AI
 UPDF AI Solutions
 AI User Guide
 FAQ about UPDF AI
 Summarize PDF
 Translate PDF
 Chat with PDF
 Chat with AI
 Chat with image
 PDF to Mind Map
 Explain PDF
 PDF AI Tools
 Image AI Tools
 AI Chat Tools
 AI Writing Tools
 AI Study Tools
 AI Working Tools
 Other AI Tools
 AI Bookmark Generation
 AI Bookmark Summary
 AI Watermark Generation
 AI Background Generation
 AI Sticker Generation
 AI Stamp Generation
 AI Editing Suite
 UPDF Copilot
 AI Page Management
 AI Semantic Search
 PDF to Word
 PDF to Excel
 PDF to PowerPoint
 User Guide
 UPDF Tricks
 FAQs
FAQs UPDF Reviews
 Download Center
 Blog
Blog Newsroom
 Tech Spec
 Updates
 UPDF vs. Adobe Acrobat
 UPDF vs. Foxit
 UPDF vs. PDF Expert
Batch Process with UPDF on Mac
UPDF for Mac provides batch PDF process facilities to the users. It allows various kinds of batch processing, including batch convert, Batch OCR, batch combine, batch compress, batch print, batch watermark, batch header and footer, batch insert, batch encrypt, batch Bates numbering, batch background, batch create PDF, and batch remove. You can click the button below or go to the Mac App Store to download UPDF on Mac, then follow the complete guidelines to use UPDF batch PDF features:
Windows • macOS • iOS • Android 100% secure
To enter the batch-processing mode, open UPDF on your Mac and open your PDF on the platform. Now, proceed to the Tools option at the home interface and choose the options from Batch PDFs menu.
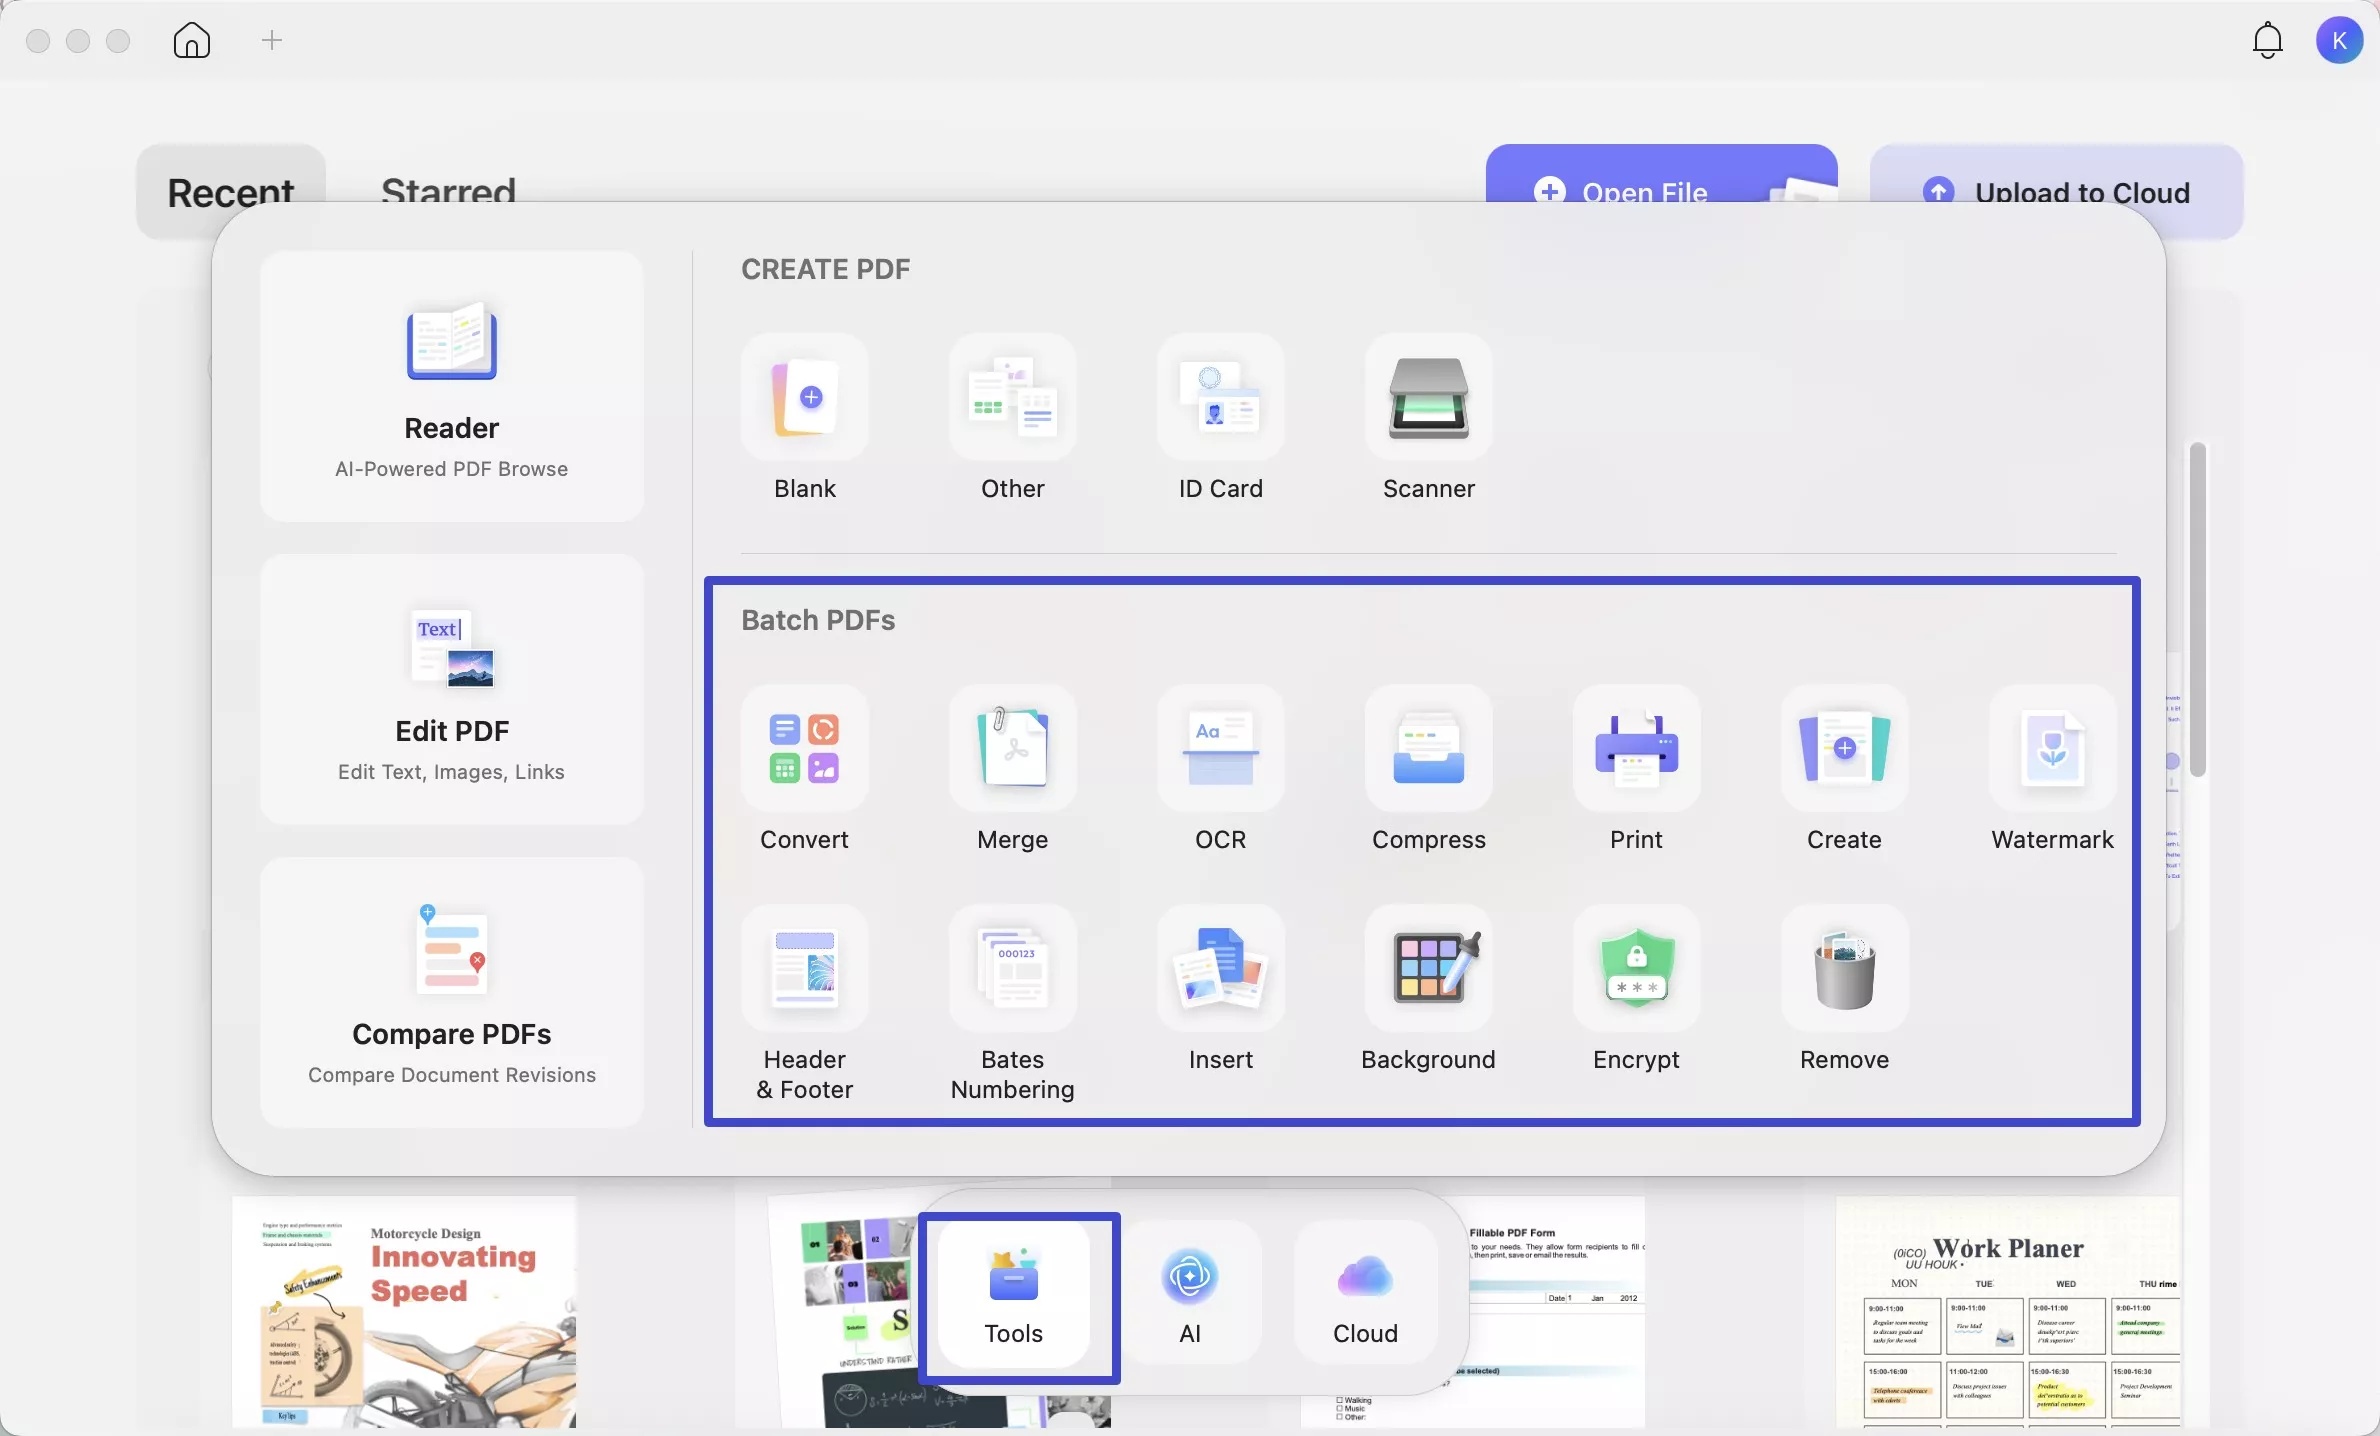
Next, we'll guide you through all the batch features in UPDF for Mac.
- Batch Convert
- Batch Merge
- Batch OCR
- Batch Compress
- Batch Print
- Batch Create
- Batch Watermark
- Batch Header and Footer
- Batch Bates Numbering
- Batch Insert
- Batch Background
- Batch Encrypt
- Batch Remove
1. Batch Convert
Batch convert allows you to convert multiple files into various formats simultaneously. Here's a step-by-step breakdown to help you navigate this process smoothly:
Before that, Select the option for Convert in after clicking on the “Tools” at the home interface.
Step 1. Adding Files
Time to add your PDF files for conversion. Click on Add Files. Alternatively, simply drag and drop your files into UPDF. If you’ve already opened the files within UPDF, utilize the Add Open Files option. If you have a complete folder to convert, opt for Add Folders.
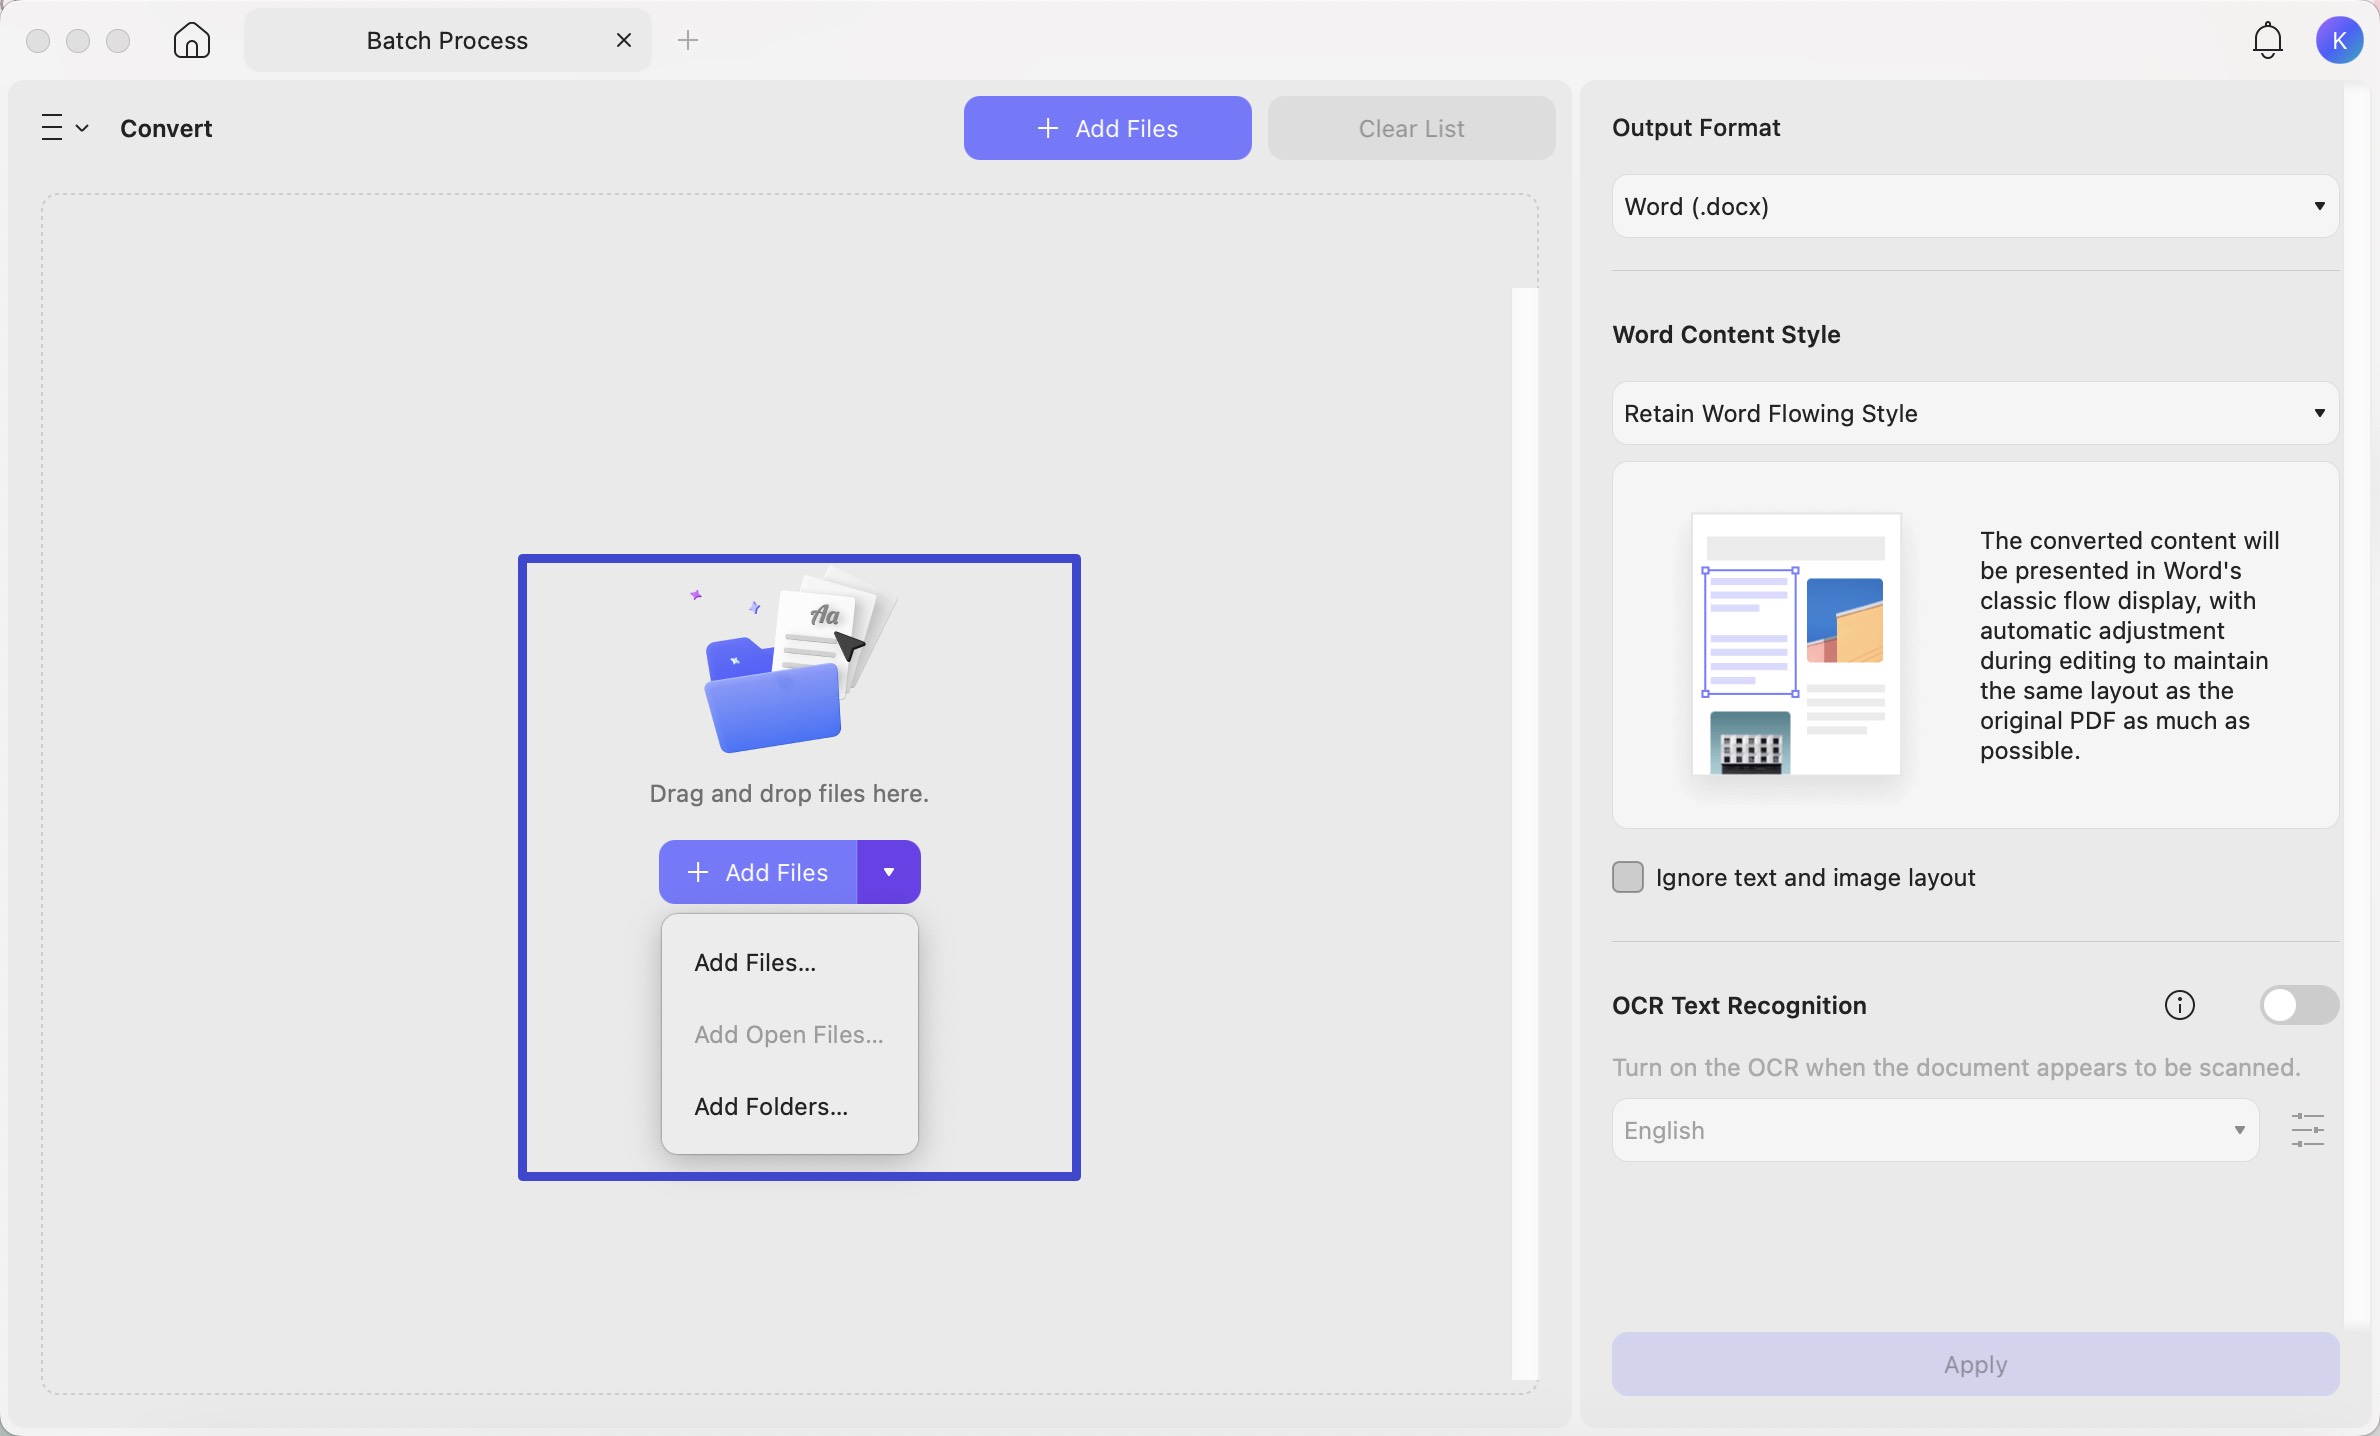
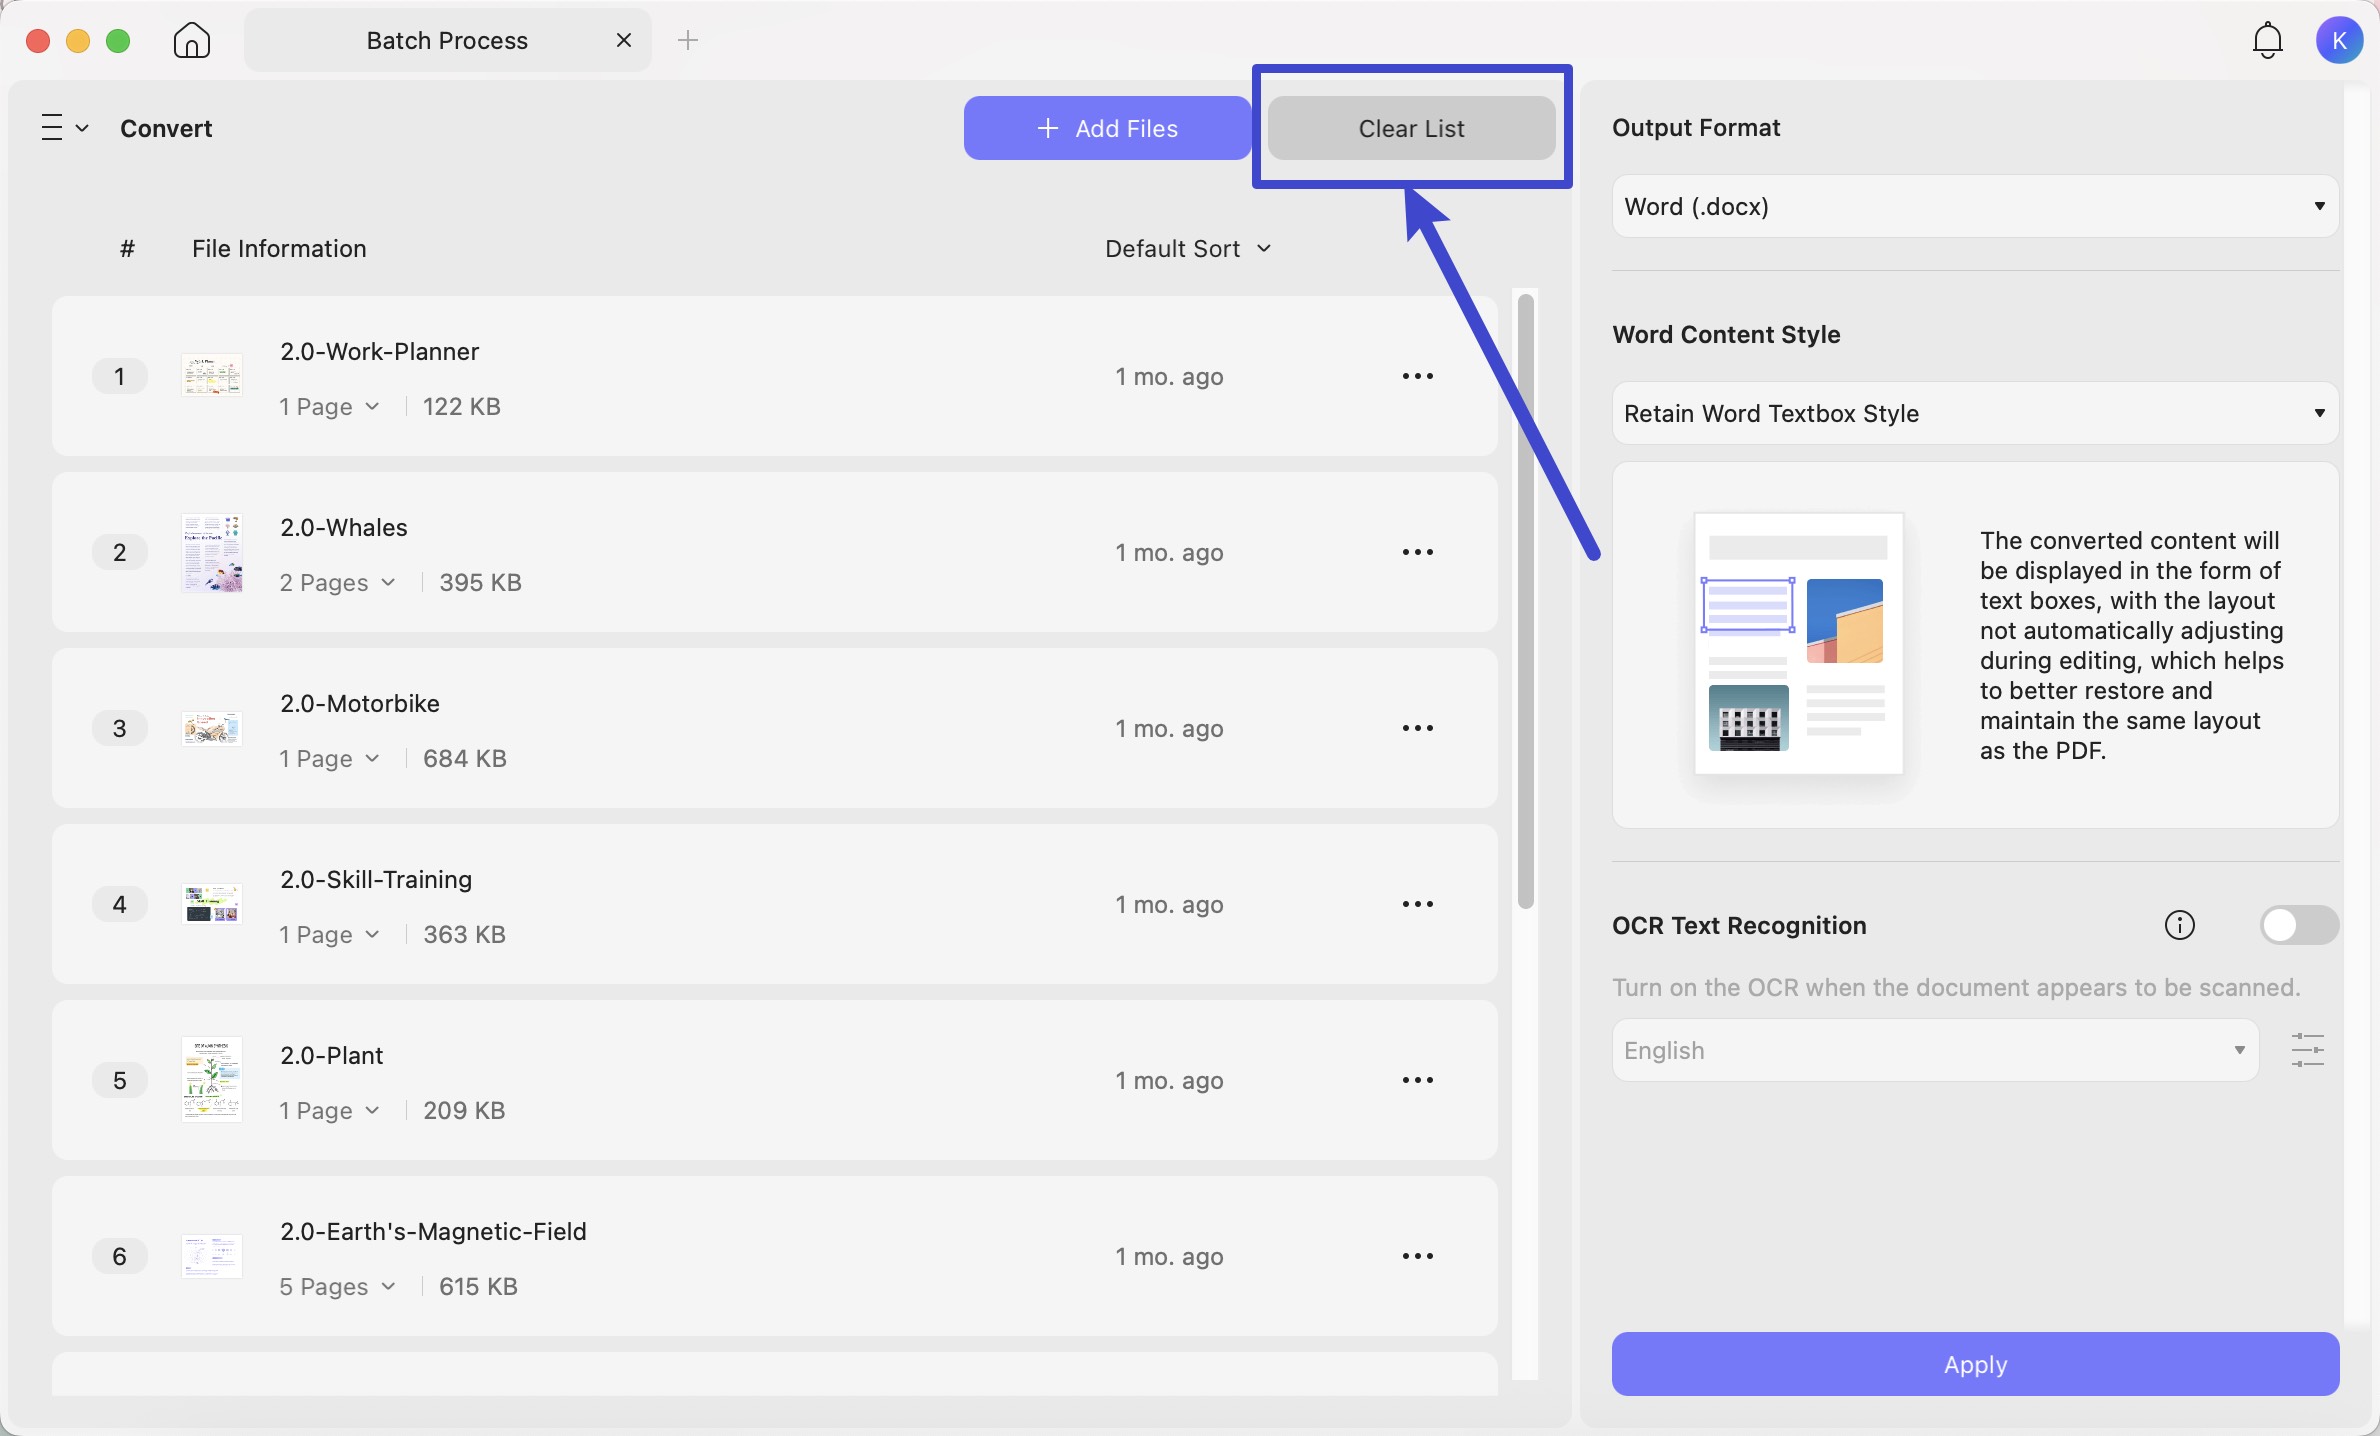
Step 2. Define the Output Format
The versatility of UPDF allows you to choose the output format that best suits your needs. To do this, extend the menu for Output Format and select your desired output format. You can export the converted files as Word, PowerPoint, Excel, CSV, RTF, Text, Image, XML, and HTML documents.
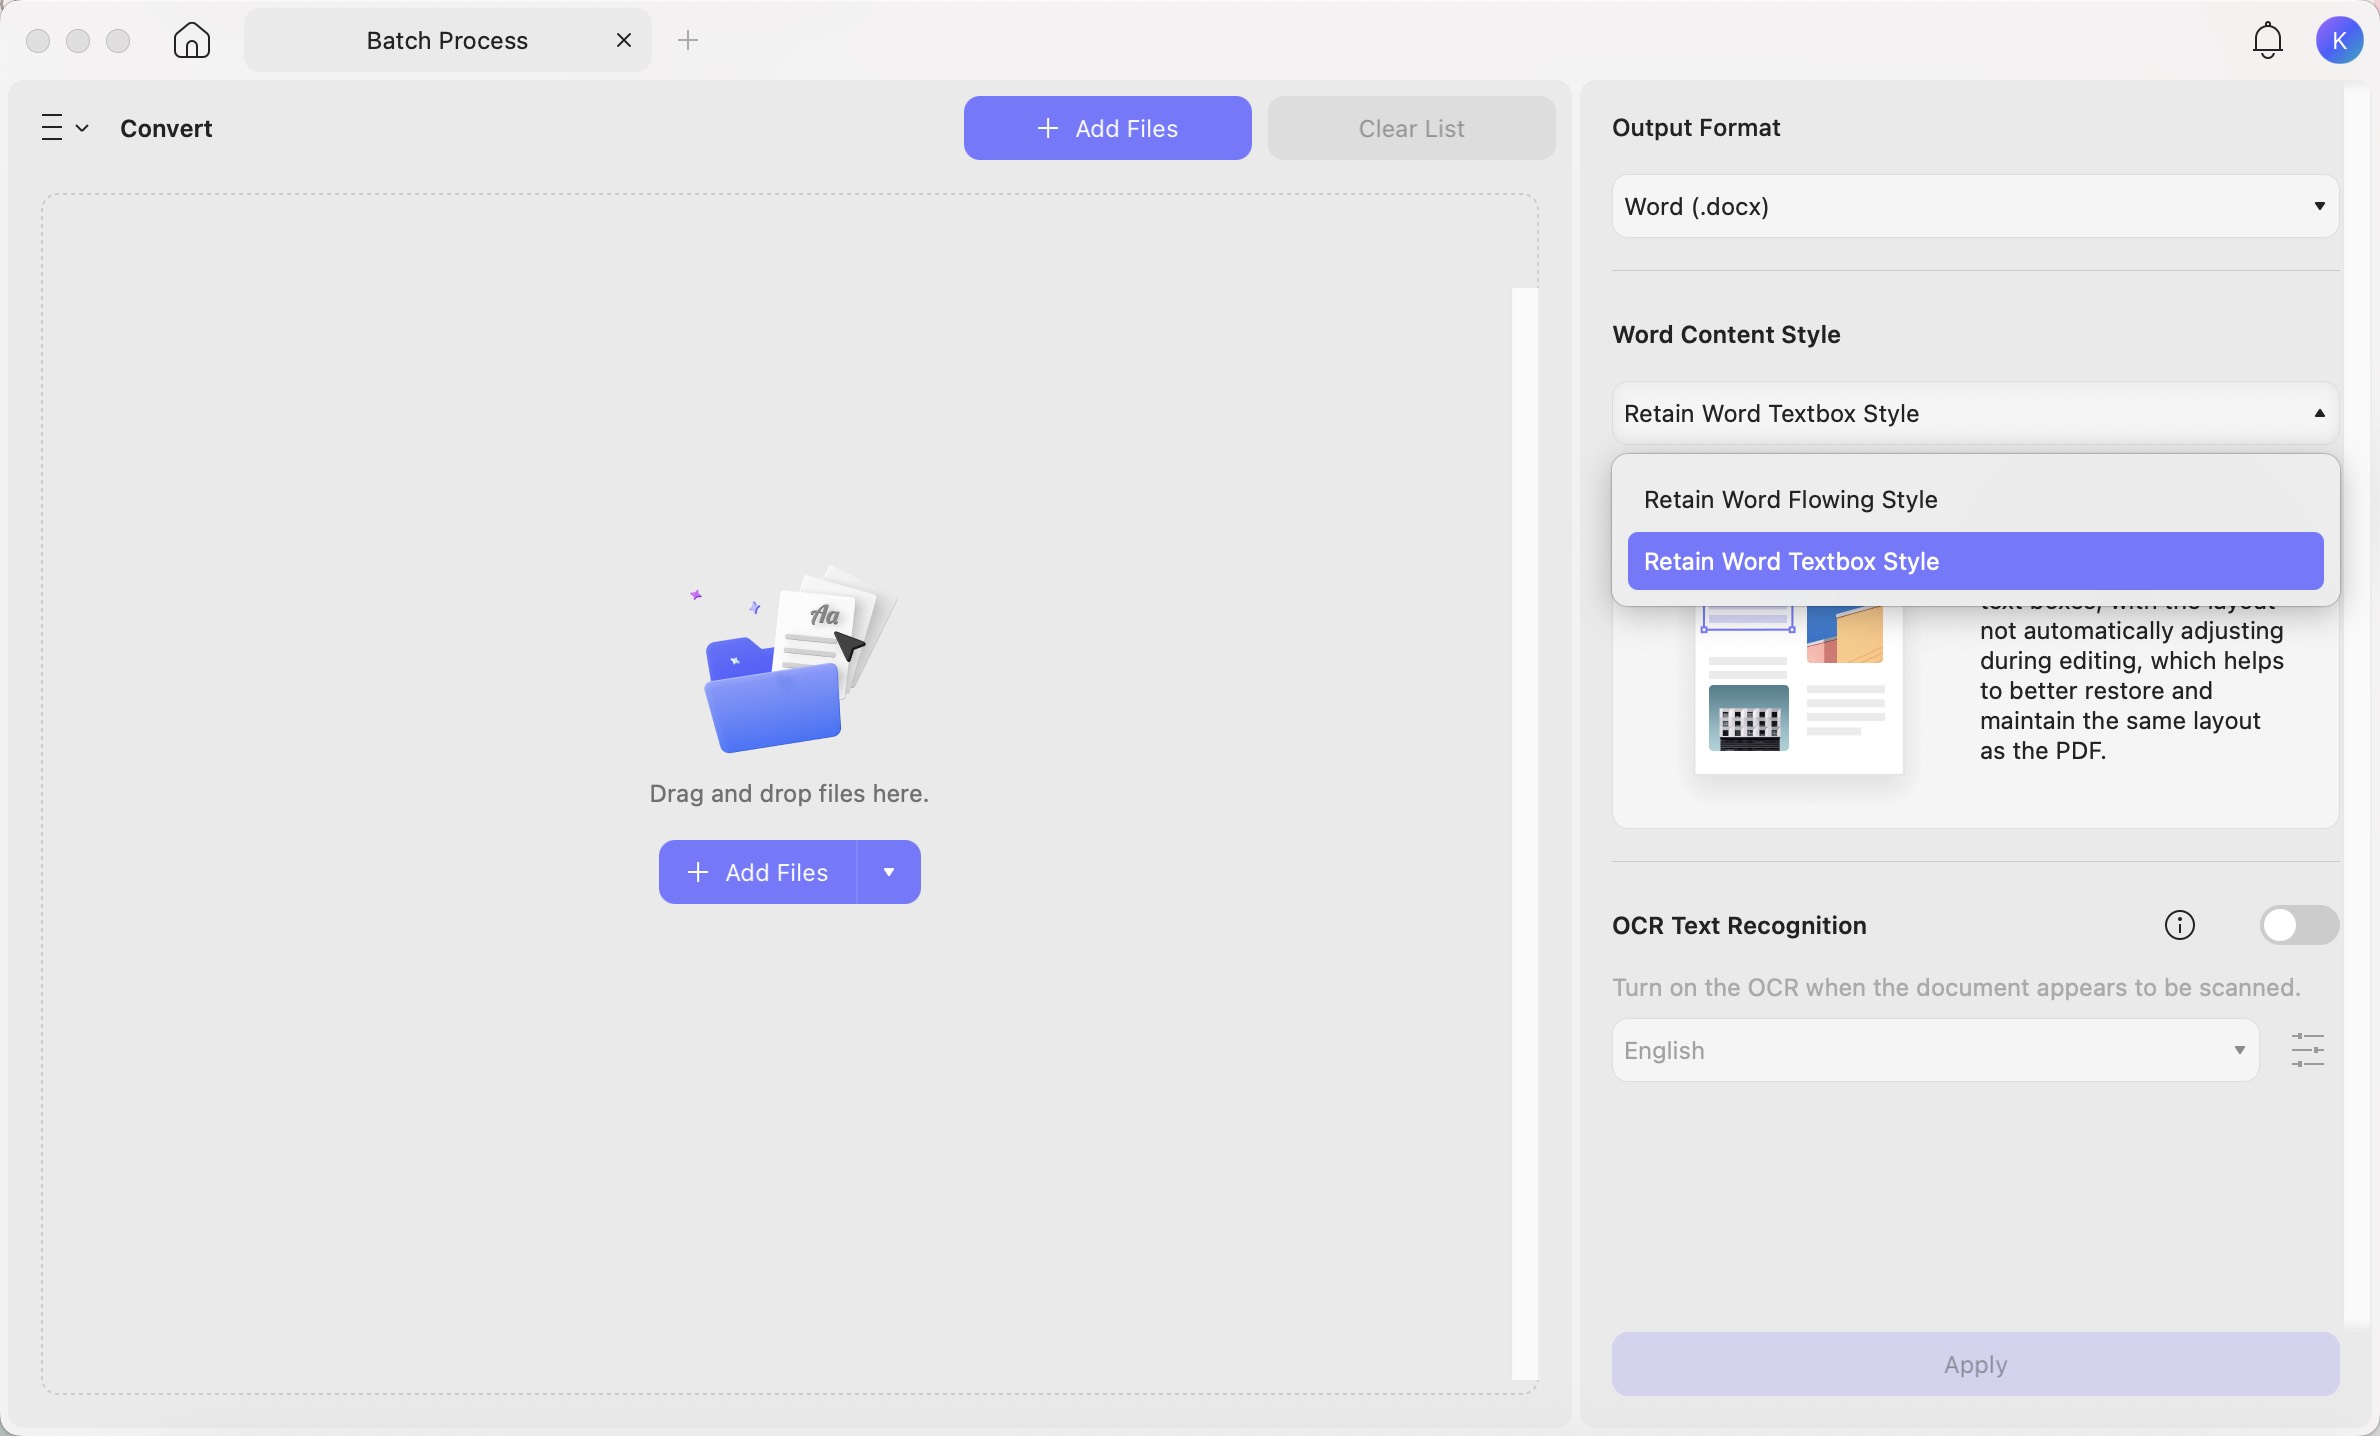
Step 3. Layout Settings (Optional):
If you’re converting to formats like Word or RTF, UPDF offers a feature to retain your document’s layout. You have two options: Retain Word Flowing Style and Retain Word Textbox Style.
Step 4. Applying Conversion:
Once you’ve customized your settings, click the Apply button. This step sets your chosen preferences into motion. Don’t forget to designate a location for the converted files. Simply click Select Folder to choose where your new files will reside.
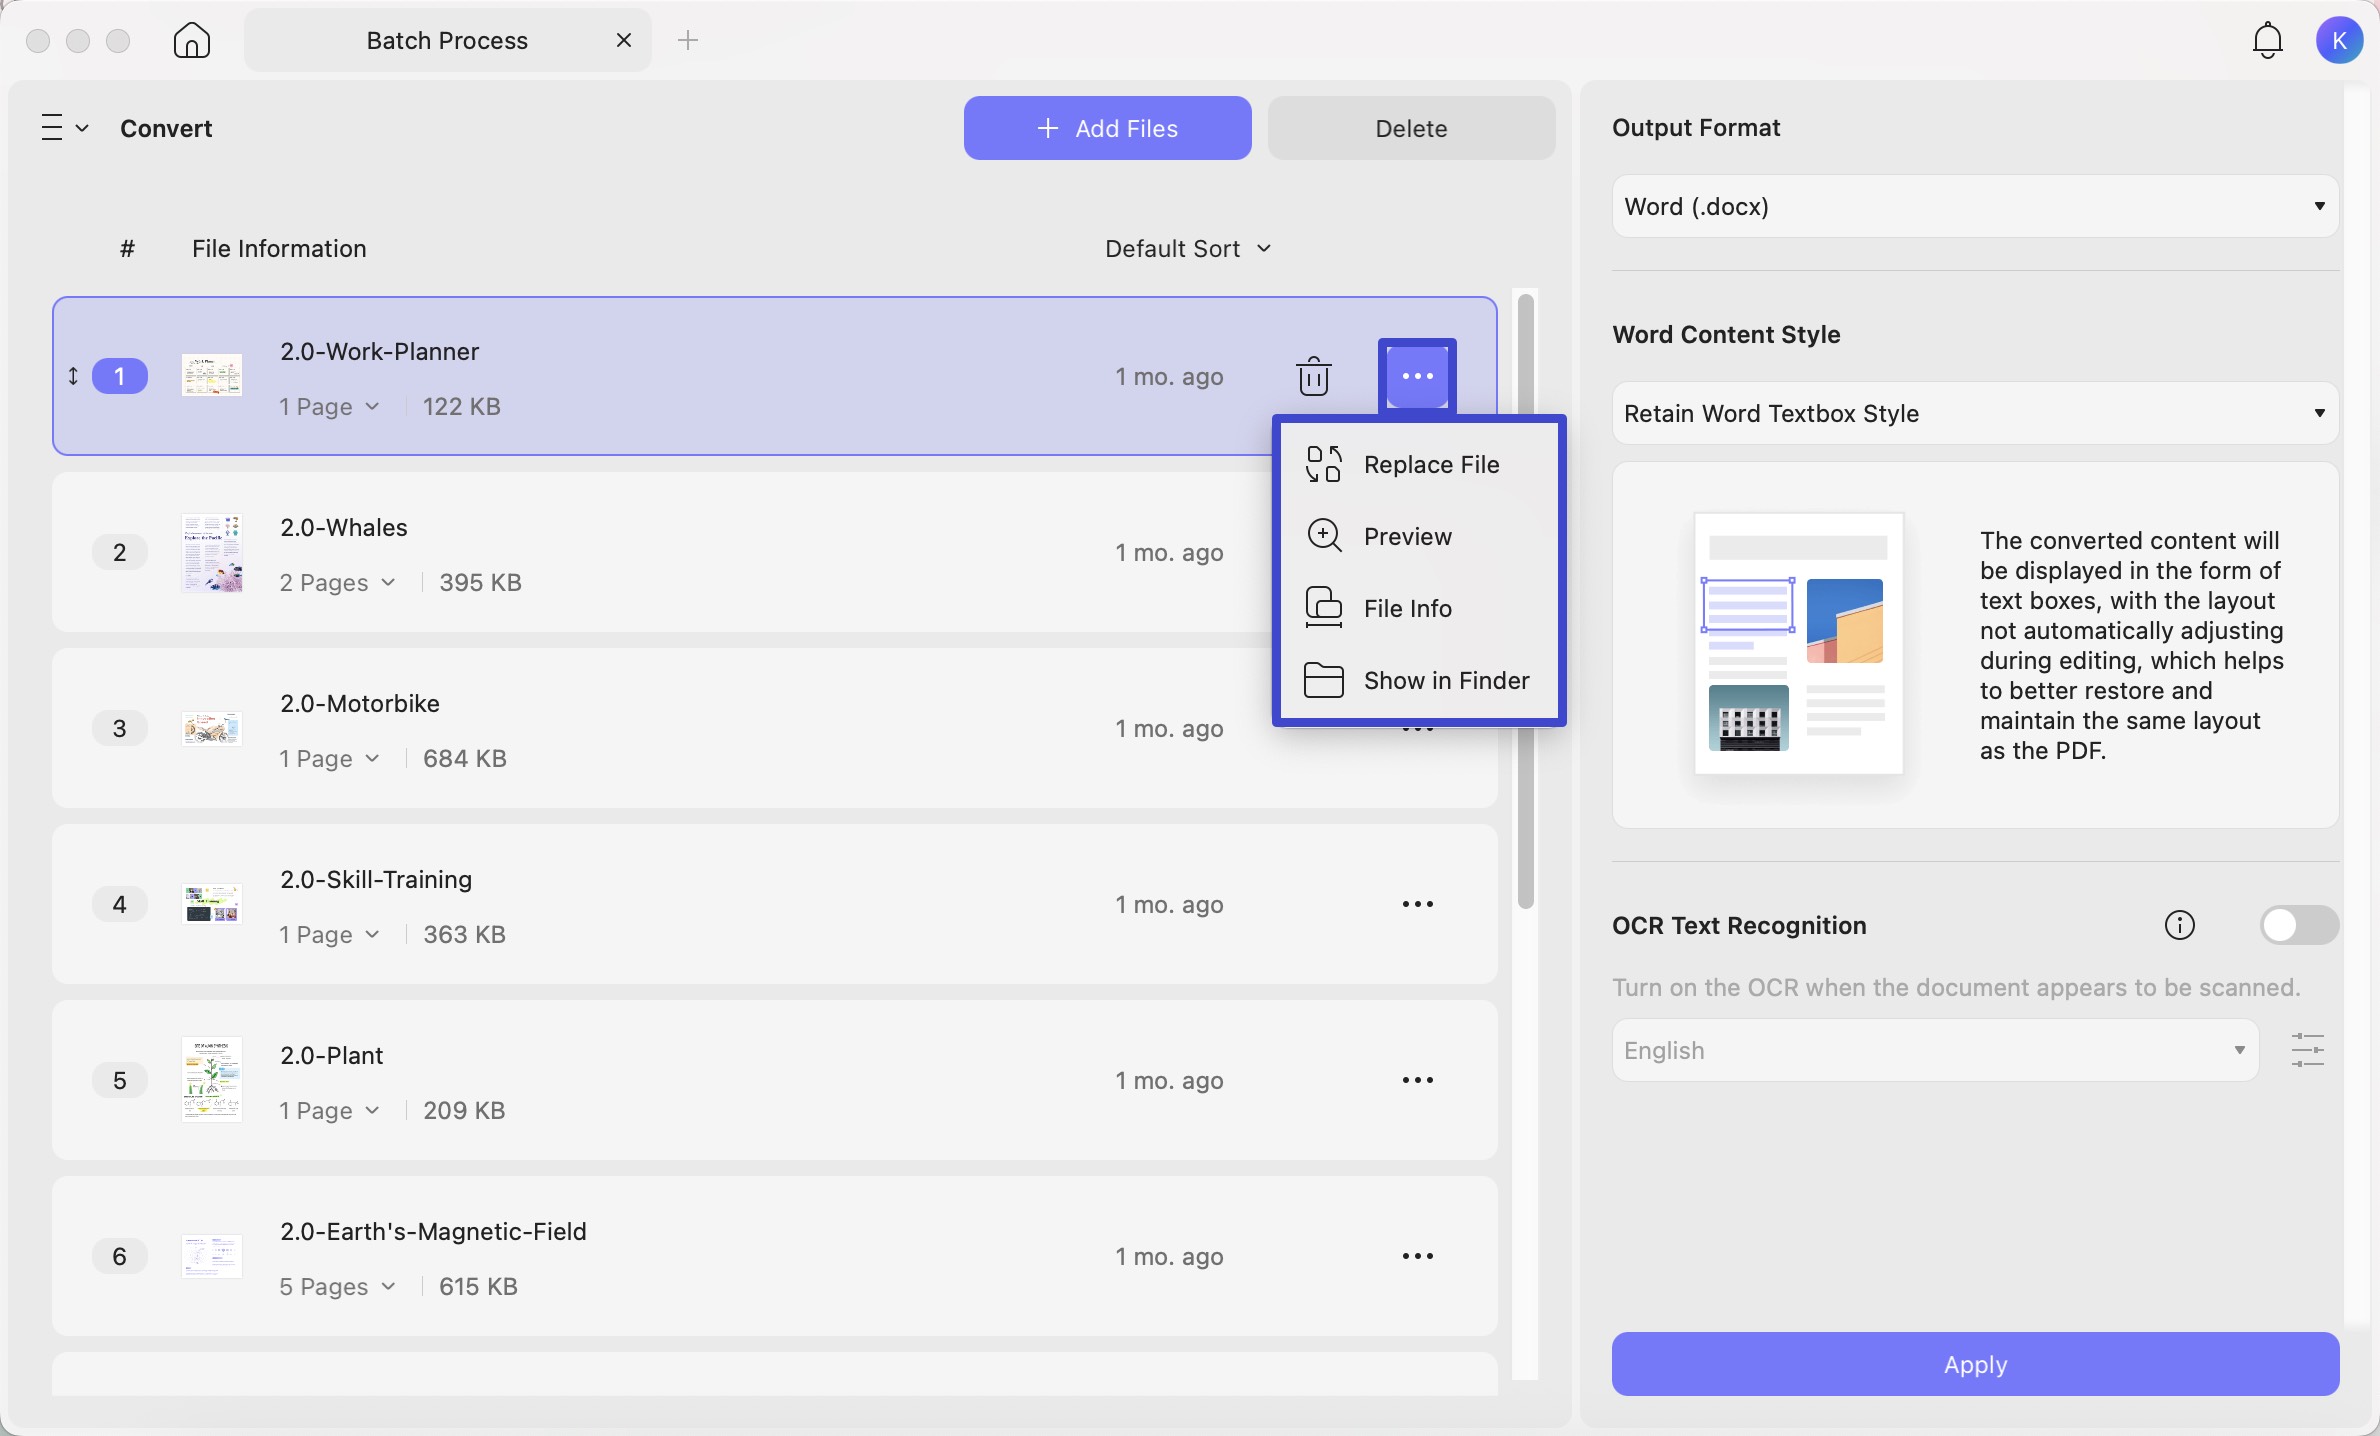
Here are some additional tips to aid you in a successful conversion seamlessly. You can click the three-dotted icon next to the file to find the below options.
- Preview: This option enables you to check whether you’ve chosen the right document or not.
- Replace file: It allows you to replace your existing file with another document in your device.
- File Info: With this option, you can have a quick review about your document before conversion.
- Show in Finder: To find out where the PDF is located, select Show in Finder.
- Clear List: If you decide to start a new or have completed the conversion, use the Clear List button at the top of the window to remove all files from the list.
These additional settings are also applied to other batch process features.
2. Batch Merge
With the help of the batch combine feature, UPDF can combine multiple images as well as PDF files into a single PDF in no time! Here's how to do it:
Step 1. Adding Files:
If you want to merge the files you've selected while operating batch convert mentioned above, you can simply click on the three vertical lines and choose "Merge" icon. All the files will be preserved without being uploaded again. Otherwise, click "Tools" in the UPDF home page and select "Merge".
Your next move is to incorporate the files you want to combine. Click the Add Files button. If the files are already open within UPDF, use the arrowhead adjacent to the button and select Add Open Files. Alternatively, if you have an entire folder to merge, explore the Add Folders option.
Step 2. Arranging the Files and Setting the Properties
Arrange the added files in the desired order. This step ensures that your merged document flows smoothly. If needed, simply use the intuitive drag-and-drop functionality.
Apart from this, you can set the properties like Page Size Options, Page Size, Orientation, or File Name. Once satisfied, click Apply. Upon clicking the apply button, UPDF prompts you to select a location. Choose a suitable directory for your output file.
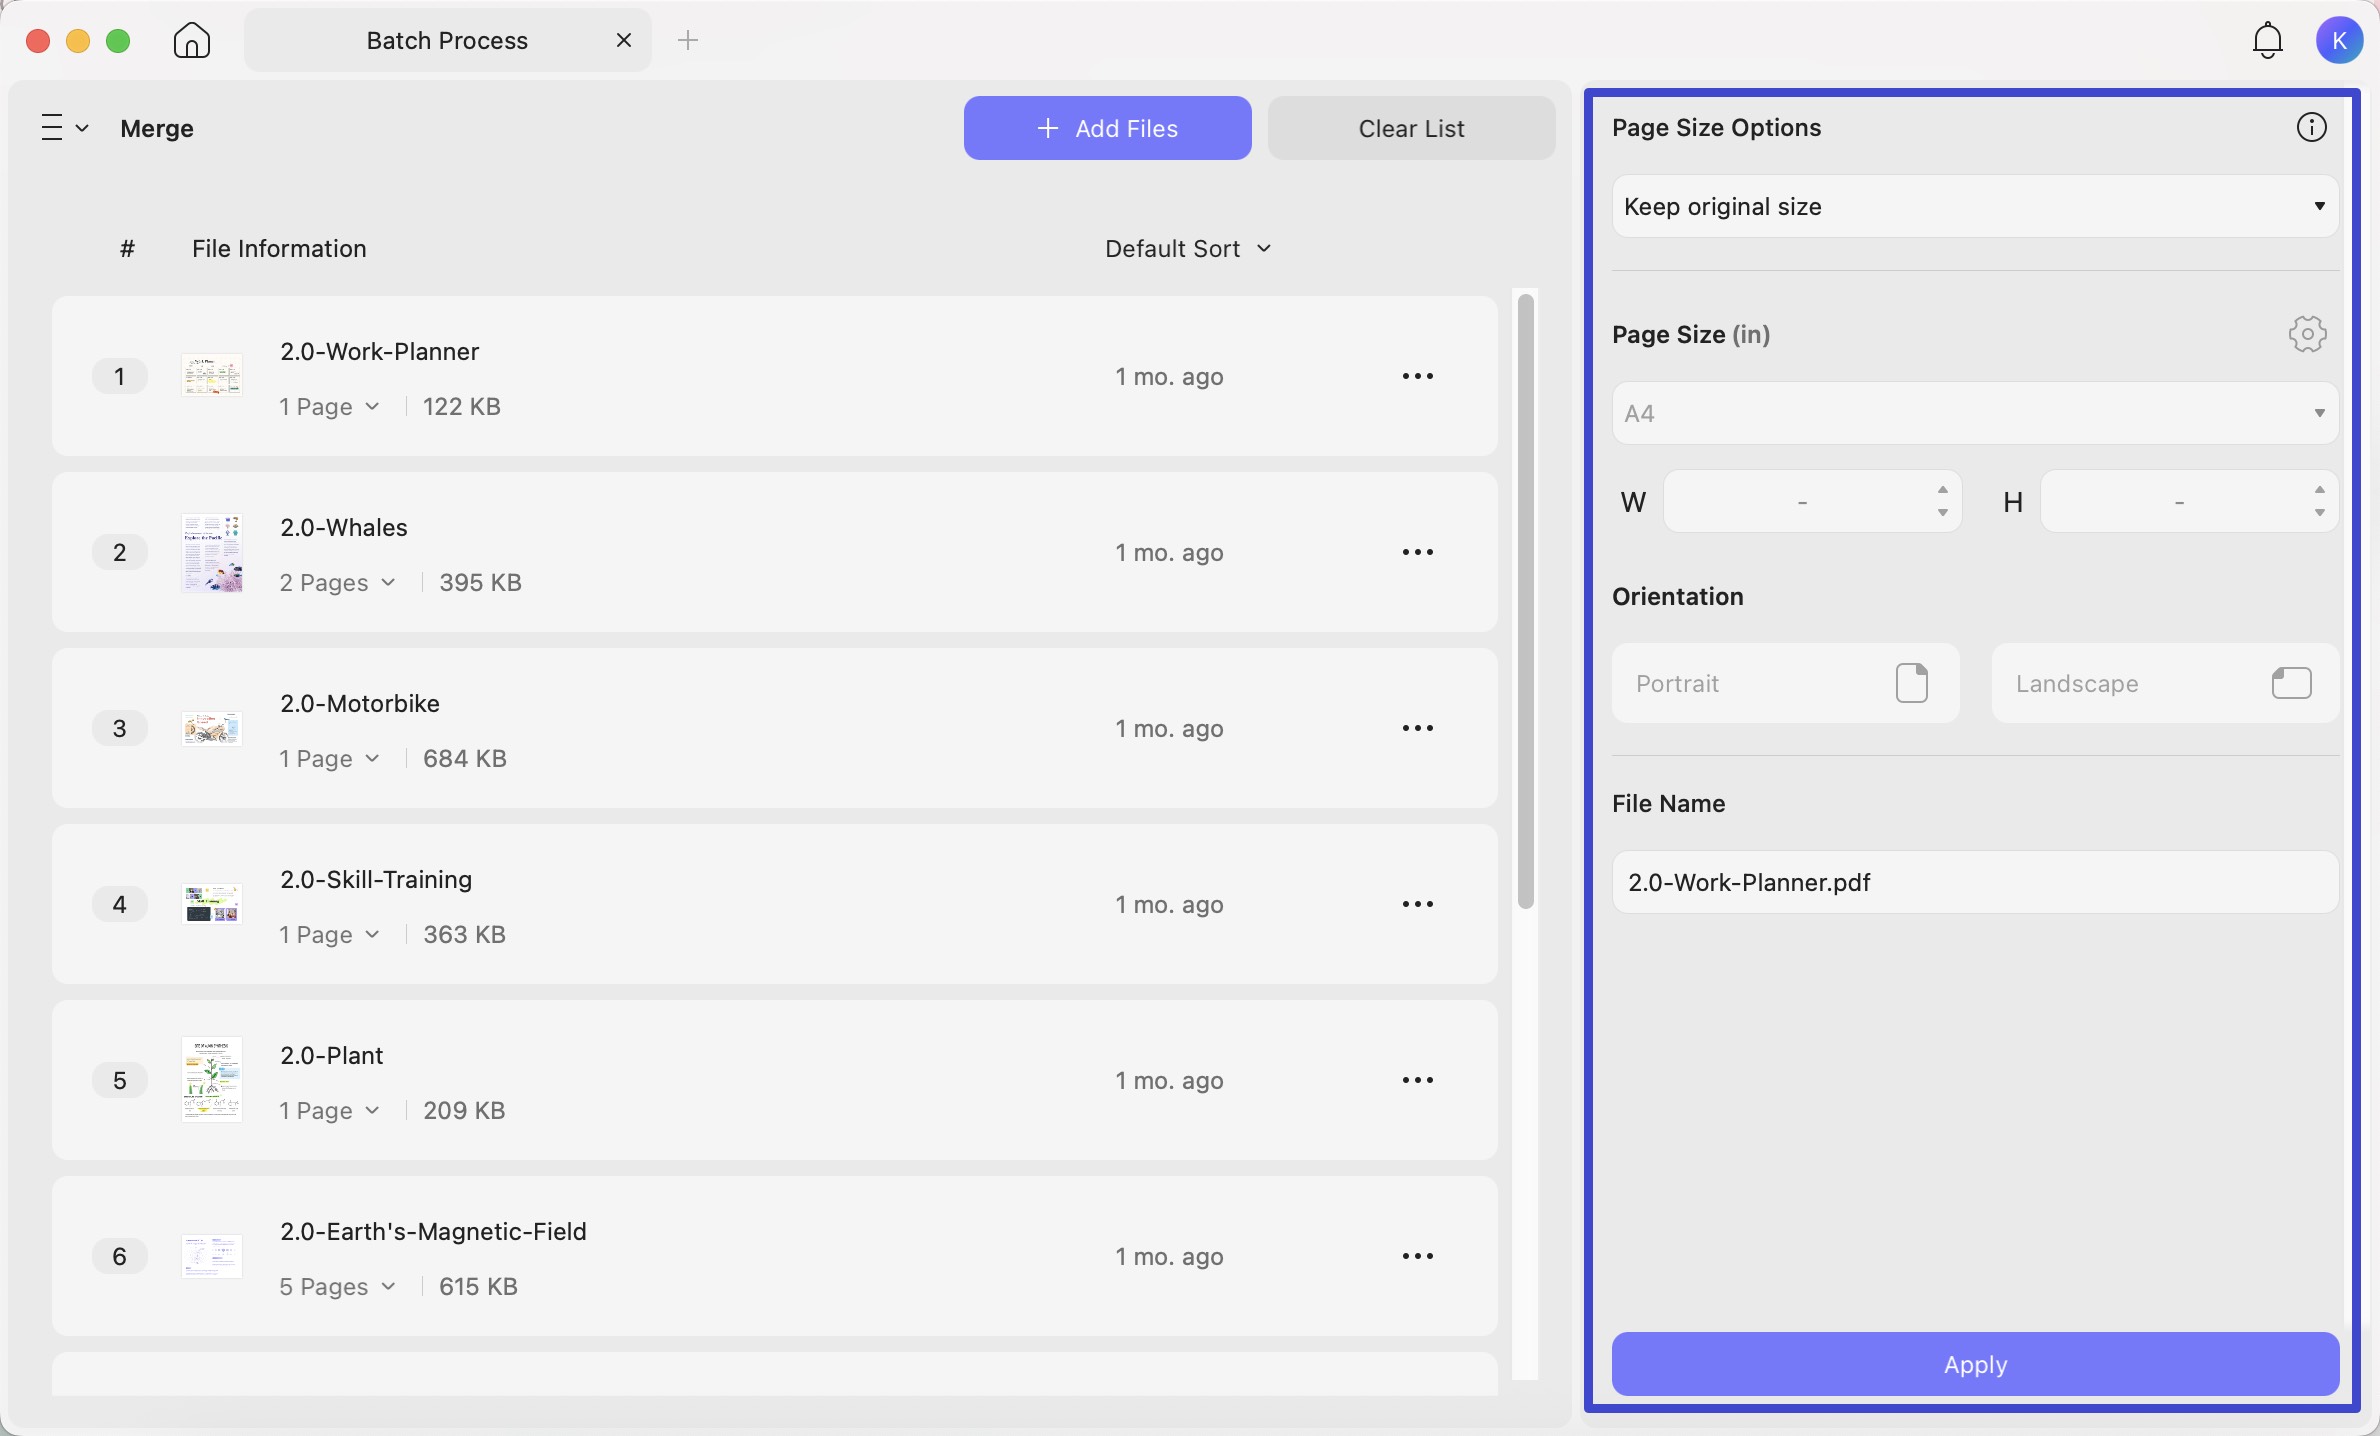
Execute the process by clicking Save. UPDF seamlessly combines your selected files into a single PDF.
3. Batch OCR
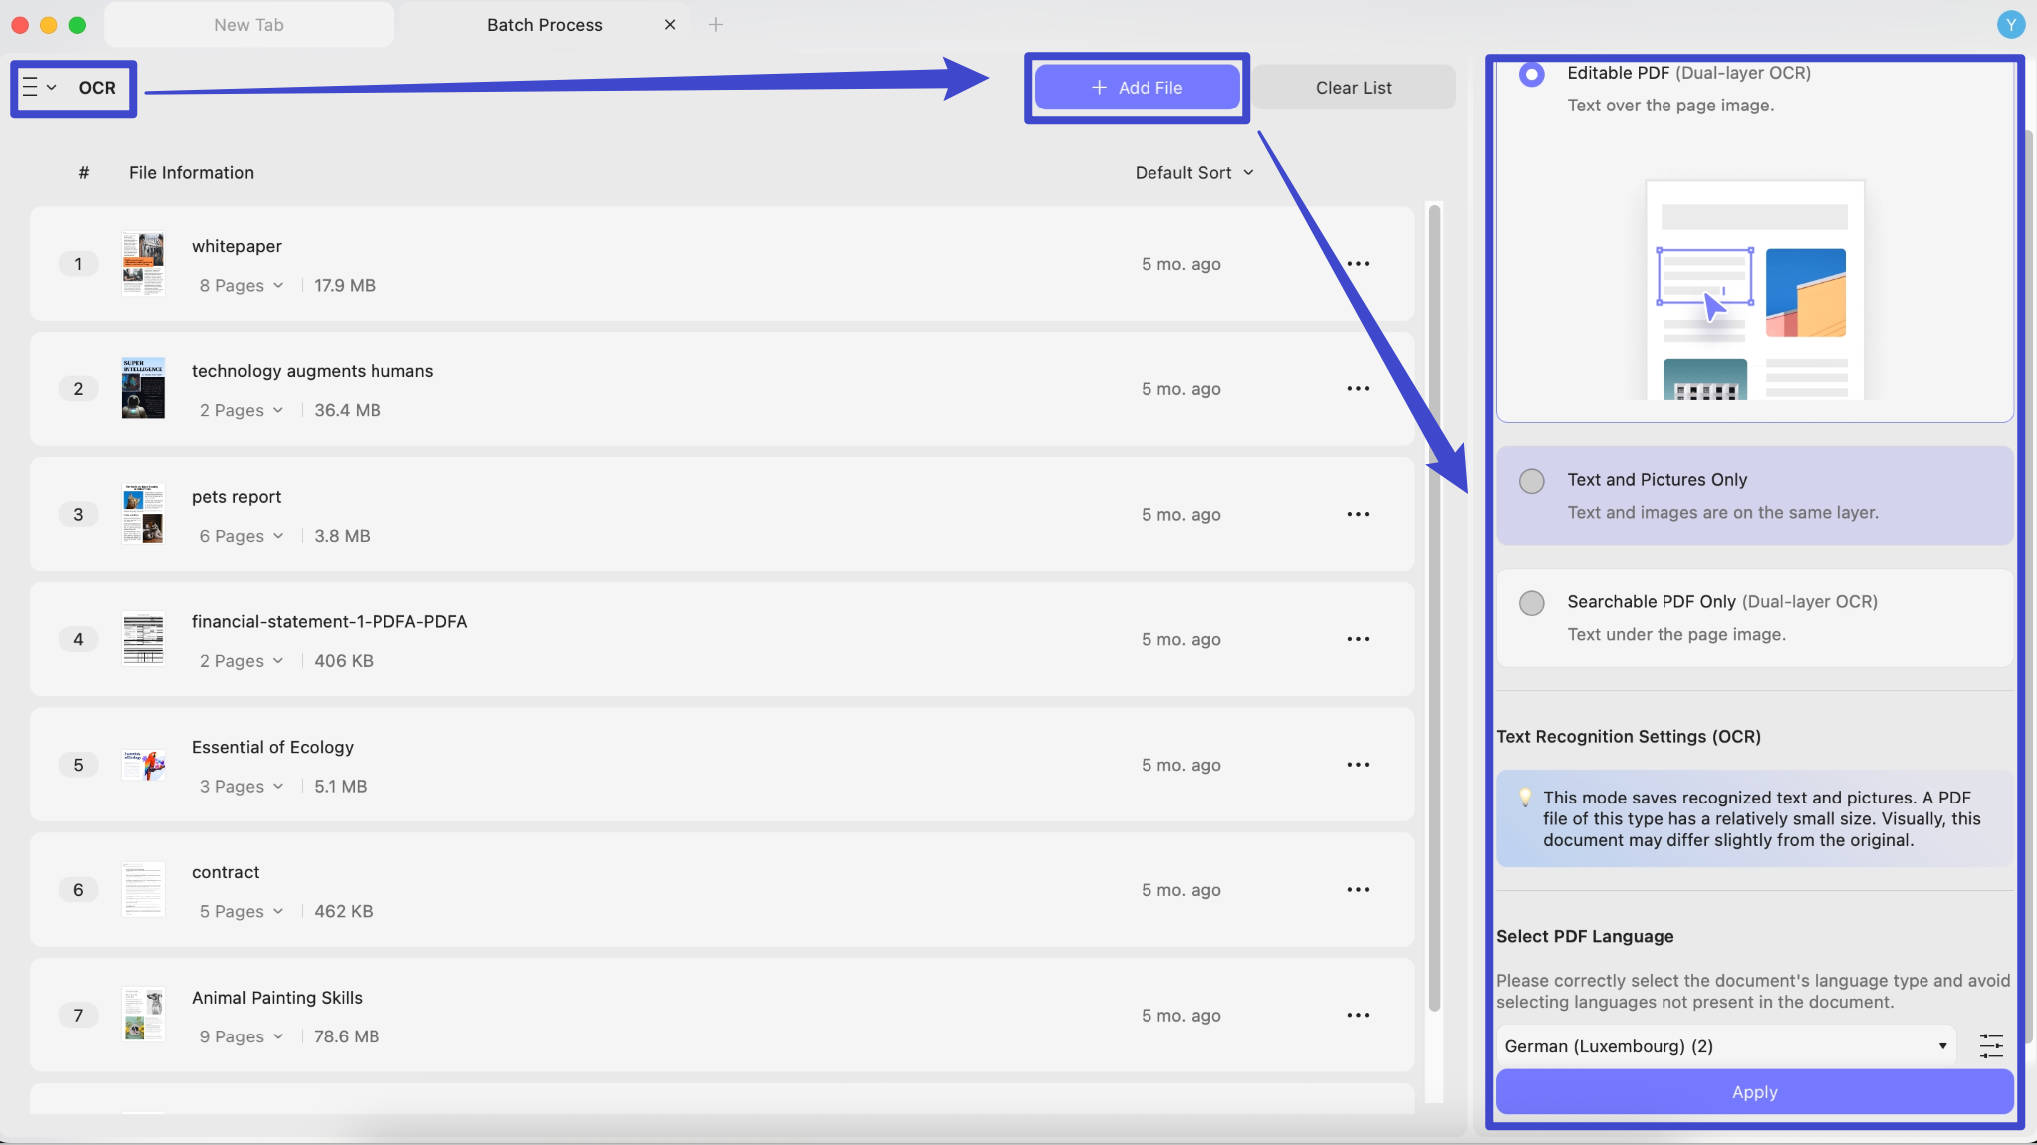
If you have many scanned PDF files and want to convert them into editable files, you can use the batch OCR feature. Here is the guide.
Select “OCR” after clicking the three vertical lines, “Add Files”, select the options like “Editable PDF”, “Text and Pictures Only”, or “Searchable PDF Only”, choose the document language, and click on the “Apply” button.
4. Batch Compress
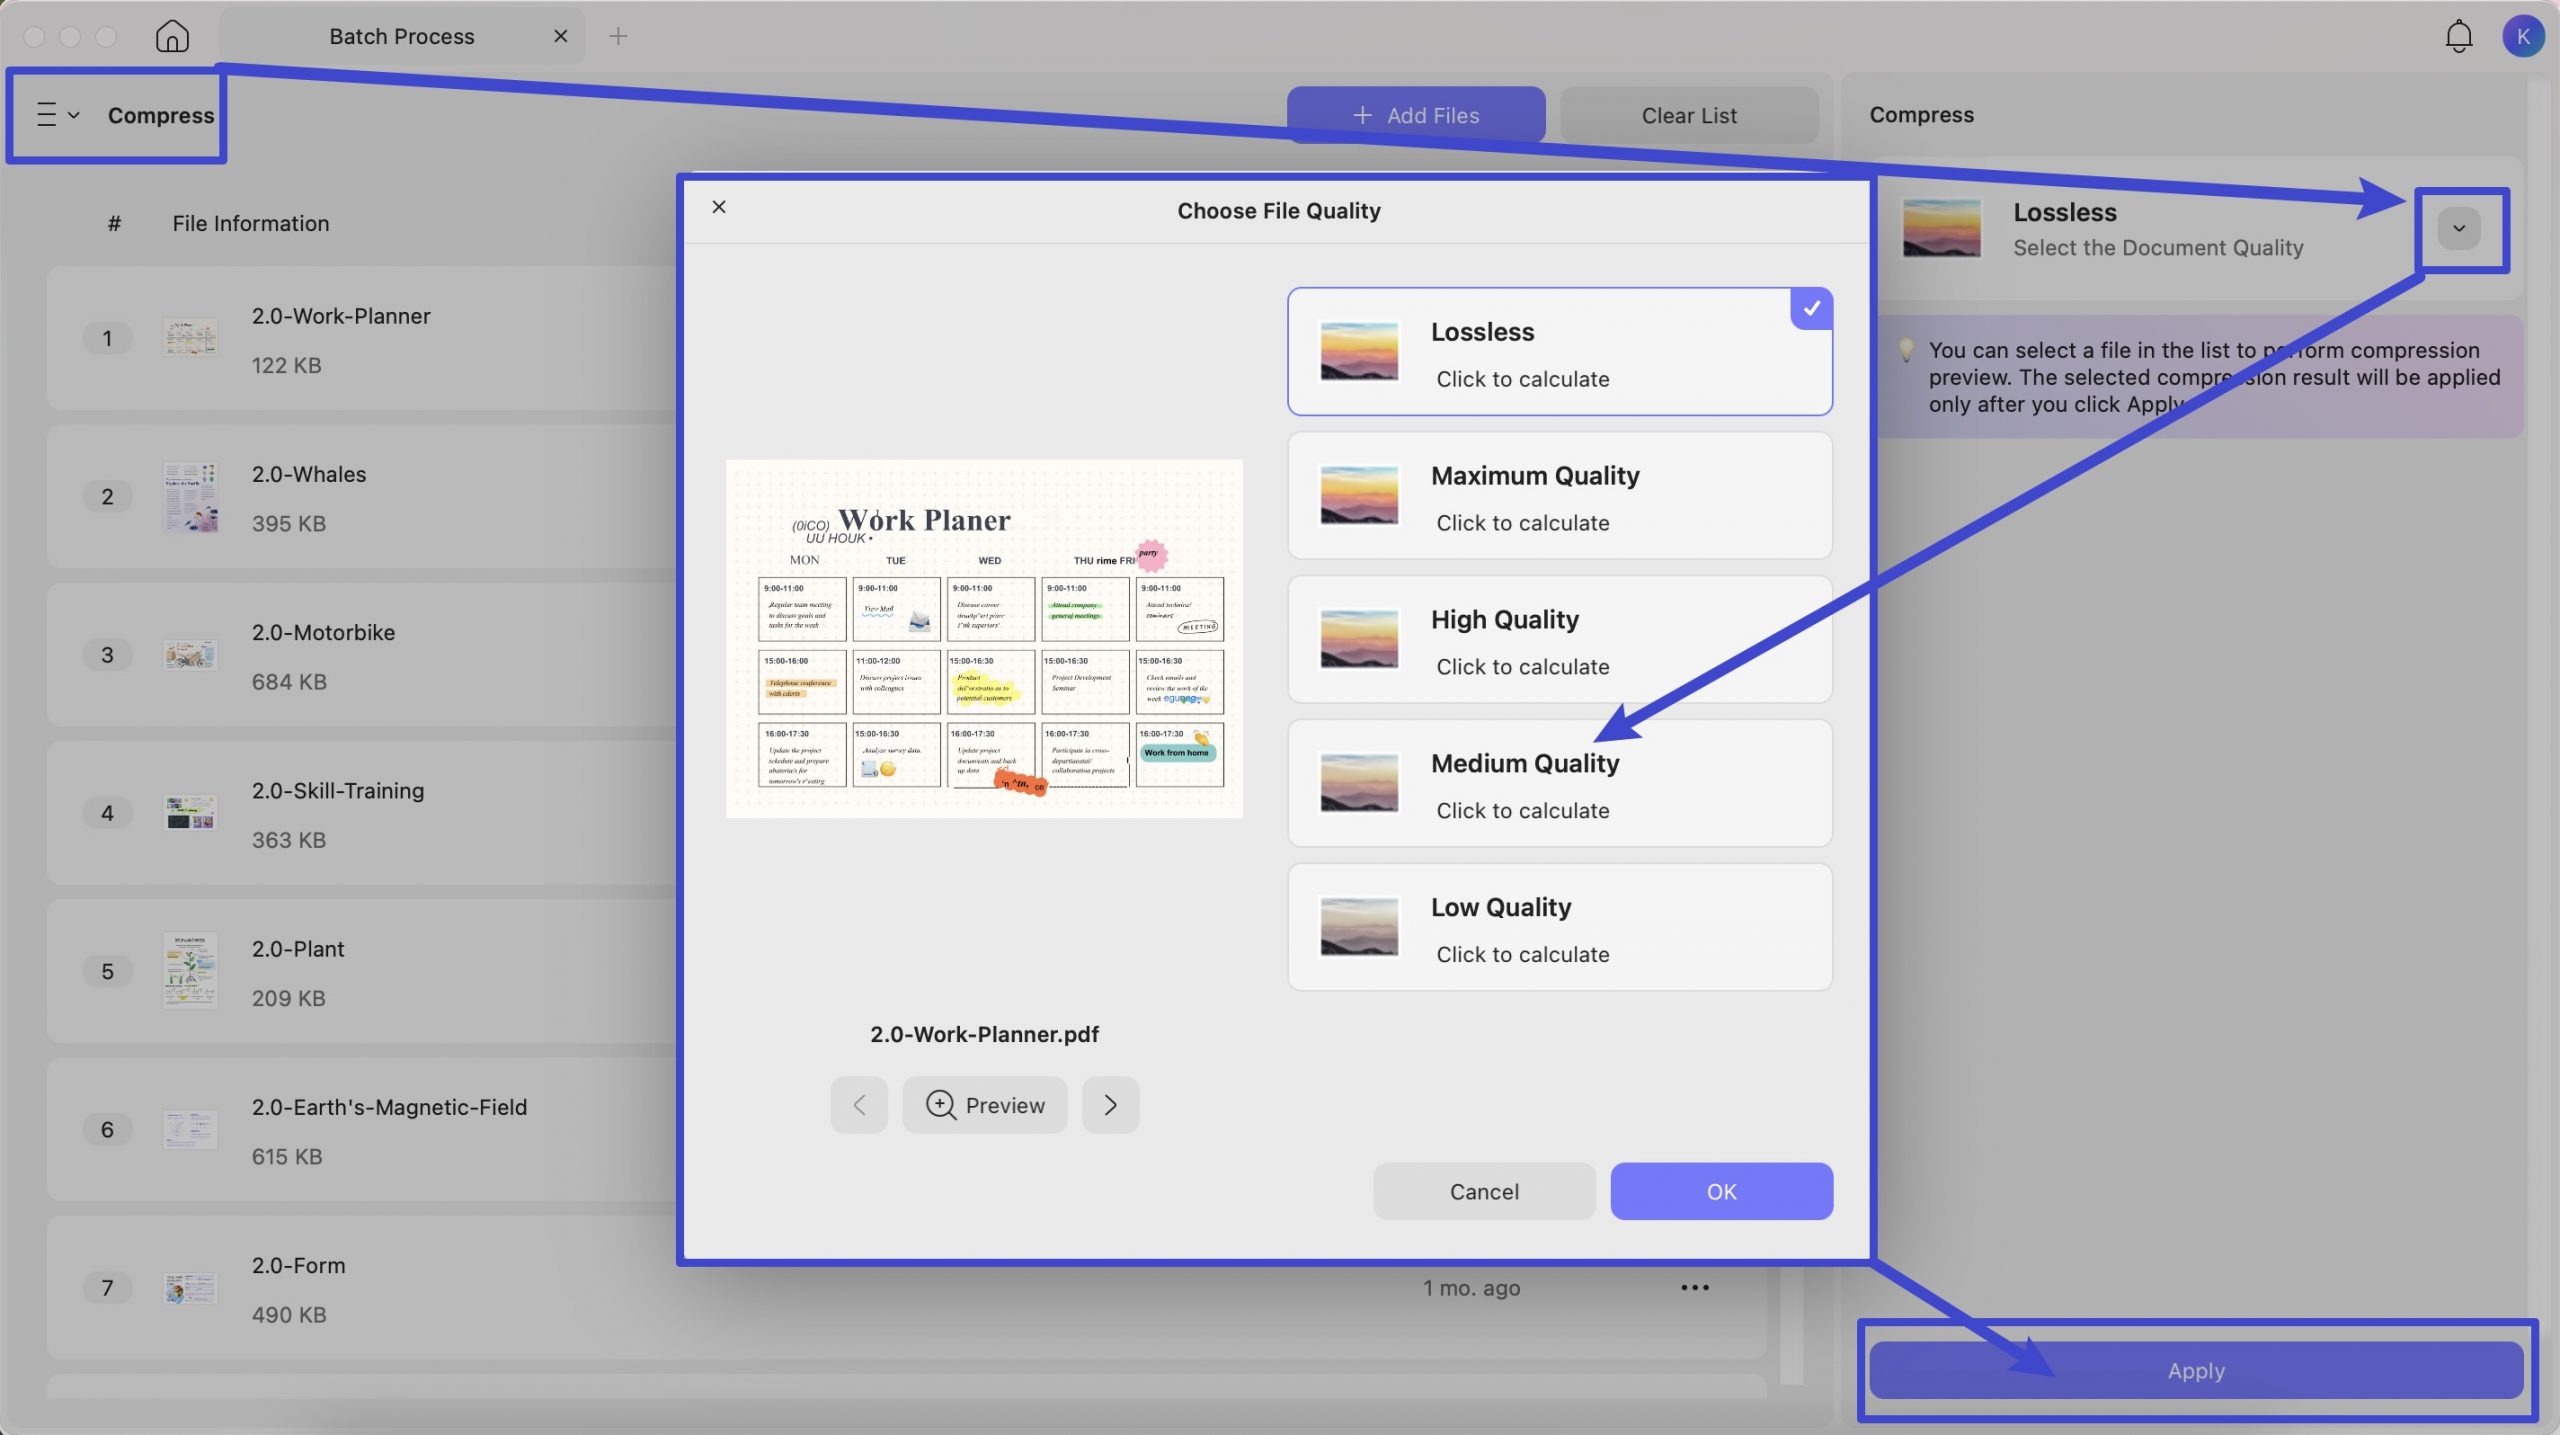
Want to compress all your PDF files into smaller size, you can follow the below steps.
Switch to “Compress” option, “Add Files” to upload all the PDF files, click on the “>” after the “Lossless” option to select the quality option you need like “Lossless”, “Maximum Quality”, “High Quality”, “Medium Quality”, “Low Quality”. Click on the “OK”, then, “Apply” to compress all PDF files.
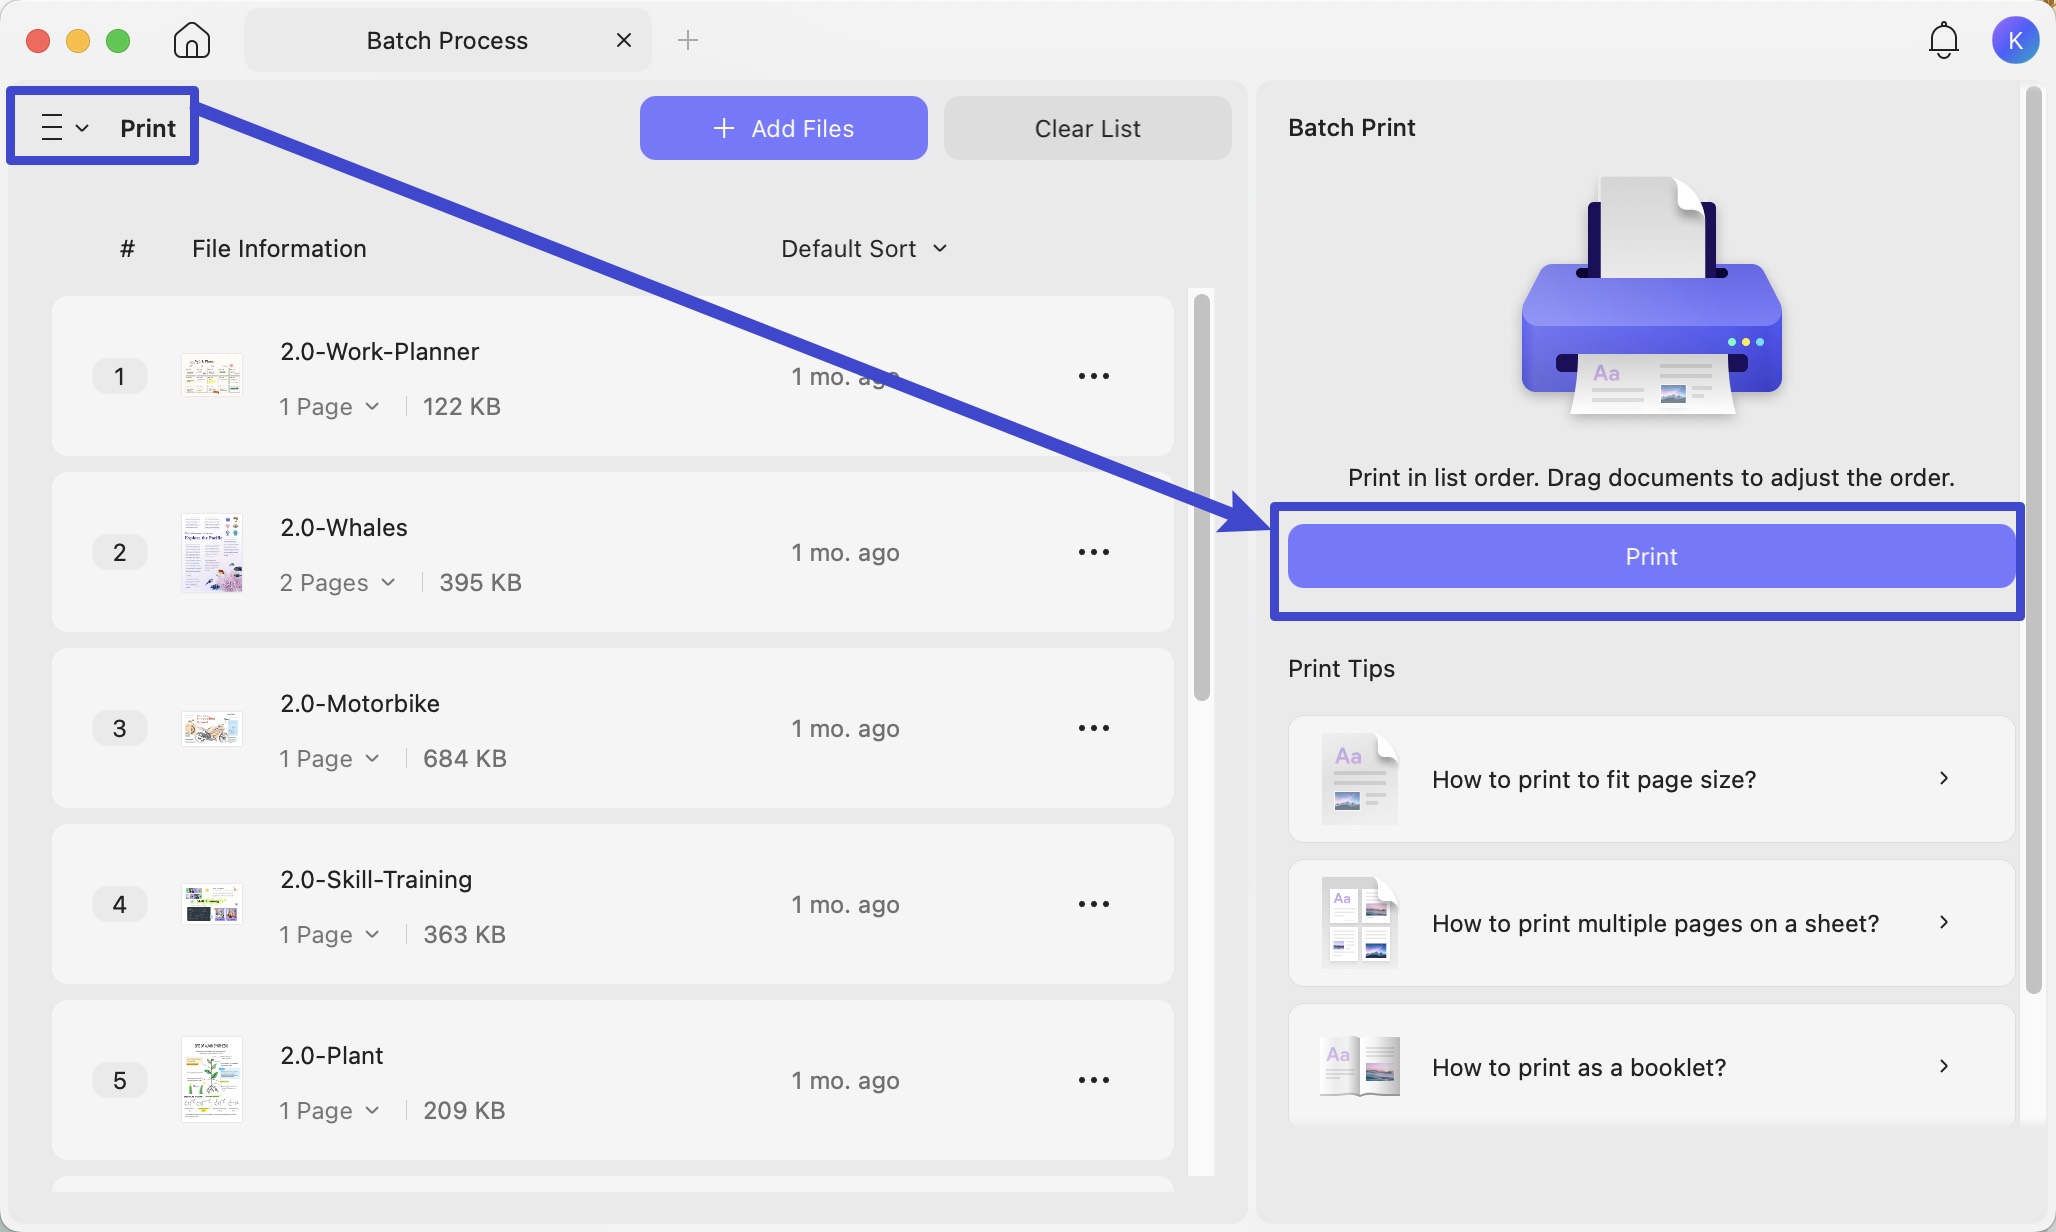
5. Batch Print
To batch print PDF files on Mac, you can click on the “Print” after clicking the three vertical lines, “Add Files” to upload PDF files, click on the “Print” to get a pop up window to select the printer, change the presets, enter the copies you need, customize the pages. And more, then, click on the “Print” to print all the PDF files.
6. Batch Create
With the Batch Create feature of UPDF, you can create a single PDF or create multiple PDFs from different files in other formats. Here is how you can create PDF from multiple files in supported format (Images, Word, Excel, PowerPoint, CAJ, Clipboard, Captures, etc.):
Step 1. Adding Files
Choose “Create” this time, Add files by hitting the Add Files button and choosing files from your device. You may upload any supported file format, such as images, Word documents, Excel spreadsheets, PowerPoint presentations, CAJ files, clipboard content, and captures.
Alternatively, you can click the arrow to reveal the drop-down menu and select Add Folders if you want to import folders, or just click Add Files.
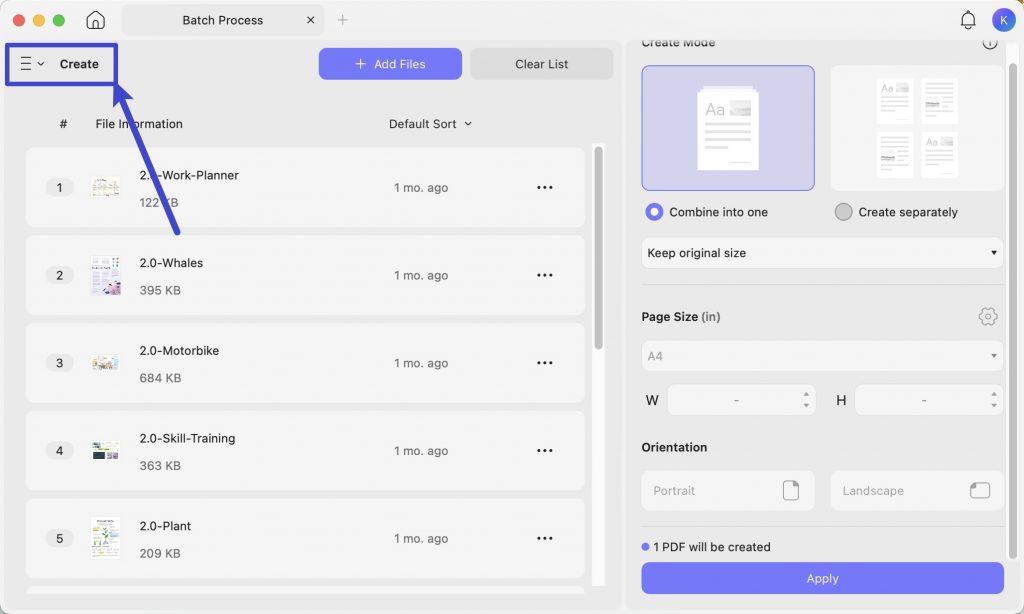
Step 2. Choosing a Specific Option
Now, you have got two choices. You can either Combine into one or simply Create separately, one for each file. Besides this, you can see the screenshot below to analyze what other features UPDF offers for batch creating PDFs.

Step 3. Hit Apply
Once you have made the choice, hit the Apply icon on the bottom right screen corner. The following window will ask you to choose a storage location and set the file name for your newly created PDF(s). Do so to complete the process. Newly created PDF(s) will open up in new tabs once saved. Edit them the way you want or share them without any hassle!
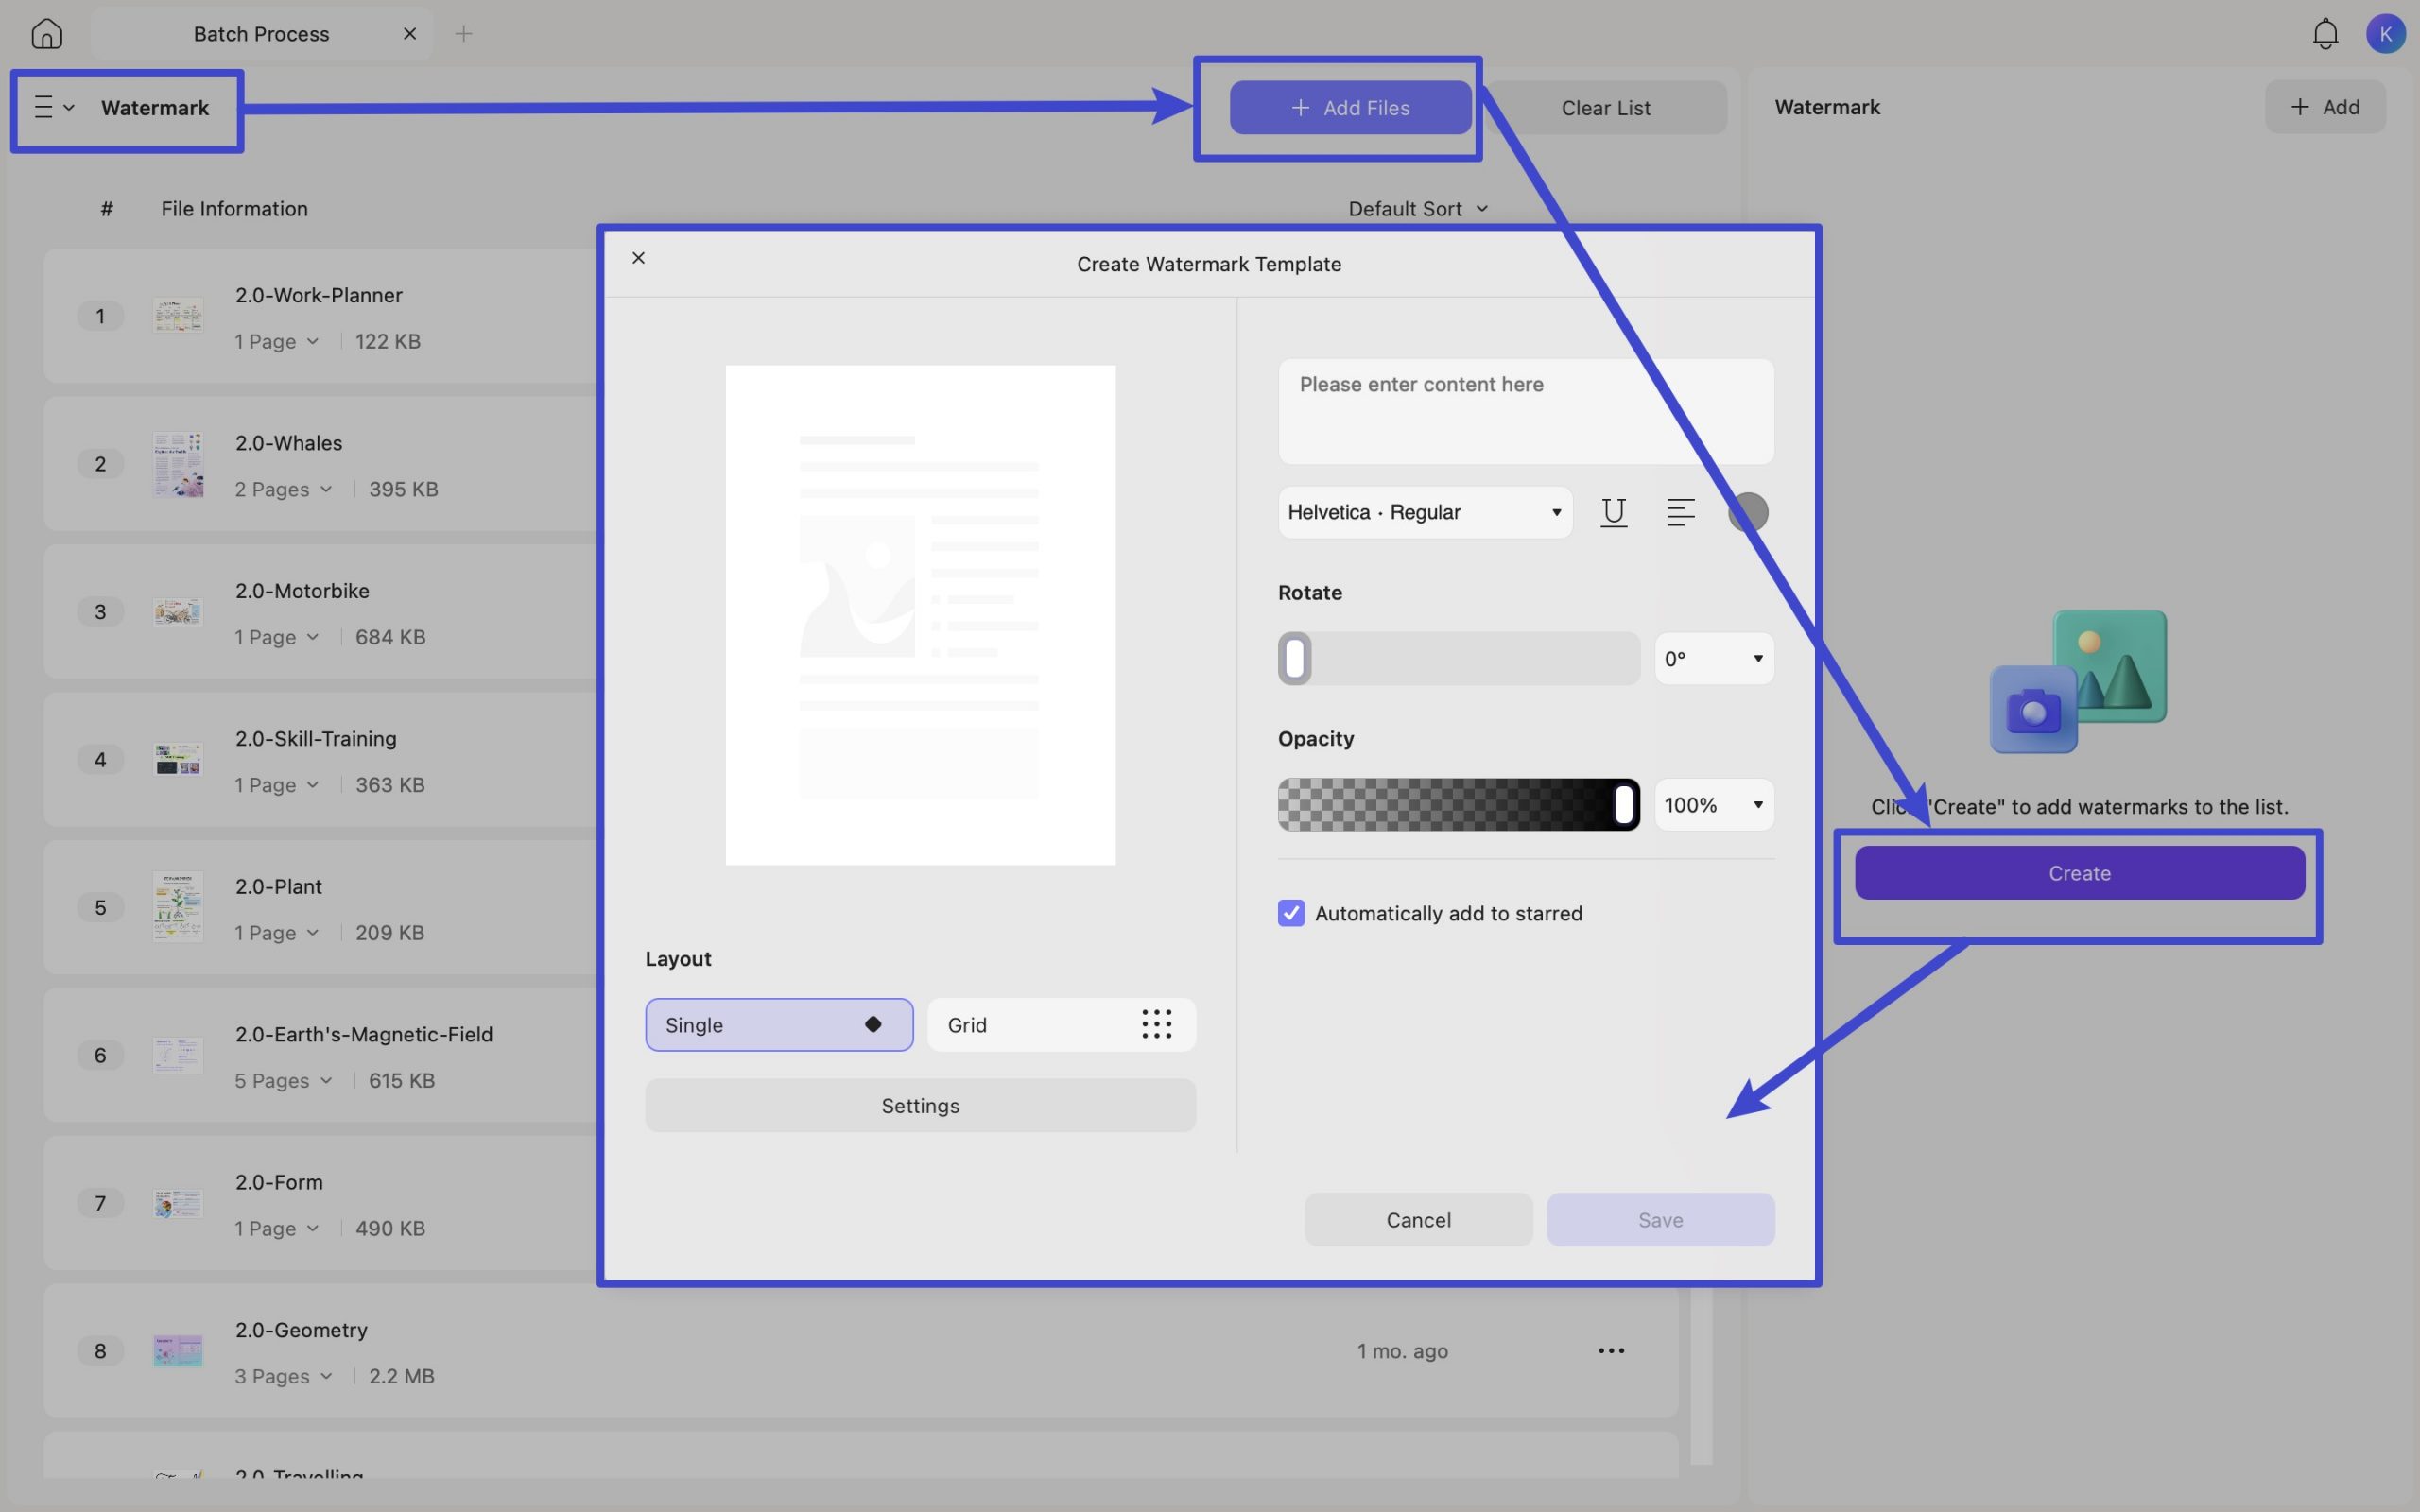
7. Batch Watermark
Want to add the watermark to multiple PDF files? You can click on the "Watermark" after clicking on the Three Vertical Lines, click on the “Add Files” to upload the PDF files, click on the “Create” icon, select “Text” or “File”. In the pop up window, you can change the layout to Single or Grid, enter the content, rotate and set the opacity. Then, click on the "Save", then, click on the “Apply” to add the watermark to all PDF files.
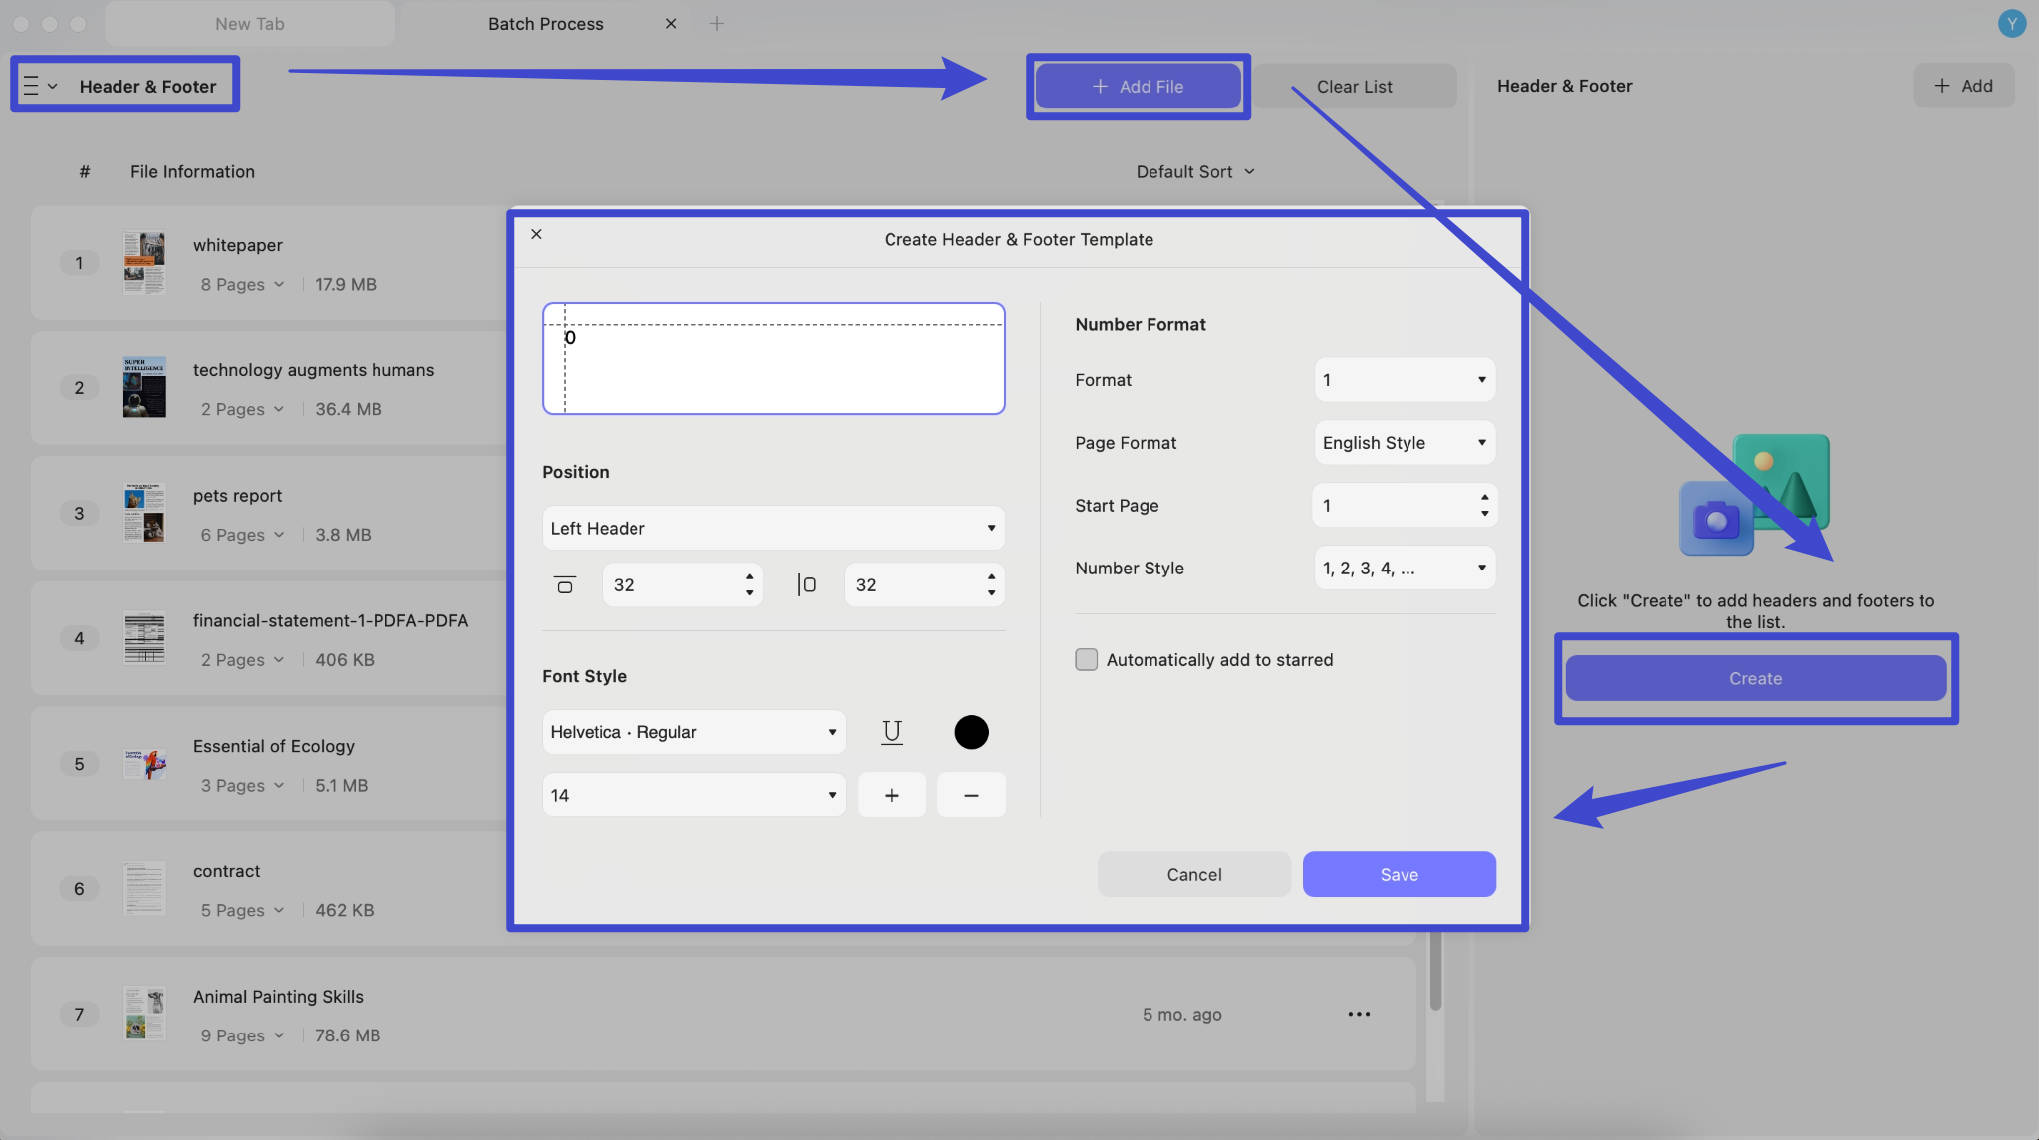
8. Batch Header and Footer
You can also batch add the header and footer to PDF with UPDF on Mac. Select the “Header and Footer”, click on the “Create”, choose “Page Number”, “Text”, “Date”, or “Image”. In the pop up window, you can customize the position, style, and format, then, click on the “Save” and “Apply”.
9. Batch Bates Numbering
For those who want to add Bates Numbering to PDF files in batch, UPDF also has the feature for you.
- Just select the Bates Numbering button after accessing the Bates Numbering menu from the Tools tab at the home interface.
- In the new windows, you can click on the Add Files to select the files to add or choose to add a folder or add opened files.
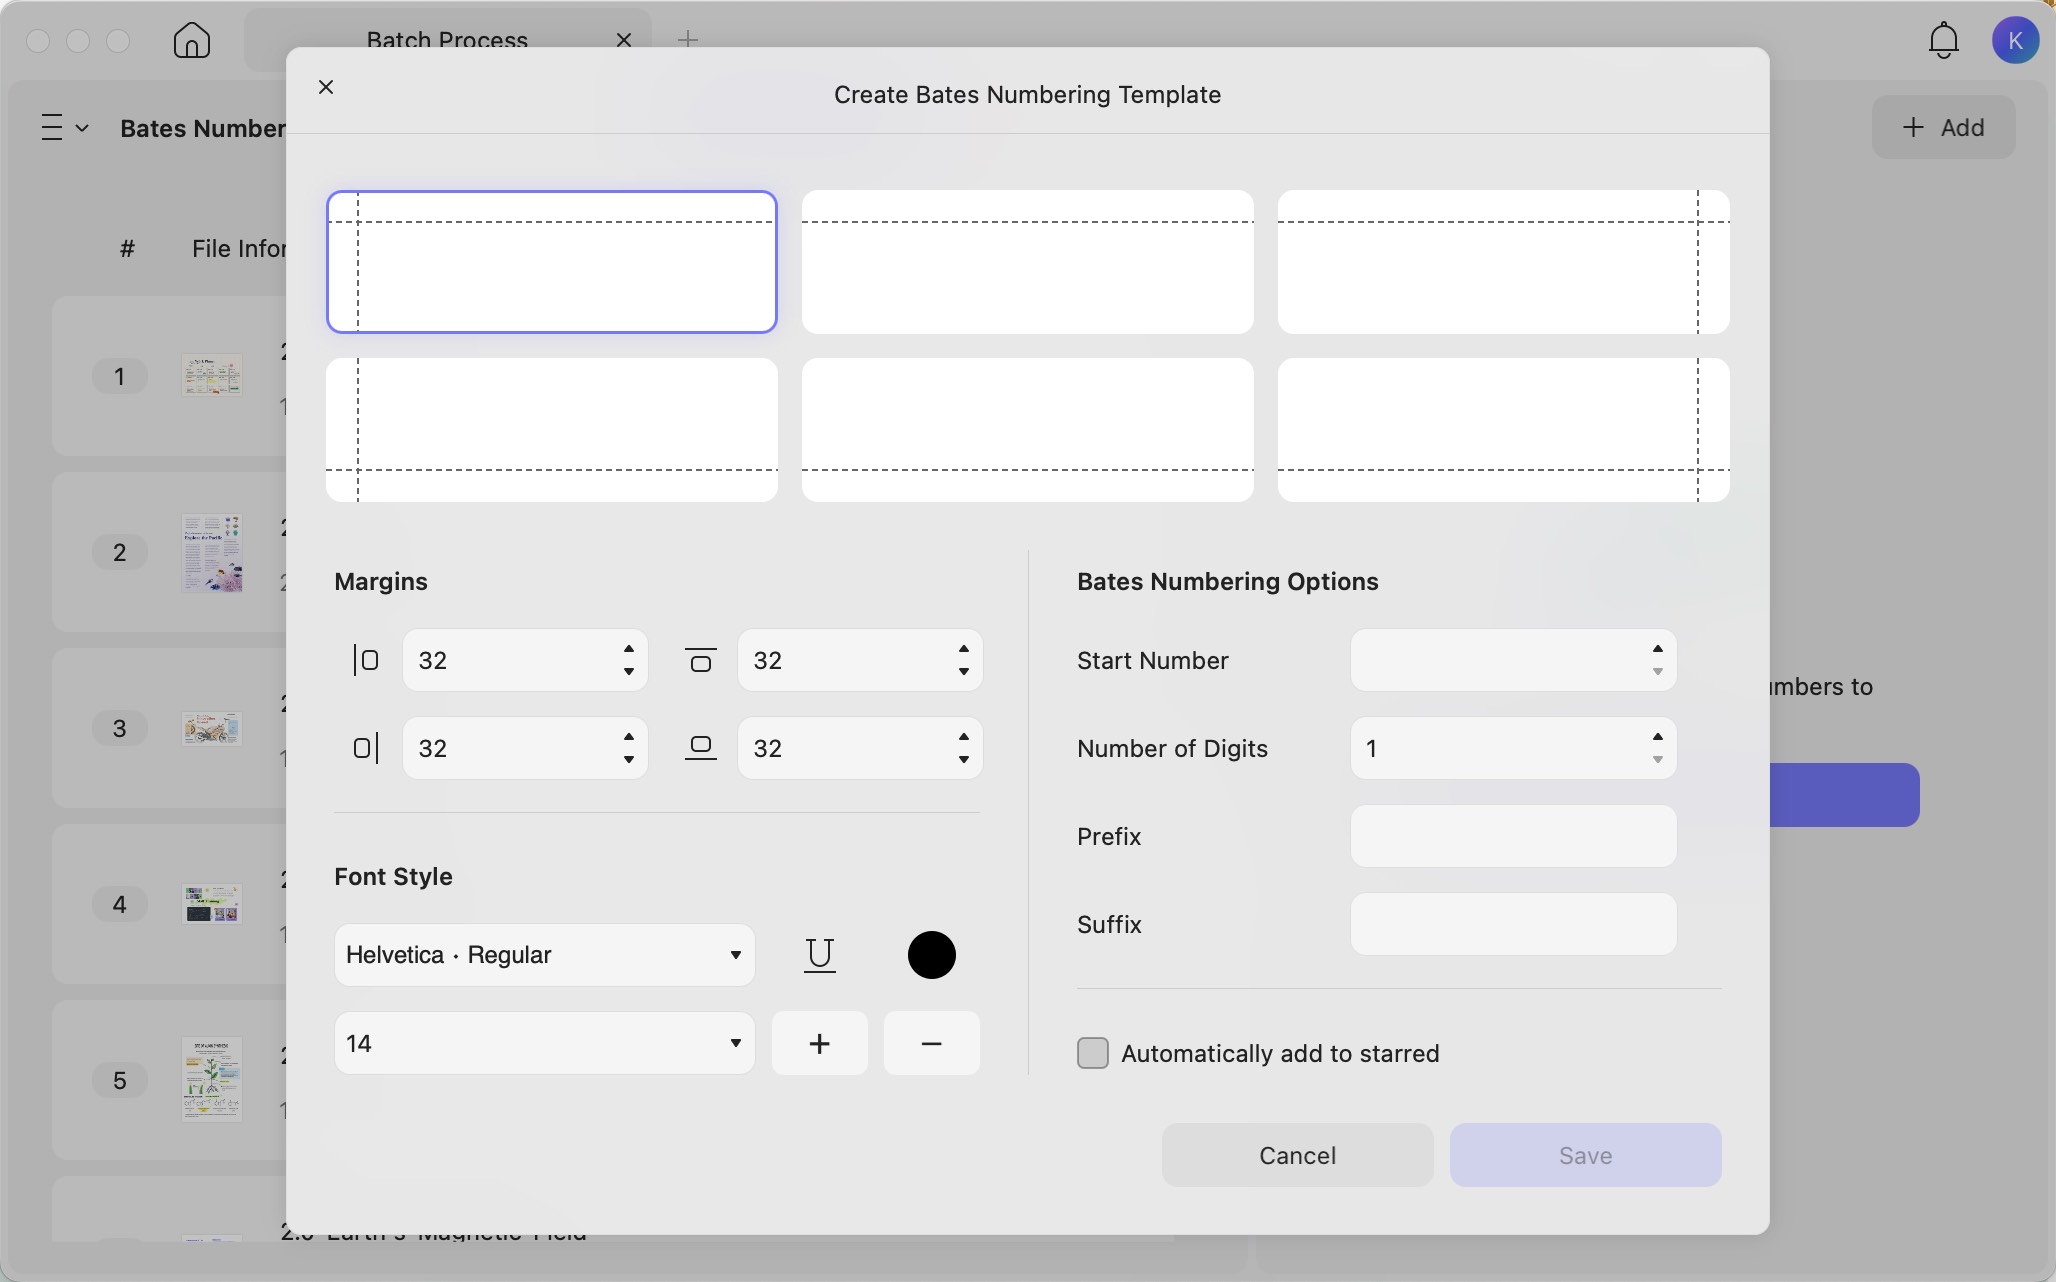
- Now, press the Create button from the right-hand panel to reveal a new window on your screen.
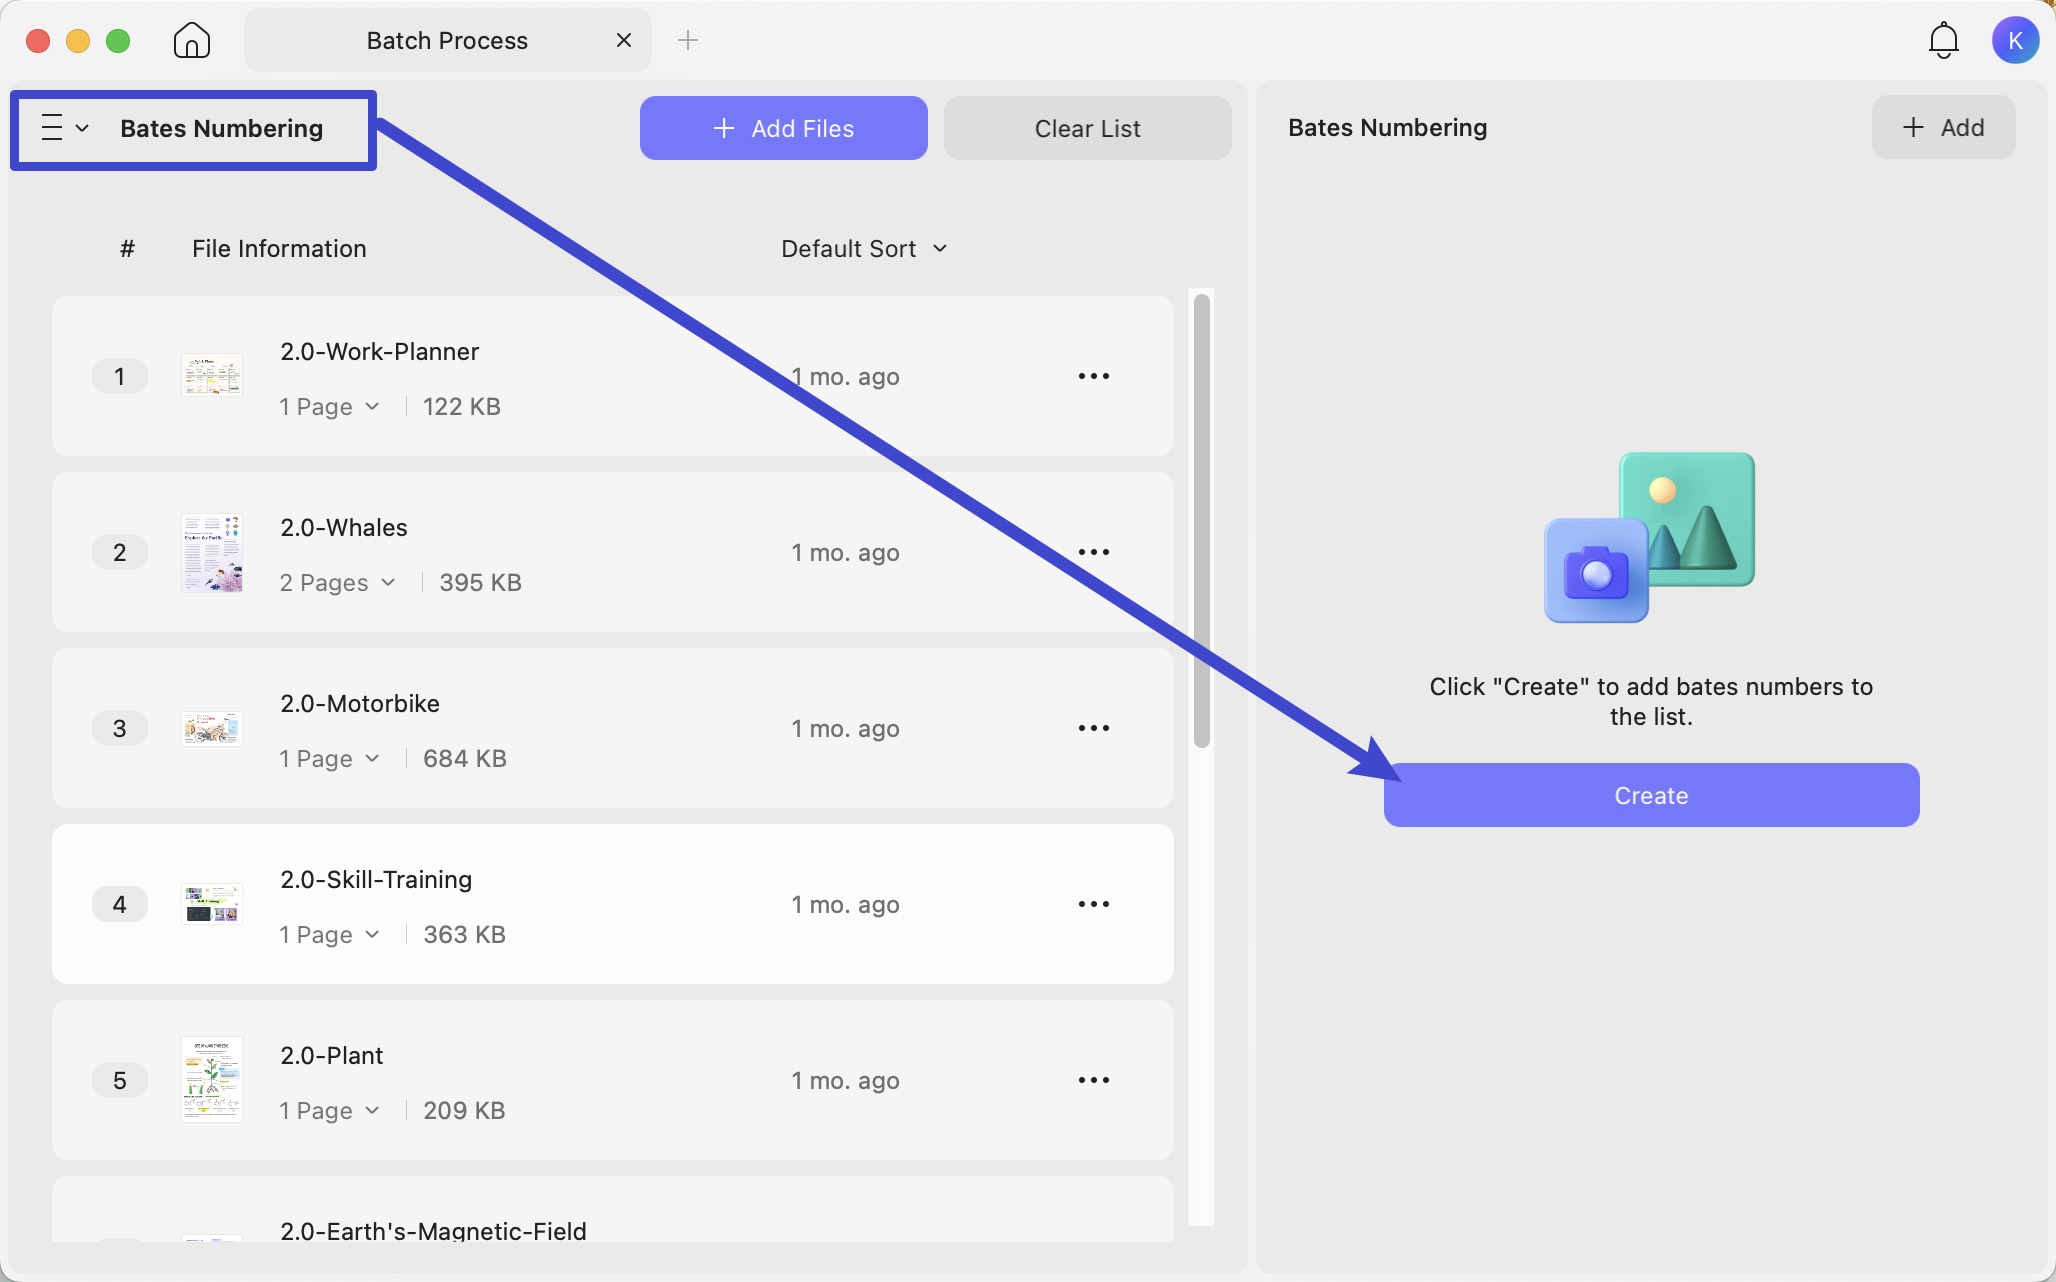
- After this, fill in the properties as shown in the given window and press the Save button at the end.
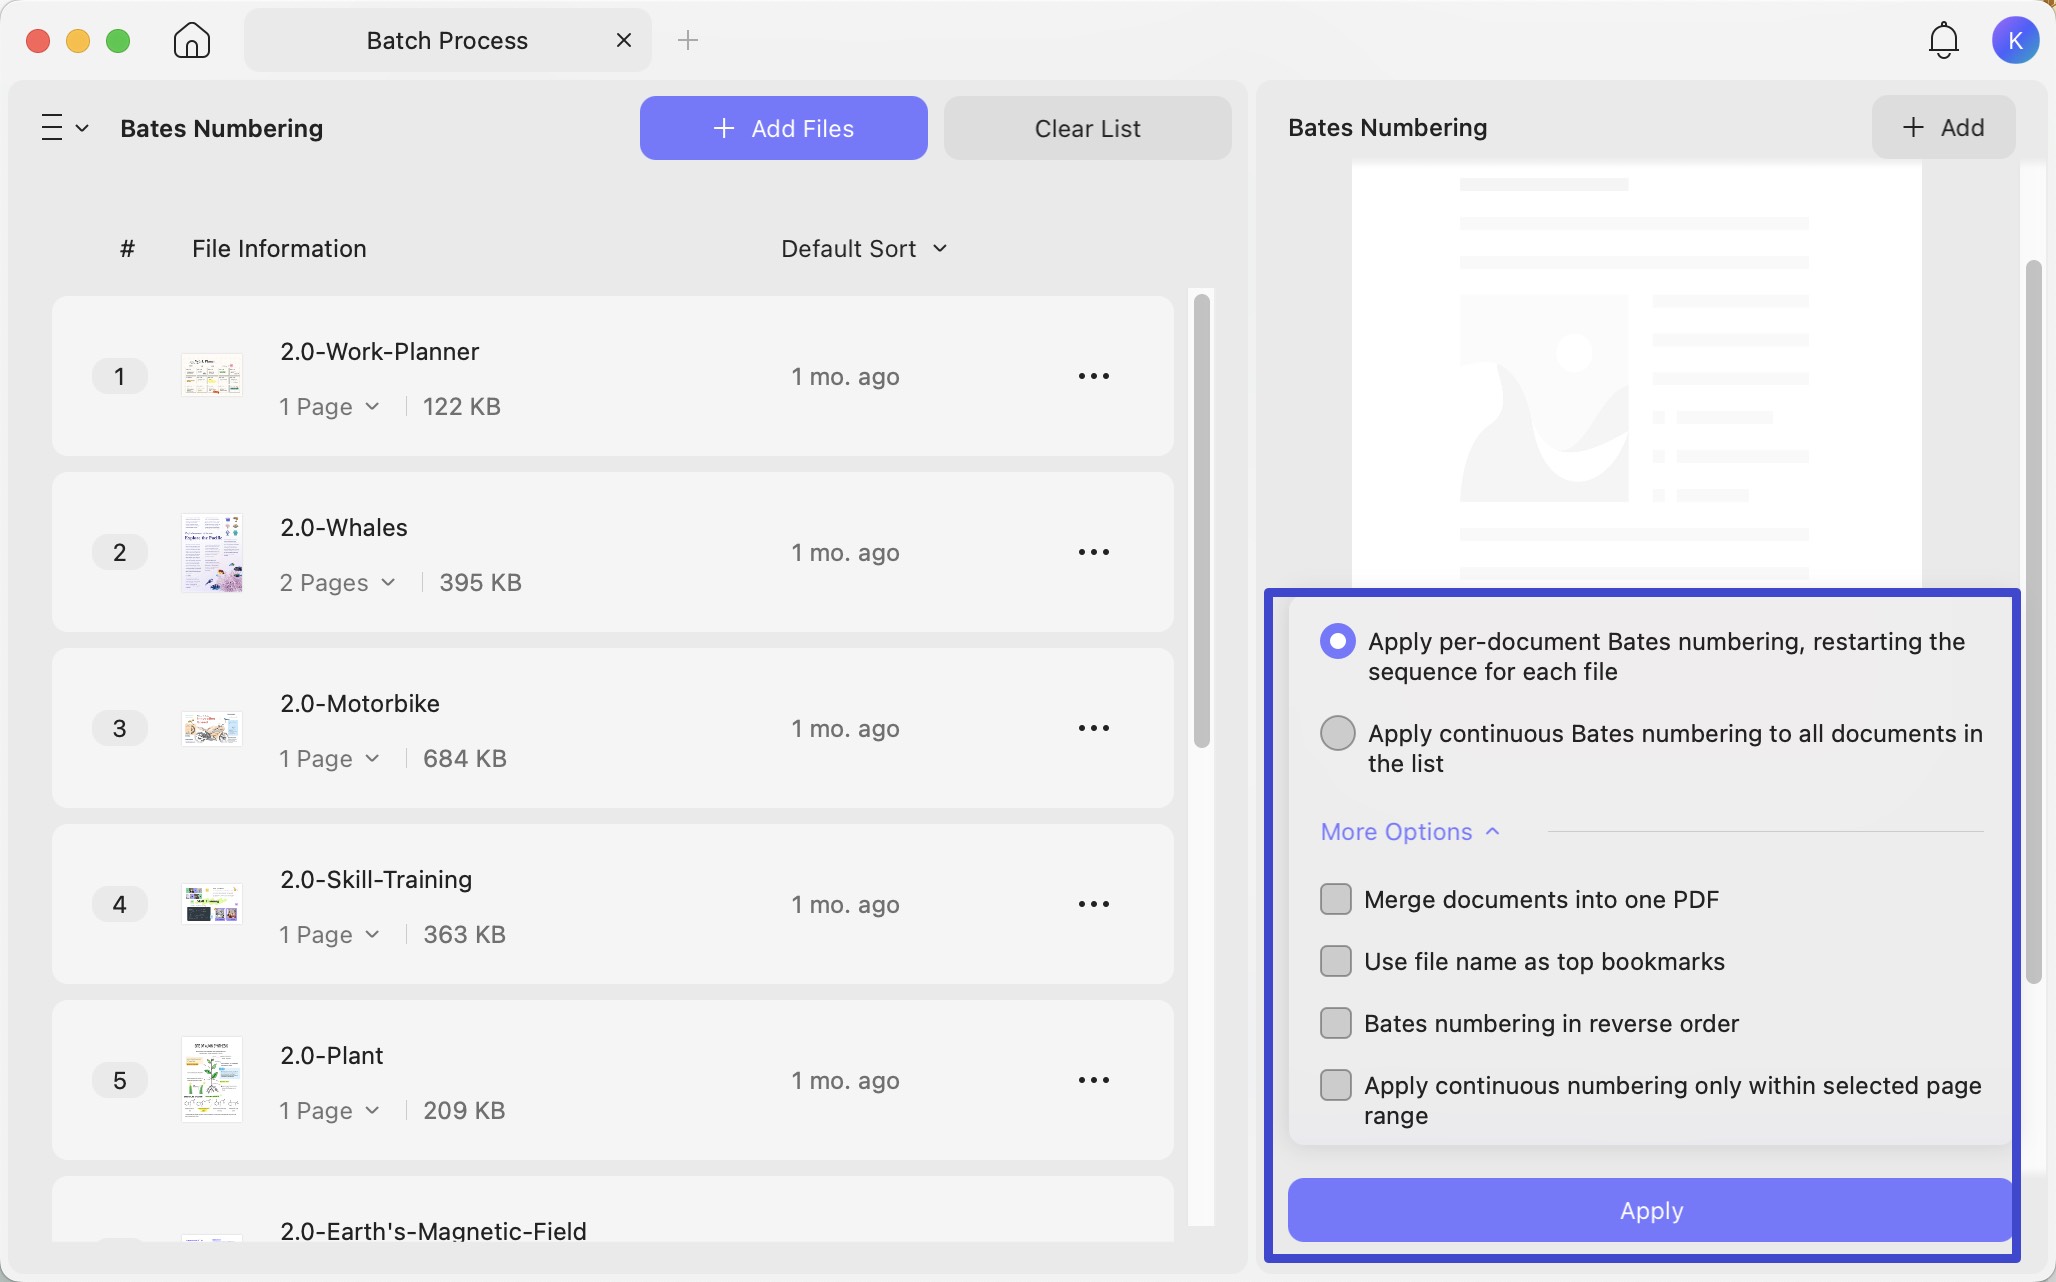
- You also have more options to customize the Bates Numbering. When everything is OK, click on the Apply button to add the Bates Numbering to PDF files.
10. Batch Insert
The best way to insert a single file into different PDF files is by utilizing the batch insert feature. Here’s how you can do it:
Open UPDF on your Mac and then access your desired PDF on the platform. Once done, proceed to the Tools option at the home interface and select Insert option from the batch menu.
Step 1. Adding Files:
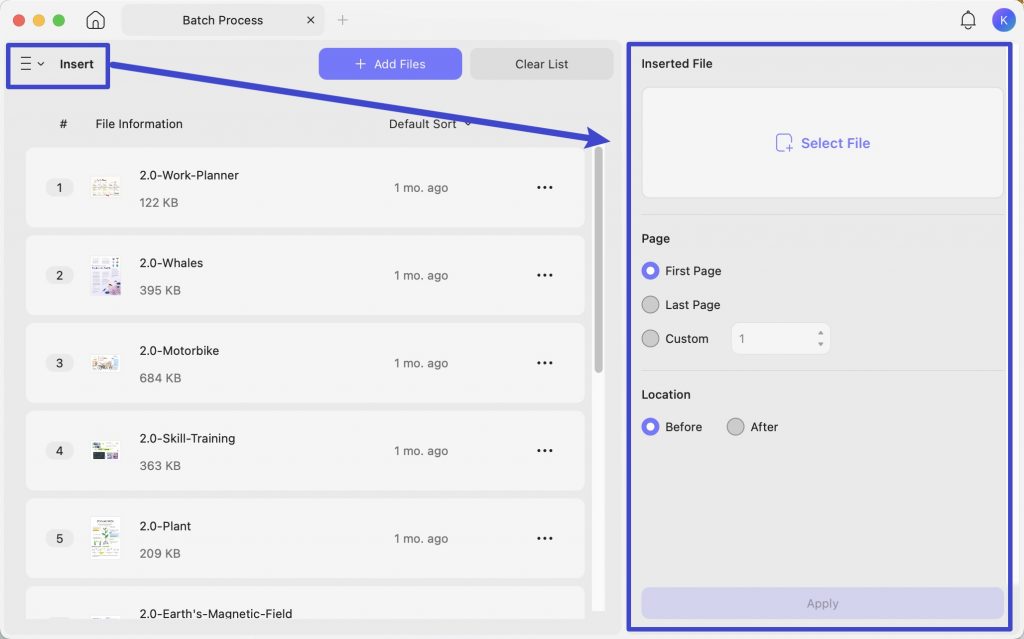
Once in the Batch Insert menu, click the Add Files button to initiate the process. Alternatively, use the arrowhead icon to access further options. This lets you import open files within UPDF or entire folders, streamlining your workflow.
Step 2. Inserting Specific Files
If you want to insert a particular file across all the imported PDFs, UPDF makes it effortless. Press the Select File button to specify the desired file by browsing your computer. Now, choose the location for insertion and select from the the Page options to insert pages accordingly.
Step 3. Defining Output Location
With your files aligned and customized, it’s time to determine where your merged PDF masterpiece will be saved. Click Apply, and UPDF guides you to choose a suitable directory for your output file.
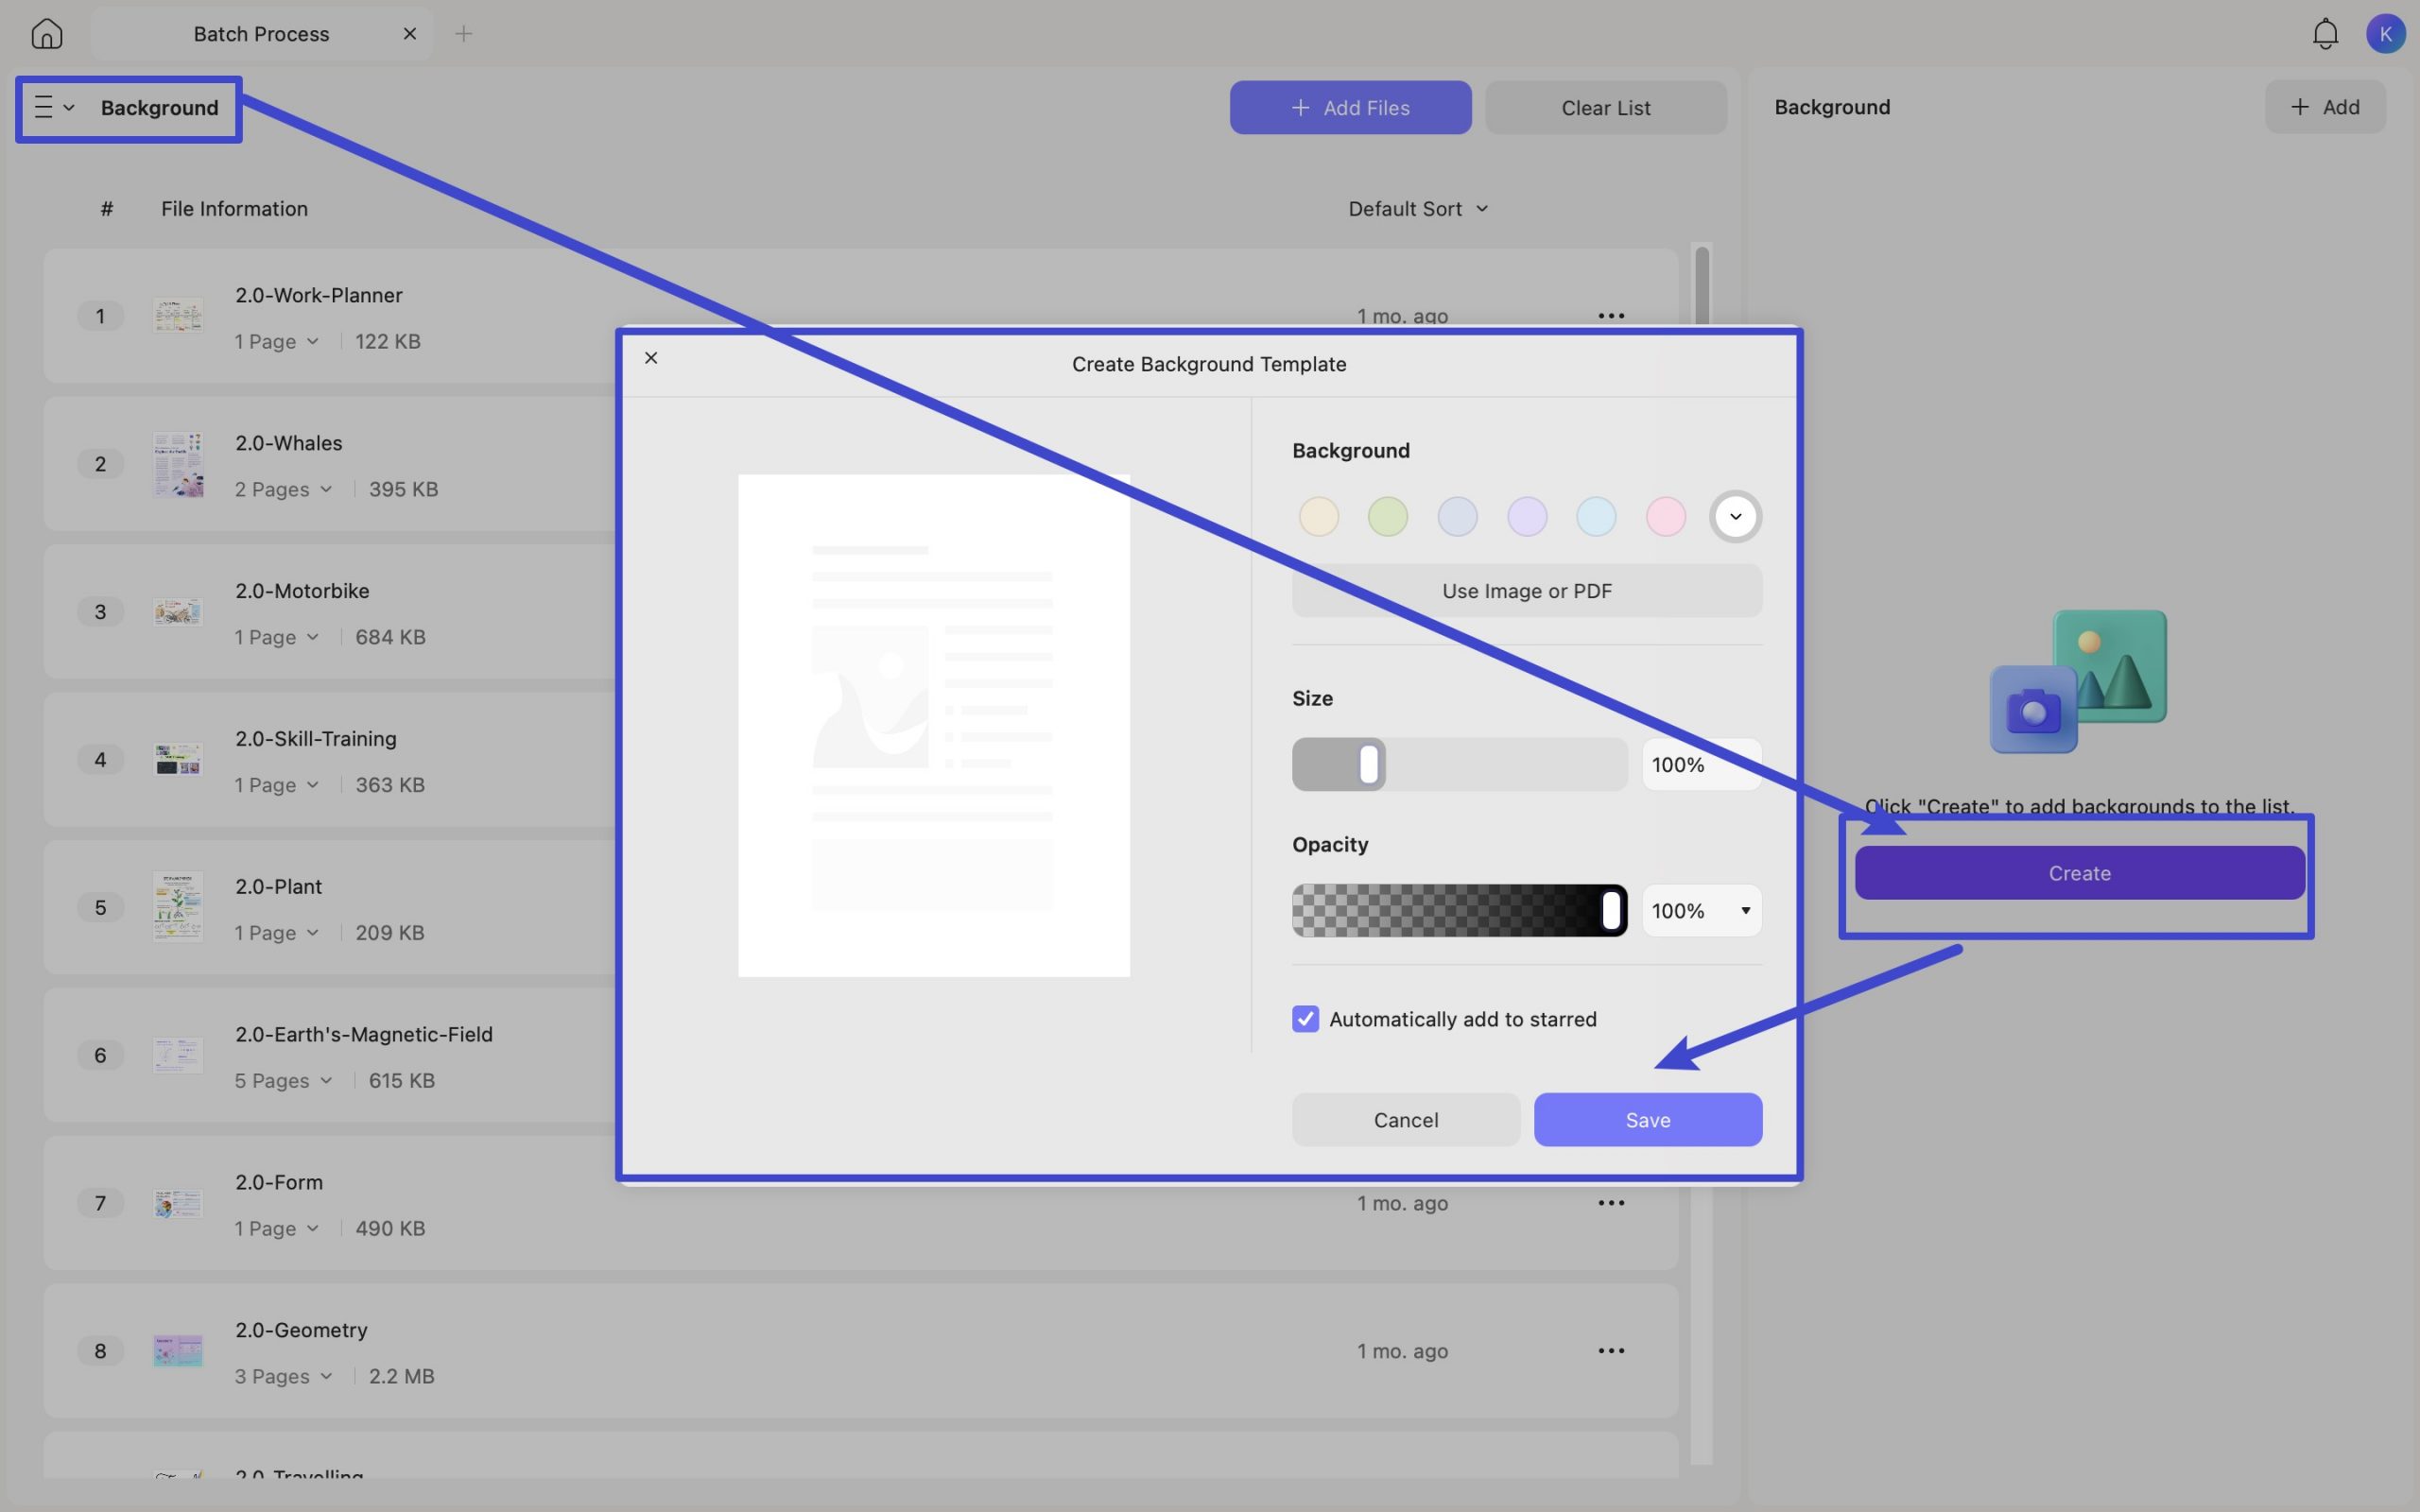
11. Batch Background
To add background to all the PDF files you need, you can choose “Background” from the “Batch PDFs” after clicking on the “Tools” at the home interface. Click on the “Add Files” to upload all the PDF files, then, click on the “Create” button, choose the background color, or use image or PDF as background, set the size, change the opacity, click on the “Save” and “Apply” to add the background to PDF files.
12. Batch Encrypt
For safeguarding an entire collection of documents with encryption and passwords, UPDF offers a powerful solution through its Batch Encrypt feature. Here’s a comprehensive walkthrough to make the process a breeze:
To start, open UPDF on your Mac and access your PDF on the platform. After this, proceed to the Tools at the home interface and choose the “Encrypt” in the Batch PDFs section.
Step 1. Importing Files:
Once within the Batch Encrypt section, kickstart the process by clicking the Add Files button. To expedite the process, utilize the arrowhead icon to access additional import options. This includes adding files that are already open within UPDF or even entire folders.
Step 2. Setting Passwords for Encryption:
- Setting Open Passwords: On the right panel, press the + Add button to add an Open Password and rewrite it to confirm it. Once done, press the Save button to keep the added password.
- Setting Permission Password: Alternatively, if you want to set permissions for specific actions, press the + Add button to add a Permission Password and type it again to confirm it. Finally, click the Save button to secure your document with a password.
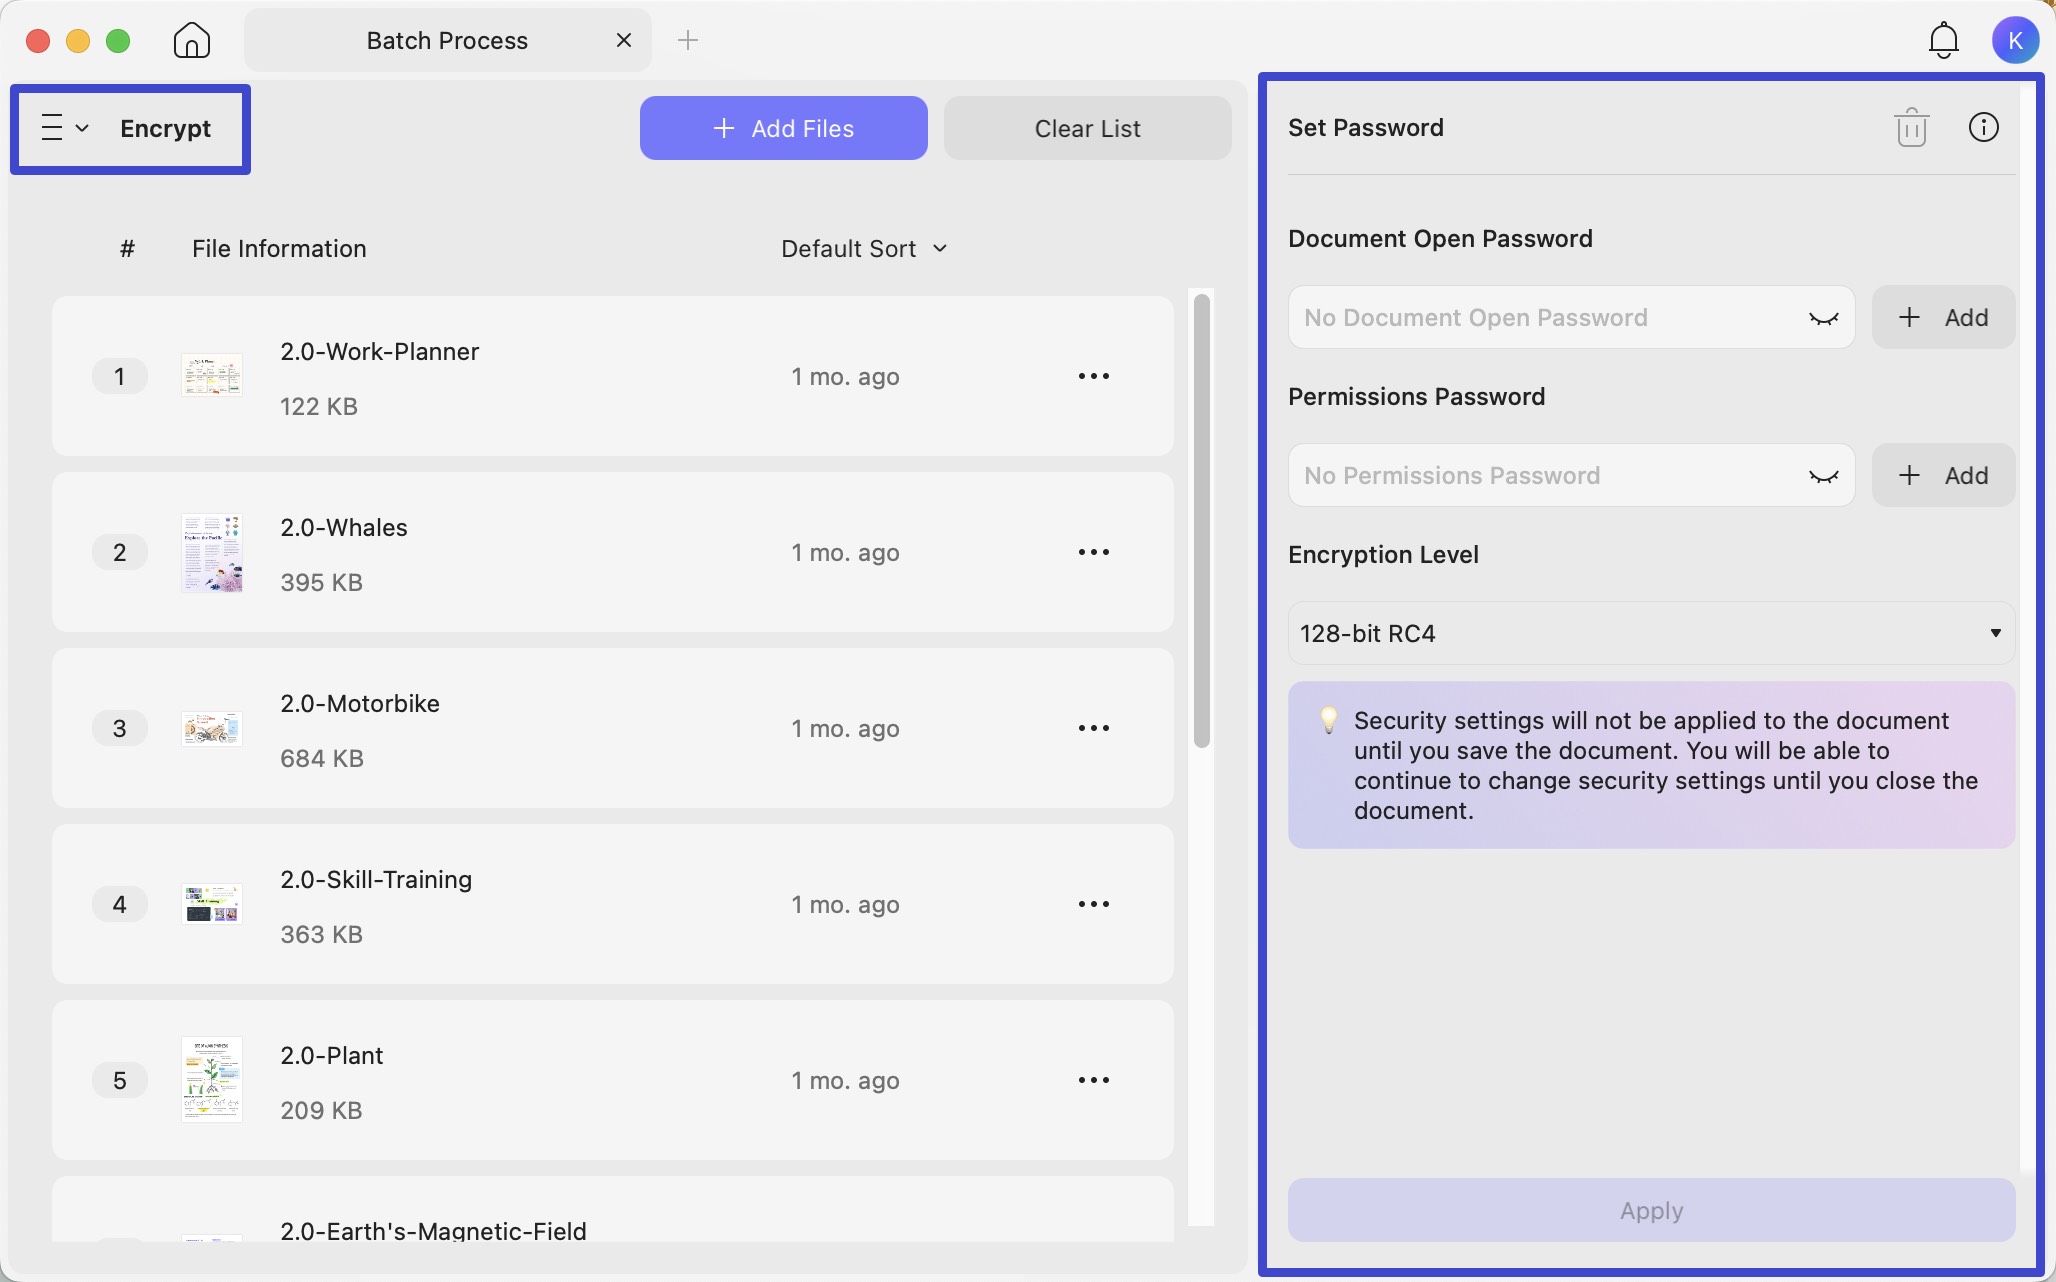
Choose from Encryption Level options like 128-bit RC4, 128-bit AES, or 256-bit AES based on your needs. Click Apply to set the batch encryption in motion.
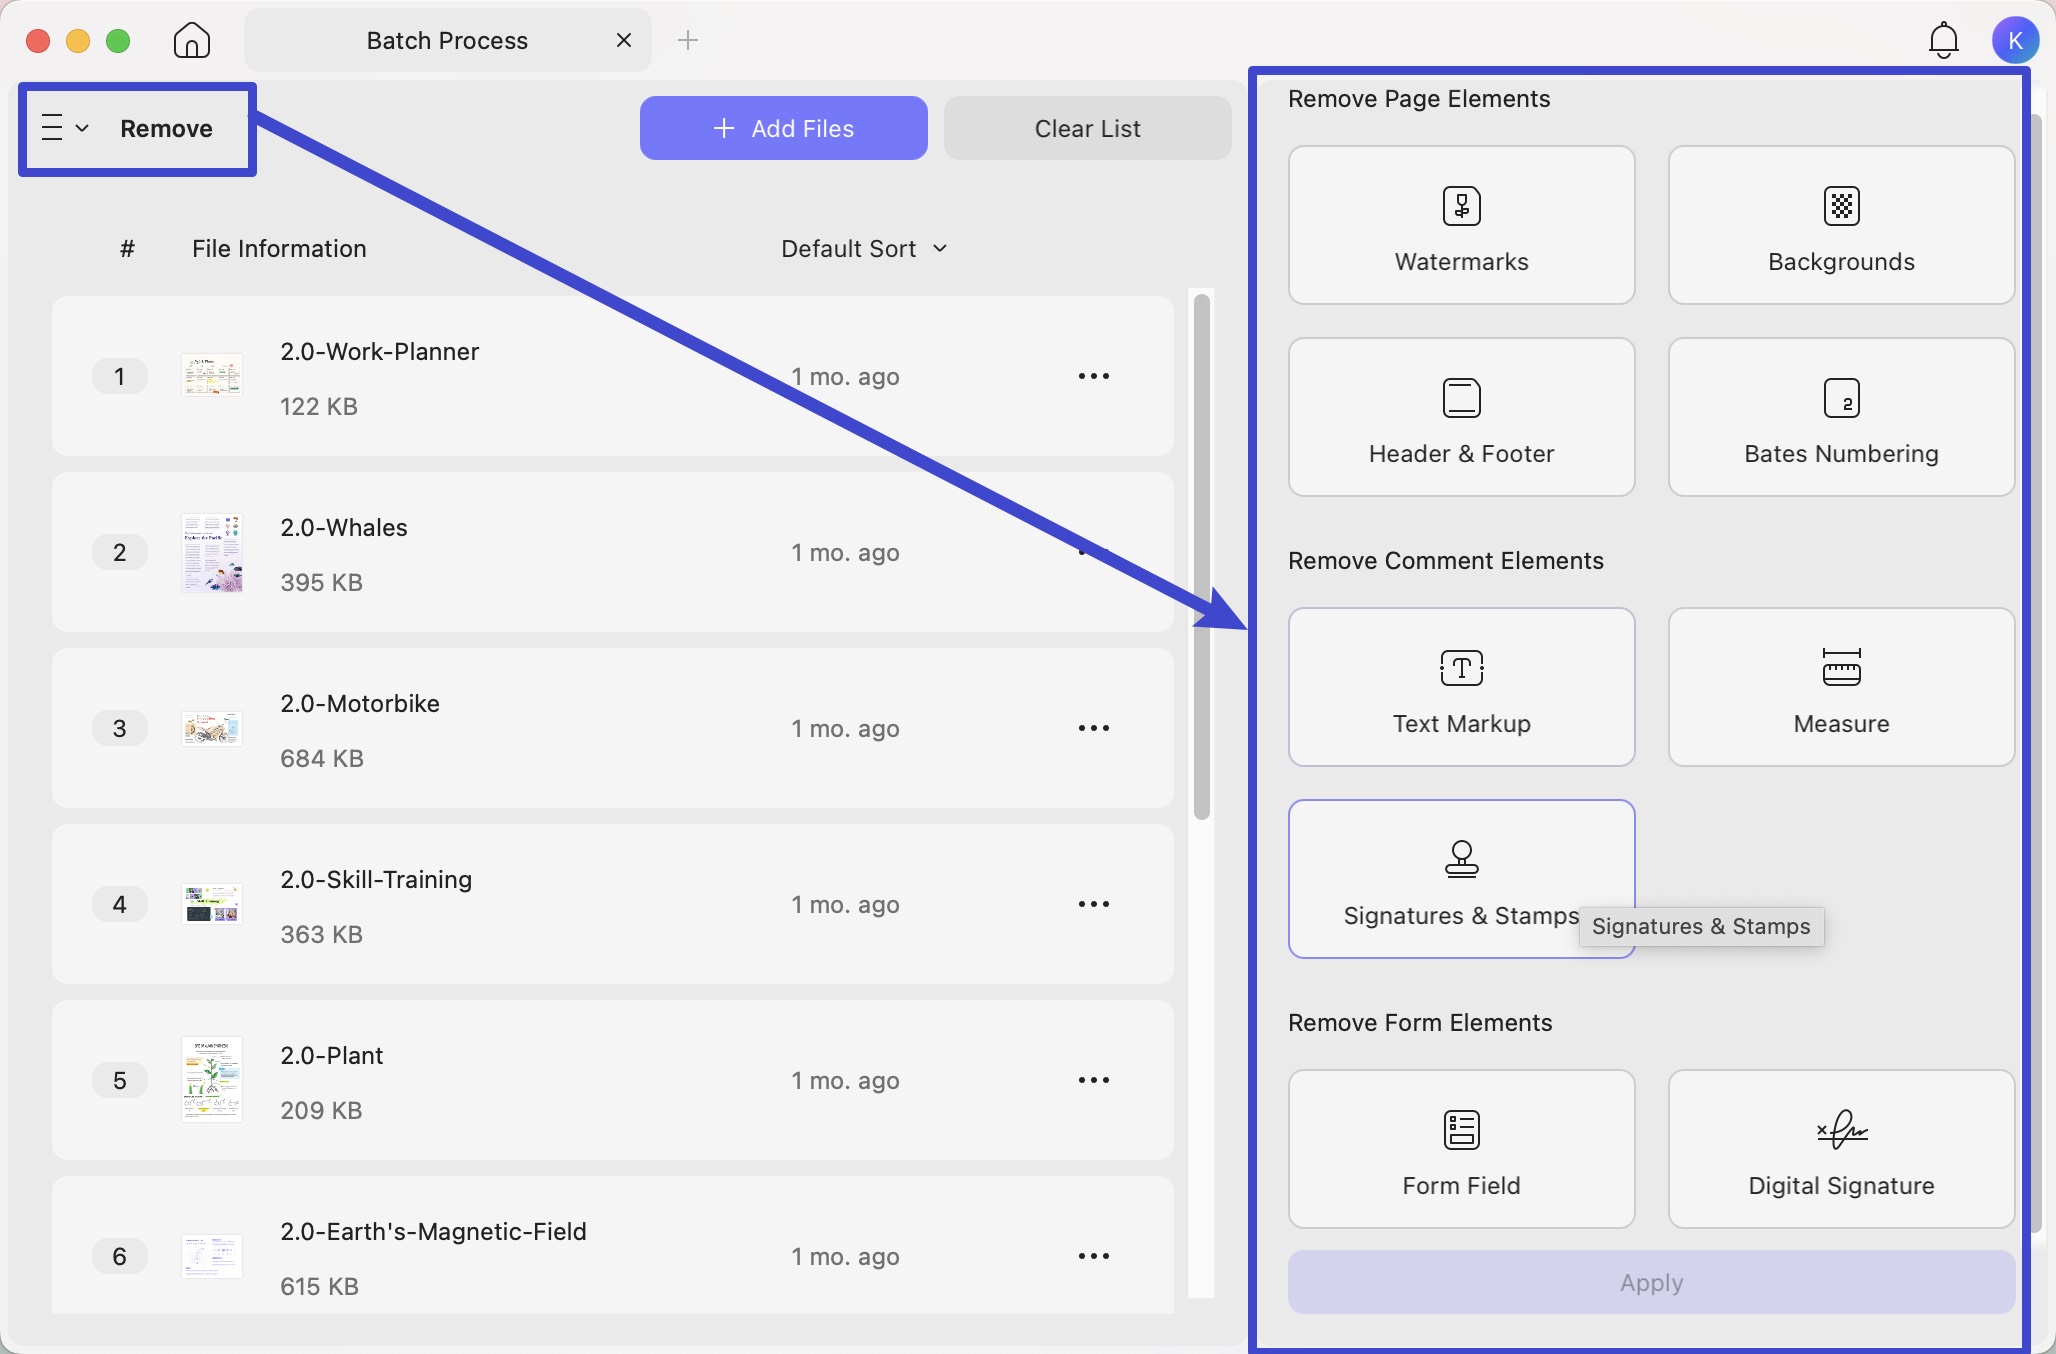
13. Batch Remove
With UPDF on Mac, you are allowed to batch remove watermarks, background, footer and headers, bates number, text markup, measure, signatures and stamps, form field, and digital signature.
Go to “Remove” icon by clicking on the three vertical lines, select the elements you need to remove, and click on the “Apply” to save the changes.
In the free version of UPDF, you are allowed to add two files. To unlock the limitations, you can upgrade to pro at a low price