Annotate PDF on Mac with UPDF
UPDF for Mac has many annotation features that can help you take notes on PDF and review the PDF easily. It has sticky notes, highlight, strikethrough, underline, squiggly, text comment, text box, text callout, pencil, eraser, shapes, measurement tools, attachment, stickers, stamps, and signatures.
We will show how to use these features one by one in the following.
Highly recommend you download UPDF via the below button to text its all features and upgrade to the pro version at a low price if you like it after testing.
Windows • macOS • iOS • Android 100% secure
- 1. Add Comments (Text Comment/Box/Sticky Note/Callout)
- 2. Text Markups (Highlight/Underline/Strikethrough/Squiggly)
- 3. The Distance Tools
- 4. Add Stamps
- 5. Add Stickers
- 6. Add Attachment
- 7. Drawing/Add Shapes
- 8. Manage Comment List
1. Add Comments to PDF with UPDF on Mac
You can add a comment to PDF on Mac with UPDF by following the below steps.
Step 1. Click on the Tool button and hit the "Comment" icon to find the "Sticky Notes", "Text Comment", "Text Box", or "Text Callout" options in the Tools or quick toolbar at the top.
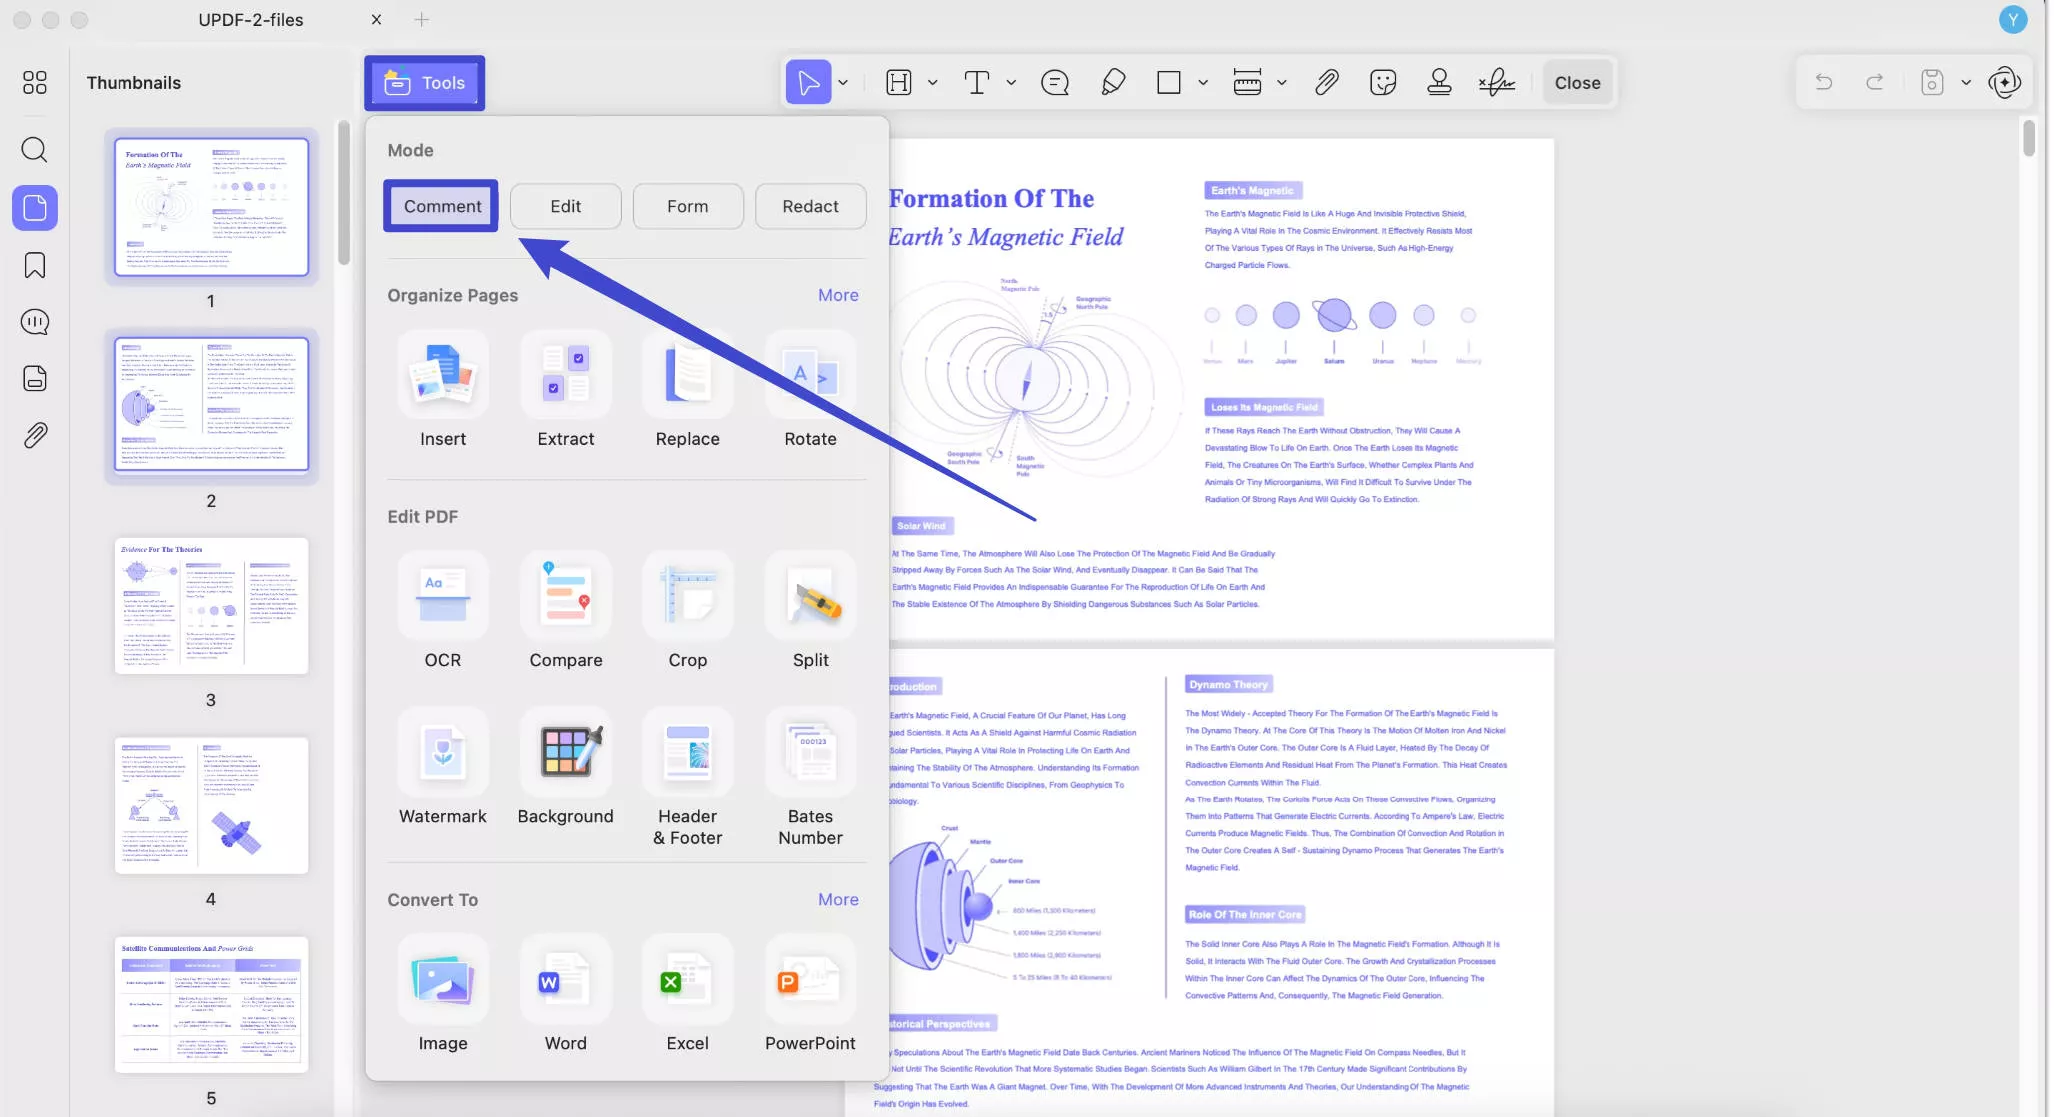
Step 2. Select one option, customize its properties, and add the comment to the PDF. Here, we will show you how to use the four options one by one.
- Text Comment
Click on the "Text Comment' icon, you can customize the text color, style, and size.
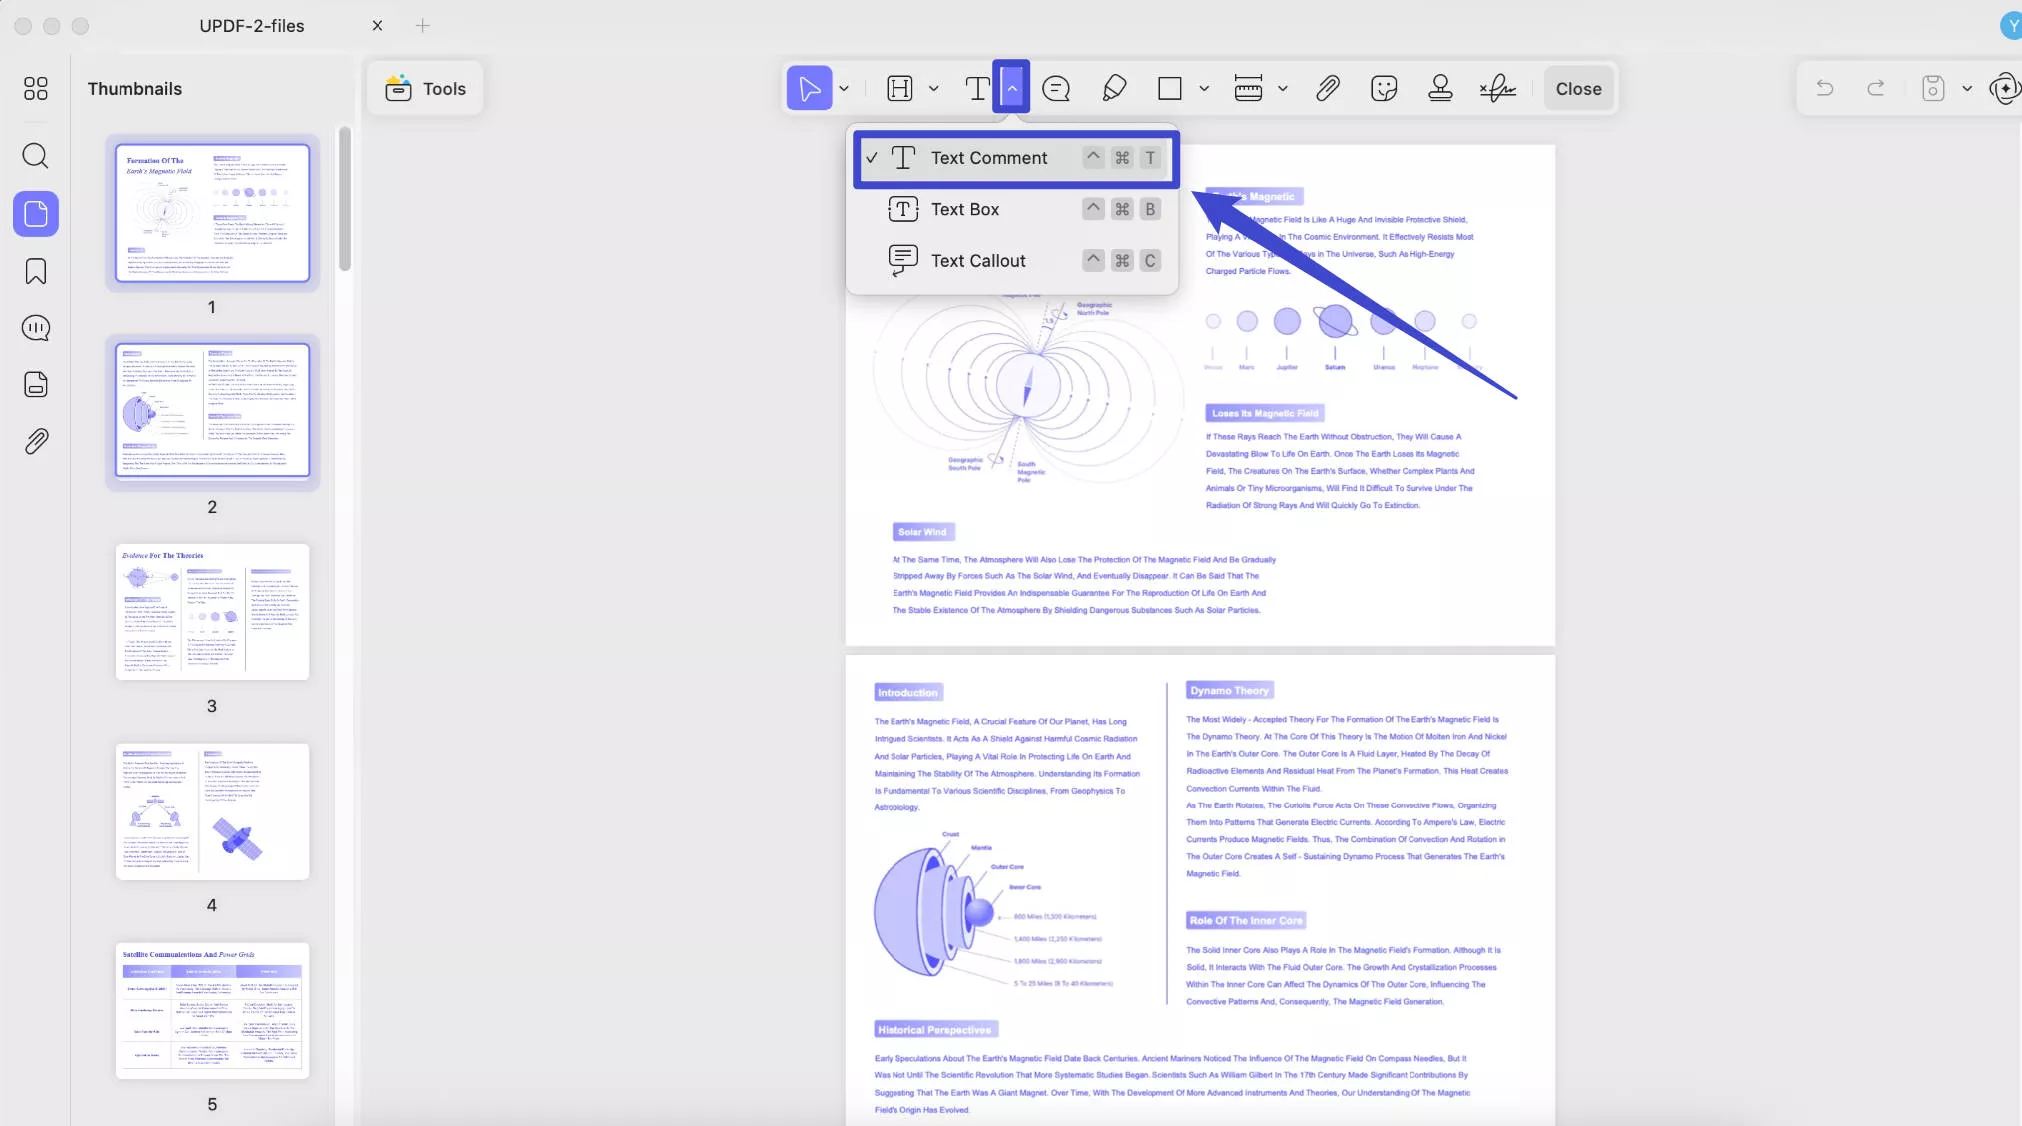
Click the place where you want to place the text comment and type the content. You can single-click to reveal the options like "Copy", "Delete", etc.
- Text Box
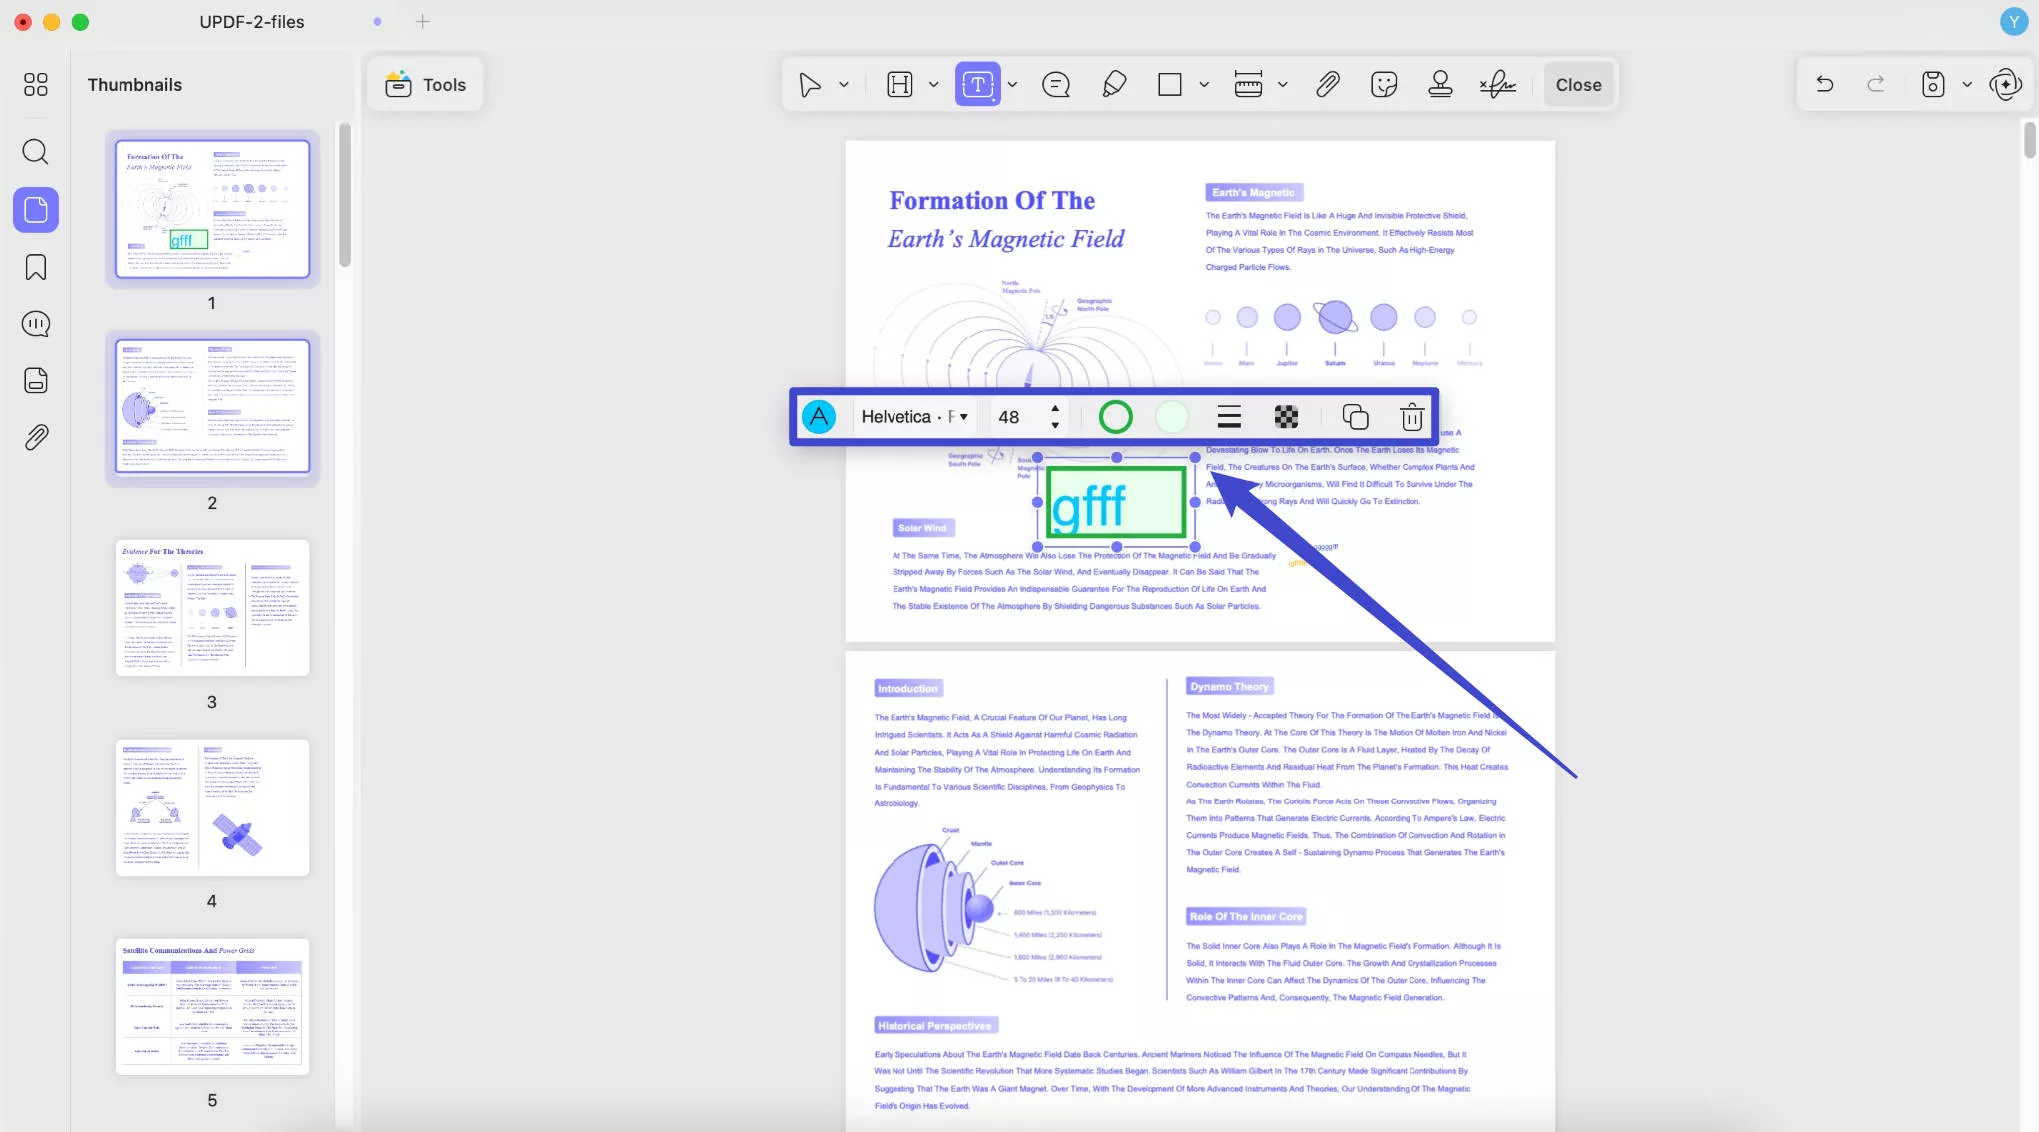
To use a text box, you can click "Text Box", and select the text color, border color, background color, text style, and font size.
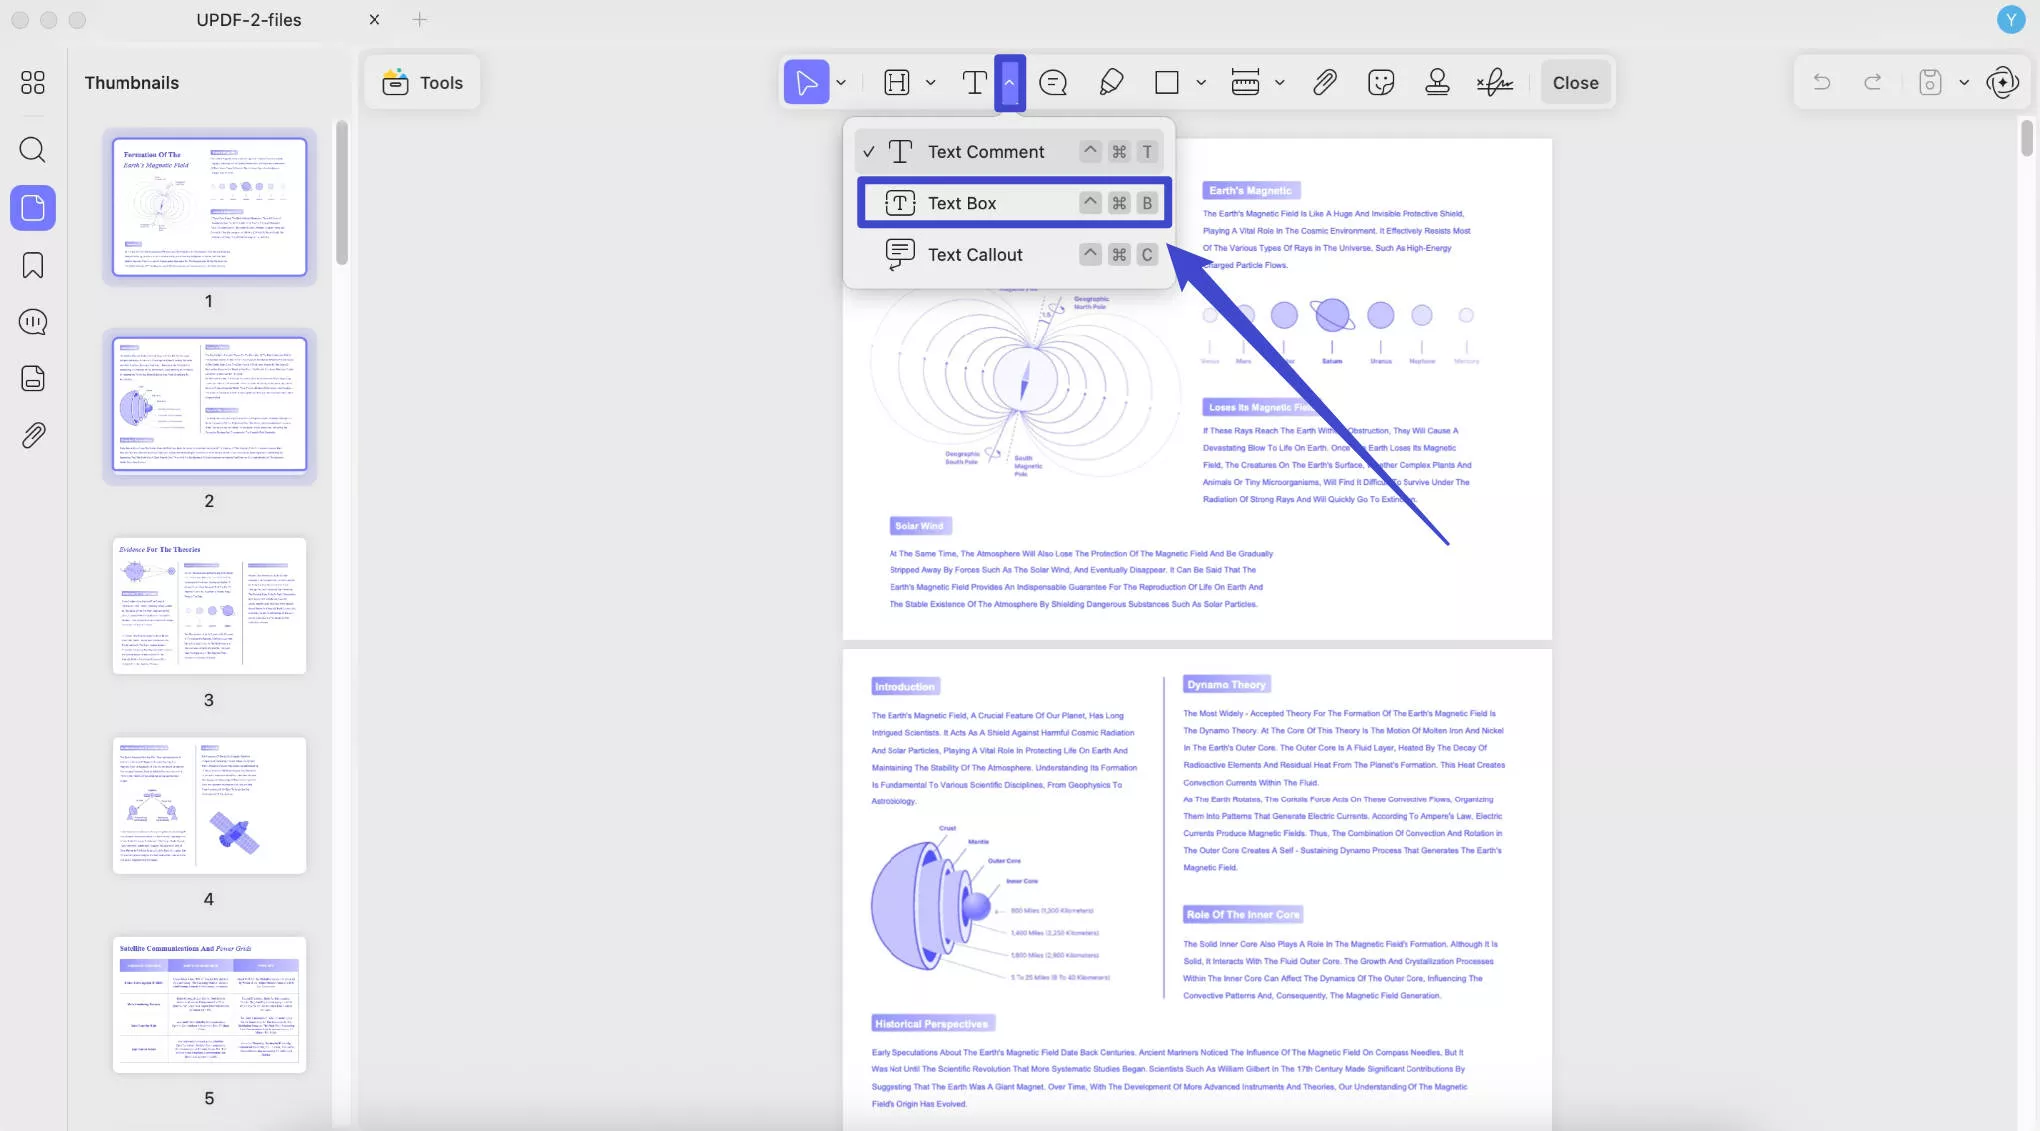
Click the position where you need to add the text box to, then, enter your text. When you finish typing, you can have the same operations as in Text Comment to get the options you need like "Delete", "Copy", and more.
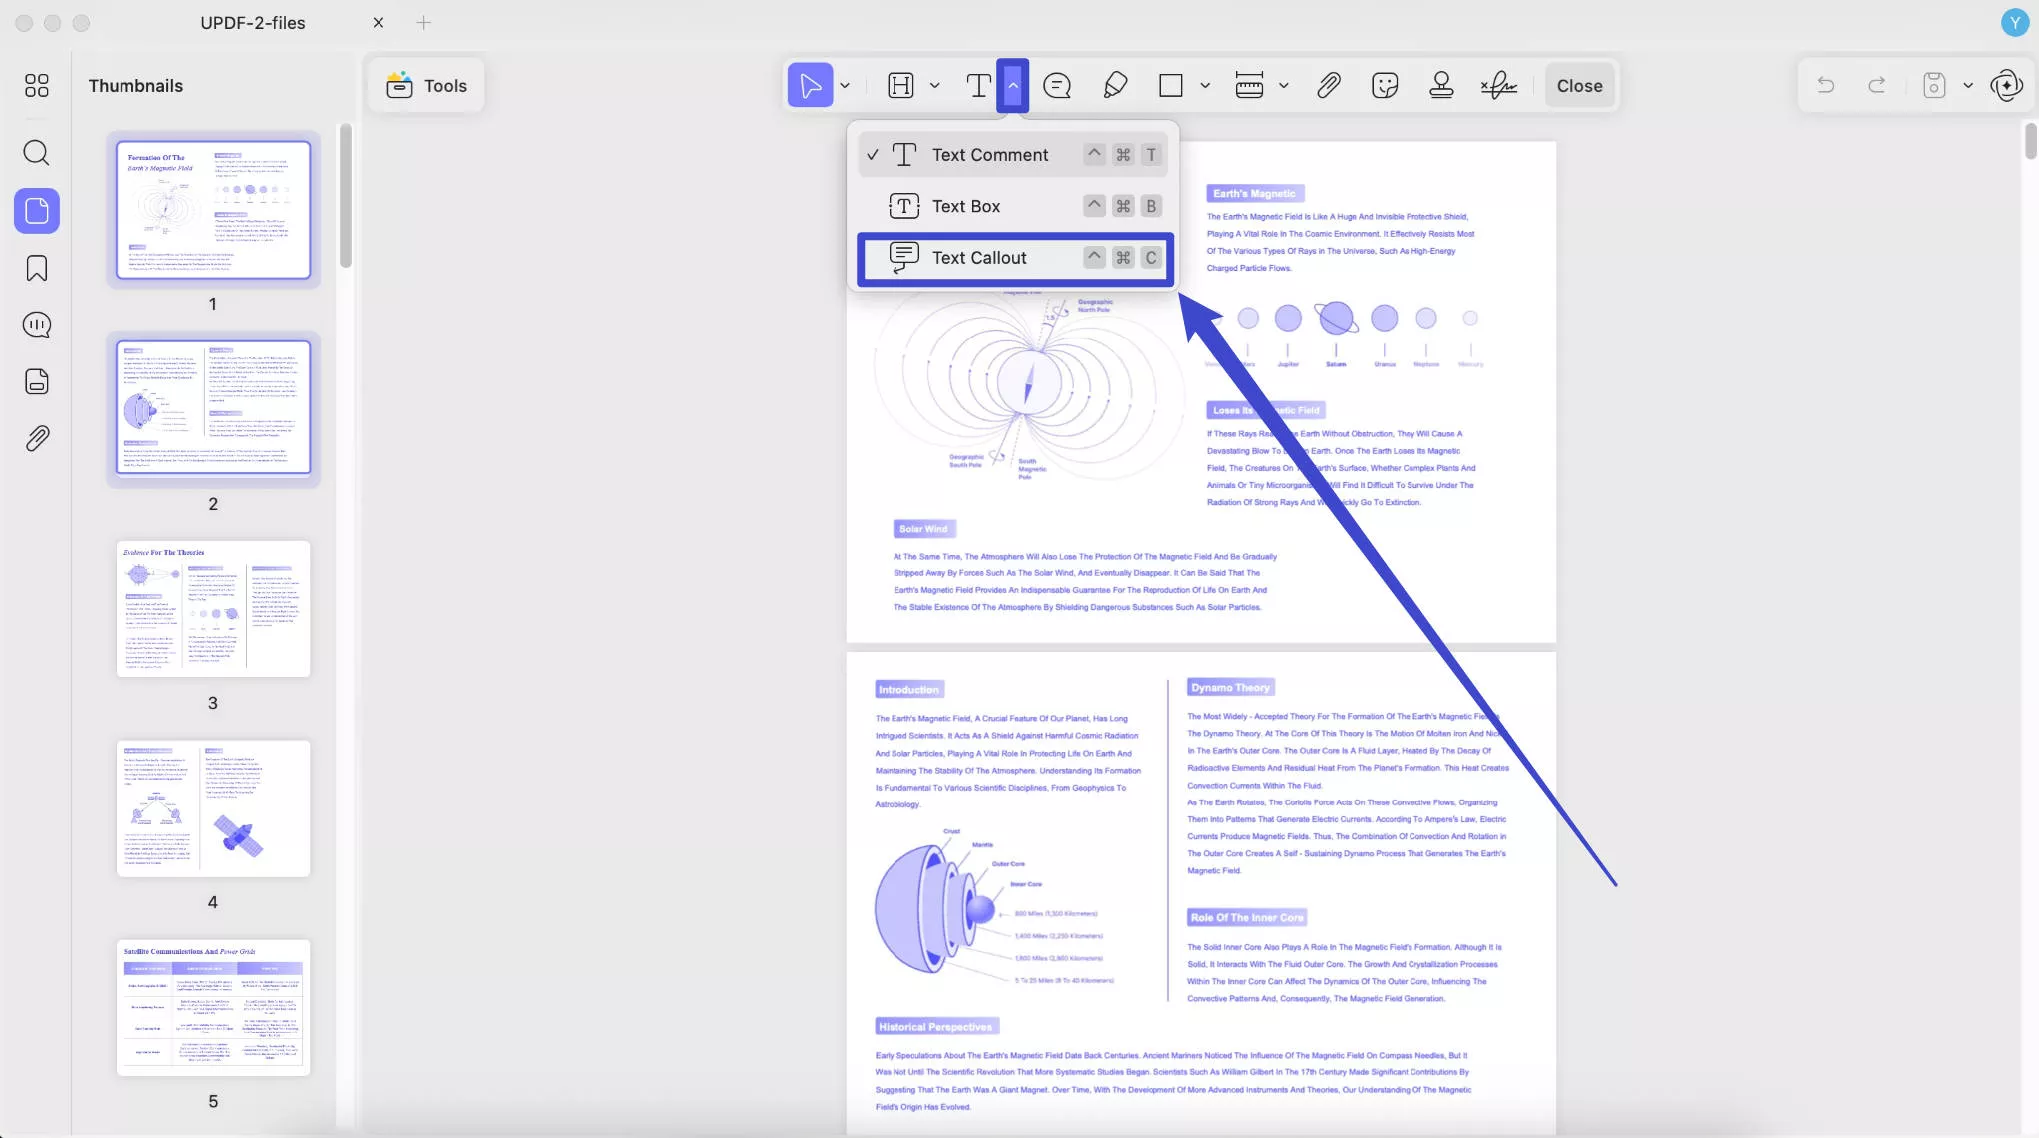
- Text Callout
You can add text callout by clicking on the "Text Callout" icon, and selecting the text color, border color, background color, text style, and font size.
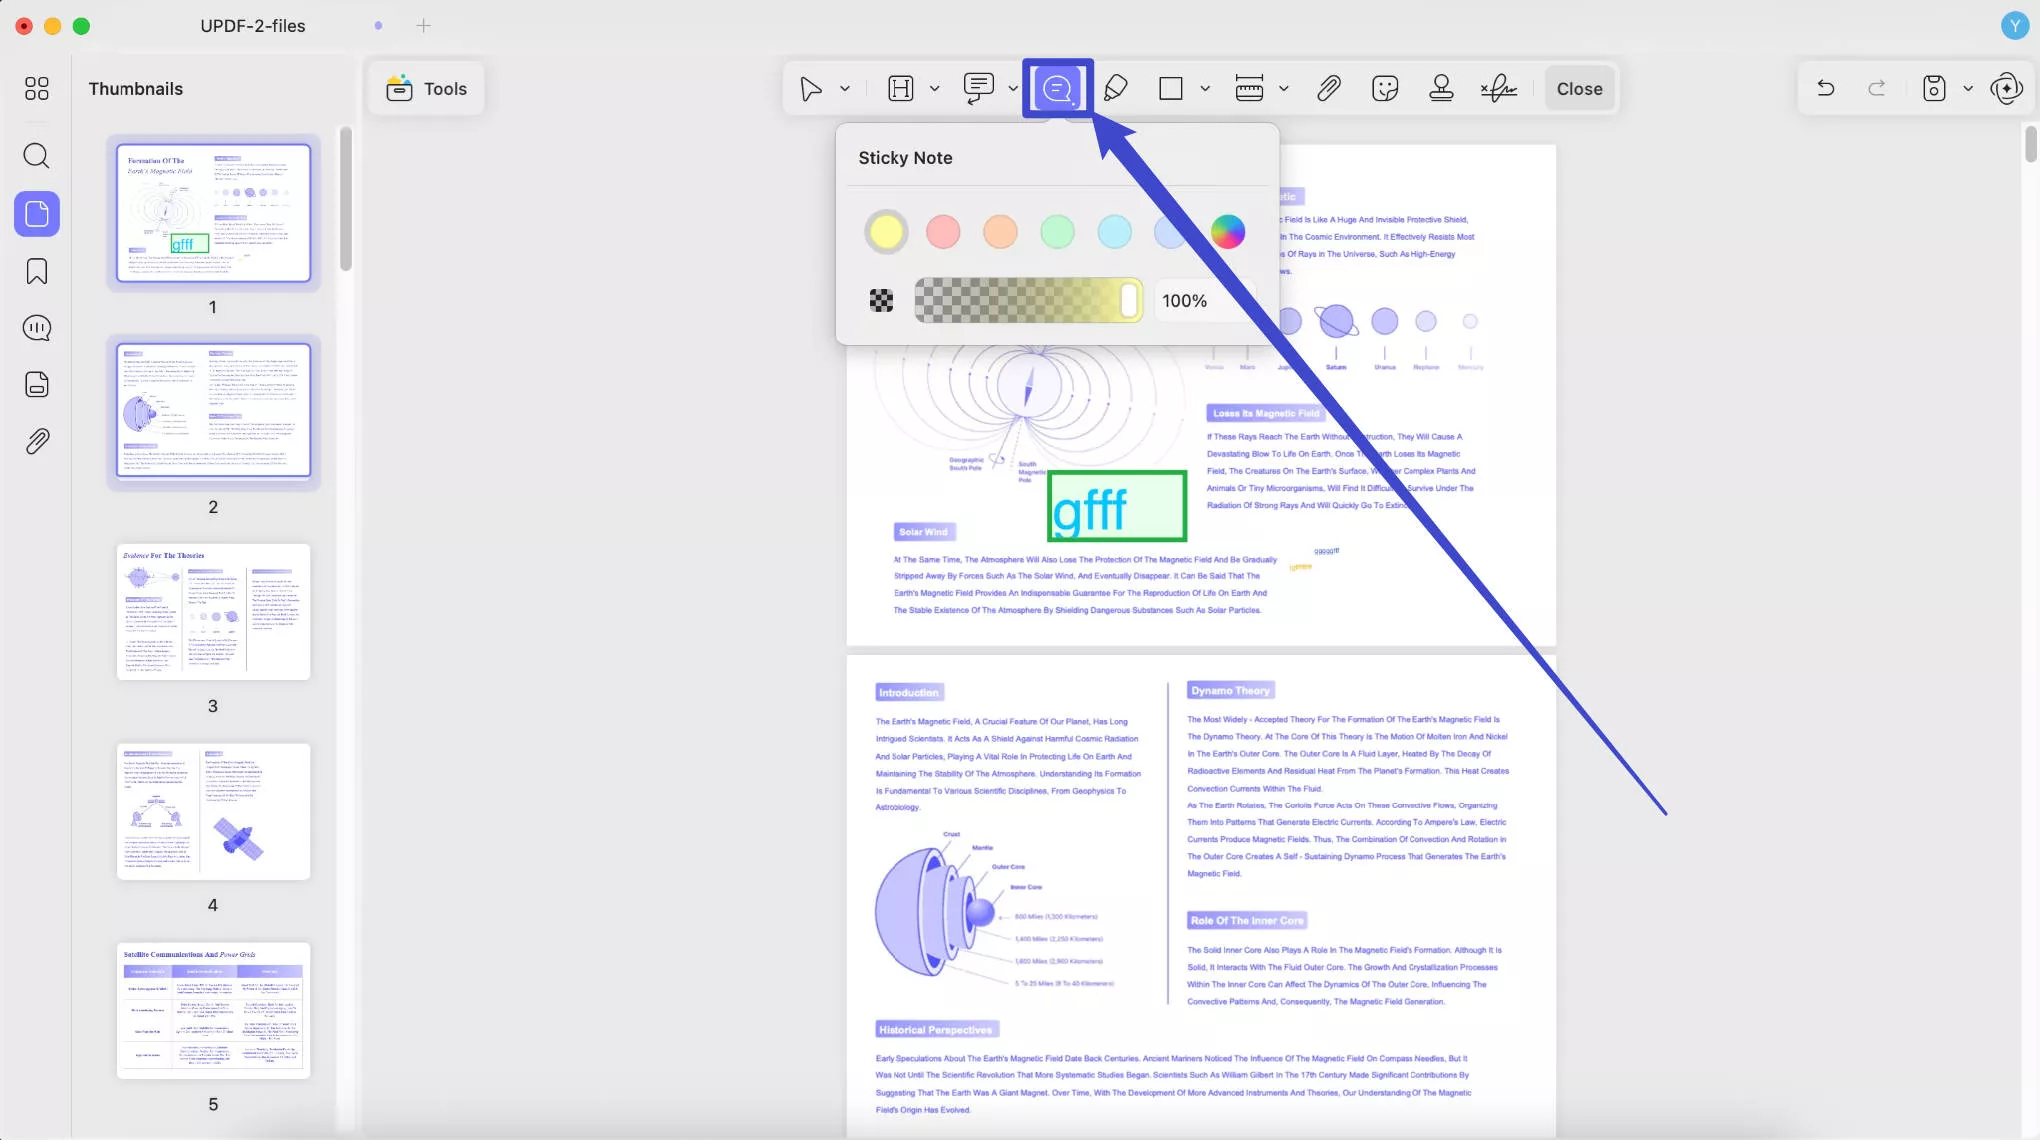
- Sticky Note
The steps are the same for adding sticky notes to PDF. Click on the "Sticky Note" and choose the color. Then, add the text to the sticky note after clicking the place to add it.
Step 3. Go to "Done" to save all changes.
2. Text Markups
You can use highlight, strikethrough, underline, and squiggly, etc to mark up PDF on Mac with UPDF. Here is the guide for you.
Step 1. Click the Tool button and select Comment to see the markup options.
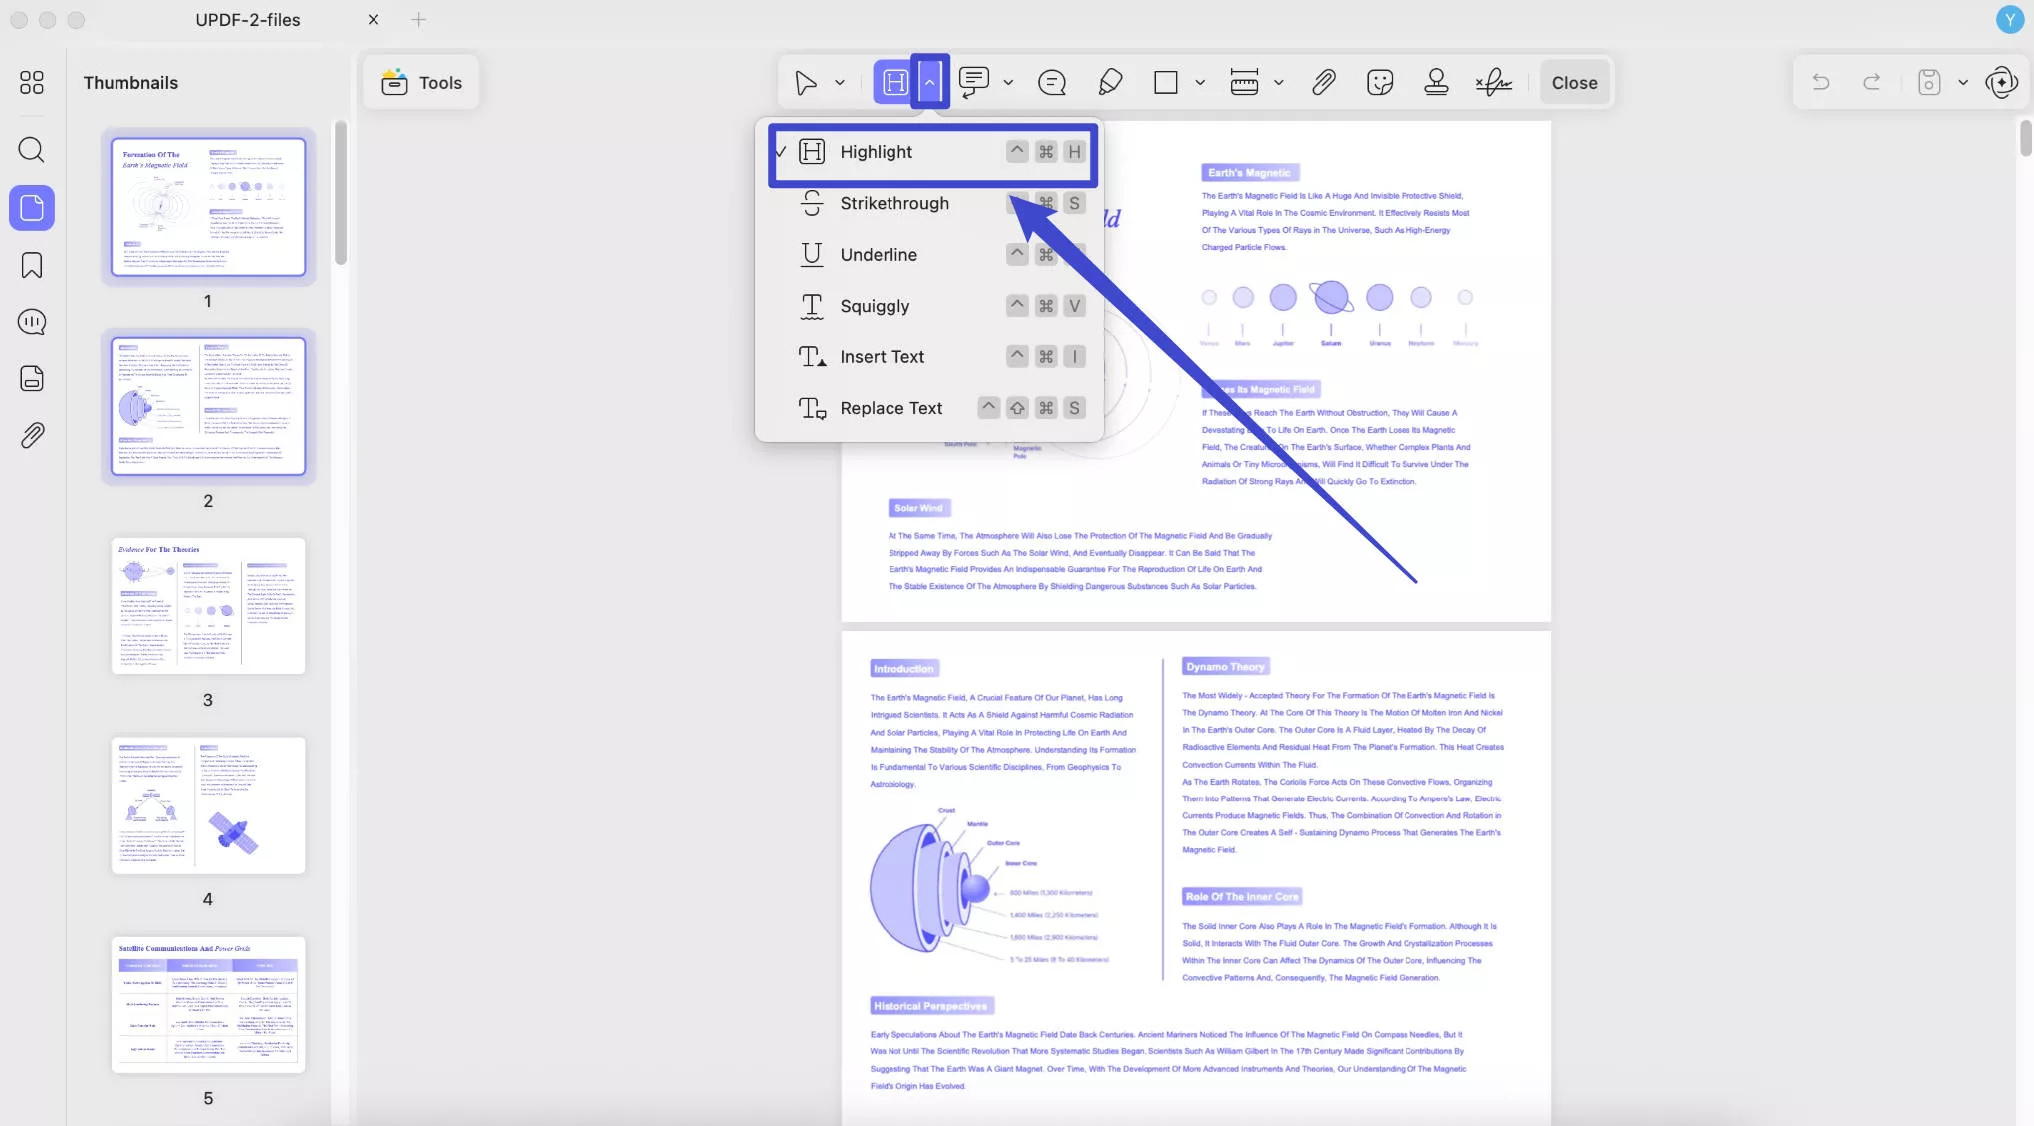
Step 2. Choose a text markup type from the six options provided:
- Highlight
- Strikethrough
- Underline
- Squiggly line
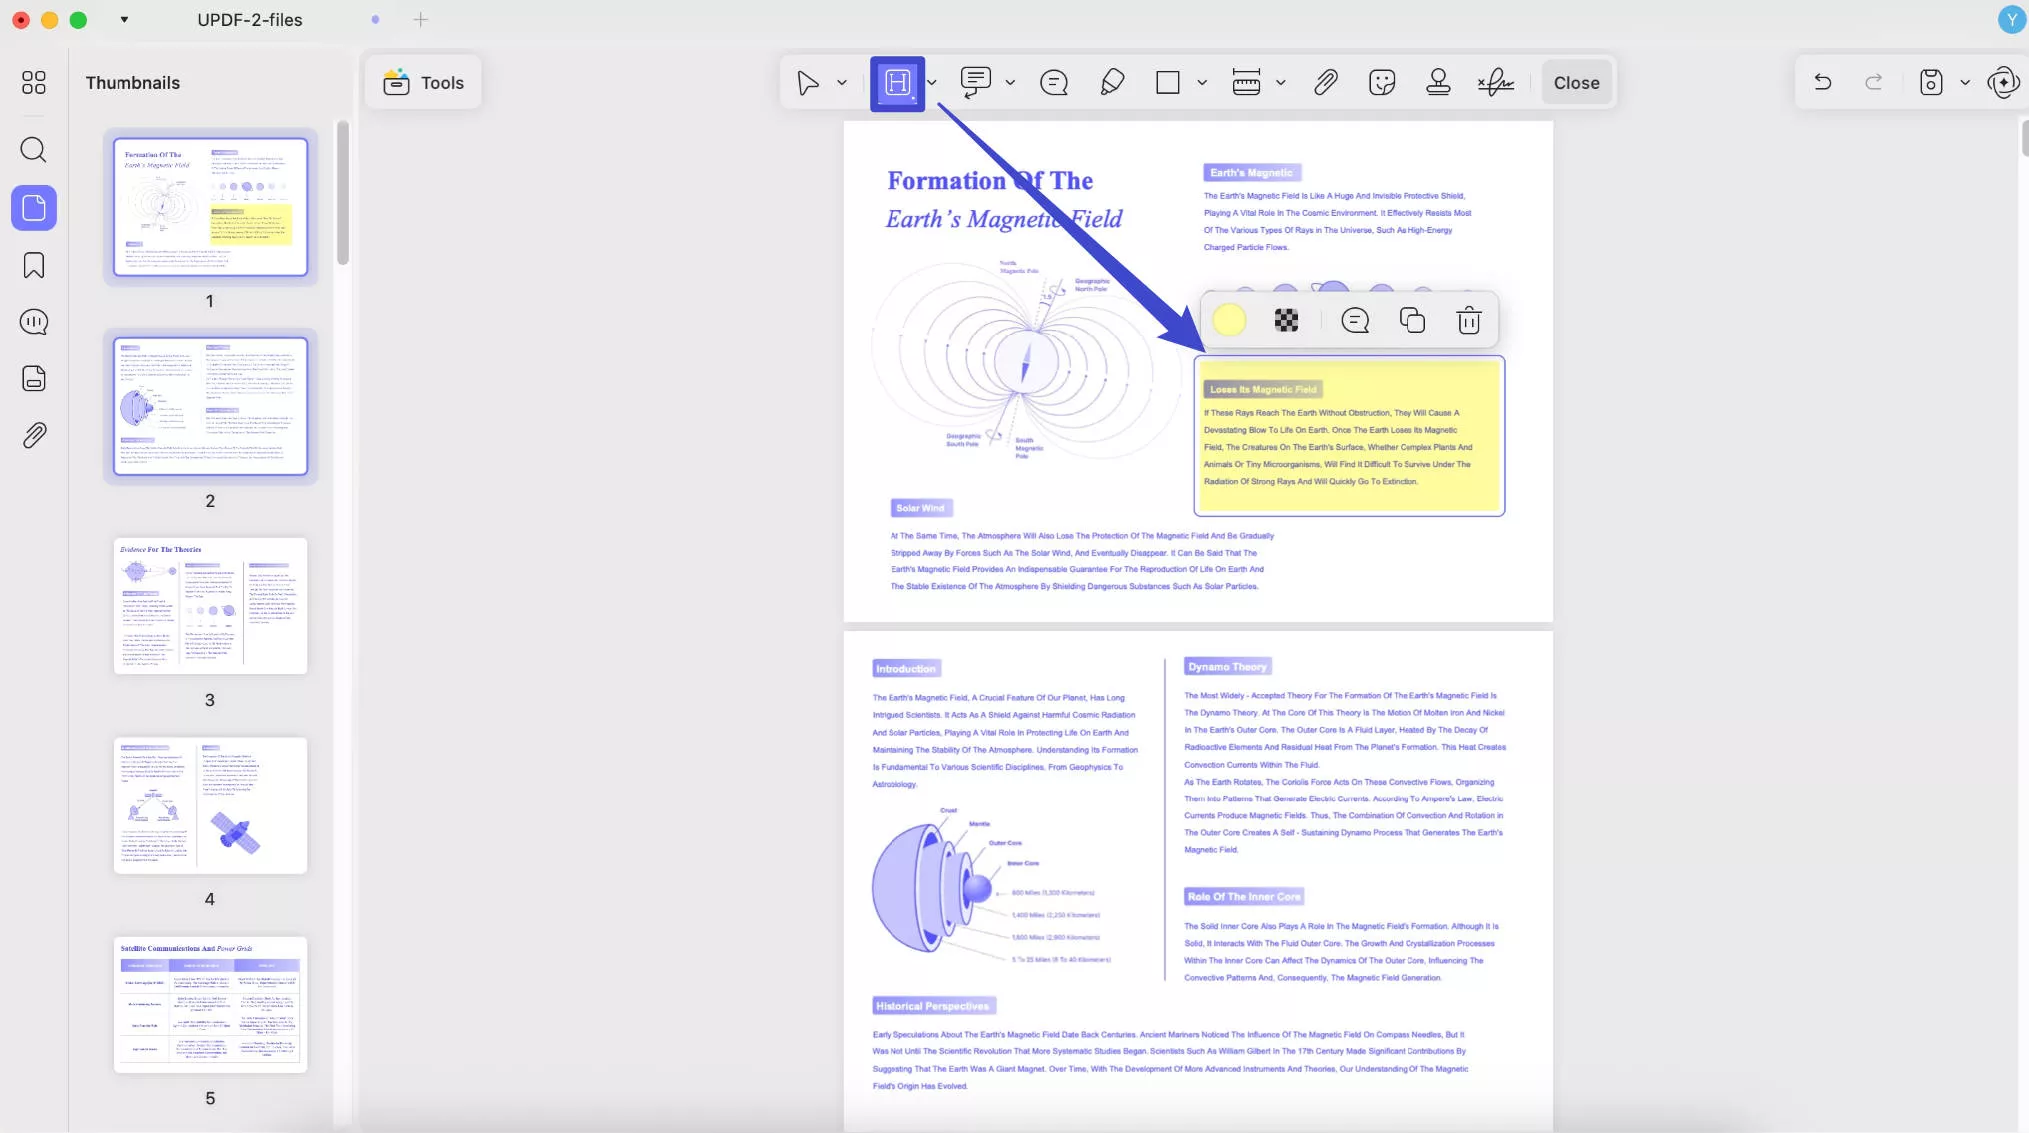
Highlight Text: Click the "Highlight" icon, select the color for highlighting, and select the text you want to highlight. You can also change the color for highlighting in the comment properties panel after adding the highlight.
Highlight Area: Click the "Highlight" icon and choose a color. Hold down the Shift key and use your mouse to draw a shape over the area you want to highlight. UPDF will highlight the selected area for you. This feature is especially useful for highlighting non-editable text in image-only PDFs.
Strikethrough: Click the Strikethrough icon and choose the text to be marked up using a click-and-drag action. The strikethrough will be applied once you release your mouse button.
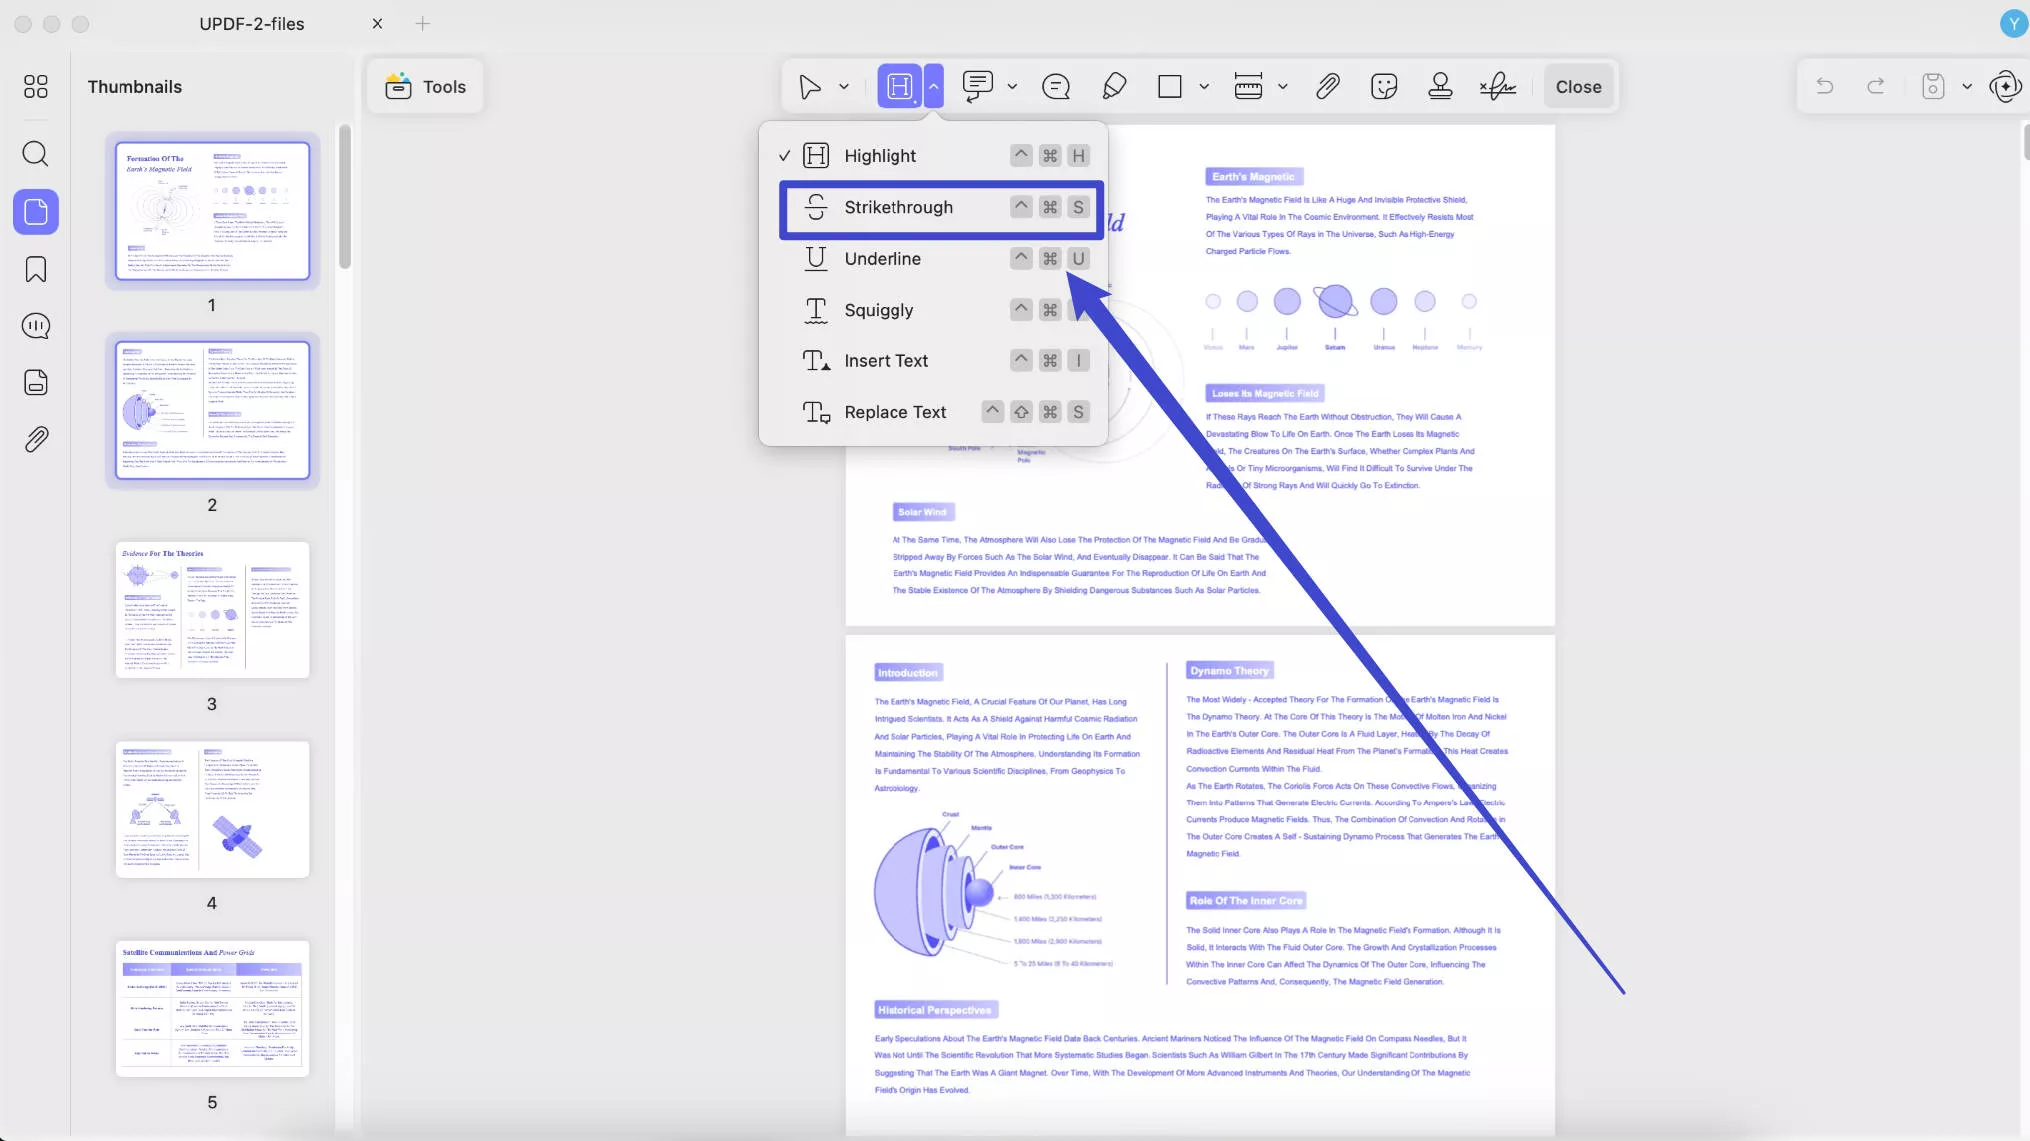
Underline: Click the underline icon, and select the text, release your mouse to finish adding the underline to the text.
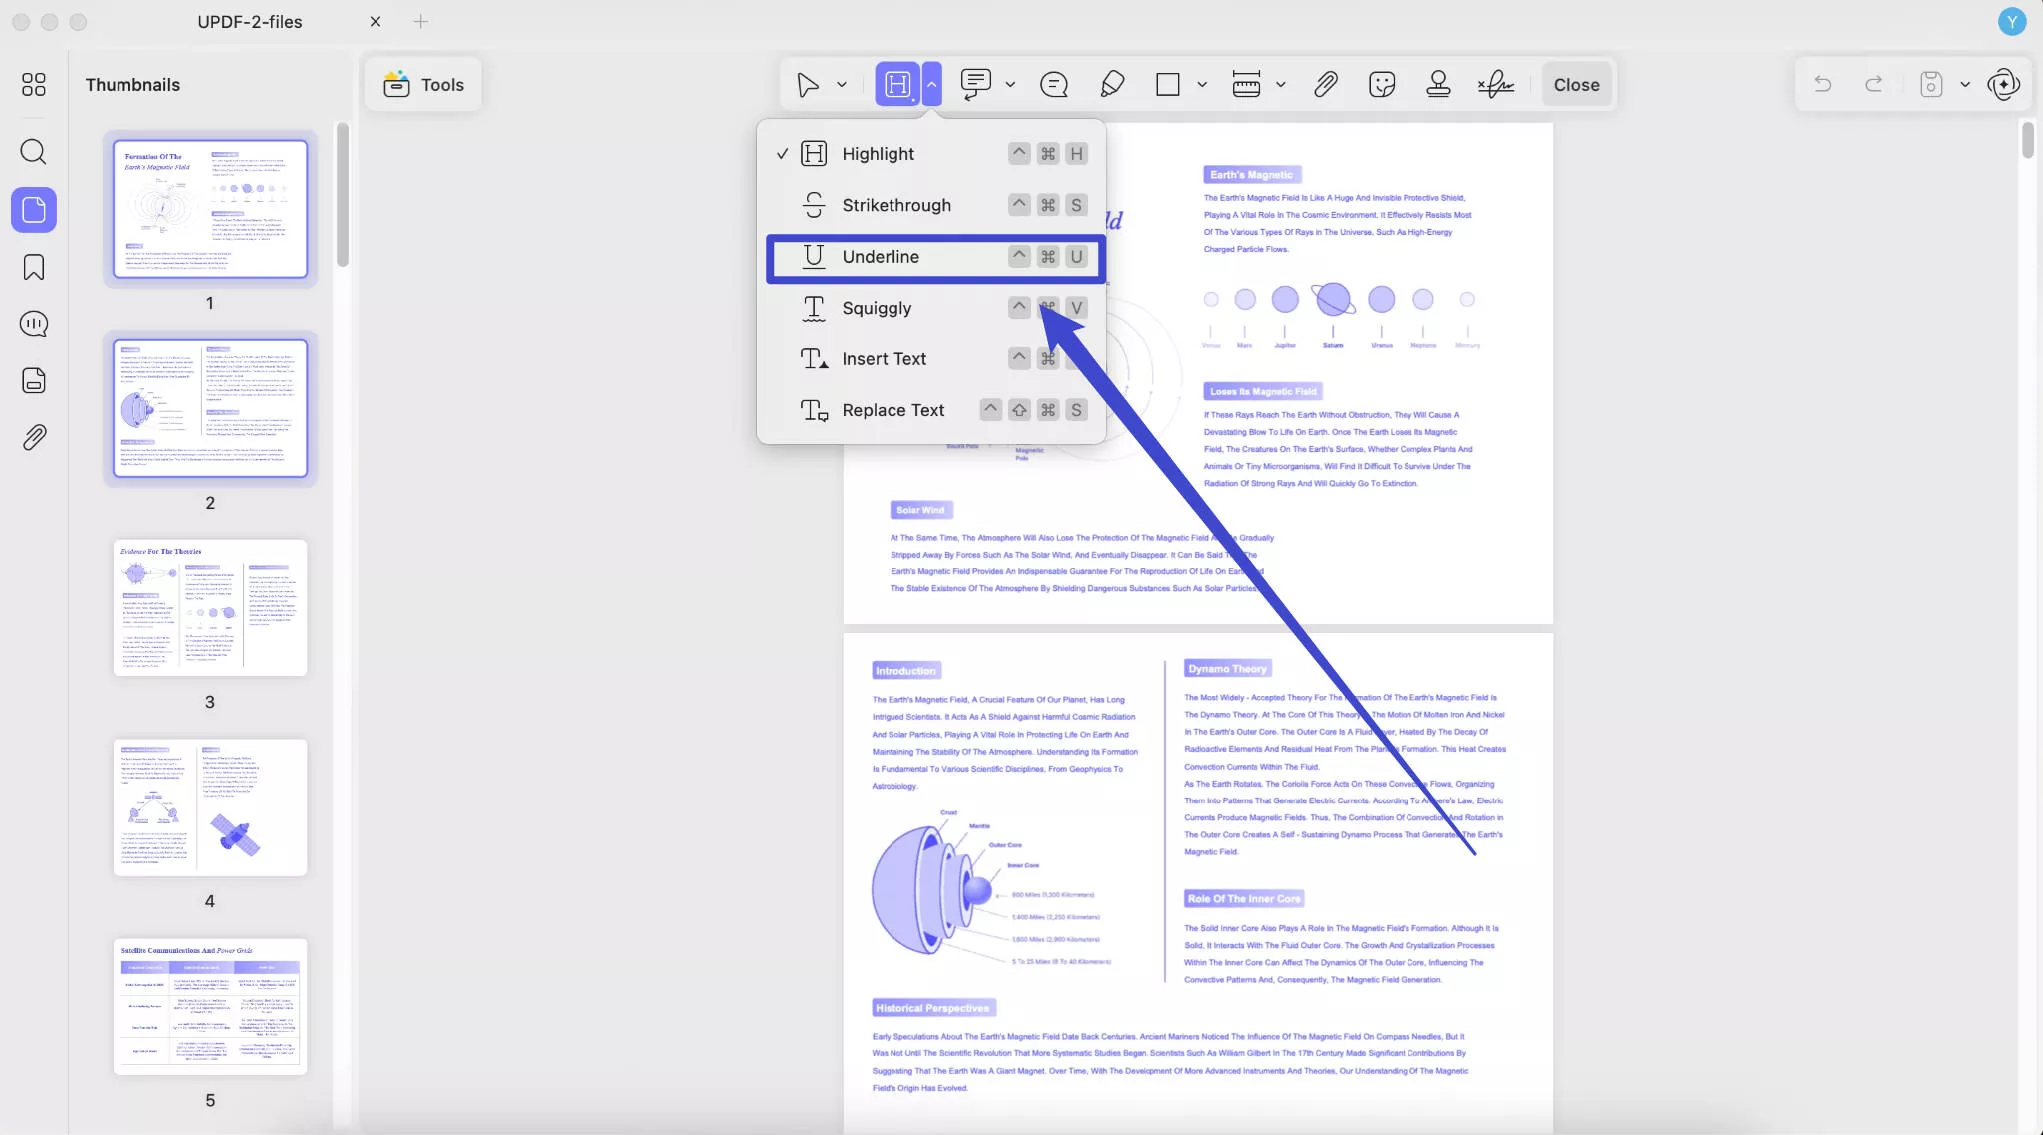
Squiggly line: To add a squiggly line to text, you can click the squiggly line icon on the top toolbar, and select the text to add the squiggly line.
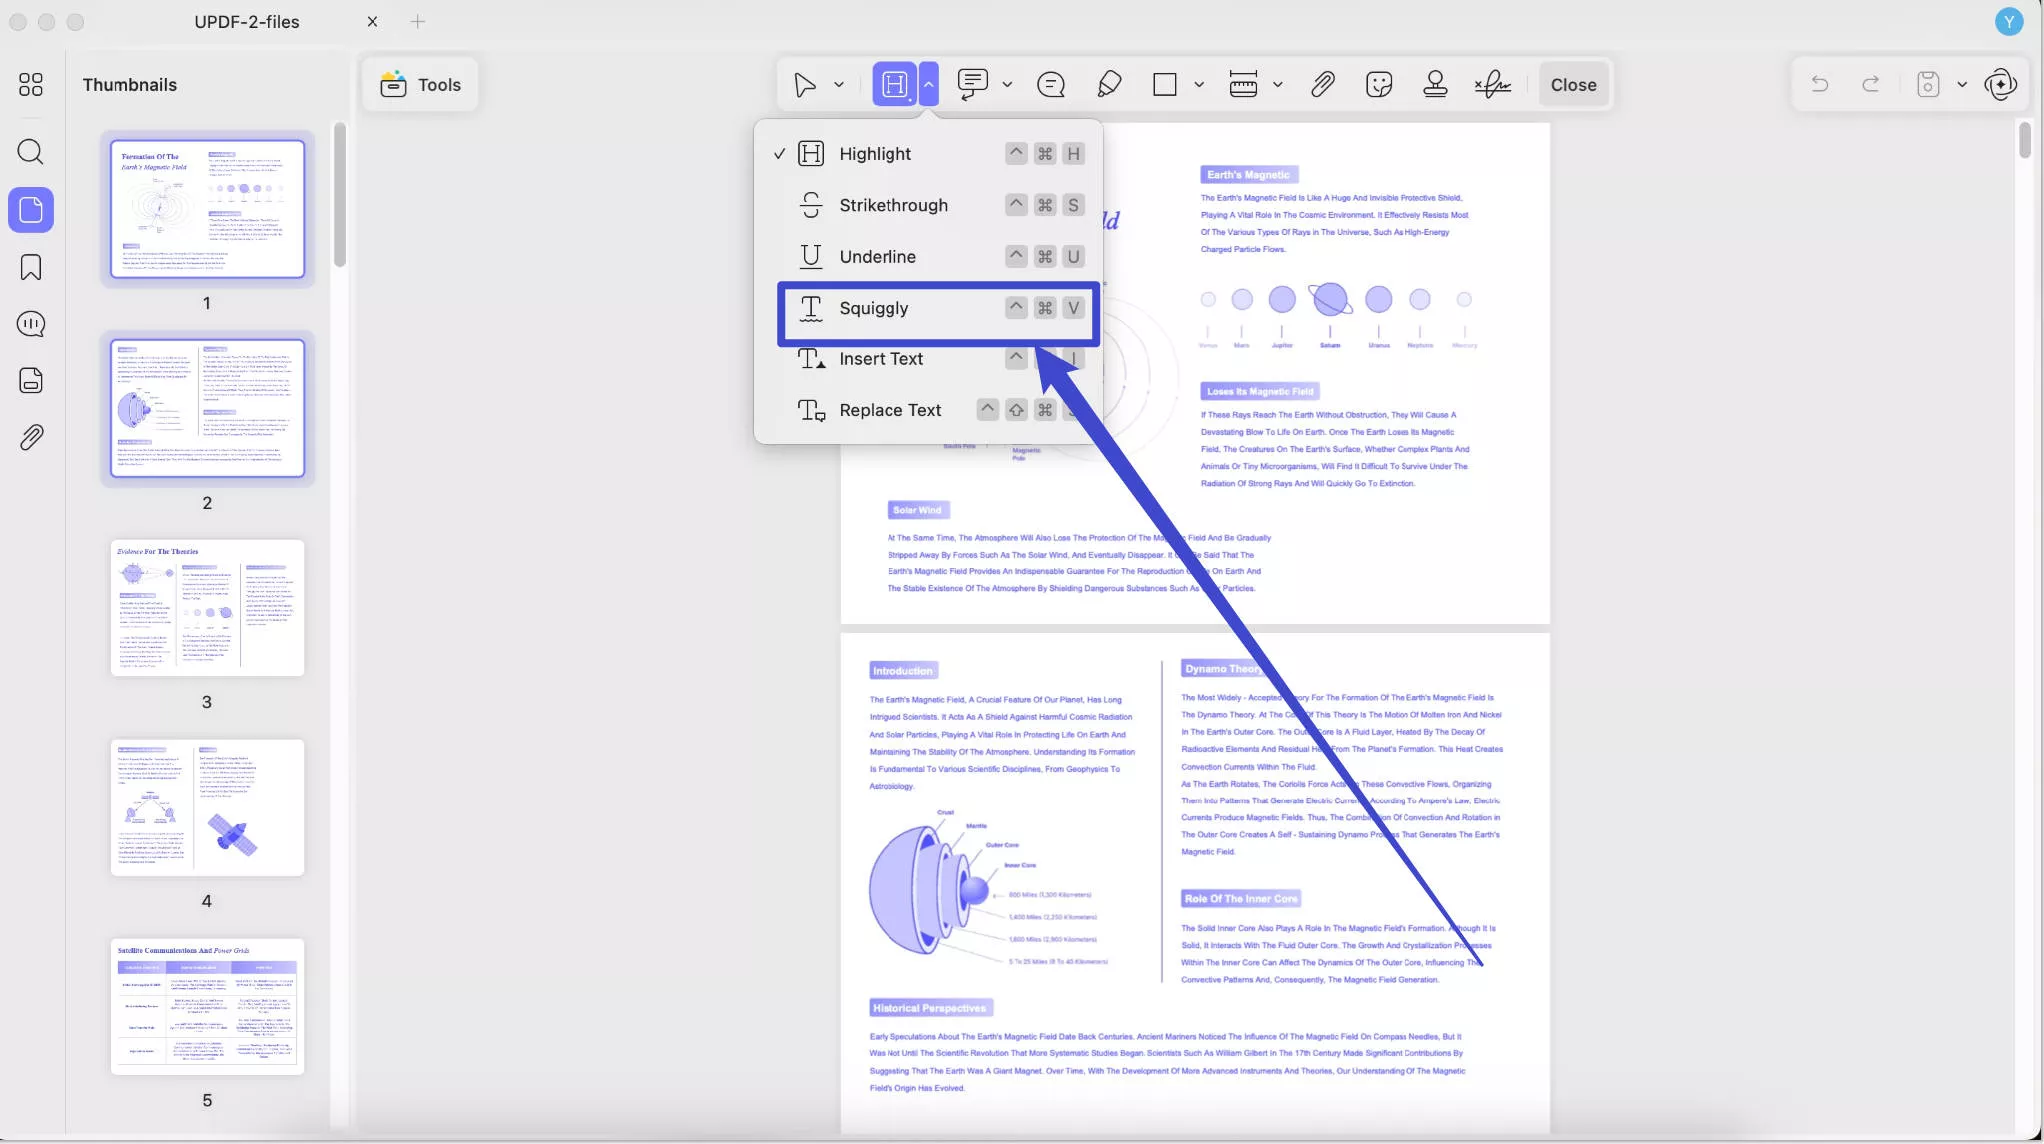
3. The Distance Tools
UPDF for Mac allows you to measure the distance, parameter, and Area on your PDF documents. Want to know how you can do this? All you have to do is follow the steps mentioned below:
Step 1. Enter the Comment mode by clicking on the Tools button and selecting Comment, and choose 'Distance Tool'.
Step 2. UPDF will give you three options in a drop-down menu: Distance Tool, Perimeter Tool, and Area Tool.
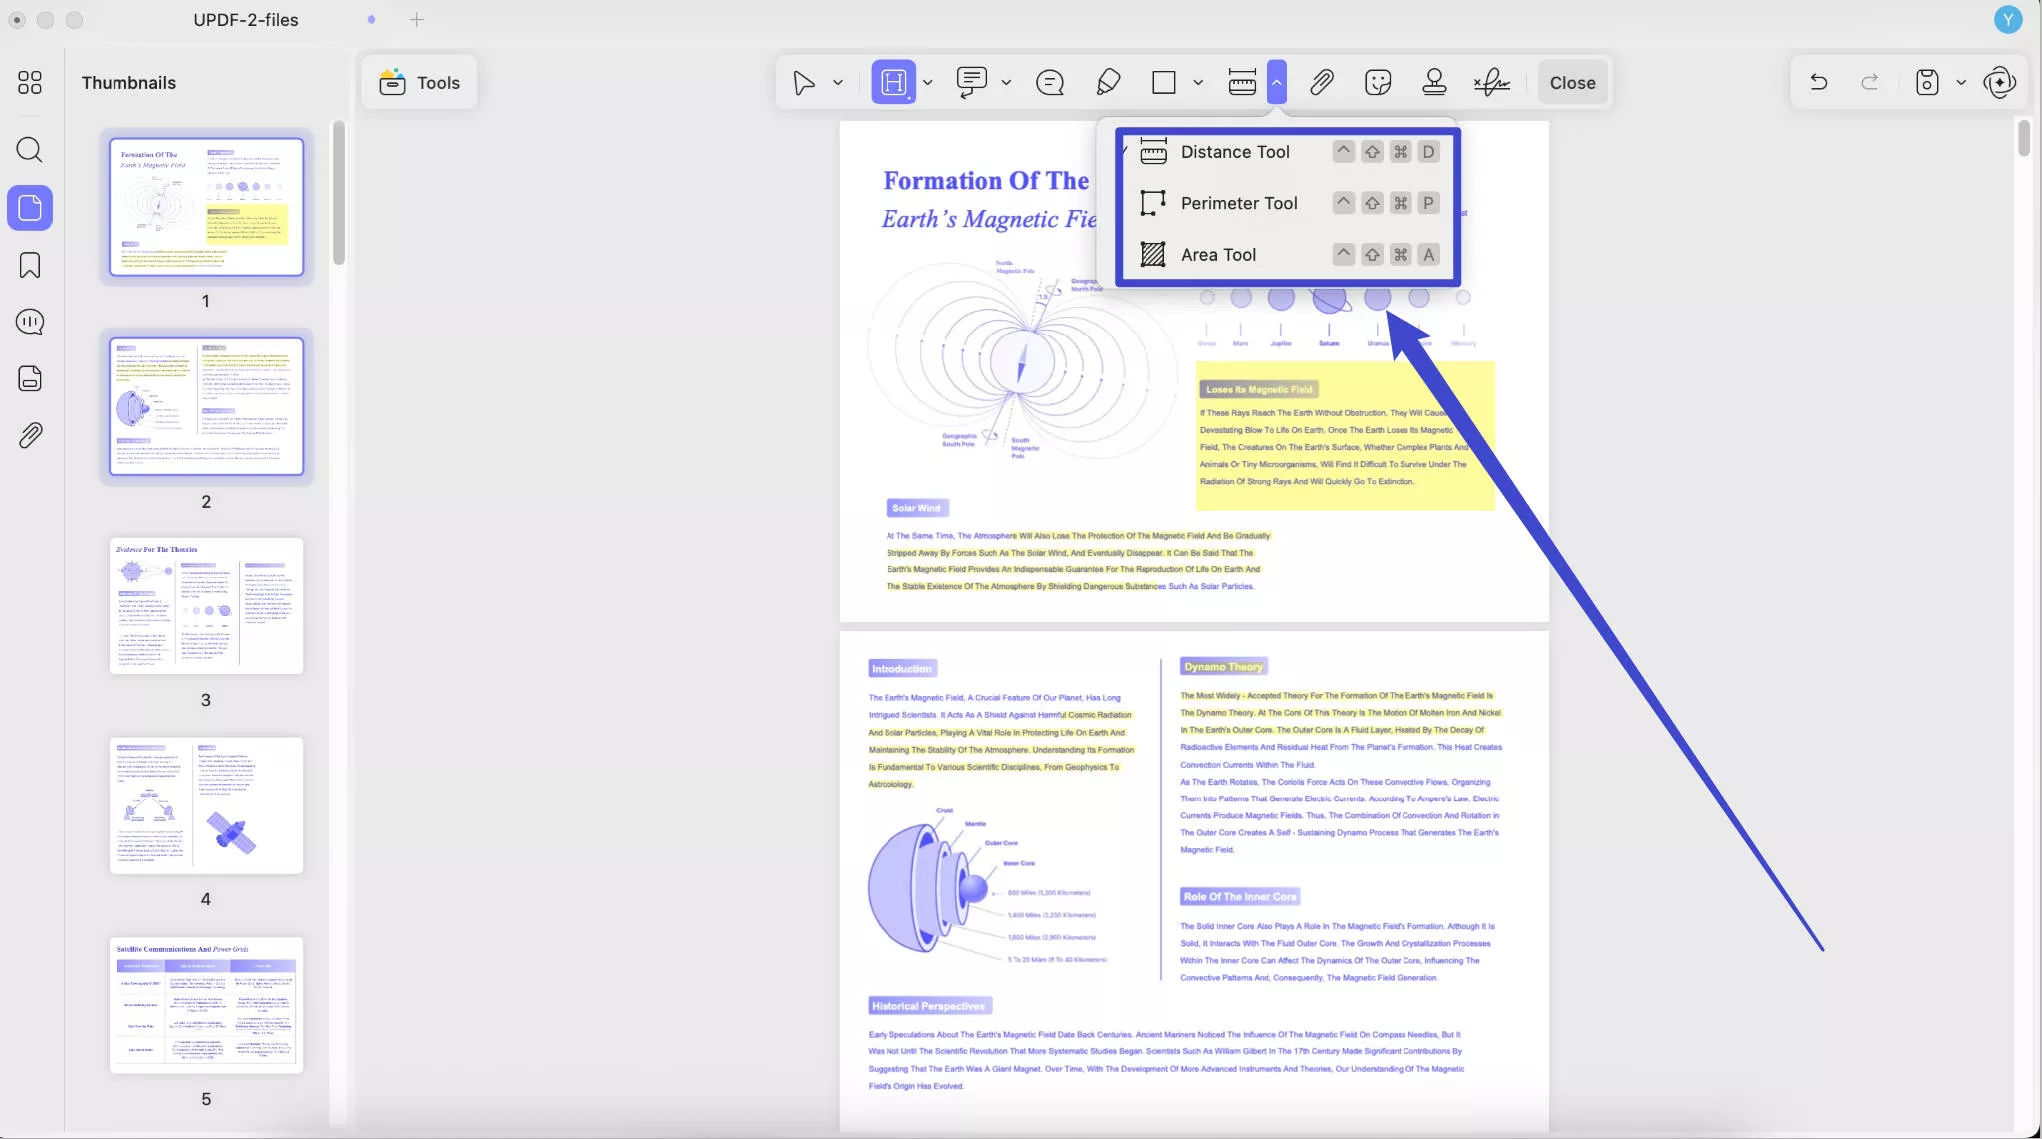
- The distance measuring tool would help you calculate the distance of your PDF from one point of the object to another. The tool also allows you to set the color of the measuring line along with its width and opacity for user convenience.
- To add the distance to the PDF, you need to click on the "Distance" icon, choose color, thickness, and opacity, then, click on the start point, move your mouse to the end point of the object, and double-click to finish measuring.
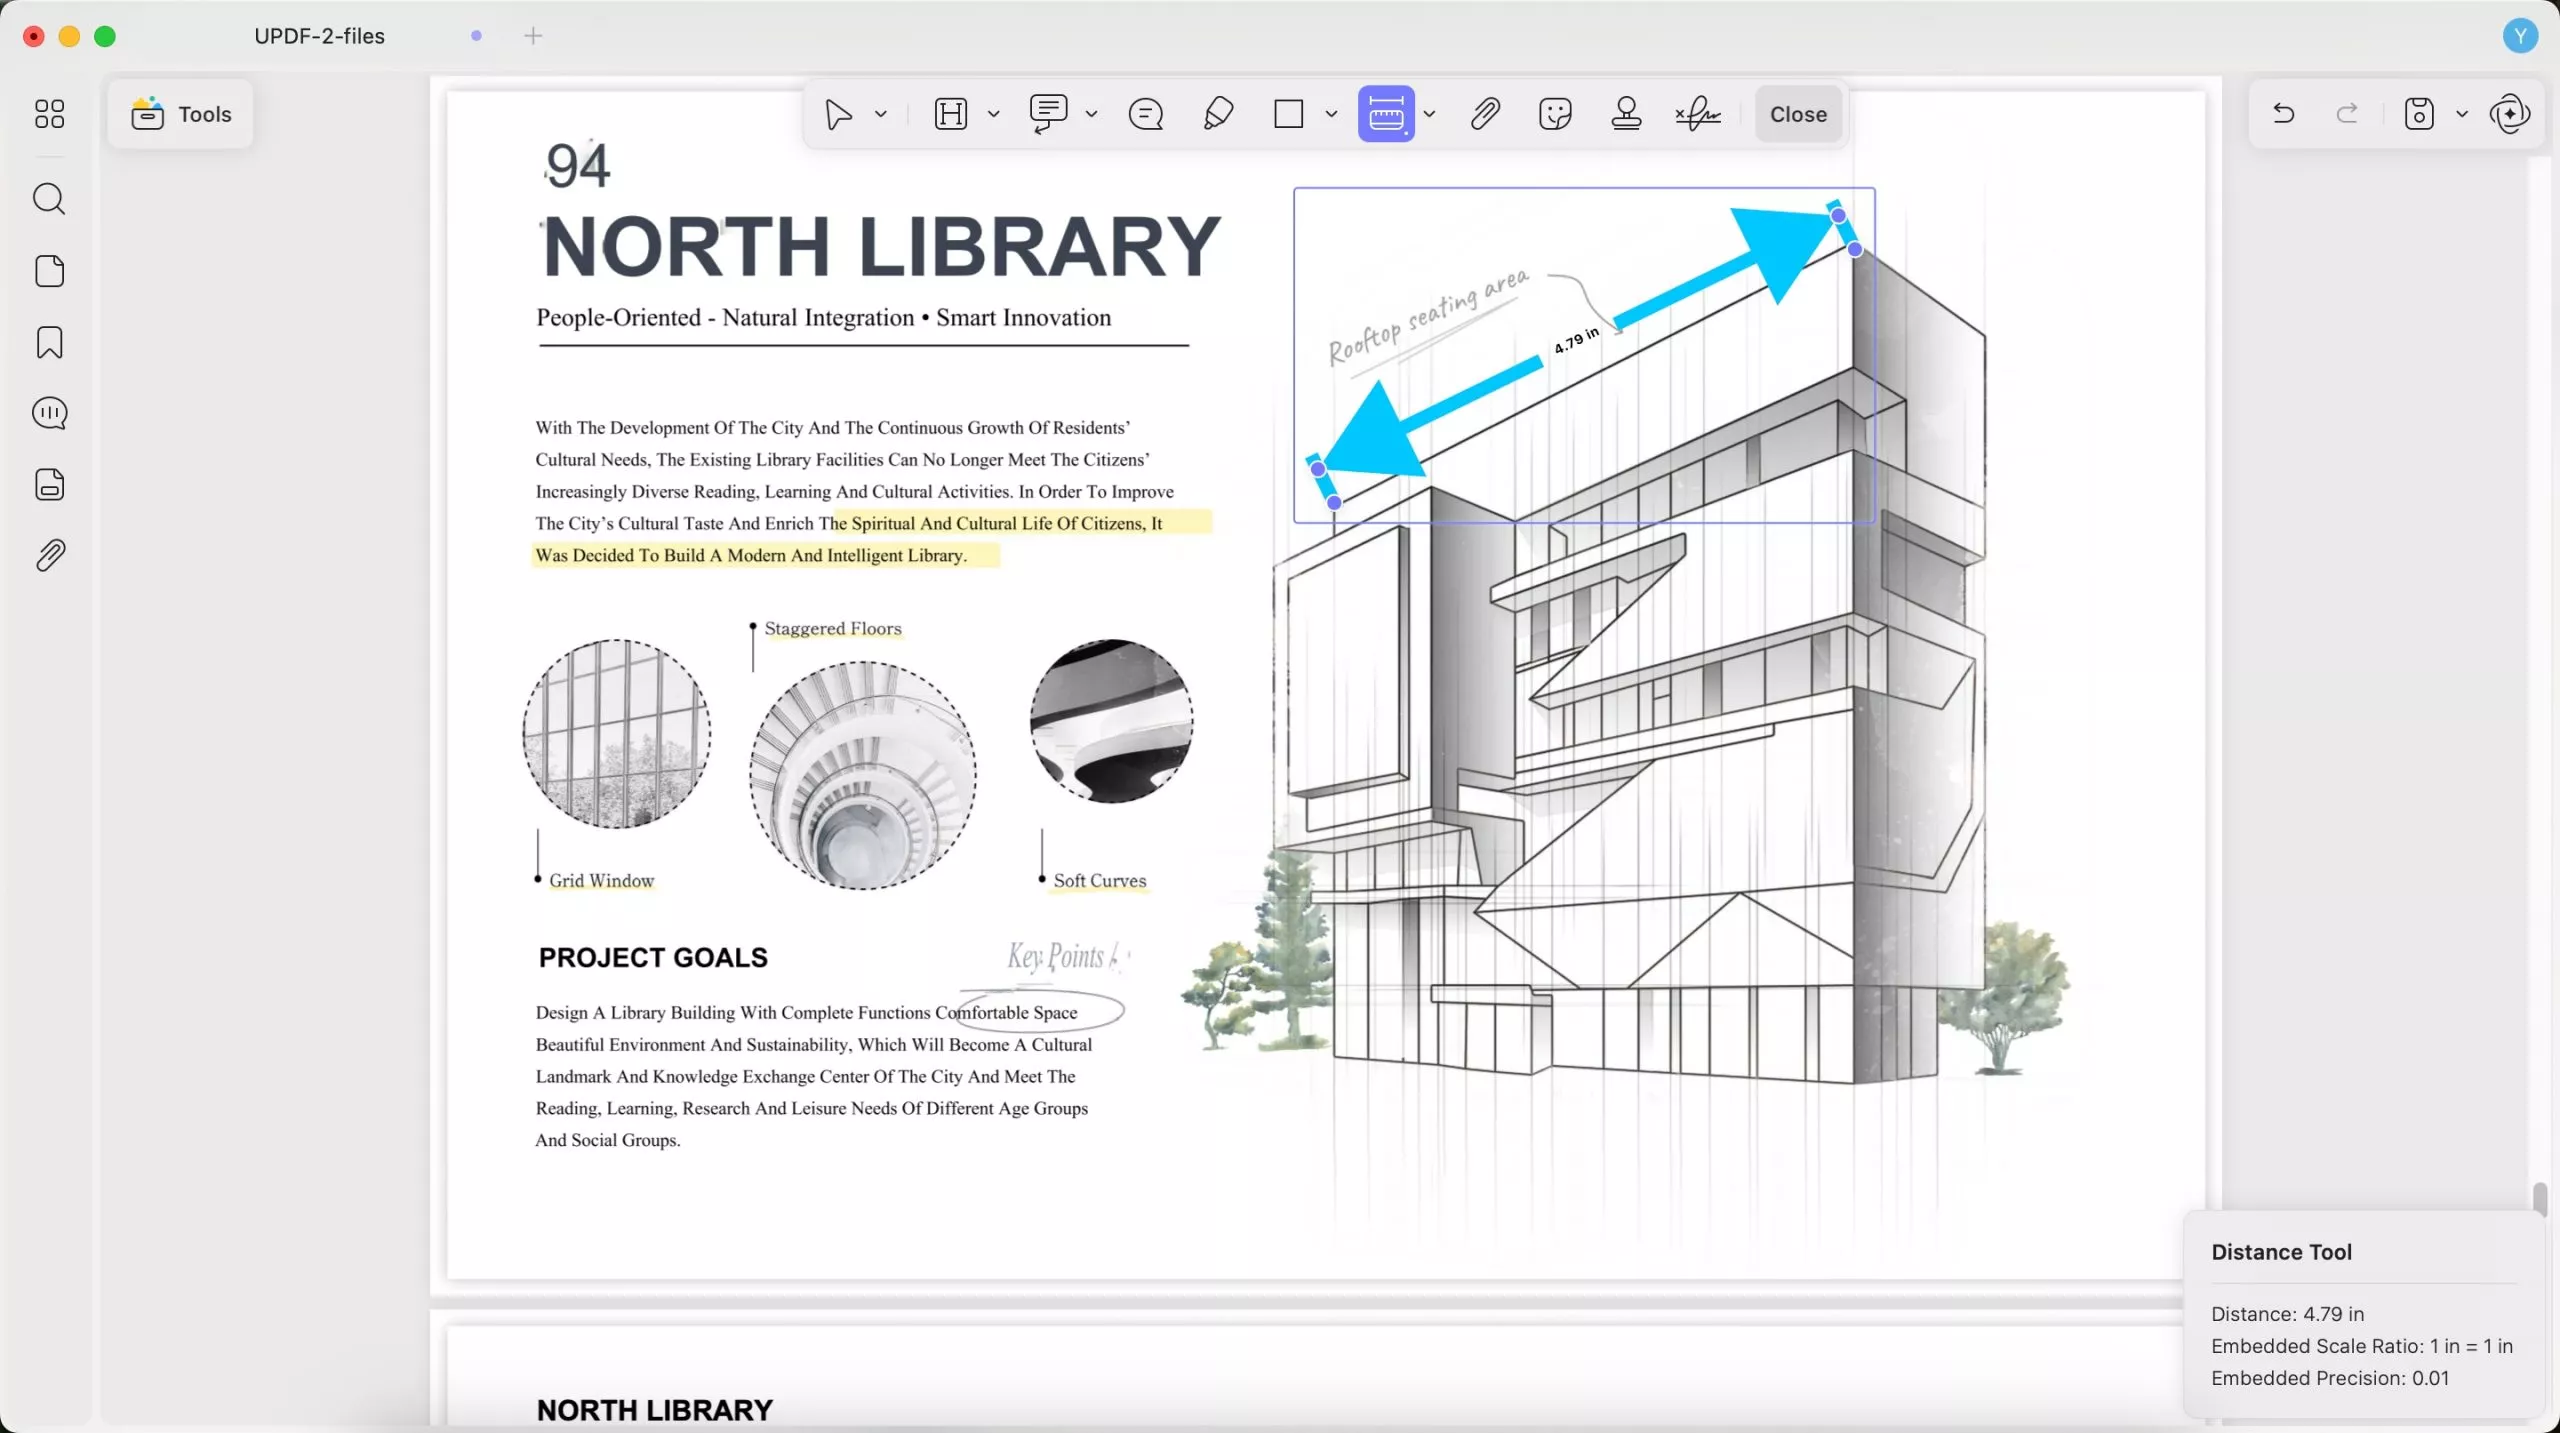
- The next option in the drop-down menu is perimeter, which allows you to measure the boundary of your object. The tool also allows you to set the color of the measuring line, along with its width and opacity, for user convenience.
- It is easy to use the perimeter. Just click on the "Arrow Down" behind the measurement feature, select "Perimeter Tool", and customize its appearance. Find the object, click on the start point, move your mouse to the second point, and click to add it, repeat the same steps for other points, and double-click on the start point to finish measuring. Now you can see the perimeter of the object.
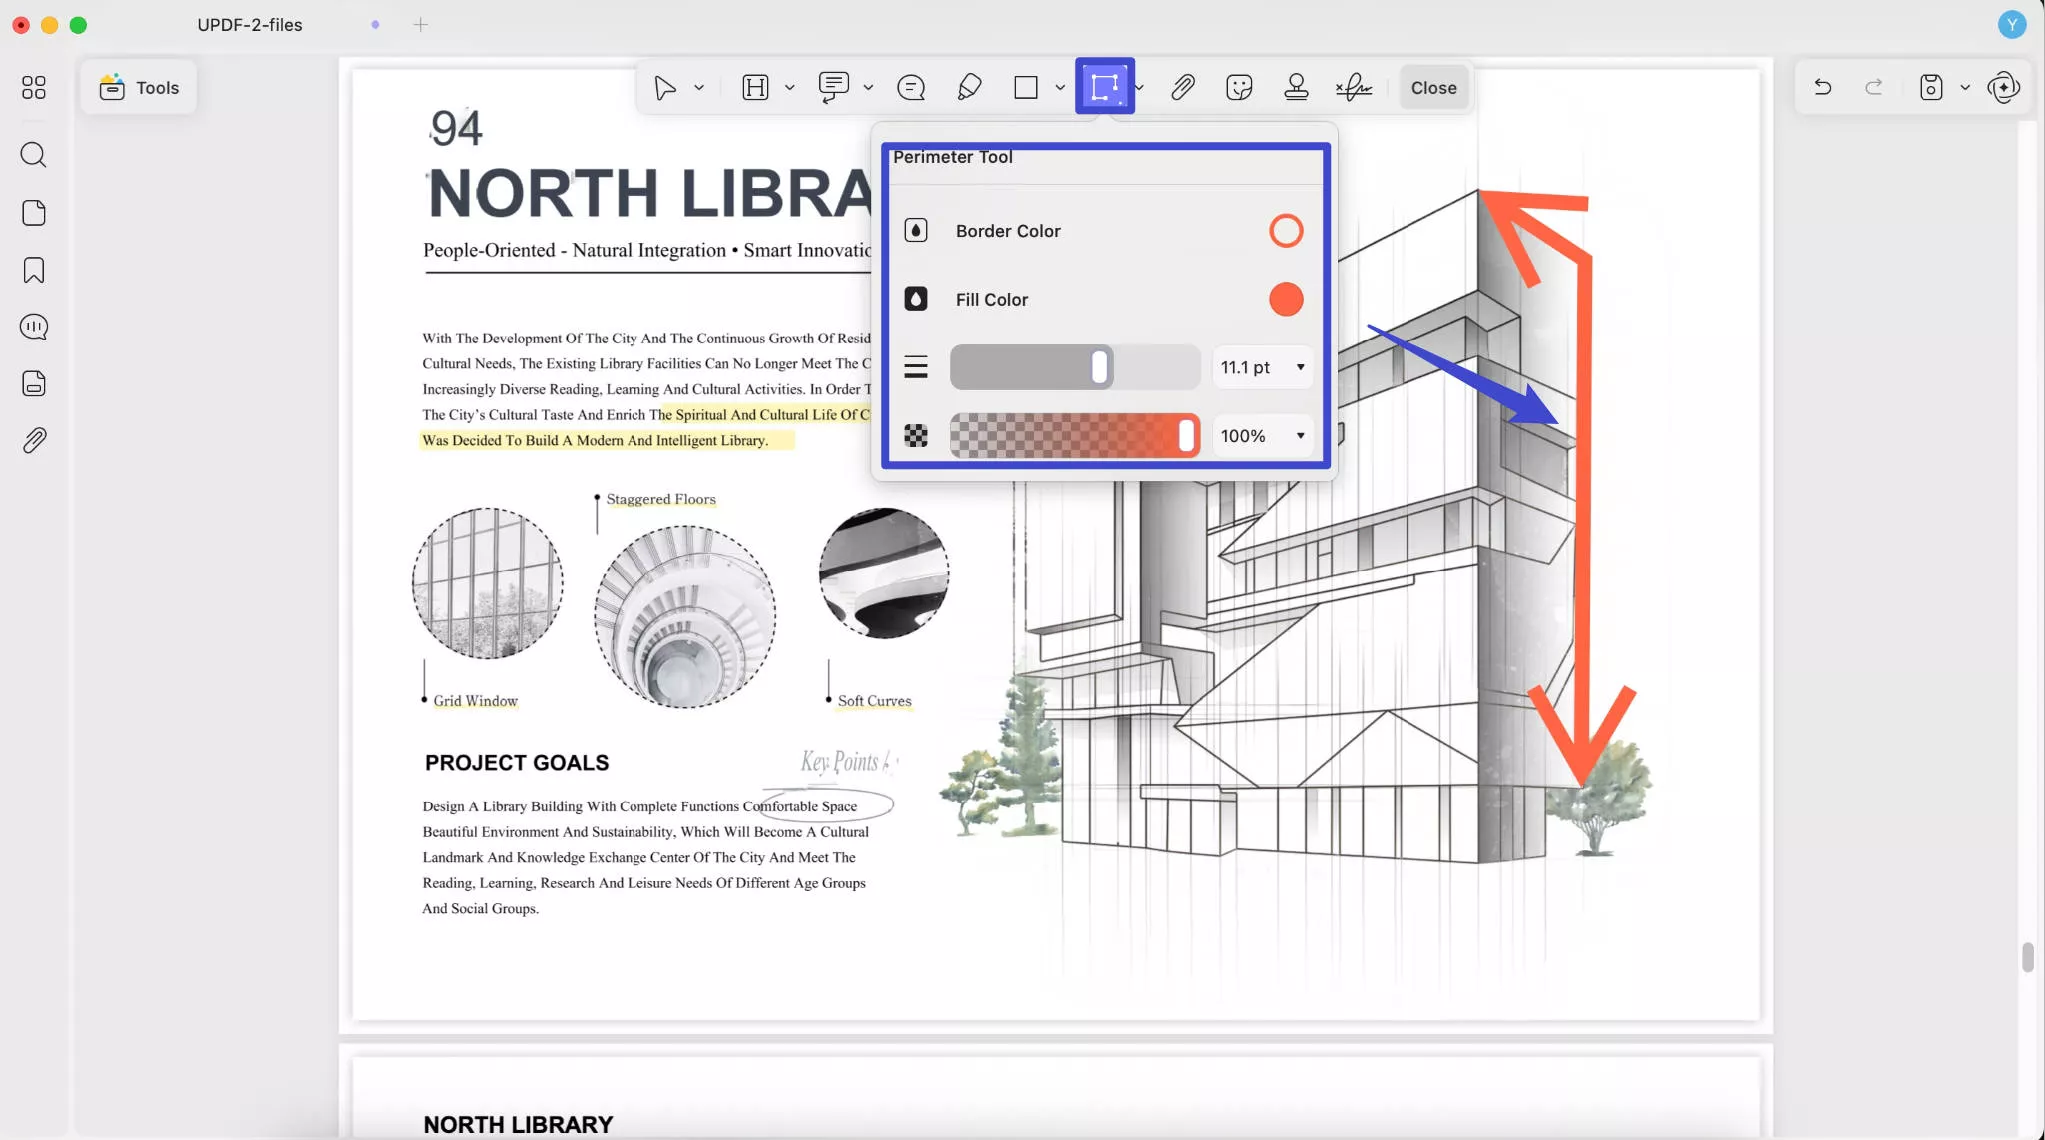
- The last option in this tool category is Area, which allows users to measure the overall space of any object, shape, or flat surface present on your PDF document. The tool also allows you to set the color of the measuring line, along with its width and opacity, for user convenience.
- The steps are similar to using the perimeter. Select "Area" tool this time, customize its appearance, click on the start point, the second, and more points, and double-click on the start point to finish measuring.
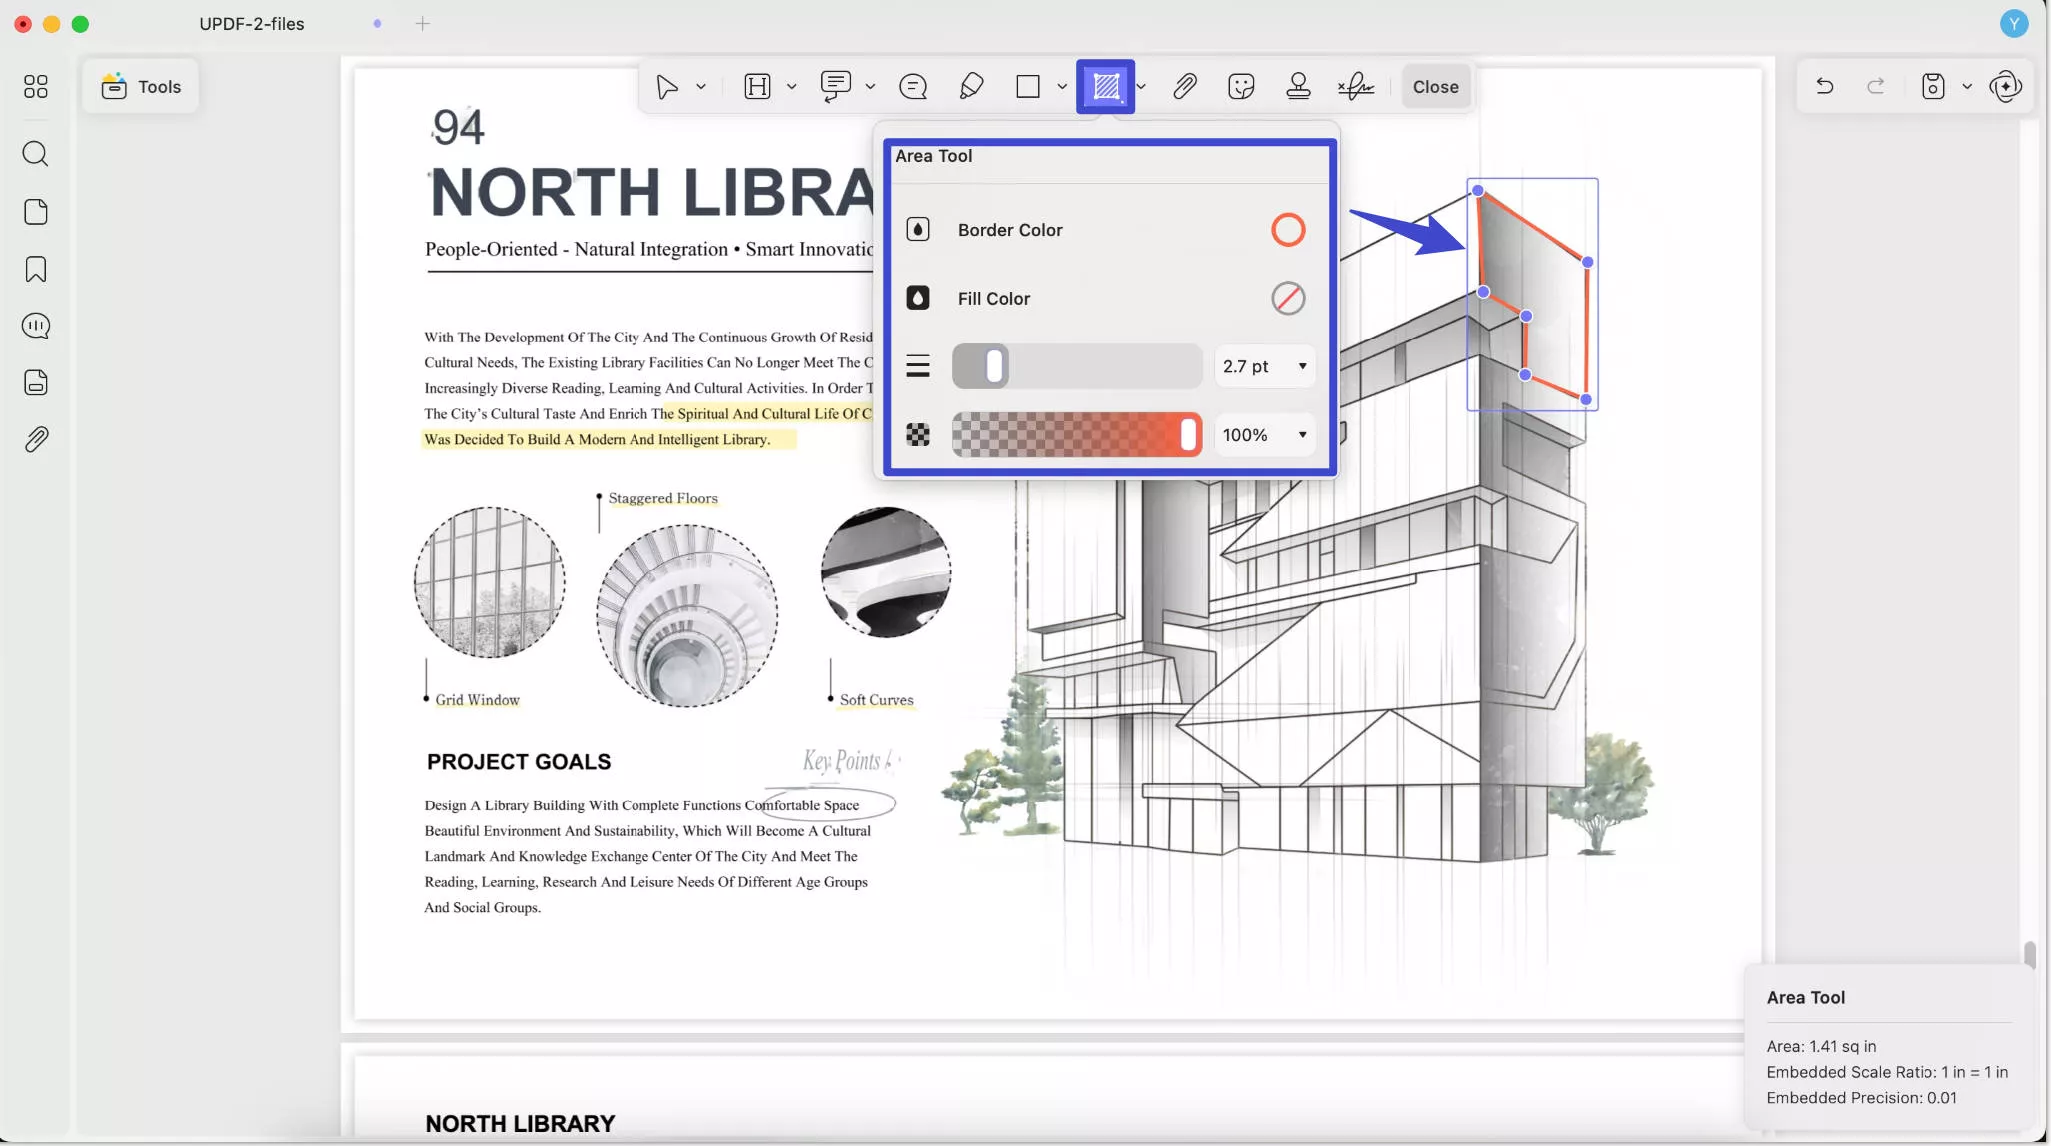
Step 3. If you want to change the properties, delete the added measurement, copy it, or add a note to it, you can click on the measurement to find these options.
Step 4. Save the changes by holding on "CMD+S" or going to "File" > "Save".
4. Add Stamps
You can add preset stamps to PDF or create customized stamps for PDF.
1) Add a Preset Stamp
- Click Tools > Comment and then select a stamp from the dropdown menu of the Stamps icon.
- Click the place to add the stamp.
- Adjust the position and size of the stamp using the border handles.
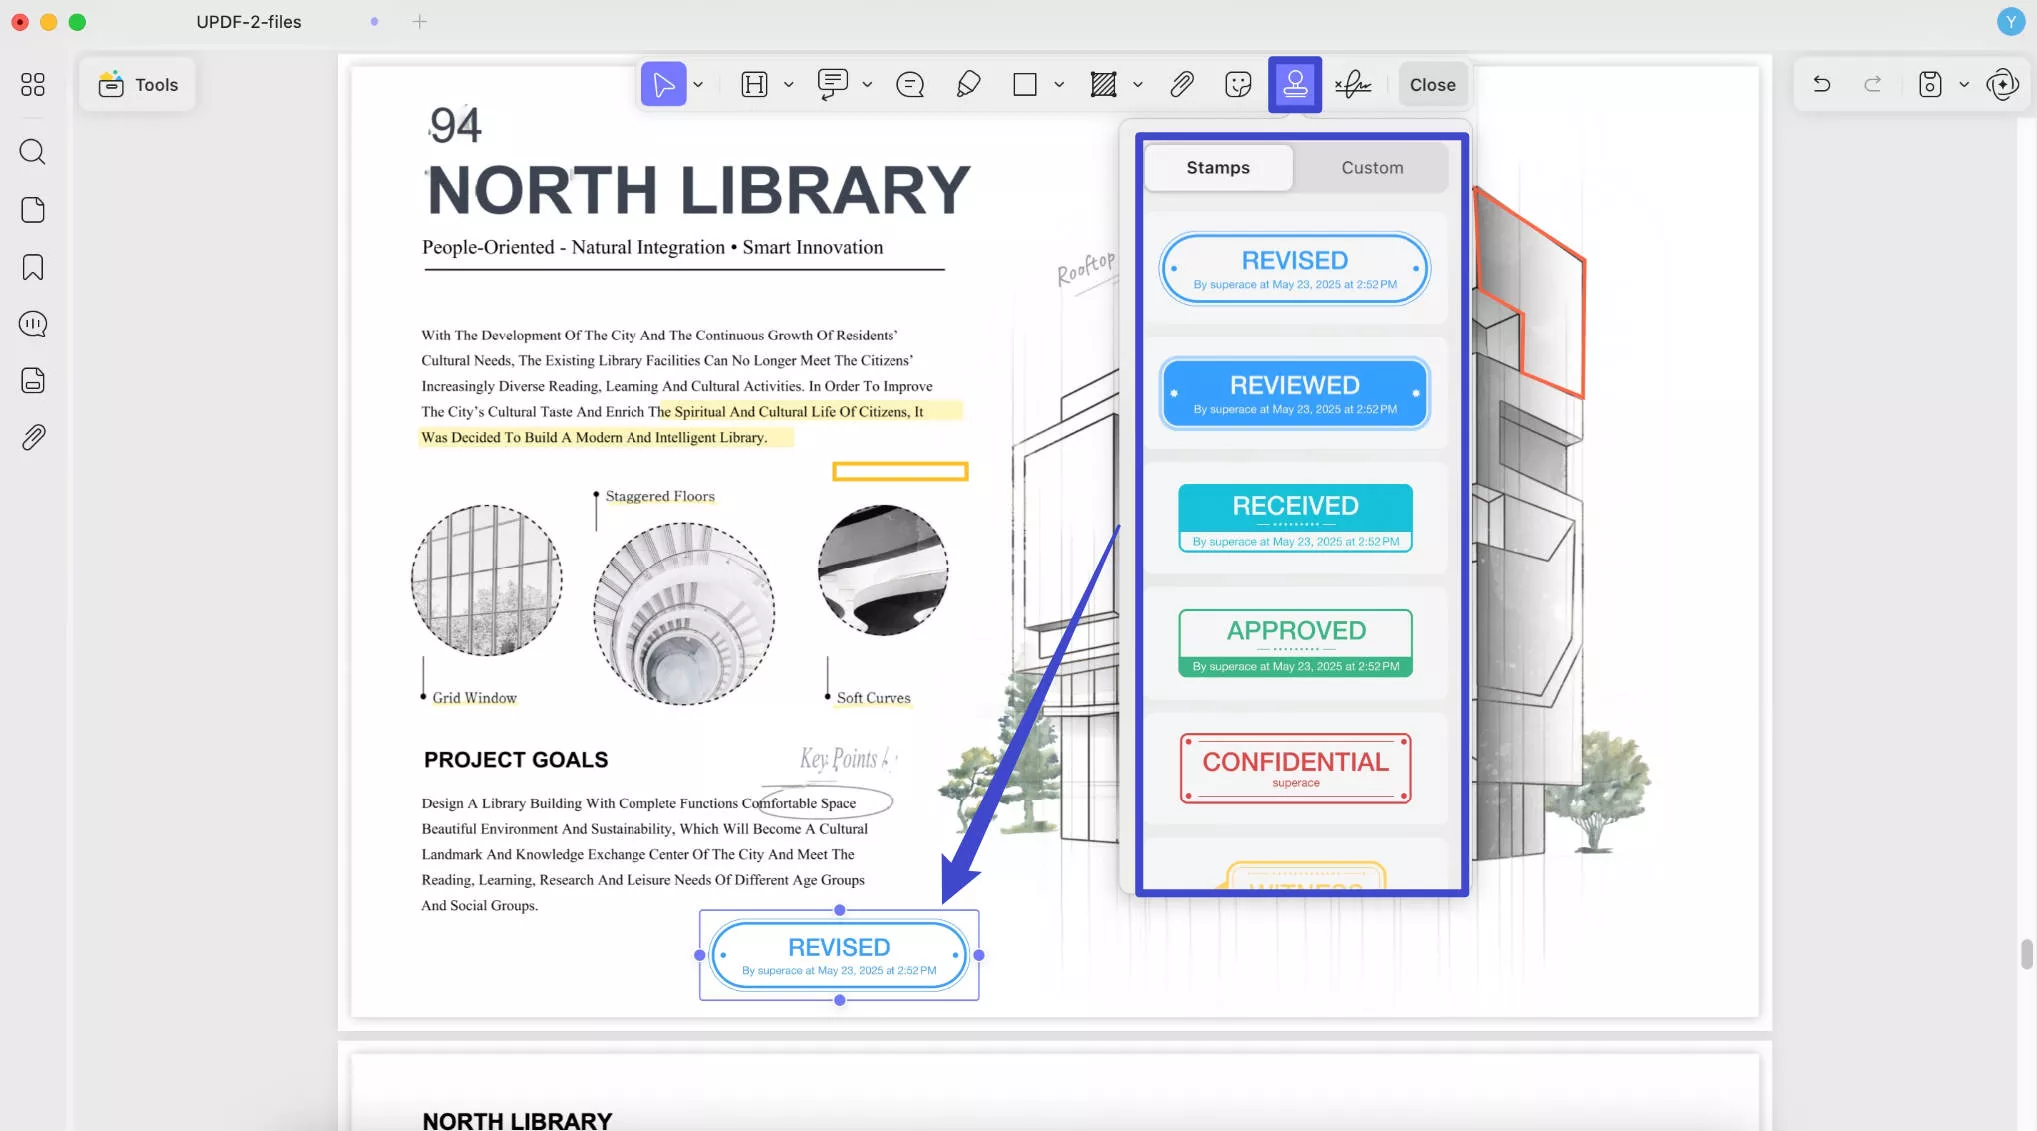
2) Create a Custom Stamp or Import a Stamp
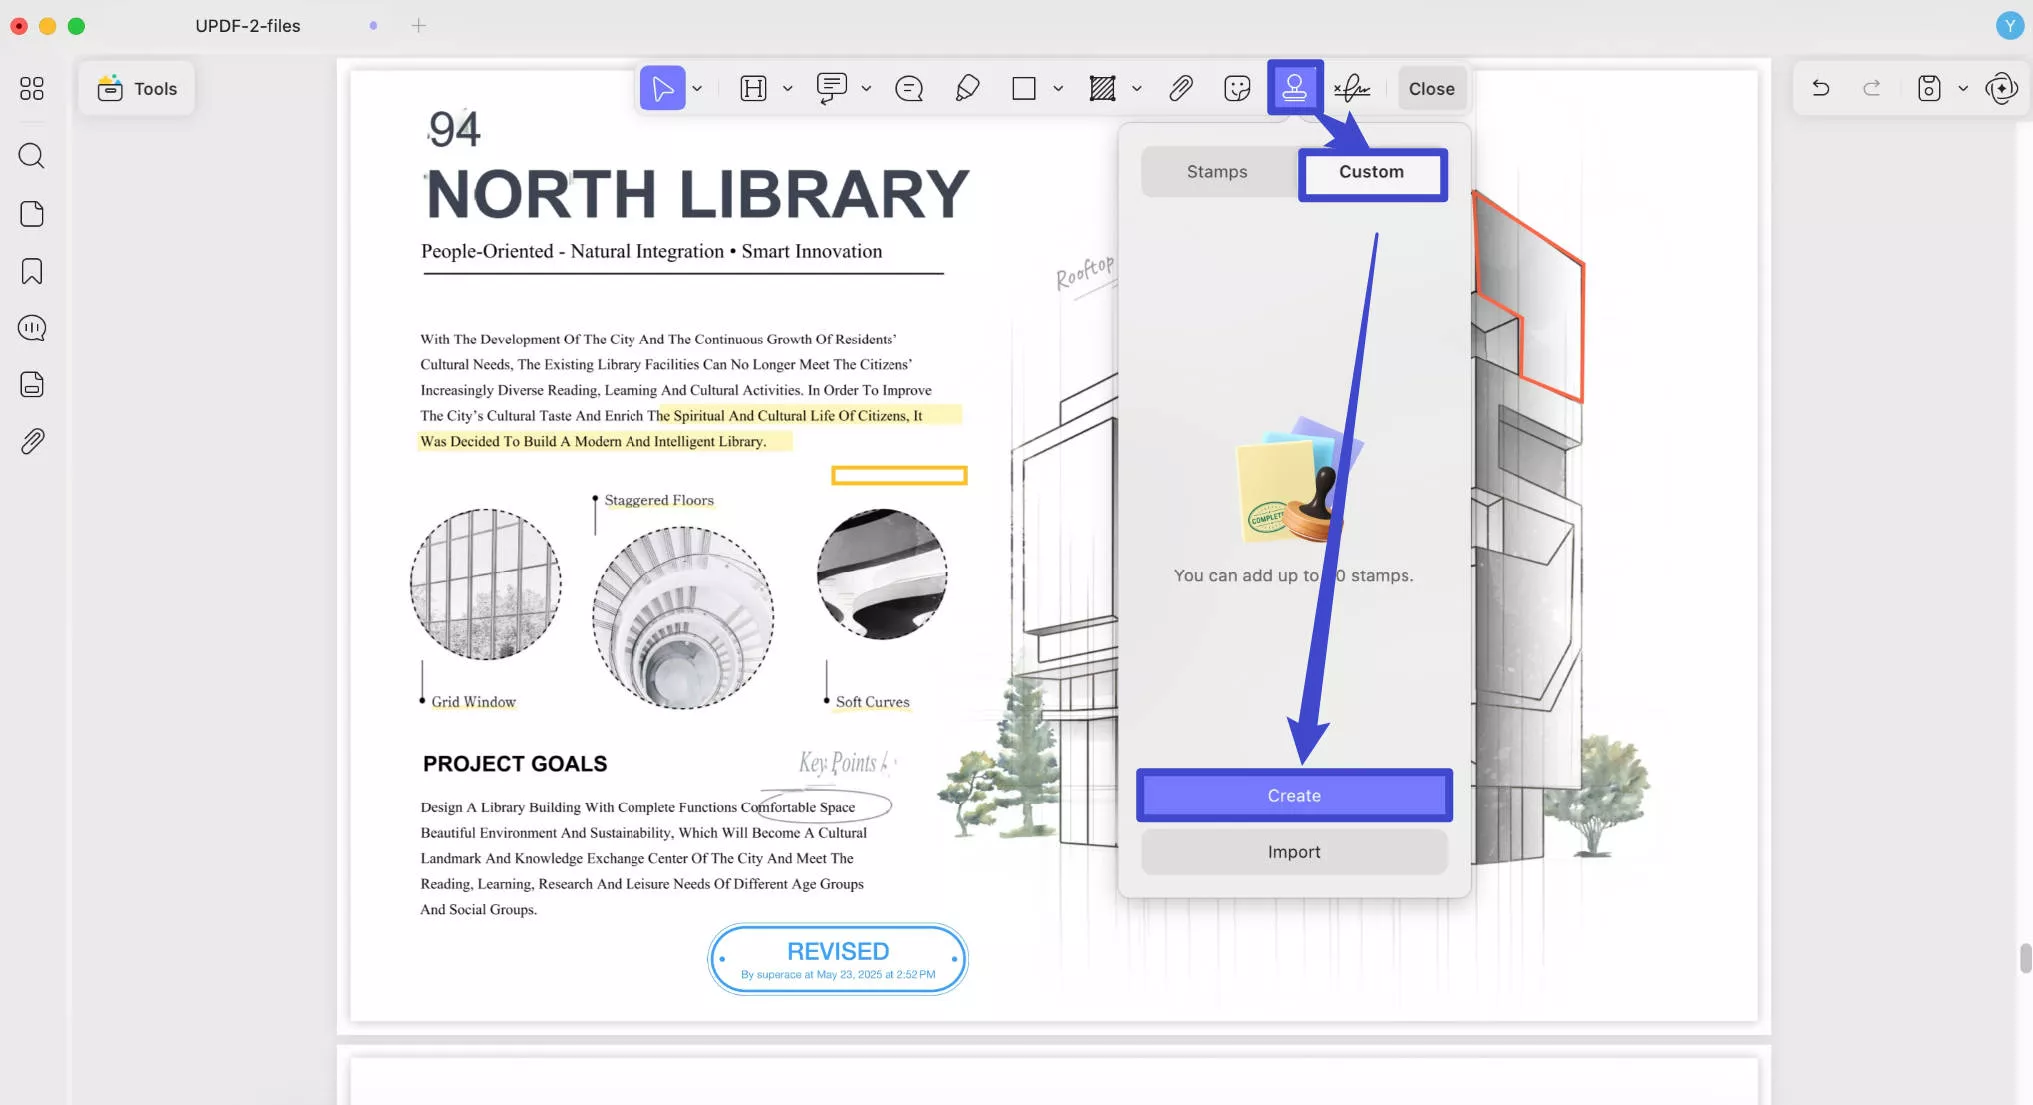
You can also add custom stamps. Click the Custom option and click the Create button to create a new stamp, or the Import button to import your custom stamp.
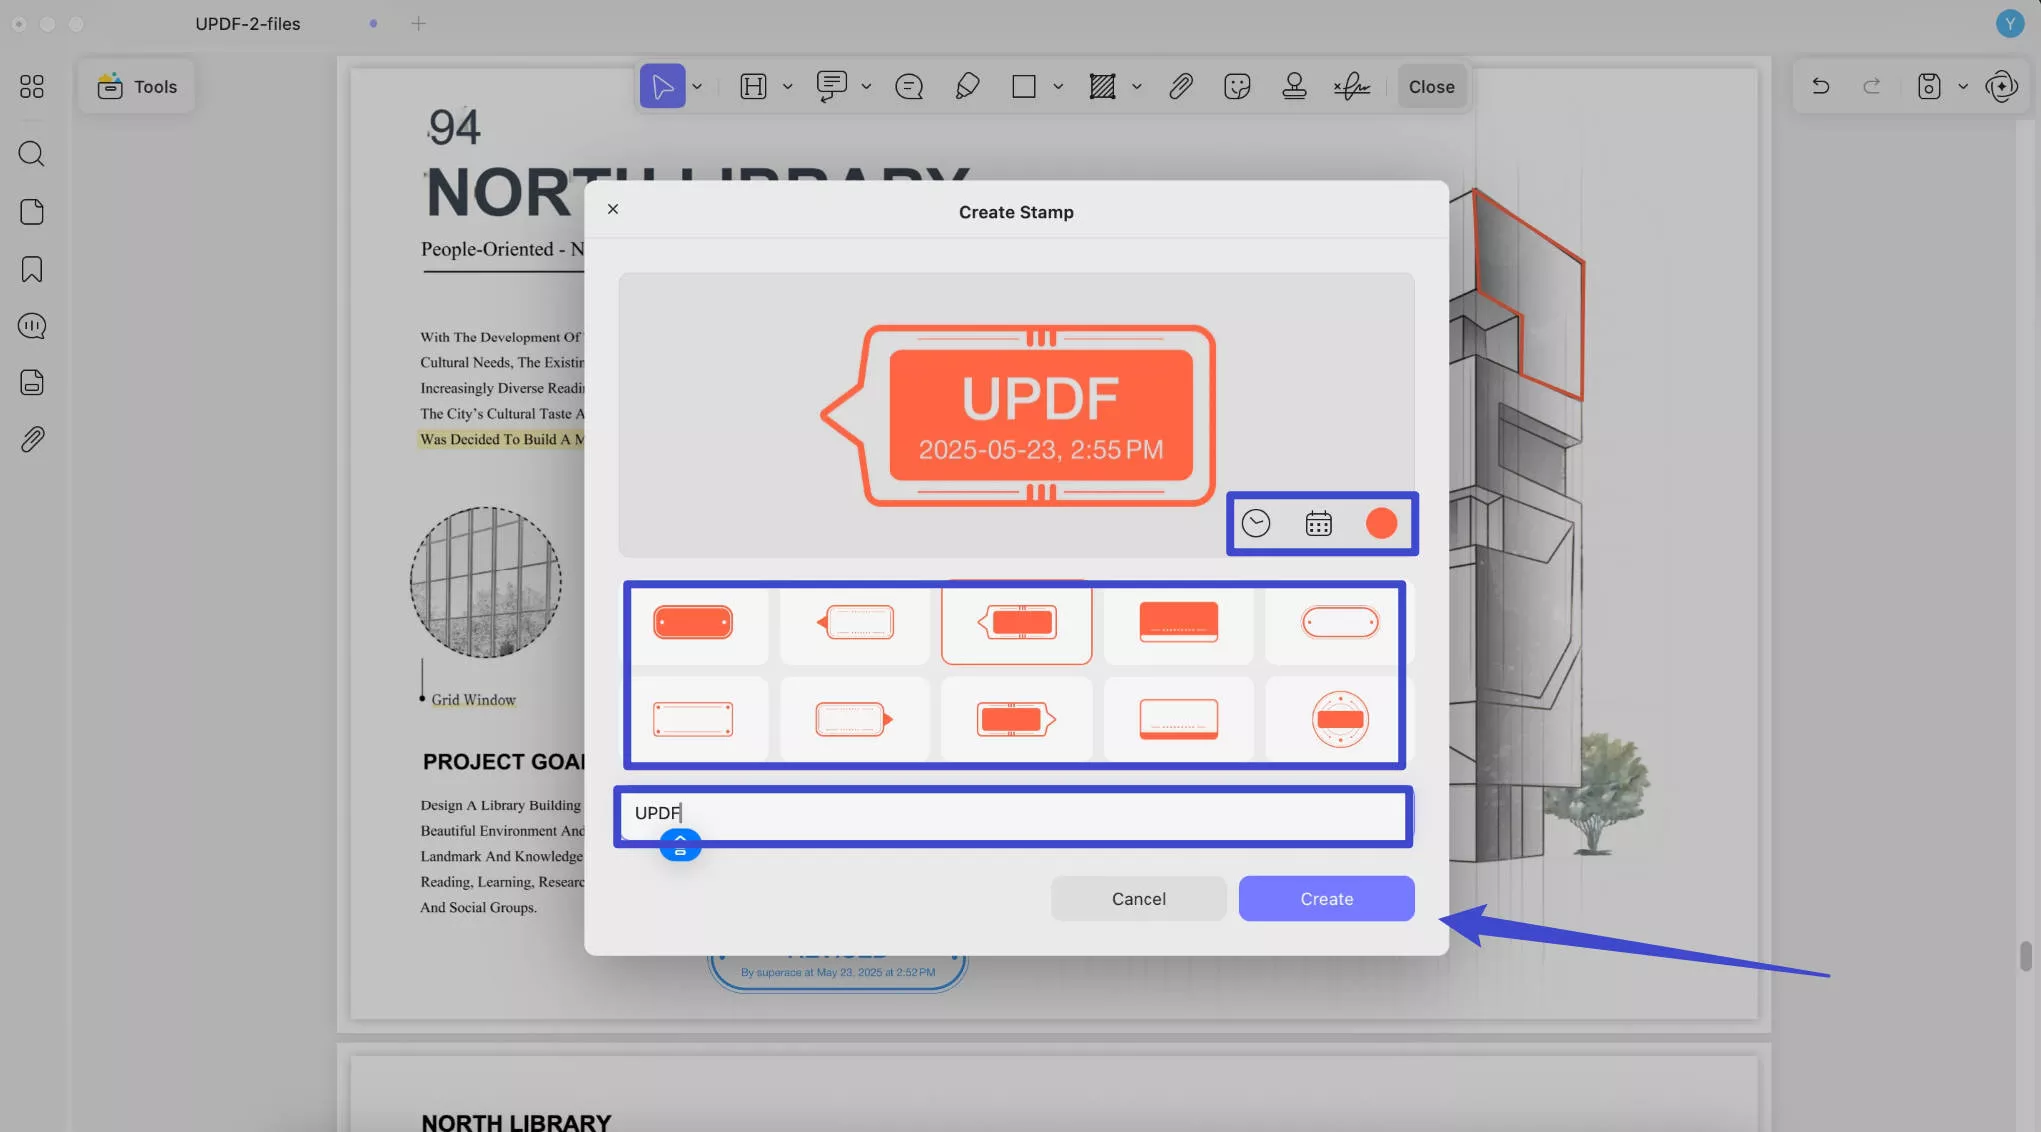
UPDF provides many templates for you to create a new stamp. You can set the date, time, color, style, and text of the stamp. After selecting all the settings, click the "Create" button to save it.
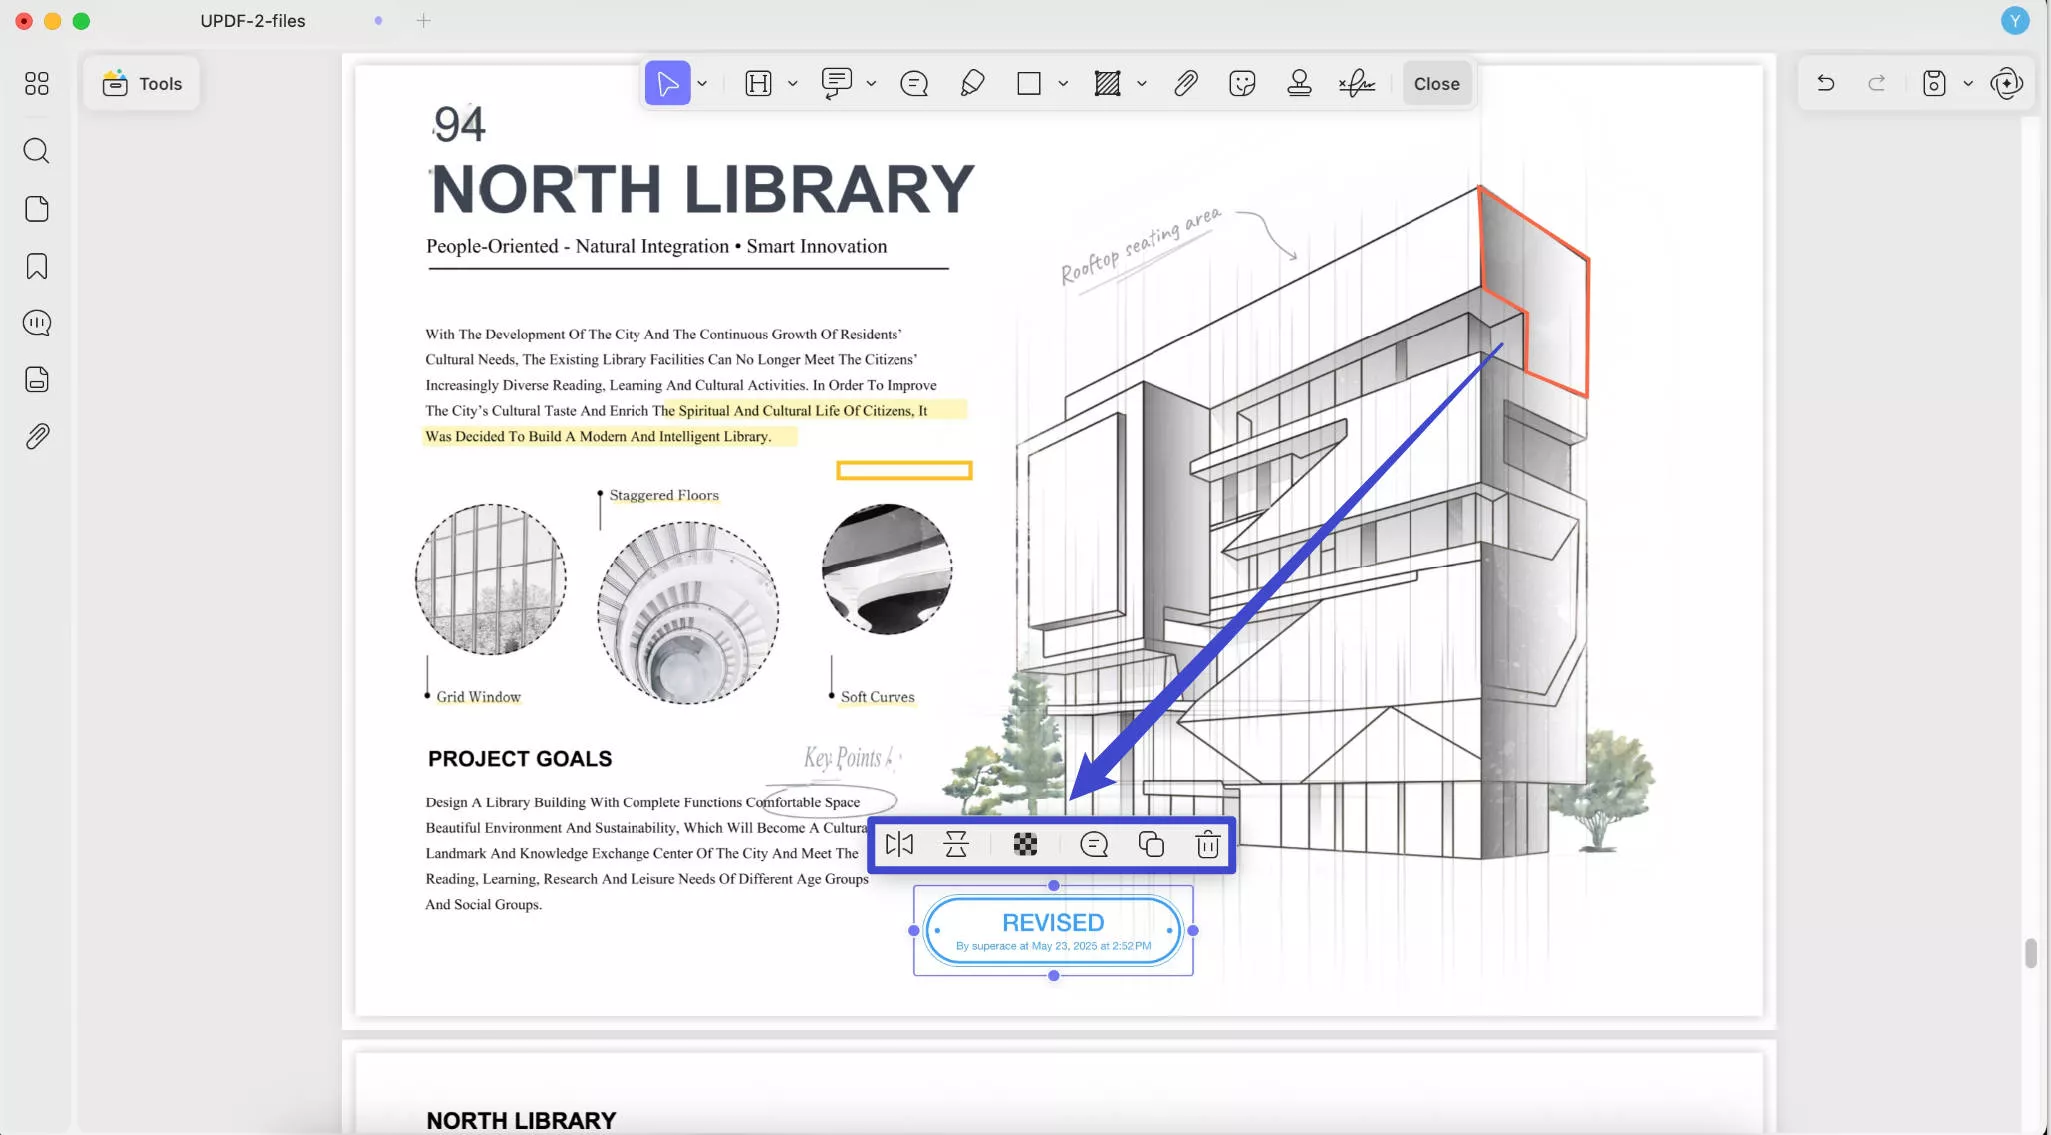
Now, you can click on the place where you need to add the custom stamps and drag the side of the stamp to change its position and size.
Tip
If you want to add the dynamic stamps to PDF, you can choose the stamps with date and time or create one dynamic stamp with adding date and time.
3) Make Changes to Added Stamps
You can click on the added stamps to flip, copy, delete, or add a note to it.
5. Add Stickers
UPDF provides multiple stickers. Click the Sticker icon on the top toolbar, select the sticker you want, click on the place to add the sticker, and adjust the size and position by dragging its edge. Same for the added stamps, you can click on the added sticker to flip, copy, delete and add a note.
6. Add Attachment
UPDF on Mac has one attachment feature that can help you add any files like video, audio, word, excel, and more to your PDF.
The process is straightforward:
- Open any PDF document on your device and select the "Comment" in Tools menu.
- Within Comment mode, opt for the 'Attach File' option.
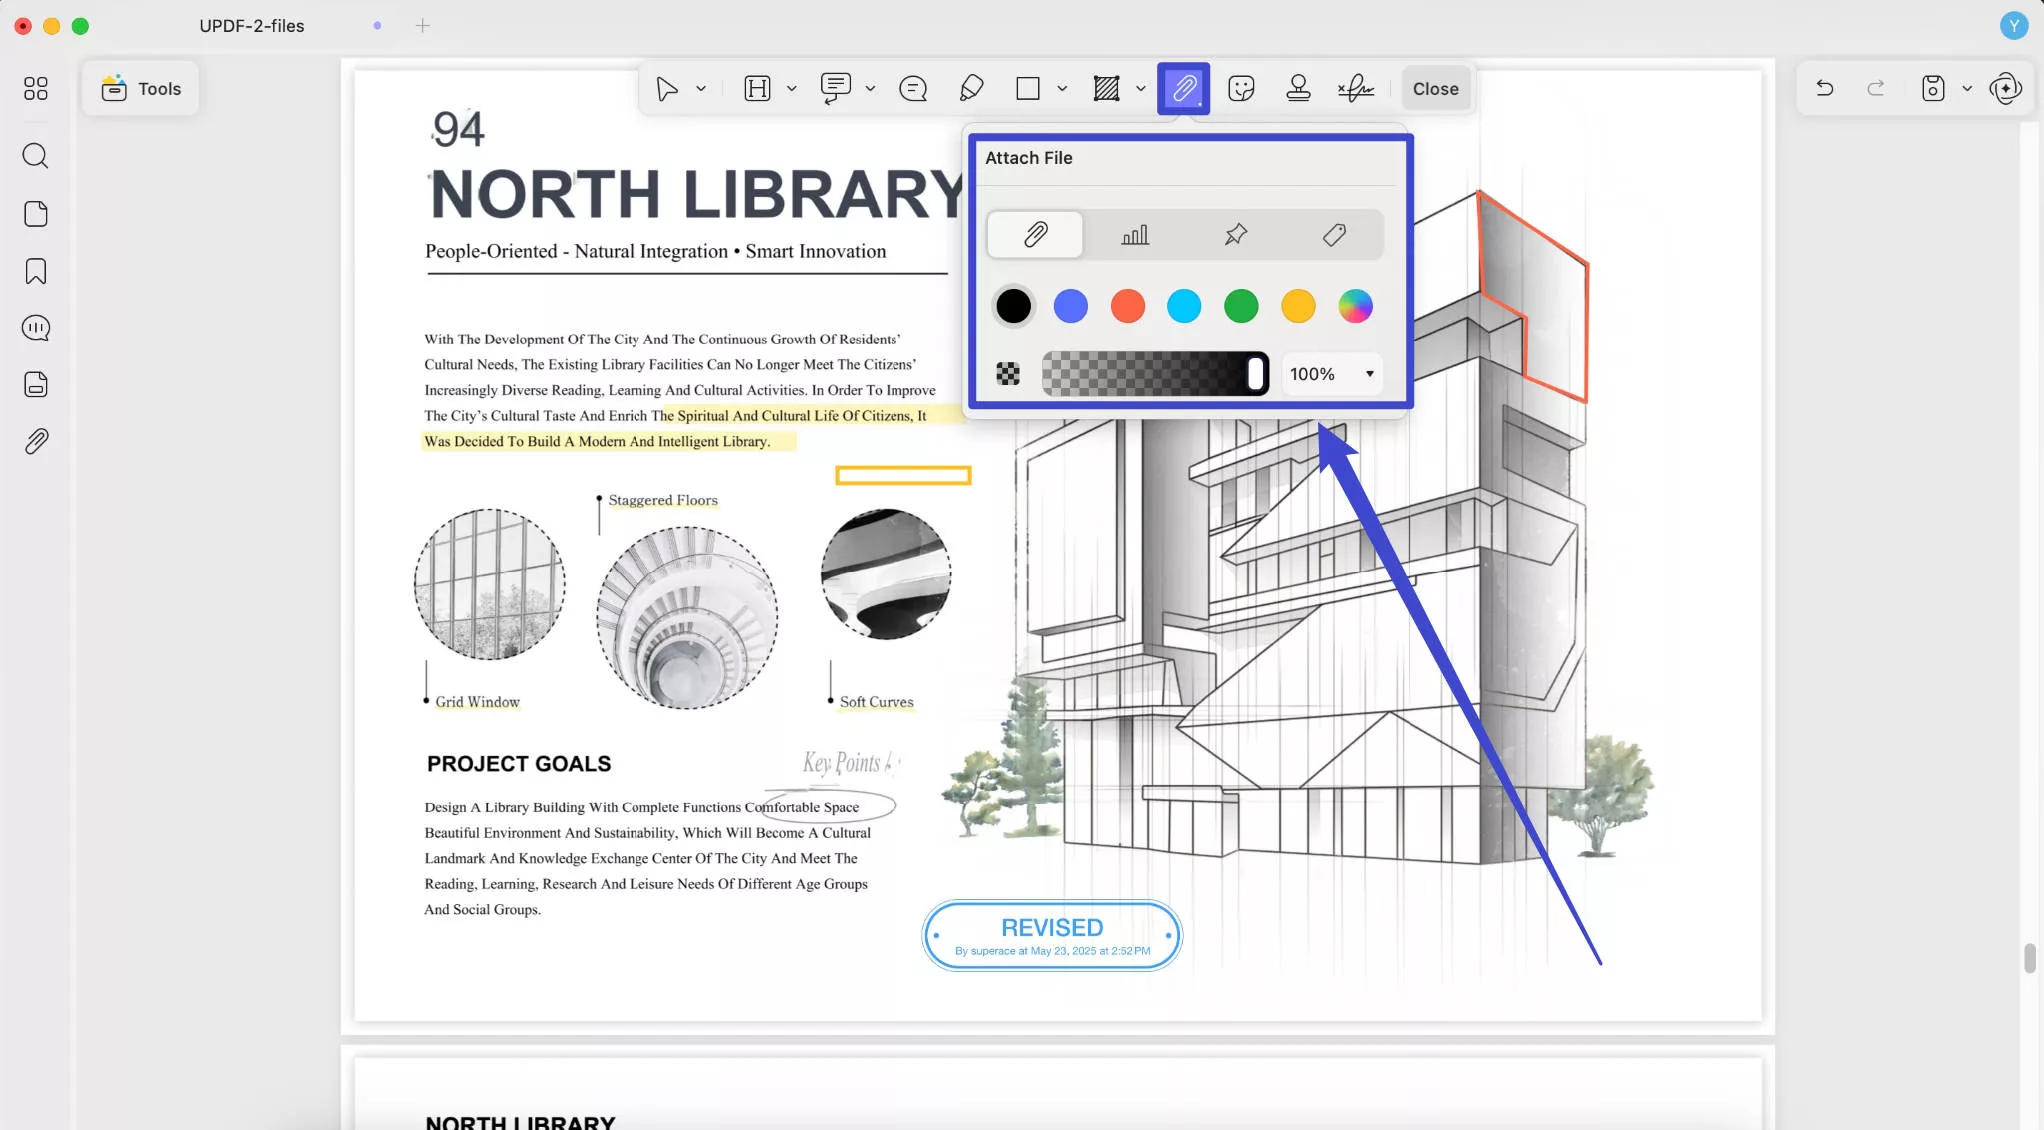
- Customize the appearance of the Attachment Button. Here, you can choose the desired attachment icon, change its color and opacity.
- Click anywhere on the document to reveal the File Manager Browser popup window. From there, you can choose a specific document from your device's memory.
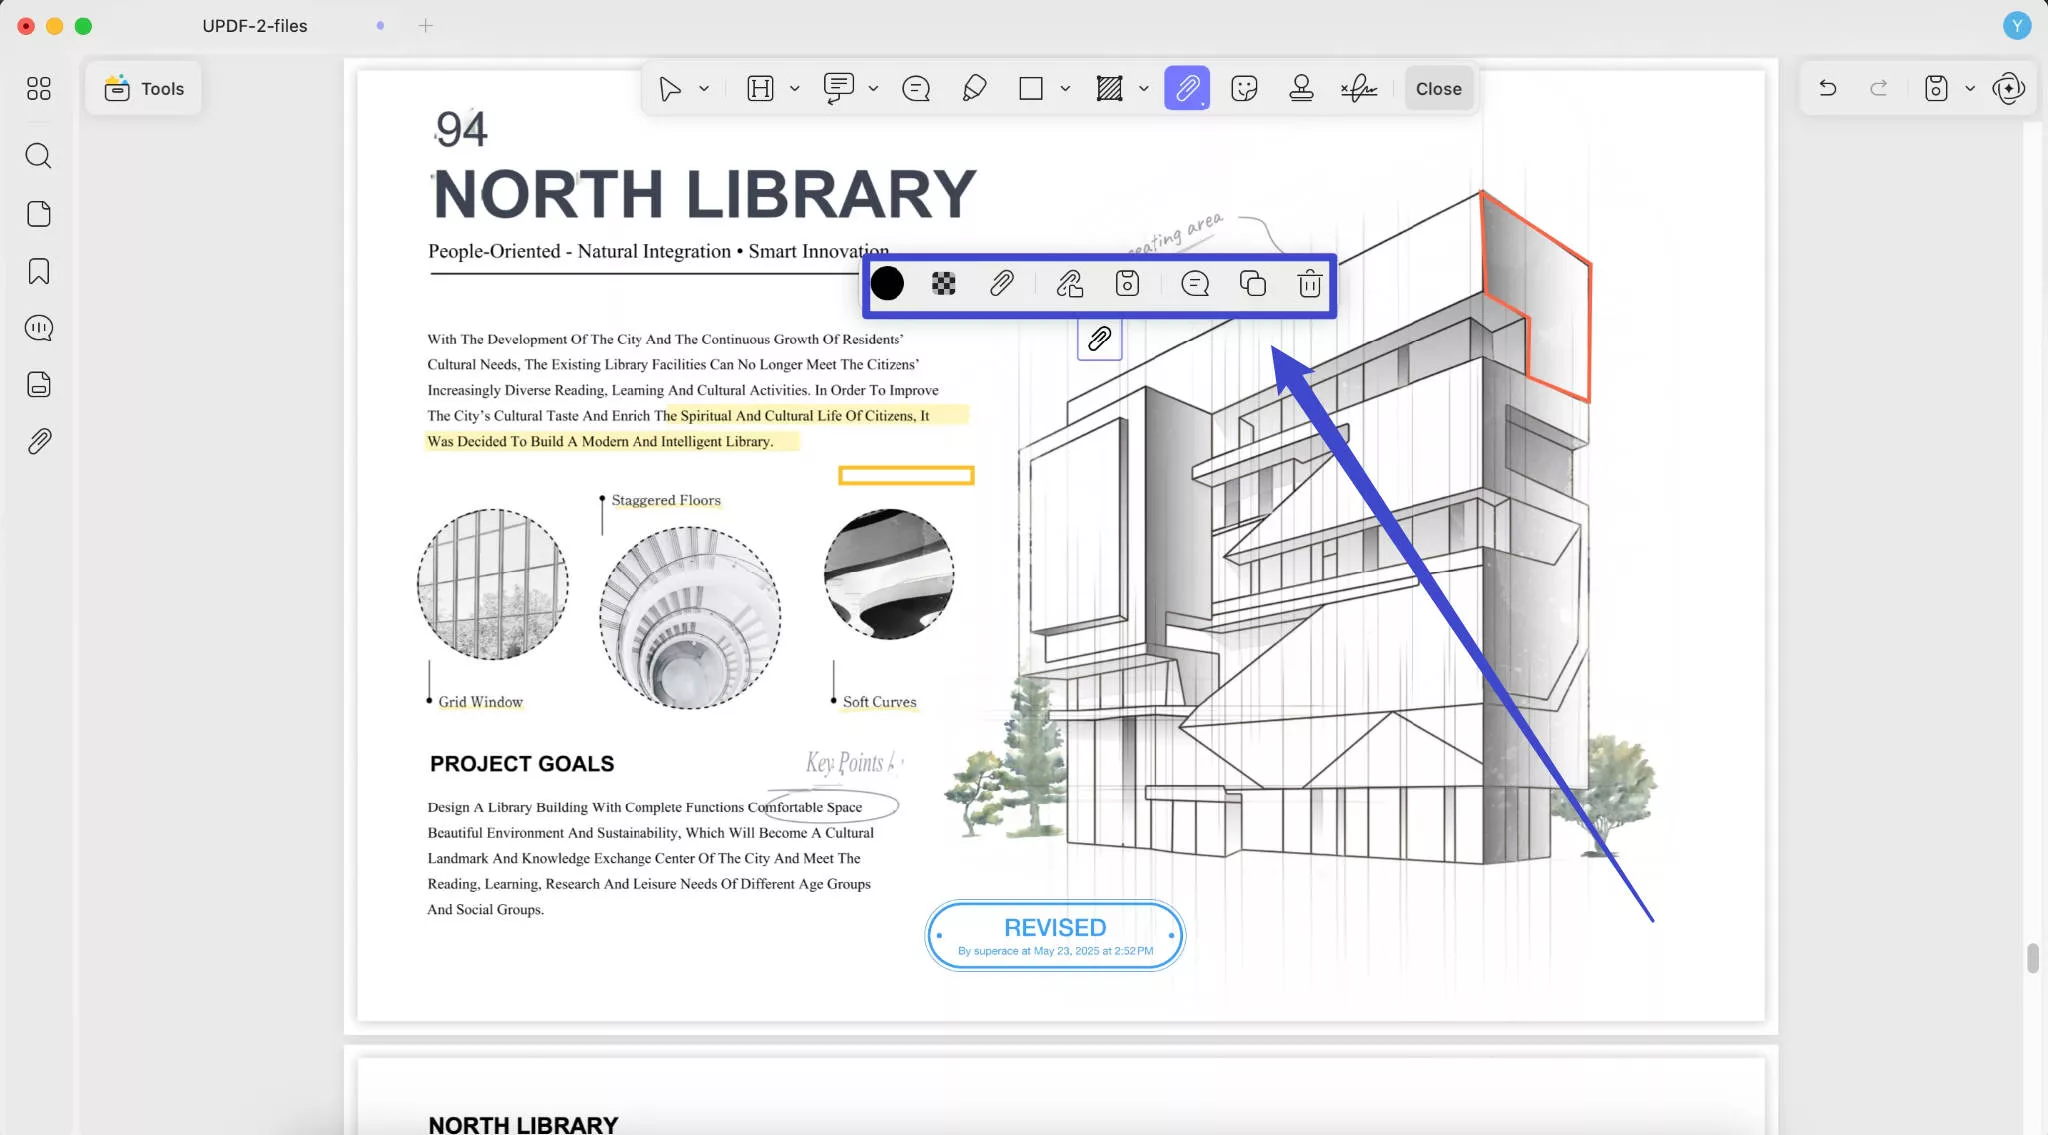
- You can move it to anywhere you want in the PDF. Clicking on the attached document icon allows you to open, save, copy, or delete it as desired. You can also add a 'Note' or 'Comment' here as a reference and edit the attachment button as in the initial steps.
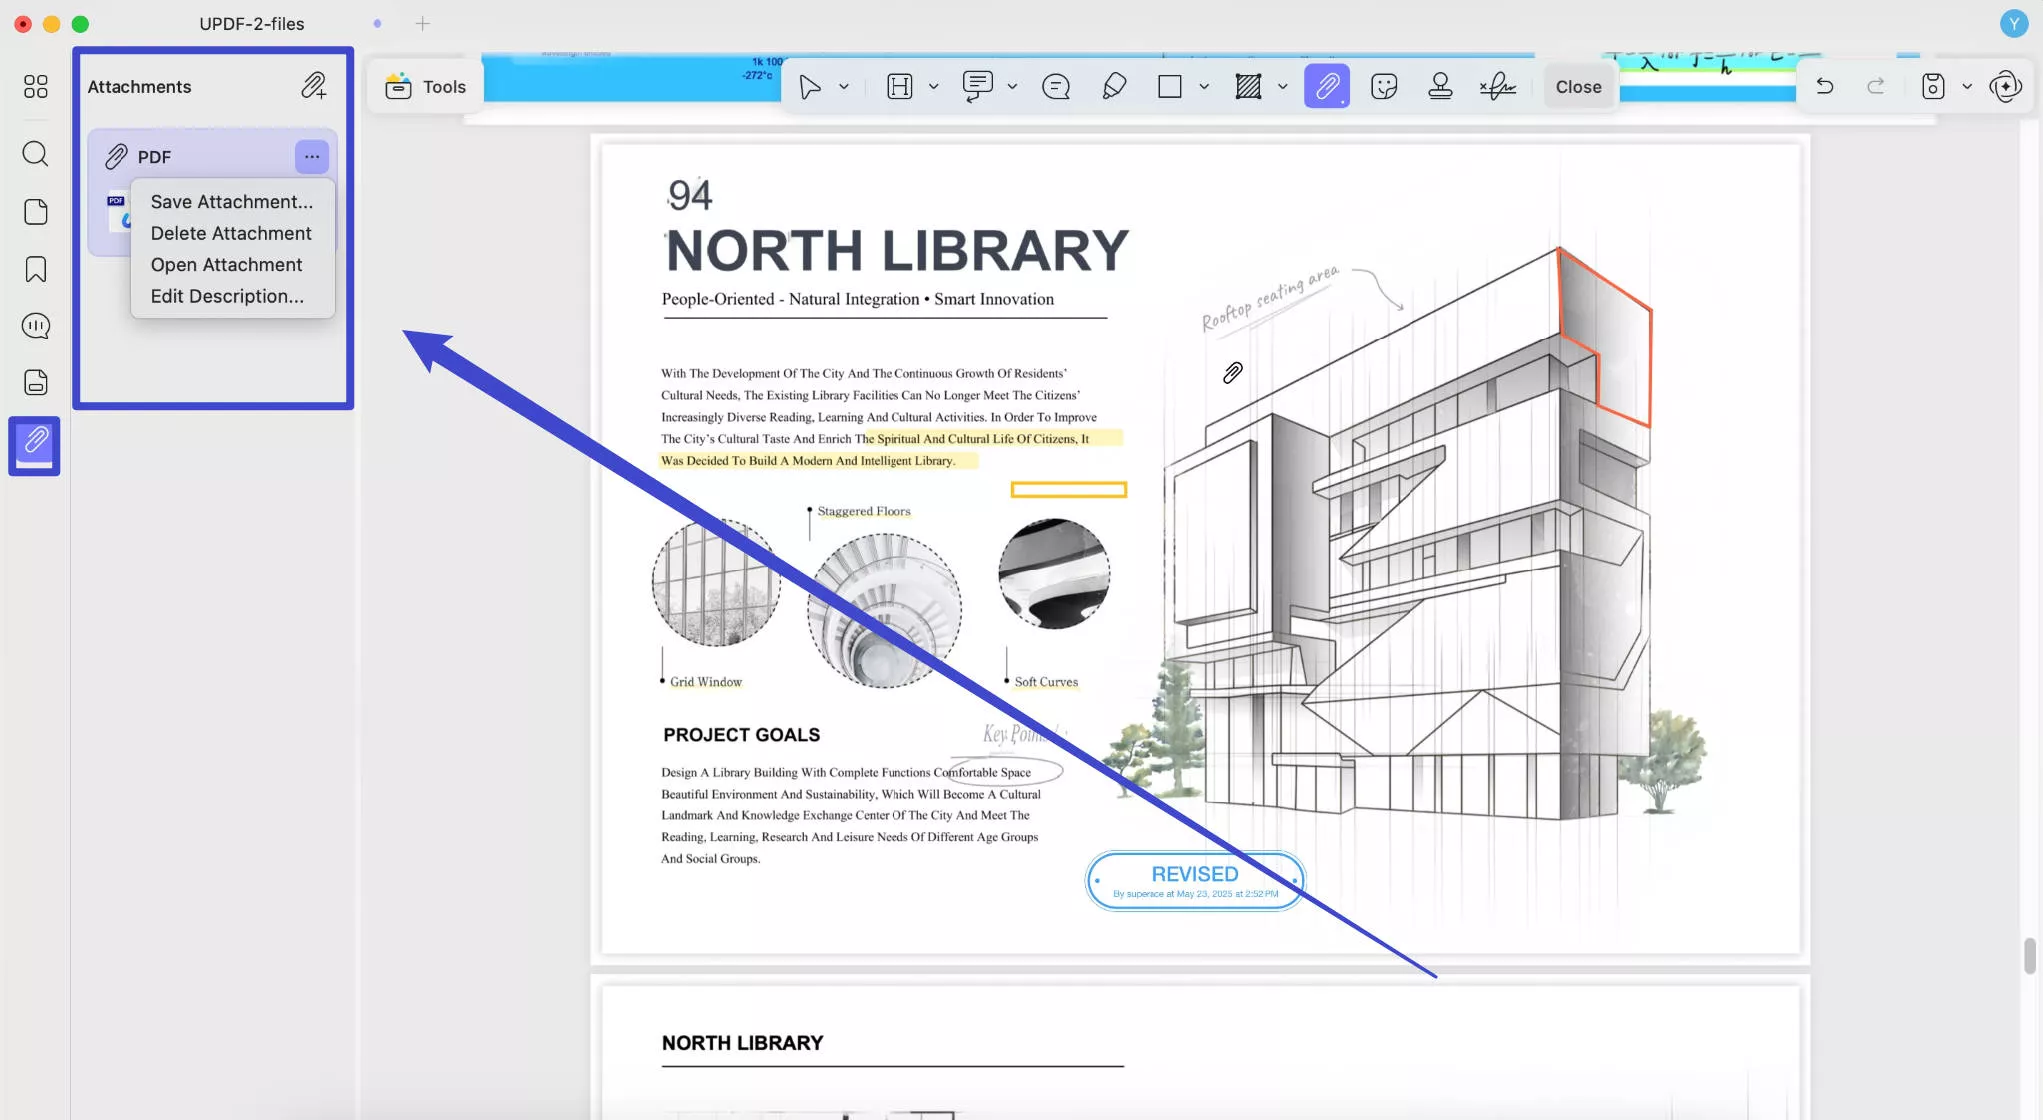
- If you have many attachments in your PDF and want to manage them all, you can click on the "Attachments" at the left side bottom. Here, you can add new attachment, open, delete and save it.
7. Drawing/Add Shapes
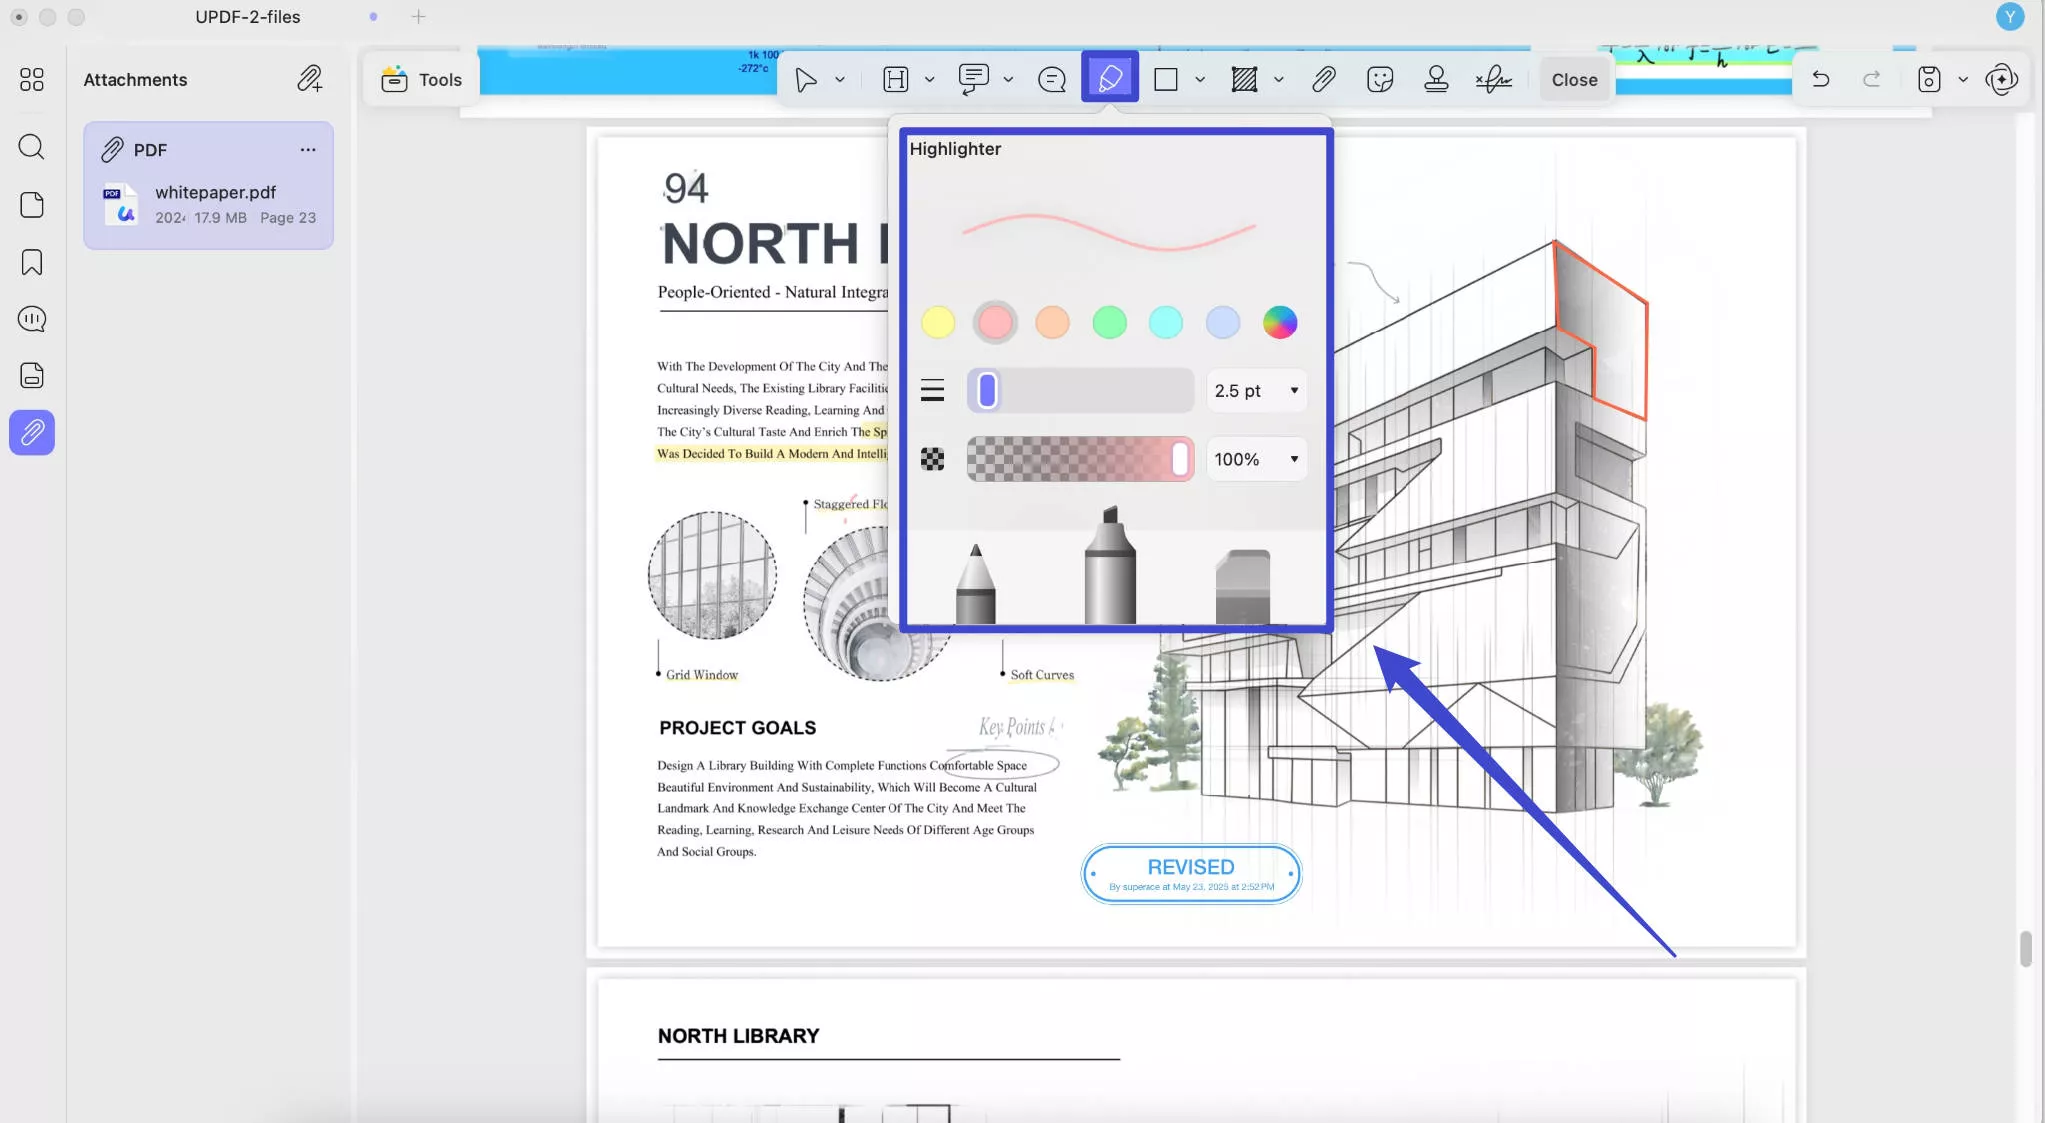
Pencil - The Pencil annotation tool lets you add free-hand shapes and markups to your PDF. Click the "Pencil" icon in the top toolbar, and choose the pencil, color, thickness, and transparency. Start drawing on the PDF by holding on the left side of your mouse and moving it. When you finish drawing, click on the "Pencil" icon again to stop applying the feature.
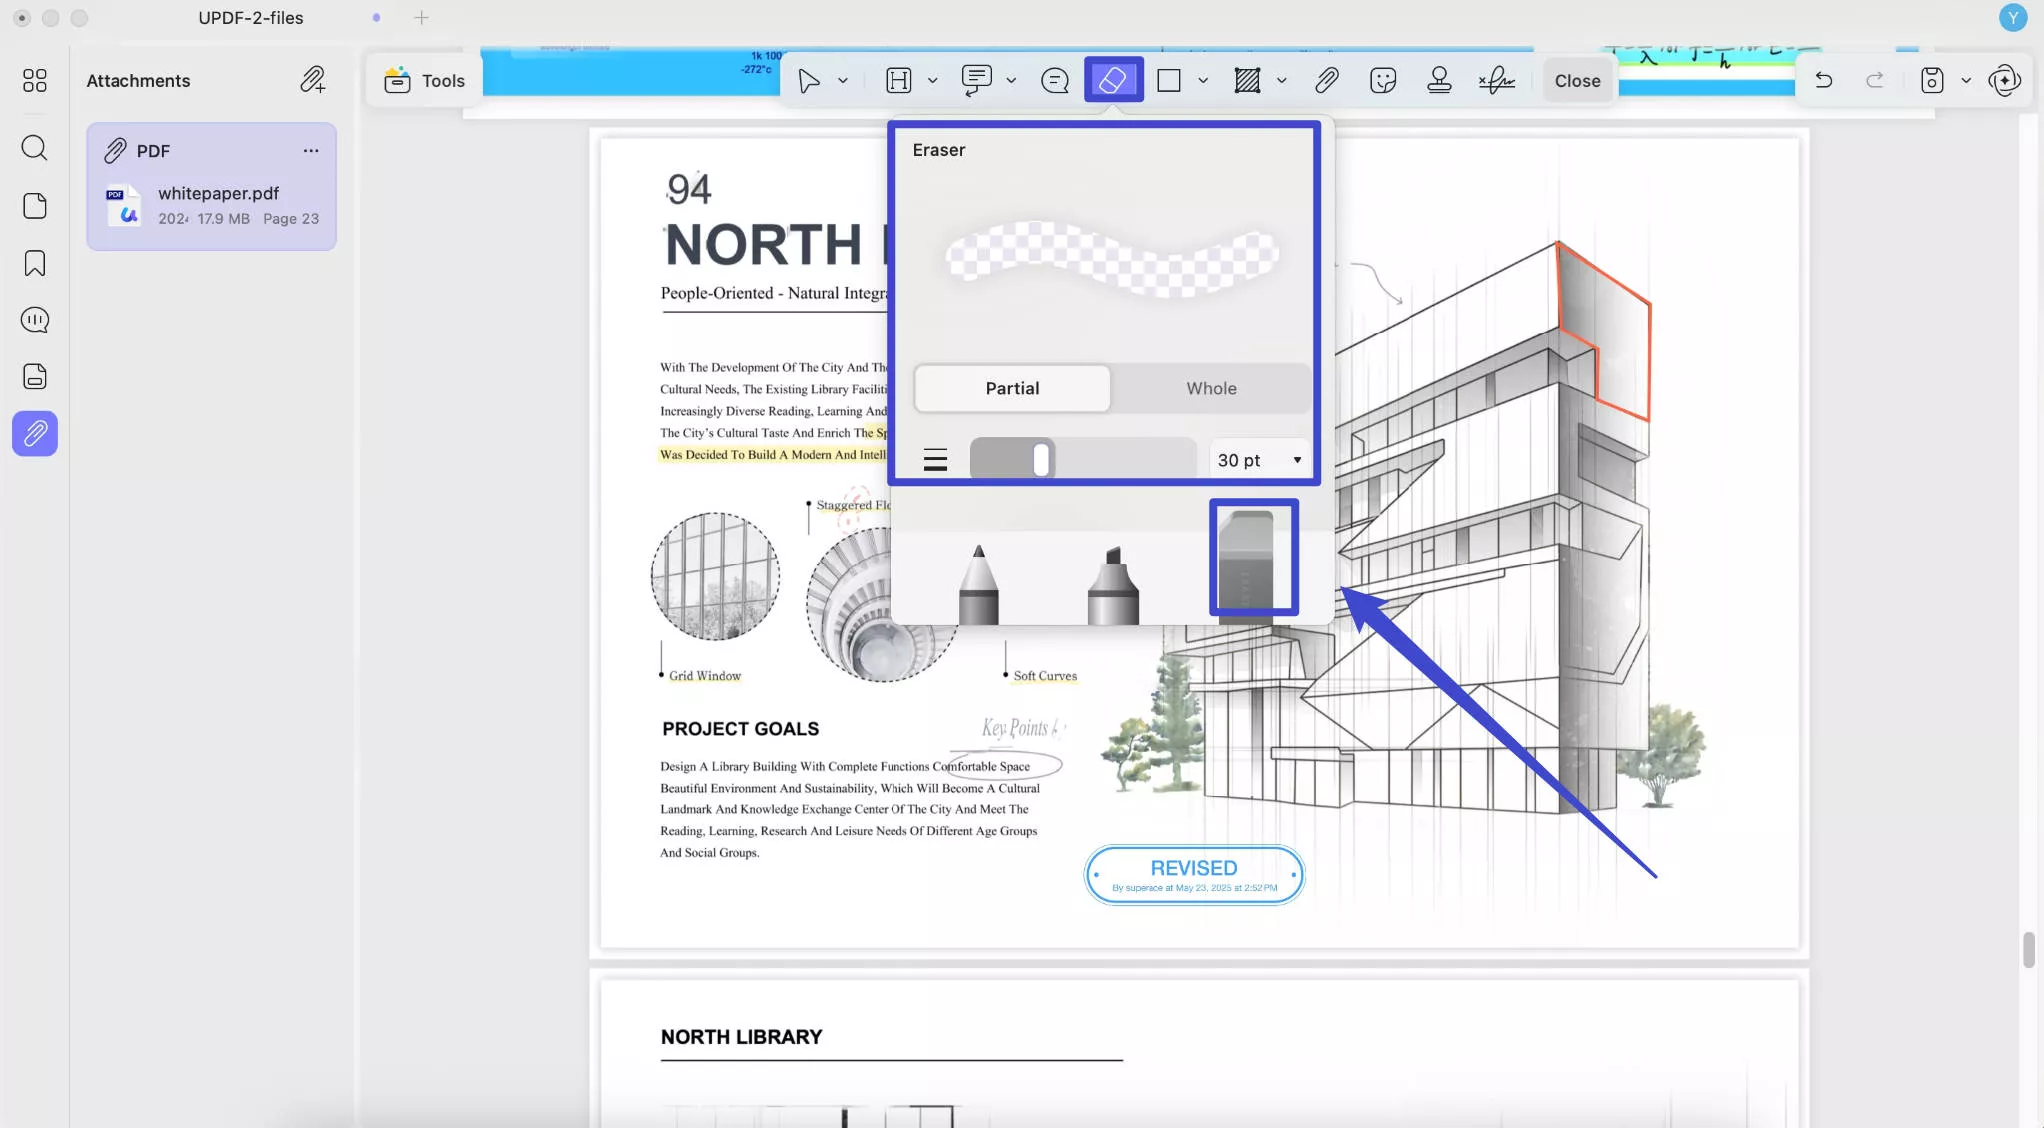
Eraser: To erase the markups with the pencil tool, click the "Eraser" tool, change its thickness, and choose to remove the partial or the whole drawing. Now, you can hold on to the left side of your mouse and move to remove the drawing. You may find that you have to click on the "Eraser" icon again and again if you have many parts to remove. In this case, you can double-click on the "Eraser" icon to activate the continuous removal feature.
(Note: the eraser tool is only available for pencil, highlighter, and markups.)
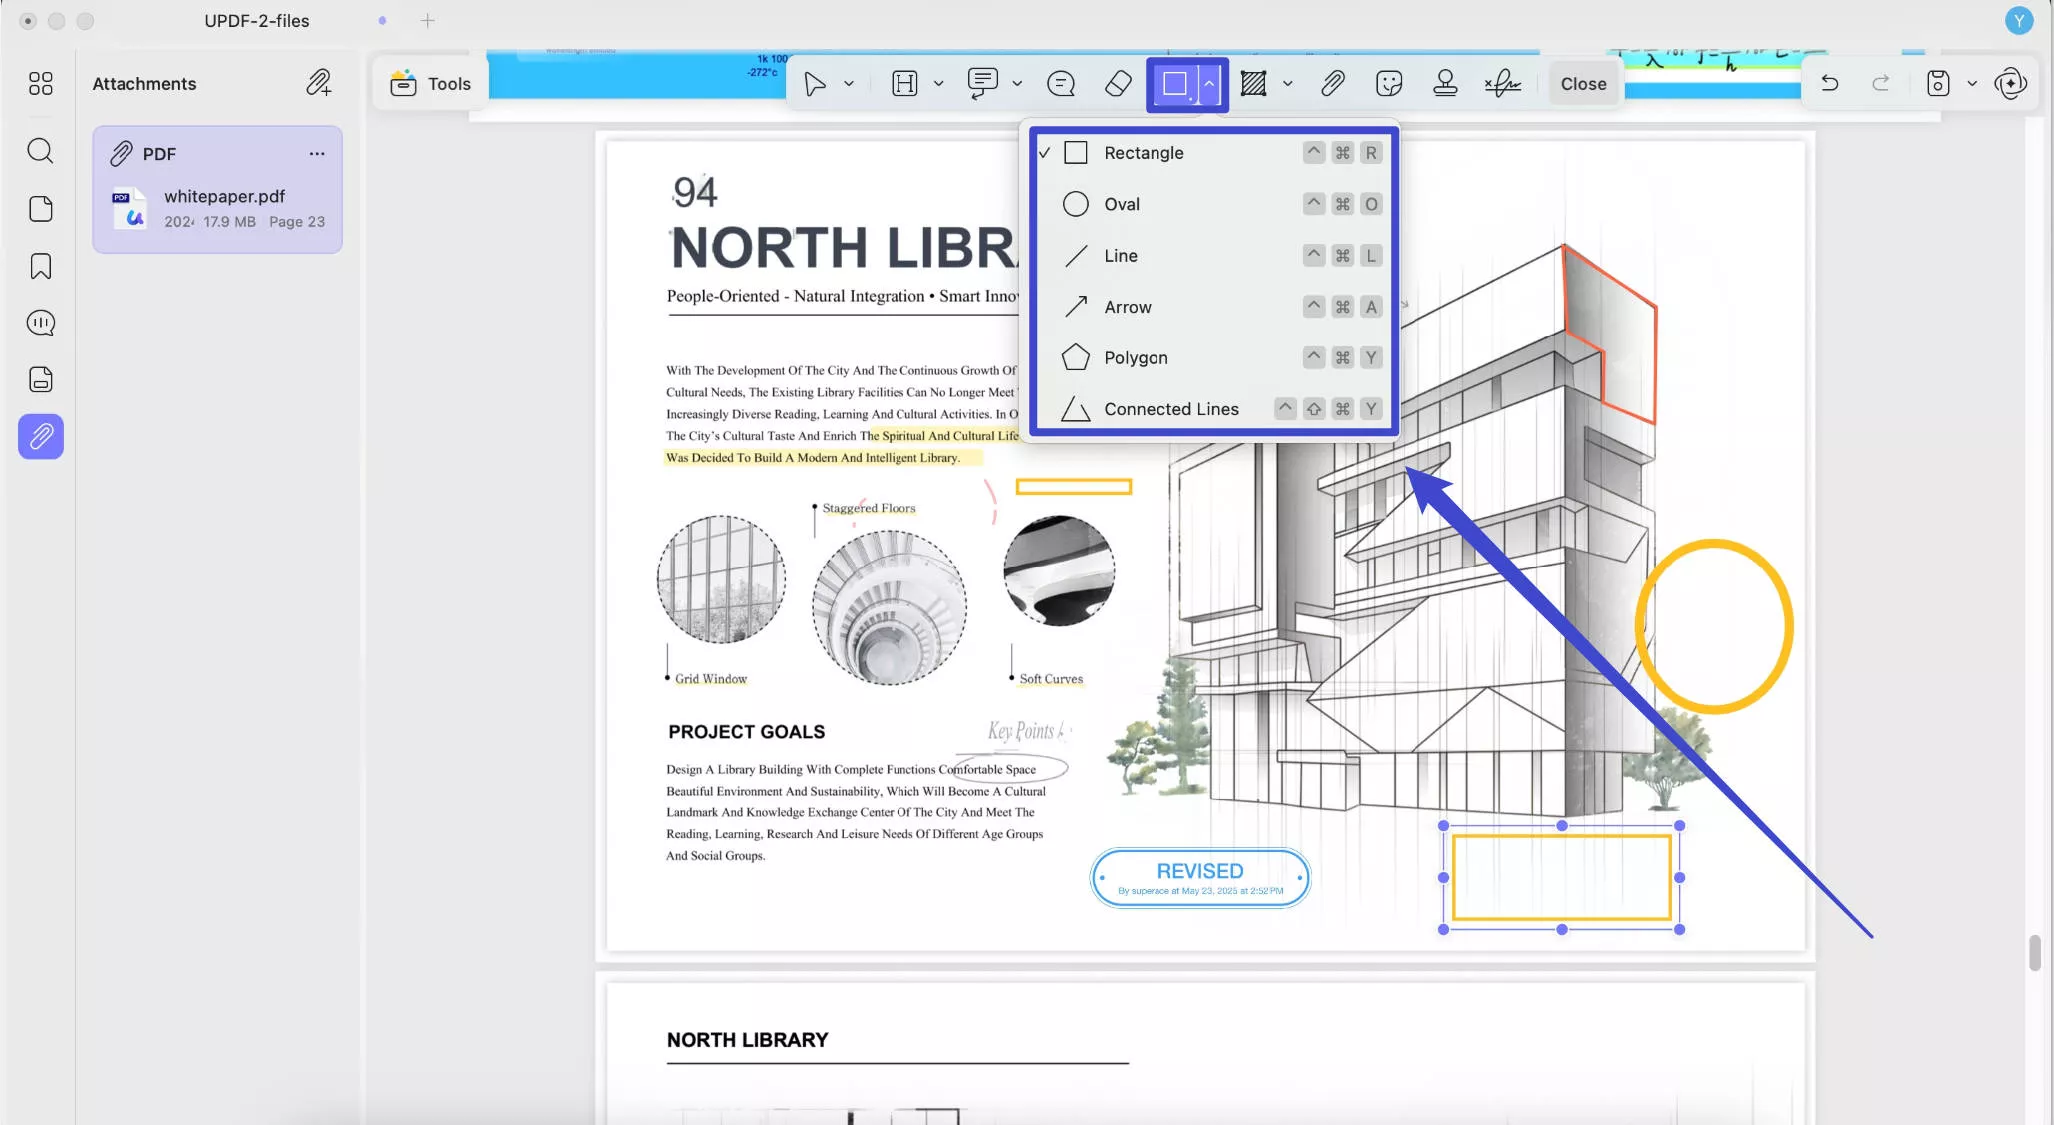
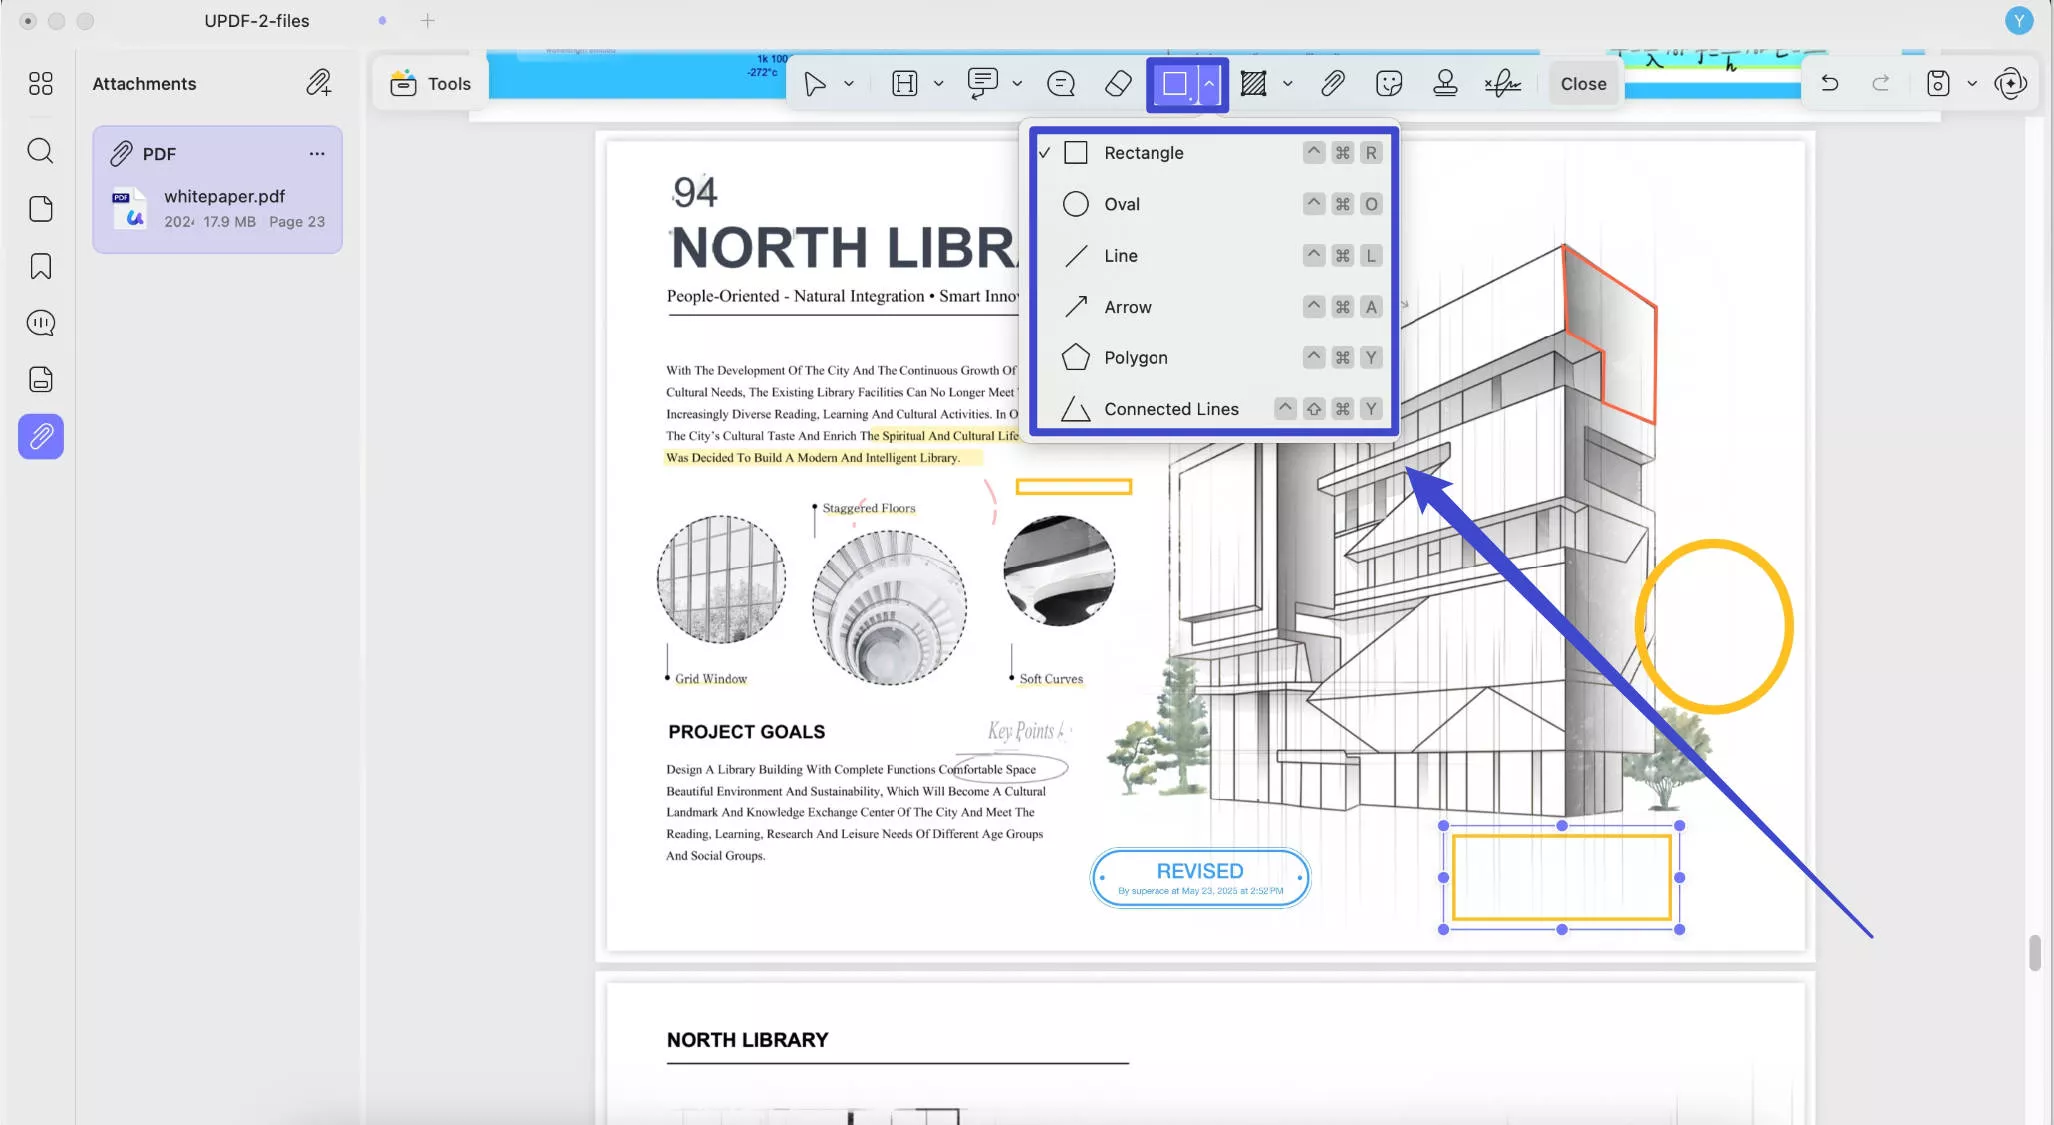
Shapes: Select the Rectangle/Oval/Line/Arrow/Pentagon/Triangle shapes under the drawing tools drop-down menu, and use the click-and-drag action to draw them on your document.
8. Manage Comments List
UPDF allows you to fold and unfold the Comments List. The Comments List will help you review all the comments and quickly jump to a specific comment. Moreover, you can reply the comments, filter the comments, sort the comment, and export the comments.
To unfold the Comments List, you need to click the Comments icon on the top-right.
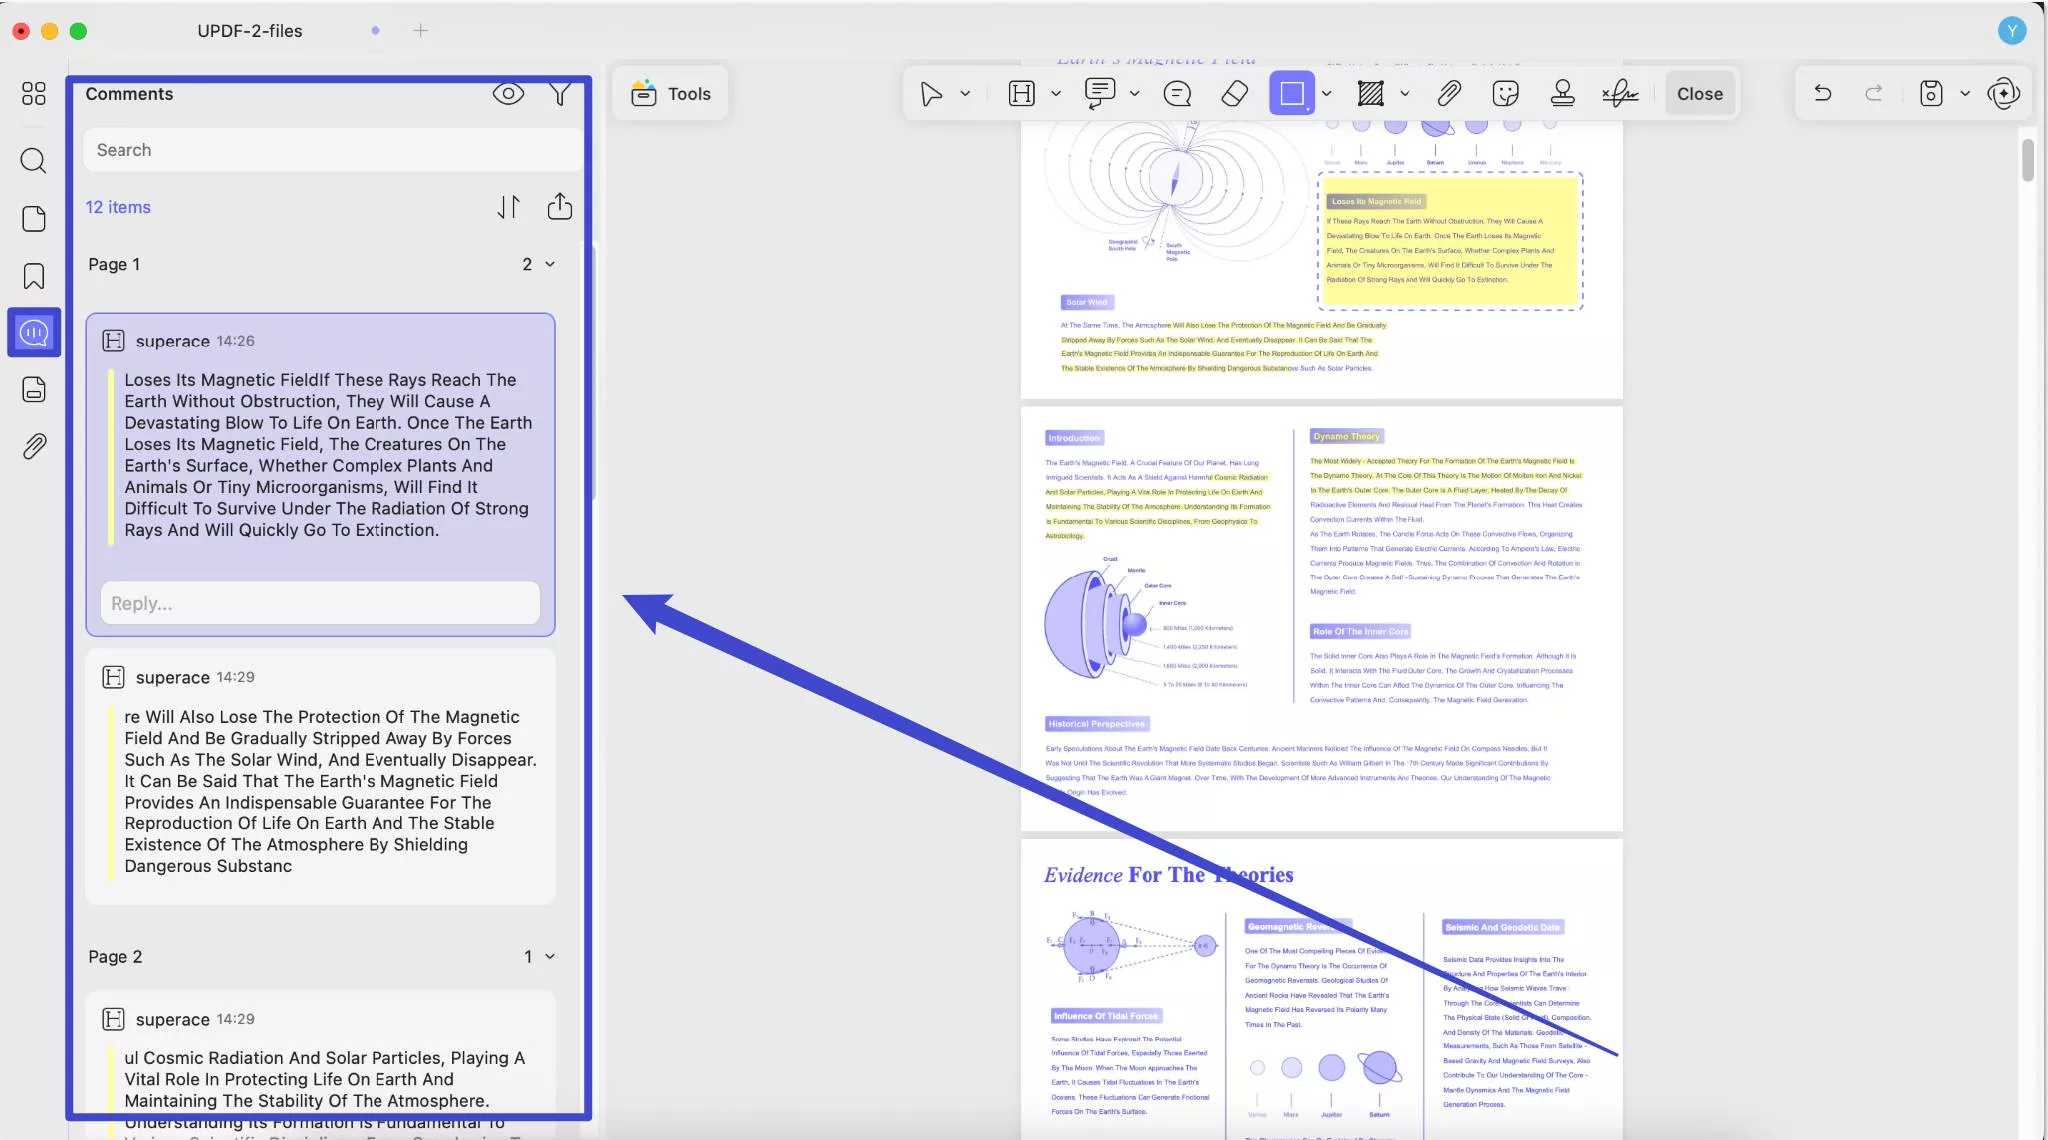
Then you will find the Comments List unfold on the right sidebar. From here, you can see all the comments on the current PDF document. You can click to select and jump to a specific comment, and the selected one will turn on a purple borderline which means selected.
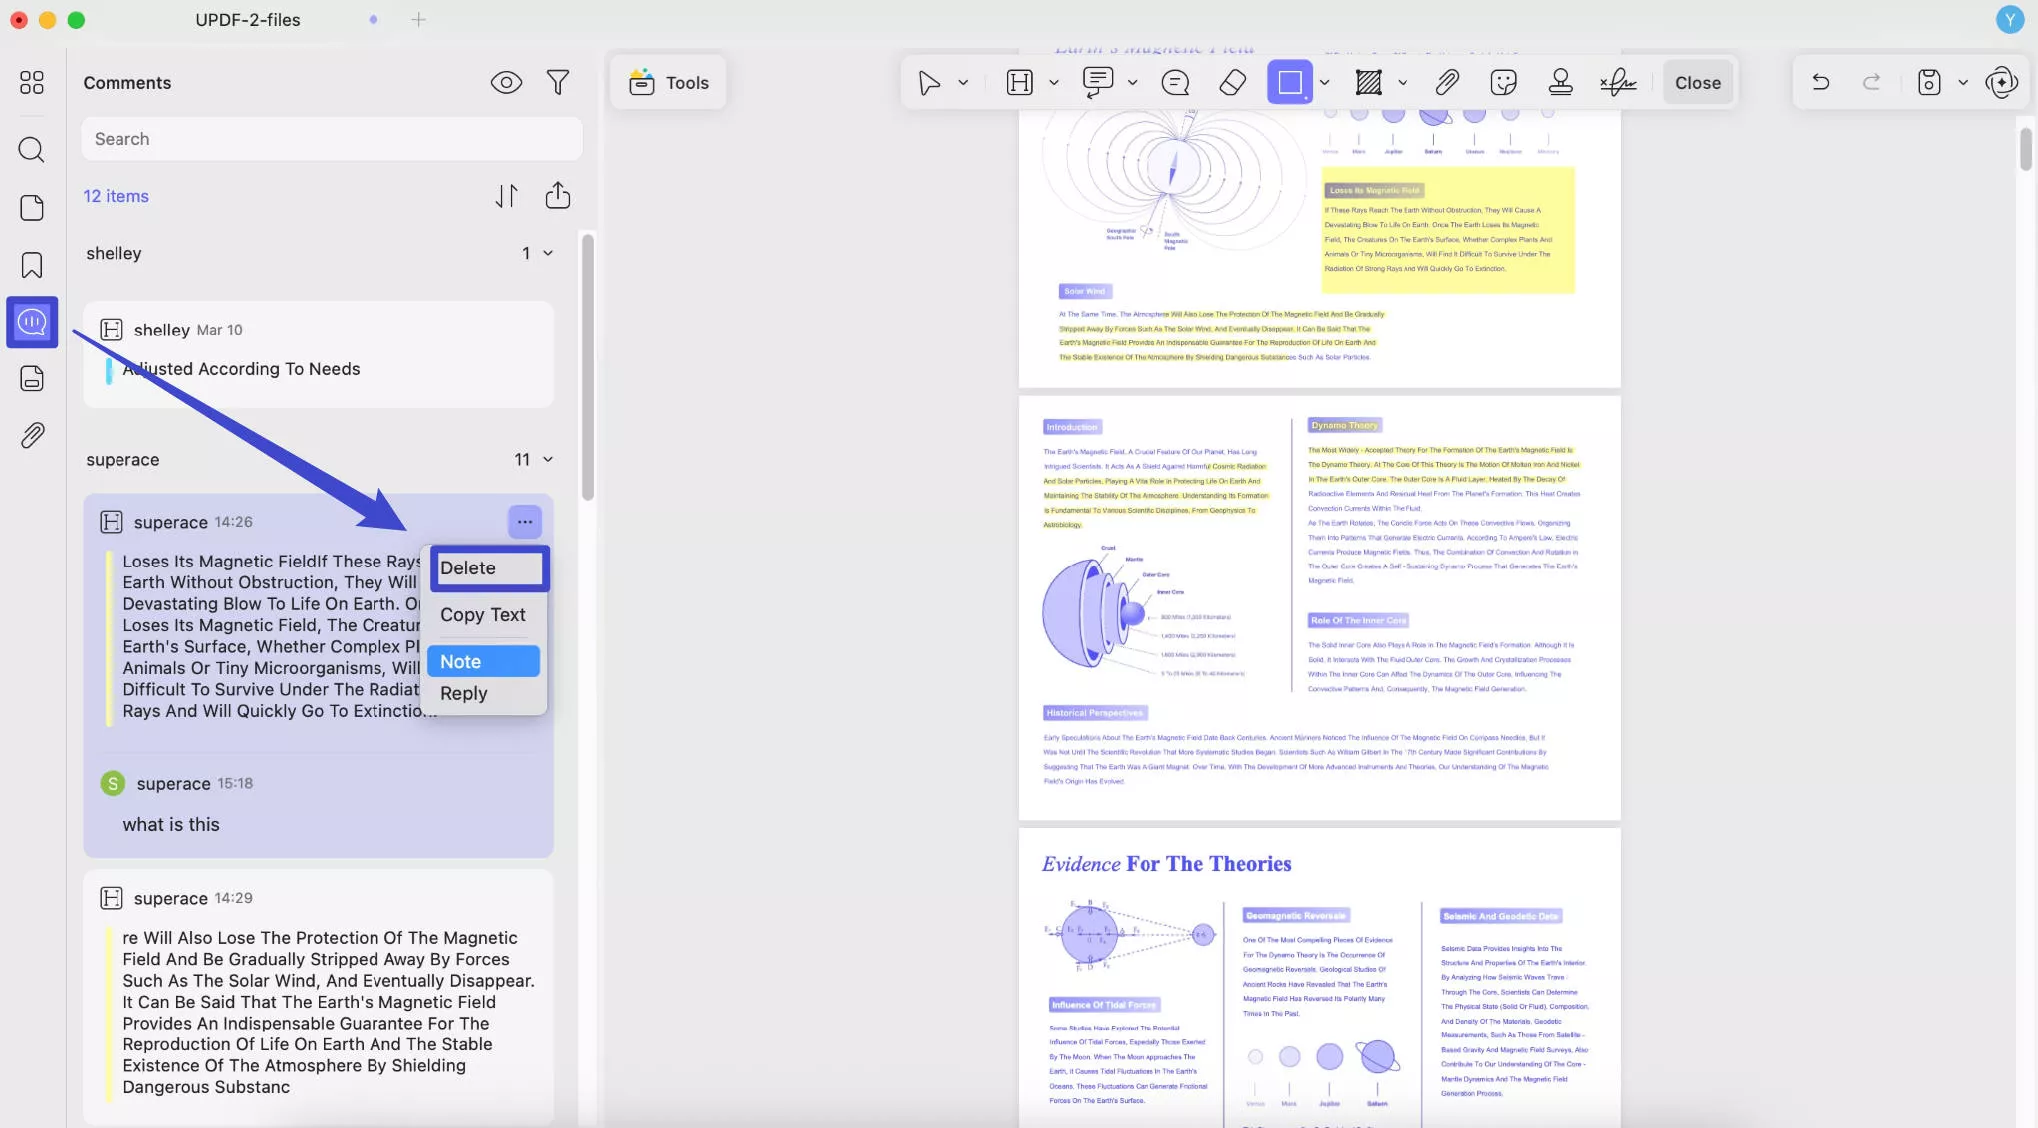
You can delete a comment by clicking the "Three Dots" icon on the top-right corner of each comment and choosing "Delete".
You can also export all your comments by clicking on the "Export PDF", selecting what contents you want to export, and clicking on "Export". Now all your comments will be in a separate PDF.
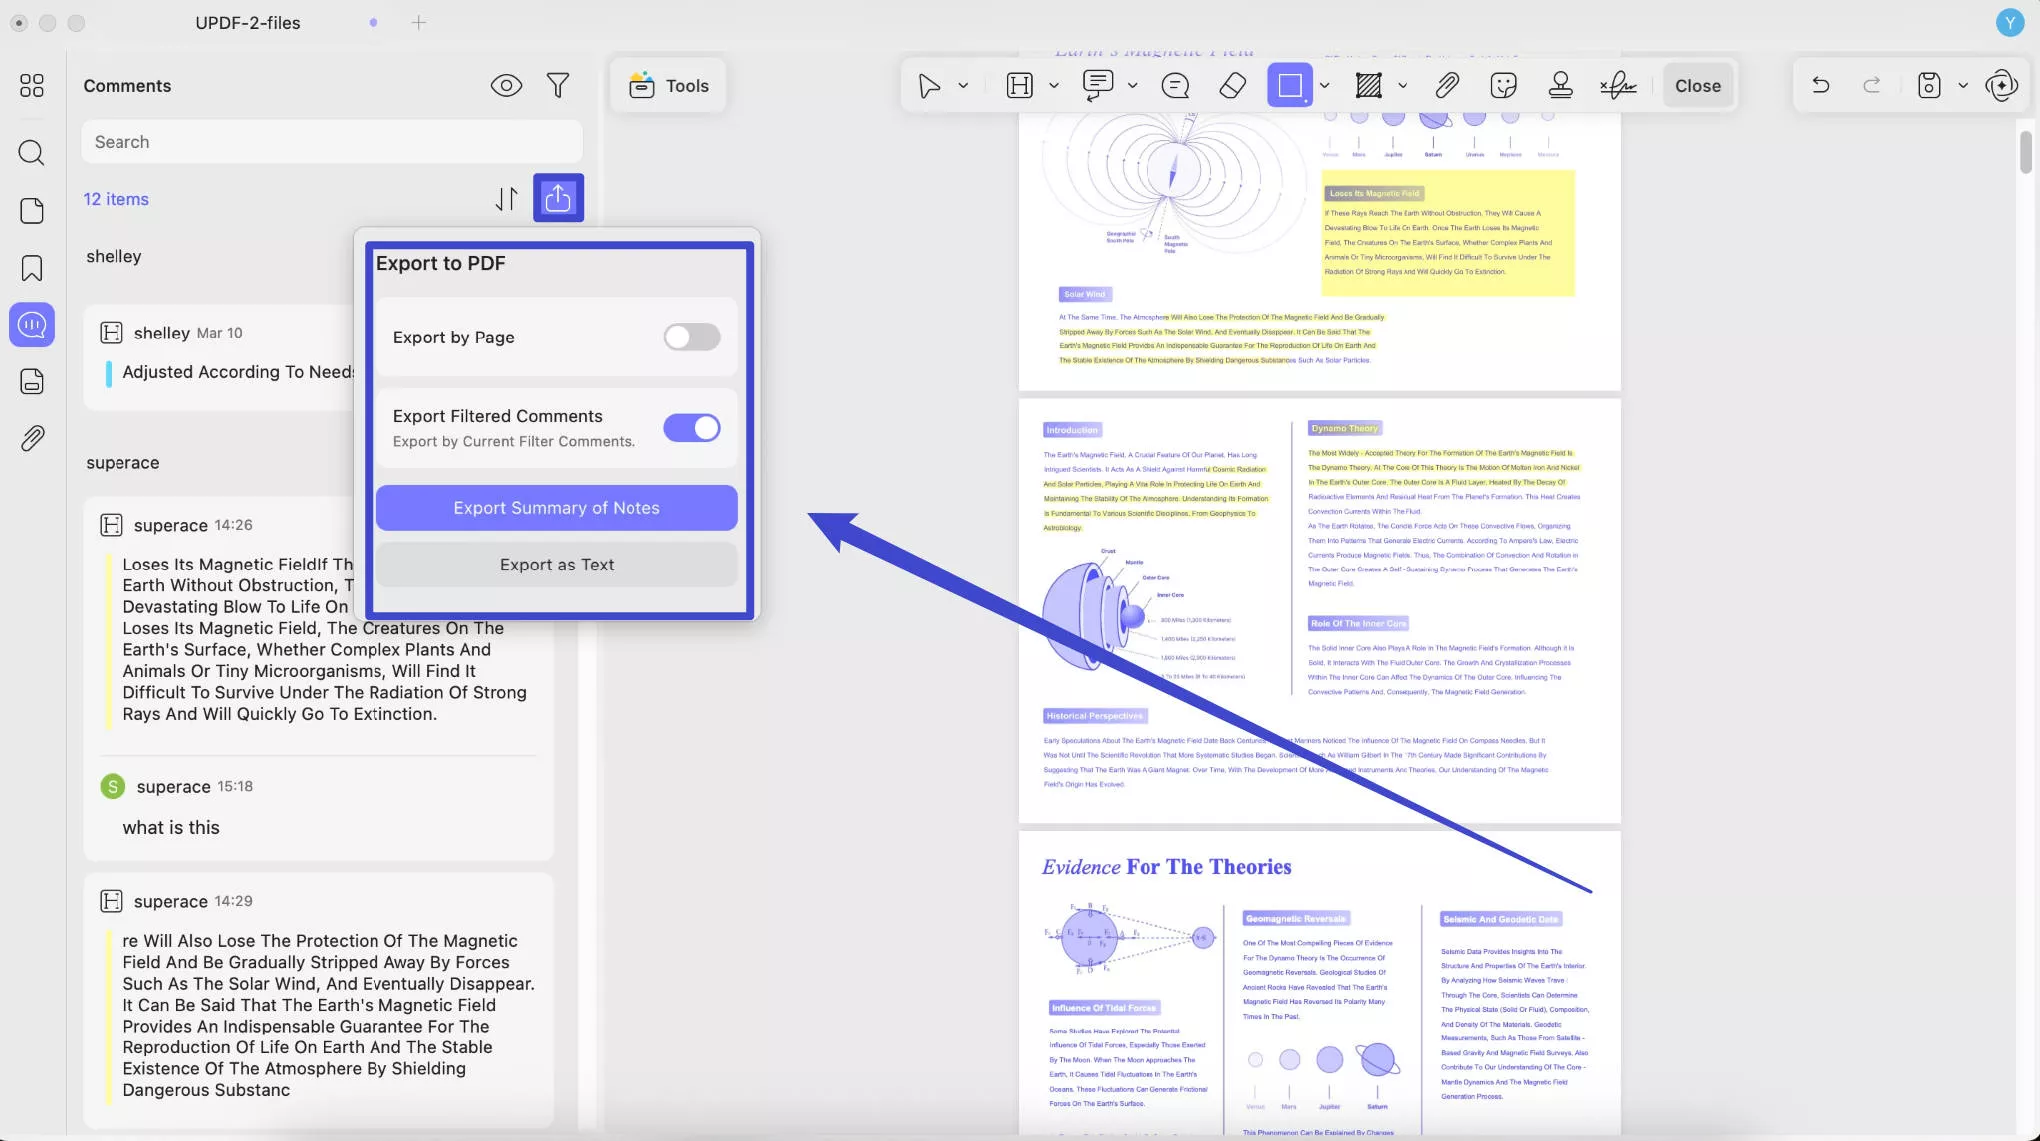
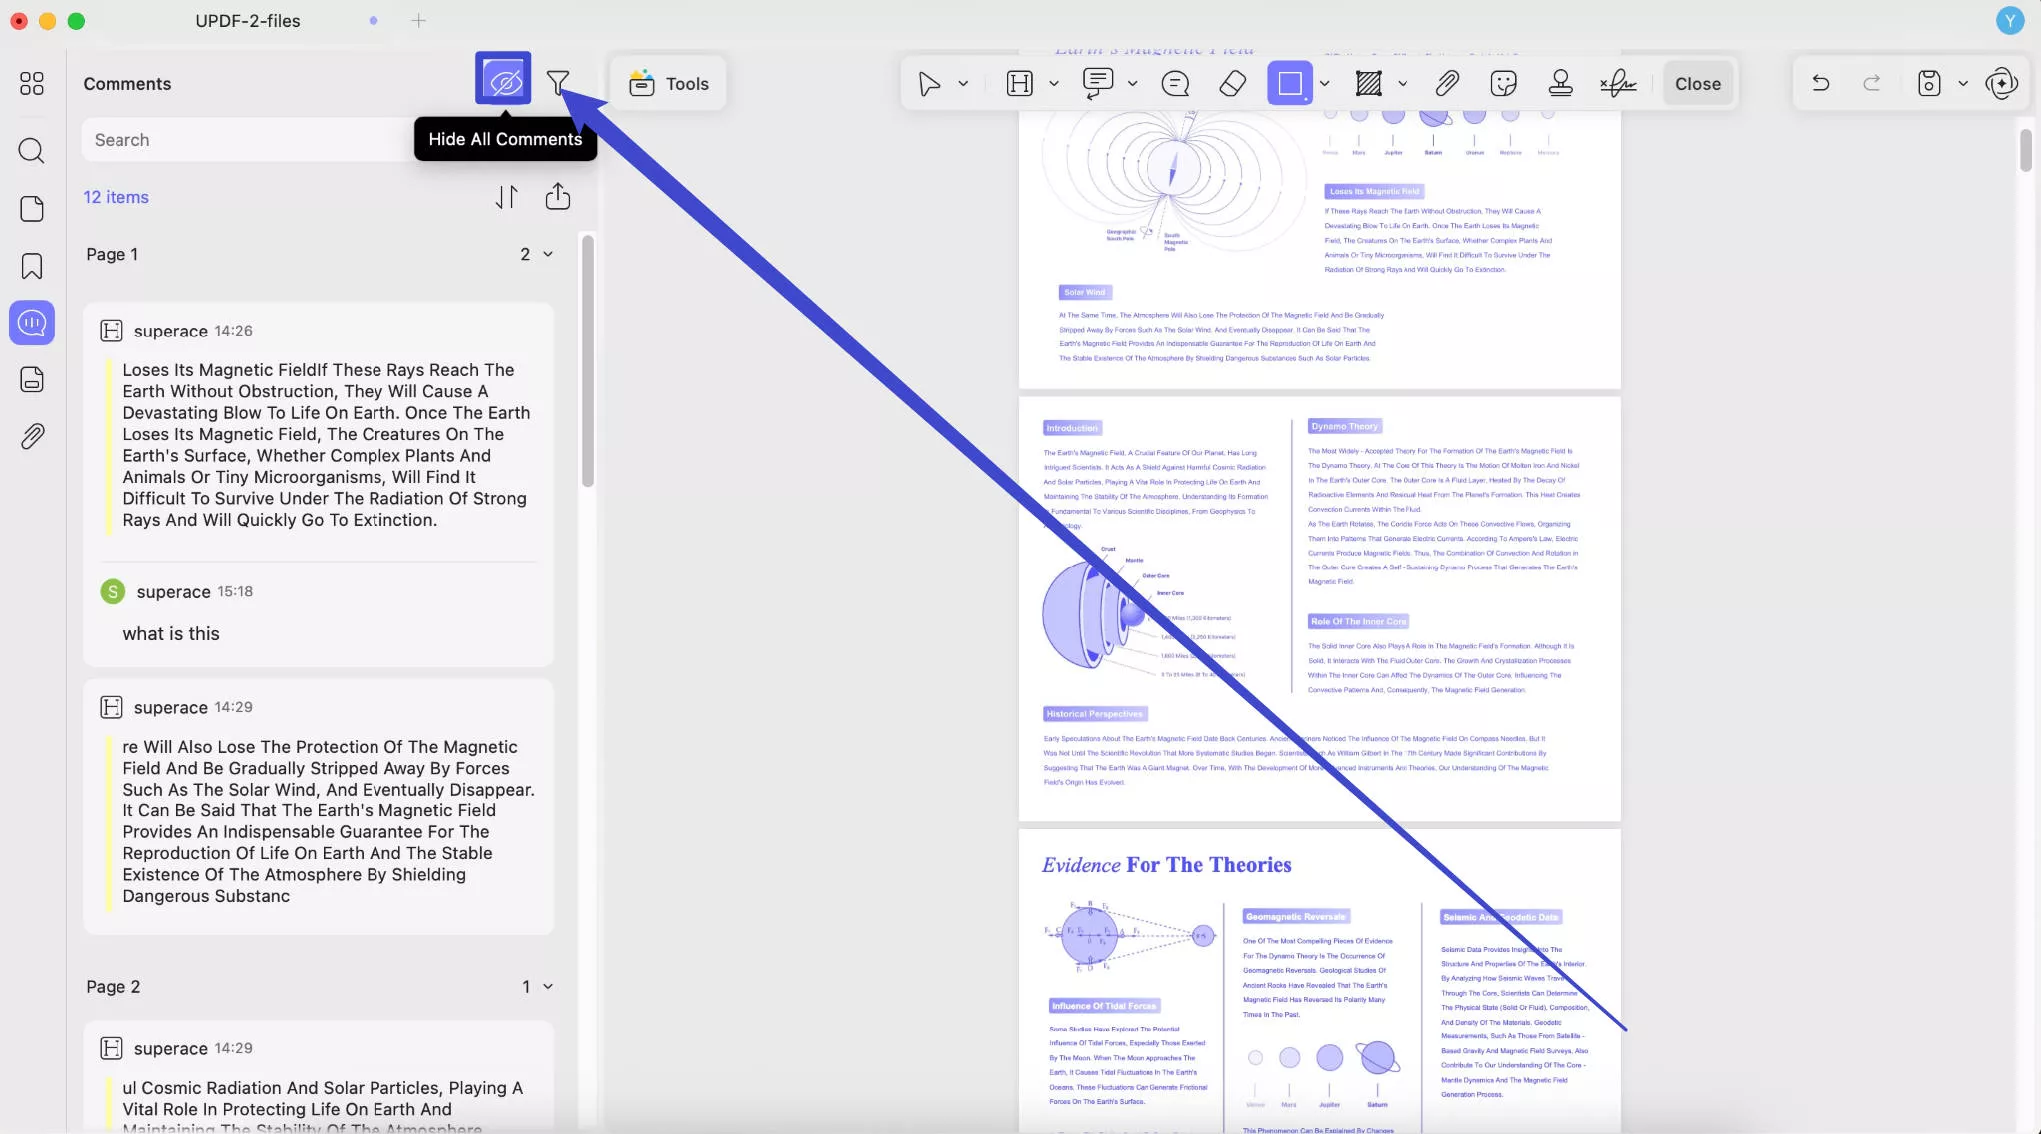
Hide All Comments: Just click on the eye icon to hide or reveal comments based on your preferences.
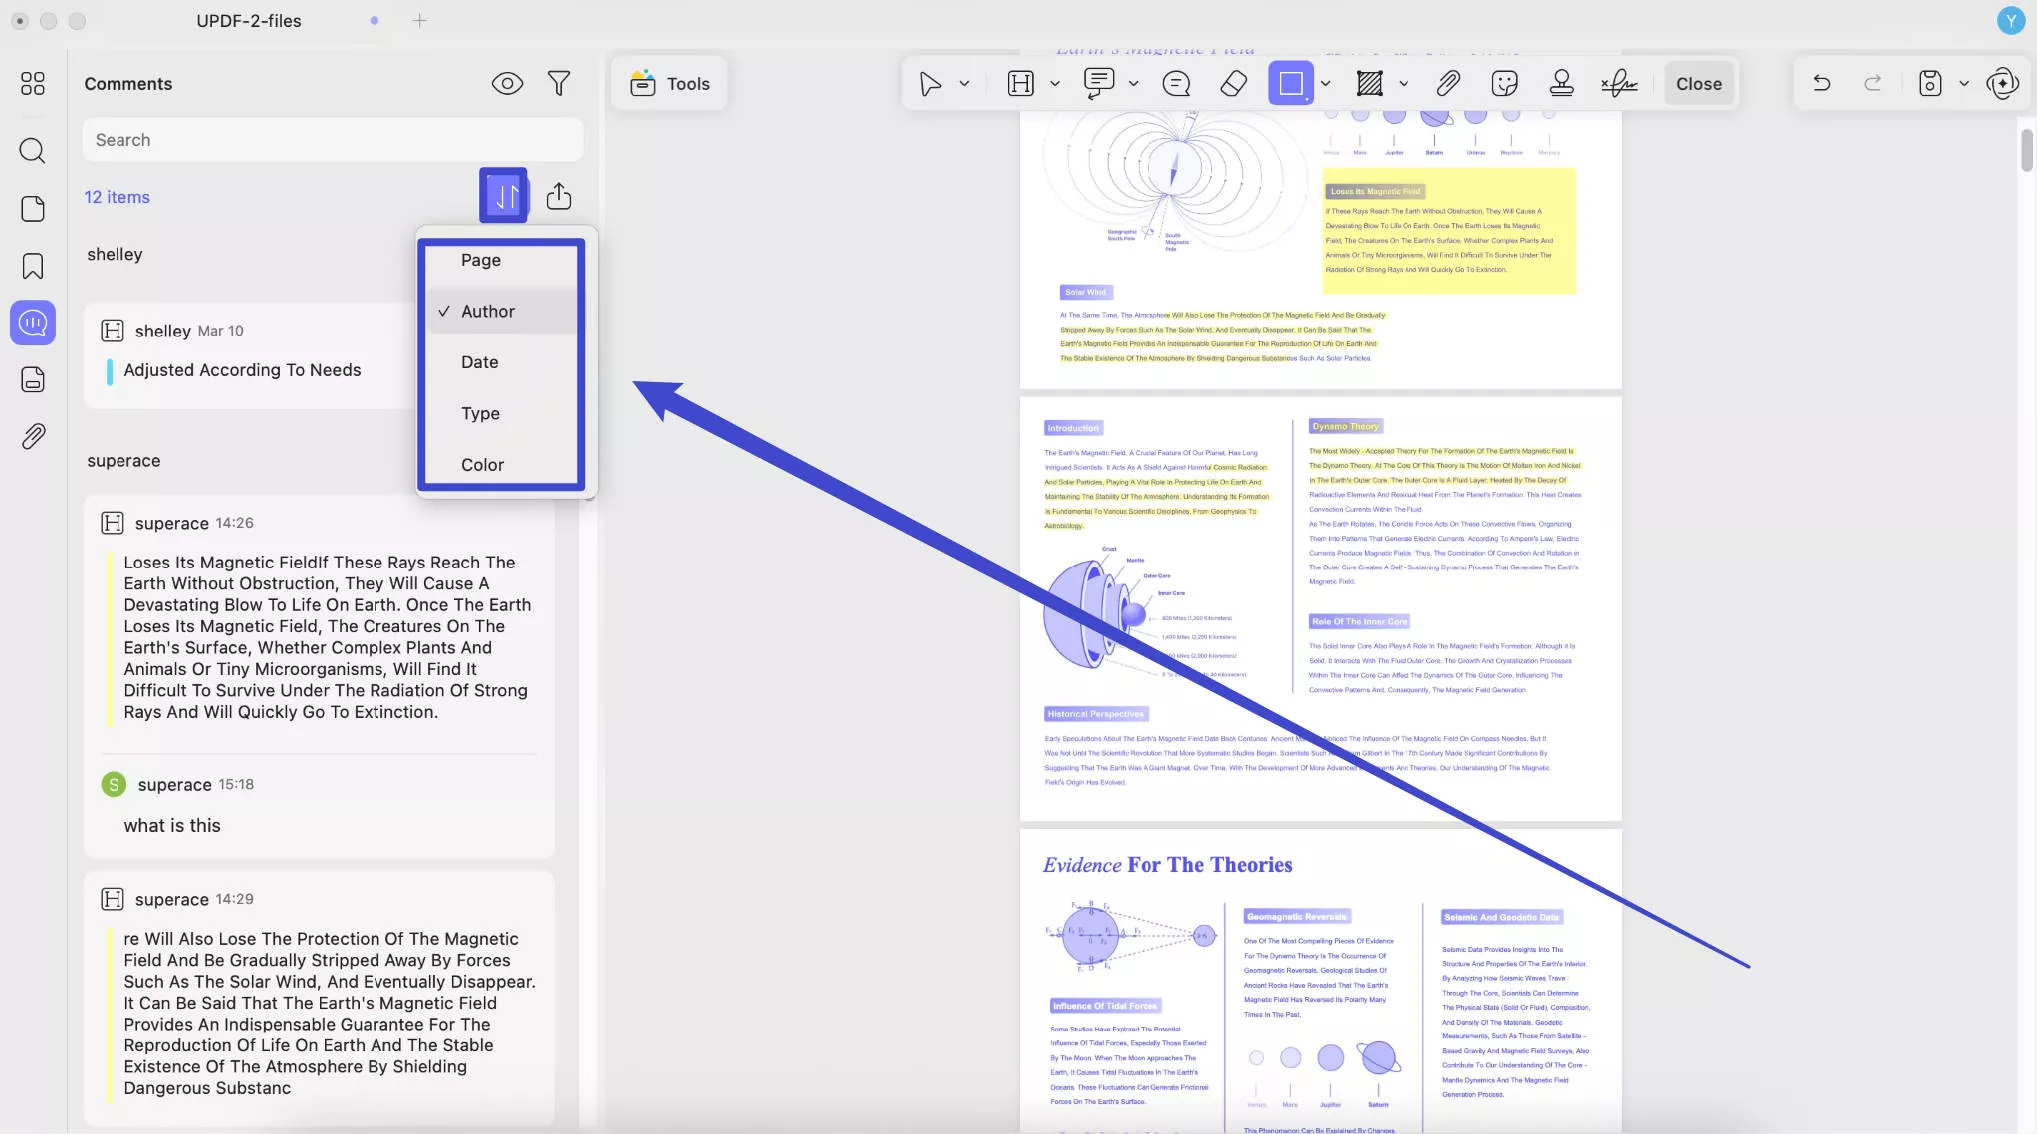
Sort Comments: You can sort comments based on page, author, date, type, and color.
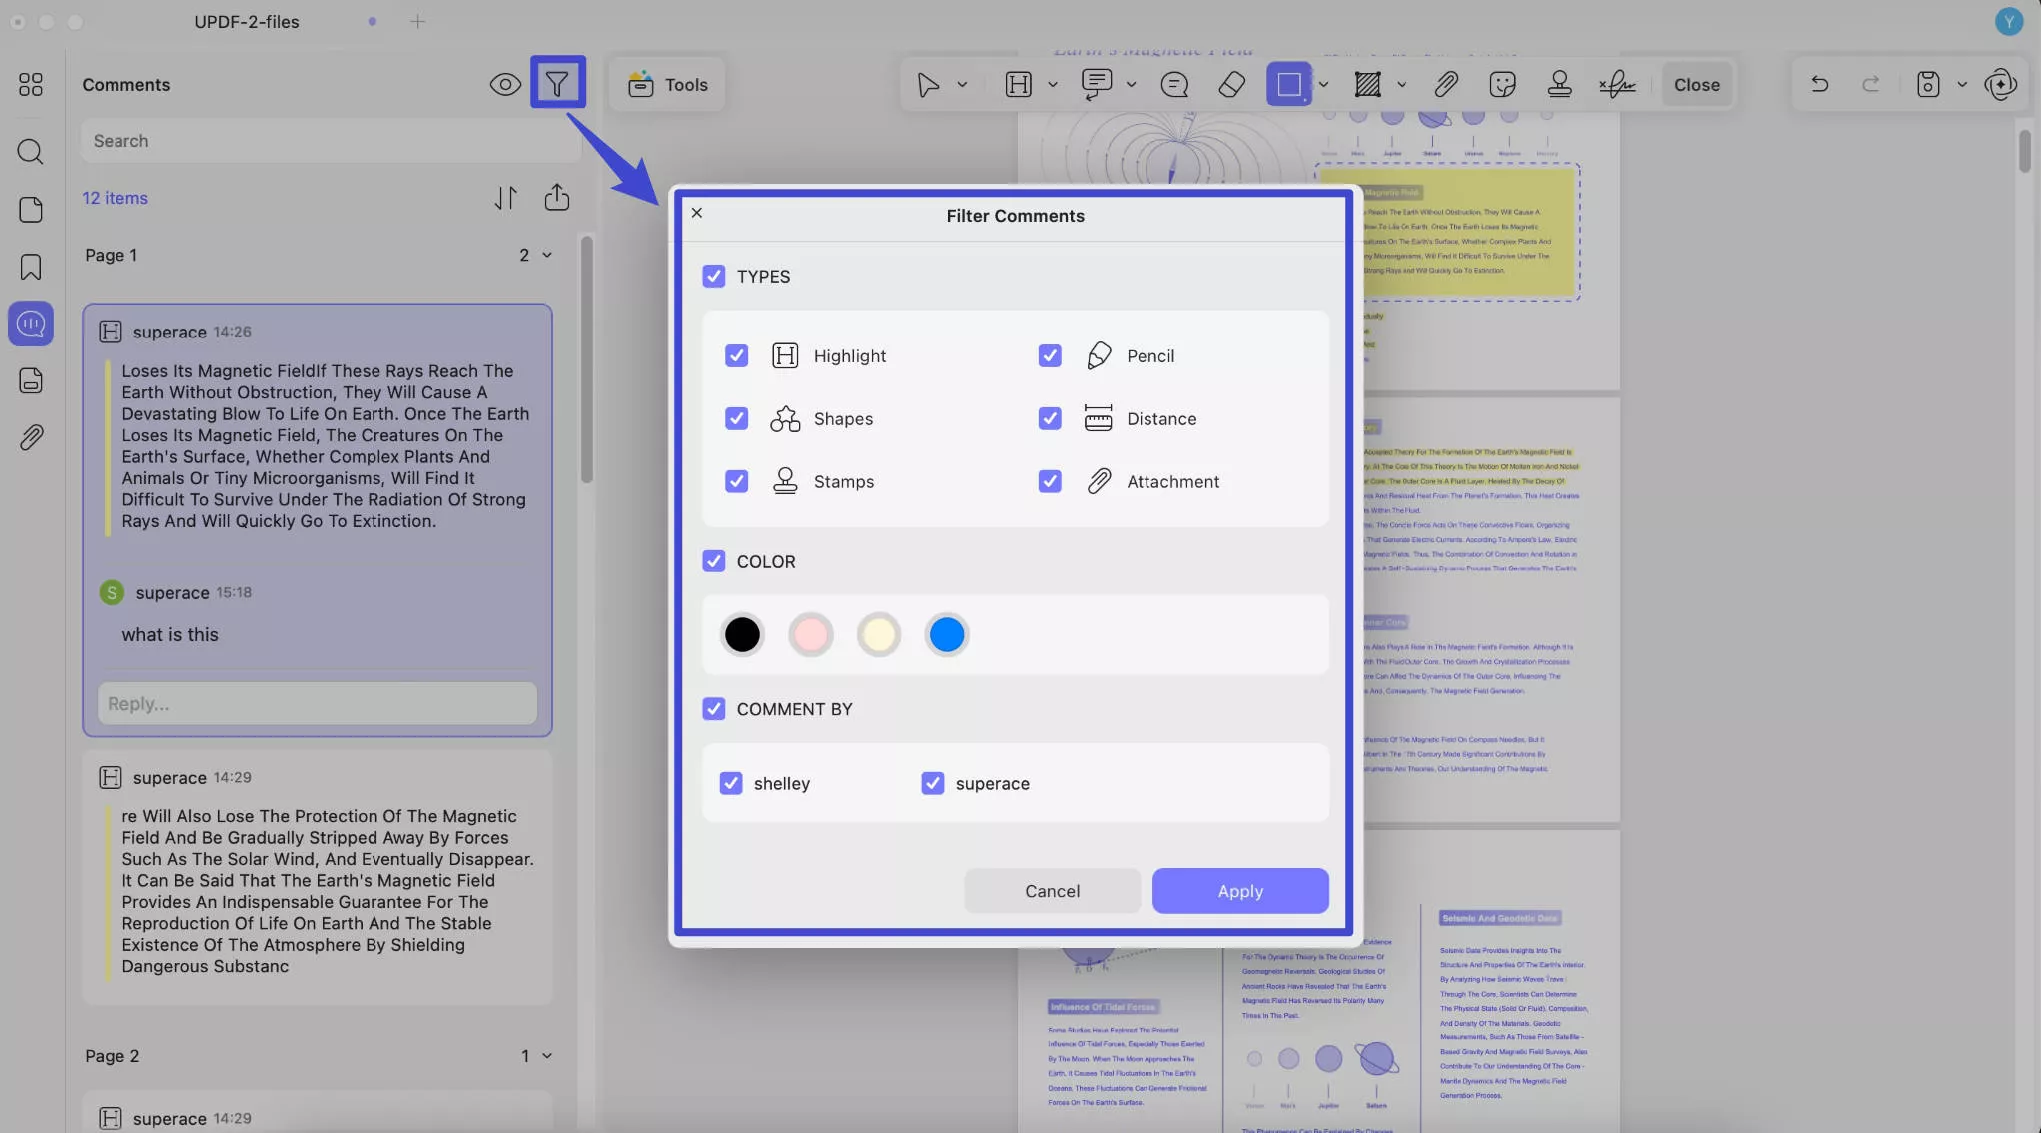
Filter Comments : If you only want to check some of the comments, you can use the filter feature. Just click on the “Filter” icon and select the comment type to filter.
 UPDF
UPDF
 UPDF for Windows
 UPDF for Mac
 UPDF for iPhone/iPad
 UPDF for Android
 UPDF AI Online
 UPDF Sign
 Read PDF
 Annotate PDF
 Edit PDF
 Convert PDF
 Create PDF
 Compress PDF
 Organize PDF
 Merge PDF
 Split PDF
 Crop PDF
 Delete PDF pages
 Rotate PDF
 Sign PDF
 PDF Form
 Compare PDFs
 Protect PDF
 Print PDF
 Batch Process
 OCR
OCR UPDF Cloud
 About UPDF AI
 UPDF AI Solutions
 FAQ about UPDF AI
 Summarize PDF
 Translate PDF
 Explain PDF
 Chat with PDF
 Chat with image
 PDF to Mind Map
 Chat with AI
 User Guide
 Tech Spec
 Updates
 FAQs
FAQs UPDF Tricks
 Blog
Blog Newsroom
 UPDF Reviews
 Download Center
 Contact Us
