 UPDF
 UPDF for Windows
 UPDF for Mac
 UPDF for iPhone/iPad
 UPDF for Android
 Nomostar
 UPDF AI Online
 UPDF Sign
 IvyCraft
 Edit PDF
 Annotate PDF
 Create PDF
 PDF Form
 Edit links
 Convert PDF
 OCR
 PDF to Word
 PDF to Image
 PDF to Excel
 Organize PDF
 Merge PDF
 Split PDF
 Crop PDF
 Rotate PDF
 Protect PDF
 Sign PDF
 Redact PDF
 Sanitize PDF
 Remove Security
 Read PDF
 UPDF Cloud
 Compress PDF
 Print PDF
 Batch Process

 About UPDF AI
 UPDF AI Solutions
 AI User Guide
 FAQ about UPDF AI
 Summarize PDF
 Translate PDF
 Chat with PDF
 Chat with AI
 Chat with image
 PDF to Mind Map
 Explain PDF
 PDF AI Tools
 Image AI Tools
 AI Chat Tools
 AI Writing Tools
 AI Study Tools
 AI Working Tools
 Other AI Tools
 AI Bookmark Generation
 AI Bookmark Summary
 AI Watermark Generation
 AI Background Generation
 AI Sticker Generation
 AI Stamp Generation
 AI Editing Suite
 UPDF Copilot
 AI Page Management
 AI Semantic Search
 PDF to Word
 PDF to Excel
 PDF to PowerPoint
 Enterprise Solution
 Enterprise Sign
 Enterprise AI
 Enterprise Plan
 Enterprise User Guide
 Enterprise Webinar
 IT
 Education
 Construction
 Financial Service
 Healthcare
 Insurance
 Legal
 Manufacturing
 Government
 Researchers & PhDs
 Solopreneurs & Freelancers
 Lawyers & Legal Professionals
 Real Estate Agents & Brokers
 Education Solution
 Customer Stories
 User Guide
 UPDF Tricks
 FAQs
 UPDF Reviews
 Download Center
 Blog
 Newsroom
 Tech Spec
 Updates
 UPDF vs. Adobe Acrobat
 UPDF vs. Foxit
 UPDF vs. PDF Expert


Toolbar Navigation for UPDF on Mac
UPDF for Mac offers a range of toolbars to help you access PDF editing, annotation, navigation, and other features. You can also customize the mode toolbar to keep your frequently used tools within easy reach. This guide explains the different toolbars and how to use them. Download the free trial of UPDF using the button below to explore these features yourself.
Windows • macOS • iOS • Android 100% secure
Home Page Toolbar
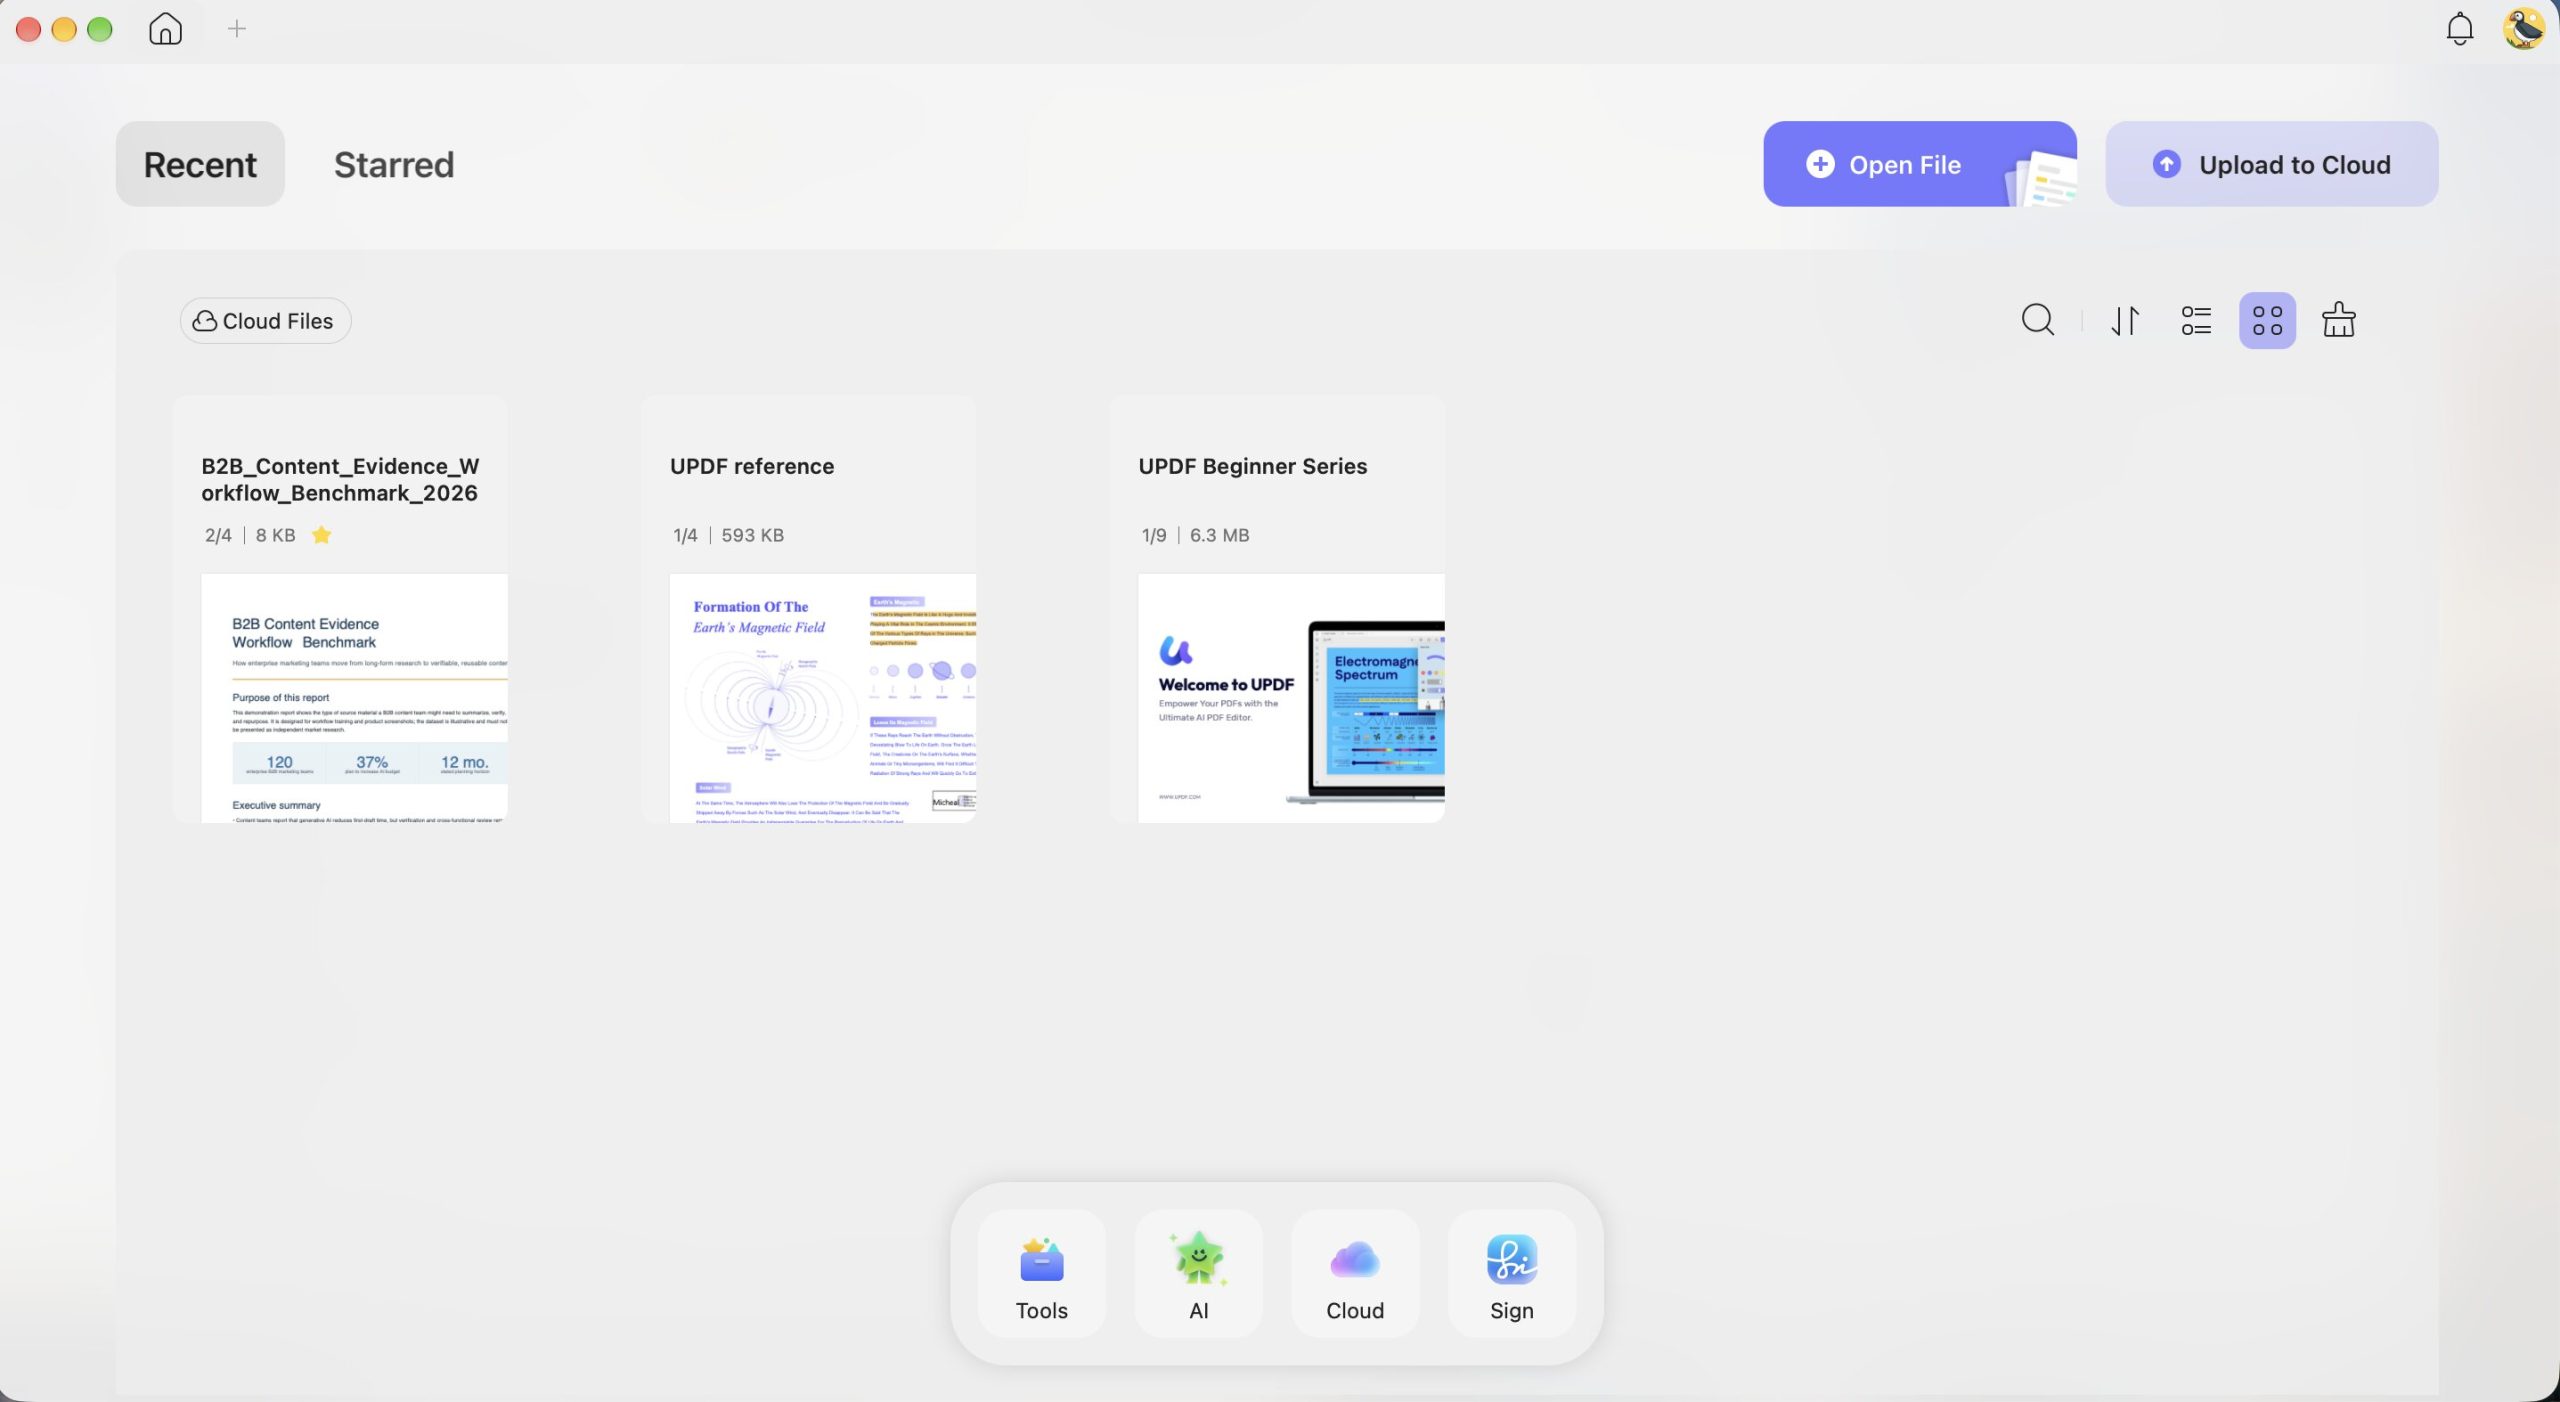
When you launch UPDF on Mac, you can find the home page like the below picture.
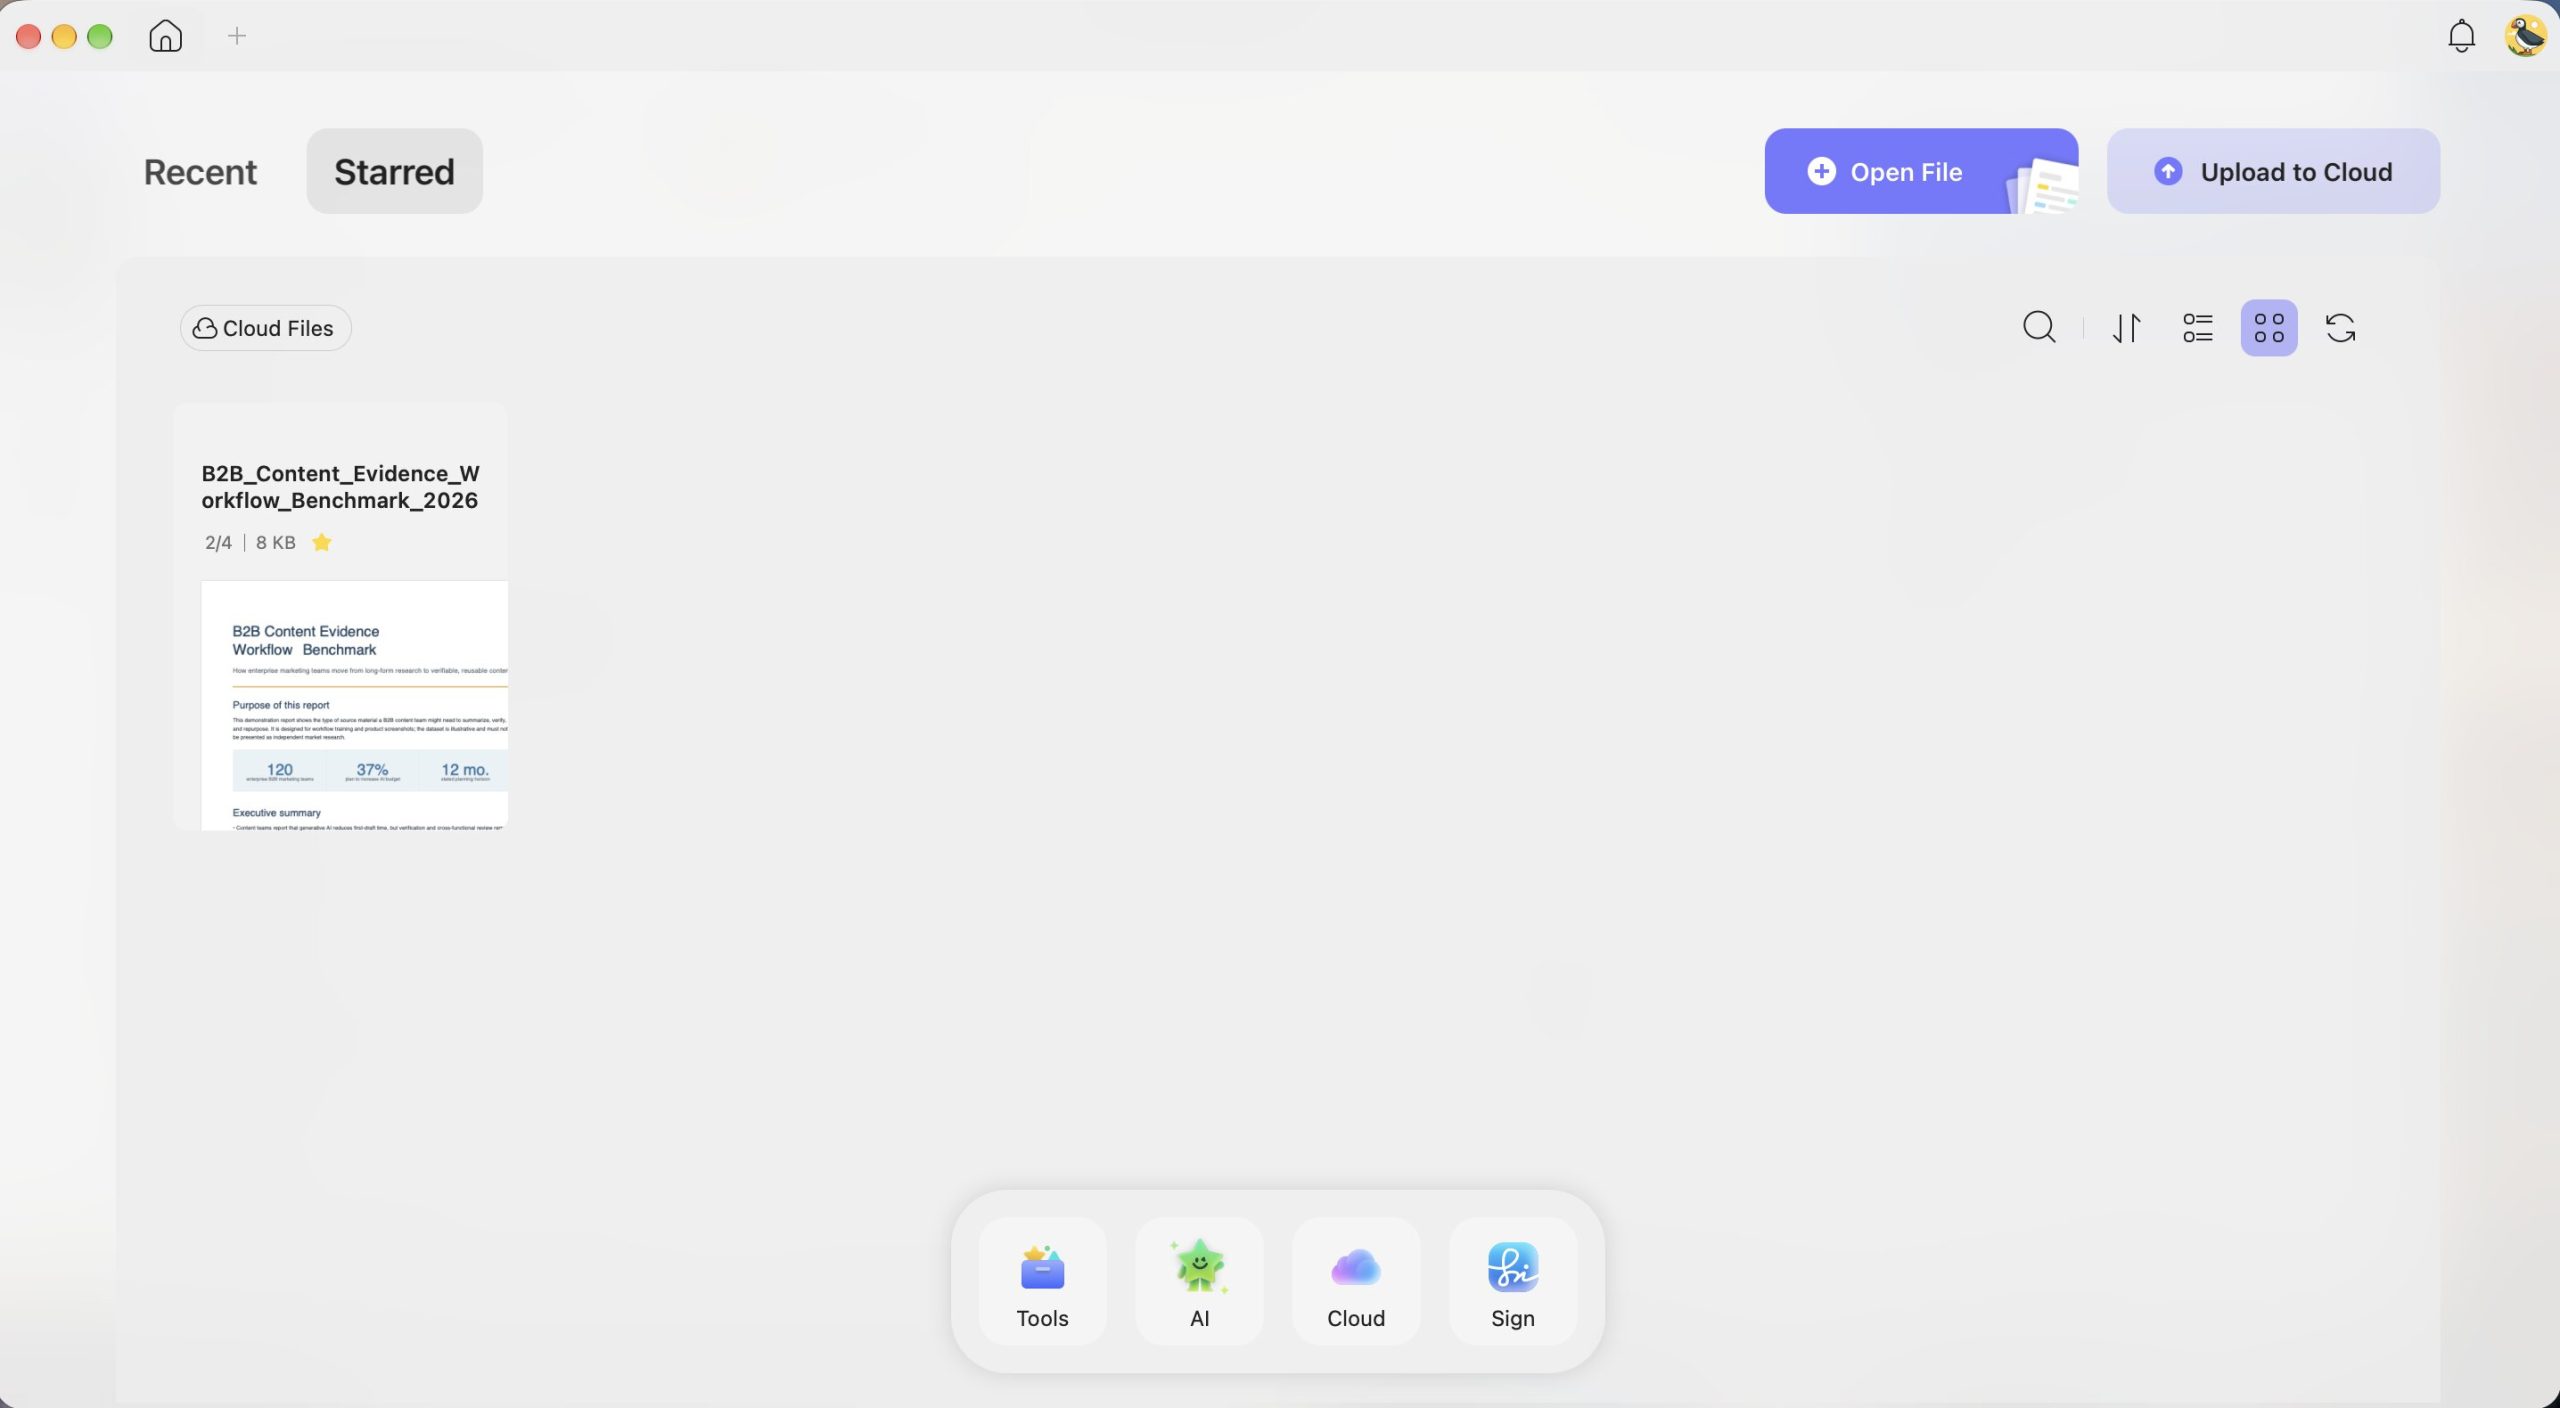
From the top toolbar, you can find "Recent", "Starred", "Open File" and "Upload to Cloud".

Starred
When you star one file from the "Recent" or "UPDF Cloud" list, it will appear in this list. Same in the Recent list, you can change the list order by last modified, file name, file size, switch between list view and thumbnail view, refresh the list, unstar the file, open, rename, copy to UPDF Cloud, and show in Finder.
Recent
Here, you can see all the recent PDF files you opened or edited. You can change its present order by last opened, file name, and file size, switch between list view and thumbnail view, clear list, delete files from recent list, click to open it, rename it, copy to UPDF Cloud, star the file, show in finder and more.
Open File
There are two ways to open PDFs in UPDF: The first way is to drag any PDF file from your drive and drop it into UPDF. The second way is to import a PDF file by clicking on the Open File button.
Upload to Cloud
UPDF Cloud allows you to manage your shared files and uploaded files in UPDF Cloud. You can Upload PDF to Cloud, create a folder to organize all the files in the cloud, and open, download, rename, delete, move, copy, and start the PDF files here. You can also create a new folder in the cloud. To learn more about UPDF Cloud, visit the UPDF Cloud page here.
In the middle bottom, you can find "Tools", "AI", and "Cloud".
AI: Features AI-driven functionalities for enhanced document processing and analysis.
Cloud: Offers cloud storage options for saving and accessing documents.
If you click the Tools Button below, you will find more integrated PDF Tools:
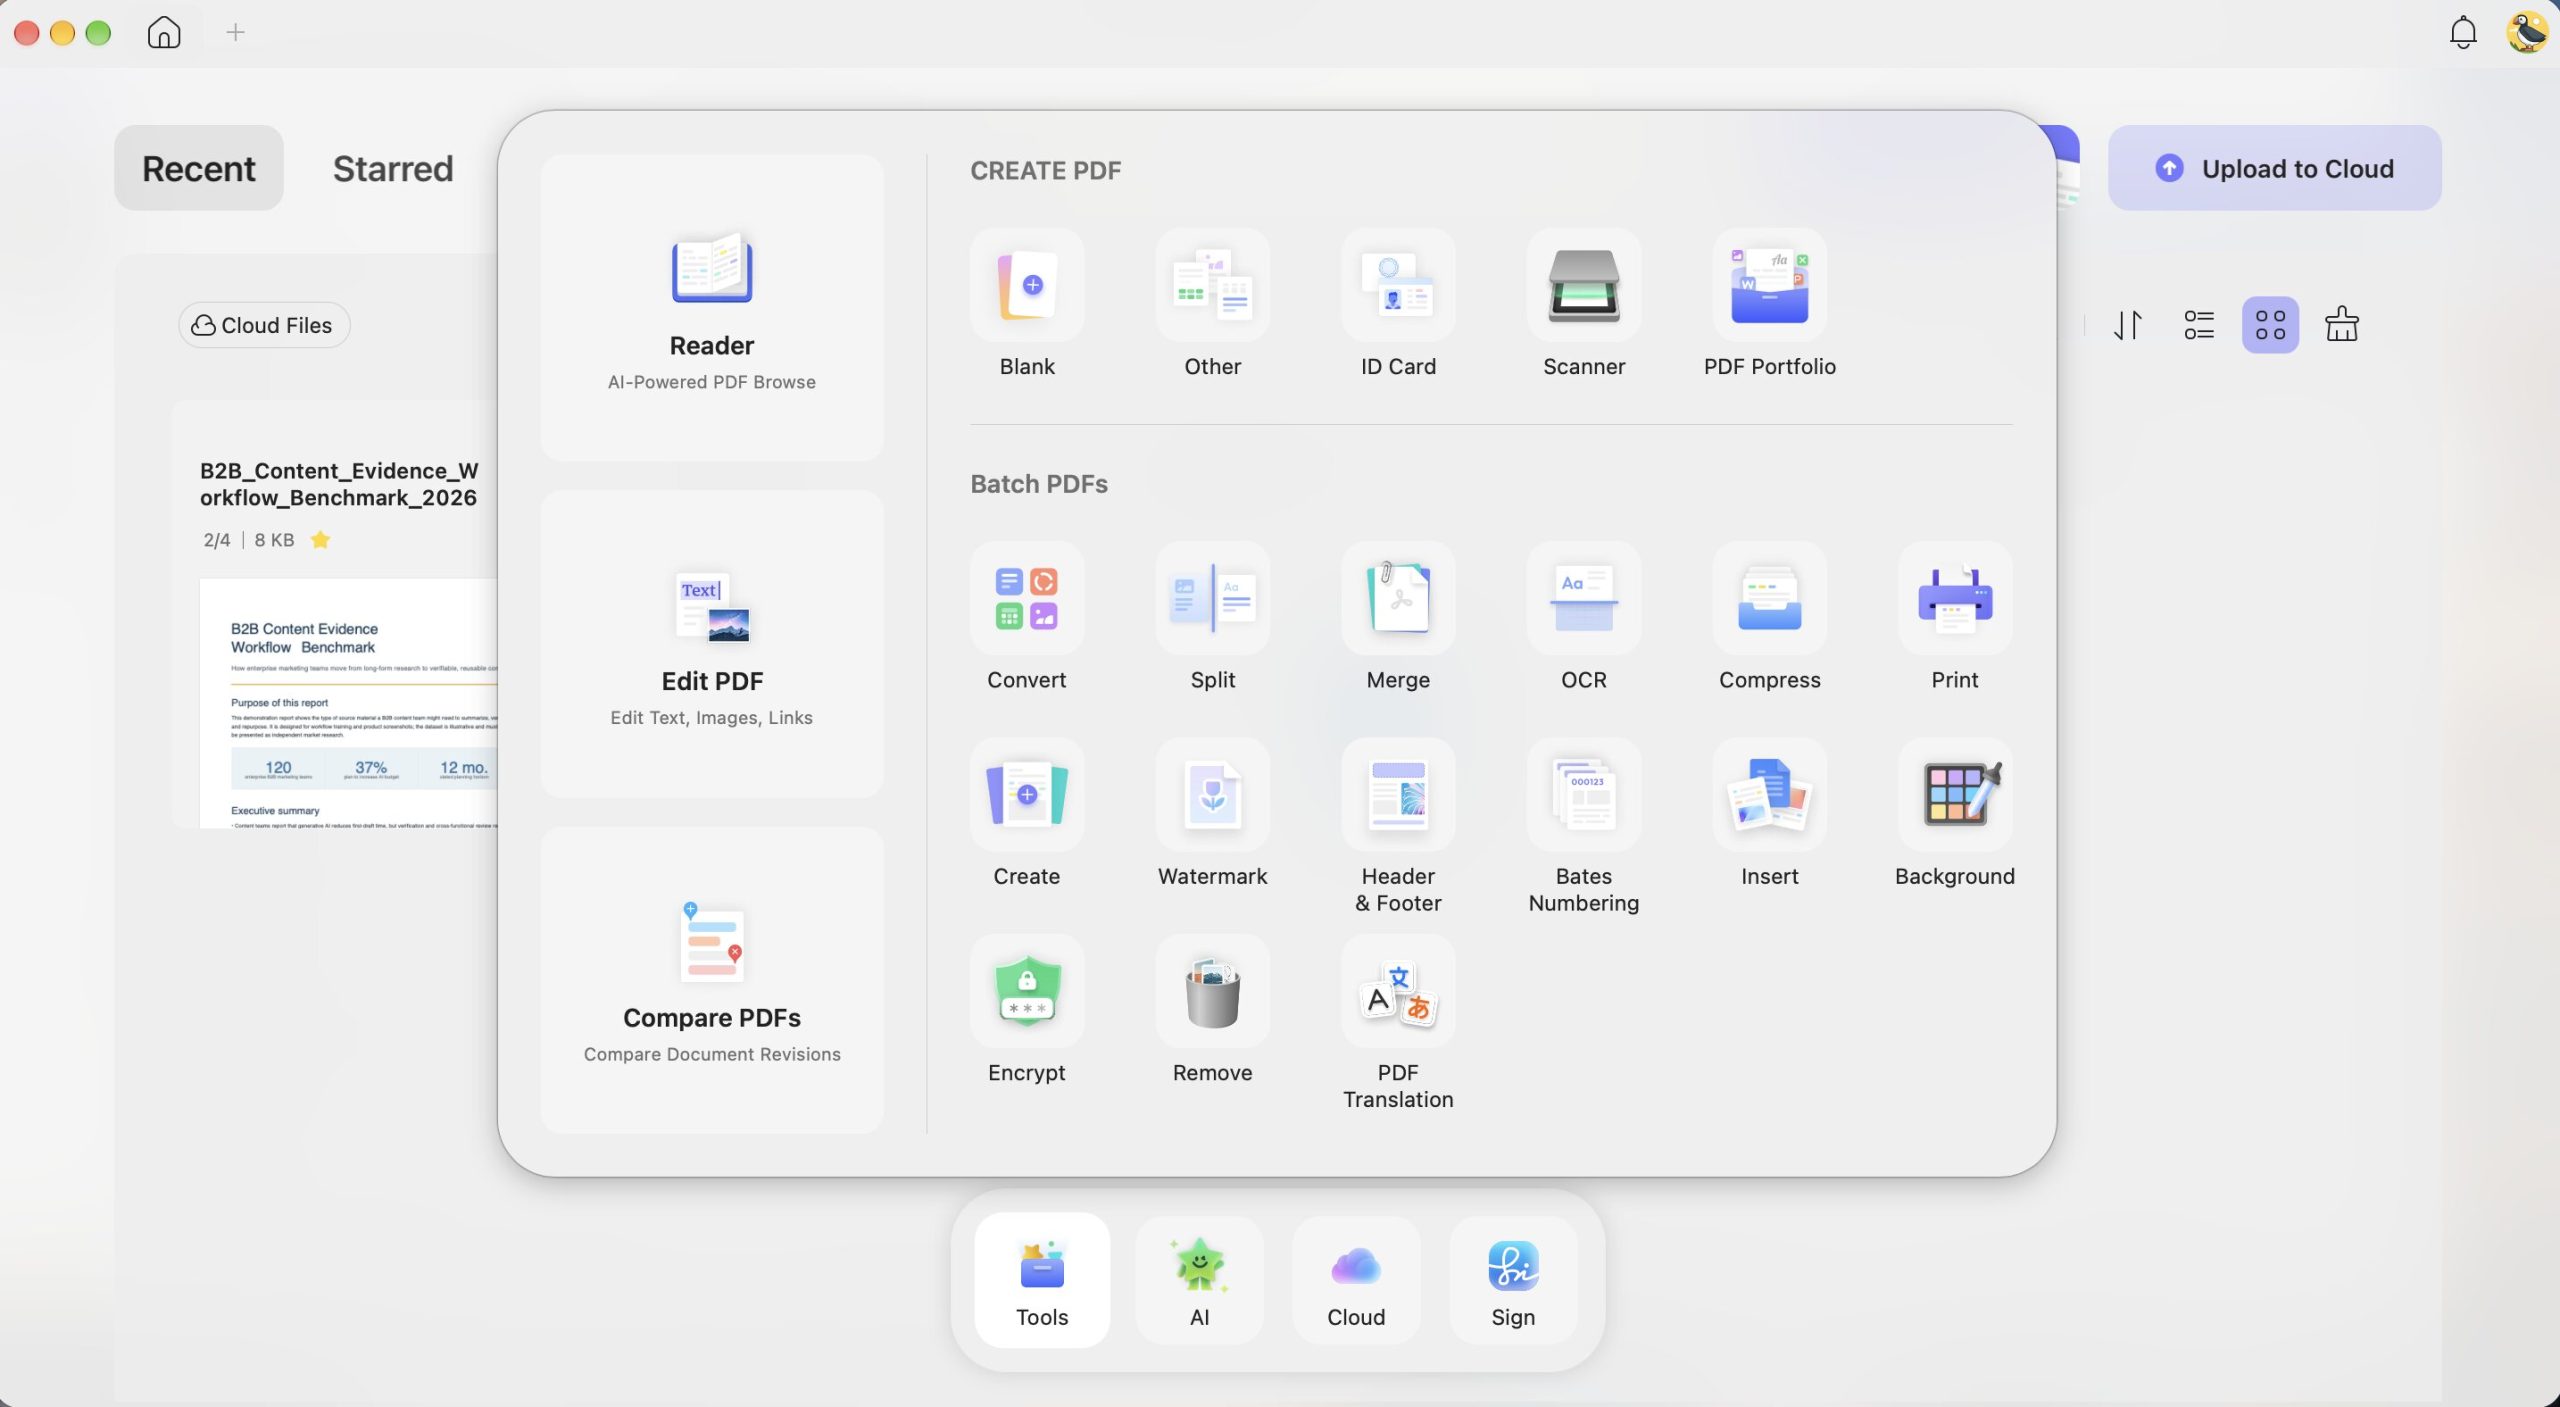
Reader: Utilizes smart AI for enhanced PDF reading.
Edit PDF: Features to edit text, images, and links in PDF.
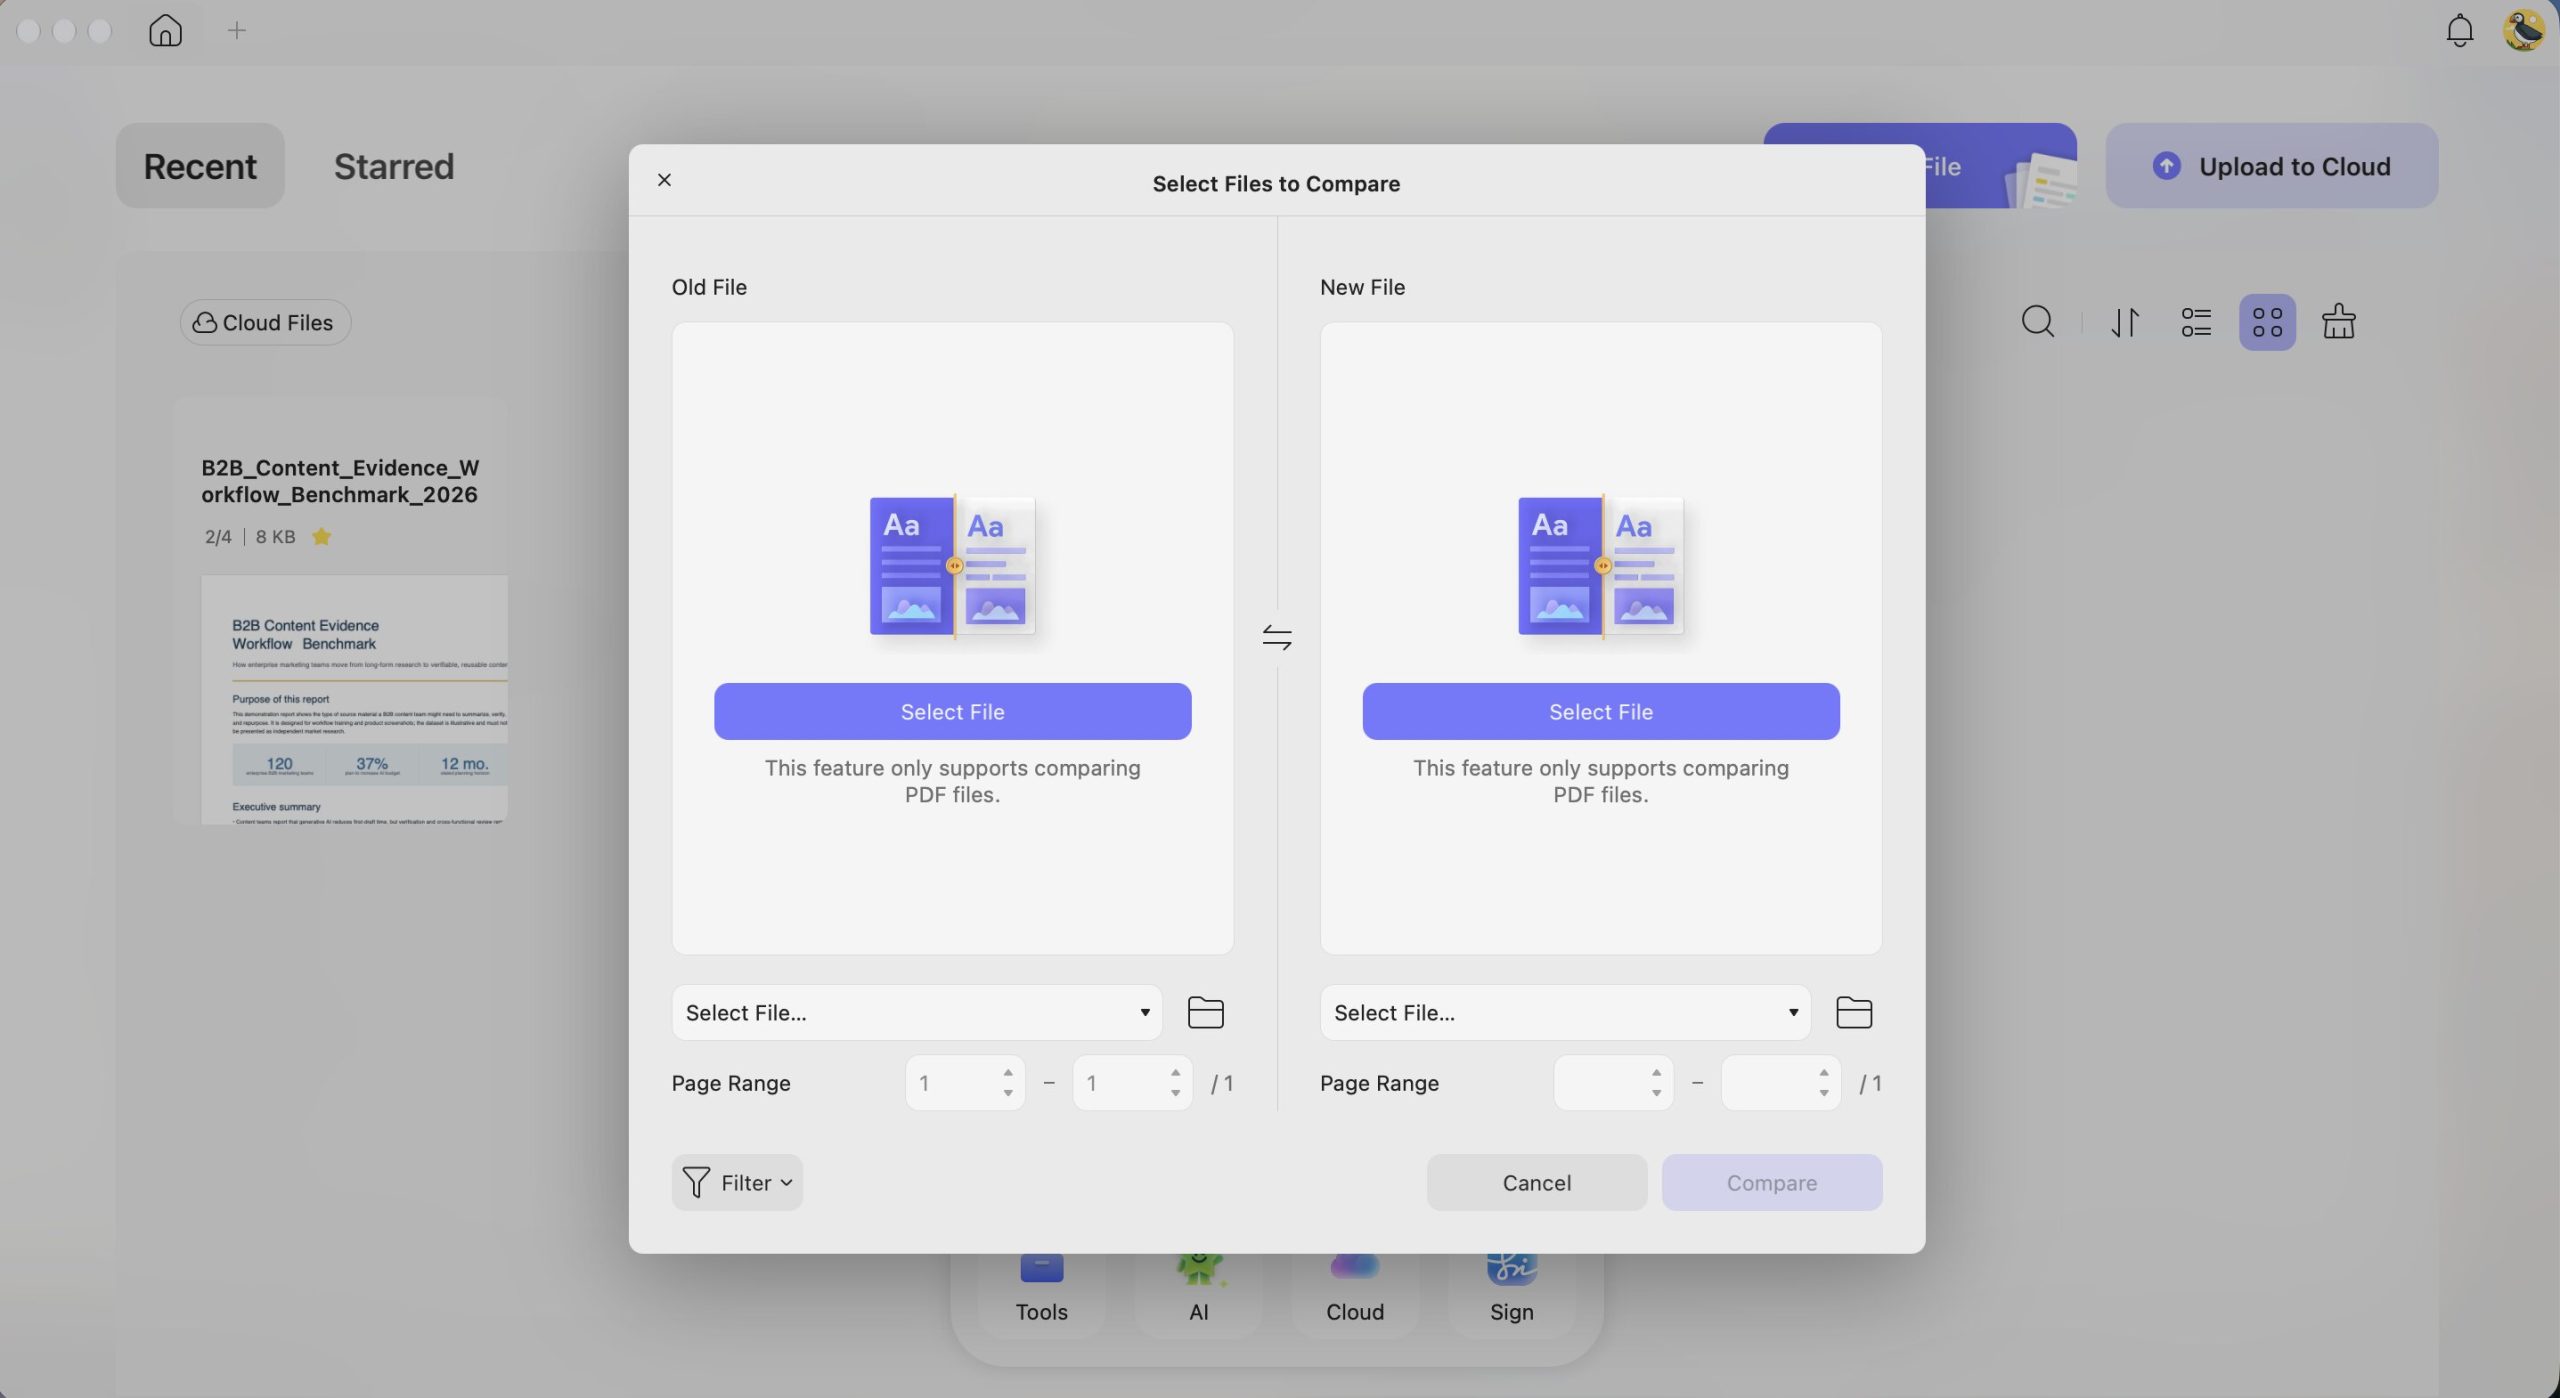
Compare: This option will help you compare two files to track changes.
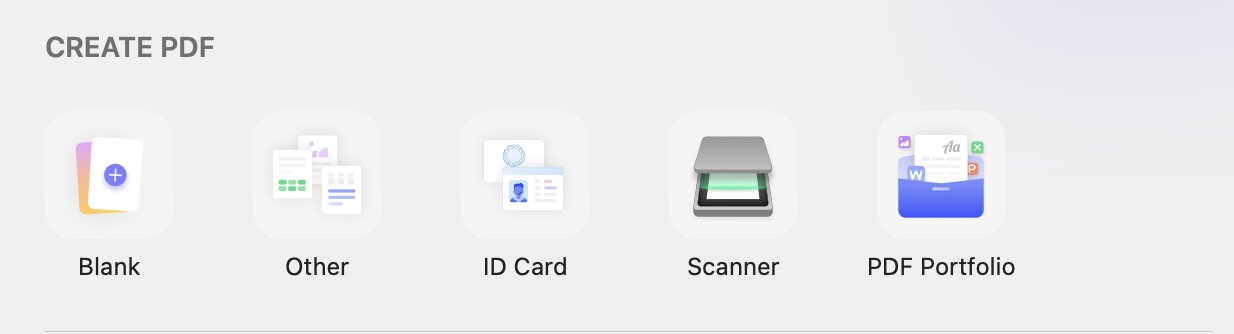
Create PDF: Options for a blank document, other document types (e.g. Excel, PPT, Word), ID card, and scanner.
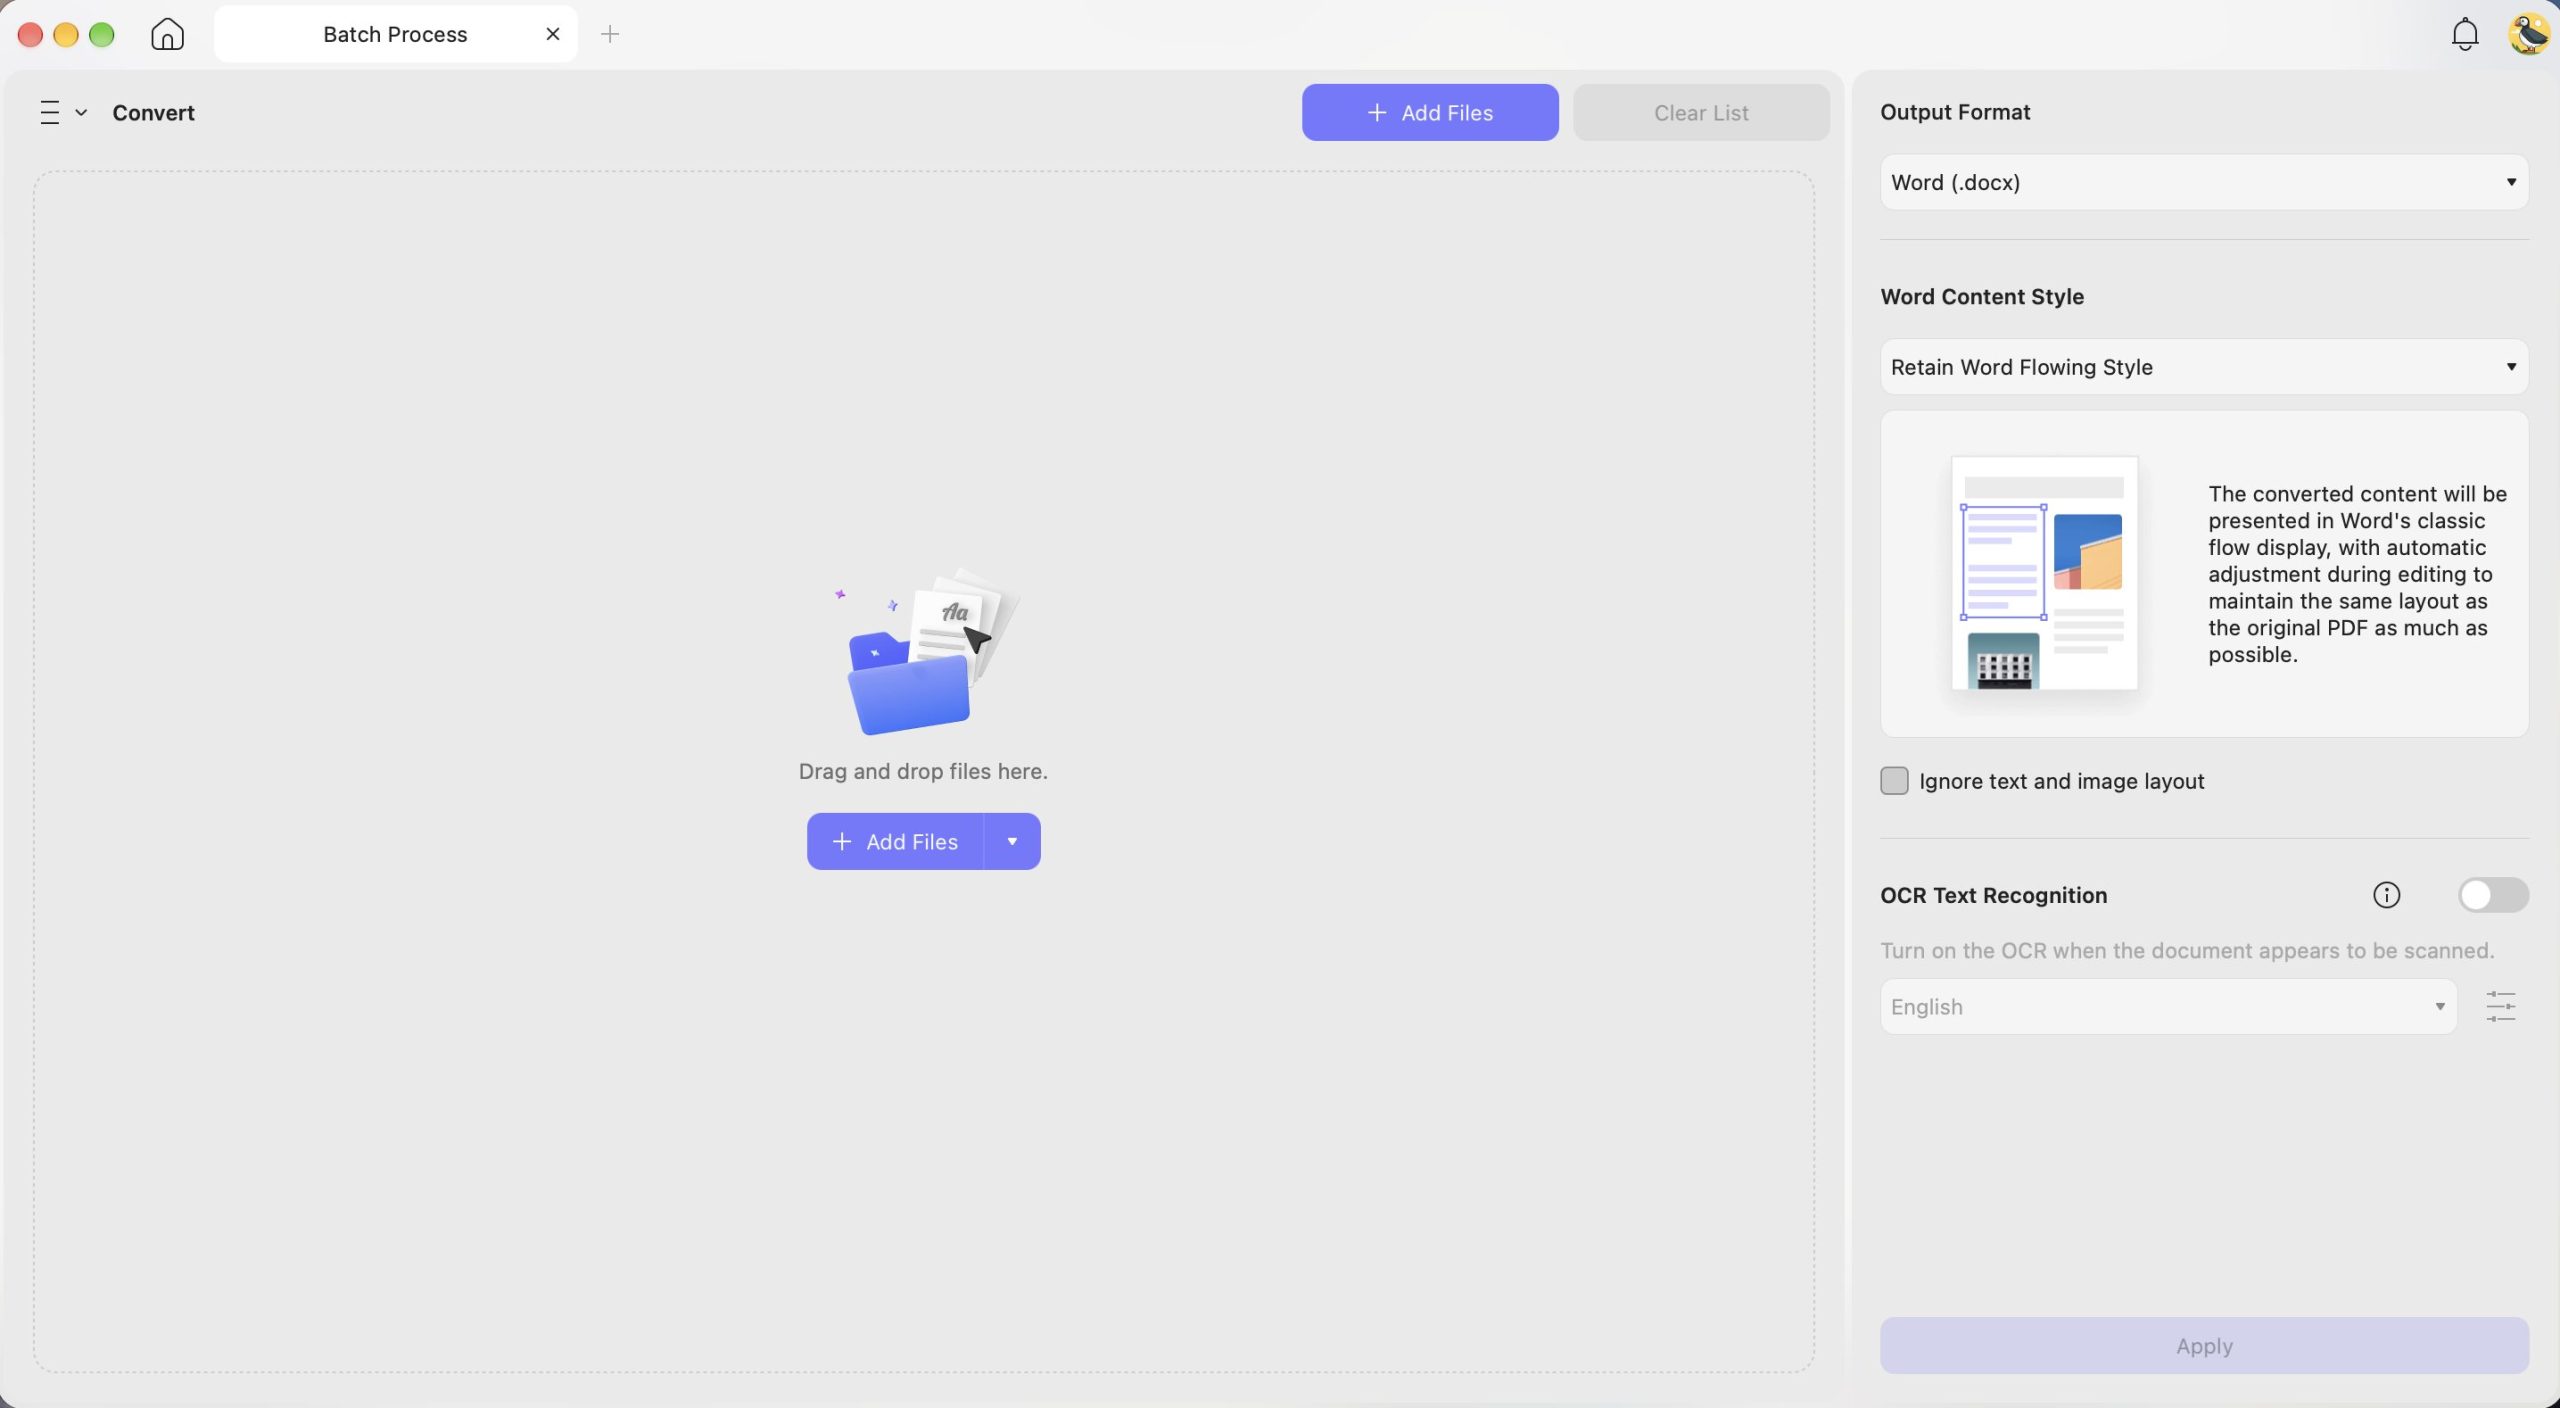
Convert: Convert PDF to Word, PPT, Excel, PNG, JPEG, HTML, PDF/A, etc. Change Word, Excel, PPT, Images, blank pages, Mac clipboard, etc. to PDF.
Merge: Merge multiple PDF documents or images into a single file.
OCR (Optical Character Recognition): OCR recognizes PDFs in 38 languages to easily convert scanned PDFs, paper docs, and images into searchable and editable PDFs.
Compress and print documents.
Add watermarks, headers & footers, bates numbering.
Insert: add a PDF file on multiple PDFs
Encrypt and remove documents.
Top Menu Toolbars
When you open the PDF, you can find the top menu with "UPDF", "File", "Edit", "View", "Go", "Tab", "Window", and "Help". We will also show you what they have and when to use them.
UPDF button: Here, you can get what version of your UPDF is, whether there is an update, settings, hide UPDF, quit UPDF, and more.
File button: In the file button, you can create a PDF, create a new tab, create a new window, open a file, open a recent one, close a tab, close a window, save a file if you edit one PDF, save as other, export PDF to other formats, batch process PDF, protect PDF, show the file in Finder, check the file properties, and print PDF.
Edit button: Use this button when you are in the "Edit PDF" mode and making some changes. Here, you can undo and redo changes. You can cut, copy, paste, delete, select all your content.
View button: In the View button, you can change the page display mode, zoom in/out, enter/exit full screen, play PDF as a slideshow, and go to feature sections like UPDF AI, PDF translation, and more.
Tools button: Here, you can rearrange, delete, or insert pages. "Crop Pages" and "Split Pages" enable trimming visible areas or dividing documents into separate files. Additionally, you can add watermarks, set backgrounds, and edit headers and footers. The "Compare Files" feature finds differences between documents, while "Batch" allows actions on multiple files simultaneously.
Go button: Here, you can go to the pages you need.
Tab button: You can show the next tab, and previous tab, and move the tab to a new window.
Window button: In the Window button, you can minimize, zoom, tile window, and more.
Help button: You can search for a specific feature of UPDF to find it quickly, buy UPDF pro, view your account, view the product page, read the user guide, overview Privacy Policy, etc.
Document Page Toolbars and Panels
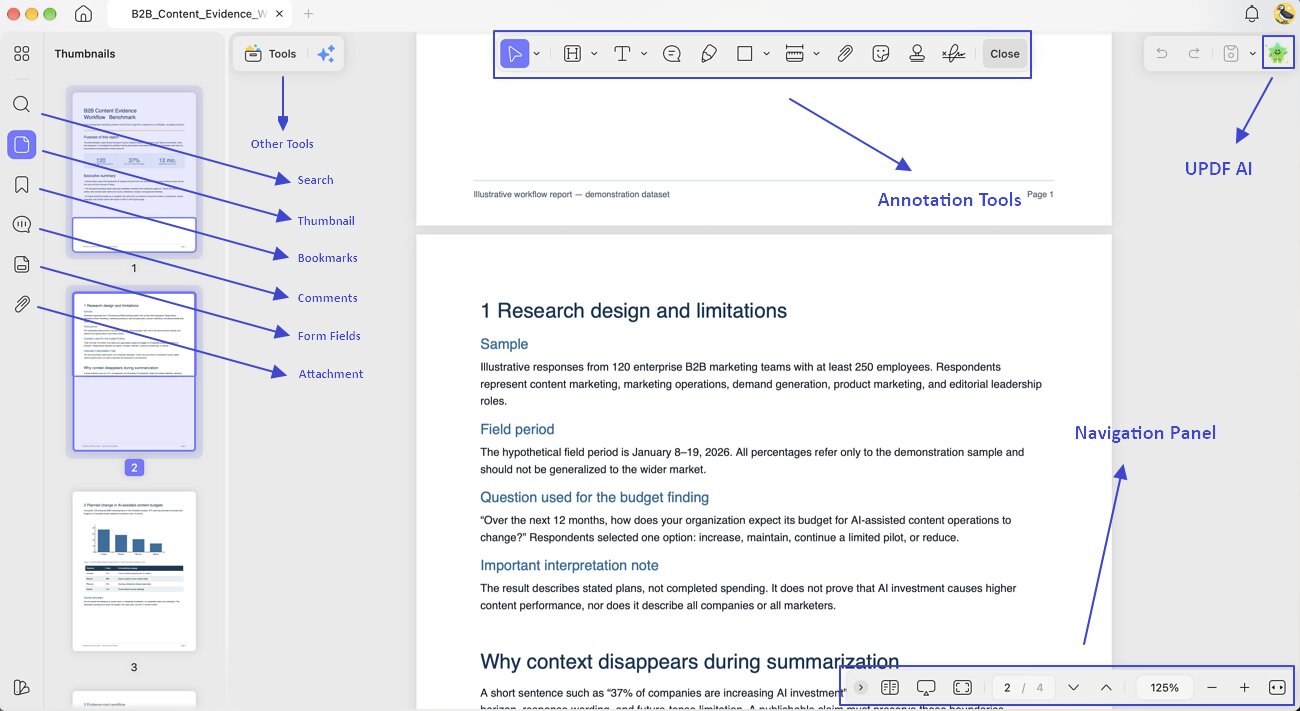
Left Main Menu: Once a document is open, you'll see a main toolbar at the left with the core features - Organize Pages, Search, Thumbnail, Bookmarks, Attachments, Comments, Form Fields.
Top Toolbar: It features different options depending on which tool you have accessed. By default, it features selection tool, highlight, text callout, sticky note, highlighter, rectangle, area tool, attach file, stickers, stamps, signature buttons.
Navigation Panel: At the bottom of the document, you can see a navigation panel with zoom controls, view settings, slideshow, full screen, and more.
Quick Access Toolbar: Click UPDF AI icon to open the panel to chat with PDF and ask AI anything. And when you click on the save icon, you can reveal a detailed drop-down menu relevant to file saving. Redo and undo buttons are also featured in this toolbar.
Customize Mode Toolbar
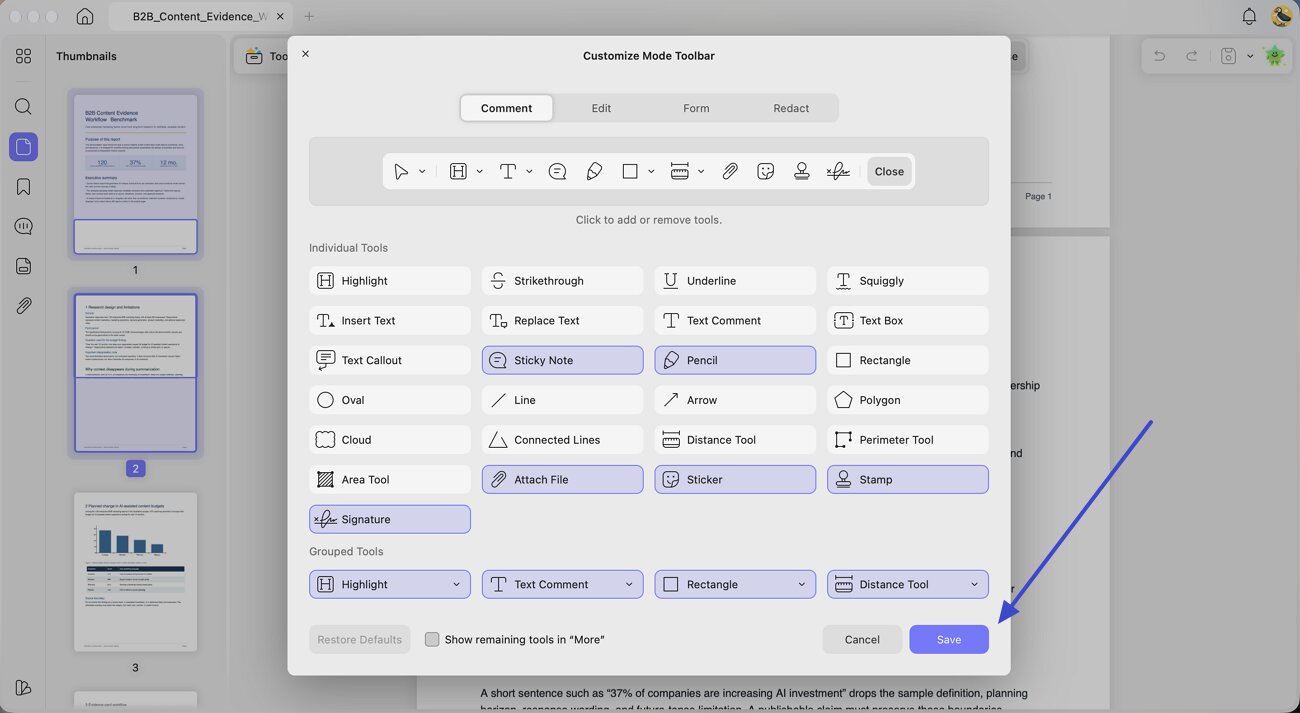
UPDF for Mac lets you customize the Mode Toolbar so the tools you use most often remain easy to access. Because each work mode has its own toolbar, you can create a different layout for commenting, editing, creating forms, and redacting content. Follow the steps below to configure it:
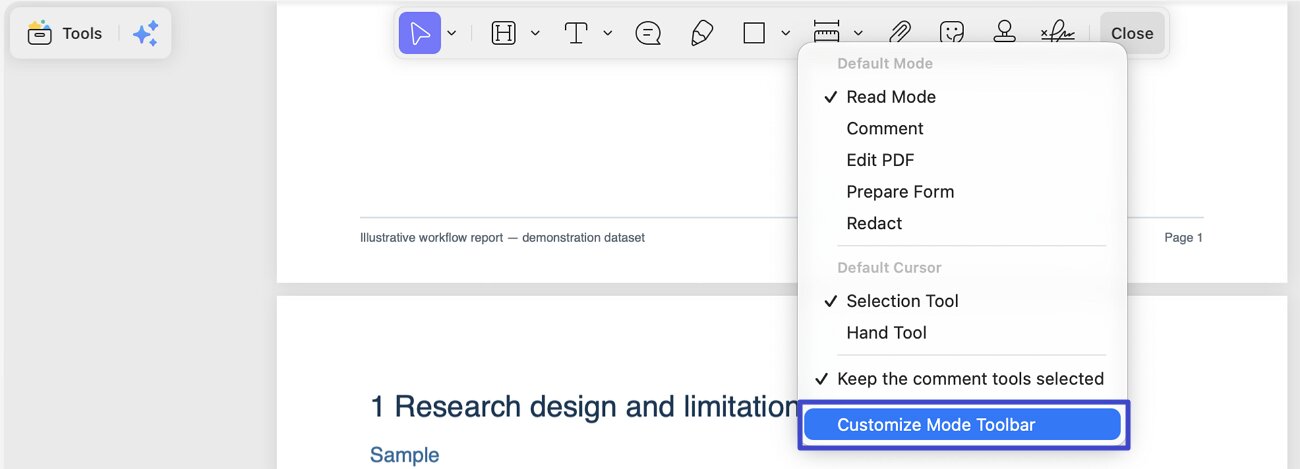
Step 1. Open the toolbar customization window. Switch to a mode such as “Edit” or “Comment.” Then, double-click the top toolbar and select “Customize Mode Toolbar” from the menu.
Step 2. Select the mode you want to customize. At the top of the “Customize Mode Toolbar” window, switch between Comment, Edit, Form, and Redact. Each mode has its own toolbar, so changes made under one tab do not automatically change the others.
Step 3. Add or remove individual tools. In the “Individual Tools” section, click a tool to toggle whether it appears in the toolbar for the selected mode. Selected tools are highlighted, making it easy to confirm which commands will remain visible. You can keep frequently used tools—such as Highlight, Text Comment, Rectangle, Arrow, Attachment, or Signature—on the toolbar and remove less frequently used ones to reduce clutter.
Step 4. Configure grouped tools. The “Grouped Tools” section lets you place related commands in a drop-down group instead of displaying every command separately. Open a group menu and choose the tool that should appear as the group’s default. The other tools in that group will remain available from the arrow beside the selected tool, helping you save toolbar space without losing access to them.
Step 5. Review and save the layout. Check the preview toolbar near the top of the window to make sure the selected tools are displayed as expected, then click “Save” to apply the new layout. UPDF remembers your customized toolbar after you close and reopen the application. To return to the original arrangement, reopen the customization window and click “Restore Defaults.” Click “Cancel” if you want to close the window without applying the current changes.