 UPDF for Windows
 UPDF for Mac
 UPDF for iPhone/iPad
 UPDF for Android
 UPDF AI Online
 UPDF Sign
 Edit PDF
 Annotate PDF
 Create PDF
 PDF Form
 Edit links
 Convert PDF
 OCR
OCR PDF to Word
 PDF to Image
 PDF to Excel
 Organize PDF
 Merge PDF
 Split PDF
 Crop PDF
 Rotate PDF
 Protect PDF
 Sign PDF
 Redact PDF
 Sanitize PDF
 Remove Security
 Read PDF
 UPDF Cloud
 Compress PDF
 Print PDF
 Batch Process
 About UPDF AI
 UPDF AI Solutions
 AI User Guide
 FAQ about UPDF AI
 Summarize PDF
 Translate PDF
 Chat with PDF
 Chat with AI
 Chat with image
 PDF to Mind Map
 Explain PDF
 PDF AI Tools
 Image AI Tools
 AI Chat Tools
 AI Writing Tools
 AI Study Tools
 AI Working Tools
 Other AI Tools
 AI Bookmark Generation
 AI Bookmark Summary
 AI Watermark Generation
 AI Background Generation
 AI Sticker Generation
 AI Stamp Generation
 AI Editing Suite
 UPDF Copilot
 AI Page Management
 AI Semantic Search
 PDF to Word
 PDF to Excel
 PDF to PowerPoint
 User Guide
 UPDF Tricks
 FAQs
FAQs UPDF Reviews
 Download Center
 Blog
Blog Newsroom
 Tech Spec
 Updates
 UPDF vs. Adobe Acrobat
 UPDF vs. Foxit
 UPDF vs. PDF Expert
Add, Edit, and Remove Watermark in PDF
Watermarks are essential in defining the ownership of the PDF document. Here are the steps to add and edit watermark in PDF with UPDF on Mac.
For a step-by-step video guide, check out this YouTube video that shows how to add watermark in PDF using UPDF.
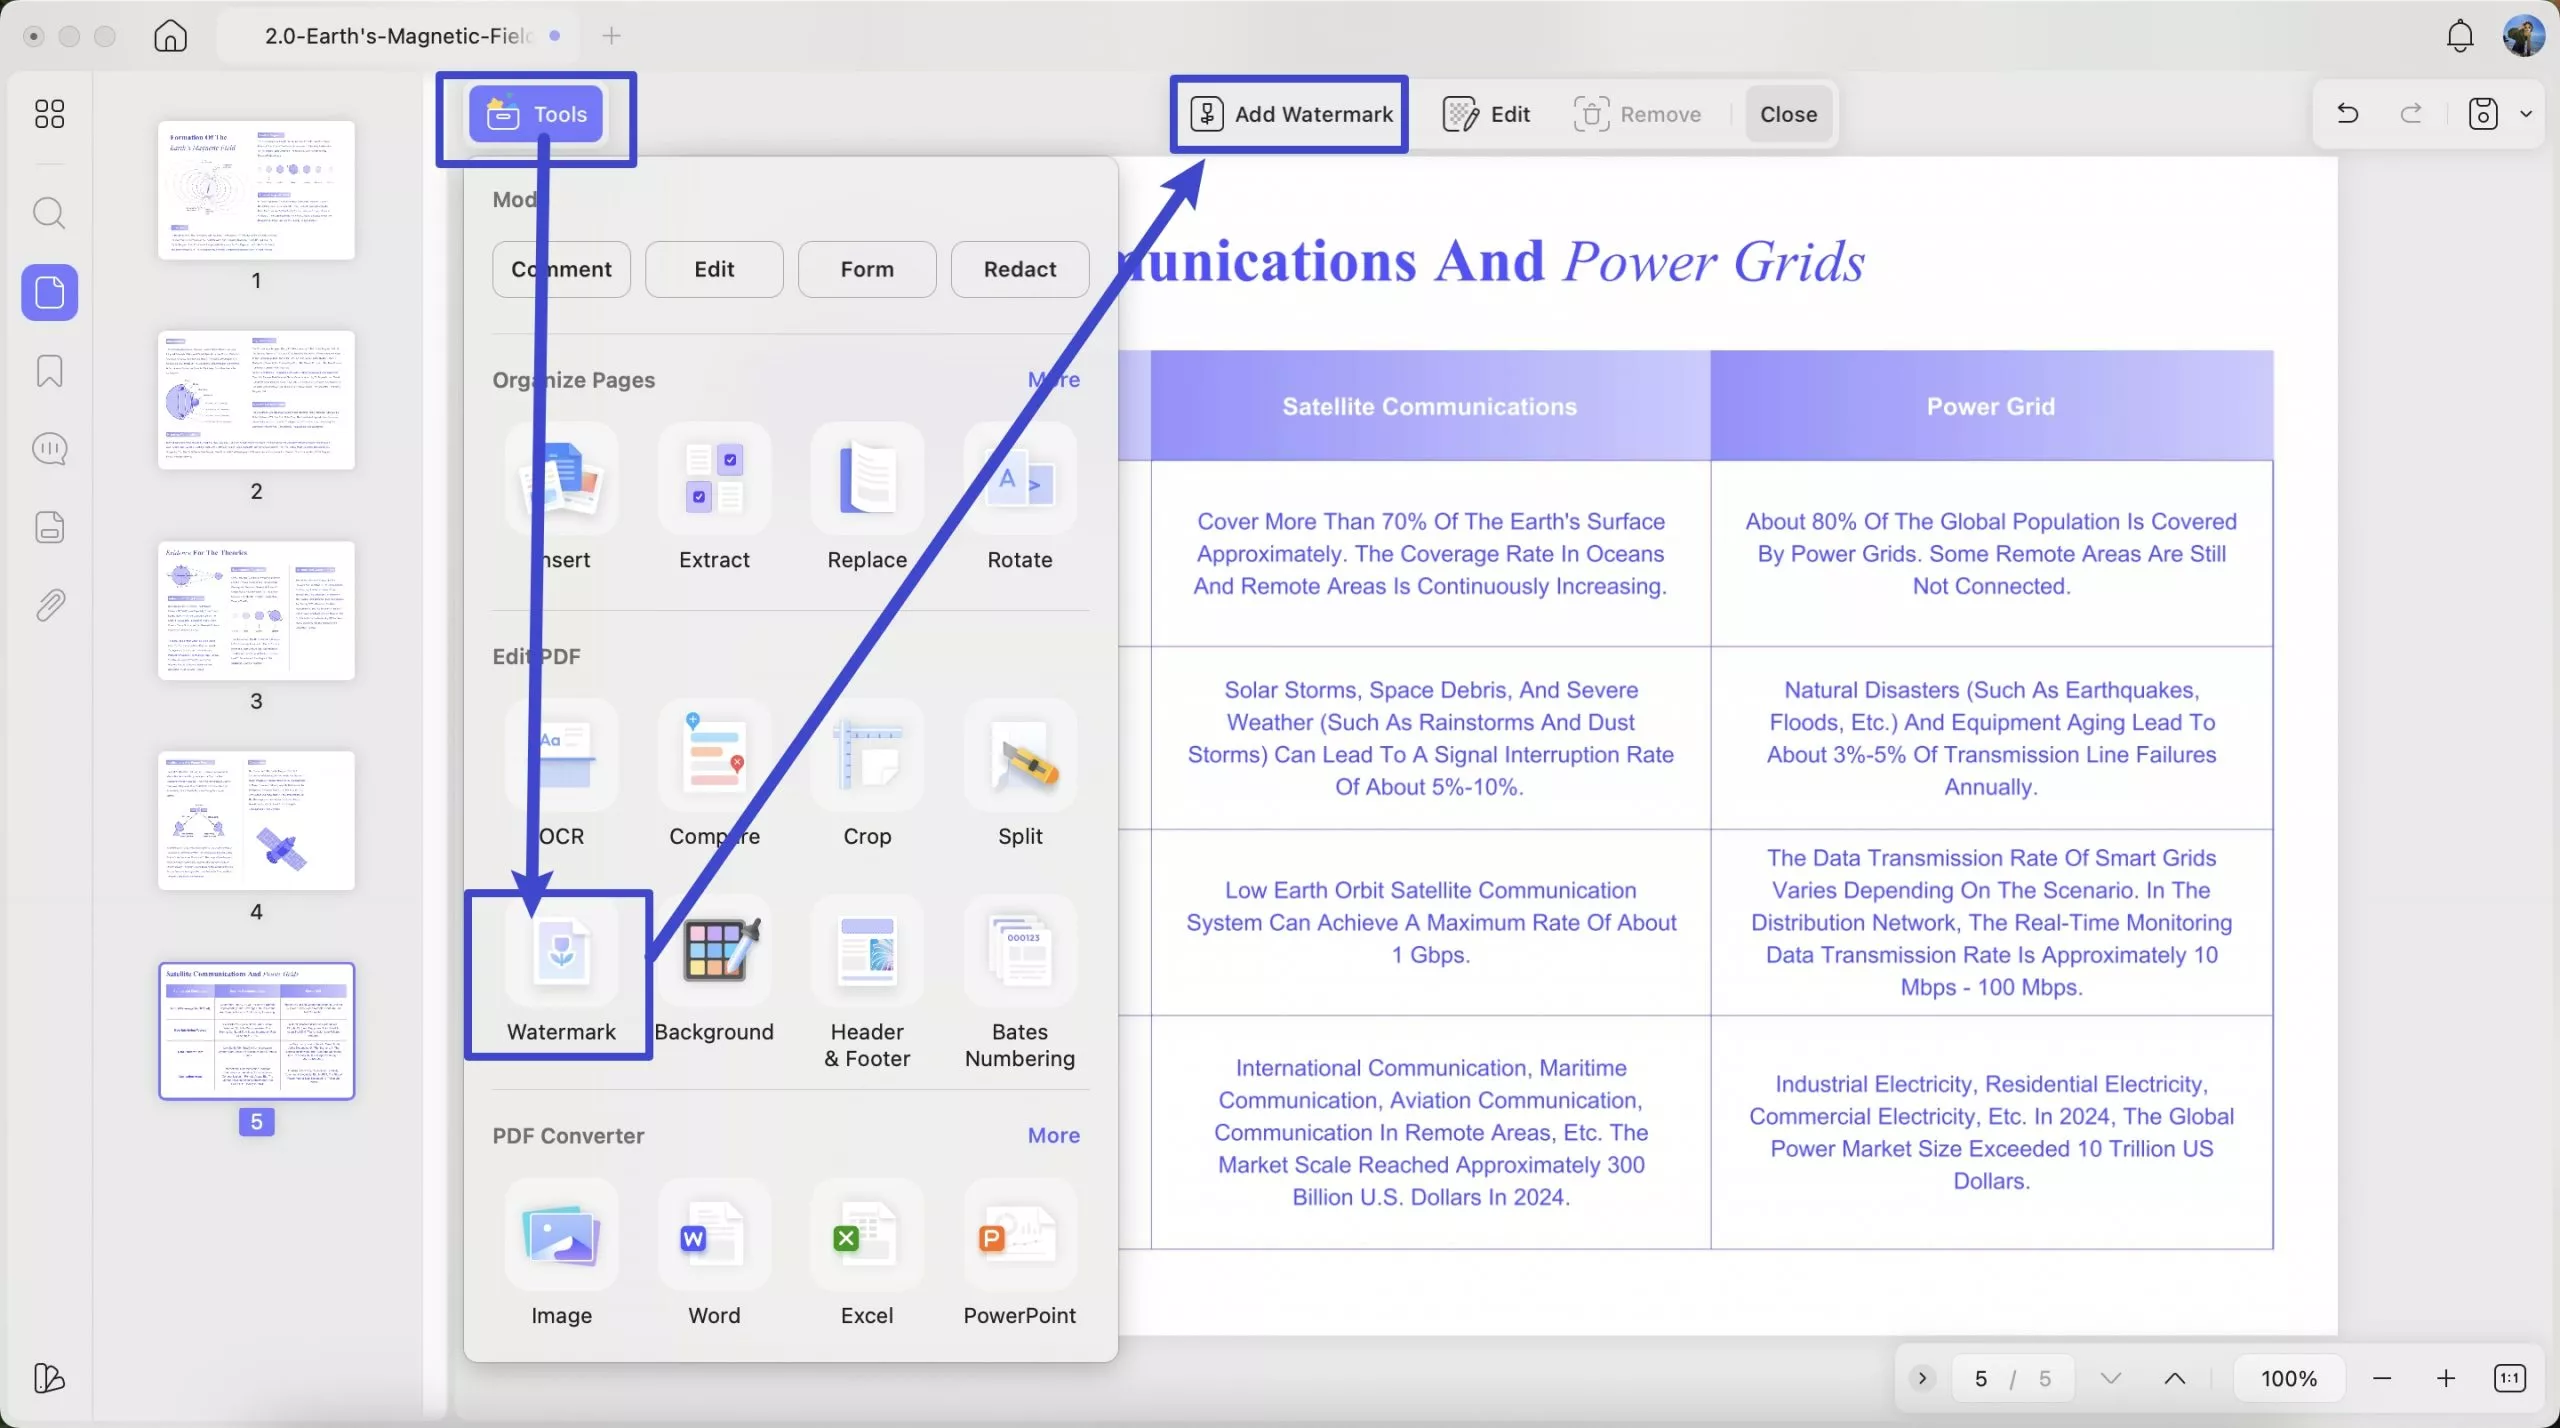
Add Watermark
You need to click on the Tools button and select "Watermark" > "Add Watermark".
Now, choose "Preset" watermarks or "Starred" ones according to add text/file (Image/PDF) watermark. You can also create one by clicking the "Create" button.
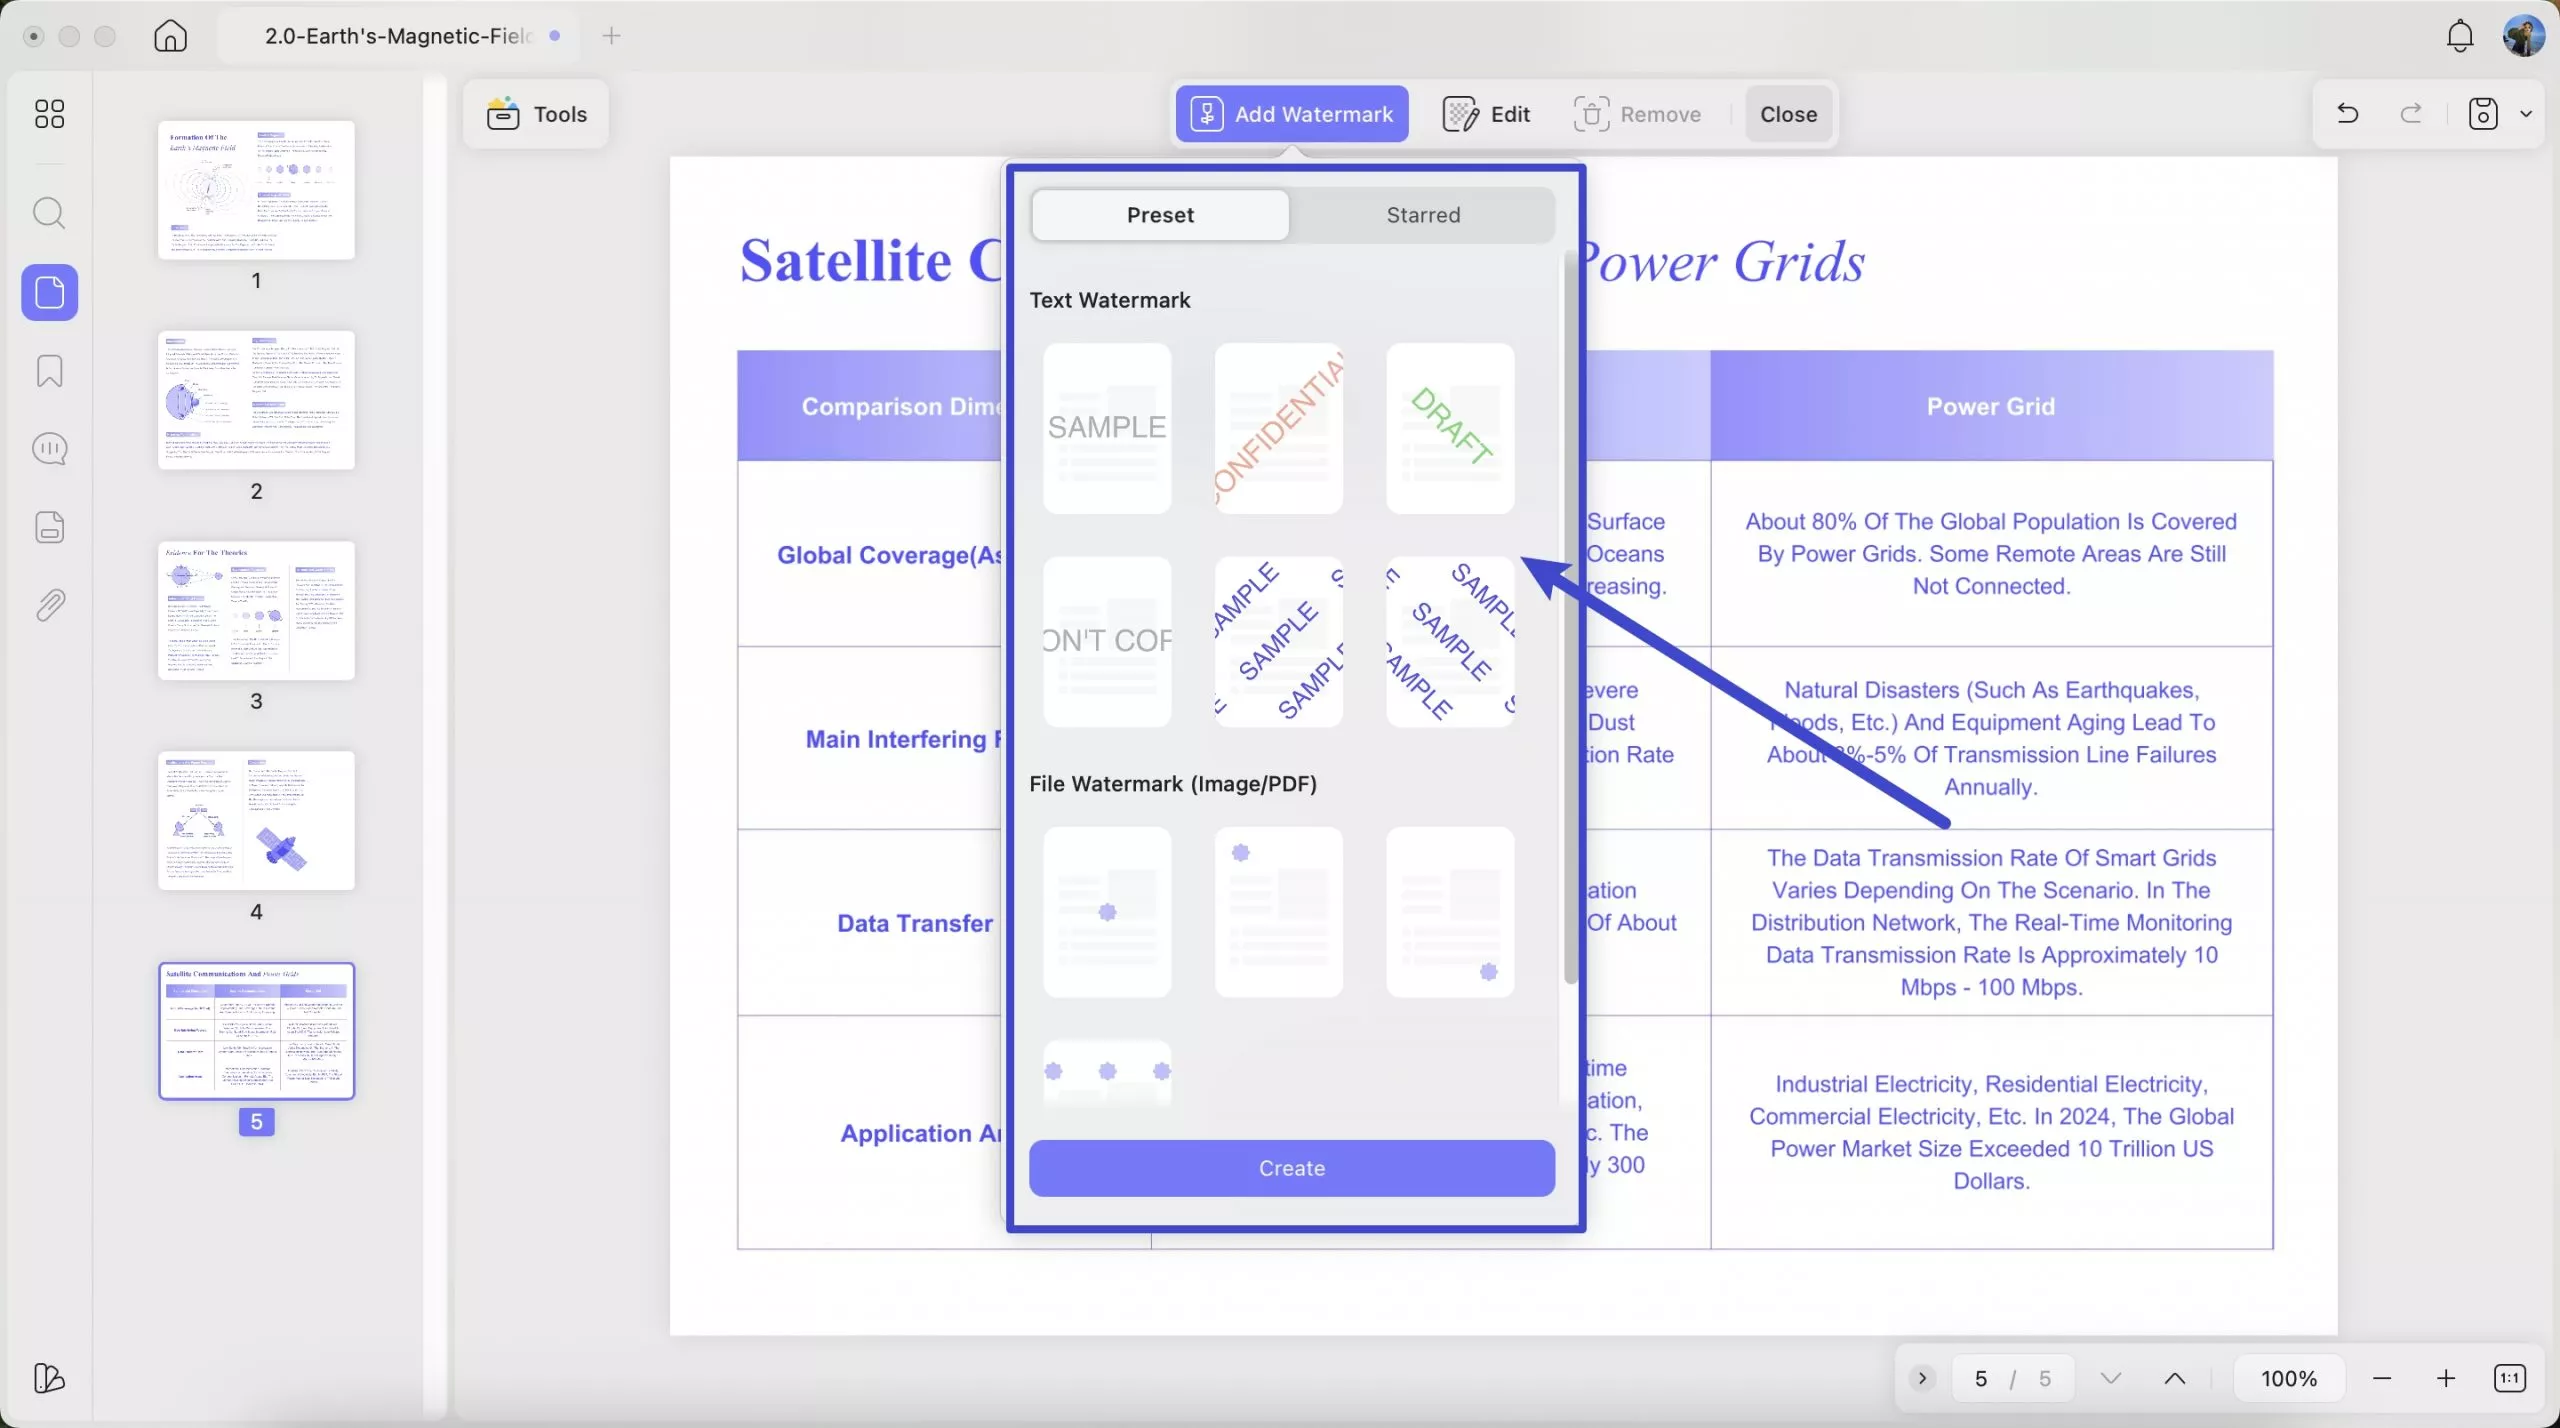
Now, if you select text watermark, add text in the Content box, set font color, font style, alignment, and underline it, if needed. You can also choose the Ratio, Opacity, Page Ranges of the watermark across the document.
The page range can be custom, and you can also select an option from the dropdown menu. You get multiple options, like all pages in your custom range, just odd or just even pages, etc.

Click "Done” to save the new watermark and add it to the selected page range.
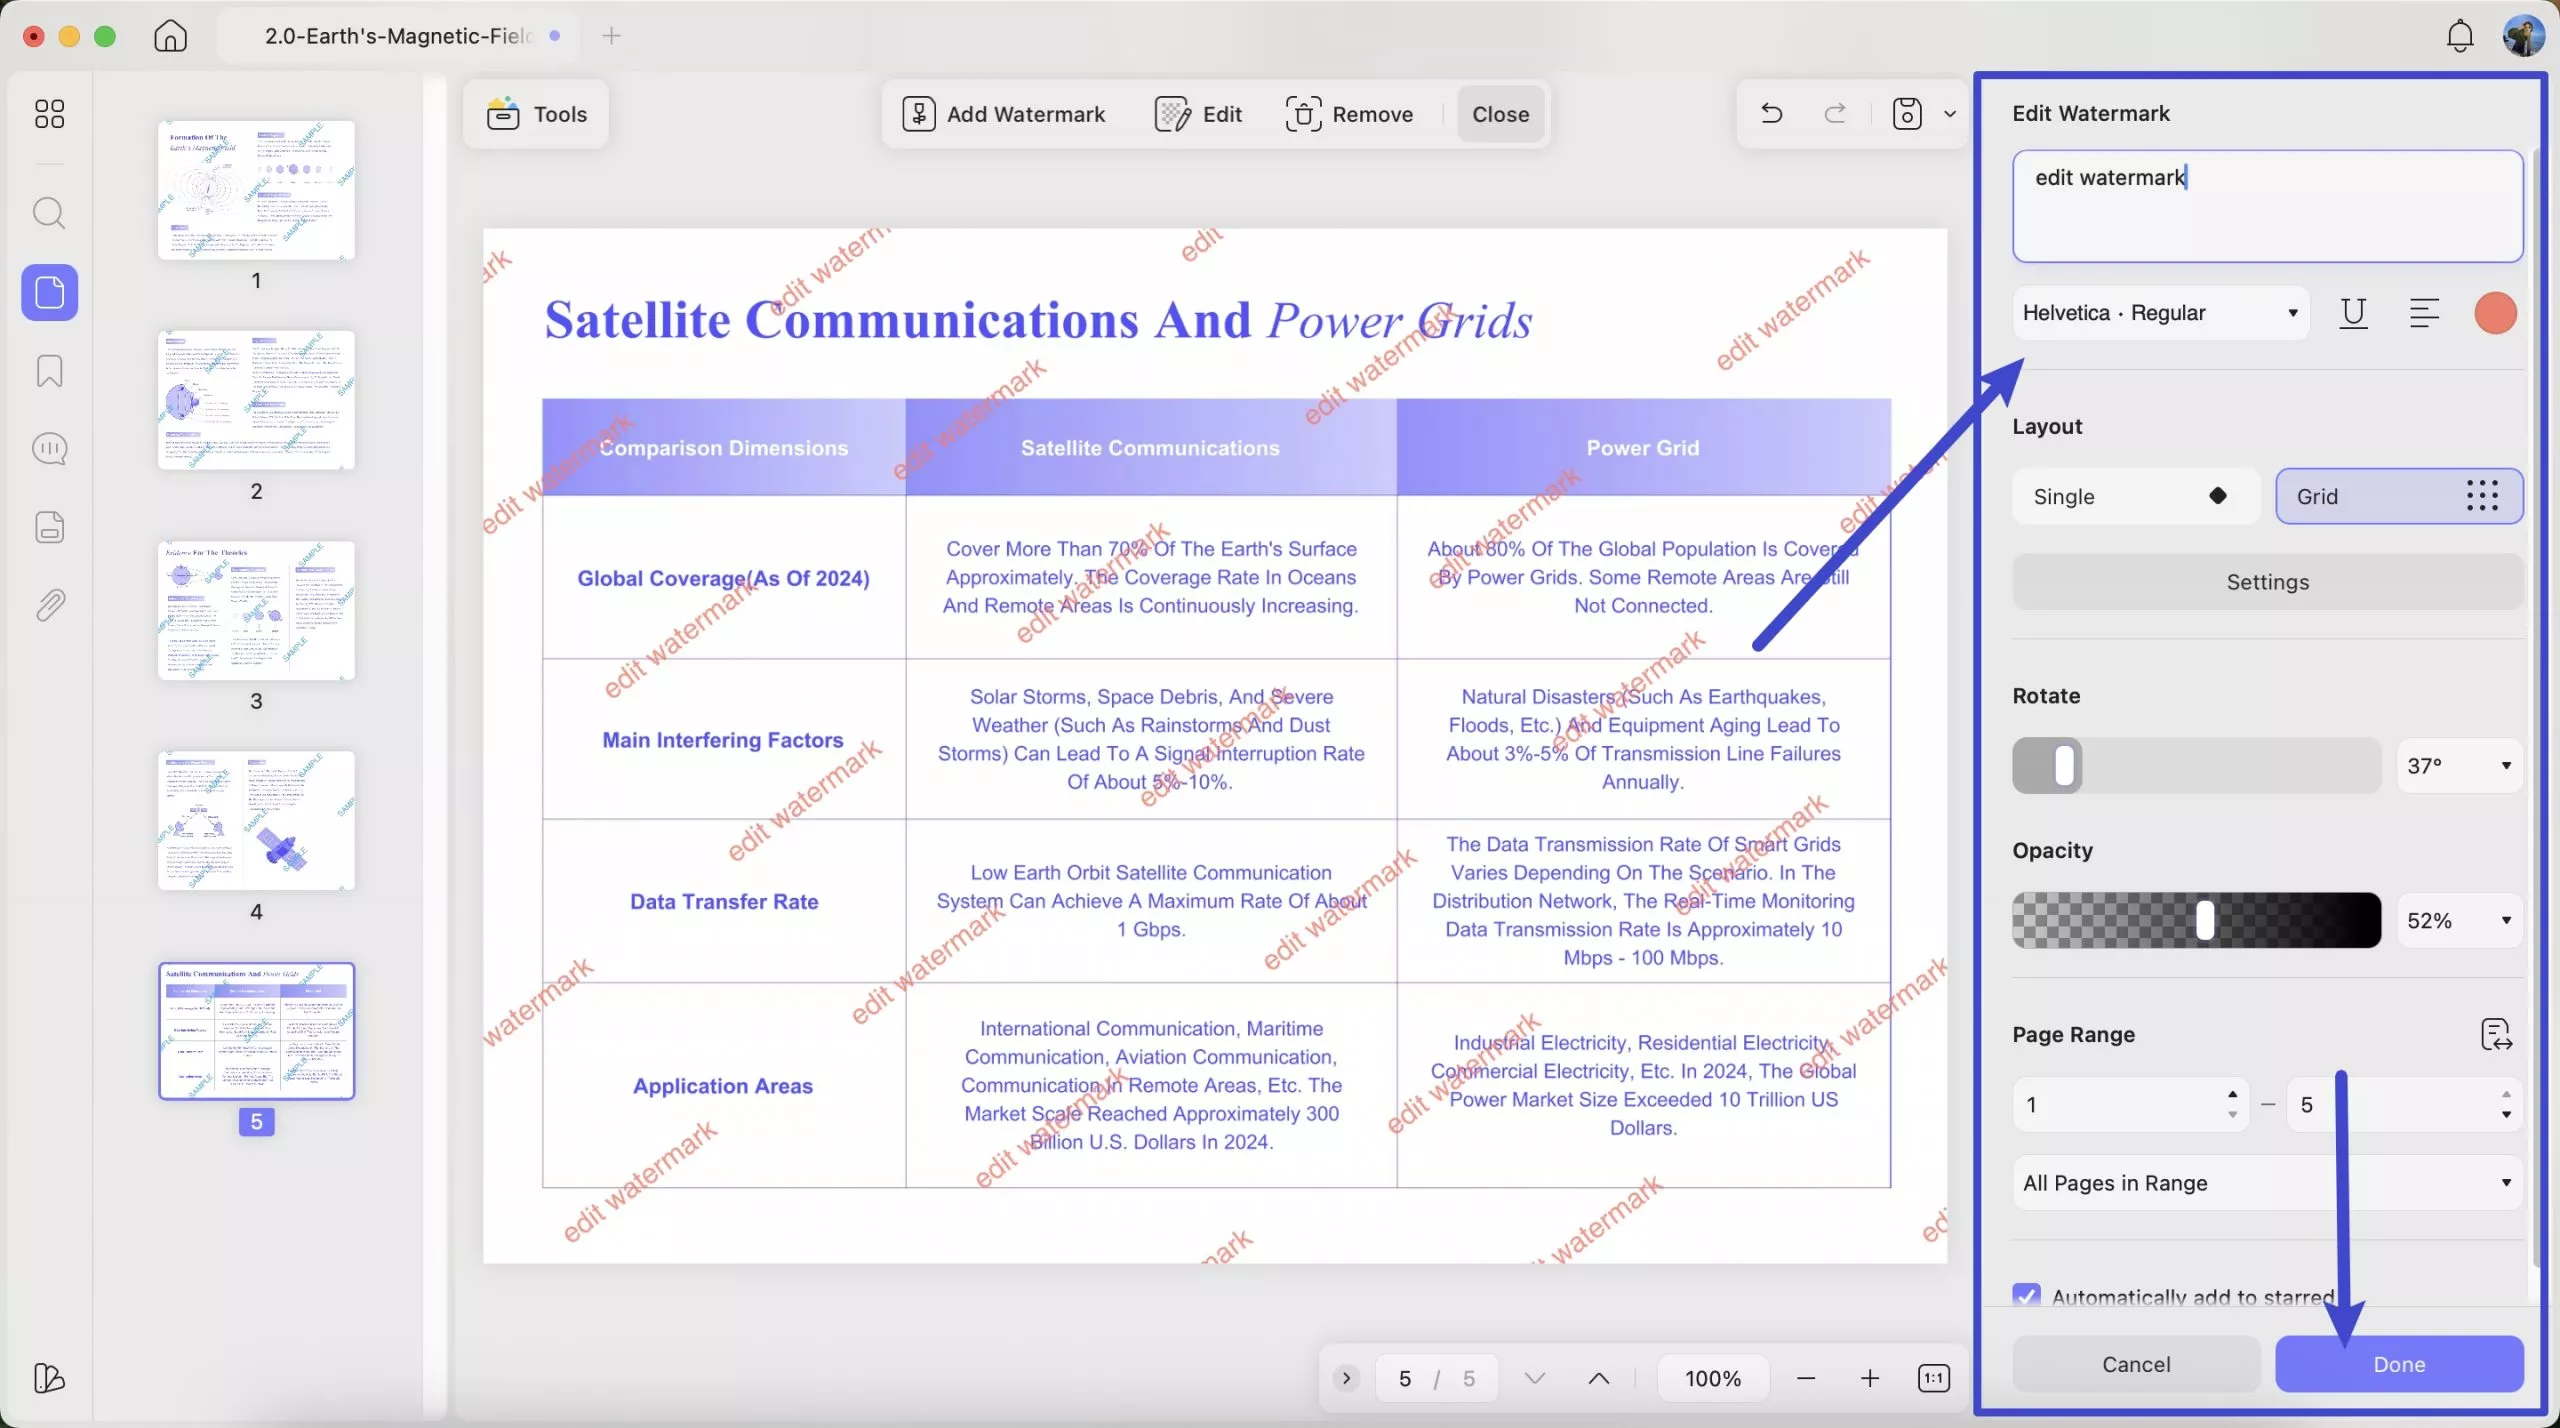
Edit Watermark
To edit a watermark, find the created watermark in the right column. Hover your cursor to the watermark and click on the "Edit Watermark" icon.
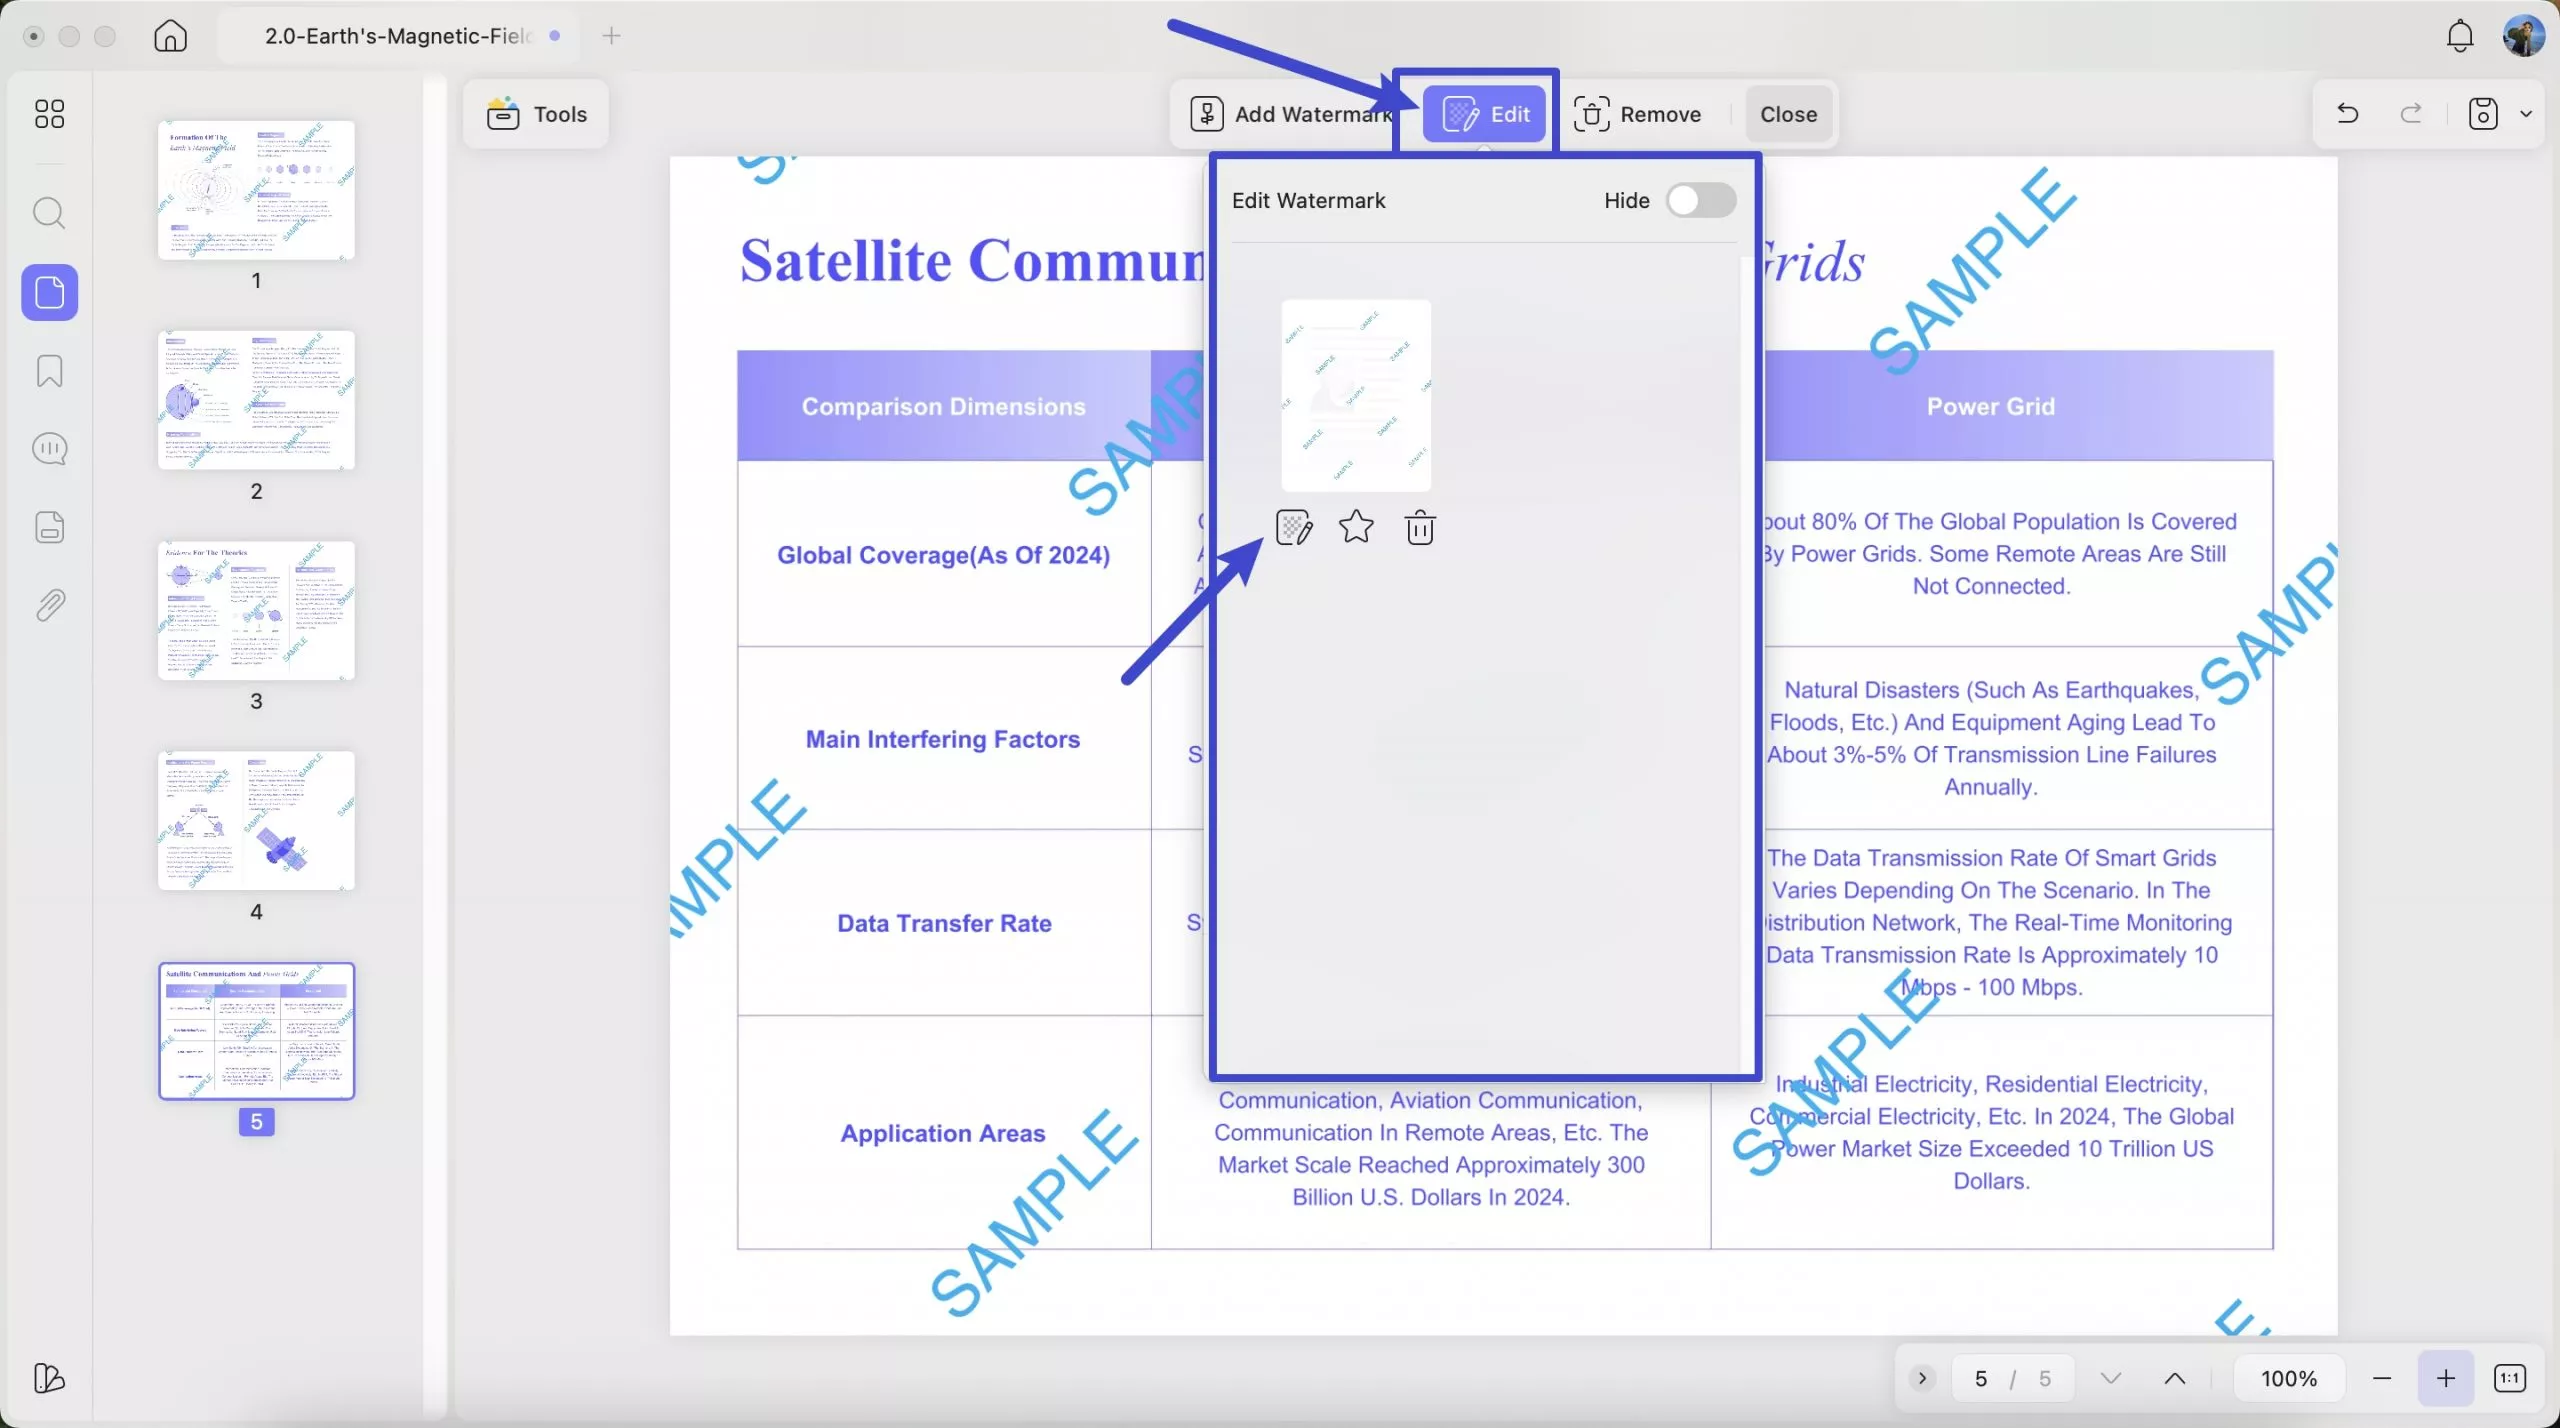
With the editing panel opened across the right-handed column, set all parameters to be edited. Click "Done" once done.
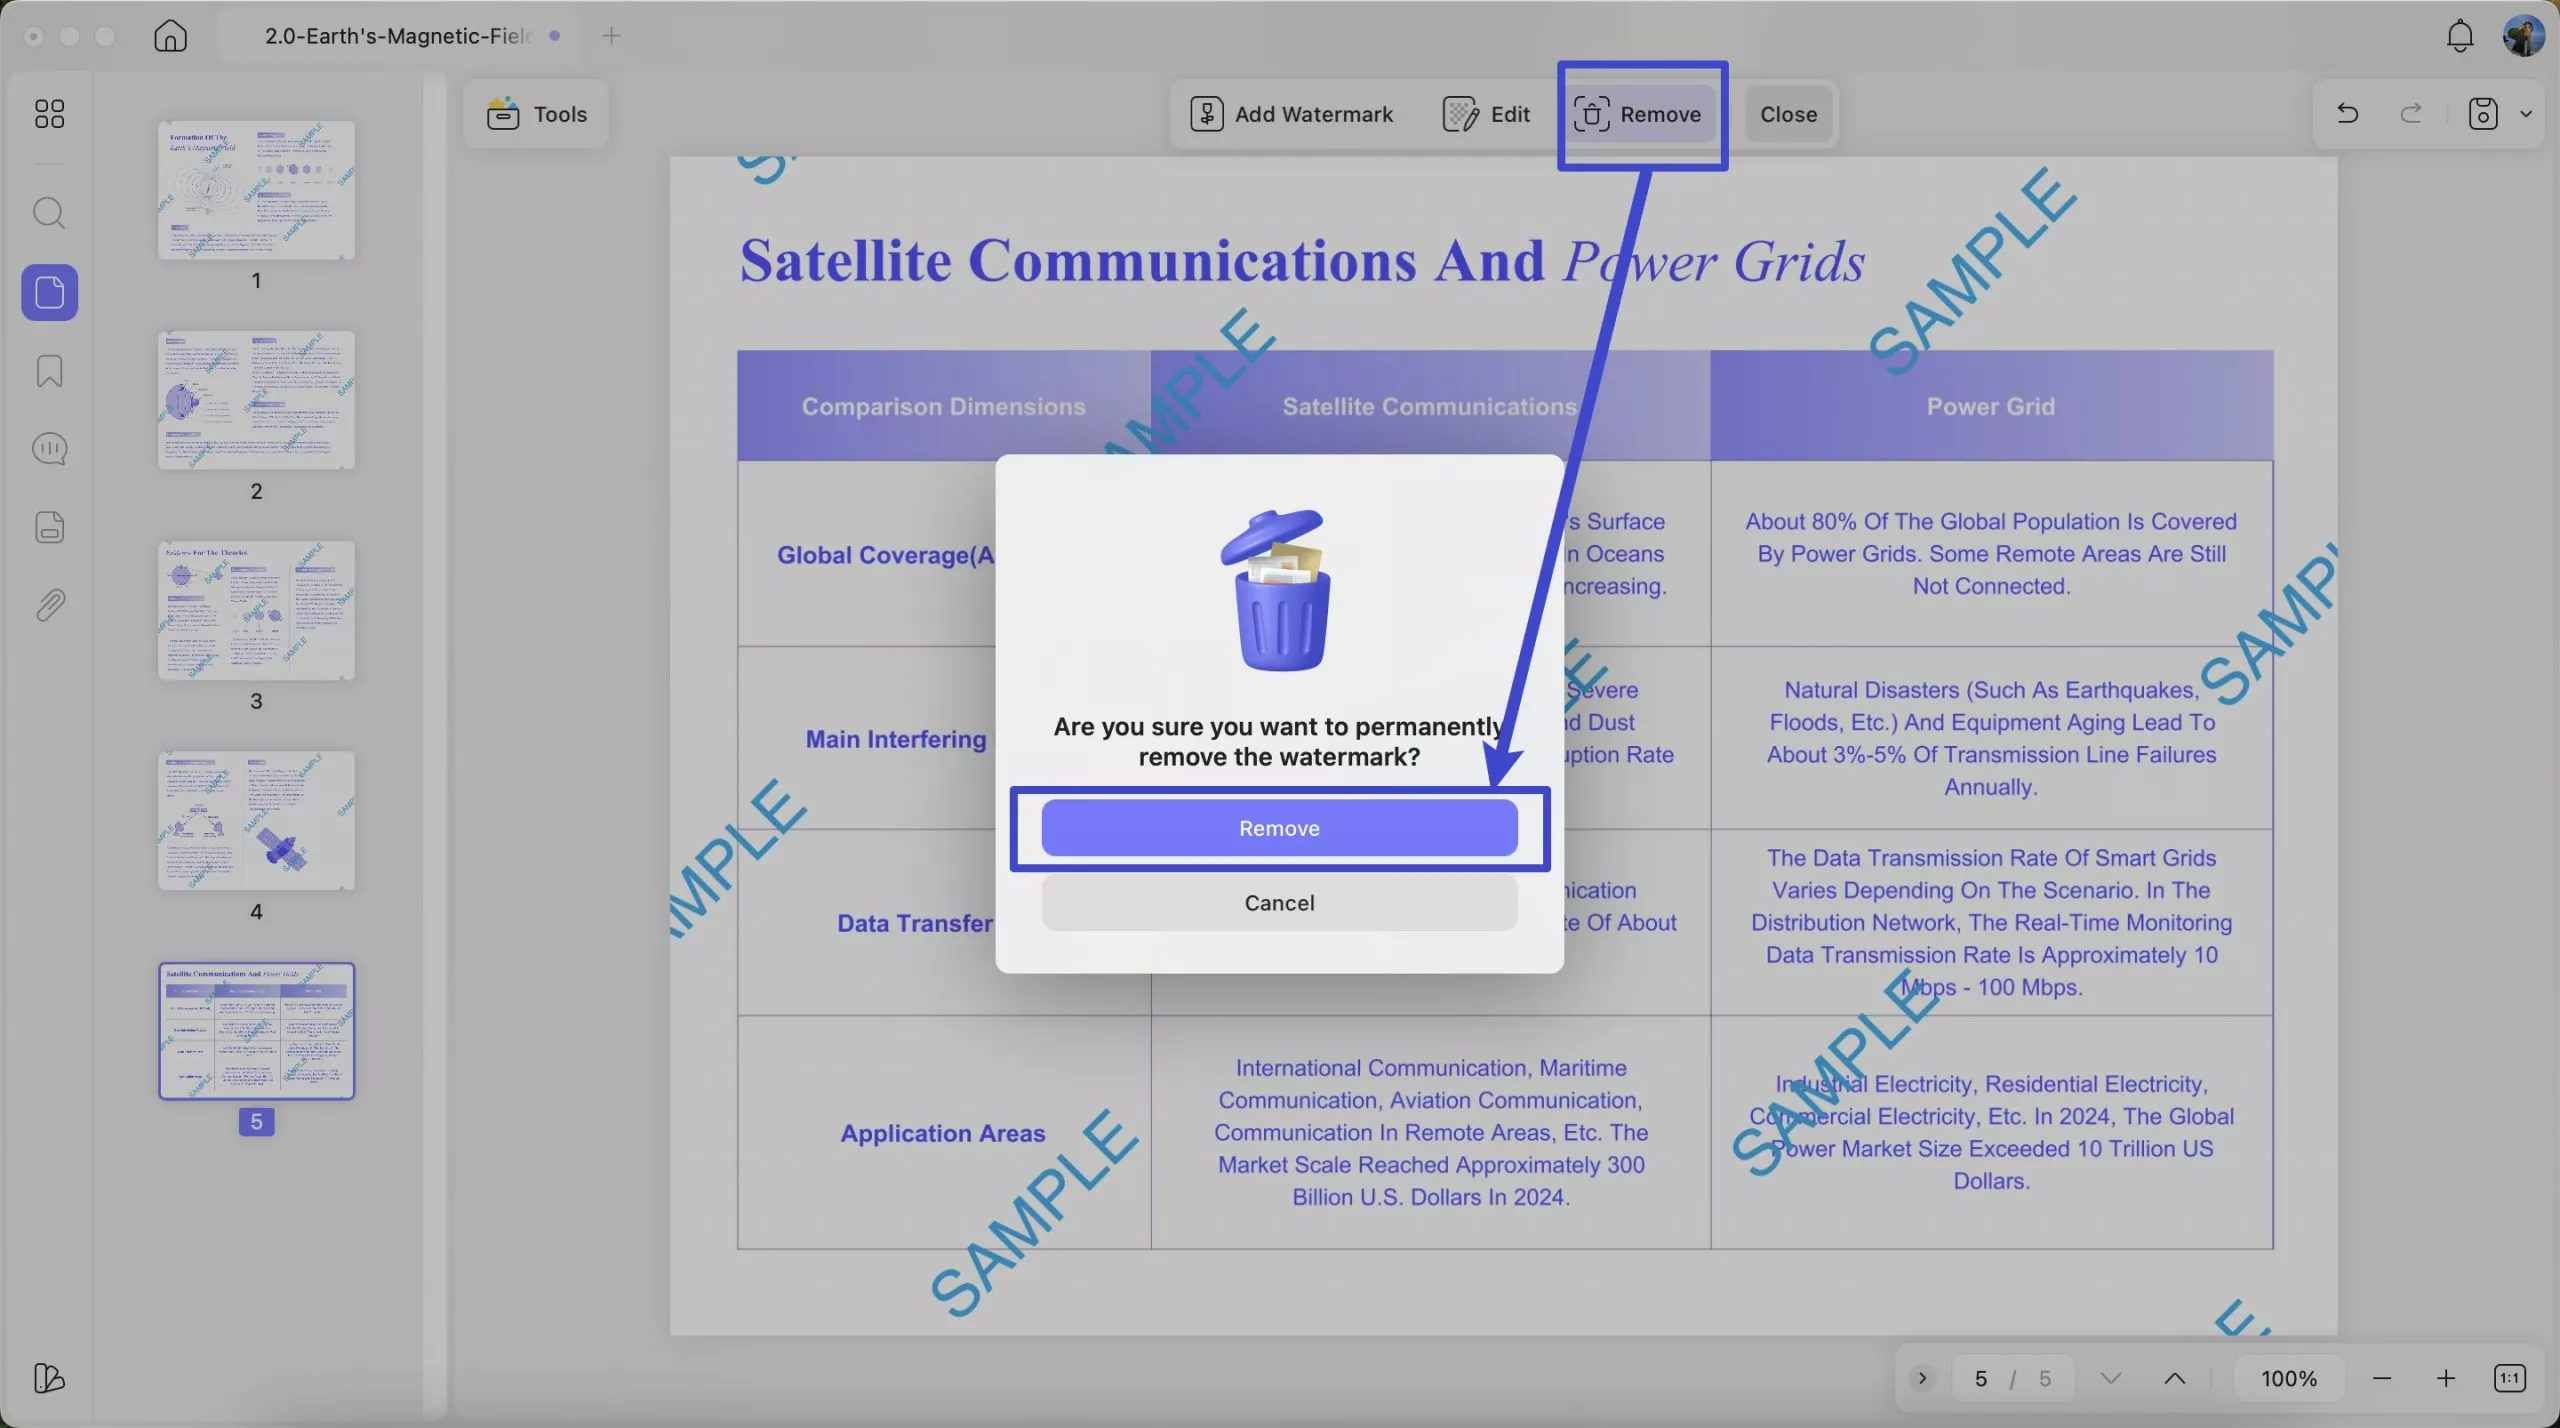
Delete Watermark
If you intend to delete a watermark, click on the "Remove" icon on the top toolbar. After that, click the "Remove" button on the pop-up window. This will successfully delete the watermark on your PDF too.
Note