Add or Edit Images in PDF with UPDF on Mac
You can easily add and edit images in PDF with UPDF on Mac. In this guide, we will show you a step-by-step guide about how to add and edit images in PDF with UPDF on Mac.
First of all, click the below button to download UPDF on Mac. And if you want to save without a watermark, you can upgrade to the pro version at a low price here.
Windows • macOS • iOS • Android 100% secure
1. How to Edit an Image in PDF?
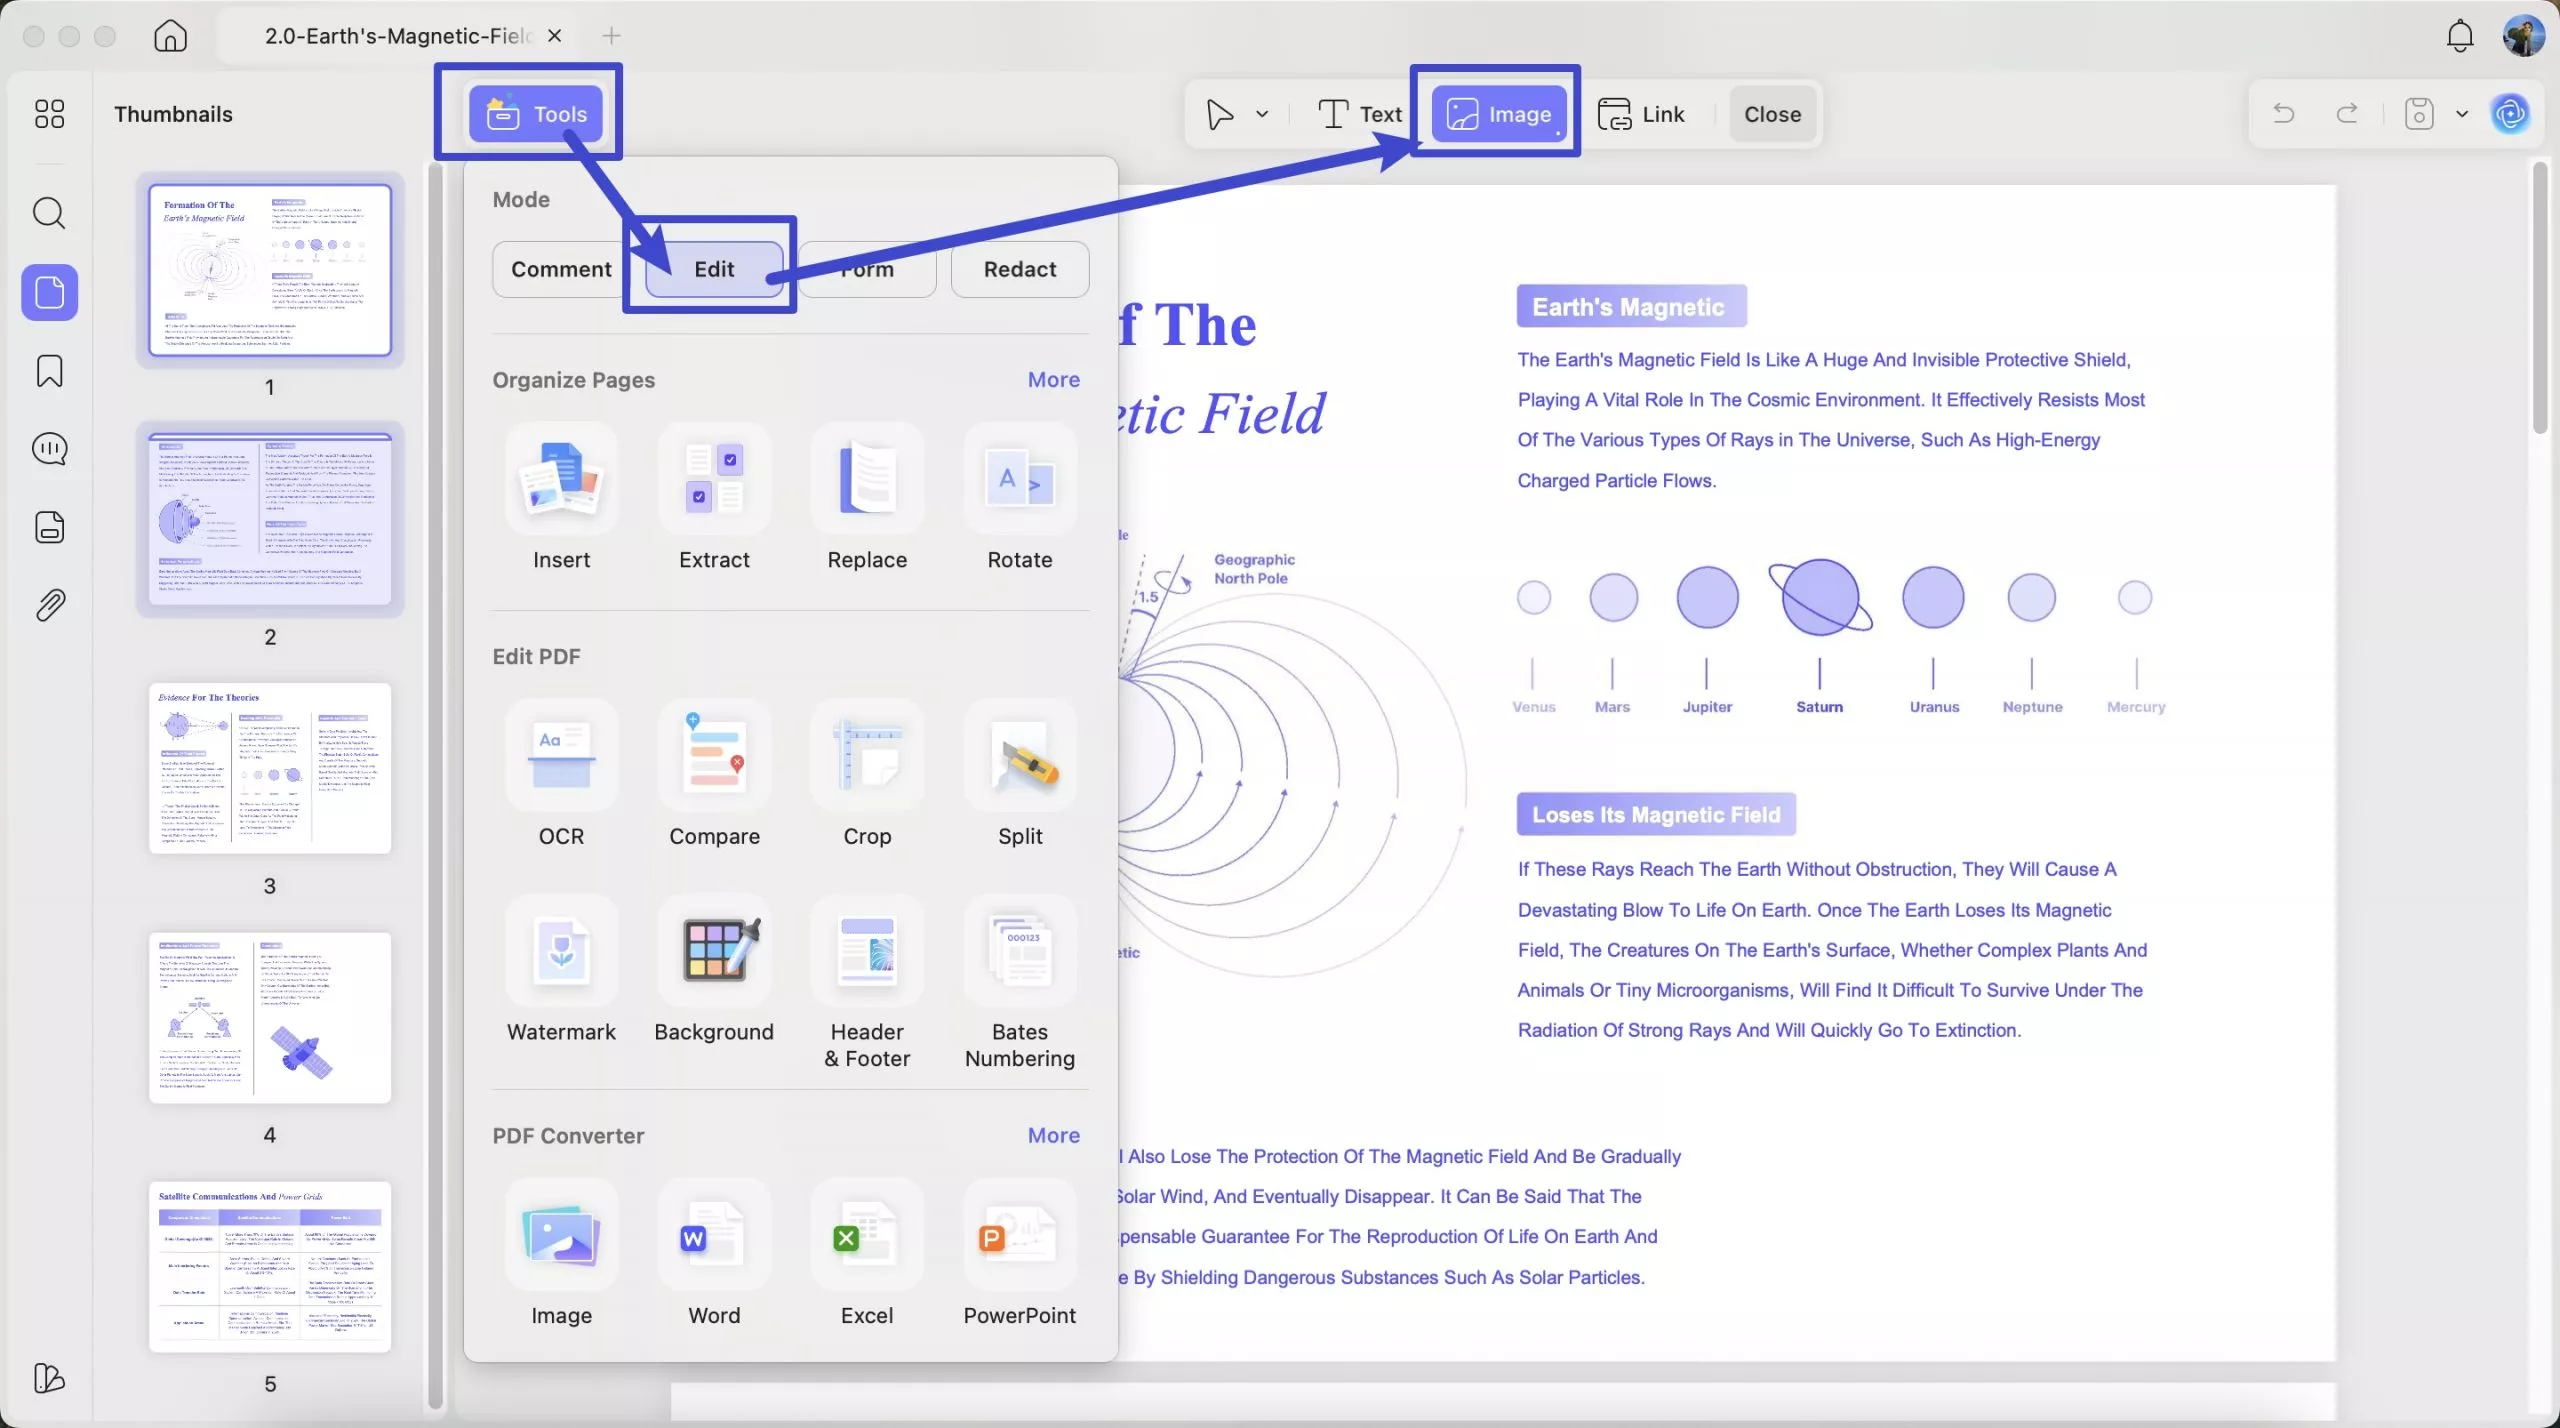
- To edit an image, enter Edit mode first by clicking the "Tools "> "Edit".

- Then click on "Image" in the top navigation bar, and click anywhere on the file to add an image.
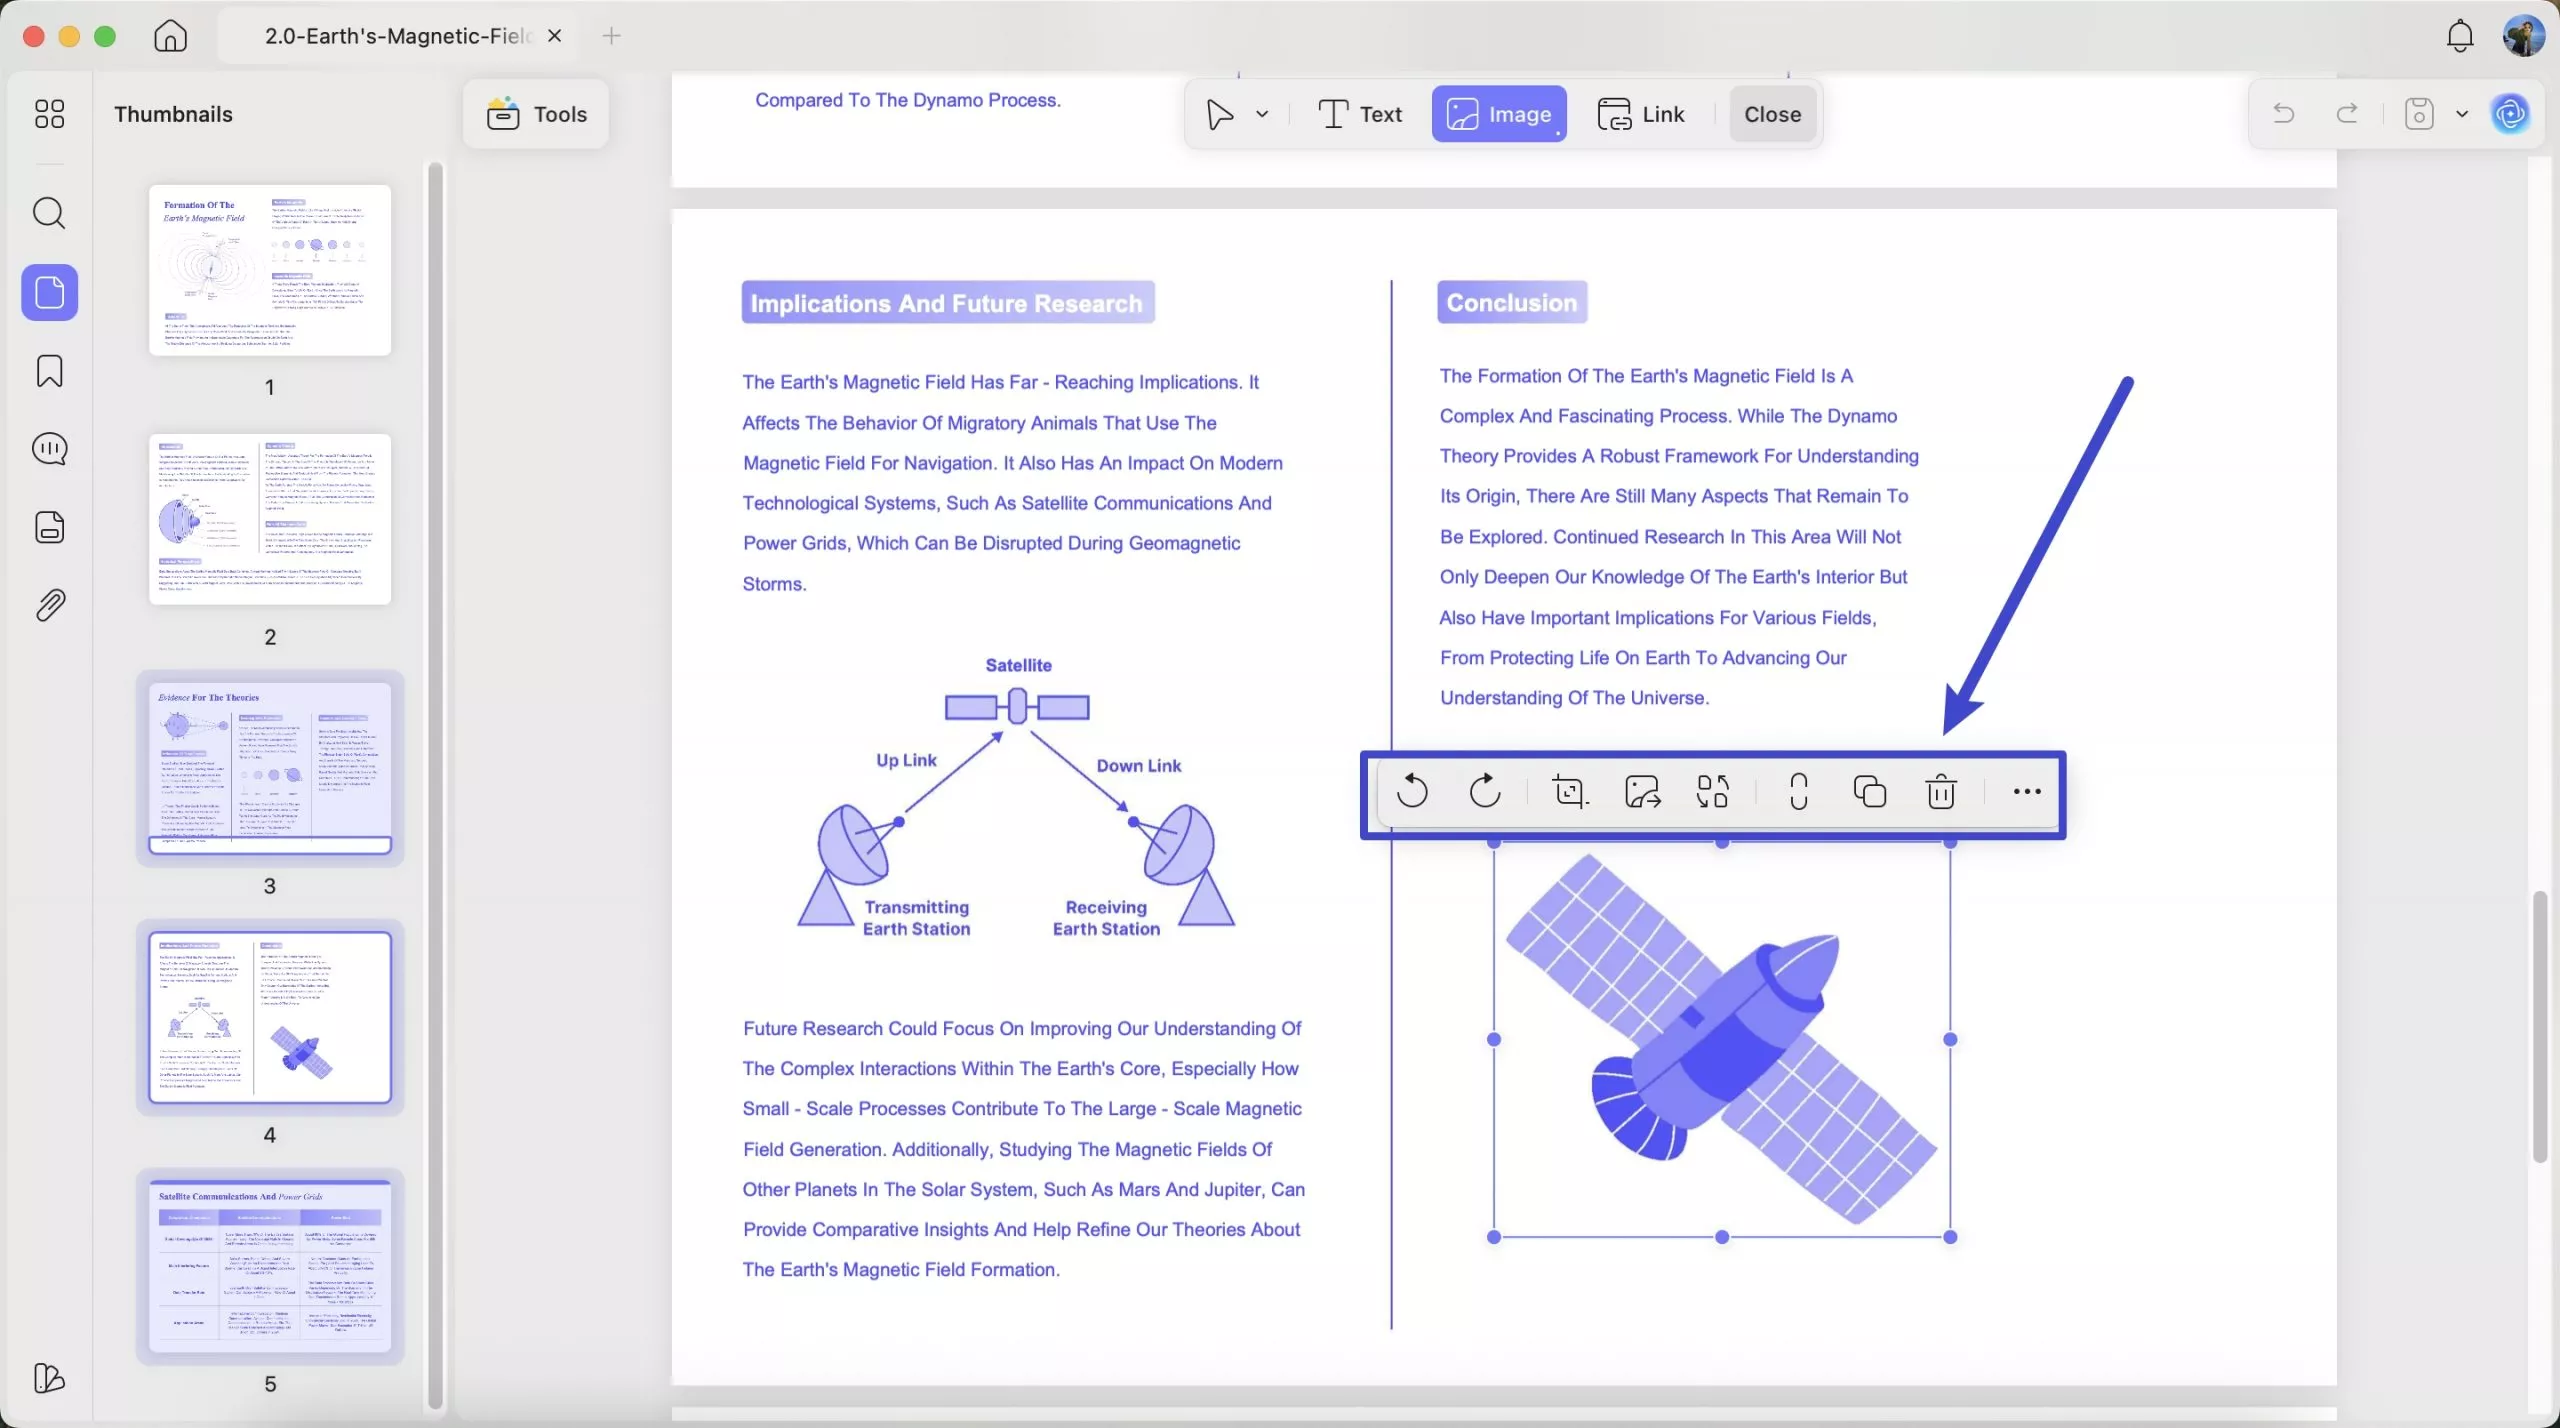
- You can find the icon to rotate, flip, crop, extract, replace, and change the size of the image. (Note: You can extract the image by dragging and dropping it to the desktop after selecting a picture in the edit mode.)

Alternatively, right-click the image and select the tools to copy, flip, rotate, crop, extract, replace, or delete the image.
2. How to Add an Image to a PDF?
- To add an image, go to "Edit" mode in "Tools" and click the "Image" icon.

- Now, click anywhere in the file or double-click "Image" icon with the mouse to reveal a pop-up window. Select and insert the image from a local folder. (Alternatively, you can simply drag the image into the UPDF interface to add it.)
- Once you add the image, you can adjust the position, rotate it, and perform other image edits.
 UPDF
UPDF
 UPDF for Windows
 UPDF for Mac
 UPDF for iPhone/iPad
 UPDF for Android
 UPDF AI Online
 UPDF Sign
 Edit PDF
 Annotate PDF
 Create PDF
 PDF Form
 Edit links
 Convert PDF
 OCR
OCR PDF to Word
 PDF to Image
 PDF to Excel
 Organize PDF
 Merge PDF
 Split PDF
 Crop PDF
 Rotate PDF
 Protect PDF
 Sign PDF
 Redact PDF
 Sanitize PDF
 Remove Security
 Read PDF
 UPDF Cloud
 Compress PDF
 Print PDF
 Batch Process
 About UPDF AI
 UPDF AI Solutions
 AI User Guide
 FAQ about UPDF AI
 Summarize PDF
 Translate PDF
 Chat with PDF
 Chat with AI
 Chat with image
 PDF to Mind Map
 Explain PDF
 Scholar Research
 Paper Search
 AI Proofreader
 AI Writer
 AI Homework Helper
 AI Quiz Generator
 AI Math Solver
 PDF to Word
 PDF to Excel
 PDF to PowerPoint
 User Guide
 UPDF Tricks
 FAQs
FAQs UPDF Reviews
 Download Center
 Blog
Blog Newsroom
 Tech Spec
 Updates
 UPDF vs. Adobe Acrobat
 UPDF vs. Foxit
 UPDF vs. PDF Expert

