UPDF for Windows
 UPDF for Mac
 UPDF for iPhone/iPad
 UPDF for Android
 UPDF AI Online
 UPDF Sign
 Edit PDF
 Annotate PDF
 Create PDF
 PDF Form
 Edit links
 Convert PDF
 OCR
OCR PDF to Word
 PDF to Image
 PDF to Excel
 Organize PDF
 Merge PDF
 Split PDF
 Crop PDF
 Rotate PDF
 Protect PDF
 Sign PDF
 Redact PDF
 Sanitize PDF
 Remove Security
 Read PDF
 UPDF Cloud
 Compress PDF
 Print PDF
 Batch Process
 About UPDF AI
 UPDF AI Solutions
 AI User Guide
 FAQ about UPDF AI
 Summarize PDF
 Translate PDF
 Chat with PDF
 Chat with AI
 Chat with image
 PDF to Mind Map
 Explain PDF
 PDF AI Tools
 Image AI Tools
 AI Chat Tools
 AI Writing Tools
 AI Study Tools
 AI Working Tools
 Other AI Tools
 PDF to Word
 PDF to Excel
 PDF to PowerPoint
 User Guide
 UPDF Tricks
 FAQs
FAQs UPDF Reviews
 Download Center
 Blog
Blog Newsroom
 Tech Spec
 Updates
 UPDF vs. Adobe Acrobat
 UPDF vs. Foxit
 UPDF vs. PDF Expert
When you want to sign a contract, give any approval, or make an agreement, you often need to sign a PDF. When it comes to signing a PDF on a Mac, Preview is the built-in PDF viewer that allows you to sign a PDF as well. So How to add a Signature to a PDF with Preview on Mac?
We’ll teach you that in this article and also tell you what the limitations are and what the better and faster way of doing that is.
If you need a better alternative to Preview to add a signature to PDF, go for UPDF, an AI-powered PDF signer that allows you to add electronic and digital signatures within seconds. You can download UPDF via the button below to give it a test.
Windows • macOS • iOS • Android 100% secure
Part 1. How to Add Signature to PDF in Preview
There are 3 best methods to add signatures to PDF with Preview on Mac. Let’s go through each.
1. Via Signature Feature
The first method is via the Signature feature of Preview, which involves using your trackpad and the camera.
Using Trackpad:
- Right-click on the PDF that you want to sign and hit "Open With" >” Preview”. Click on the markup icon – a pencil in a circle. Then, click on the “Signature” tab. Hit “Trackpad”

- Click “Click Here to Begin,” then draw your signature using your trackpad. After that, tap anywhere on your screen and hit “Done.”
- Now, you can click on the signature and add it to the PDF file. You can drag it to the place where you need.
Using Camera:
You can also use your Mac camera, which is the second method of adding a signature to a PDF using Preview. Follow this step-by-step guide to do it.
- Simply click the “Camera” option after clicking on the Markup tool and Signature, and your laptop’s front camera will open. Sign on a piece of paper clearly, then hold it up to the camera. The tool will scan it, and once it’s done, you can click on “Done.” Your signature will be saved, and you can click on it to place it wherever you want.

2. Via Pencil
You can also use the pen in Preview to add a signature to the PDF. Here is the guide for you.
- Choose the pencil icon on the top menu, then, click on the “Draw” icon. Now, hold on to your mouse, and draw your signature to sign the PDF.

3. Via Adding Image
You can also add an image signature to a PDF with Preview by following these steps:
- Open your PDF in "Preview". Now, find the image signature and open it with Preview as well.

- Now, make sure you are staying in the Preview with image signature, hold on the “Command + A” to select the image signature, hold on the “Command + C” and then, “Command + V” to make a copy of image signature in the Preview with image signature. Then, hold on the “Command + C” to copy the second copy of the image signature. Go to the preview of PDF and hold on “Command + V” to paste it in the PDF. Now, you add the image signature to PDF successfully. You can move the position and adjust the size of the image signature.

These are all the methods of adding a signature to a PDF on a Mac with Preview. Although Preview is a good way to add a signature to PDF in some cases, there are some problems using it.
Also Read: How to Add Signature to PDF in Microsoft Edge?
Part 2. Problems of Using Preview to Sign PDF on Mac
Following are the issues with using Preview to sign a PDF on Mac:
- No Digital Signatures: In Preview, you cannot add a digital signature to PDF on Mac, which is important for verifying the authenticity and integrity of a document.
- Limited Customization: The signature option in Preview is too basic and doesn’t offer any advanced customization features to improve its appearance. You cannot change the signature line size and color and remove the image signature background.
- No Cloud Sync: You can’t access your created signature on other devices, as Preview doesn’t offer cloud sync or cloud-based storage.
Part 3. A Better Way to Sign PDF on Mac
The best option for all those issues: is UPDF for Mac. This advanced AI-powered PDF manager allows you to add electronic signatures and digital signatures to your PDFs within seconds.
Not only that, it also offers you a signature sync feature that makes it easier for you to access your electronic signs across your different devices. Download UPDF now with the button below or via App Store, and let’s learn how to add a signature to a PDF on a Mac with it.
Windows • macOS • iOS • Android 100% secure
1. Add Electronic Signatures to PDF
If you want to add Electronic Signatures to PDF on your Mac, then these are the steps that you need to follow.
- Open UPDF and click on “Open File” to select the PDF file to which you want to add an Electronic signature.
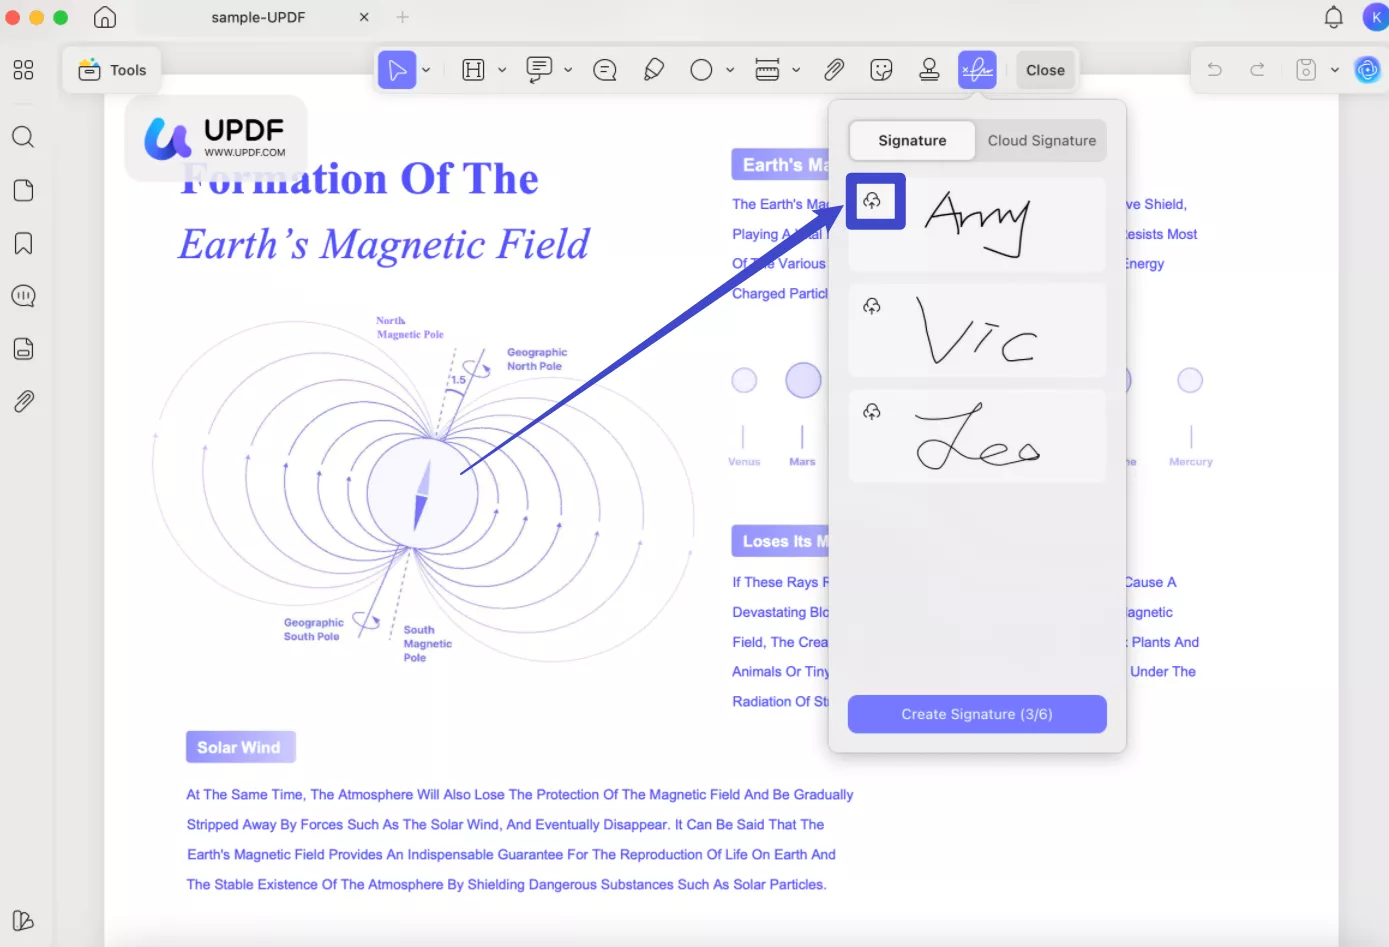
- In the left toolbar, select “Comment,” and in the middle toolbar on your right, click on “Signature tab”> ”Create” to create your digital sign.
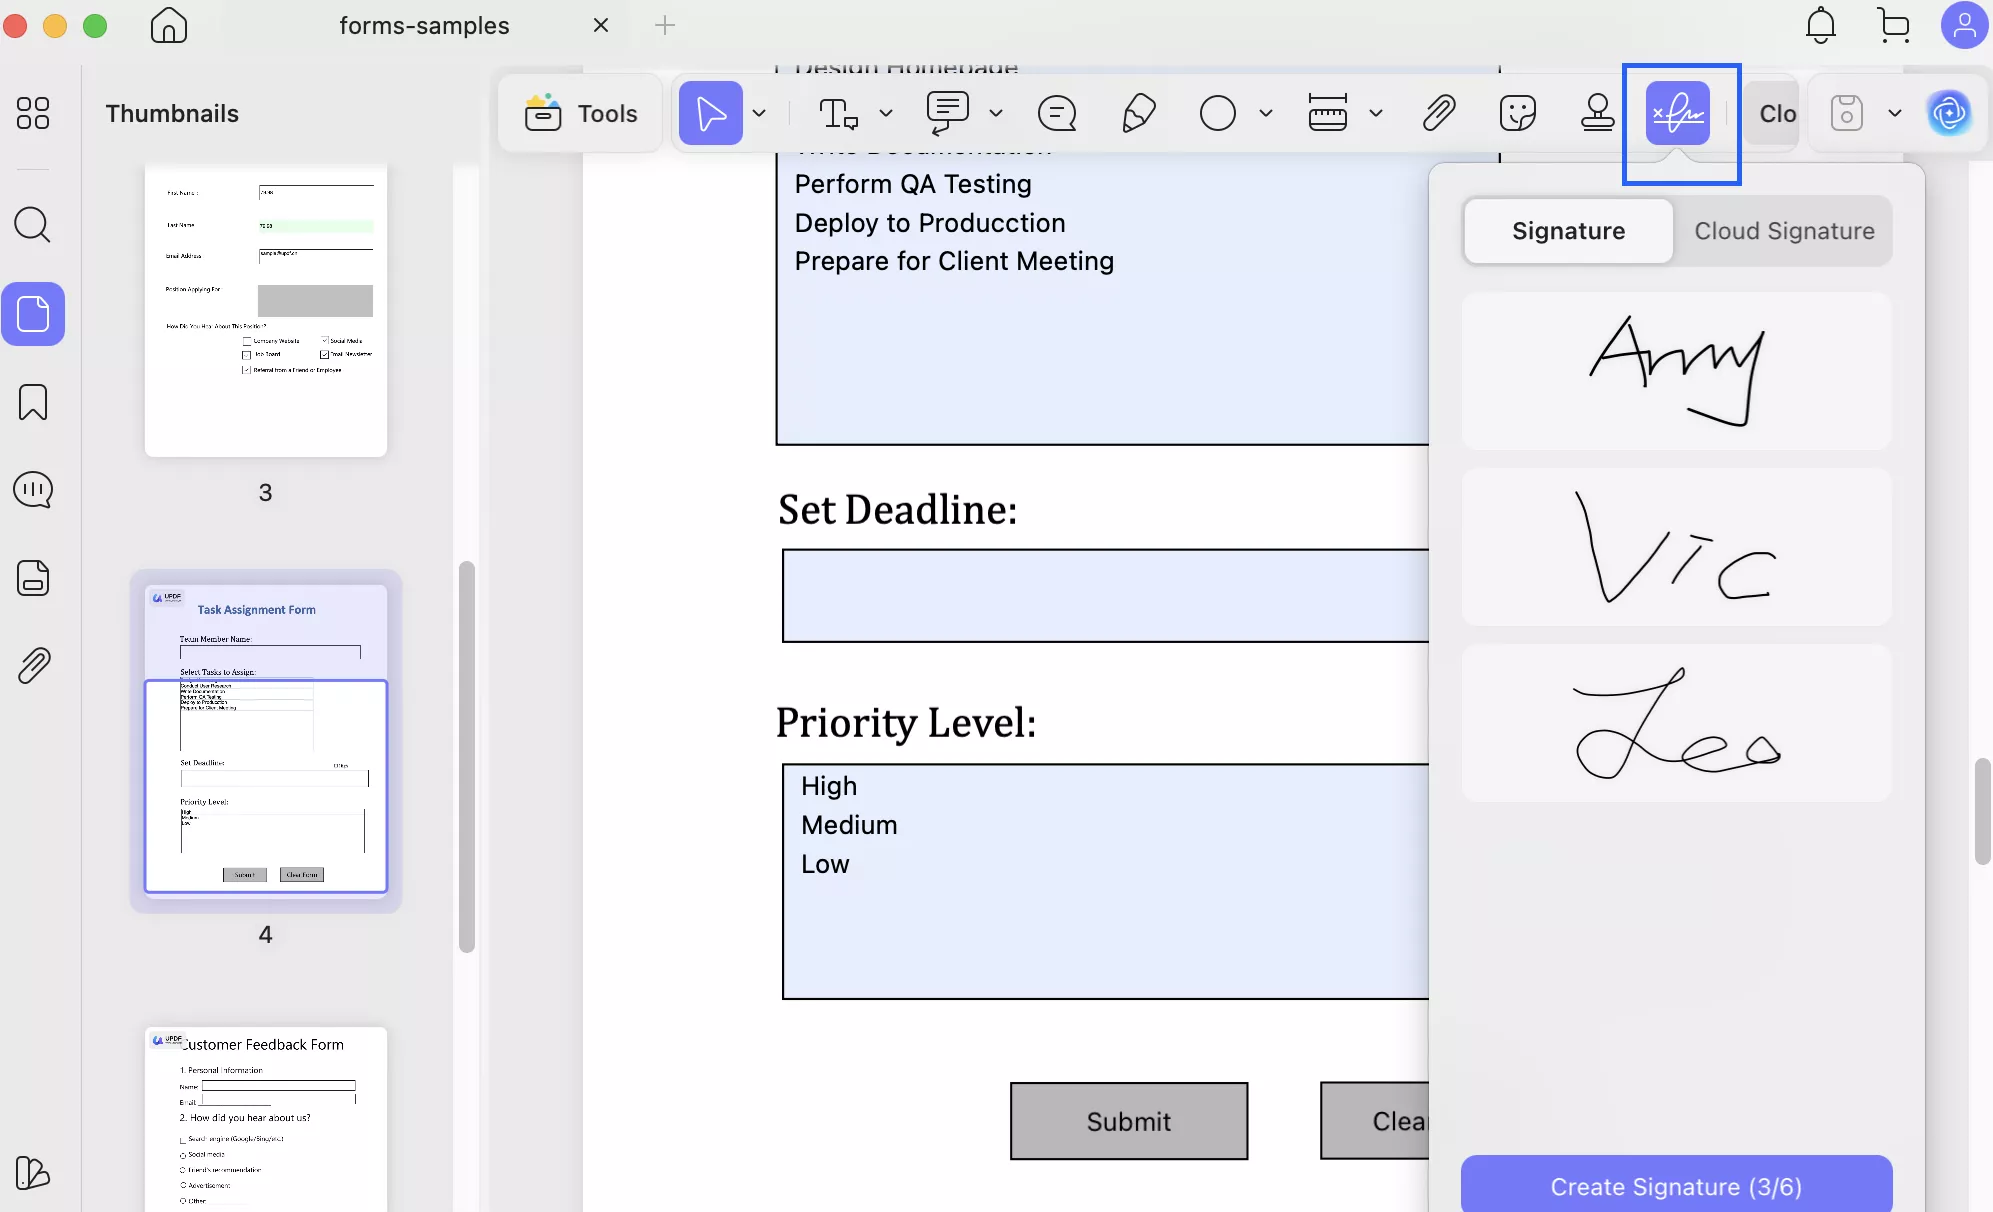
- Here, you can select “Keyboard” to input your signature, “Mouse” to draw your signature with your mouse, “Trackpad” to write your signature with your hand, or “Photo” to upload an image signature.
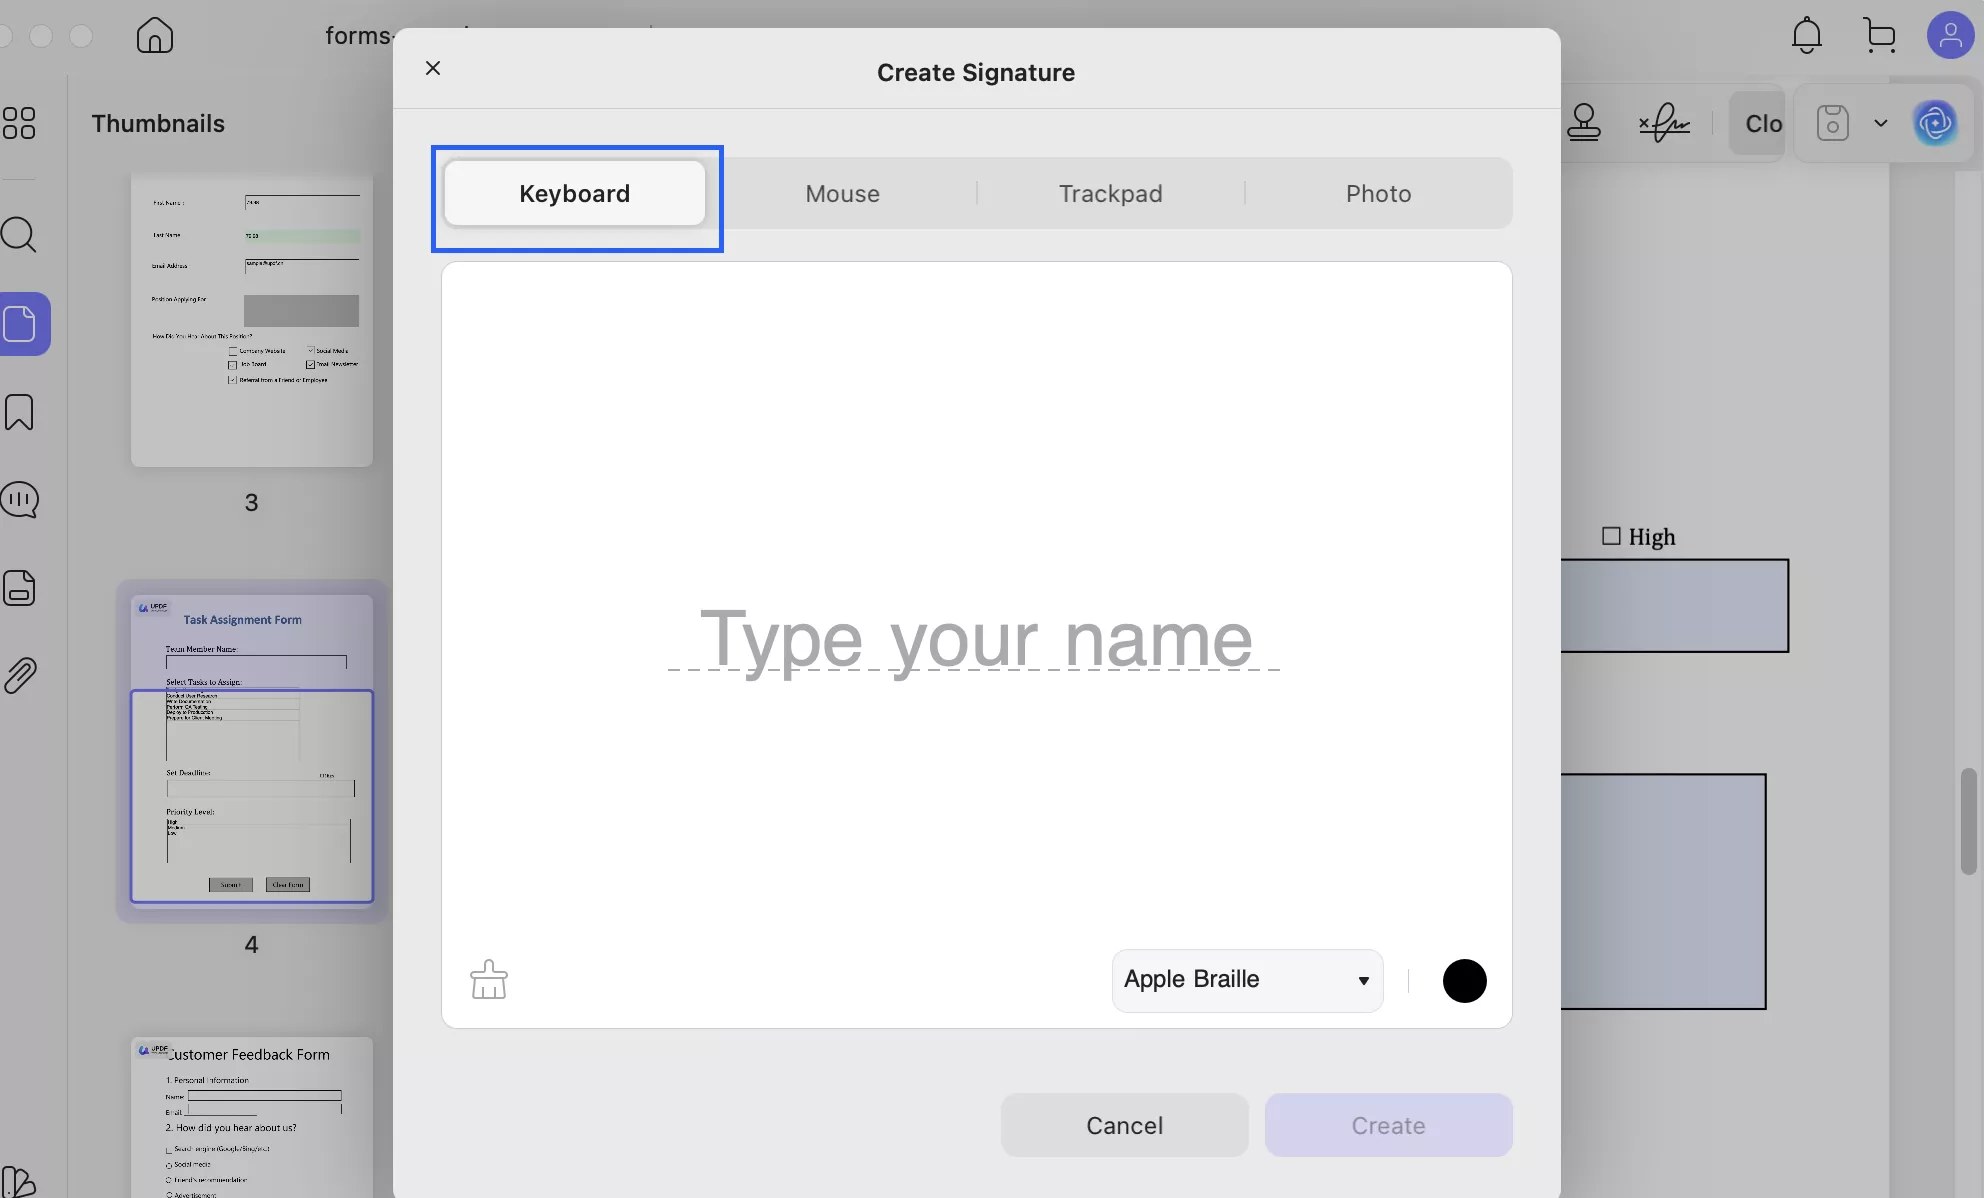
- Then, click on “Create”. Afterward, go to the part of your PDF where you need to add the signature and click there. The signature will be added. Using your mouse, position it in the right place.
- If you want to sync the signature on any device, you can click on the “Signature” icon again and click on the “Cloud” icon to upload it to Cloud. Now, you can log in with the same account on the UPDF on Android, IOS, or Windows to get the signature.
2. Add Digital Signatures to PDF
You can also add digital signatures to PDF with UPDF. It is also easy. Here is the guide for you.
Step 1. Open the PDF with UPDF on Mac. Click on the “Form” and “Digital Signature”. Now, click on the place where you need to add the digital signature.
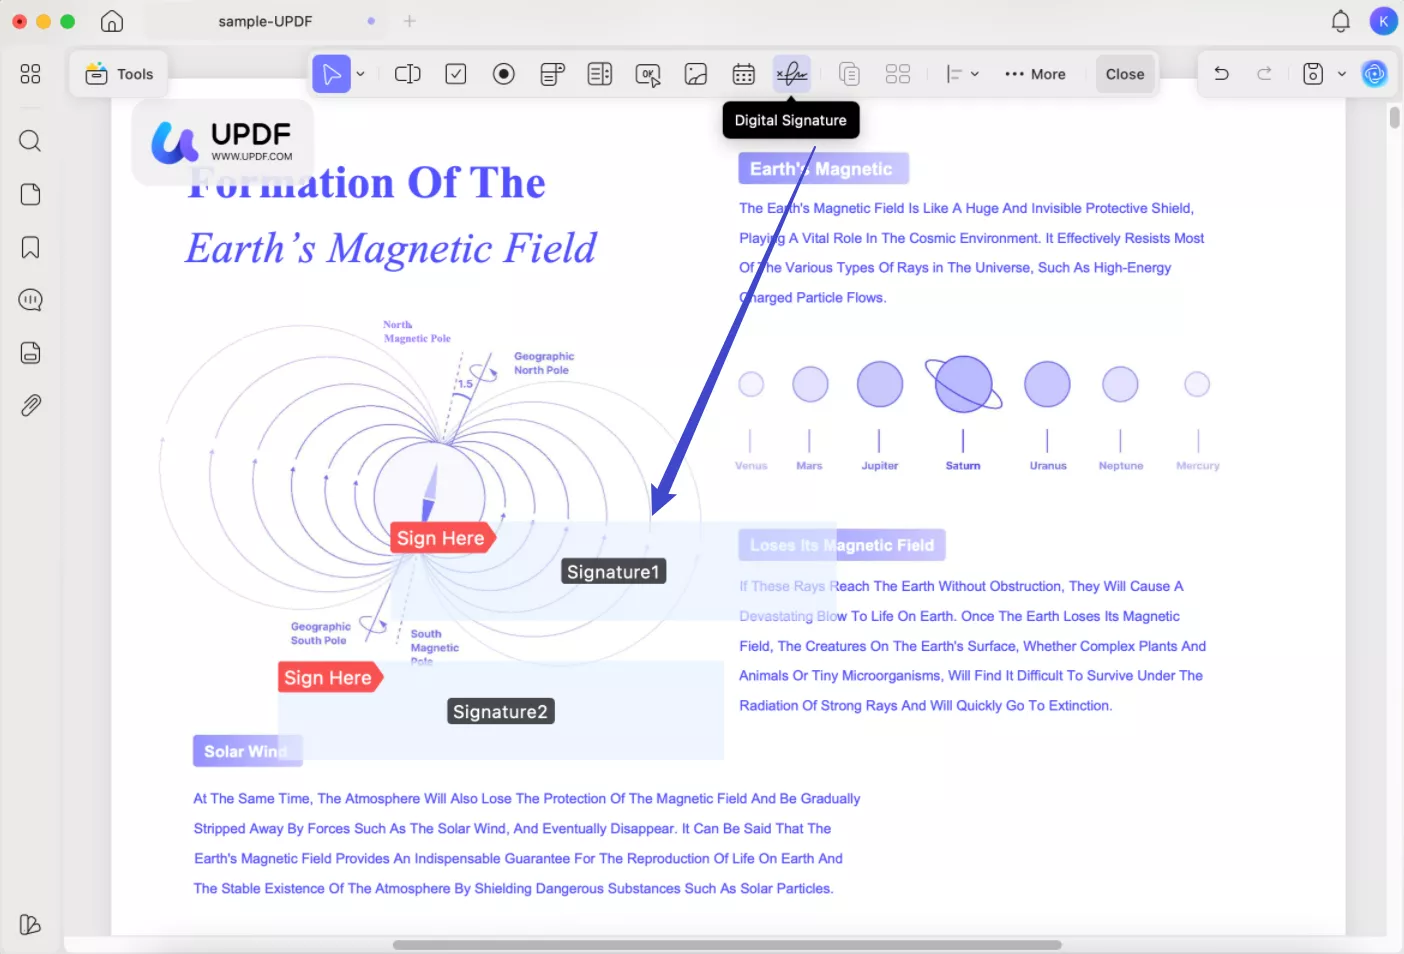
Step 2. Click on the “Preview” icon, click on the “Digital Signature” area, in the pop up window, click on the “Create”. Enter the name, email address, and other information. Then, click on the “OK” and click on the “Sign” to add digital signatures to PDF.

Or if you have the digital signature on the computer, you can click on the “Import” to import it to sign.

That's how easy it is to add a signature to a PDF on a Mac with UPDF. Except adding a signature to PDF. UPDF for Mac has many other features, you can read this review blog post or watch the following video to learn more about this tool.
Final Words
It's easy to add a signature to a PDF with Preview on Mac. However, it comes with many limitations. Preview is a basic PDF viewer for Mac that allows you to do basic signatures that you can't fully edit or customize, and you can't even access your signatures on your different devices as it doesn't have cloud storage. For that reason, you must go for UPDF for Mac to add a signature to PDF on Mac.
It's an easy-to-use tool that allows you to create digital and electronic signatures with ease.
Furthermore, you can edit the signature by adjusting its size, color, and everything. It also gives you tons of other features, such as translating your PDFs, OCR, comparing your PDFs, converting any file formats to PDFs, and taking notes using its AI assistant. So, download UPDF today.
Windows • macOS • iOS • Android 100% secure


 Enola Miller
 Enrica Taylor
 Lizzy Lozano