UPDF for Windows
 UPDF for Mac
 UPDF for iPhone/iPad
 UPDF for Android
 UPDF AI Online
 UPDF Sign
 Read PDF
 Annotate PDF
 Edit PDF
 Convert PDF
 Create PDF
 Compress PDF
 Organize PDF
 Merge PDF
 Split PDF
 Crop PDF
 Delete PDF pages
 Rotate PDF
 Sign PDF
 PDF Form
 Compare PDFs
 Protect PDF
 Print PDF
 Batch Process
 OCR
OCR UPDF Cloud
 About UPDF AI
 UPDF AI Solutions
 FAQ about UPDF AI
 Summarize PDF
 Translate PDF
 Explain PDF
 Chat with PDF
 Chat with image
 PDF to Mind Map
 Chat with AI
 User Guide
 Tech Spec
 Updates
 FAQs
FAQs UPDF Tricks
 Blog
Blog Newsroom
 UPDF Reviews
 Download Center
 Contact Us
You can insert an image in Bluebeam using the Markup option in just 1 minute. This Bluebeam insert image feature helps you in improving the project documentation to make complex information much easier to understand.
However, some find Bluebeam’s interface too complicated or outdated. Therefore, they need guidance while importing PDFs to enhance reports with relevant visuals.
Read this guide to quickly learn how to upload images to Bluebeam or find a simple yet more advanced alternative in the form of UPDF. If you prefer an easier way, you can download UPDF via the button below to use it to add the image to PDF directly.
Windows • macOS • iOS • Android 100% secure
Part 1. How to Insert an Image in Bluebeam?
Bluebeam Revu helps edit and markup PDFs, especially for architecture and construction projects, due to its precision. As a standout feature, its Markup tool allows users to add text, shapes, and even images to PDFs. With the Image markup feature, users can utilize Bluebeam to insert images directly onto their PDFs.
However, most of the users may face difficulties while adding images using this tool due to its complex interface. To navigate its outdated user interface, let’s go over the steps to insert an image into your documents in Bluebeam Revu.
Step 1. Add an Image to Your Uploaded Document
Before the process, download the Bluebeam tool from the official site and install it. You can insert the image in different ways, as described below:
Method 1: Using the Tools Menu
- After opening your file in Bluebeam, click the Tools tab in the top toolbar and go to the Markup option.
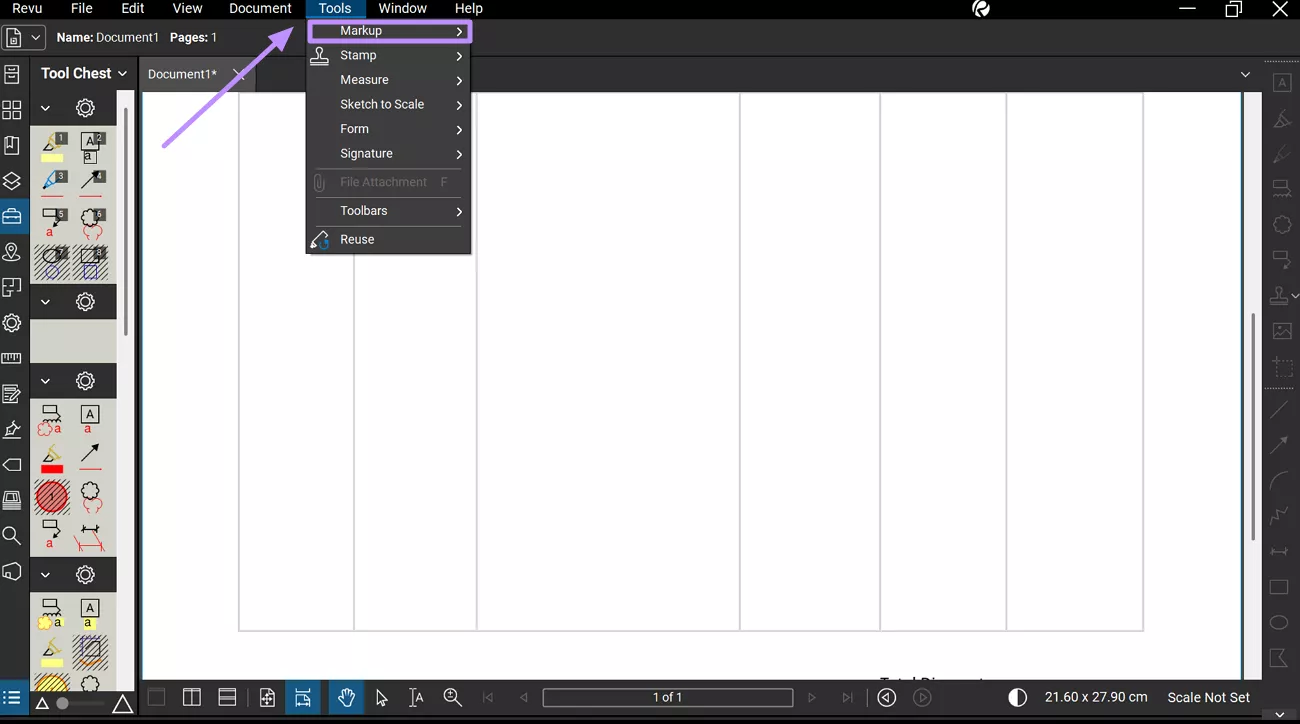
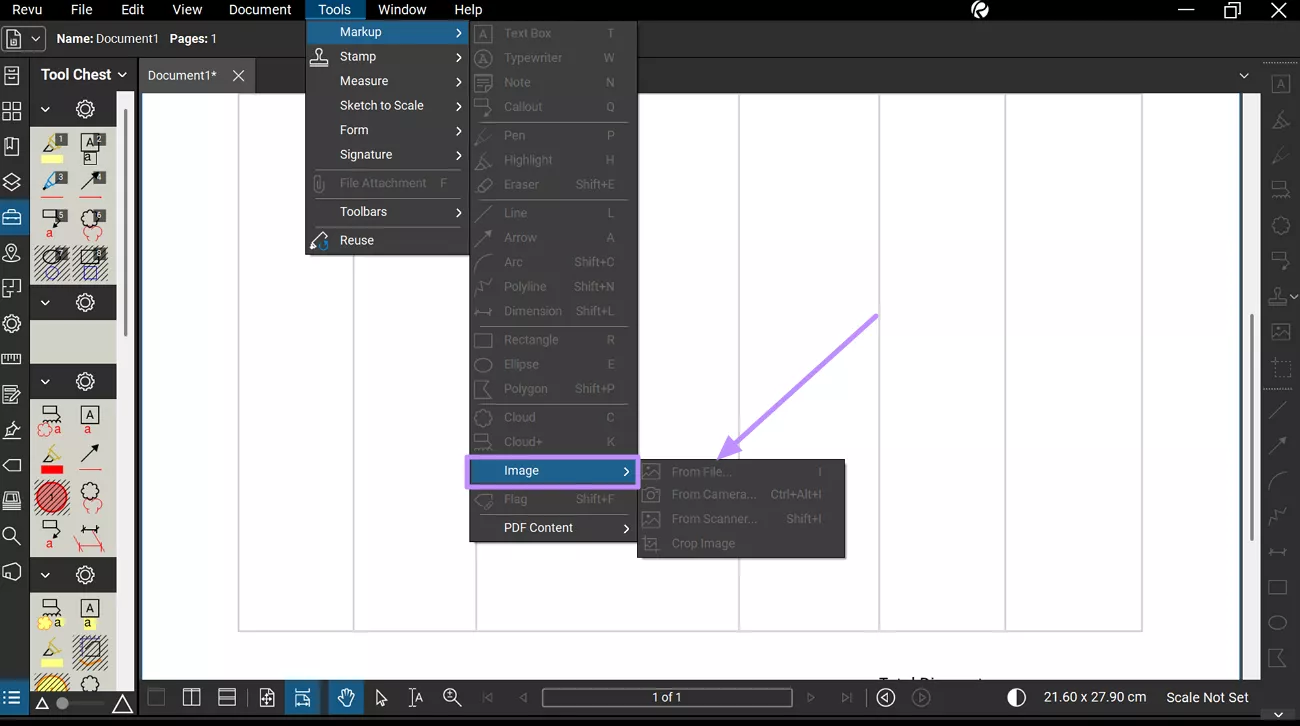
- From the newly appeared menu, tap on the Image tool and then choose the From File… option to let Bluebeam paste image.
Method 2: Using Shortcuts
Users can simply tap the Image icon on the right toolbar or press the I key to open the image insertion dialog box.
Step 2. Crop Image Using Bluebeam
- Once Bluebeam inserts image into your file, tap on the added picture and reveal the Image Properties window on the left side of your screen.
- Now, click the Crop button within the Appearance section and optimize the image dimensions as per your needs.
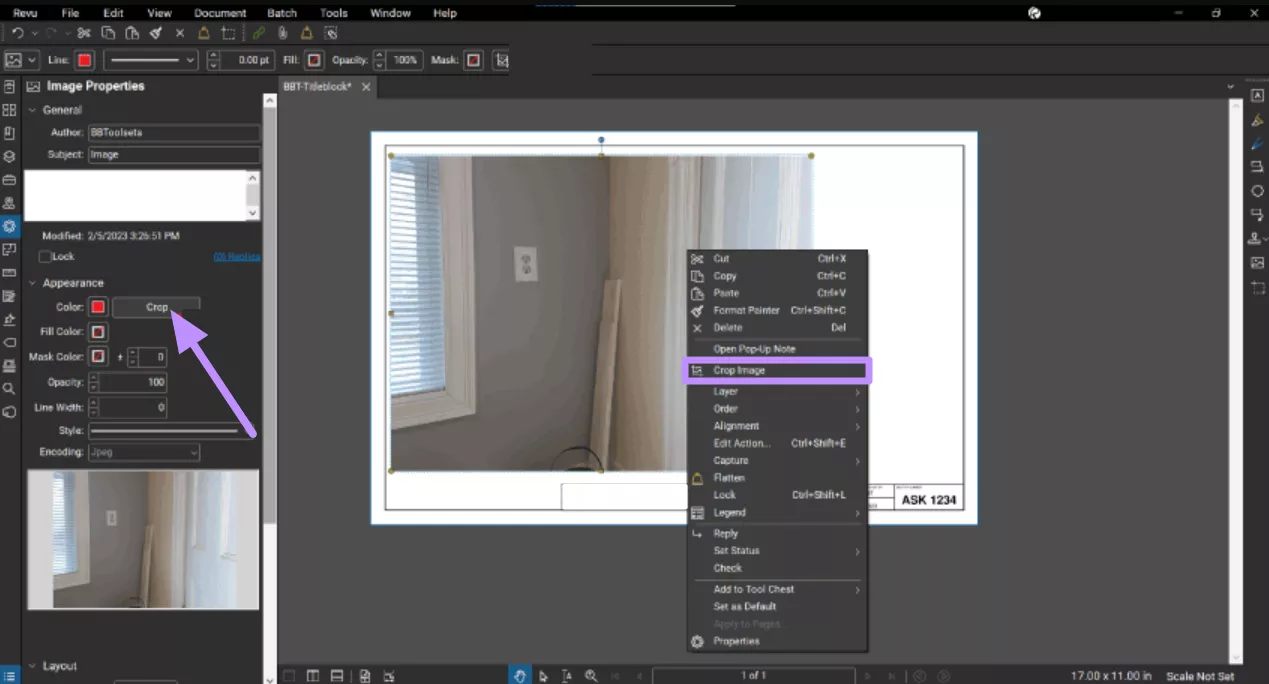
To simply use Bluebeam to crop images, right-click on the inserted markup and tap the Crop Image option to get the job done.
Step 3. Mirror an Image with Bluebeam
- Upon cropping the image, simply right-click on the added image and hover over the Alignment option to reveal a new menu.
- From here, choose the Flip Horizontal or Flip Vertical option to mirror your image.
- If you want to rotate images, tap on the inserted visual and hold the Rotate icon on top of the selected image. Now, simply adjust the orientation of your image as desired.

| Extra Tip: Designers can also use the Ctrl + Alt + V shortcut to vertically mirror and the Ctrl + Alt + H shortcut to horizontally mirror the images. |
Part 2. FAQS About Inserting Image in Bluebeam
After learning how to use Bluebeam to insert pictures, go through these questions to further learn about the functionality of this tool.
Q1. How to Use Bluebeam to Convert Image to Text?
To use Bluebeam to convert image to text, open the image and tap the OCR option within the Document menu. From the newly opened dialog box, select your image language and adjust other advanced settings for proper conversion.
Q2. How Do I Overlay an Image in Bluebeam?
Start by converting your image to a PDF to overlay the markup with PDF pages. Afterward, access the Document menu and hover over the Comparison option to pick Overlay Pages. Now, align your base PDF and converted images to overlay them over each other.
Q3. How to Use Bluebeam to Insert PDF as Image?
First, you have to save your PDF as an image using the Export feature through the File menu in Bluebeam. Upon creating an image, tap on the Image icon on the right toolbar or press the I key to insert the converted image.
Bonus Tip. The Best Tool to Add Image to PDF
While the Bluebeam insert image feature is useful for markup, UPDF provides better options for adding images to PDFs with flexibility. This advanced PDF editor allows you to both edit existing images and add new ones to any PDF file.
Moreover, users can even drag and drop images directly into the document without requiring any complex steps. Upon adding pictures, this tool gives you complete control over image manipulation, as you can crop, rotate, and even replace images.
After learning the advantages of UPDF over Bluebeam paste image feature, download this tool to try the steps to add an image.
Windows • macOS • iOS • Android 100% secure
Step 1. Import PDF File to Insert Image
Initiate this task by downloading and launching UPDF on your device. On its main interface, tap on the Open File button to import the document to which you want to insert the image.
Step 2. Insert the Image Using the Edit PDF Tool
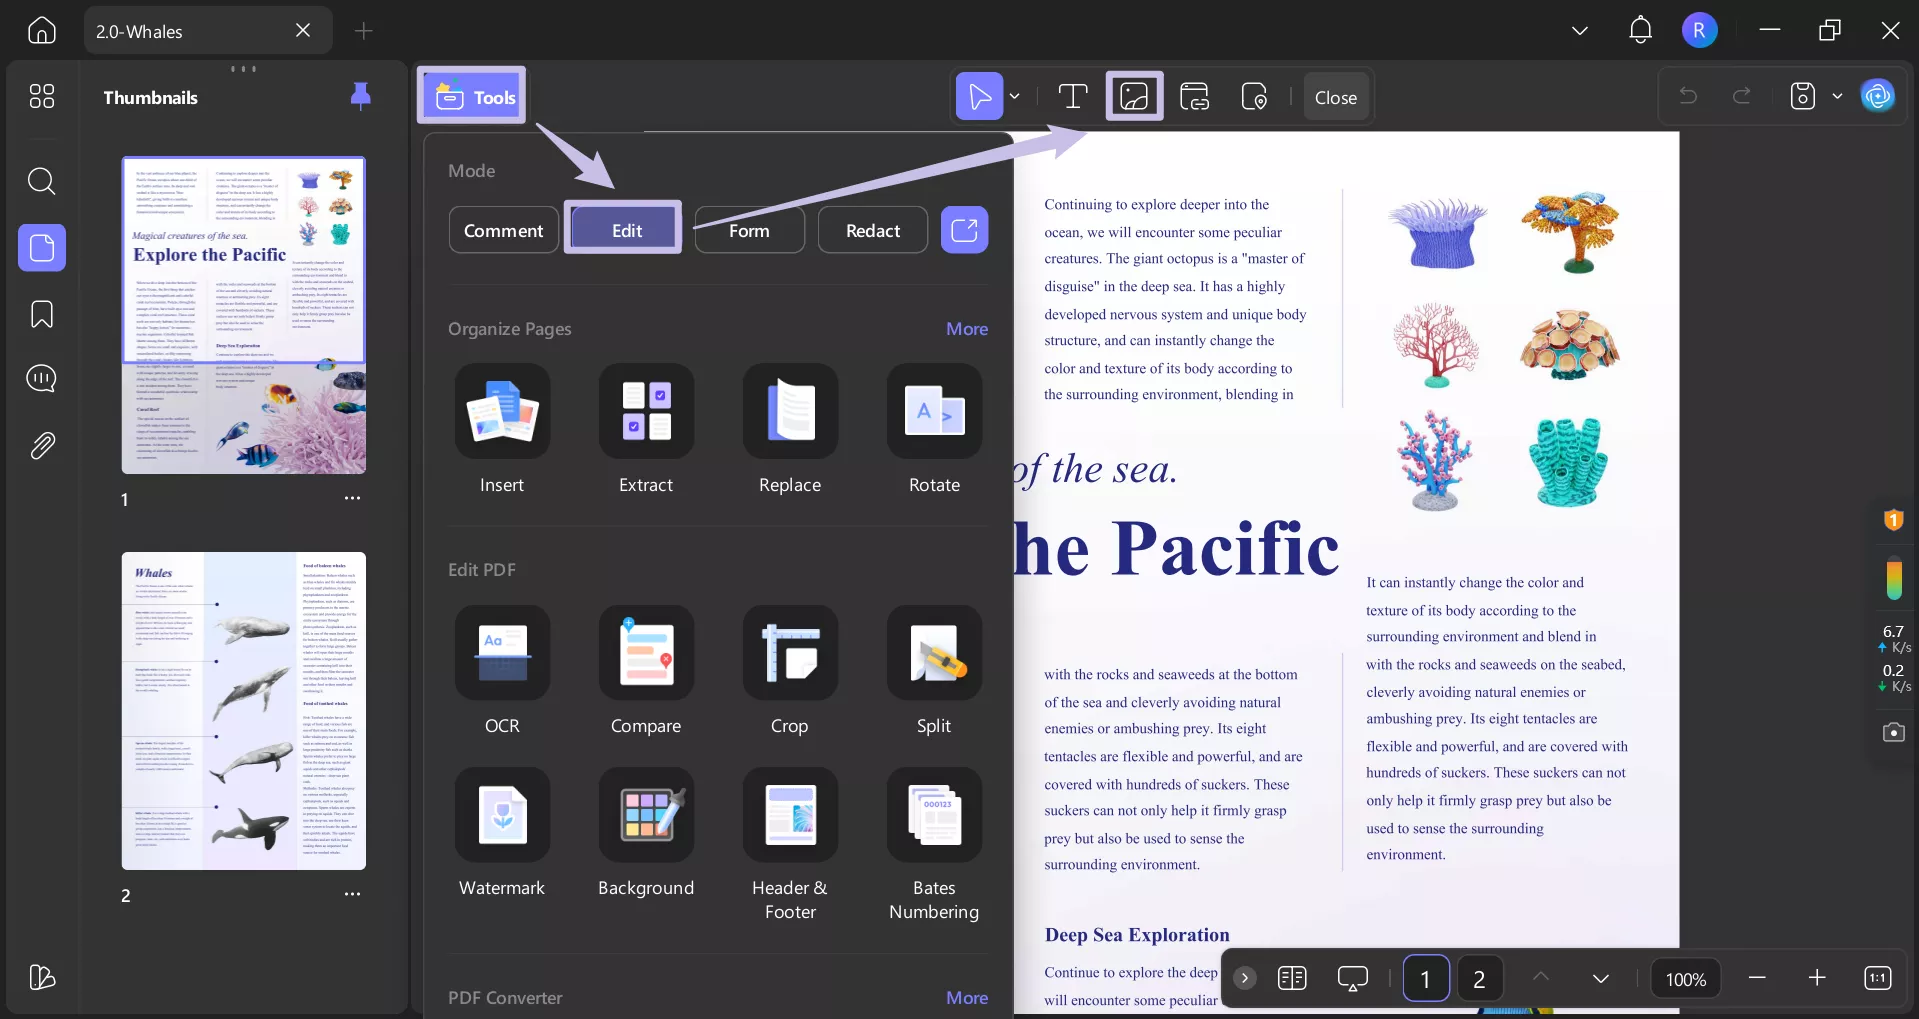
Upon importing the PDF file, tap on the Edit mode after clicking on the “Tools” and then press the Image button. Now, draw a box in the position where you want to insert the image and select the image from the newly opened dialog box.
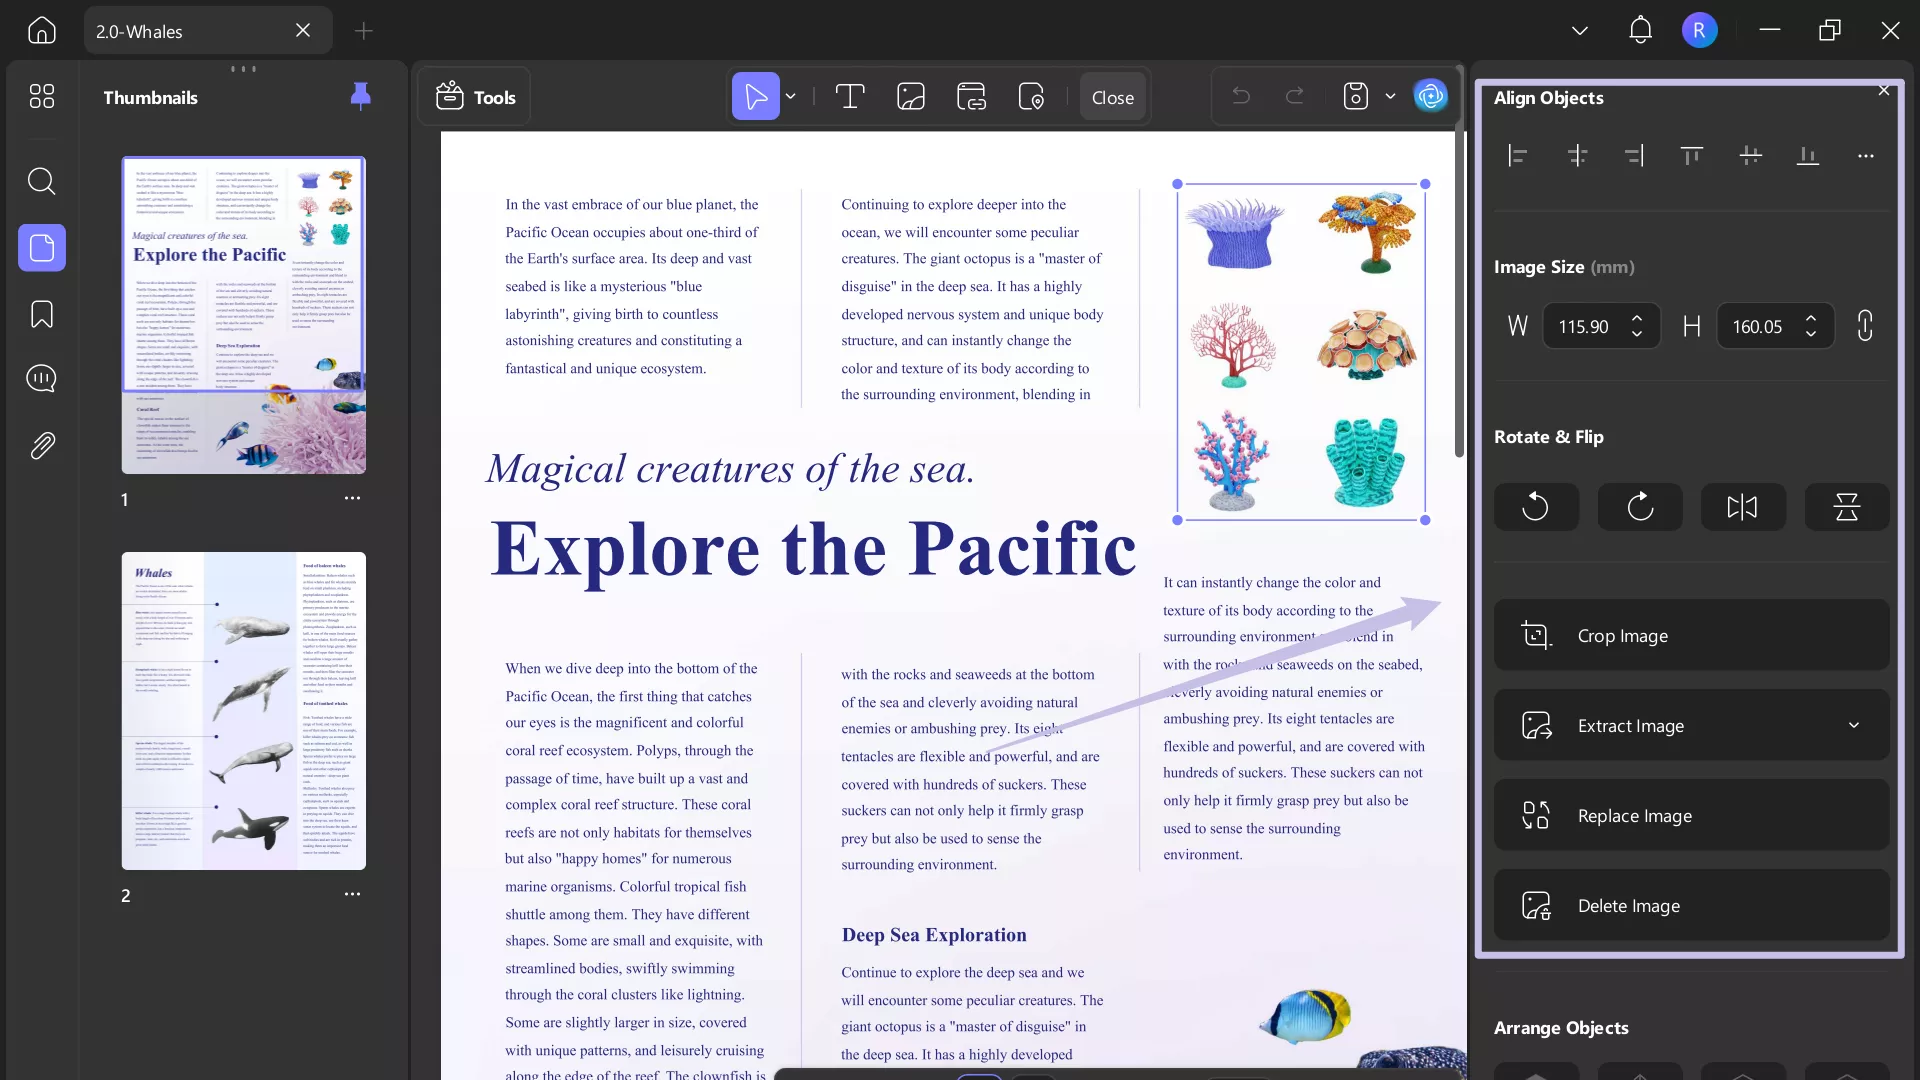
Step 3. Adjust the Appearance of the Inserted Image
Once the image is added, you will see multiple options within a new toolbox under the inserted picture. From here, choose any of the Crop, Rotate, or Replace options to optimize its appearance as you desire.
Other Key Features of UPDF
Beyond its powerful image editing tools, UPDF offers the following advanced features to streamline your workflow.
- Edit or Add Text: This allows you to easily edit existing text within a PDF or add new content anywhere in the document. After adding the text, you can change its font styles, sizes, and even colors.
- AI Summarization: With this feature, users can save time by generating concise summaries of lengthy PDF documents. UPDF AI lets you choose a specific page range or an entire document while creating summaries.
- Organize Pages: Users get to rearrange, rotate, delete, or insert pages to their PDFs using this tool. Moreover, this organization feature even lets you split or extract specific pages into a new file.
- Convert PDF Files: It can transform your PDFs into editable formats like Word, Excel, PowerPoint, and more. While doing so, this tool maintains formatting and layout of the original document.
- Translate Text or Full Document: To understand foreign documents, you can utilize its translation feature within the UPDF AI window. Moreover, its new feature lets you translate the whole document with a single tap.
- Create Forms: Using UPDF, users will be able to design and fill out interactive PDF forms that include text fields and drop-down menus.
Keeping in view all these features, we recommend you purchase this image editor to enjoy its full functionality. If you want to learn more about this advanced tool, watch this video and read this review article for better insights.
Wrapping Up
In summary, Bluebeam Revu proves to be a great tool for adding visual content to documents, especially with its Bluebeam insert image. Upon adding the images, users even get to crop, rotate, and mirror them for better appearance.
However, its interface proves to be a bit complex for some users, so they look for a simpler alternative. In such cases, UPDF appears to be the obvious choice with its drag-and-drop functionality. So, download this image editing tool today and utilize a smarter way to manage your documents.
Windows • macOS • iOS • Android 100% secure


 Donnie Chavez
 Lizzy Lozano