UPDF for Windows
 UPDF for Mac
 UPDF for iPhone/iPad
 UPDF for Android
 Nomostar
 UPDF AI Online
 UPDF Sign
 IvyCraft
 Edit PDF
 Annotate PDF
 Create PDF
 PDF Form
 Edit links
 Convert PDF
 OCR
OCR PDF to Word
 PDF to Image
 PDF to Excel
 Organize PDF
 Merge PDF
 Split PDF
 Crop PDF
 Rotate PDF
 Protect PDF
 Sign PDF
 Redact PDF
 Sanitize PDF
 Remove Security
 Read PDF
 UPDF Cloud
 Compress PDF
 Print PDF
 Batch Process
 About UPDF AI
 UPDF AI Solutions
 AI User Guide
 FAQ about UPDF AI
 Summarize PDF
 Translate PDF
 Chat with PDF
 Chat with AI
 Chat with image
 PDF to Mind Map
 Explain PDF
 PDF AI Tools
 Image AI Tools
 AI Chat Tools
 AI Writing Tools
 AI Study Tools
 AI Working Tools
 Other AI Tools
 AI Bookmark Generation
 AI Bookmark Summary
 AI Watermark Generation
 AI Background Generation
 AI Sticker Generation
 AI Stamp Generation
 AI Editing Suite
 UPDF Copilot
 AI Page Management
 AI Semantic Search
 PDF to Word
 PDF to Excel
 PDF to PowerPoint
 User Guide
 UPDF Tricks
 FAQs
FAQs UPDF Reviews
 Download Center
 Blog
Blog Newsroom
 Tech Spec
 Updates
 UPDF vs. Adobe Acrobat
 UPDF vs. Foxit
 UPDF vs. PDF Expert
Organize Pages with UPDF on Mac
UPDF enables smart management of PDF pages with its user-friendly interface. You can insert, replace, extract, split, rotate, delete, or perform various other functions with individual or multiple pages per your need. In this guide, we will uncover the different aspects of PDF organization with UPDF on Mac.
Windows • macOS • iOS • Android 100% secure
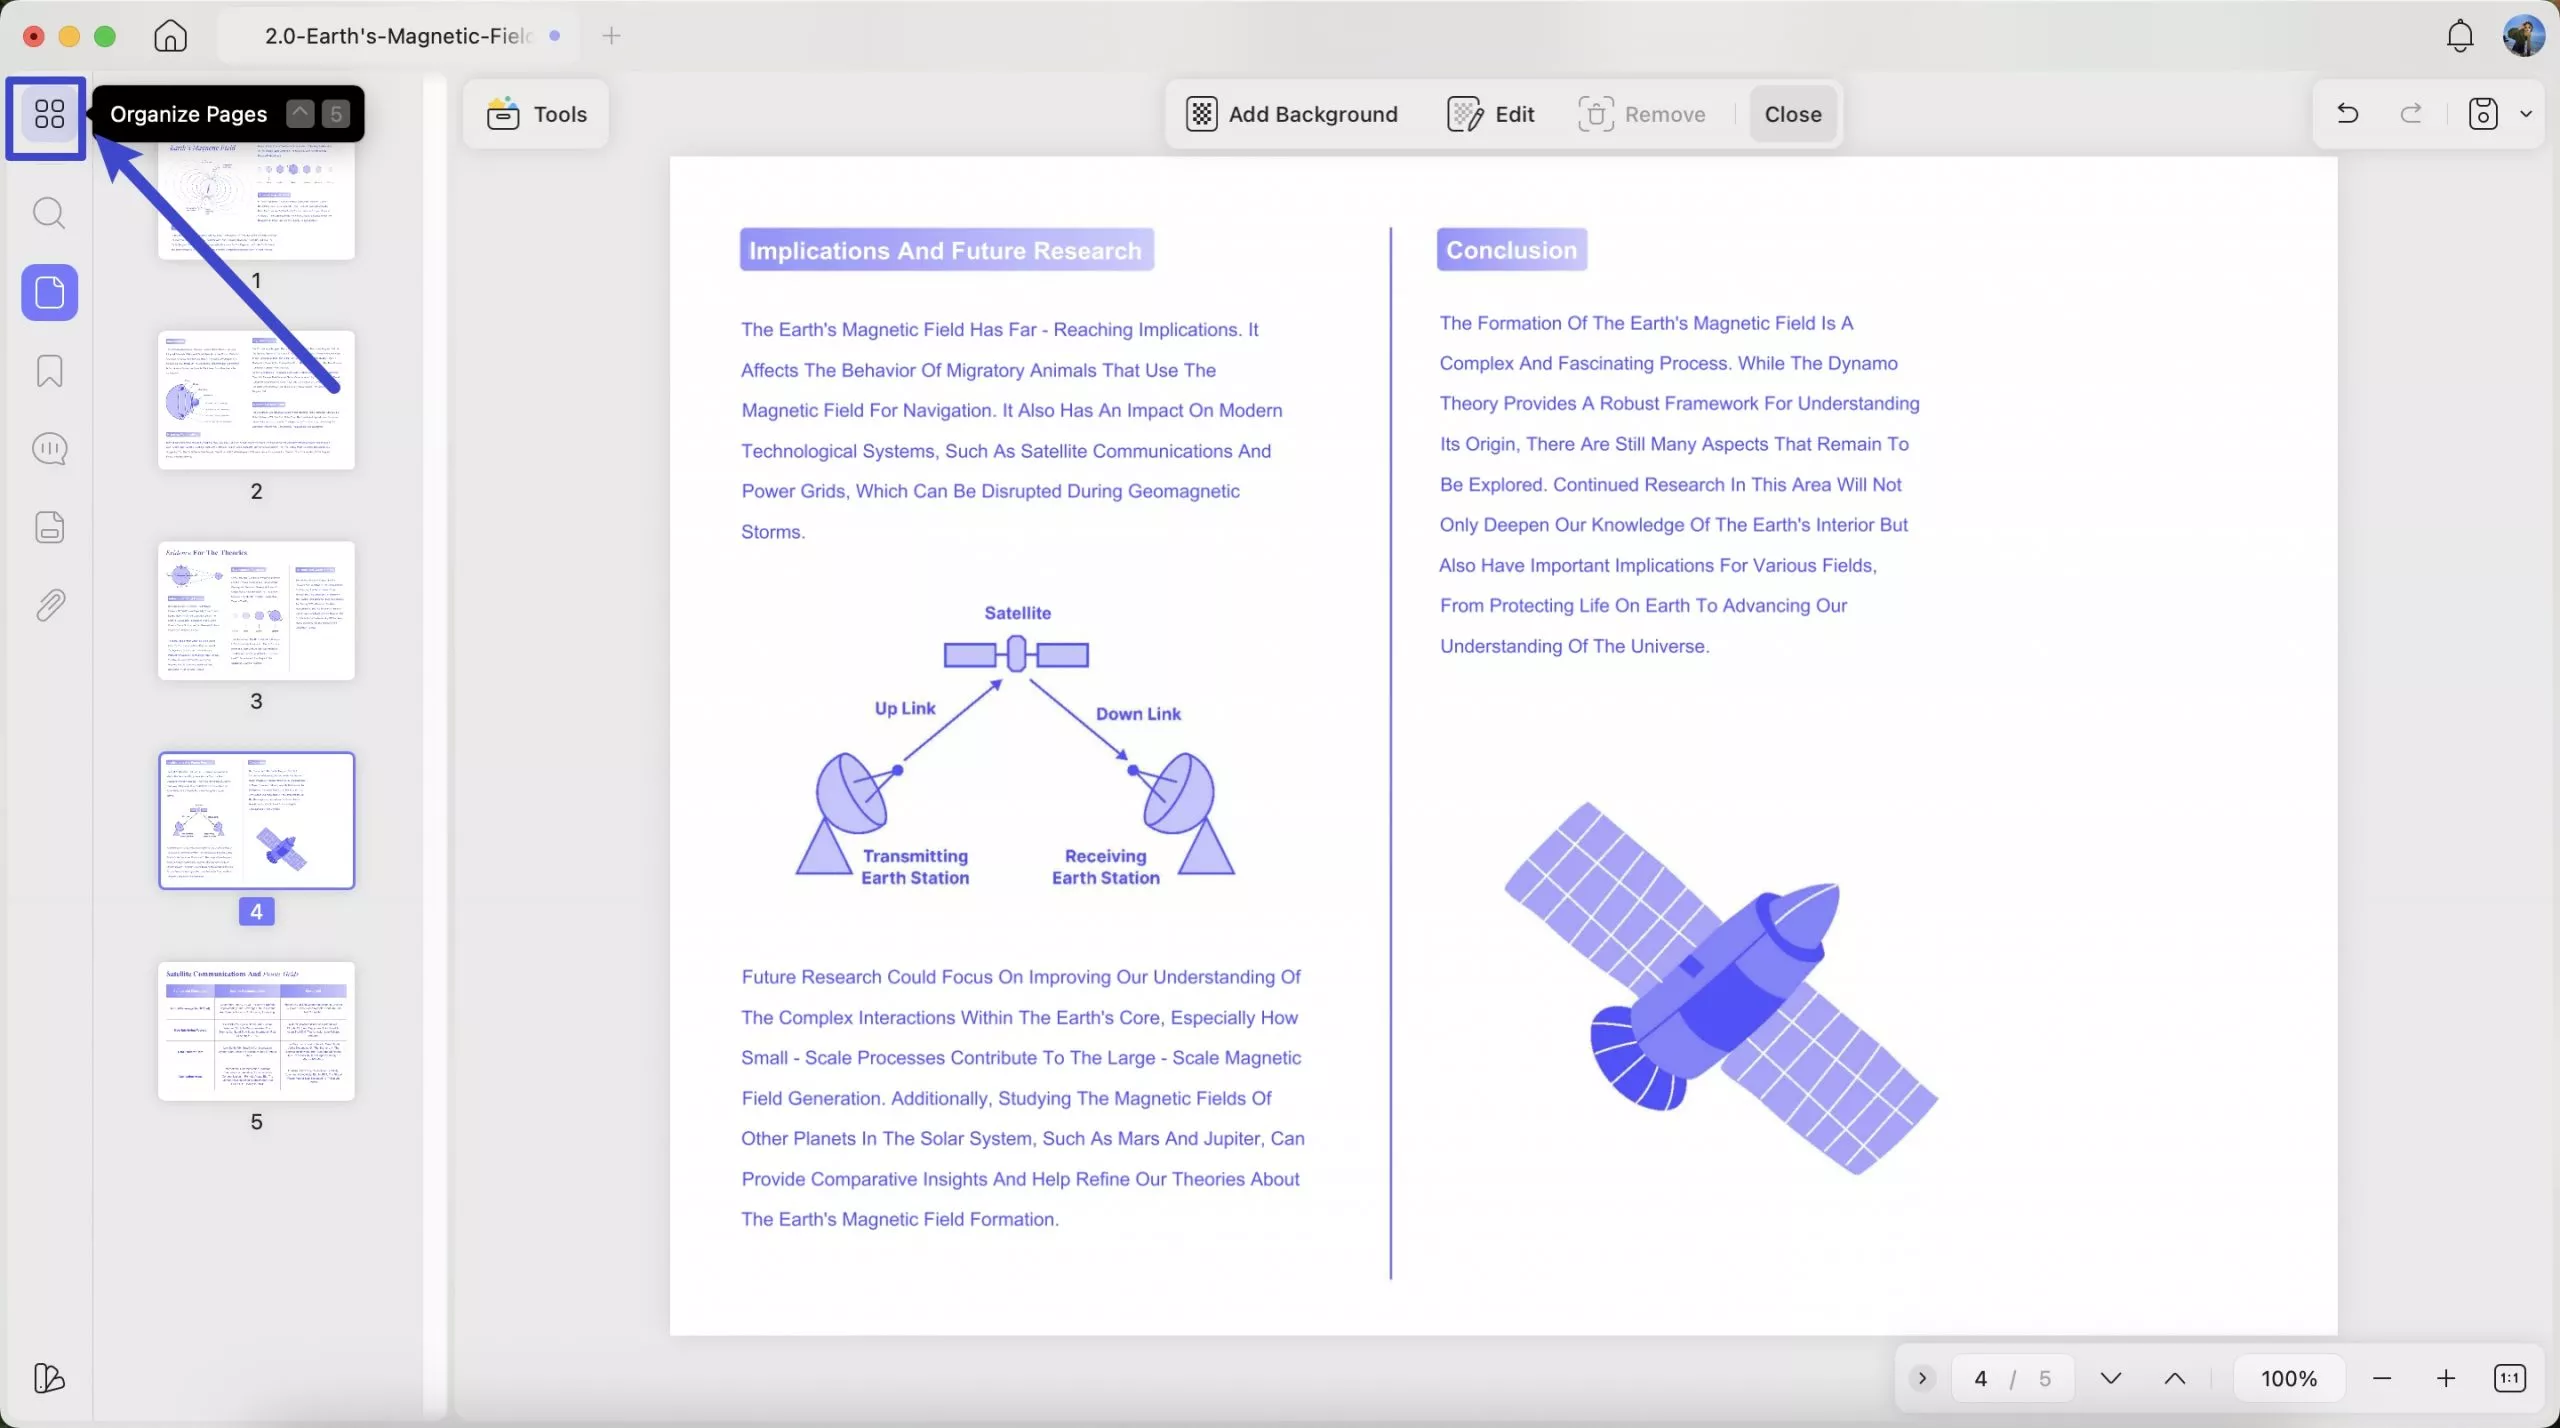
To begin PDF organization, open your PDF and click on the "Organize Pages" icon on the left toolbar.
Now, you can see all the organize pages features on the top menu.
Here, you will get plenty of tools to use, including:
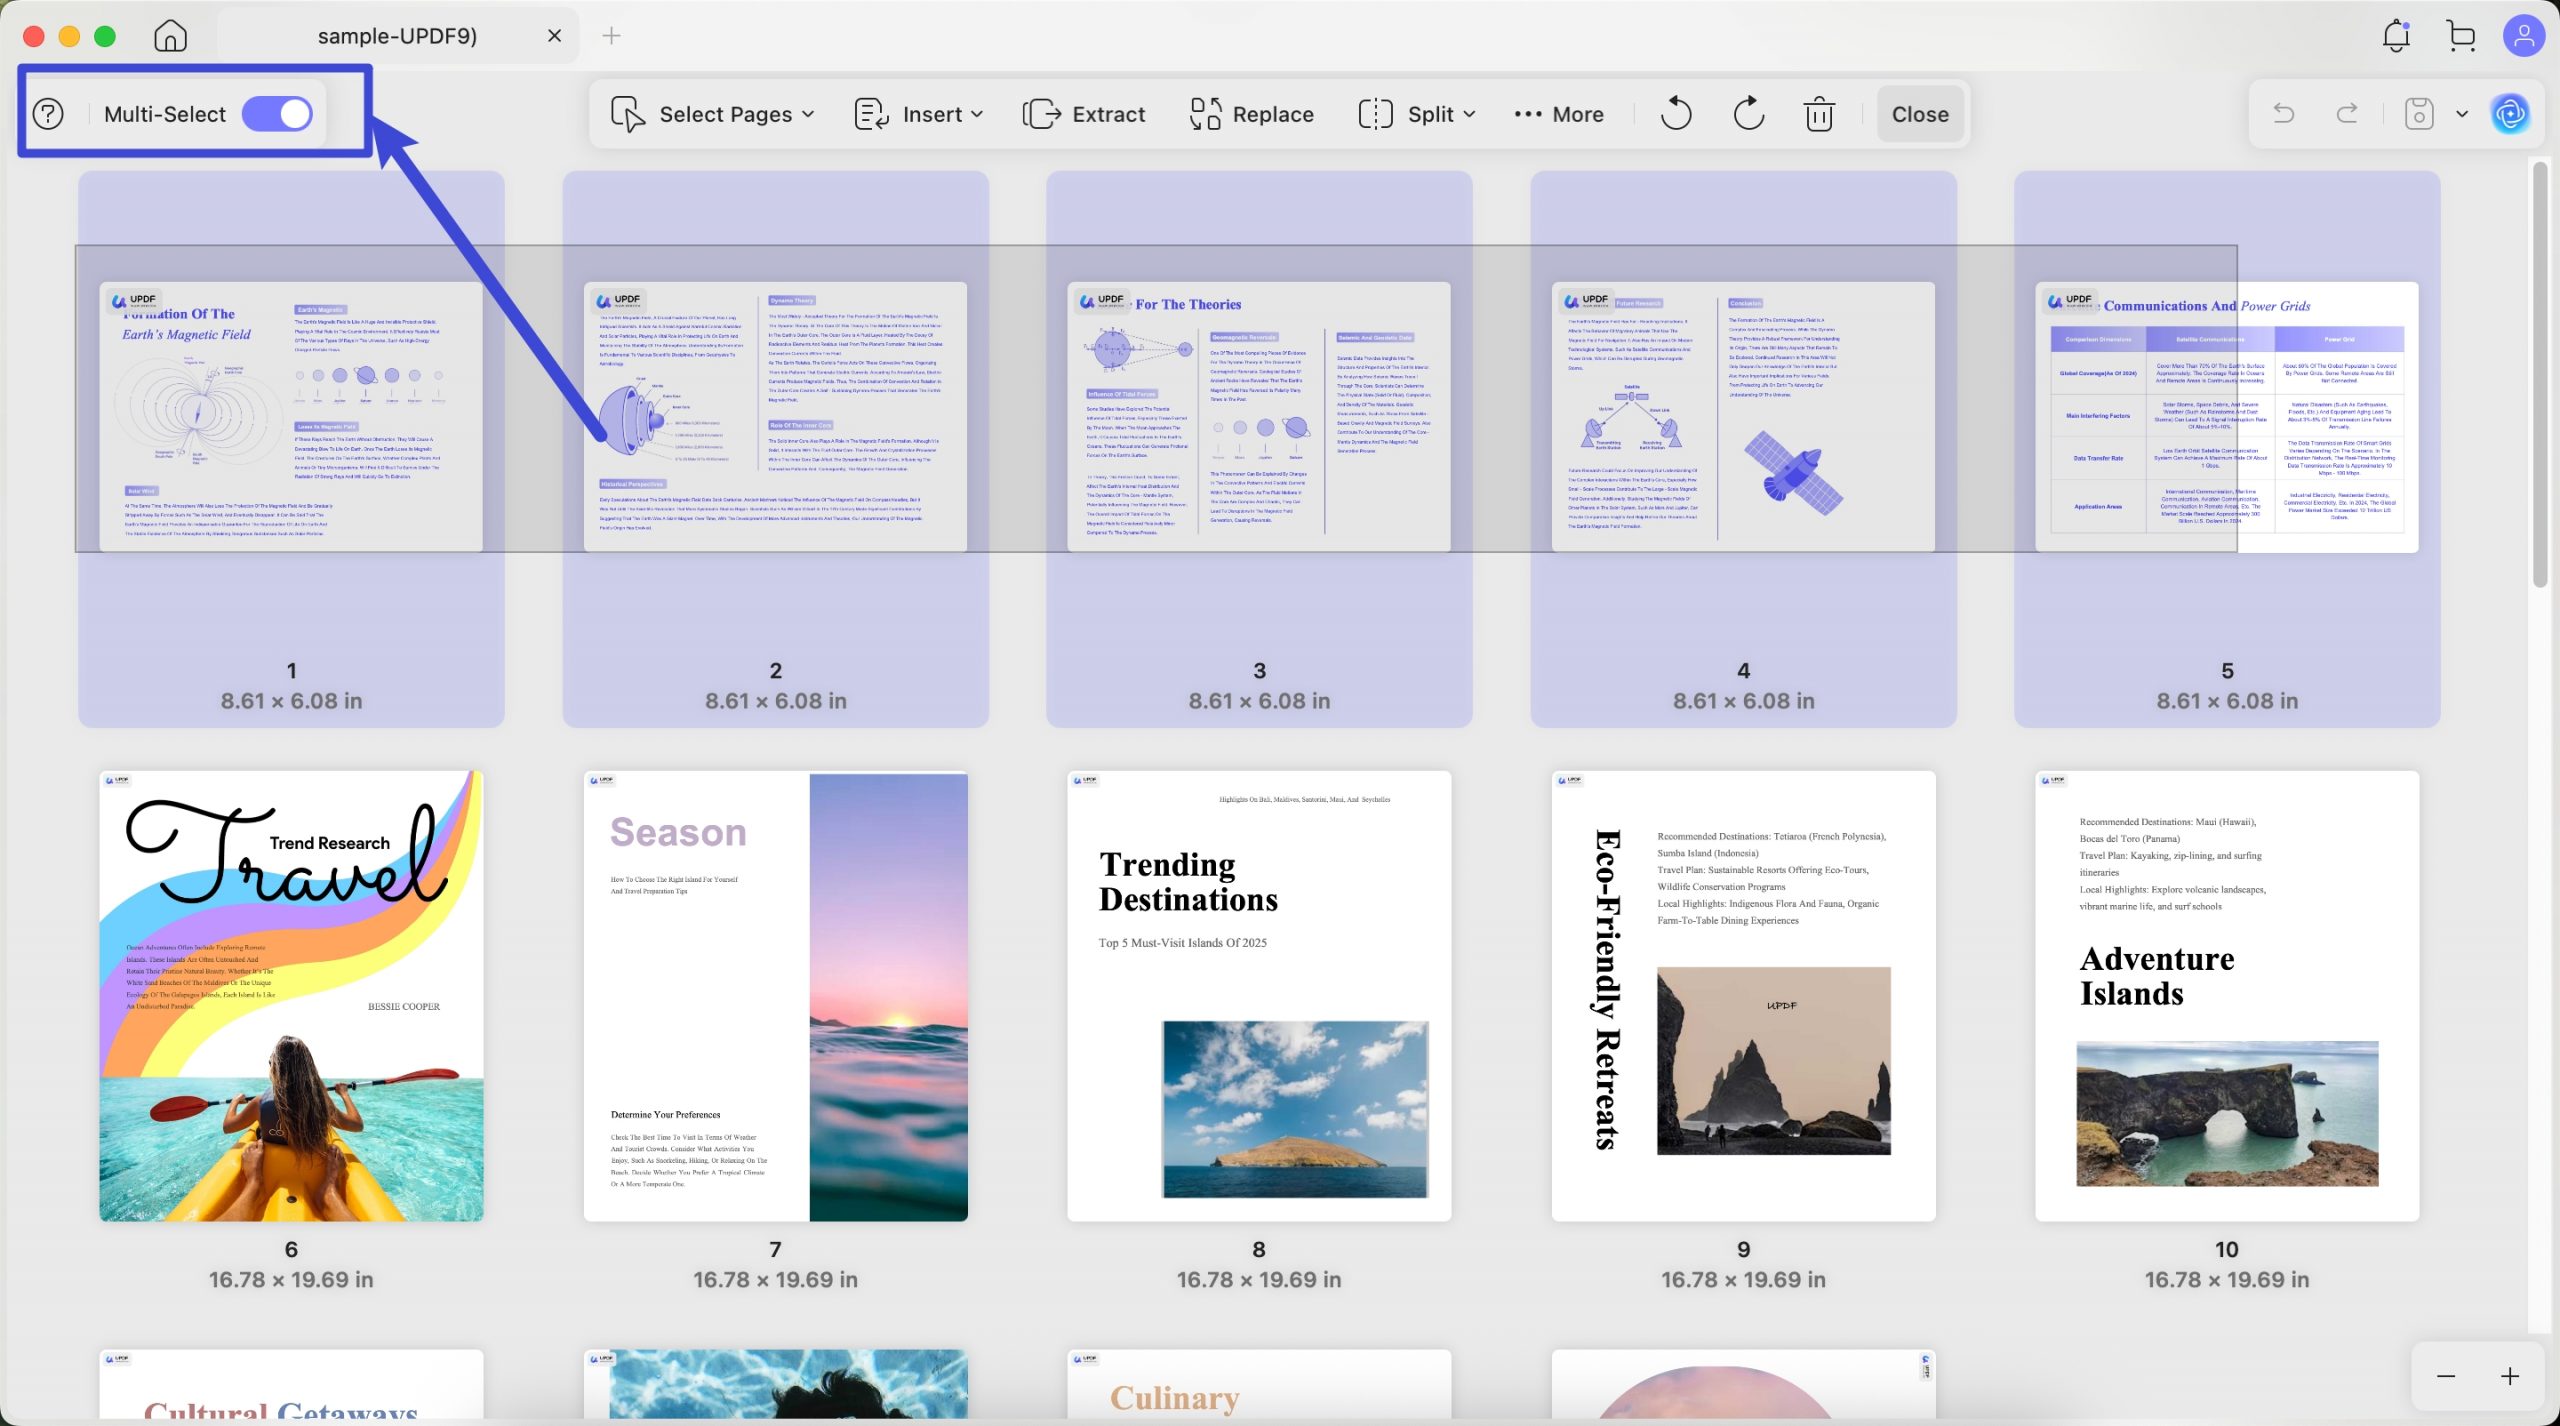
Multiple Select Mode:
Video Tutorial on How to Enter Multi-Select Mode and Select Pages with UPDF
It's one of the great UPDF features that lets you select multiple items with one click without holding the Command key.
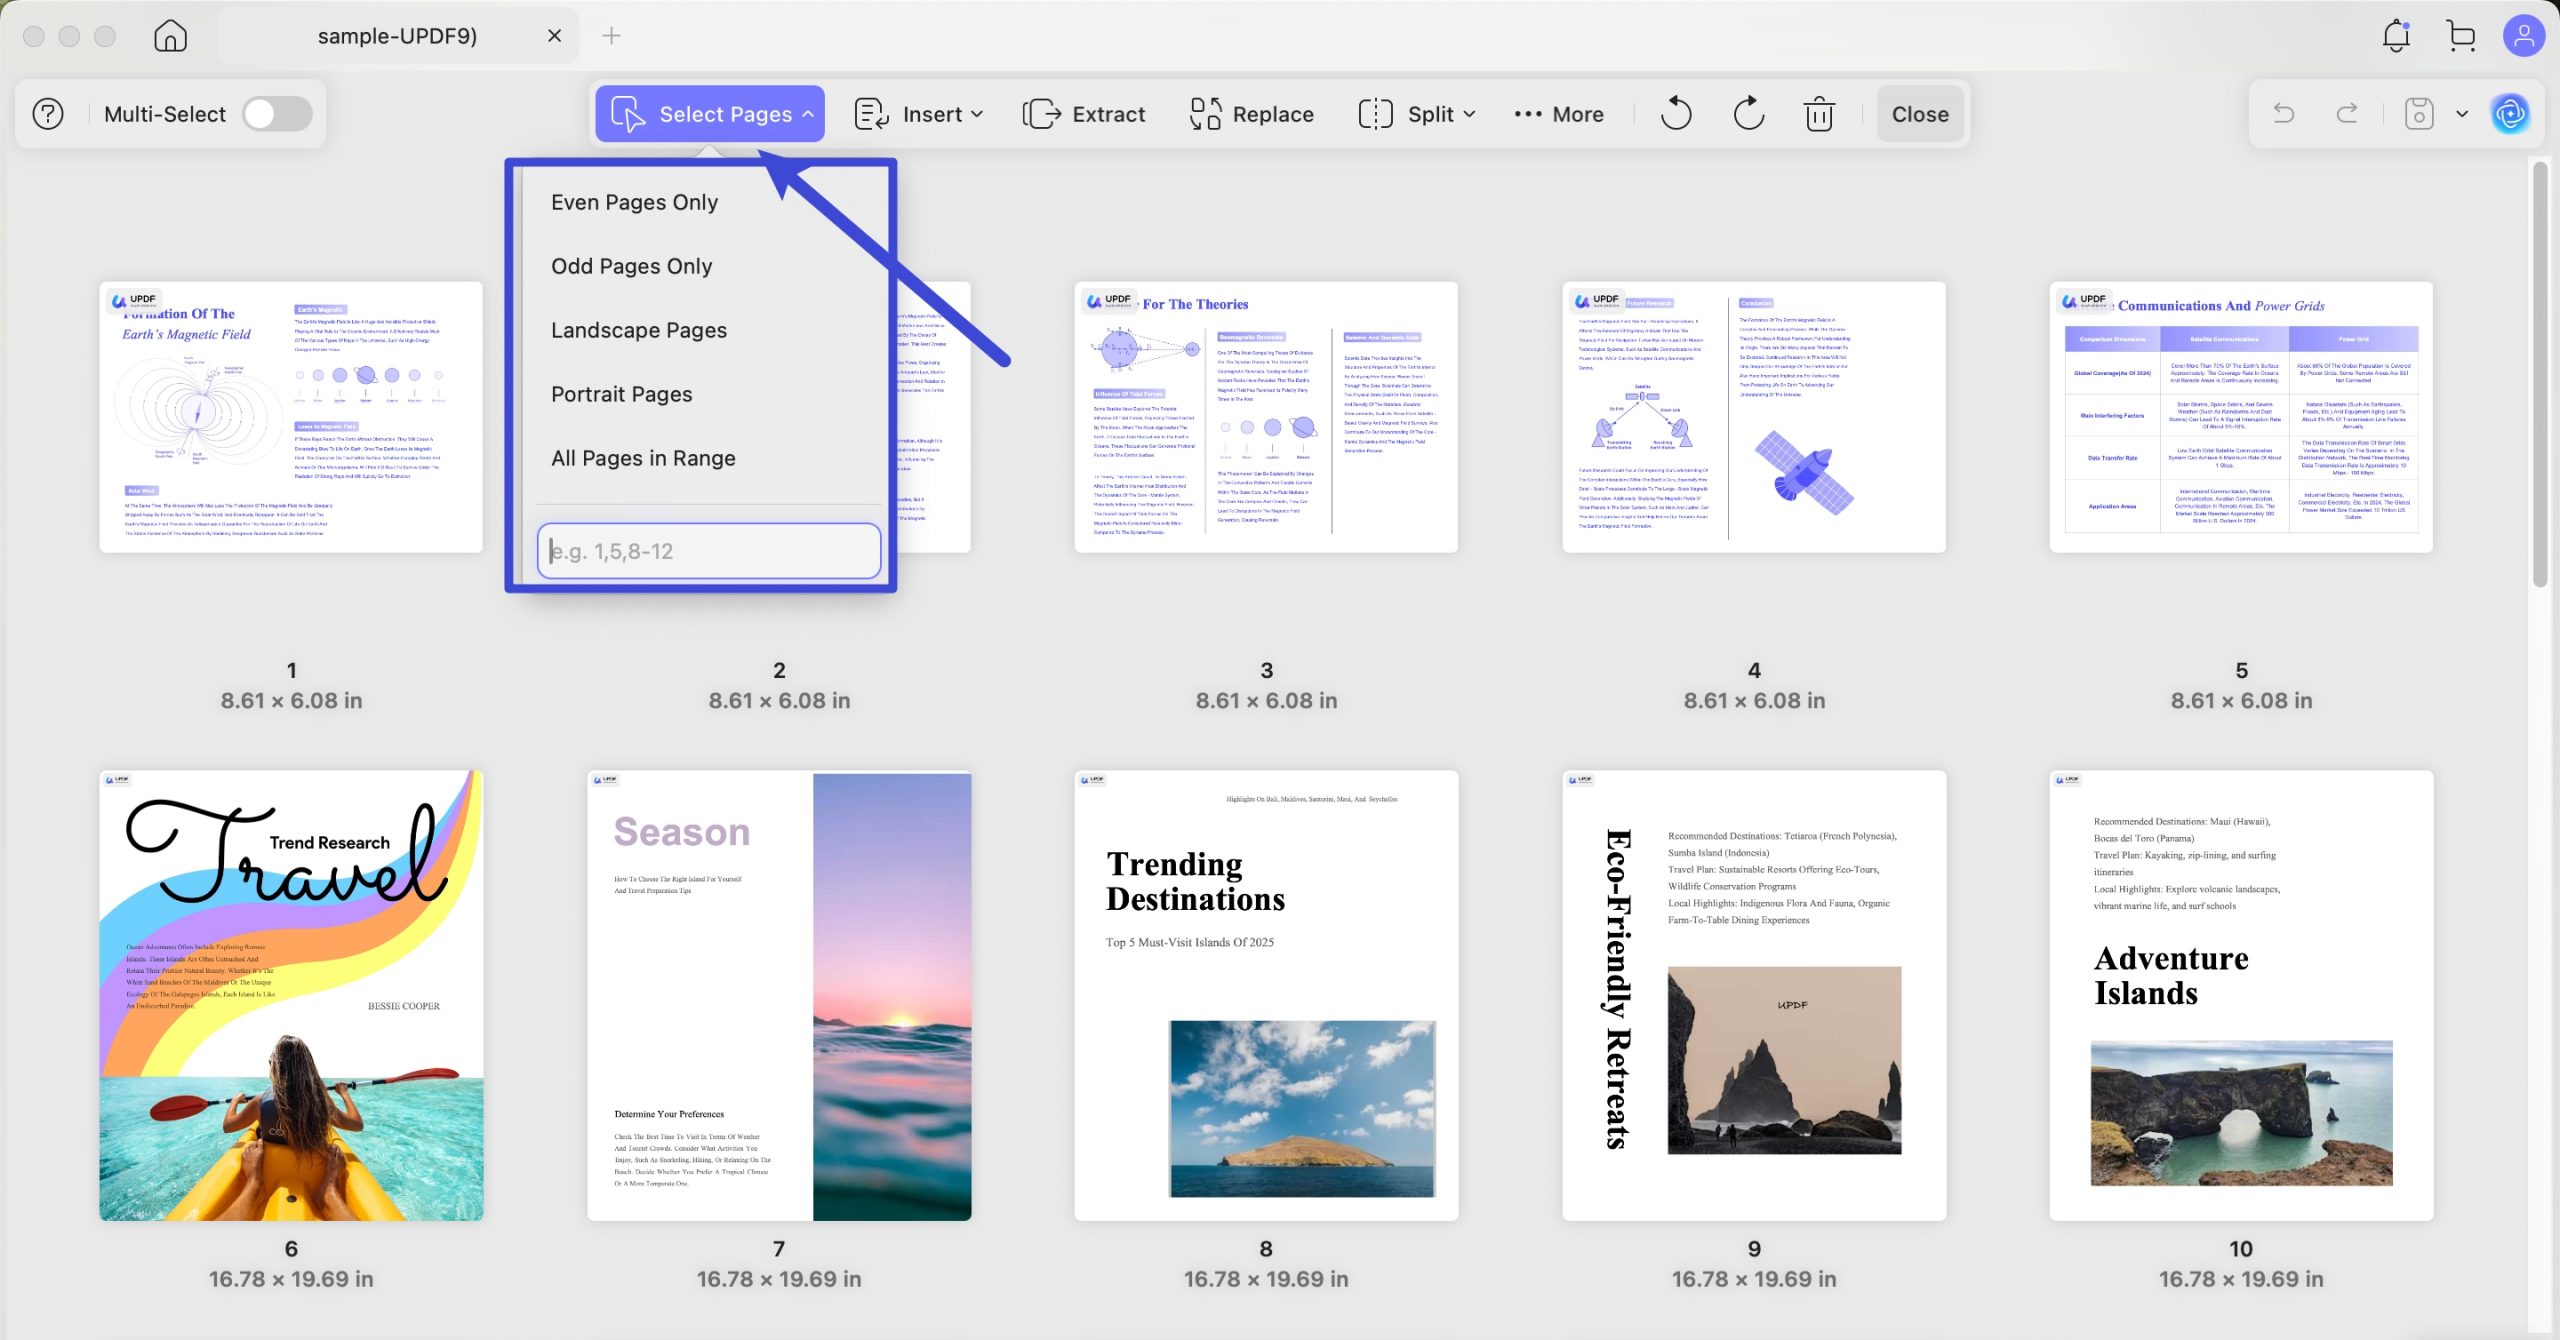
Select Pages:
This feature lets you select different page ranges. You can select even, odd, landscape, portrait, or all pages at once. Custom page range can also be selected.
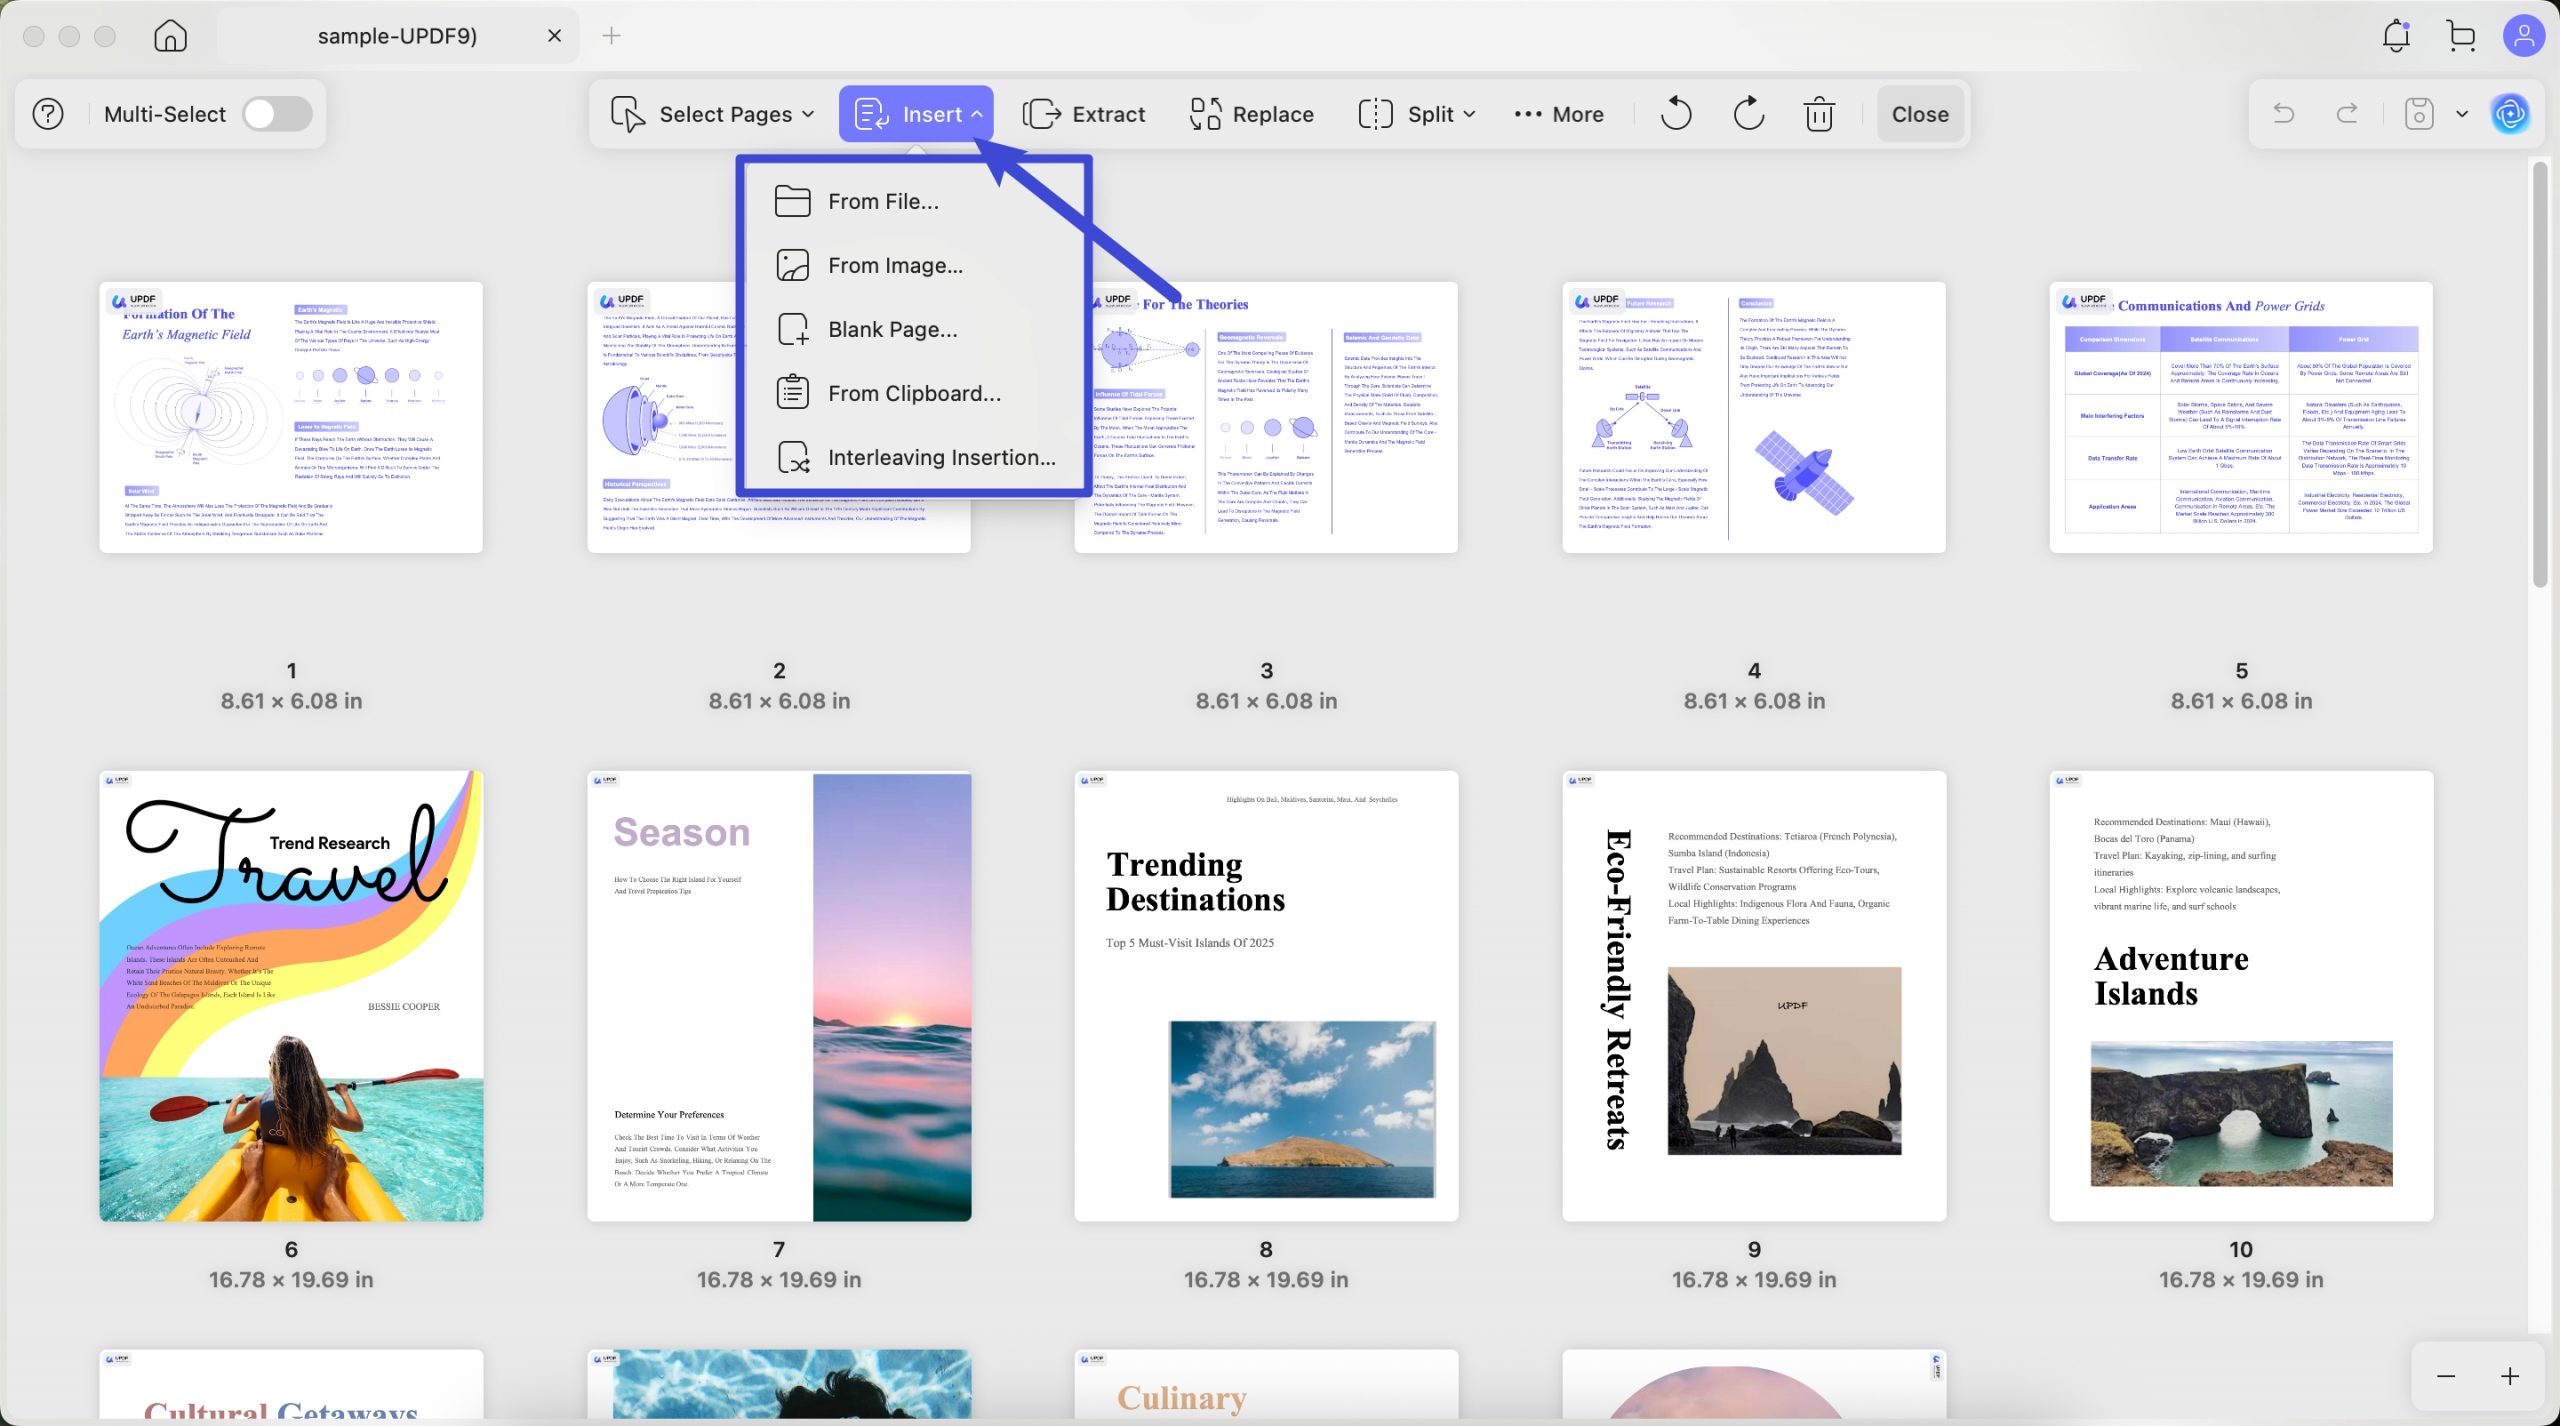
Insert:
Video Tutorial on How to Insert Pages with UPDF
This option enables you to insert PDFs from Files, clipboards, or images. Blank pages can also be inserted to begin writing or editing from scratch. Lastly, you can cross-insert a PDF, inserting its odd or even pages only.
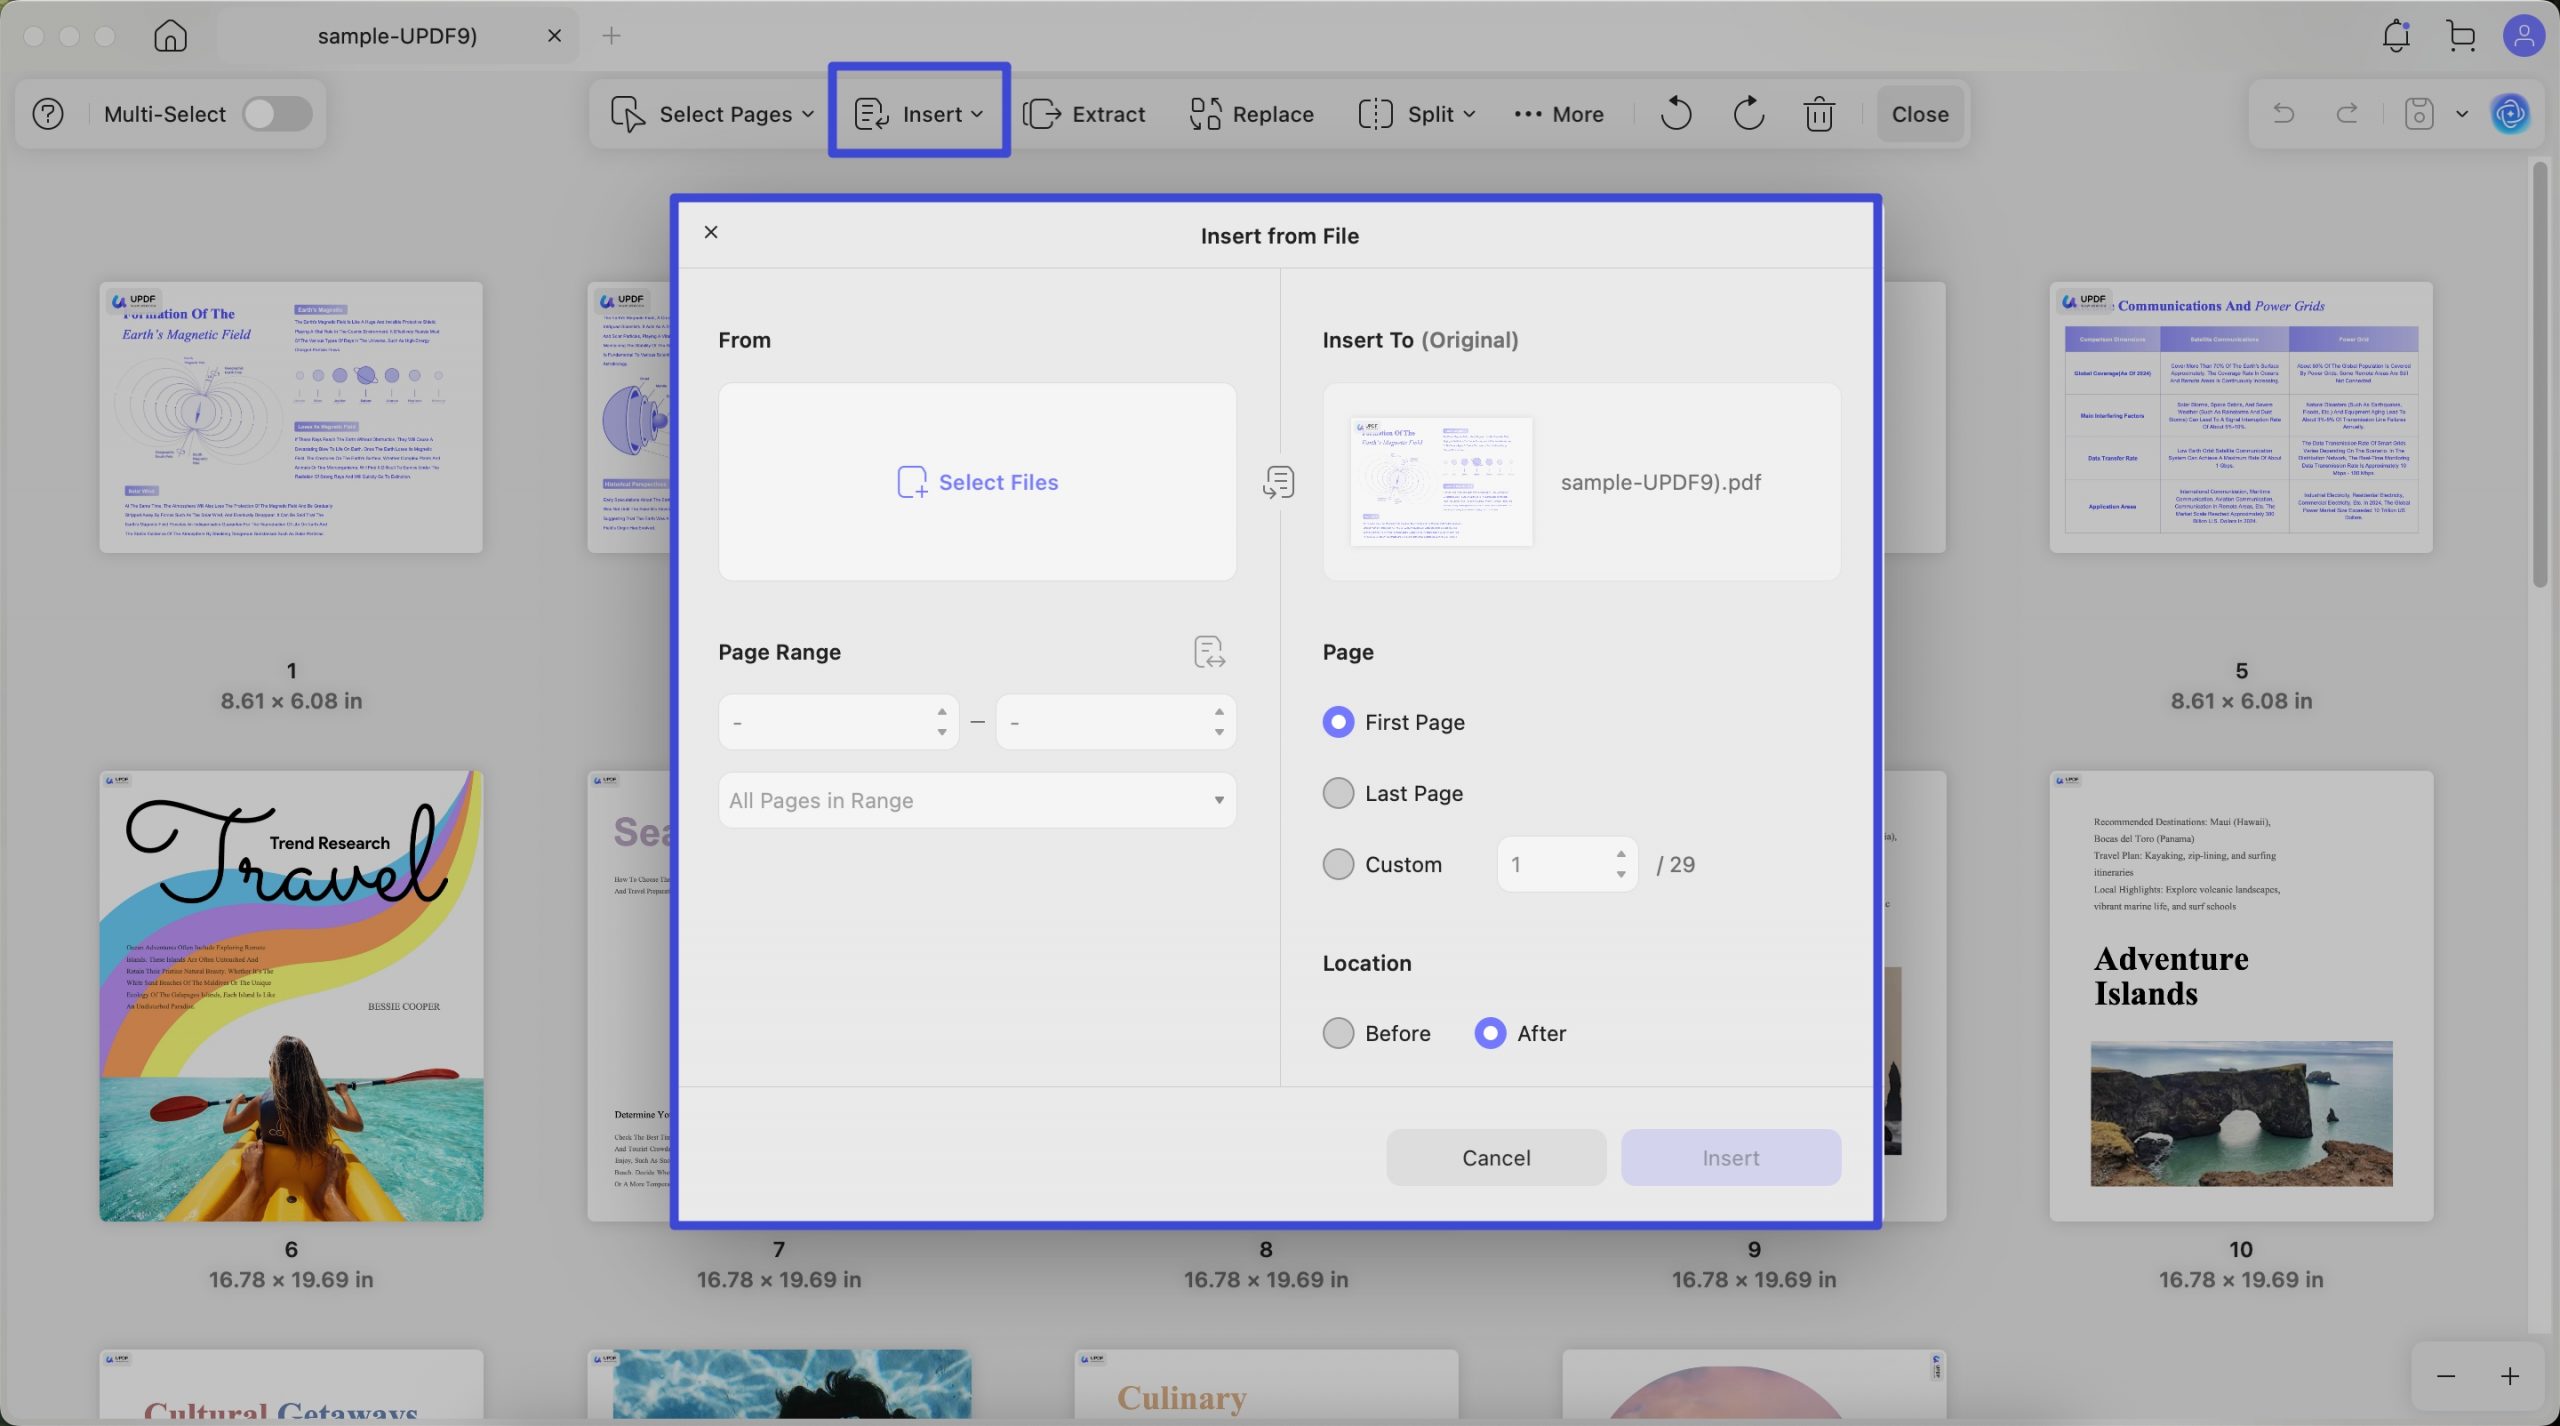
Insert PDFs from Files, if you want to insert one PDF to the opened PDF file, you can use this method. Just click on the “From File”, “Select File” to upload the PDF that you want to insert to the opened PDF, customize the page range for the uploaded PDF that you want to insert. Now, go to customize the Insert To section, select to insert the pages into first page, after last page, or customize the page of your opened PDF, choose the Location like Before or After. For example, if you select First Page in the “Insert Page” section and choose “After”, the pages will be inserted after the first page in the opened PDF. Click on the “Insert”.
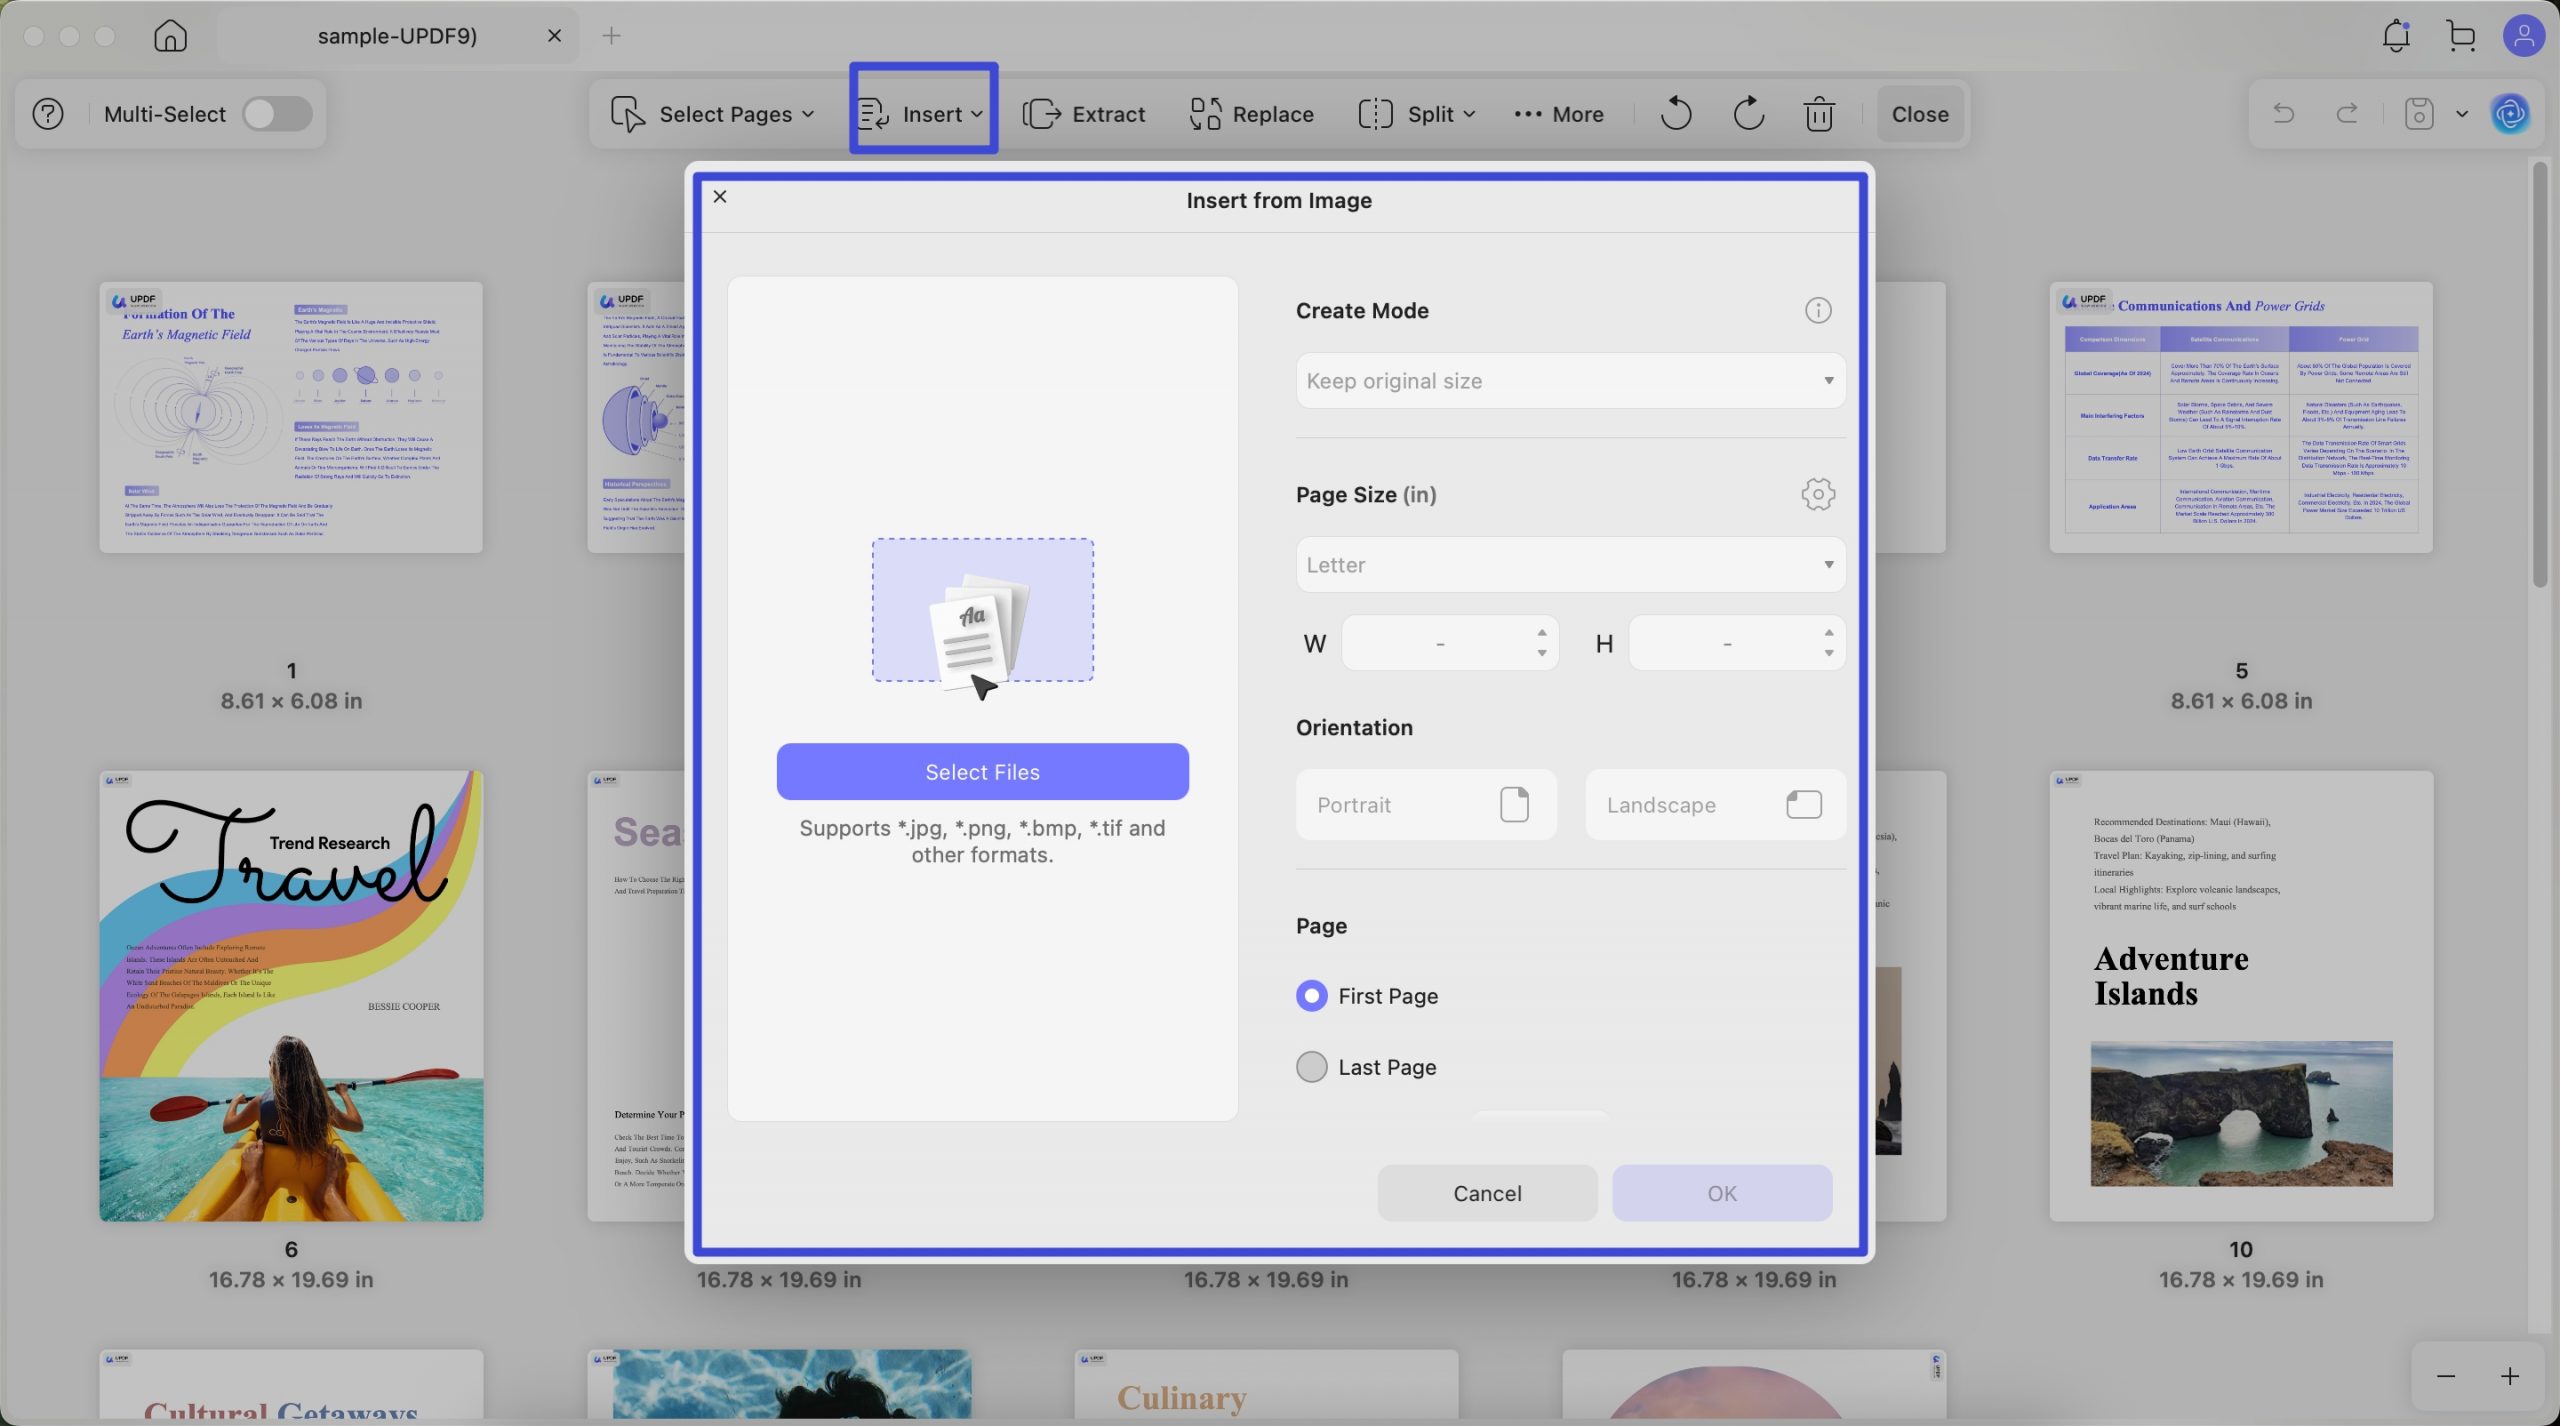
If you want to insert one image into the opened PDF as a page, you can select the “From Image” button. From the pop up Window, you can click on the “Choose File” to upload the image with jpg, png, bmp, tiff, or other image formats, choose whether you need to create by file size to keep the original file size or by paper size to use the uniform page size. If you choose by Paper Size, you can select the page size you need like A4, A5, B5, etc and select the orientation. Then, select to insert the page in the First Page, Last Page, or Custom Page, and choose the location to insert like After or Before the selected page. Click on the “Insert”.
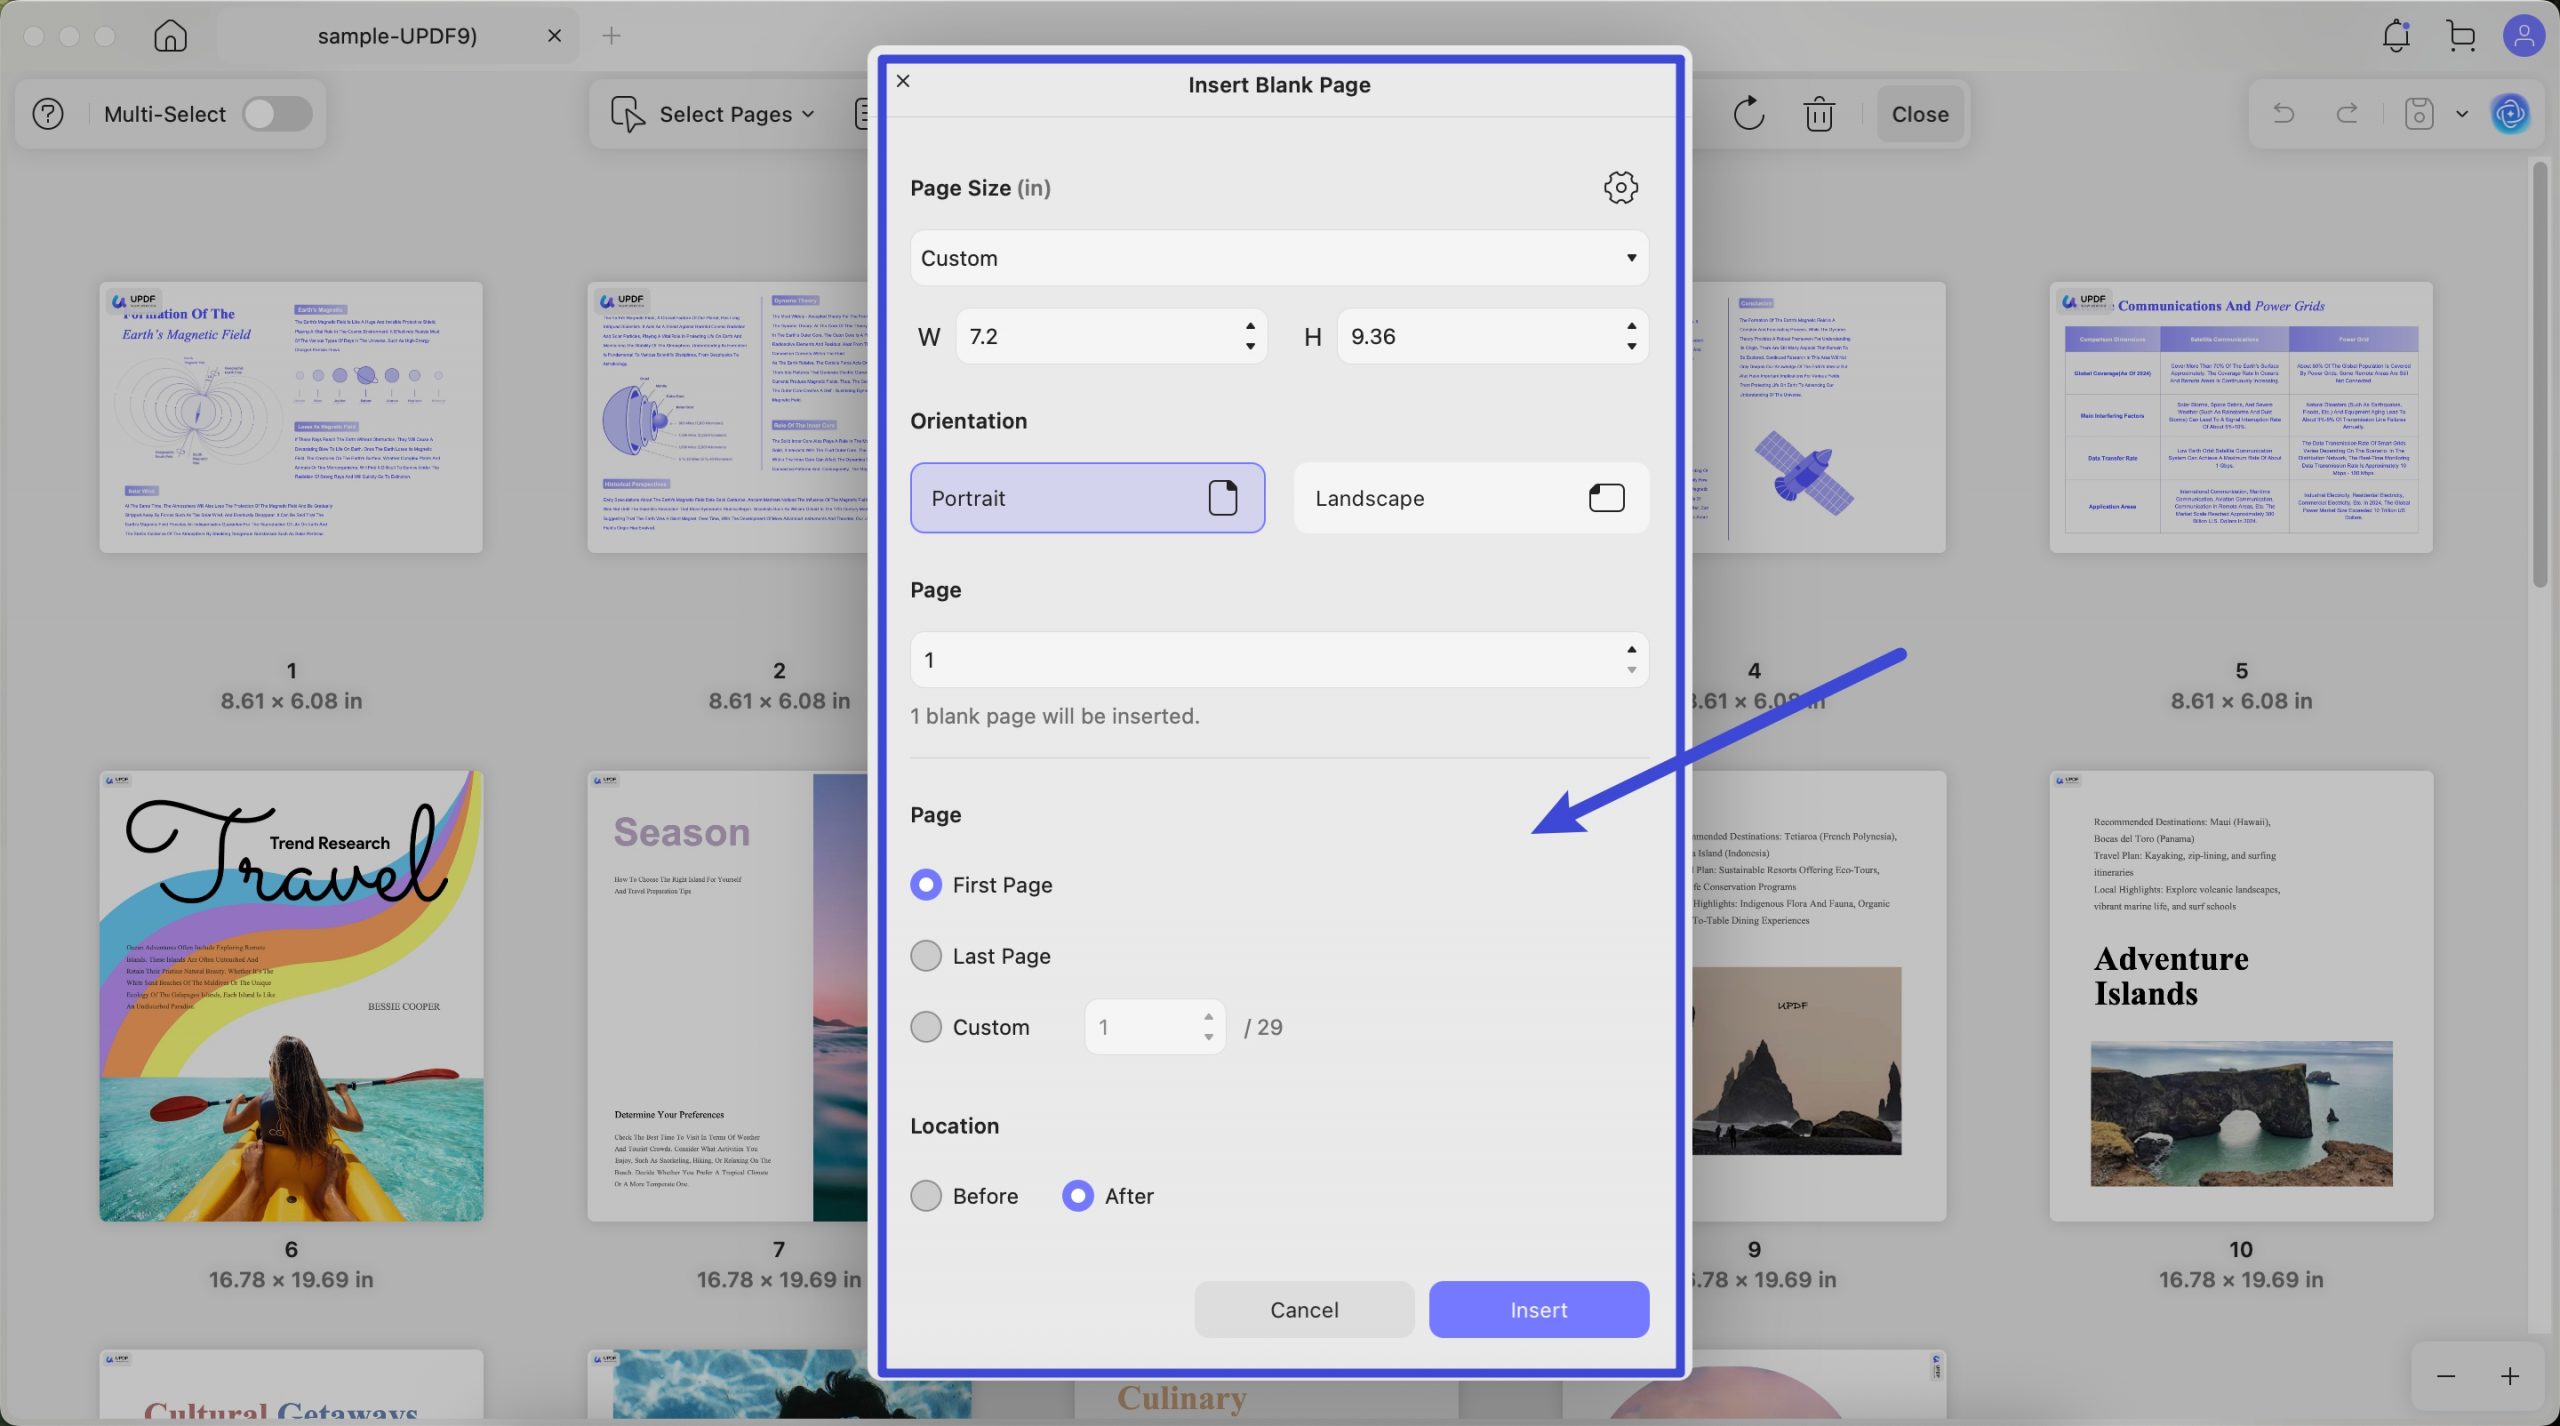
You can also insert blank page into the PDF. Just click on the “Blank Page...” after clicking on the “Insert”. In the pop up window, choose Page Size, select the orientation, enter how many pages you need. Then, choose where you want to insert the blank page to. Before or After the First Page, Last Page, or Customize Page. Now, click on the “Insert” to insert the blank page to PDF.
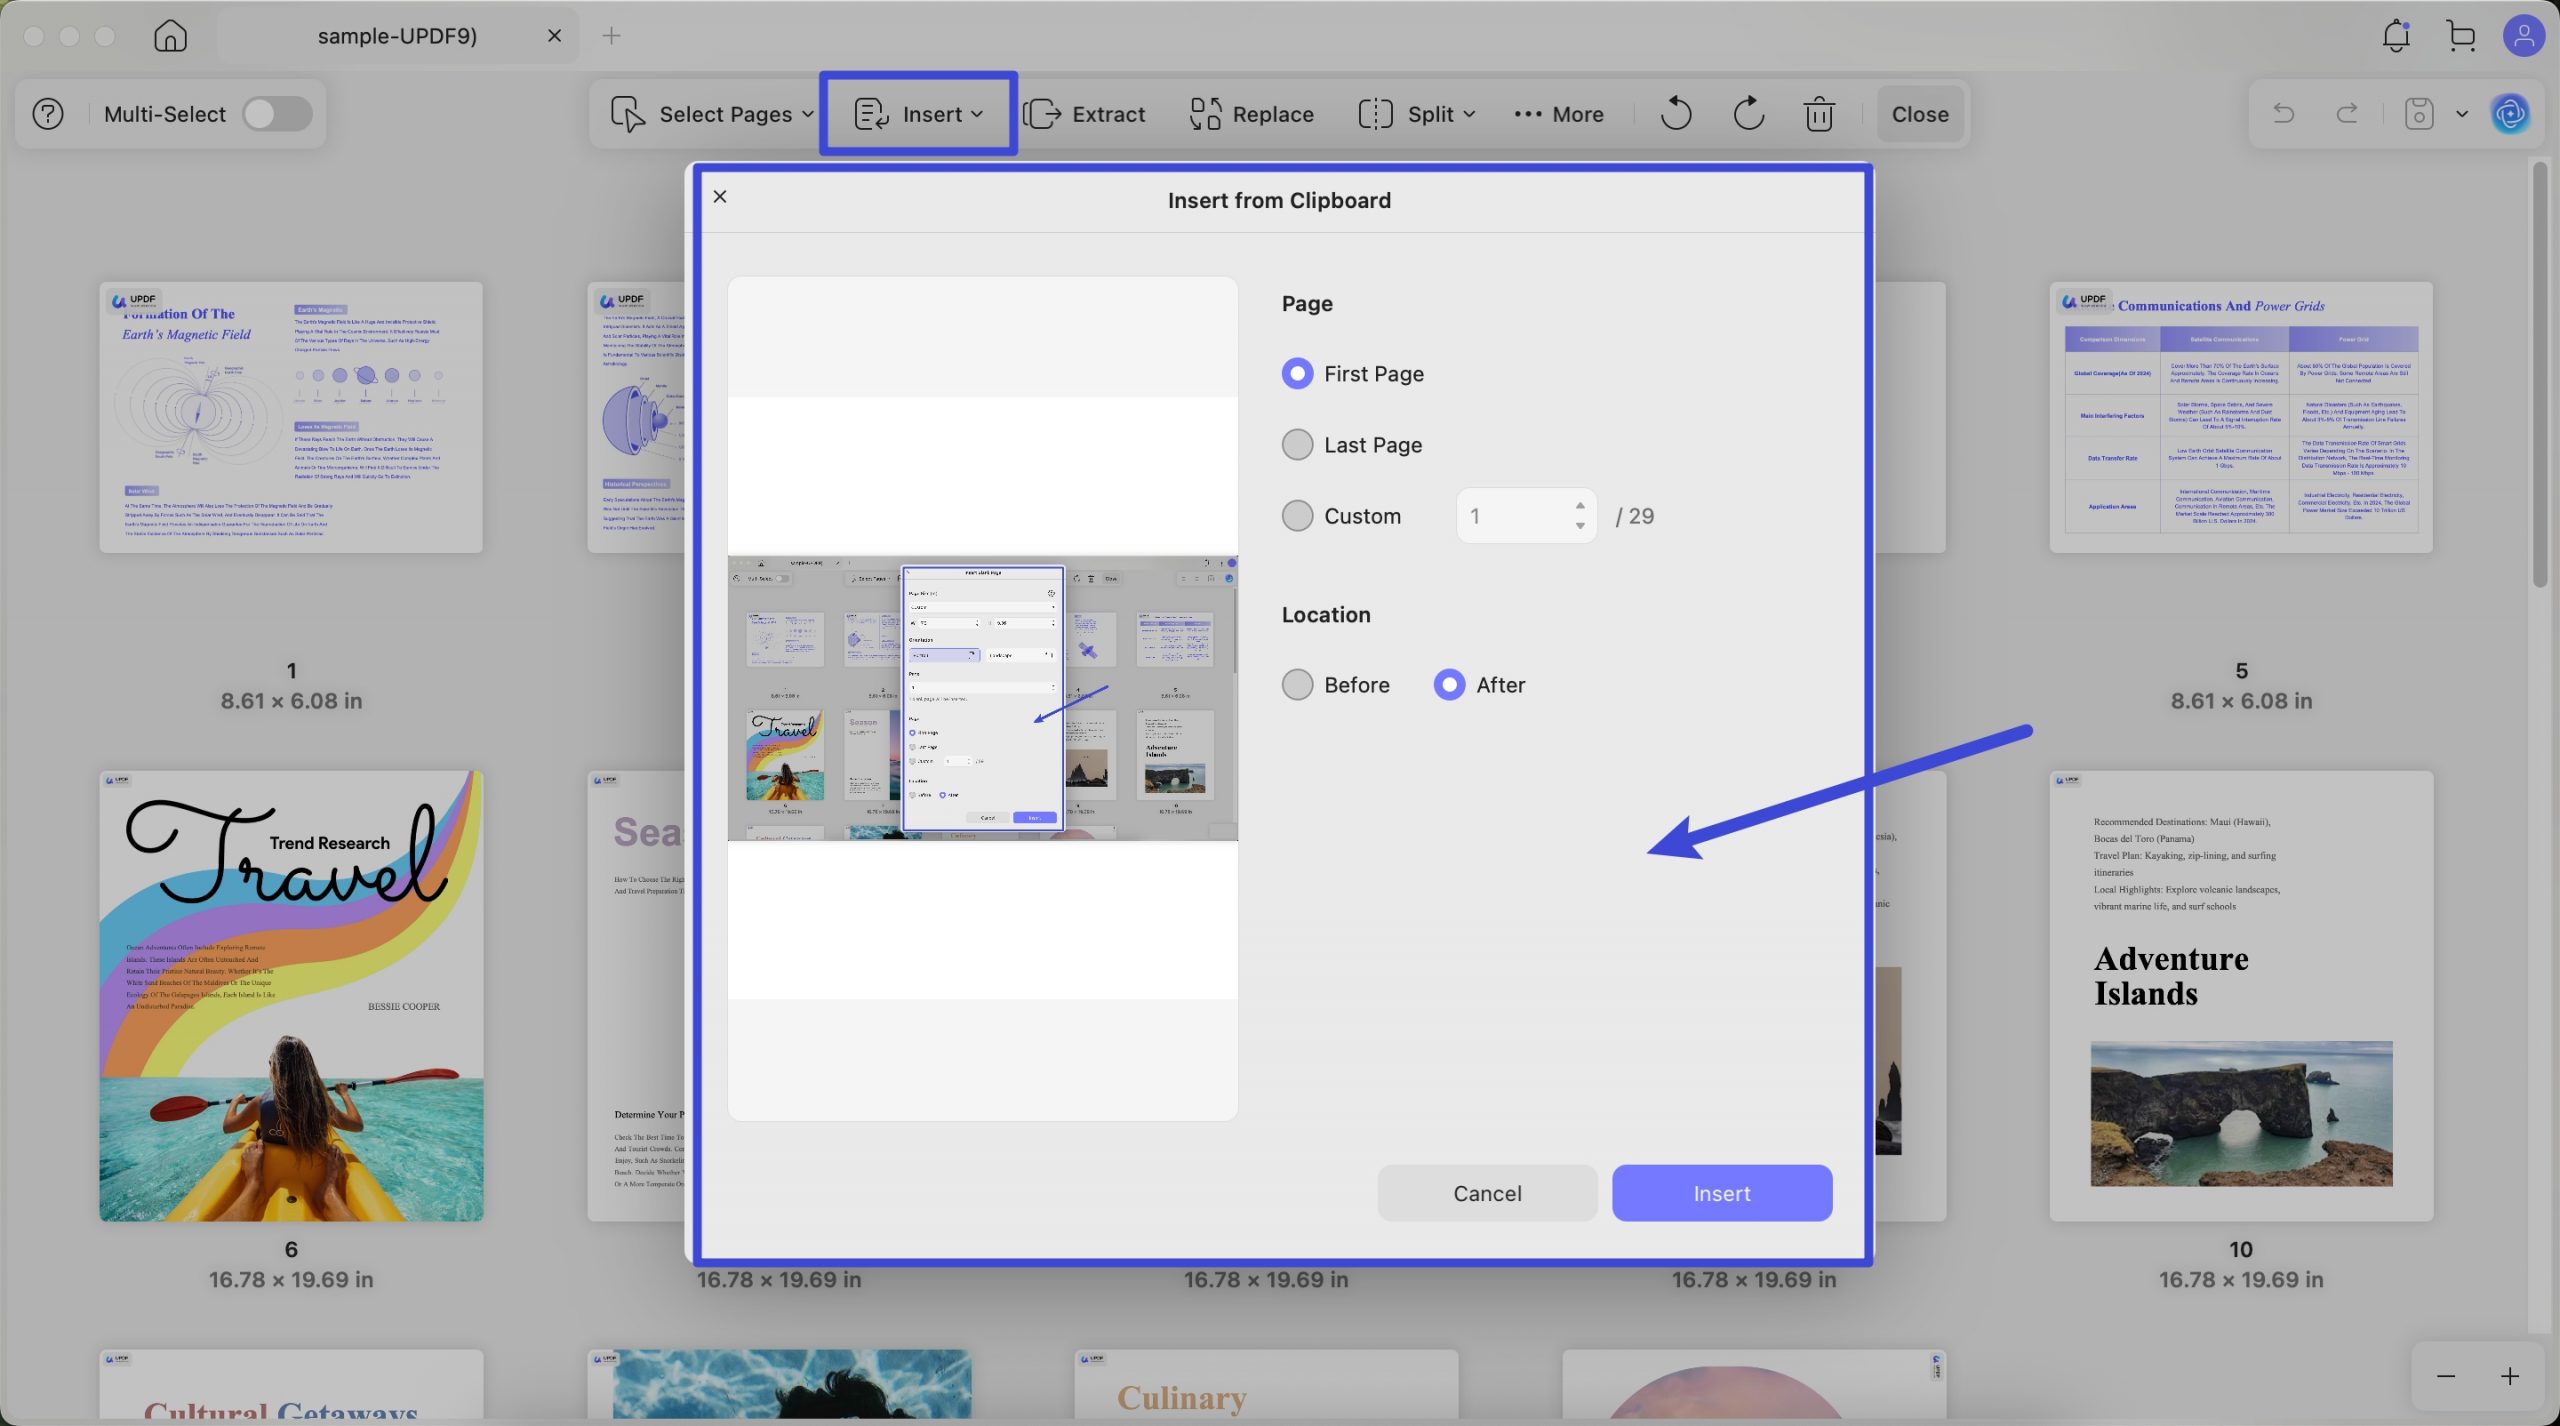
With UPDF on Mac, you can copy the content or image and insert them into PDF as pages. Here, you need to use the feature of inserting from Clipboard. Hold on “CMD+C” to copy the content or images. Click on the “Insert” > “From Clipboard”. Select where to insert the page. You can choose Before or After the “First Page”, “Last Page”, or customize the pages. Click on the “Insert” to finish inserting the content from the Clipboard.
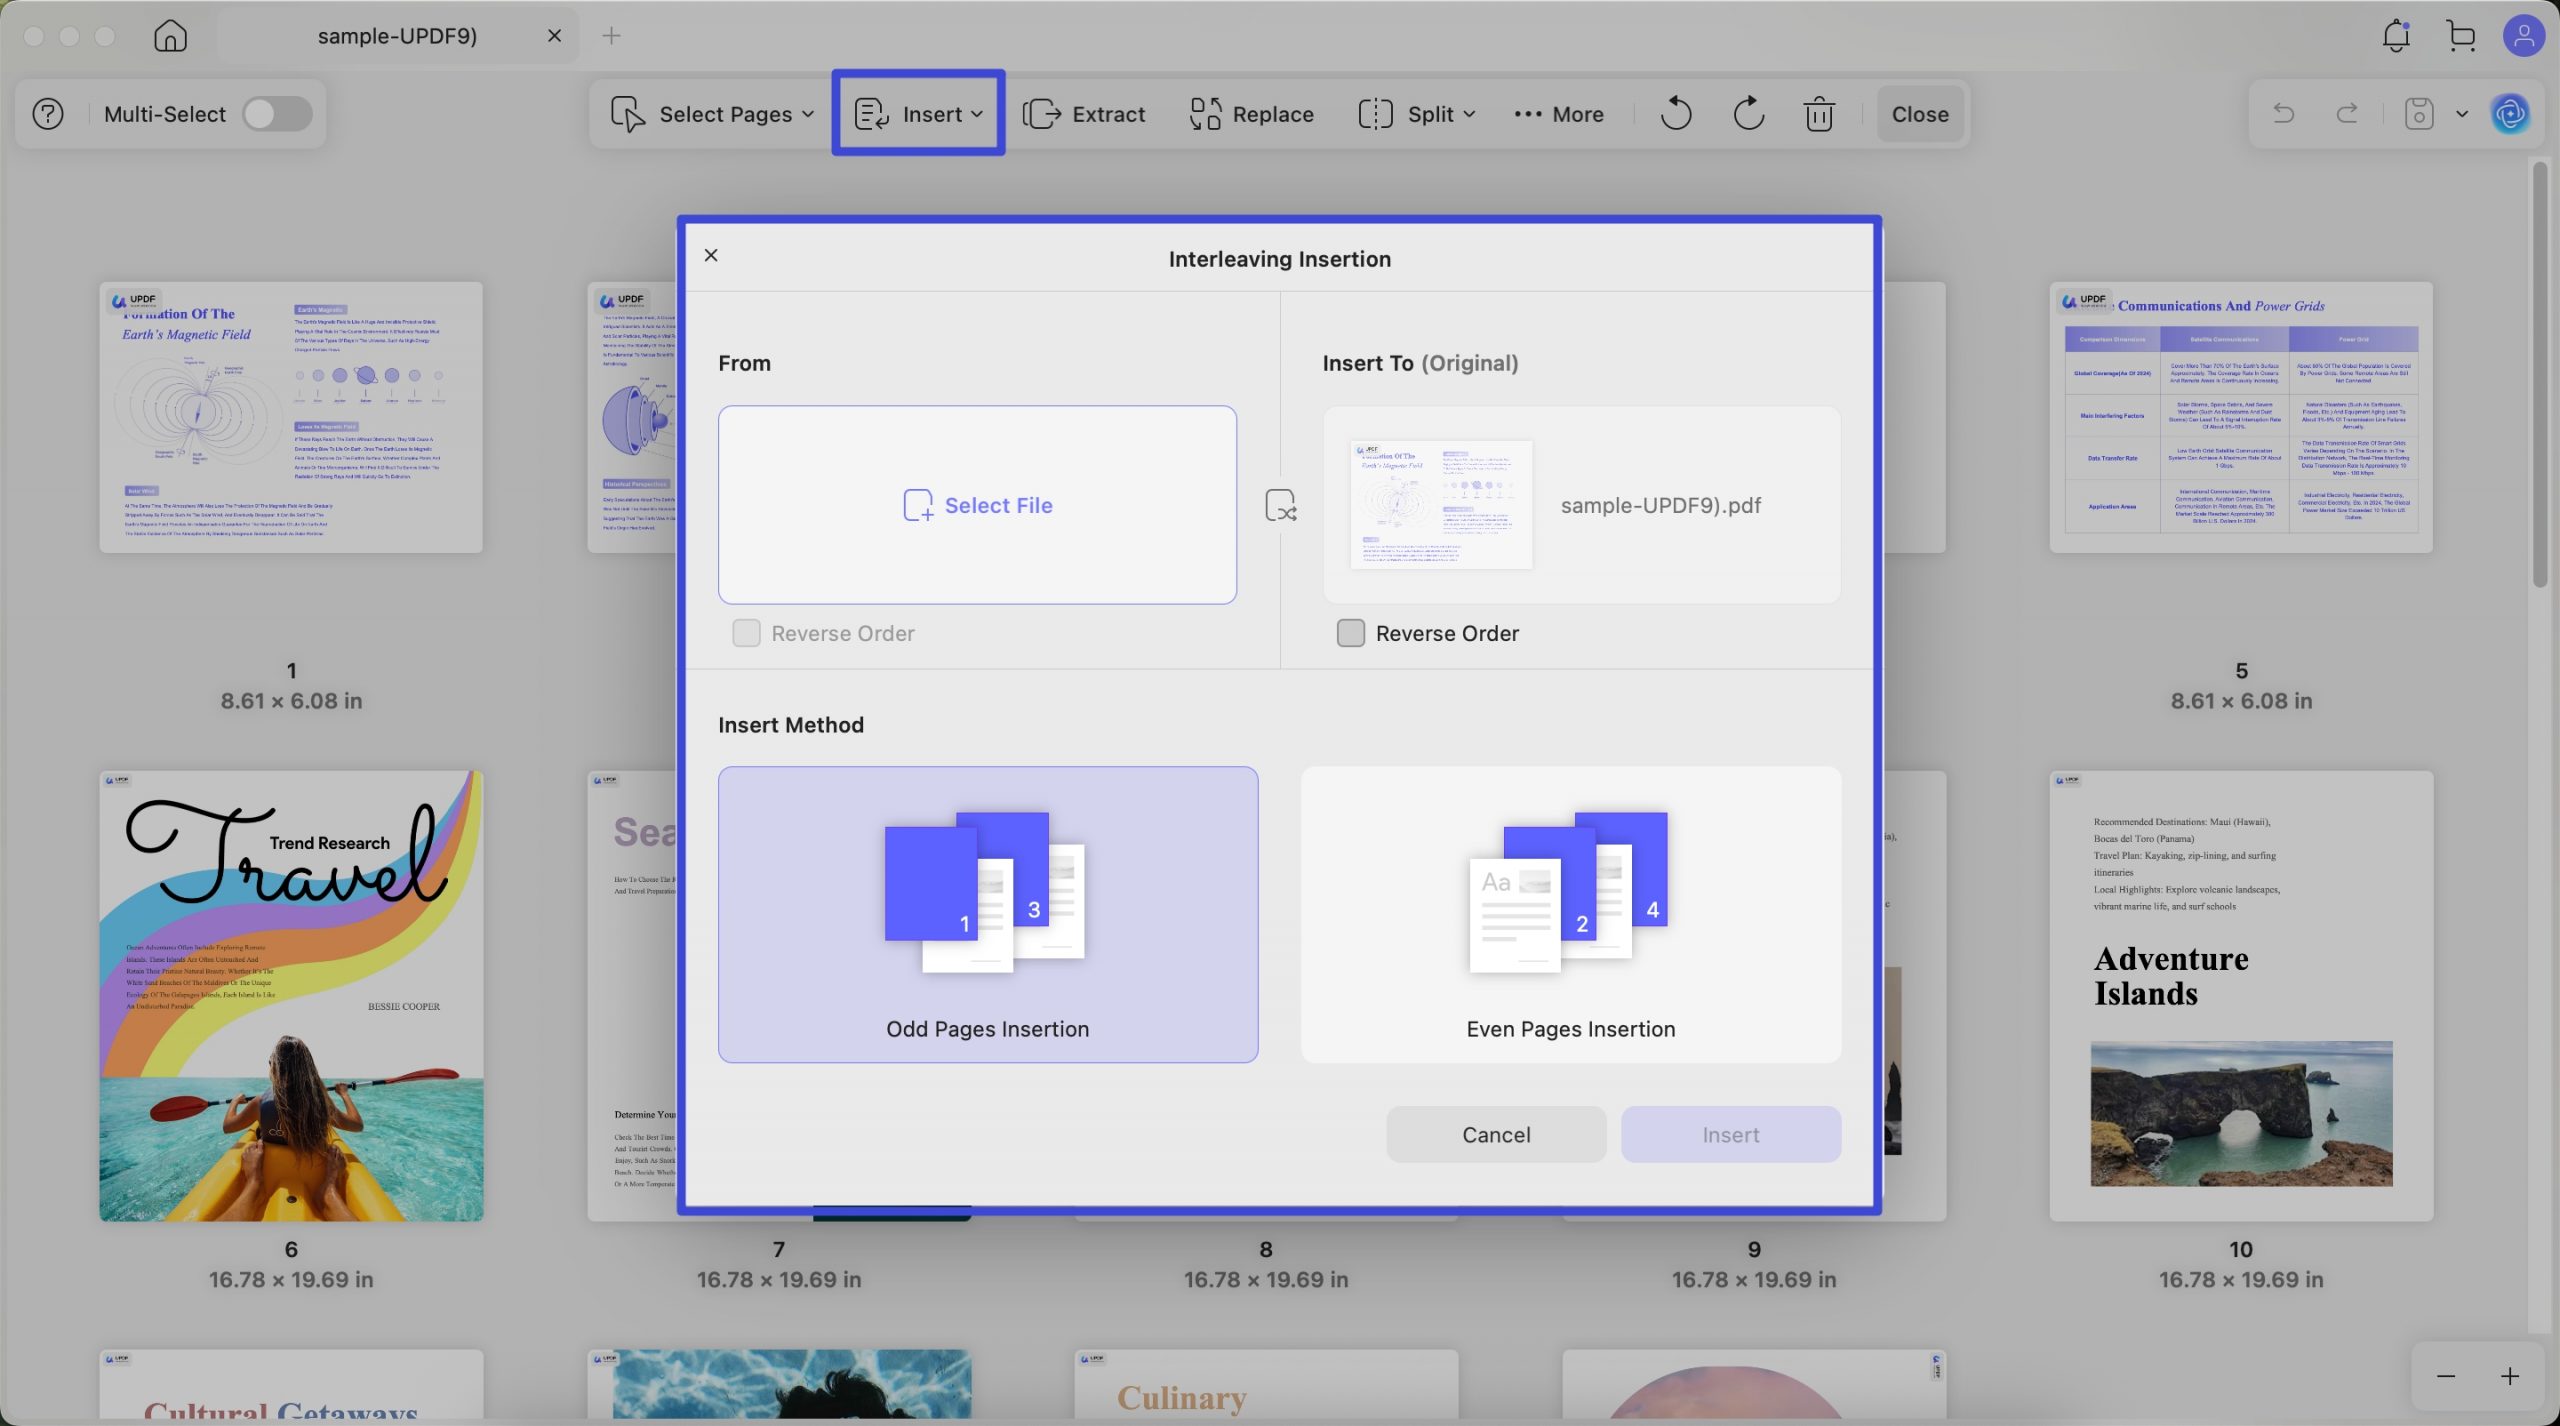
The last option you can have is interleaving insertion. It is very helpful if you have one file with all your odd pages and the other with even pages you need. You can insert them in the correct place in one PDF. Here is how to use it.
Just click on the "Interleaving Insertion" icon, then, click on the “Select File” to choose the PDF to open it.
Now, select how you want to insert the uploaded PDF. You can choose “Odd Pages Insertion” to insert them as odd pages in opened PDF or choose to insert as “Even Pages Insertion”.
Extract:
Video Tutorial on How to Extract and Replace Pages with UPDF
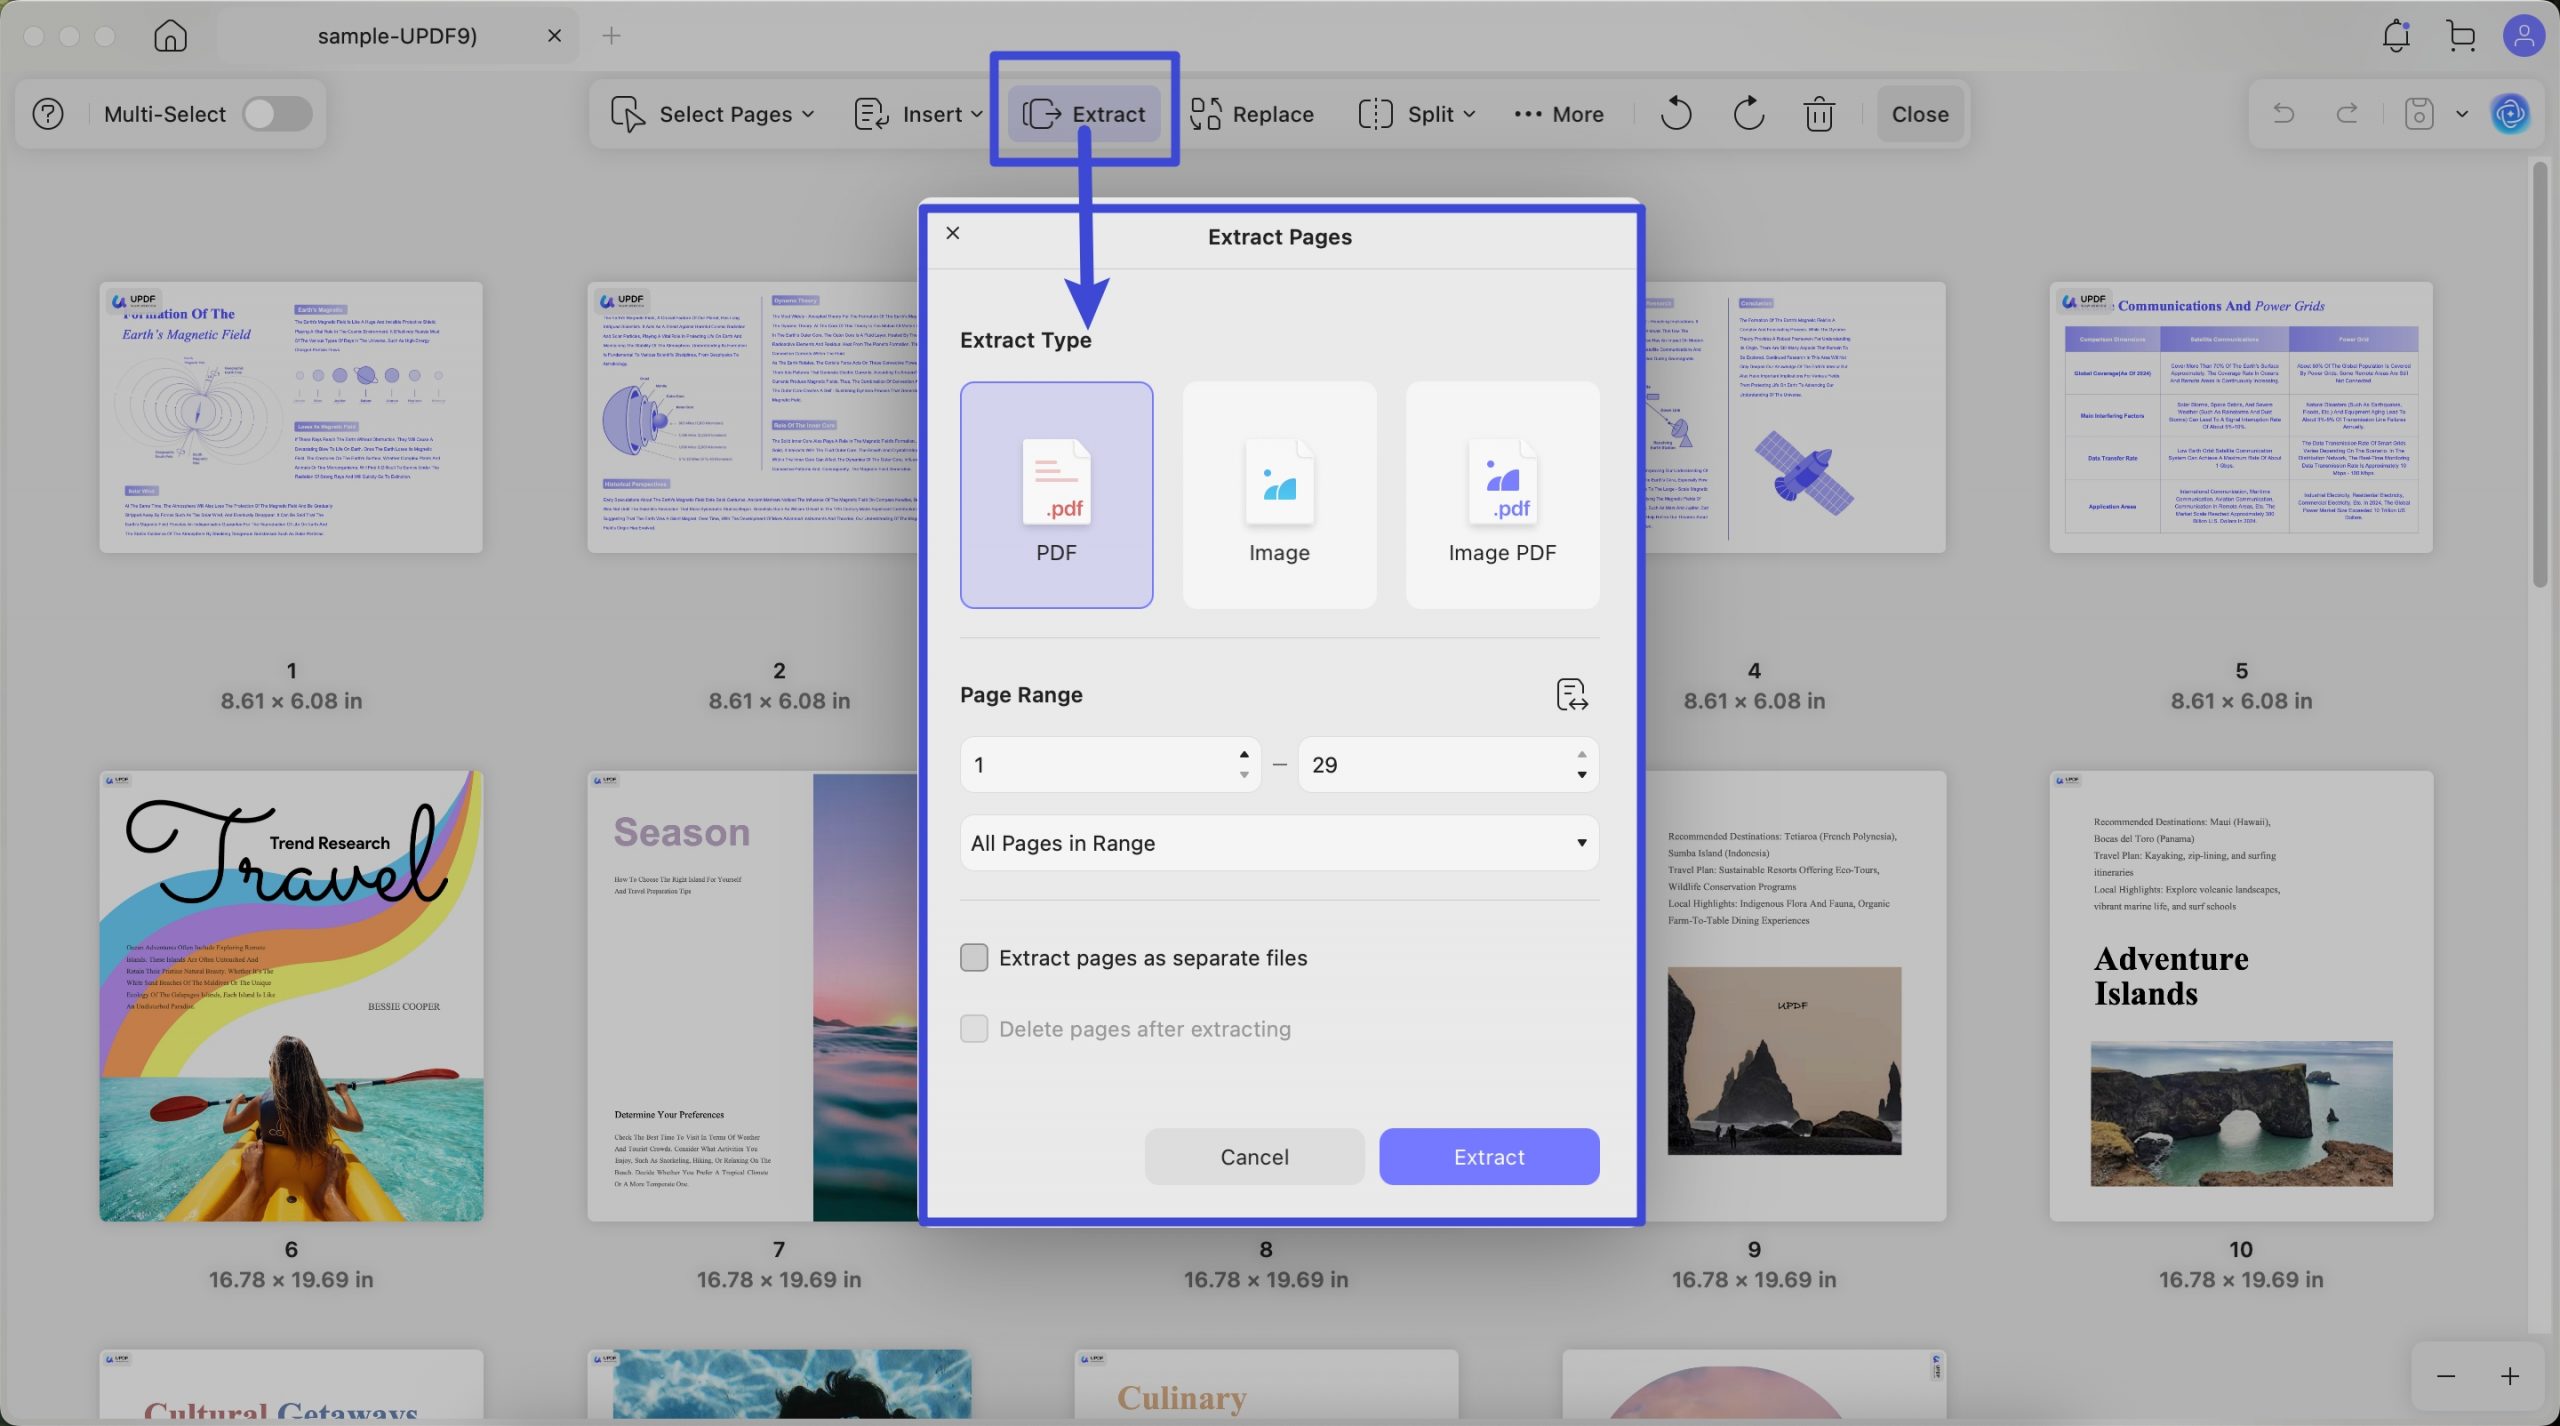
With this feature, you can extract either PDF, image, or image PDF from a certain file. Just select the pages you want to extract. Click on the “Extract” button. Or you do not select any page firstly, click on the “Extract” button directly, select the page range you want to extract in the pop up window. Select what extract type you need, PDF, image, or image PDF. You can choose to extract pages as separate files and delete pages after extraction. Once finished, hit the Extract button to proceed.
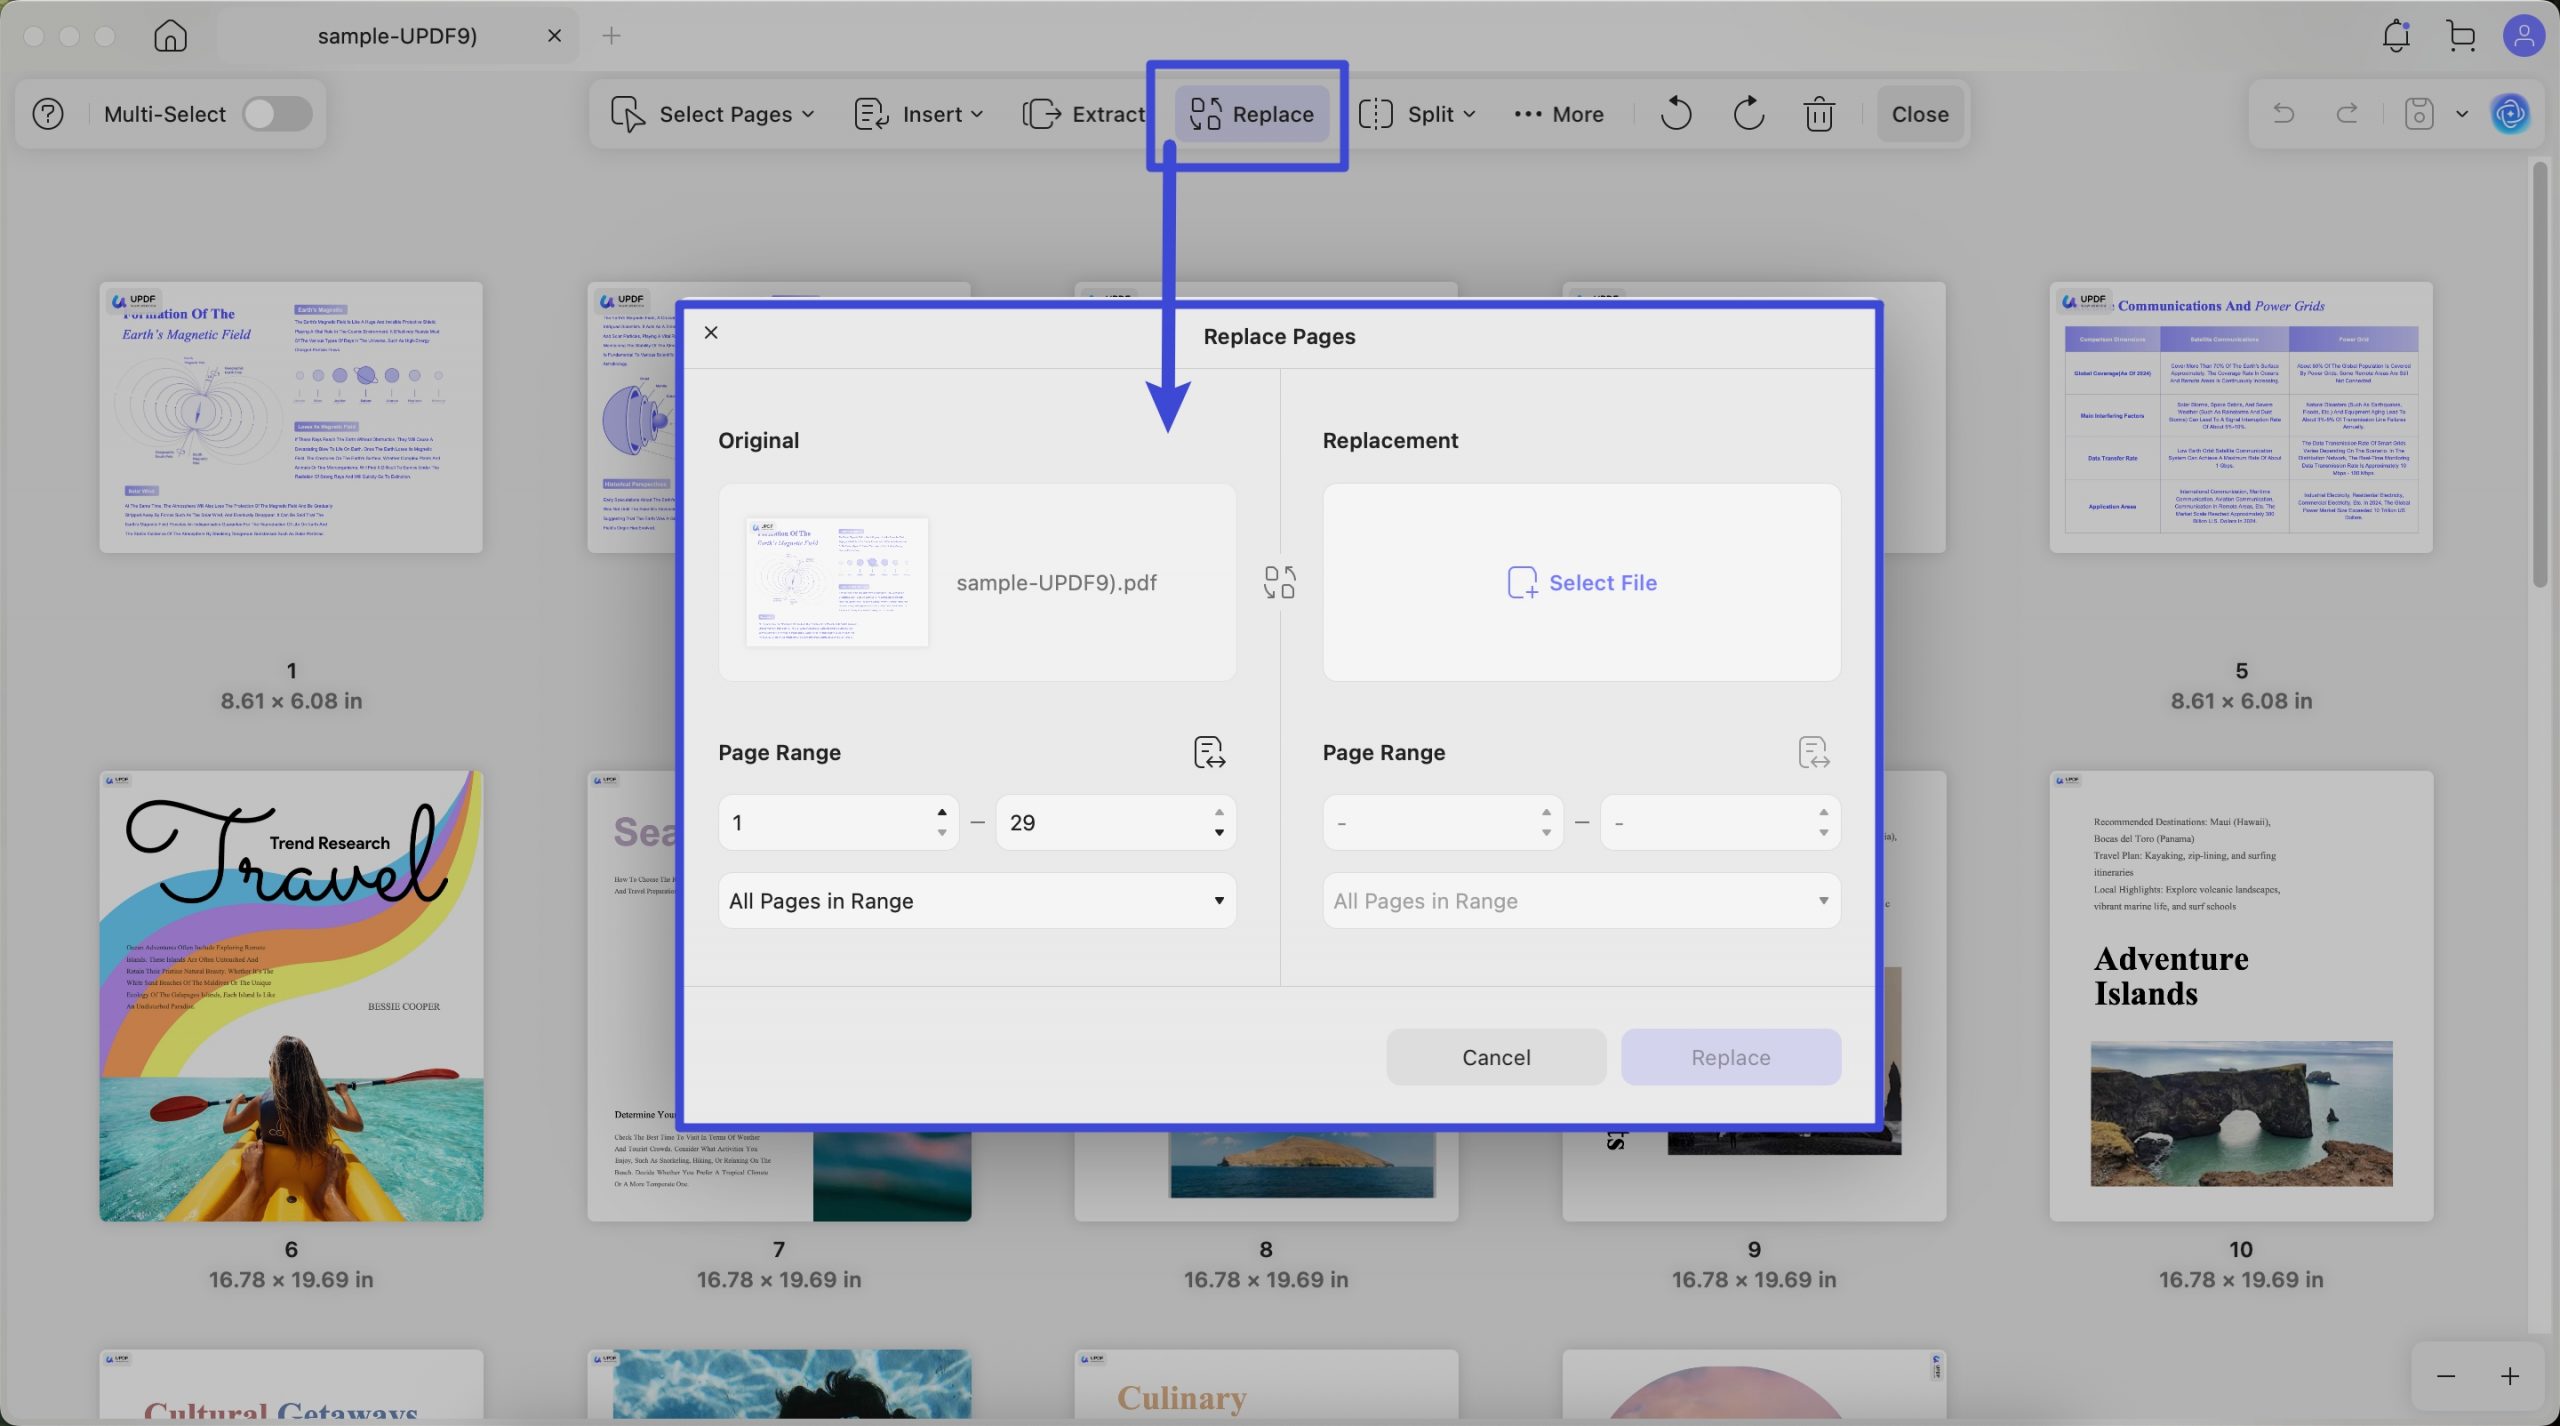
Replace:
UPDF for Mac supports replacing pages from other PDFs.
- Firstly, select a single page, or multiple pages on your PDF document if only several pages need to be replaced. If you have many pages to replace, do not need to select any page. Just click on the "Replace" icon.
- Secondly, click on the “Select File” to select the PDF that has the pages you want to use to replace the opened PDF. Click Open.
- Lastly, Select the page ranges you need to use to replace in the uploaded PDF. Click on the "Replace" button to replace successfully.
Split:
Video Tutorial on How to Split Pages with UPDF
UPDF on Mac allows you to split a PDF into multiple small PDF documents by pages, Size, Top-Level Bookmarks, or customized pages.
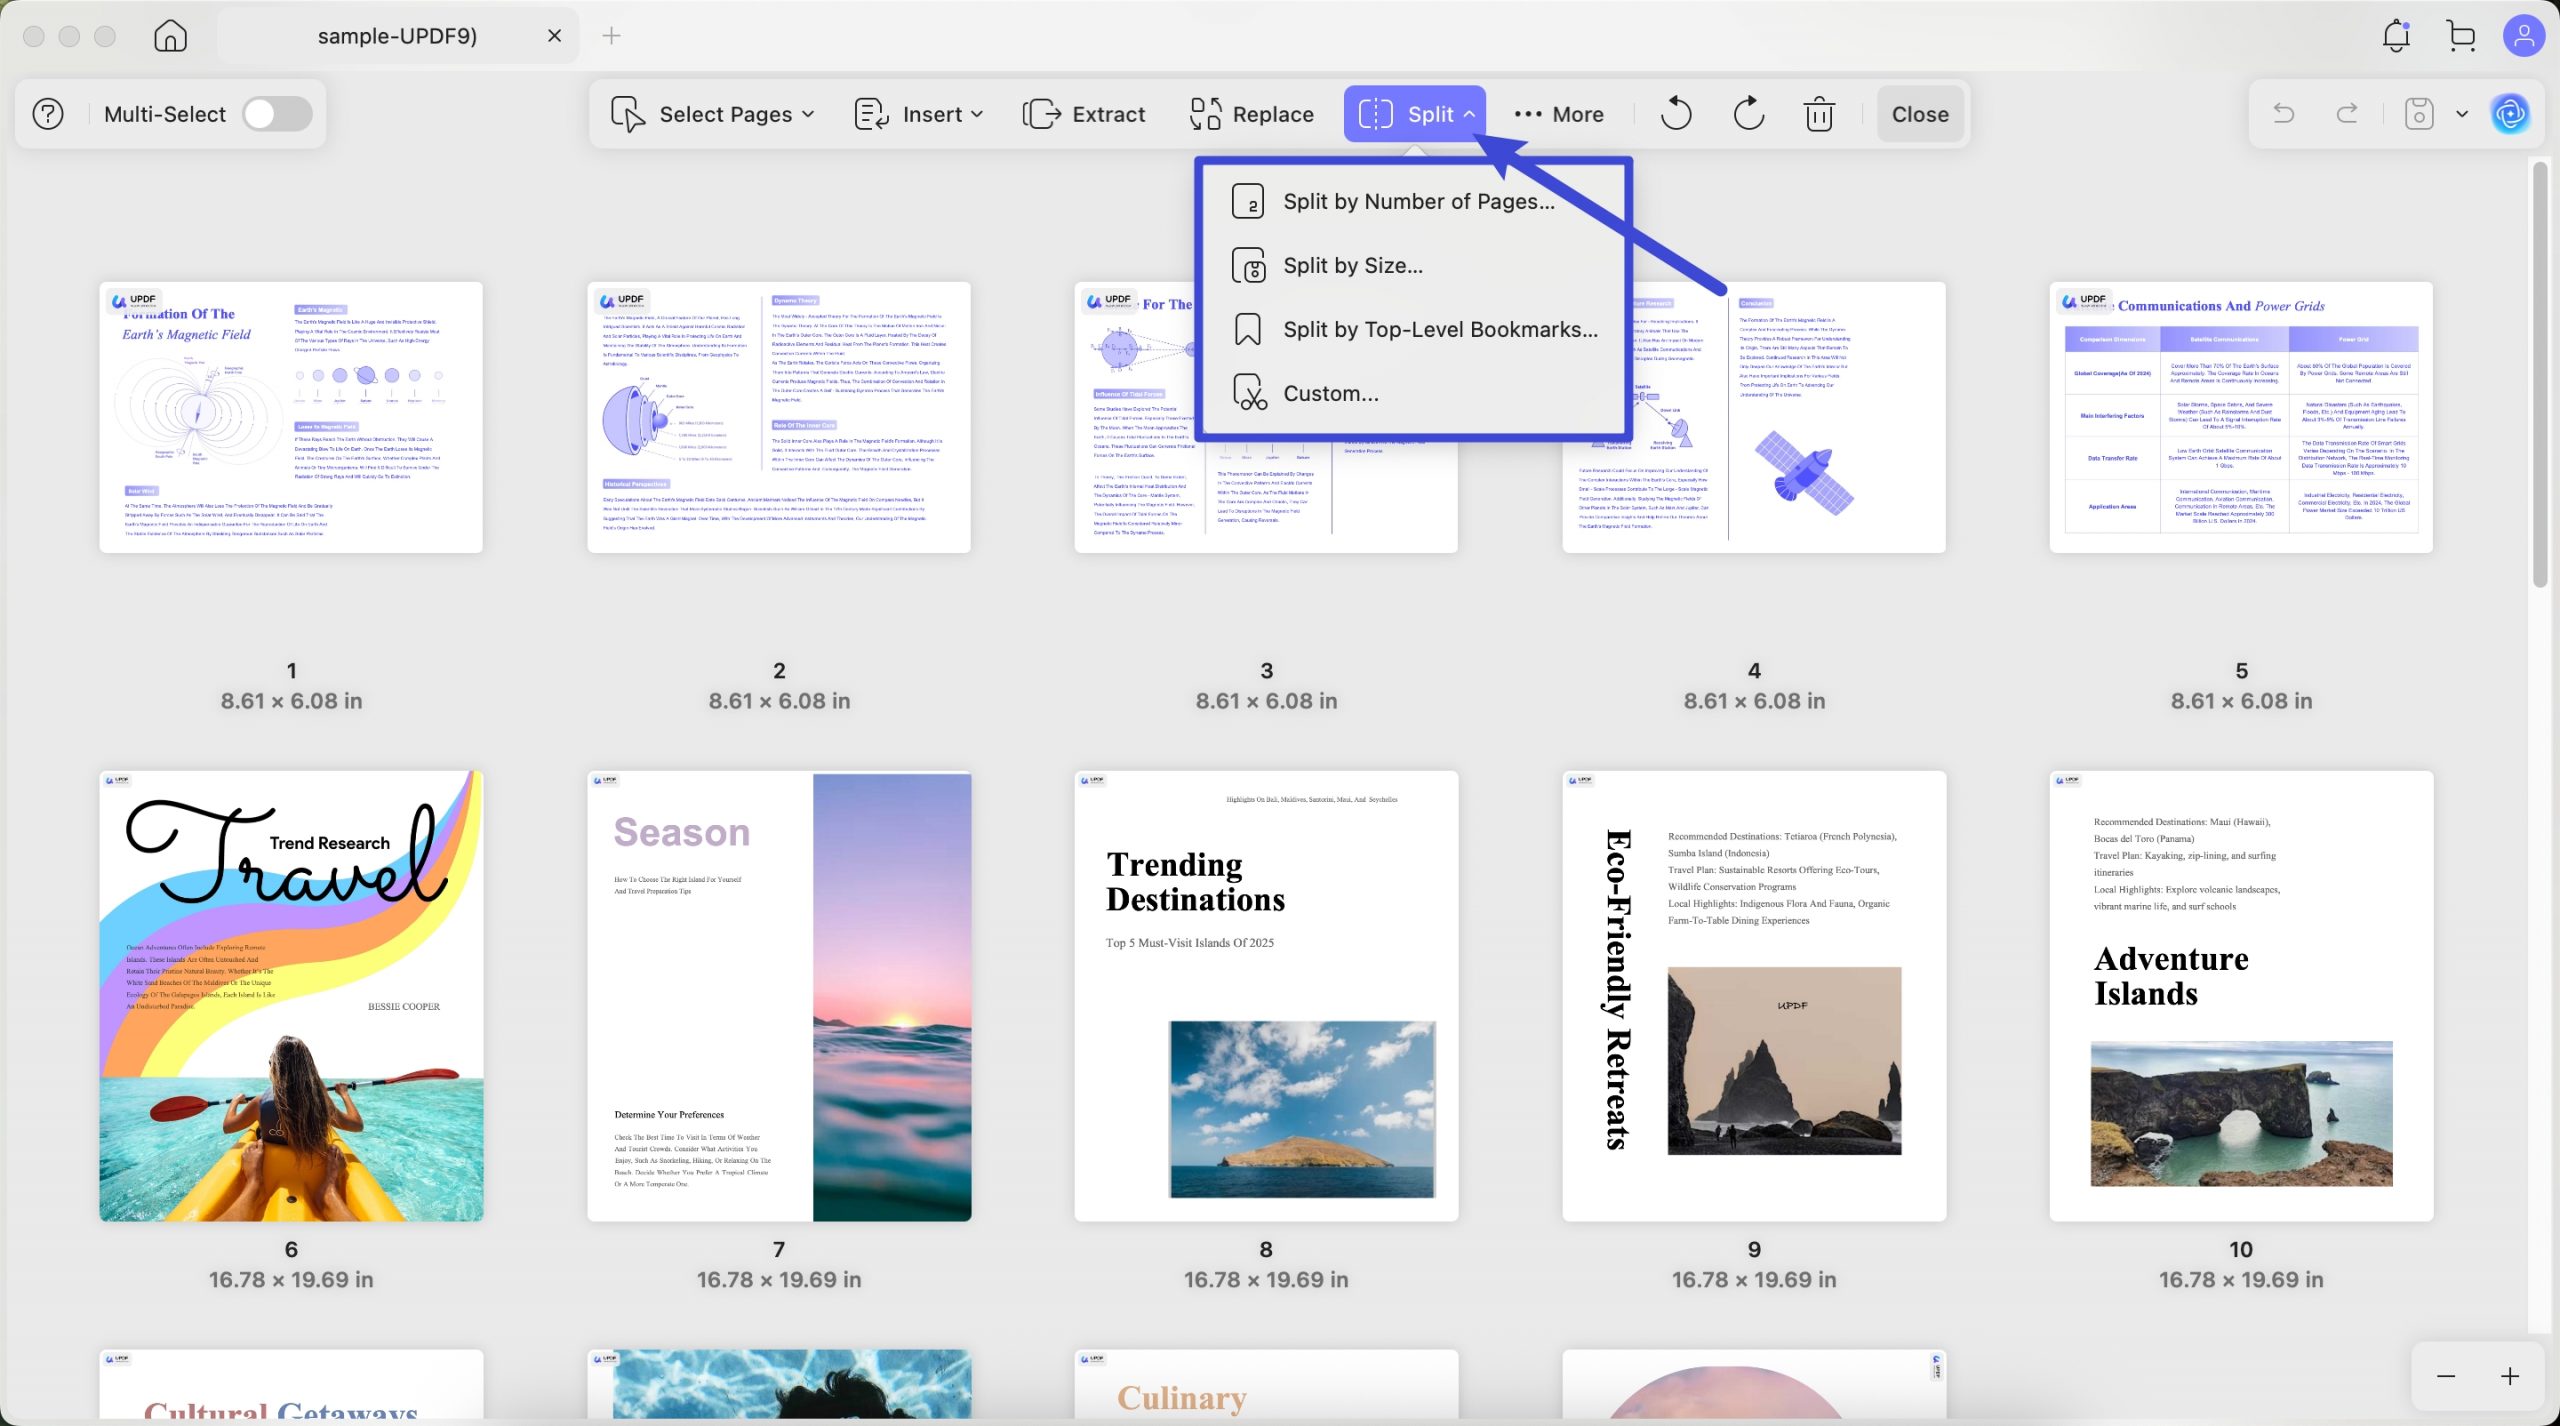
1) Split PDF by Pages
To split PDF by the number of pages, you can click on "Split" > "Split by Number of Pages...".
In the window, you can enter the page count you need for each PDF, and at the bottom, you can find how many PDF files will be created. Click on the "Split" to split PDF by number of pages.

2) Split by Size
Select "Split by Size..." after clicking on the "Insert" icon.
Enter the file size you need to split the PDF. Click on the "Split" to split PDF file and select where you need to save these PDF files.

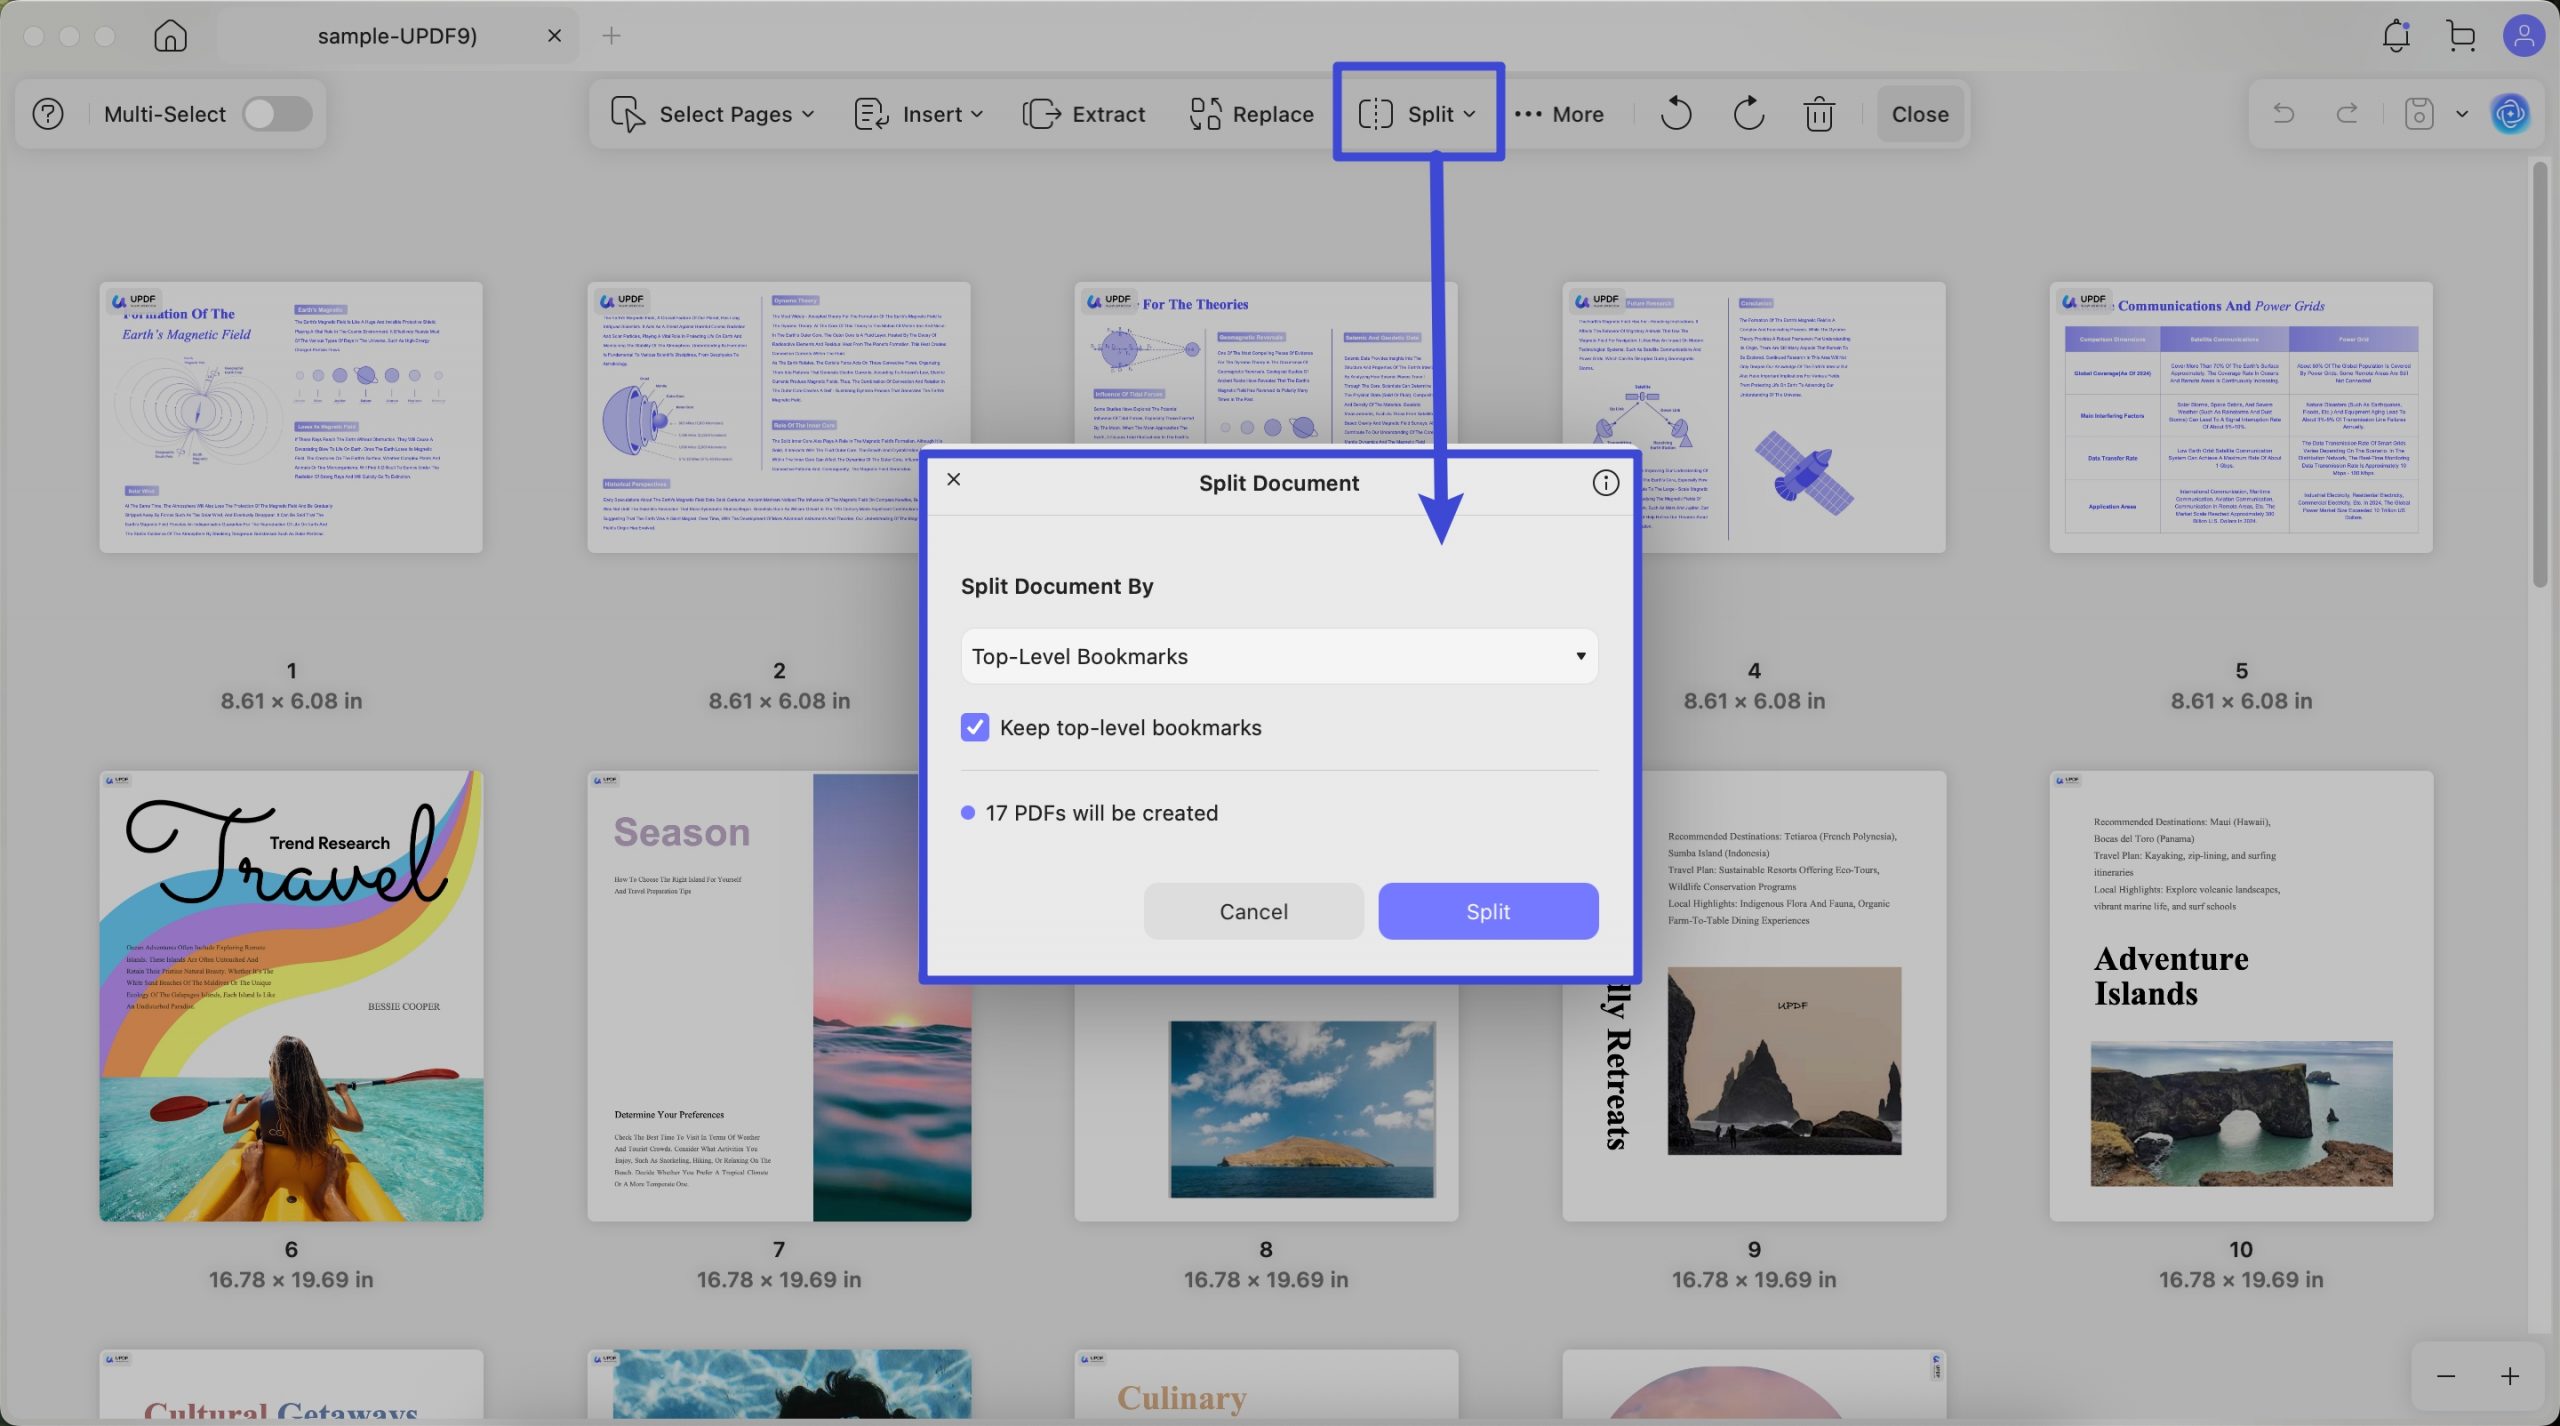
3) Split by Bookmarks
If you want to split the PDF by Top level bookmarks, you can click on "Split by Top-Level Bookmarks...".
Then, click on the "Split" to split the PDF into several PDF files. And select the place where to save the PDF files. The bookmark names will be set as the separate PDF file names.
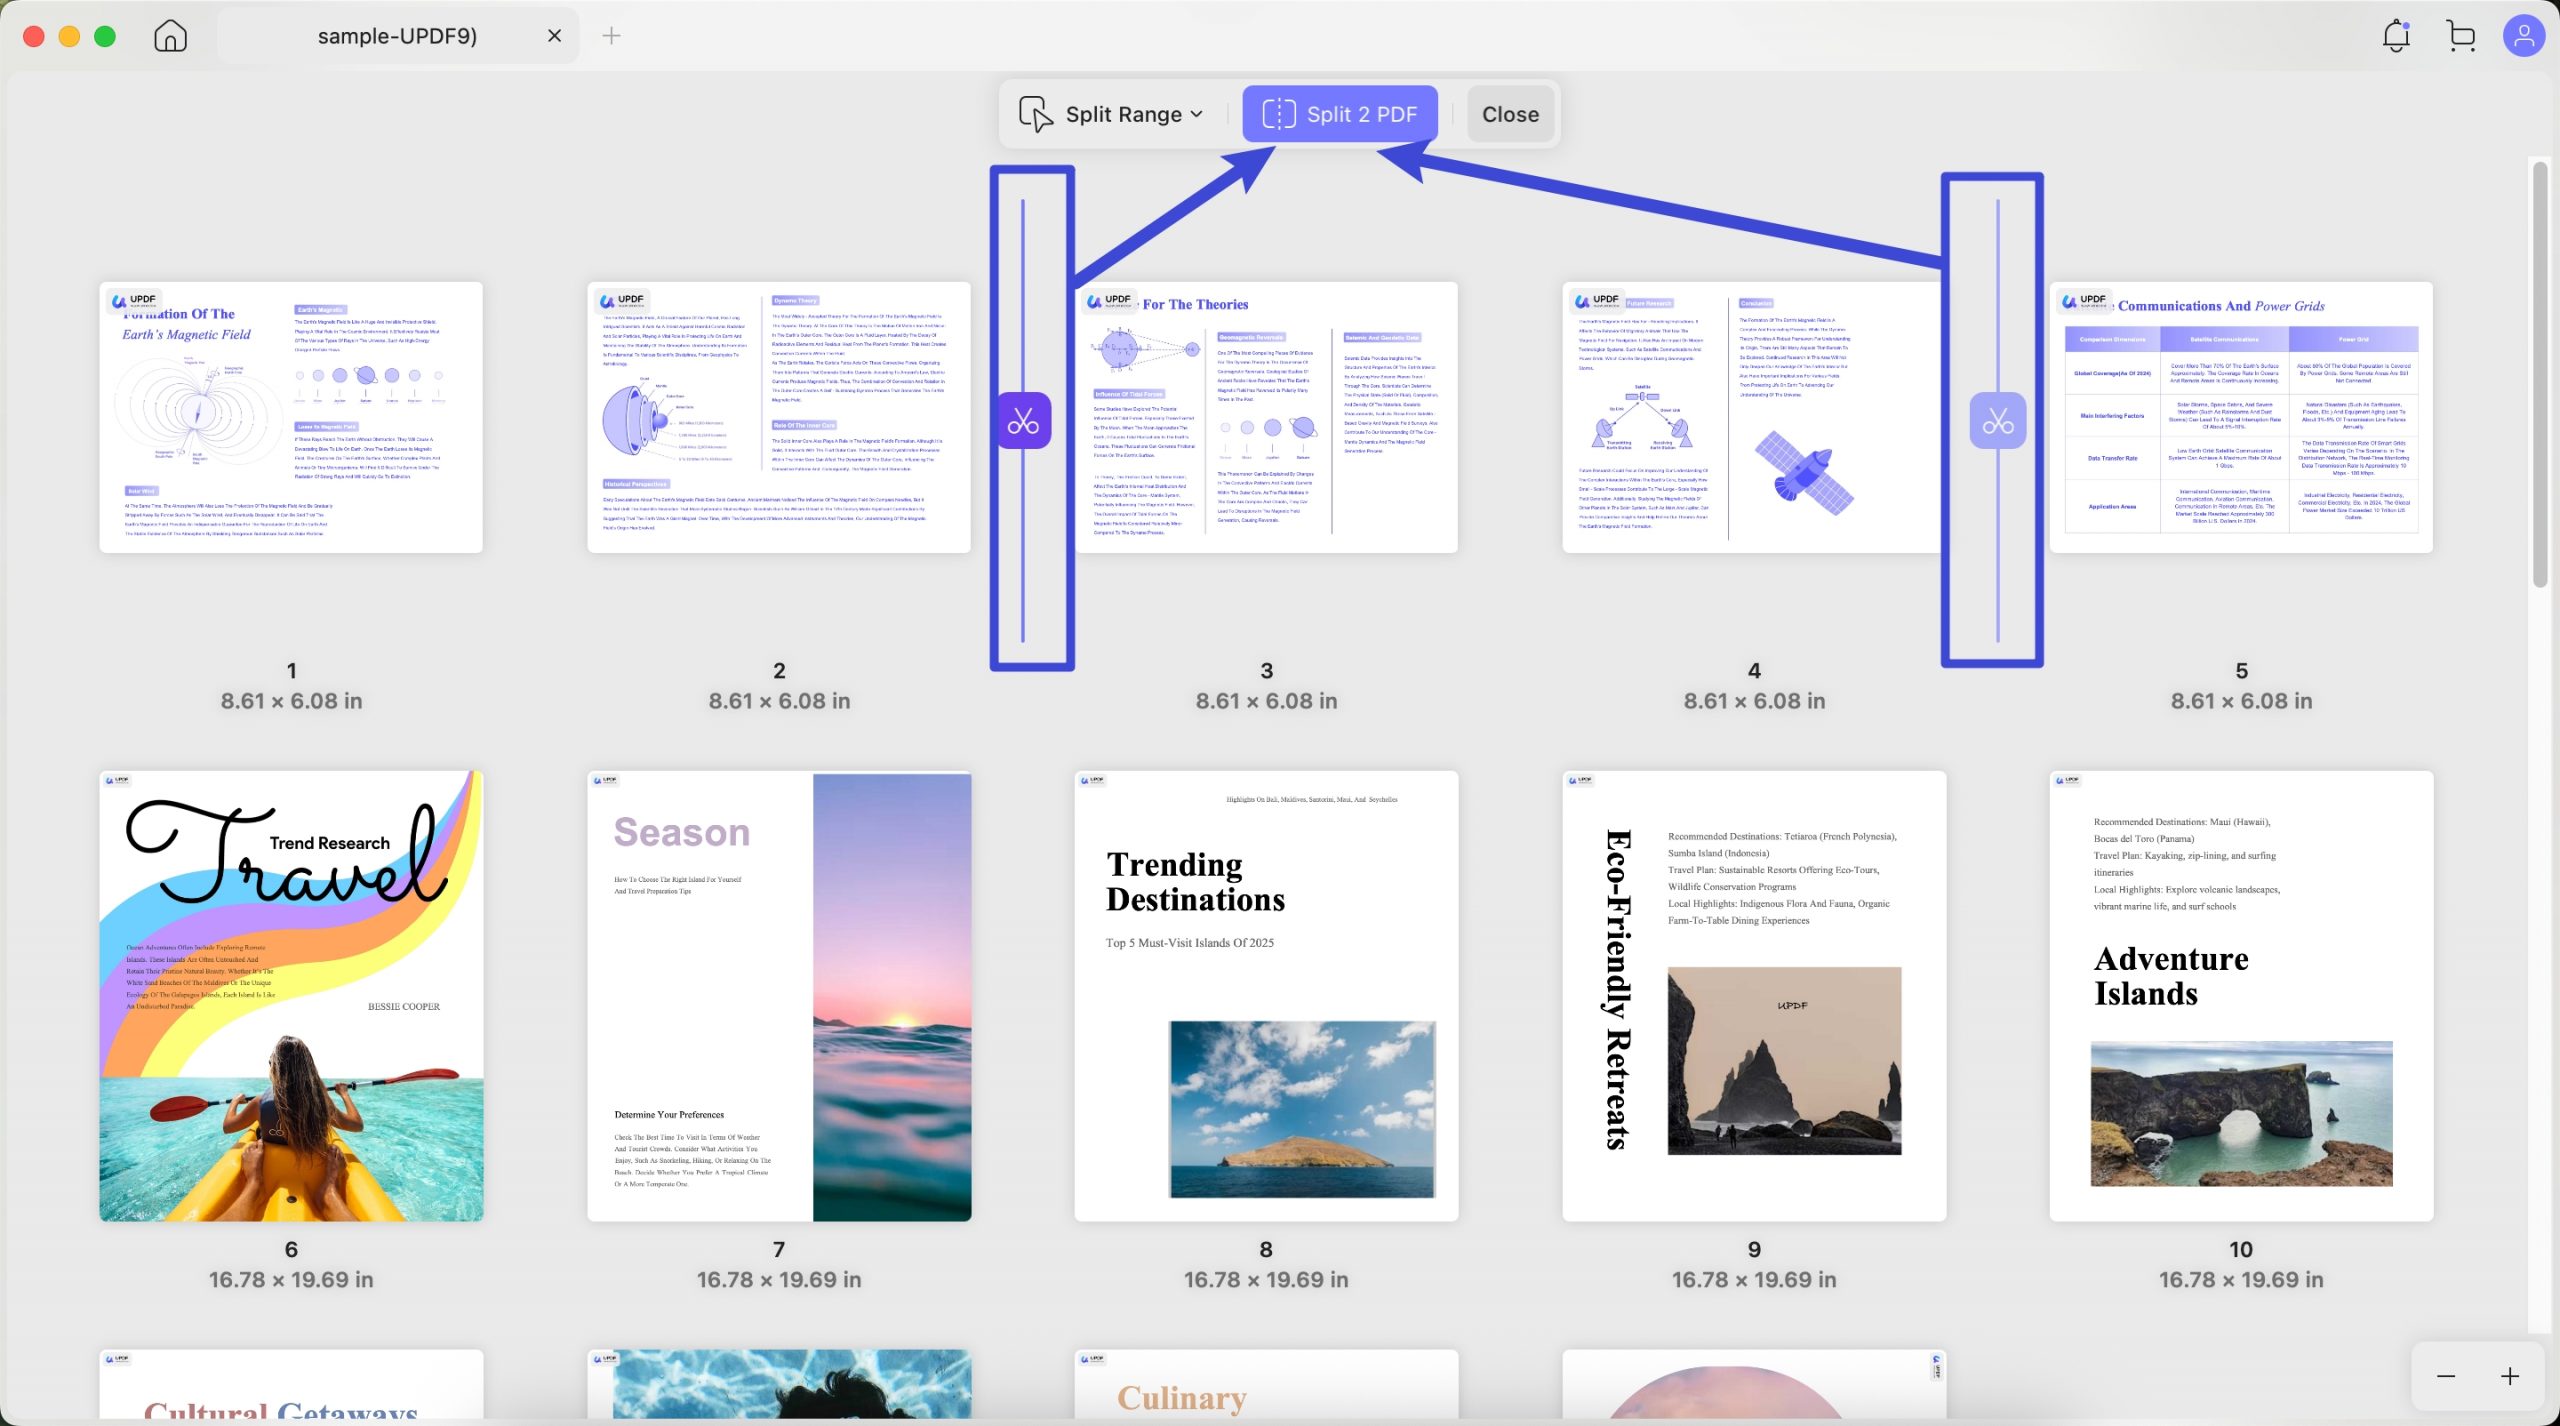
4) Customize to Split
You can also customize to split. Here is how. Click on the “Split” > “Custom”, find the place where you want to split, and move your mouse to the space between the two pages. You can find the scissors, click on it to let UPDF know it needs to split here. Move your mouse to the second place and use the scissors to mark the split. Repeat the steps to mark all the places that you want to split. When everything is done, you can click on the button at the top named “Split XX PDF” to split the PDF.
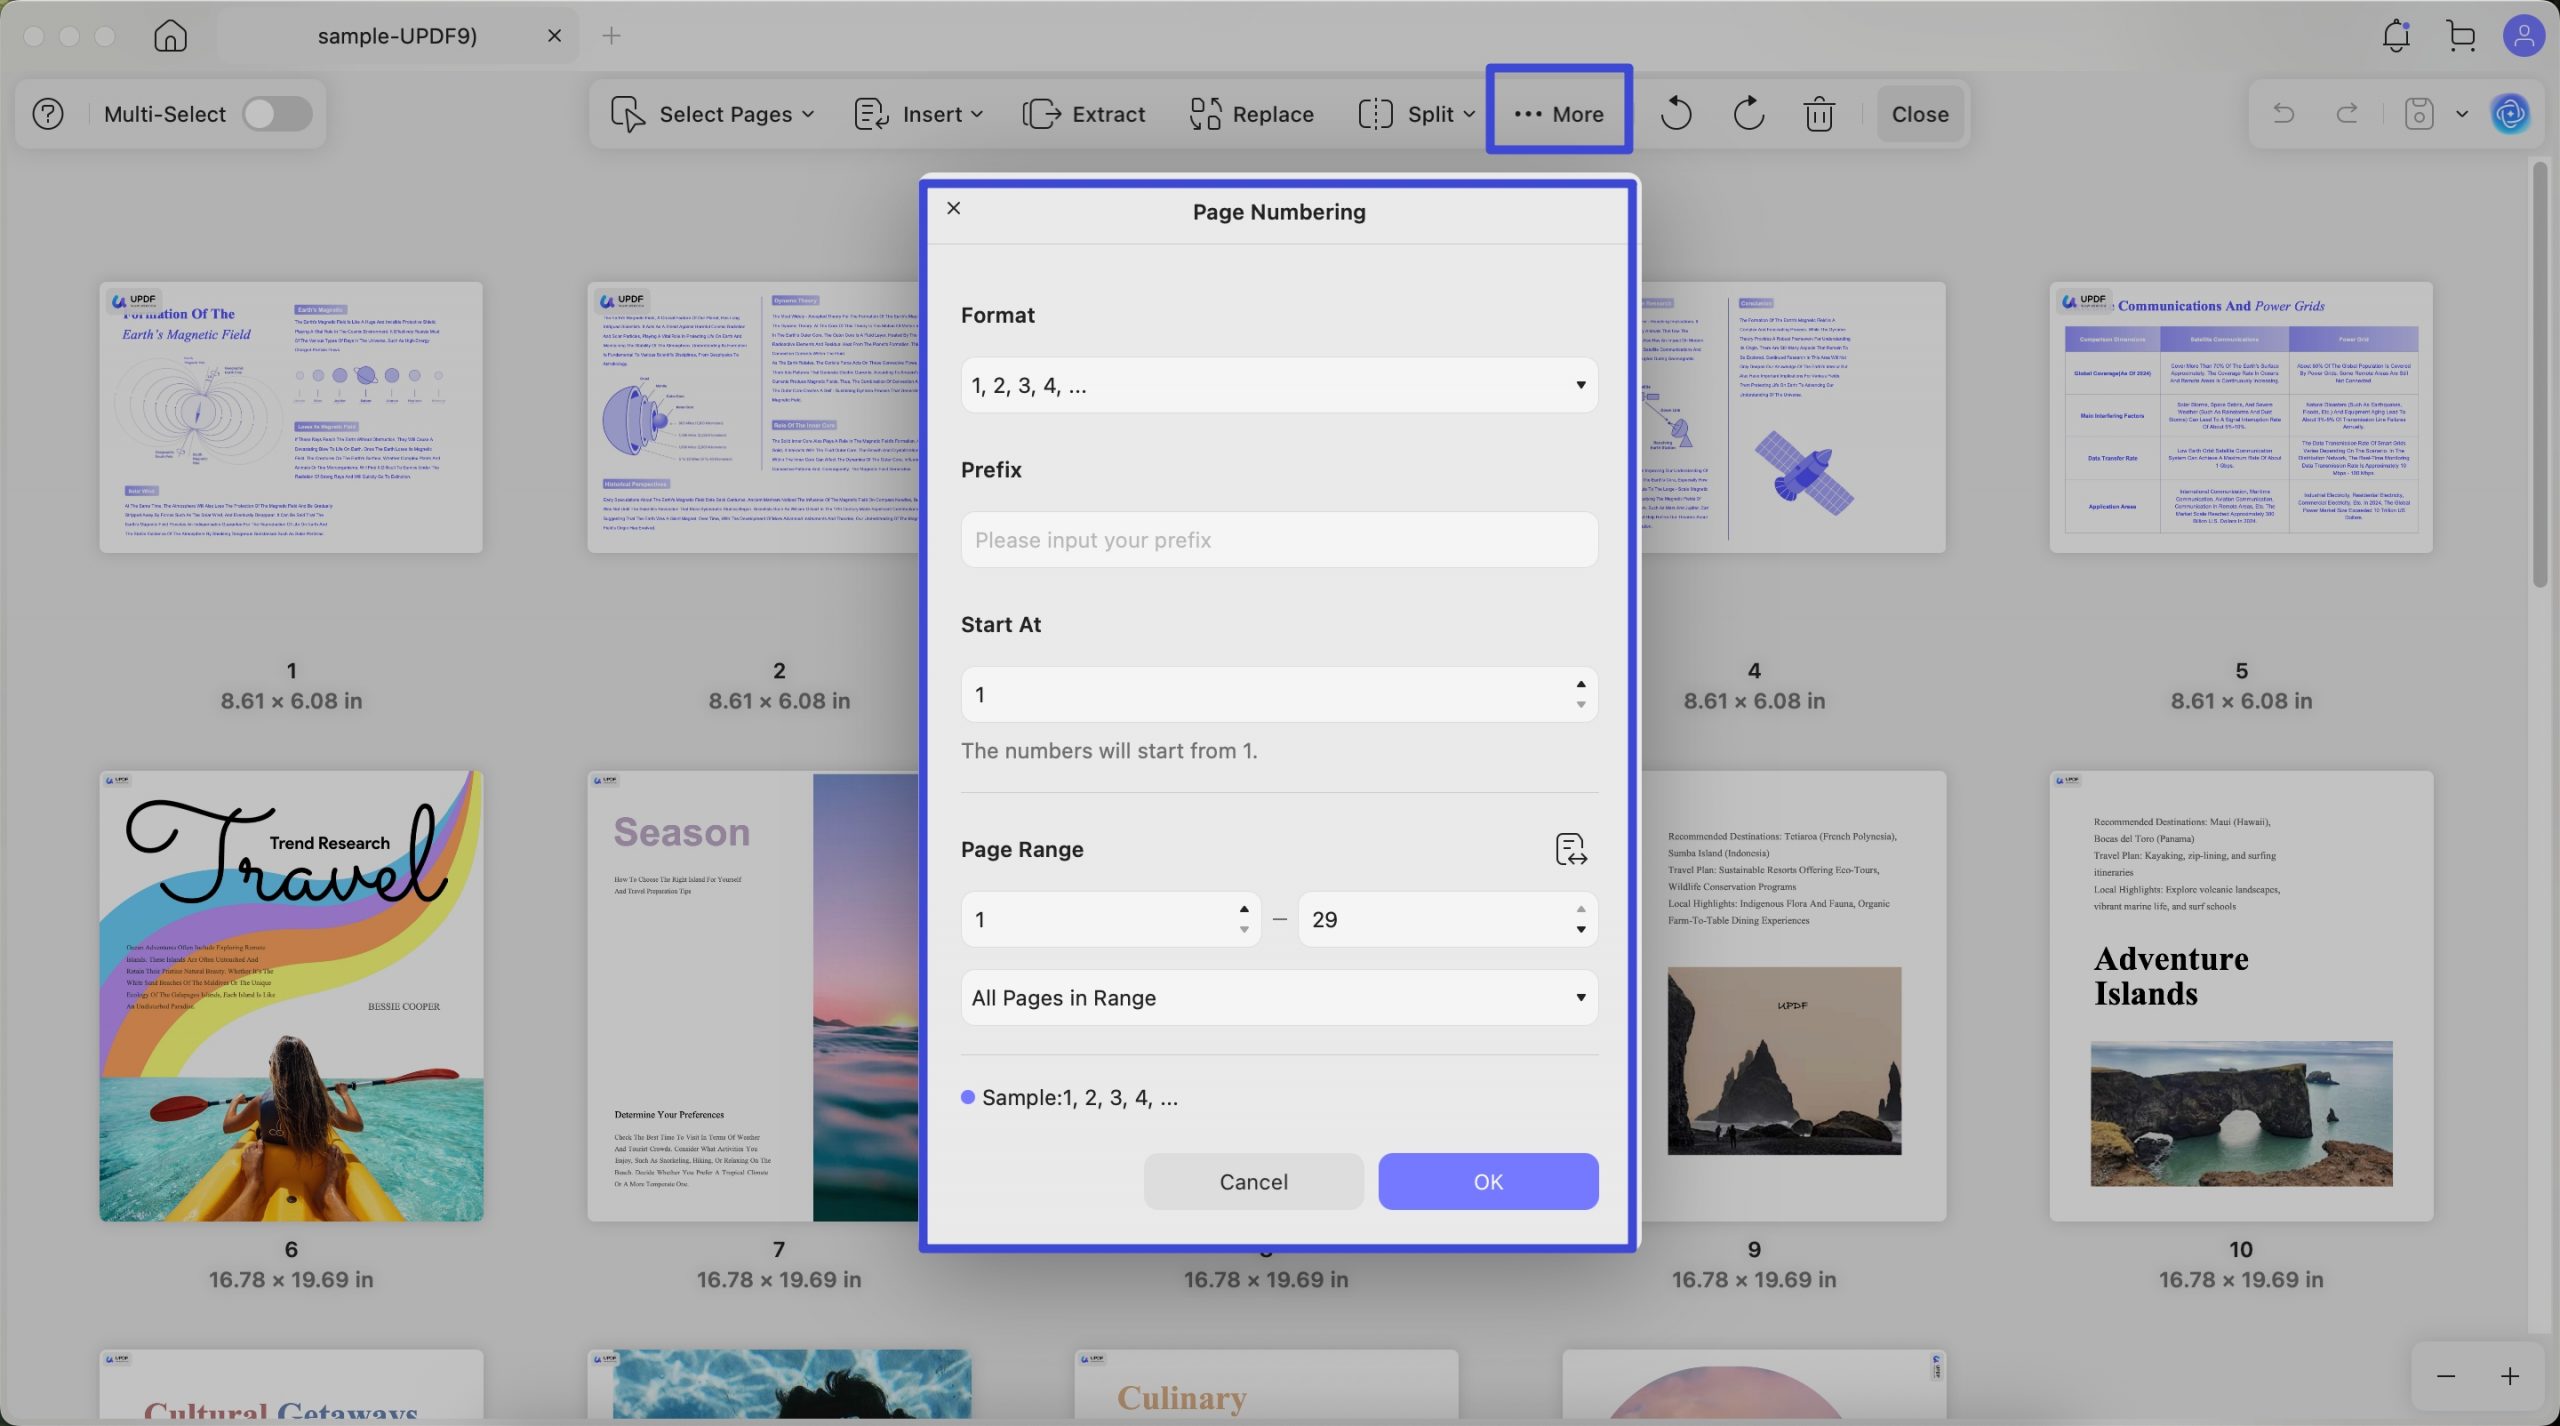
Page Labels:
Video Tutorial on How to Customize Page Label, Order, and Size with UPDF
Page label lets you organize your pages with the labels you set. You can click on the “More” > “Page Labels”. In the settings panel, you can choose the label format, set prefix, which number you want to start at, page range you want to apply with your label, then, click on the “OK” to save.
Page Order:
If you want to change your page order, you can use the page order feature. Just click on the “More” > “Page Order”. Here, you can choose “Swap Odd and Evan” If you want to swap odd and evan pages, choose “Reverse order” if you want to reverse the order of all the pages, or you can click o the “Customized Exchange” to enter the page numbers that you want to exchange.
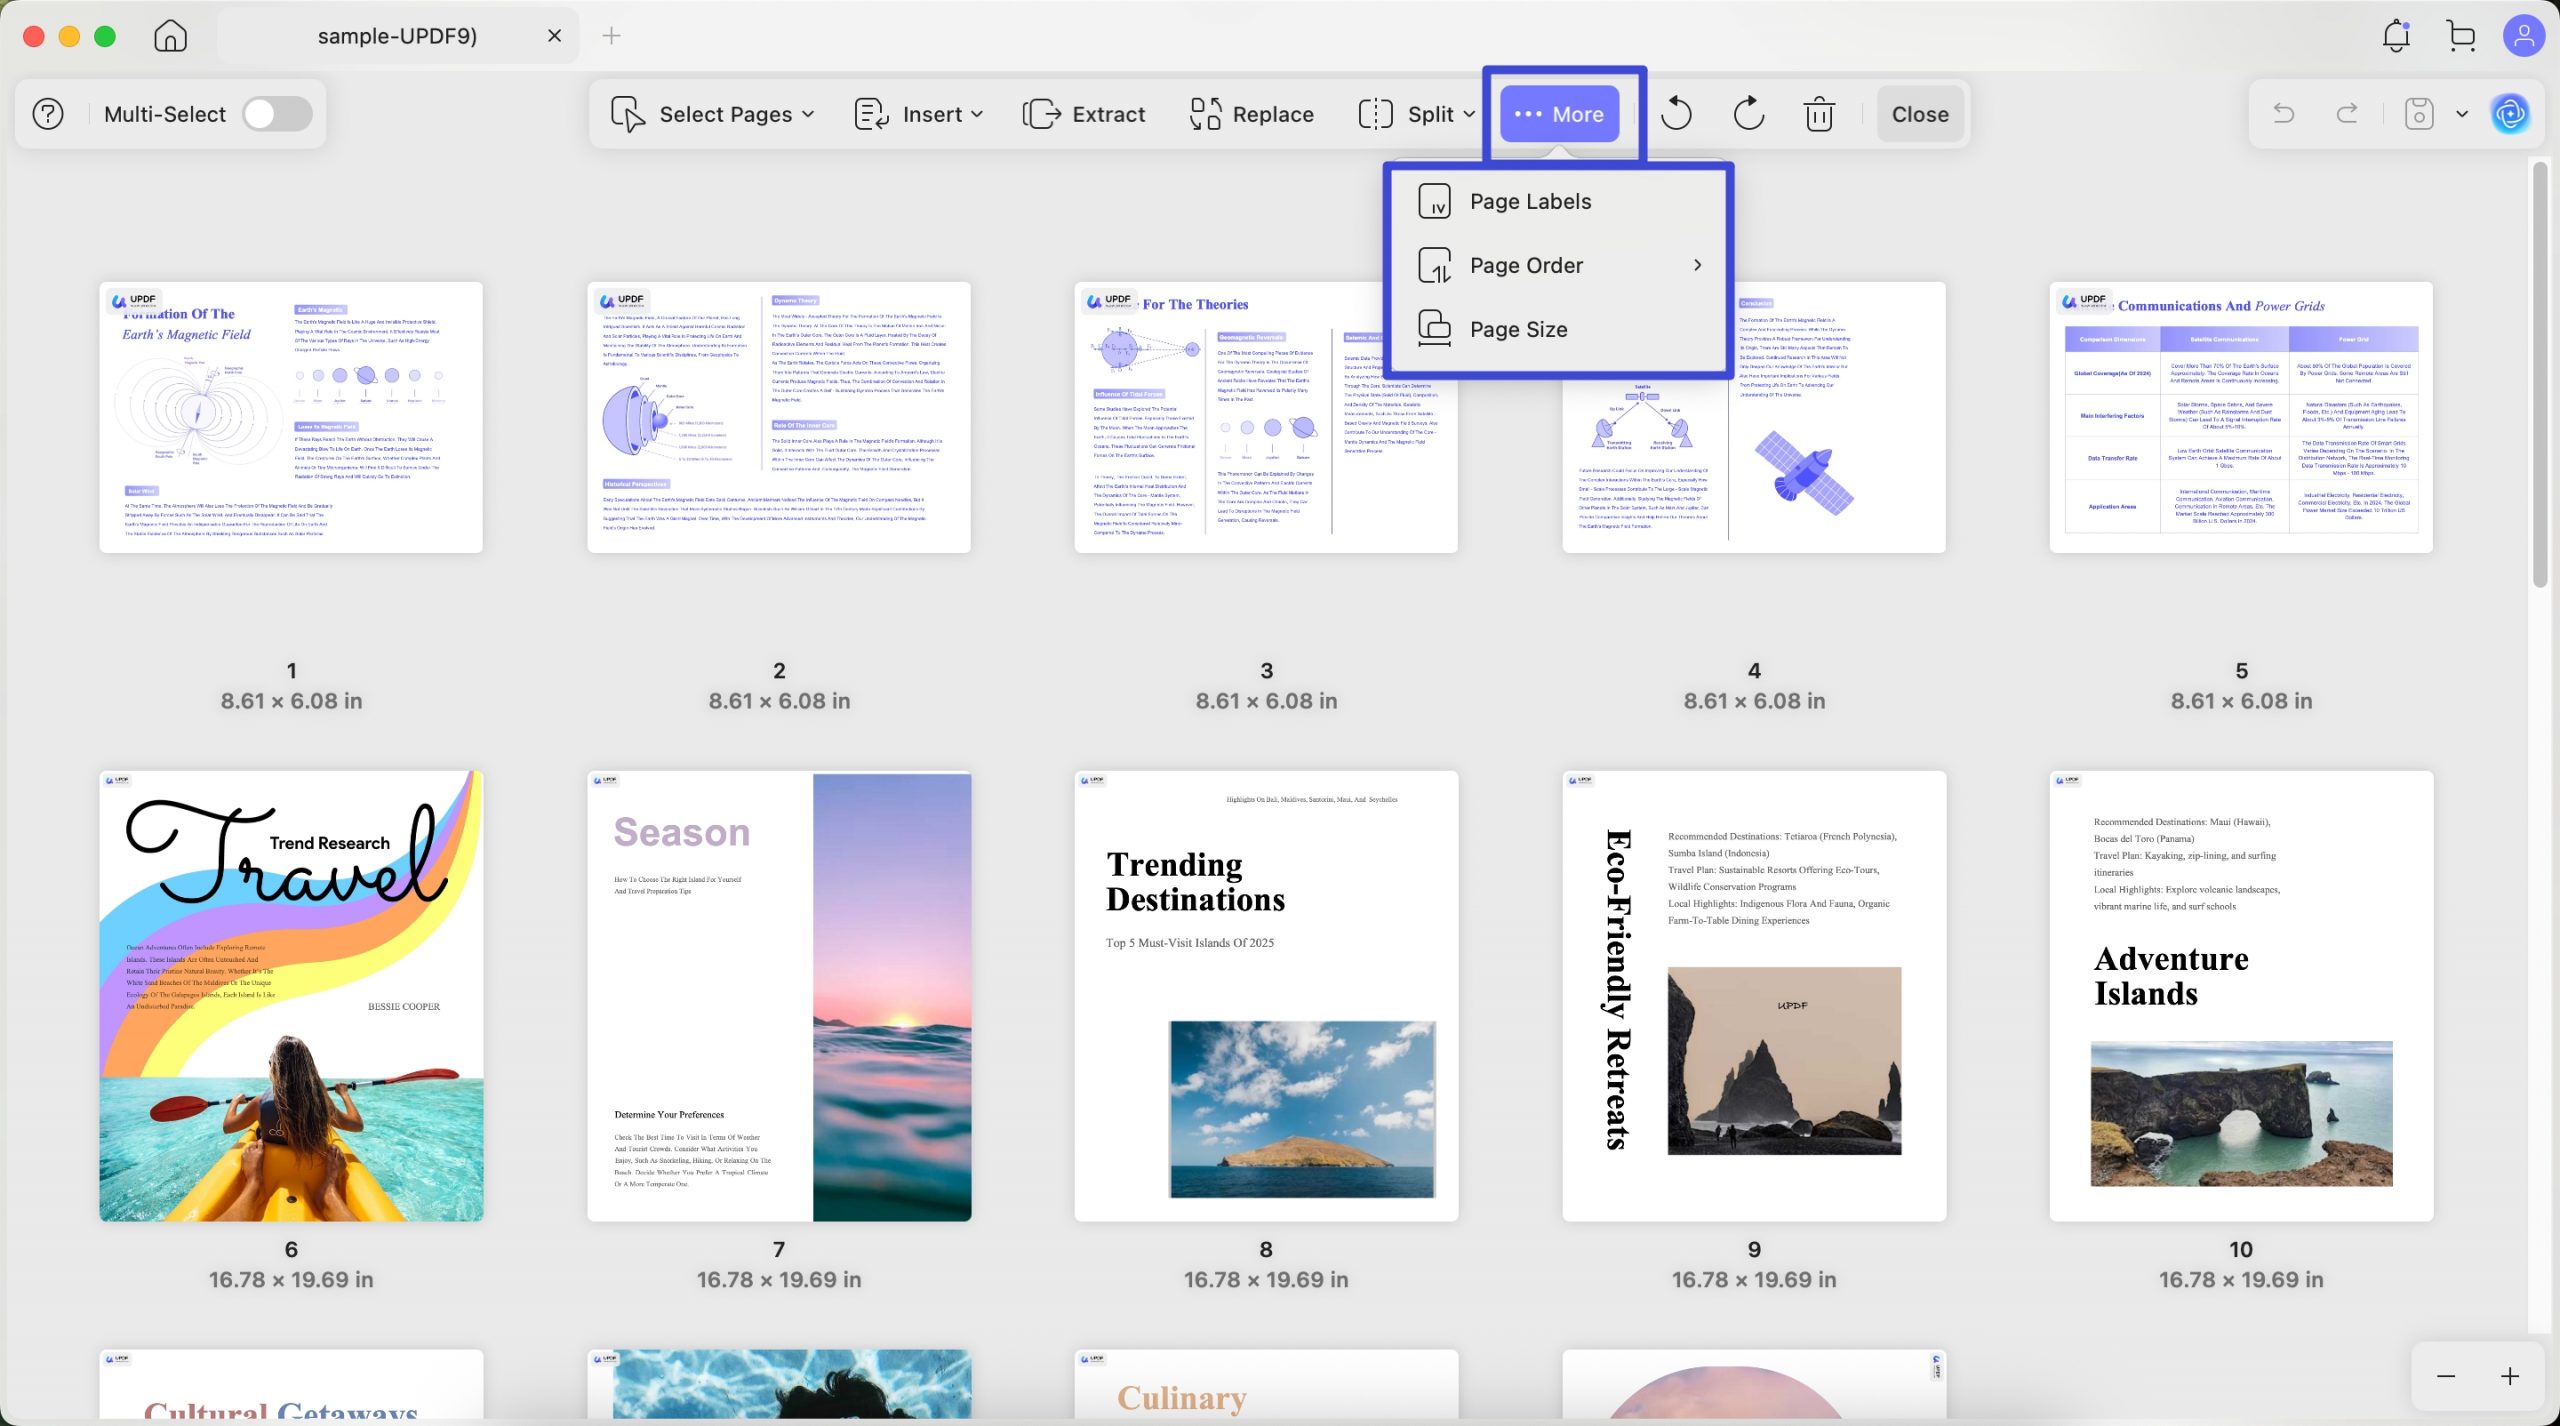
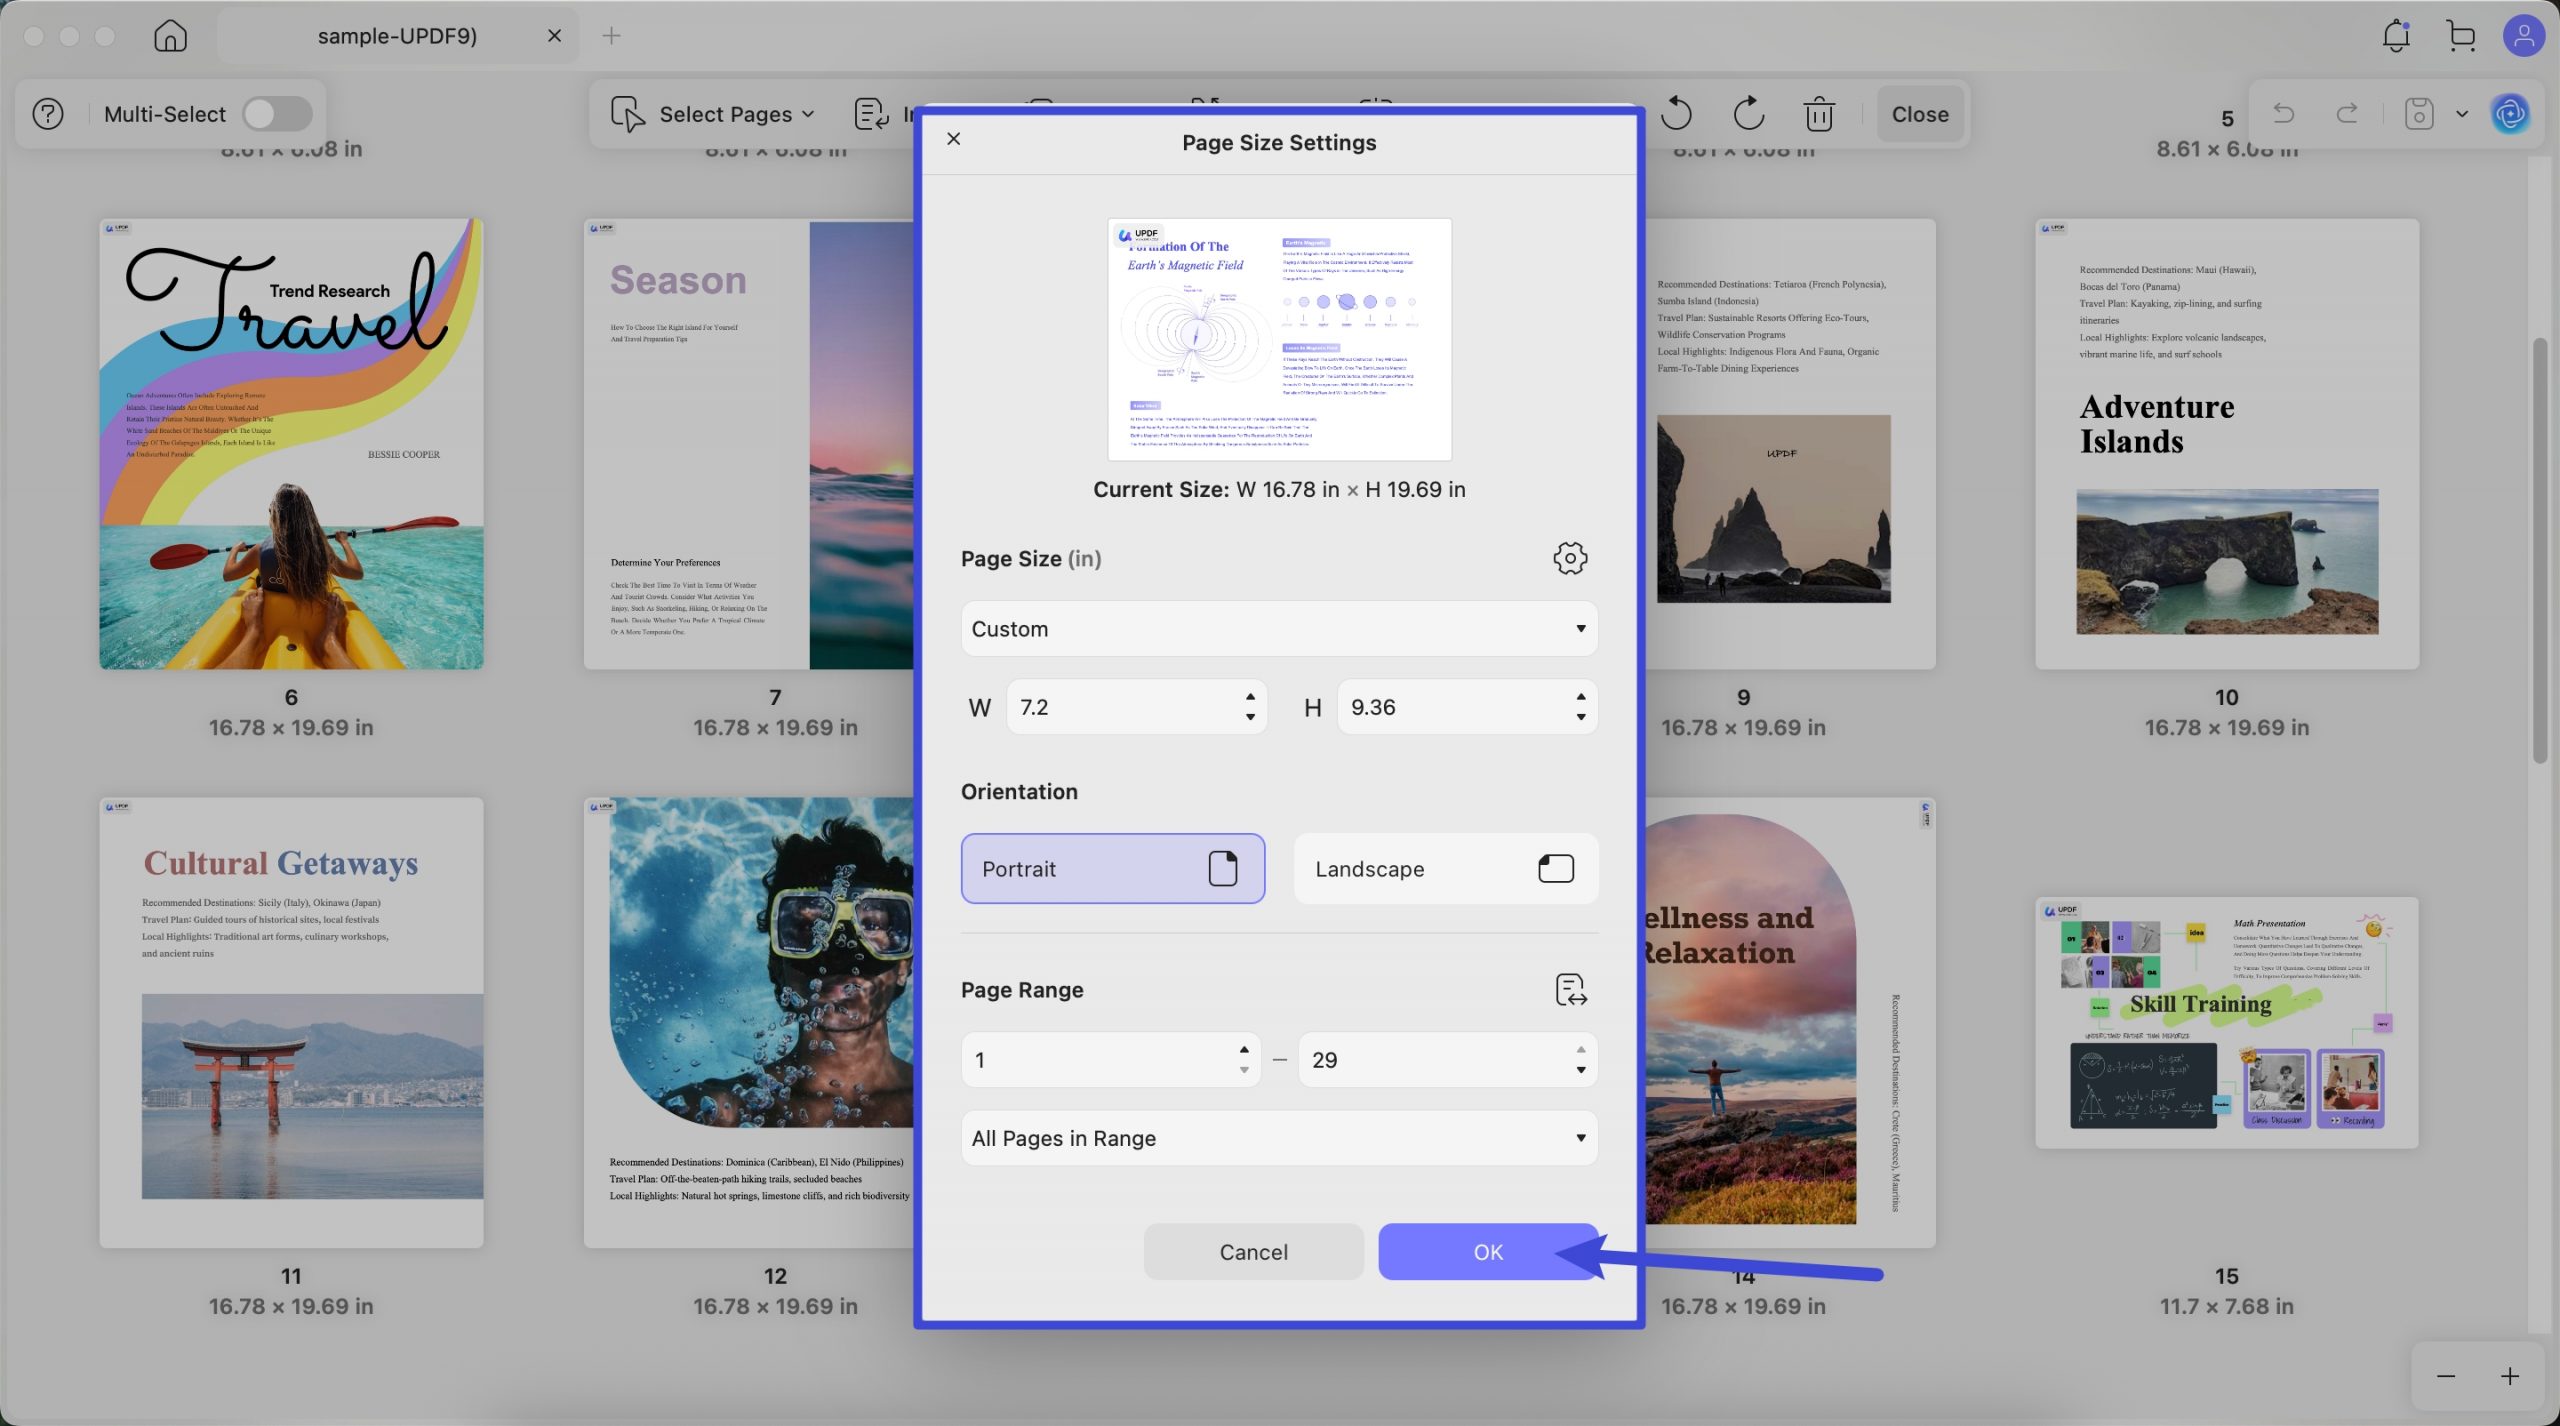
Page Size:
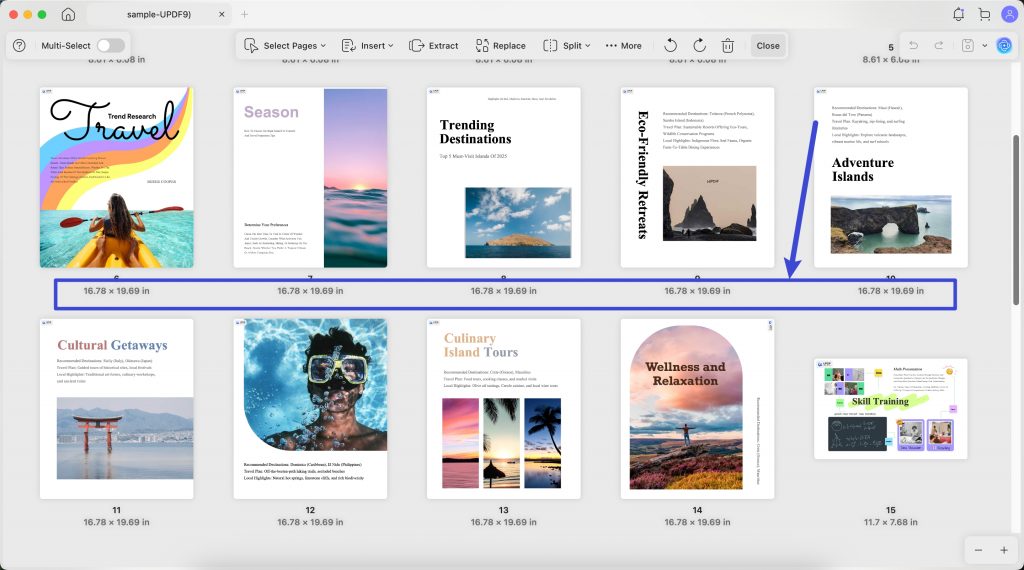
UPDF displays the page size of each PDF page when users open the Organize PDF panel. This helps users quickly see the dimensions of different pages in the document. Knowing the page size is useful for tasks like layout design, printing, or ensuring consistency across pages.
To change the page size, you need to click on the “...More” > “Page Size”. Now, in the window, you can choose the preset page size like A4, A5, B5, etc, or custom the page size by entering Width and Height. You can also change the orientation and select the page range the apply the changes. Then, click on the “OK”.
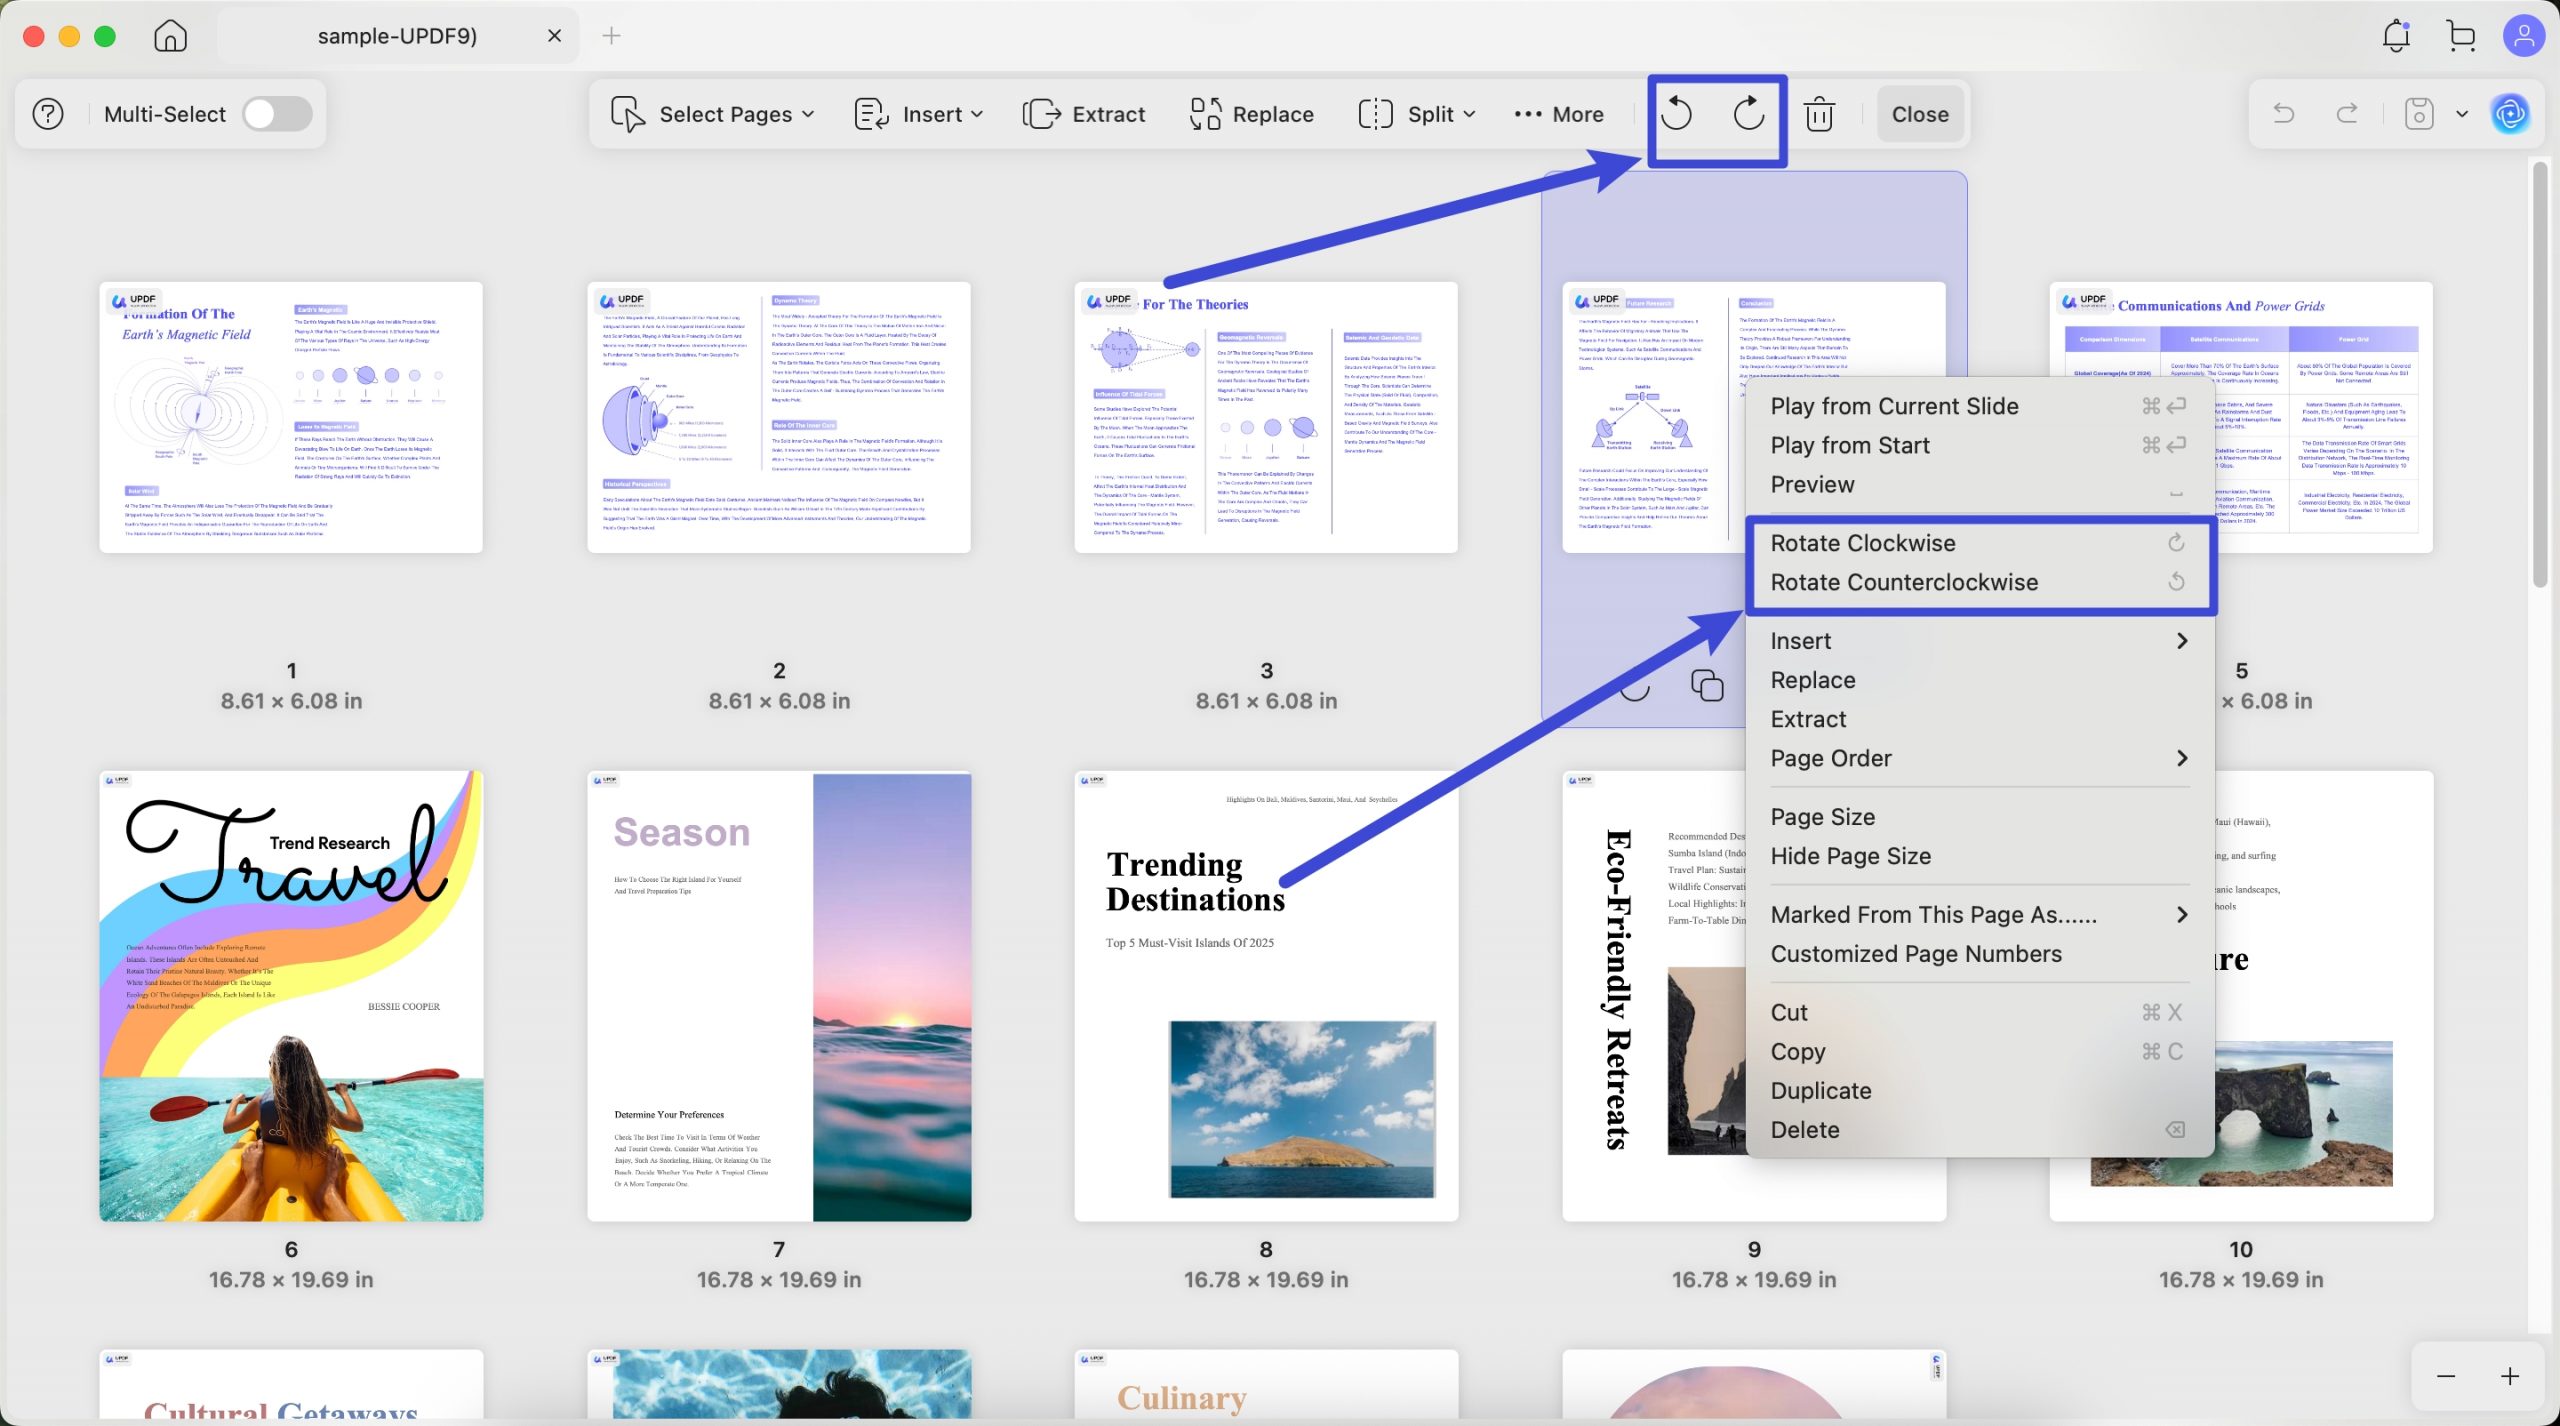
Rotate Pages:
Video Tutorial on How to Rotate, Delete, and Zoom Pages with UPDF
PDF pages are sometimes disoriented, meaning some pages may be in Portrait mode while others are in Landscape mode. you can easily change the orientation of a page using the Page feature, for which you'll see the icon at the top when a PDF file is open.
- To rotate a page, click on Organize Page.
- Choose the page or pages to be rotated.
- Next, in the top toolbar, choose Rotate Counterclockwise or Rotate Clockwise to rotate the pages in that direction. Or, you can select the pages and right click to select Rotate Counterclockwise or Rotate Clockwise to rotate.
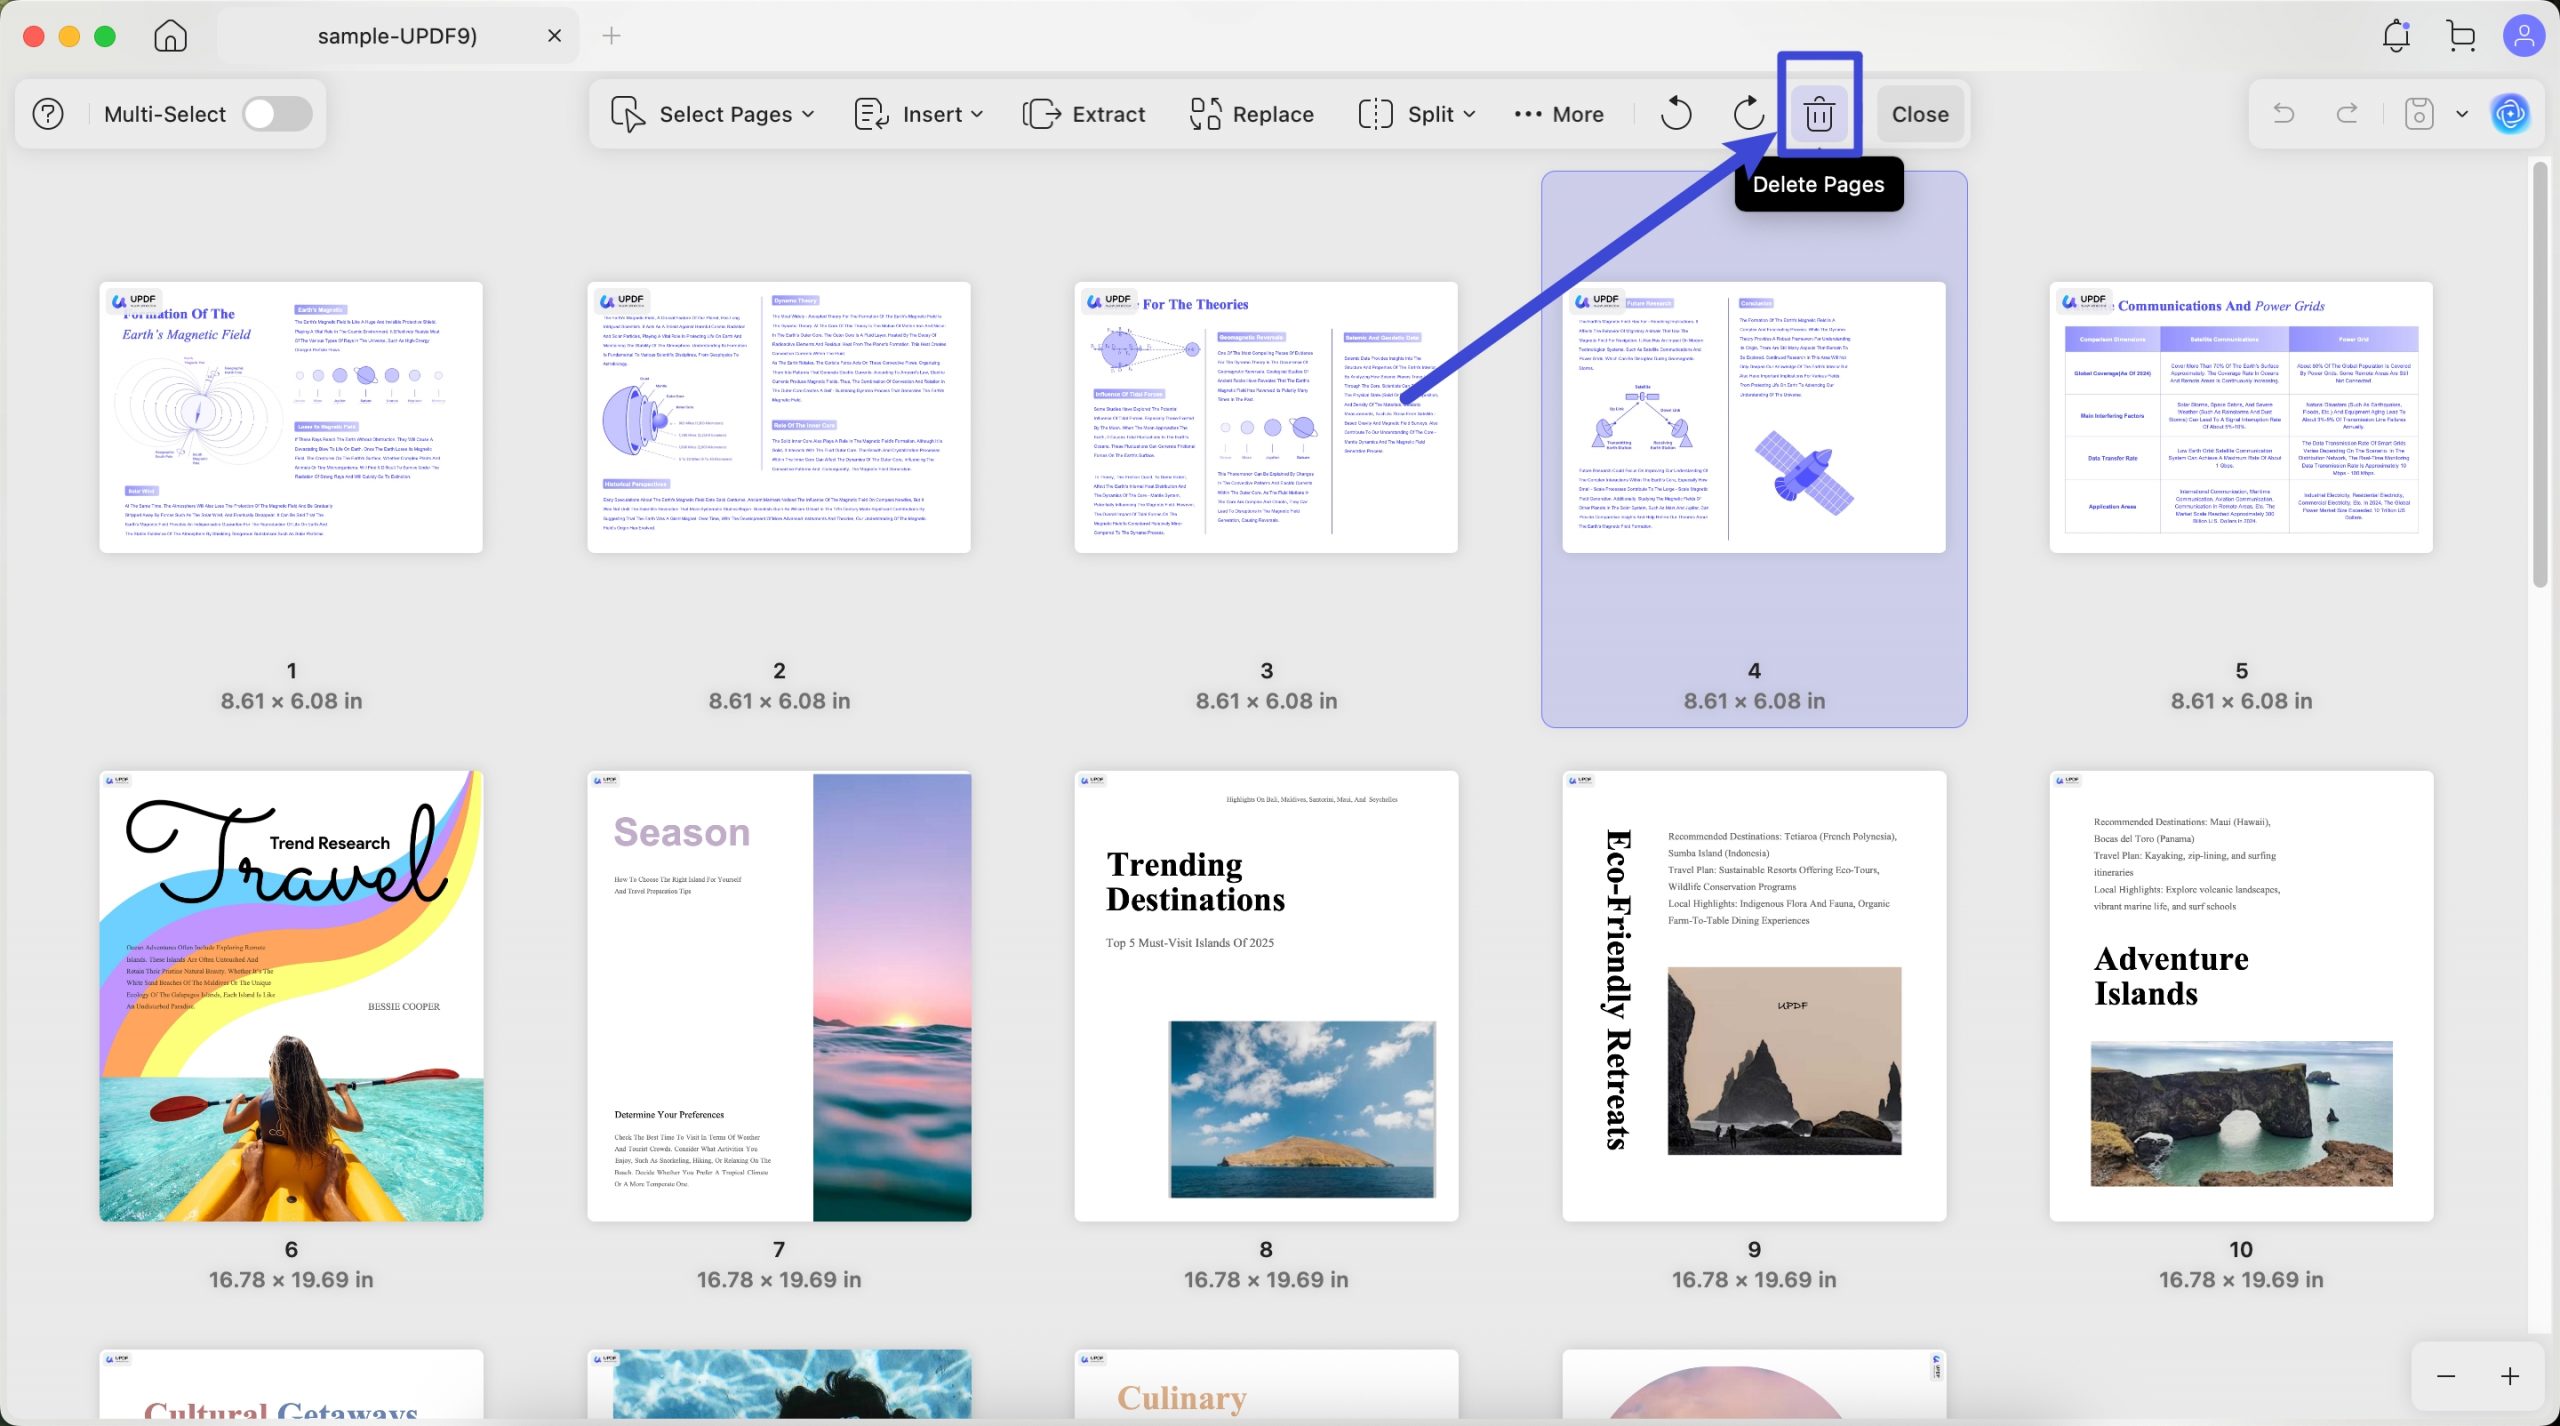
Delete Pages:
Any unwanted page or pages in a PDF document can be quickly removed using the process steps shown below:
- Click the Organize Page function in the main document view.
- Select the pages to be deleted.
- Click the Delete Pages option in the top toolbar. Alternatively, click the Del key on your keyboard.
- Save the file with the deleted pages.
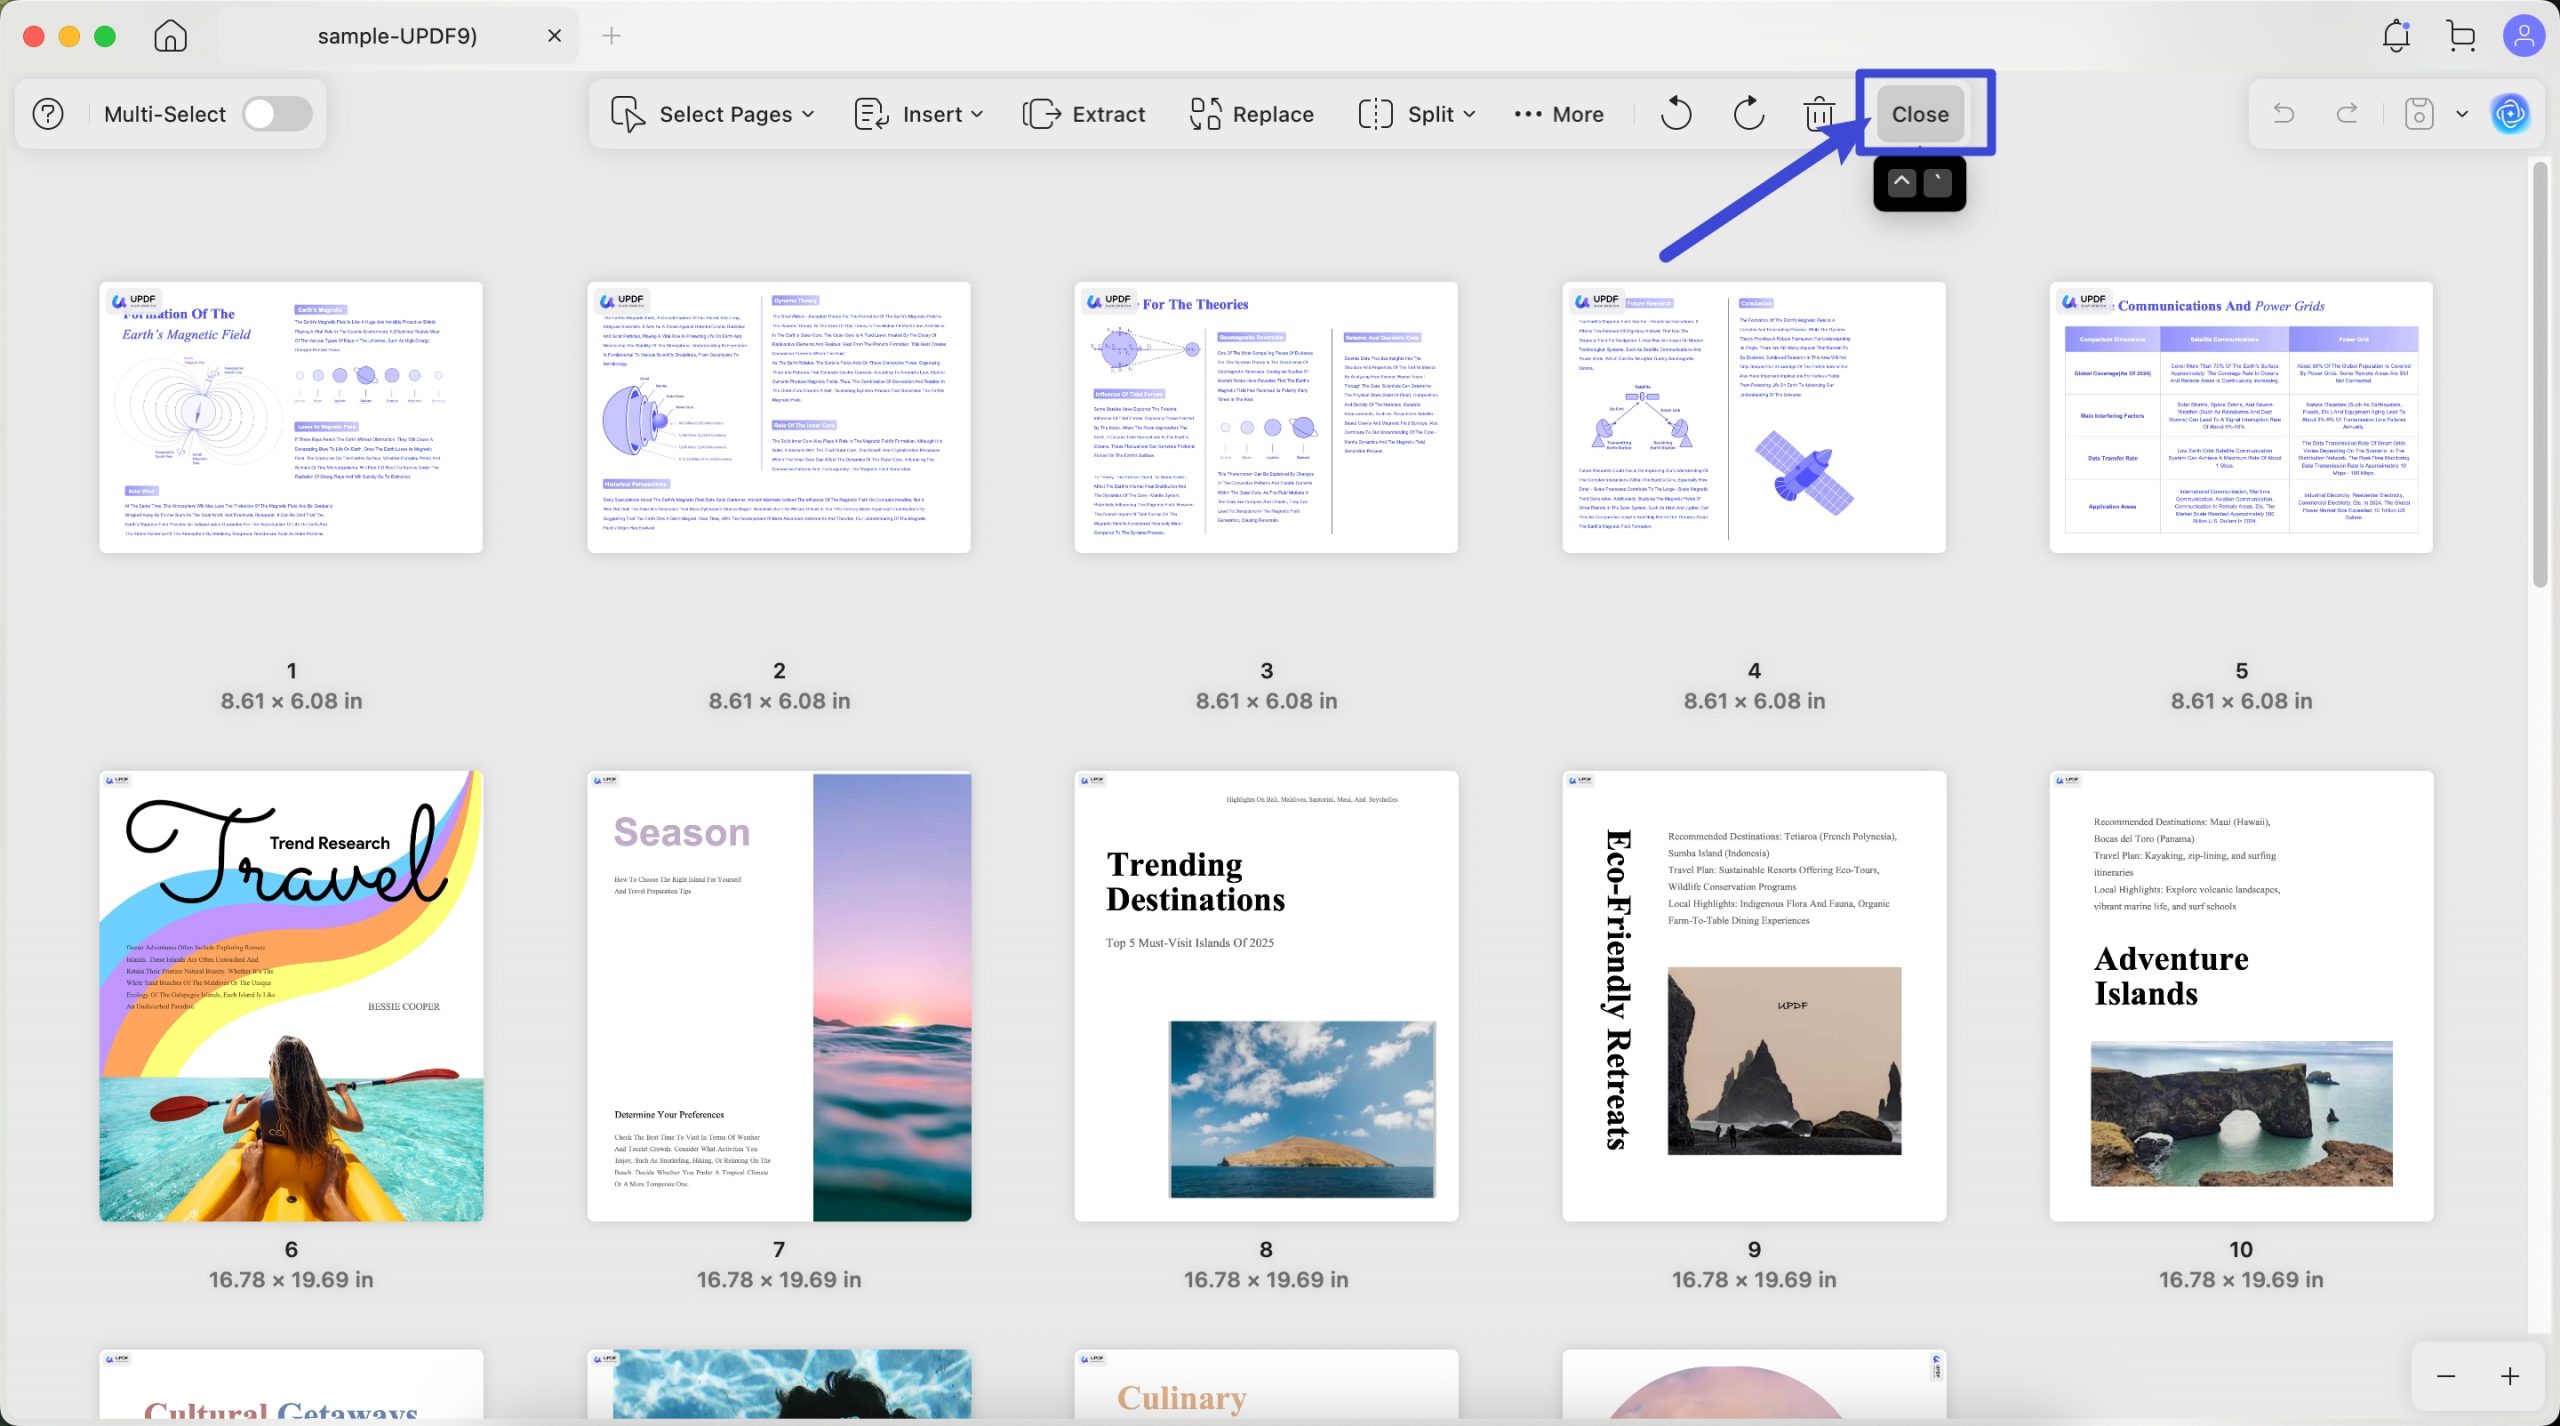
Close:
Once you have made all the changes, hit the "Close" button to exit the organization mode.