 UPDF for Windows
 UPDF for Mac
 UPDF for iPhone/iPad
 UPDF for Android
 Nomostar
 UPDF AI Online
 UPDF Sign
 IvyCraft
 Edit PDF
 Annotate PDF
 Create PDF
 PDF Form
 Edit links
 Convert PDF
 OCR
OCR PDF to Word
 PDF to Image
 PDF to Excel
 Organize PDF
 Merge PDF
 Split PDF
 Crop PDF
 Rotate PDF
 Protect PDF
 Sign PDF
 Redact PDF
 Sanitize PDF
 Remove Security
 Read PDF
 UPDF Cloud
 Compress PDF
 Print PDF
 Batch Process
 About UPDF AI
 UPDF AI Solutions
 AI User Guide
 FAQ about UPDF AI
 Summarize PDF
 Translate PDF
 Chat with PDF
 Chat with AI
 Chat with image
 PDF to Mind Map
 Explain PDF
 PDF AI Tools
 Image AI Tools
 AI Chat Tools
 AI Writing Tools
 AI Study Tools
 AI Working Tools
 Other AI Tools
 AI Bookmark Generation
 AI Bookmark Summary
 AI Watermark Generation
 AI Background Generation
 AI Sticker Generation
 AI Stamp Generation
 AI Editing Suite
 UPDF Copilot
 AI Page Management
 AI Semantic Search
 PDF to Word
 PDF to Excel
 PDF to PowerPoint
 User Guide
 UPDF Tricks
 FAQs
FAQs UPDF Reviews
 Download Center
 Blog
Blog Newsroom
 Tech Spec
 Updates
 UPDF vs. Adobe Acrobat
 UPDF vs. Foxit
 UPDF vs. PDF Expert
PDF format is a very good format to make a presentation and share with others. It always remains the same look no matter whether you open and view it on any device, system, or software. The file size of the PDF format is also smaller than PowerPoint format. Converting PowerPoint to PDF could be difficult for you especially if you're not used to doing it on a Mac. This article will introduce different ways to do it. Here are some methods to convert your PowerPoint to PDF on Mac:
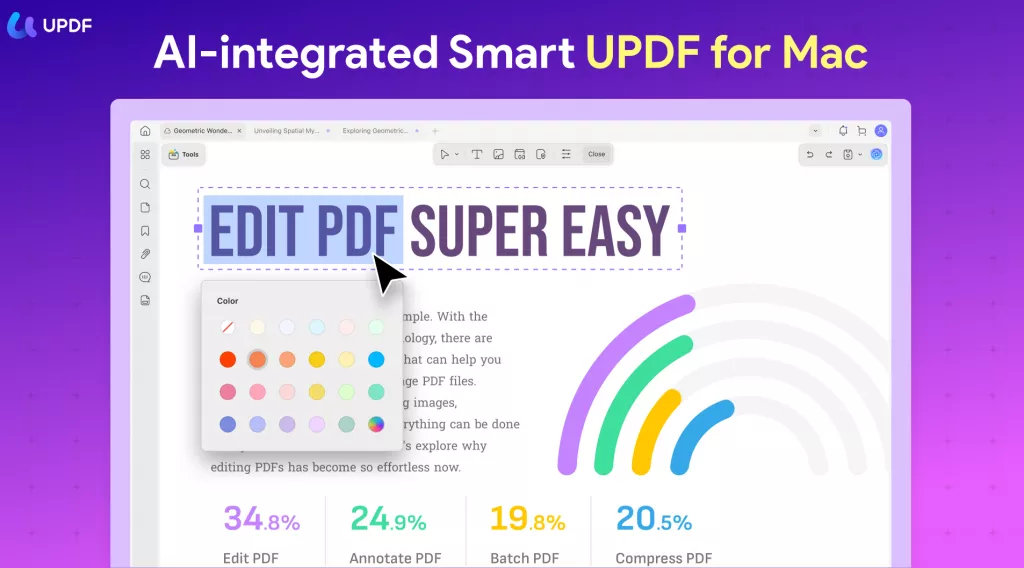
The Best PDF Editor for Mac
UPDF for Mac is an all-in-one PDF editor for Mac that has a very user-friendly interface. It lets you edit, annotate, convert, protect, share, organize, and recognize text in scanned PDFs with OCR.
Windows • macOS • iOS • Android 100% secure
- The interface is very beautiful with a simple style, which requires no learning curve.
- You can open PDFs and edit PDFs very quickly and steadily, even if you are working on a large PDF file.
- It has robust annotation tools for highlighting, and adding text boxes and shapes with its navigation and annotation tool.
- Edit texts, images and links in your PDF easily and efficiently.
- It enables you to select an image in your content and allows you to edit, resize, reposition, copy, delete, or even crop the PDF image.
- The OCR tool can recognize up to 38 languages in your scanned document's text.
- Its page management tool enables you to modify your PDF pages. It lets you extract, split, rotate, reorder, replace, delete, and add pages.
- Its PDF conversion covers many types of files like Word, Excel, CSV, PowerPoint, RTF, Text, Image(PNG, JPEG, BMP, TIFF, GIF), HTML, XML, and PDF/A.
UPDF annual plan starts at US$39.99 where you can get full access, unlimited document processing, no ads, and no file size limits. Perpetual plan is at US$59.99, a one-time fee where you can use everything about UPDF, forever.
Method 1: How to Save PowerPoint as PDF on Mac Directly
Microsoft PowerPoint for Mac is an excellent tool that is commonly used to create responsive PowerPoint presentations. It also enables you to save your PPT into another file type, particularly PDF. It's good to have MS PowerPoint pre-installed already, and if not, you can either pay for their software or use the free version online. Here are the steps to convert PowerPoint to PDF on Mac:
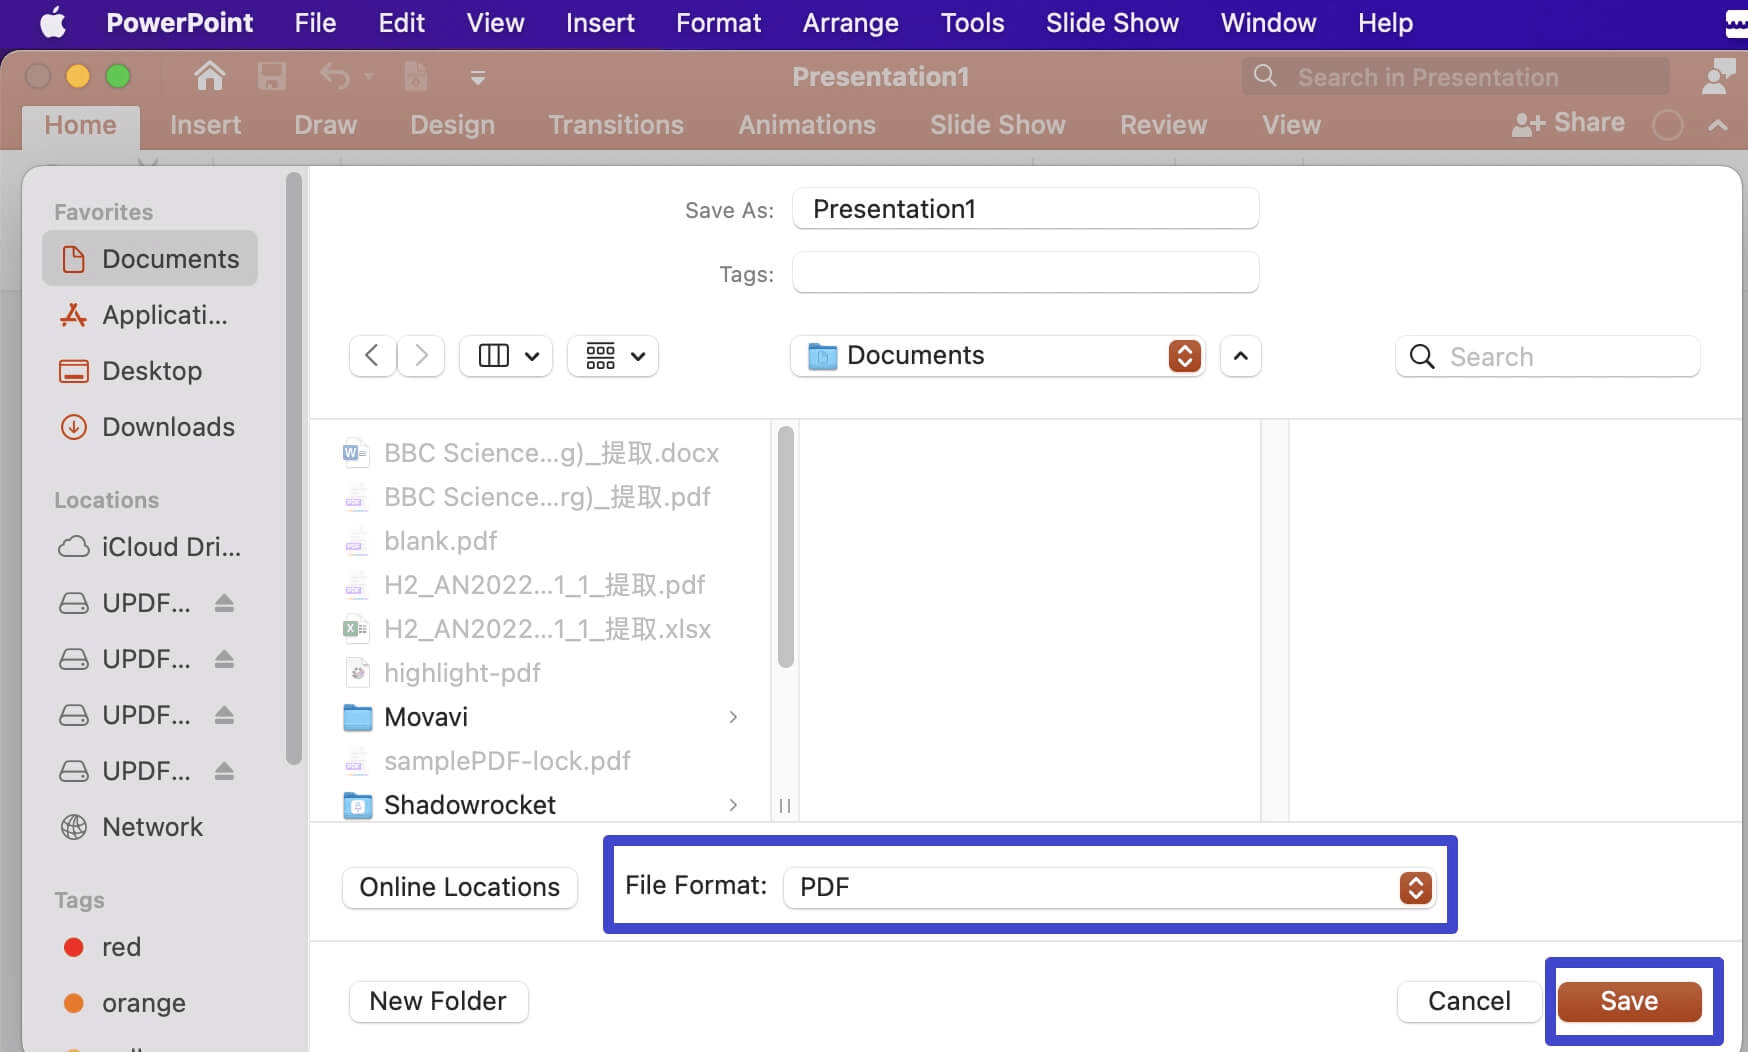
- Step 1. First of all, you need to open the PowerPoint file on your Mac device.
- Step 2. After that, you can click on the "File" option and then choose "Save As".
- Step 3. You can rename and choose the location for the PDF file.
- Step 4. In the "File Format" section, choose the "PDF" format.
- Step 5. Click the "Save" button.
Saving the PPT as a PDF on Mac with MS PowerPoint is a piece of cake. However, since you are converting one format to a different one, there is a chance that some data might be missing after the conversion. There are chances that your PDF files could be missing slide contents or possible disarrangement of the slides. Furthermore, you cannot edit the output after converting it.
If you want to make further editing of the PDF document, you will need a professional PDF editor like UPDF. It allows you to edit the text and images in the PDF document easily. You can also add or edit links, watermarks, backgrounds, headers, and footers in the PDF document.
Windows • macOS • iOS • Android 100% secure
Method 2: How to Save PowerPoint as PDF with Notes on Mac
MS PowerPoint has a built-in print to PDF feature to help you save it as a PDF with notes. When doing Method 1, it only saves the PPT but does not include the speaker notes. Speaker notes are important points in each slide of the presentation. If you want to include those in PDF, these are the steps on how to save PowerPoint as PDF with notes on Mac:
Step 1. Go to "File>Print"
After opening the PowerPoint file, you need to go to the "File>Print" option.
In the print pop-up window, click the "Show Details" option to reveal more options for printing.
Step 2. Save PowerPoint as PDF with Notes on Mac
- Click on the printer drop-down menu, then select "UPDF AirPrint" if you have UPDF installed.
- Go to the Layout drop-down options, and make sure you select "Notes".
- Make sure you select "PDF" format to output.
- Finally, click the "Print" button.

Since you are only converting the PPT into PDF using PowerPoint with speaker notes, it may appear differently when you convert your PPT file to PDF. In this situation, a PDF editor will help you a lot. If you want to make further editing to your PDF document after conversion, you can use UPDF to help you. It offers the best editing capability to modify the text, images, links, watermark, background, header, footer, etc. You can organize the pages with this tool easily by rotating, splitting, extracting, etc.
Windows • macOS • iOS • Android 100% secure
Method 3: How to Convert PPT to PDF on Mac with Google Slides
Another method is to use Google Slides to convert PPT to PDF on Mac. It is an online, Creative PowerPoint maker that enables you to work with other users collaboratively. These are the steps to convert PPT to PDF using Google Slides:
Step 1. Upload your PPT to Google Slides
Go to Google Slides, and login/register your Google account.
Upload your PPT file by clicking "Blank" on Google Slides' homepage, and going to "File>Import Slides>Upload". You can either drag or select the file you wish to convert.
Select "All" in select slides in the upper right in the pop-up window, then click on import slides.
Step 2. Download as PDF
Go to "File>Download>PDF Document(.PDF)" to download the PDF file.
Similarly, with the other methods, you cannot edit or annotate contents into your PDF after converting. Also, when you download the PPT into PDF format, it has the raw file size compared to other methods where you can have the option to compress the file.
Method 4: How to Convert PPT to PDF on Mac with Online Tool
There are a lot of online tools that you can use to directly convert a PPT to a PDF on Mac. Here are the steps to convert your PPT to PDF online:
Step 1. Find any Online Tool
Search for any free online tool that converts PPT to PDF. You can search keywords like free PPT to PDF convert, free PPT to PDF converter, etc.
Step 2. Upload and Convert PPT to PDF
Upload your PPT file into the tool. Then, you may configure your document if the online tool you are using provides you with its features, like compressing the PDF or organizing the pages. Then, start converting the PPT file into PDF, and wait for it to finish converting.
Step 3. Download and Save
After converting, download the file, and save it.
There are many online PPT to PDF converting tools that you may use. Since it is an online tool, it means you cannot use it without an Internet Connection. Furthermore, most of these tools do not enable you to edit and annotate your PDF files.
All methods to convert PPT to PDF on Mac have quite the same disadvantage. The methods mentioned above do not really provide you with features where you can edit the text, edit the image, or annotate your PDF. After converting your PPT to PDF, you might want to make some edits with the PDF, which then you will be finding the best PDF editor for Mac.
Also Read: How to Convert PPT to Google Slides
Conclusion
We have learned four different methods of converting PowerPoint to PDF on Mac, which are commonly specialized for converting only. Since the aforementioned methods specialize in converting, they are not suitable for editing content for your PDF, like editing the text/images or annotating. Plus, you might need to use everything in one tool for editing your PDF with a productive and user-friendly interface since going to different online tools to access such different features is a hassle and inefficient. There is a solution to every problem, and in the case of editing PDFs, UPDF is the best solution for that.
Windows • macOS • iOS • Android 100% secure


 Enola Miller
 Enola Davis