 UPDF for Windows
 UPDF for Mac
 UPDF for iPhone/iPad
 UPDF for Android
 Nomostar
 UPDF AI Online
 UPDF Sign
 IvyCraft
 Edit PDF
 Annotate PDF
 Create PDF
 PDF Form
 Edit links
 Convert PDF
 OCR
OCR PDF to Word
 PDF to Image
 PDF to Excel
 Organize PDF
 Merge PDF
 Split PDF
 Crop PDF
 Rotate PDF
 Protect PDF
 Sign PDF
 Redact PDF
 Sanitize PDF
 Remove Security
 Read PDF
 UPDF Cloud
 Compress PDF
 Print PDF
 Batch Process
 About UPDF AI
 UPDF AI Solutions
 AI User Guide
 FAQ about UPDF AI
 Summarize PDF
 Translate PDF
 Chat with PDF
 Chat with AI
 Chat with image
 PDF to Mind Map
 Explain PDF
 PDF AI Tools
 Image AI Tools
 AI Chat Tools
 AI Writing Tools
 AI Study Tools
 AI Working Tools
 Other AI Tools
 AI Bookmark Generation
 AI Bookmark Summary
 AI Watermark Generation
 AI Background Generation
 AI Sticker Generation
 AI Stamp Generation
 AI Editing Suite
 UPDF Copilot
 AI Page Management
 AI Semantic Search
 PDF to Word
 PDF to Excel
 PDF to PowerPoint
 User Guide
 UPDF Tricks
 FAQs
FAQs UPDF Reviews
 Download Center
 Blog
Blog Newsroom
 Tech Spec
 Updates
 UPDF vs. Adobe Acrobat
 UPDF vs. Foxit
 UPDF vs. PDF Expert
PowerPoint has been here for a long time and it has helped us when it comes to presentations. However, it has a few limitations. The complication of sharing real-time edited presentations and access from different devices.
Google Slides comes to the rescue with benefits that makes it convenient for users to view and share their presentations with important stakeholders with ease.
This blog will walk you through the steps to convert PPT to Google Slides as well as a better way, UPDF, to share PDF safely. You can click the below button to download UPDF, if you need a safe and easy way to share your PPT. Let’s dive straight in.
Windows • macOS • iOS • Android 100% secure
Part 1. How to Convert PPT to Google Slides? (4 Ways)
Let us go through 4 ways to convert a PPT file to a Google Slides file.
Remember that to make the workflow smoother, you will need to access your Google account first online.
Method #1 - Convert PPT to Google Slides Online by Uploading to Google Slides
This is probably the easiest way to convert a PPT to Google Slides by opening your PPT file in Google Slides.
The steps are as follows:
- Open the Google Slides website.
- Click Blank Presentation to create a blank presentation file.
- Then, head over to File on the top-left corner of your screen and click Open.
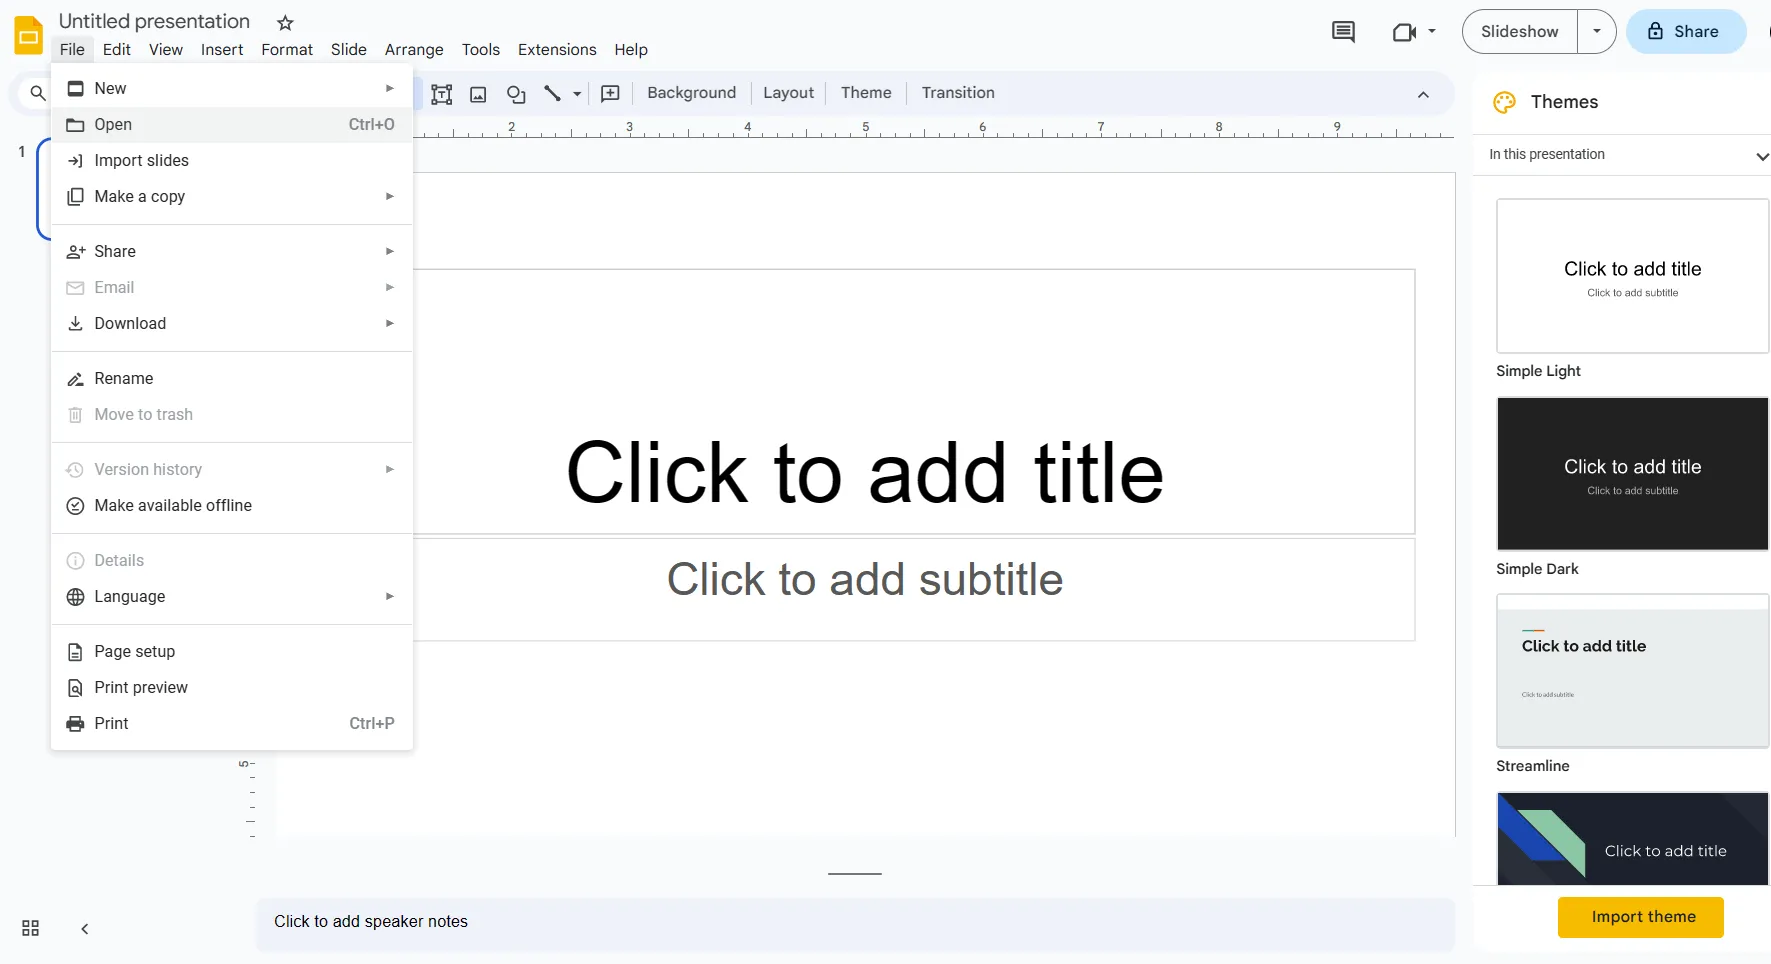
- Once a pop-up appears, click Upload. You can select the PPT file you want to convert.
- Finally, the PPT file will appear as your Google Slides file. And you convert PPT to Google Slides successfully.
Method #2 - Convert PPT to Google Slides Online Free Using Google Drive
An alternate method you can use is simply centered around using Google Drive.
This enables you to have your presentation saved as both a PPT and a Google Slides file. This makes it easier for you to choose any of them when accessing them at any point.
The steps are as follows:
- Open Google Drive and upload your PPT file to it with a simple drag and drop.
- Then, right-click your PPT file in Google Drive.
- Select the Open with option and choose Google Slides.

- Your presentation will open in Google Slides now. You can head over to File and click Save as to make it a permanent Google Slides file. It is easy to convert PPT to Google Slides with Google Drive.
Method #3 How to Convert PowerPoint to Google Slides without Losing Formatting
When using the methods mentioned above, you will find that you will lose your format. What if you do not want to lose the format and how to do it? We also get you covered. However, you need to have one software like UPDF that can help you convert PowerPoint to images, so that it keeps all your content format. The reasons to use UPDF instead of other methods are that UPDF is easy to use, can convert your PPT one by one or in batch to images, and it is very cheap to use. Just click the below button to download UPDF and follow the below guide to convert PowerPoint to Google Slides now.
Windows • macOS • iOS • Android 100% secure
Step 1. Drag the PowerPoint to the UPDF interface, now, the PowerPoint is converted into PDF.

Step 2. Click on the "Export PDF" at the right side panel, select "Images", choose the "JPEG" format, and click on the "Export" to select where you want to save the image files.

Note: it is completely free to use if you only need to convert 2 PPT files to images per day. For more tasks, you can upgrade to UPDF pro version with a very low price.
Step 3. Now, you need to open the Google Slides website, and click on the "Blank Presentation" > "Insert" > "Upload from computer" to upload one image to the first slide. Adjust the size and position of the images to completely match the slide. Go to "Slide" > "+ New Slide" and repeat the same steps to add the image. Work with the same steps until you finish adding all images as slides. Now, you convert PowerPoint to Google Slides successfully.

Method #4 How to Convert PowerPoint to Google Slides if File is Too Large
Now, you learned how to convert PPT to Google Slides without losing formats. But, sometimes, you may have one large file (Larger than 100 MB) that cannot be converted to Google Slides successfully. No worry, we also have methods that can work for you. Just follow the below guide.
Step 1. Also, you need to use UPDF. Just click the below button to download it, if you still do not have it. Once you download it, drag the PowerPoint to UPDF's "Open File" part at the home interface.
Windows • macOS • iOS • Android 100% secure
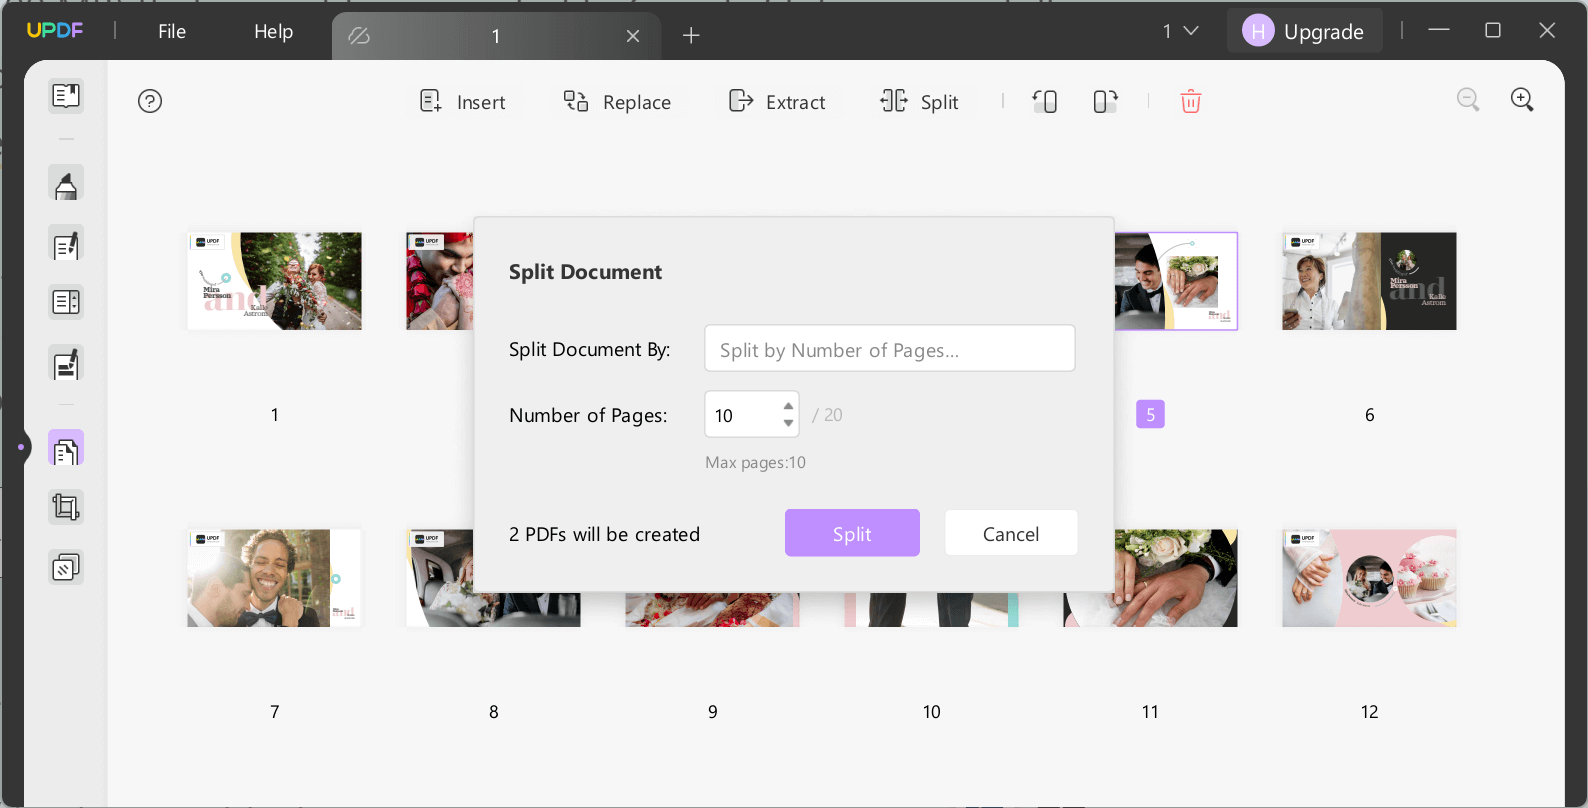
Step 2. Click on the "Organize Pages" at the left side menu list. Click on the "Split" > "Split by Number of Pages" or "Split by Size". Here, we choose "Split by Number of Pages". Now, enter the numbers you want to split for each file. For example, here, I enter 10 in the number of pages to split the 20 pages into 2 files. Click on the split to split them into 2 files.
Step 3. Now, you have 2 PDF files and you need to convert them into PPT by clicking "Batch" > "Convert" > "Add Files" > "PPT" > "Apply" to convert them back to PPT.
Step 4. Now, you will find the size of the two PPT files are much smaller. You can convert them into Google Slides directly by opening the Google Slides website, and clicking on the "Blank Presentation" > "File" > "Open" > "Upload" to upload the first PPT. Now, you convert the first PPT to Google Slides successfully. You can use the same guide for another PPT.
Part 2. 7 Reasons to Switch from PowerPoint to Google Slides
You may ask why you should convert PowerPoint to Google Slides.
Here are a few reasons why:
2.1 Google Slides is meant for effective collaboration
Presentations are usually done by an individual or by a team effort and presented to an audience. Teamwork here is essential and this involves a lot of sharing and editing in real-time by different users.
With a PowerPoint file, you will need to manually transfer files and have them saved in different revised versions.
However, in Google Slides, everyone can be on the same version file and also do other things such as commenting and editing without losing any progress.
2.2 Ease of access from different devices
Your Google Drive can be accessed from any browser and device and this makes it a widely used storage system.
When it comes to accessing files in Google Slides, all you need is to log on to your Google account and you will have your presentations accessed from any browser.
Even on smartphones like iPhones, you can install the Slides app and access and view/edit your presentations on that.
2.3 Sharing is easy
To share your PowerPoint file, you will need to use OneDrive or SharePoint.
With Google Slides, you can simply click on the file you want to share and have them sent to different email addresses of users you want to share with.
2.4 Keep track of changes
It can be difficult to track changes on a PowerPoint file offline made by others.
However, if it is used as a Google Slides file, you can get access to the file’s version history and find out different timestamps of users who edit the document with such ease.
Moreover, you will also have the option to restore the version at any time on Google Slides.
2.5 Work on presentation files offline
Even though you could access a PowerPoint file offline using OneDrive, you can do the same for a Google Slides file.
First, simply install the Google Docs Offline extension.
Head over to your Google Drive settings, and check the option to Create, open and edit your recent Google Docs, Sheets, and Slides files on this device while offline from the Offline section.
This enables you to access and edit presentation files even if you are offline.
2.6 No need to worry about losing progress
In a PowerPoint file, you will need to manually save the file or turn on AutoRecover.
Whereas, since Google Slides is an online tool, your changes are saved automatically and you won’t lose any progress.
2.7 Add graphical representations with ease
In Google Slides, you can easily drag and drop images from your PC into your presentation by clicking Insert, and then selecting Image.
You can also add important charts from your Google Sheets file by clicking Insert, then selecting Chart, and selecting From Sheets. This helps you to import the chart you want to add.

Part 3. A Better Way to Share Your PPT - UPDF
So far, we have covered the benefits of using Google Slides to view your slideshows online. However, there can still be some disadvantages to using it.
For instance, although Google Slides allows the file owner to set up permissions to access the file, you can still find users able to print the PPT as a PDF file and edit content. This can lead to copyright issues.
But using a tool like UPDF can allow you to set watermarks to your PDFs and set permissions such as downloading and printing to specific users without hassle.
Moreover, UPDF is an effective PDF management tool and very easy to use.
You can click the below button to download UPDF on your computer and follow the below steps to learn how to share your PDF in a safer and easier method.
Windows • macOS • iOS • Android 100% secure
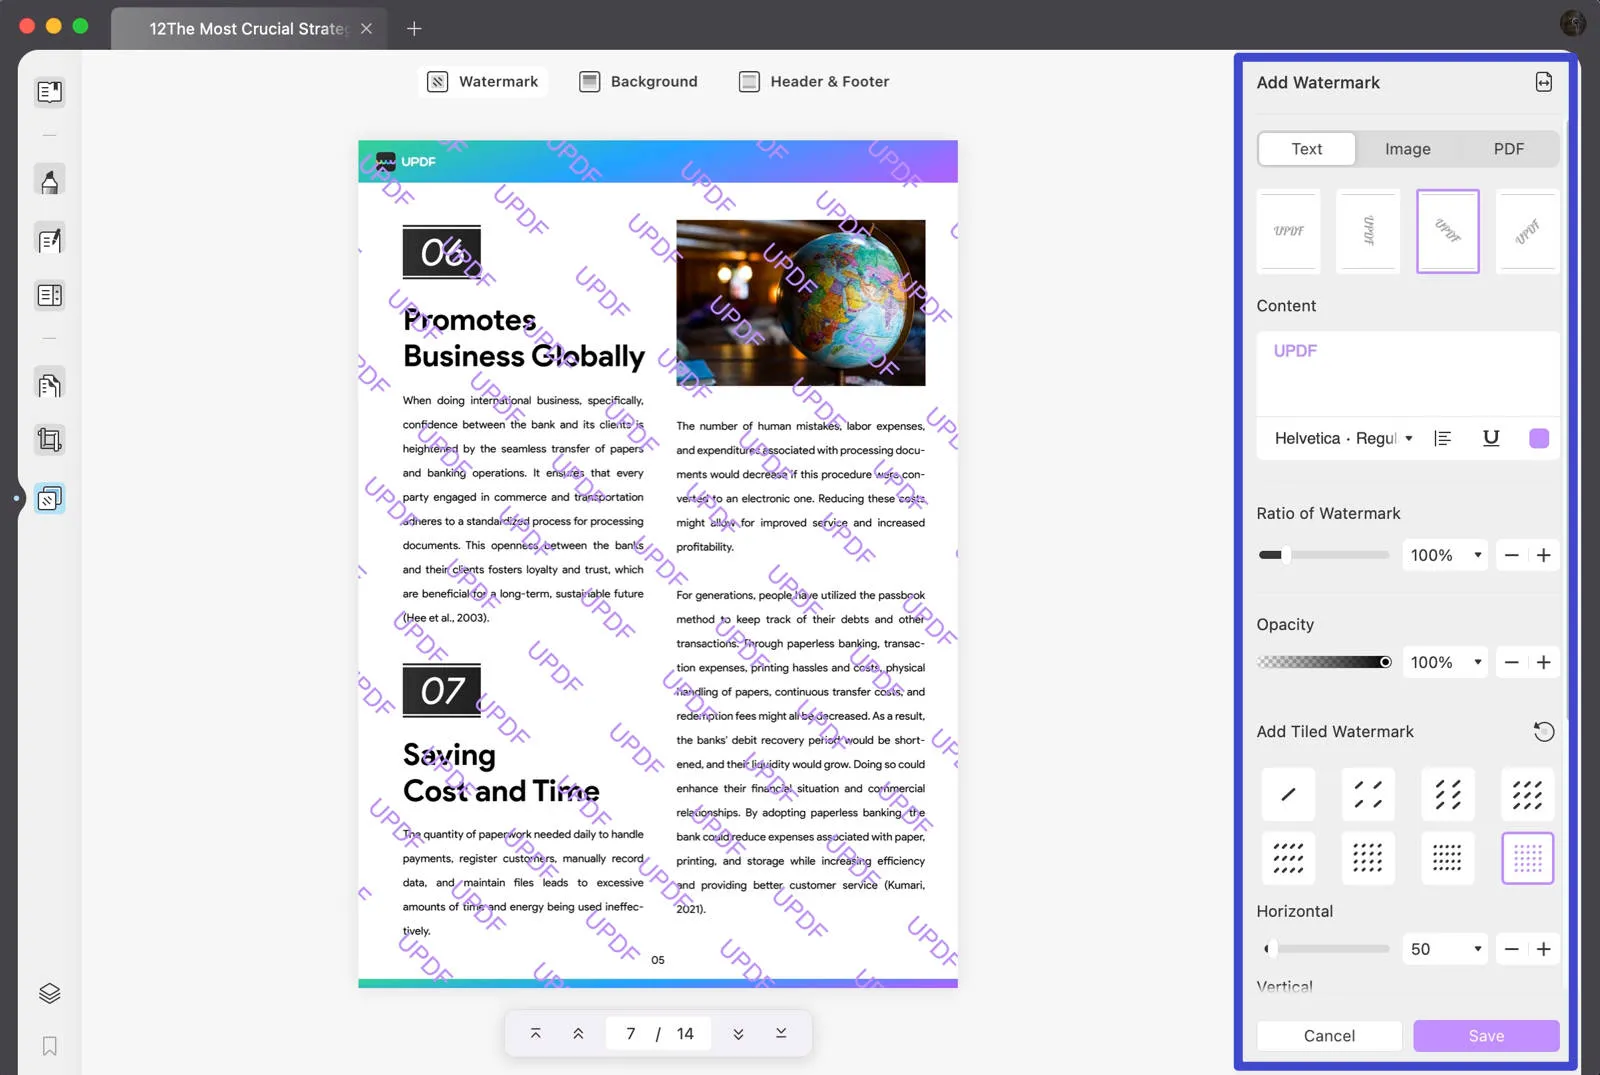
Step 1. Drag the PPT to the UPDF interface to open it as PDF. If you want to add watermarks to the PDF, you can click on the "Page Tools" at the left side menu, and click on the "Watermark" > "Add". Customize the watermarks to add it.
Step 2. When you finish editing, you can click on the "Share this file with others" button on the right-hand side panel.
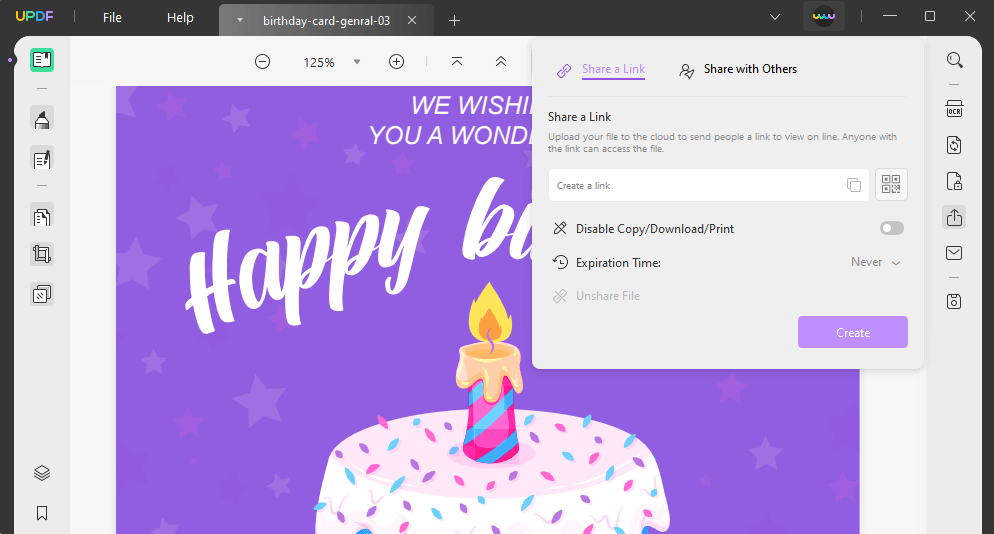
Then, a small pop-up appears. You can head under the Share a Link tab, switch on the "Disable copy/Download/Print" to protect your PDF, and click Create to generate a link. Once it is done, you can click on the "Copy" icon to copy and share the link with others.
Final Words
Now, you know how to convert PowerPoint to Google Slides Online Free, without losing formatting, and convert successfully with large files. You can choose the method per your scenario.
However, if you want to share the PowerPoint in a safer and better way, we recommend you to use UPDF. It allows you to add the watermark and permission passwords to the PDF. Moreover, it has many other features like editing PDF, AI features, OCR and more.
Click the below button to download UPDF and test its features now.
Windows • macOS • iOS • Android 100% secure


 Enola Davis
 Delia Meyer
