When previewing a large document, readers require annotation tools to highlight certain sections for quick recall.
Annotation helps in saving time in reading, improves the reader’s comprehension, and stores important information for analysis and interpretation.
In this blog, you will learn how to annotate a document in Word, Excel, and PDF by using a practical tool. Let’s get started.
Windows • macOS • iOS • Android 100% secure
Part 1. Types of Annotation Tools
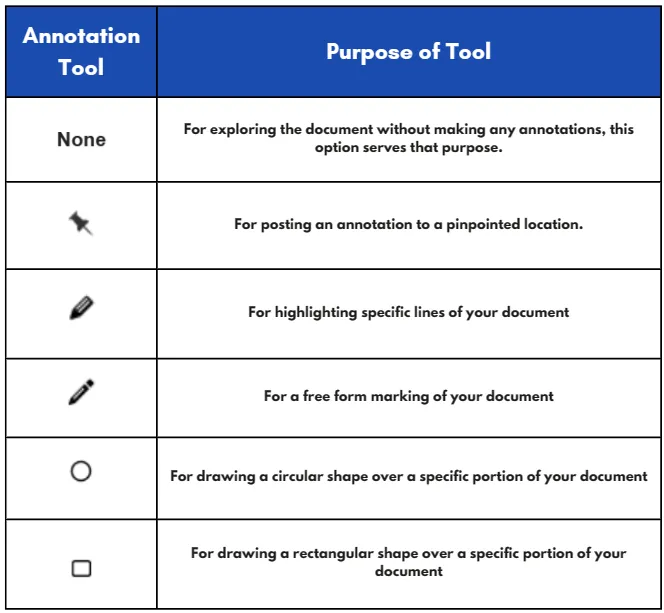
When you open a document and look to annotate certain portions of the file, you will be introduced to certain annotation tools from the Tools menu. Let us familiarize ourselves with some of these common annotation tools in the table below:
Part 2. How to Annotate or Markup a Document on Windows & Mac
If you are someone who is using Windows or Mac, this blog is still for you. Next, we will cover how you can annotate a Word, Excel, and PDF document in both Windows and Mac as these two operating systems still share the same common steps.
2.1 How to Annotate or Markup a Word Document
In both Windows and Mac, you can mark up any portion and review changes in your Word document with ease. Simply follow these steps:
- Head over to the Reviews tab, and click on Track Changes to turn the feature on.
- Highlight specific text that you want to add a comment, and in the Comments section, click on New Comment to add your small note.
- You can carry out other edits such as inserting content, deleting content, formatting etc., and this will be tracked by the markup feature.
- Under the Tracking section, you will find an option to view simple markup, all markup, no markup, and the original document. This helps to view all the changes made and all the markup notes.
- After use, you can head over to the Track Changes and click it again to turn it off.

Also Read: How to Highlight & Add More Highlight Colors in Word
2.2 How to Annotate or Markup a PDF Document
Without a doubt, annotation tools are necessary for a PDF document. There are going to be a lot of PDF files shared around and many readers like you require tools that can help them mark up important sections. This is where UPDF comes in handy as this software helps you to view your PDF with ease and make necessary edits, and annotations, and improve your reading experience.
UPDF provides:
- Different reading modes suit your reading experience the best.
- A simple array of annotation tools to markup and make your document more readable.
- Complete PDF organization tool to help reorder pages, crop, extract, delete, etc.
- Available for Windows, Mac, iOS, and Android users.
Windows • macOS • iOS • Android 100% secure
Here is how you can annotate or markup a PDF with the help of UPDF:
Step 1. Import your PDF file into UPDF.
Step 2. Select a certain section of text or paragraph you want to highlight.
Step 3. On top of your UPDF app, you will find a banner of annotation tools available such as colored highlighters, text comments, erasers, sticky notes, and more—bringing you convenience.

2.3 How to Annotate or Markup an Excel Document
Markups in an Excel document can be important too especially when it comes to those long monthly reports that need analyzing and presenting to stakeholders. Excel has similar steps compared to Word documents. They are as follows:
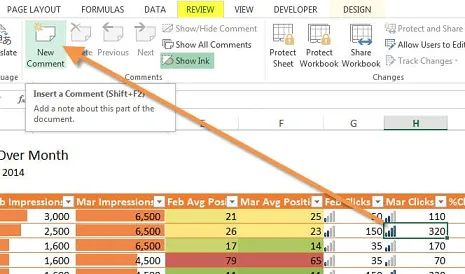
Step 1. Select a specific cell that needs to be marked, and then head over to the Review tab.
Step 2. Under the Review tab, there is a Comments section. Click on New Comment to add your small note.
Step 3. In Mac, you can find it under the Review tab, and under Comments, select New.
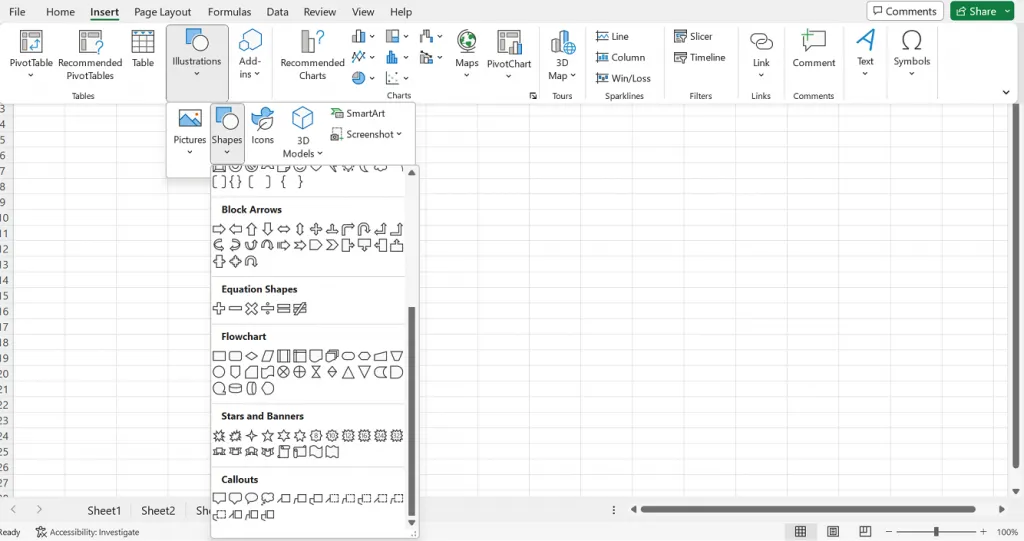
Step 4. You can also add Callouts by heading over to the Insert tab. Under the tab, click on Illustrations and then Shapes, and then you will find options under the Callout section.
Step 5. In Mac, you can find it under Insert, and click Shape. Then, one can change the formatting using the Format tab and Shape Styles.
Step 6. You can add Callouts of different shapes and adjust their parameters to highlight the certain cell or section that needs attention.
Part 3. How to Annotate or Markup a Document on iOS
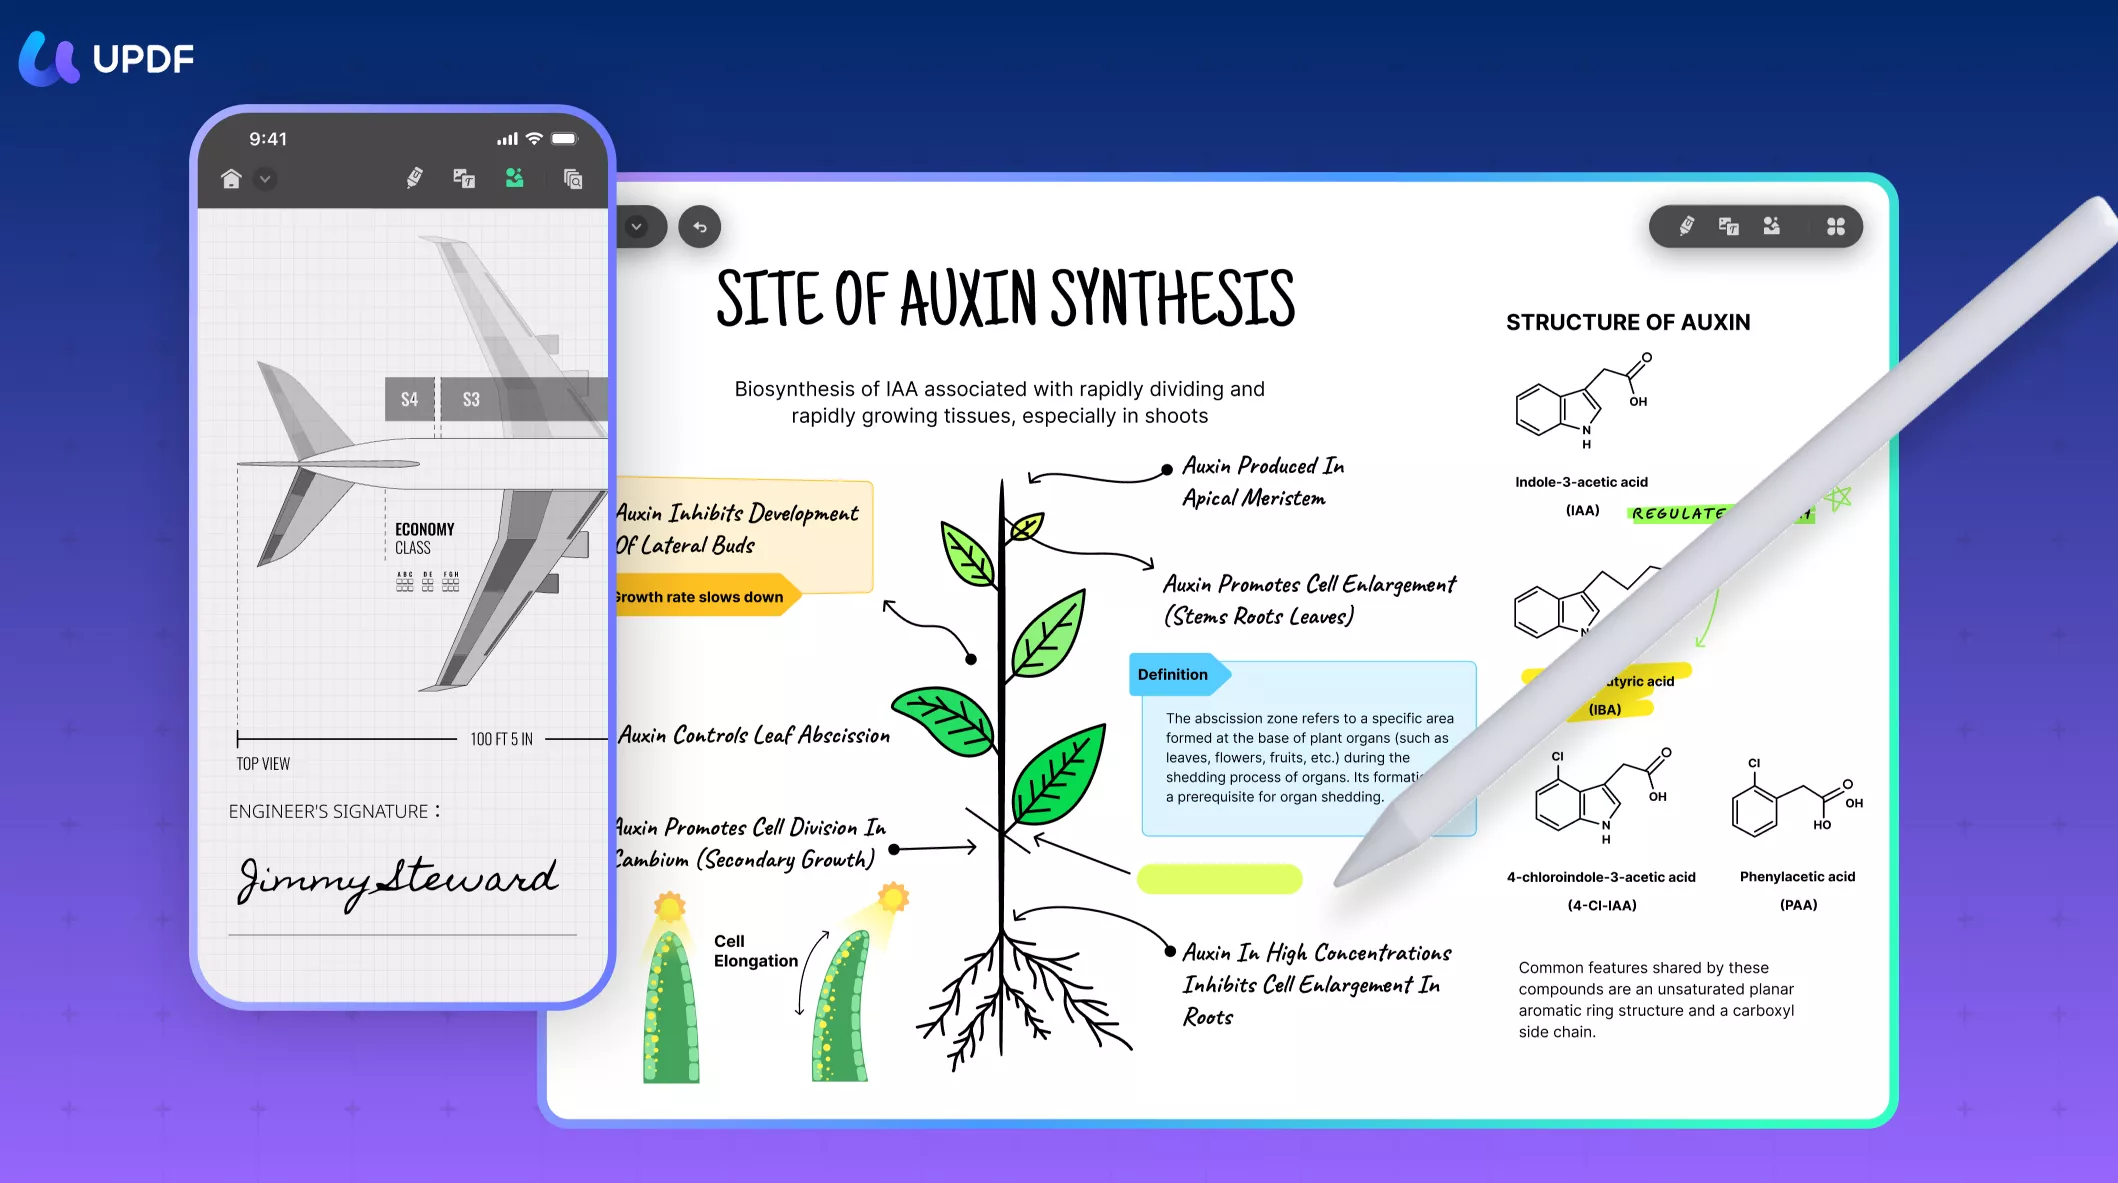
So far, we have covered how you can annotate a document on a desktop. Let’s go mobile now. First up, the good old iPhones. Follow these simple steps for annotating a document at your fingertips using UPDF for iOS:
Step 1. Download UPDF on your iOS devices and open it.
Step 2. Upload the document that you want to annotate to UPDF and open it. It’s worth mentioning that UPDF for iOS supports all kinds of documents, such as PDF, word, excel, PowerPoint, etc.
Step 3. After that, you can freely annotate the document with UPDF.
Part 4. How to Annotate or Markup a Document on Android
4.1 Word and Excel
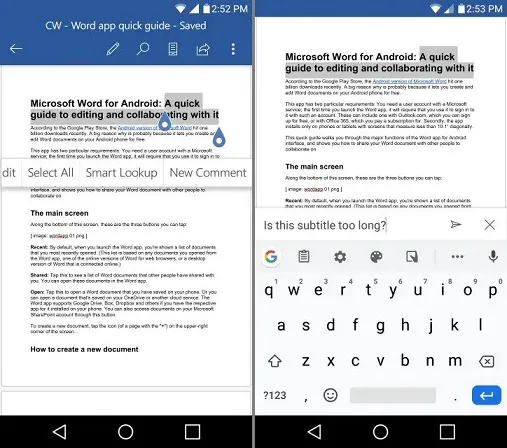
Open your Word document or Excel spreadsheet file on your Android phone and follow these steps:
- Tap the Edit icon, head to Home, and then tap Review.
- Select Comment and type out your comment to the post. You can also reply back to the comment.
- For viewing a specific thread, you can tap the cell, and select the purple comment icon. For viewing all threads, head to Review and tap Show Comments.
- You can delete a comment by tapping on Delete and a whole thread by tapping on Delete Thread.
4.2 PDF
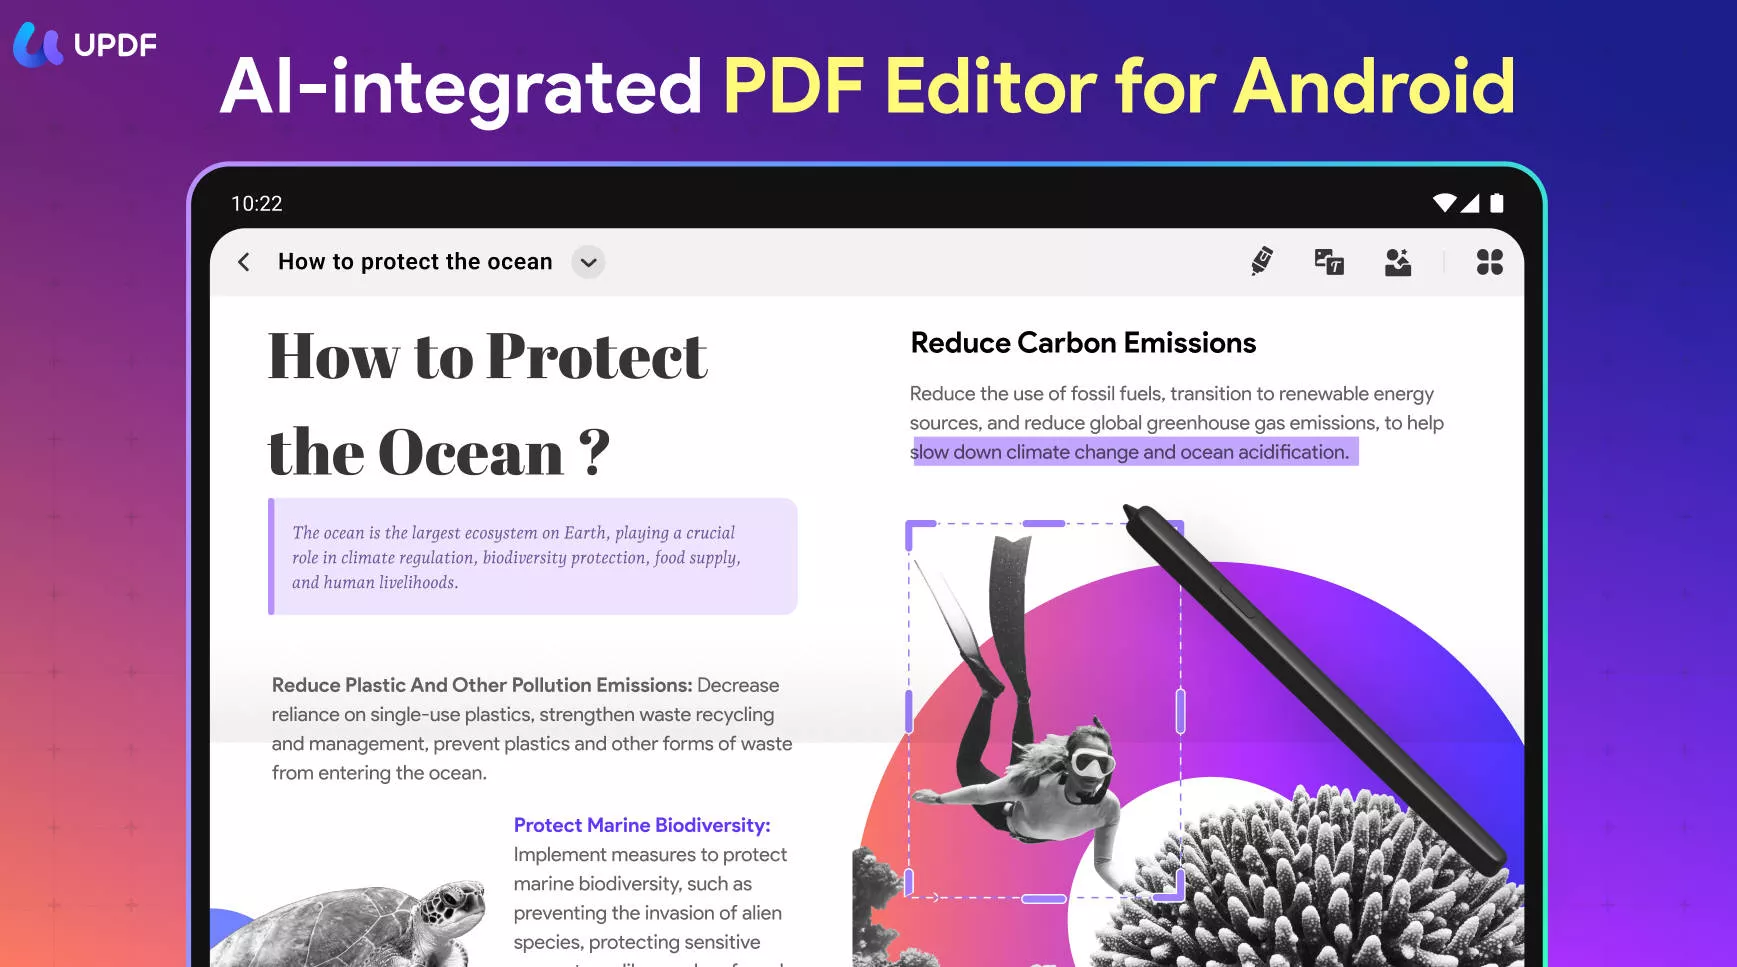
To improve your workflow on annotating PDFs on your Android phones, UPDF has a unique app for Android and you can learn how to add/edit markups on Android by following the steps below:
- Download UPDF and open it on your Android.
- Upload the document that you want to annotate to UPDF, then open it.
- From there, you can utilize all kinds of annotation tools, including sticky notes, comments, underline, highlighter, etc.
Windows • macOS • iOS • Android 100% secure
Closing Note
This blog has covered the necessary steps you can take for annotating and adding notes to different document types in Windows, Mac, iOS, and Android.
To make your annotation workflow go even smoother in PDF documents, use UPDF today and get numerous benefits in viewing and organizing your PDF files for a better reading experience.
Windows • macOS • iOS • Android 100% secure
 UPDF
UPDF
 UPDF for Windows
 UPDF for Mac
 UPDF for iPhone/iPad
 UPDF for Android
 UPDF AI Online
 UPDF Sign
 Edit PDF
 Annotate PDF
 Create PDF
 PDF Form
 Edit links
 Convert PDF
 OCR
OCR PDF to Word
 PDF to Image
 PDF to Excel
 Organize PDF
 Merge PDF
 Split PDF
 Crop PDF
 Rotate PDF
 Protect PDF
 Sign PDF
 Redact PDF
 Sanitize PDF
 Remove Security
 Read PDF
 UPDF Cloud
 Compress PDF
 Print PDF
 Batch Process
 About UPDF AI
 UPDF AI Solutions
 AI User Guide
 FAQ about UPDF AI
 Summarize PDF
 Translate PDF
 Chat with PDF
 Chat with AI
 Chat with image
 PDF to Mind Map
 Explain PDF
 Scholar Research
 Paper Search
 AI Proofreader
 AI Writer
 AI Homework Helper
 AI Quiz Generator
 AI Math Solver
 PDF to Word
 PDF to Excel
 PDF to PowerPoint
 User Guide
 UPDF Tricks
 FAQs
FAQs UPDF Reviews
 Download Center
 Blog
Blog Newsroom
 Tech Spec
 Updates
 UPDF vs. Adobe Acrobat
 UPDF vs. Foxit
 UPDF vs. PDF Expert




 Grace Curry
 Enrica Taylor
 Enola Miller
