 UPDF for Windows
 UPDF for Mac
 UPDF for iPhone/iPad
 UPDF for Android
 Nomostar
 UPDF AI Online
 UPDF Sign
 IvyCraft
 Edit PDF
 Annotate PDF
 Create PDF
 PDF Form
 Edit links
 Convert PDF
 OCR
OCR PDF to Word
 PDF to Image
 PDF to Excel
 Organize PDF
 Merge PDF
 Split PDF
 Crop PDF
 Rotate PDF
 Protect PDF
 Sign PDF
 Redact PDF
 Sanitize PDF
 Remove Security
 Read PDF
 UPDF Cloud
 Compress PDF
 Print PDF
 Batch Process
 About UPDF AI
 UPDF AI Solutions
 AI User Guide
 FAQ about UPDF AI
 Summarize PDF
 Translate PDF
 Chat with PDF
 Chat with AI
 Chat with image
 PDF to Mind Map
 Explain PDF
 PDF AI Tools
 Image AI Tools
 AI Chat Tools
 AI Writing Tools
 AI Study Tools
 AI Working Tools
 Other AI Tools
 AI Bookmark Generation
 AI Bookmark Summary
 AI Watermark Generation
 AI Background Generation
 AI Sticker Generation
 AI Stamp Generation
 AI Editing Suite
 UPDF Copilot
 AI Page Management
 AI Semantic Search
 PDF to Word
 PDF to Excel
 PDF to PowerPoint
 User Guide
 UPDF Tricks
 FAQs
FAQs UPDF Reviews
 Download Center
 Blog
Blog Newsroom
 Tech Spec
 Updates
 UPDF vs. Adobe Acrobat
 UPDF vs. Foxit
 UPDF vs. PDF Expert
PDFs are widely used for sharing digital documents across platforms. And there are times when you need to sign a legal agreement or verify a PDF form. In these situations, knowing how to sign a PDF is essential.
This article will guide you through five easy ways to sign PDFs using UPDF. It’s a powerful PDF editor that makes adding signatures quick and effortless.
You can add digital and electronic signatures, edit PDFs, create fillable forms, and share your signed PDFs. Plus, it’s cheap and affordable. Buy it today to sign your PDFs with ease!
Download UPDF on your device now. Then, follow our guide to validate your PDFs quickly.
Windows • macOS • iOS • Android 100% secure
Part 1. How to Electronically Sign a PDF? (3 Ways)
Electronically signing means adding handwritten or image-based signatures to your PDF. If you’re looking to sign a document that is not legally binding, an electronic signature is the way to go. UPDF gives you three easy solutions for it.
Let’s explore these below!
Way 1. Via Creating Signature
UPDF's signature tool lets you sign PDFs using your mouse, keyboard, or images. You can also customize and upload your signature to the cloud for easy access across platforms.
Here’s how to sign a PDF using this method.
Step 1: Launch UPDF and click “Open File” to import your PDF.
Step 2: Click “Comment” from the "Tools". Then select “Signature” from the top and click “Create.”
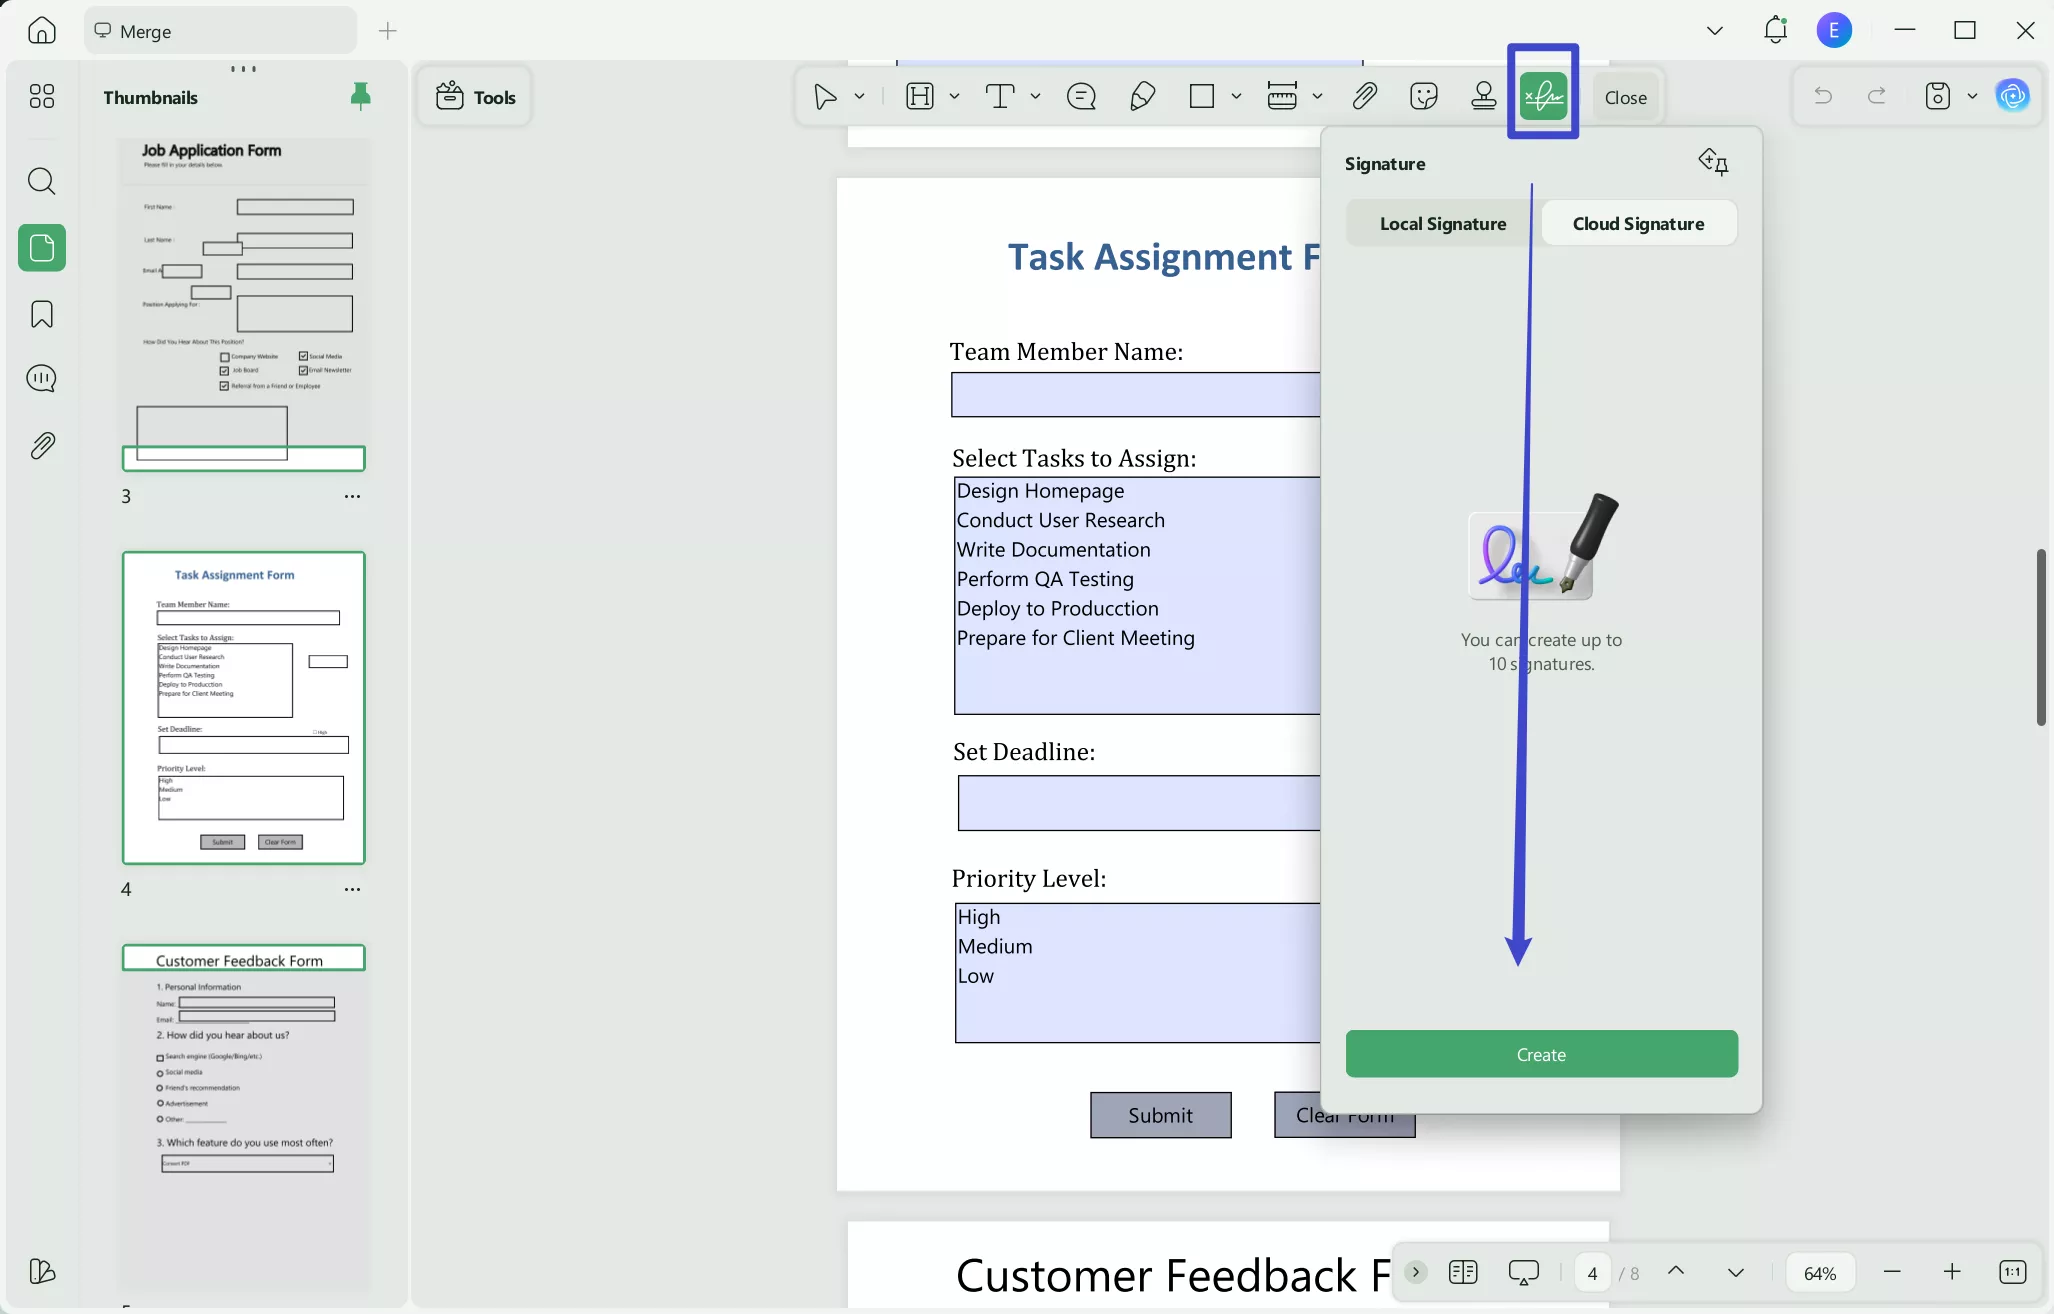
Step 3: Select a method to create a signature from the popup.
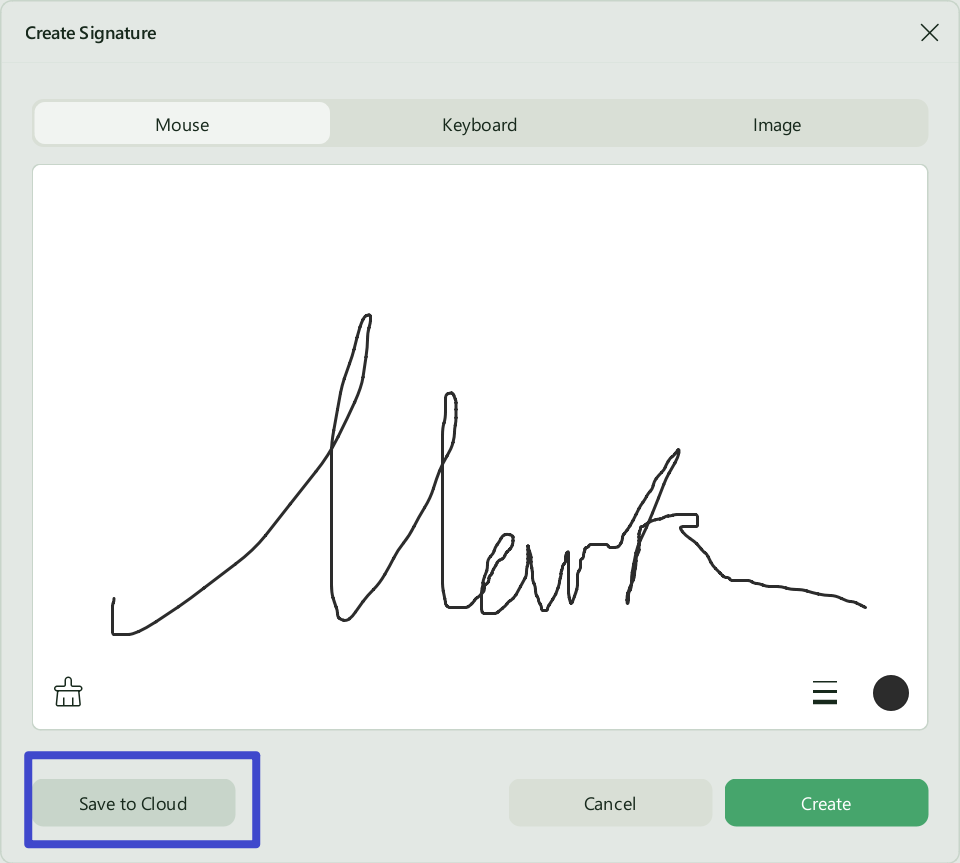
- Handwritten Signature: Select “Mouse” from the top and choose the signature’s color and thickness. Then, draw it using your mouse/trackpad.
- Typed Signature: Select the “Keyboard” option. Then, write your name and customize its color using the option in the bottom right.
- Image-based Signature: Select the “Image” option and click “Choose File” to upload your signature. Then, crop it and click “Create” to add it to the PDF.
Step 4: Click “Save to Cloud” at the bottom left to store and sync your signature across platforms.
Let’s explore another way to sign your PDFs!
Way 2. Via Pencil
You can also create a handwritten signature using the Pencil tool in UPDF. Here’s how to sign a PDF using it.
Step 1: Open your PDF with UPDF. Then, select the “Pencil” icon in the “Comment” toolbox.
Step 2: Select the pencil's color, opacity level, and thickness as needed.
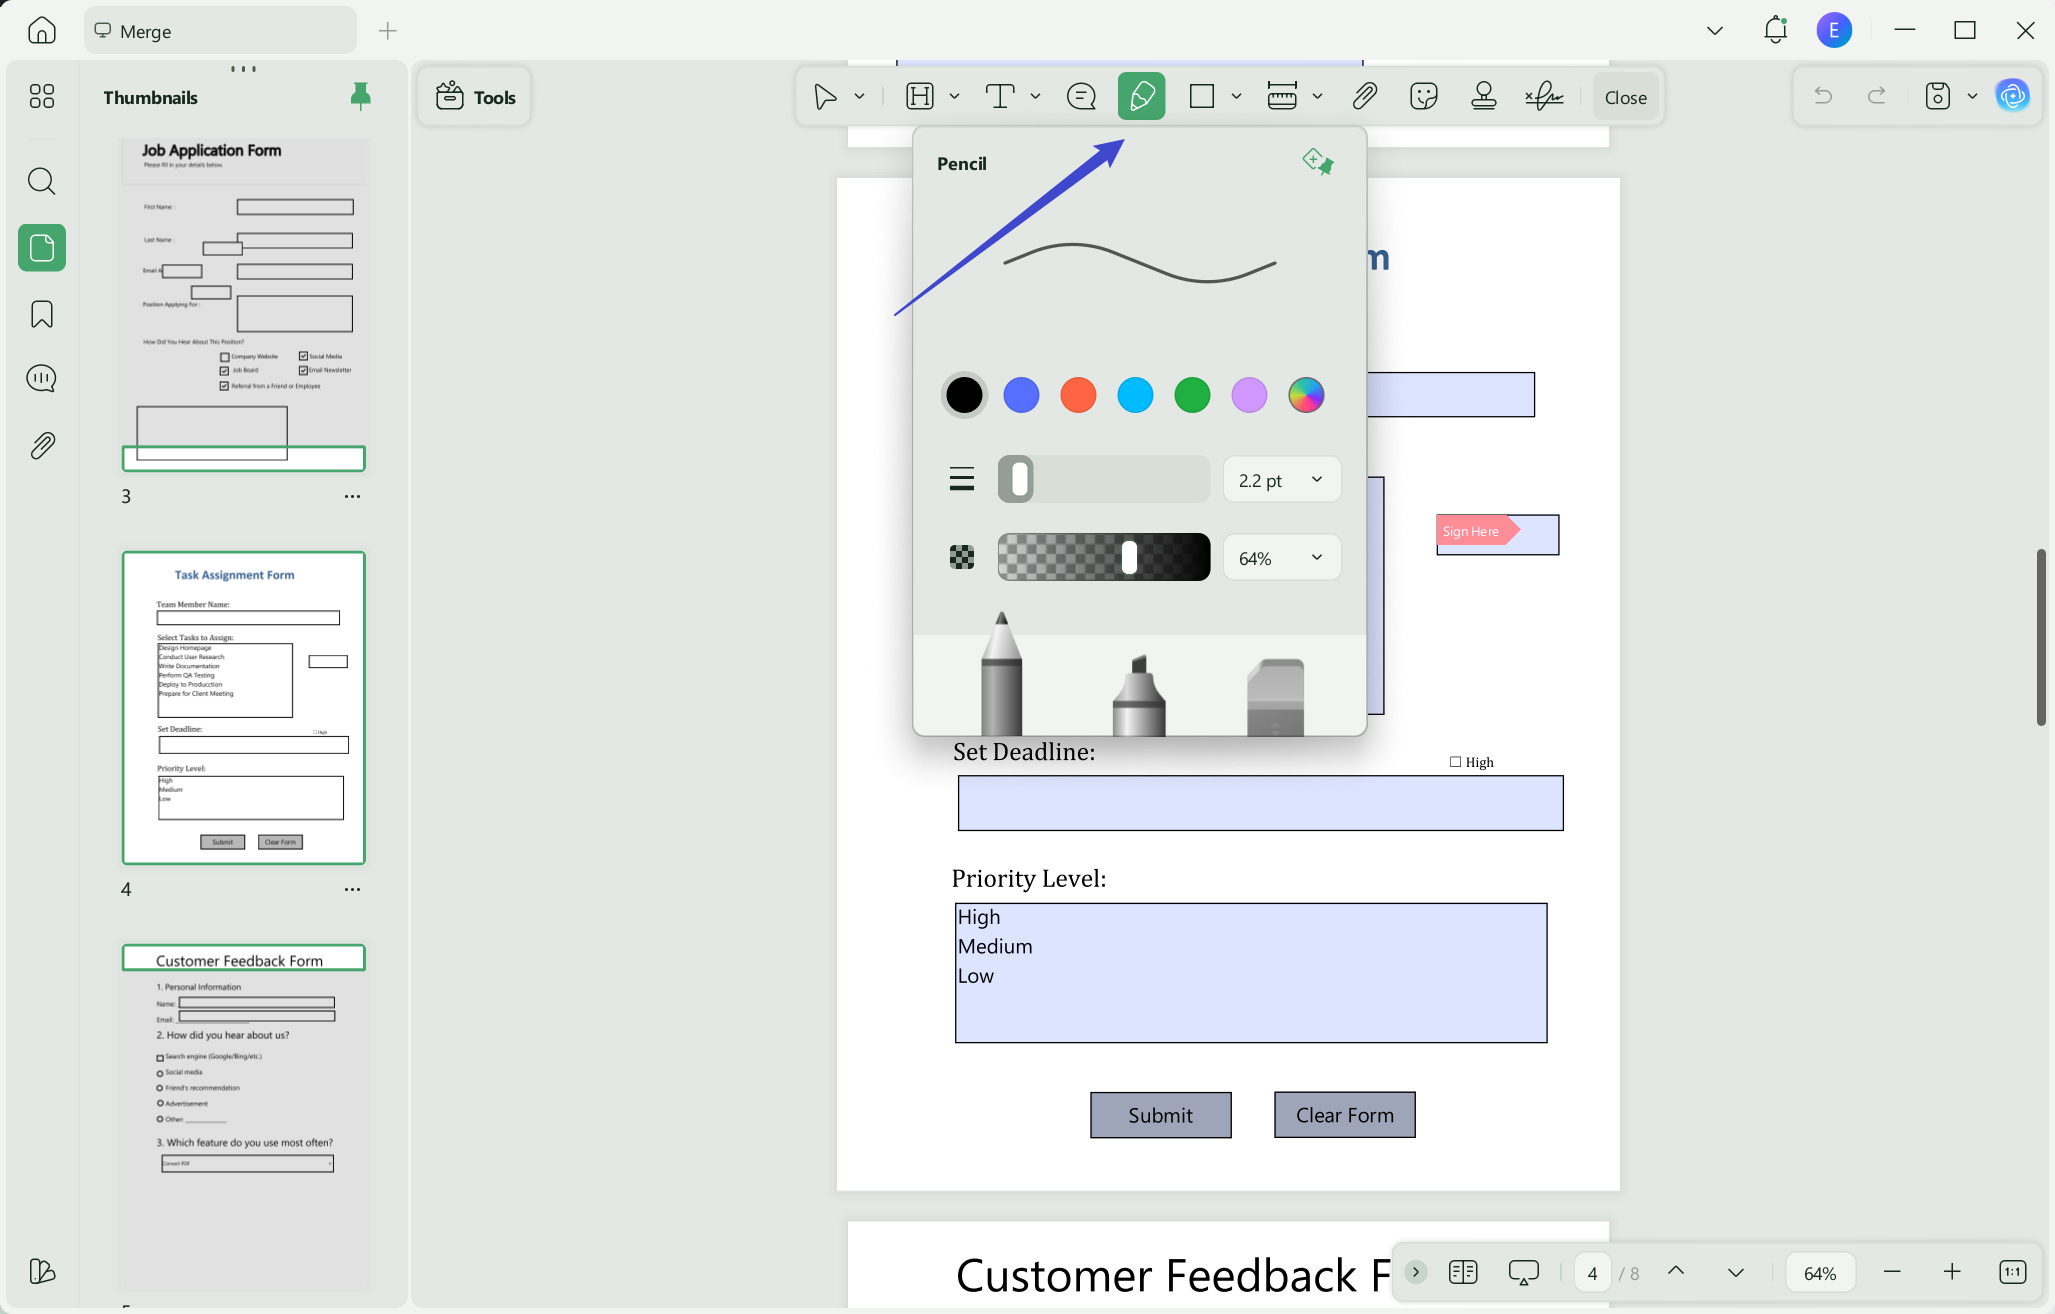
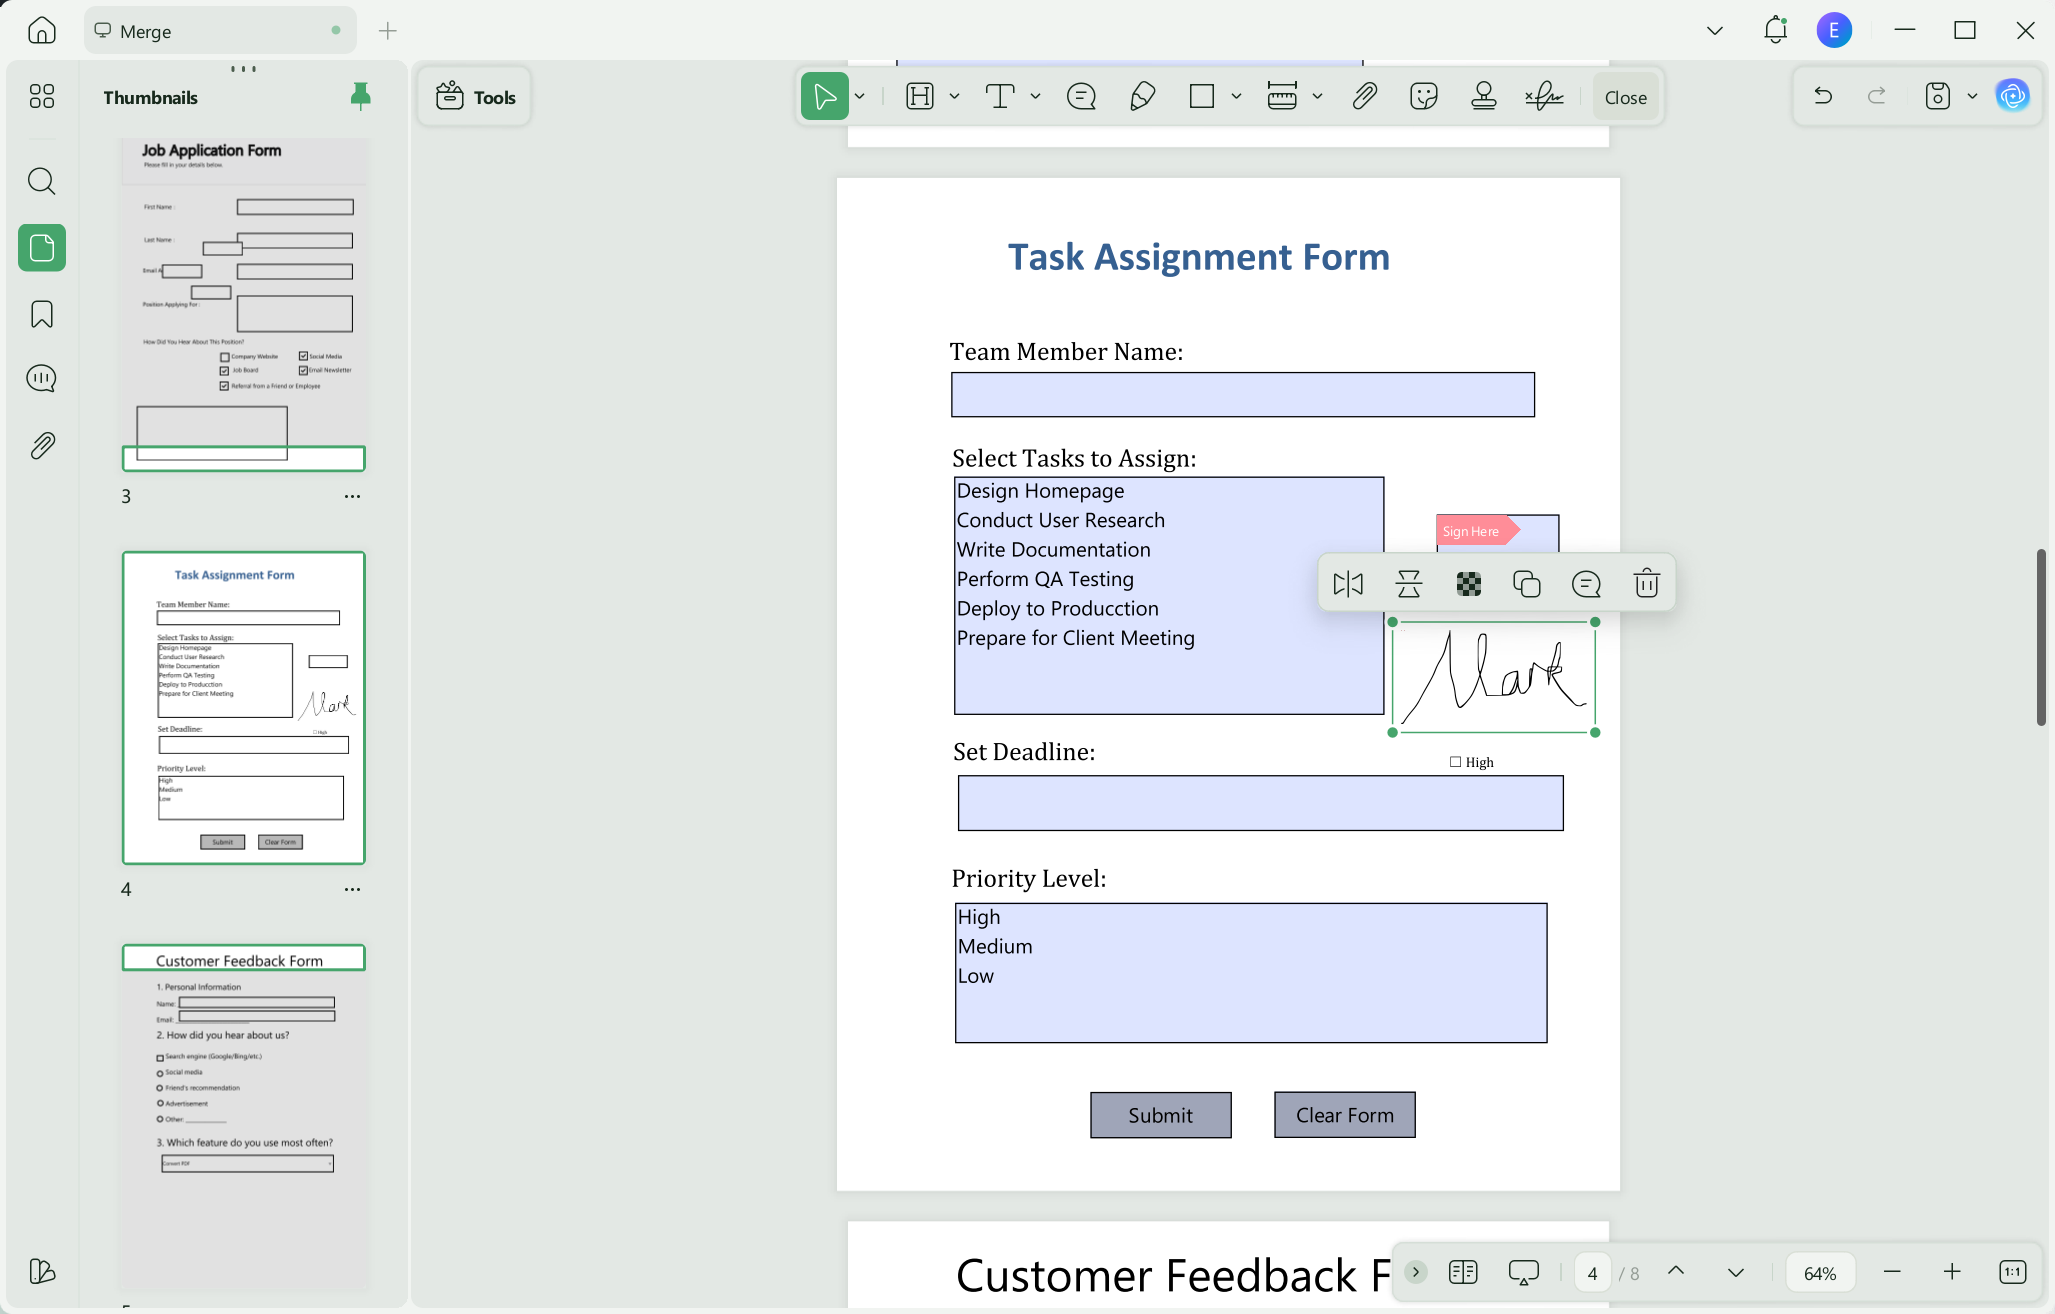
Step 3: Use your mouse to draw the signature in the relevant field to sign the PDF.
Keep reading for another solution to sign PDFs!
Way 3. Via Adding Image
If your signature is saved in a transparent image format, you can upload it and add it to your PDF. This can be useful for various scenarios, such as adding a consistent signature to a large volume of documents or reusing a signature for routine documents.
Here’s what to do.
Step 1: Download the UPDF via the below button firstly. After importing your PDF in UPDF, select “Edit PDF” from the left. Then click “Image” from the top.
Windows • macOS • iOS • Android 100% secure
Step 2: Click where you need to add the signature and import your image.
Step 3: Drag the borders to resize the signature, or use the toolbar to crop, rotate, or replace it.
So, that’s how to electronically sign a PDF! Now, let’s see how to add digital signatures.
Also Read: Electronic Signature vs. Digital Signature: Unraveling the Key Differences
Adding a signature to a PDF is a crucial step in contract signing and document approval. Return to How to Annotate PDF to learn how the signature feature works alongside other annotation tools—such as stamps and sticky notes—to create a more comprehensive signing workflow.
Part 2. How to Digitally Sign a PDF?
Unlike electronic signatures, digital signatures are more secure and legally recognized. They show the signer’s identity and ensure the document has not changed. UPDF lets you digitally sign a PDF with and without a signature field. Let’s see how.
Way 1. With Signature Field
Do you need to fill out an interactive PDF form with a fillable signature field? With UPDF, you can digitally sign it in just a few steps.
Here’s how to digitally sign a PDF with a signature field.
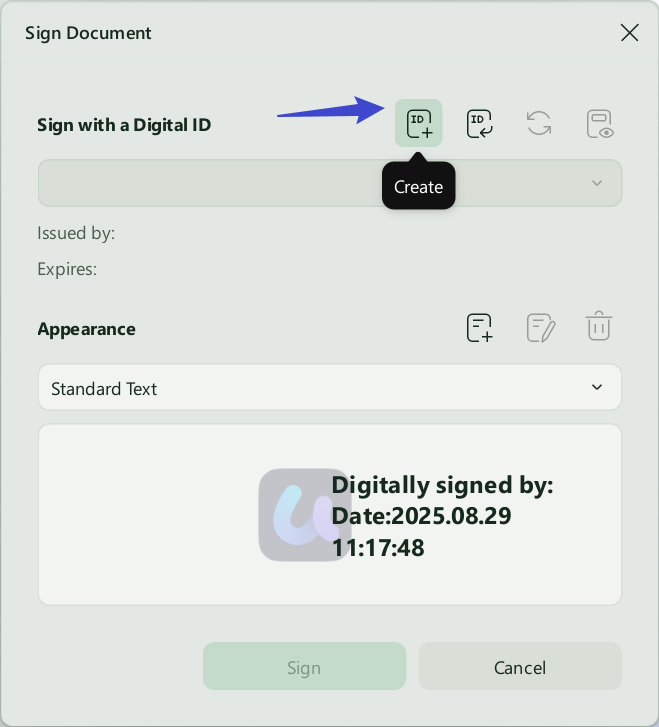
Step 1: Open your PDF with UPDF. Then, click the signature field. This will open a popup. From here:
- Import a Digital Signature: Click the “Import” button. Then, click “Browse” to import your ID. Type its password and click “Save.”
- Add a New ID: Click the “Create” button. Enter your name, email, and organization details. Then click “Create” and proceed.
Step 2: Select a location to save your ID and add a six-digit password to protect it. Once you've done this, click "Save”.
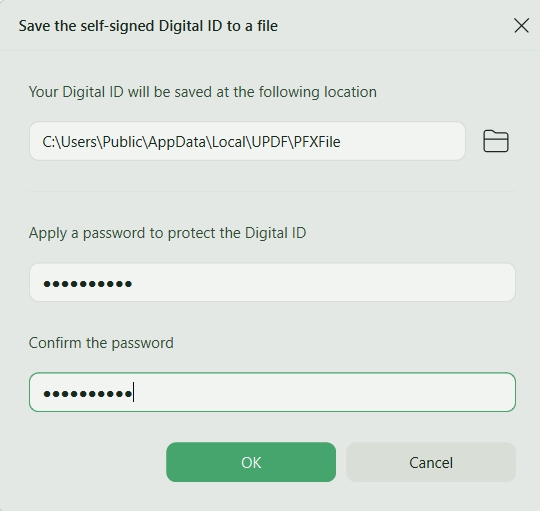
Step 3: Your digital signature will be created. Click “Sign” to add it to the PDF.
Way 2. Without Signature Field
Do you have a static PDF form or contract without fillable fields? UPDF lets you create a signature field to sign the PDF digitally.
Here’s how it’s done.
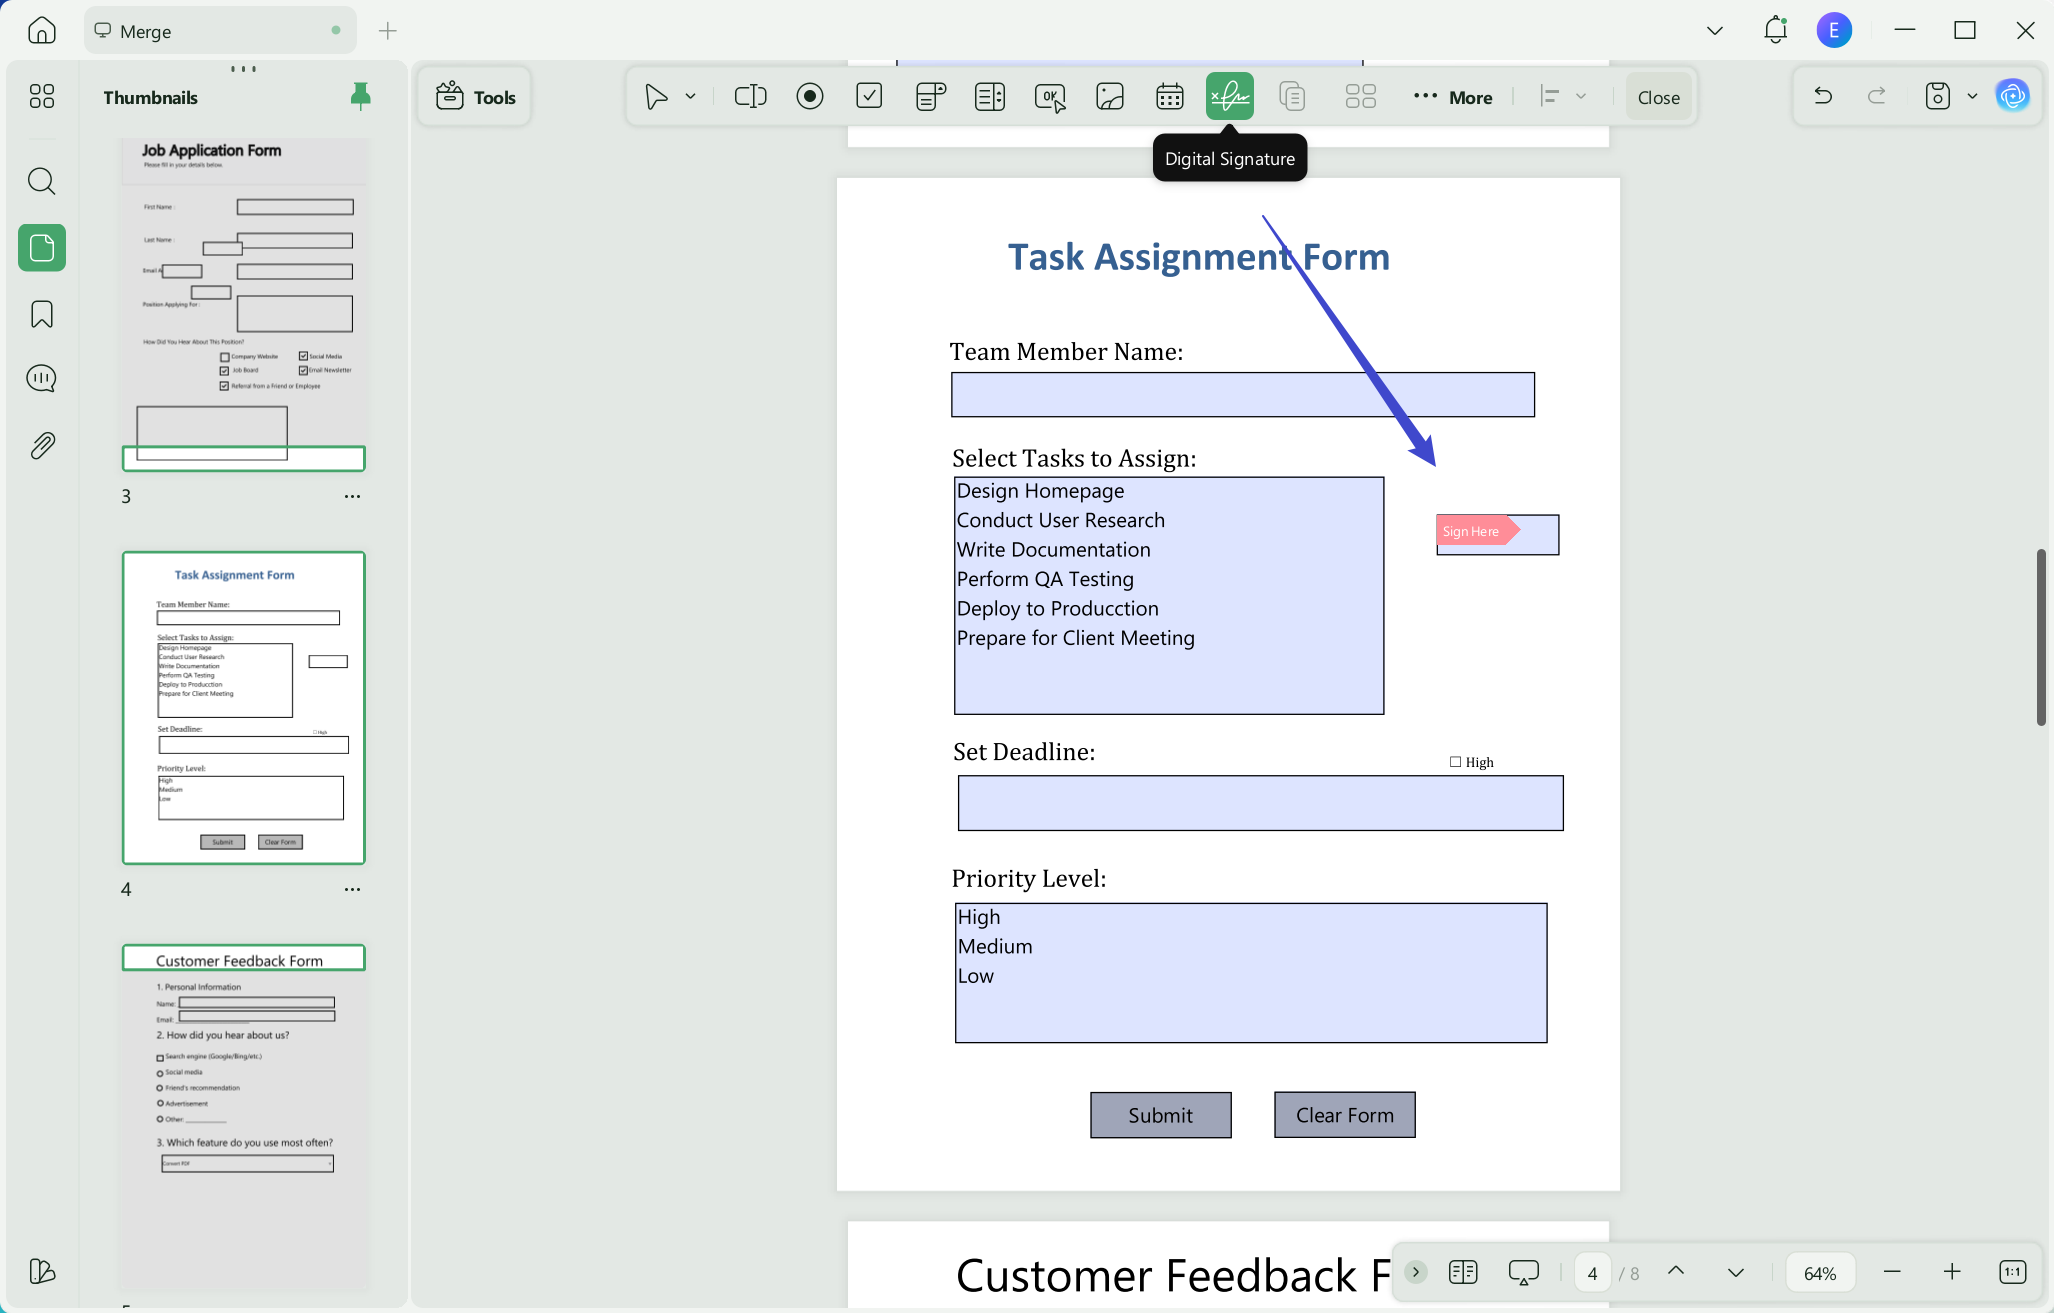
Step 1: Launch UPDF and click “Form” from the "Tools".
Step 2: Select “Digital Signature” from the top. Then click anywhere to add the signature field.
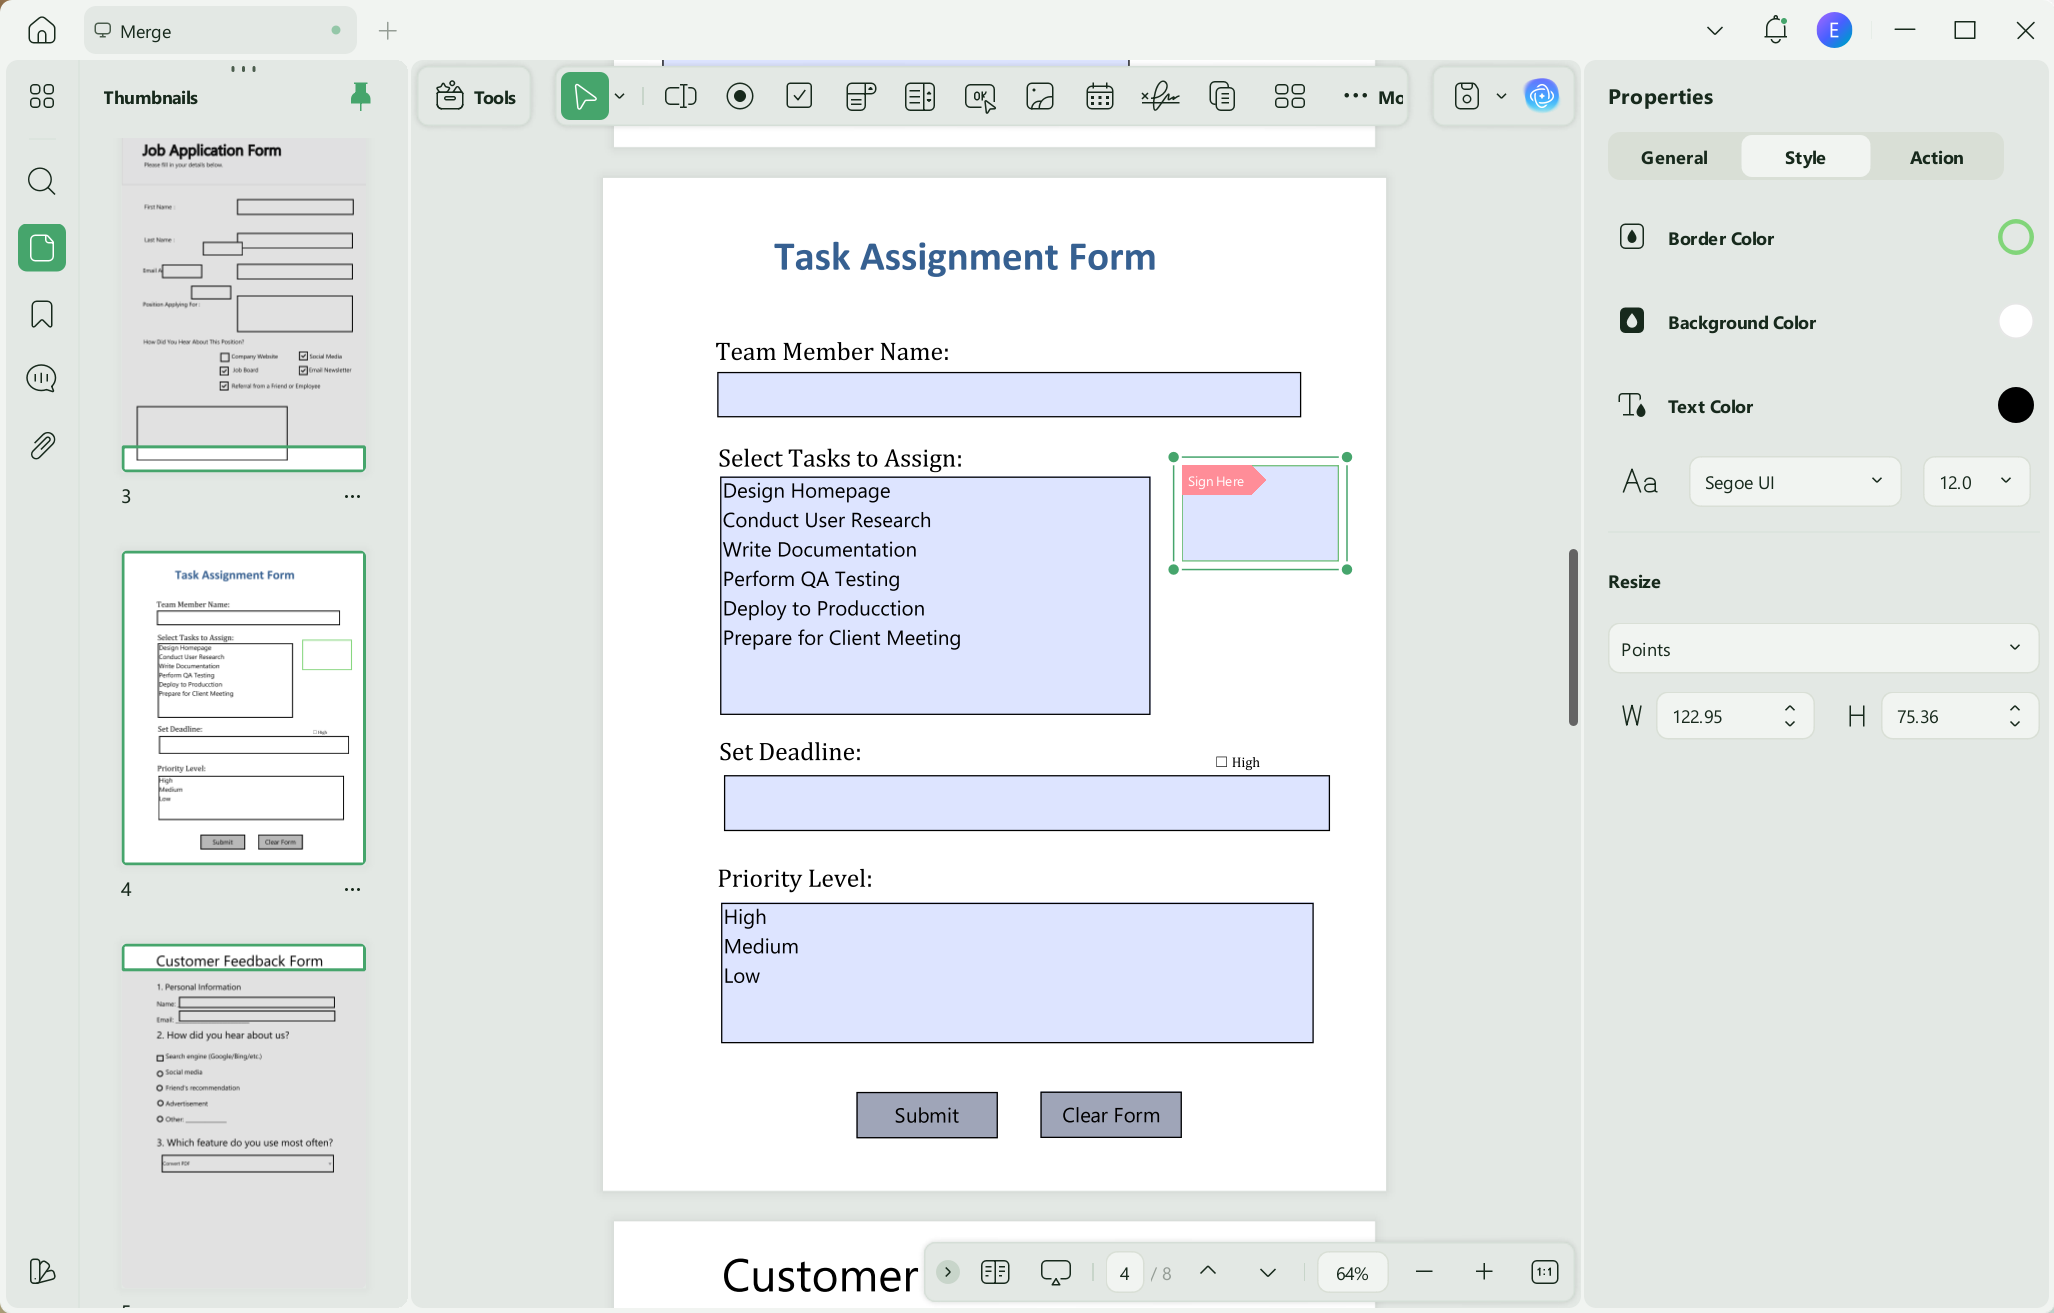
Step 3: Resize the signature field and enable “Properties” from the top right. Click the “Sign Here” box. Then, create or import your digital ID.
So, that’s how to digitally sign a PDF! Signing is just one of the many capabilities of UPDF. Watch the video below or read this review to explore everything you can do with it.
Or, try it out yourself!
Also Read: How to Add Signature to PDF in Microsoft Edge? (Easy Guide)
Part 3. Sign PDF Online and Send for Signatures
For users needing to collect multiple signatures and track signing status anytime, anywhere, UPDF Sign is the perfect solution. It’s an online platform that lets you send, sign, and track PDF documents with ease. You can send up to 50 PDFs to up to 50 recipients at once and monitor the signing process on any device. If you already have a UPDF account, simply log in to UPDF Sign without any additional registration to enjoy a free trial. Click the button below to get started.

For the following section, we will show you how to sign PDFs using UPDF Sign:
Step 1. Access to UPDF Sign website and log in to it.
Step 2. From the homepage, click the "+" icon and upload the documents you need to send for signature.
Step 3: Enter the details of the first signer in the "Recipient 1" section. To add more signers, click "Add Recipient" and enter their information.

Step 4: Choose "Set Signing Order" if the document needs to be signed in a specific sequence, or select "Just Need My Signature" if you are the only signer.
Step 5: Provide a document name and write a custom message for the recipients. Click "Continue."

Step 6: Drag and drop signature fields onto the document for the first signer.
Step 7: Switch to the next signer from the top left corner and customize their signature fields. Ensure fields do not overlap.

Step 8: Click "Finish" when done. Review the document and click "Send." You can track the signing process on the home page.
Step 9: Recipients will receive an email with a "Review Document" button. They need to click the link to access the document.
Step 10: Recipients can sign using one of three options: Font, Draw, or Upload. Click "Confirm" to complete the signing process.
Final Words
That’s all about our guide on how to sign a PDF! Whether you want to add digital or electronic signatures, UPDF offers an easy solution. You can add handwritten, typed, and image-based signatures. And if your PDF does not have a signature field, you can still sign it digitally with UPDF. Download to try it now! You’ll find a versatile solution to authenticate your documents with ease.
Signing a PDF is often the final step in the document annotation workflow. For the complete collaborative process—covering everything from marking up and annotating to signing—please refer to "How to Annotate PDF."
Windows • macOS • iOS • Android 100% secure


 Lizzy Lozano
 Enola Miller
 Enola Davis