 UPDF for Windows
 UPDF for Mac
 UPDF for iPhone/iPad
 UPDF for Android
 UPDF AI Online
 UPDF Sign
 Edit PDF
 Annotate PDF
 Create PDF
 PDF Form
 Edit links
 Convert PDF
 OCR
OCR PDF to Word
 PDF to Image
 PDF to Excel
 Organize PDF
 Merge PDF
 Split PDF
 Crop PDF
 Rotate PDF
 Protect PDF
 Sign PDF
 Redact PDF
 Sanitize PDF
 Remove Security
 Read PDF
 UPDF Cloud
 Compress PDF
 Print PDF
 Batch Process
 About UPDF AI
 UPDF AI Solutions
 AI User Guide
 FAQ about UPDF AI
 Summarize PDF
 Translate PDF
 Chat with PDF
 Chat with AI
 Chat with image
 PDF to Mind Map
 Explain PDF
 Scholar Research
 Paper Search
 AI Proofreader
 AI Writer
 AI Homework Helper
 AI Quiz Generator
 AI Math Solver
 PDF to Word
 PDF to Excel
 PDF to PowerPoint
 User Guide
 UPDF Tricks
 FAQs
FAQs UPDF Reviews
 Download Center
 Blog
Blog Newsroom
 Tech Spec
 Updates
 UPDF vs. Adobe Acrobat
 UPDF vs. Foxit
 UPDF vs. PDF Expert
Sign PDFs on Mac using UPDF
When dealing with digital contracts, online forms, and documents, you often need to sign electronically or digitally. If you want to do the same, UPDF has got you covered with its exclusive adding signature feature. Delve into this ultimate guide to explore how you can sign your PDF files on Mac with UPDF! You can click the button below or go to the App Store to download the free UPDF trial. If you like it, you can check its price here and the price is very low here.
Windows • macOS • iOS • Android 100% secure
1. How to Add an Electronic Signature
Here is how you can add electronic signatures in a PDF:
Step 1: Create Signatures
Follow the steps below to create an electronic signature in UPDF.
Click the Tools icon on the left toolbar to enter the Comment mode.
Move your mouse to the Signature icon on the top toolbar.
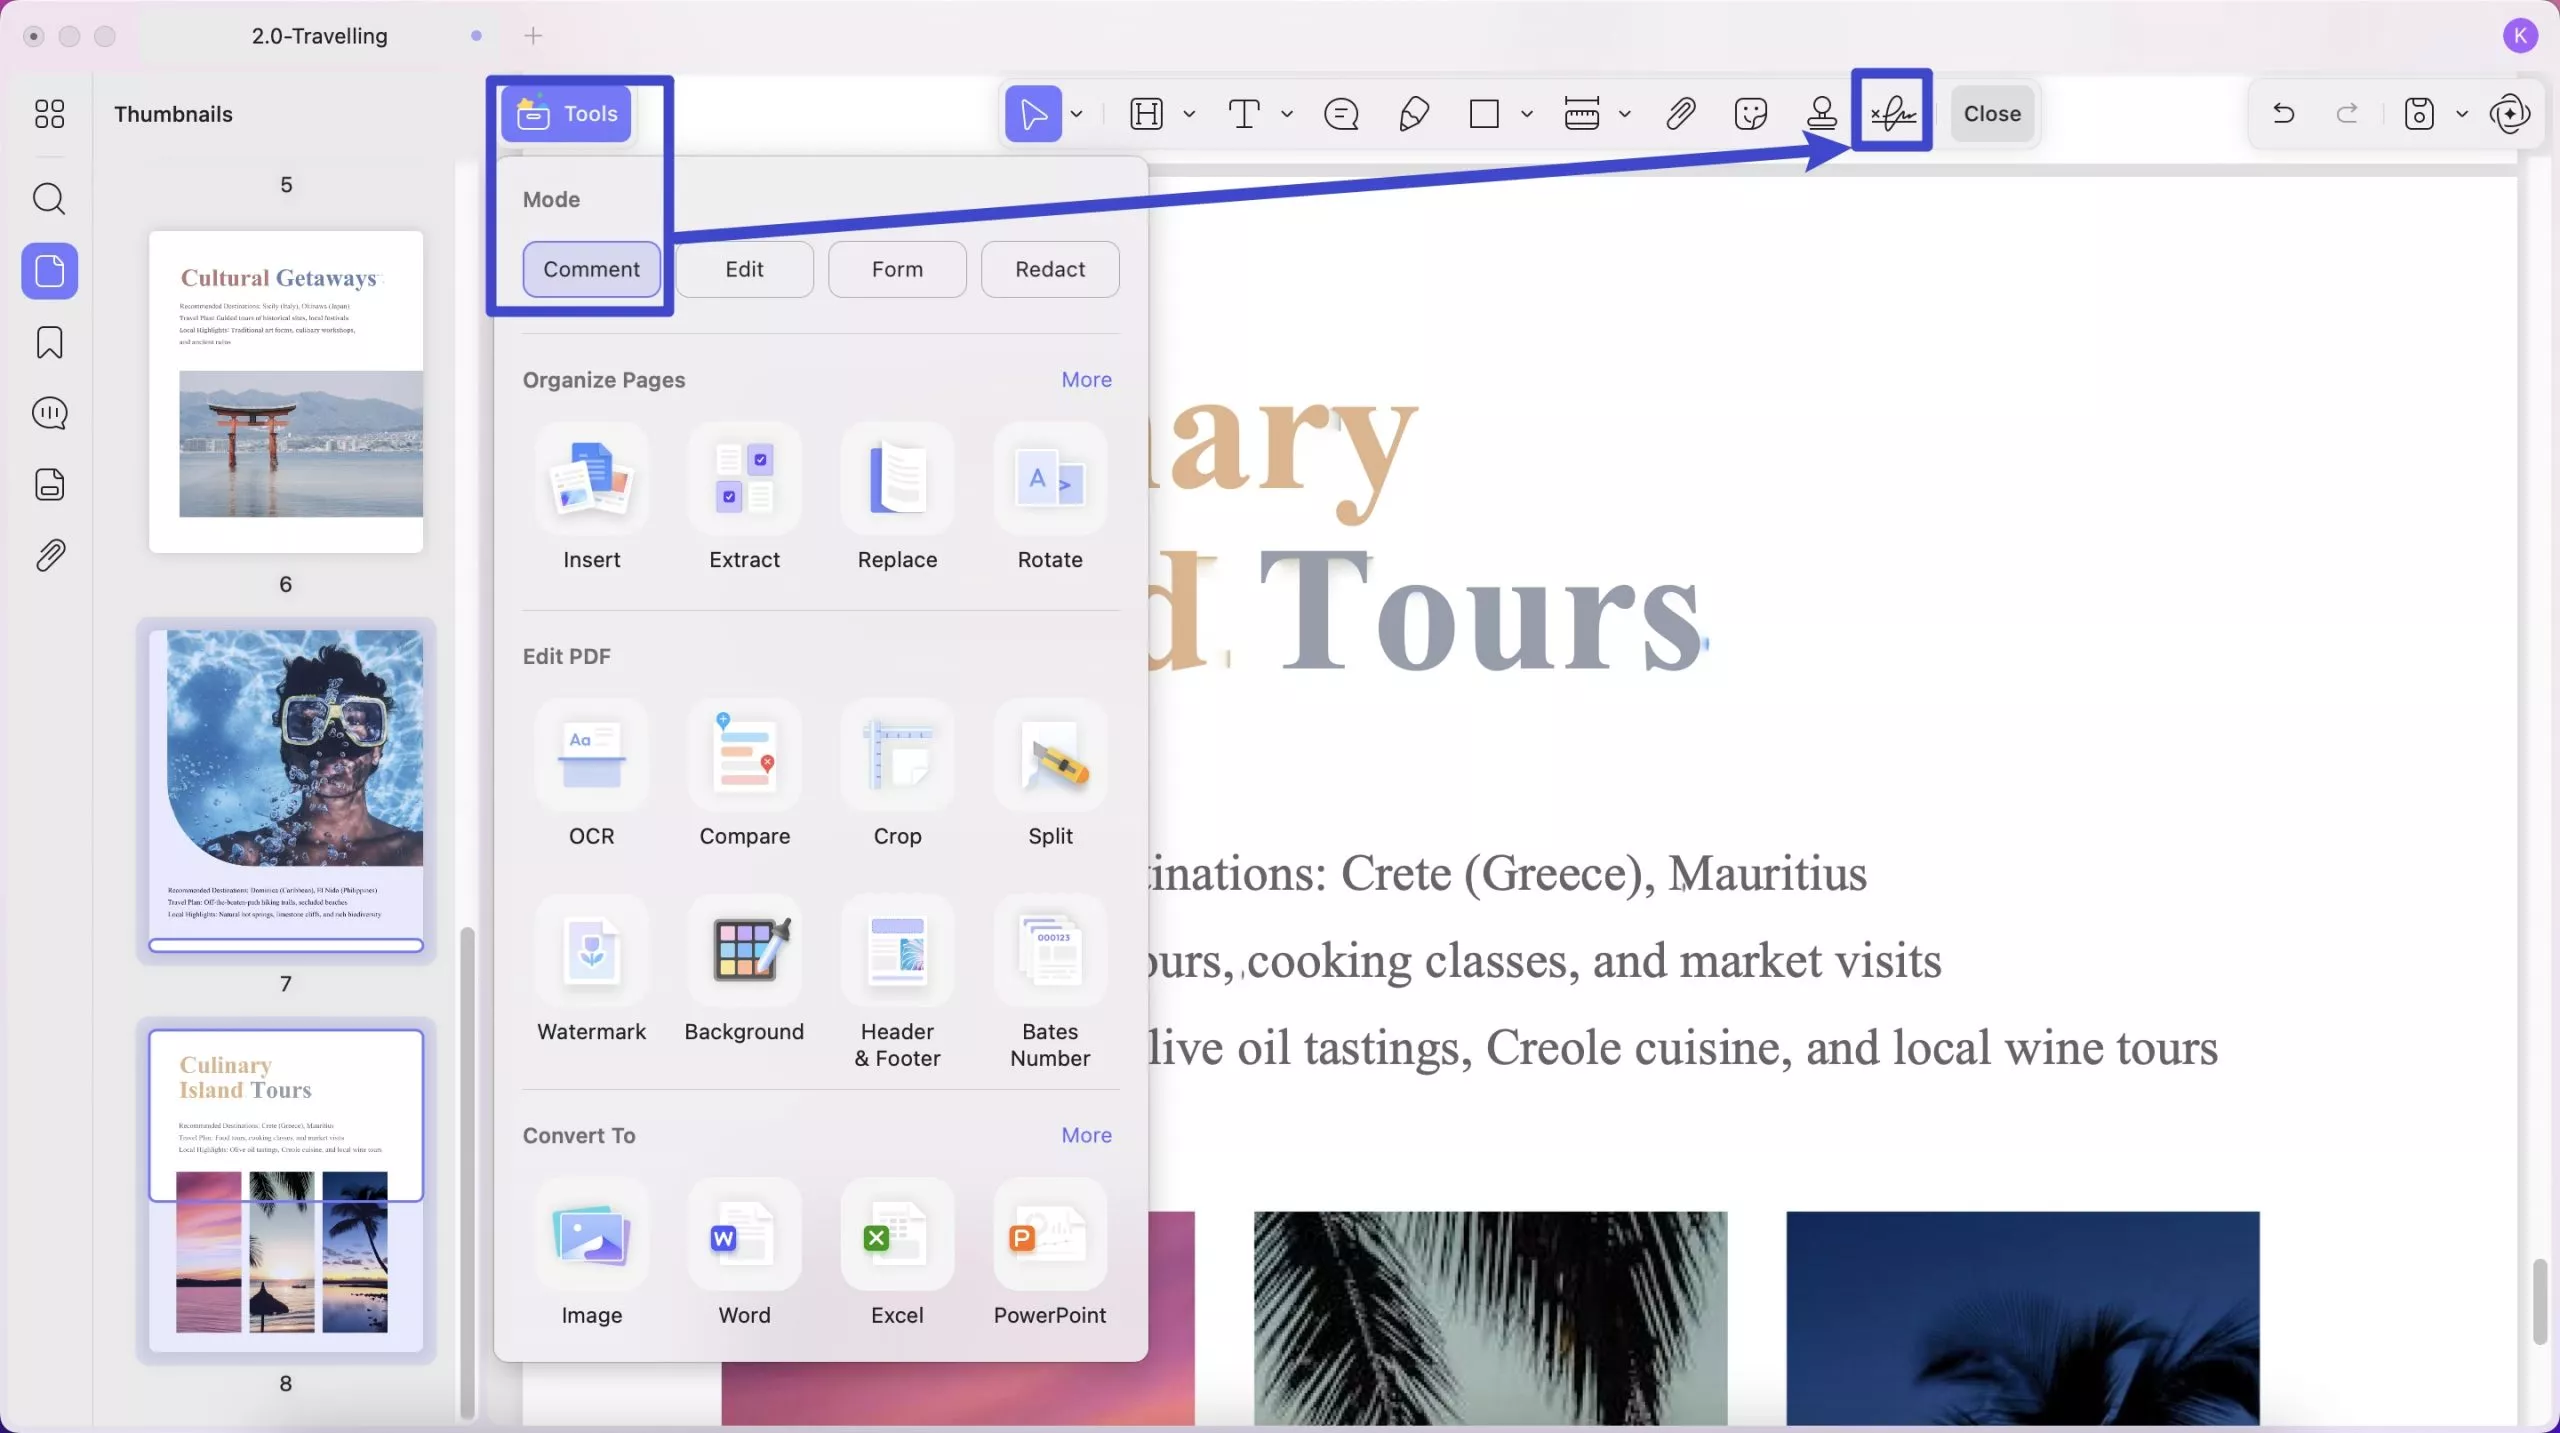
Then, you need to click the Create Signature button. Now, you can add signatures to your PDF document quickly with four methods:
- Keyboard
- Mouse
- Trackpad
- Photo

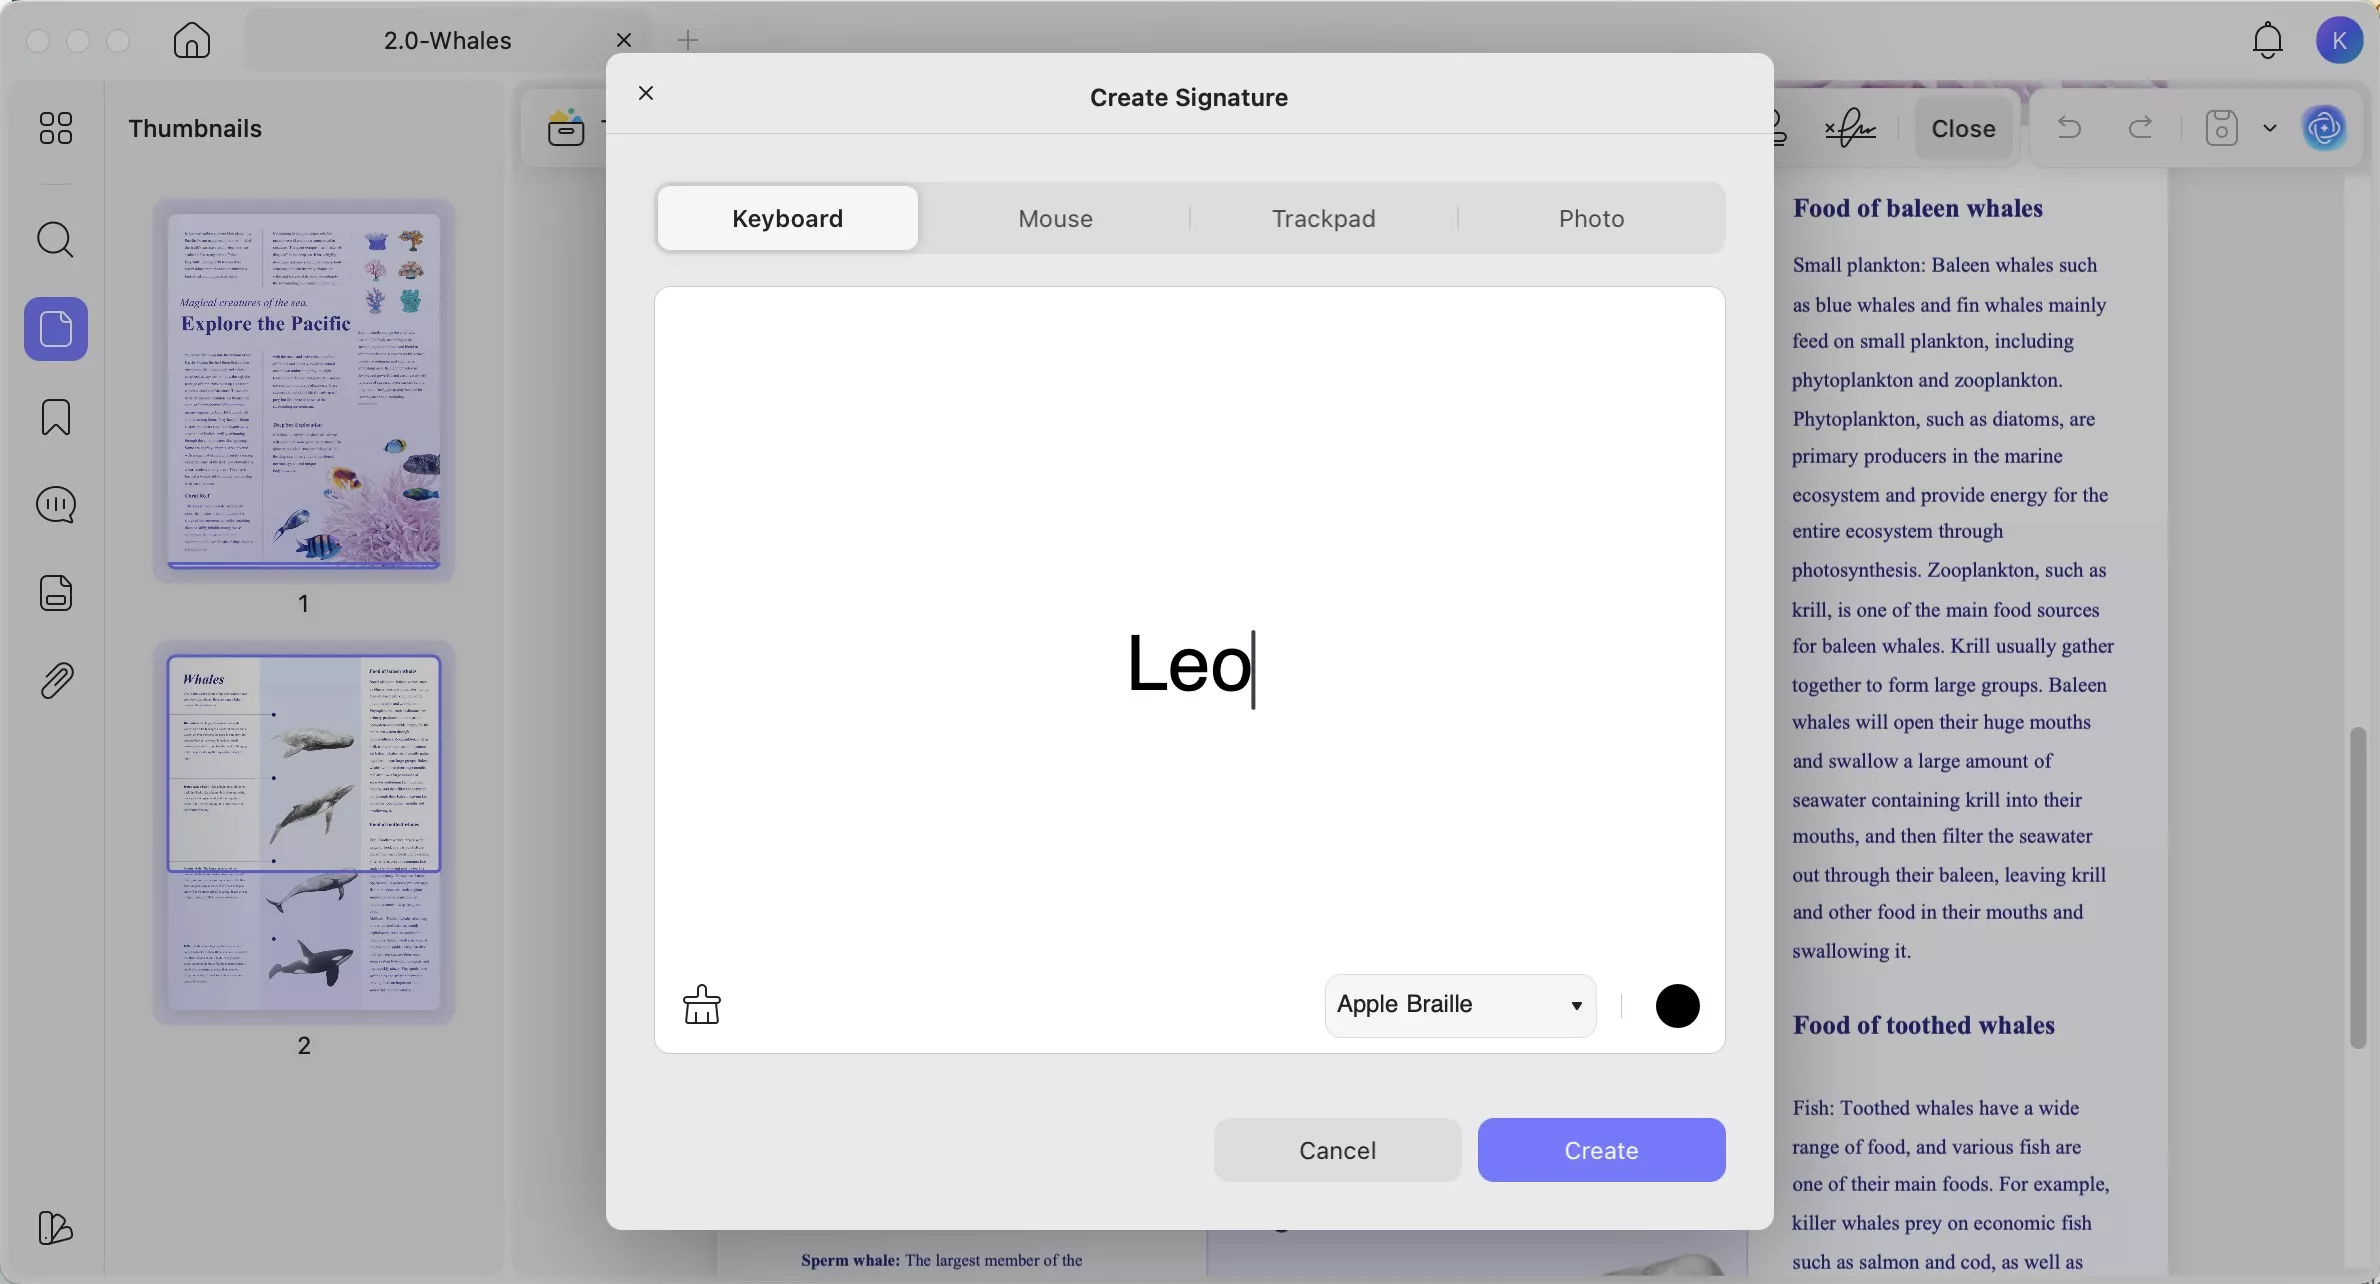
To type the signature, you need to click on the "Keyboard" icon. You can change the signature's font style and color.
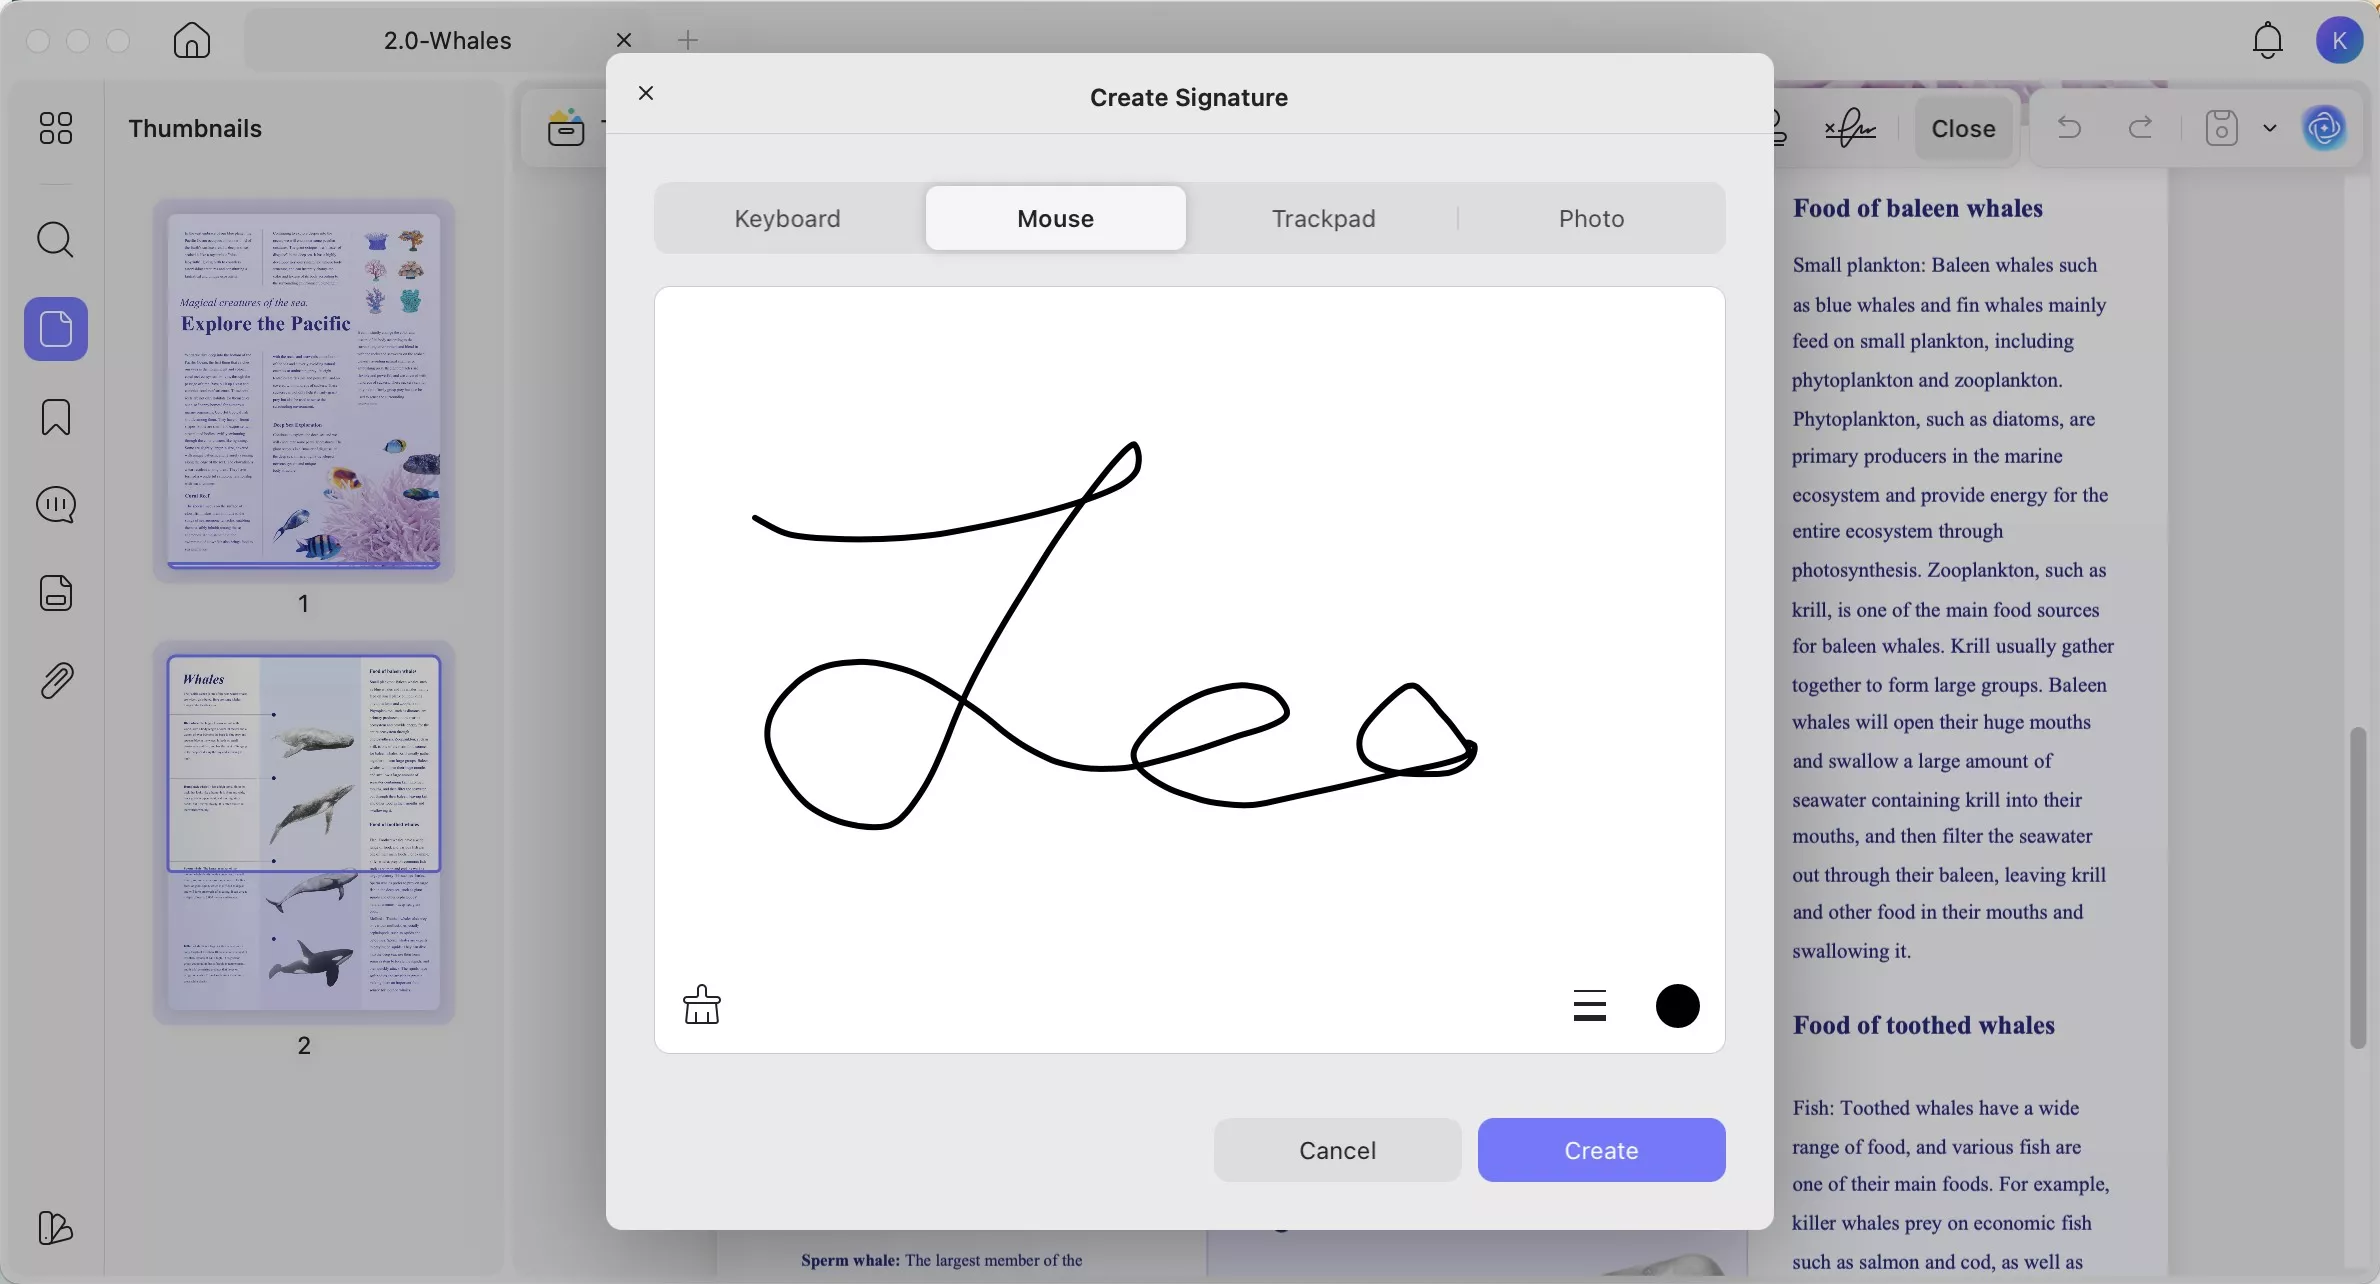
You can also use the mouse to draw your signature by selecting the "Mouse" option. And it allows you to customize the line's size and color.
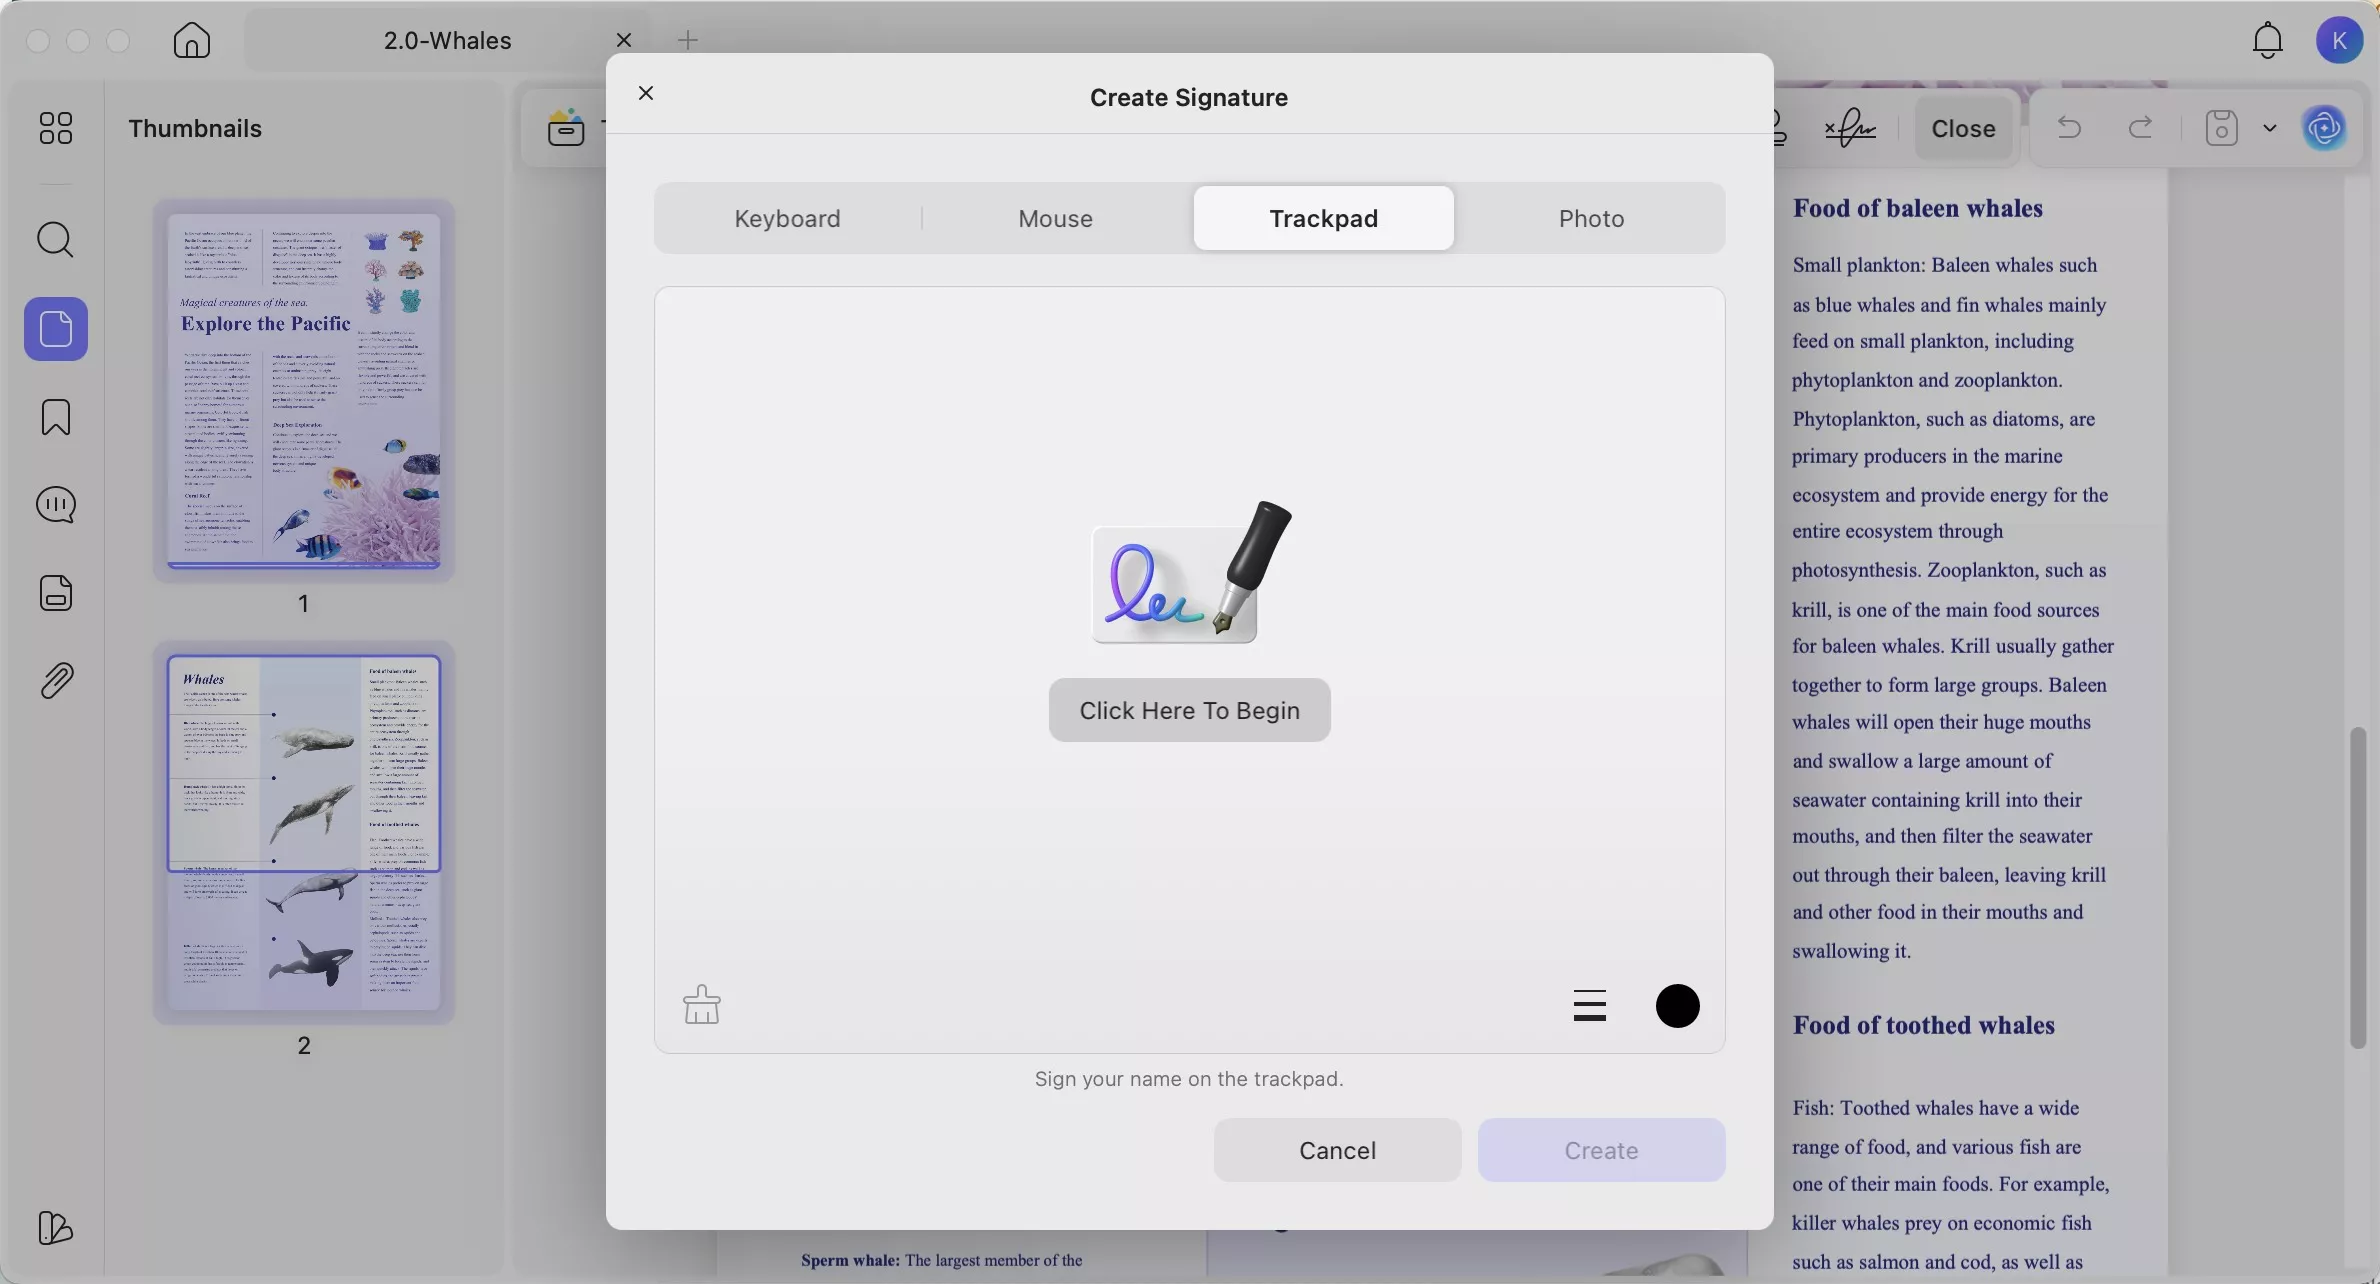
You can select "Trackpad" and click "Click Here to Begin" to handwrite your signature with your trackpad. When it is done, press "Create" to finish writing.
And if you have one signature in image format, you can use the "Photo" feature, click on the "Choose File" to upload the image, and change the signature color if you want to create a signature.
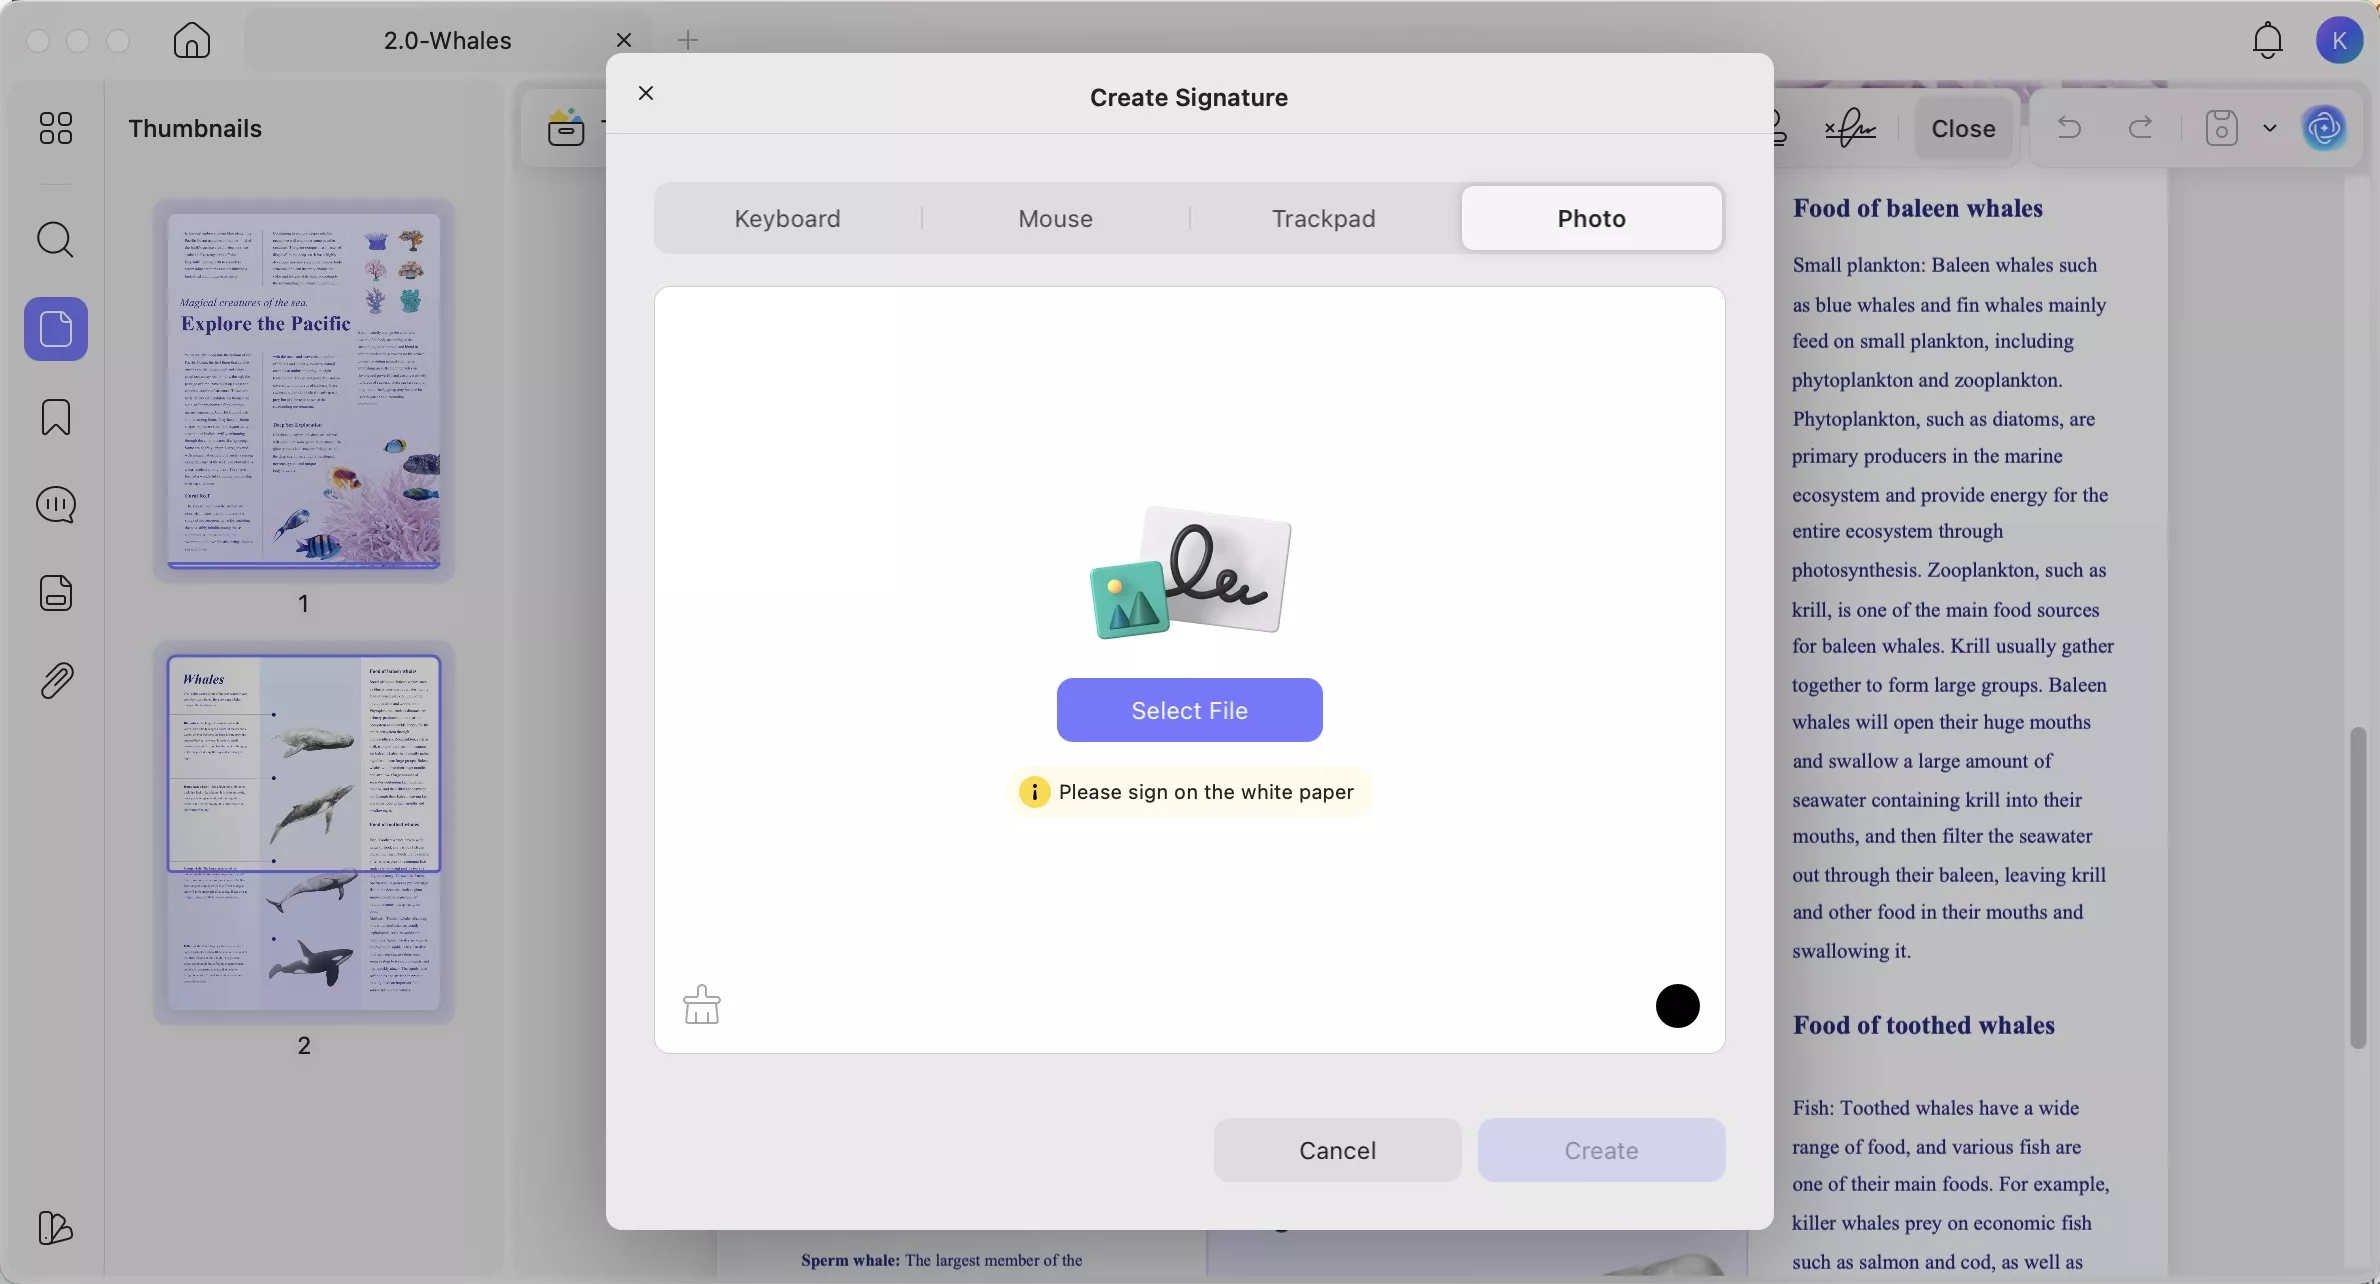
Now, you can click on the "Create" to create your signature with UPDF on Mac.
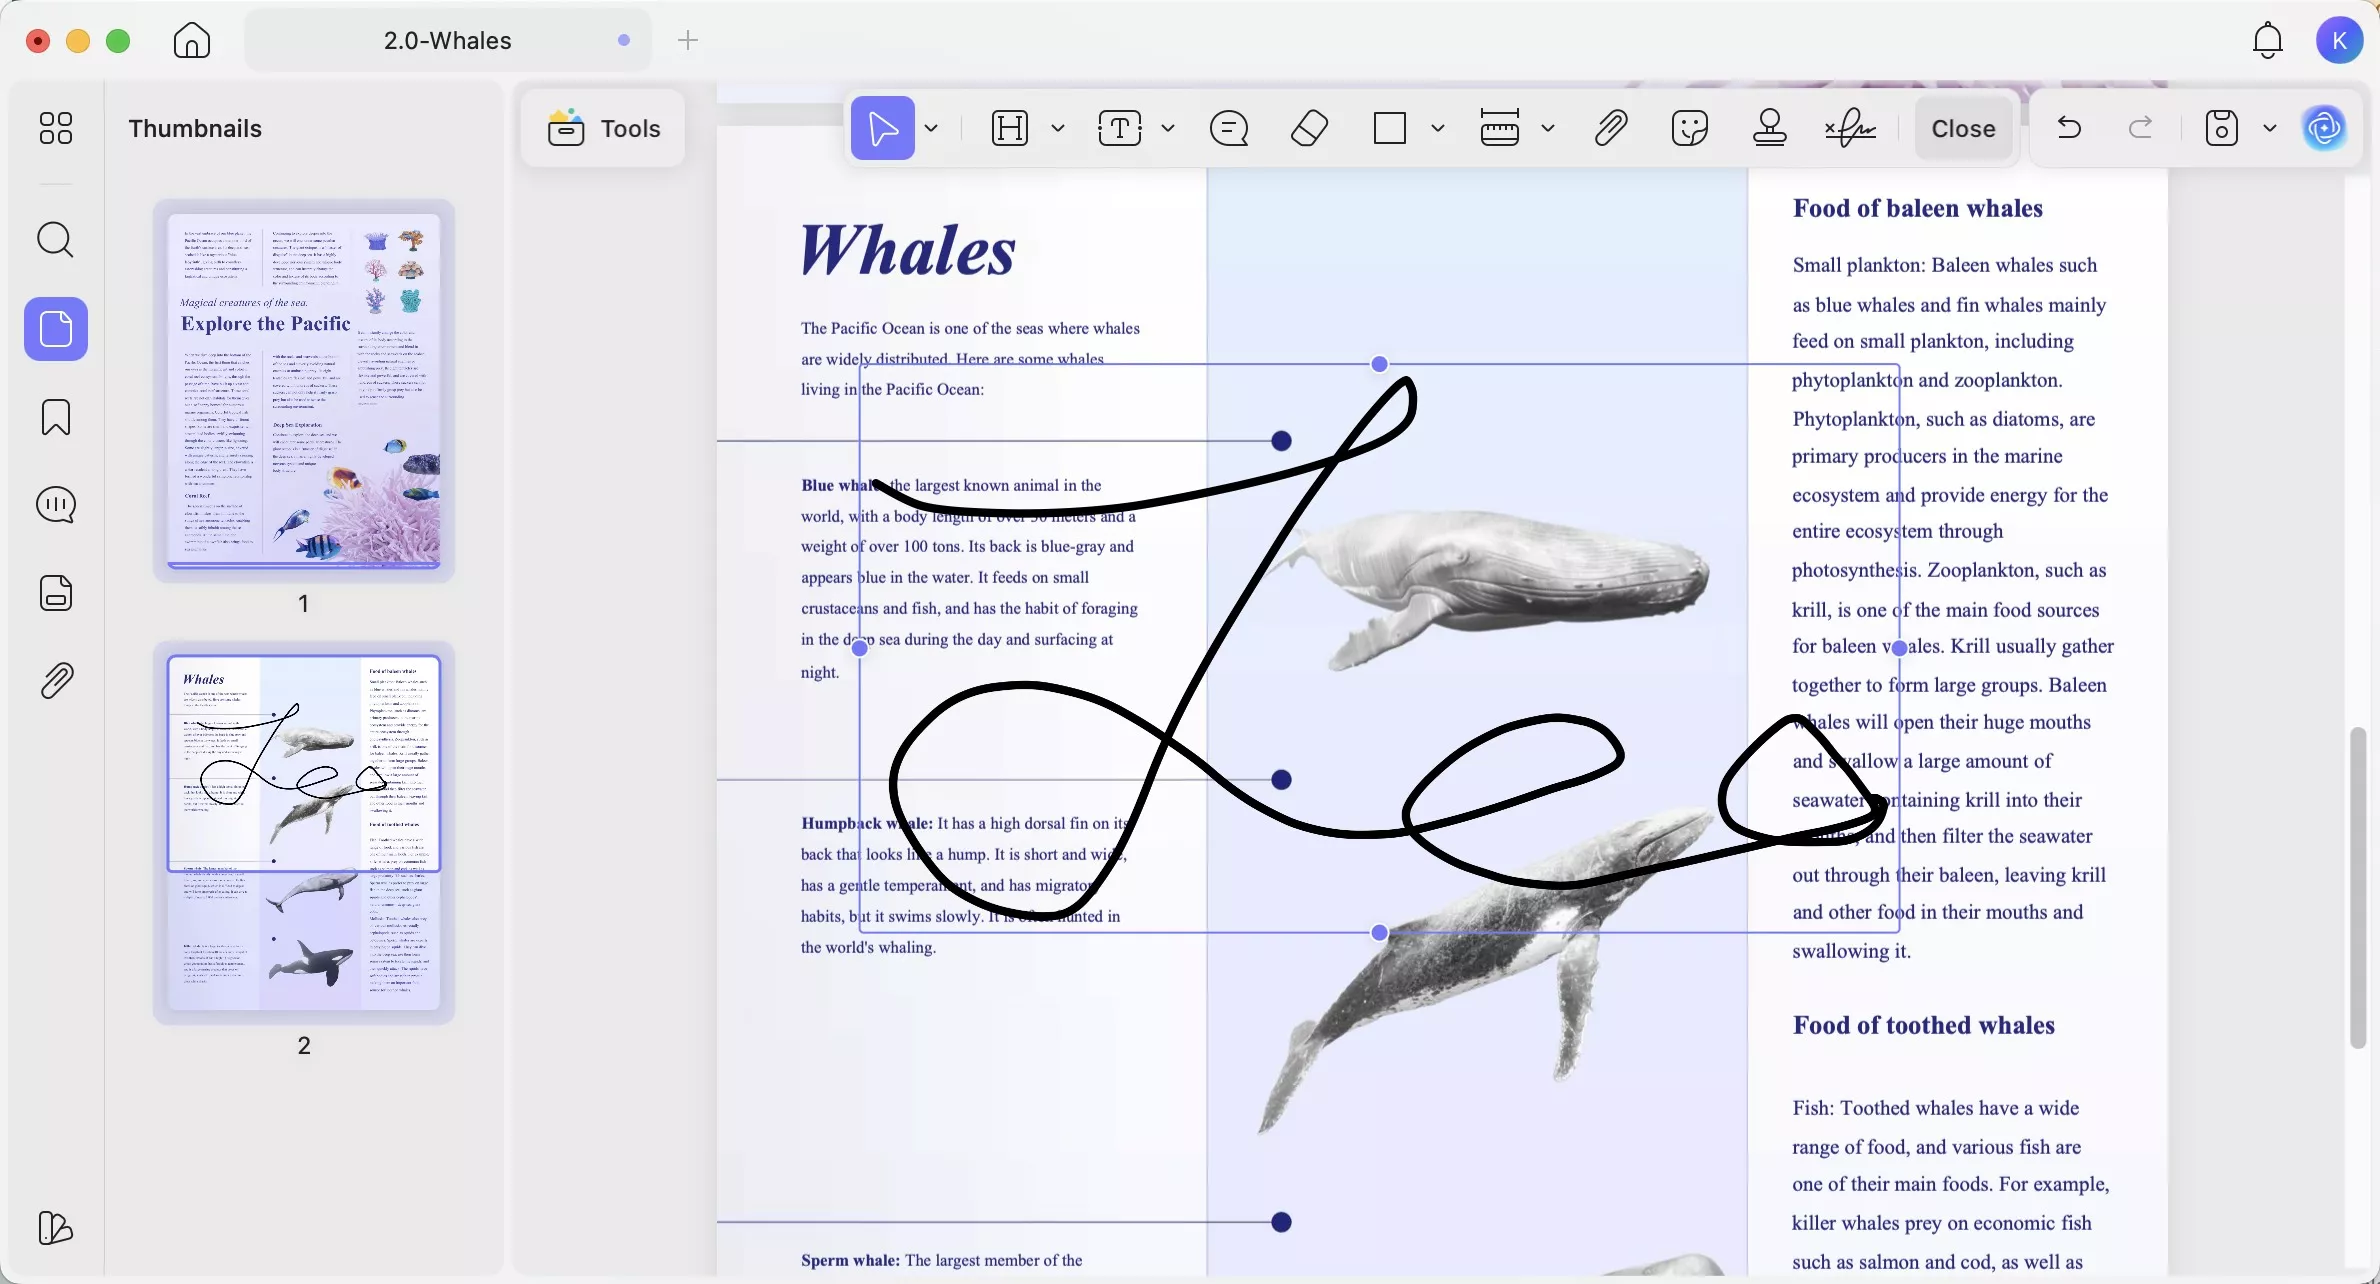
Step 2: Add Signature
After creating the signature, you can place it anywhere on the document you want. You can also resize the signature according to your needs.
Step 3: Sync Signature Across Devices
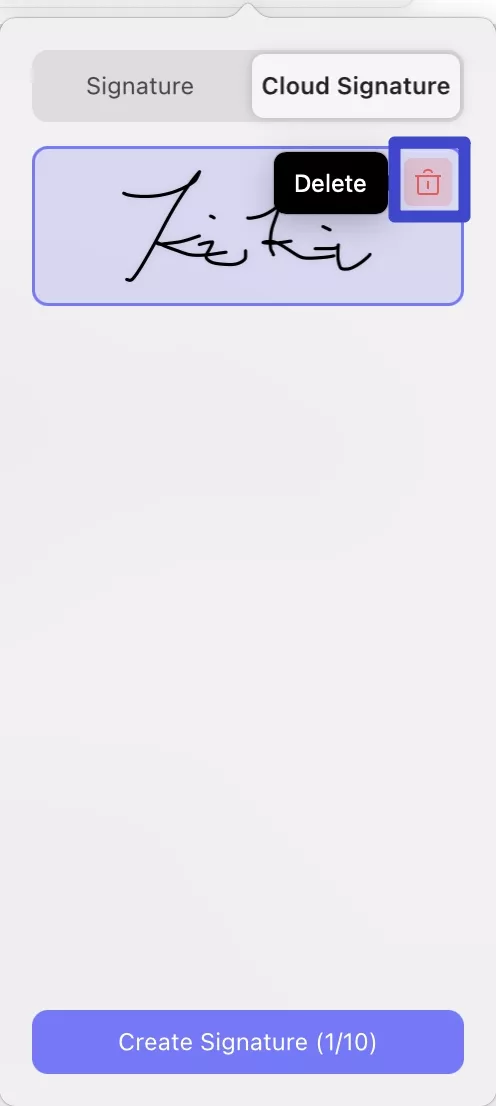
If you create signatures on a Mac and want to use them on other devices like Windows, Android, and iOS, you can sync the signature to the cloud. Just click on the "Cloud" icon to upload the created signature to the Cloud.
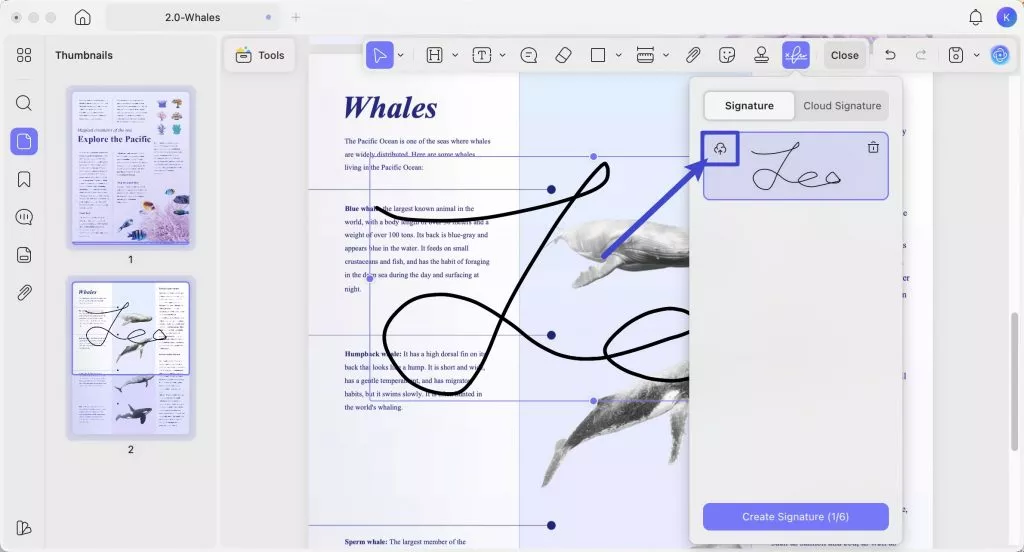
You can click on the "Cloud Signature" to find all the synced signatures.
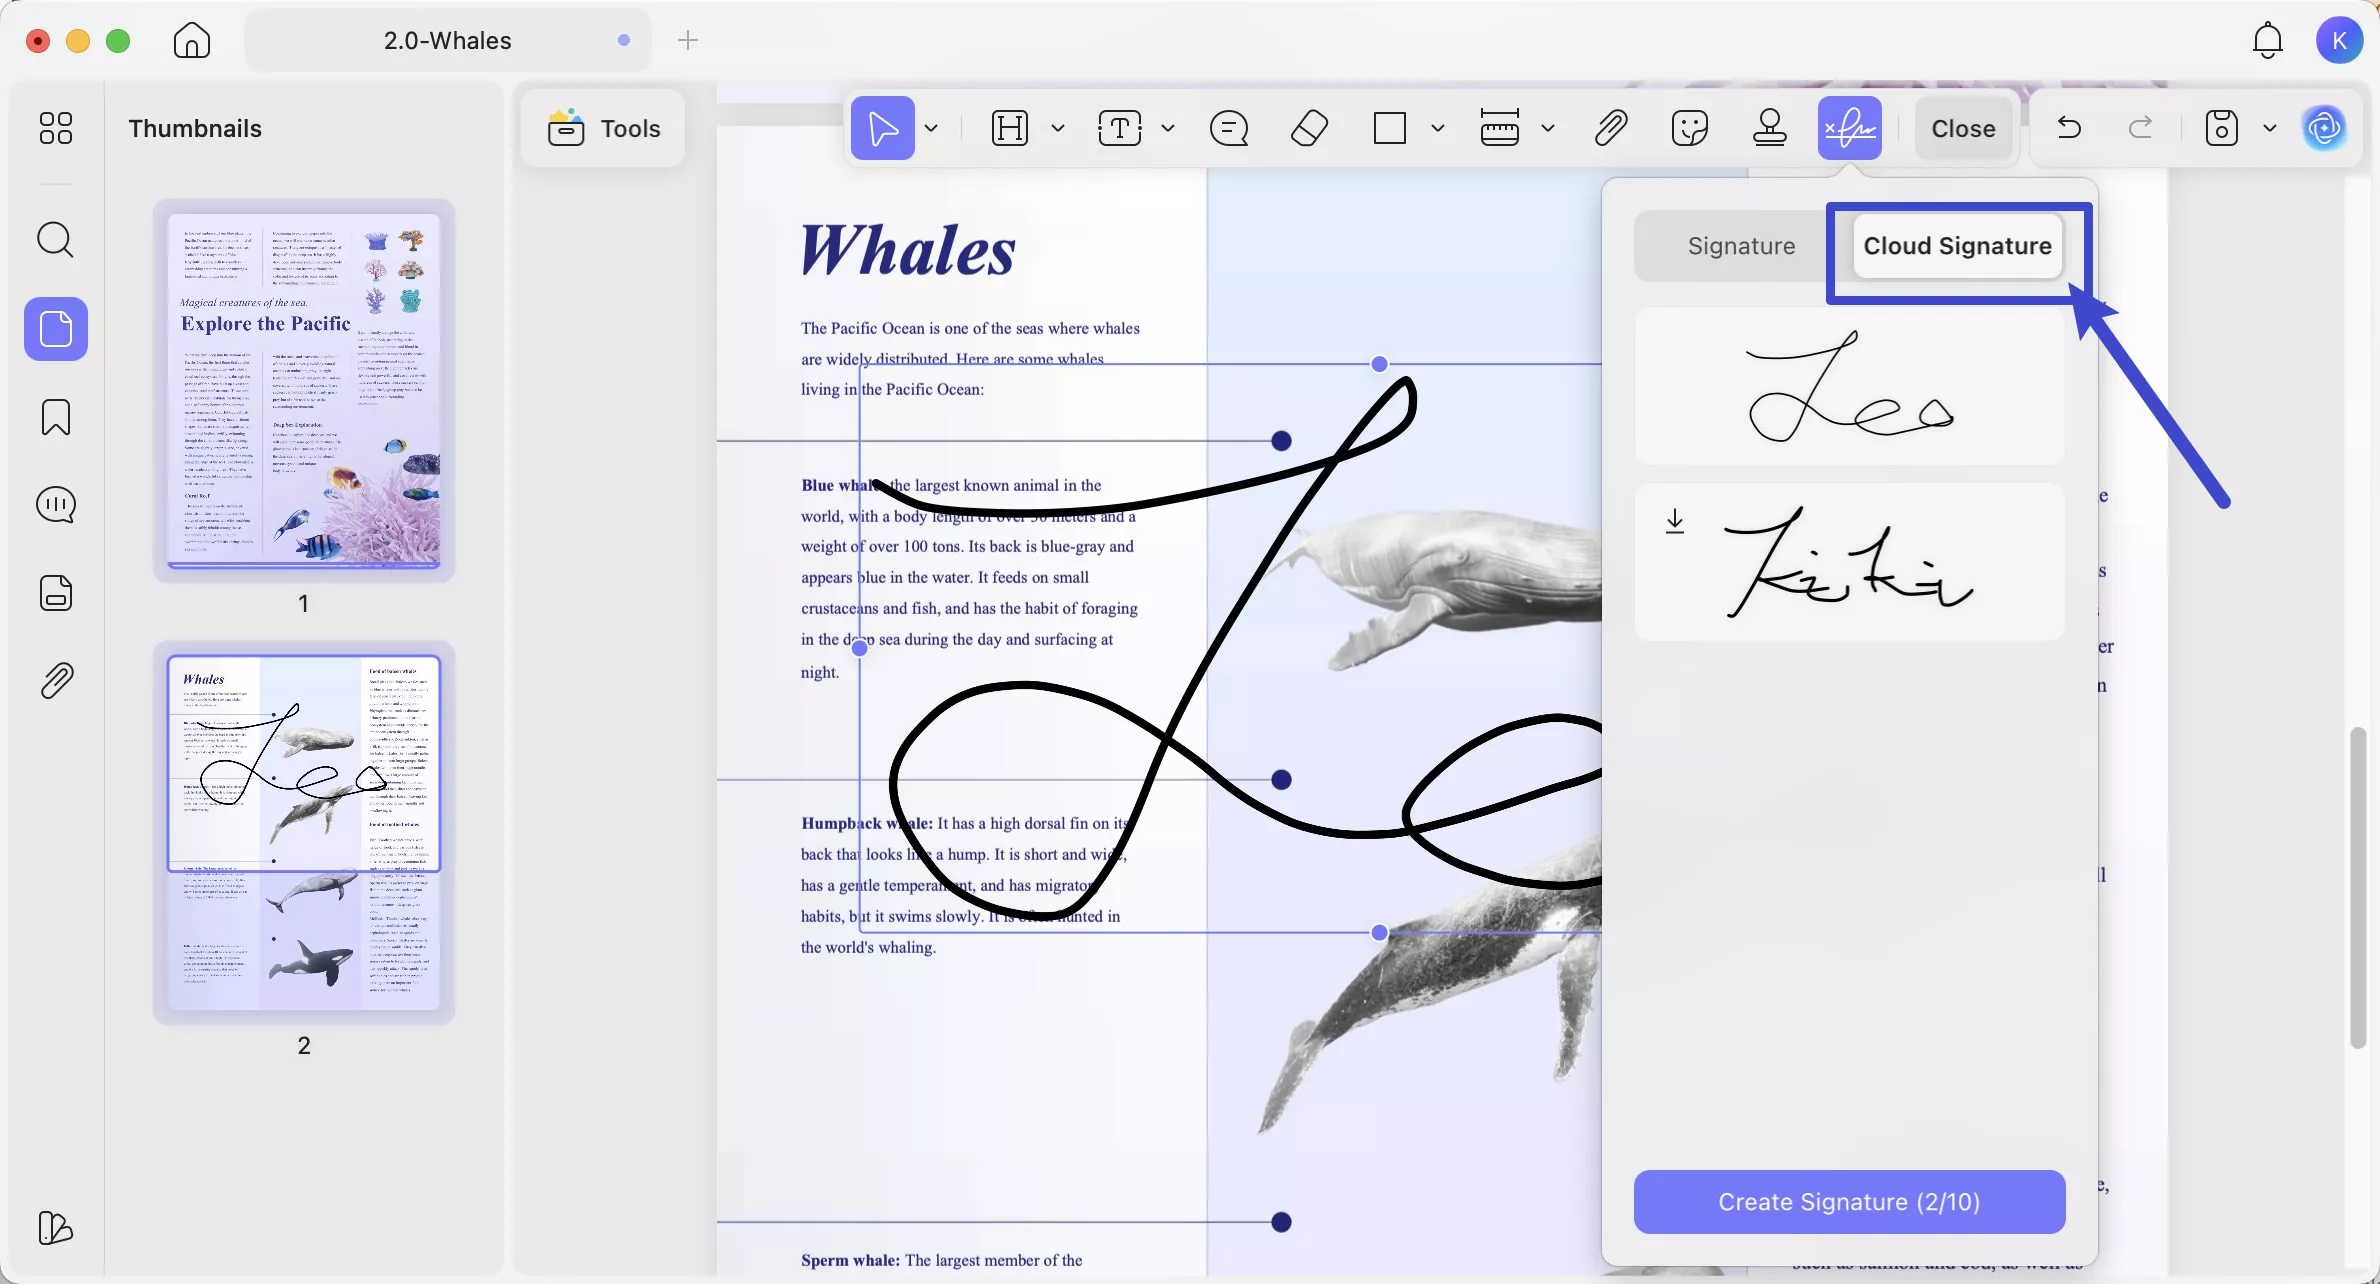
Note: You can create and save four signatures under the signature icon. If you want to add a new signature, simply remove one first.
Bonus Tip
2. How to Add a Digital Signature
Want to sign your PDF document digitally? The below guide has covered you. Ensure that you follow each step to avoid any sort of confusion.
Step 1: Add the Signature Box
Hop on below to learn how to add a signature box!
- Launch UPDF and open the PDF that you want to digitally sign.
- Once opened, navigate to "Tools" on the top left and select the option "Form".
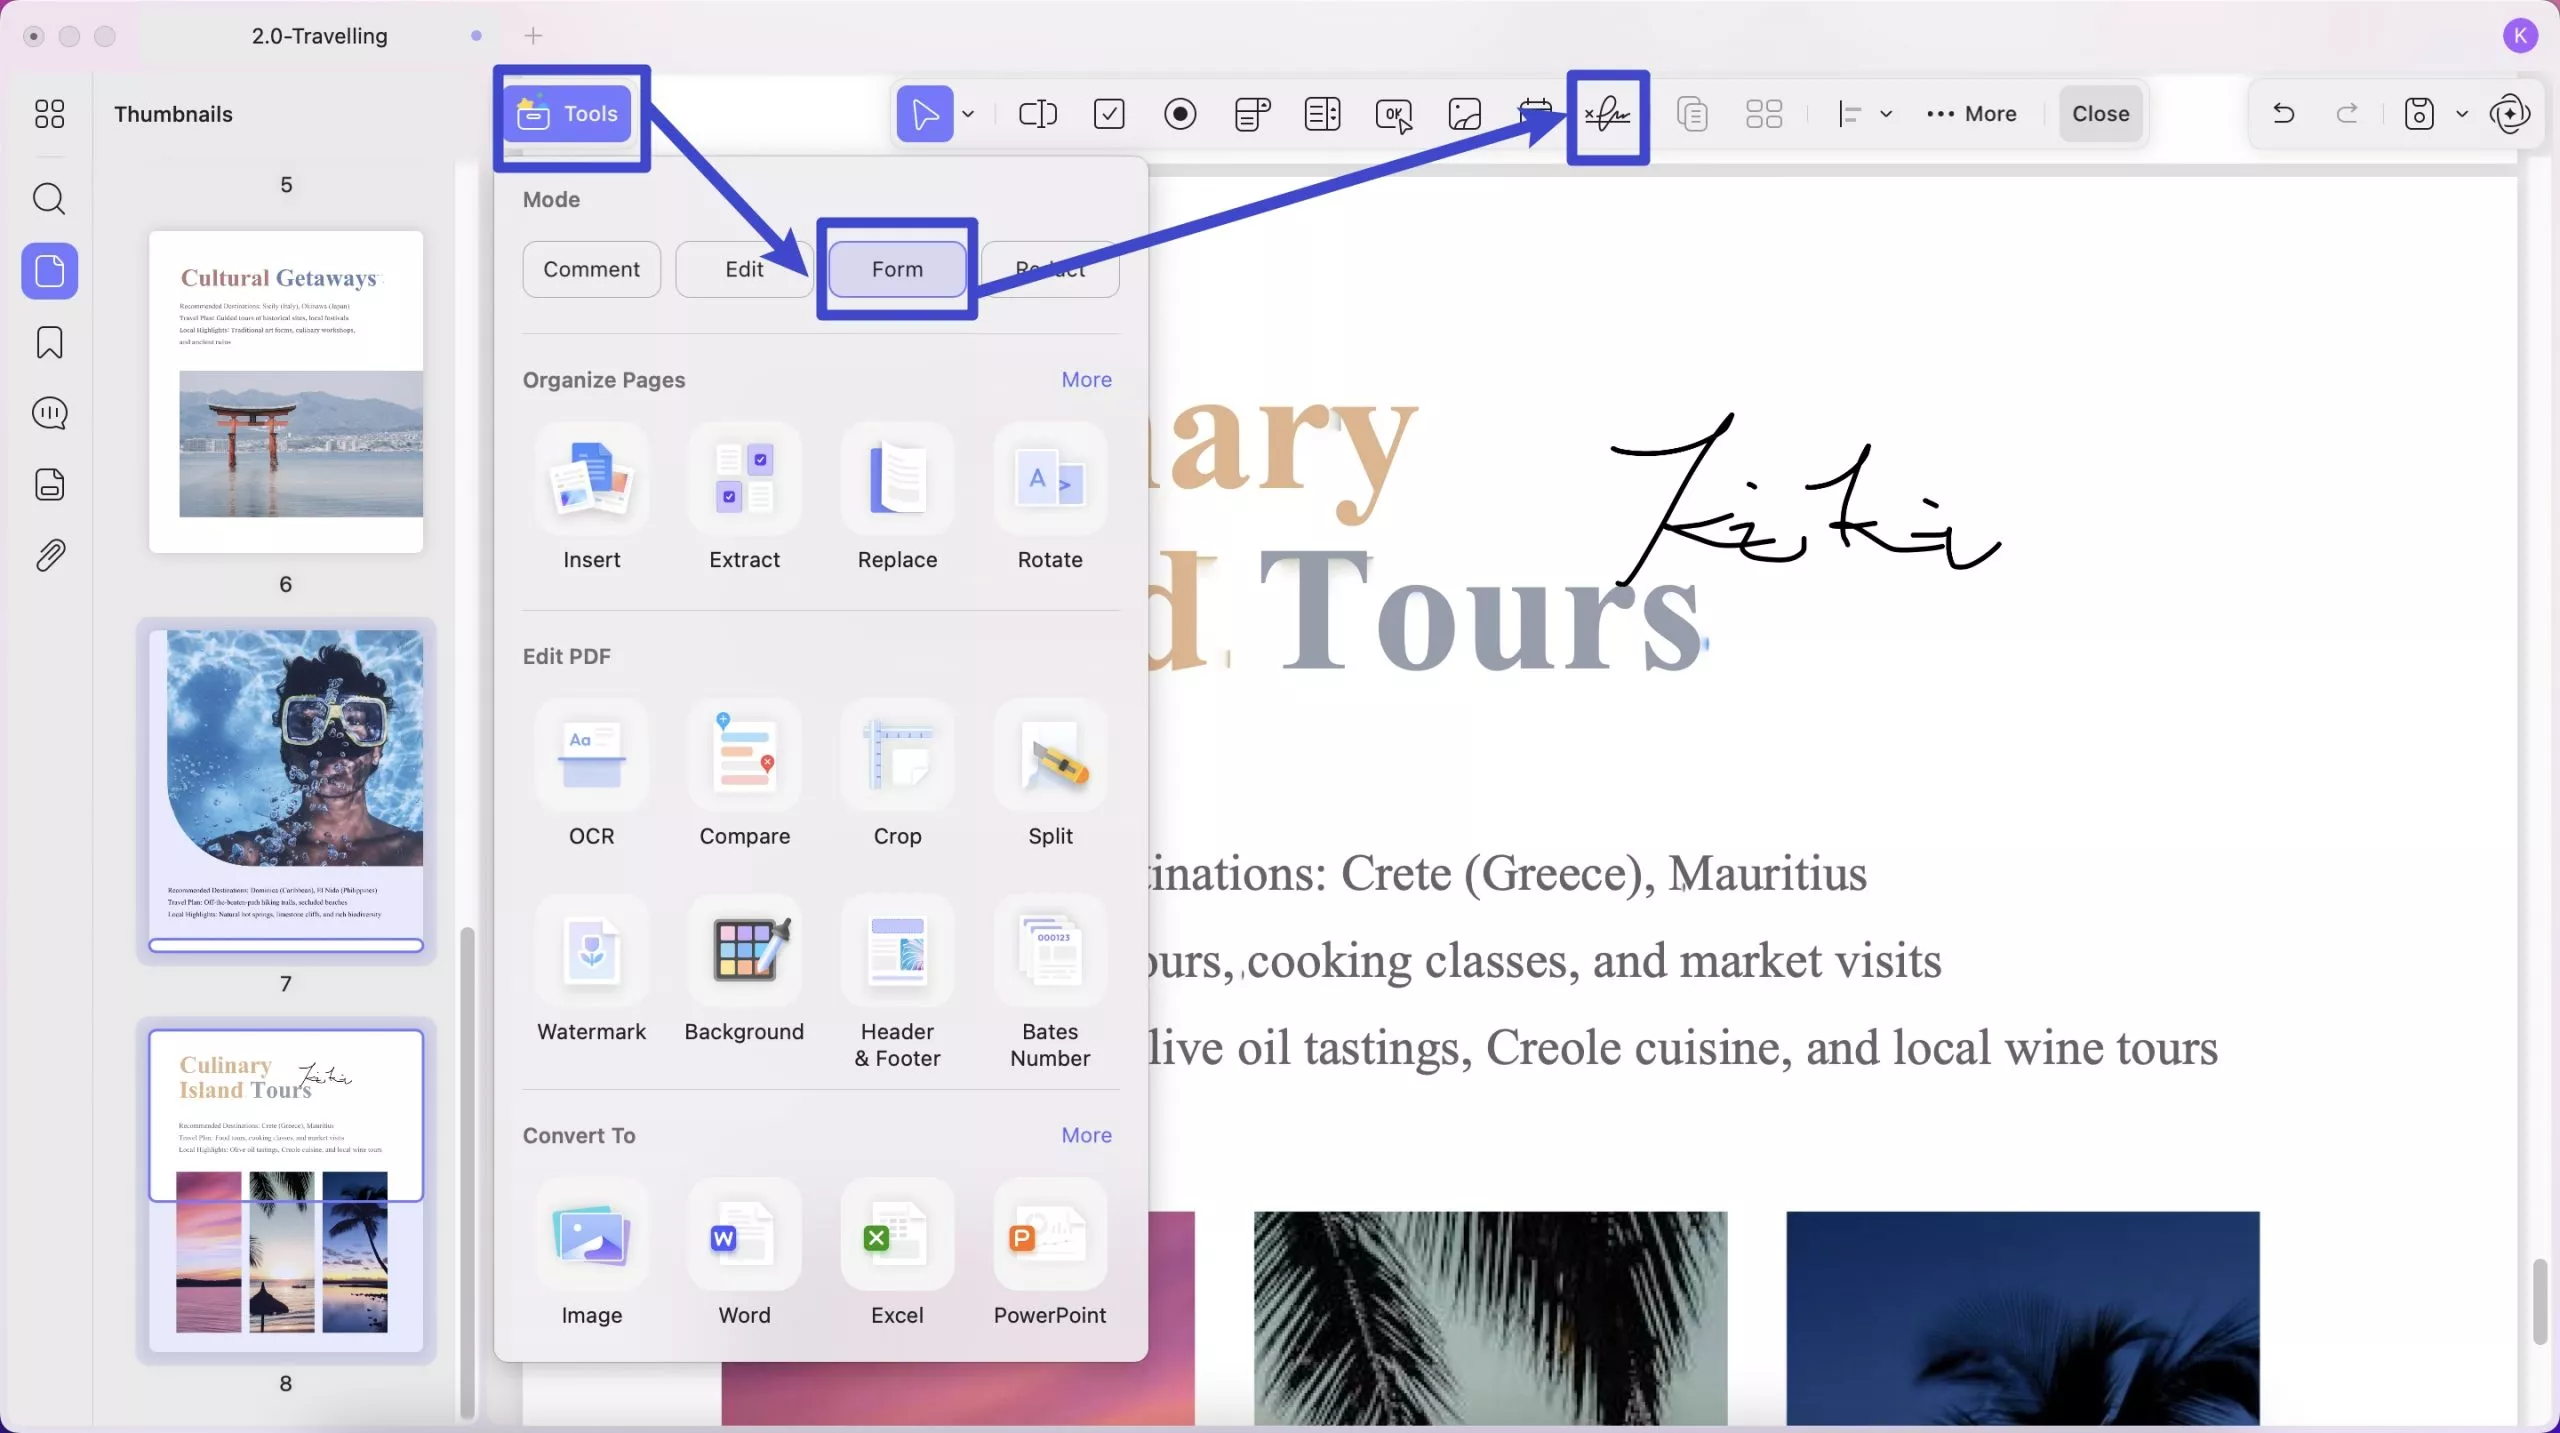
- Now, from the top menu bar, select Digital Signature and click anywhere of the file to add digital signature.
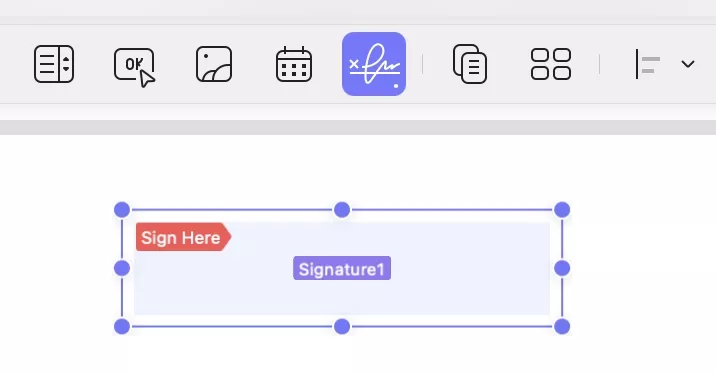
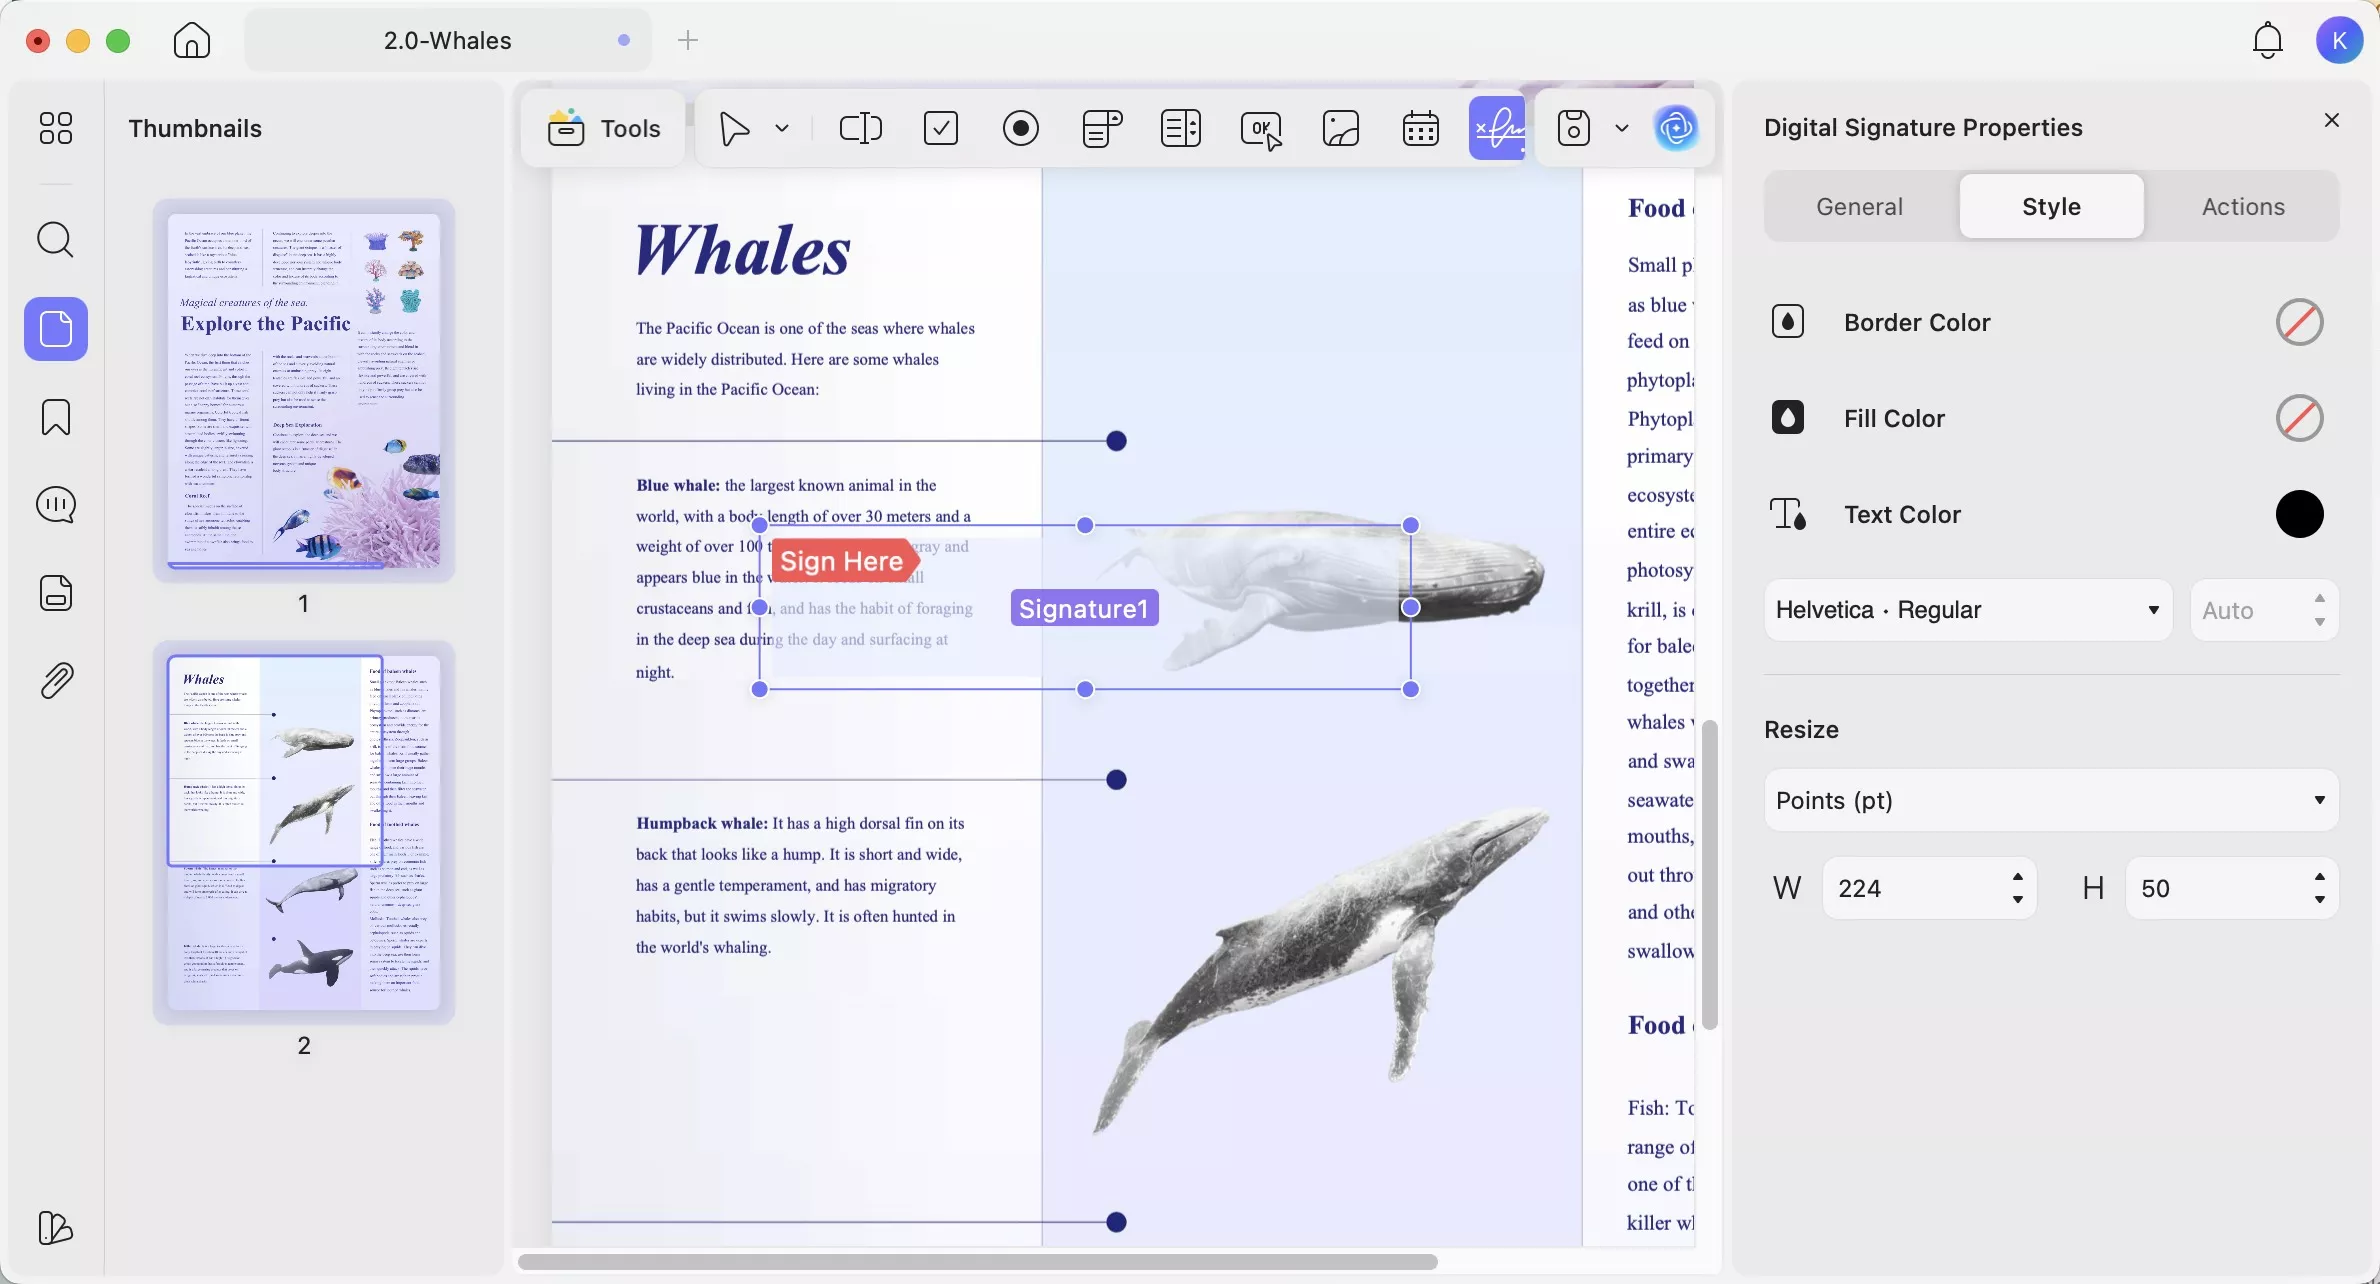
- Follow up by drawing a box on your desired location. You can resize this box, change its location, or click on the digital signature to customize its general information, styles and actions.
- Go to "Save" icon to save the document before sharing it to let others add digital signatures.
Step 2: Sign Your PDFs Digitally
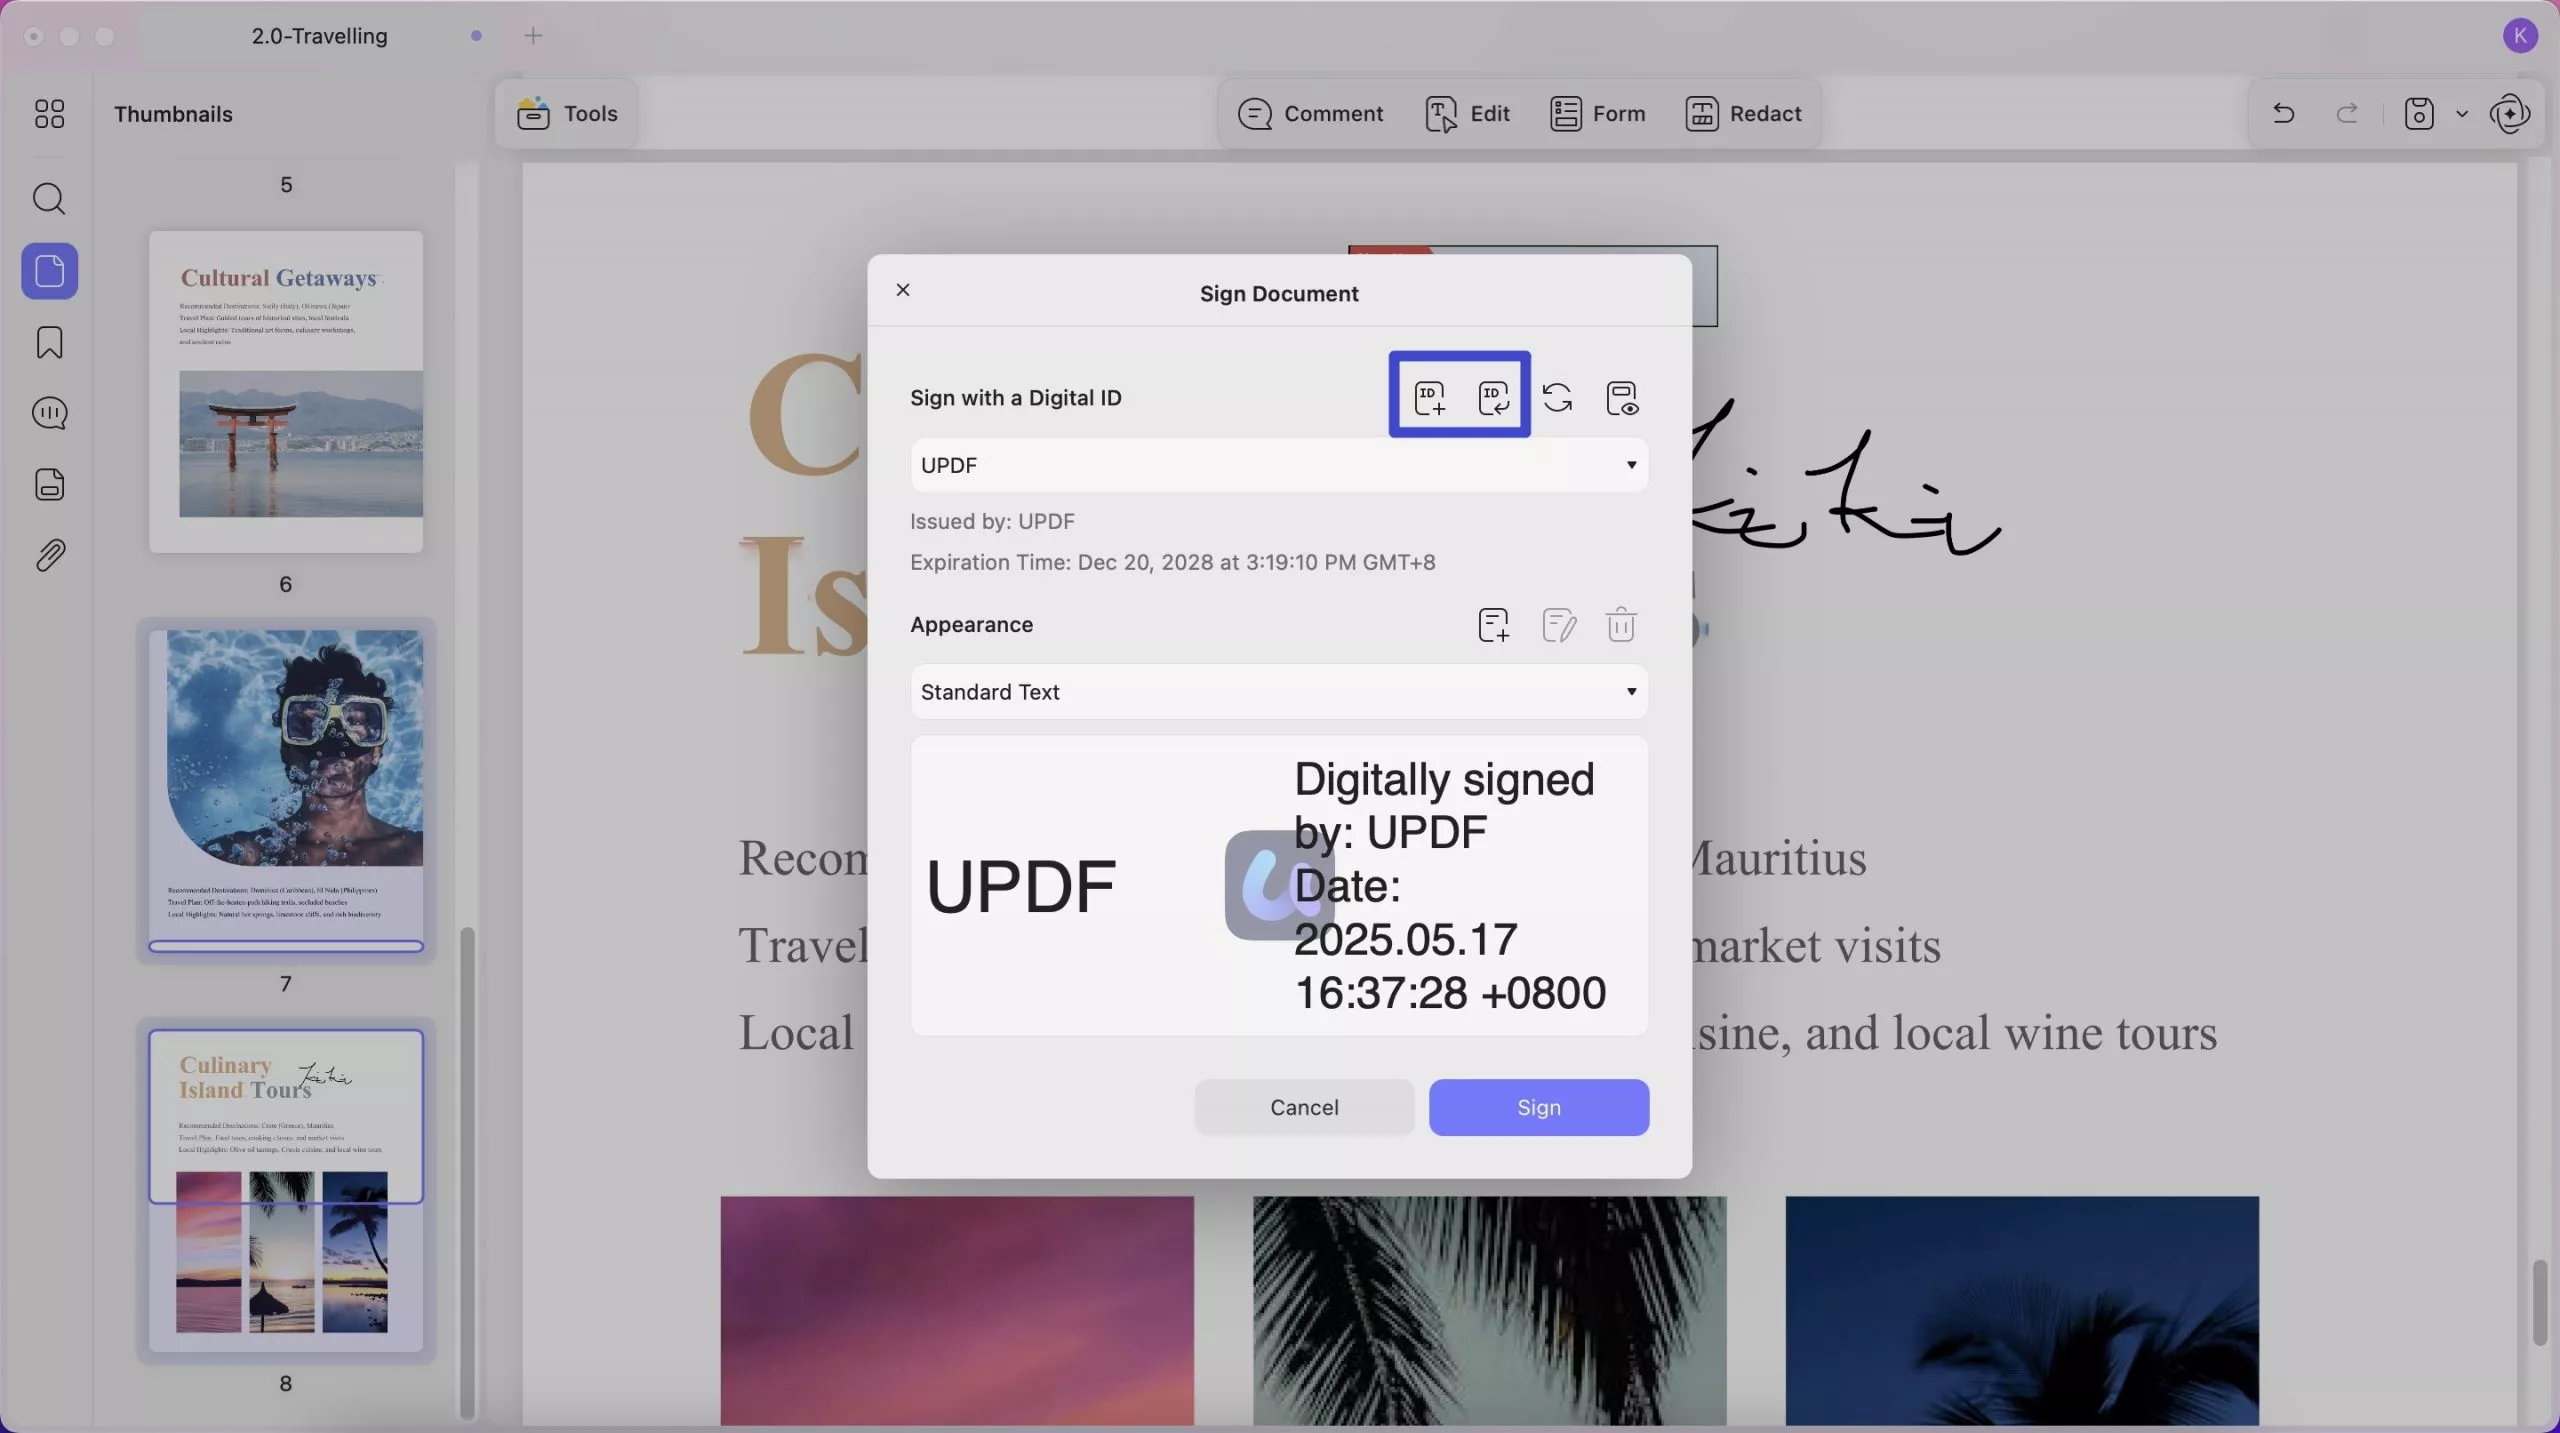
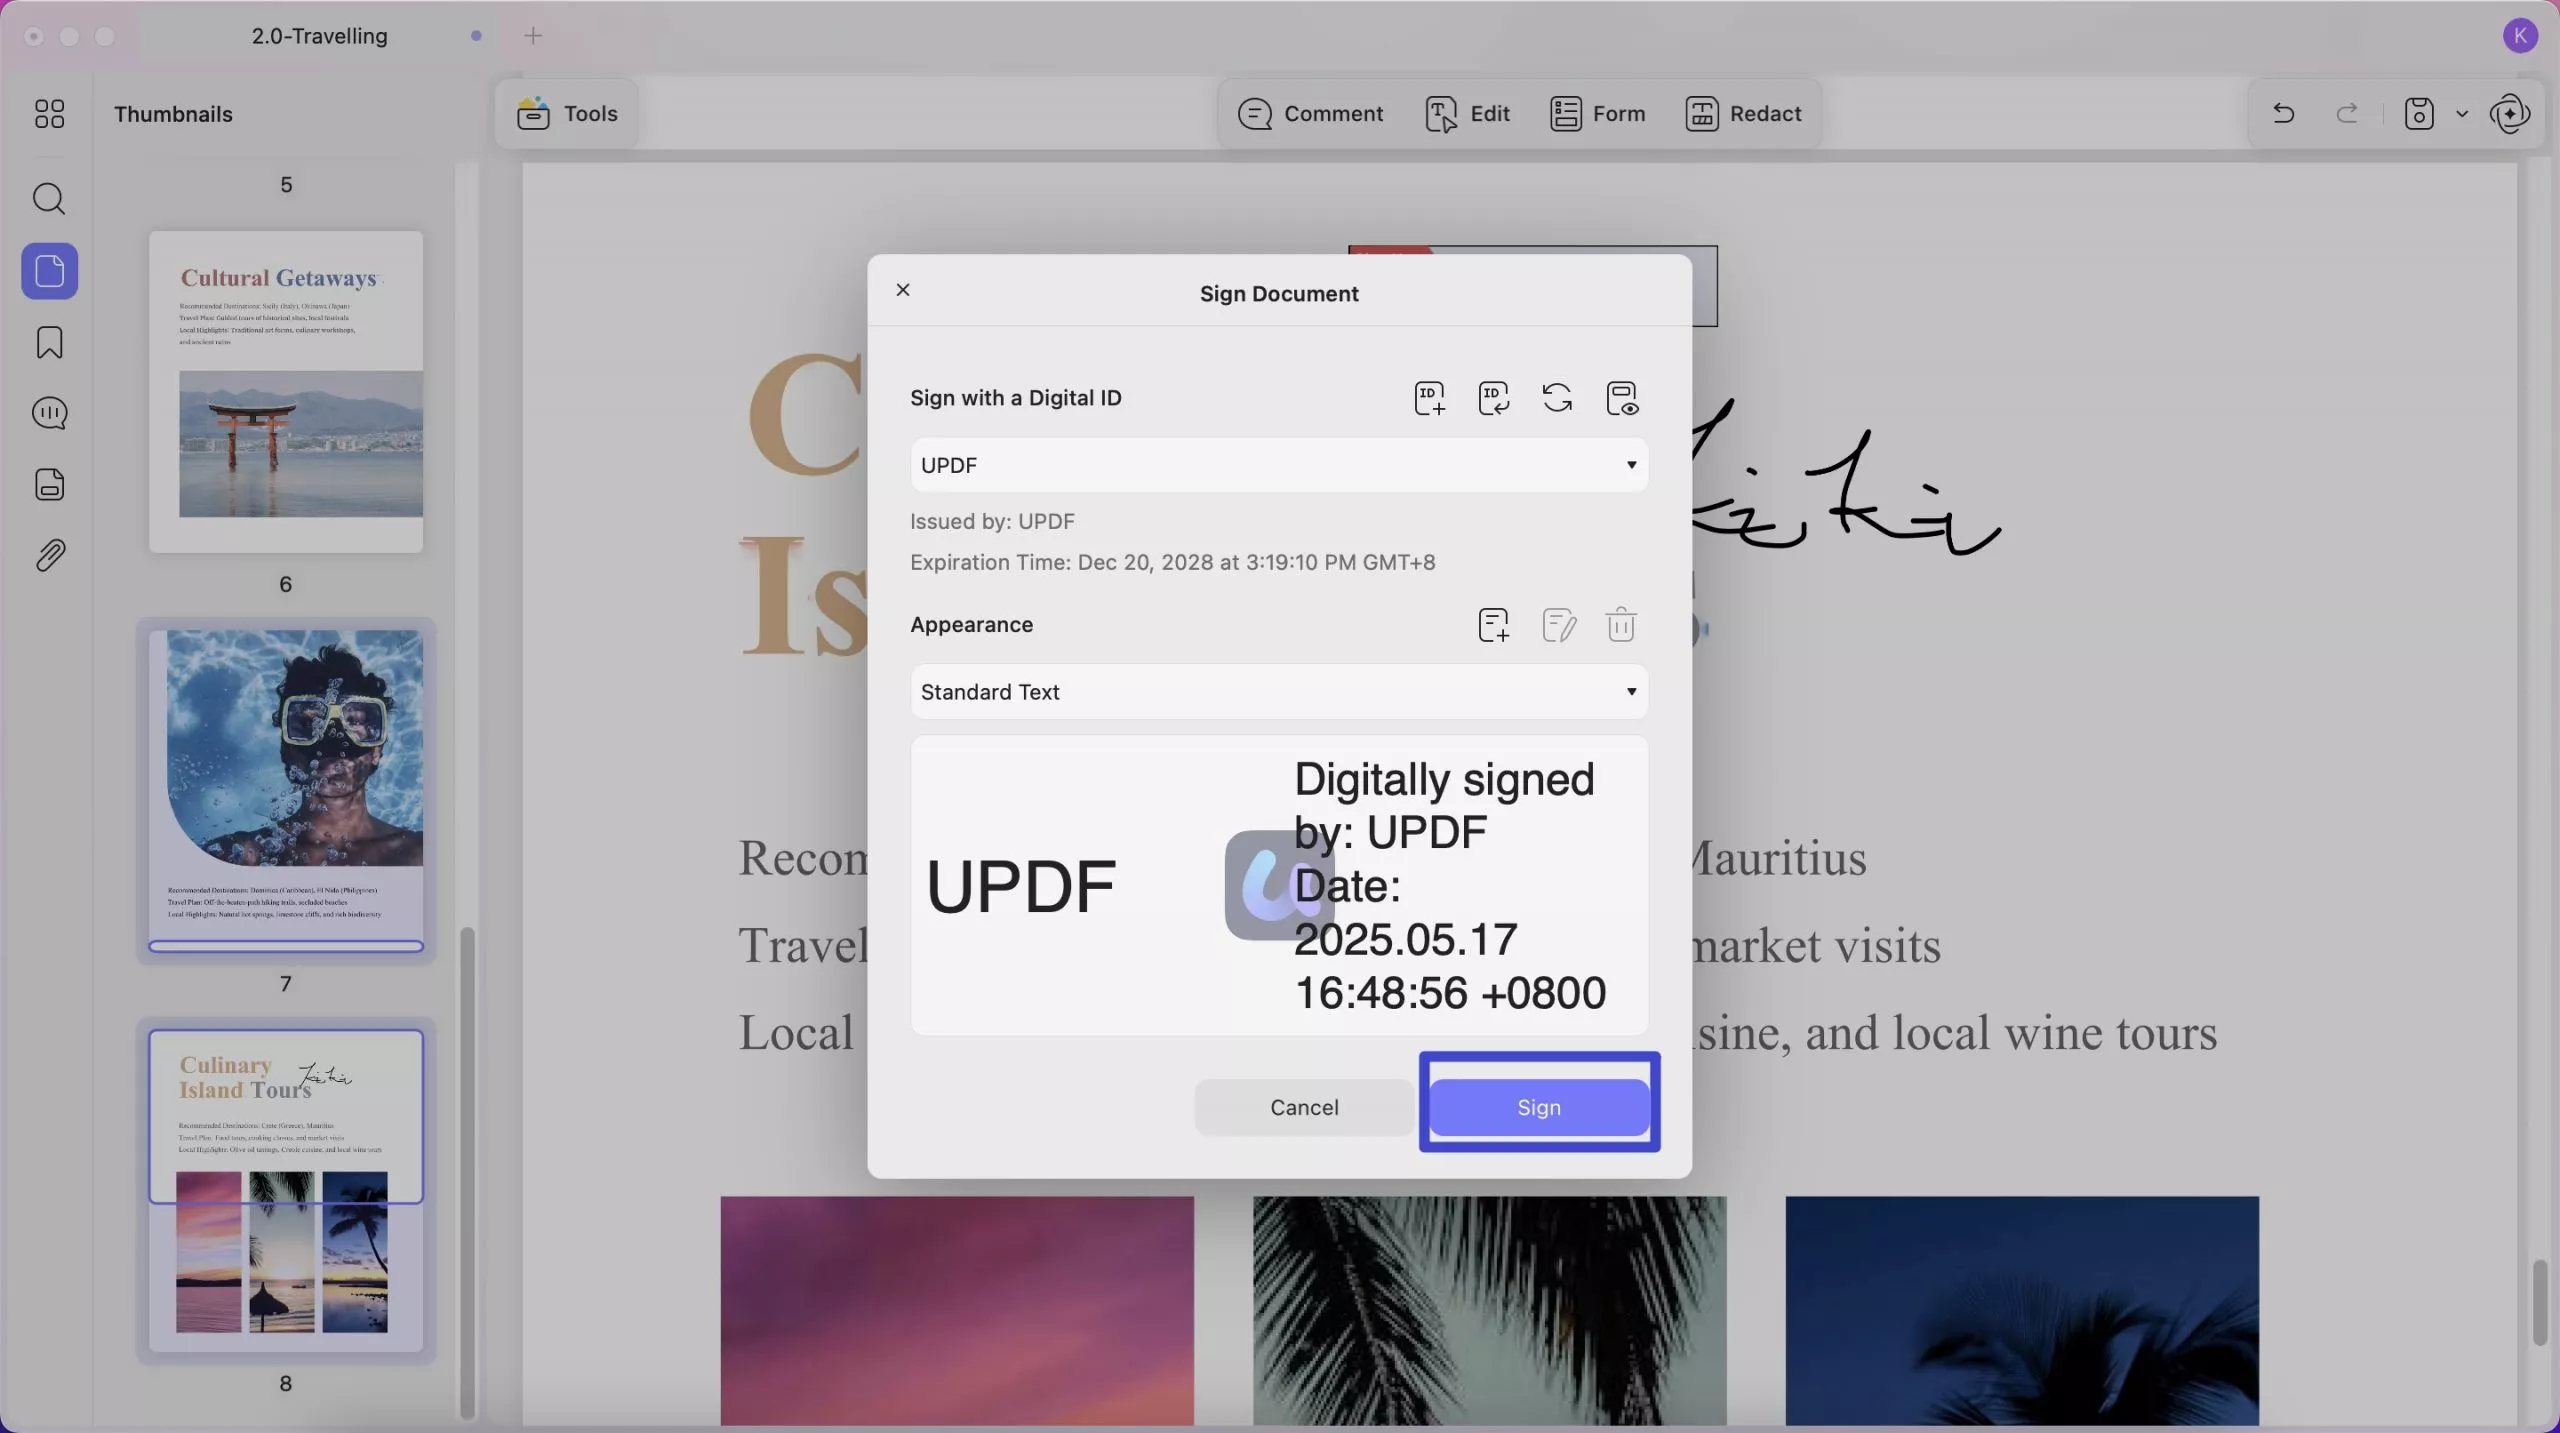
If you want to sign a PDF yourself, UPDF will allow you to either sign with a premade digital ID or create a new one.
Option 1: Create and Add Digital Signature
Hop on below to learn how you can create a digital ID in UPDF.
- Navigate to "Tools" on the top left and select the option "Form". From the top menu bar, select Digital Signature and click anywhere of the file to add digital signature. Follow up by drawing a box on your desired location.
- After drawing a box, click close to exit the "Form" mode.

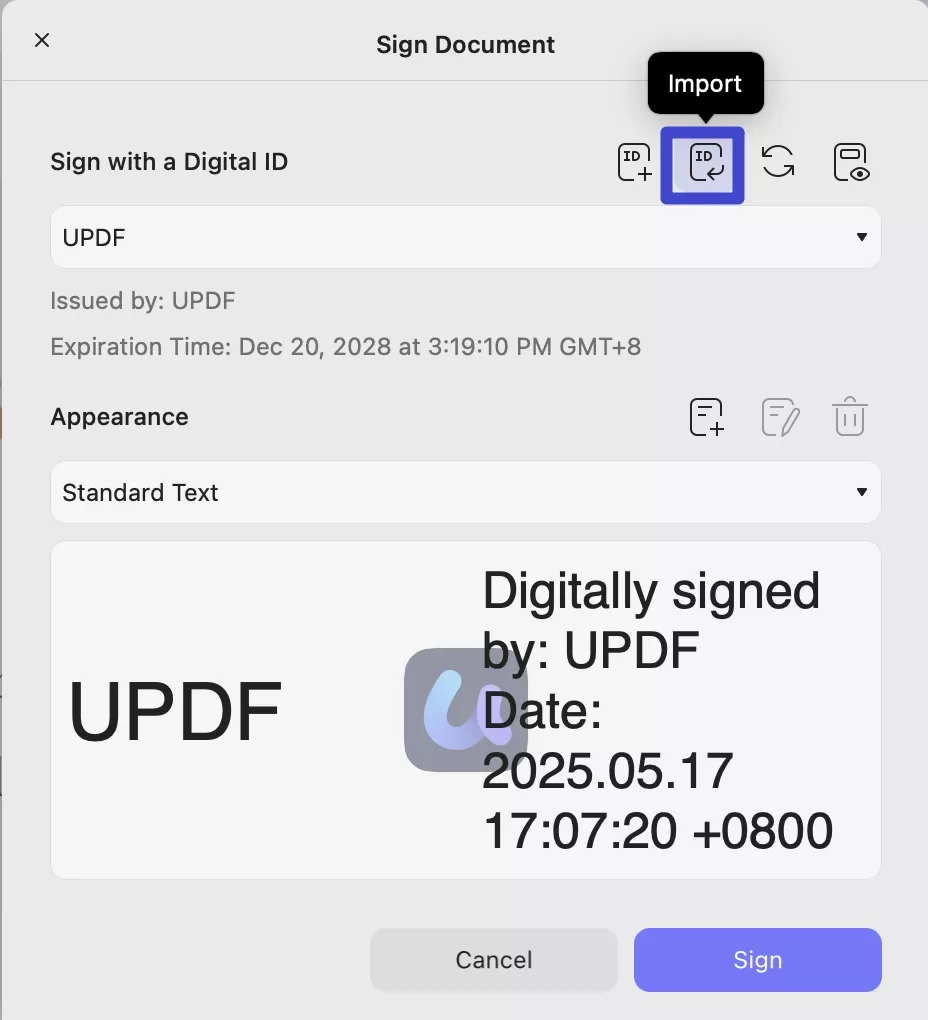
- Click the box and a pop-up window will appear. The following window features multiple options. Click on the "Create" or "Import" icon.
- To create a digital ID, you will be prompted to enter personal information, including name, email address, etc. Add the information and hit "Create" to proceed.

- On successful creation of a digital ID, please enter at least a six-character password and secure your digital ID.
- Now, in the Sign Document window, select the Sign option to add your digital signature.
- In the following window, select the storage destination for your signed PDF, and that's it!
Bonus Tip
Click on the signature to explore its properties and certificates.
Option 2: Import and Add Your Digital Signature
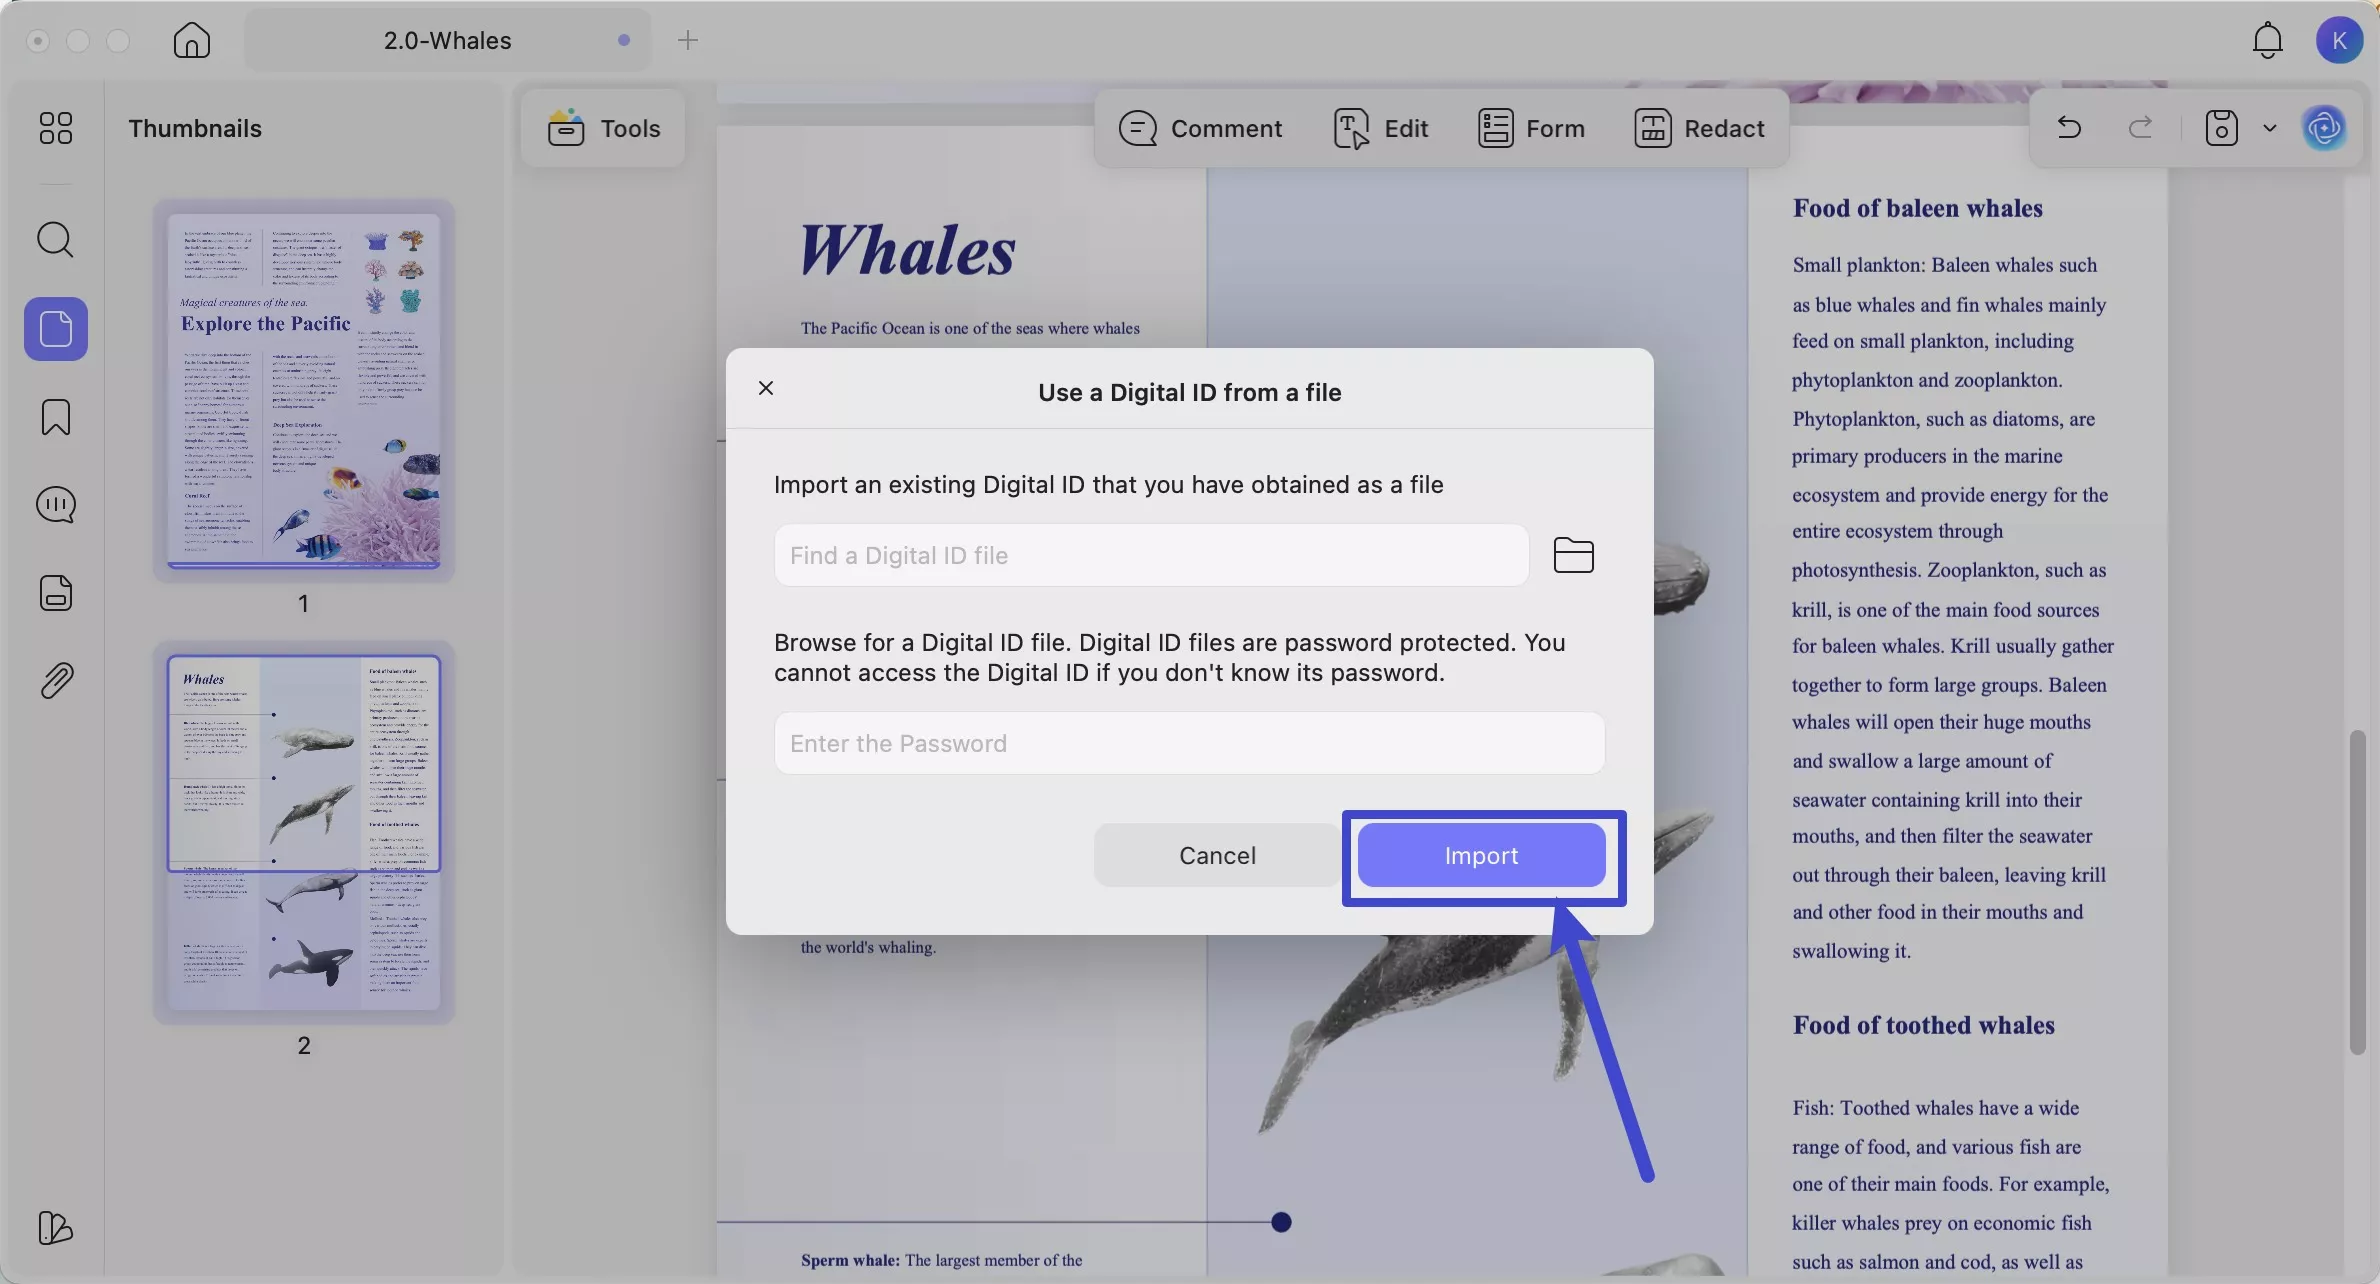
Besides creating your digital ID from scratch, you can also import a pre-existing one to digitally sign your PDF. Here is how you can do so:
- Instead of clicking on the "Create" option in the Sign Window, select "Import".
- Browse your device to import your premade digital ID. Enter the password. Press "Import" to import it.
- Now, click on the "Sign" to sign the PDF with digital signature. You need to select one place to save your digitally signed PDF in the pop up window.