UPDF for Windows
 UPDF for Mac
 UPDF for iPhone/iPad
 UPDF for Android
 UPDF AI Online
 UPDF Sign
 Edit PDF
 Annotate PDF
 Create PDF
 PDF Form
 Edit links
 Convert PDF
 OCR
OCR PDF to Word
 PDF to Image
 PDF to Excel
 Organize PDF
 Merge PDF
 Split PDF
 Crop PDF
 Rotate PDF
 Protect PDF
 Sign PDF
 Redact PDF
 Sanitize PDF
 Remove Security
 Read PDF
 UPDF Cloud
 Compress PDF
 Print PDF
 Batch Process
 About UPDF AI
 UPDF AI Solutions
 AI User Guide
 FAQ about UPDF AI
 Summarize PDF
 Translate PDF
 Chat with PDF
 Chat with AI
 Chat with image
 PDF to Mind Map
 Explain PDF
 PDF AI Tools
 Image AI Tools
 AI Chat Tools
 AI Writing Tools
 AI Study Tools
 AI Working Tools
 Other AI Tools
 PDF to Word
 PDF to Excel
 PDF to PowerPoint
 User Guide
 UPDF Tricks
 FAQs
FAQs UPDF Reviews
 Download Center
 Blog
Blog Newsroom
 Tech Spec
 Updates
 UPDF vs. Adobe Acrobat
 UPDF vs. Foxit
 UPDF vs. PDF Expert
Optical Character Recognition (OCR) is a great tool to convert a scanned PDF to an editable PDF file. However, it is not uncommon that after OCR the layout is changed. But sometimes you may not like the new layout, or the OCR process has erased or distorted the layout in such a way that the document has lost its esthetics. In these instances, you may want to remove OCR from PDF files or reverse the process.
UPDF is a great tool to work with PDF files and will be very useful for your purpose. It can help you remove unwanted layers, also when OCR processing is done using UPDF, you can actually revert the OCR back to the original, and remove the layers much more easily if you are not happy with the outcome. You can download UPDF right now and resolve your issue quickly by following the below methods.
Windows • macOS • iOS • Android 100% secure
Part 1. How to Remove OCR Layer from PDF?
The OCR process generates different layers for the content of the scanned file, for instance, the background layer, image, and text layer, etc. If you are not happy with your OCR outcome, it could be because the OCR layer is covering the content. In this case, you can remove the layer to see if that helps improve the output quality. Follow these steps to do so with UPDF.
Step-1. Open the UPDF app. Click on the "Open File" tab you will see on the screen to browse and open the PDF file after OCRed. Also, if UPDF is not the default PDF reader, you can right-click on the file and click on the "Open with > UPDF" option.
Also Read: How To Change PDF Default Viewer?
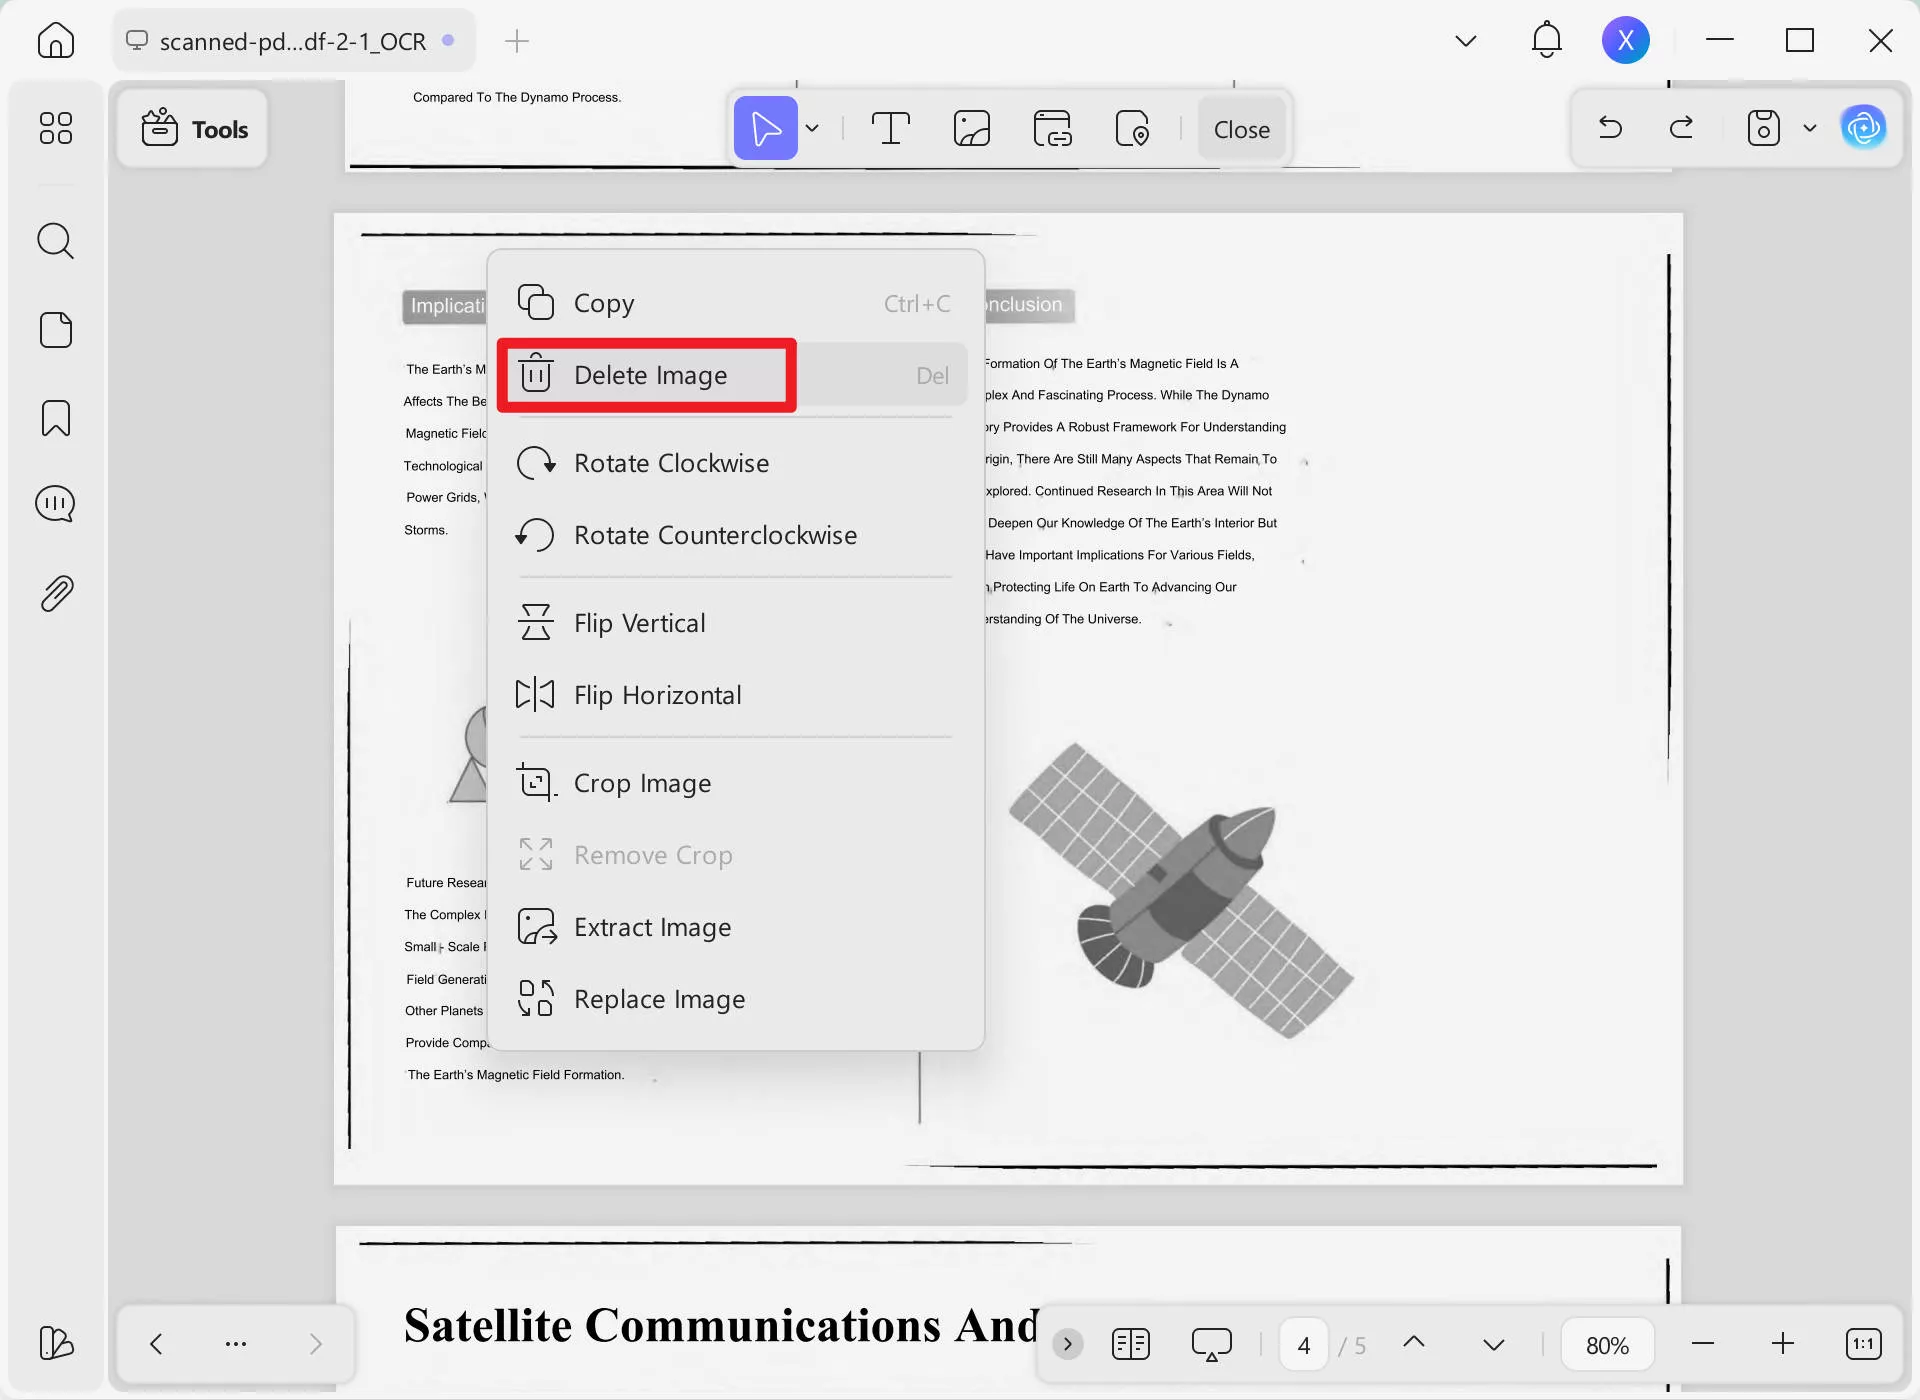
Step-2. Once you have opened the PDF file, click to open the "Edit" in "Tools".
If you move your cursor over the page near the content or the objects are covered, you will see that there are several sections or layers that may not be very apparent at first. If you right-click on the side of the page, you will see a menu bar. You can click on the "Delete Image" to delete the unwanted objects. Once done, you can find the covered content.
Step-3. Once you are happy with the outcome, you can save the file using the "Save" option.
Part 2. How to Remove OCR from PDF by Using OCR with UPDF
If you are not happy with the OCR results obtained with the other software and you want to improve the outcome, you can use UPDF to OCR the scanned file. First download the UPDF and then follow these steps to convert the scanned file into a text-recognizable file.
On Desktop:
Step-1. Once you have downloaded the UPDF app, open it. You will see the "Open File" tab on your screen. Click to open the scanned file in UPDF.
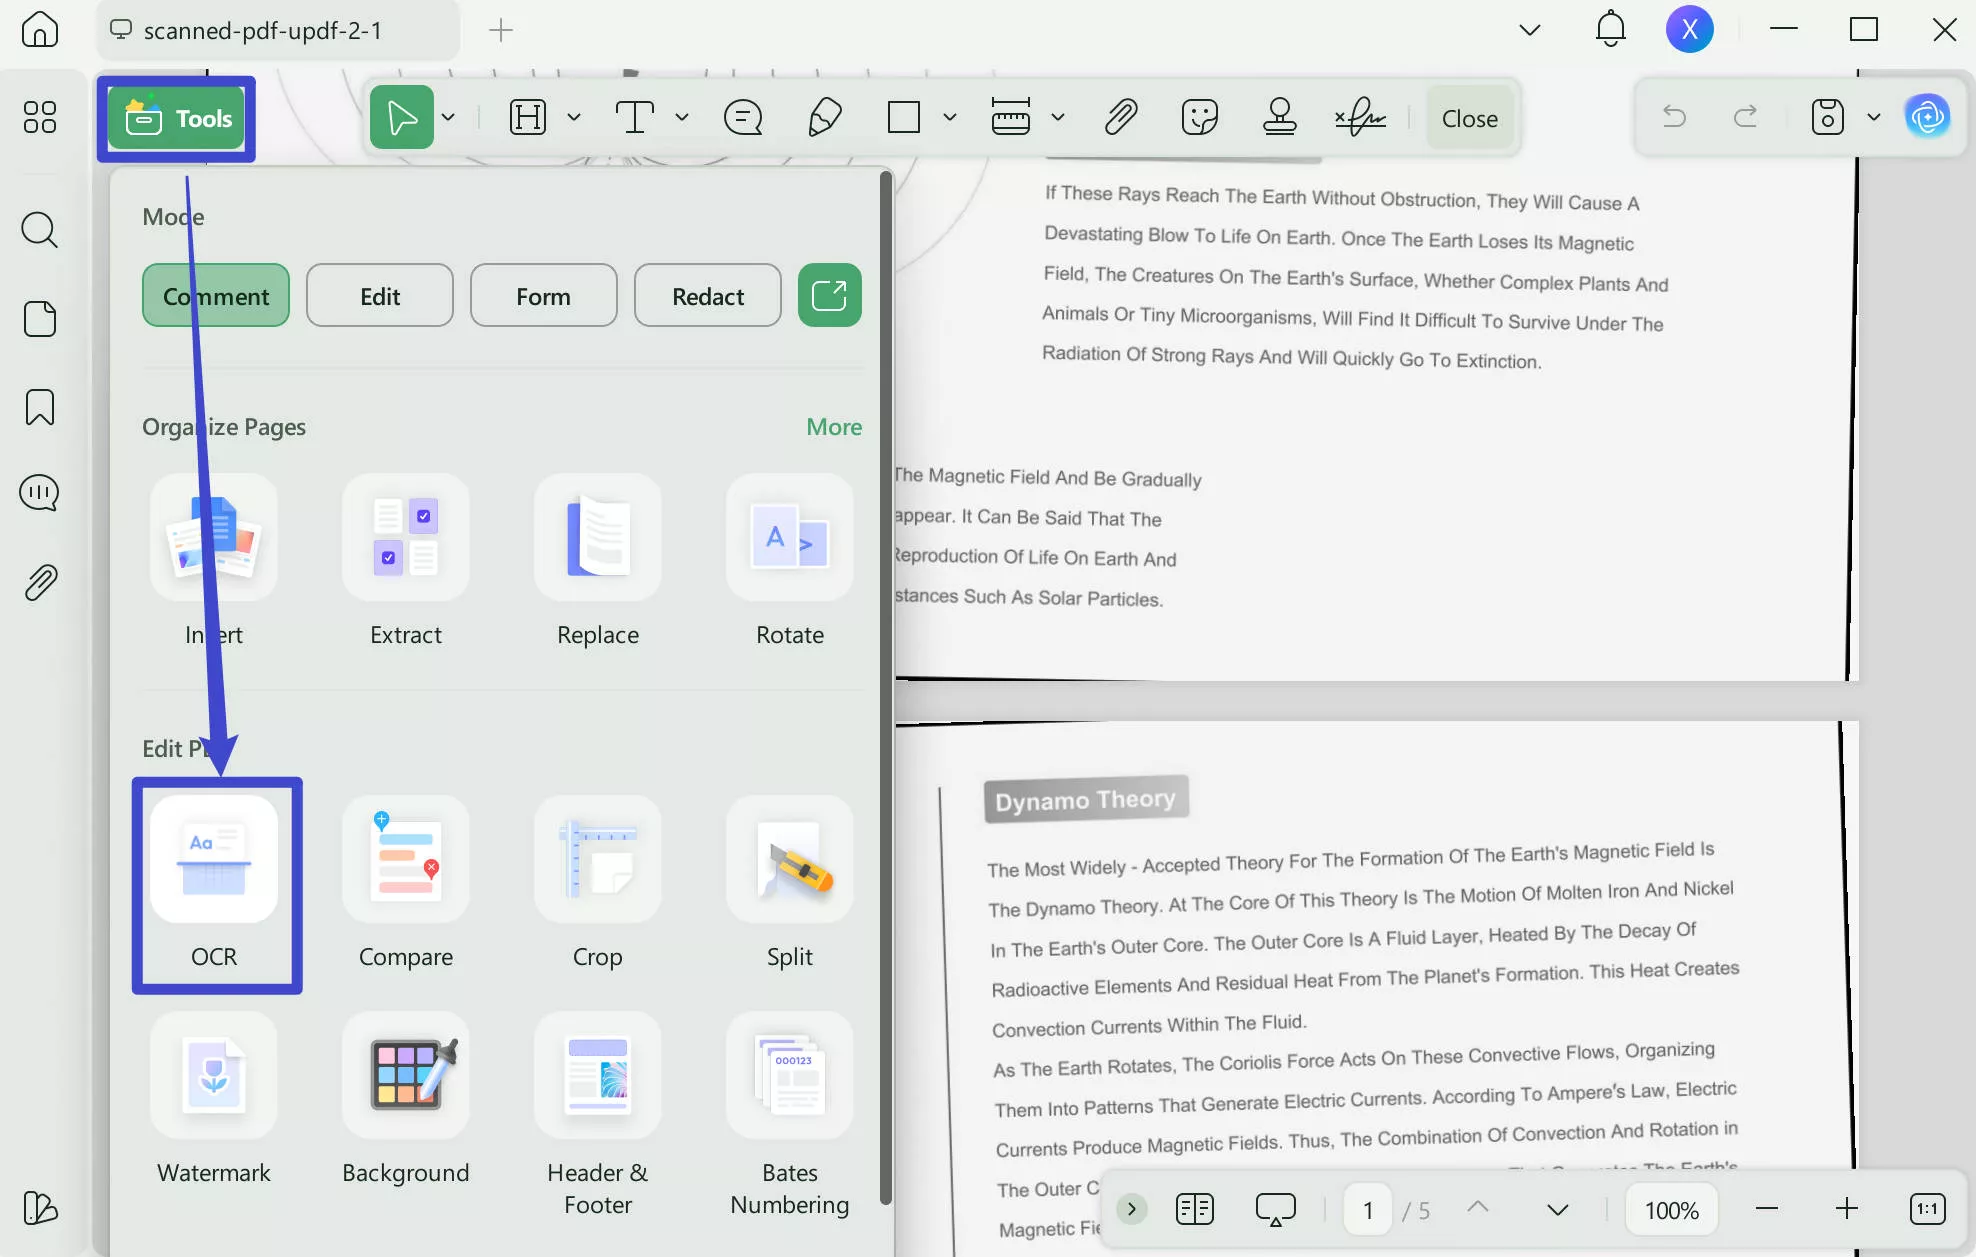
Step-2. Once you have the scanned PDF file opened, you will see a series of tools on the right side of the window. Click on the OCR in "Tools" to open the OCR popup window, which will allow you to custom OCR your scanned PDF.
Step-3. Now you can "Editable PDF", "Text and Pictures Only", "Searchable PDF Only" for different needs.
You should pick the "Document Language" that matches the source language. Also, if you have several pages but you only want a selected few to undergo OCR, you can specify the "Page Range" and "Odd/Even Pages".
Step-4. Once you have customized the settings you can hit the "Convert" button. Your scanned file will undergo OCR and you will be prompted to save the output file in the desired folder.
On Mobile:
Step 1: Download UPDF for Android via the Play Store or UPDF for iOS via App Store. Now click on the "Tools" > "OCR".
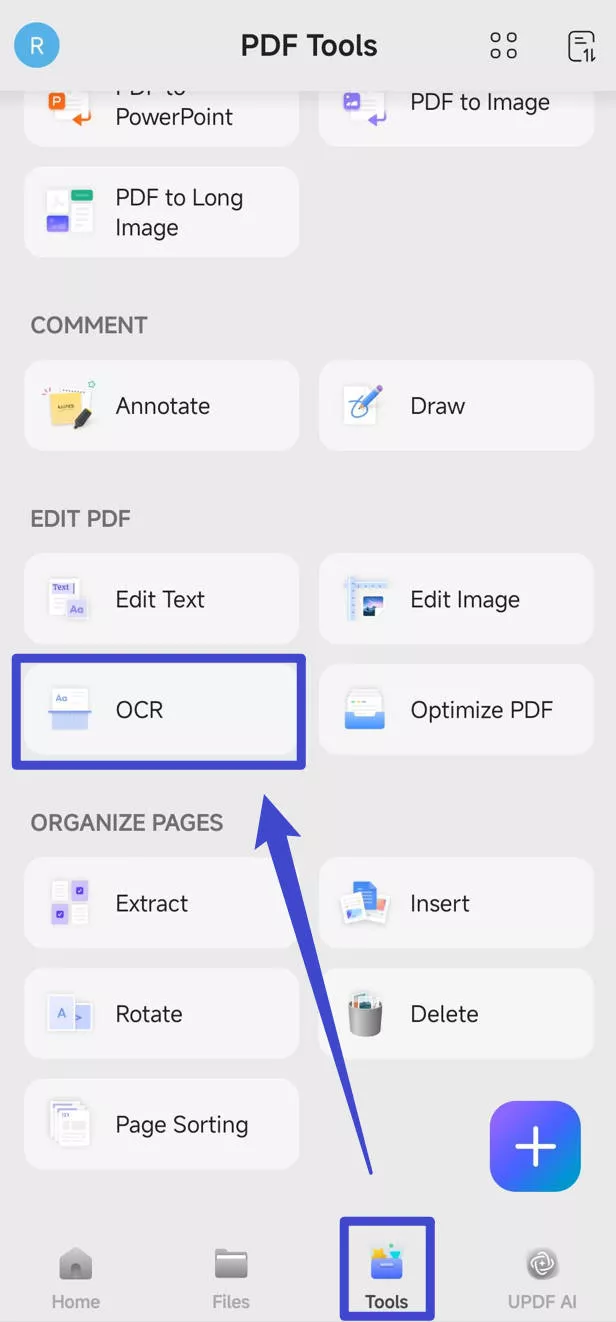
Step 2: Tap to select the document language, then, tap on the "Done" to perform OCR.

If you still have questions about UPDF's OCR feature, watch the video below.
OCR is not the only feature that UPDF has. You can download UPDF right now by clicking the button below to try UPDF yourself.
Windows • macOS • iOS • Android 100% secure
Part 3. How to Remove OCR from PDF by Converting Back
If you need to revert the OCR result and convert the OCRed PDF back to an image-based PDF, you can use UPDF to convert the OCRed PDF back to a scanned or image-only PDF. With UPDF, you can achieve this in two ways. You can use either method, whichever suits you.
Just download UPDF. Open the scanned OCR-processed file with UPDF. Either right-click on the file in the folder and click on "Open with > UPDF", or the "Open File" tab you will see on the screen when you open the UPDF app.
Windows • macOS • iOS • Android 100% secure
Once your file is open, use one of the options below:
Way 1. Use Image Only Feature
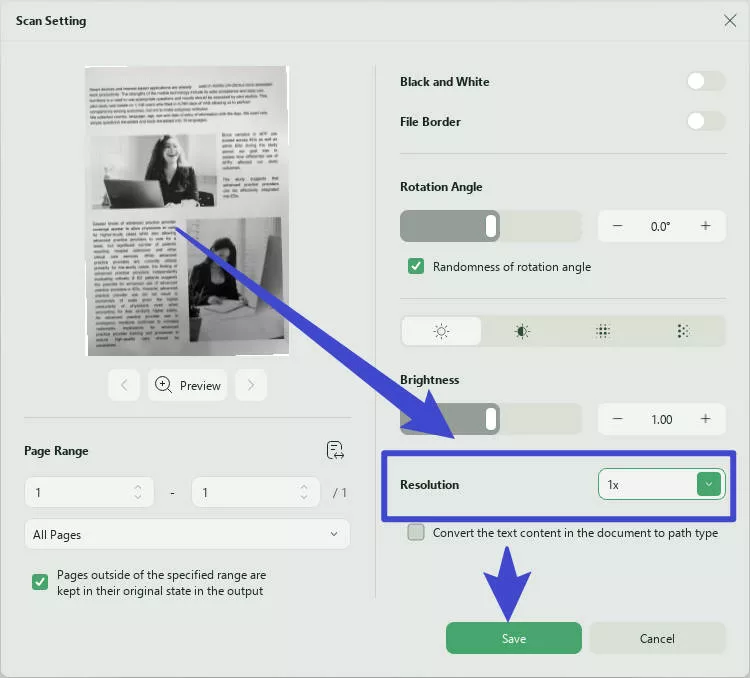
Step 1. From the panel of tool icons on the right, click on the "Arrow Down" icon.

Now, choose the "3x" in the resolution to get a clear scanned PDF. Click on the "Save" to convert the PDF back to image only PDF.
Way 2. Print as Image
You can use the print feature. In the UPDF, click the narrow next to "Save" and choose the "Print..." option.

The print window will open. Select the "Print As Image" option. On the top right, select the printer as "Microsoft Print to PDF". You can also specify the page range and size if you want but generally, default settings are made suitable to save the file as PDF by itself.
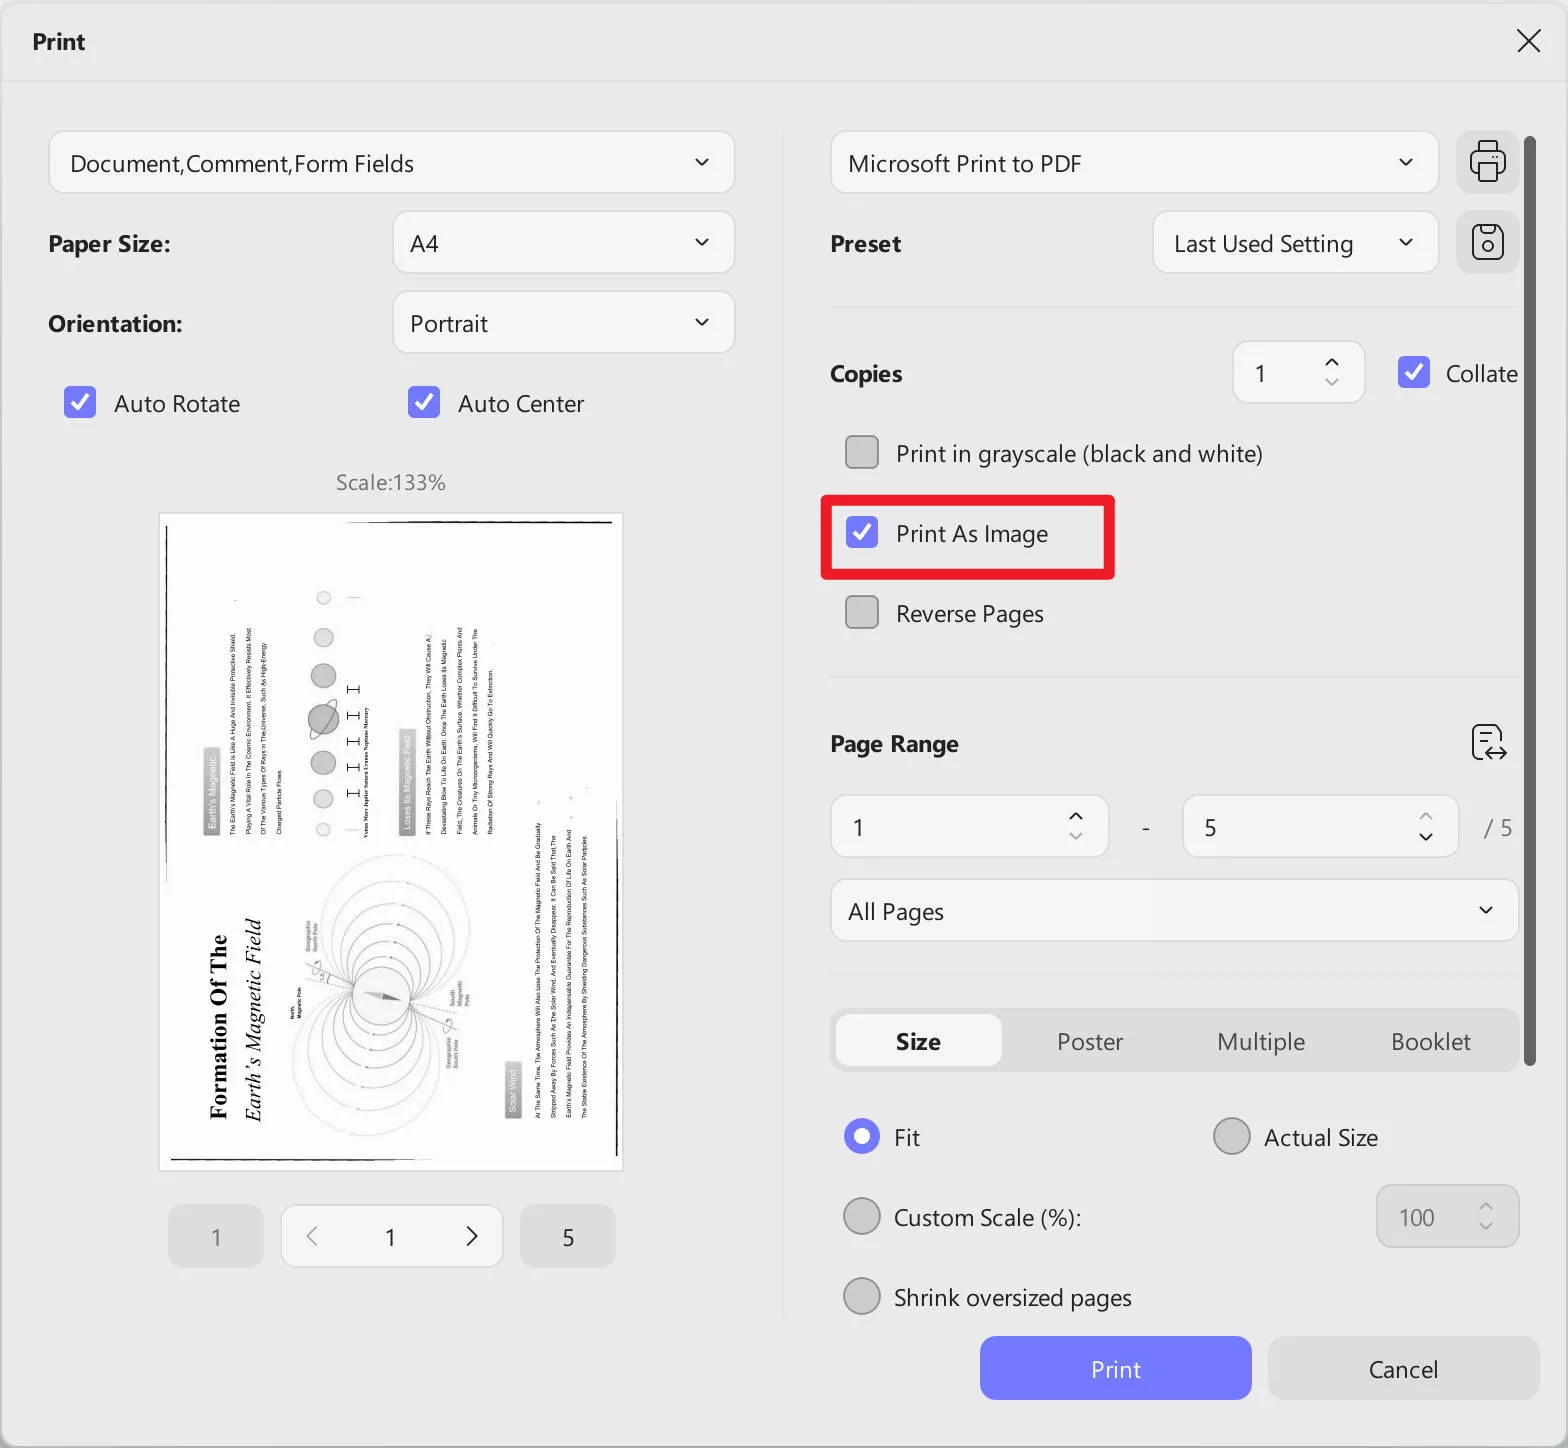
Then click on the "Print" button at the bottom and you will be prompted to save the file in the desired folder. The file will be saved as an image PDF file similar to the scanned file before OCR.
UPDF has many other features besides the OCR tool. It is a complete package of PDF reading and editing tools. Any PDF file text or scanned or OCR processed can be worked on with UPDF. You can edit text or images, annotate, add comments, redact, password protect, stamp, sign, fill forms, crop pages, change page settings, and merge or split files.
Even if the file size is too large to attach to an email, you can share by creating a link or QR code. Also, you get cloud storage with a UPDF subscription to save any files and access them from anywhere.
One of the coolest features is the integrated AI in UPDF. It is not just a chatbot but can also translate, summarize, and explain the PDF document.
To learn more about UPDF, you can read this review article. To test all these features, download UPDF right now. And to enjoy all of its features, you can upgrade to UPDF pro at a big discount.
Windows • macOS • iOS • Android 100% secure
Part 4. FAQS About Removing OCR from PDF
Q1. How to Remove OCR Text from PDF?
Open your OCRed PDF file with UPDF. Then pick the "Edit" in "Tools" from the panel of tools on the left. Move the cursor over the text and you will see the text lines surrounded by dashed lines. Right-click on the text and click on the "Delete" from the menu option.
Q2. How to Remove OCR from PDF Online Free?
To remove OCR from PDF online, go to ilovepdf.com and upload your OCRed PDF file. To remove OCR, use the "Convert" tool and convert the PDF to an image file. Download the file and then upload this image file again to the same platform and then convert the image file to a PDF file. This will make the editable PDF file into an image PDF file.
Final Words
Converting a scanned PDF file to a text editable file using OCR is easier and there are many apps to do so. However, removing OCR from PDF like removing OCR layers and converting the file back to its original status is a little difficult. However, this task is easier with UPDF. You can also use UPDF's OCR to OCR the PDF because you do not get the desired result with other tools, so that you want to remove the OCR from PDF. It is even easier as the OCR quality is much better with UPDF than other competitor software. Plus, you get a lot more with UPDF at a much lower price. Download UPDF right now and unhinge your ability to work with any PDF file.
Windows • macOS • iOS • Android 100% secure


 Enola Miller
 Enola Davis
 Engelbert White