UPDF for Windows
 UPDF for Mac
 UPDF for iPhone/iPad
 UPDF for Android
 UPDF AI Online
 UPDF Sign
 Edit PDF
 Annotate PDF
 Create PDF
 PDF Form
 Edit links
 Convert PDF
 OCR
OCR PDF to Word
 PDF to Image
 PDF to Excel
 Organize PDF
 Merge PDF
 Split PDF
 Crop PDF
 Rotate PDF
 Protect PDF
 Sign PDF
 Redact PDF
 Sanitize PDF
 Remove Security
 Read PDF
 UPDF Cloud
 Compress PDF
 Print PDF
 Batch Process
 About UPDF AI
 UPDF AI Solutions
 AI User Guide
 FAQ about UPDF AI
 Summarize PDF
 Translate PDF
 Chat with PDF
 Chat with AI
 Chat with image
 PDF to Mind Map
 Explain PDF
 PDF AI Tools
 Image AI Tools
 AI Chat Tools
 AI Writing Tools
 AI Study Tools
 AI Working Tools
 Other AI Tools
 PDF to Word
 PDF to Excel
 PDF to PowerPoint
 User Guide
 UPDF Tricks
 FAQs
FAQs UPDF Reviews
 Download Center
 Blog
Blog Newsroom
 Tech Spec
 Updates
 UPDF vs. Adobe Acrobat
 UPDF vs. Foxit
 UPDF vs. PDF Expert
Are you a Photoshop enthusiast looking to combine your graphics into a PDF? We get it!
Photoshop is ideal for creating high-resolution brochures, business cards, or portfolio designs. Turning these into PDFs lets you share them across platforms without compatibility issues.
If you want to know how to create a PDF in Photoshop, we can help. This article provides two practical ways to create single and multi-page PDFs in Photoshop.
However, Photoshop can be technical. If you want an easier alternative, try UPDF. It allows you to create PDFs from scratch, convert other file types into PDFs, and more. Download UPDF via the below to convert all your graphics to PDF directly!
Windows • macOS • iOS • Android 100% secure
Let's get started.
Part 1. Create PDF in Photoshop
If you want to convert a single-page file into a PDF, Photoshop offers a simple solution. Once you’ve created your design, you can just export it in PDF format. Here’s how it works.
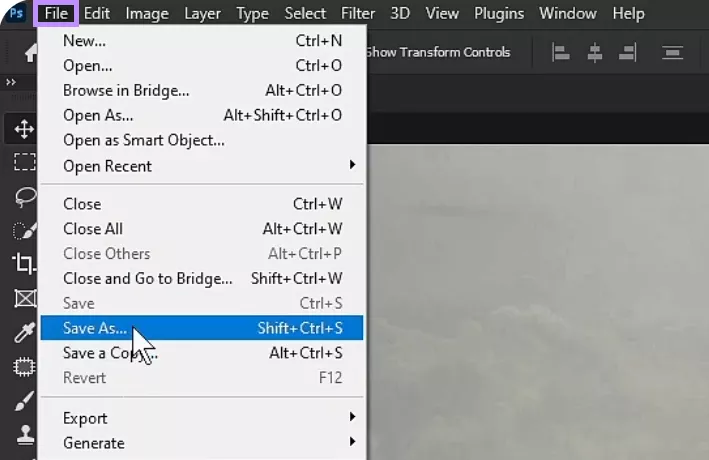
Step 1: Open your desired project in Photoshop and go to “File.” Then click “Save as.”
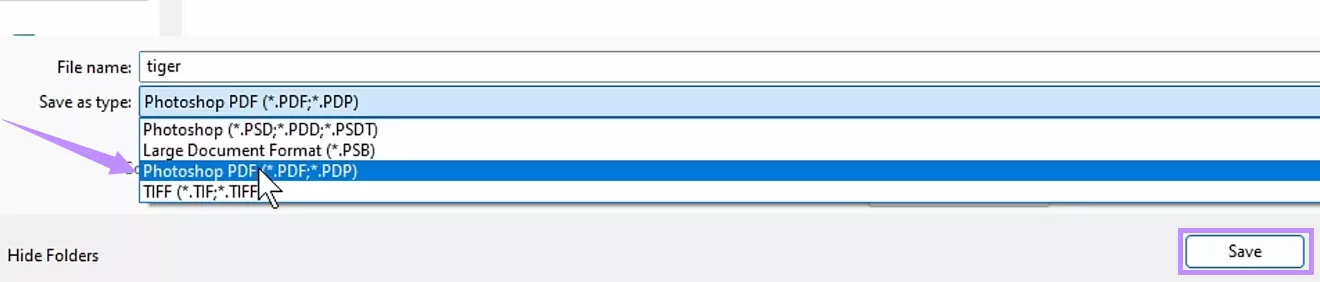
Step 2: A popup will appear. Click the “Save as type” dropdown and select “Photoshop PDF” from the list. Then click “Save.”
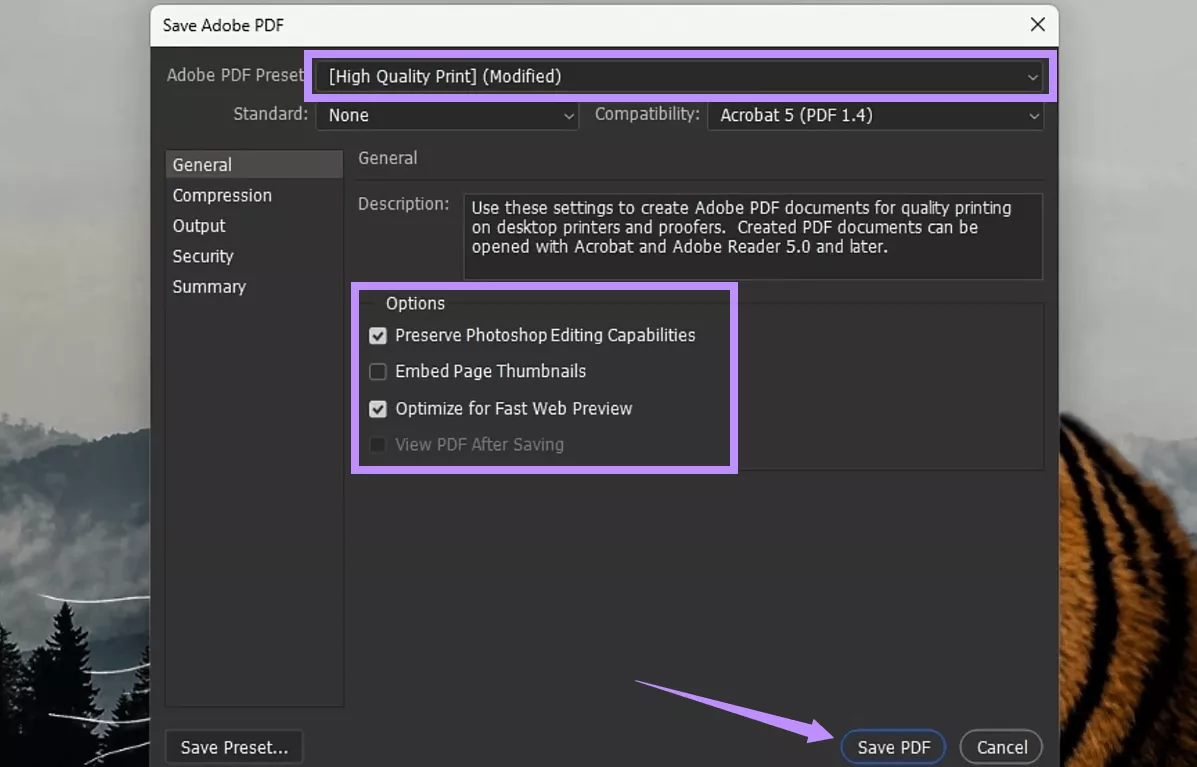
Step 3: Click “OK” on the dialogue box. This will open a Save Adobe PDF window. From here, click the Adobe PDF Preset dropdown and select,
- “High Quality Print” for PDF documents will printed in high quality.
- “Smallest File Size” if the PDF is only for digital distribution.
Step 4: Check the Options for “Preserve Photoshop Editing Capabilities” and “Optimize for Fast Web Preview.” Then, click “Save PDF.”
Part 2. Create a Multi-Page PDF in Photoshop
Sometimes, you may need to create a PDF with multiple pages. This can be helpful in various scenarios, such as creating lookbooks, portfolio presentations, or layouts. In all cases, combining multiple images into a PDF lets you showcase your work in an organized way.
So, how do we create a multi-page PDF in Photoshop?
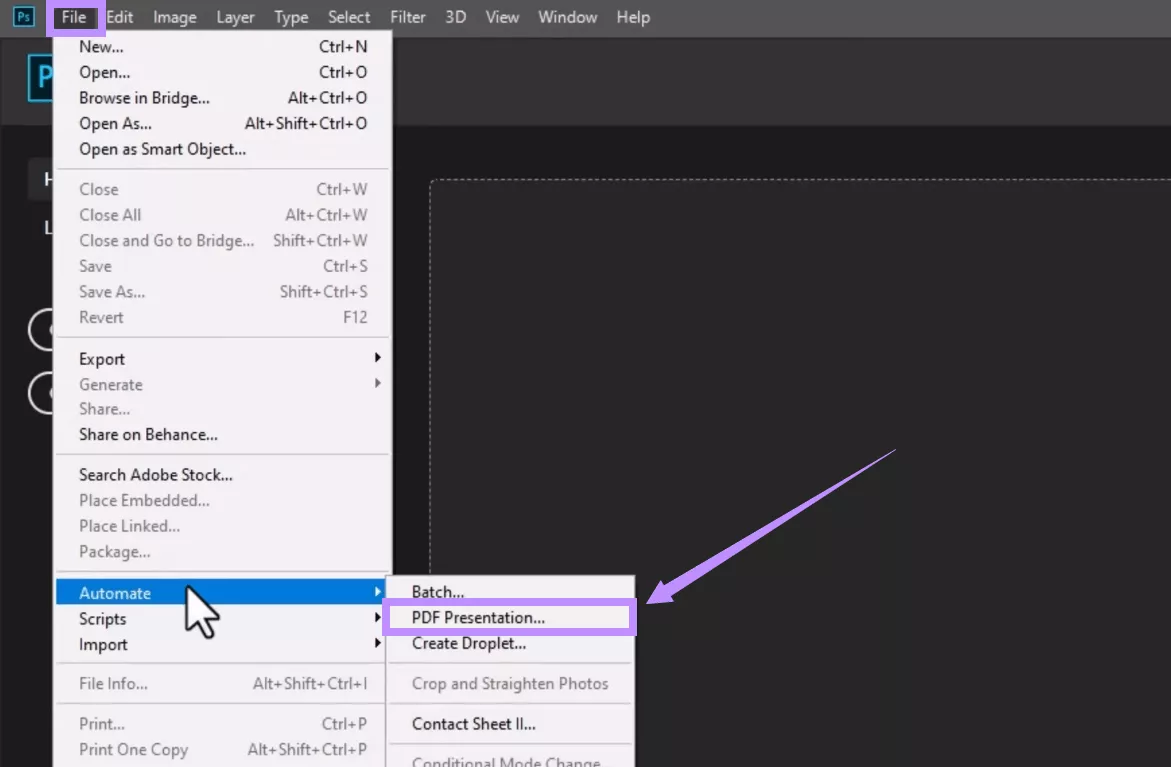
Step 1: Open Photoshop and go to the “File” menu. Click “Automate” and choose “PDF Presentation” from the list.
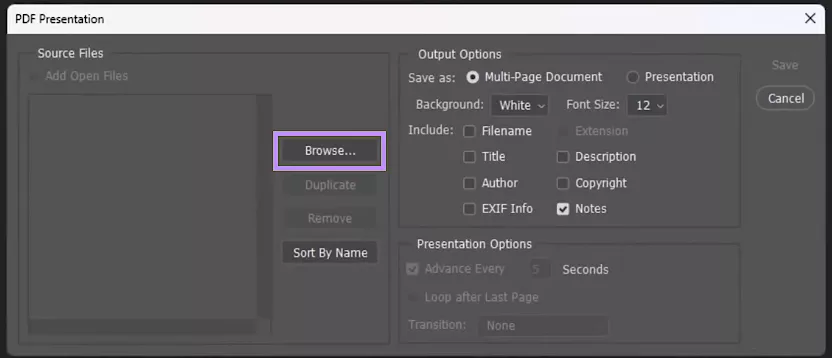
Step 2: Click “Browse” from the popup. Select pictures to create the PDF from images and click “Open.”
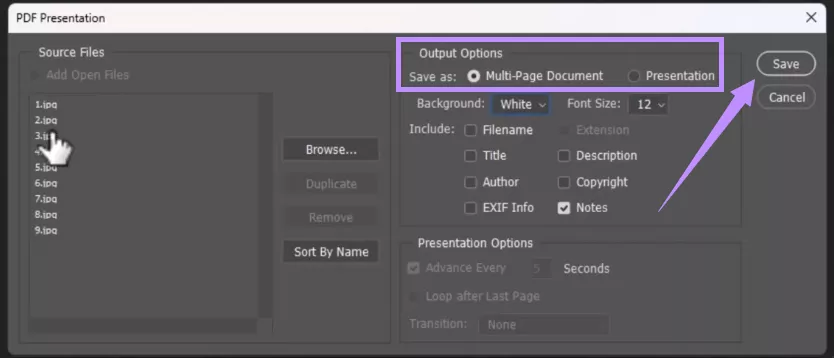
Step 3: Your images will be listed under the Source Files section. To adjust their sequence, drag them up or down.
Step 4: Under Output Options, select “Multi-Page Document.” Then click “Save” and select where to save your PDF.
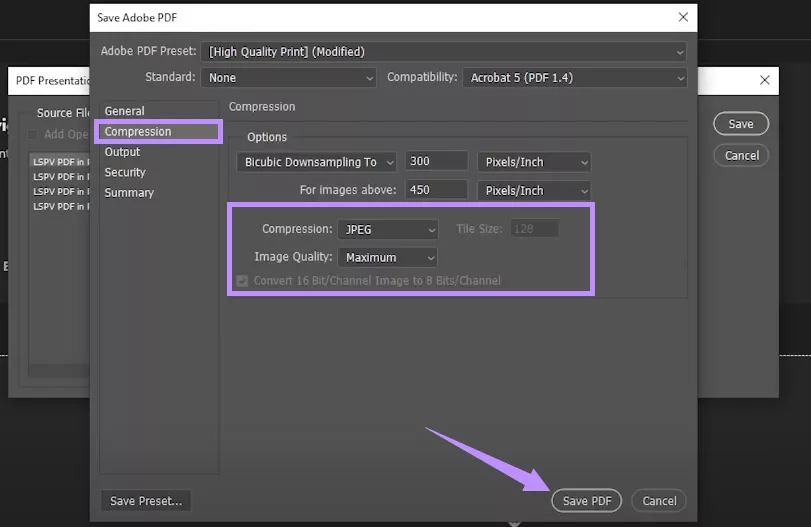
Step 5: Click the Adobe PDF Preset dropdown from the new window and choose “High Quality Print.”
Step 6 To reduce the PDF’s file size, click “Compression” from the left. Then,
- Click the Compression dropdown and choose “JPEG.”
- Click the Image Quality dropdown and select your desired quality from minimum to maximum.
Step 7: Once you’re done with settings, click “Save PDF” to create a multi-page PDF in Photoshop!
Part 3. Issues to Create a PDF with Photoshop
Now you know how to create a PDF in Photoshop! While Photoshop is an excellent photo editor, it is not the best for creating PDFs. Here’s why:
- Creating Editable or Fillable PDFs: You cannot create interactive or fillable PDFs where users input text and click checkboxes.
- Difficult to Use for Beginners: Creating a PDF in Photoshop requires a solid understanding of layers, resolution settings, and export options. This can be confusing for beginners.
- Editing PDFs Later: PDFs saved from Photoshop get flattened. This makes it difficult to edit specific elements such as text, images, shapes, etc.
- High Cost: Photoshop is an expensive program, making it less practical for those who don’t need its full range of features.
Part 4. A Better Way to Create a PDF - UPDF
After learning the limitations of creating a PDF with Photoshop, you may wonder, “Is there an easier and cheaper solution?” Well, there is!
Let us introduce you to UPDF, your one-stop solution to creating and editing PDFs with ease. Whether designing a flyer, brochure, business layout, or anything else, UPDF gives you complete control over creating professional-quality PDFs.
Why choose it? Here are the key reasons:
- UPDF offers affordable price plans. Buy it at a cheaper price today for an accessible solution to creating PDFs and more!
- You can create PDFs from images, blank pages, and various formats like Word, PPT, etc.
- You can create editable, fillable, password-protected PDFs and more.
- It lets you add all elements to PDFs, such as text, images, links, shapes, and stickers.
- It supports Windows, Mac, Android, and iOS. Plus, you can use one licence for all platforms.
So, download UPDF! Then, use the following guide to create a PDF without hassle.
Windows • macOS • iOS • Android 100% secure
Method 1. Create PDF from a Blank Page
If you want to create a PDF from scratch, this method can be helpful.
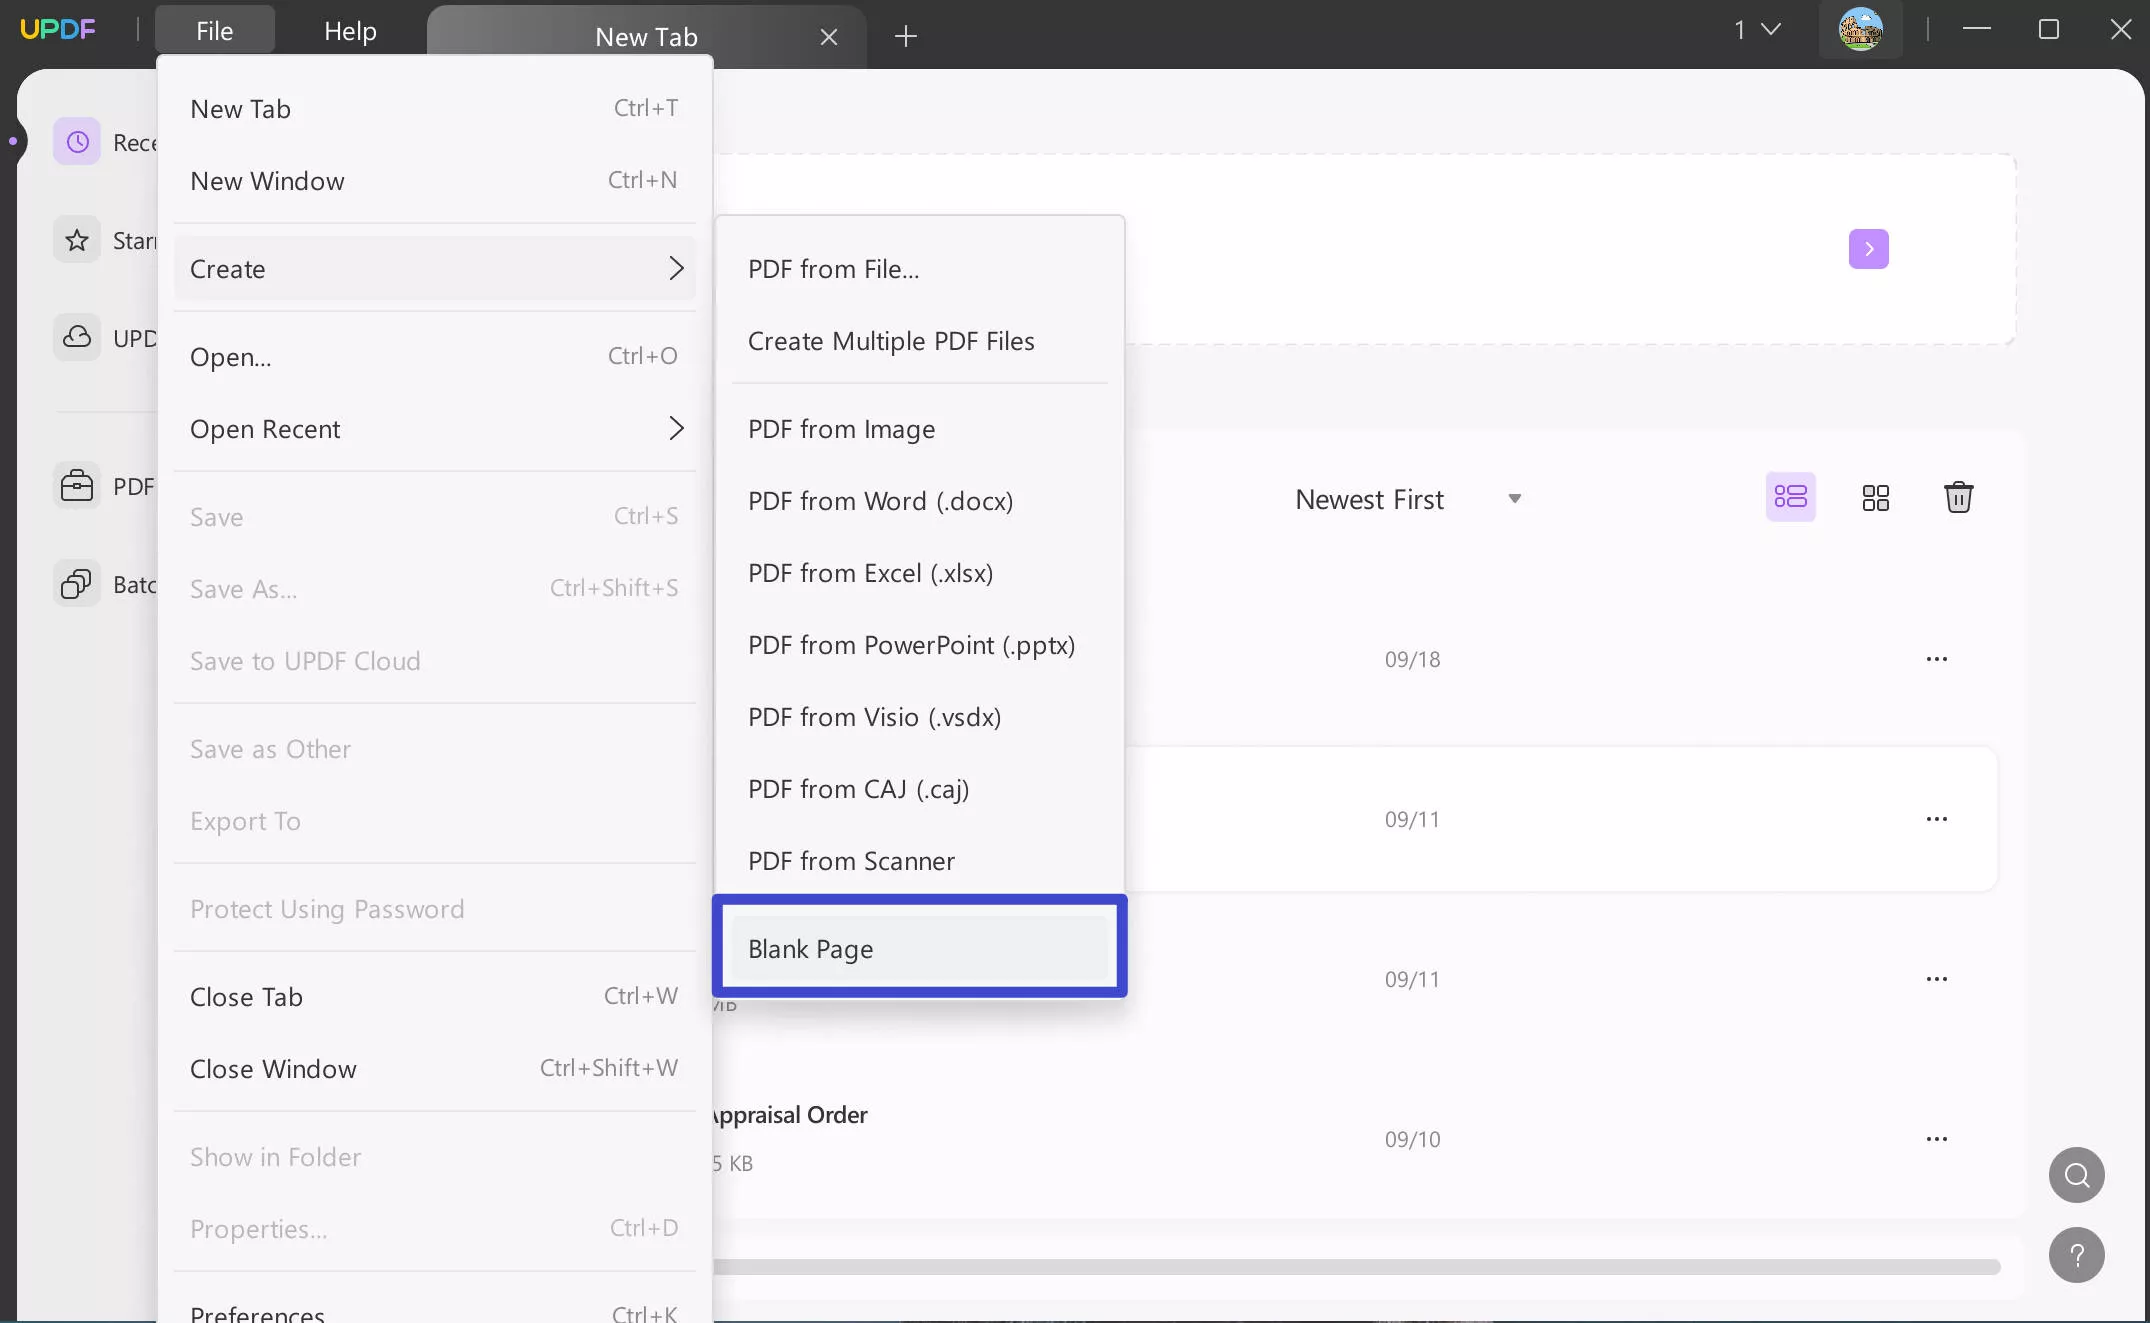
Step 1: Open UPDF and click “File” from the top. Then select “Create > Blank Page.” This gives you a blank canvas to add your desired elements.
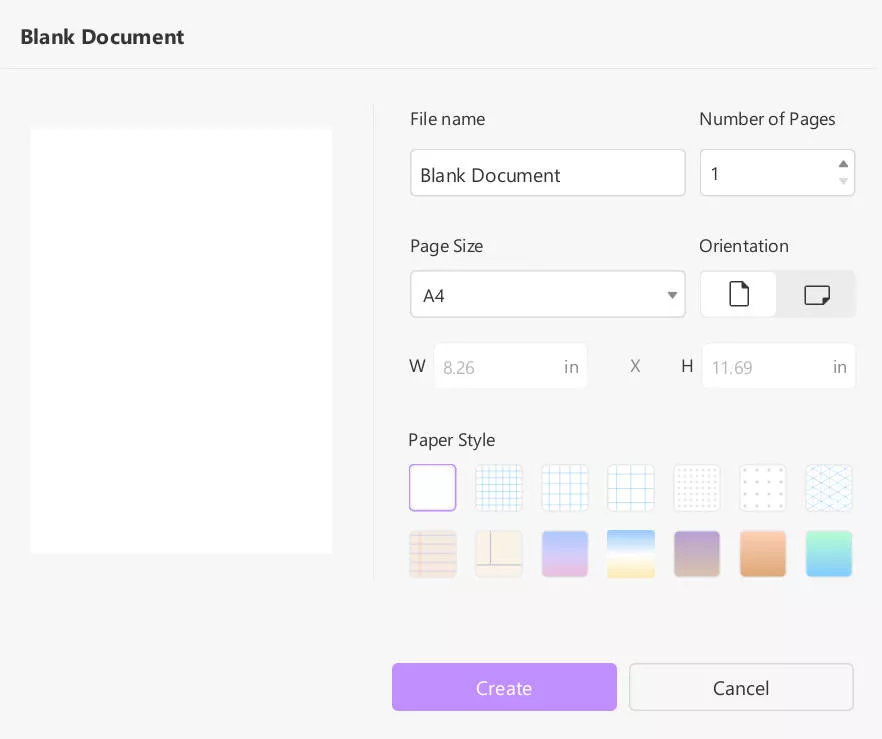
Step 2: A popup will appear. Adjust the document settings, such as file name, number of pages, page size, etc. Then, click “Create.”
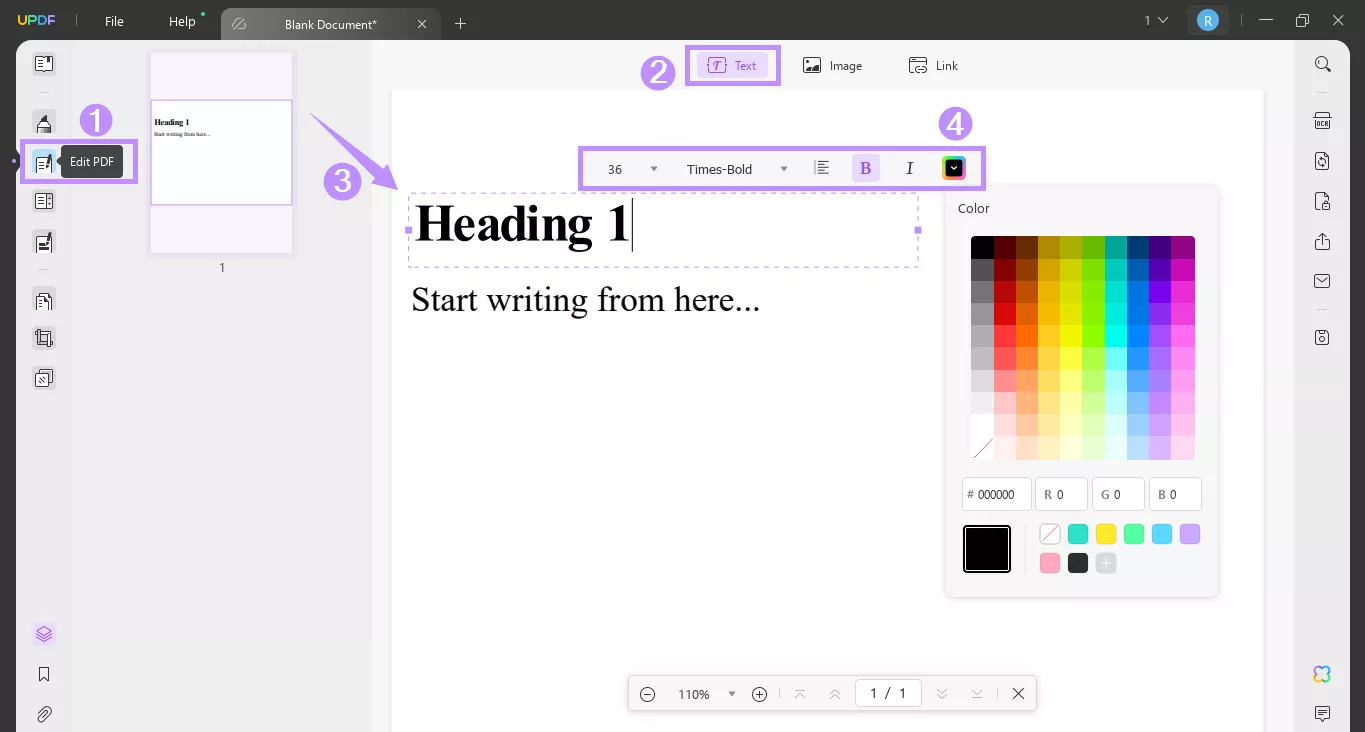
Step 3: Select “Edit PDF” from the left to add elements to your PDF. Then select “Text” from the top toolbar.
Step 4: Click where you need to add text. Then, type in anything you need. Use the toolbar to customize the text’s style, alignment, and color.
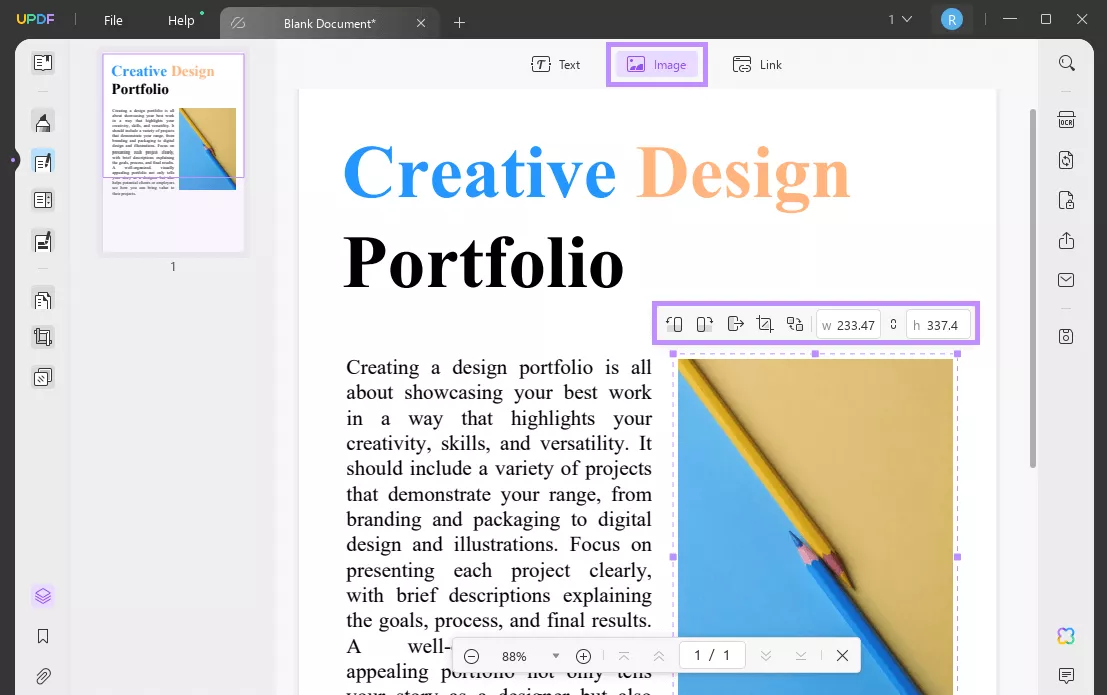
Step 5: To add images to PDF, select “Image” from the top and click where you want to insert an image. Then, upload the picture from your device. Alternatively, you can copy/paste it.
Step 6: Drag the edges of the image to adjust its size. Use the toolbar above the image to rotate, crop, or replace it. Once done, go to “File > Save” to save your new PDF.
Method 2. Create PDF from Images
If you have images of your designs, you can create a PDF from them. Here’s how:
Step 1: Click “File > Create” and select “PDF from Image.”
Step 2: Upload your images. You’ll see the prompt asking to combine them into one PDF. Select “Yes” if you agree.

That’s it. You have created a PDF with UPDF in just minutes! But there is a lot more you can do with it. It is packed with powerful tools such as converting, annotating, organizing PDFs, and more. Watch the video below or read this review to learn more about it!
Ending Note
That’s a wrap on how to create a PDF in Photoshop! Whether you want to create a single or multi-page PDF, Photoshop makes it possible. However, the lack of creating editable and fillable PDFs and associated high pricing make it less than the best.
If you want to create high-quality PDFs at low cost, try UPDF. You can start from a blank canvas, fill it in with creative elements and text, convert other formats to PDF, and more. So, download UPDF and start creating editable PDFs without hassle.
Windows • macOS • iOS • Android 100% secure


 Delia Meyer
 Enola Miller
 Lizzy Lozano