 UPDF for Windows
 UPDF for Mac
 UPDF for iPhone/iPad
 UPDF for Android
 UPDF AI Online
 UPDF Sign
 Edit PDF
 Annotate PDF
 Create PDF
 PDF Form
 Edit links
 Convert PDF
 OCR
OCR PDF to Word
 PDF to Image
 PDF to Excel
 Organize PDF
 Merge PDF
 Split PDF
 Crop PDF
 Rotate PDF
 Protect PDF
 Sign PDF
 Redact PDF
 Sanitize PDF
 Remove Security
 Read PDF
 UPDF Cloud
 Compress PDF
 Print PDF
 Batch Process
 About UPDF AI
 UPDF AI Solutions
 AI User Guide
 FAQ about UPDF AI
 Summarize PDF
 Translate PDF
 Chat with PDF
 Chat with AI
 Chat with image
 PDF to Mind Map
 Explain PDF
 PDF AI Tools
 Image AI Tools
 AI Chat Tools
 AI Writing Tools
 AI Study Tools
 AI Working Tools
 Other AI Tools
 PDF to Word
 PDF to Excel
 PDF to PowerPoint
 User Guide
 UPDF Tricks
 FAQs
FAQs UPDF Reviews
 Download Center
 Blog
Blog Newsroom
 Tech Spec
 Updates
 UPDF vs. Adobe Acrobat
 UPDF vs. Foxit
 UPDF vs. PDF Expert
Bookmarks are a great way to mark important sections in a Word document. You can insert a bookmark anywhere in the document so that you can locate the information quickly. Here we will answer some basic questions like what Bookmarks are, how to insert them, and remove them. If you are facing a problem inserting bookmarks, we will suggest the possible reason. Additionally, we will also let you know a bonus tip on how to insert a bookmark in a PDF file.
If you are using PDF and want to add a bookmark, you can click the below button to download UPDF to insert directly.
Windows • macOS • iOS • Android 100% secure
Part 1. What is a Bookmark in Word?
Bookmarks were traditionally used in printed books to mark specific pages that can be accessed when needed. In electronic Word files, bookmarks are electronic marks that can be inserted anywhere in the file. Especially if you are working with a large document in which you do not want to use a highlighter to mark any text, bookmarks are a great way to mark the section. Bookmarks are also helpful if you want to jump quickly from one place in the document to the next location. These are especially helpful if you want to keep track of a specific section or piece.
Part 2. How to Insert a Bookmark in Word?
To insert a bookmark in a Word file, follow these steps.
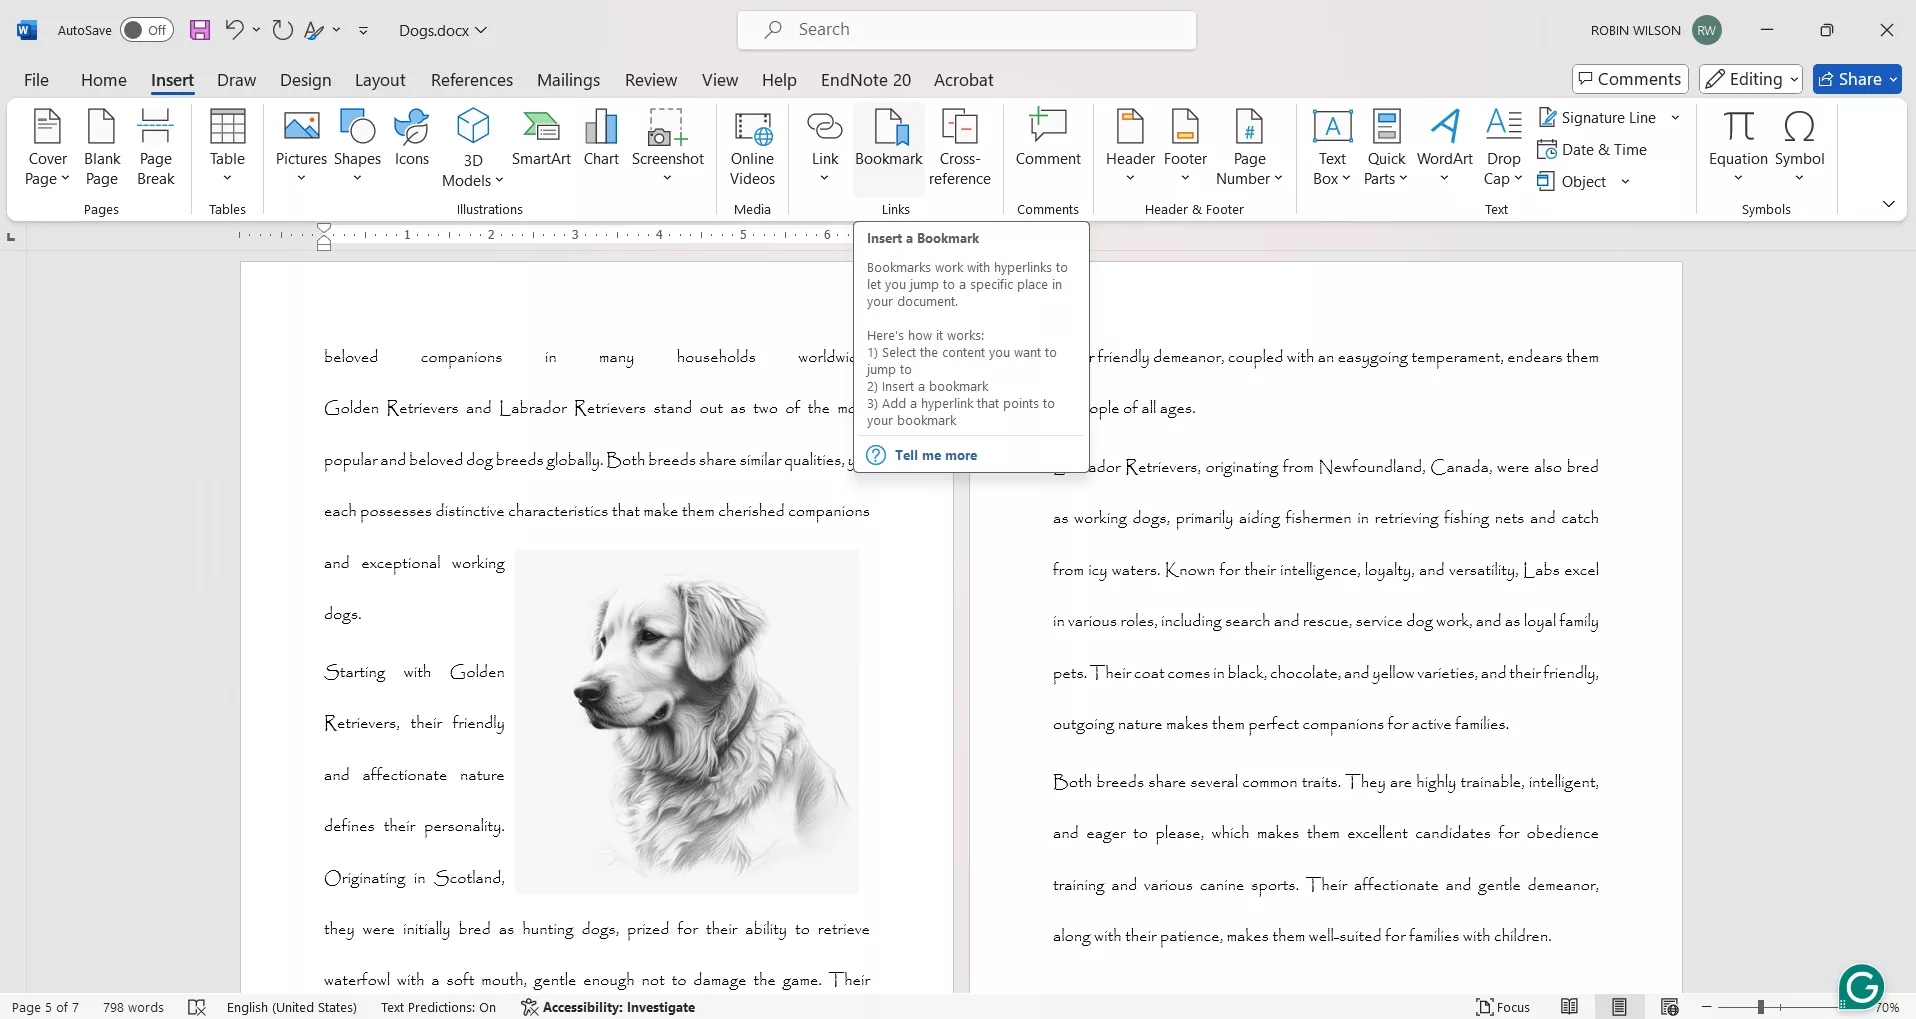
Step-1. Click on the “Insert” tab to open the insert tools on the top. You will see a “Bookmark” tab in the tools.

Step-2. Keep the cursor or select the text in the file where you want to insert the bookmark. Then click on the “Bookmark” tab. A bookmark window will appear on the screen. You will see a “bookmark name” box where you can name the bookmark. Once you type the name, click the “Add” button and a bookmark will be inserted. The name has to be a single word or phrase with no space.
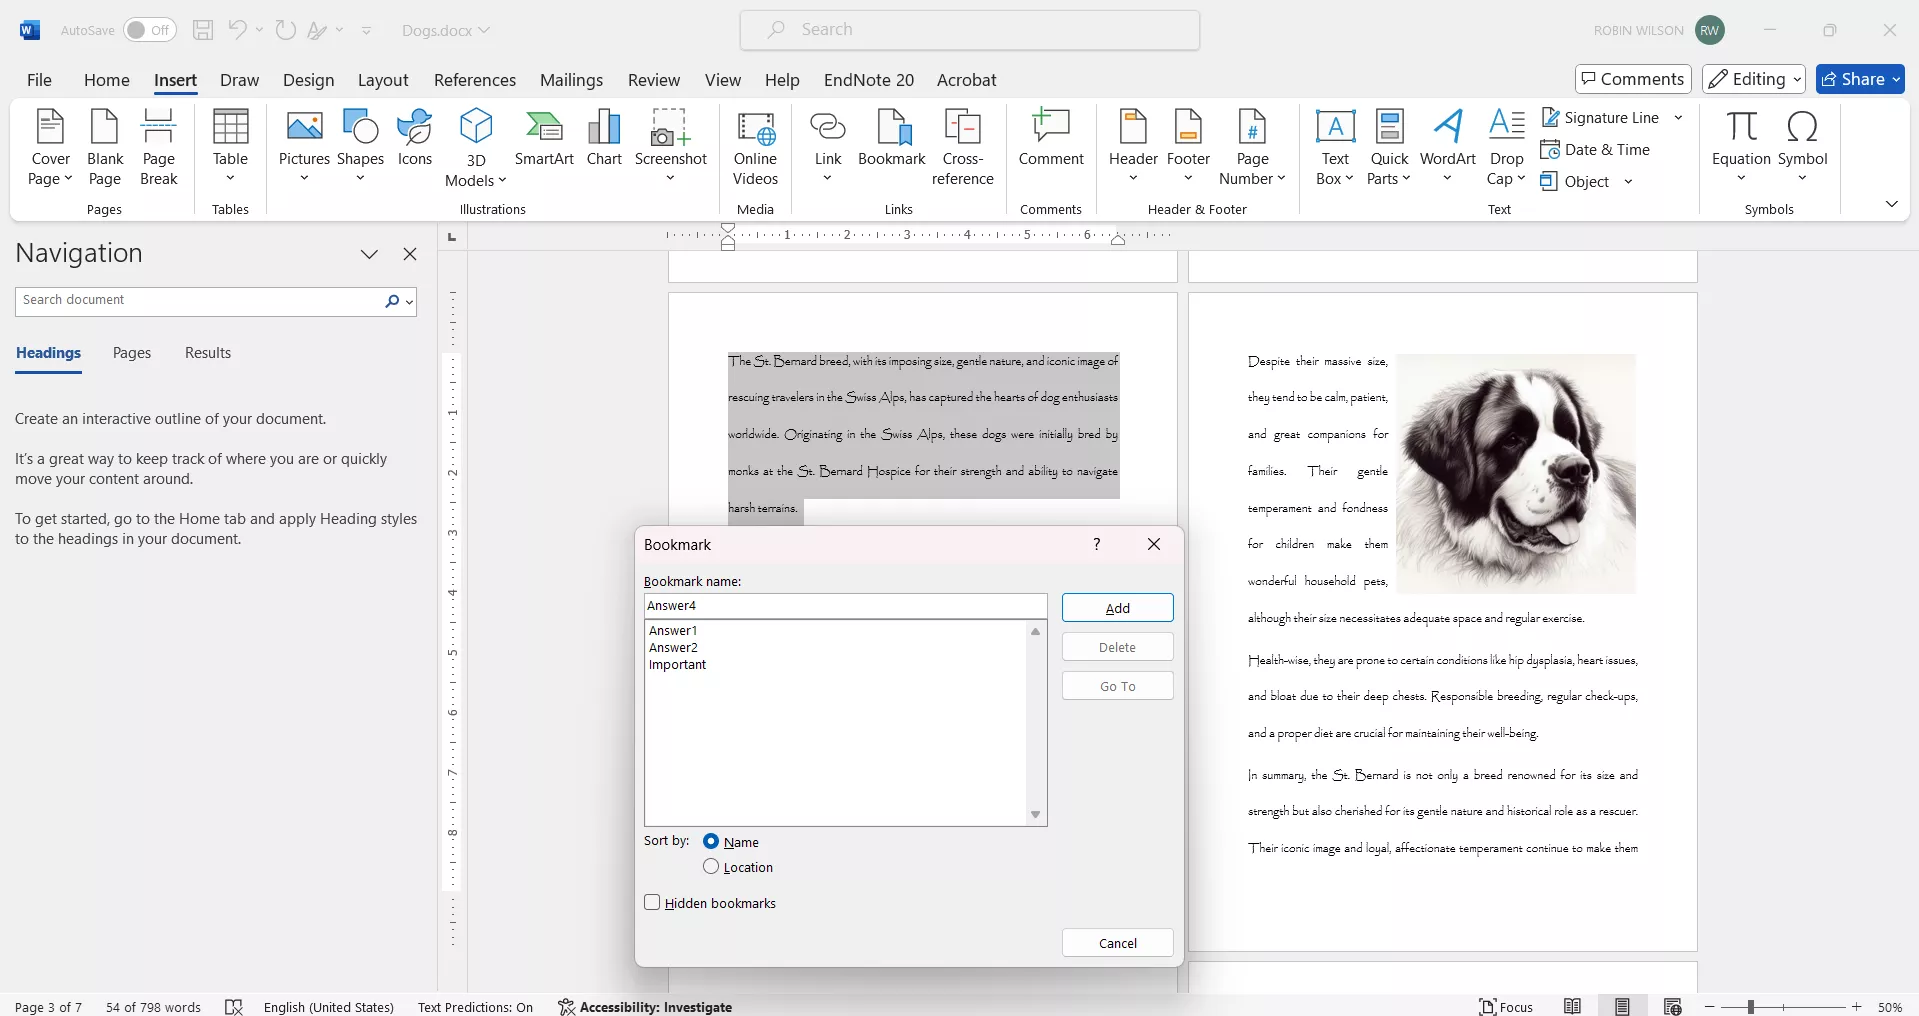
Step-3. Once you hit the “Add” button, the bookmark window will disappear. You can save the file by clicking the “Save” icon on the top left of the screen or the “Save” option in the “File” menu.
Part 3. How to View Bookmarks in Word?
Once you have inserted the bookmarks, you can view them using the following steps.
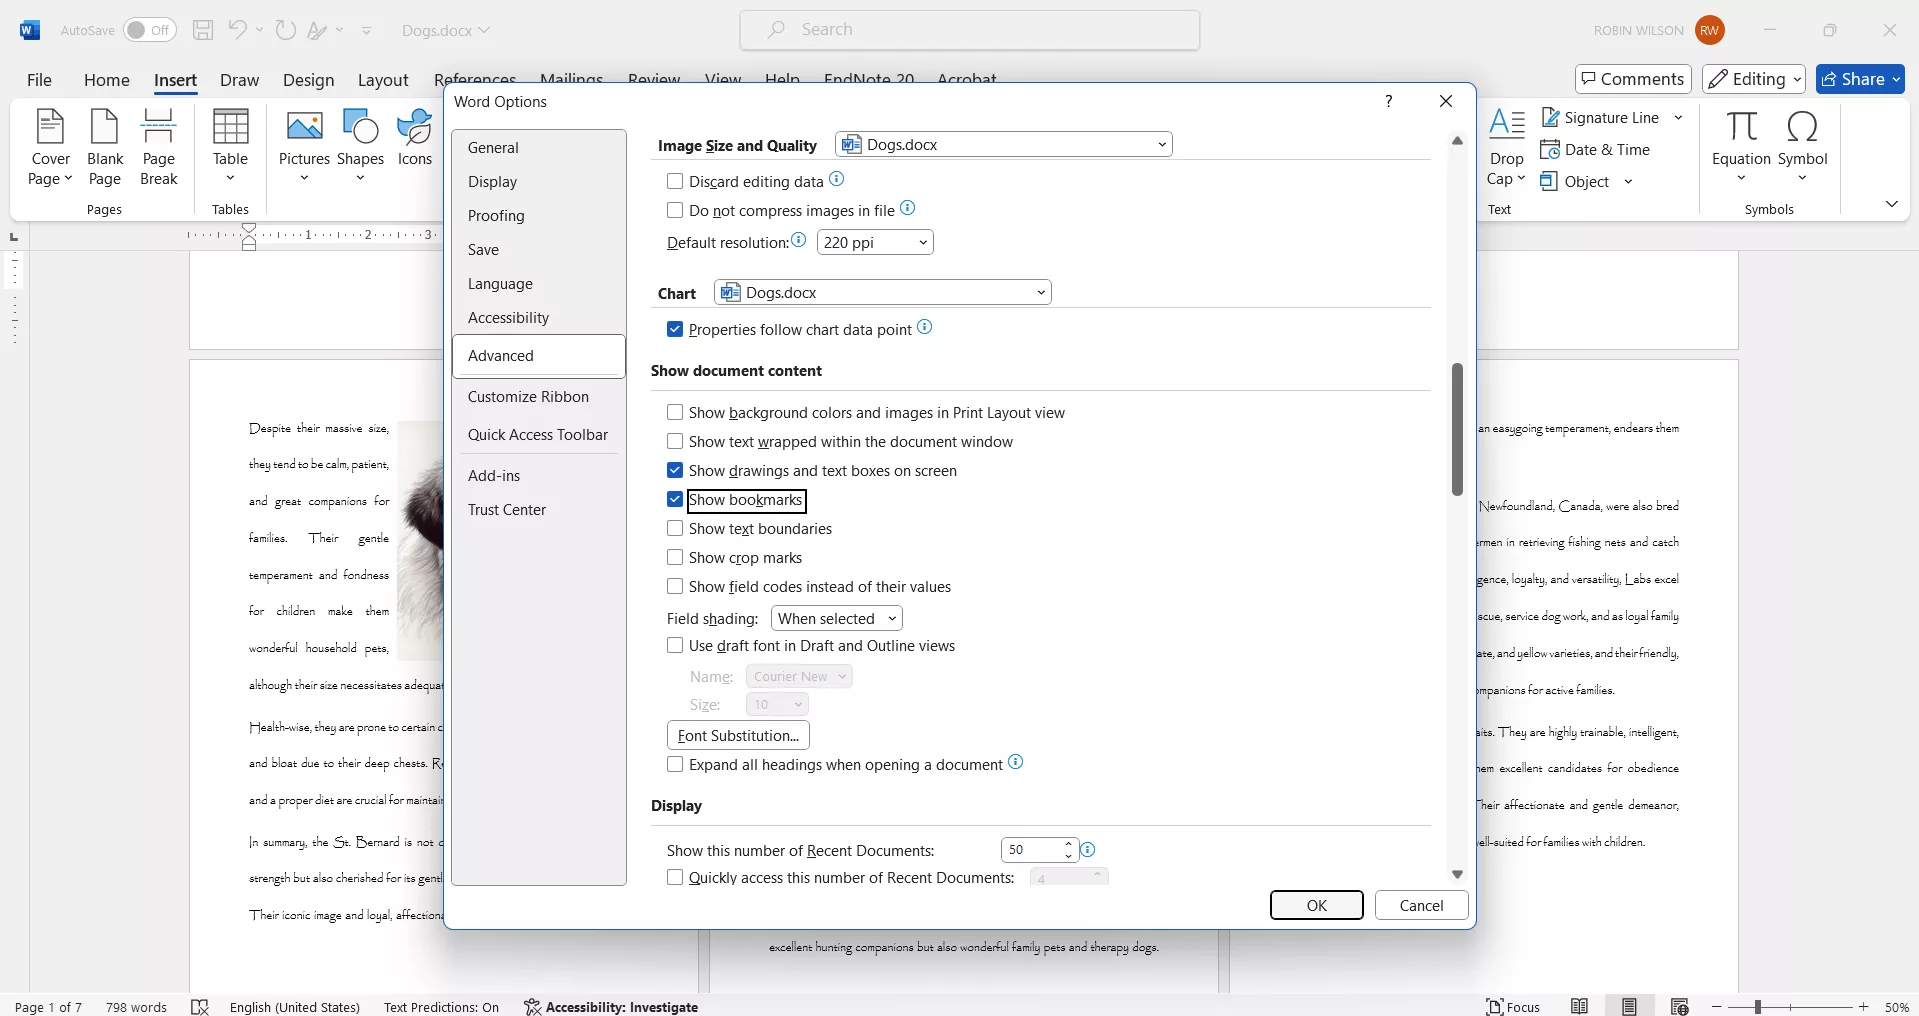
Step-1. Go to the “File” menu and then click “Options”.
Step-2. A “Word Options” window will appear. From the left side panel of tools, click “Advanced”. Then scroll down to “Show document content” and check the “Show bookmark” option. Then hit the OK button.
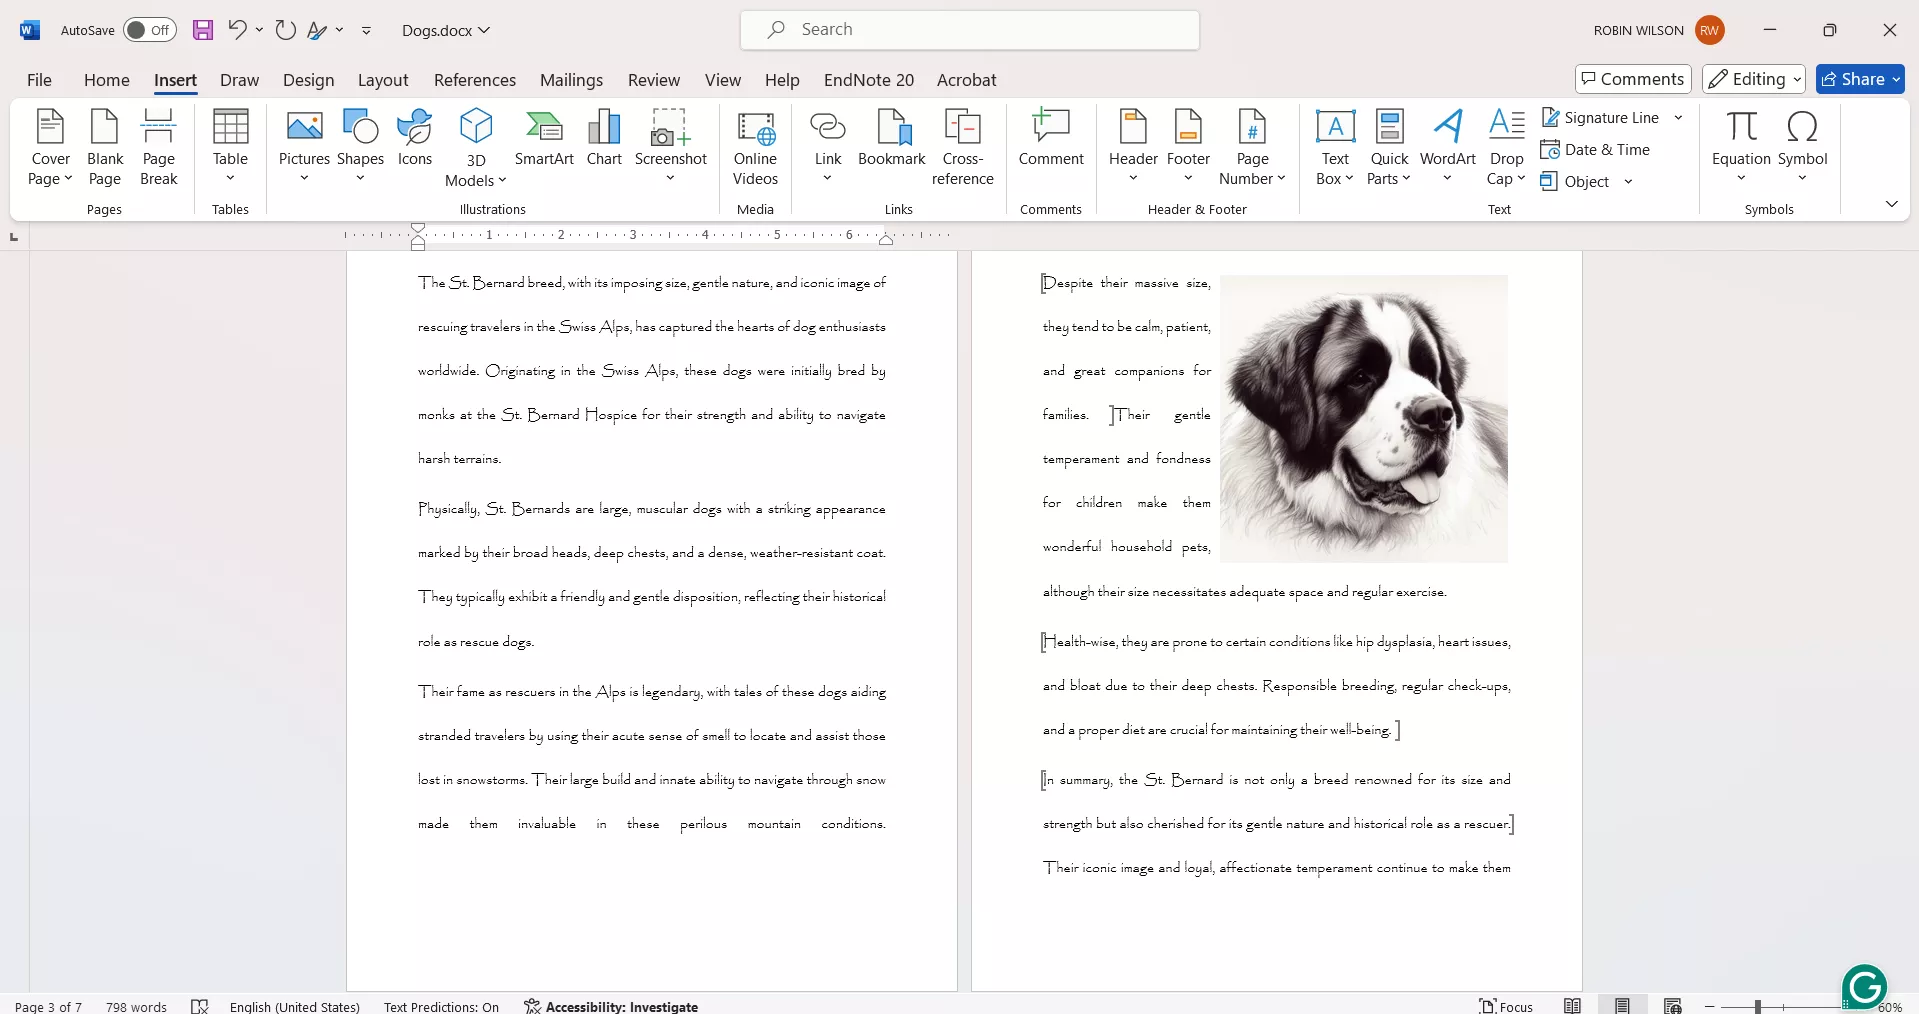
The bookmarked text or area will show up in square brackets.
Part 4. How to Remove Bookmarks in Word?
In case you have inserted a bookmark at the wrong place, or you no longer need that bookmark you may want to remove the bookmark. To remove the bookmark, follow these steps.
Step-1. Go to the “Insert” tab and a banner of tools will appear on the top. Click on the “Bookmark” icon to open a bookmark window.
Step-2. In the bookmark window, you will see the list of all the bookmarks. Click to select the one you want to delete. Hit the “Delete” button and the bookmark will be removed from the list.
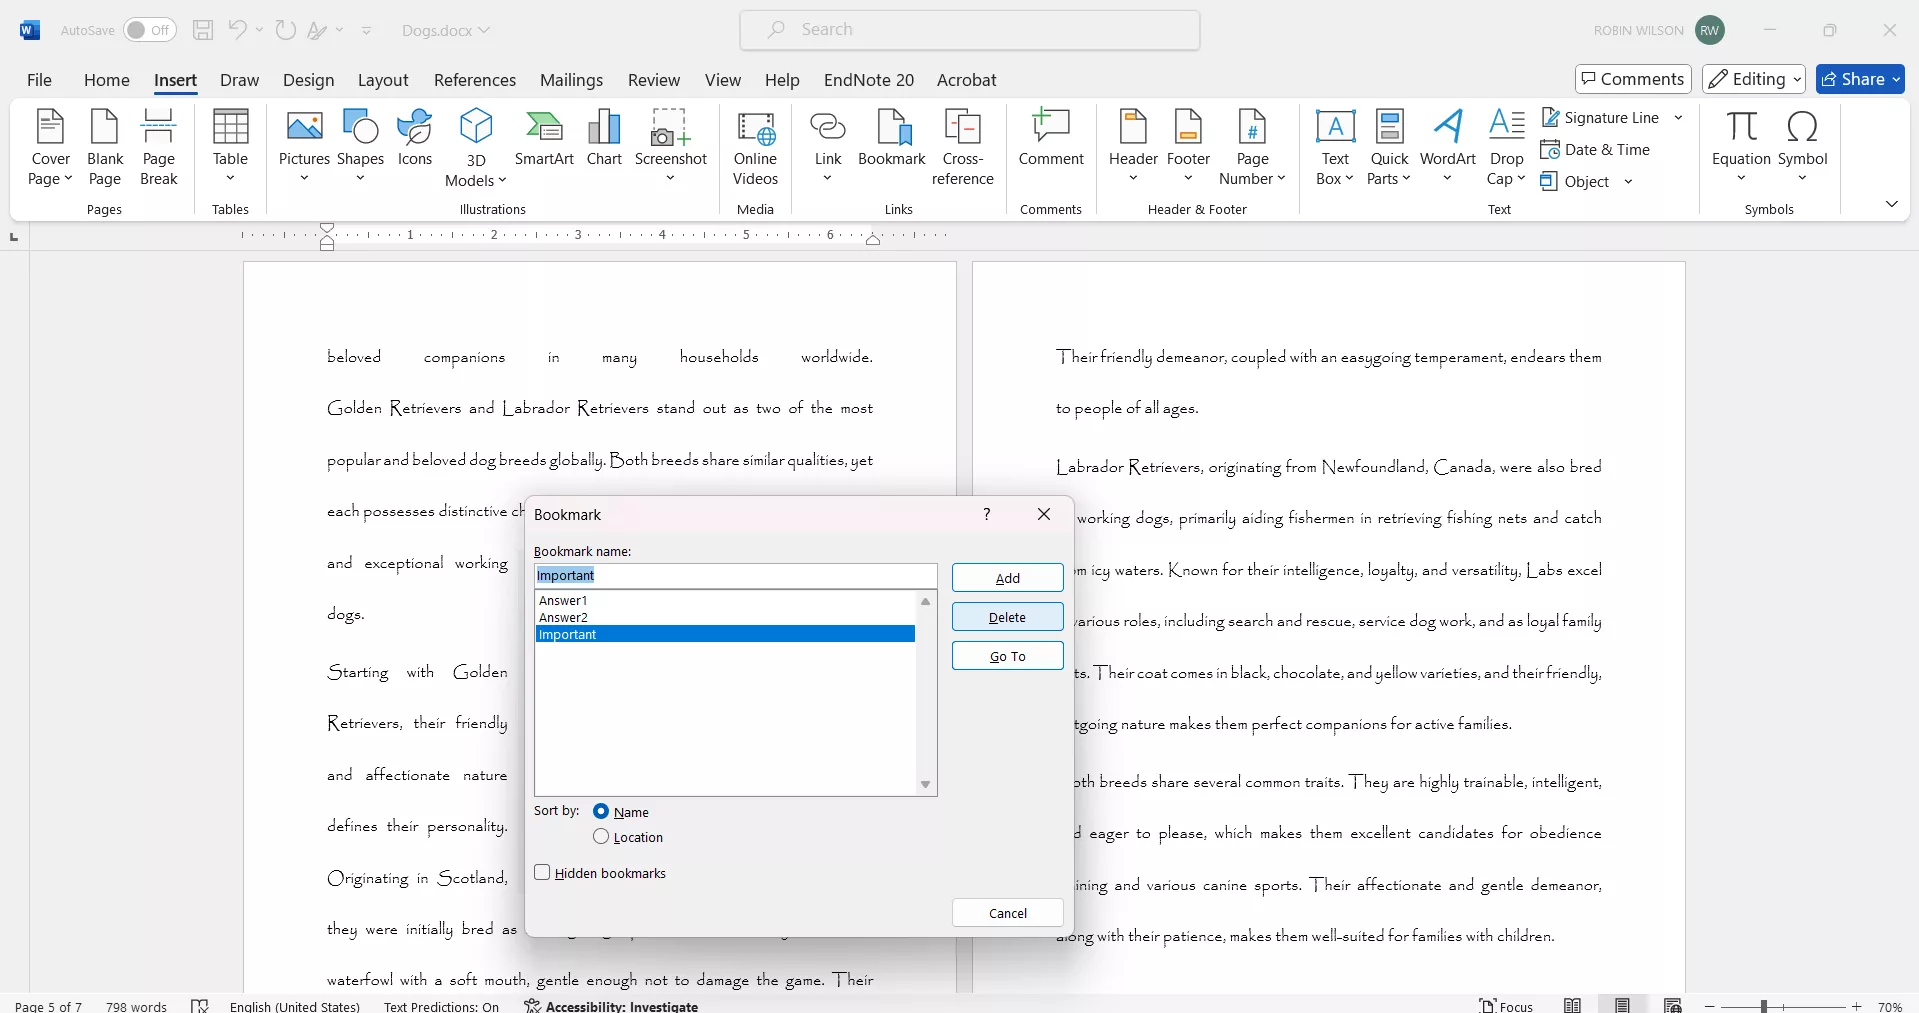
Step-3. Close the bookmark window and to save the changes, Click the “Save” icon on the top left of the window or use the “Save” option in the “File” menu.
Part 5. Why Can't I Add a Bookmark in Word?
There are a couple of reasons which may not allow you to add bookmarks. Some common reasons and their solutions are:
Space in the bookmark name: If you give a space in the bookmark name when you are inserting the bookmark, it will not allow you to add it. Try removing the space. The word or phrase should be continuous without space. If you want to insert a gap between words you can try using something like an underscore symbol.
Document Protection: If the document is protected, you may not be able to add bookmarks. Check if the document has editing restrictions and, if possible, remove them temporarily.
Compatibility issue: Sometimes if the file has been prepared and saved in a different format of Word, you may not be able to use all the features like inserting bookmarks. Try the “Save as” option in the file menu and save it as the current version of the office like “docx”.
Corrupted Word Installation: If the word installation has not been completed or is corrupted for some reason, you may not be able to use the bookmark function. Try repairing the office installation via the control panel.
Part 6. Bonus Tip: How to Add a Bookmark in PDF?
If instead of a Word file, you are working with a PDF file and you want to insert a bookmark, UPDF is a great PDF reading and editing software with which you can easily add bookmarks to your file. UPDF is a complete package of PDF editing and annotating tools. You can use UPDF for:
- Converting any file from and to PDF.
- Editing text or images in the PDF.
- Fill fillable PDF forms.
- Add annotations, stamps, symbols, signatures, background, watermarks, headers, footers, and thumbnails.
- Add password protection to any file.
- Organize pages, crop pages, split files or pages, and add links.
- Convert scanned files to text searchable and editable files.
- Generate a link or barcode to share files rather than sending them in emails.
- Most striking is the integrated AI which you can use as a chatbot or talk to a PDF file, translate, explain, or summarize a PDF.
You can download UPDF right now. To learn more about UPDF you can also watch this video.
Windows • macOS • iOS • Android 100% secure
To add a bookmark to a PDF file using UPDF, follow these steps.
Step-1. Download and install the UPDF app and open the app. Then open the PDF file using the “Open” option in the “File” menu or the “Open” tab on the window.
Step-2. From the panel of tools on the left, click the “Bookmark” icon to open the “Bookmark” window on the left side.
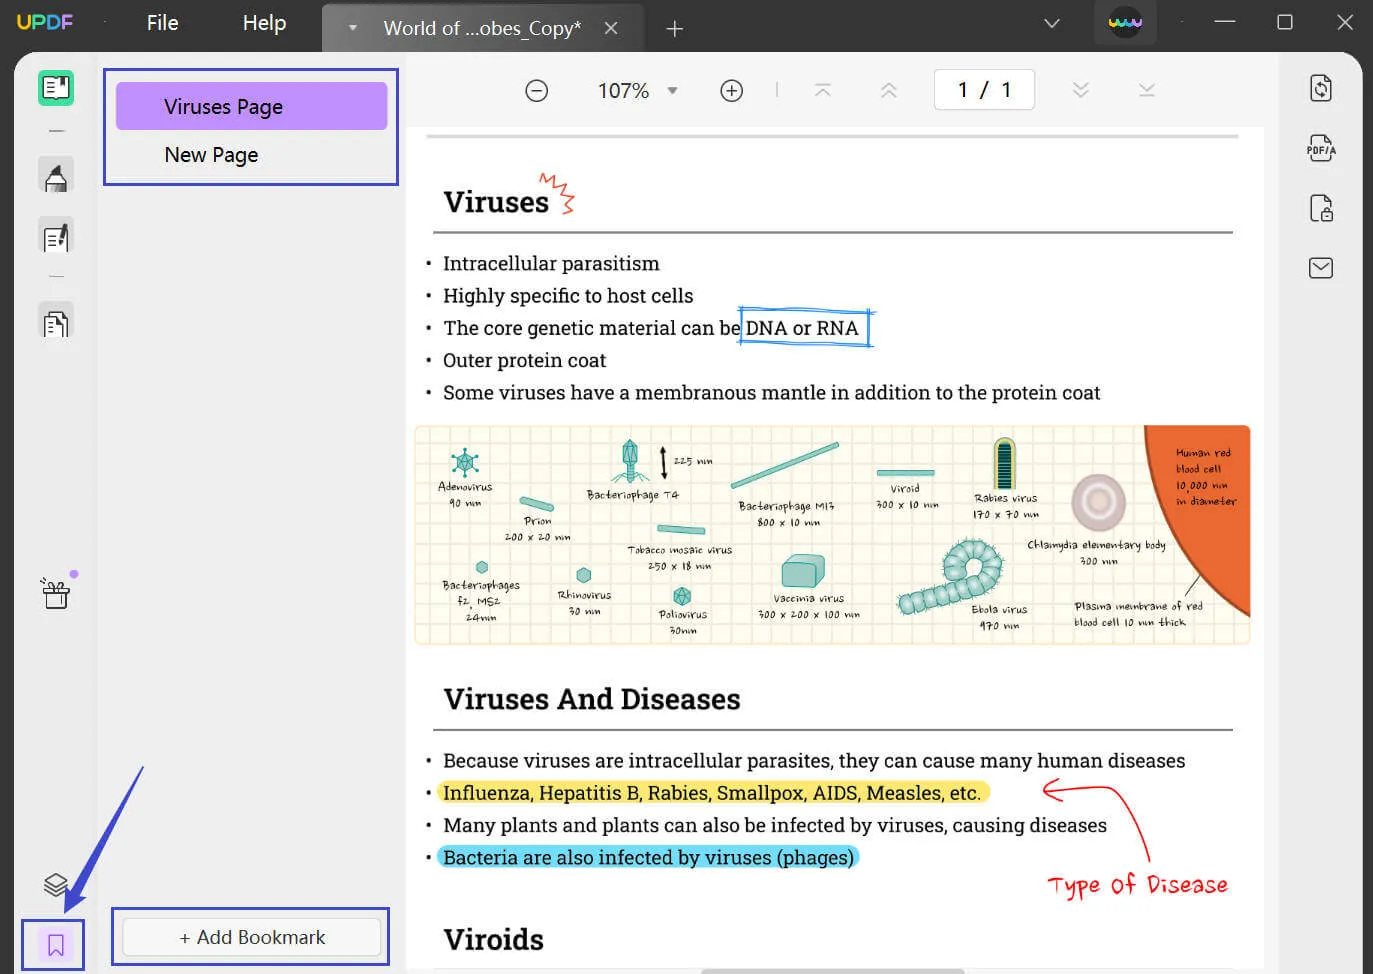
Step-3. On the top, you will see a “Bookmark +” icon. Click it to add the bookmark on the top or bottom of the list if there are already existing bookmarks.
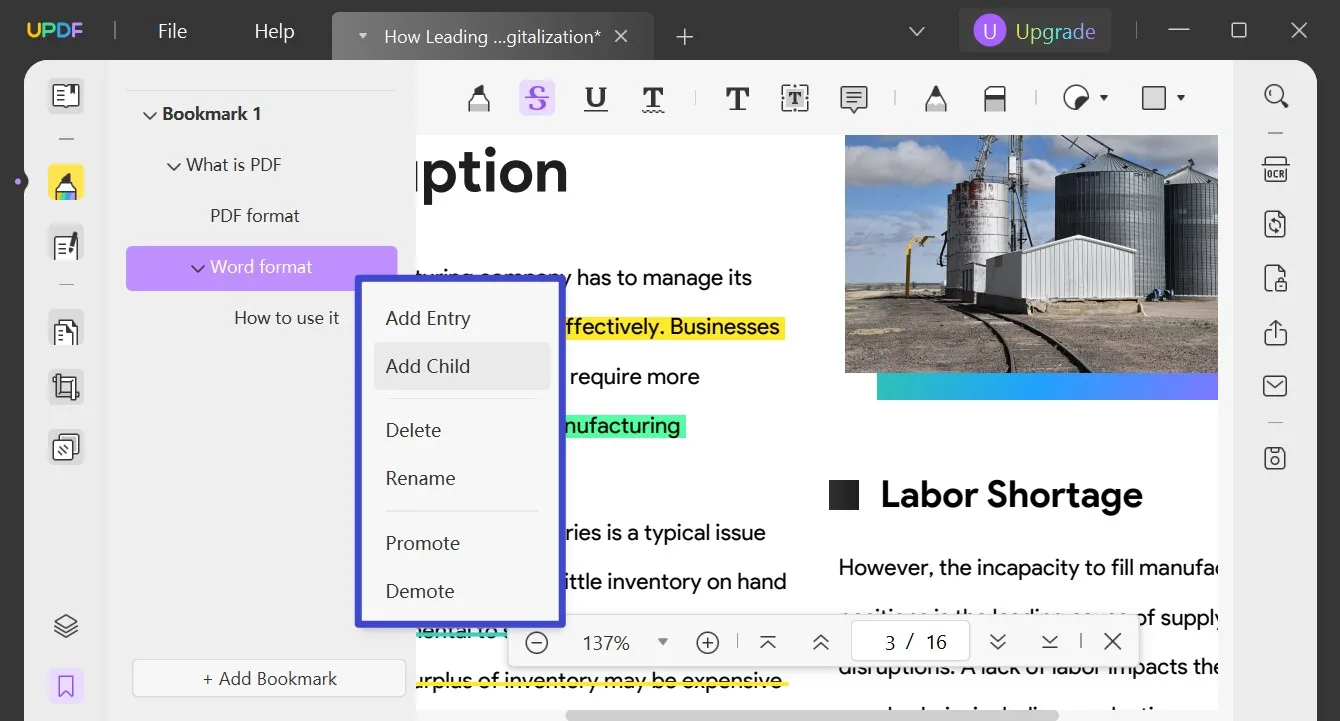
Step-4. The Bookmark will appear as a page number. Right-click on the bookmark to rename it. You can use the same menu to delete any bookmark if you want.
Step-5. Save the changes using the “Save” option in the file menu.
Step-6. You can keep adding more bookmarks. Also, you can add a sub bookmark. Right-click on the bookmark and pick the “Child” option from the menu. So you can have a main bookmark like “Chapter-1” and the child or sub-bookmark “Specific features” to indicate a particular content of the page.
Final Words
Now you know how to create a bookmark in Word. You can use the above step-by-step guide to add, view, or remove any bookmark. Additionally, you now know that UPDF is the one pit stop if you want to insert bookmark to PDF files as well as all your PDF editing needs. Download UPDF right now and you will be surprised to see how much you get at such a cheap price.
Windows • macOS • iOS • Android 100% secure


 Italo Rossi
 Engelbert White
 Enola Davis

 Lizzy Lozano