UPDF for Windows
 UPDF for Mac
 UPDF for iPhone/iPad
 UPDF for Android
 UPDF AI Online
 UPDF Sign
 Edit PDF
 Annotate PDF
 Create PDF
 PDF Form
 Edit links
 Convert PDF
 OCR
OCR PDF to Word
 PDF to Image
 PDF to Excel
 Organize PDF
 Merge PDF
 Split PDF
 Crop PDF
 Rotate PDF
 Protect PDF
 Sign PDF
 Redact PDF
 Sanitize PDF
 Remove Security
 Read PDF
 UPDF Cloud
 Compress PDF
 Print PDF
 Batch Process
 About UPDF AI
 UPDF AI Solutions
 AI User Guide
 FAQ about UPDF AI
 Summarize PDF
 Translate PDF
 Chat with PDF
 Chat with AI
 Chat with image
 PDF to Mind Map
 Explain PDF
 PDF AI Tools
 Image AI Tools
 AI Chat Tools
 AI Writing Tools
 AI Study Tools
 AI Working Tools
 Other AI Tools
 PDF to Word
 PDF to Excel
 PDF to PowerPoint
 User Guide
 UPDF Tricks
 FAQs
FAQs UPDF Reviews
 Download Center
 Blog
Blog Newsroom
 Tech Spec
 Updates
 UPDF vs. Adobe Acrobat
 UPDF vs. Foxit
 UPDF vs. PDF Expert
Sometimes you need to convert Excel to PNG. Through this technique, you can get a picture of the required Excel data that can be used in multiple ways to present some data. Here we will discuss the top 4 ways you can easily convert your Excel files to PNG pictures.
Part 1. The Best Way to Convert Excel to PNG
The best way you can use is UPDF which can help you get high accuracy and easily convert your Excel document into a PNG image. It is a tool that meets all your requirements and brings multiple other features for you that enhance your experience. For instance, it works instantly, meaning you won’t need to wait for the conversion to process.
Windows • macOS • iOS • Android 100% secure
Moreover, if you don’t have spreadsheet software but want to edit some data in that Excel spreadsheet, UPDF can help you. With UPDF, you can edit data in the cells before converting it. That editing will be done with the same font, size, and positioning. Hence, when you convert it into PNG, nobody can tell if you edited it in spreadsheet software or UPDF.
The best part about UPDF is that it is extremely simple and quick. The whole process for converting the Excel file into a PNG image takes a few steps as follows:
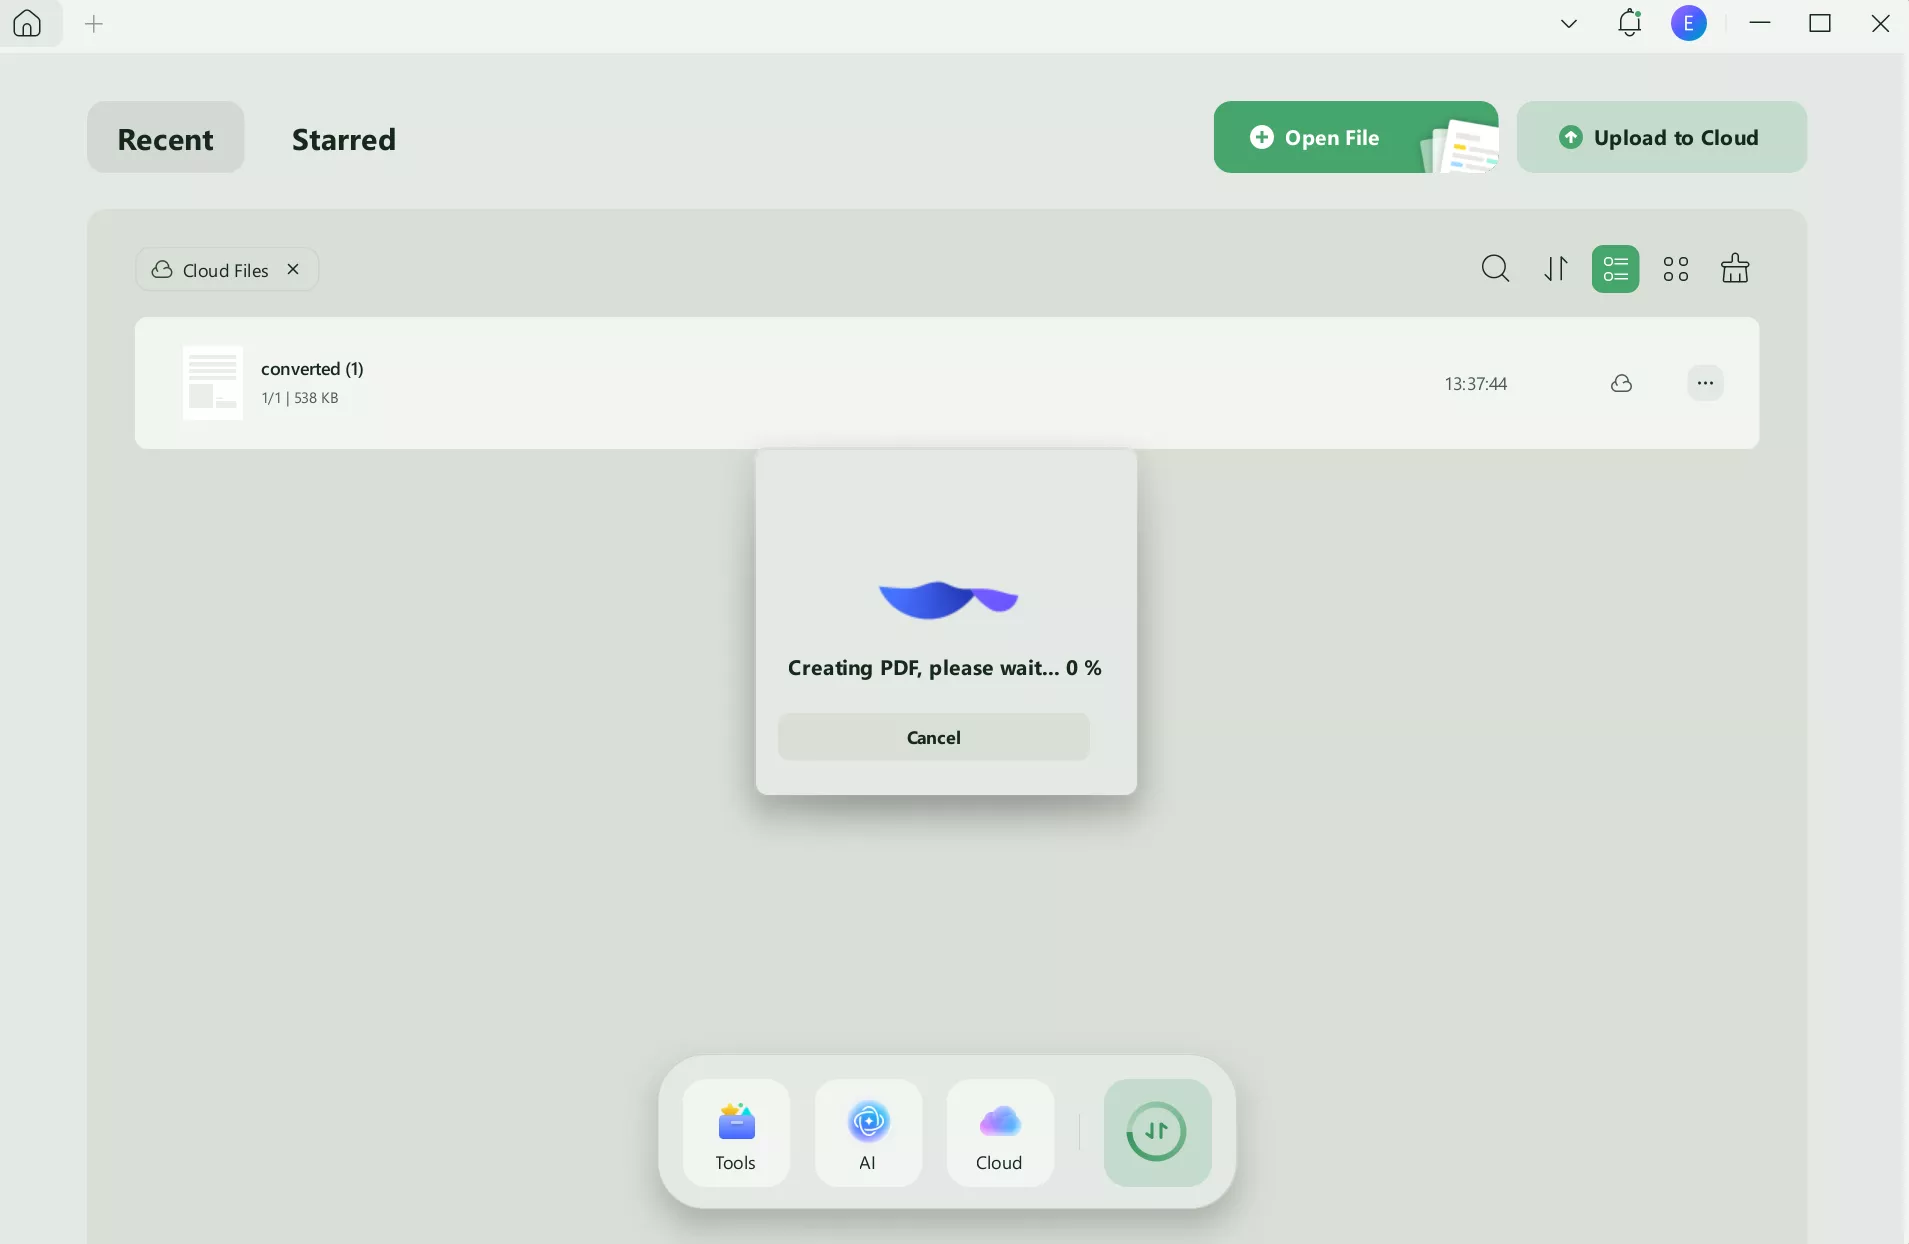
Step 1: Drag Excel to UPDF
Go to your PC's desktop and open the UPDF tool. Alternatively, go to Windows search and look for UPDF by typing "UPDF." Click on it and open UPDF. Once UPDF opens, drag your Excel file into the UPDF interface. The tool will now automatically convert your Excel file into PDF instantly. Once the conversion to PDF is complete, it will automatically display your document.
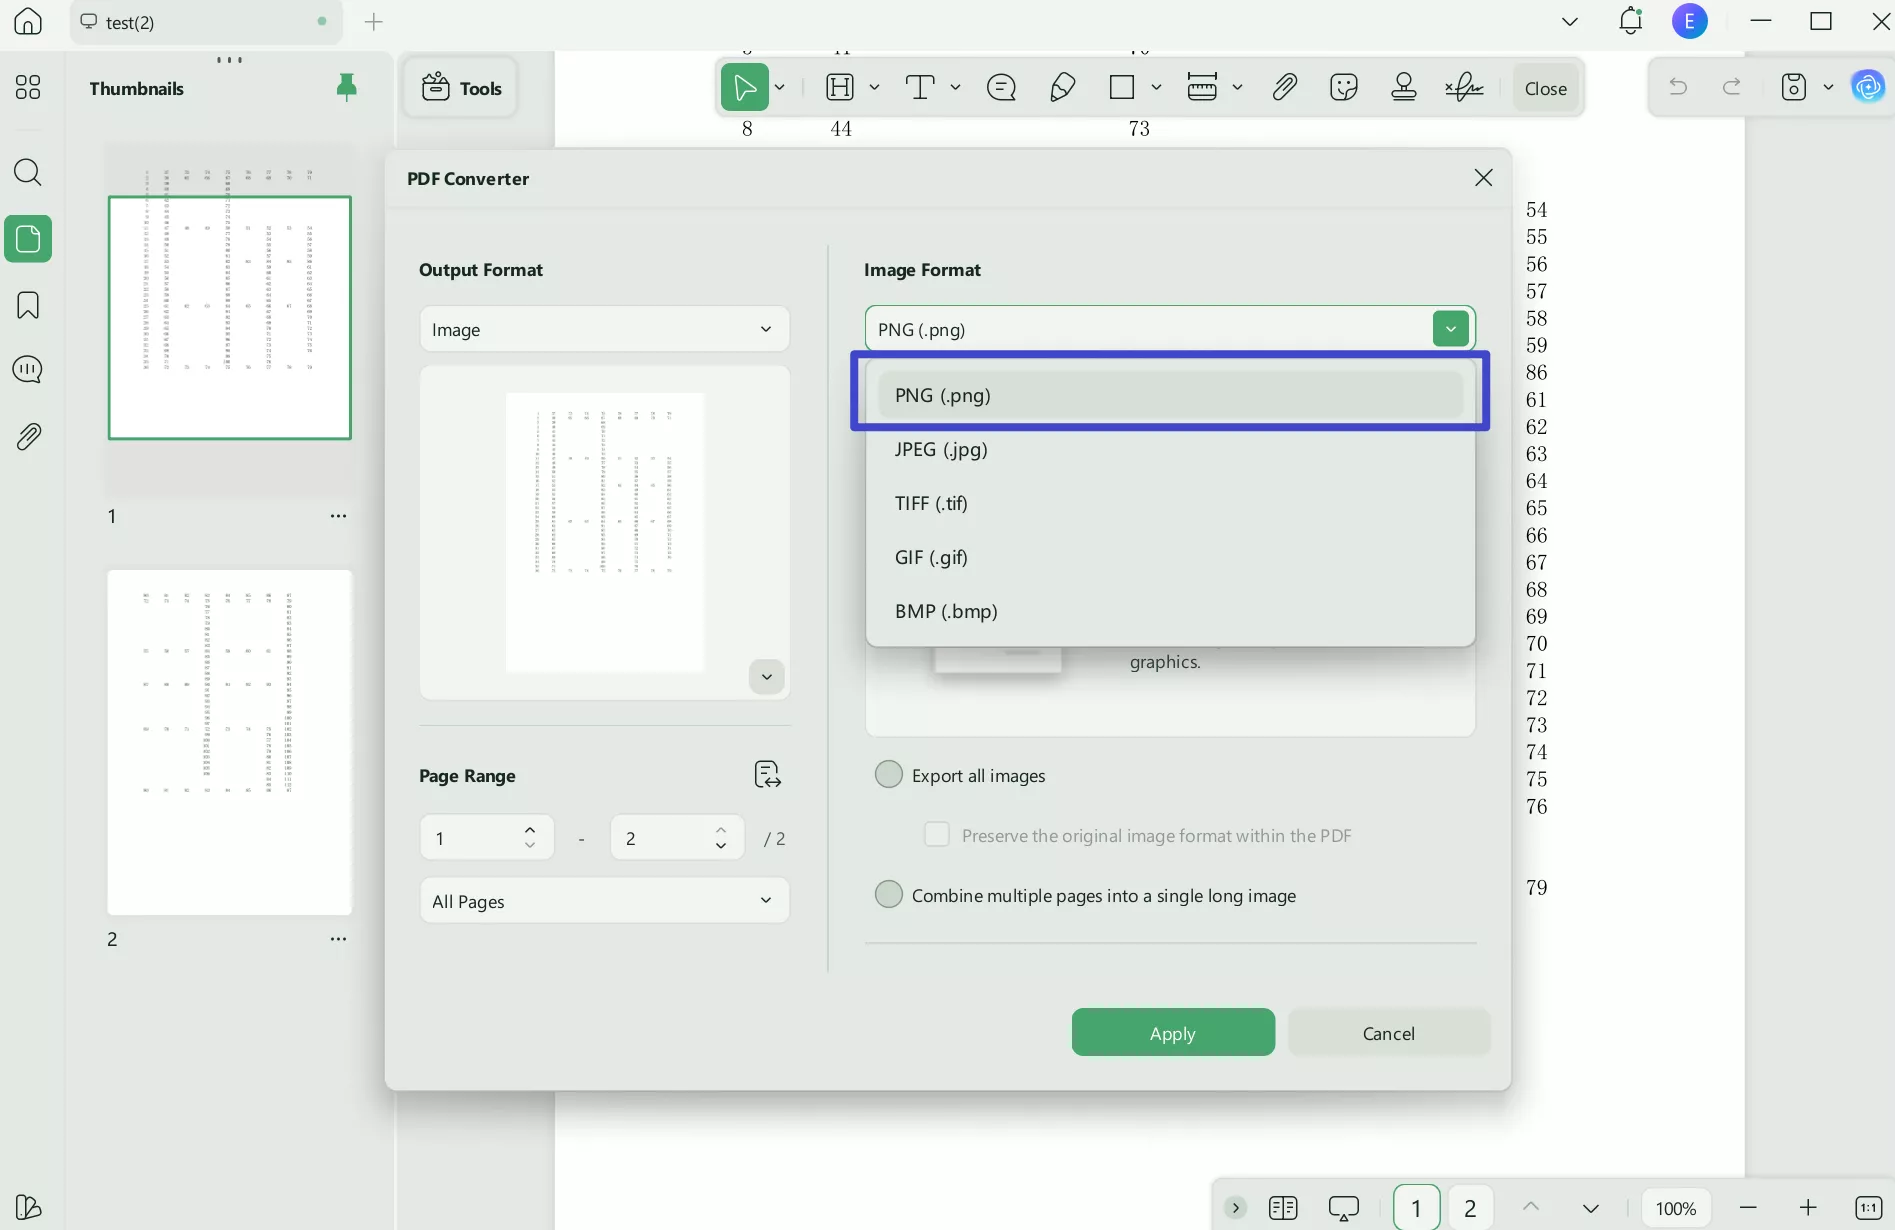
Step 2: Go to the Export PDF option and choose Image
Now you need to go to the Export option in the Right menu. Clicking on it will show multiple options; you must click on the image here. Now a new window will appear that contains export settings. It may not have a PNG output format as default. So, click the second dropdown menu from the top and look for "PNG" Once you find it, click it to select. Now you will need to hit the Export button present below, and your Excel document will be successfully converted into PNG.
Windows • macOS • iOS • Android 100% secure
Part 2. Convert XLS to PNG Via Screenshot
If you only want to convert a selected part of your Excel document to PNG, then the easiest method for you is taking a screenshot. You will get multiple options when taking a screenshot, including screen snip, selective snip, etc. The best option is taking a selective rectangular snip of a specific part of your screen.
The experience for this method varies between Windows PC and Macs. So, below are the detailed steps for both types of computers where you can use this technique.
1. On Windows
Taking screenshots is considerably easier if you are on a Windows PC. It takes only a few steps, and you can quickly convert any part of an Excel spreadsheet into PNG. Below are the steps that you can follow for maximum efficiency.
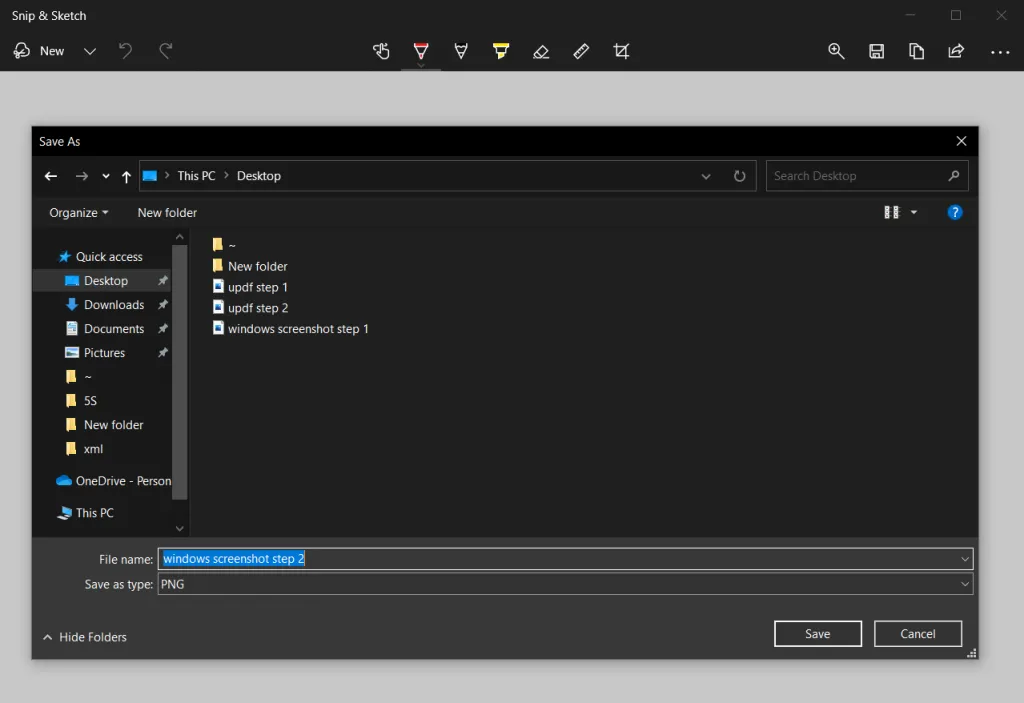
Step 1: Open the snipping tool and take your screen picture
Press the “Windows," "Shift," and "S" keys together on your Windows 10 or 11 PC, and it will open the snipping tool for you. It will be set to rectangular snip by default, so you can click and drag on any screen section to take a snip. Once you release your click, a notification will appear telling you that the screenshot is saved on the clipboard and you need to save it permanently.

Step 2: Open the capture and save it to your PC.
Click on this notification to open the screenshot editor. Now you can do any markings, highlighting, or crop the image further for finer results from the top menu. Press the "Control" and "S" buttons to open the saving option. Here you can rename the image and change its location on your PC. Once you are done renaming, click the "Save" button, and your screenshot will be saved on the selected location.
2. On Mac
Taking screenshots is relatively easier on a Mac. It is because it does not require you to save the image from the clipboard, which can significantly enhance your efficiency. So, taking a screenshot on your Mac is a single-step process. To take a screenshot, you need to press the "Command" key along with the "Shift" and "5" keys simultaneously. You may use other button combinations, but this combination is the best for selective screenshots on a Mac.

Now the cursor will be replaced with a crosshair. Click and drag it across the required area, and once you release the click, the screen will flash. Now you know that the screenshot is saved to the computer, and it is usually saved on the desktop of your Mac.
Part 3. Convert Excel to PNG Via Copy as Picture
Microsoft Office comes with this built-in feature that allows you to copy a cell, a table, or any specific part of the Excel workbook as a picture. It initially allows you to copy the data from an Excel workbook and paste it somewhere else. However, you can also save that to the storage on your PC if required. When pasting that image, you don’t have any restrictions on where you will be if it is still copied on the clipboard.
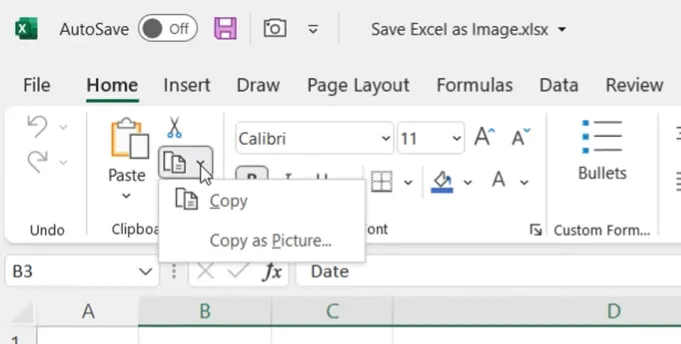
Step 1: Copy as Picture
Open the Excel document and select the cells you want to copy as pictures. You can select them by clicking and dragging the cursor on those cells. The ones that change their color are selected. Go to the "Home" tab and the "Clipboard" area. You need to click the dropdown button next to the "Copy" button. Select Copy as Picture.
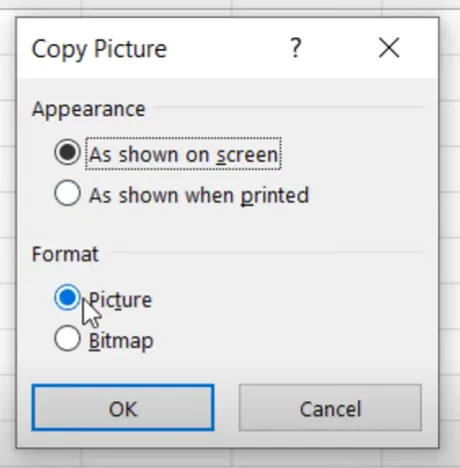
Step 2: Set preferences
Excel will start showing a new window that contains image preferences. From the appearance option, click "As shown on screen”. It is best for better image quality. You can choose "Picture" from the format option and click "OK."
Now a static picture of your selected cells will be copied to the clipboard that you can paste into the same document or any other document by pressing the "Control" and "V" keys together. Right-click on the image and click save option to save this image on your PC.
Part 4. Convert XLSX to PNG Online
The last option you can choose is converting your XLSX document into PNG using online tools. Search for this specific requirement, and you may come across multiple options, including:
- Zamzar
- Online Converter
- Convertio
- Cloud Convert
- Aspose, etc.
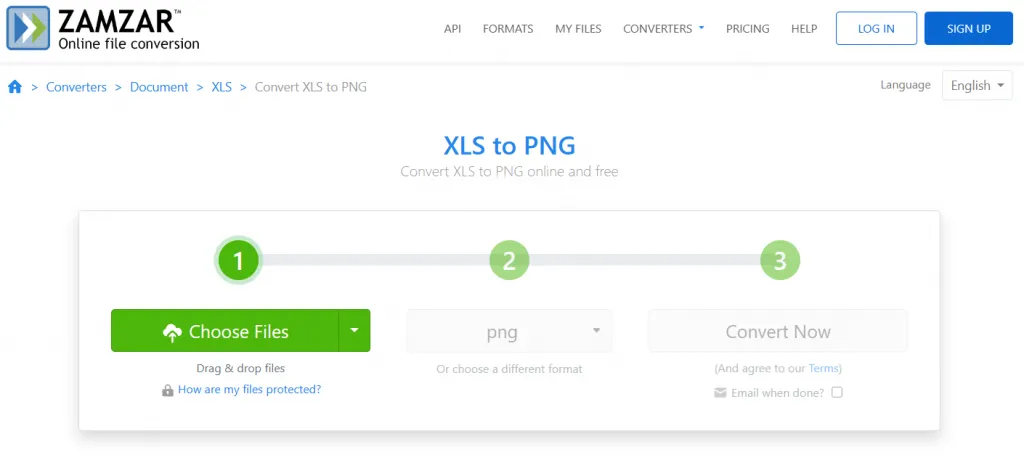
All these come with slightly varying features but fulfill the same requirements. So, let’s take an example of how you will conduct this conversion using Zamzar. Zamzar is one of the best online document converter tools with numerous conversions. The best part about it is its easy experience with minimum steps as follows:
Step 1: Upload files to Zamzar
Open the Zamzar website for converting XLS to PNG. Drag your Excel files to the web page or click the "Choose Files" button to choose a file from your PC. Once your file uploads, you will move to the next step.
Step 2: Select PNG and convert
Click the dropdown button next to the "Choose Files" button to select the conversion format. In this case, we will select "PNG”. When you select PNG as your conversion format, you may click the “Convert Now” key next to it.
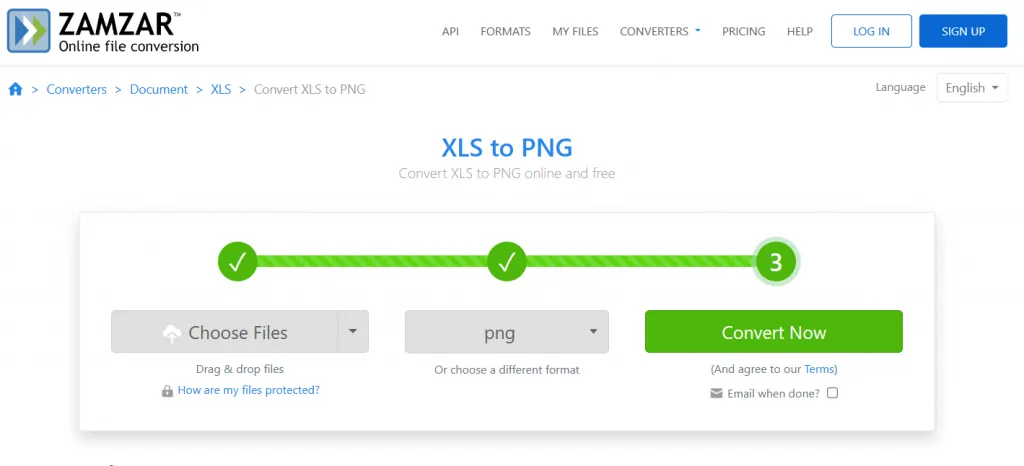
Step 3: Download
As you click the "Convert Now" key, a new interface will load that will show the conversion processing. After a second or two of processing, a "download" button will appear next to the file name with the PNG extension. Hit the download button, and your Excel converted to PNG will be saved on your PC.

With such online tools, you don’t have to go through complex procedures of manual snipping or copying a picture. However, selecting the right tool is the most important thing to consider here. It is because multiple options are available, and only a few are reliable.
Final Thoughts
There will be several moments where you need to use some part of the whole Excel spreadsheet somewhere. The best option is to convert Excel to PNG. We hope that now you know the best ways of converting your Excel data into PNG format for using it as a picture. This method allows you to use the spreadsheet data without changing its formatting and other properties.
You may use any of the above-discussed 4 methods, but if you want the best experience, go with UPDF. It is because UPDF offers a complete range of tools to work on your PDF documents. These tools can help work on PDFs and convert PNG from Excel. The easy sharing and market-competitive pricing from UPDF also make it a better option.
Windows • macOS • iOS • Android 100% secure


 Enola Davis
 Lizzy Lozano
 Enrica Taylor
 Enola Miller