UPDF for Windows
 UPDF for Mac
 UPDF for iPhone/iPad
 UPDF for Android
 Nomostar
 UPDF AI Online
 UPDF Sign
 IvyCraft
 Edit PDF
 Annotate PDF
 Create PDF
 PDF Form
 Edit links
 Convert PDF
 OCR
OCR PDF to Word
 PDF to Image
 PDF to Excel
 Organize PDF
 Merge PDF
 Split PDF
 Crop PDF
 Rotate PDF
 Protect PDF
 Sign PDF
 Redact PDF
 Sanitize PDF
 Remove Security
 Read PDF
 UPDF Cloud
 Compress PDF
 Print PDF
 Batch Process
 About UPDF AI
 UPDF AI Solutions
 AI User Guide
 FAQ about UPDF AI
 Summarize PDF
 Translate PDF
 Chat with PDF
 Chat with AI
 Chat with image
 PDF to Mind Map
 Explain PDF
 PDF AI Tools
 Image AI Tools
 AI Chat Tools
 AI Writing Tools
 AI Study Tools
 AI Working Tools
 Other AI Tools
 AI Bookmark Generation
 AI Bookmark Summary
 AI Watermark Generation
 AI Background Generation
 AI Sticker Generation
 AI Stamp Generation
 AI Editing Suite
 UPDF Copilot
 AI Page Management
 AI Semantic Search
 PDF to Word
 PDF to Excel
 PDF to PowerPoint
 User Guide
 UPDF Tricks
 FAQs
FAQs UPDF Reviews
 Download Center
 Blog
Blog Newsroom
 Tech Spec
 Updates
 UPDF vs. Adobe Acrobat
 UPDF vs. Foxit
 UPDF vs. PDF Expert
There may be times when you need to convert Excel to JPG. For example, you may need to prevent others from editing and copying contents from Excel or you need to keep the contents in desired formats. Whatever cases you are in, you need to find a solution to convert Excel to JPG. This article will discuss the top 4 ways to provide great results when you need this conversion, along with their step-by-step guide.
Part 1. How to Convert Excel to JPG with High Quality on Windows Via UPDF?
The optimum method for this conversion is to quickly and accurately create a JPG image from an Excel sheet. UPDF is the software that satisfies all of these needs and offers several more features to improve your experience, including the following:
Windows • macOS • iOS • Android 100% secure
- You can edit Excel documents without having any spreadsheet software on your PC
- UPDF features immediate JPG conversion that can save your time
- It works on macOS, Windows, iOS and Android
- You can store your PDF documents in the UPDF cloud
- Highlight, comment, and annotate your Excel documents before or after converting to JPG
- UPDF ensures 100% satisfaction with 99% accuracy when converting Excel to a JPG image
Many other technicalities set UPDF ahead of all other tools. However, the best thing is its interface and performance. You can quickly convert Excel documents without any complex procedures. Here is how UPDF will convert your Excel document to JPG on Windows:
Step 1: Drag the Excel file into UPDF
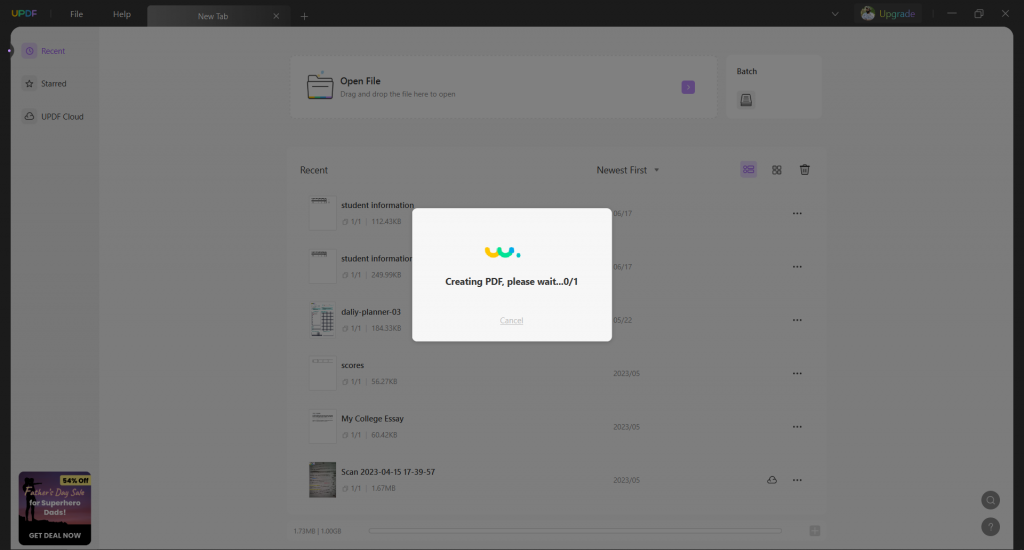
Double-click on the UPDF icon on your computer after you download it. Now, find your Excel file, select it, and hold on the mouse to drag it to the UPDF interface. It will convert Excel to PDF automatically.
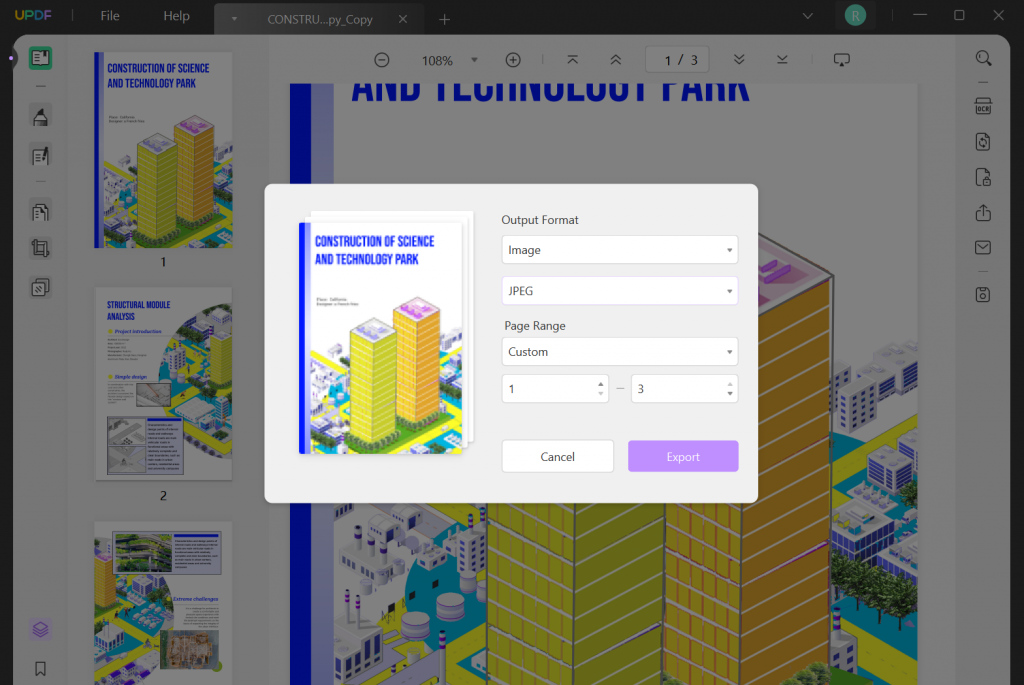
Step 2: Export as an image
Now, navigate to UPDF right-side menu, click on the “Export PDF” icon, select “Image” and choose “JPEG” as output format. Click “Export”, and select the place where you want to save the converted JPG images on your computer. Click the “Choose” button, and UPDF will convert Excel to JPG automatically.
As you export, the Excel spreadsheet's JPG file will be saved on your PC. Now you can use it as a static spreadsheet, which can be used anywhere without changing the formatting or disturbing the data presentation.
Windows • macOS • iOS • Android 100% secure
Part 2. How to Convert Excel to JPG on Windows Via Copy as Picture?
If you install a Windows PC with Microsoft Excel, you can use the unique "Copy as Picture" feature for this conversion. The best part about this method is that you don’t need to open any other tool or export documents. Everything happens inside Microsoft Excel software, and no special requirements exist.
This method has certain advantages, with the best being easy to use and quick. Additionally, there is no chance you will find any data integrity issues when using this conversion method. Below are all the steps that you need to proceed with to use this method:
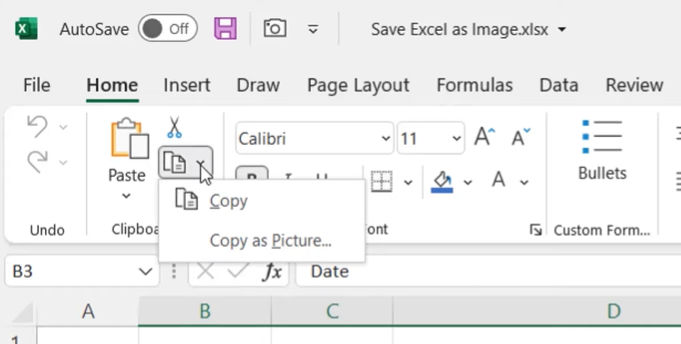
Step 1: Use copy as the picture feature
Open the Excel file, then click and drag the mouse over the cells you wish to copy as images. Observing a variation in color between the selected cells will reveal which ones are chosen. Go to the "Clipboard" area in the "Home" tab.
Click the dropdown menu adjacent to the "Copy" button to reveal the "Copy as Picture" option. Choosing Copy as Picture will copy the selected content as a picture, and you can paste it anywhere as a picture. However, it is important to set image preferences before.
Step 2: Set image preferences
As you copy those cells as a picture, a new window will appear on your screen, containing some image copying preferences. From the given options, you need to select:
- Appearance: as shown on screen. It gives you the best possible quality for the image
- Format: Picture
After selecting these two, you can click "OK”. Now wherever you paste the image, it will follow your selected preferences for pasting.
Step 3: Save as JPG
Finally, you will paste that image into the Excel document by simultaneously pressing the "Control" + "V" buttons. Now right-click on the image and click "Save as Picture." A new window will appear where you must set the file name and type. Select "JPG or JPEG" in type and save the image.
It is important to note where you will be saving that image since finding it will become much easier this way.
Part 3. How to Convert XLS to JPG on Mac Via Screenshot?
If you are a Mac user, converting Excel files to JPG files will be a simple experience using the screenshot method. Remember that taking a screenshot and saving it will set it as a PNG file by default. So, to get its JPG file, you change the settings, which would be a complex process.
The easier way of getting it done is taking a PNG screenshot and then converting it to JPG, which we will discuss here. This process is considerably simpler with the following steps only:
Step 1: Take the screenshot
Taking a screenshot on your Mac requires you to press the following 3 buttons together:
- Command
- Shift
- 5
It is a combination for taking screenshots of only a selective area on the screen. So, you don’t need to worry about the data in an Excel spreadsheet apart from that table. When you press these 3 keys together, you will see the cursor of your Mac change into a crosshair. Drag that while holding the click to take a screenshot. Releasing the click will make the screen flash, and your screenshot will be saved on the desktop folder on your Mac.
Step 2: Converting it to JPG
Your screenshot is saved, and you must convert it to JPG format. Open the screenshot and click "File” on top. There you need to select the “Export" option. It will display a new window with different options. Now you need to rename the image and select "JPEG” as the image format from the “Format dropdown." Ensure its quality is set to "Best," You may click "Save."
With this procedure, you can take a selective area screenshot on your Mac and convert it into desired JPG format.
Part 4. How to Convert Excel to JPG Online Via Convertio?
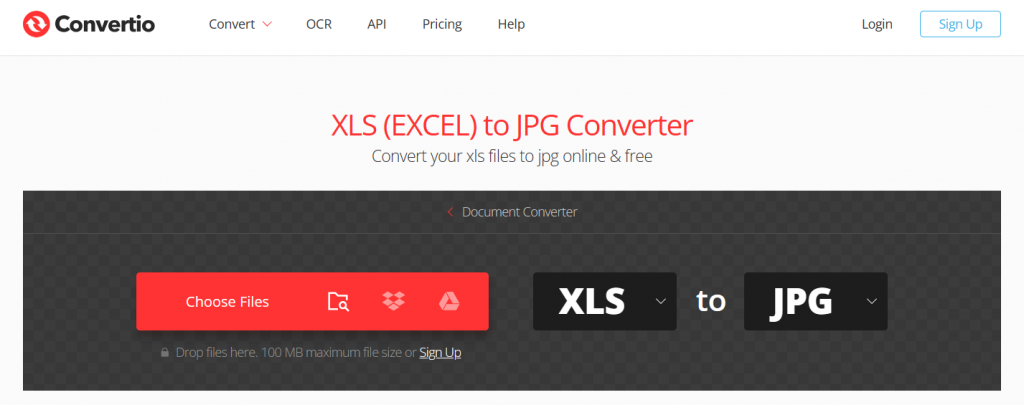
You may need to use online tools for this conversion, and there will be many options. One is Convertio, which provides you quick, free, and online conversion experience for multiple documents. Converting your Excel files with Convertio brings a reliable experience with great accuracy and customer satisfaction. The best part is the easy conversion procedure that anyone can perform.
So, here are the steps you need to follow on Convertio for converting XLS files to JPG format.
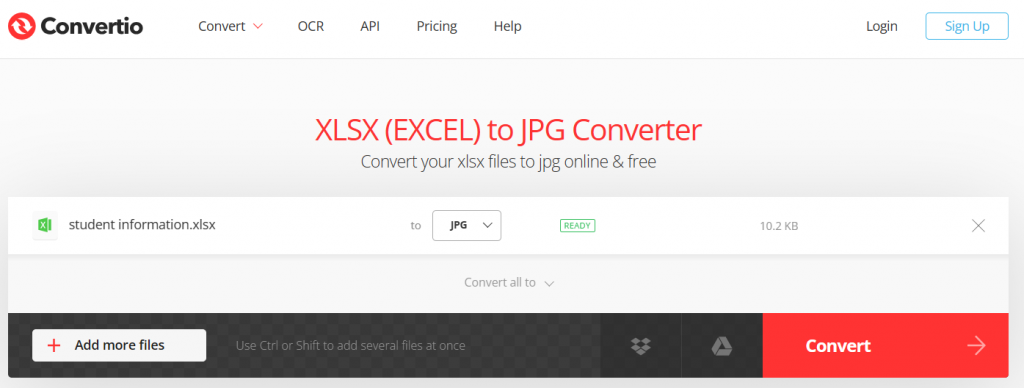
Step 1: Upload Excel file
Go to Convertio XLS to JPG conversion website. There you can upload Excel files from multiple options, including "storage," "Google Drive," and "And Dropbox." Upload files with a limit of 100MB. Convertio supports converting the latest Excel files to Excel 2007 and even younger ones.
Step 2: Convert Excel File with 1-click
You can upload multiple files to Convertio, but click the big "Convert" button once you are done. It will initiate your conversion, which may take a few seconds before completion. However, pressing it once will convert all the Excel files you uploaded.
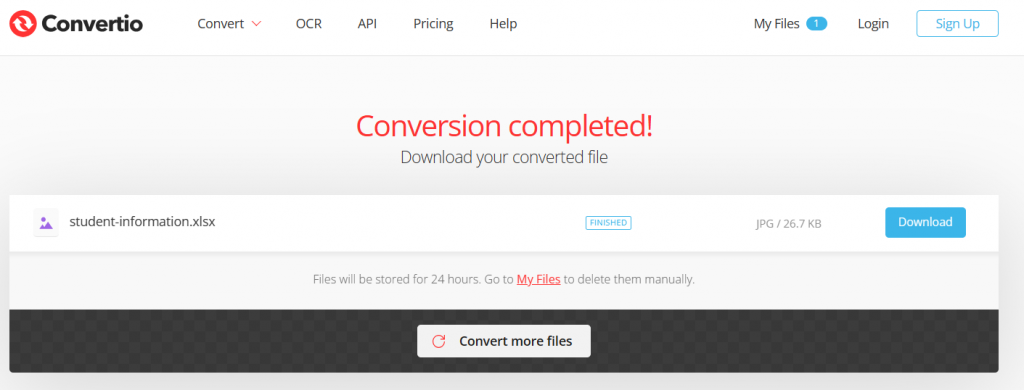
Step 3: Download
When the conversion is complete, a blue "Download" button appears next to the file name. Clicking that will initiate downloading your file. Wait for the download to complete, and then you can use that JPG image as a static instance of your Excel spreadsheet.
So, whether you need to convert one file or many, you can easily convert them with Convertio in one go.
Final Words
While creating a document report or a presentation, you may need to use the data from an Excel spreadsheet. There could be several such instances, and using the Excel document is not the right choice. That’s where converting Excel to JPG can help a lot. It is a method of creating a static image from an Excel workbook that can be used in all those places where required.
You may come across many options when you need to do this conversion. However, if you are looking for the most efficient one, UPDF is the answer. It is because UPDF does the conversion for you, and you can do many other cool things with it, like editing Excel as PDF before exporting it, saving everything on the UPDF cloud, etc.
Windows • macOS • iOS • Android 100% secure


 Enrica Taylor