 UPDF
 UPDF for Windows
 UPDF for Mac
 UPDF for iPhone/iPad
 UPDF for Android
 Nomostar
 UPDF AI Online
 UPDF Sign
 IvyCraft
 Edit PDF
 Annotate PDF
 Create PDF
 PDF Form
 Edit links
 Convert PDF
 OCR
 PDF to Word
 PDF to Image
 PDF to Excel
 Organize PDF
 Merge PDF
 Split PDF
 Crop PDF
 Rotate PDF
 Protect PDF
 Sign PDF
 Redact PDF
 Sanitize PDF
 Remove Security
 Read PDF
 UPDF Cloud
 Compress PDF
 Print PDF
 Batch Process

 About UPDF AI
 UPDF AI Solutions
 AI User Guide
 FAQ about UPDF AI
 Summarize PDF
 Translate PDF
 Chat with PDF
 Chat with AI
 Chat with image
 PDF to Mind Map
 Explain PDF
 PDF AI Tools
 Image AI Tools
 AI Chat Tools
 AI Writing Tools
 AI Study Tools
 AI Working Tools
 Other AI Tools
 AI Bookmark Generation
 AI Bookmark Summary
 AI Watermark Generation
 AI Background Generation
 AI Sticker Generation
 AI Stamp Generation
 AI Editing Suite
 UPDF Copilot
 AI Page Management
 AI Semantic Search
 PDF to Word
 PDF to Excel
 PDF to PowerPoint
 Enterprise Solution
 Enterprise Sign
 Enterprise AI
 Enterprise Plan
 Enterprise User Guide
 Enterprise Webinar
 IT
 Education
 Construction
 Financial Service
 Healthcare
 Insurance
 Legal
 Manufacturing
 Government
 Researchers & PhDs
 Solopreneurs & Freelancers
 Lawyers & Legal Professionals
 Real Estate Agents & Brokers
 Education Solution
 Customer Stories
 User Guide
 UPDF Tricks
 FAQs
 UPDF Reviews
 Download Center
 Blog
 Newsroom
 Tech Spec
 Updates
 UPDF vs. Adobe Acrobat
 UPDF vs. Foxit
 UPDF vs. PDF Expert


Toolbar Navigation of UPDF for Windows
Welcome Page
Start by downloading UPDF using the button below. Once installed, launch the app on your device and you’ll be greeted by the welcome page, as shown below.
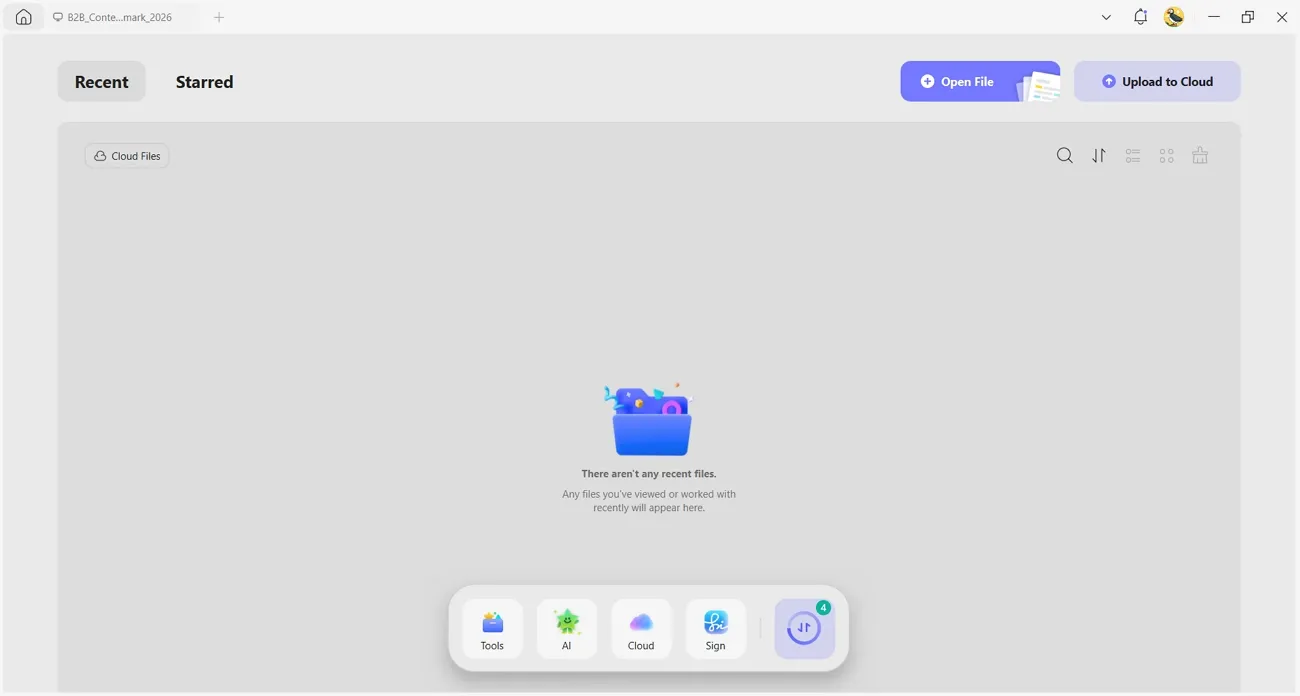
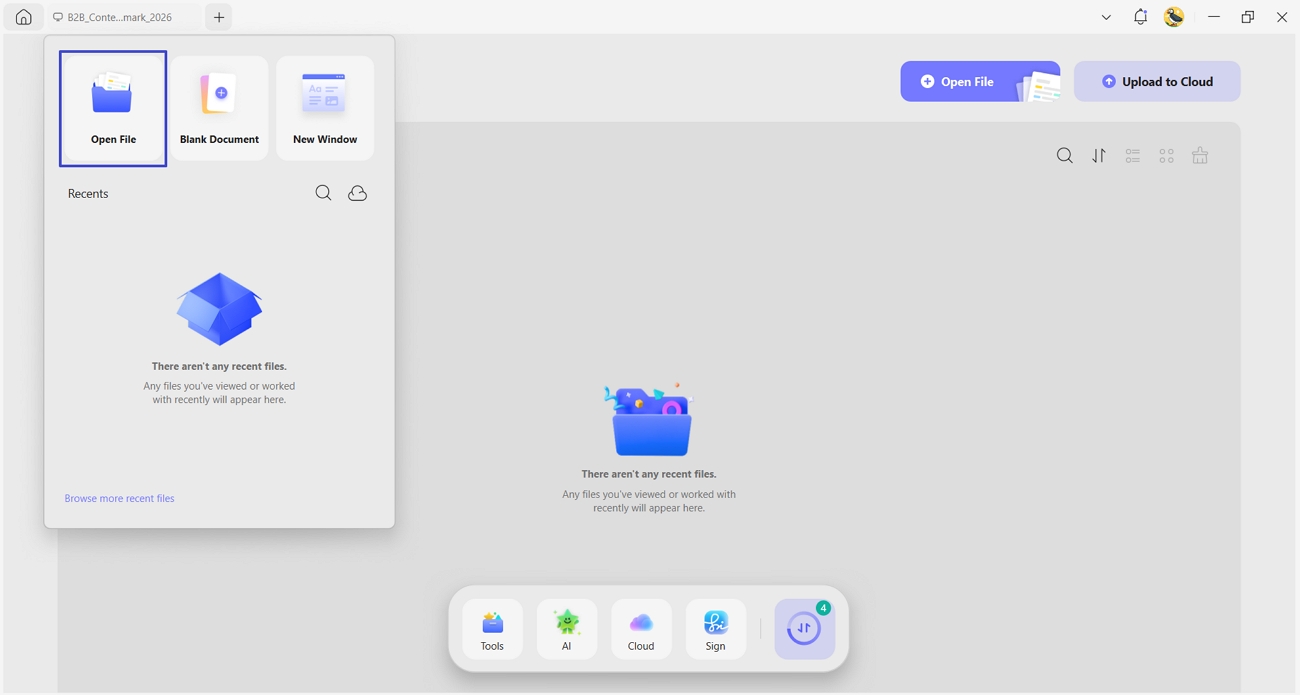
When you open UPDF for the first time, you will see its main interface. Click the “Open File” button to select a PDF from your device. Your document will then open in UPDF. You can also access options to create, export, batch process, compare files, and upload PDFs to the cloud.
Document Page
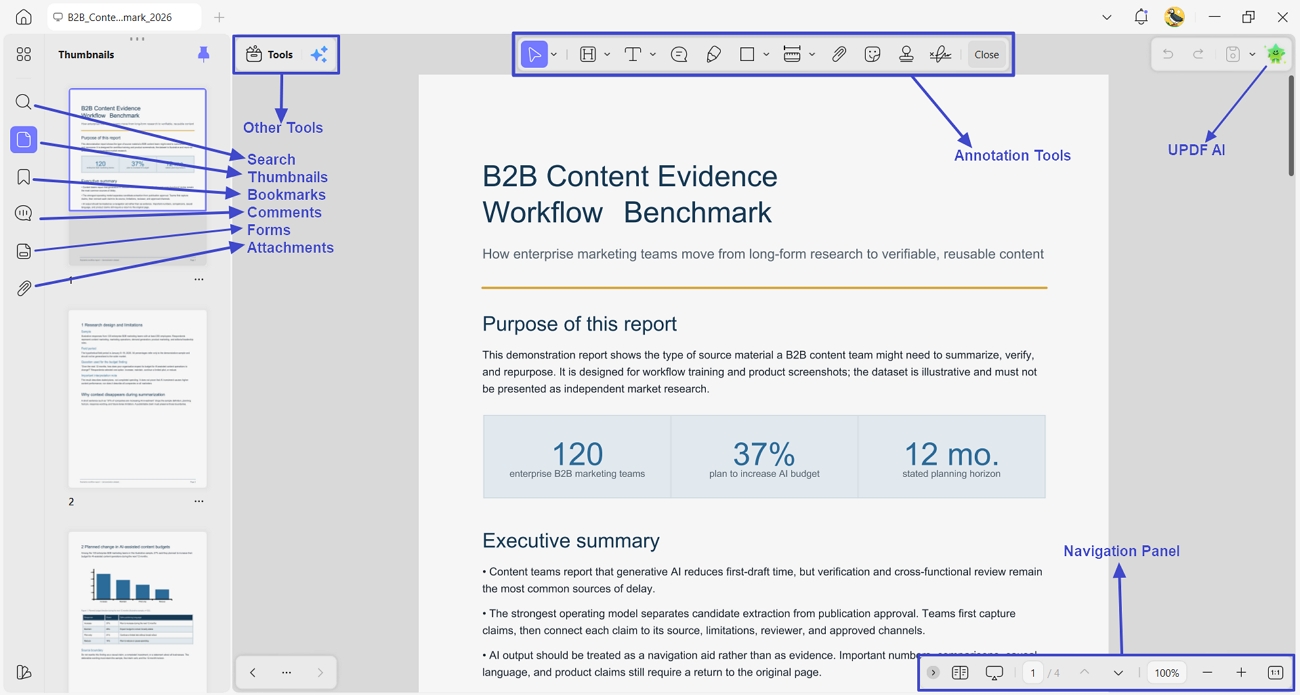
Once you open a document, you will find several tools on the left side of the UPDF interface. These include “Other Tools,” “Search,” “Thumbnails,” “Bookmarks,” “Comments,” and “Attachments.” Each option helps you access different features while working with your PDF.
At the bottom right, the navigation bar lets you zoom in or out to adjust the document view. It also displays the current page number for easy navigation. You can access “View Settings” and “Slideshow” options from the same bar.
The top-right corner provides access to “UPDF AI,” which lets you chat with, translate, summarize, and explain PDF content. You will also find an “Annotation” toolbar for marking up your document. It includes tools such as “Selection,” “Highlight,” “Text Comment,” “Sticky Notes,” “Pencil,” “Rectangle,” and “Distance Tool.”
Customize Mode Toolbar
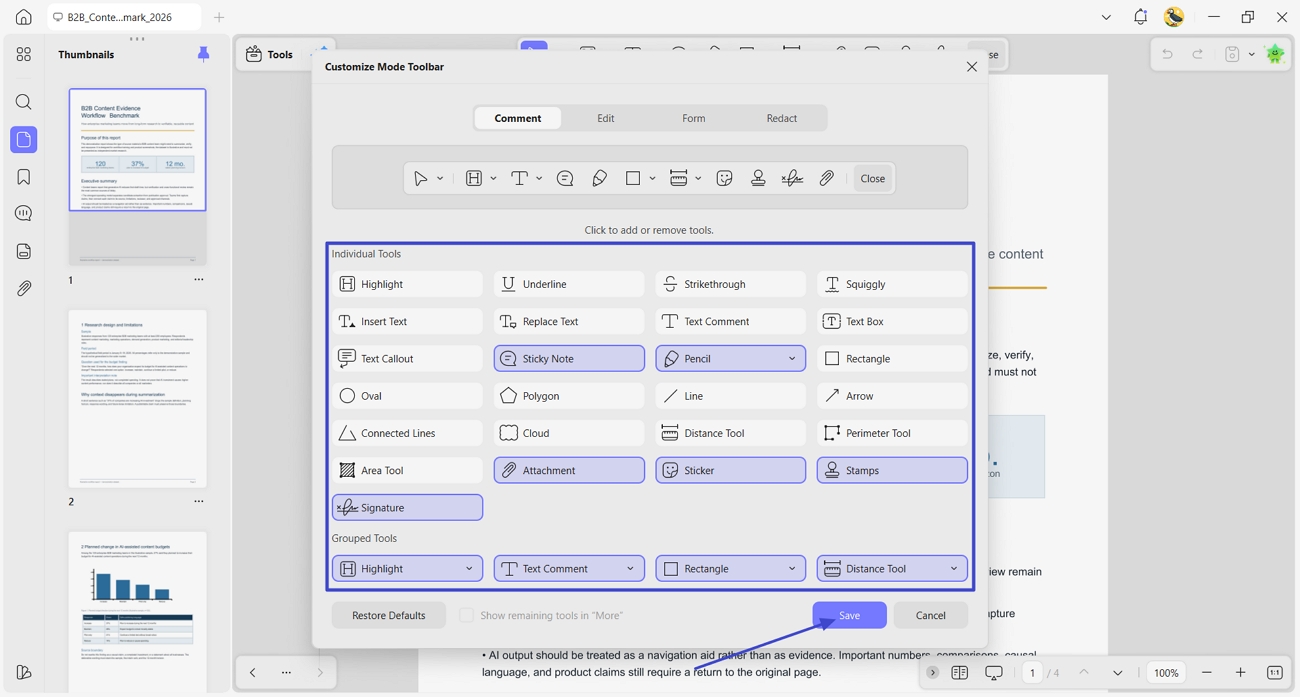
UPDF allows you to customize the Mode Toolbar to keep your frequently used tools easily accessible. You can adjust the toolbar according to your preferences for a more convenient workflow. Follow the steps below to customize the Mode Toolbar in UPDF:
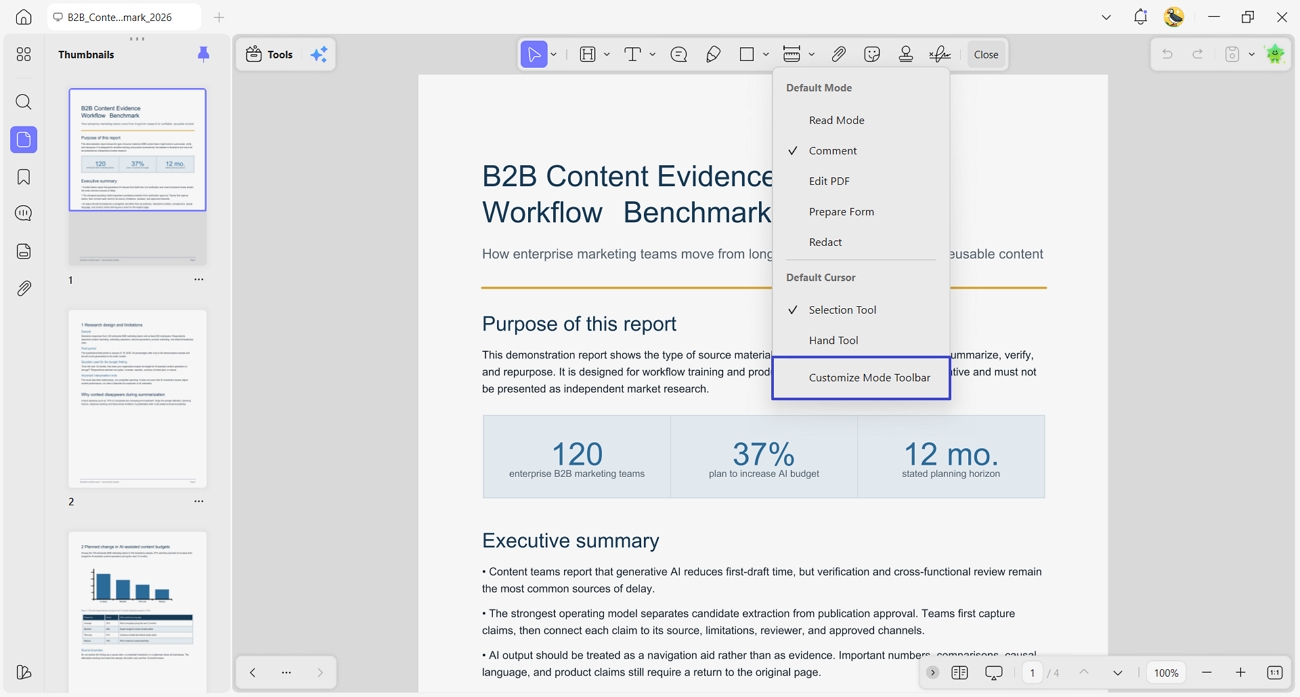
Step 1. Once you access a feature like “Edit” or “Comment,” right-click the top toolbar and click the “Customize Mode Toolbar” option.
Step 2. Select the mode you want to customize. At the top of the “Customize Mode Toolbar” window, switch between Comment, Edit, Form, and Redact. Each mode has its own toolbar, so changes made under one tab do not automatically change the others.
Step 3. Add or remove individual tools. In the “Individual Tools” section, click a tool to toggle whether it appears in the current mode toolbar. Added tools are highlighted, making it easy to confirm your selection. Keep the commands you use most often—such as Highlight, Text Comment, Rectangle, Arrow, Attachment, or Signature—visible, and remove less frequently used tools to reduce clutter.
Step 4. Configure grouped tools. The “Grouped Tools” area lets you place related commands in a drop-down group instead of showing every command separately. Open a group menu and choose the tool you want to use as the group’s default. Grouping similar tools saves toolbar space while keeping the remaining options available from the arrow beside the selected tool.
Step 5. Review and save the layout. Check the preview toolbar near the top of the window to make sure the tools are arranged as expected, then click “Save.” UPDF remembers the customized layout after you close and reopen the application. If you want to undo your changes, reopen the customization window and click “Restore Defaults”; use “Cancel” if you want to leave without applying the current edits.