 UPDF for Windows
 UPDF for Mac
 UPDF for iPhone/iPad
 UPDF for Android
 Nomostar
 UPDF AI Online
 UPDF Sign
 IvyCraft
 Edit PDF
 Annotate PDF
 Create PDF
 PDF Form
 Edit links
 Convert PDF
 OCR
OCR PDF to Word
 PDF to Image
 PDF to Excel
 Organize PDF
 Merge PDF
 Split PDF
 Crop PDF
 Rotate PDF
 Protect PDF
 Sign PDF
 Redact PDF
 Sanitize PDF
 Remove Security
 Read PDF
 UPDF Cloud
 Compress PDF
 Print PDF
 Batch Process
 About UPDF AI
 UPDF AI Solutions
 AI User Guide
 FAQ about UPDF AI
 Summarize PDF
 Translate PDF
 Chat with PDF
 Chat with AI
 Chat with image
 PDF to Mind Map
 Explain PDF
 PDF AI Tools
 Image AI Tools
 AI Chat Tools
 AI Writing Tools
 AI Study Tools
 AI Working Tools
 Other AI Tools
 AI Bookmark Generation
 AI Bookmark Summary
 AI Watermark Generation
 AI Background Generation
 AI Sticker Generation
 AI Stamp Generation
 AI Editing Suite
 UPDF Copilot
 AI Page Management
 AI Semantic Search
 PDF to Word
 PDF to Excel
 PDF to PowerPoint
 User Guide
 UPDF Tricks
 FAQs
FAQs UPDF Reviews
 Download Center
 Blog
Blog Newsroom
 Tech Spec
 Updates
 UPDF vs. Adobe Acrobat
 UPDF vs. Foxit
 UPDF vs. PDF Expert
Add, Edit, and Remove Watermark
Since you might be looking to put a watermark on your PDF to specify the ownership, this guide presents you with a complete overview of how you should use the watermark feature on UPDF.
Windows • macOS • iOS • Android 100% secure
For a step-by-step video guide, check out this YouTube video that shows how to add watermark in PDF using UPDF.
Add Watermark
Starting off with the PDF, proceed to the Tools option on the left side of your screen. You will find the Watermark option in the menu to proceed with adding the watermark.
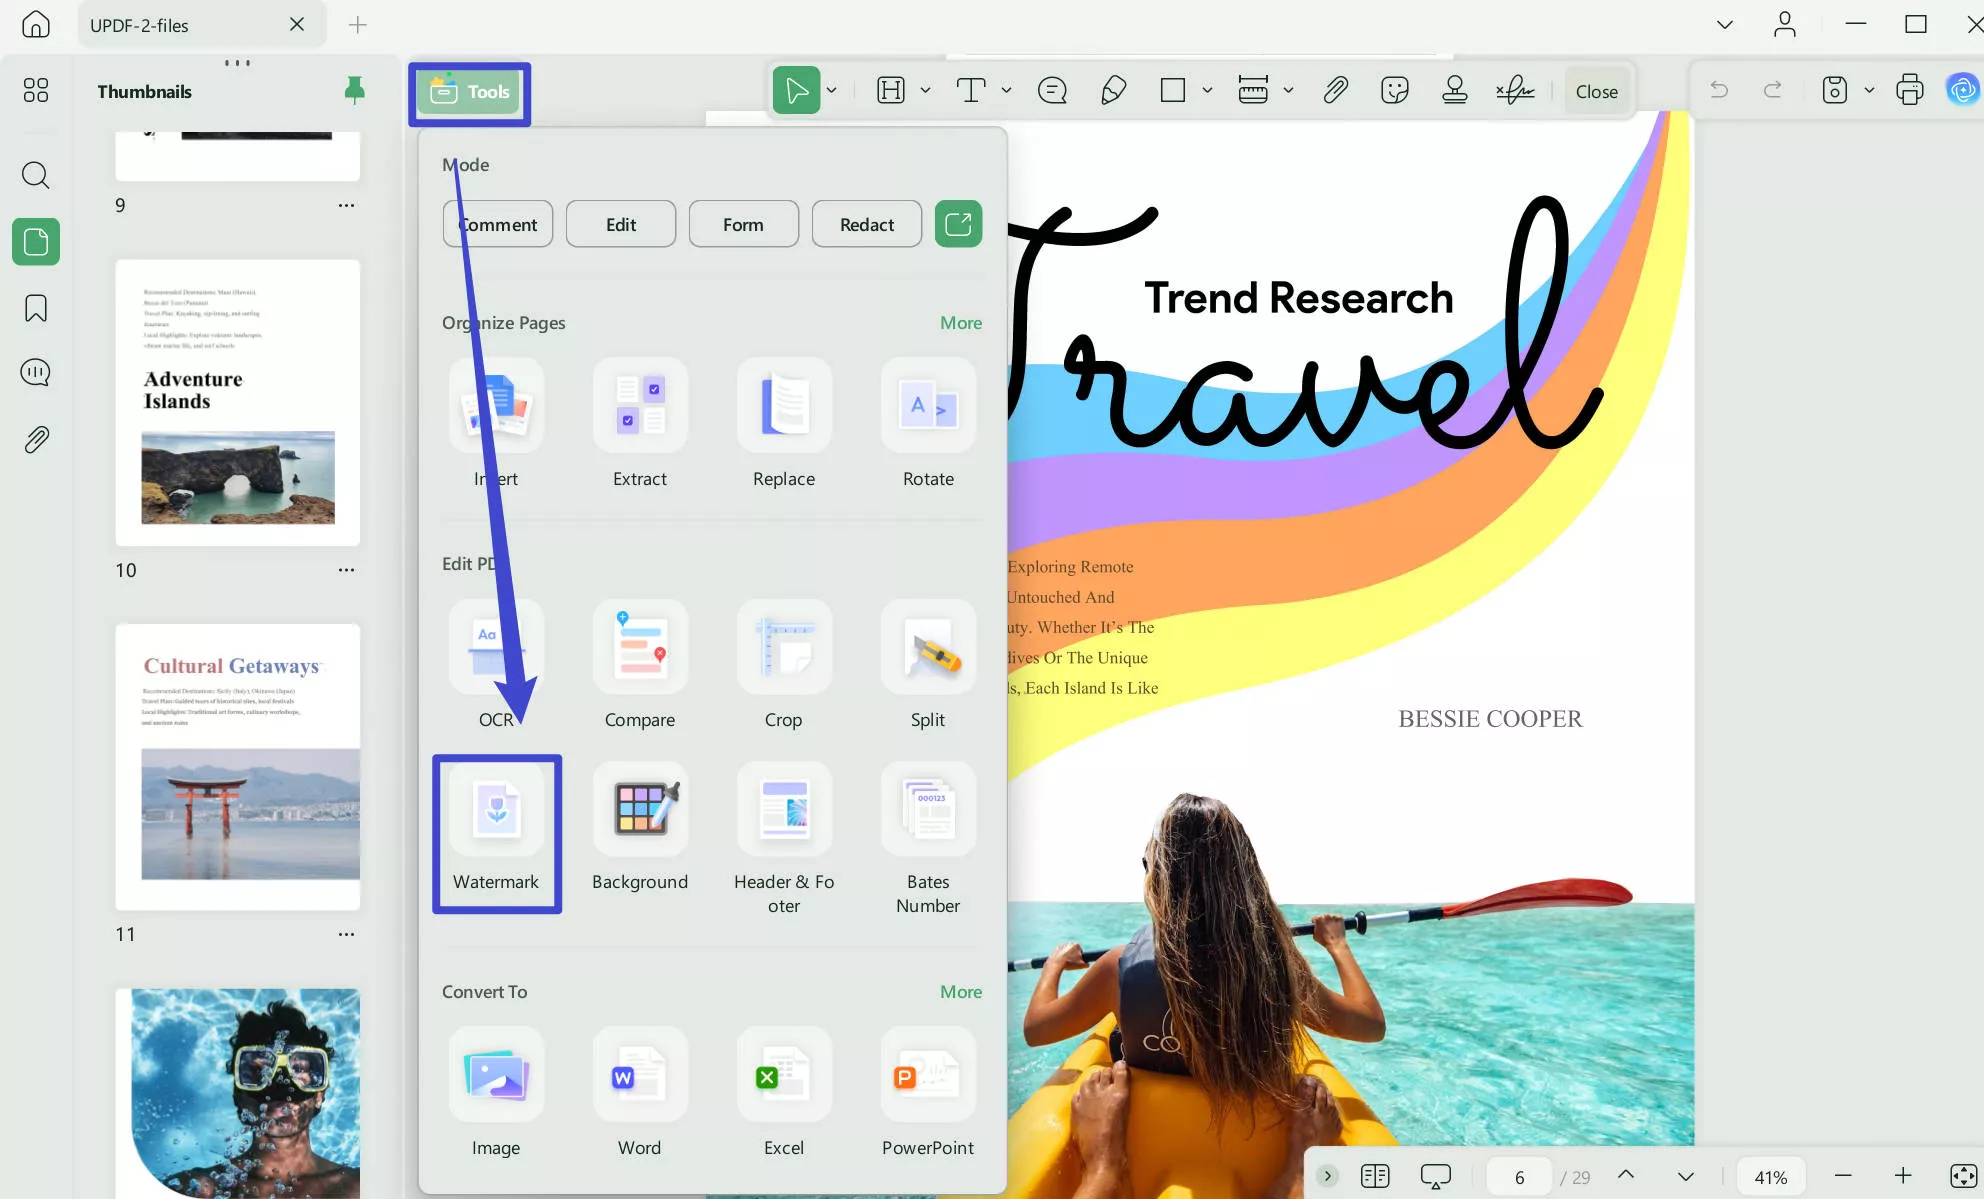
- Click the Add Watermark option from the appearing toolbar to start creating the watermark that you will add to the PDF.
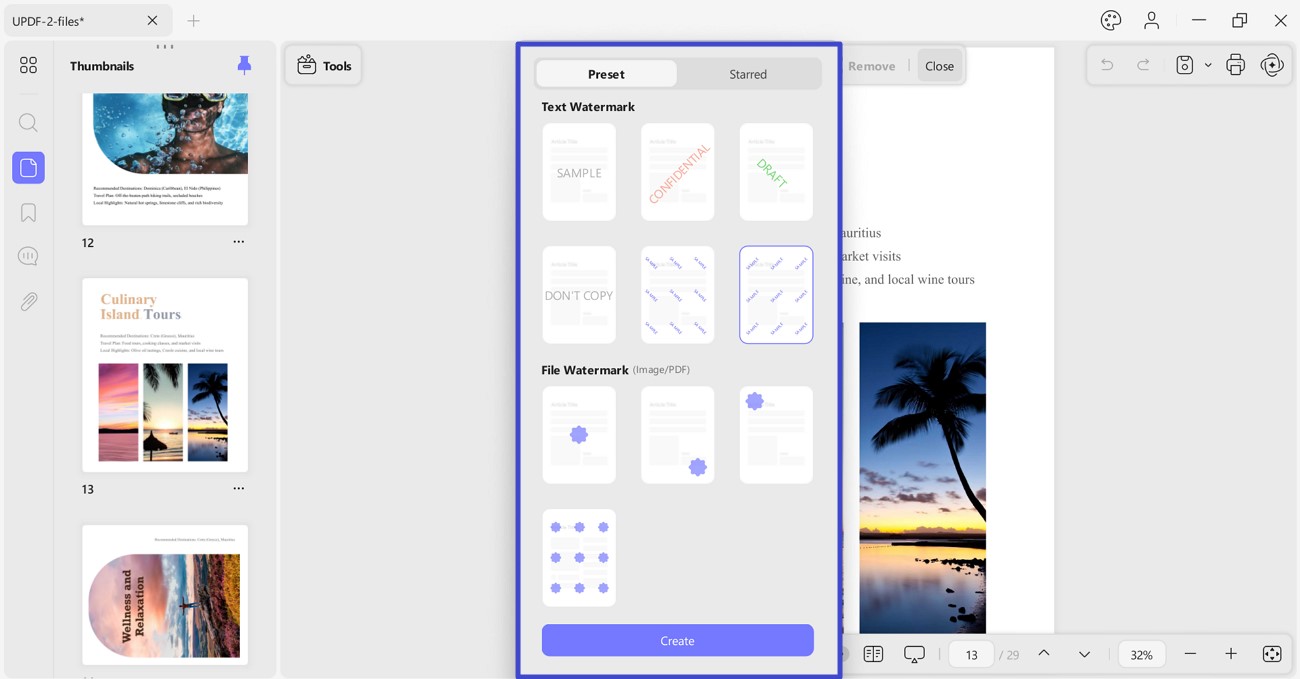
- The Add Watermark option reveals a menu for Preset and Starred watermarks.
- From which the Preset provides you with Text and File (Image and PDF) watermark options. You can click to select the one template you need or click on "Create" to start from scratch to access the Edit Watermark panel.
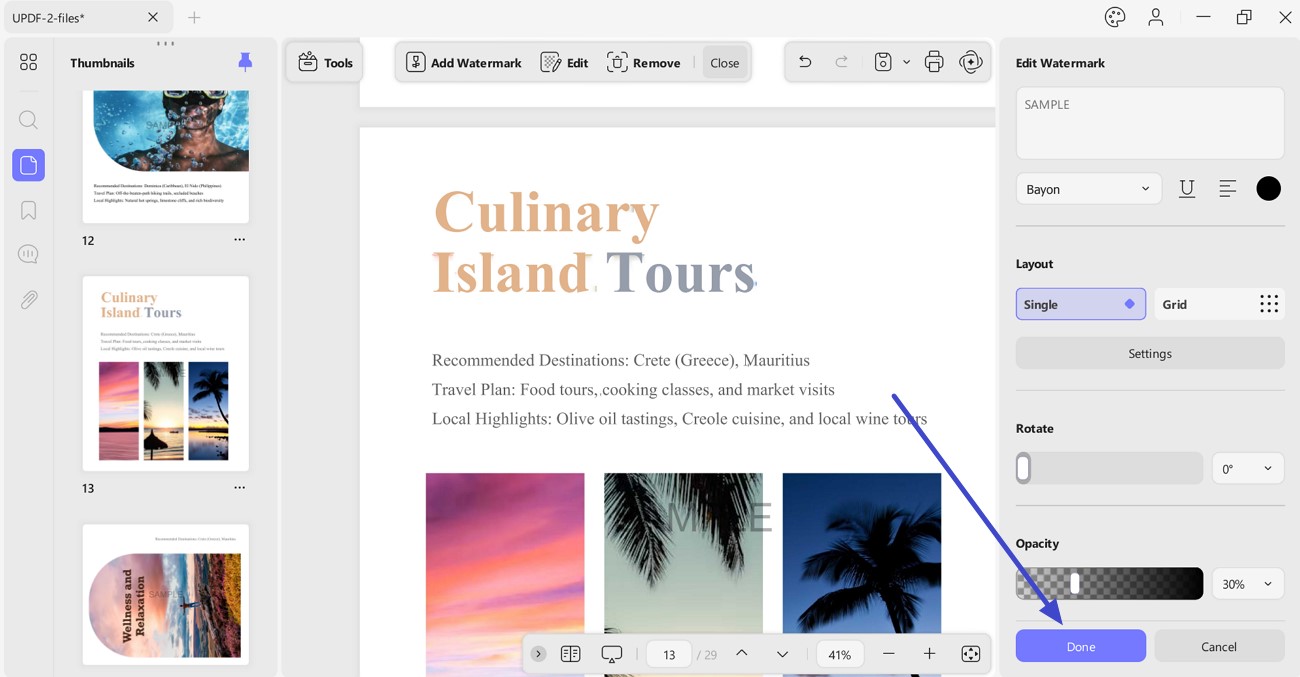
- In the Edit Watermark panel, you can customize the watermark according to your needs. It provides editing options including changing text, font, underline, alignment, and text color.
- You can rotate the watermark by specifying its degree through the slider or the menu. With the Opacity slider, you can adjust its appearance accordingly.
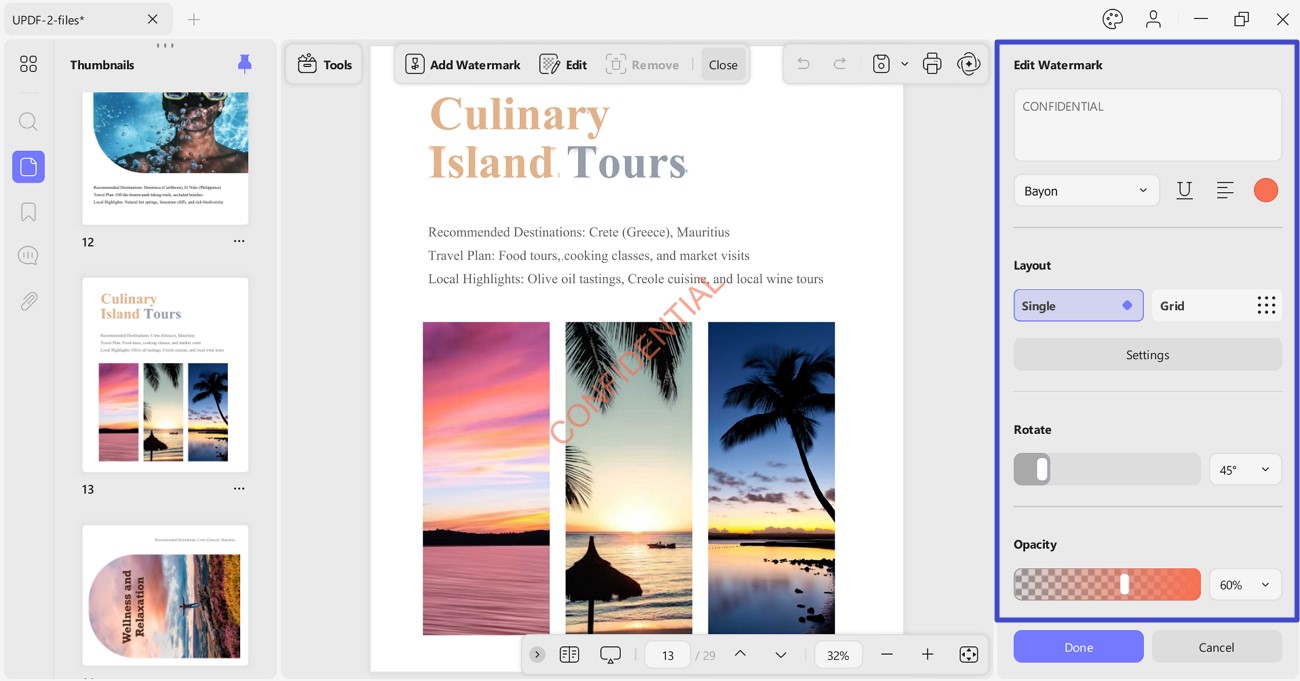
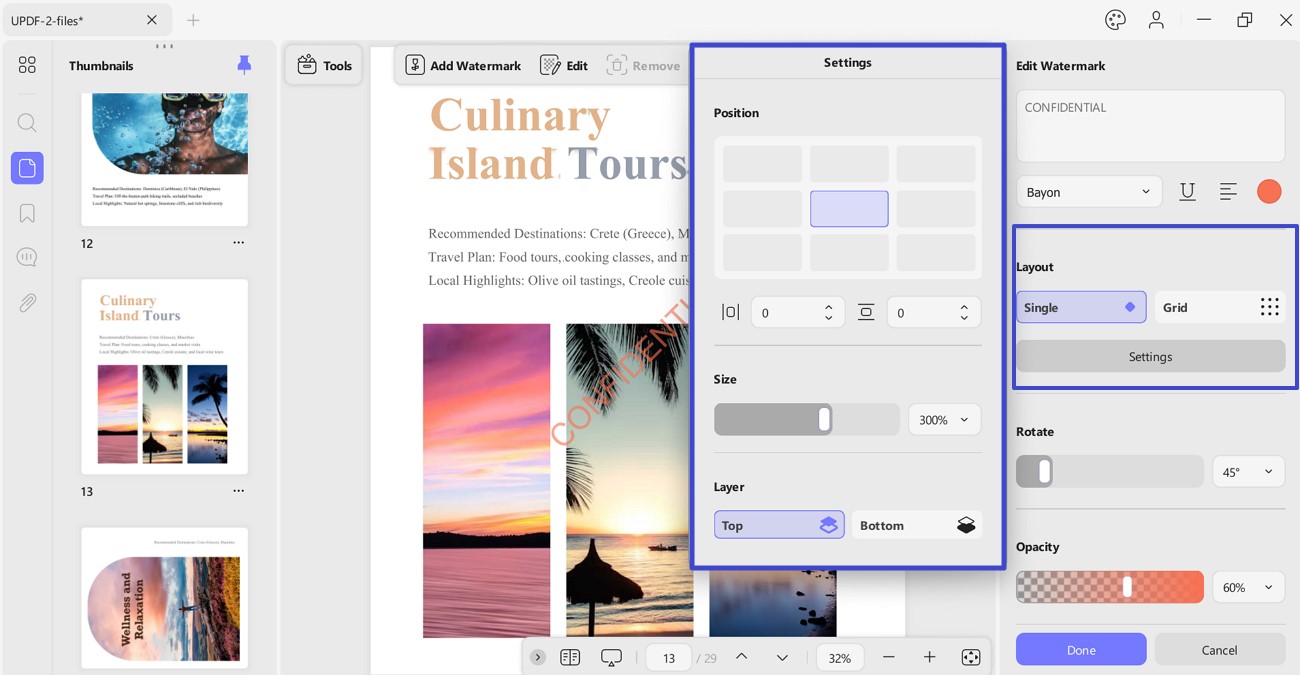
- Besides this, the Layout section allows you to adjust settings for the watermark, including Position, Size, and Layer for Single watermark or Grid watermarks.
- The Position section allows you to type the position for the X and Y axes, respectively, in the given bar.
- Now, scroll down for the Page Range option in the same menu.
- Specify pages manually or by extending the menu and choosing All Pages, Even Pages, or Odd Pages option if required.
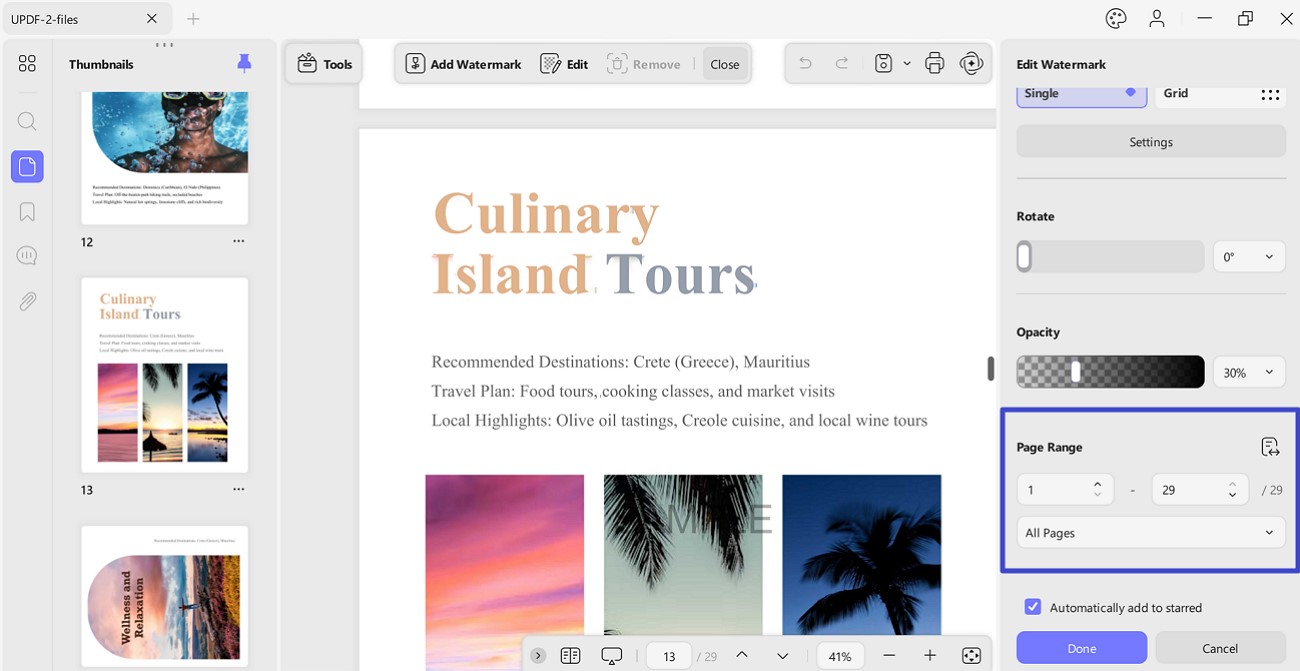
- Finally, click the Done button to apply the watermark.
Edit Watermark
Once you’ve added the watermark, access the Edit tab from the toolbar. Now, hover over the added watermark and press the Edit icon that appears on it.
The editing panel reopens, where you can change all the properties of the watermark with ease. Once done, select "Done" to make changes to the watermark.
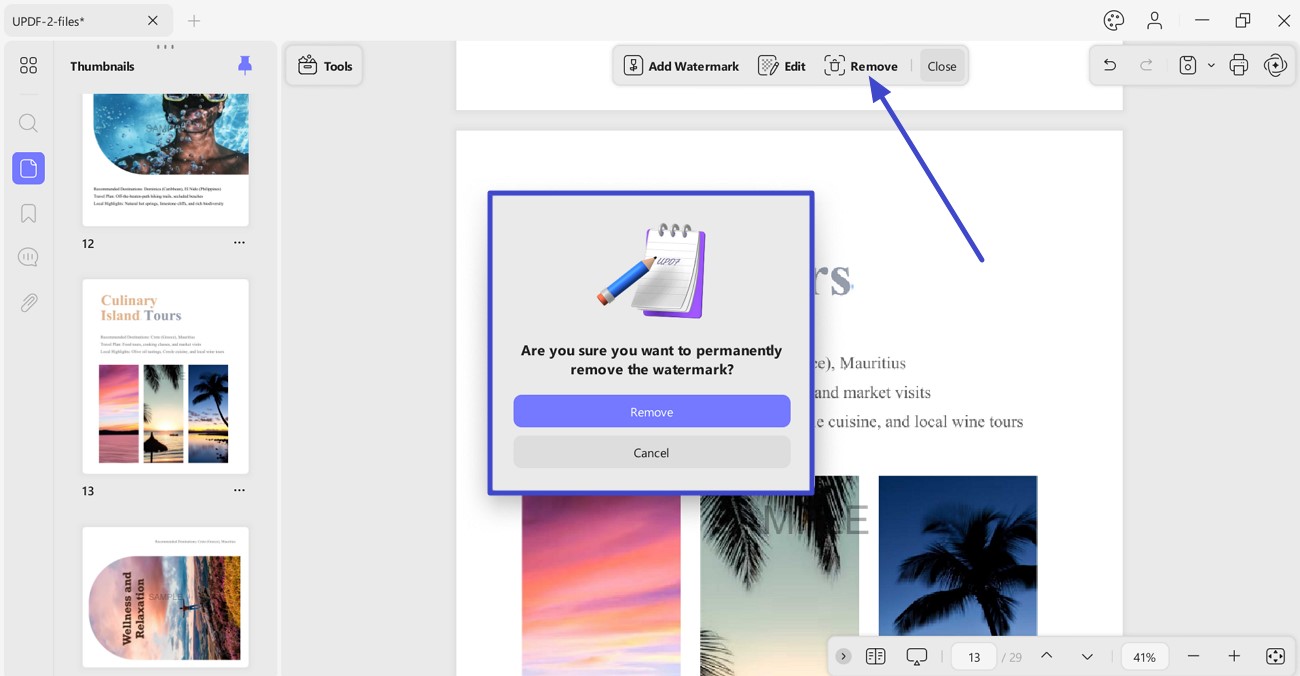
Delete Watermark
To remove added watermark, navigate to the toolbar at the top and choose Remove option. A pop-up window will appear asking you to either remove watermark or cancel the task. As you click the Remove button, the watermark is removed from the PDF.
Note