 UPDF for Windows
 UPDF for Mac
 UPDF for iPhone/iPad
 UPDF for Android
 UPDF AI Online
 UPDF Sign
 Edit PDF
 Annotate PDF
 Create PDF
 PDF Form
 Edit links
 Convert PDF
 OCR
OCR PDF to Word
 PDF to Image
 PDF to Excel
 Organize PDF
 Merge PDF
 Split PDF
 Crop PDF
 Rotate PDF
 Protect PDF
 Sign PDF
 Redact PDF
 Sanitize PDF
 Remove Security
 Read PDF
 UPDF Cloud
 Compress PDF
 Print PDF
 Batch Process
 About UPDF AI
 UPDF AI Solutions
 AI User Guide
 FAQ about UPDF AI
 Summarize PDF
 Translate PDF
 Chat with PDF
 Chat with AI
 Chat with image
 PDF to Mind Map
 Explain PDF
 PDF AI Tools
 Image AI Tools
 AI Chat Tools
 AI Writing Tools
 AI Study Tools
 AI Working Tools
 Other AI Tools
 AI Bookmark Generation
 AI Bookmark Summary
 AI Watermark Generation
 AI Background Generation
 AI Sticker Generation
 AI Stamp Generation
 AI Editing Suite
 UPDF Copilot
 AI Page Management
 AI Semantic Search
 PDF to Word
 PDF to Excel
 PDF to PowerPoint
 User Guide
 UPDF Tricks
 FAQs
FAQs UPDF Reviews
 Download Center
 Blog
Blog Newsroom
 Tech Spec
 Updates
 UPDF vs. Adobe Acrobat
 UPDF vs. Foxit
 UPDF vs. PDF Expert
Annotate PDF
The Comment tools enable users to add comments to PDF easily. The intention of a written comment describe a point of view, an illustration, an example, or a revelation of reality, mainly demonstrating a reaction or personal attitude. You can easily add, edit, and delete the comments.
- 1. Add Text Comments (Typewriter/Text Box/Note)
- 2. Sticky Note
- 3. Text Markups (Highlight/Strikethrough/Underline/Insert Text/Replace Text)
- 4. Pencil and Eraser Tool
- 5. Add Shapes
- 6. Measure Tool
- 7. Attachment Tool
- 8. Add Stickers
- 9. Insert Stamps
- 10. Comment Properties
- 11. Manage Comment Lists
- 12. Undo/Delete Annotations
Next, let's dive into how you can use these annotation tools in UPDF.
Windows • macOS • iOS • Android 100% secure
Video Tutorial on How to Annotate PDF with UPDF
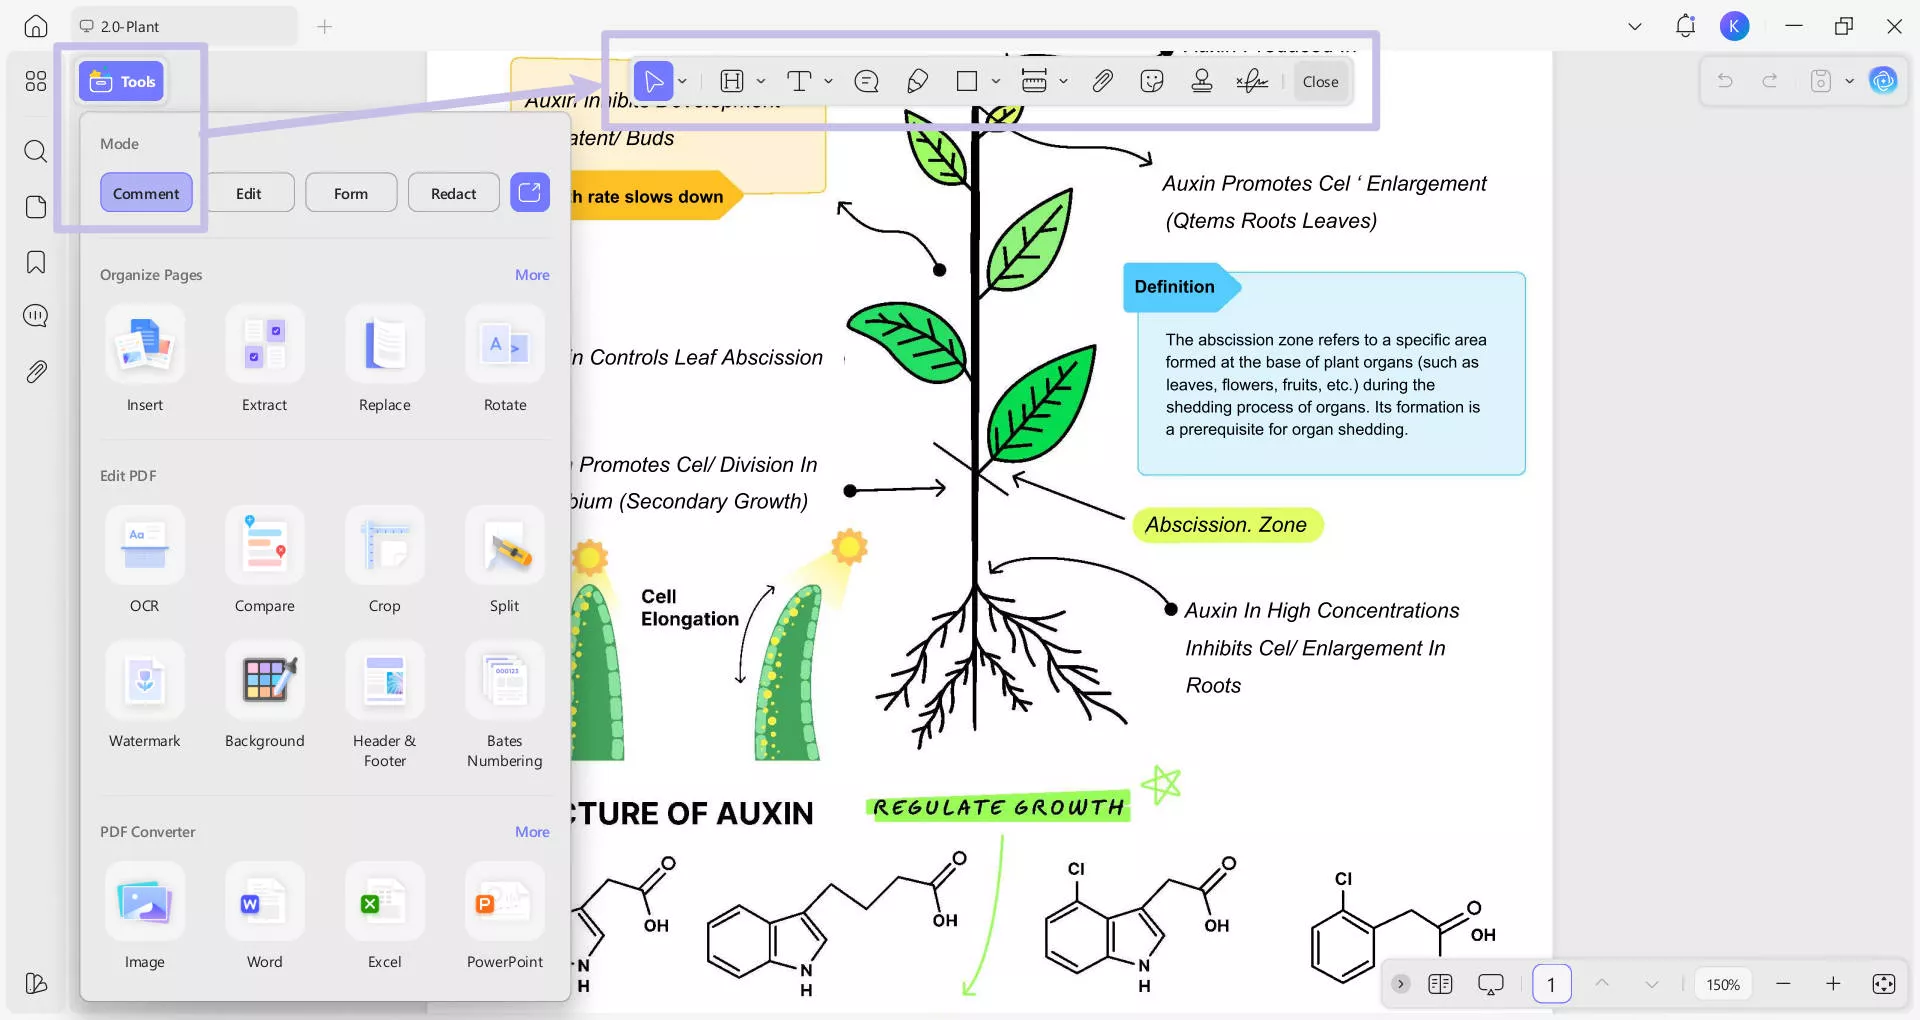
1. Add Text Comments
The Text Comment feature in the Annotation bar allows you to add 3 text types: Text Comments, Text Box, and Text Callout.

Text Comment
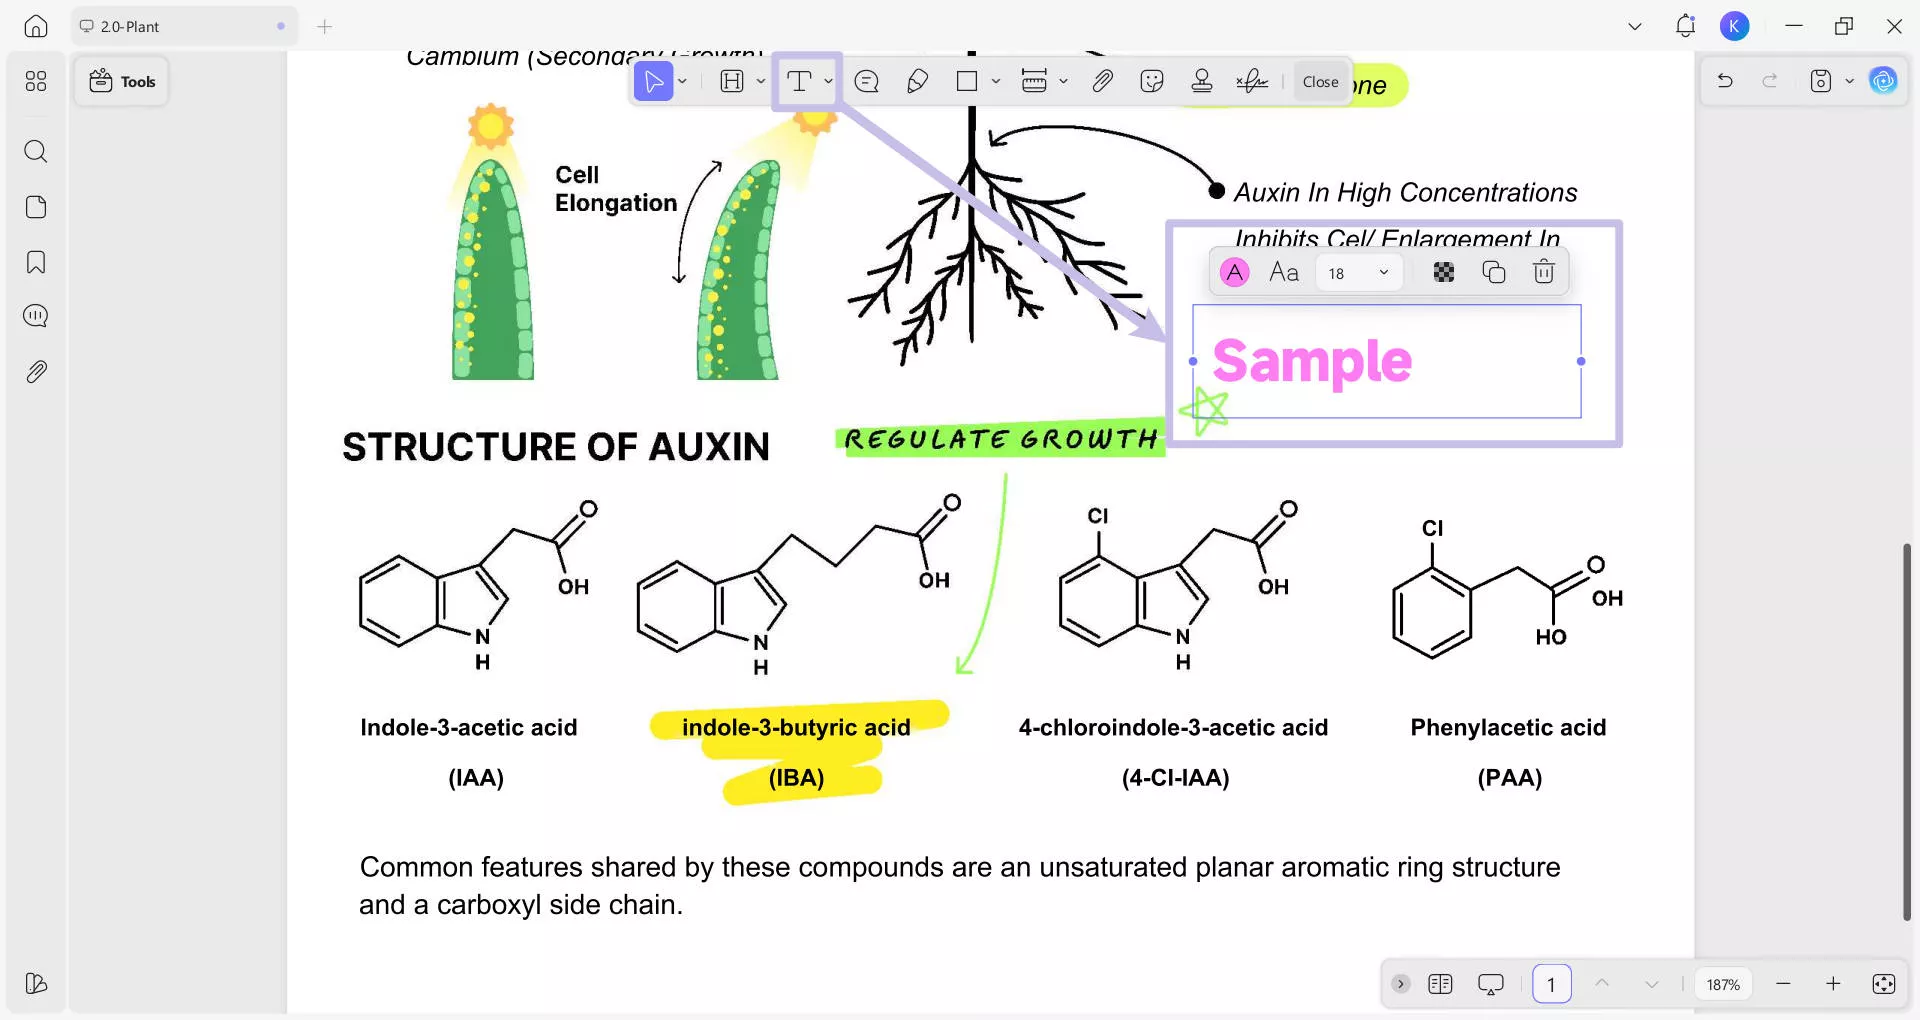
- To add a typewriter, press the T icon and click anywhere on the PDF where you want to place the typewriter comment. Once placed, start writing a comment in the text box.
- After writing a comment, a floating bar appears that provides options like changing opacity, font, text size, and text color.
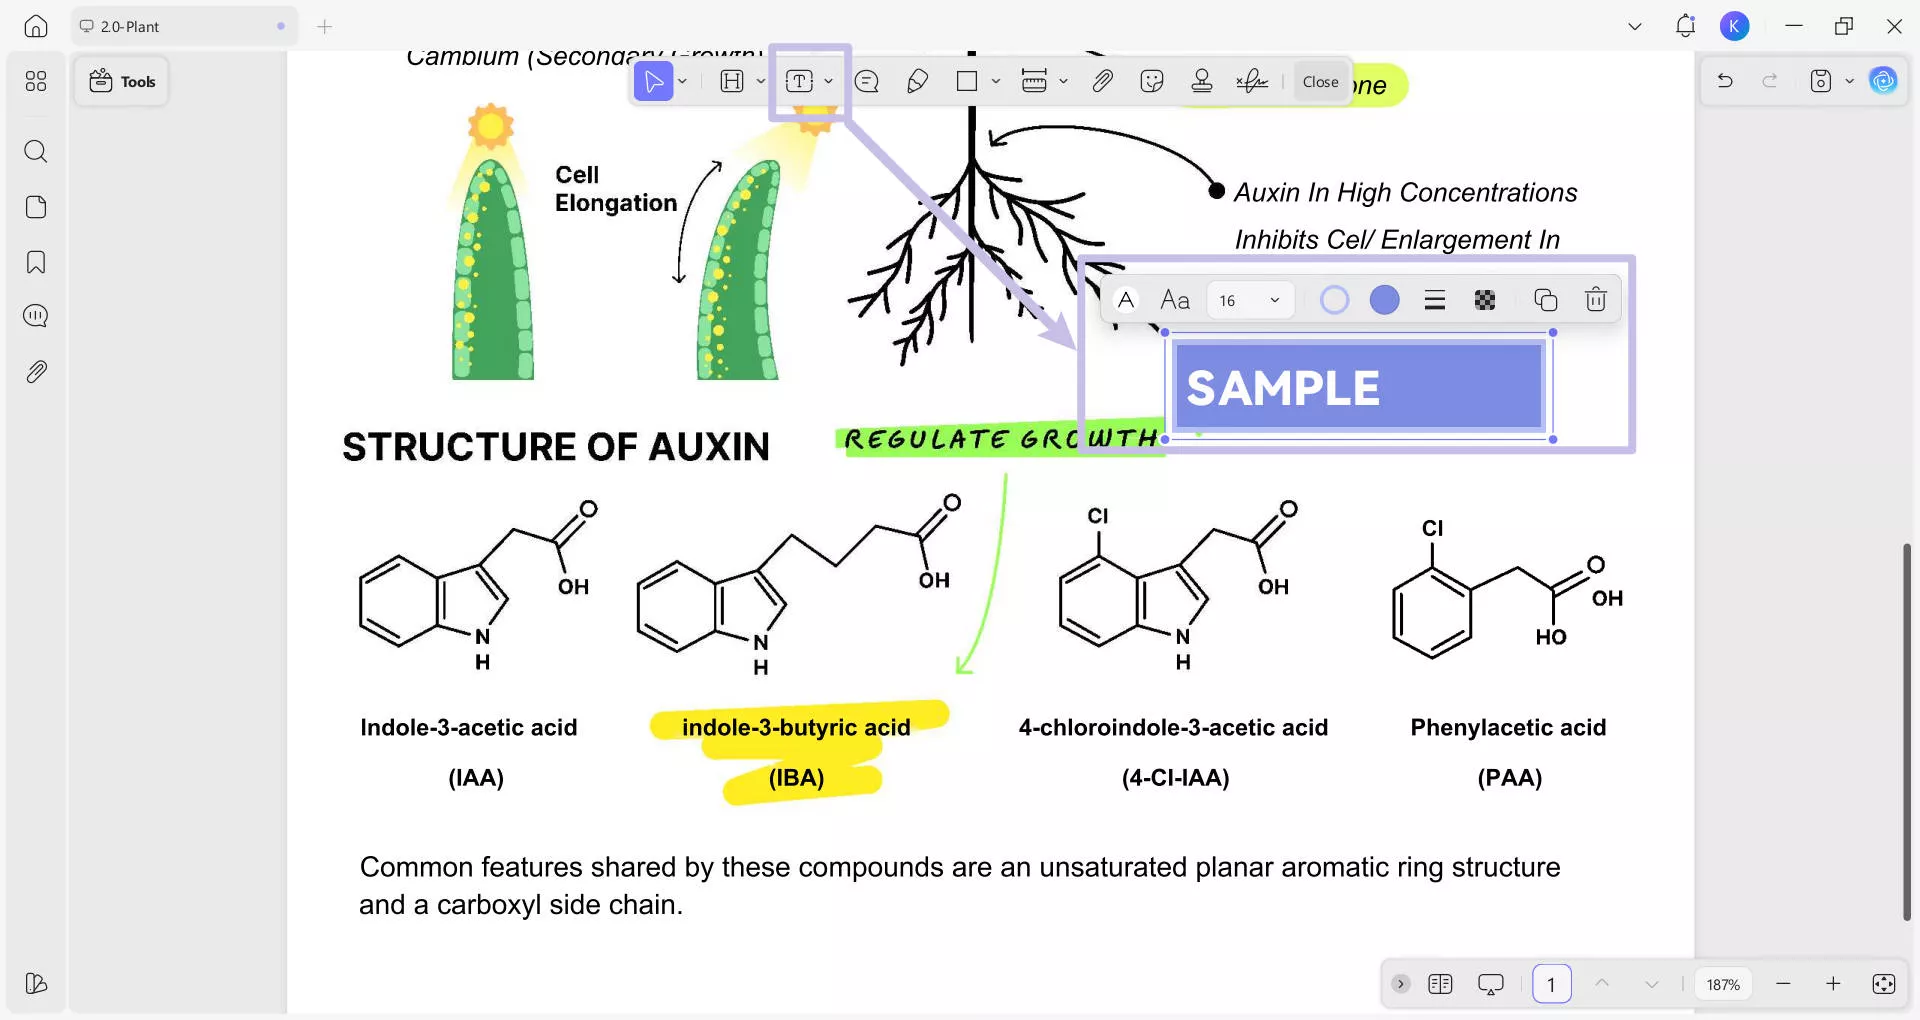
Text Box
- To insert a Text Box, Press the T icon and choose the Text Box option. After this, click anywhere on the PDF to add a text box.
Text Callout
- This Text Callout feature can be added when you press the T icon and choose Text Callout option from annotation bar.

- After adding the comment, you can select it to copy, delete, or view/change the properties.
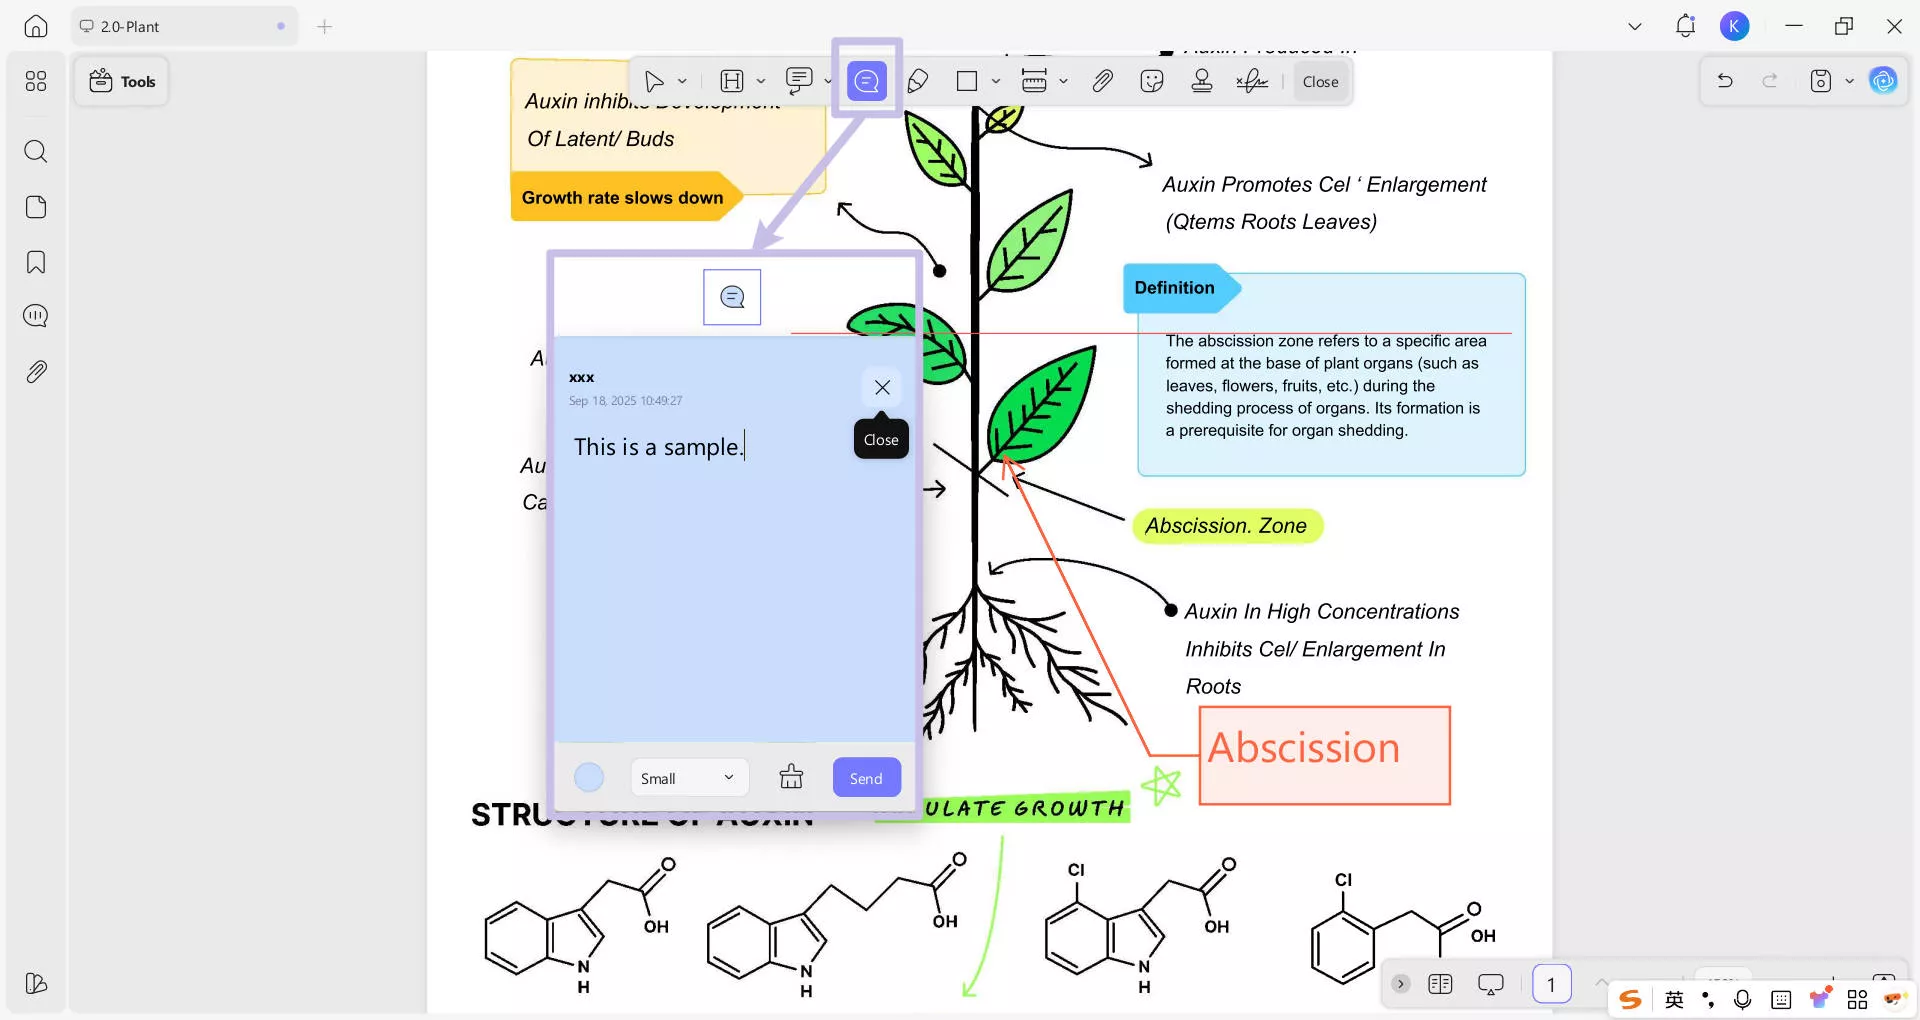
2. Sticky Note
- To add a Sticky Note, navigate to the Annotation bar and choose the Sticky Note icon.
- Once done, it will provide possibilities like fill color, font size (small, medium, and large), a Clear icon, and a Send button.
3. Text Markups
Text Markups is available in the annotation bar and helps you to add the following types of markups:
- Highlight
- Strikethrough
- Underline
- Squiggly
- Insert Text
- Replace Text
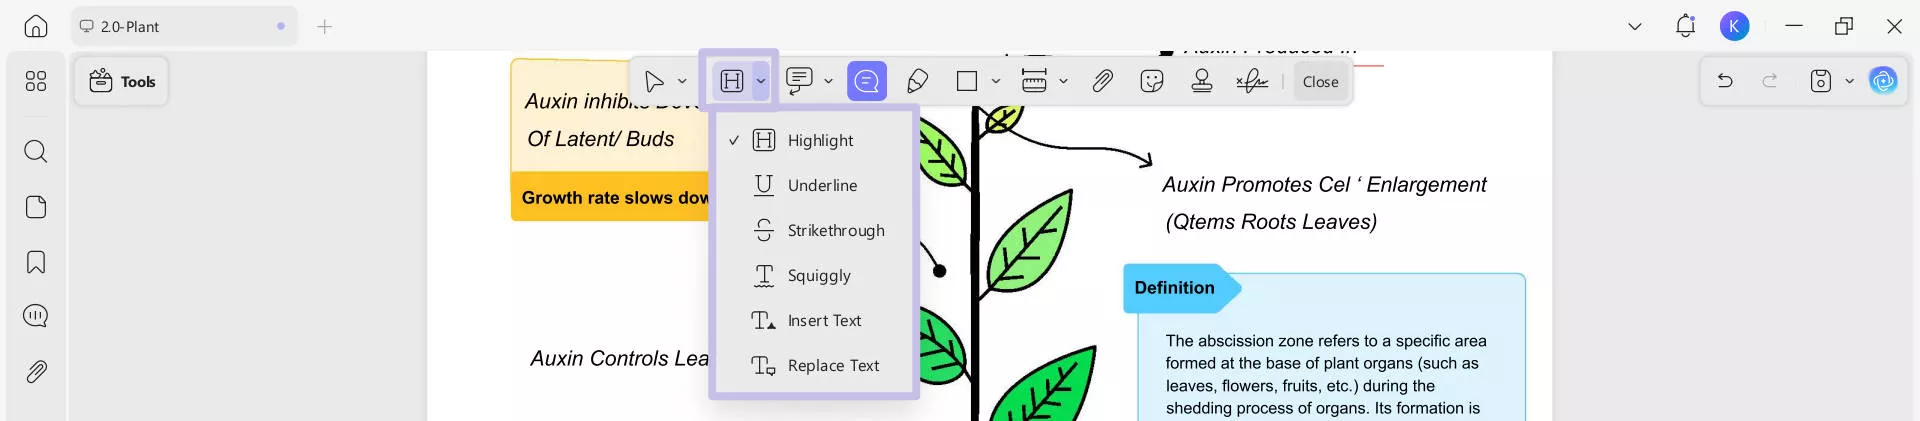
Regardless of the markup type, you can easily edit it through the floating bar that appears upon marking. Conversely, if you make a mistake, simply press Ctrl + Z to undo the annotation instantly. Now, let's discuss each of the following markup features in detail:
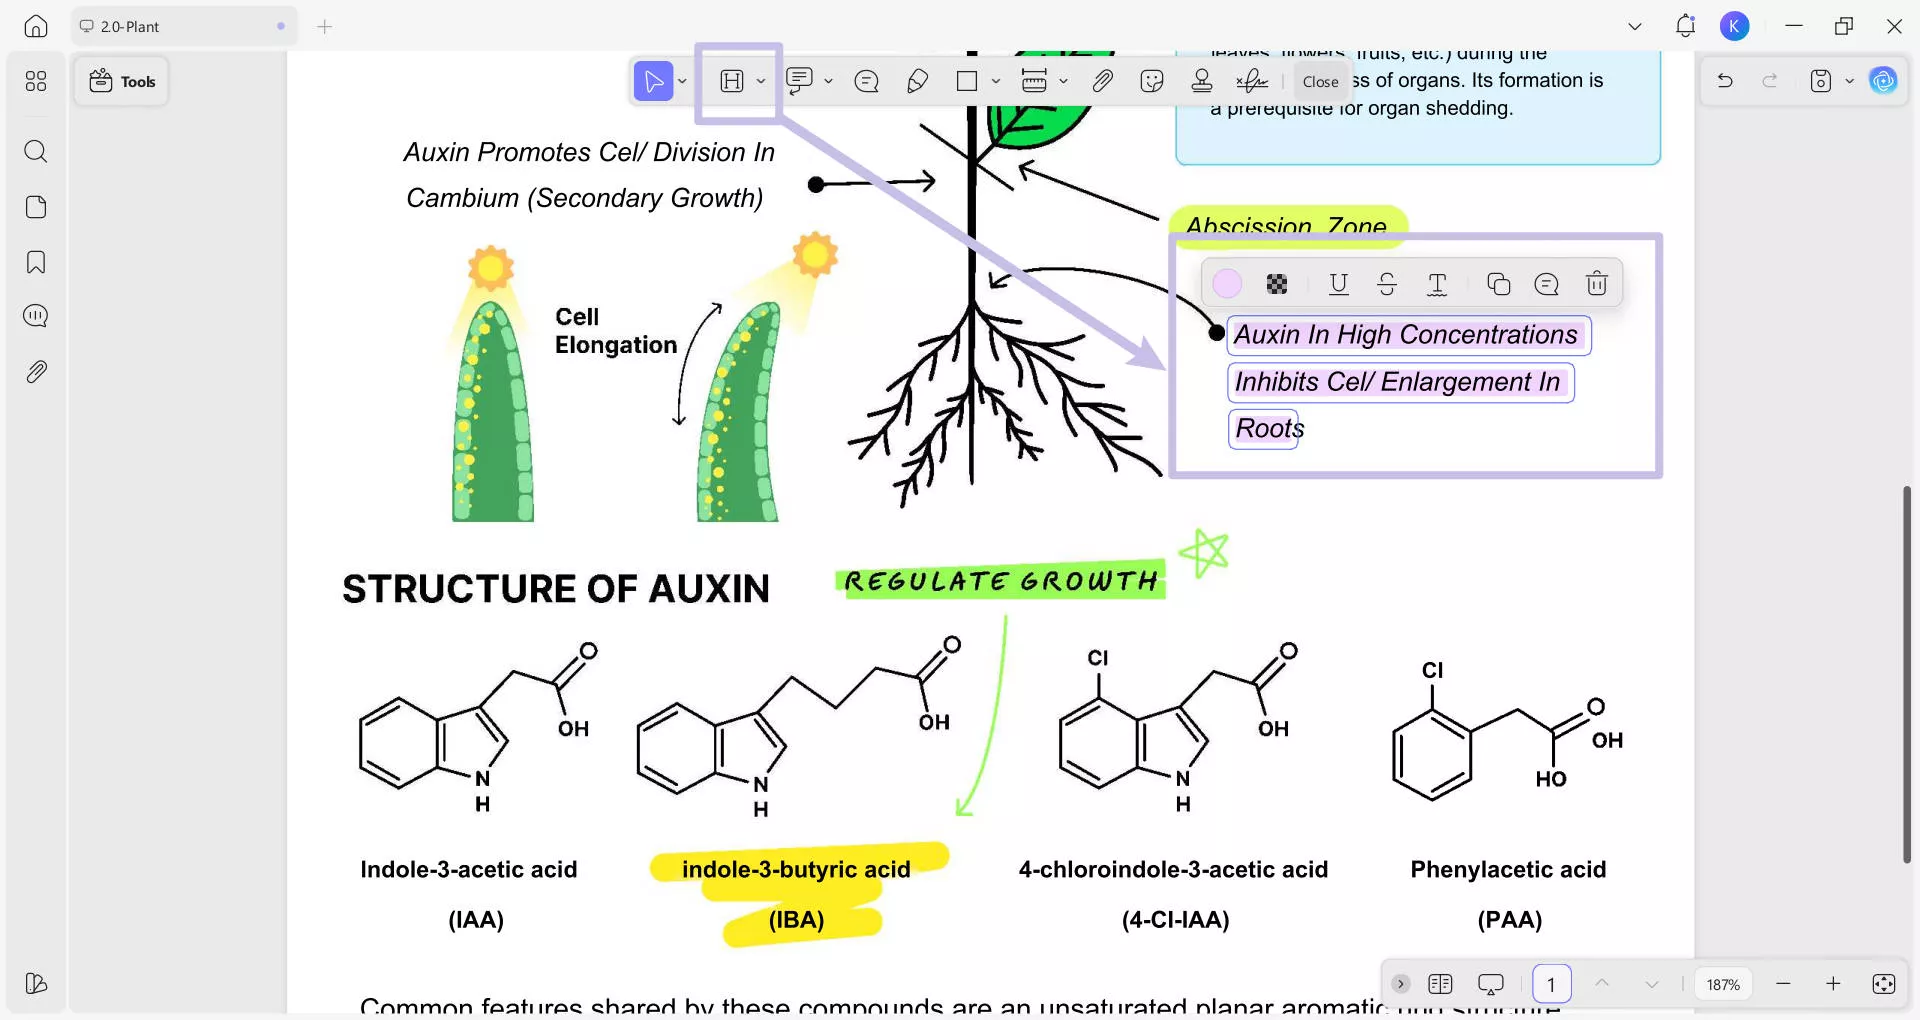
Highlight: To highlight, navigate to the Markup Tool and select the Highlight feature.
Strikethrough: For strikethrough, press the Markup Tool again and select the Strikethrough option from the menu. This feature helps others know that the text has been deleted.

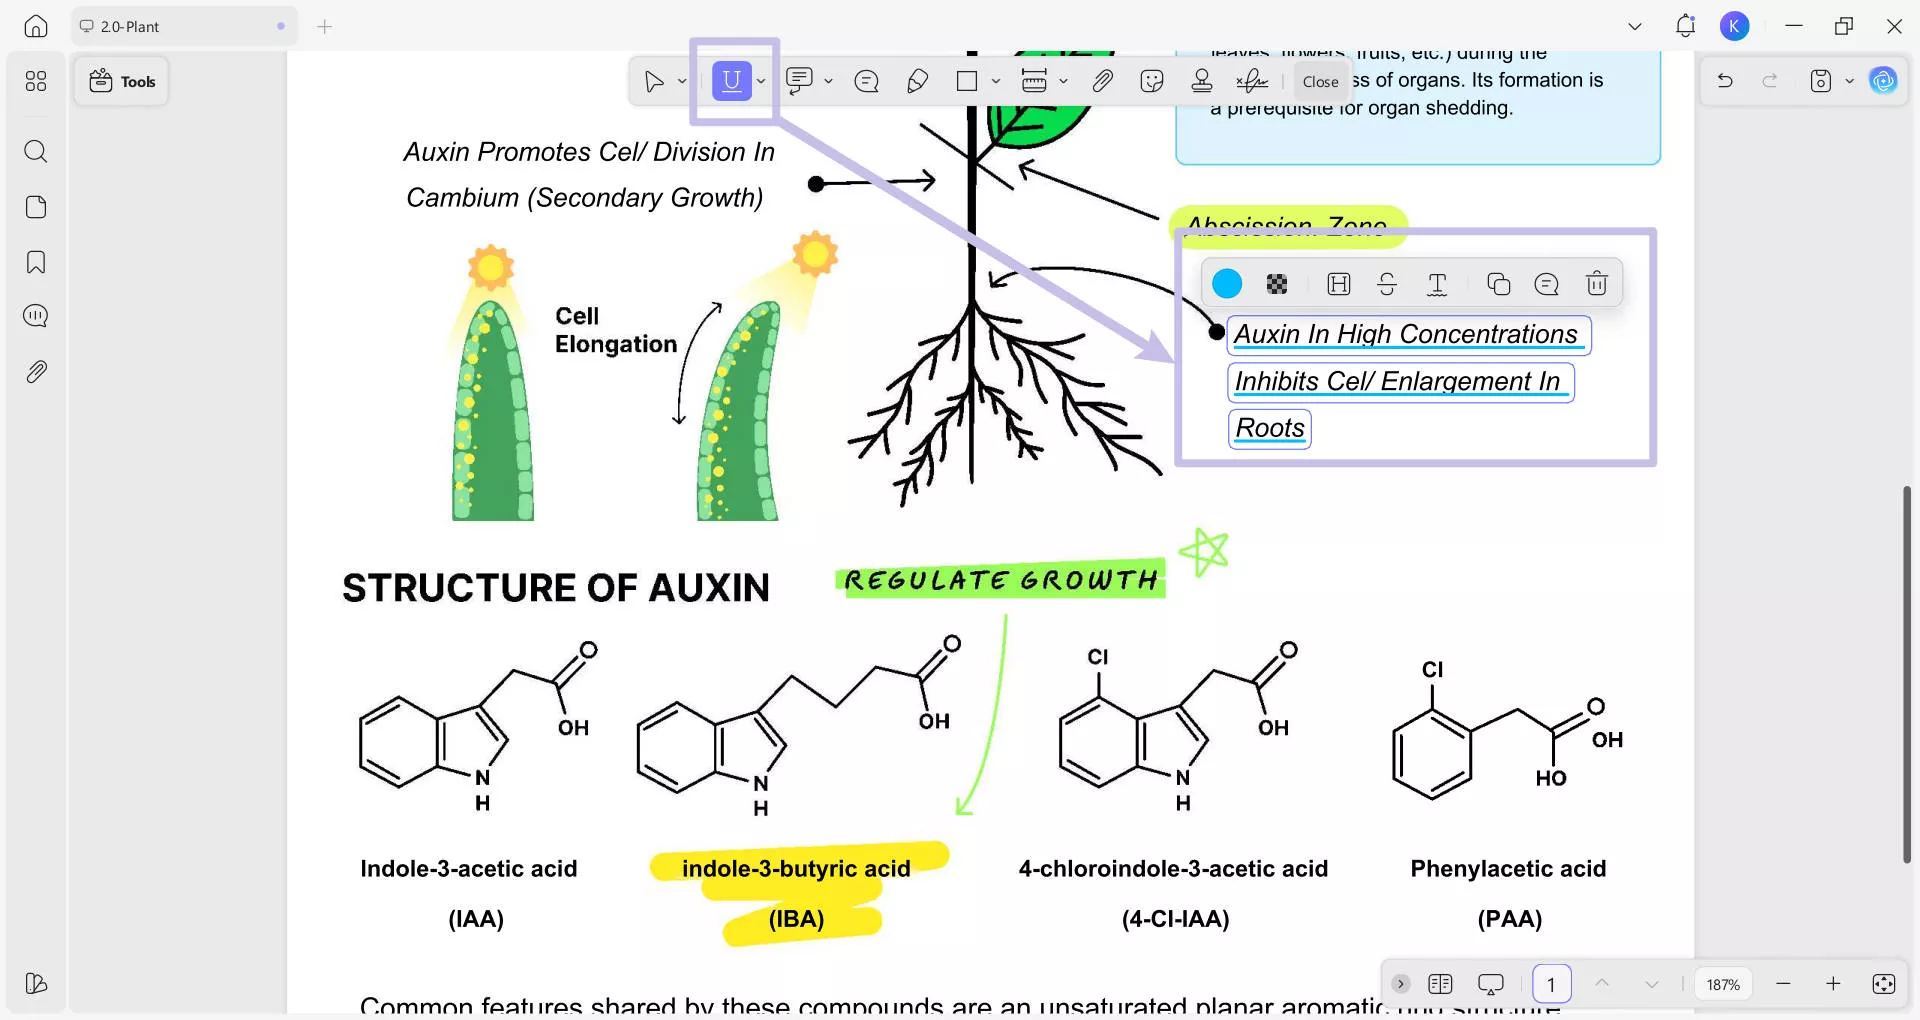
Underline: To underline an important text, simply click on the Underline option from the Markup Tool in the annotation bar.
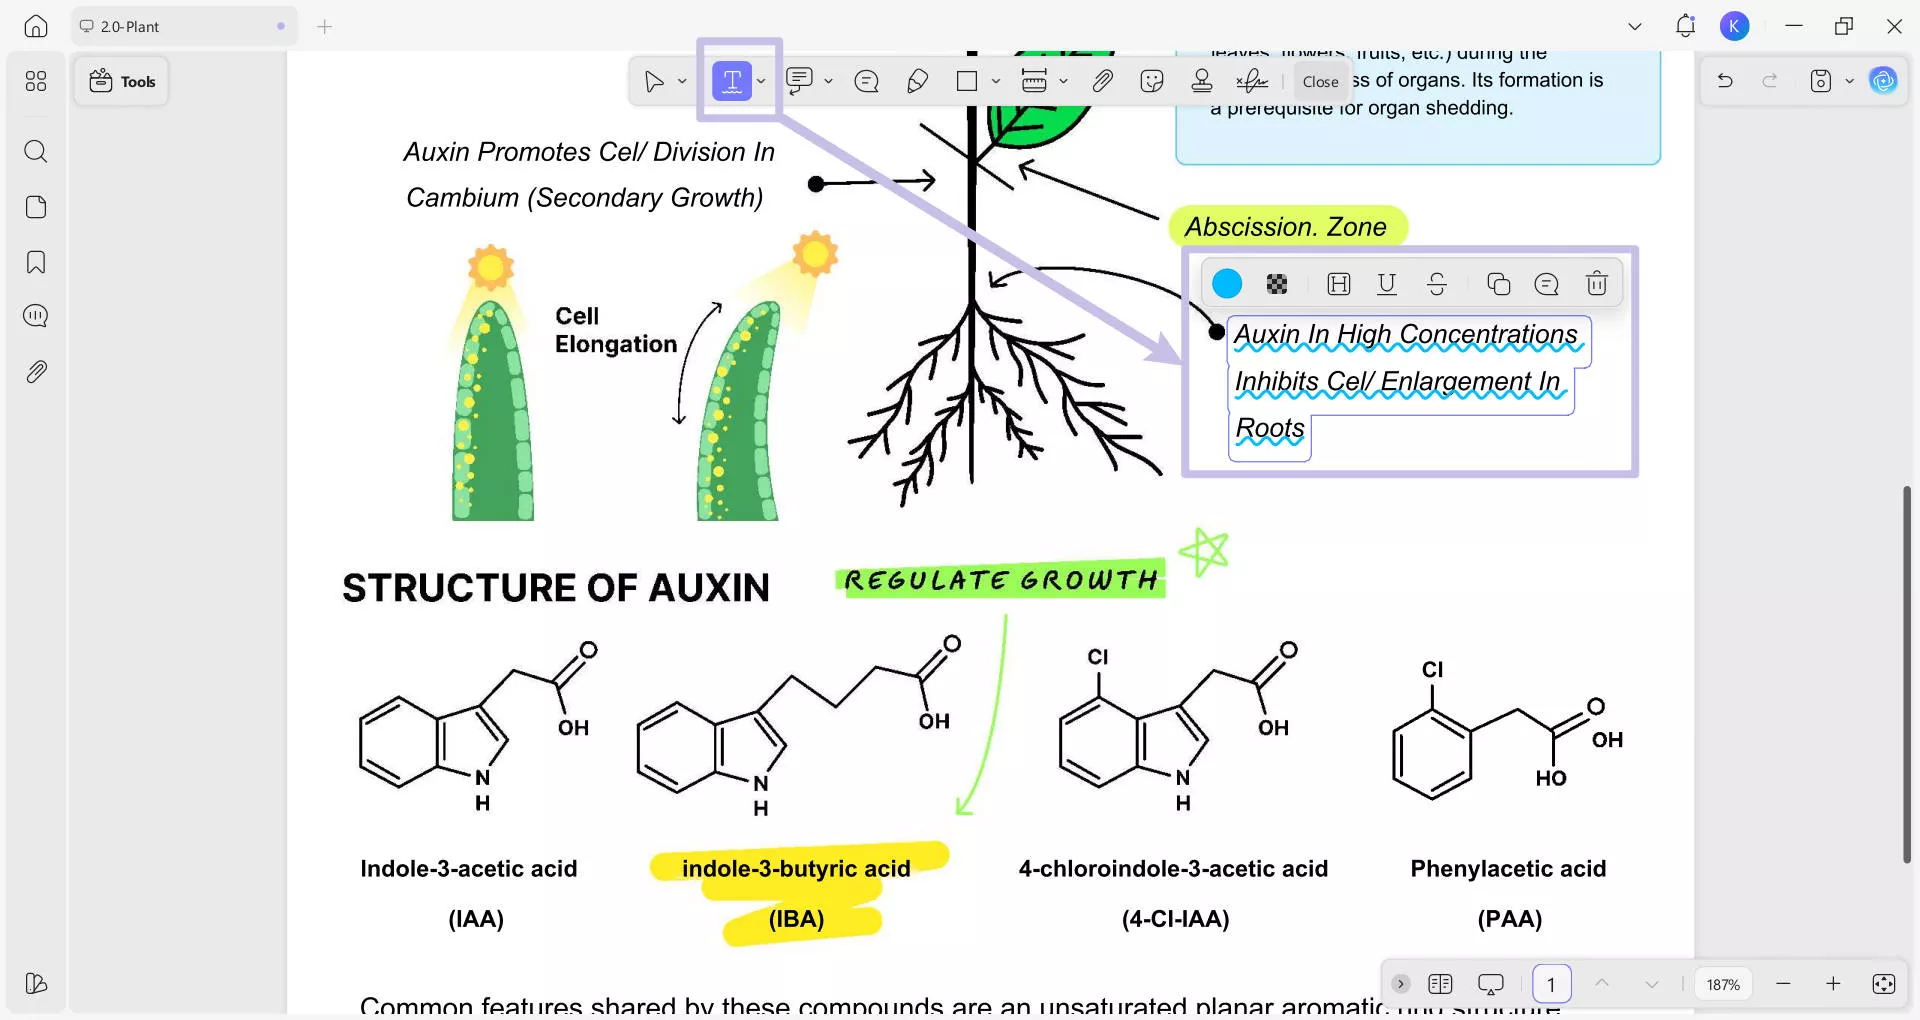
Squiggly: proceed to the Markup Tool icon in the annotation bar and select the Squiggly option.
Insert Text: The text insertion annotation function allows you to mark where new text should be added in the document during review or editing.
Click the drop-down arrow next to the "Highlight" button. In the pop-up tool menu, click the "Insert Text" option.
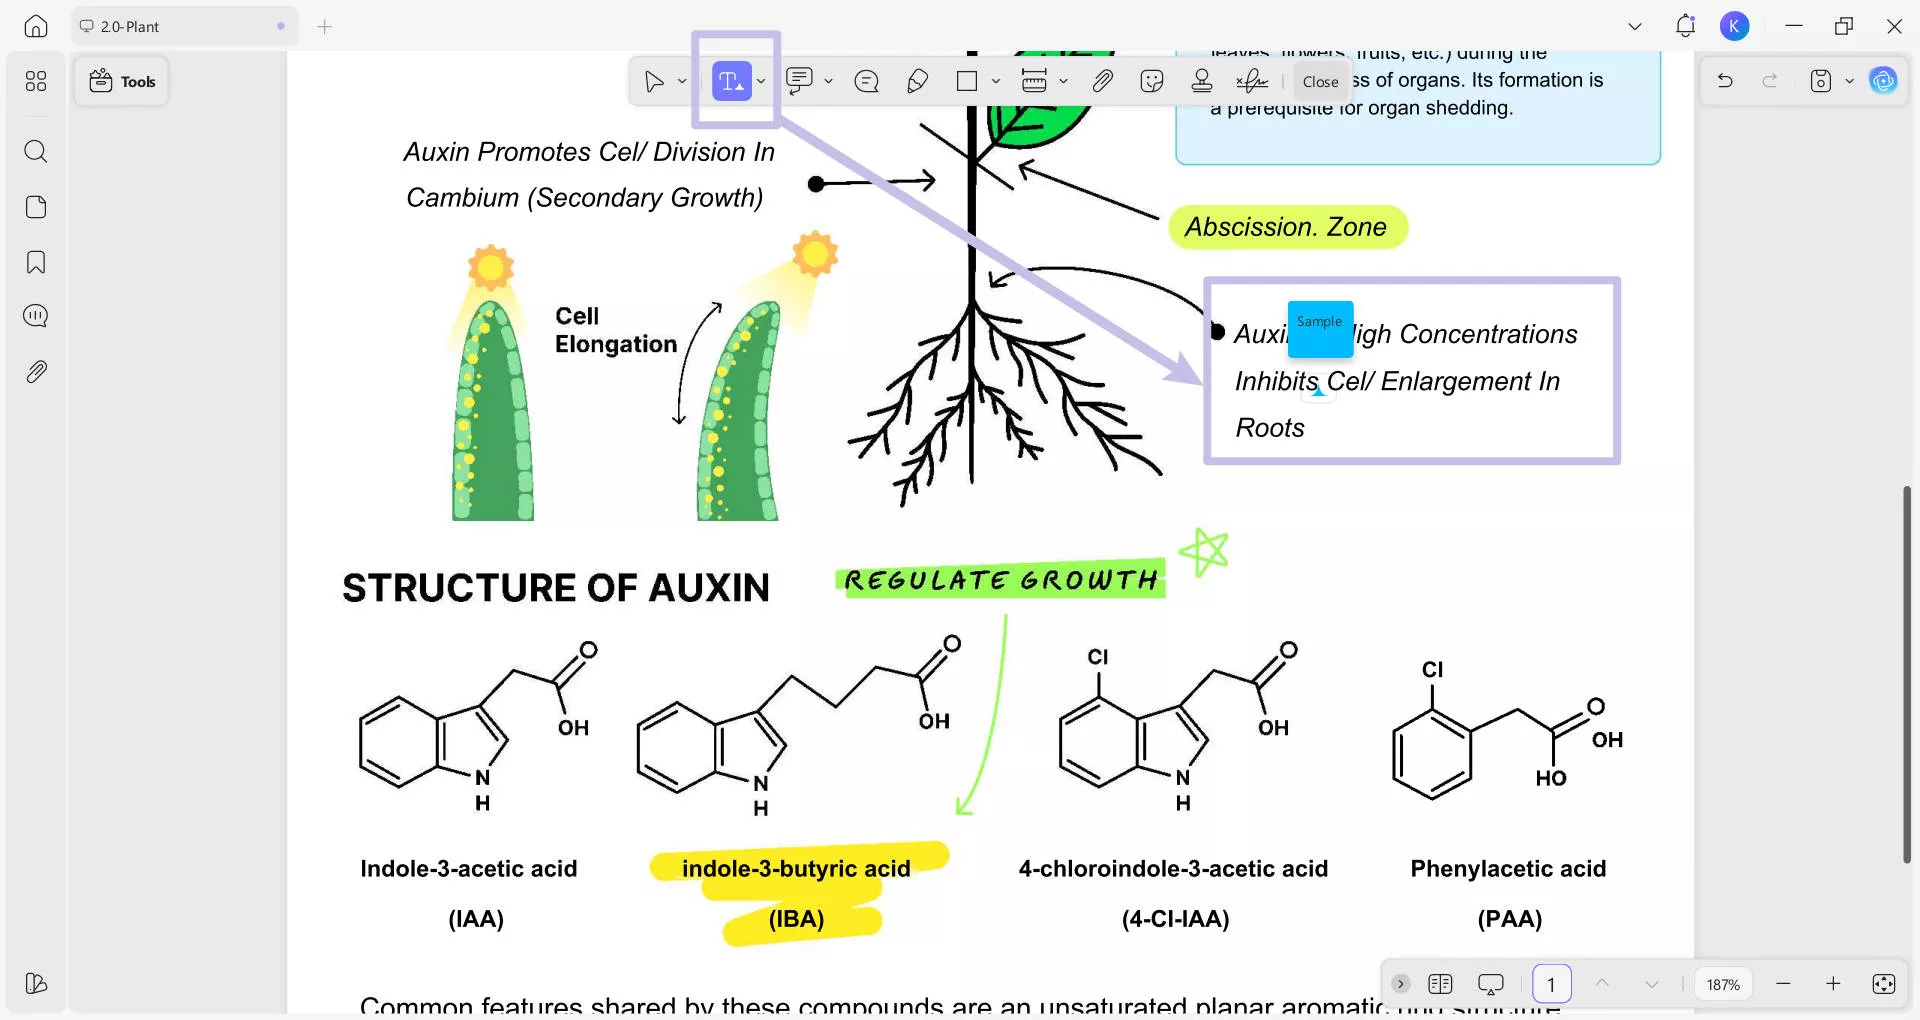
Move the mouse pointer to the specific location in the document where you want to add new text and click the left mouse button, a text box will appear. Enter the new text content you want to add in the text box.
Replace Text: The text replacement annotation feature enables you to suggest replacement text directly within the PDF, which facilitates more efficient collaboration.
Click the drop-down arrow next to the "Highlight" button. In the pop-up tool menu, click the "Replace Text" option.
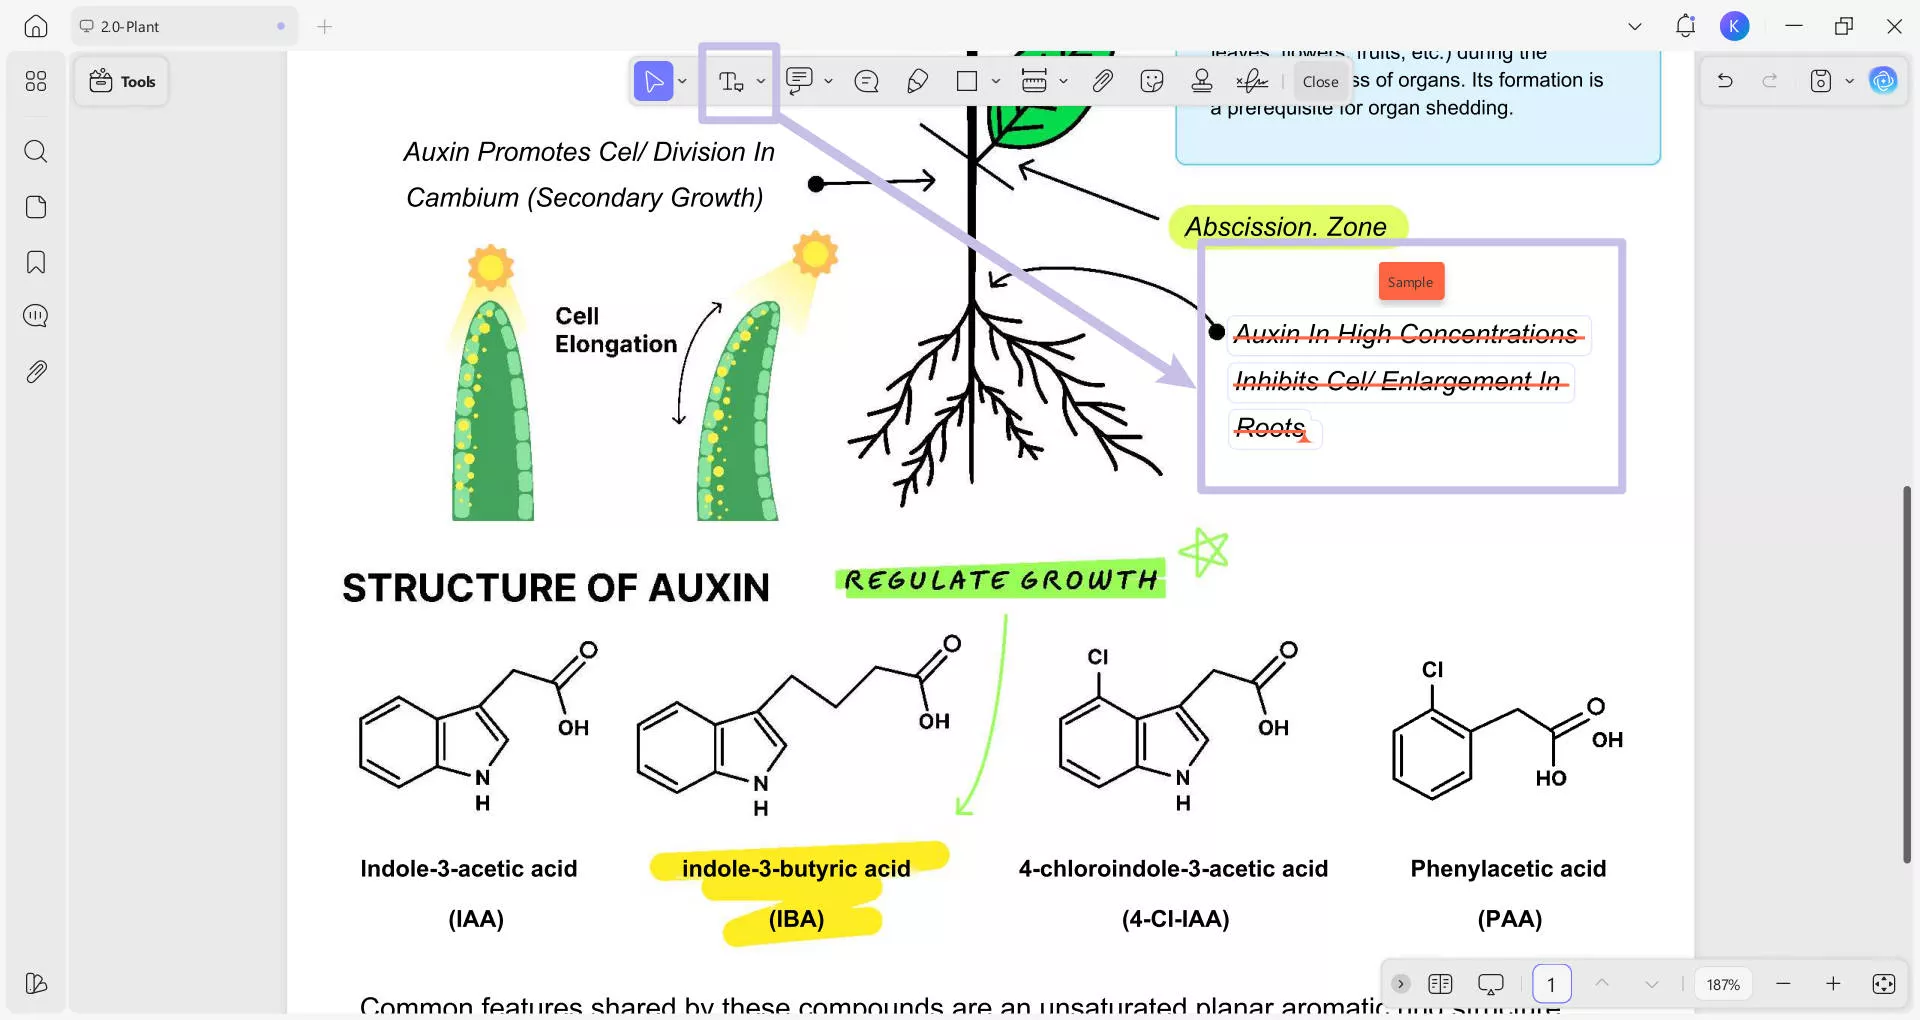
Use your mouse or cursor to highlight the text within the PDF that you want to suggest a replacement for. Once you have selected the text, type in the text that you think should replace the selected text. After entering the replacement text, save the changes to the PDF.
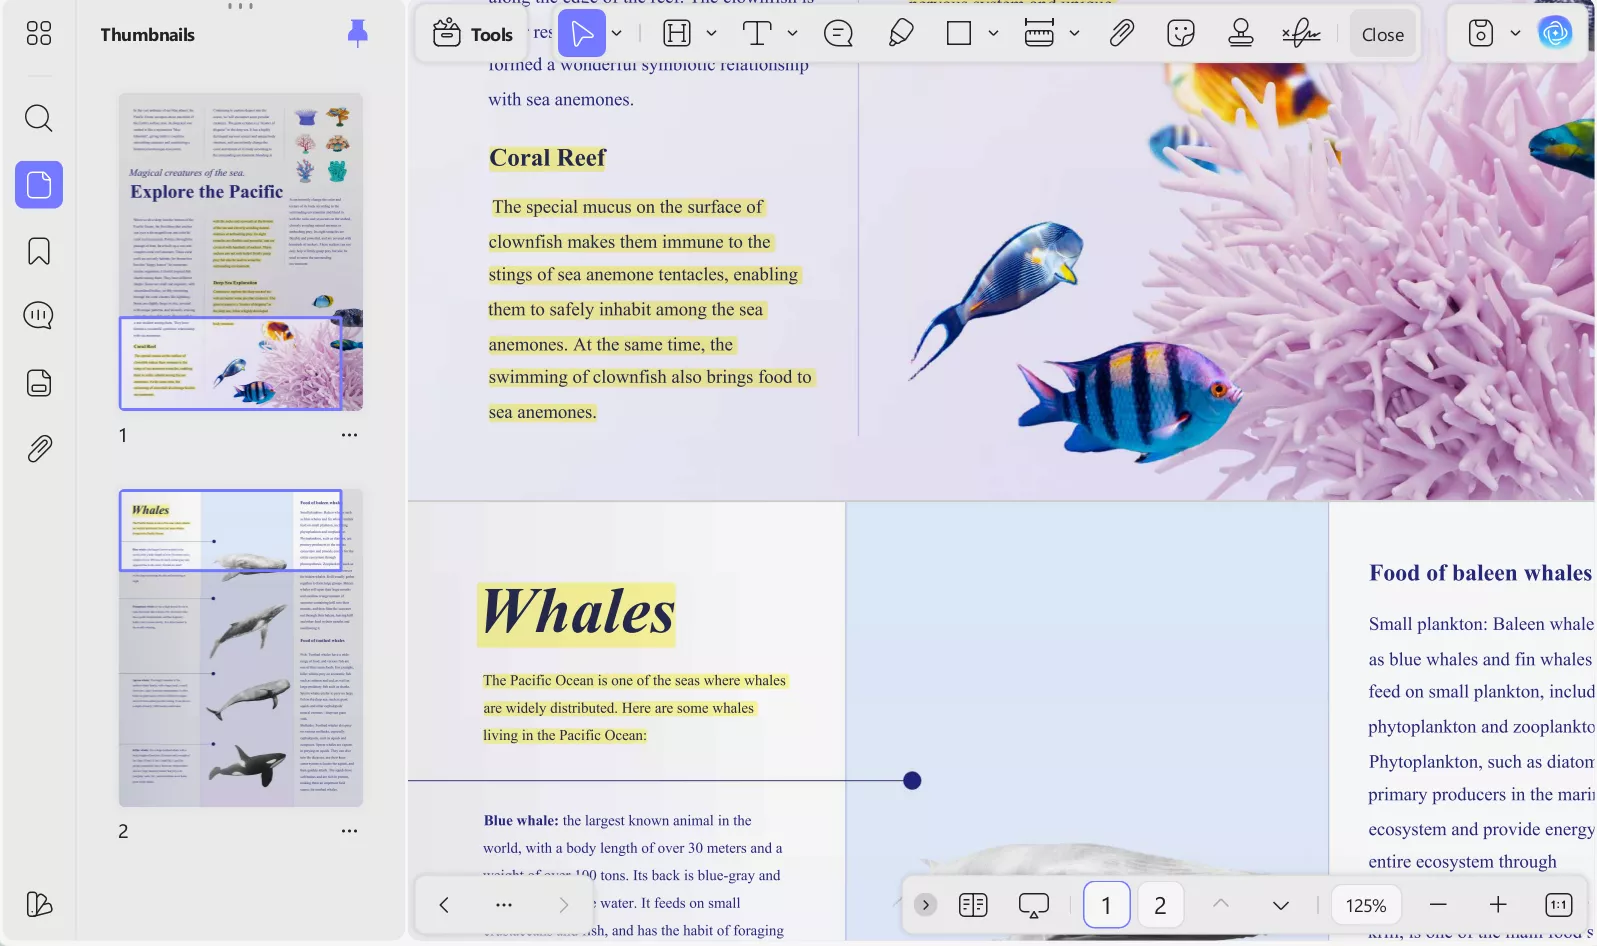
Cross‑page annotation: In UPDF, the cross‑page annotation feature allows you to continuously add and manage Highlight, Strikethrough, Underline, and Squiggly across multiple pages, enabling consistent marking of content that spans pages.
4. Pencil and Eraser Tool
If you are looking forward to drawing on a PDF document free hand, you can use the pencil and eraser tool provided by UPDF.
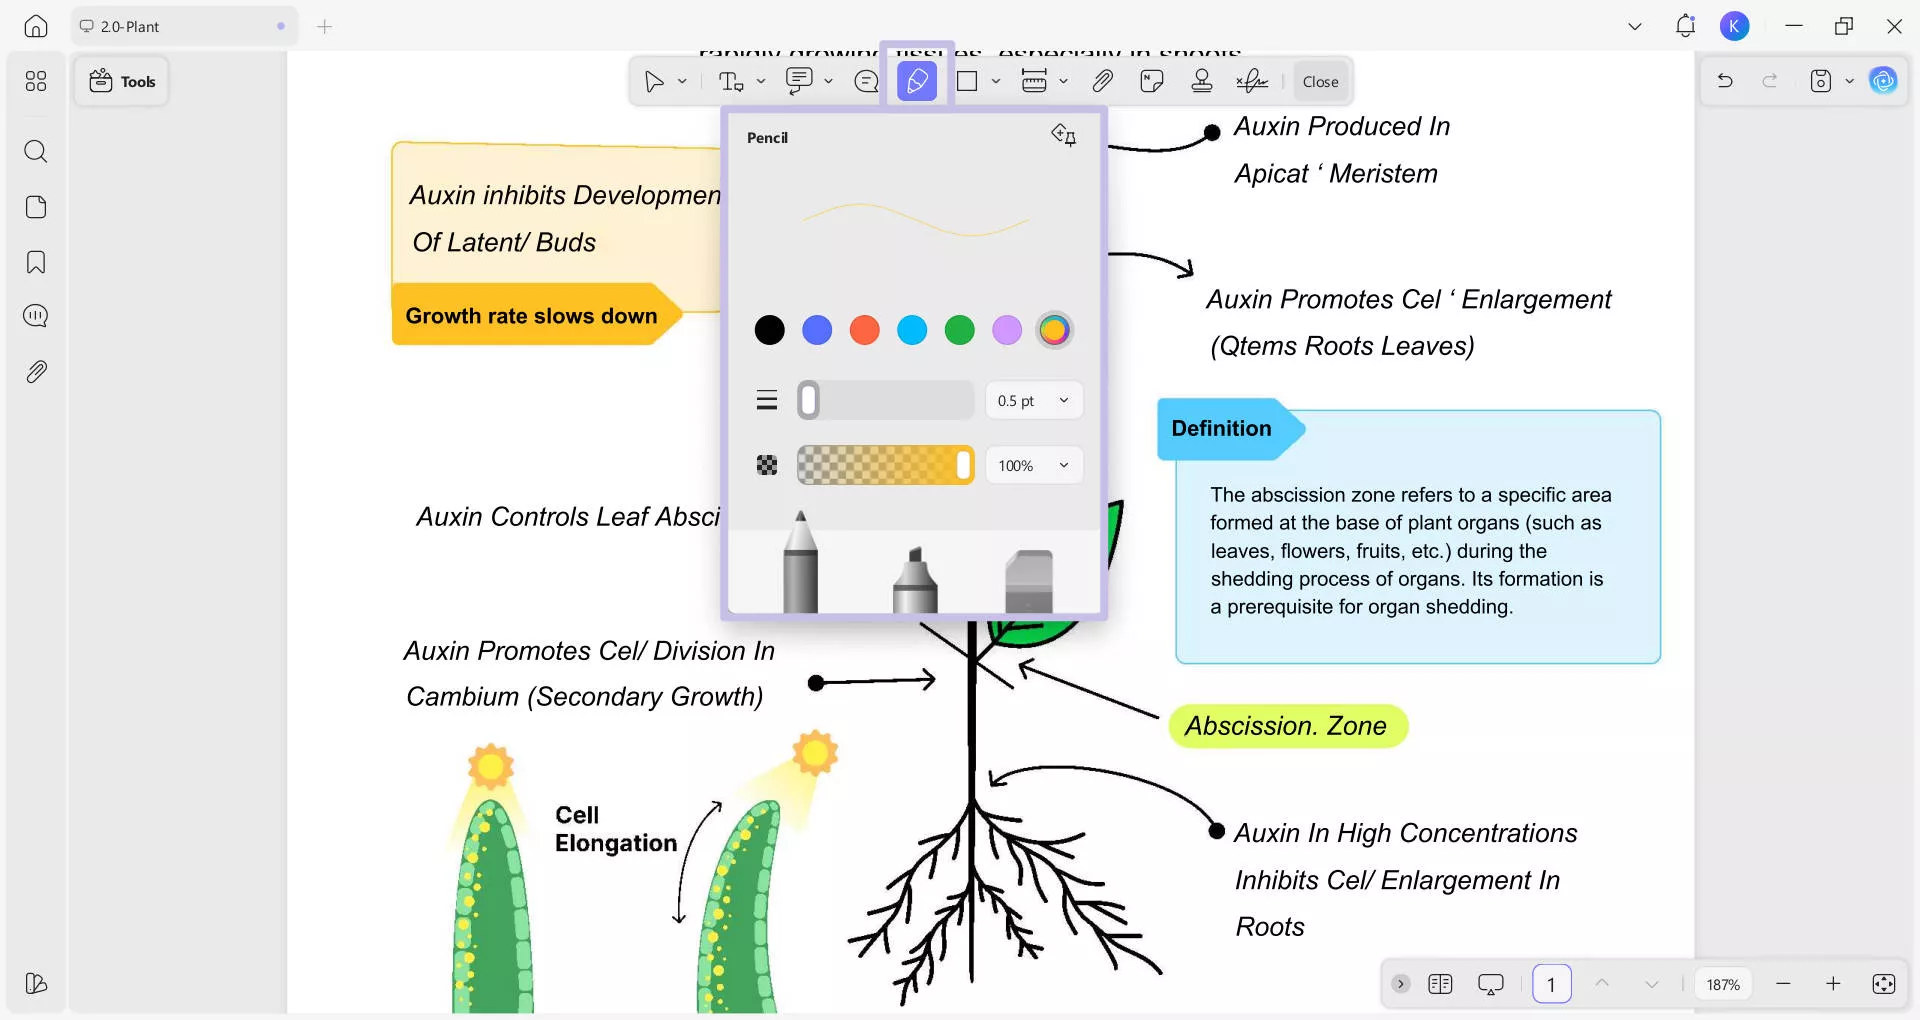
- Select the "Pencil" tool on the top menu that will open some personalization options for you before you draw it on the PDF.
- In the Pencil menu, you can choose the color, adjust the thickness (with a slider or pt. range list), and alter its opacity (through a slider and % menu).
- You can also access the Highlighter (comparatively thicker than pencil) and Eraser tool to add or remove markups.
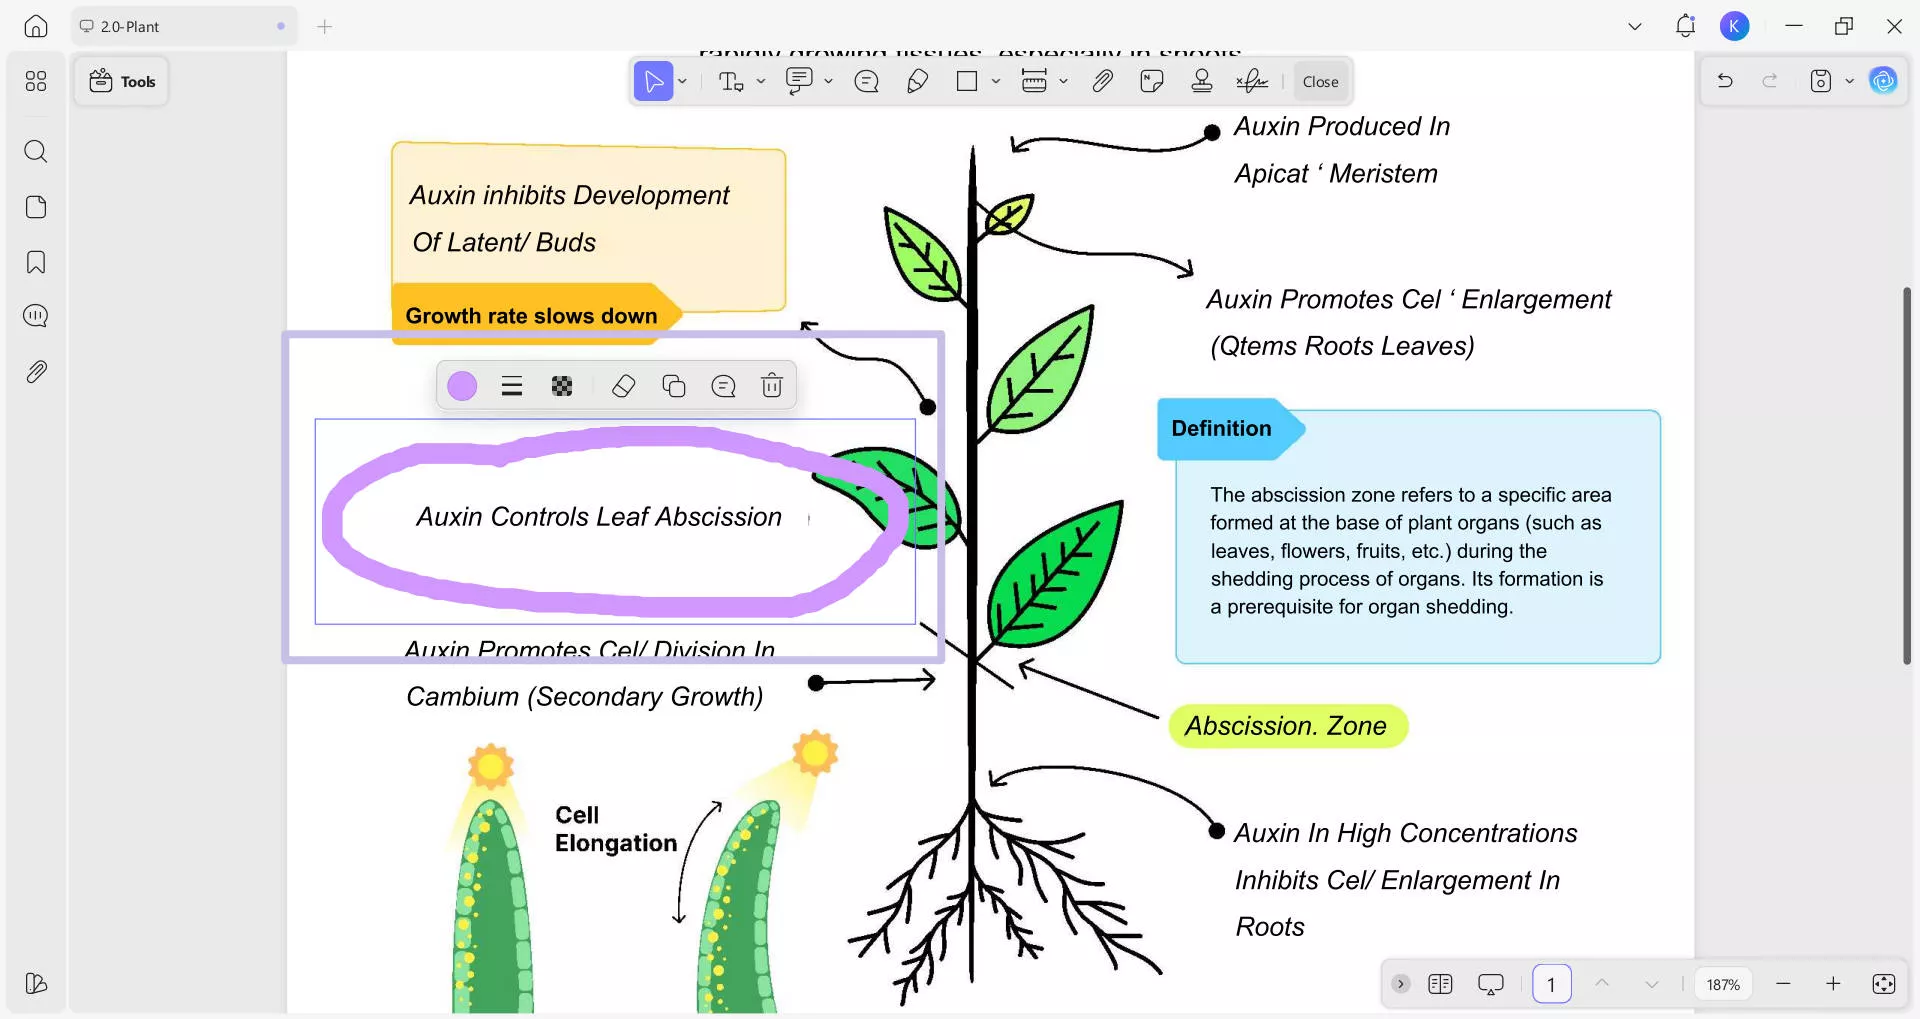
Upon marking through a Pencil, it reveals a floating menu which provides options like Color, Thickness, Eraser, and Delete.
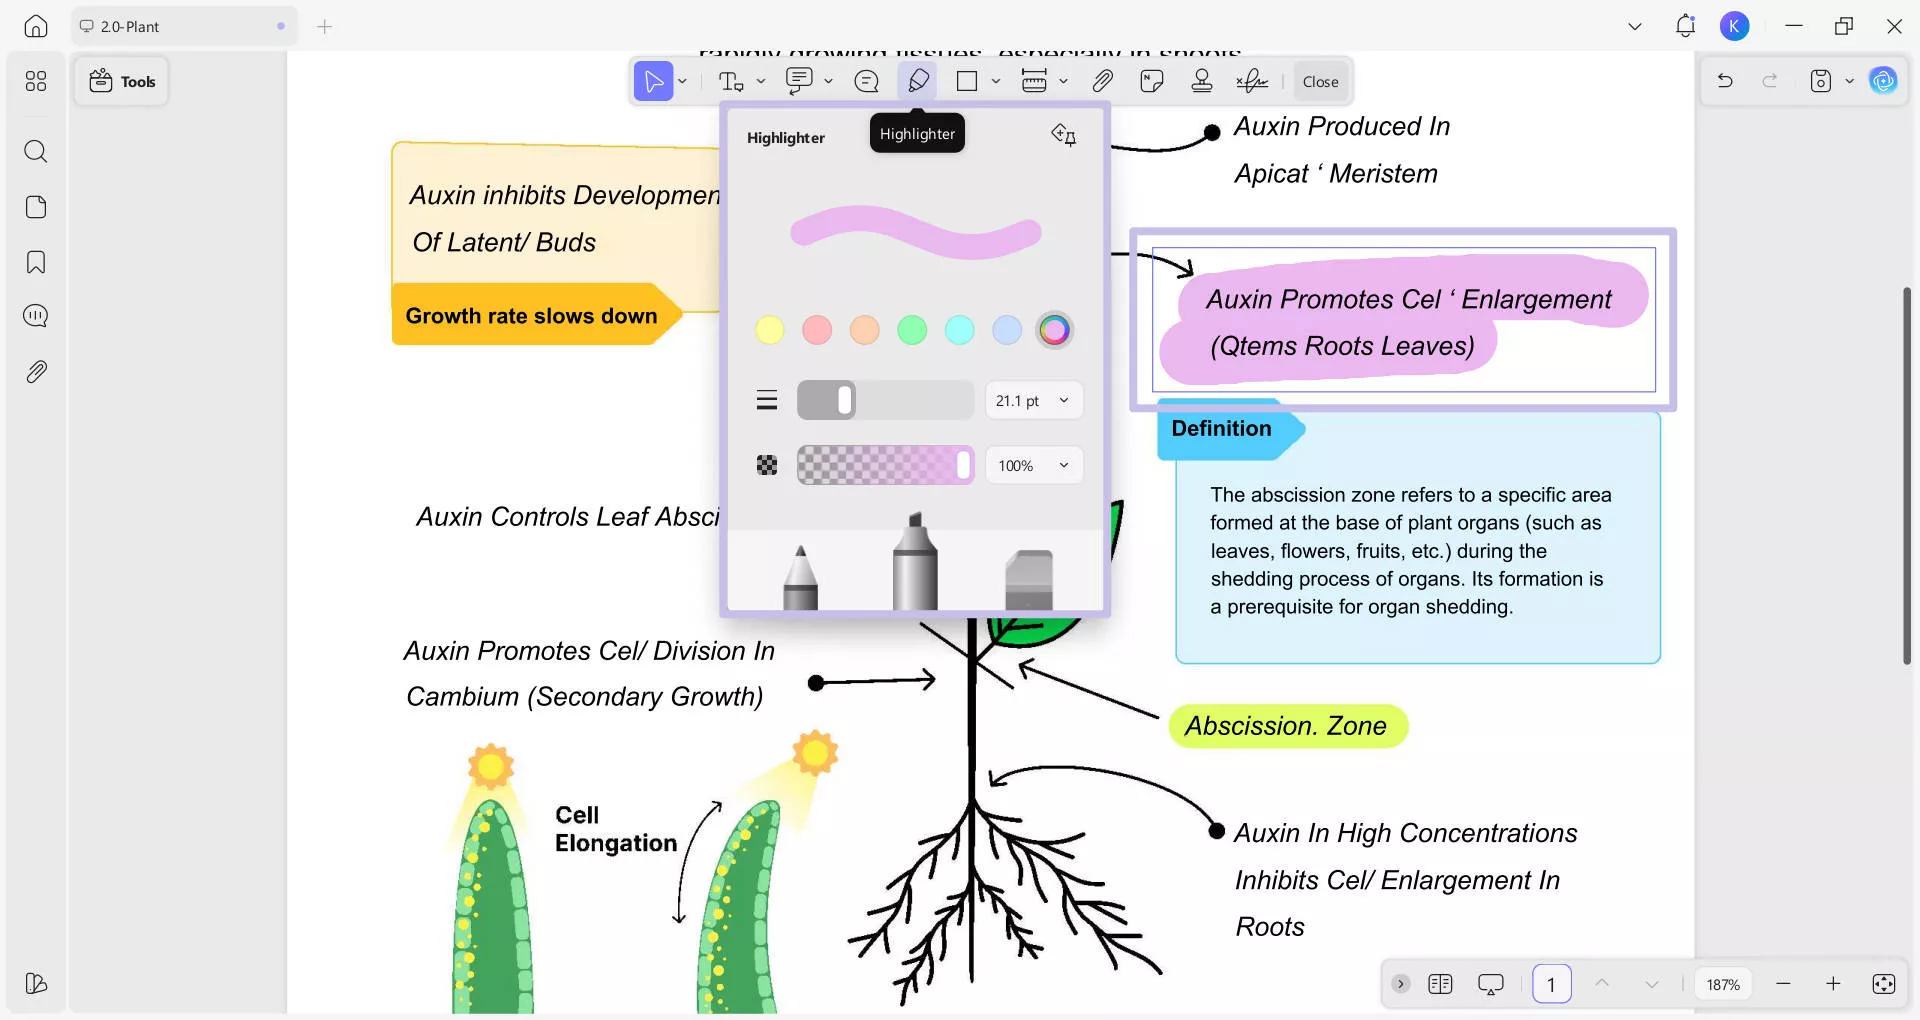
Highlighter: It can be selected from the pencil menu when you access the Pencil icon from the annotation toolkit.
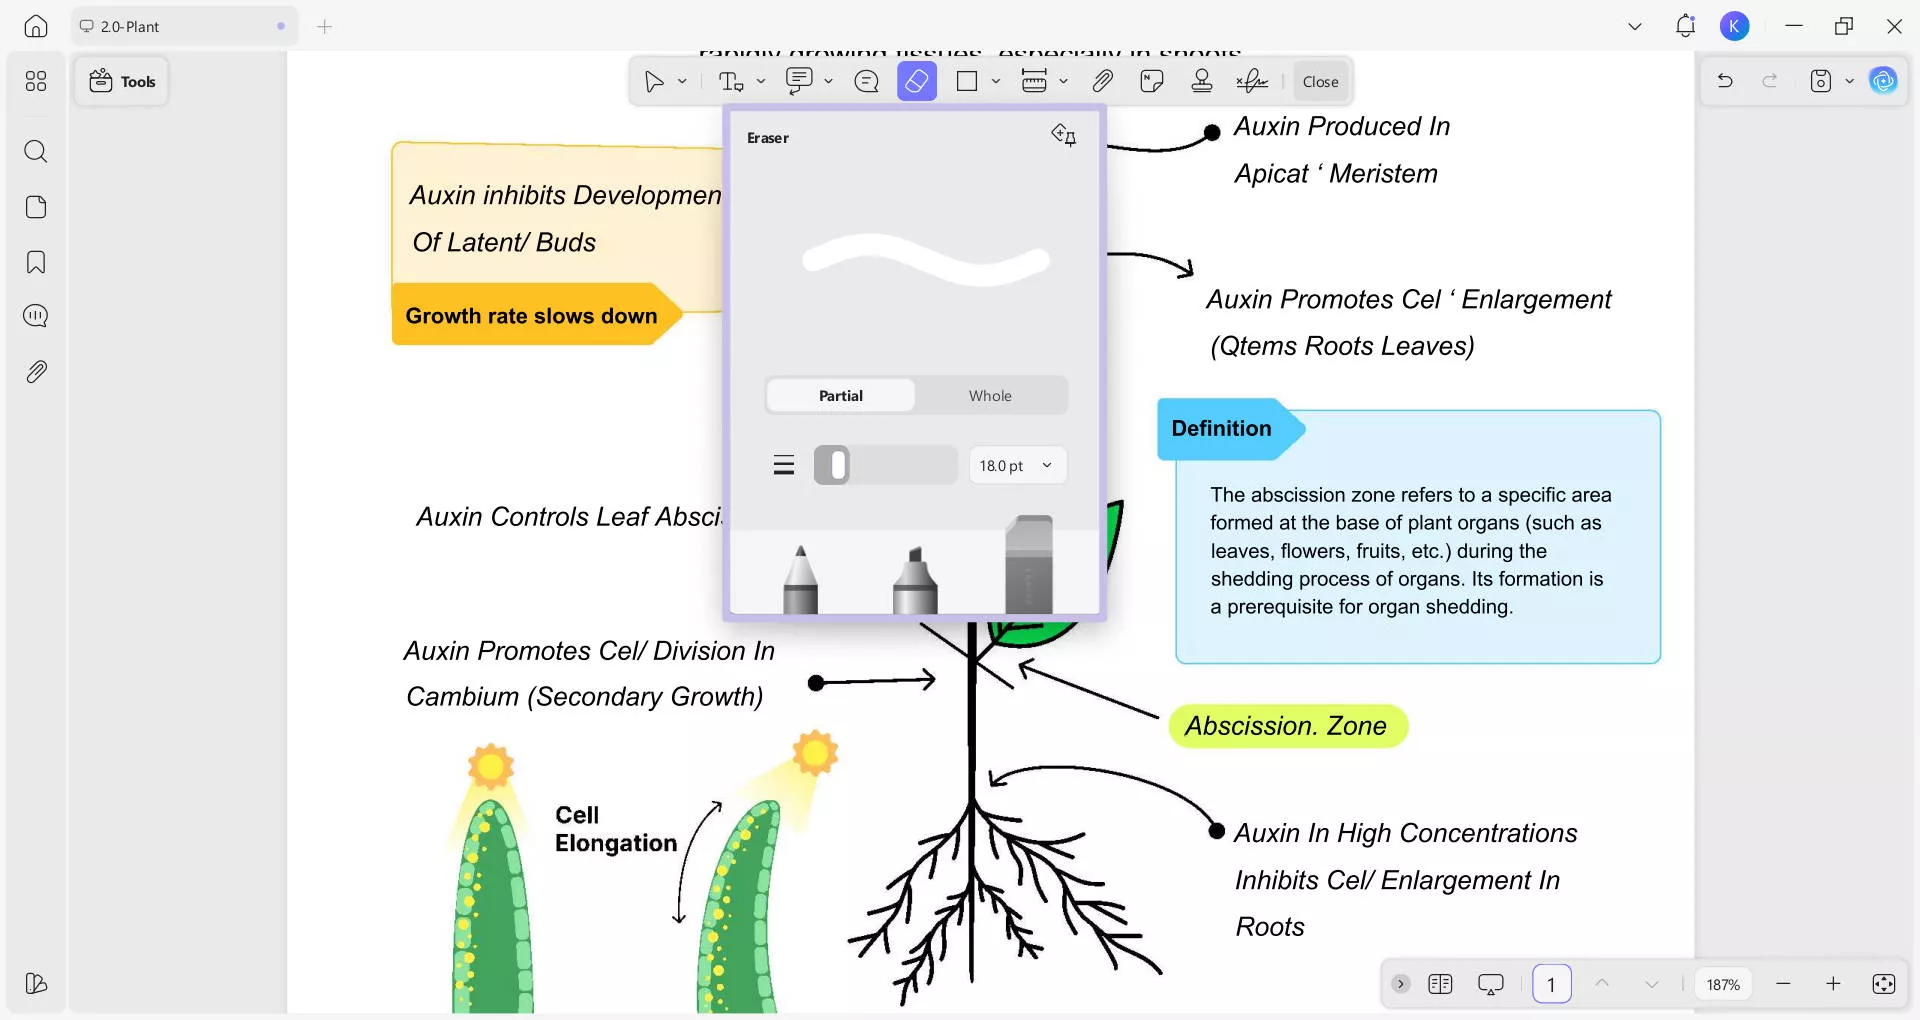
Eraser: You can erase any markup added through a pencil or a highlighter. However, the Pencil tool itself provides an Eraser, which further reveals a menu for precise removal. In the menu, you can see 2 options: Partial (erasing manually through cursor) and Whole (removing entire markup at once).
In the same menu, adjust the thickness of eraser through a slider and an extended menu for pt. Following this, you can easily remove the marked-up items from your PDFs.
5. Add Shapes
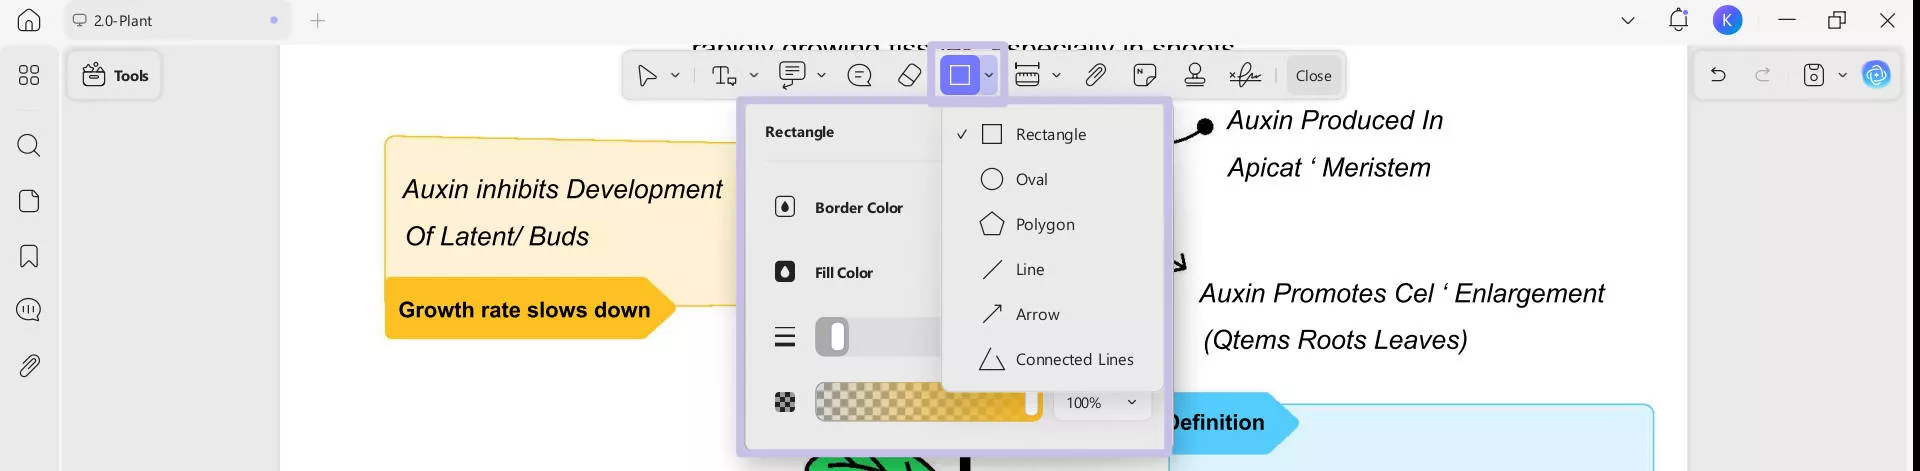
UPDF supports adding various shapes or lines to your document with a Shapes icon in the annotation toolbar. Extending the menu for shapes reveals possibilities like Rectangle, Oval, Polygon, Line, Arrow, and Connected Lines. Once your PDF is added, navigate to the Shapes icon and select the drawing tools from the drop-down menu.
- Rectangle: To add a rectangle to your document, click the rectangle shape, and use the click-and-drag action to draw it on your document.
- Oval: Click the oval icon and click and drag on your document. You can adjust the shape of the oval anytime by selecting it.
- Polygon: Like other shapes, navigate to the Shapes icon and choose the Polygon shape.
- Line: Choose the Line option from the Shapes icon and draw a line.
- Arrow: To add an arrow markup, you need to click the arrow icon.
- Connected Lines: You can add connected lines to your PDF, with similar modifying options from the floating bar.
6. The Measure Tool
UPDF also supports measuring PDFs, with the help of tools like Distance, Perimeter, and Area Tools. With this information, you can better analyze your PDF's nature, editing it precisely when adding shapes and stickers or creating it from scratch. You can simply allot a specific area to each potential PDF parameter to simplify your editing.

Here is how you can measure PDF with UPDF:
Navigate to the Measure Tool from the annotation bar at top and hover on this icon to reveal the following options:
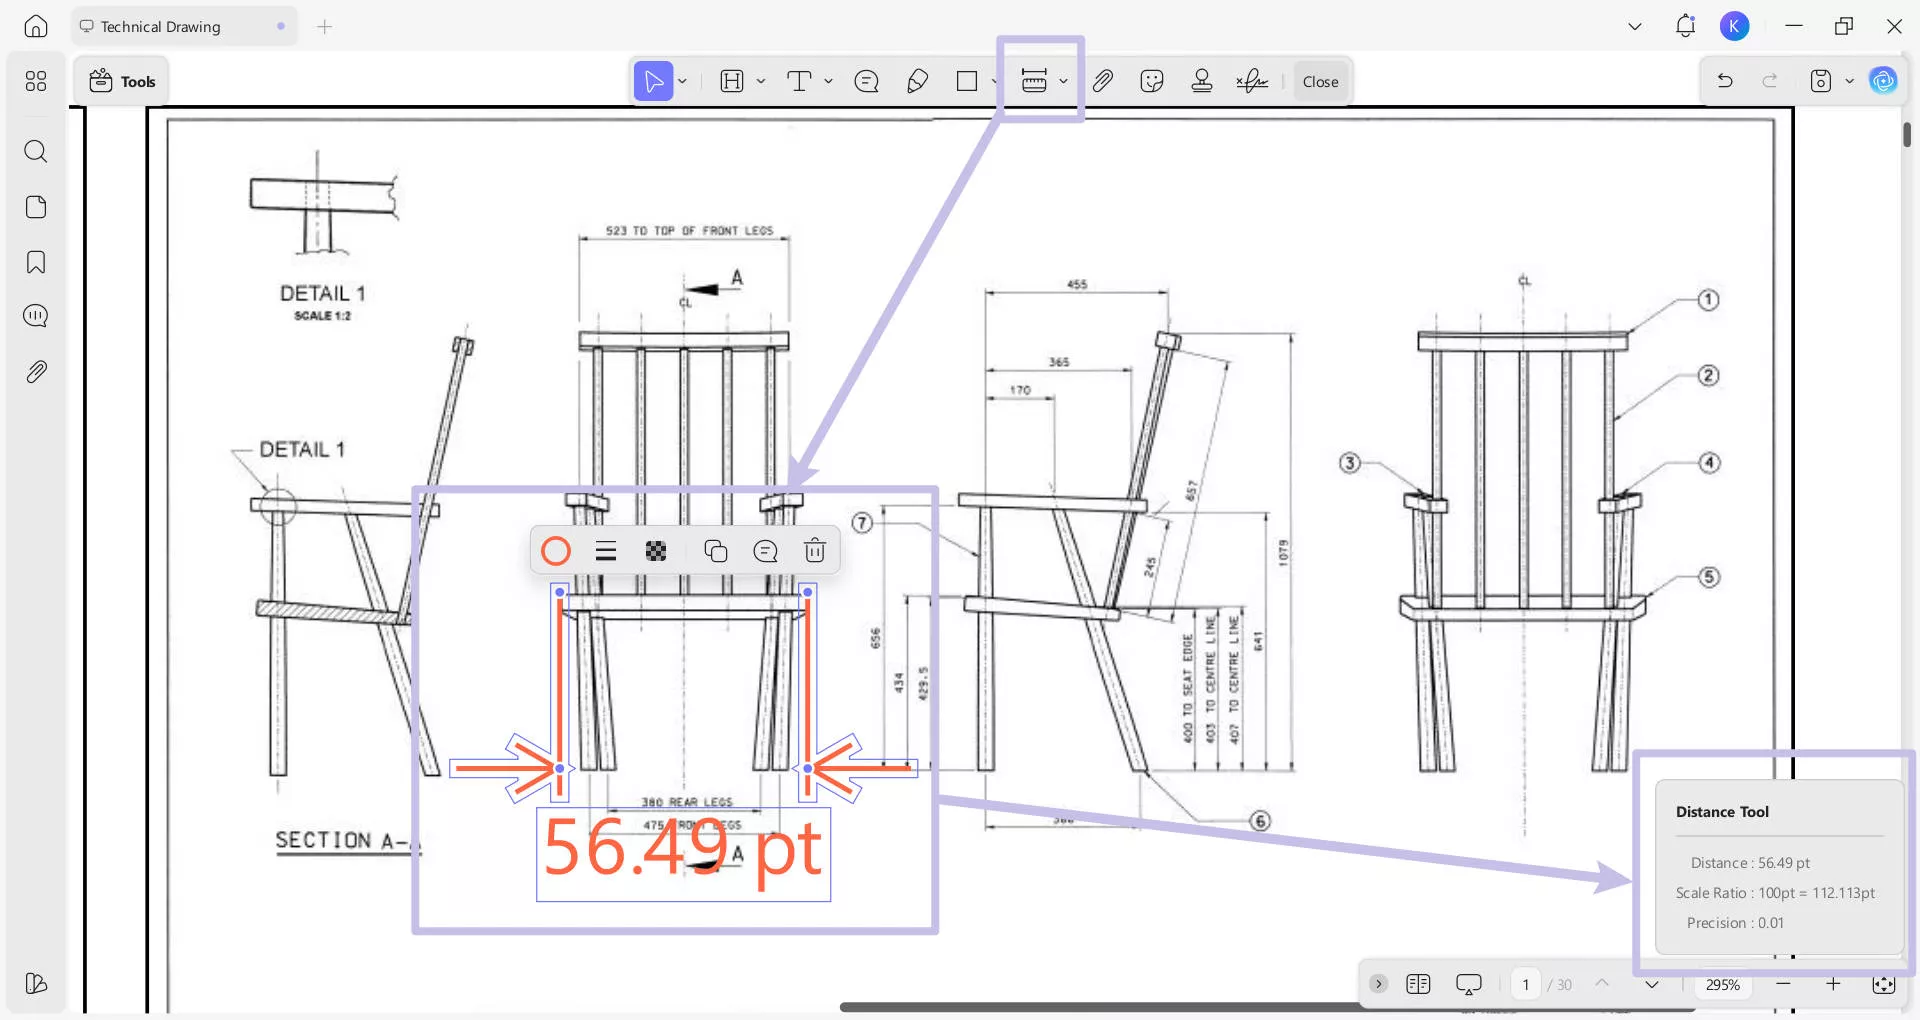
Distance Tool: It reveals information, like the Distance of the specified region, Angle X and Y axis details, Scale Ratio, and Precision of the offered details. To access this feature, you need to follow the given tutorial:
- Once done, the measured distance will be revealed on your screen, displaying Distance, Scale Ratio, and Precision.
- From the Annotation bar, extend the menu for Measuring Tool and choose Distance Tool from the options.
- Now, use your cursor and start measuring the distance along the line.
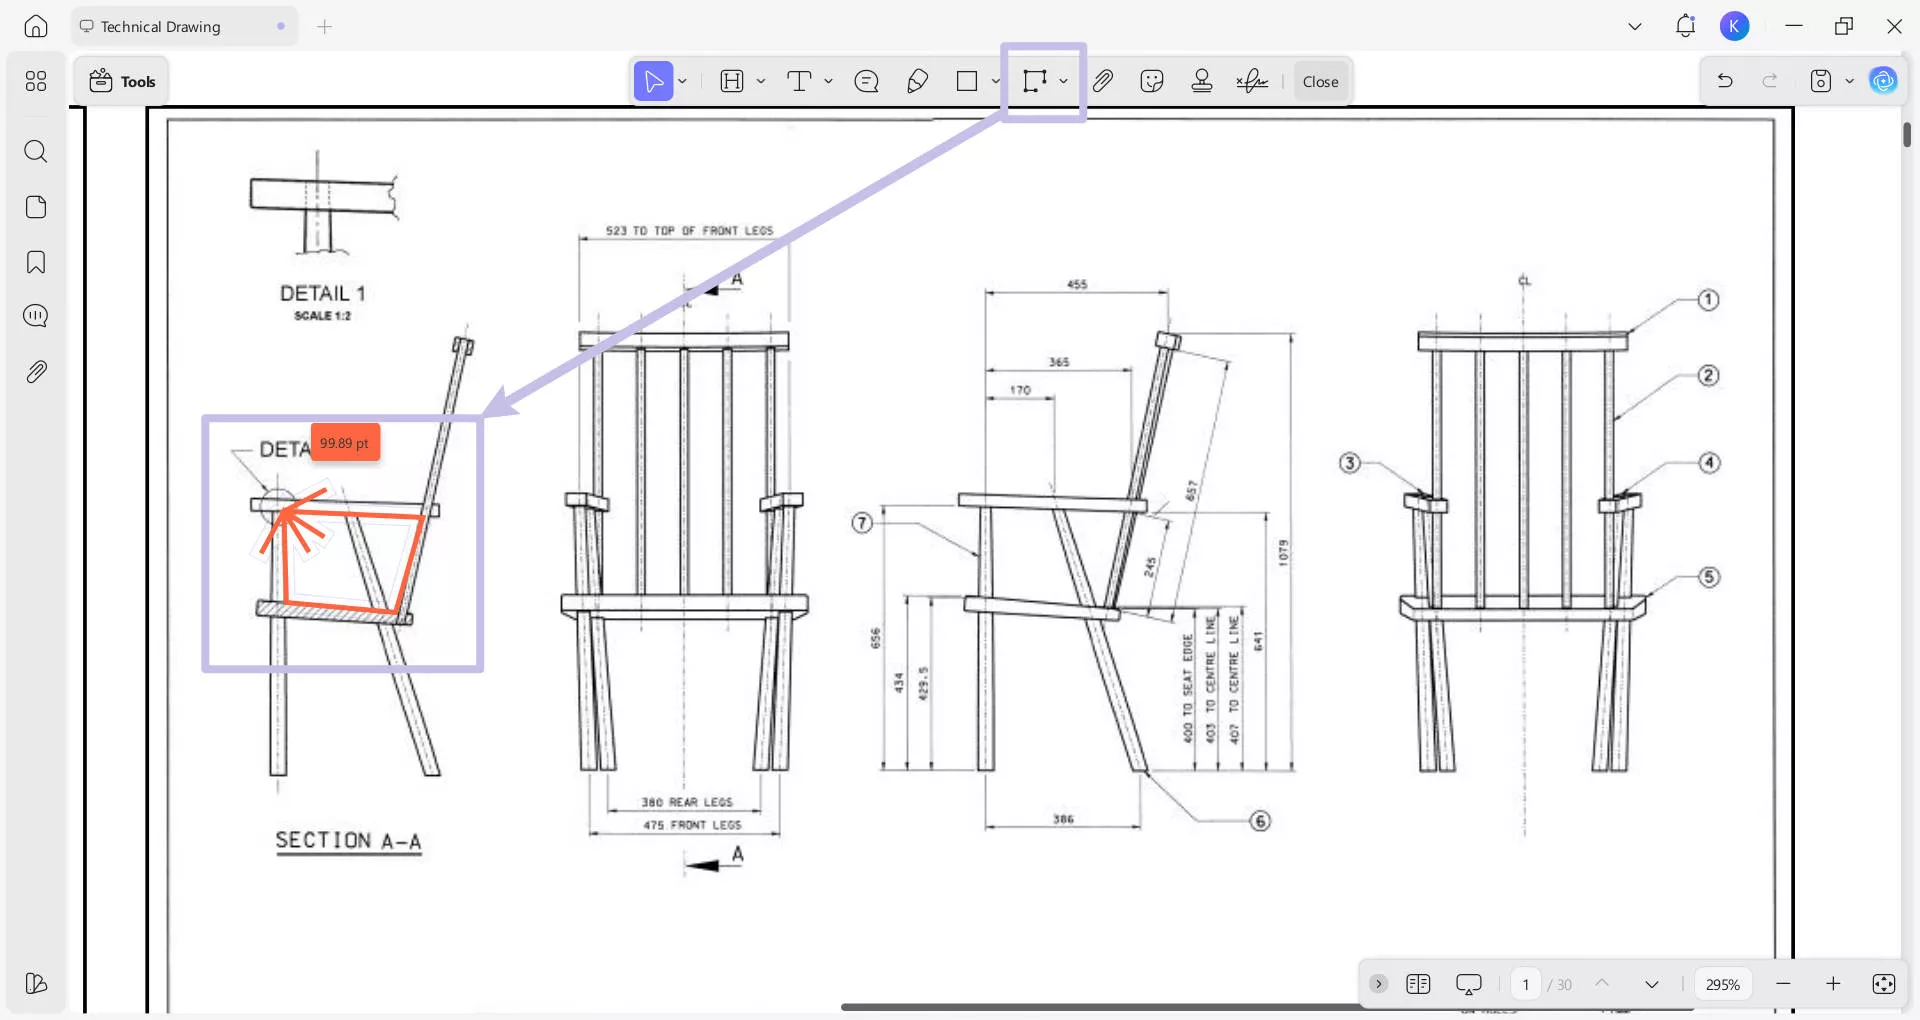
Perimeter Tool: This displays information about the Perimeter, Scale Ratio, and Precision for the measured area.
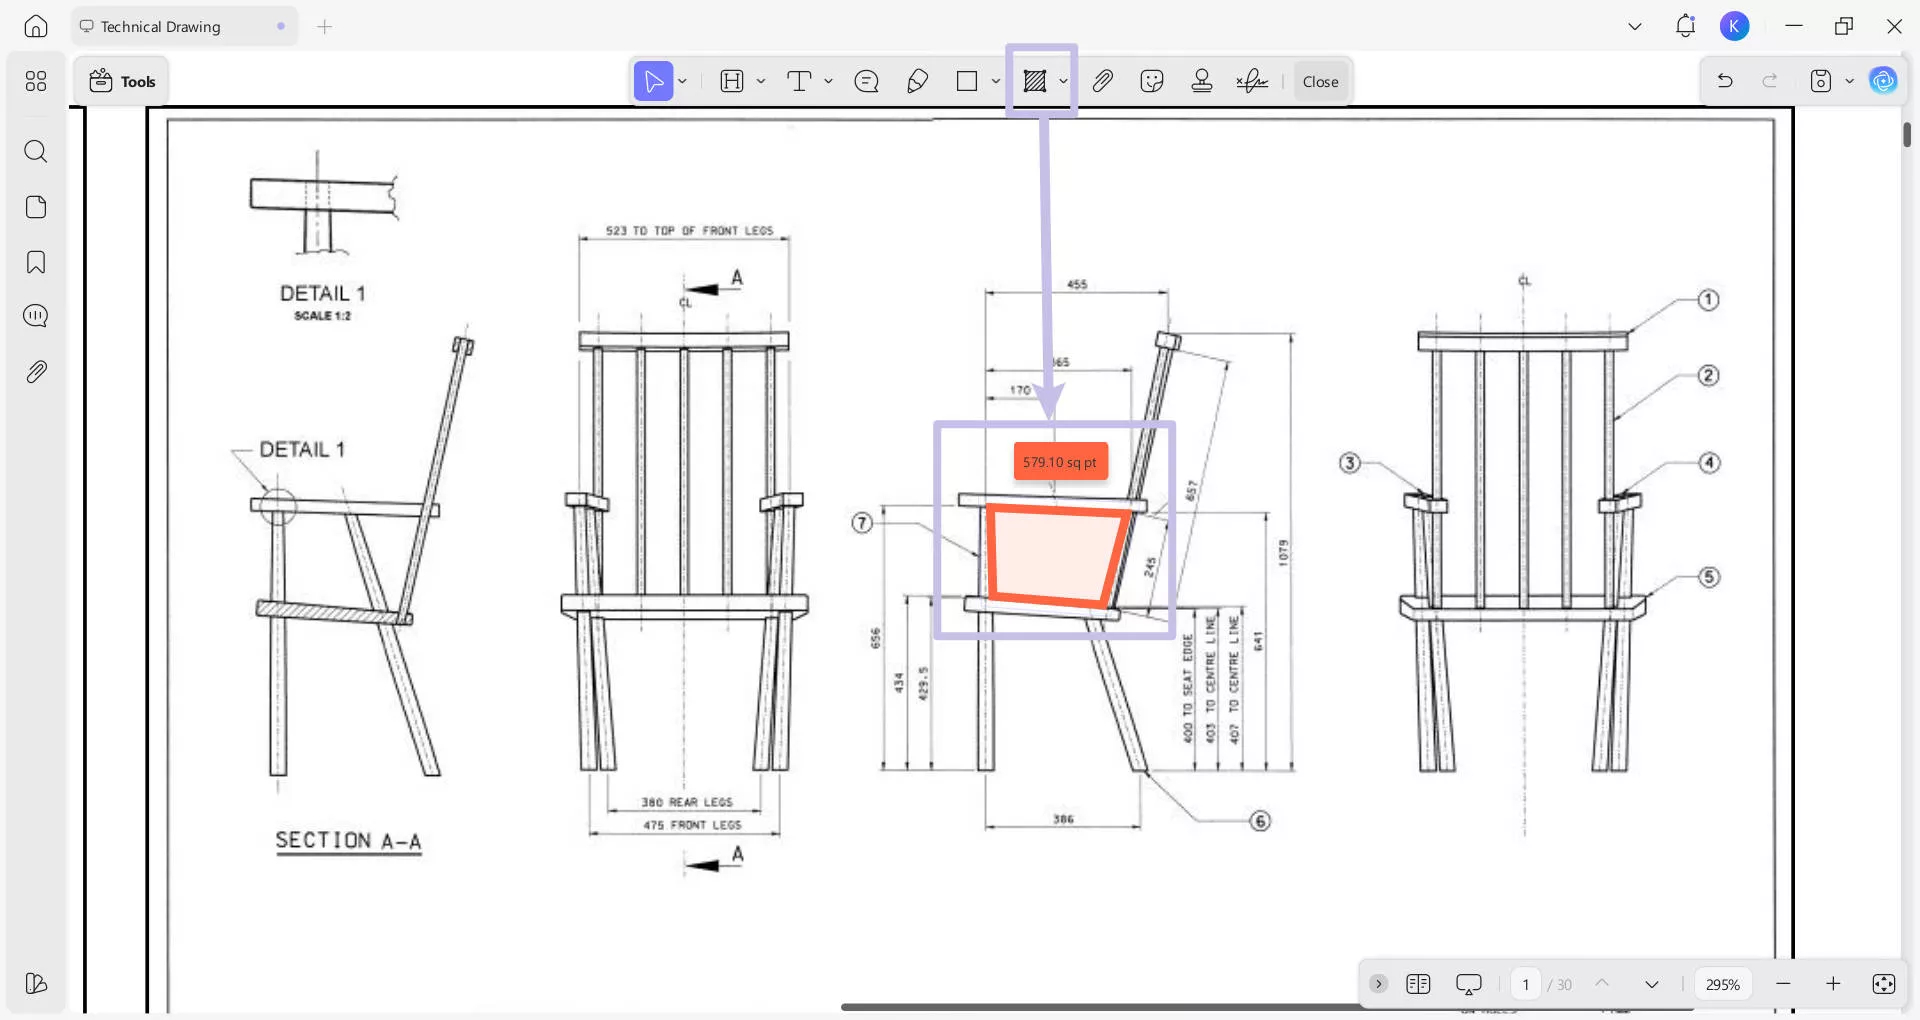
Area Tool: It offers details regarding the Area, Scale Ratio, and Precision for the marked areas in the PDF.
Once you have selected your desired option, you must create a line specifying the region where you want to take measurements.
Once you have set the line, double-click, and the desired info will appear. You can customize its appearance, including color and ratio, to enhance clarity in the document. In addition, you can also delete, copy, and paste the line.
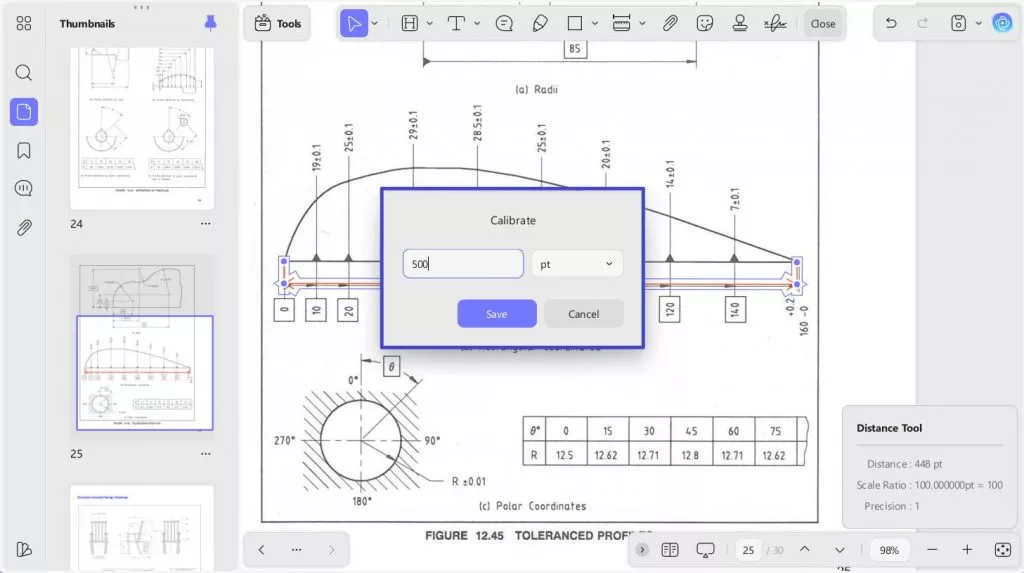
For calibrated measurements, right-click the drawing area > Select "Calibrate" button.

In the calibration window, enter known reference values (e.g., "500" in the text box). Set units (e.g., pt) and confirm with "Save" button.
7. Add Attachment
The attachment tool in UPDF allows you to add file attachment to your imported PDF as a reference to your reader. The process is quite simple; please follow these steps to add an attachment to your document.
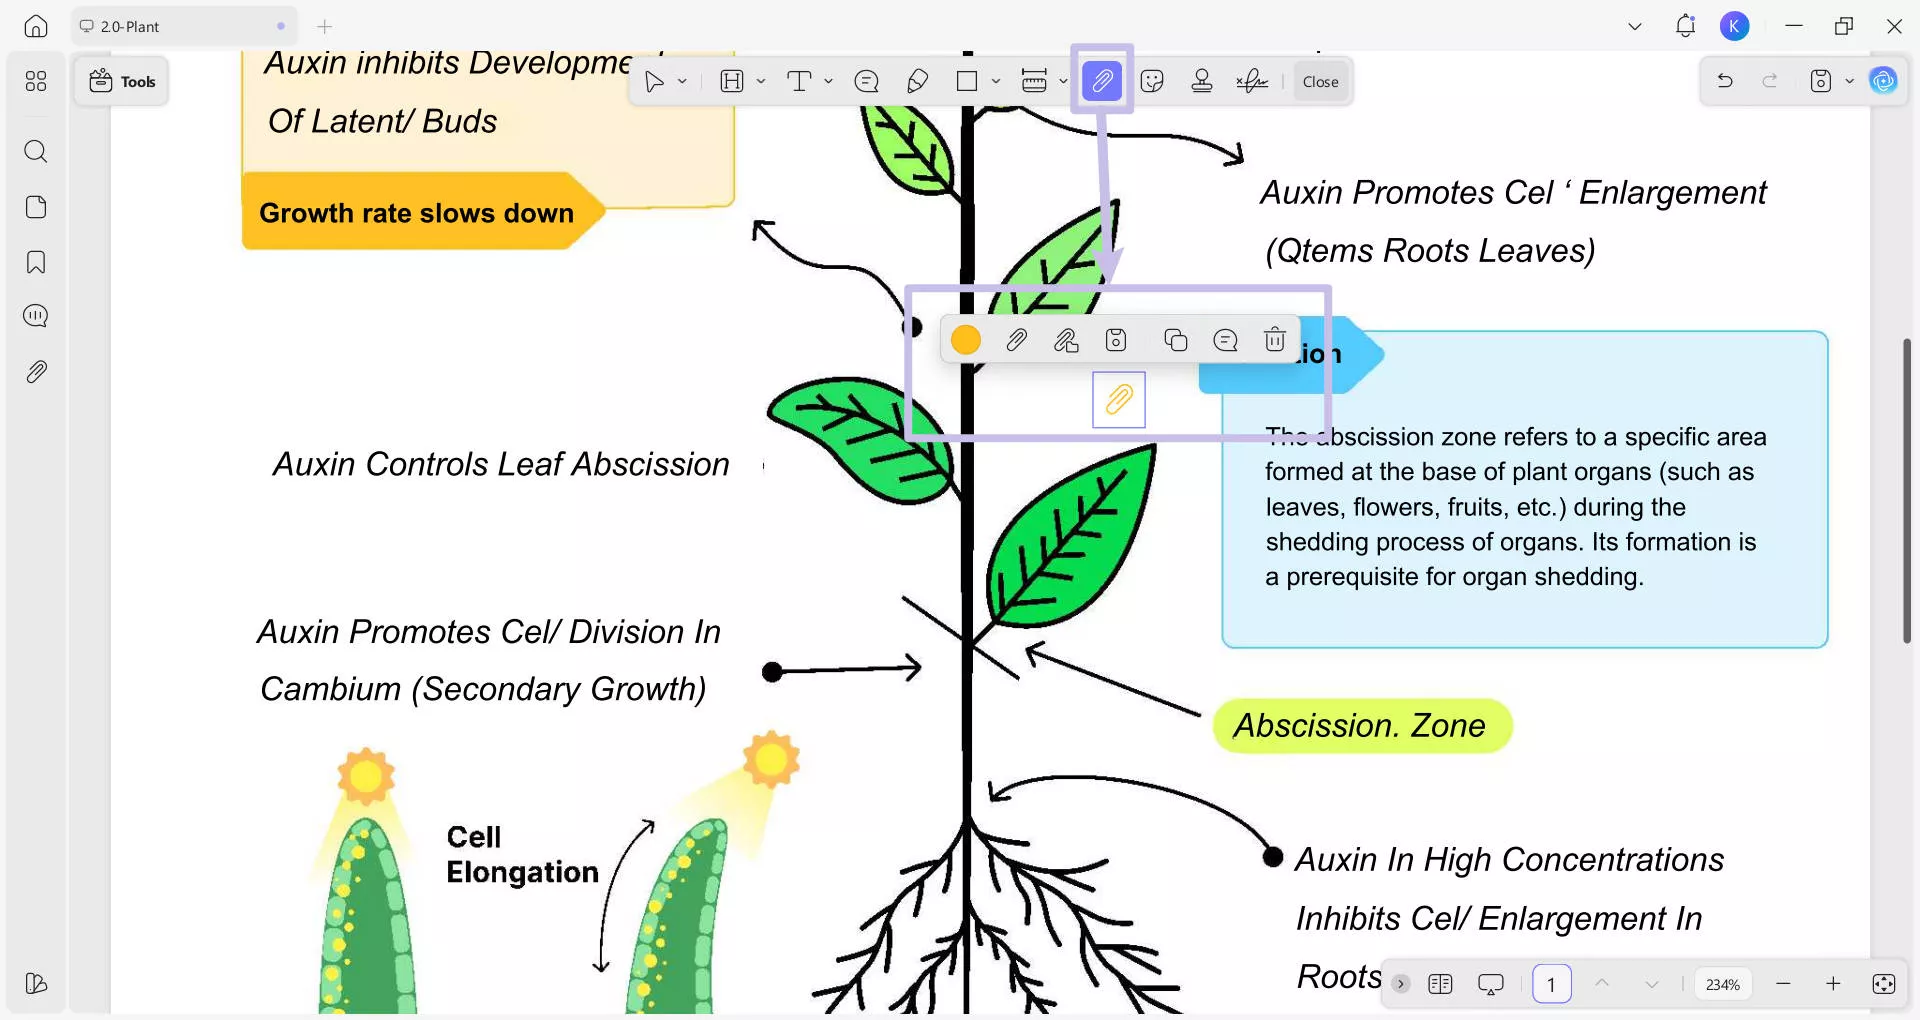
- Open any PDF document file from your device and head to the Attachment tool appearing at top annotation bar. Following this, you can change the outlook of your attachment button in the document with the Colors and Opacity option from the menu. Besides this, it provides further attachment icons, namely, Paperclip, Graph, Pin, and Tag.

- After clicking the Attachment icon (Paperclip, graph, pin, or tag), click anywhere on the document. This will open the File Manager Browser popup window, allowing you to select a particular document from your device’s memory.
- Once attachment is placed, you can further open, save, change its color, choose attachment icon, copy or delete, and add a Note.
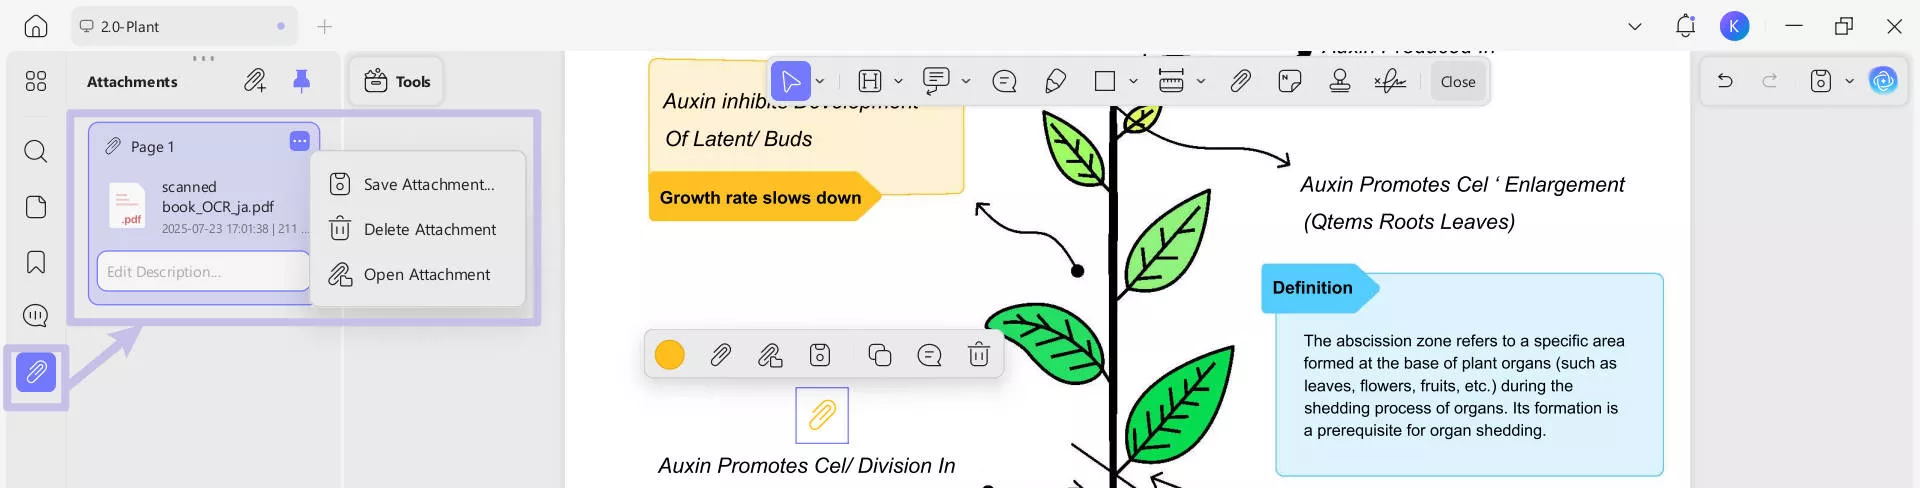
- The "Attachments" icon on the left side panel show all the attachments you have in the PDF file and which page they stay. You can select an attachment to Edit Description for that attachment.
- Access the Three-Dots icon to save, delete, and open the attachment.
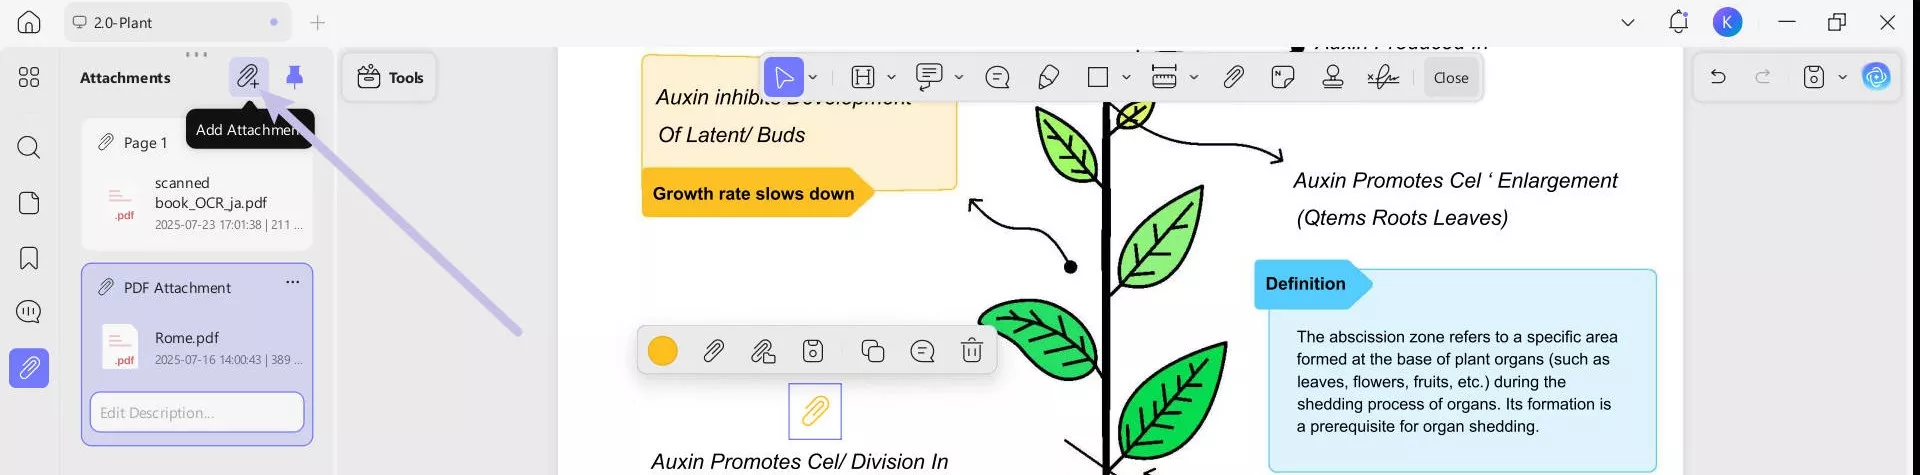
- Moreover, you can also add the attachment directly here by clicking on the "+" icon and add the description for each attachment.
Note: It is important to note that if you have a PDF attached here, the user can open any PDF document within the UPDF program. Any other attached file or document will open it in its default program.
8. Add Stickers
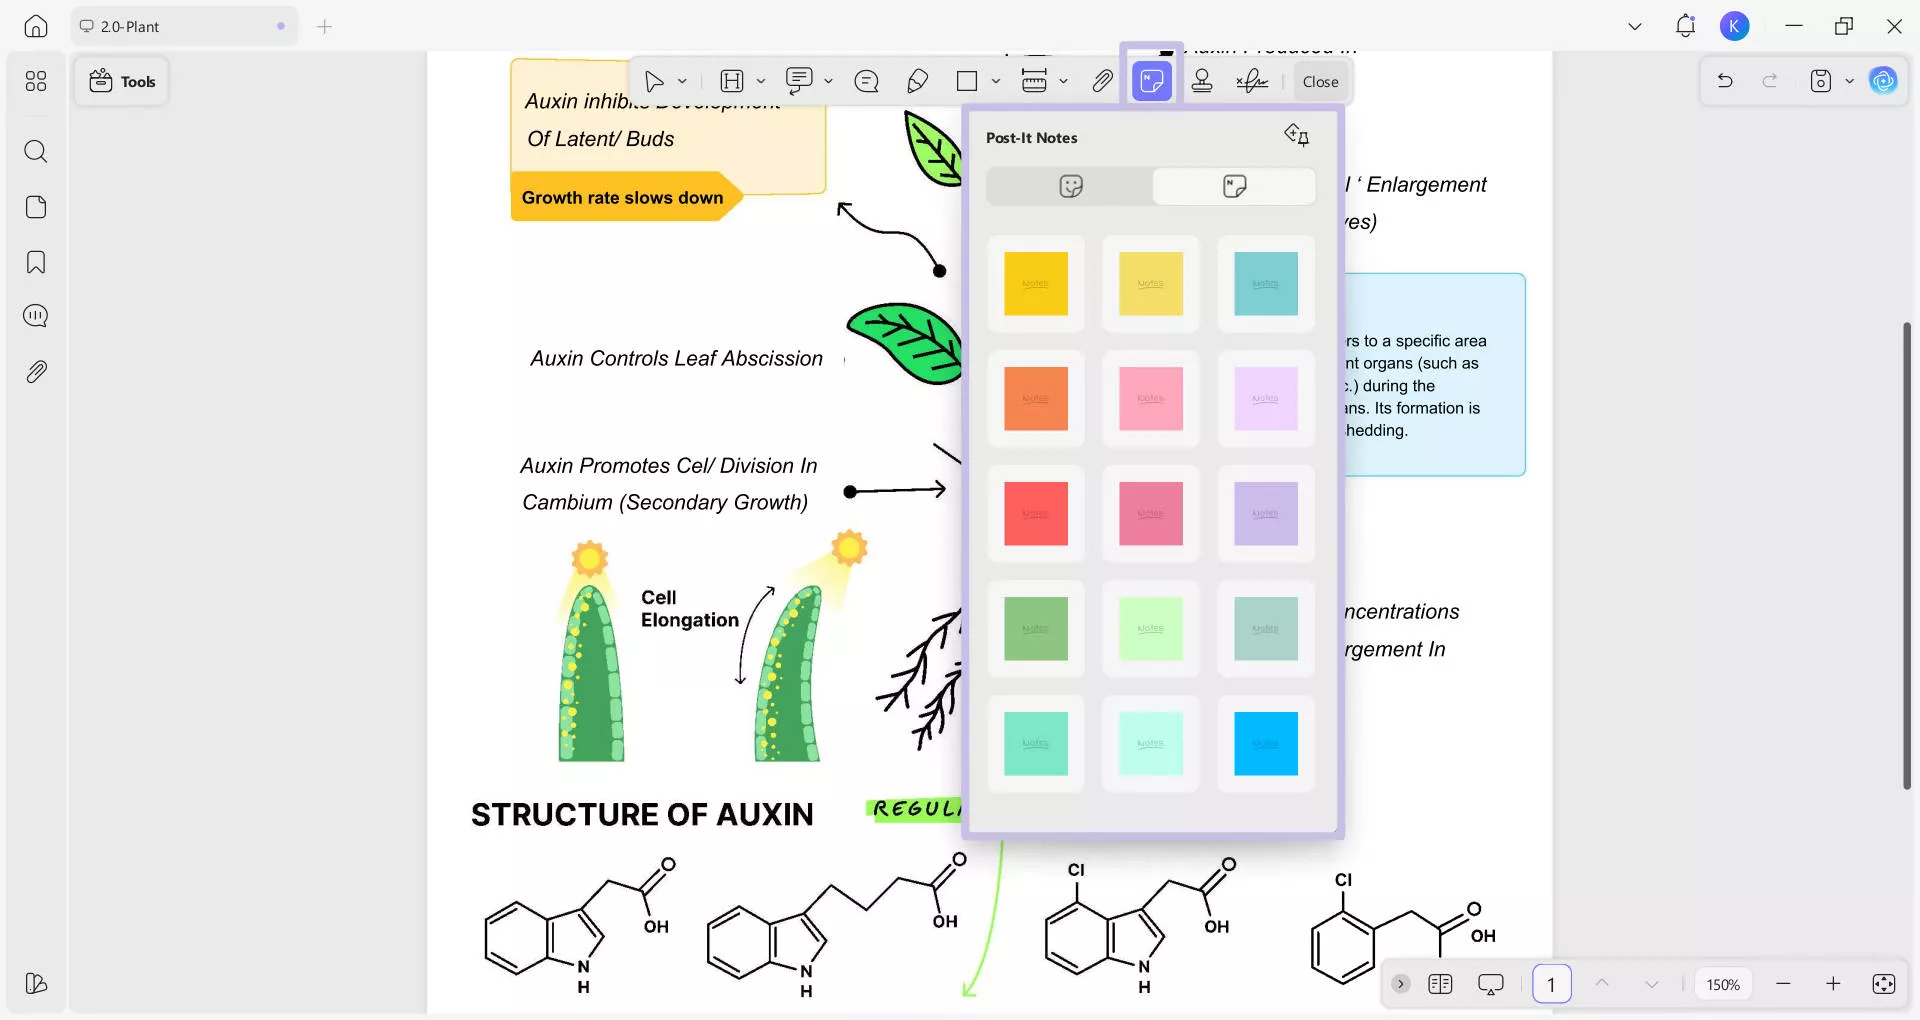
In the annotation bar, beside attachment tool you’ll see Sticker icon. When you access it, a long drop-down menu opens, which provides 2 options: Stickers and Post-It Notes.
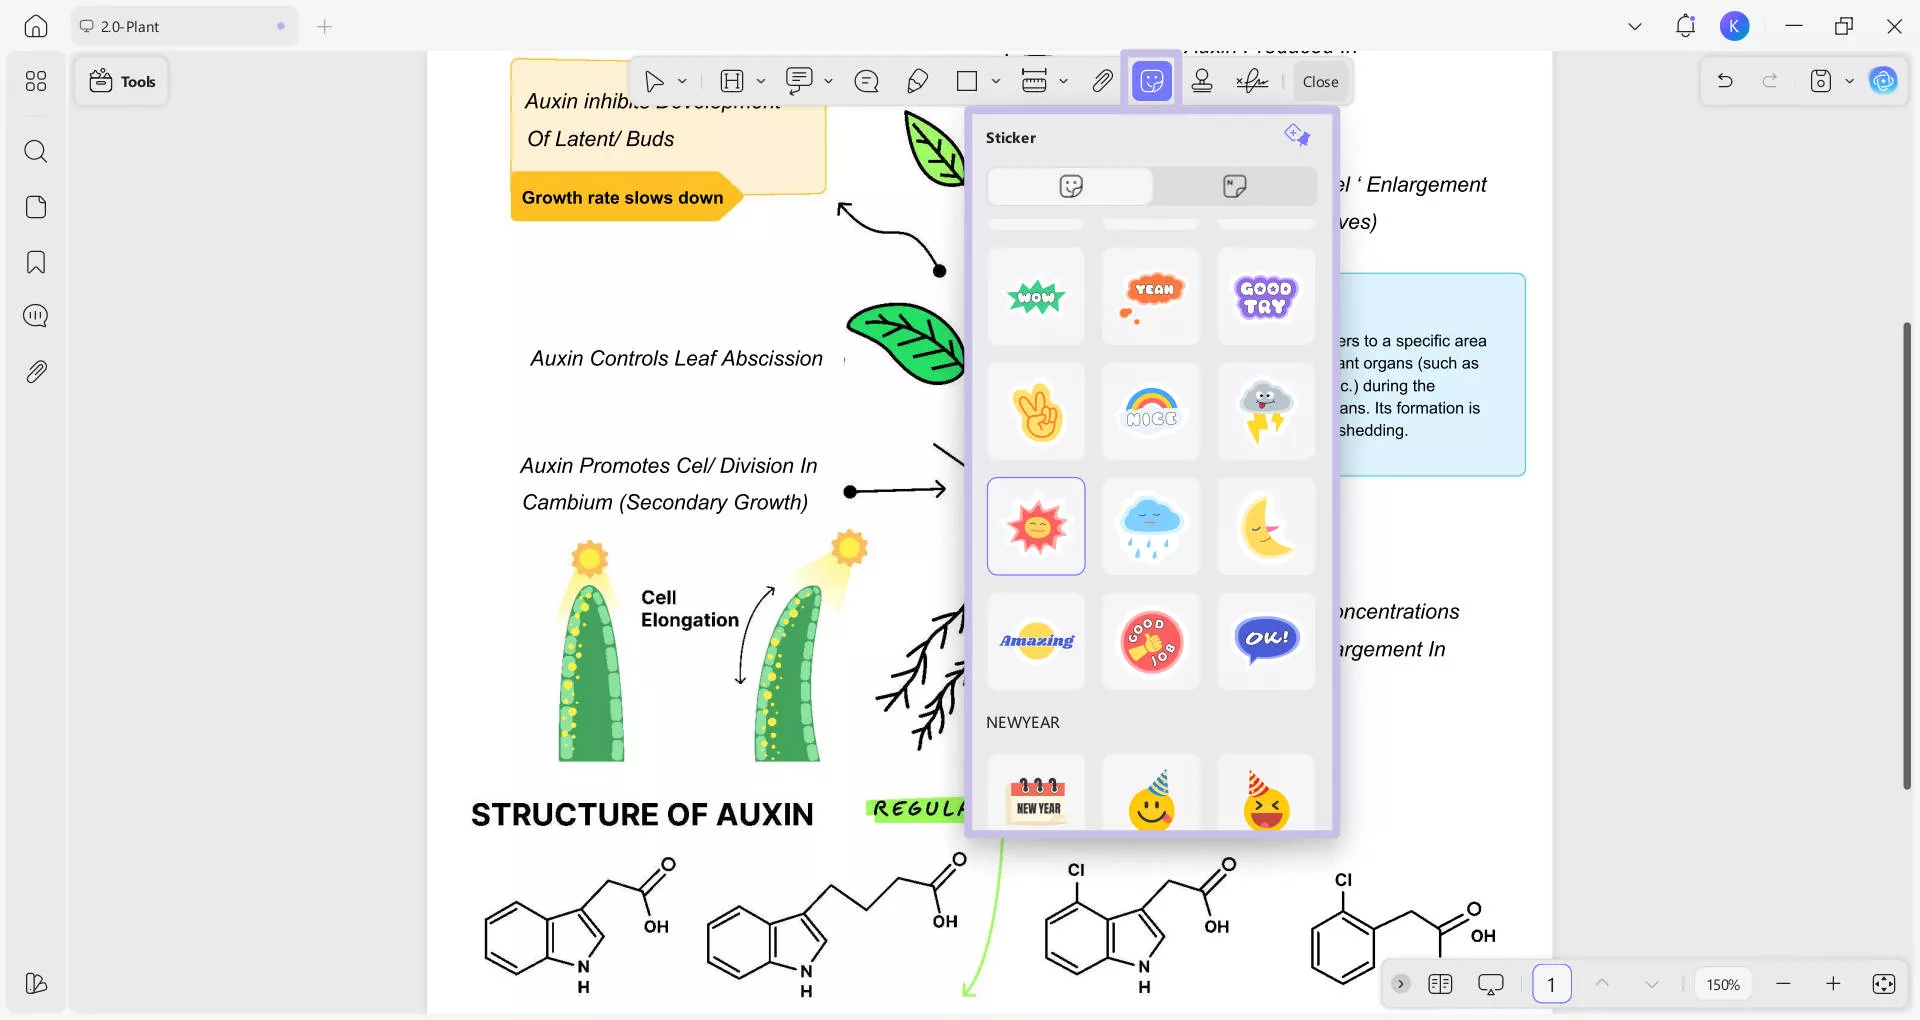
Stickers: With the menu that opens, you can access plenty of sticker options like labels, markups, and letters.
Post-It-Notes: It allows you to choose a post color and placed it as sticker on PDF.
Note
9. Insert Stamps
Lead into the "Stamp" icon from the top to open a drop-down menu. UPDF supports 2 methods to create a stamp:
- Stamps
- Custom

Pre-Built Stamps: You can select any specific stamp from the "Stamps" section. After selecting a stamp, click anywhere on the PDF to add a stamp.
Custom Stamps: In Custom stamps, you can see 2 options: Import and Create.
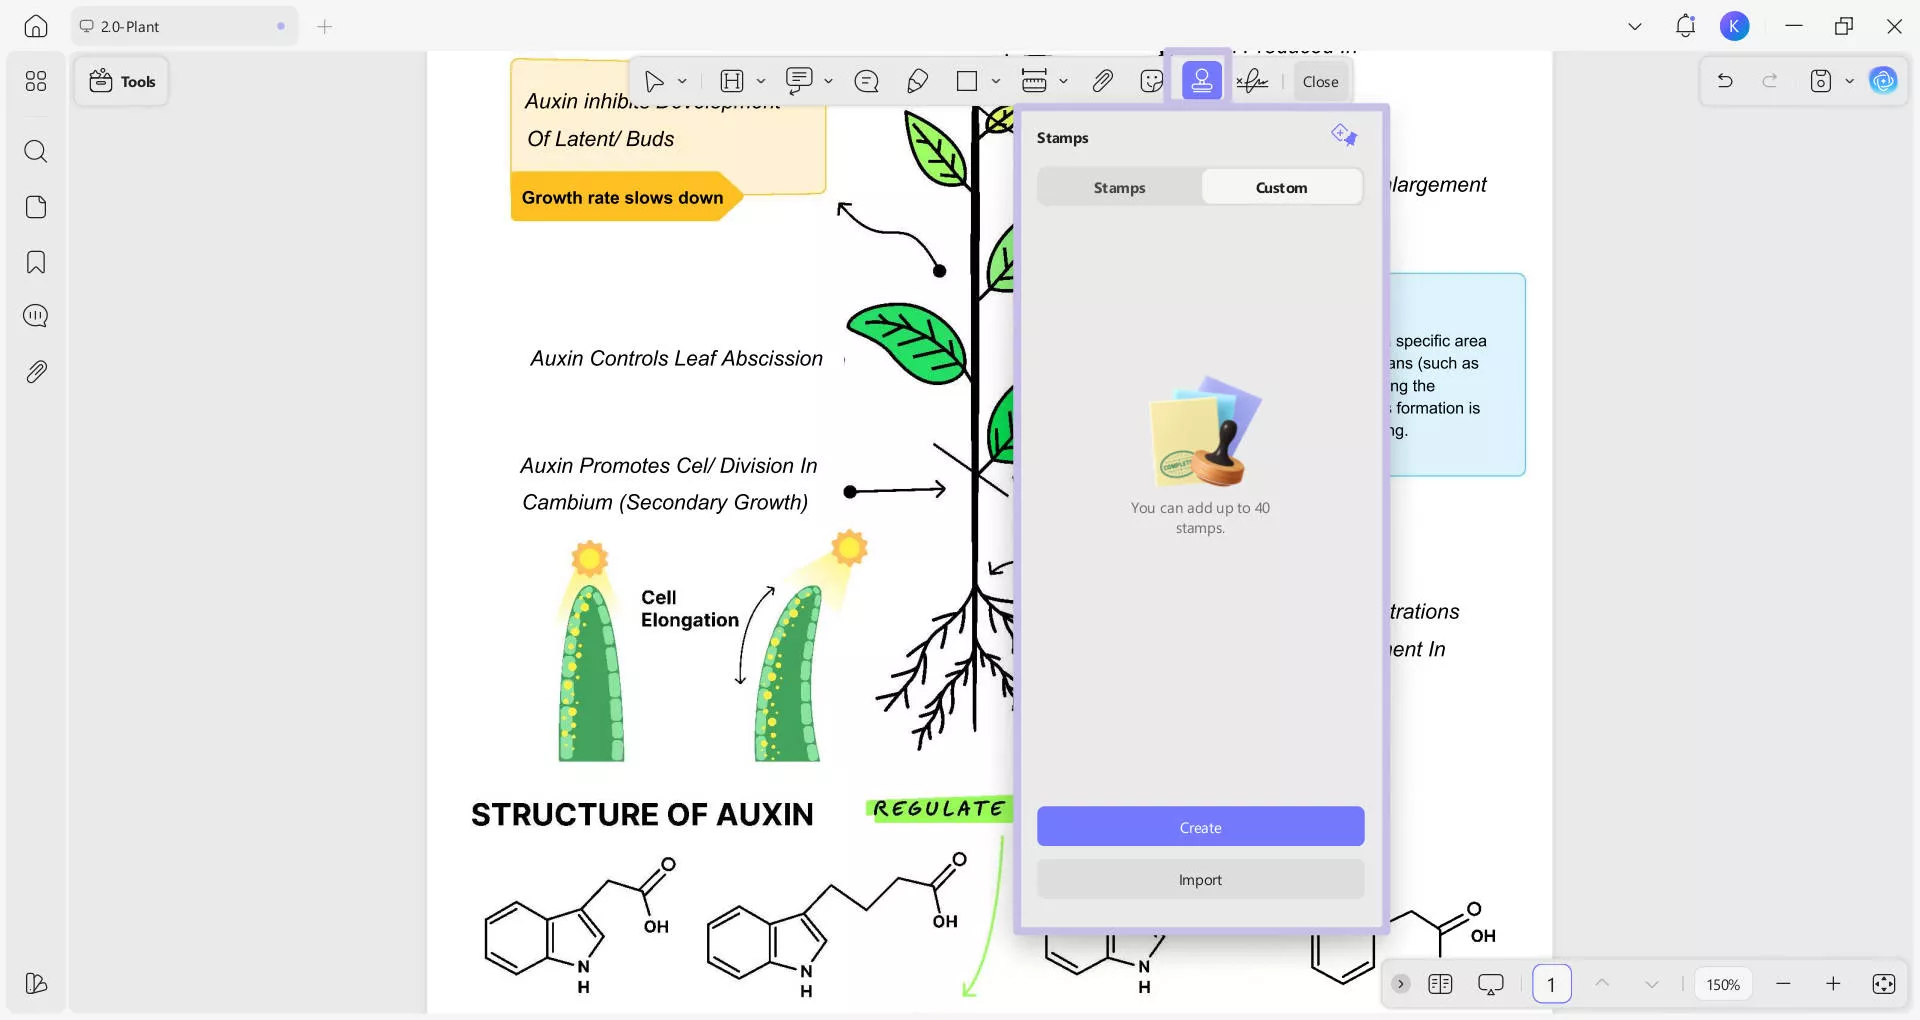
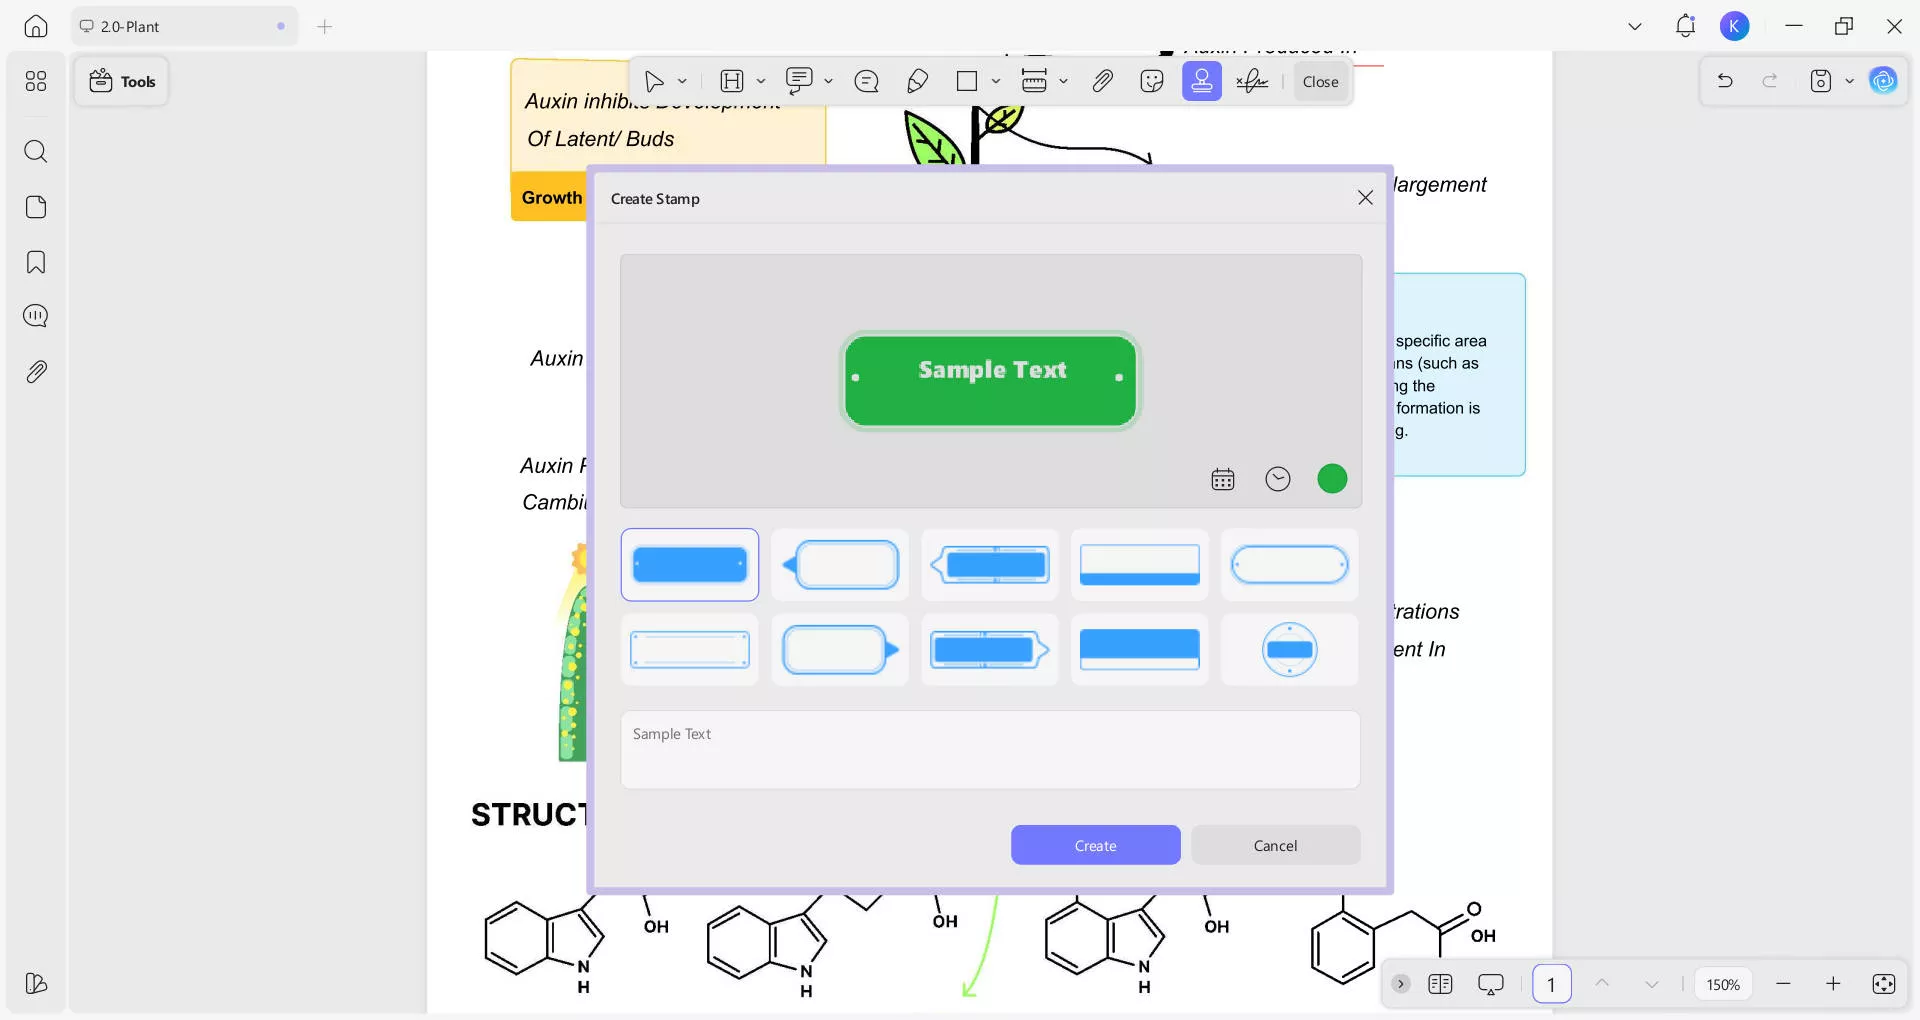
Create: The Create stamp feature allows you to choose shape for your stamp.
- After this, you can add a sample text in the given text space for your stamp.
- It provides options like the Calendar icon (for dates and days), Clock icon (to add time), and Color icon to change color.
Import: You can also import stamps into your PDF by accessing the "Custom" section in the "Stamp" feature. Click "Import" to browse the appropriate stamp and add it to your PDF successfully. You can import or create up to 40 stamps.
Note
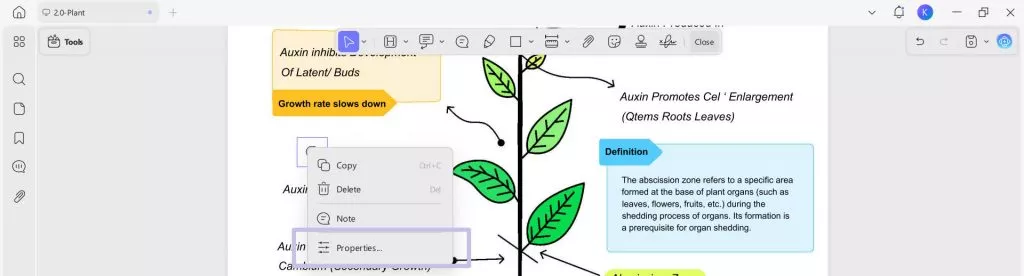
10. Comment Properties
You can also set the properties while commenting on your PDF file. You can change the text color, border color, and font attributes as well. You can change the properties by right-clicking on the annotations or selecting the Properties from the context menu.
11. Manage Comment Lists
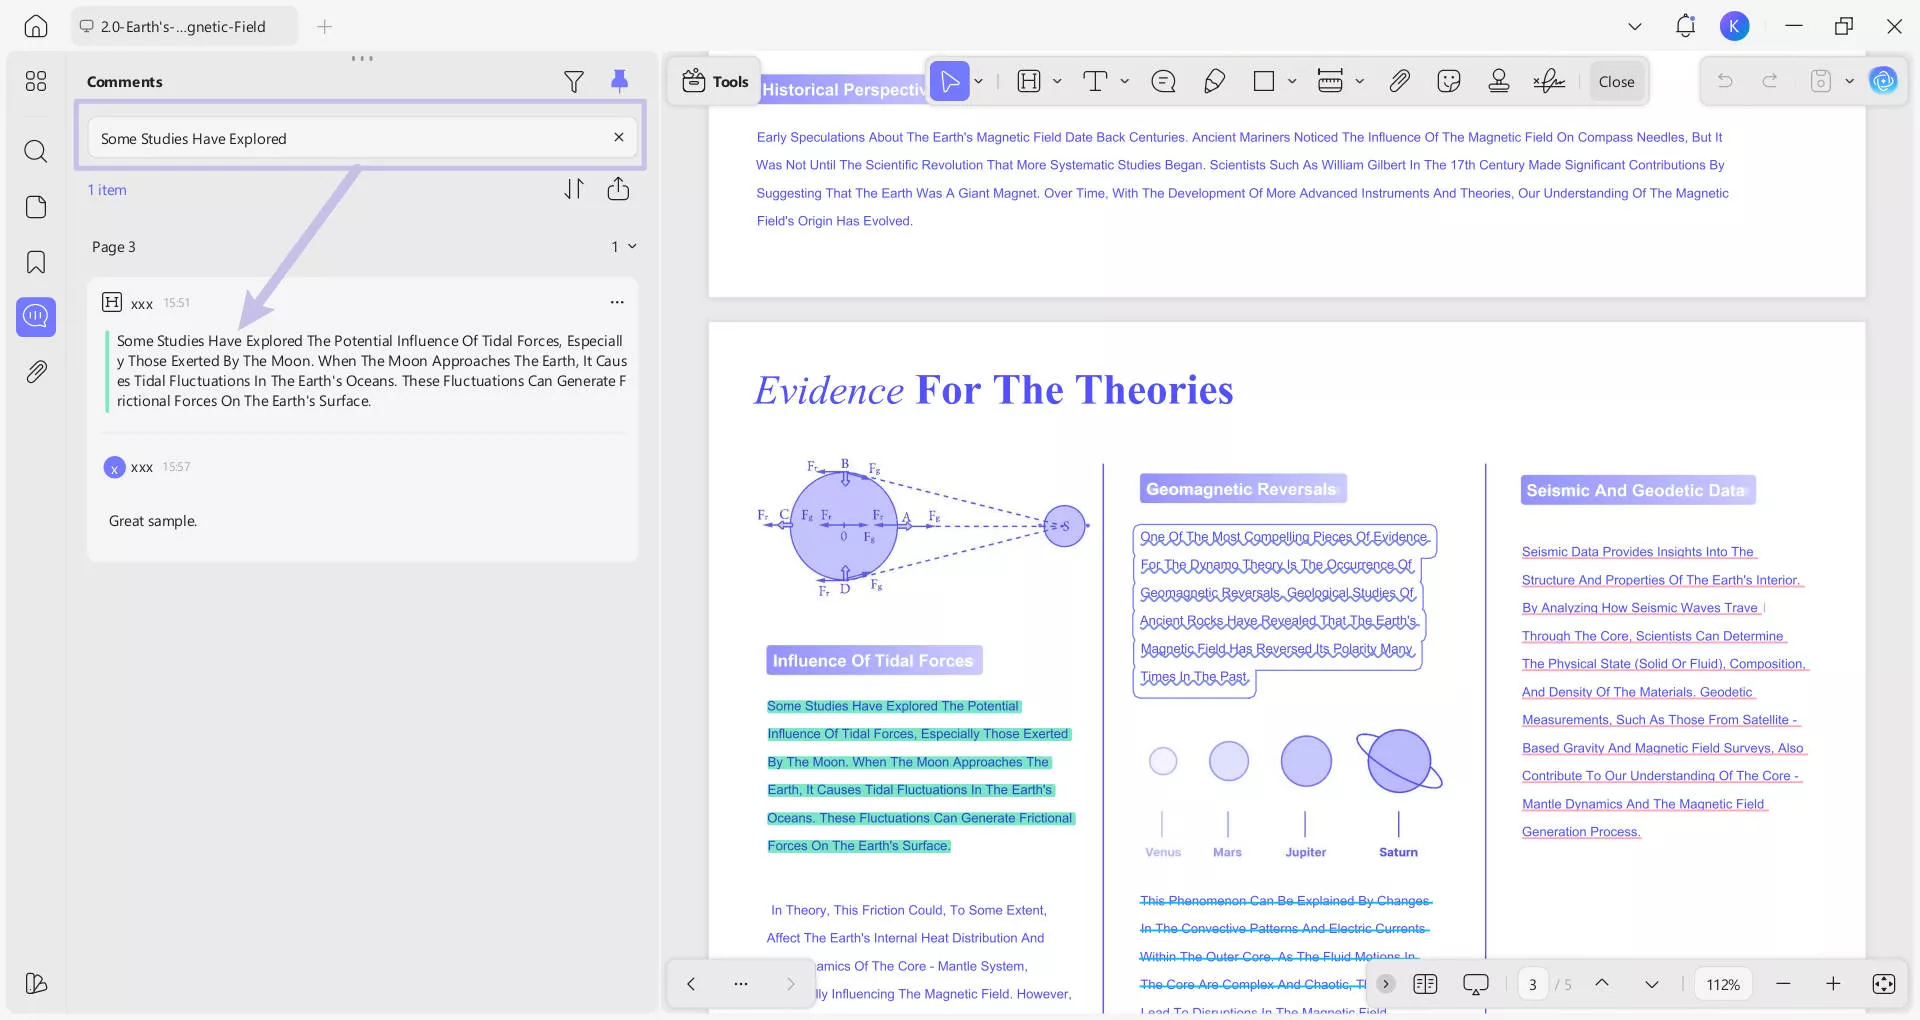
The Manage Comment Lists feature enables users to view, filter, sort, search, and interact with comments (e.g., reply, delete, edit) within a document. It is integrated into the left-side "Comments" panel and collaborates with the right-side document content for contextual reference. Key capabilities include:
- Comment Display: Lists all comments with metadata (username, timestamp, content snippet).
- Filtering: Narrows comments by types, color, or commentator.
- Sorting: Orders comments by page, author, type, date, or color.
- Searching: Locates specific comments via keyword matching.
- Exporting: Exports Comments to PDF.
- Interaction: Supports replying, deleting, or editing comments.
Step-by-Step Operations:
Step 1: Access the Comments Panel
- Open the document in UPDF and click the "Comment" button from the left-side panel. Here is a list of all existing comments.
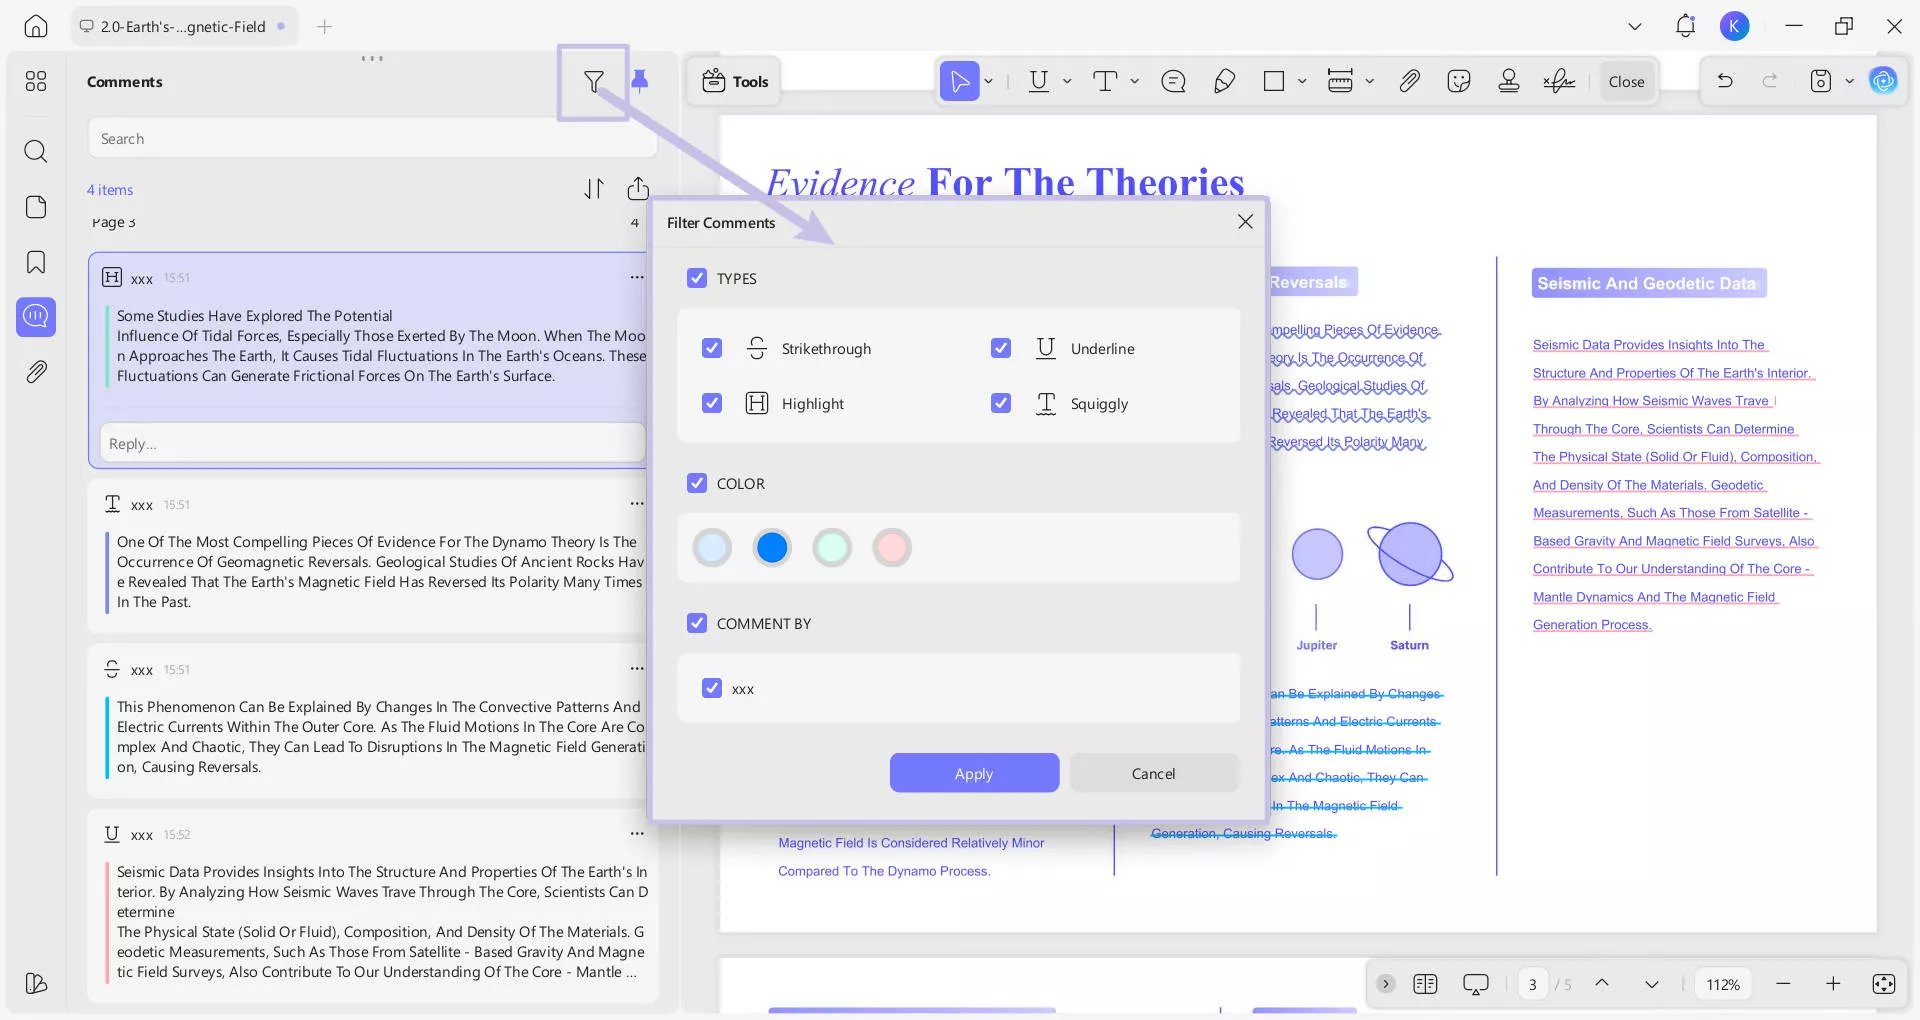
Step 2: Filter Comments by Criteria
- Click a funnel icon to open the "Filter Comments" pop-up.
- You can set filters to refine which comments are displayed. Under "Types", check the desired comment formats, such as Highlight or Strikethrough. In "Color", select the color tags you want to include. Under "Comment By", tick specific users to view only their comments.
- Finally, click "Apply" to update the list or Cancel to discard the changes.
Step 3: Export Comments
- Click "Export to PDF" icon of the Comments panel.
- In the Export to PDF window, choose your export preferences:
- Export by Page – Turn on this option to display comments grouped by page number.
- Export Filtered Comments – Enable this option to export only the comments that match your current filter settings.
- Click "Export Summary of Notes" to generate and export the comments summary as a PDF file.
- (Optional) You can also select "Export as Text" if you prefer to export the comments in text format instead of PDF.

Step 4: Sort Comments
- Click the "Sort Comments" icon at the top of the Comments panel.
- A dropdown menu will appear with several sorting options. Choose how you want to sort your comments:
- Page – Sort comments by their page order.
- Author – Sort comments alphabetically by author name.
- Type – Sort comments based on annotation type (e.g., highlight, note).
- Date – Sort comments by creation or modification date.
- Color – Sort comments by their color tags.
- The comments list will automatically update according to your selected sorting option.

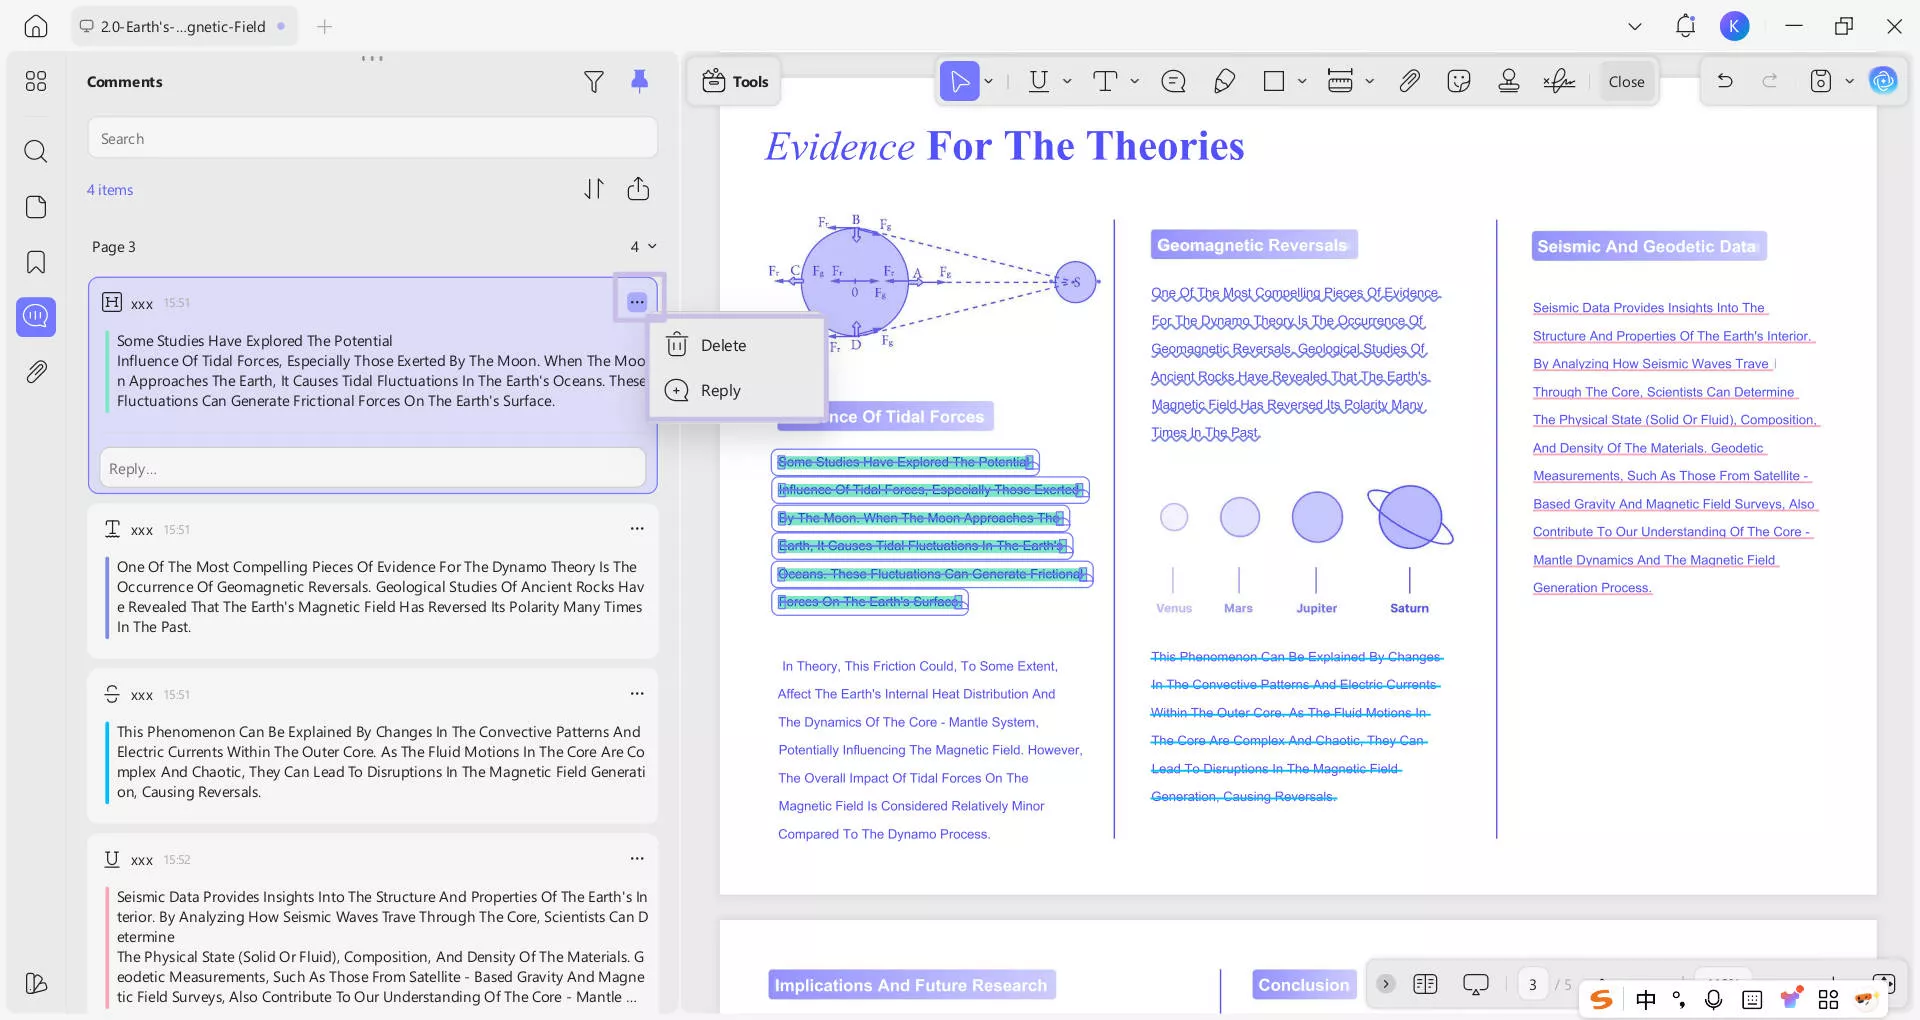
Step 5: Interact with Individual Comments
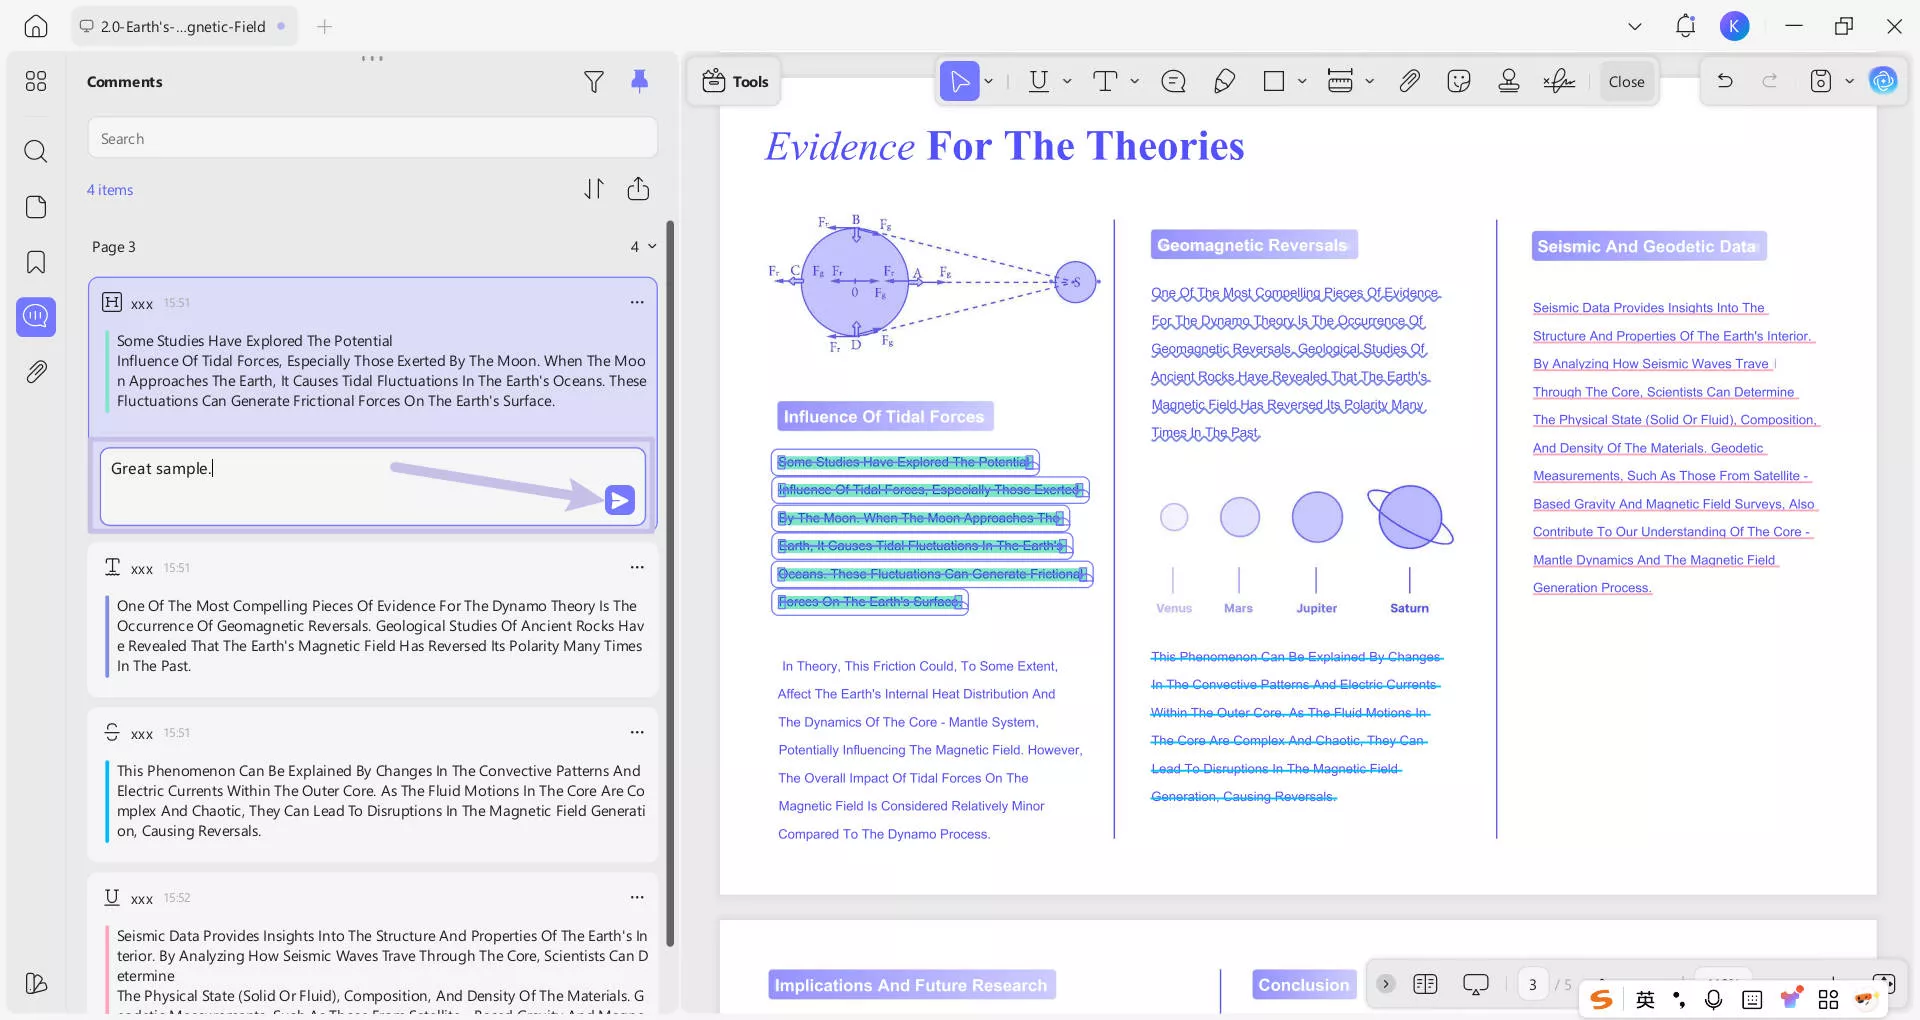
- Reply: Double-click the reply field text box under a comment or the click the three-dot menu (•••) → "Reply" to add a response.
- After typing, hit the "Send" button to reply to a comment.
- Delete: You can also click the three-dot menu (•••) → "Delete" to remove a comment.
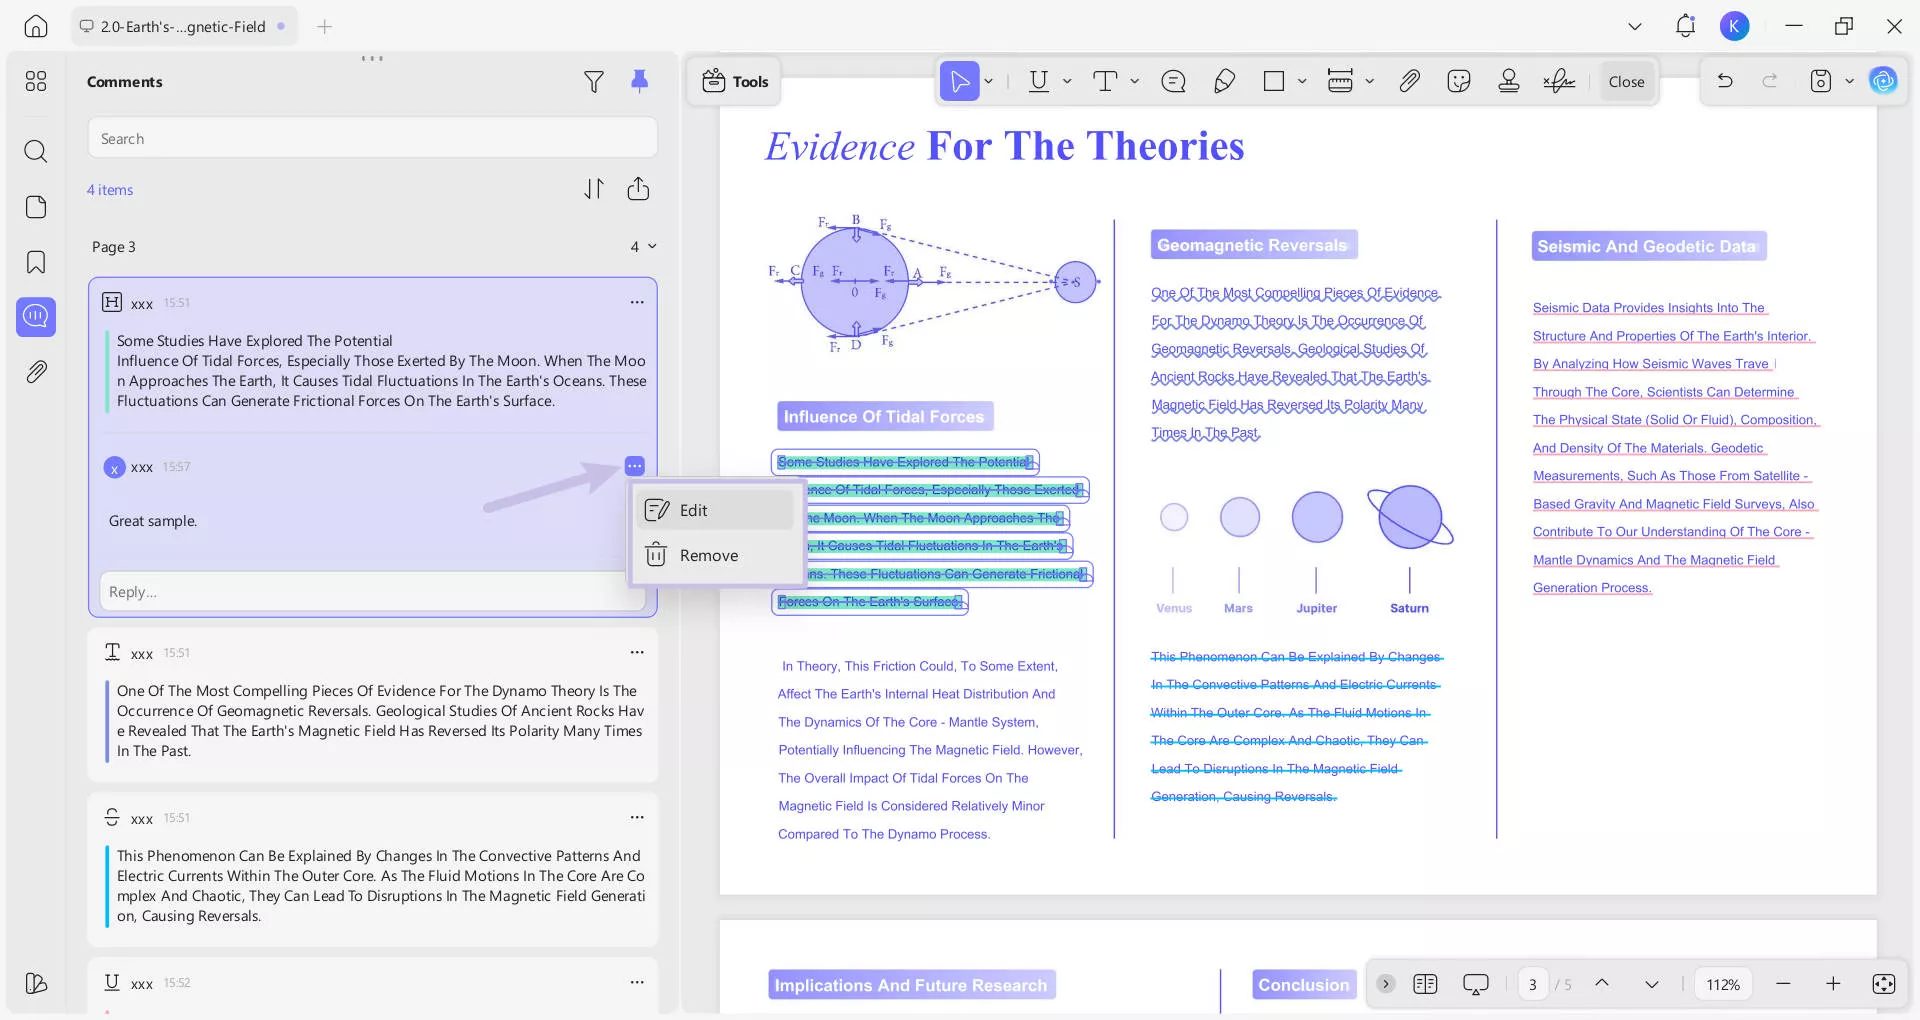
Step 6: Edit or Remove the Reply
Edit: Click the three-dot icon next to the reply. Then click the "Edit" button from the dropdown menu. Now UPDF will allow you to modify the text. Once it's done, hit the "Send" button to reply to a comment again.
Delete: To remove the reply, click the three-dot icon and press the "Remove" from the dropdown menu. Your reply will then be removed successfully.
Step 7: Search for Specific Comments
- Use the Search Bar on the top of the comments and enter keywords in the search field. UPDF will show matching comments automatically.
12. Undo/Delete Annotations
Once the annotations are applied to your documents, you can undo/delete them. To undo any changes, use the keyboard shortcut CTRL + Z to undo the annotations.
You can delete it with the help of a mouse. Navigate to the Undo icon in the top right corner and undo the last action performed on your document for annotation.
