UPDF for Windows
 UPDF for Mac
 UPDF for iPhone/iPad
 UPDF for Android
 UPDF AI Online
 UPDF Sign
 Edit PDF
 Annotate PDF
 Create PDF
 PDF Form
 Edit links
 Convert PDF
 OCR
OCR PDF to Word
 PDF to Image
 PDF to Excel
 Organize PDF
 Merge PDF
 Split PDF
 Crop PDF
 Rotate PDF
 Protect PDF
 Sign PDF
 Redact PDF
 Sanitize PDF
 Remove Security
 Read PDF
 UPDF Cloud
 Compress PDF
 Print PDF
 Batch Process
 About UPDF AI
 UPDF AI Solutions
 AI User Guide
 FAQ about UPDF AI
 Summarize PDF
 Translate PDF
 Chat with PDF
 Chat with AI
 Chat with image
 PDF to Mind Map
 Explain PDF
 PDF AI Tools
 Image AI Tools
 AI Chat Tools
 AI Writing Tools
 AI Study Tools
 AI Working Tools
 Other AI Tools
 AI Bookmark Generation
 AI Bookmark Summary
 AI Watermark Generation
 AI Background Generation
 AI Sticker Generation
 AI Stamp Generation
 AI Editing Suite
 UPDF Copilot
 AI Page Management
 AI Semantic Search
 PDF to Word
 PDF to Excel
 PDF to PowerPoint
 User Guide
 UPDF Tricks
 FAQs
FAQs UPDF Reviews
 Download Center
 Blog
Blog Newsroom
 Tech Spec
 Updates
 UPDF vs. Adobe Acrobat
 UPDF vs. Foxit
 UPDF vs. PDF Expert
Sign PDF on iOS
UPDF enables you to sign PDFs in two different ways. You can add your hand-drawn signatures, scan your handwritten signature on paper, or digitally sign your PDFs to ensure confidentiality. Dive into this guide to learn how both these features work to let you personalize your PDFs.
1. How to Sign a PDF with Hand-drawn Signature?
UPDF provides an easy way to hand-sign in PDF on iOS. You can also customize your signature and change its color per your reference.
Follow the steps below to do it:
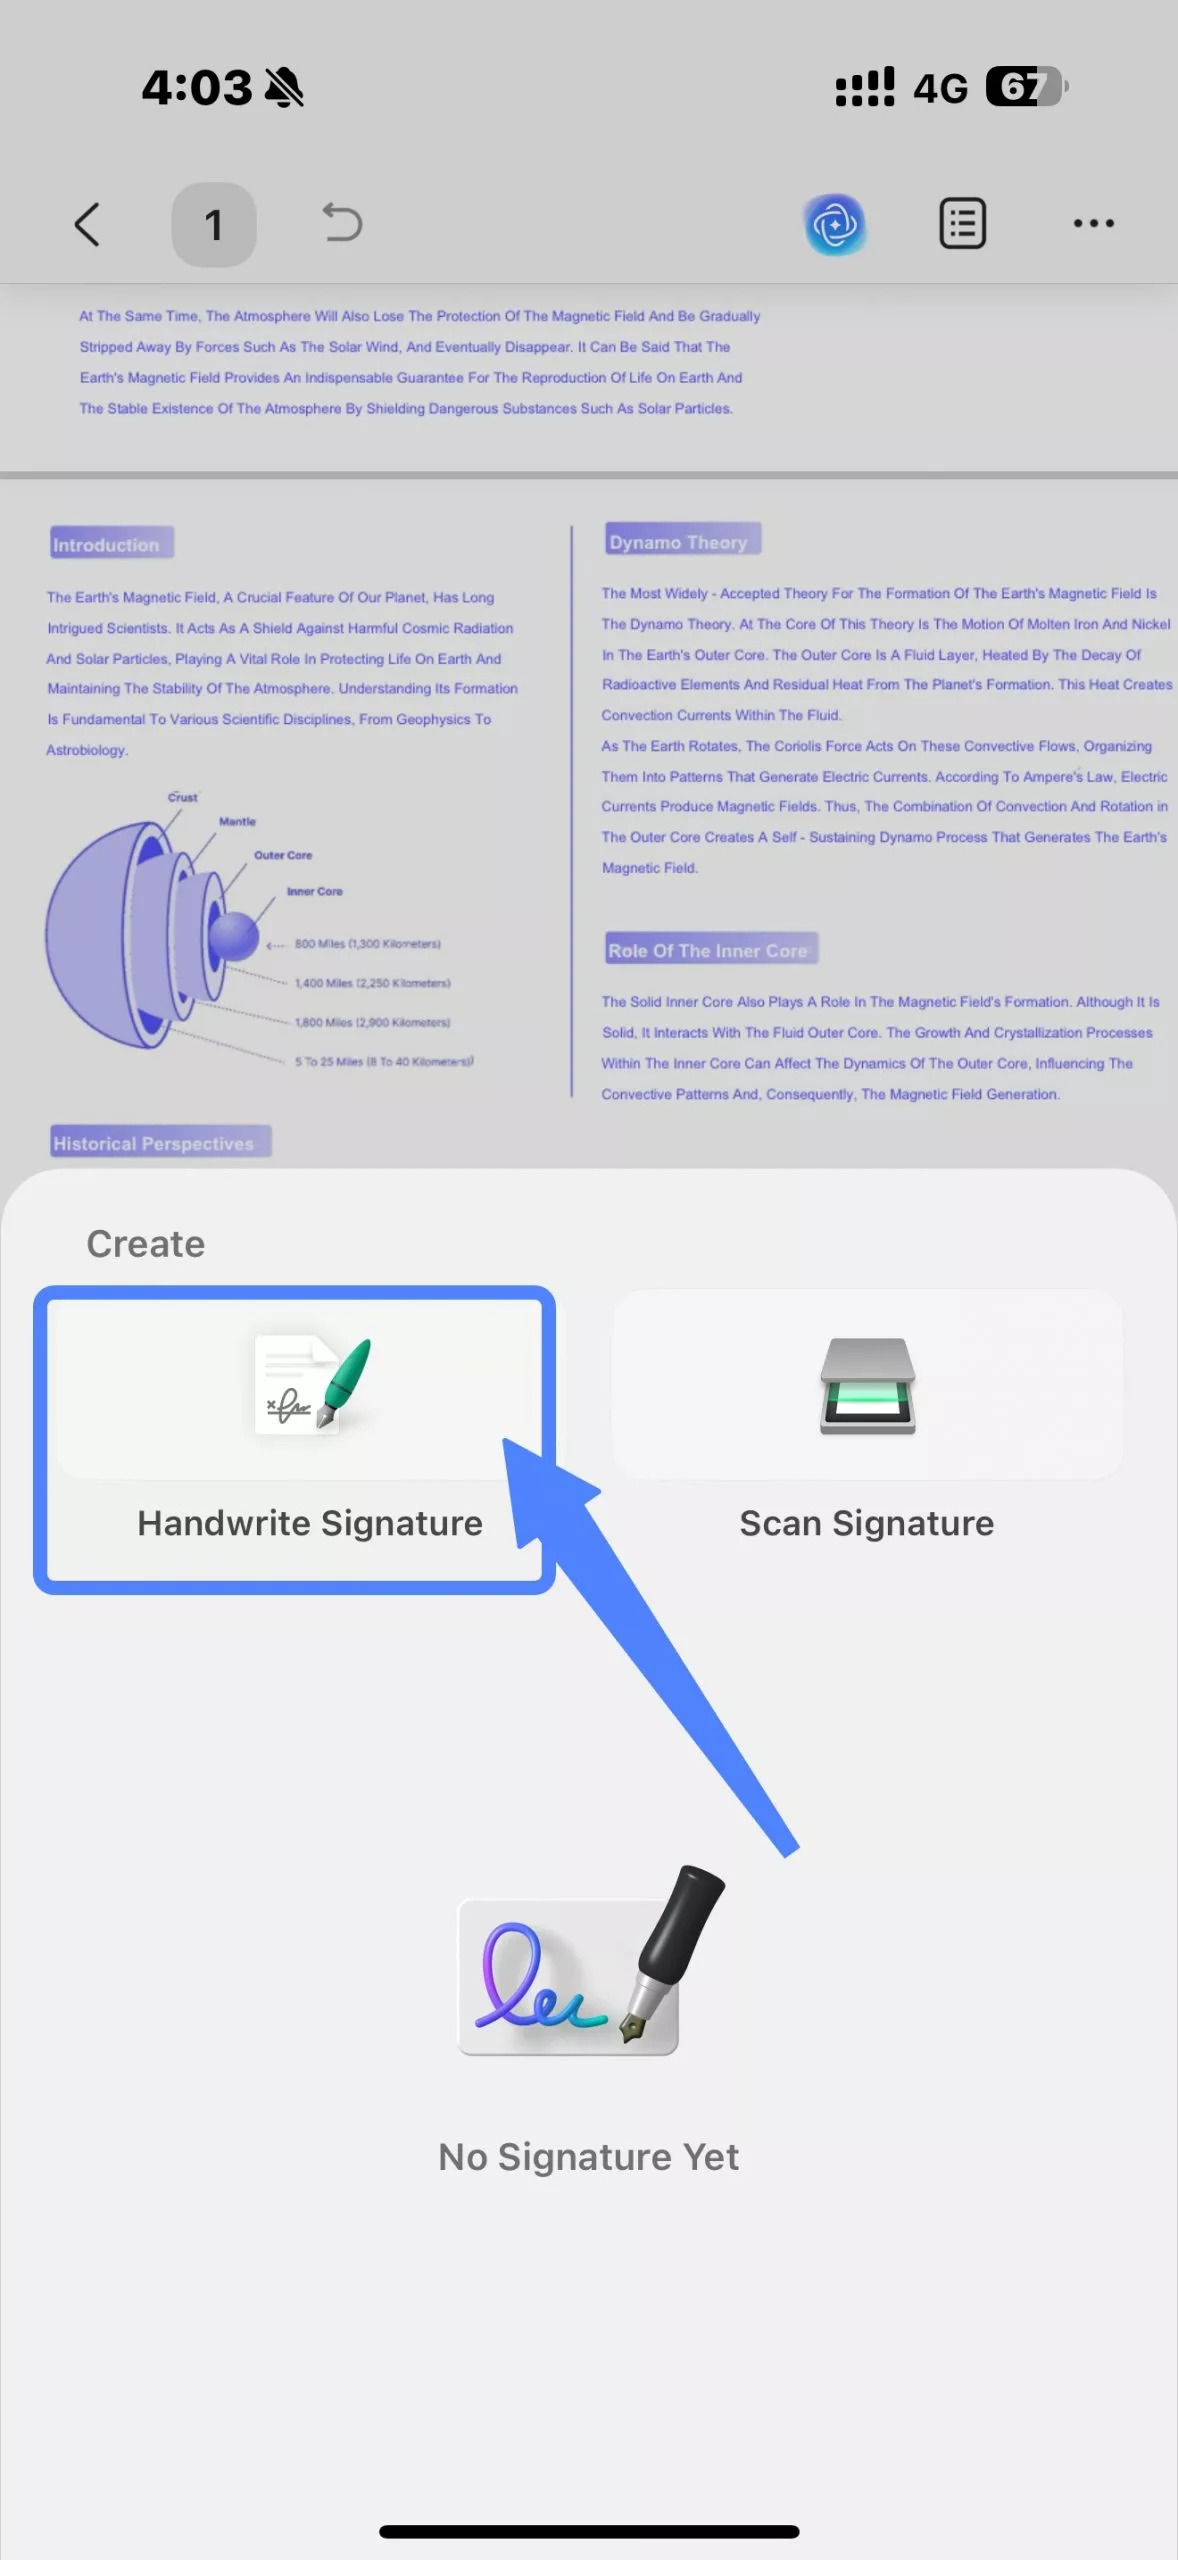
- Open UPDF on your iOS device, choose the PDF you want to sign, then tap the Fill & Sign icon on the bottom toolbar.
- From the banner displayed, tap on the Signature button.
- Tap on the Handwrite Signature button.
- On the new screen, write your Signature on the blank page.
- Customize the Signature and hit the Done button to save changes.
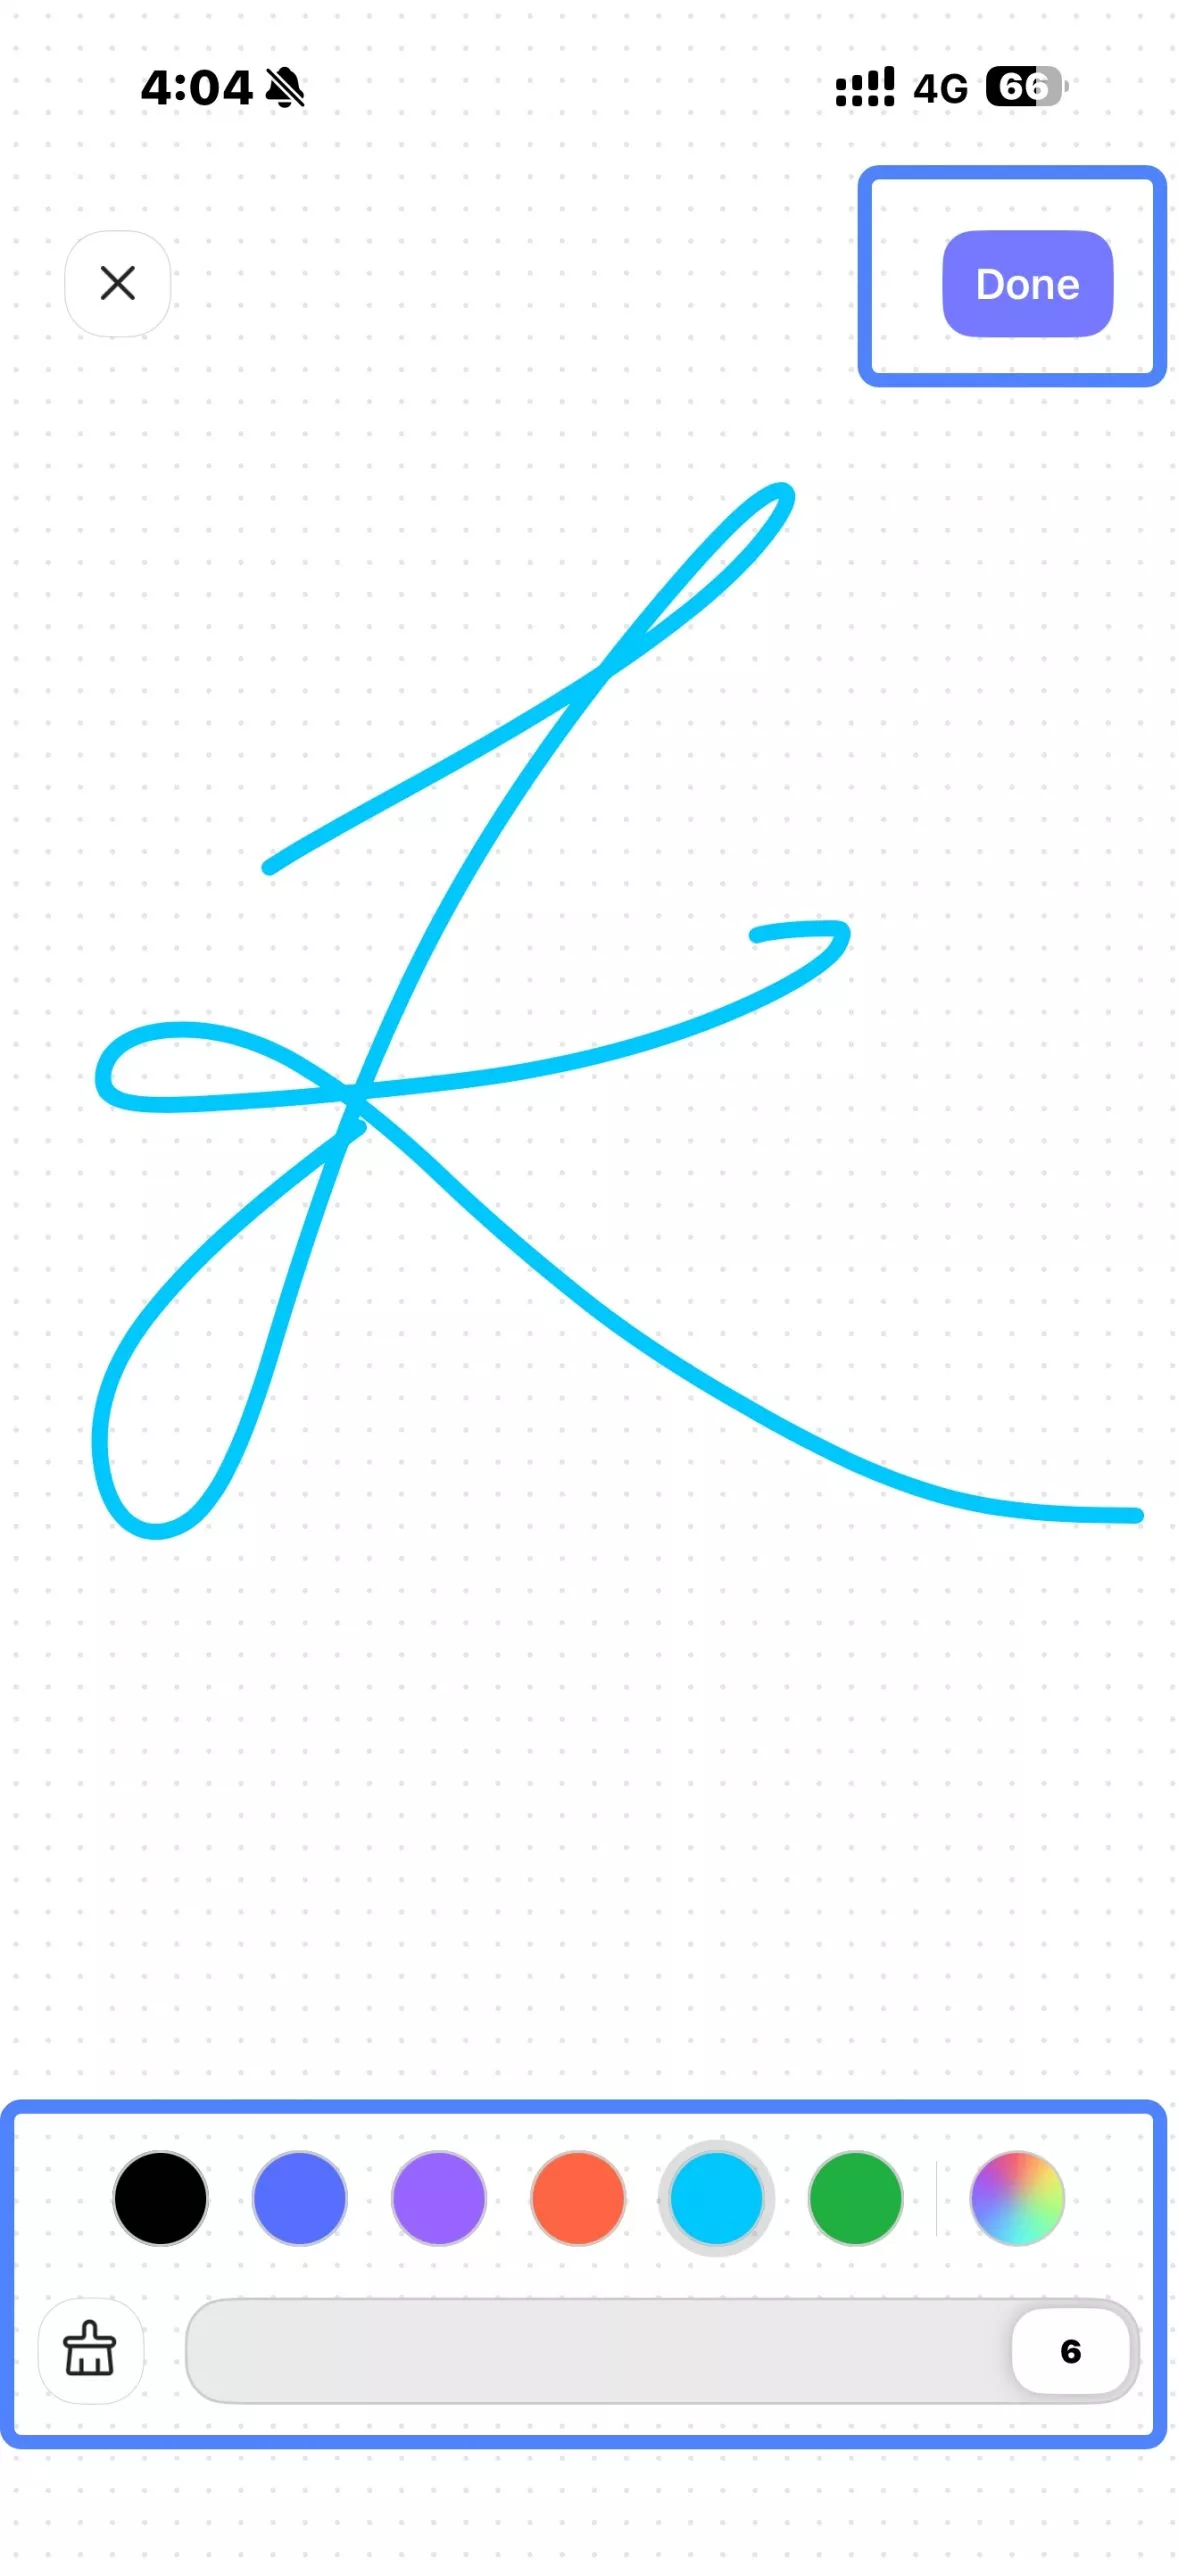
- If you're not satisfied with your handwritten signature, you can click the Broom icon in the lower left corner to clear it with one tap.
How to Change Signature Color
UPDF allows its user to apply different colors to their signatures. To do so, follow these steps:
- Locate the Color icon at the bottom of the signature screen.
- Choose the color you want to apply from the range of colors displayed.
- Save the changes by hitting the Done Button on the signature screen.
Extra Tip
2. How to Sign a PDF with Scanned Signature?
UPDF allows you to sign a PDF with a scanned version of your handwritten signature. Here’s how to do it step by step.
- Open UPDF on your iOS device, choose the PDF you want to sign, then tap the Fill & Sign icon on the bottom toolbar.
- From the banner displayed, tap on the Signature button.
- Tap on the Scan Signature button.
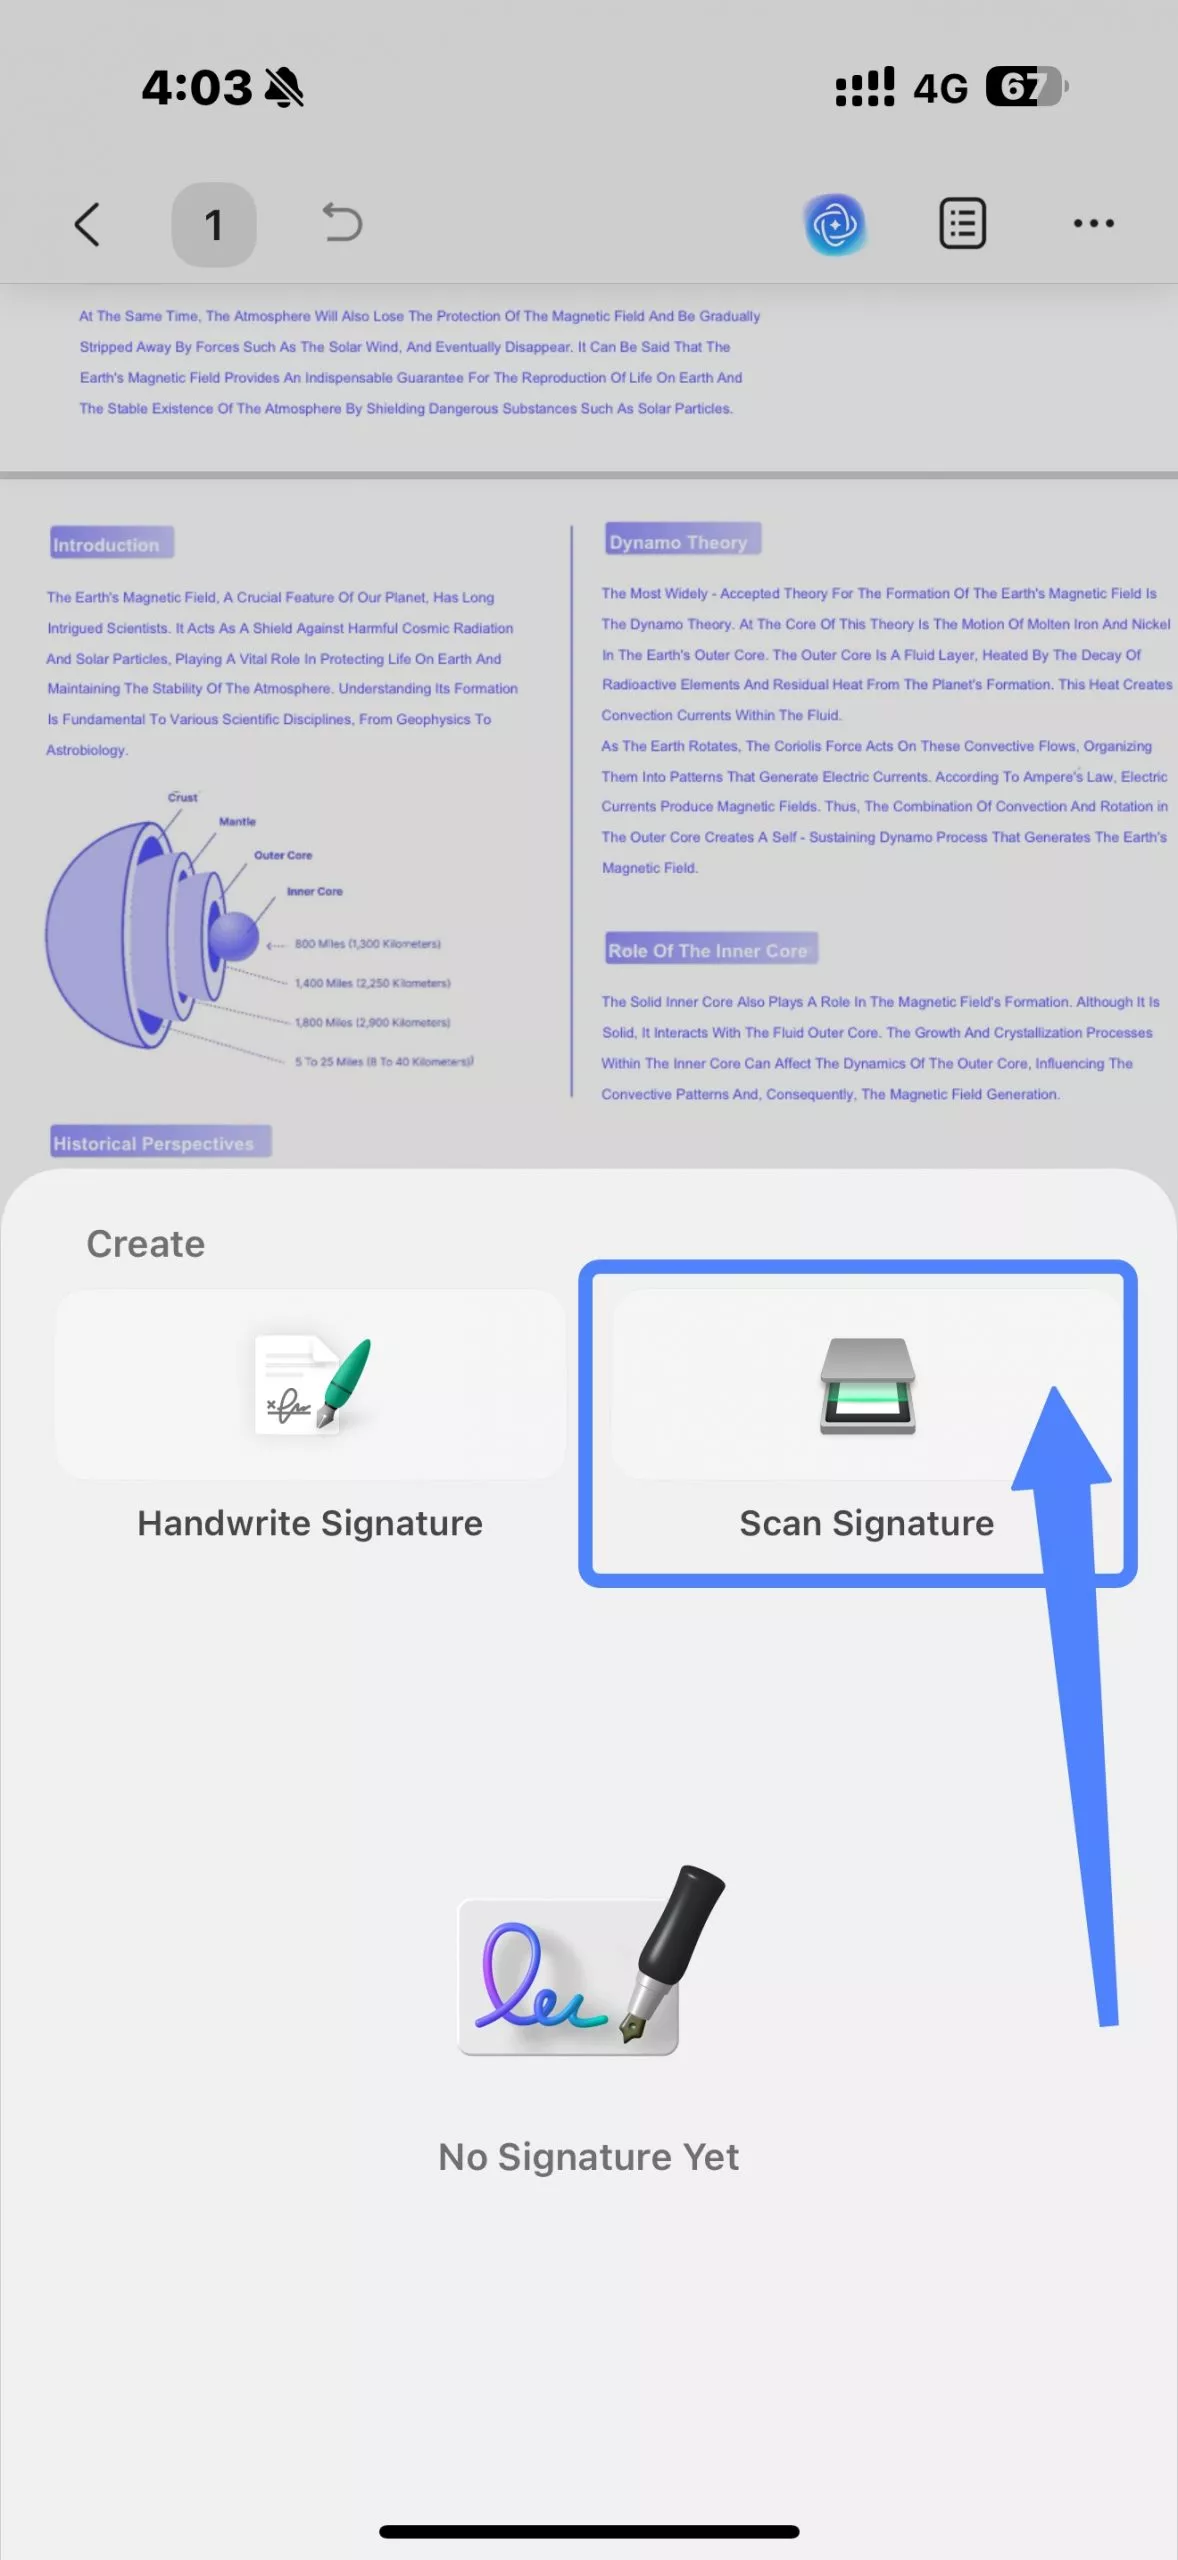
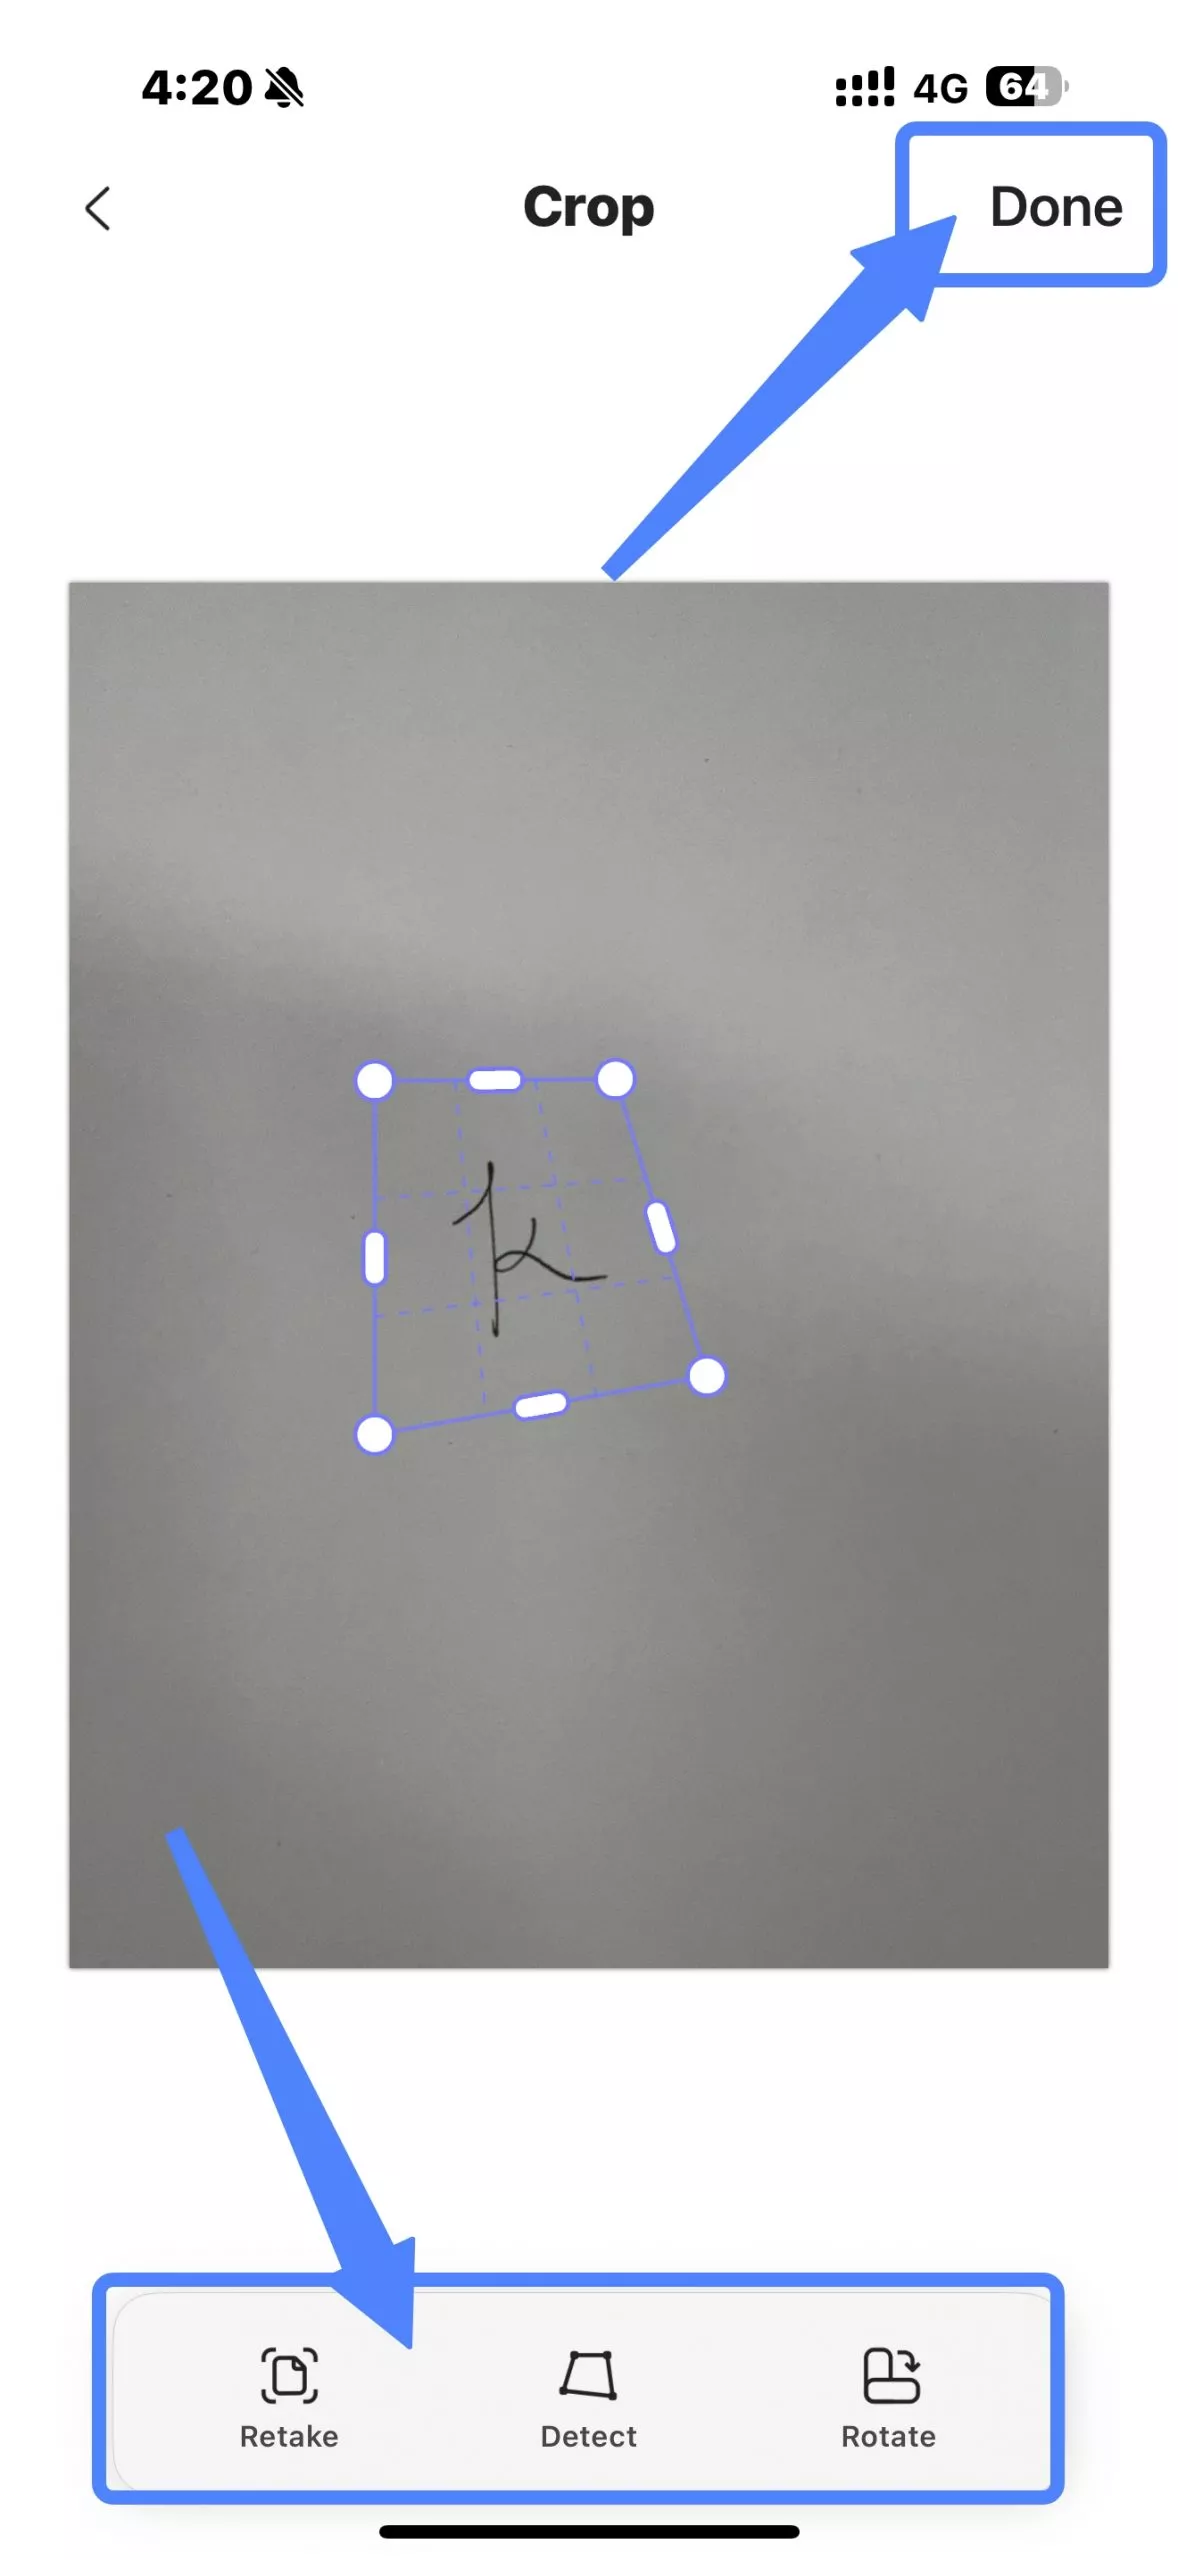
- You can tap the Capture button in the center to scan your handwritten signature on paper, or tap the Gallery button to import a photo of your signature that you've already taken from your Gallery app. For the best scanning results, please write your signature on the white paper.

- After you import a photo of your handwritten signature, the UPDF toolbar will display options like "Retake", "Detect", and "Rotate" for further actions on the photo. Then, click the "Done" button to confirm. You can manually adjust it according to your preference.
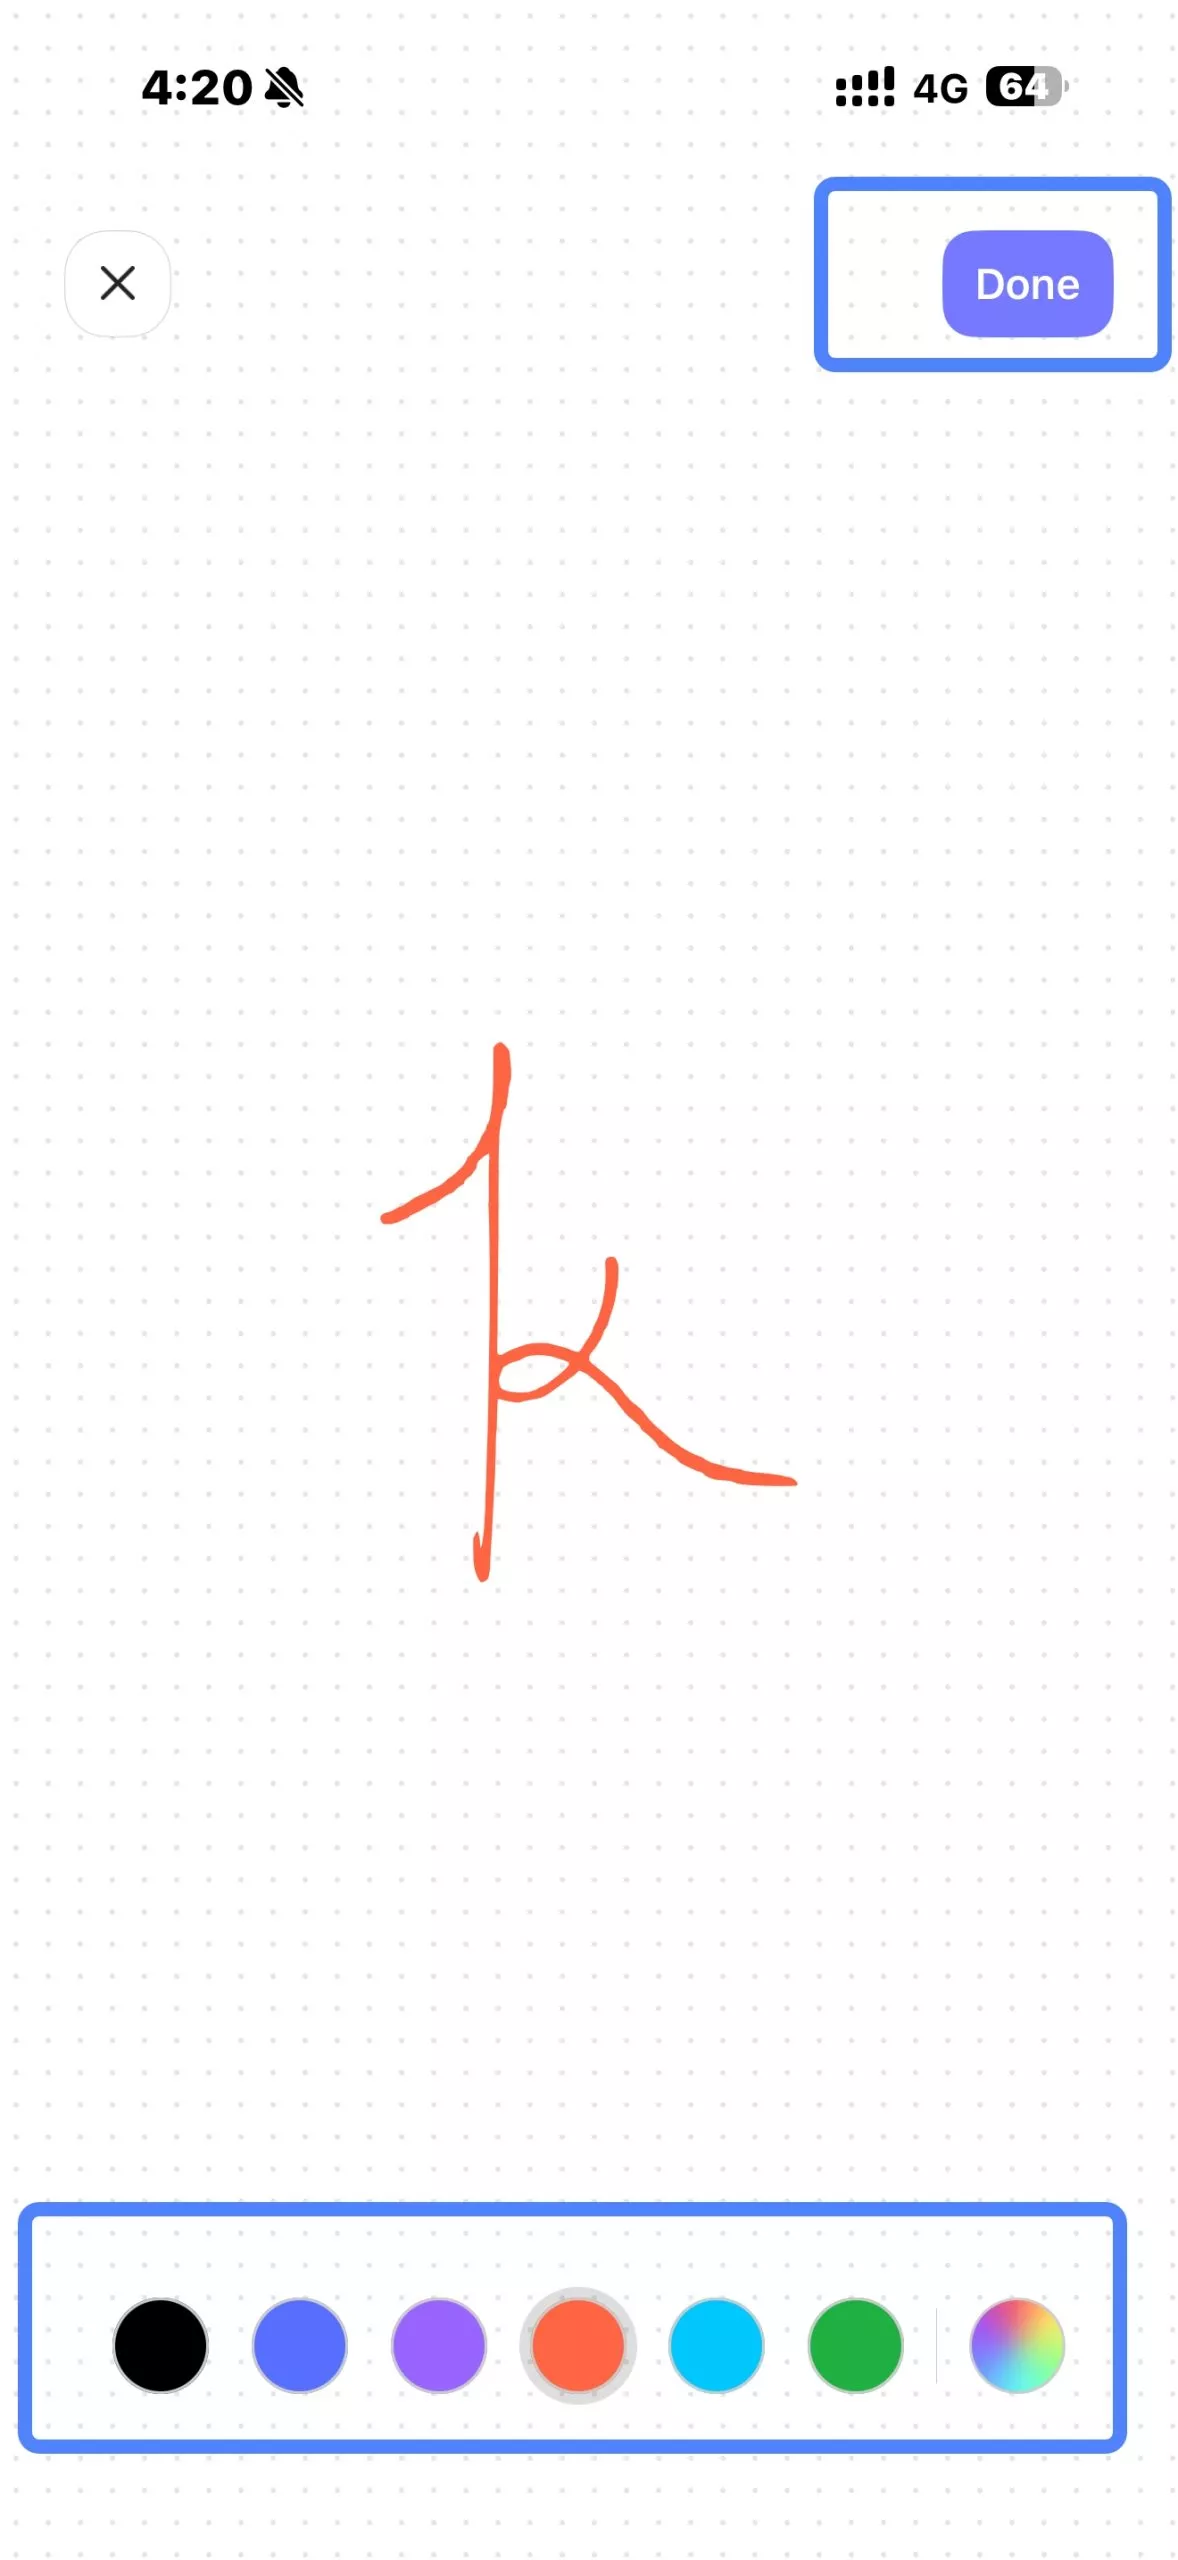
- UPDF will automatically scan your signature photo into a digital format, and you can further adjust the color of your handwritten signature. Once you're done, tap "Done" to choose whether to "Save" the scanned signature or "Save to Cloud".
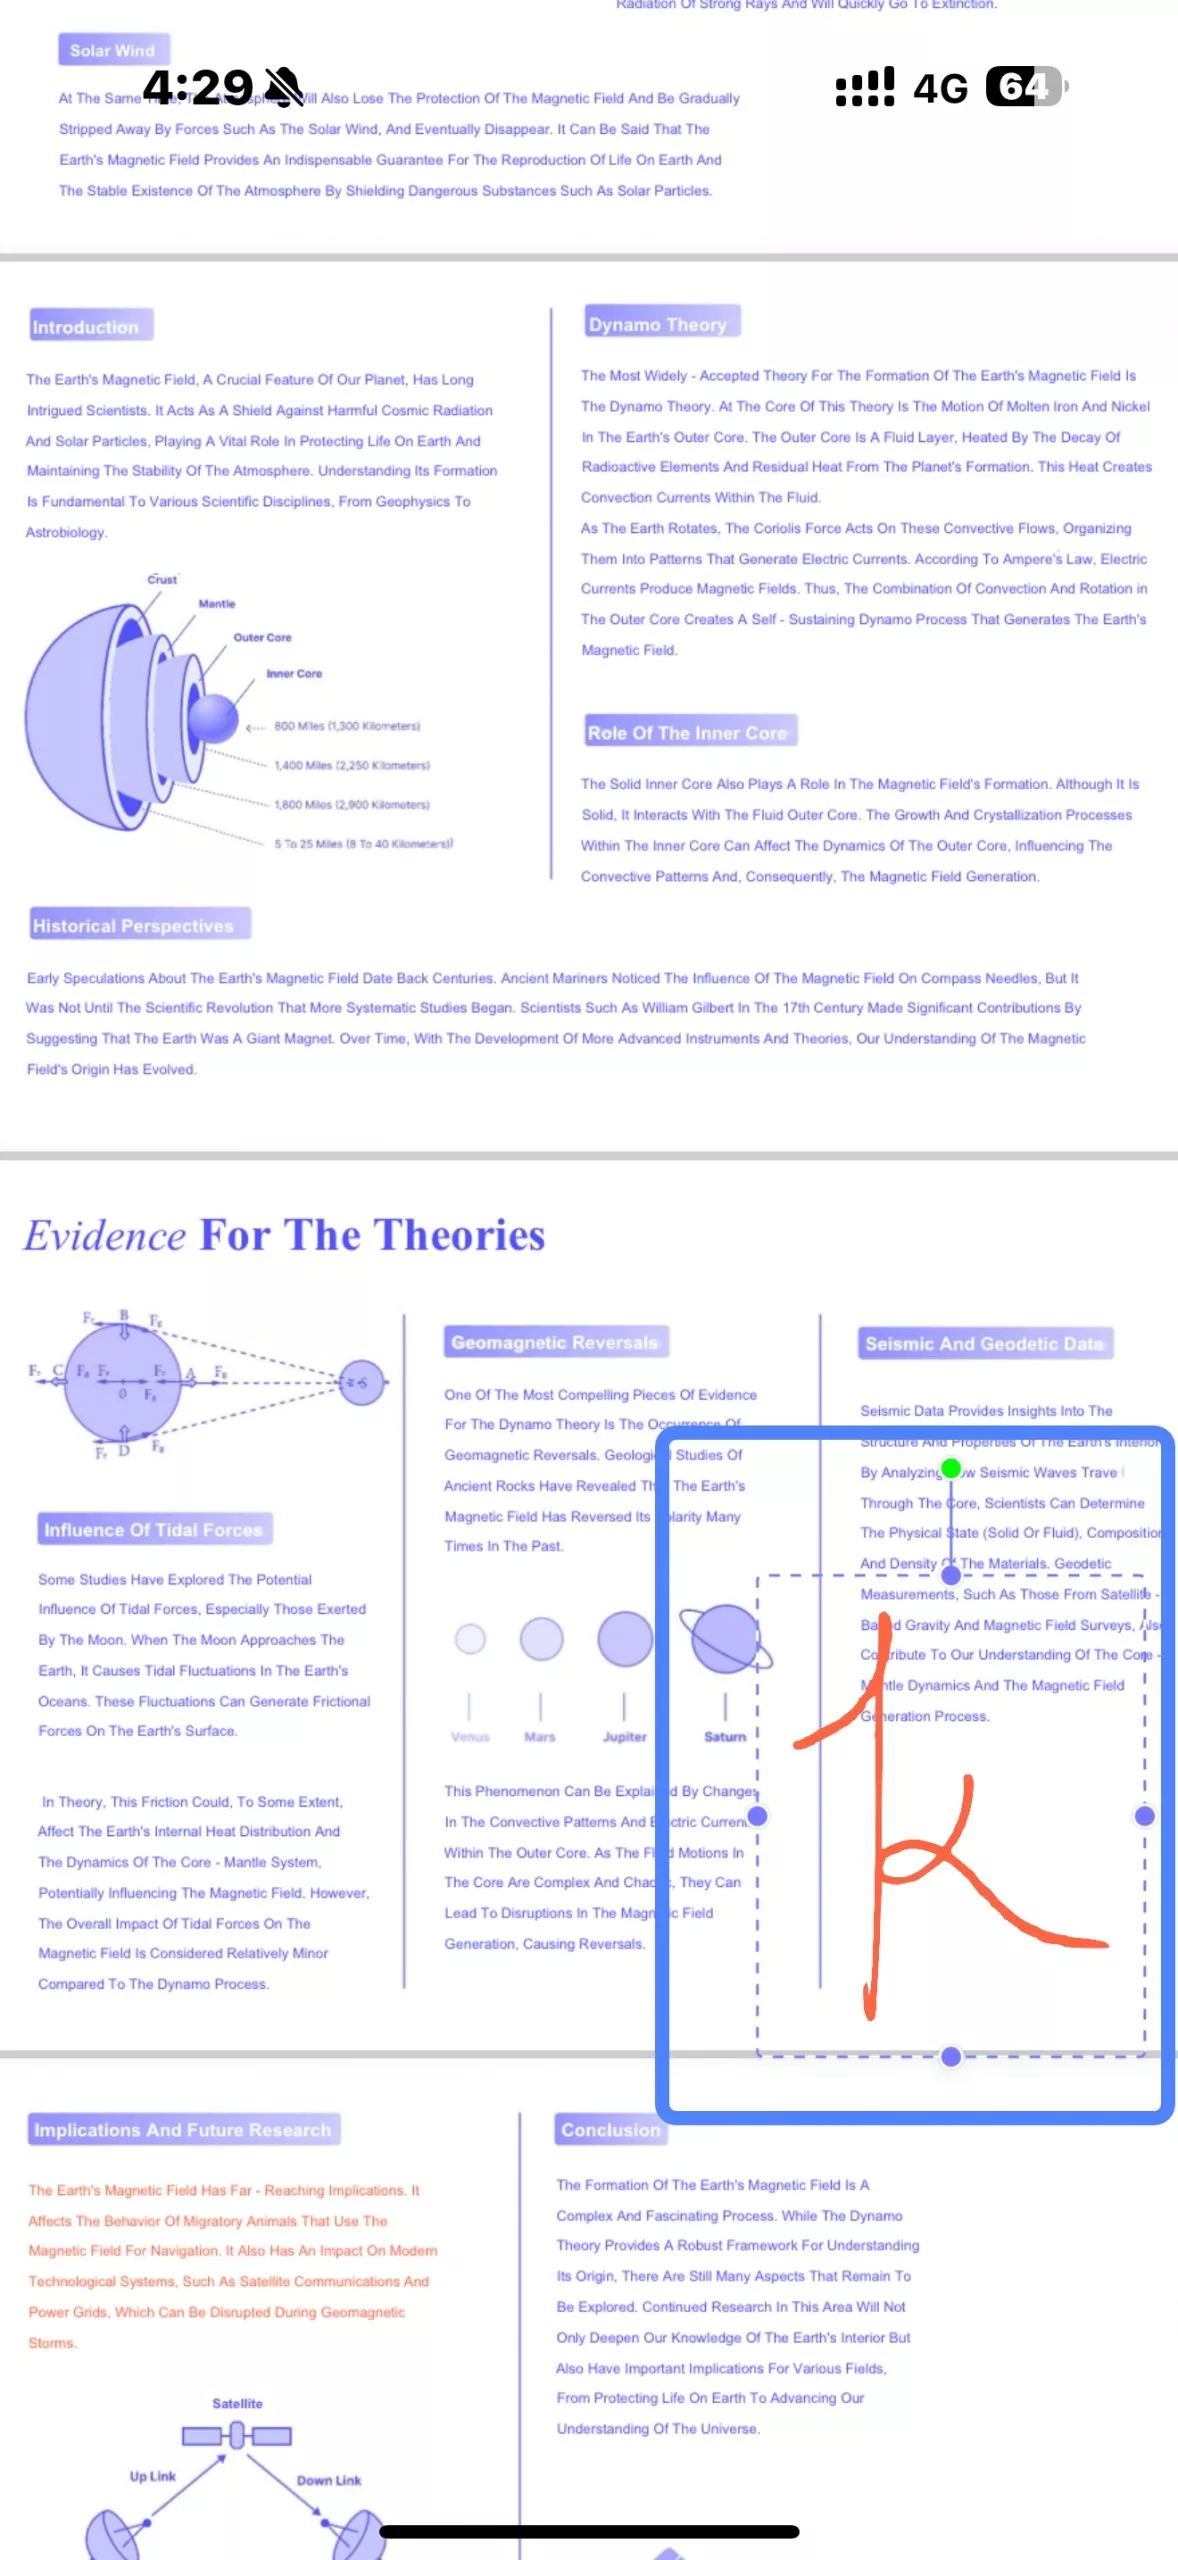
- Now, the scanned electronic signature has been imported into your PDF document, and you can manually adjust its position.
3. How to Add Digital Signature to PDF
Aside from this, you can also digitally sign your business dealings, contracts, or any other PDF with a digital ID by utilizing UPDF for iOS. This will enable you to enter a paperless, sustainable world. Note that you must first add a digital signature field to the PDF using UPDF for Windows or Mac. Let's hop onto the steps.
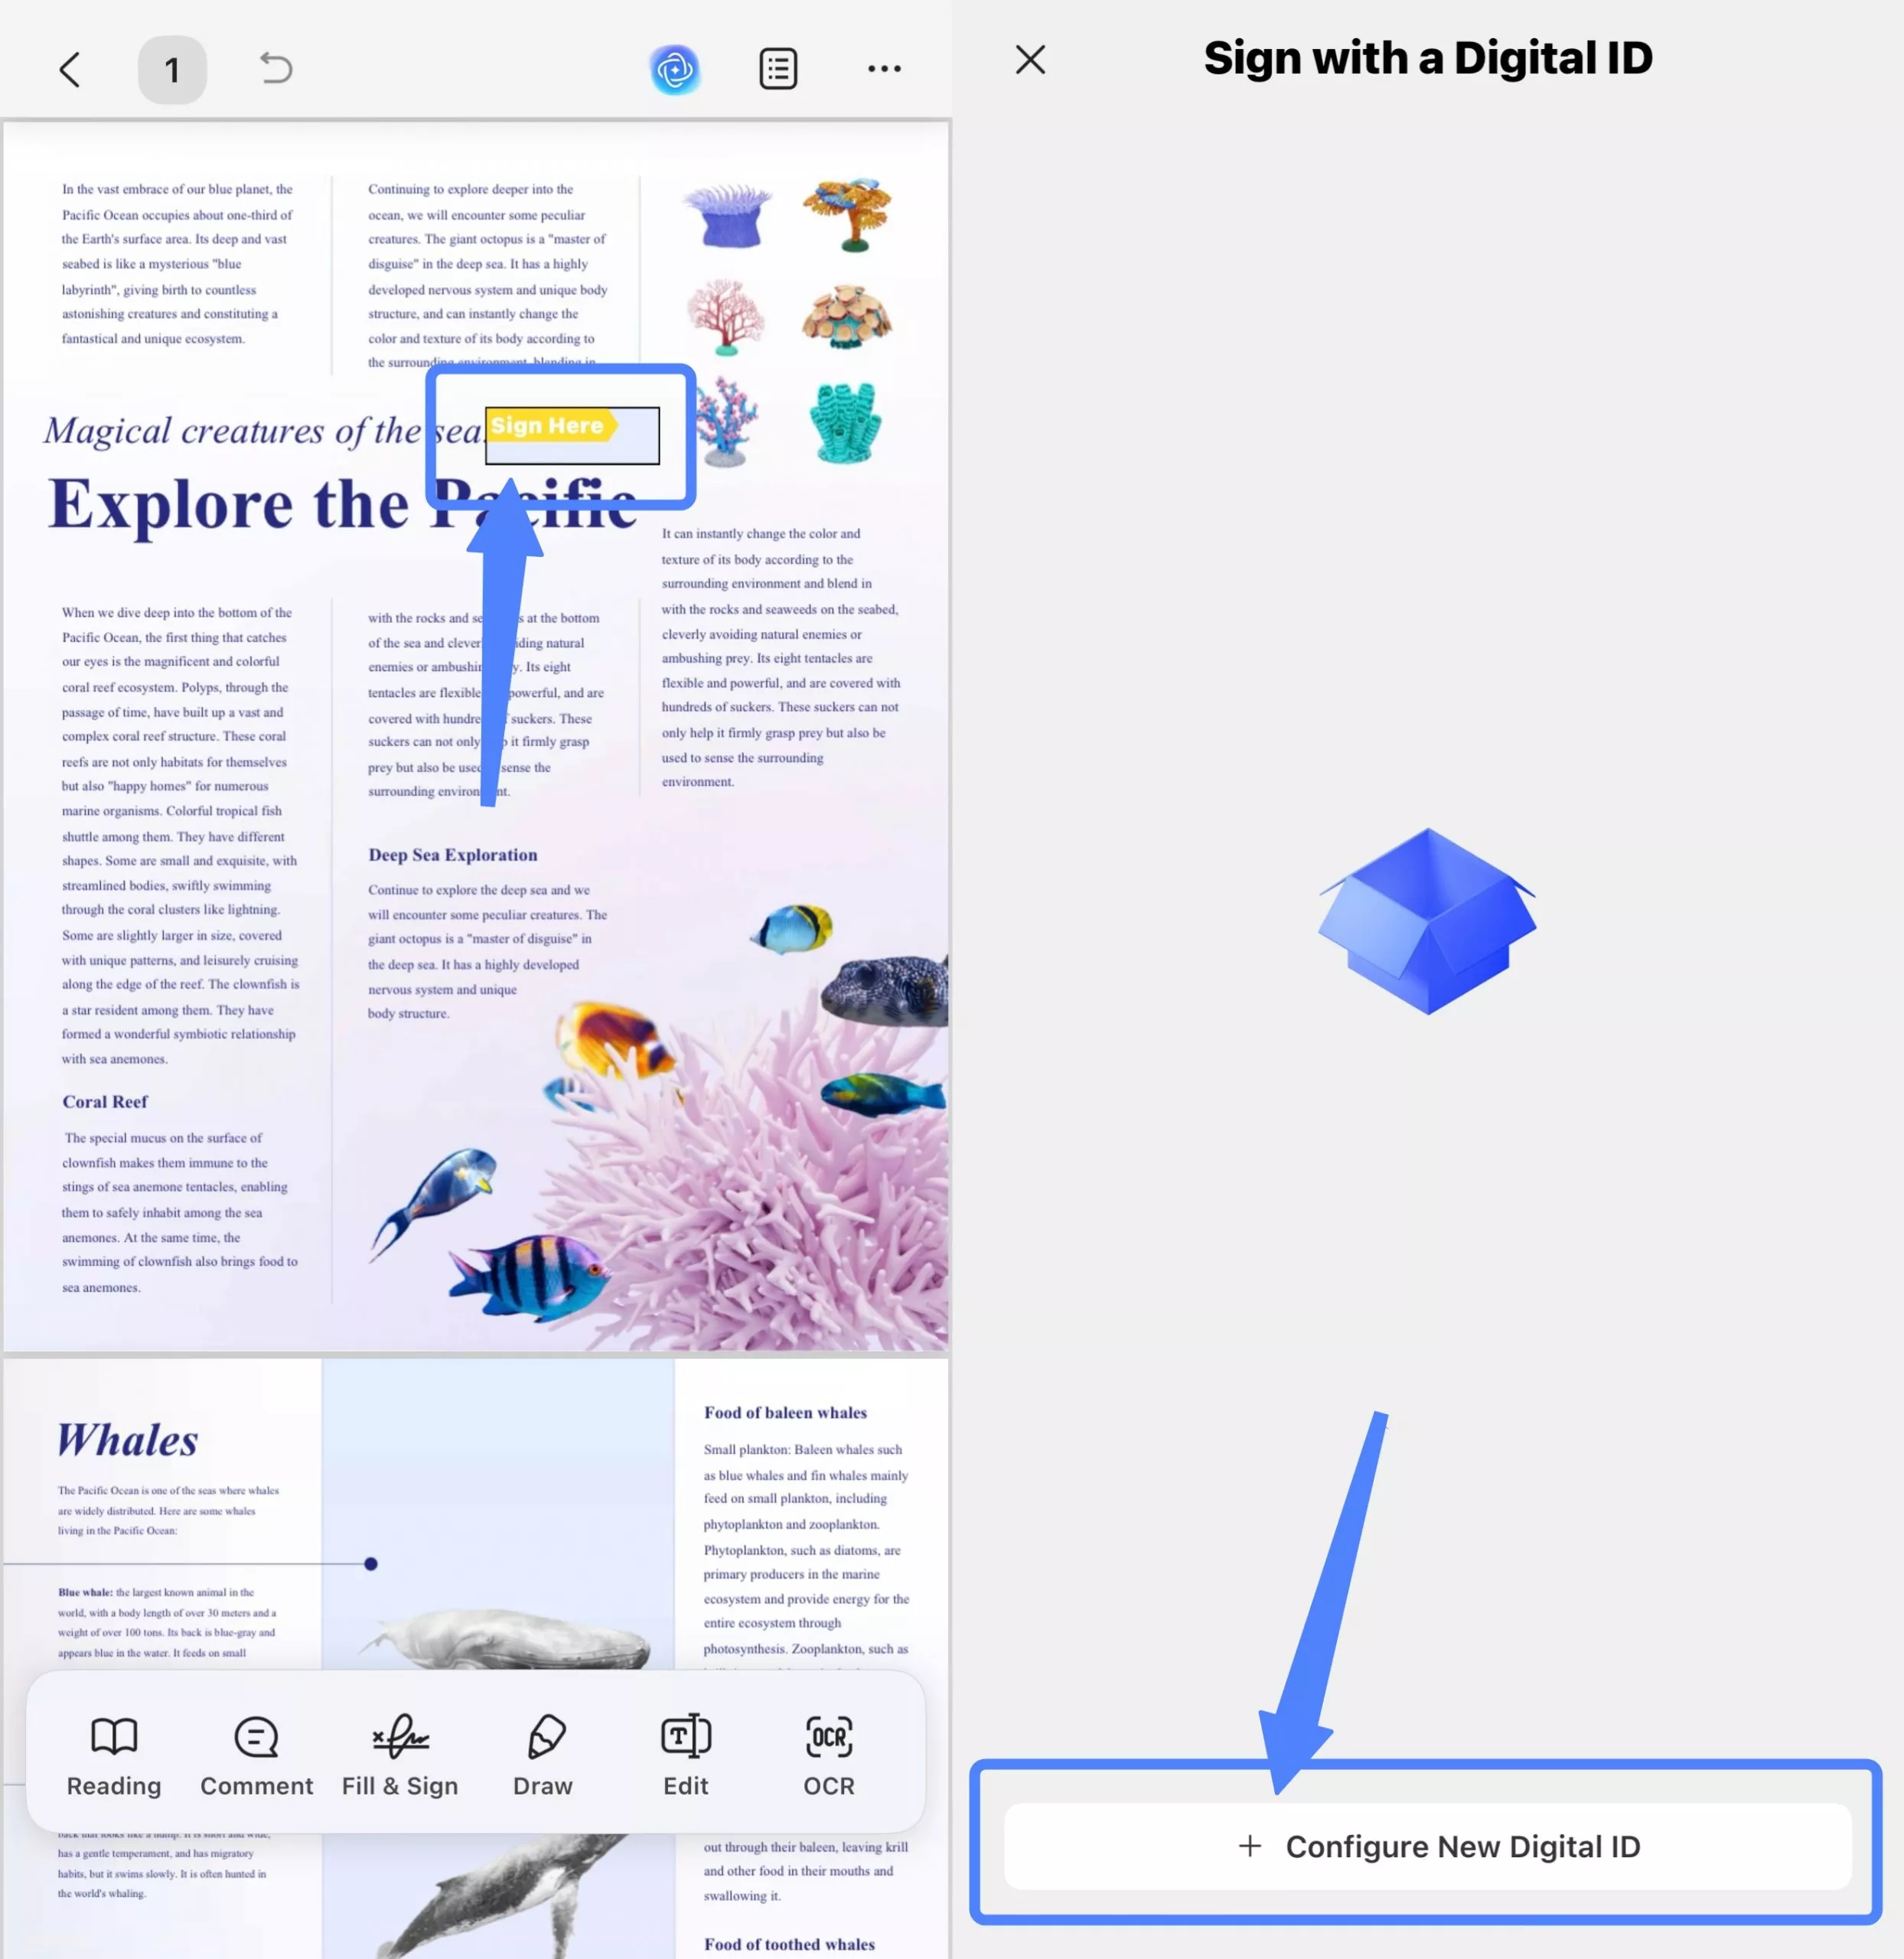
Step 1. Open a PDF that contains a digital signature field in UPDF. Once opened, tap on the digital signature field.
Step 2. A new window will show up with the "+ Configure New Digital ID" at the bottom. To create a new digital ID, tap on the "+ Configure New Digital ID" button.
Step 3. UPDF will display an interface prompting you to enter the identity information for creating the self-signed Digital ID, including your name, email address, organization unit (optional), and organization name (optional). Once done, click the "OK" button.
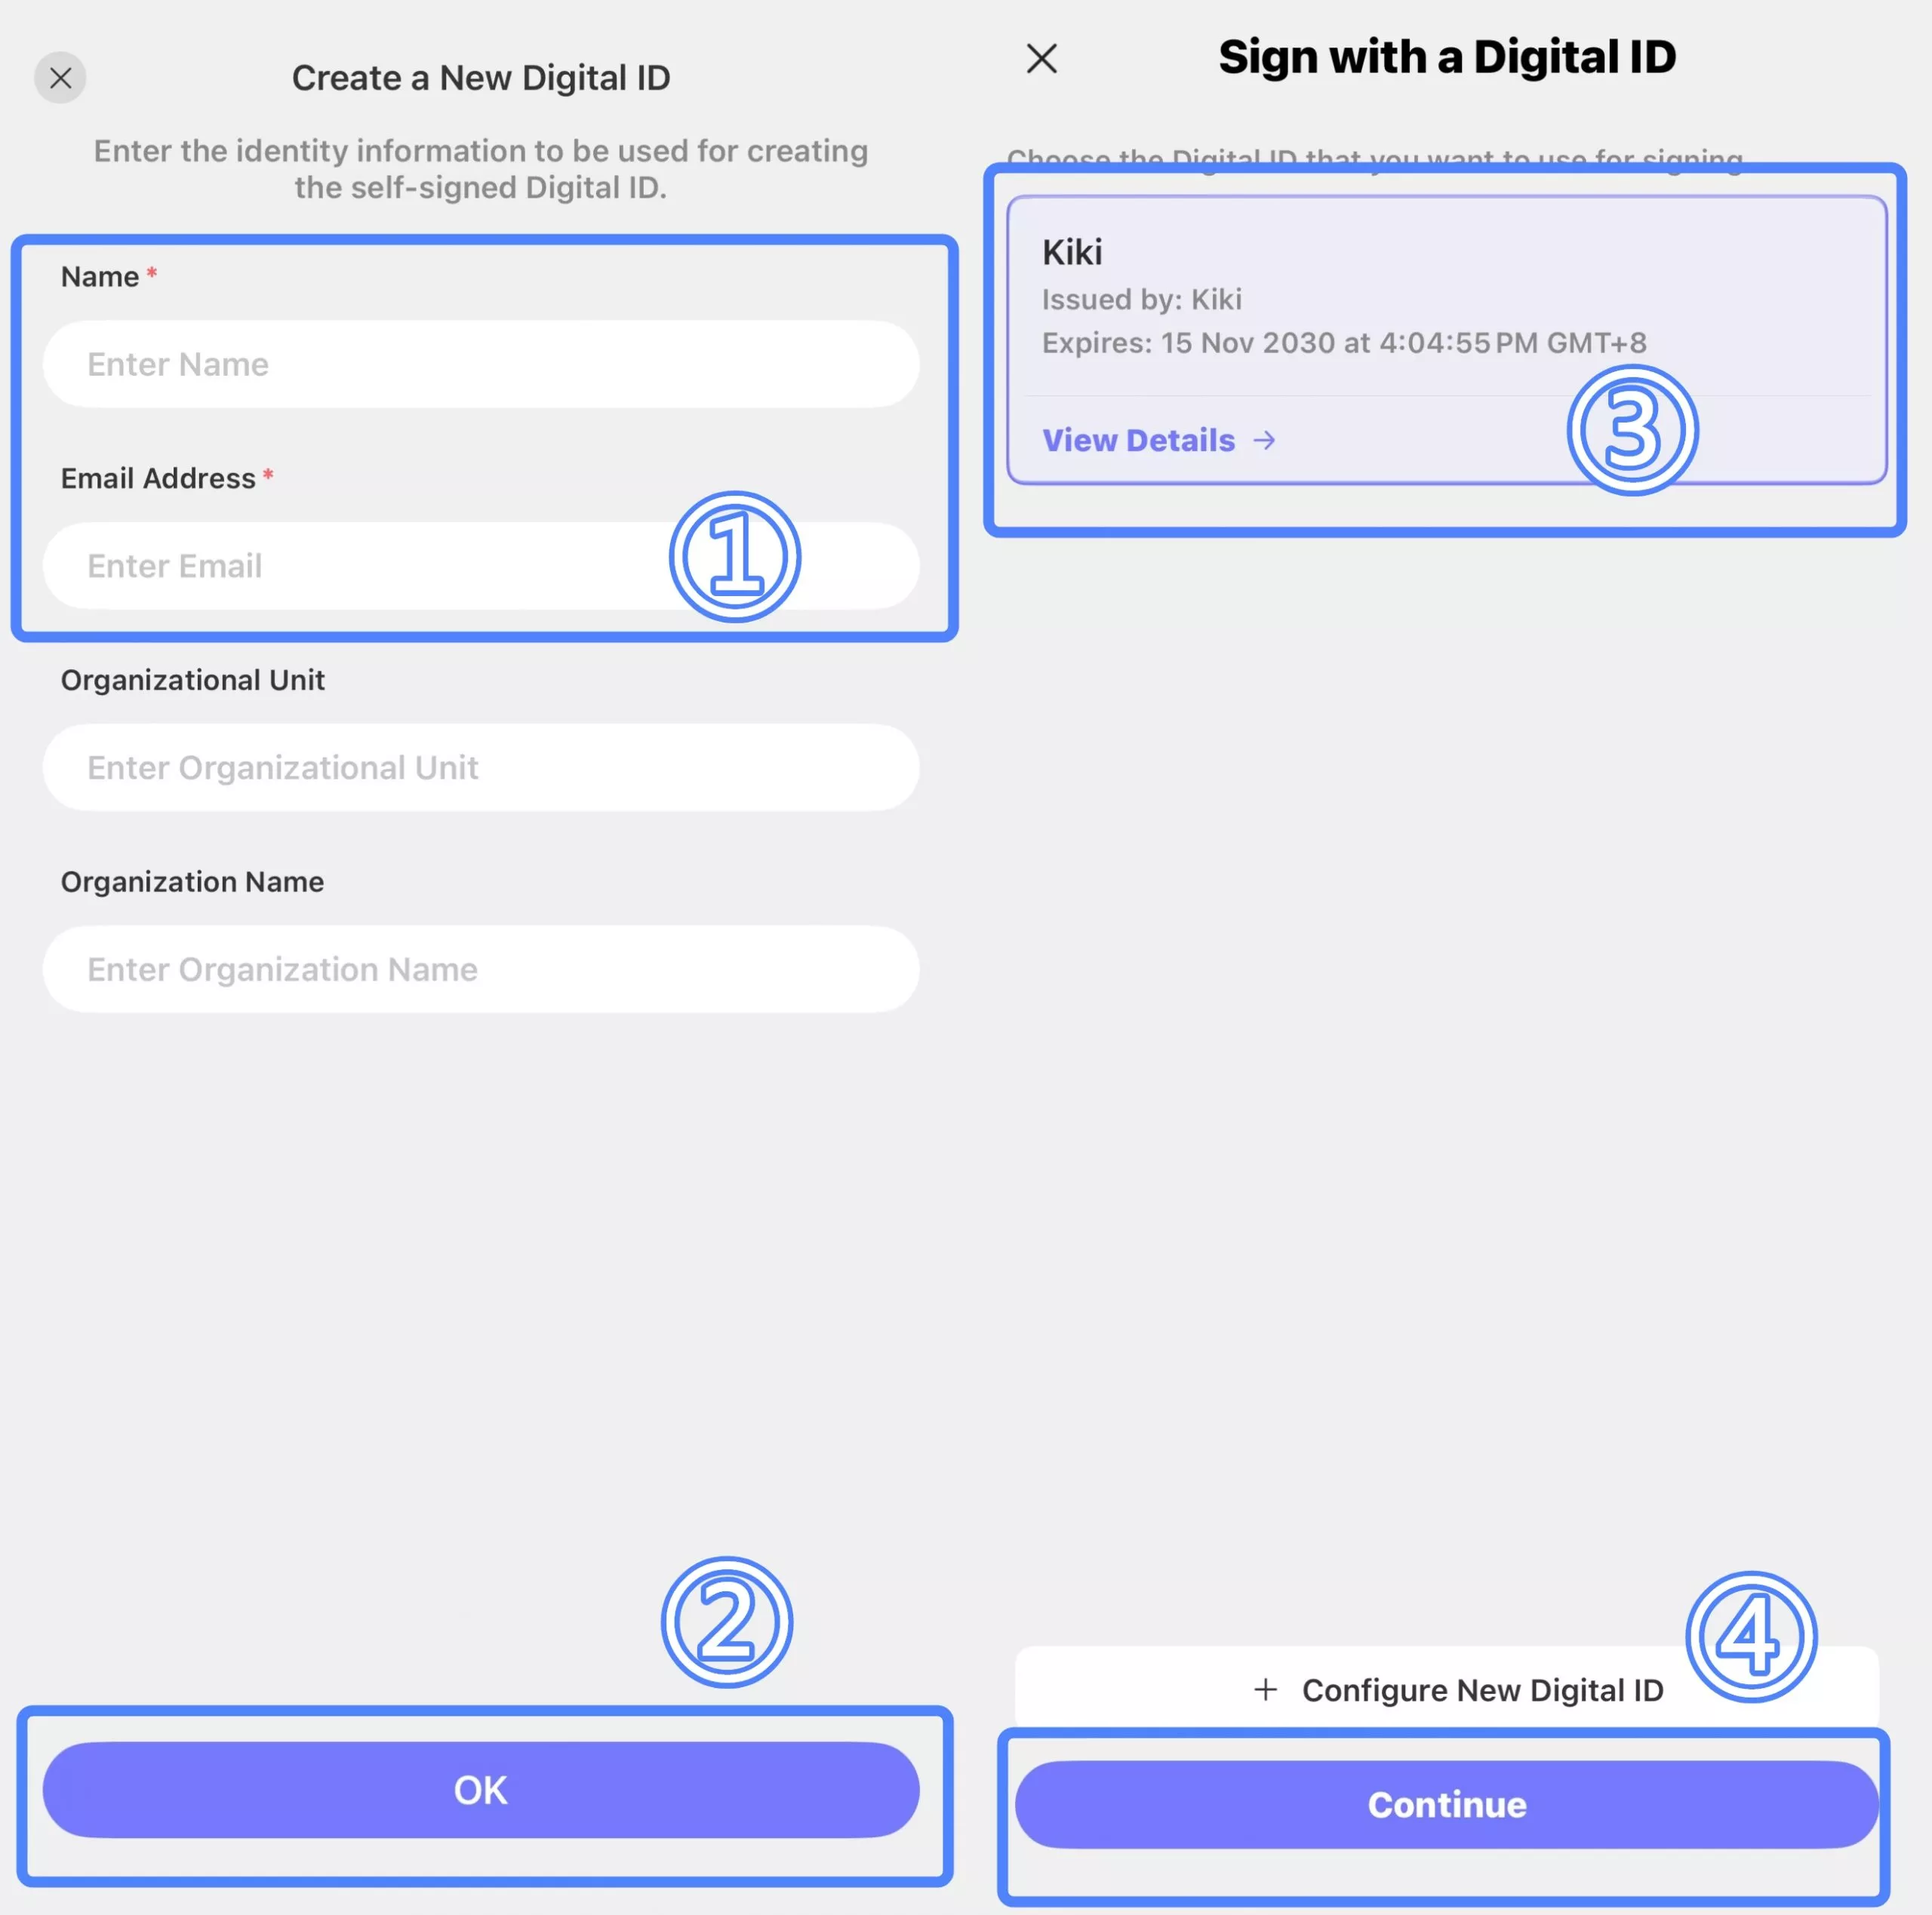
Step 4. To sign with an existing digital ID, simply choose the desired one - UPDF will allow you to view the details of the selected digital ID. If this is the one you wish to use, tap on the "Continue" button.
Step 5. In the "Sign as [Your Digital ID]" interface, you can select the "Create" option to reveal more customizations as shown below:
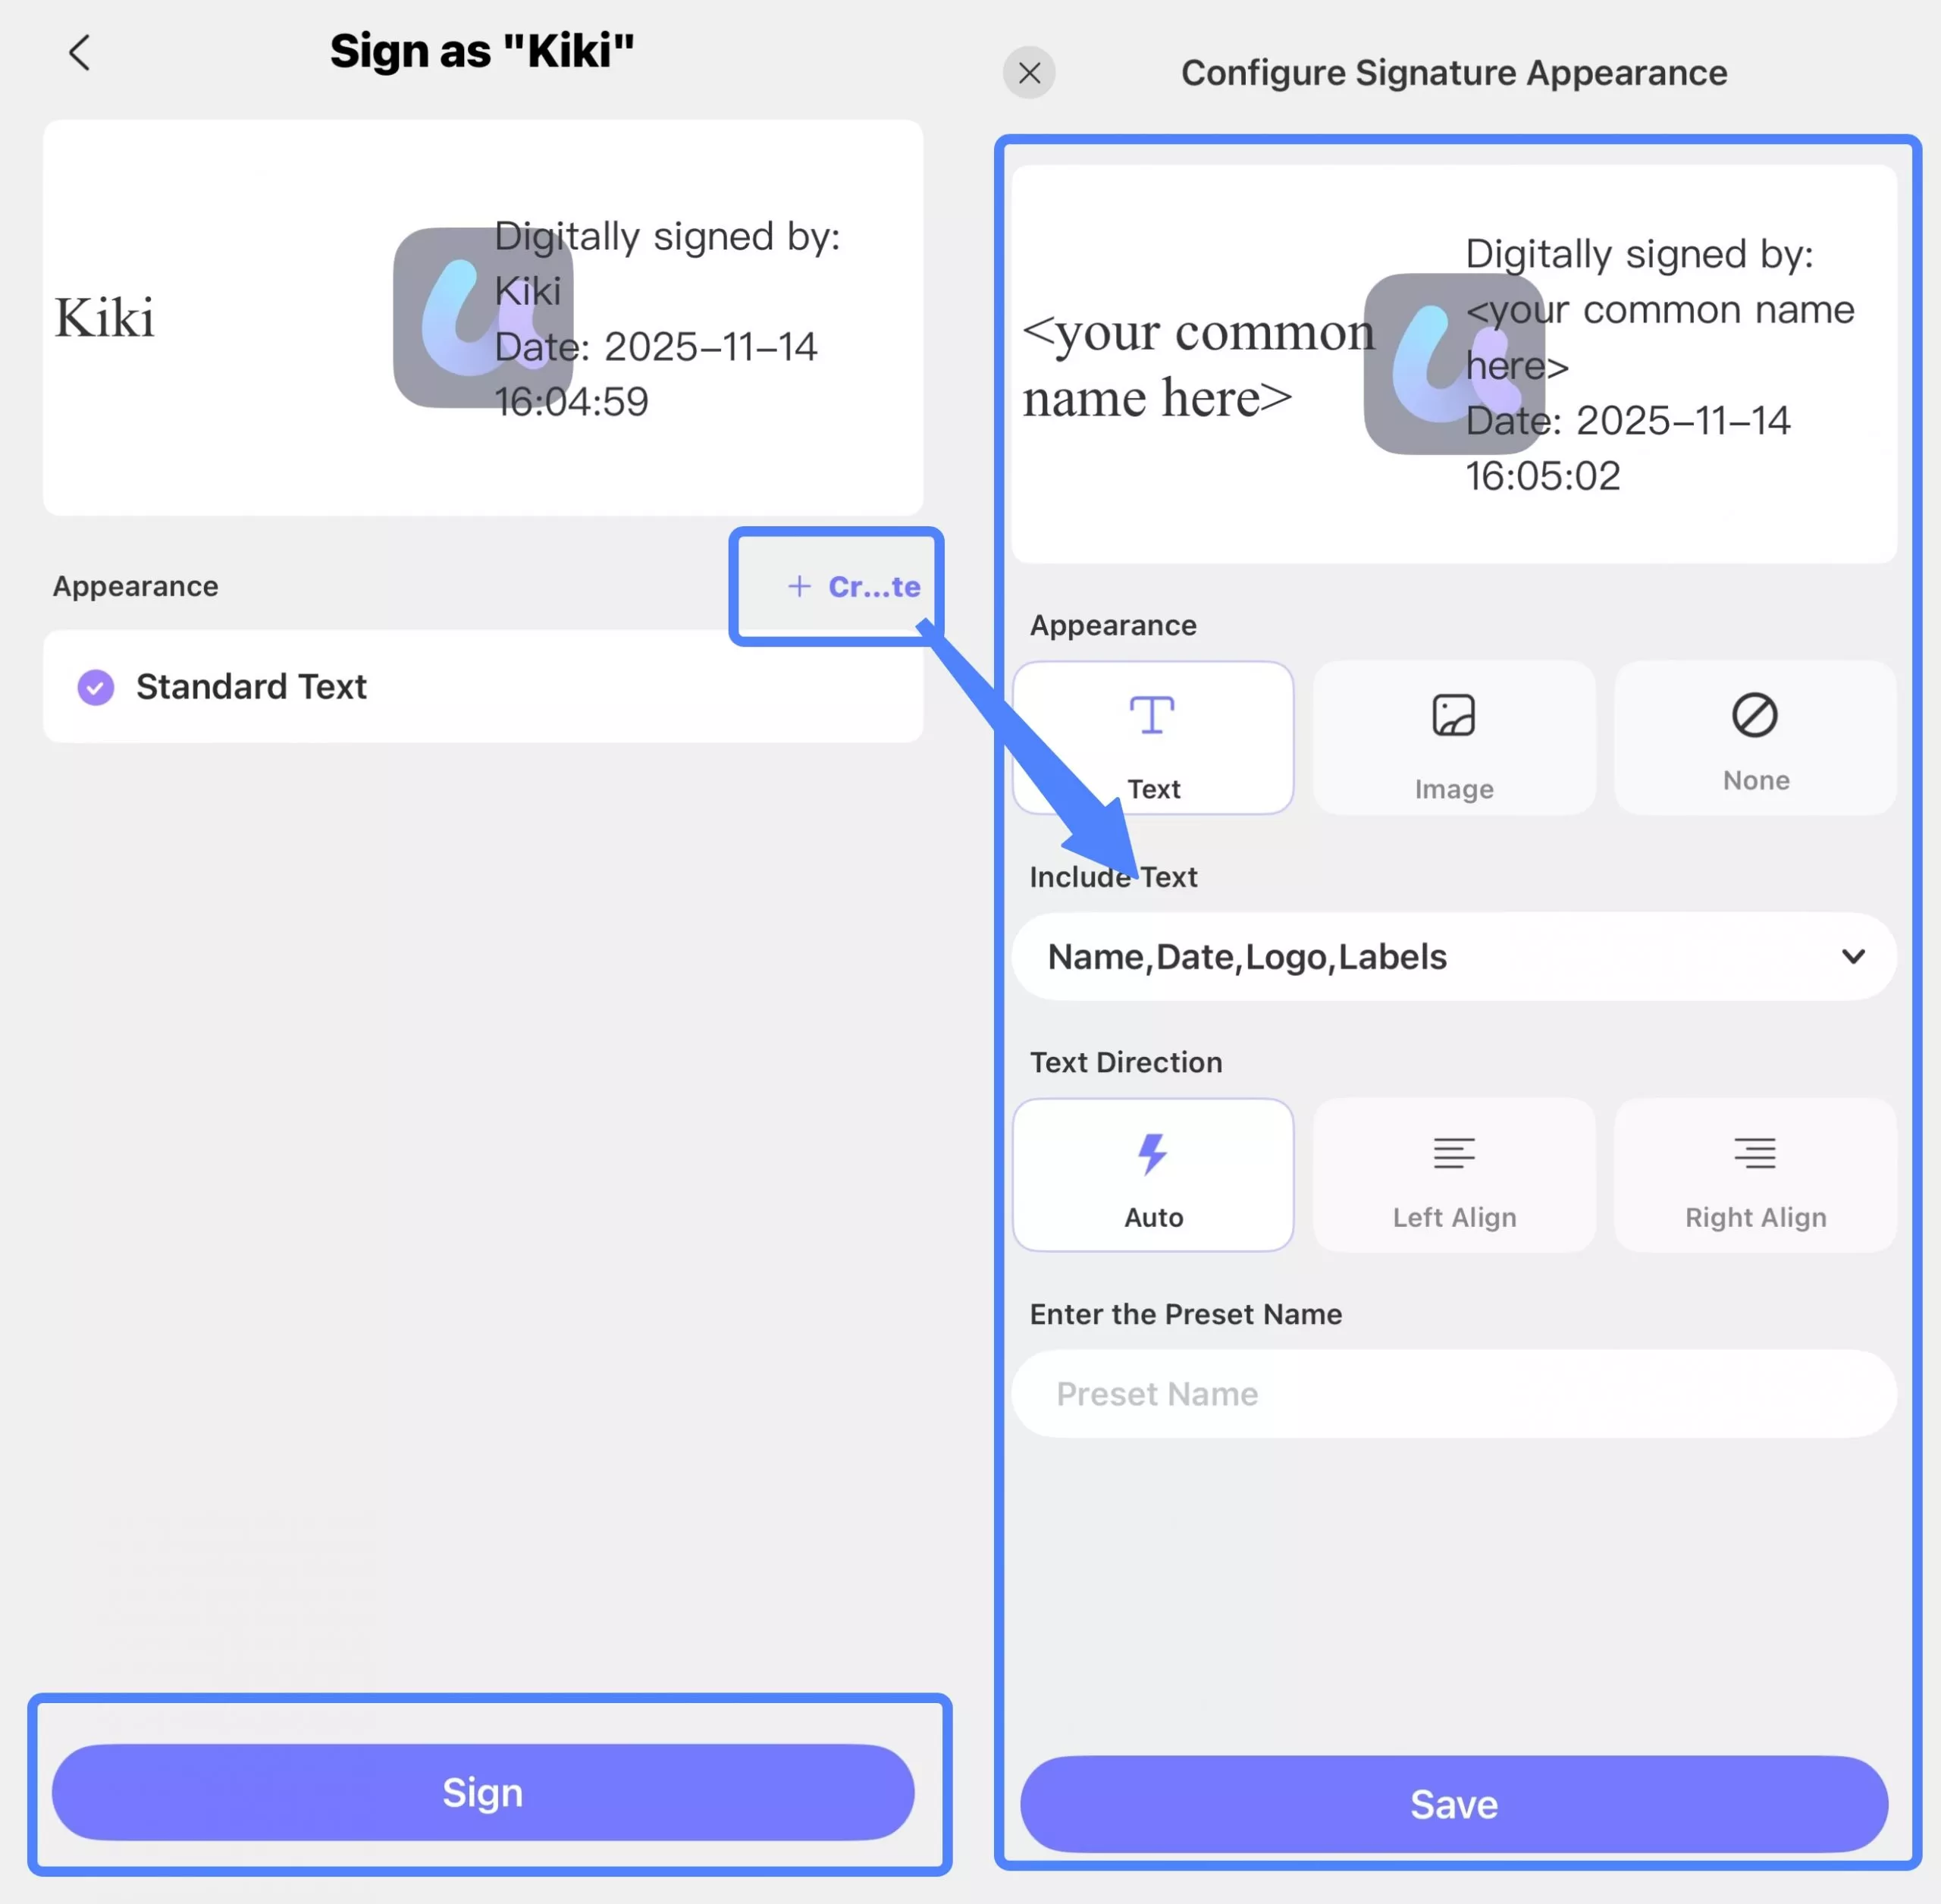
- You can change Appearance or switch to the image section to upload an image.
- Below, you can decide what you want to include in your digital signature. You have the following parameters in the Include Text drop-down menu that can be checked and marked for inclusion: Name, Date, Location, Reason, Logo, Labels, and Distinguished Name.
- You can also alter the Text direction, make it left-aligned or right-aligned, or leave it to be automatic.
- Lastly, you may Enter your Present Name.
- If you want to reverse all your changes, click the "None" option. Otherwise, hit "Save".
Step 6. Choose either option mentioned in step 5 to add a digital signature to your PDF. UPDF will then prompt you to save a copy of your file on the device at your desired location. Save it.

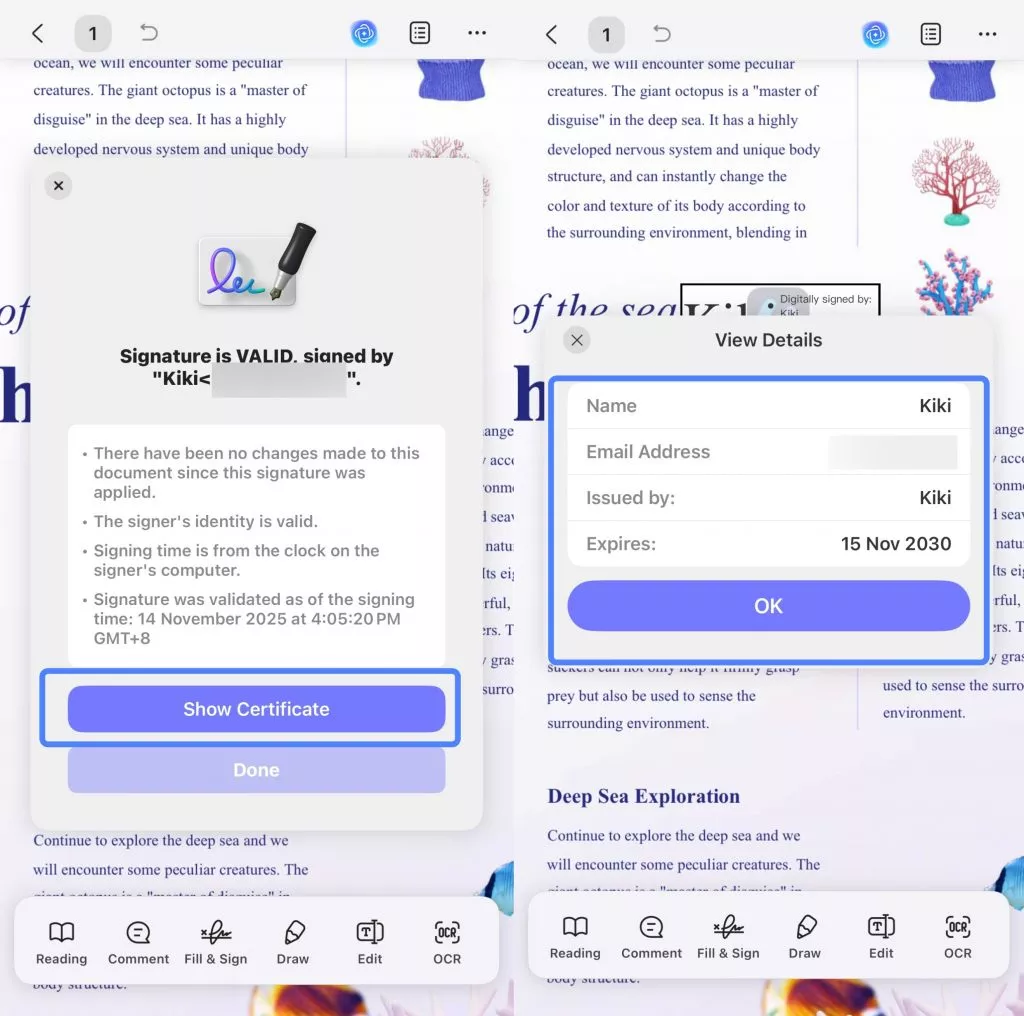
Step 7. Now open this new PDF file. You can find that you have added your digital signature! You can tap on the digital signature to verify its validity and check the "Signature Properties".
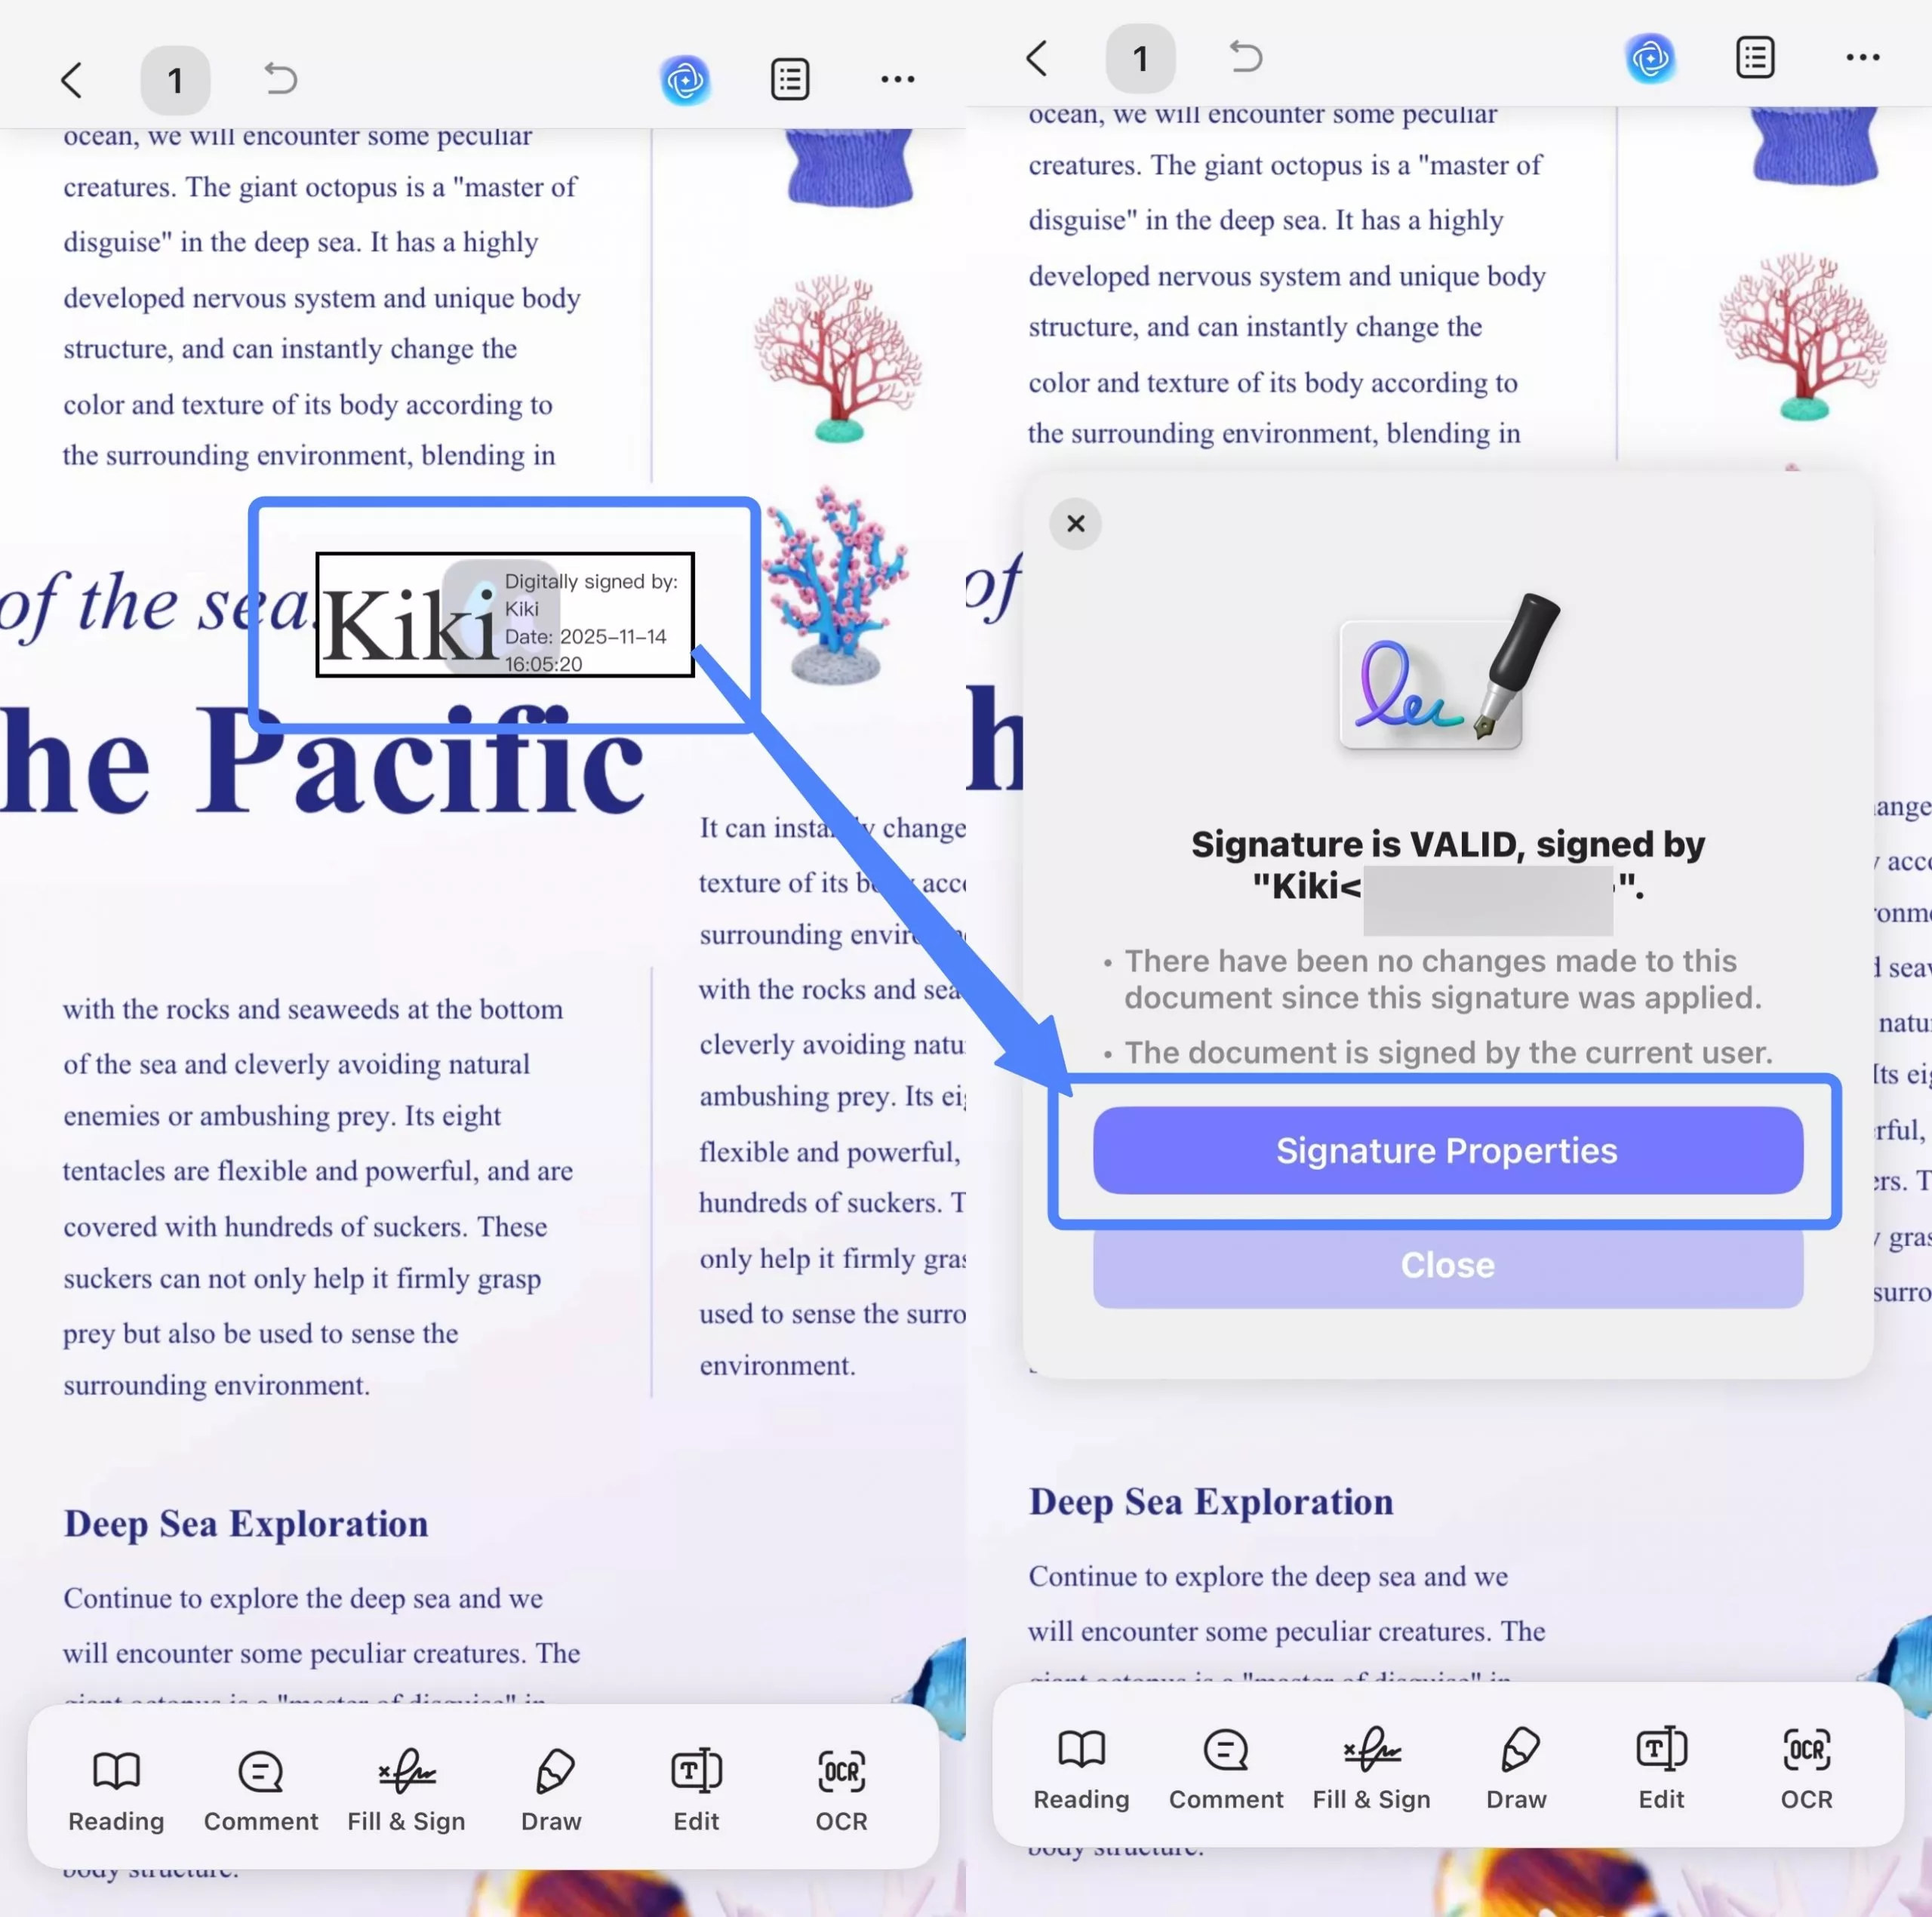
Step 8. UPDF will then show you the "Signature Properties". You can click the "Show Certificate" button to view more details about it further.