 UPDF for Windows
 UPDF for Mac
 UPDF for iPhone/iPad
 UPDF for Android
 UPDF AI Online
 UPDF Sign
 Edit PDF
 Annotate PDF
 Create PDF
 PDF Form
 Edit links
 Convert PDF
 OCR
OCR PDF to Word
 PDF to Image
 PDF to Excel
 Organize PDF
 Merge PDF
 Split PDF
 Crop PDF
 Rotate PDF
 Protect PDF
 Sign PDF
 Redact PDF
 Sanitize PDF
 Remove Security
 Read PDF
 UPDF Cloud
 Compress PDF
 Print PDF
 Batch Process
 About UPDF AI
 UPDF AI Solutions
 AI User Guide
 FAQ about UPDF AI
 Summarize PDF
 Translate PDF
 Chat with PDF
 Chat with AI
 Chat with image
 PDF to Mind Map
 Explain PDF
 PDF AI Tools
 Image AI Tools
 AI Chat Tools
 AI Writing Tools
 AI Study Tools
 AI Working Tools
 Other AI Tools
 AI Bookmark Generation
 AI Bookmark Summary
 AI Watermark Generation
 AI Background Generation
 AI Sticker Generation
 AI Stamp Generation
 AI Editing Suite
 UPDF Copilot
 AI Page Management
 AI Semantic Search
 PDF to Word
 PDF to Excel
 PDF to PowerPoint
 User Guide
 UPDF Tricks
 FAQs
FAQs UPDF Reviews
 Download Center
 Blog
Blog Newsroom
 Tech Spec
 Updates
 UPDF vs. Adobe Acrobat
 UPDF vs. Foxit
 UPDF vs. PDF Expert
Add, Edit, and Remove Watermark in PDF on iOS
Watermarks are now considered an essential PDF component for deterring copying. With it, you can protect your PDFs, clearly identifying the source of it and preventing any misuse. That said, if you are into adding, editing, or removing watermarks on iOS, UPDF has covered you! Dive in to learn how!
1. Create and Add a Watermark
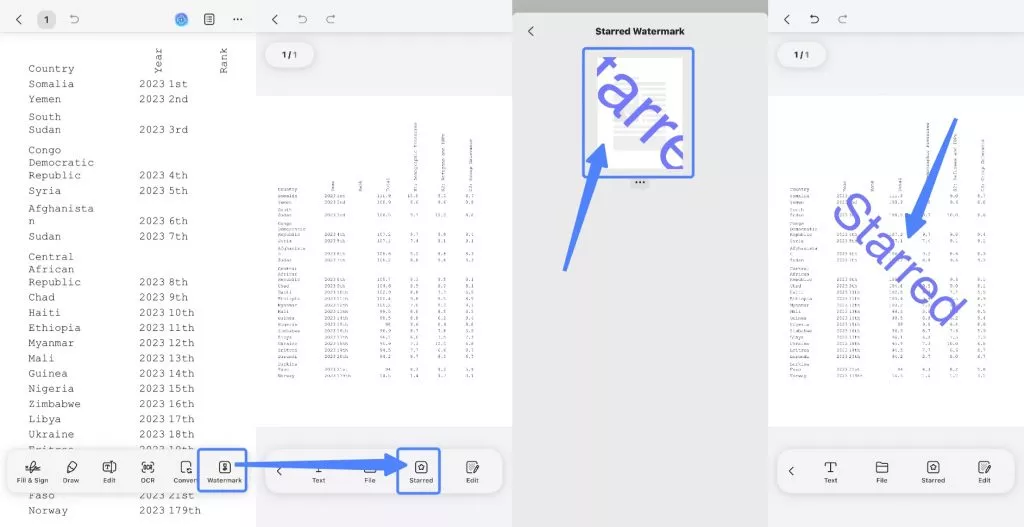
Launch UPDF for iOS and open a file. In the bottom toolbar, select the Watermark icon—the first from the right side.
You can add a new watermark or edit a previously added one here.
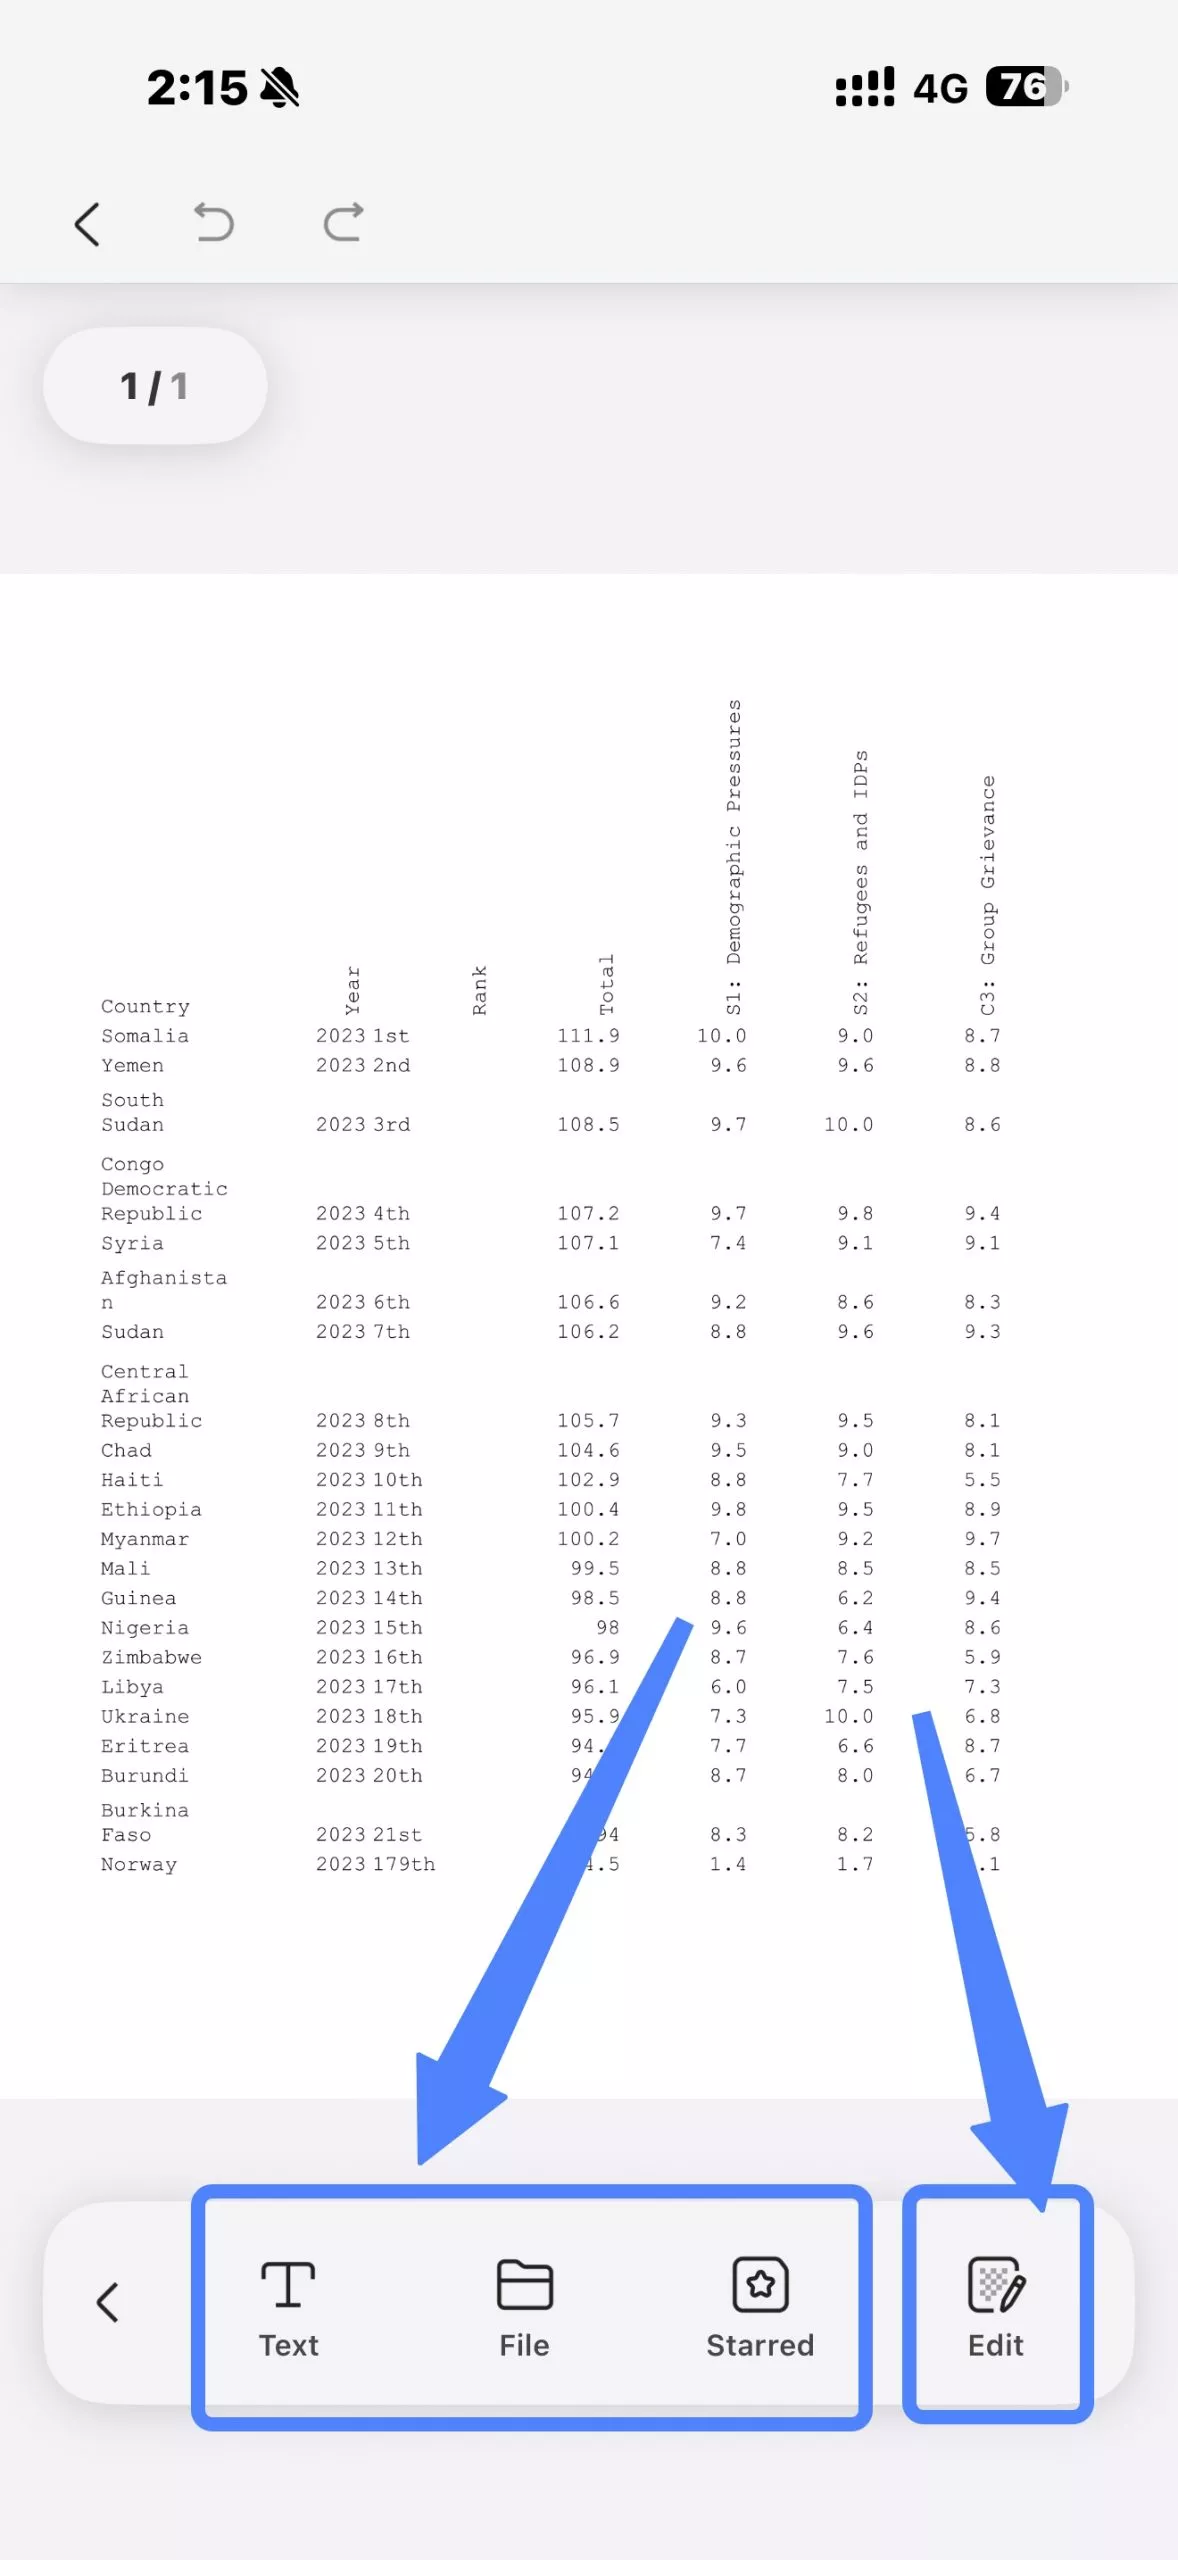
To add new, simply hit the Add Watermark button, UPDF will provide three options for adding a watermark:
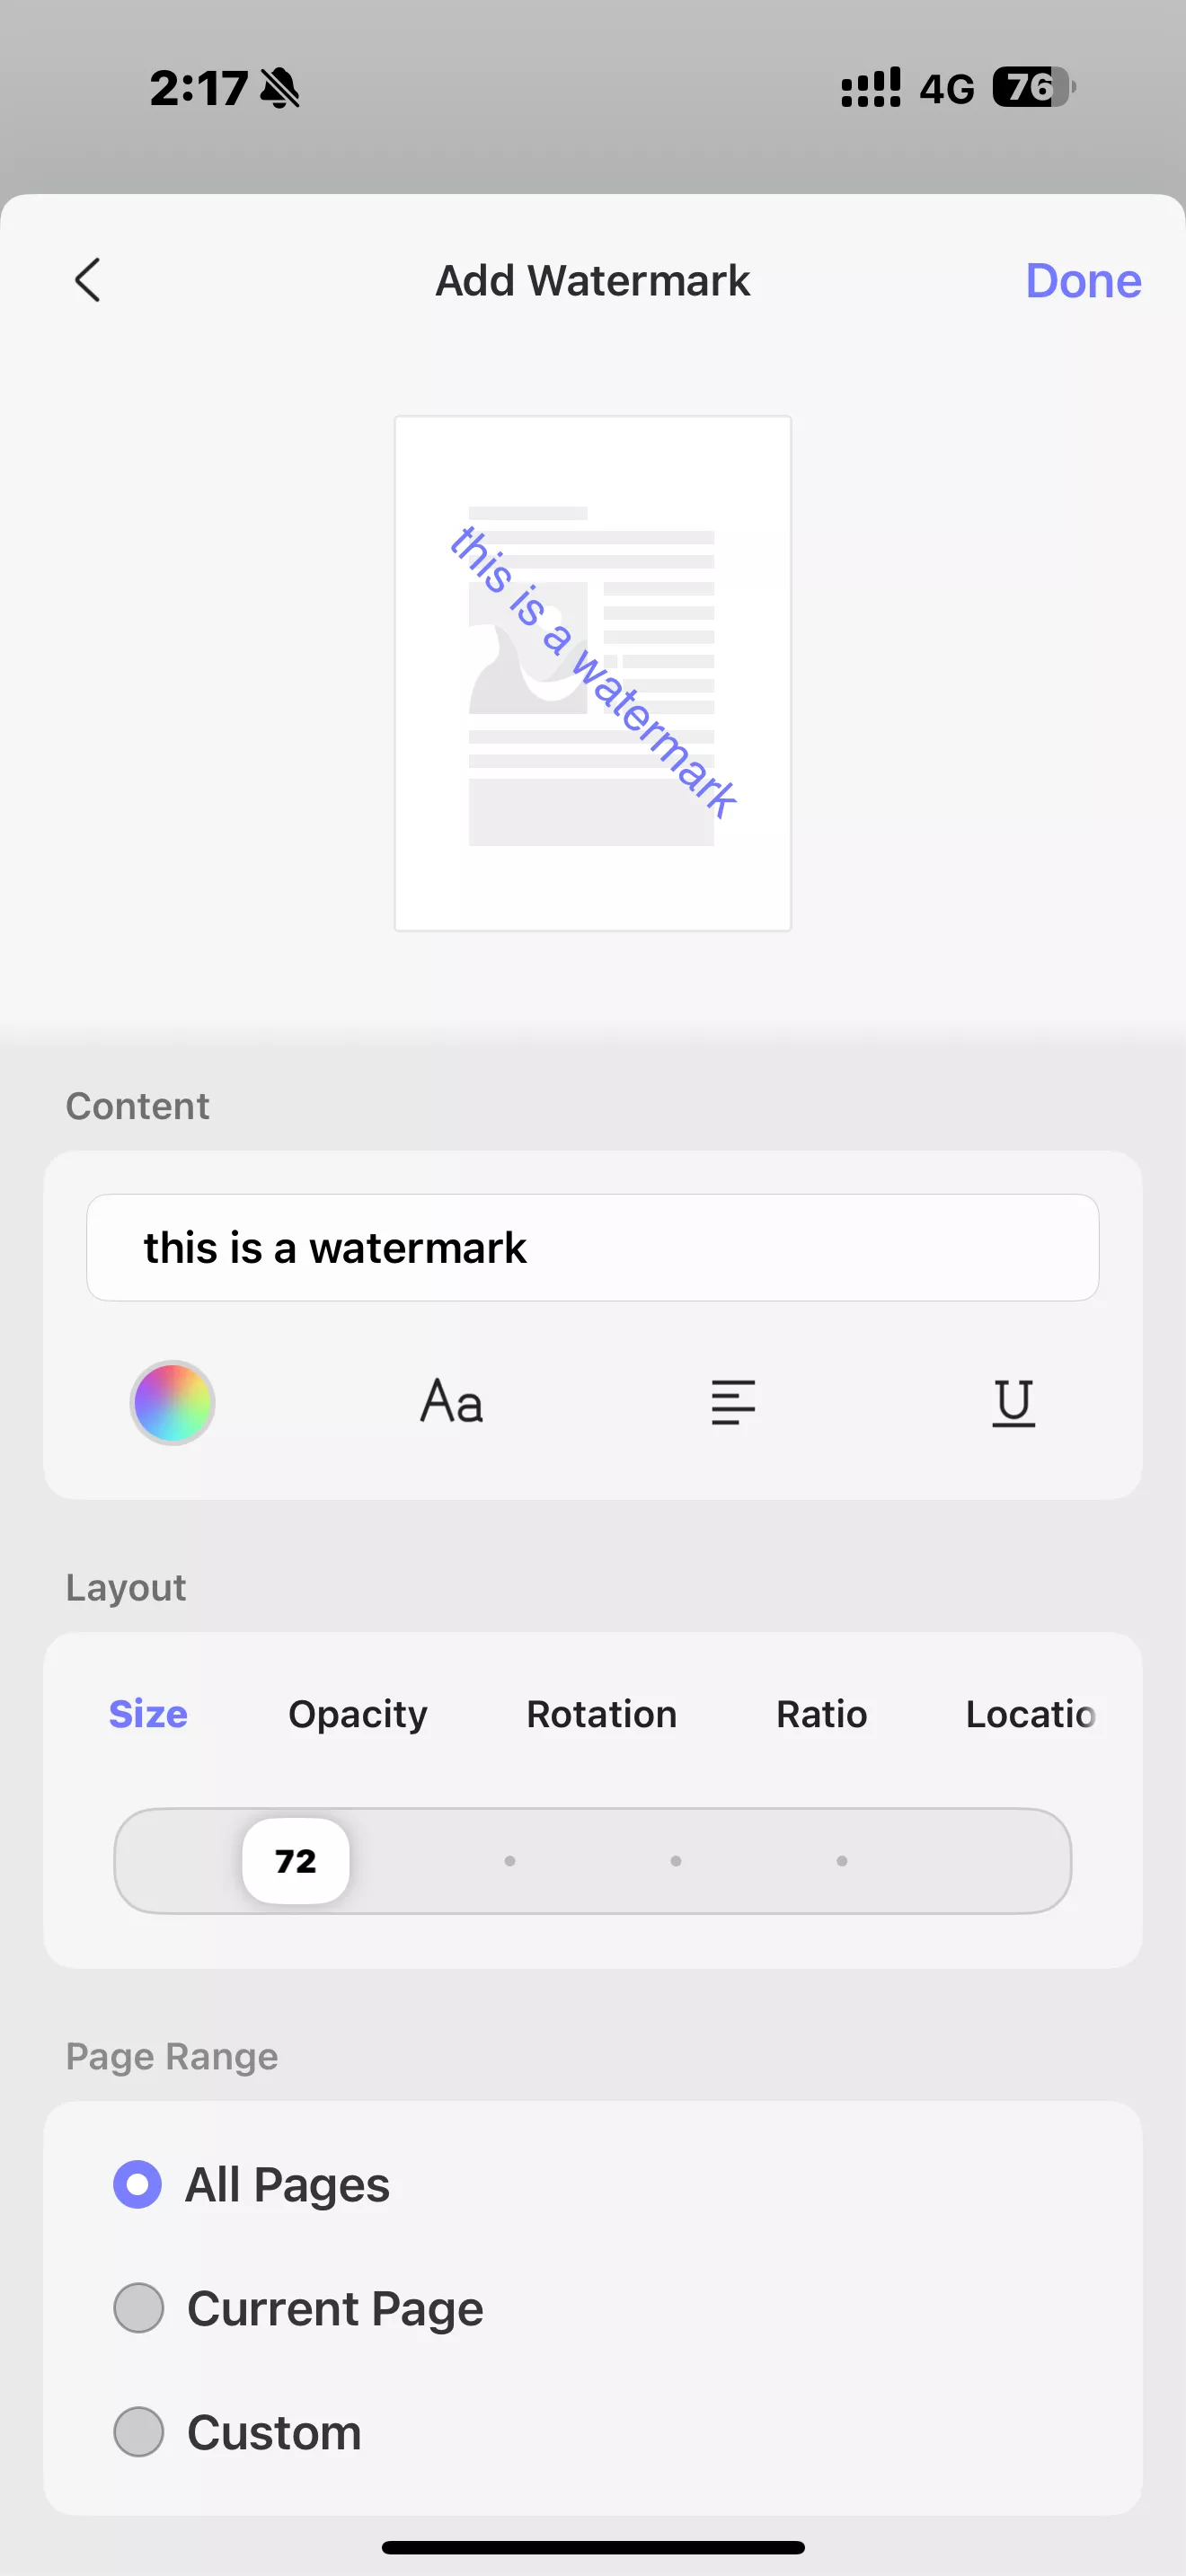
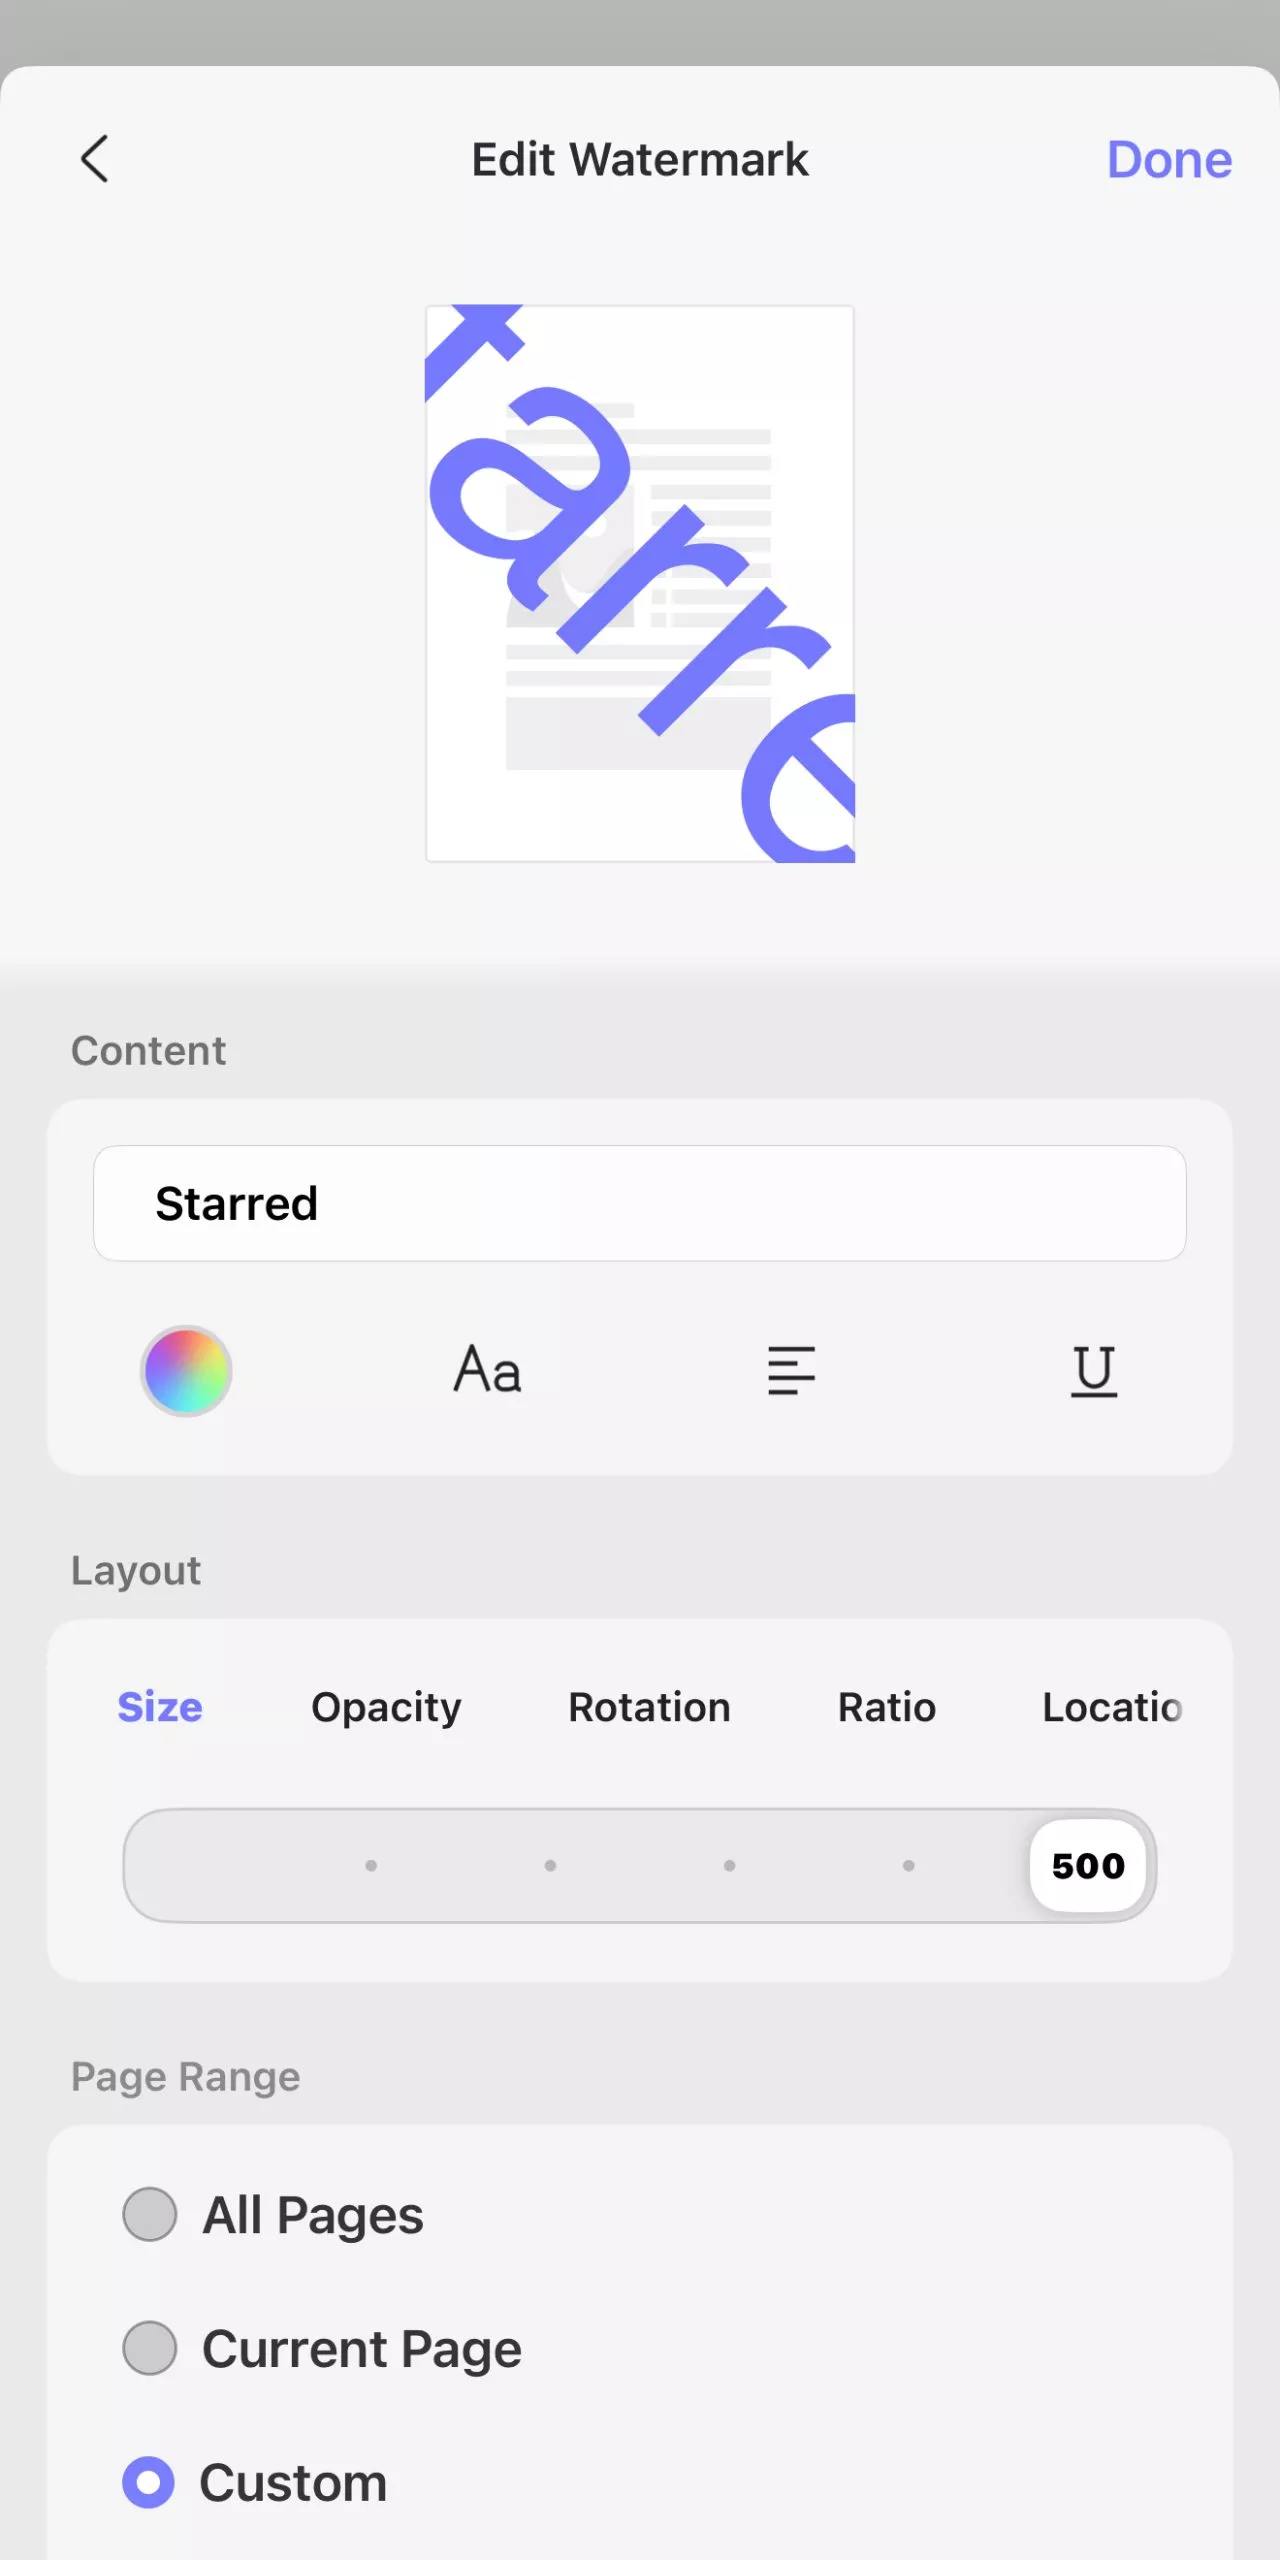
- You can add a text watermark: Enter the desired text to set as a watermark in the Content field. UPDF for iOS gives you a lot of customization options:
- Color-picker circle (rainbow gradient): Tap to choose the watermark text color.
- "Aa" icon: Tap to open font style options.
- "≡" icon: Tap to change the text alignment.
- "U" with underline icon: Tap to toggle text underlining.
- "Layout" tabs (“Size”, “Opacity”, “Rotation”, “Ratio”, “Location”): You can adjust the watermark size from 1 to 500. Change the watermark opacity from 0% to 100%. Choose the watermark orientation you like, four options are available. Select the ratio from 0 to 250. Set the location where you want to place the watermark on top of the page or behind the page.
- "Page Range" tabs: Apply the watermark to every page, current page or select a custom page range for the watermark.
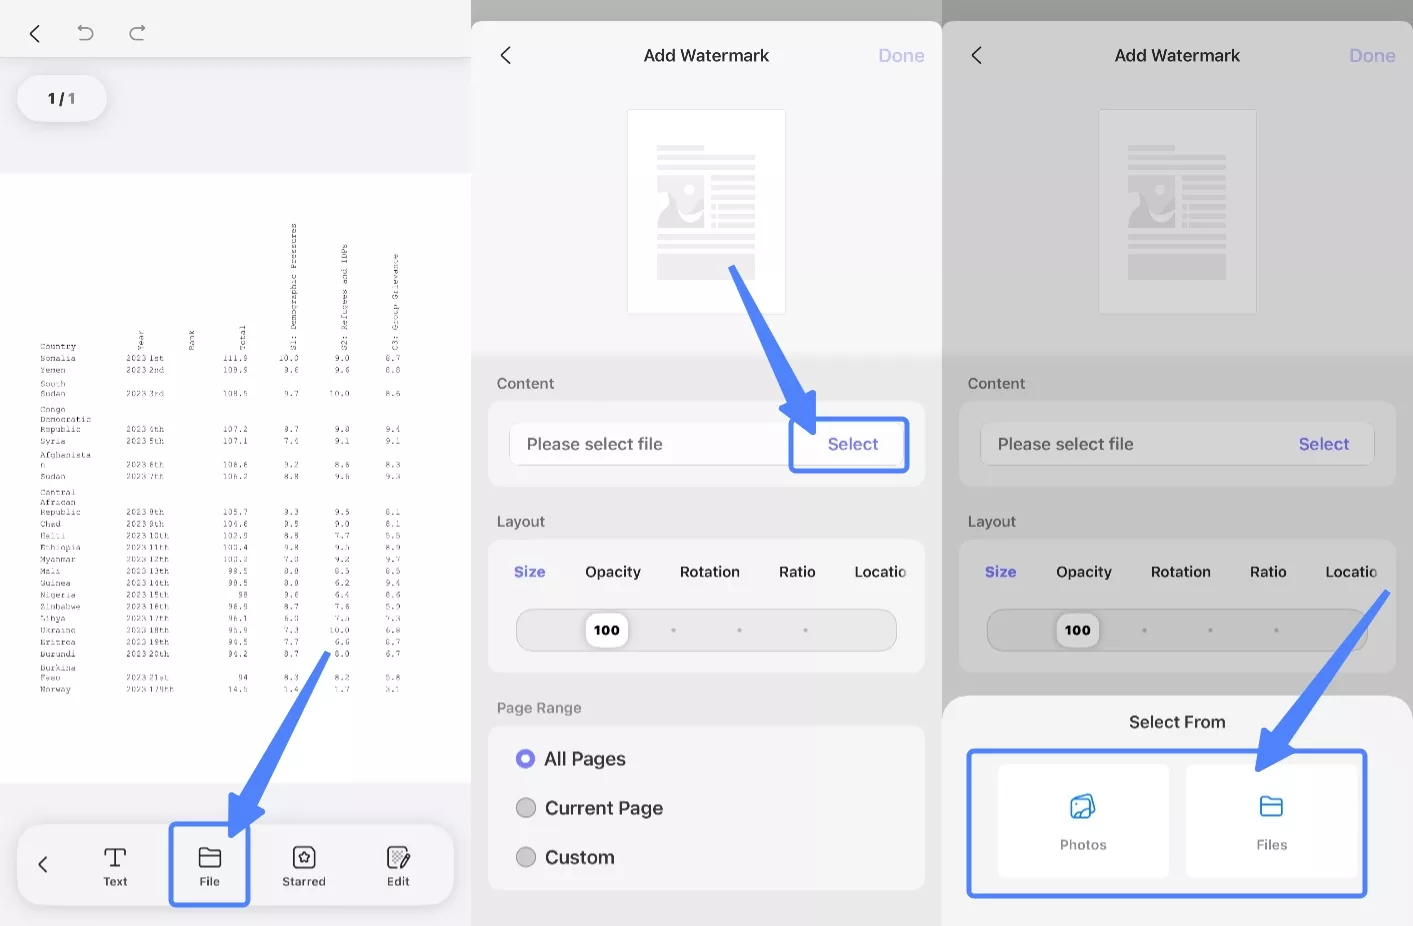
- Or set a local file as the watermark: If you select this option, you can choose any photo from your gallery or file from your iCloud Drive to set as a watermark in the Content field.
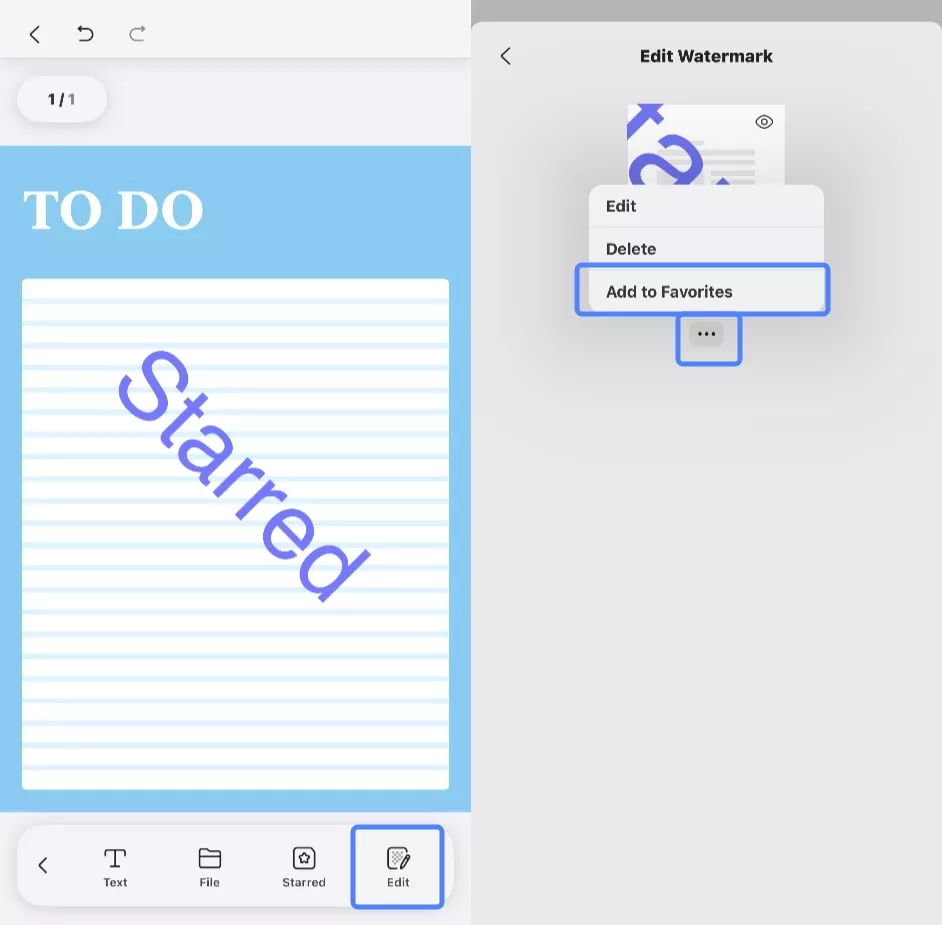
- In addition, you can add your favorite watermark template from the "Starred" section. If you haven’t saved any watermarks as favorites yet, you can manually add one from another file that contains a watermark. Then, go to the "Watermark" section and click "Edit". In the pop-up window, click the three-dot icon to access the "Add to Favorites" button.
- Now you can open the document where you want to add this starred watermark template. Go to the "Watermark" section, click "Starred", select the watermark you previously starred, and add it to the document.
Choose any of the above options, then customize the Layout options. Once you have everything set, tap on "Done" at the top right corner of the screen to apply your created watermark. Don't forget to save the file afterward.
2. Edit, Delete, and Add to Favorite
After successfully creating a watermark, if you want to continue editing, deleting, or adding it to favorites, you can select the "Edit" option and tap on the three-dot icon. These three options will appear there:
- Edit
- Delete
- Add to Favourites
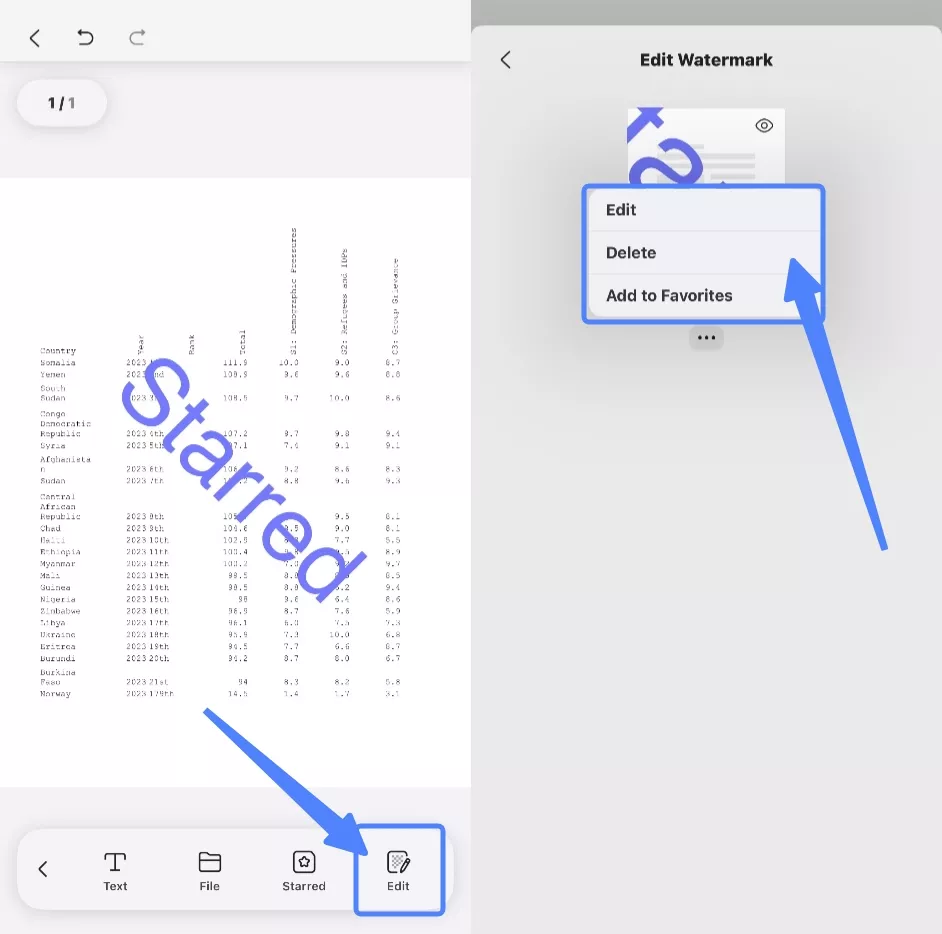
If you have added a watermark to your PDF with UPDF and no longer need it, you can remove it by choosing "Delete".