There are many things to love about iPhones - their sleek design, intuitive interface, and powerful camera. But one thing that can be a bit of a pain is transferring videos from your iPhone 17 to your Mac. Luckily, there are a few ways to make the process a little easier. In this post, we will show you how to transfer videos from iPhone to Mac using iTunes, iCloud, and third-party apps. Let us get started!
How to Transfer Videos from iPhone to Mac with UPDF
It is time to get your hands on UPDF for iOS, a full-featured file manager app that has everything you need for any Office and personal productivity tasks! With the support of open access files and secure document sharing capabilities, this is one tool no iPhone or iPad should be without. Manage your iOS content & download videos & audios all at once.
Windows • macOS • iOS • Android 100% secure
UPDF iOS app supports all file management actions on iOS devices such as viewing, searching, copying, pasting, deleting, renaming, compressing, and decompressing documents, and organizing, sharing, and securing documents.
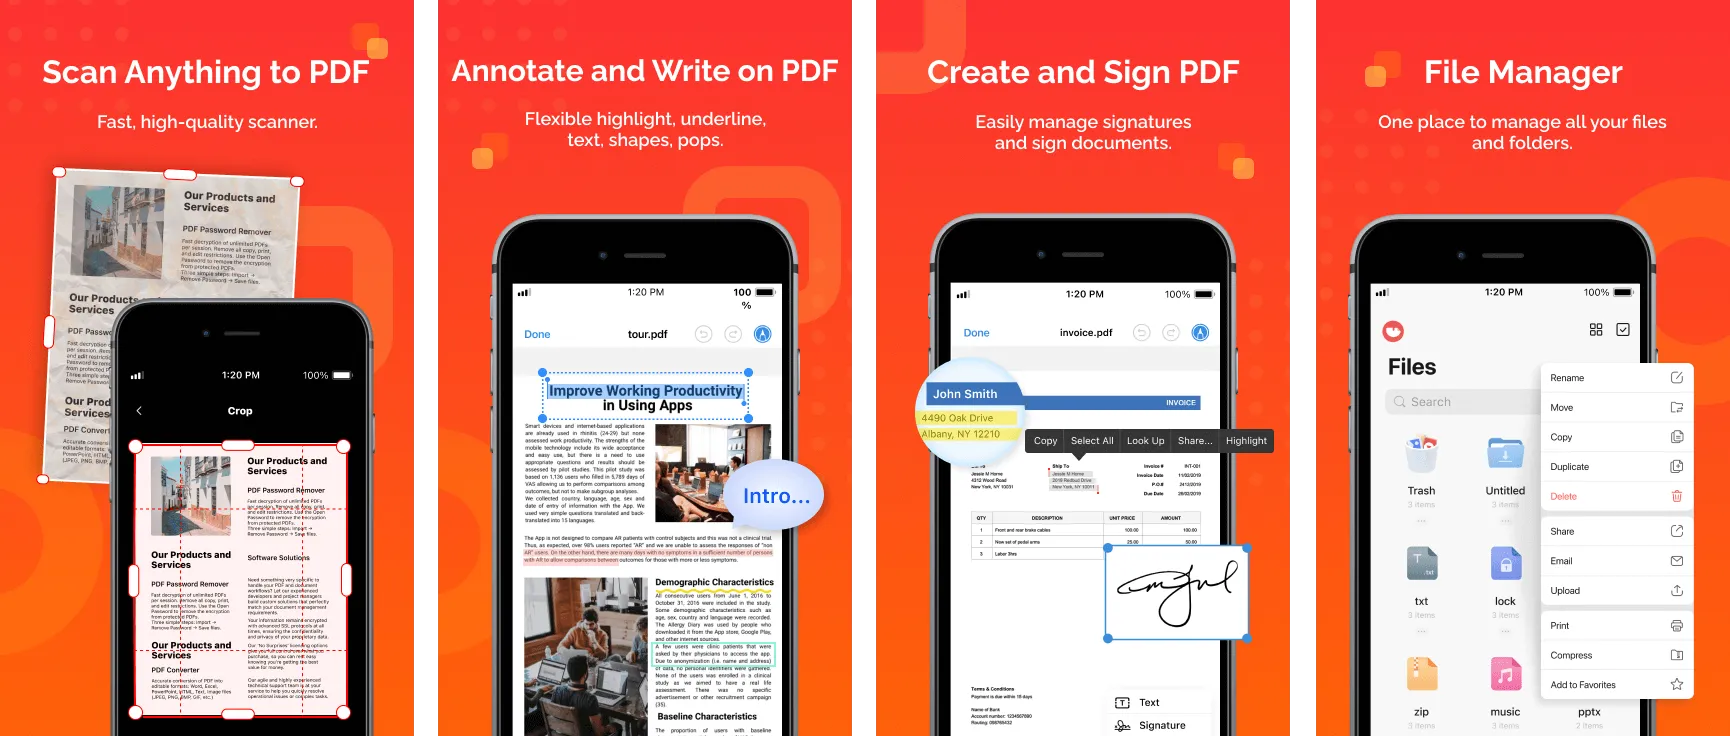
To sum it up- managing files has never been easier with the UPDF iOS App. You can easily access and manage various files, like PDFs, PowerPoints, Words, Excels, Images (JPGs, PNGs, BMPs), XMLs, videos, etc. You can also import data from your computer, Files App, or from Photo Albums. In addition, this app allows users to convert image files into PDF formats or merge them into a single PDF. It also supports printing, compression, and annotating PDF features.
- UPDF offers an intuitive and friendly user interface that requires no training.
- UPDF offers an ultrafast browsing experience along with a built-in Security Space that keeps your documents safe.
- UPDF offers OCR technology which converts scanned documents into editable and searchable PDFs.
- UPDF supports all major file formats and lets you read, manage, and transfer data without a glitch.
How to Import Videos from iPhone to Mac
Scenario 1:
Are you tired of having to wait forever for your videos to import from your iPhone 17 to your Mac?
Scenario 2:
iPhone storage can be a limiting factor, especially if you have large videos on your device taking up all the room. Transferring these files from iPhone 17 to Mac is one way of freeing up some space and ensuring everything will work smoothly again!
In both the scenarios above, the UPDF iOS App will allow you to import videos from iPhone 17 to Mac in minutes, regardless of the length of the video. So, download it now and start transferring those videos like a pro!
In this context, let us see how to transfer video from iPhone 17 to Mac.
UPDF iOS App has features that allow you to transfer videos from your iPhone 17 to Mac and vice versa without using any cables. You can do this by linking both devices via the same Wi-Fi and following the steps shown below:
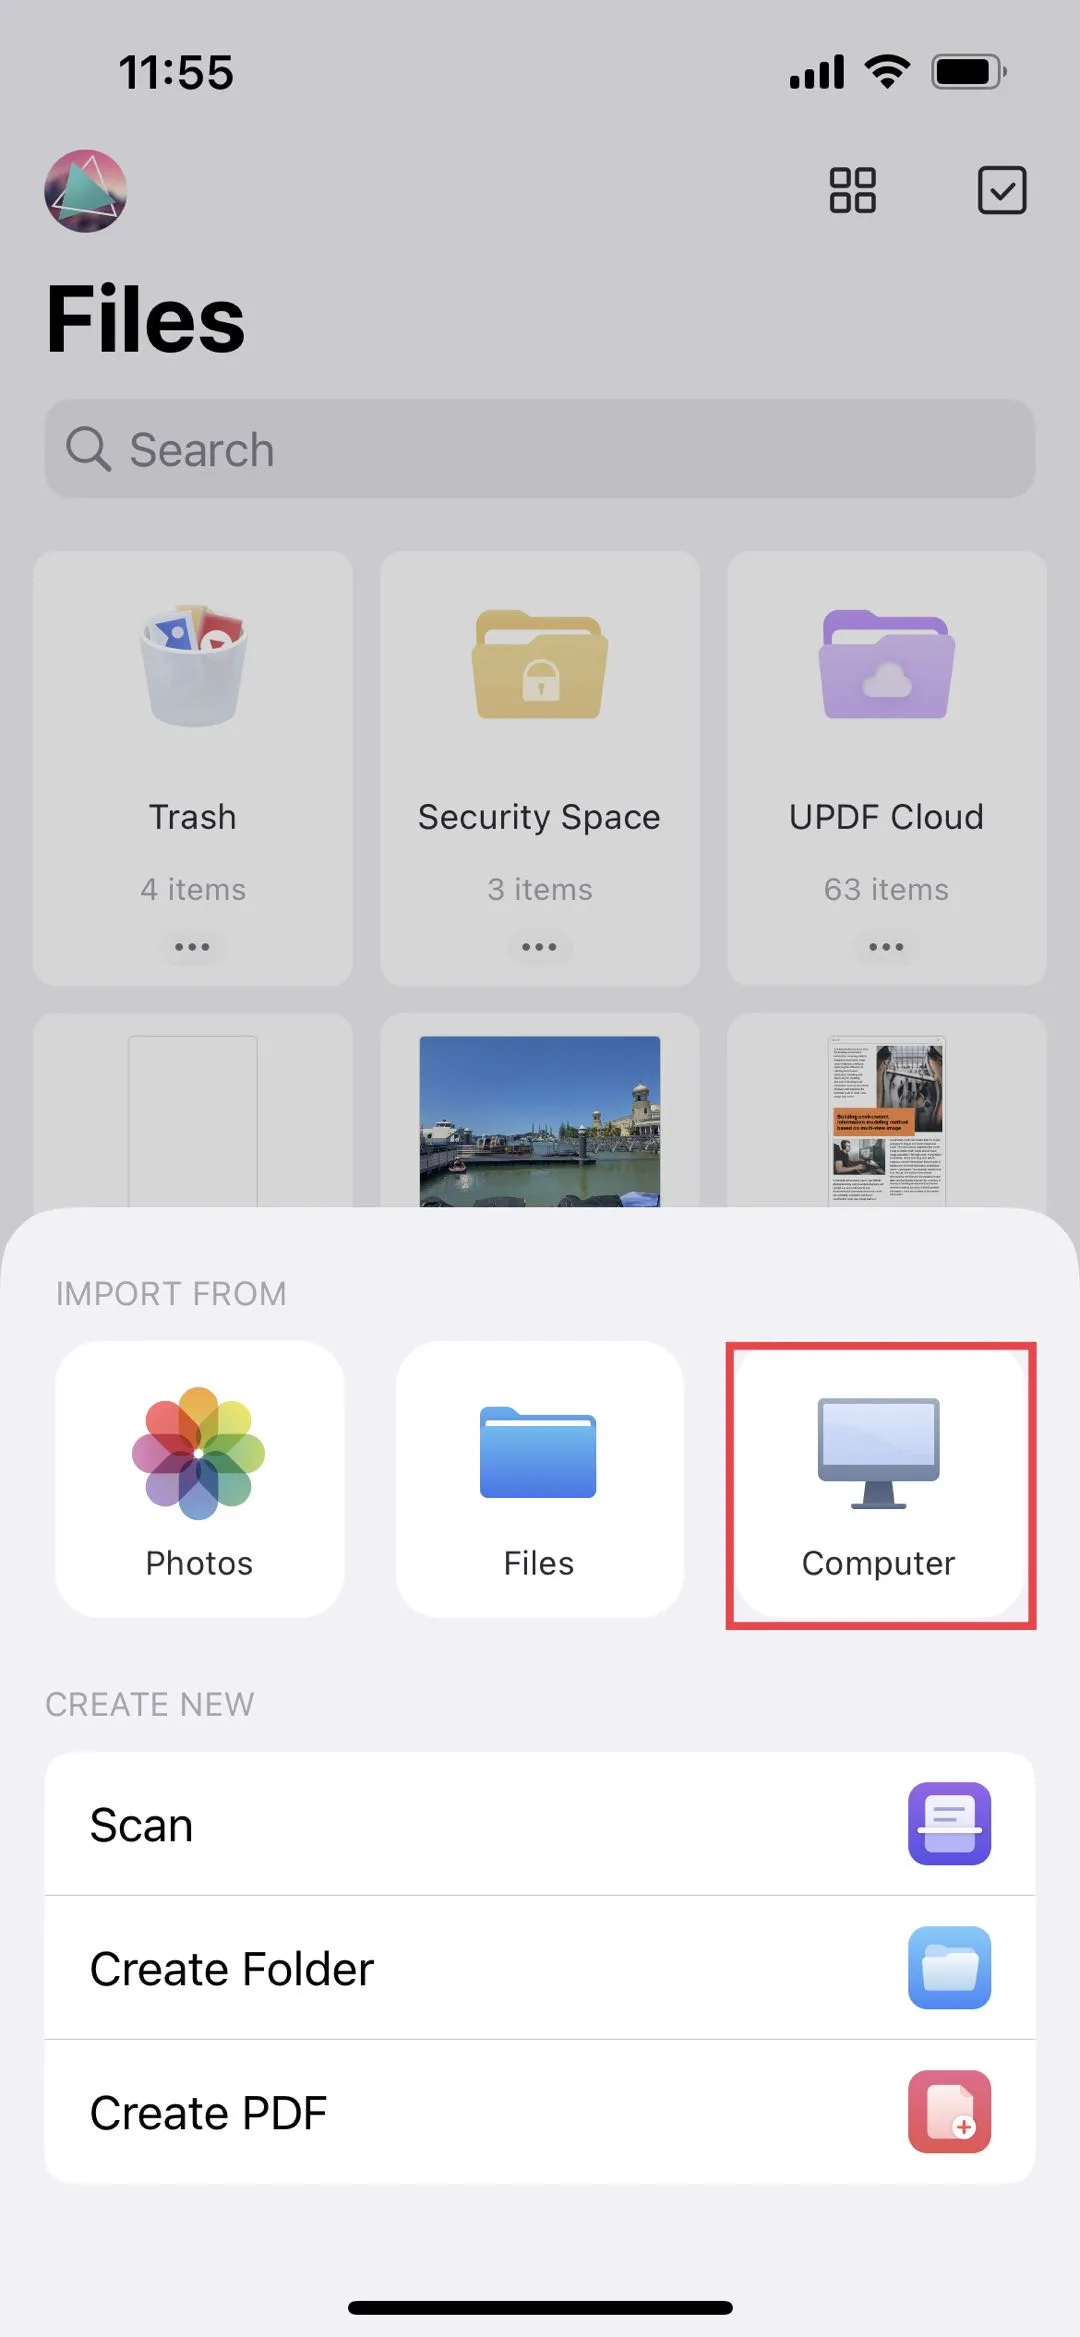
Step 1: Click "+" symbol.
Step 2: Choose Import from Computer.
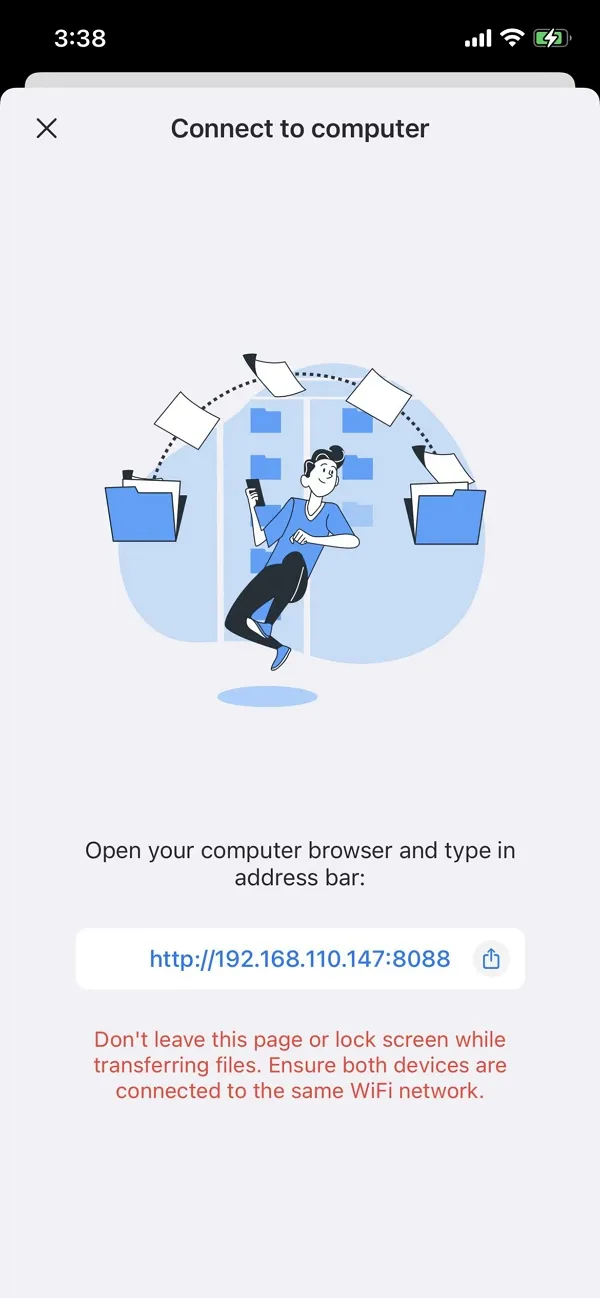
Step 3: Once Connected, a unique URL will be displayed on your iOS device screen.
Step 4: Enter this into the address bar of a browser tab on your computer and hit "Enter".
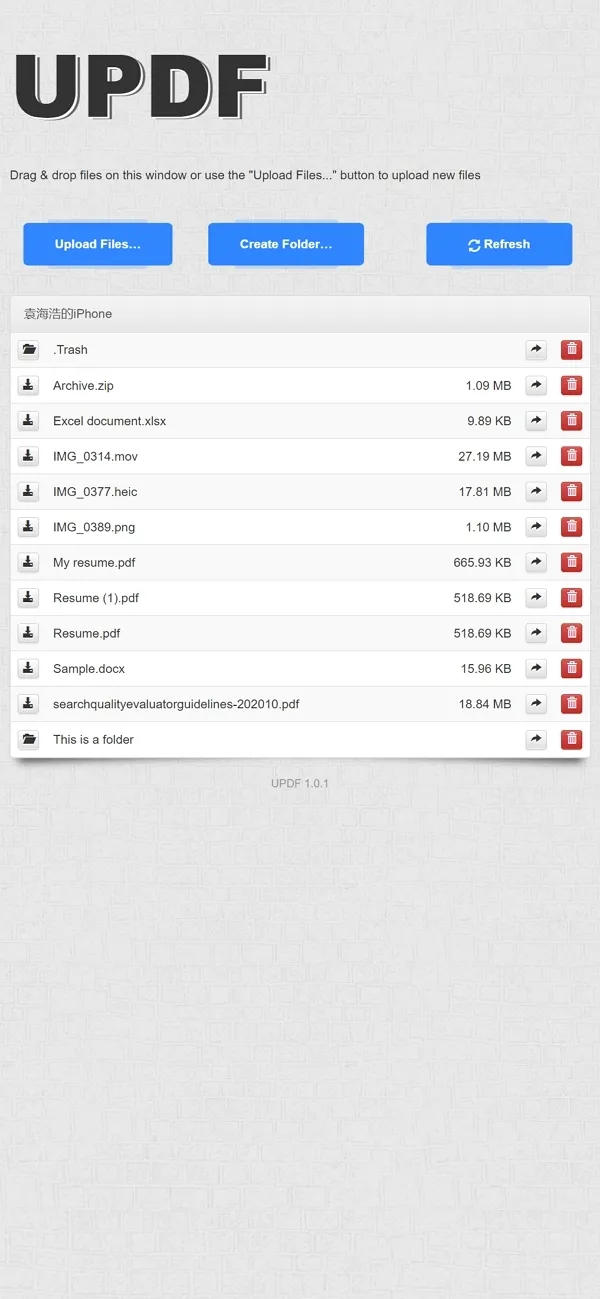
Step 5: You can view your iPhone's UPDF folders and download the videos into your Mac.
Step 6: You can also click the "Upload Files" button to import files from your Mac to your UPDF Folder computer memory.
Note:
In addition to supporting PDF, PowerPoint, Word, Excel, Images (JPG, PNG, BMP), XML, video, audio, and more, UPDF also supports an extensive range of other formats too.
How to Transfer Videos from iPhone to Mac with USB
As you know, Apple's iPhone and Mac can transfer files in numerous ways. However, for transferring large files, or many files, specifically to a Mac, you may find that using a USB flash drive might be a very convenient method.
In this context, let us look at how to Transfer Videos from iPhone 17 to Mac with USB.
- Connect your iPhone 17, iPad to your Mac with a Lightning to USB flash drive cable.
- Launch the Photos app on your Mac.
- All photos and videos on your connected device are displayed in an Import screen in the Photos app. Click on the device's name in the sidebar if the Import screen does not automatically appear.
- Enter the passcode when prompted. Tap "Trust this Computer" if you are prompted on your device.
- Click the place where you want your photos to be imported. Select existing album or create a new one under "Import to".
- If you want to import only select photos, click "Import Selected" or "Import All".
- After the installation process has finished, disconnect your device from your Mac.
How to Transfer Videos from iPhone to Mac with AirDrop
AirDrop is a wireless technology that allows you to transfer media between your iOS and Mac devices. It is super easy, just tap on the screen with one device in mind or point it at each other’s proximity sensors!
With AirDrop, you can transfer videos from your iPhone 17 to Mac. Your iPhone 17 can quickly transfer files from your Mac to your iPhone 17 using AirDrop. To use AirDrop, you must have your computer and phone within a few feet of each other - it only works for short distances. The AirDrop protocol creates a peer-to-peer wireless network by using Bluetooth. Thus, AirDrop requires no internet connection or router to work. Bluetooth and Wi-Fi, however, must be turned on for it to work.
How to enable AirDrop on your iPhone
• Go to Settings.
• Select General.
• Then tap AirDrop.
• On the AirDrop menu, select Contacts Only or Everyone
• For file transfer, make sure Bluetooth and Wi-Fi are both turned on and that you are within 30 feet of your Mac.
How to enable AirDrop on a Mac
• Launch Finder.
• Go to the left sidebar and select AirDrop. This will open the AirDrop window.
• On your screen, you will see "Allow me to be discovered by," and then a drop-down menu. Select Contacts Only or Everyone.
• If you want to transfer files, make sure both Bluetooth and Wi-Fi are on and that your iPhone 17 is within 30 feet of you.
You can AirDrop photos from your iPhone 17 to your Mac by following these steps:
As soon as you have enabled AirDrop on both your iPhone 17 and your Mac, you can begin transferring files. Follow these simple steps:
• Open the file you wish to AirDrop.
• Click the share icon to the left.
• Click AirDrop.
• Choose your Apple device from the list. A blue circle will surround the icon, followed by Waiting, Sending, and Sent.
• Then, tap Done.
Conclusion:
So if you are looking for an iOS app that can do it all - UPDF is the one. It supports every file management action, from open to secure documents. And it is easy to use; so, whether you are a business professional or student, you will be able to take advantage of everything UPDF has to offer. So, give the free trial a go today and see for yourself how impressive this app really is!
Windows • macOS • iOS • Android 100% secure
 UPDF
UPDF
 UPDF for Windows
 UPDF for Mac
 UPDF for iPhone/iPad
 UPDF for Android
 UPDF AI Online
 UPDF Sign
 Edit PDF
 Annotate PDF
 Create PDF
 PDF Form
 Edit links
 Convert PDF
 OCR
OCR PDF to Word
 PDF to Image
 PDF to Excel
 Organize PDF
 Merge PDF
 Split PDF
 Crop PDF
 Rotate PDF
 Protect PDF
 Sign PDF
 Redact PDF
 Sanitize PDF
 Remove Security
 Read PDF
 UPDF Cloud
 Compress PDF
 Print PDF
 Batch Process
 About UPDF AI
 UPDF AI Solutions
 AI User Guide
 FAQ about UPDF AI
 Summarize PDF
 Translate PDF
 Chat with PDF
 Chat with AI
 Chat with image
 PDF to Mind Map
 Explain PDF
 Scholar Research
 Paper Search
 AI Proofreader
 AI Writer
 AI Homework Helper
 AI Quiz Generator
 AI Math Solver
 PDF to Word
 PDF to Excel
 PDF to PowerPoint
 User Guide
 UPDF Tricks
 FAQs
FAQs UPDF Reviews
 Download Center
 Blog
Blog Newsroom
 Tech Spec
 Updates
 UPDF vs. Adobe Acrobat
 UPDF vs. Foxit
 UPDF vs. PDF Expert


 Enola Miller
 Lizzy Lozano
 Delia Meyer

