 UPDF for Windows
 UPDF for Mac
 UPDF for iPhone/iPad
 UPDF for Android
 UPDF AI Online
 UPDF Sign
 Edit PDF
 Annotate PDF
 Create PDF
 PDF Form
 Edit links
 Convert PDF
 OCR
OCR PDF to Word
 PDF to Image
 PDF to Excel
 Organize PDF
 Merge PDF
 Split PDF
 Crop PDF
 Rotate PDF
 Protect PDF
 Sign PDF
 Redact PDF
 Sanitize PDF
 Remove Security
 Read PDF
 UPDF Cloud
 Compress PDF
 Print PDF
 Batch Process
 About UPDF AI
 UPDF AI Solutions
 AI User Guide
 FAQ about UPDF AI
 Summarize PDF
 Translate PDF
 Chat with PDF
 Chat with AI
 Chat with image
 PDF to Mind Map
 Explain PDF
 PDF AI Tools
 Image AI Tools
 AI Chat Tools
 AI Writing Tools
 AI Study Tools
 AI Working Tools
 Other AI Tools
 AI Bookmark Generation
 AI Bookmark Summary
 AI Watermark Generation
 AI Background Generation
 AI Sticker Generation
 AI Stamp Generation
 AI Editing Suite
 UPDF Copilot
 AI Page Management
 AI Semantic Search
 PDF to Word
 PDF to Excel
 PDF to PowerPoint
 User Guide
 UPDF Tricks
 FAQs
FAQs UPDF Reviews
 Download Center
 Blog
Blog Newsroom
 Tech Spec
 Updates
 UPDF vs. Adobe Acrobat
 UPDF vs. Foxit
 UPDF vs. PDF Expert
Are you looking for an easy way to delete pages from PDF on your iPhone? We have put together a simple, step-by-step guide below featuring four different ways you can do this by using the UPDF for iOS. It’s completely free to download - you can try it now by clicking the download button below or go to App Store to download directly.
Windows • macOS • iOS • Android 100% secure
There are lots of reasons that being able to delete pages on the go can be a gamechanger. For example, when you have been working hard on a PDF document for some time, it can be so easy to miss duplicate pages, or blank pages. Isn’t it great to know there’s a selection of straightforward ways you can easily nix a page that’s no longer needed or just incorrect?
Try picturing this nightmare scenario: You have just finished work and you’re out with friends when all of a sudden your boss messages you. They need you to urgently remove a page from an important PDF file. Unfortunately, you are miles from your laptop and all you have is your phone, and the clock is ticking; so what do you do? Follow our step by step guide below which features 4 really easy ways you can delete PDF pages on your iPhone.
We know editing PDF documents this way can be a little daunting, but trust us — you really can’t go wrong with the super-handy UPDF app. Now let’s get started!
First up, we’ll show you how to delete pages from a PDF file on your iPhone by selecting the delete function…
Part 1. Delete Pages from PDF on iPhone by Deleting
Once you have downloaded the app for free and created a login (the whole process takes less than a minute), you’re ready to use the delete function to remove any unwanted pages. Here is the first of four very simple ways you can delete pages from a PDF file on an iPhone.
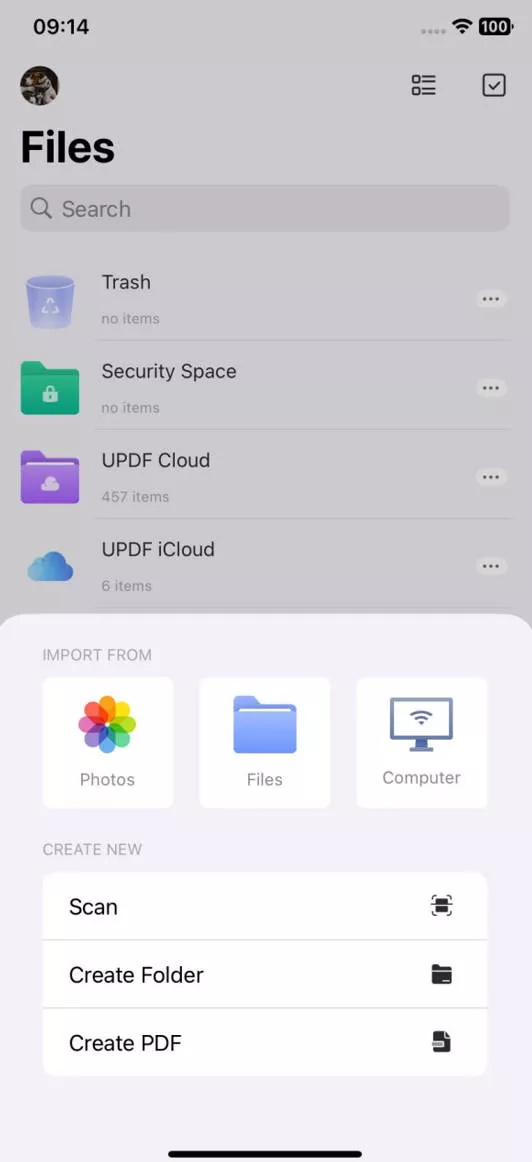
- Click the below button to download UPDF. Open the UPDF app and then select the “+” symbol in the bottom right corner. Tap the “Files” option that pops up in order to locate and upload the PDF document you want to delete pages from.
Windows • macOS • iOS • Android 100% secure
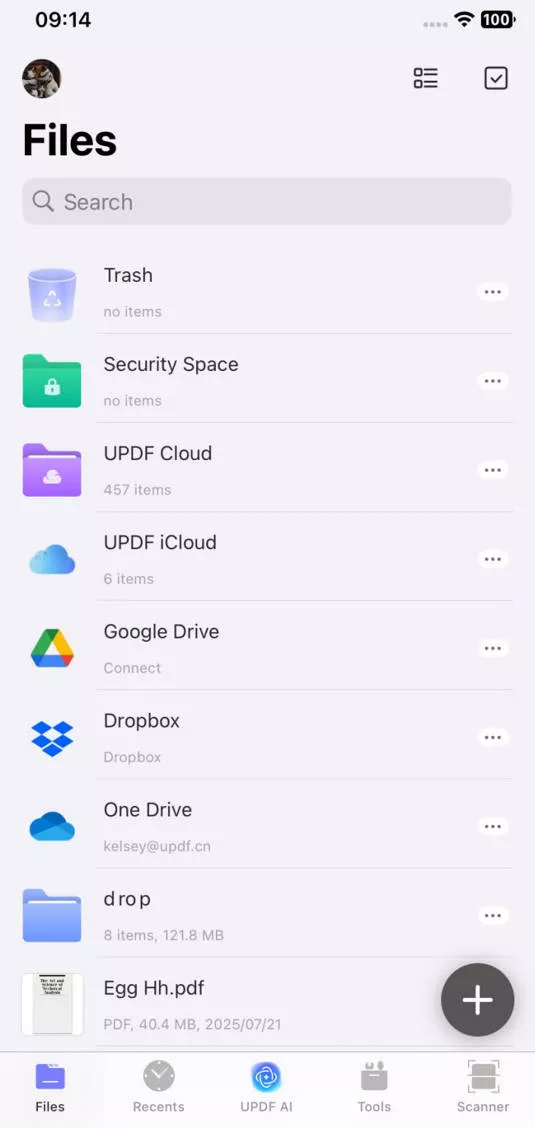
- Once you have selected your document, tap the “Open” option and the file will automatically open up in the UPDF app.
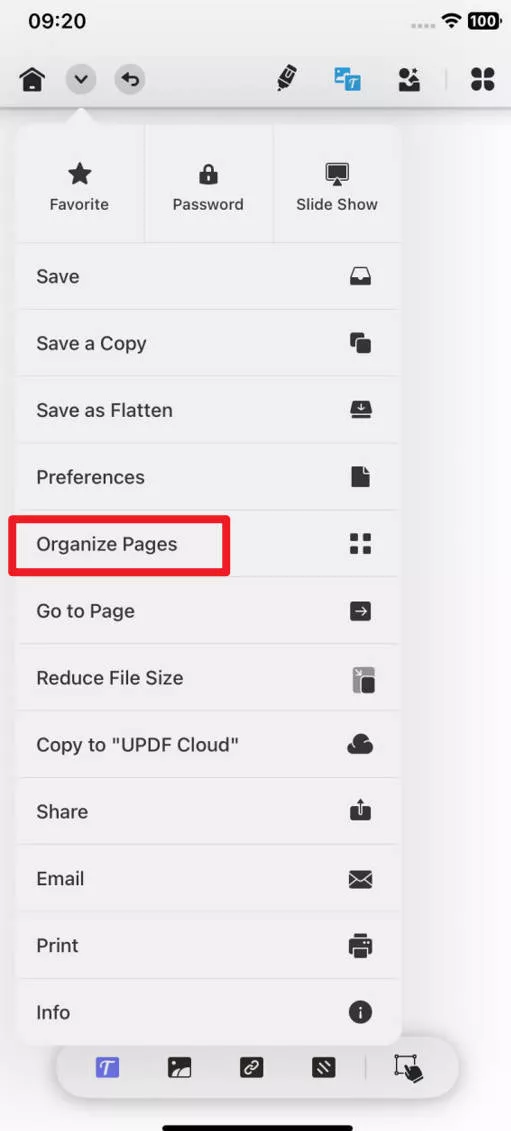
- Then select the downward arrow in the top left corner of the app (next to the house symbol) and a dropdown menu will appear.
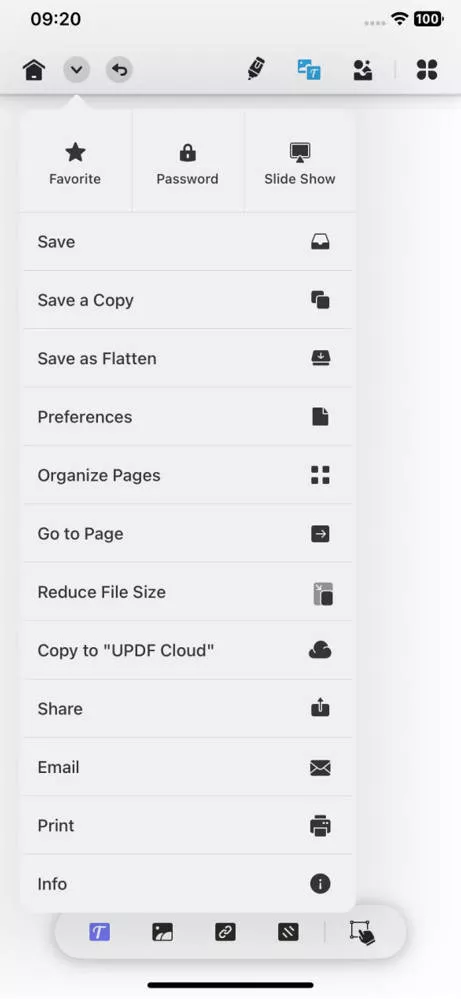
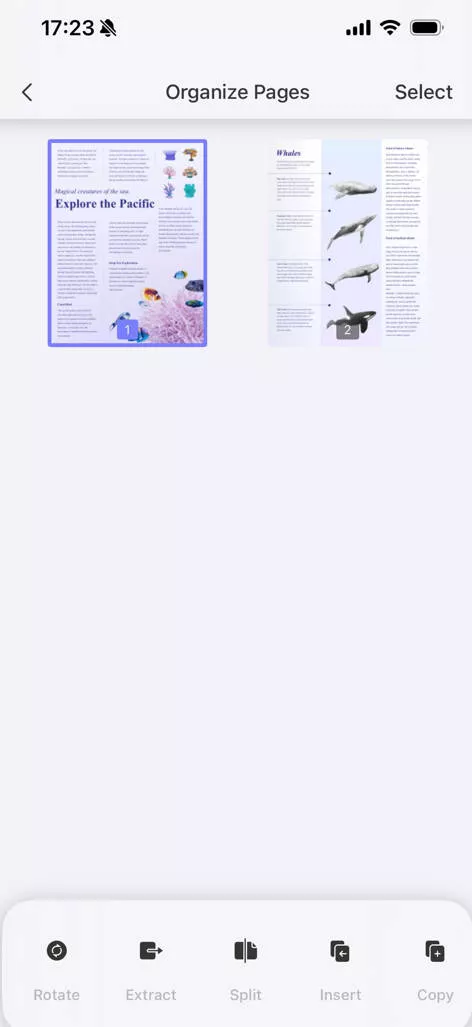
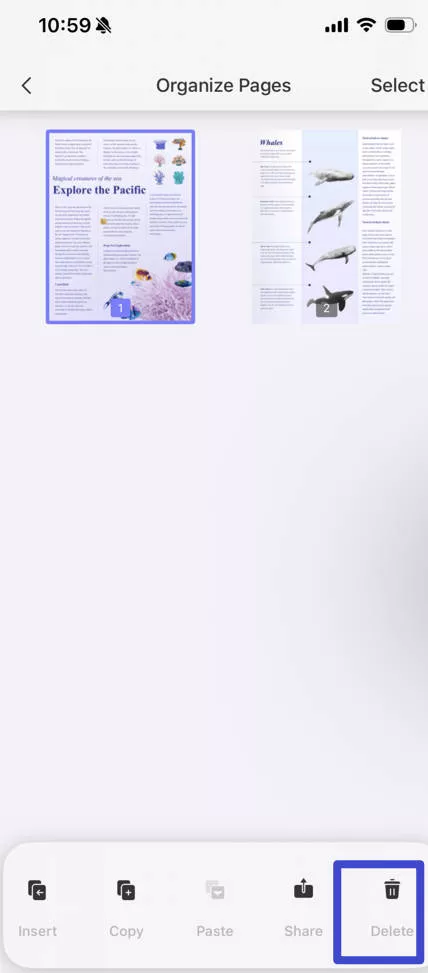
- Choose “Organize Pages” from the dropdown menu and then select the page, or pages, you want to delete. Just scroll along the bottom menu to find and tap the “Delete” option.
- The updated PDF document (with only the pages you need) can then be found in “Files”.
- Alternatively, you can select the “Tools” option from the menu along the bottom of the app, and tap the “Delete Pages” option.
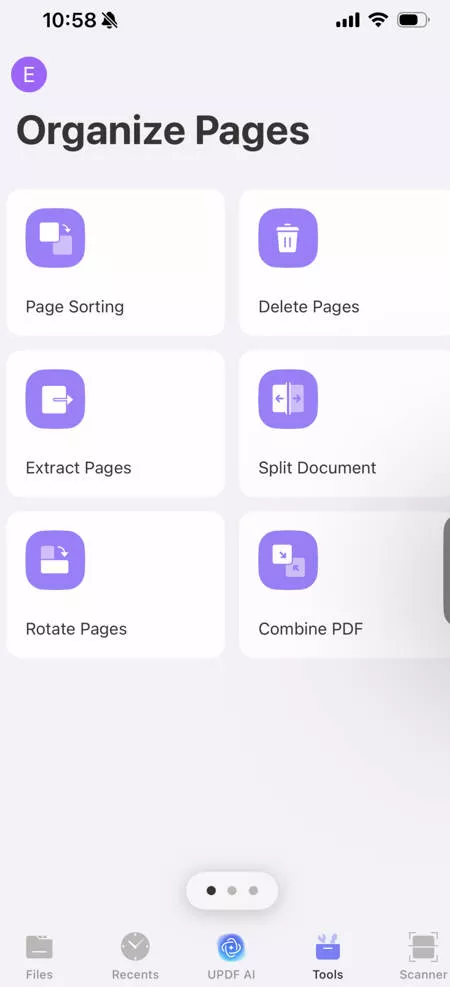
- Then locate and select the PDF document you need, it will open up and you will be prompted to choose and delete the page, or pages, of your choice (in the same way as before).
Part 2. Remove Pages from PDF on iPhone by Extracting
You can also effortlessly delete pages from PDF on an iPhone by using the “Extract” feature within the UPDF app. It can help you extract the pages you only need to achieve this task.
- Upload your PDF document following the same steps outlined in Part 1.
- Similar to Part 1 again, open up the PDF document, tap the arrow in the top left corner, and then select “Organize Pages” from the dropdown menu.
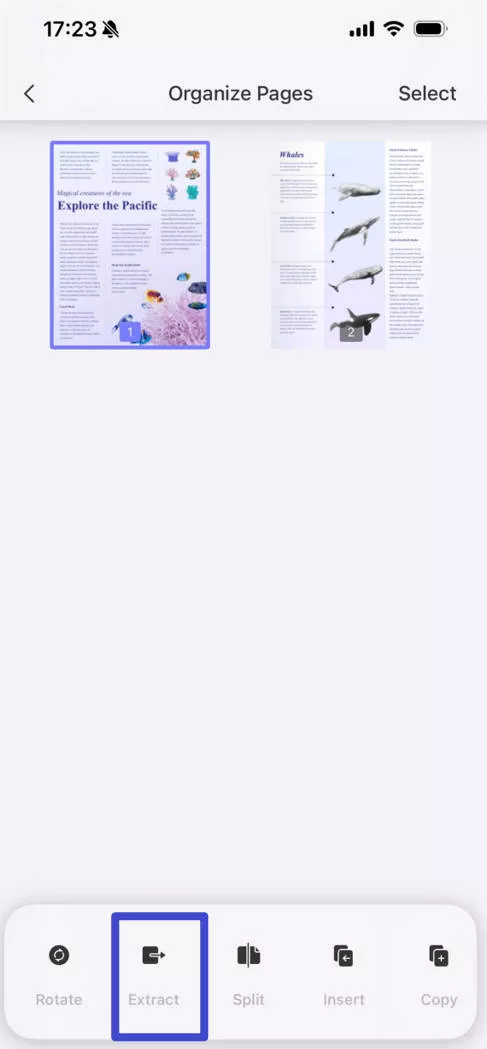
- You will then be prompted to choose the page, or pages, you wish to keep. The next step is to tap the “Extract” option which can be found in the menu along the bottom.
- You will then have the option to save to “Files” on your iPhone. Now save the PDF document to your desired iPhone file location.
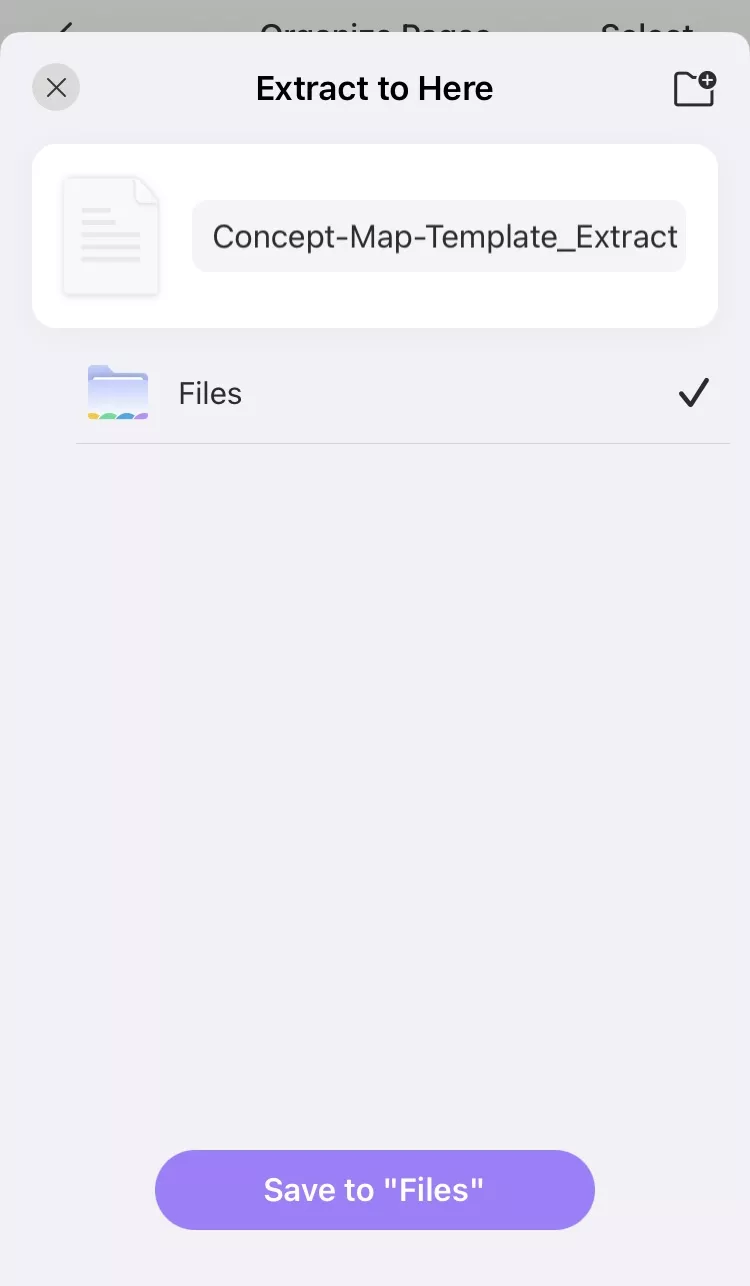
- Once you have done that you should see a pop-up which says “Extract success”. This means the PDF pages you need are extracted in the new file. You can go to “Files” and find the extracted PDF.
- It is also possible to use the “Extract Pages” option by selecting “Tools” from the menu along the bottom.

- Choose a PDF document you have uploaded to “Files” in the app already, and then the rest of the steps are just the same as above.
Part 3. Delete Pages from PDF on iPhone by Printing
There is a way to delete pages from a PDF file on an iPhone using the UPDF app’s print feature to save the pages that you need to achieve the task of deleting pages. Read on to find out how it’s done. If you still do not have UPDF for iOS, you can click the below button to download it.
Windows • macOS • iOS • Android 100% secure
- After you have uploaded and opened up your PDF document of choice, tap the arrow in the top left corner and select “Print” from the dropdown menu. It’s the second last option on the menu so you might need to scroll a little bit to see it.
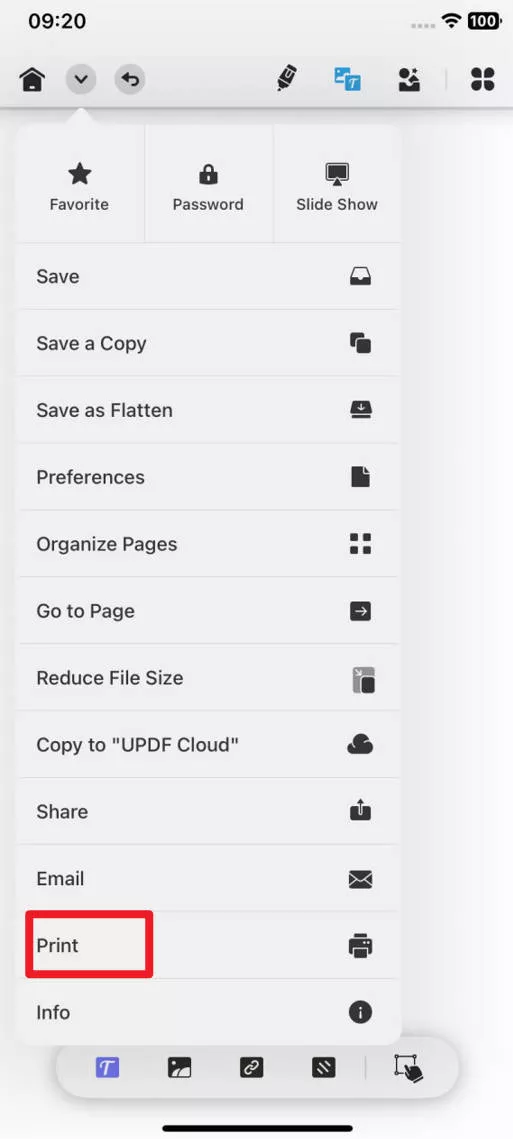
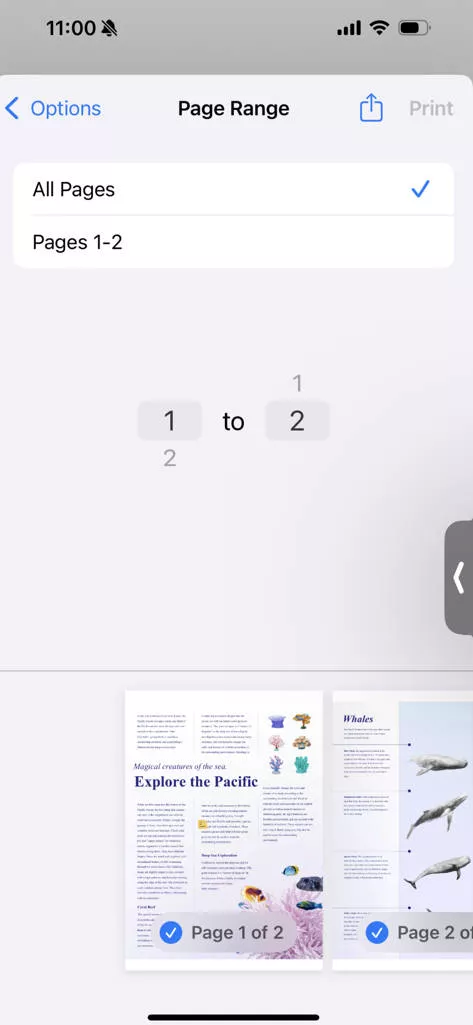
- Then tap on the “Range” option that appears. This will allow you to decide which pages you want to keep and which ones you would like to get rid of. For example, if you have a 10-page document but only need pages 4-6, just scroll to select that range.
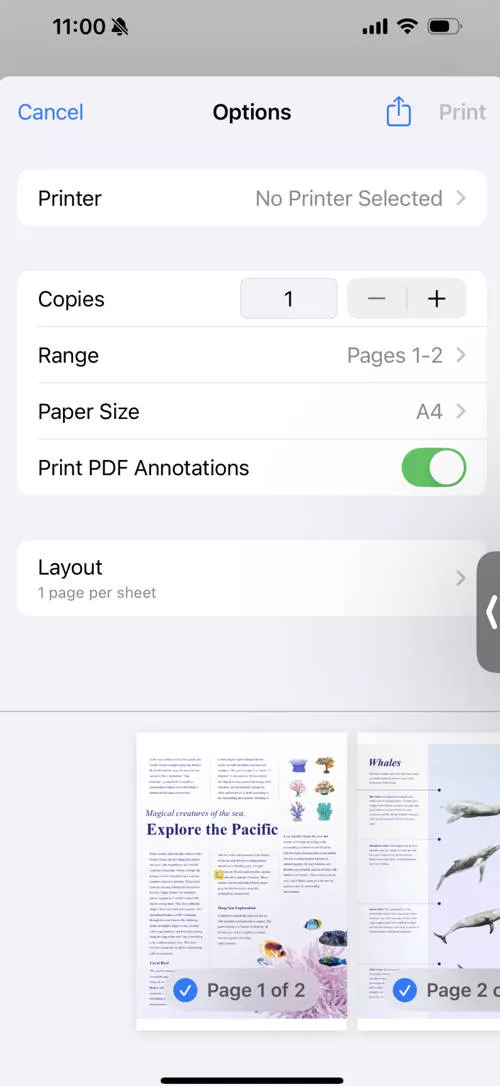
- Now you can share or save your PDF document with the pages you need by selecting the share option (the arrow in the square symbol in the top right corner, next to where it says “Print Options”).
- Then scroll down to select the “Save to Files” option so you can store the updated document on your iPhone.
Congratulations, now you have successfully deleted pages from PDF on your iPhone using the print function.
Part 4. Delete Pages from PDF on iPhone by Sharing
If you plan to share your PDF document with your boss, or a colleague, or whoever, but you don’t want to include certain pages, there’s a simple way to do this. These are the steps you need to take to be able to delete pages from PDF on your iPhone using the “Sharing” feature…
- Once your PDF document is open in UPDF for iOS, select the arrow in the top left corner to reveal a dropdown menu.
- Before tapping the “Share” option, choose the “Organize Pages” option from the menu first so you can select the page need.
- Select the pages you want to keep and/or share, then scroll along the bottom menu and tap the “Share” option.
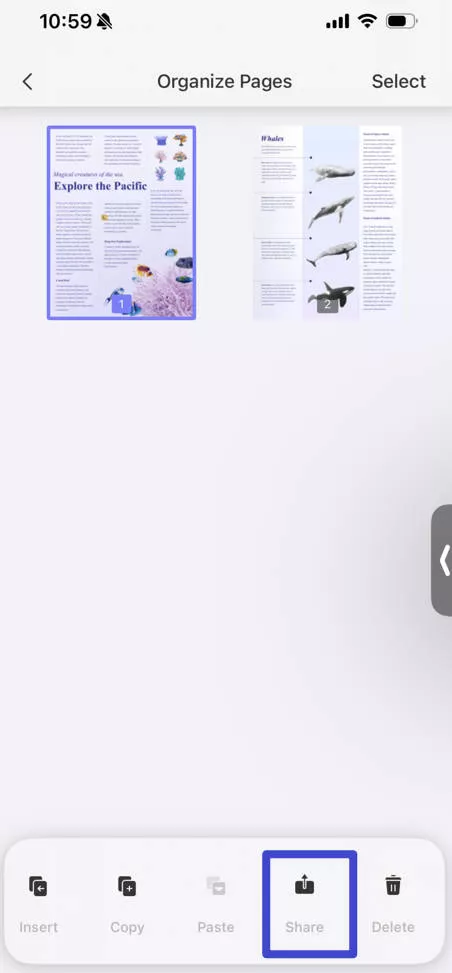
- Then you will be able to decide how you would like to send your newly edited PDF document (for example, via email or Slack), or save it on your iPhone. Only the PDF pages you decided to keep will be shared using this method.
You can see that UPDF for iOS can help you delete pages from PDF easily. You can use any method above to do it. Moreover, UPDF for iOS has many other features, you can watch the below video or read this article to learn more. If you want to upgrade to pro version, you can have a big discount here.
Conclusion
Wasting time trying to figure out how to delete pages from PDF on your iPhone is the last thing you need when you’re on the go. Thankfully, this comprehensive, step-by-step guide shows that there are many different and simple ways you can nix unwanted PDF pages fast. In conclusion, make life and work much easier for yourself by downloading the UPDF app for FREE today.
Windows • macOS • iOS • Android 100% secure


 Enid Brown


 Enrica Taylor