Pictures help readers keep their eyes on PDFs longer than plain text. This is one of the main reasons that modern documents almost always contain pictures. However, you may search around and try many ways, but none of them is what you need. No worry, you can find the methods you need as this article will show different effective ways how to insert a picture in PDF on a Mac.
Part 1. How to Add Image to PDF on Mac With UPDF (3 Ways)
If you are looking to add photos to PDF on Mac, the UPDF - PDF editor for Mac is your best choice. It has three options to help you add an image to a PDF on a Mac. They are the "Image" feature in editing PDF, "Attachment" in comment, and "Image Field" in the "Prepare Form" part. Each feature can meet your requirements in different scenarios. You can click the below button and follow the below guides to add an image to PDF on Mac.
Windows • macOS • iOS • Android 100% secure
Way 1. Insert a Picture on PDF on Mac Via Adding "Image"
If you want to edit the images after adding them to PDF, you need to use UPDF's "image" feature. It allows you to crop, replace, move, and rotate the inserted pictures. Just follow the below steps about how to use it.
Step 1. Download and launch the UPDF app on your Mac. After opening UPDF, click the "Open File" button that appears on the main interface of the app. This button launches an explorer window from which you can select the PDF file into which you wish to add an image.

Step 2. Now click on the "Edit" button in "Tools" on the left sidebar. We will use this section to add images to PDF Mac.
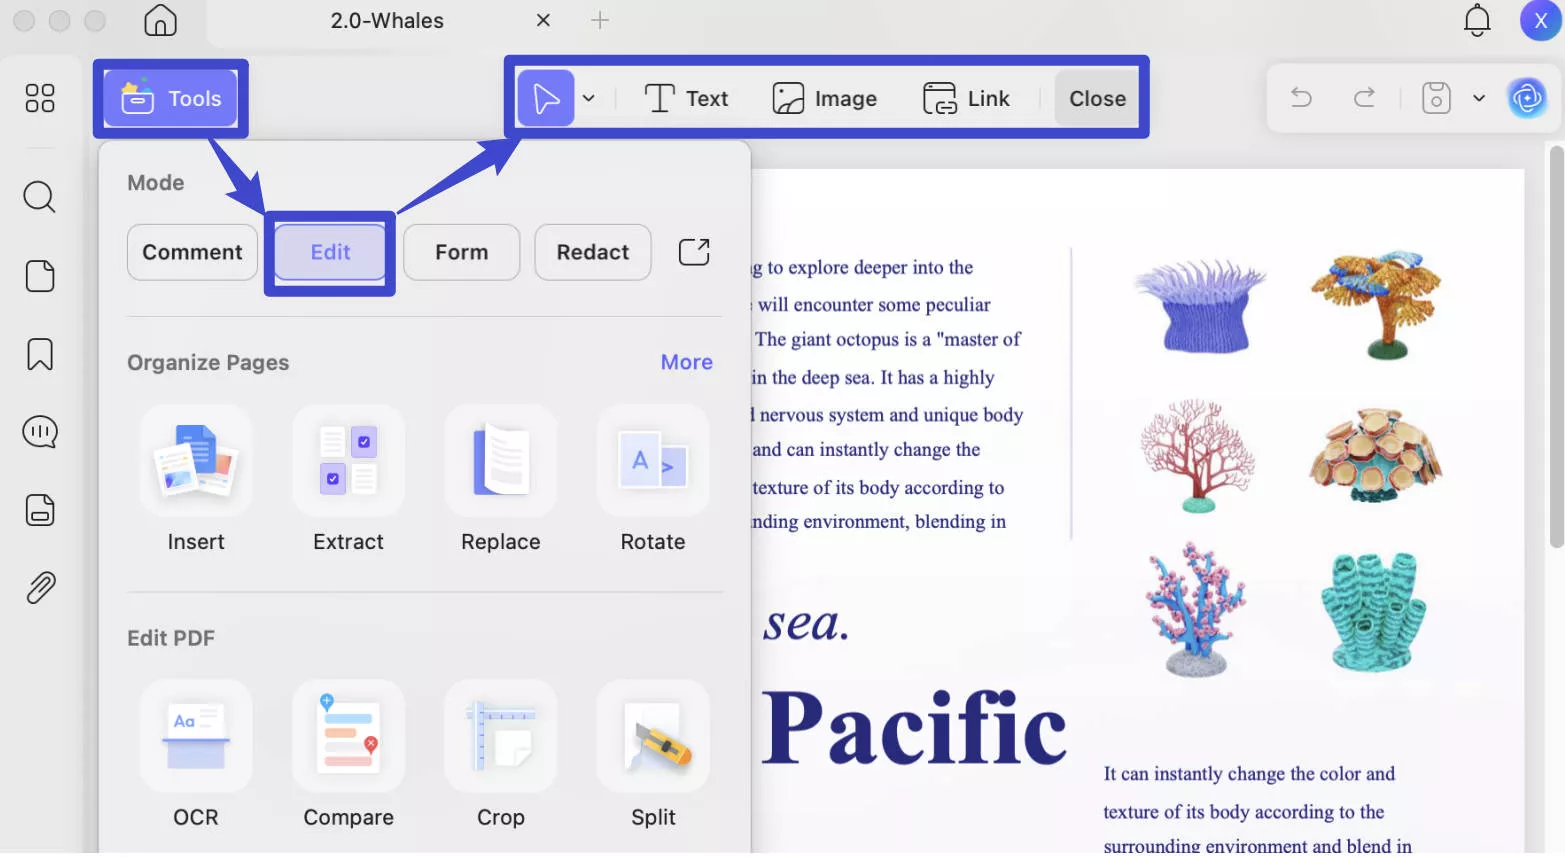
Step 3. You can now easily add photos to PDF Mac. Simply click on the "Image" icon as shown in the below screenshot, place where you want to add the image on the PDF and select the images from your MacBook to insert.

Step 4. Now that you can successfully add pictures to PDF on Mac, you can also edit the pictures in the PDF document. UPDF allows you to easily edit the position and size of the images. You can also choose to crop the images in the PDF documents as per your requirements.
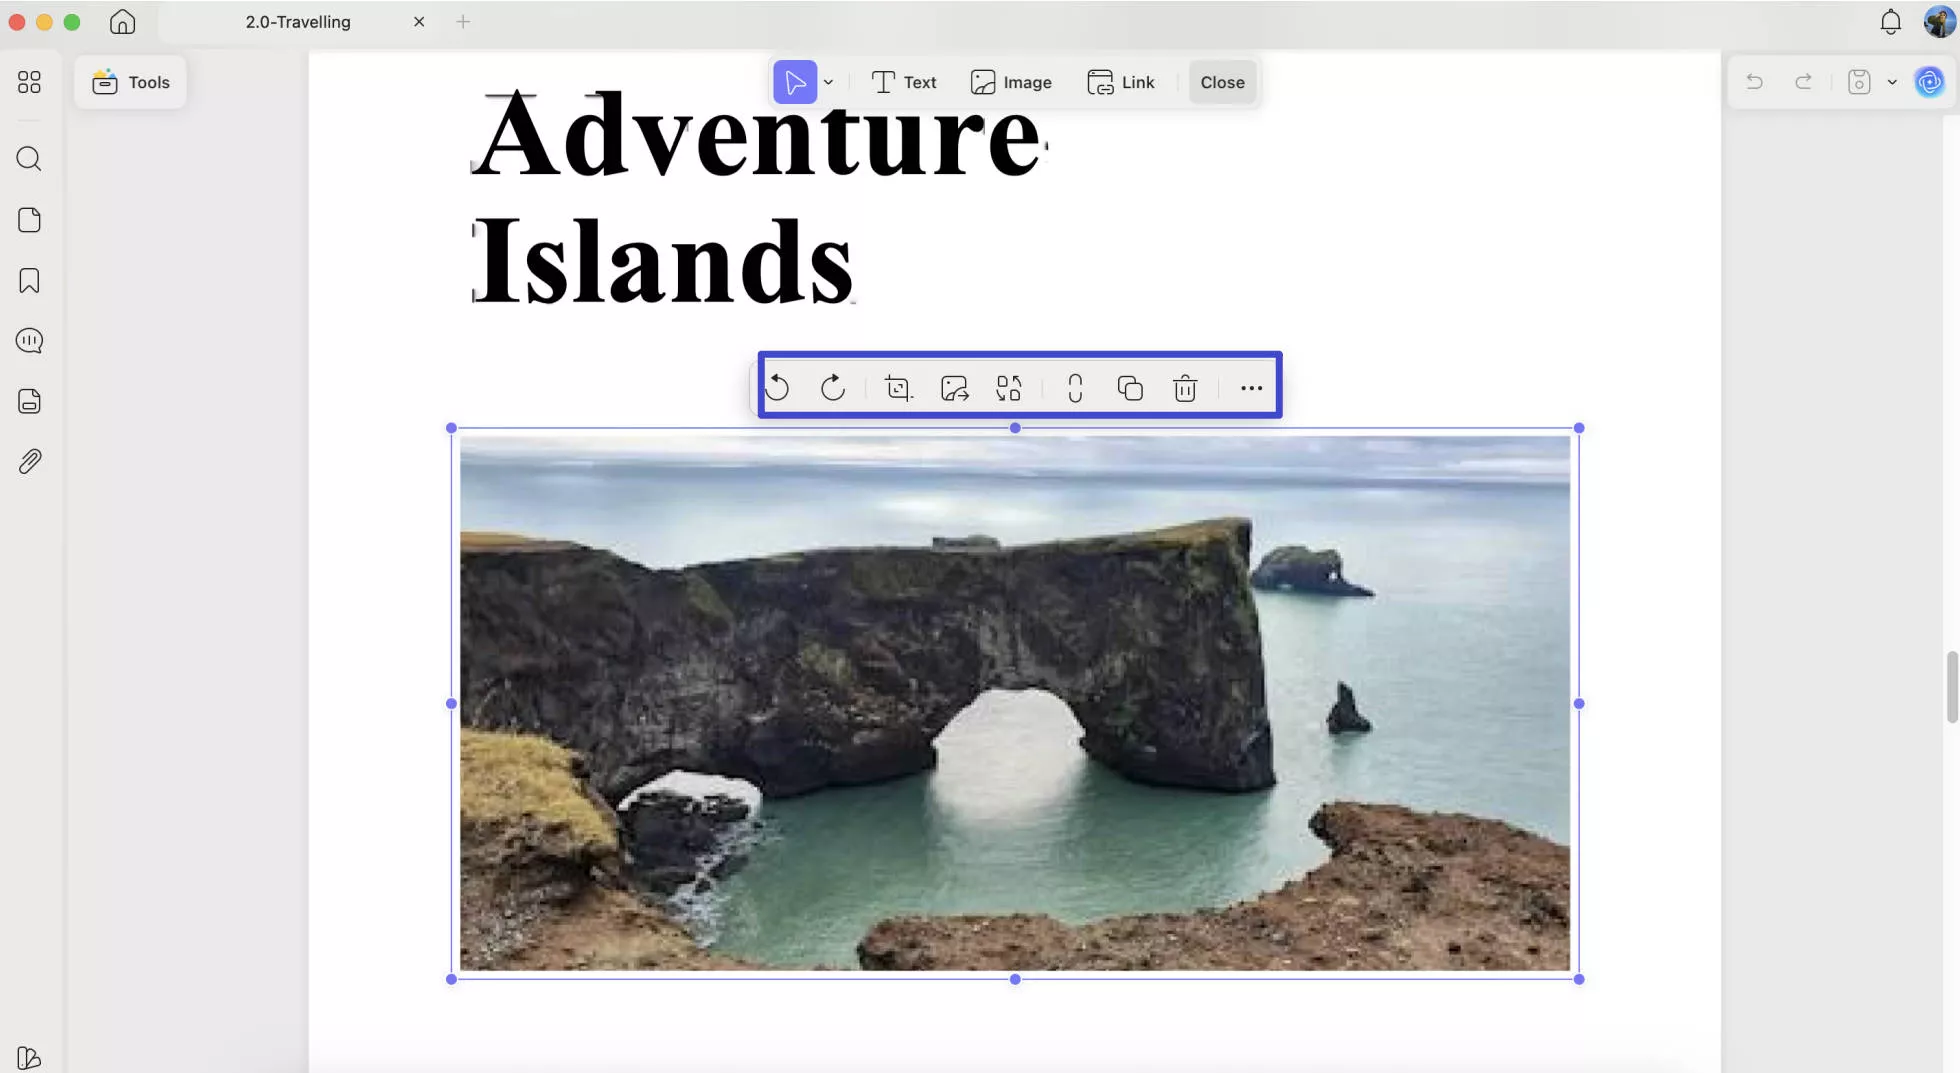
If you still do not know how to add an image to a PDF with UPDF's image feature, you can download UPDF here and follow the below video guide.
Way 2. Insert Photo to PDF With Adding Attachment
If there is no need or no place to show the picture contents, you can add the images to the PDF as an attachment.
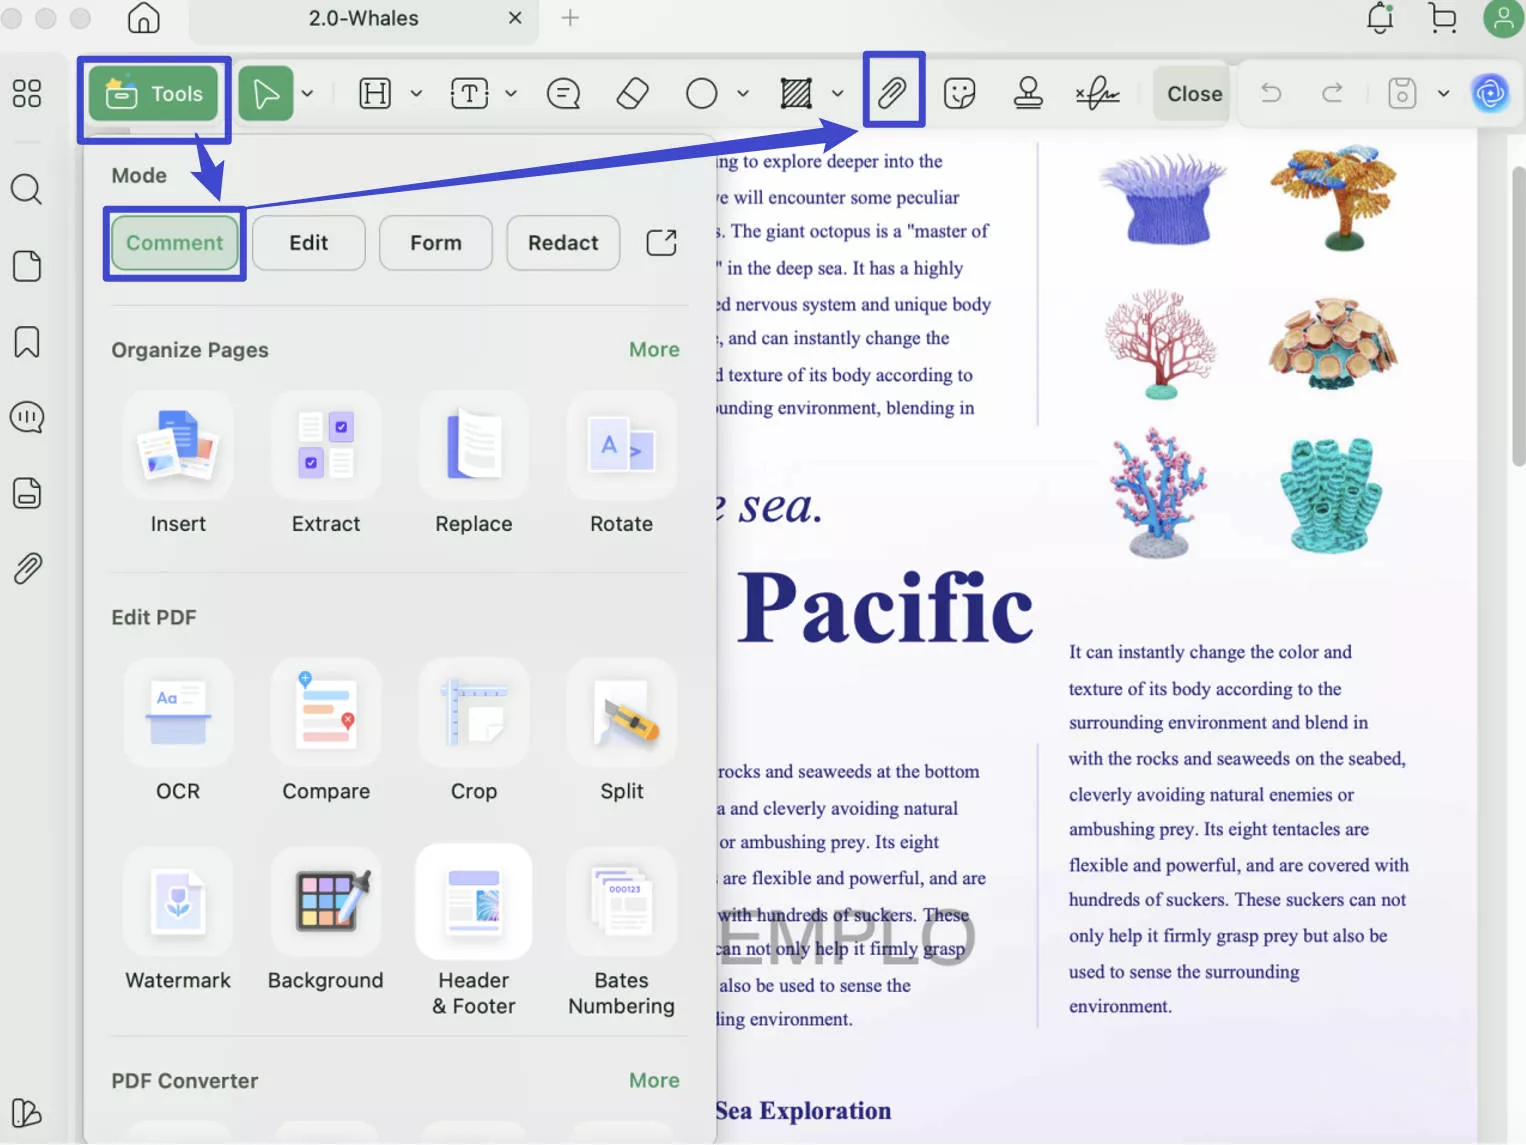
Step 1. Make sure you open the PDF with UPDF on Mac. Now, click "Comment" in "Tools" at the left side menu, find the "Attach File" icon, and click on it. You can select the attachment shape, color, and opacity.
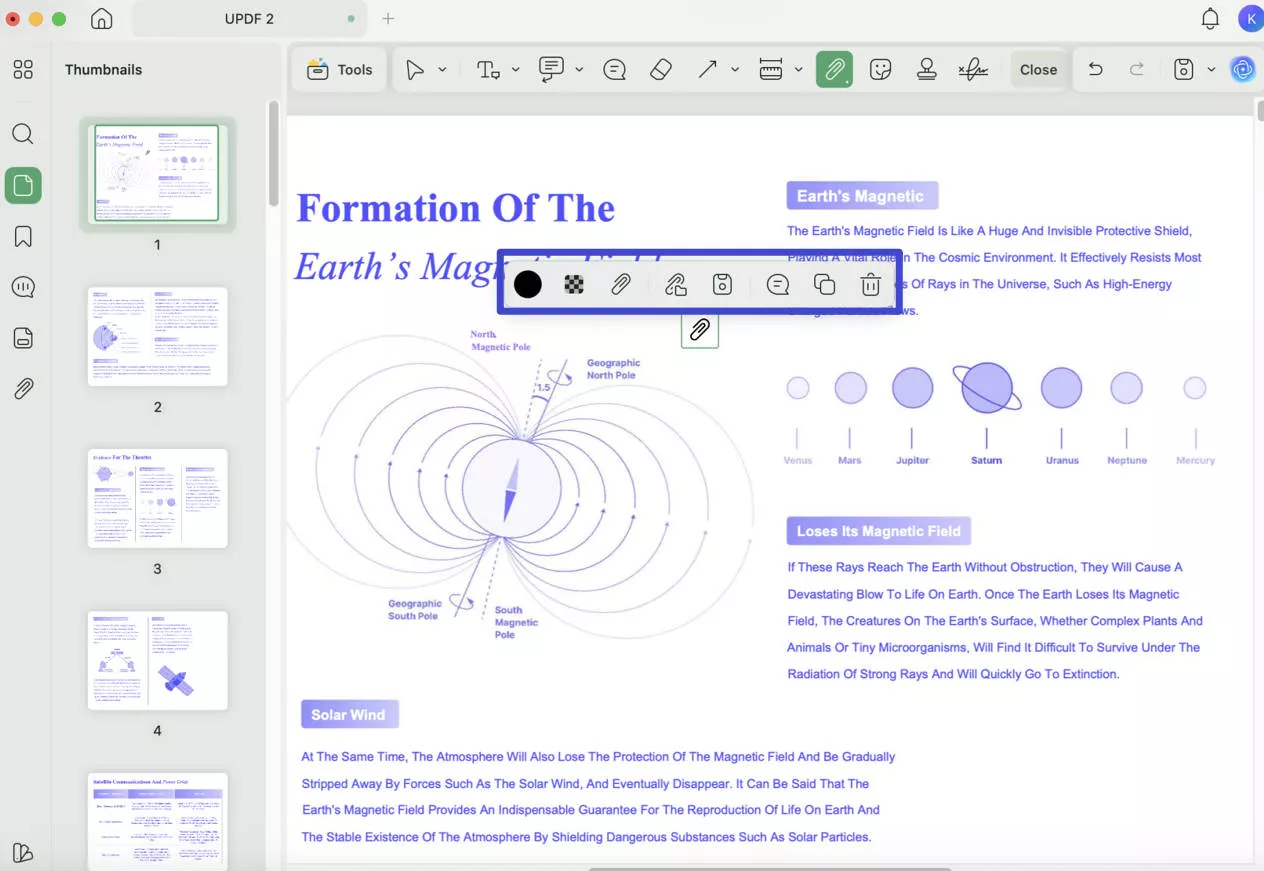
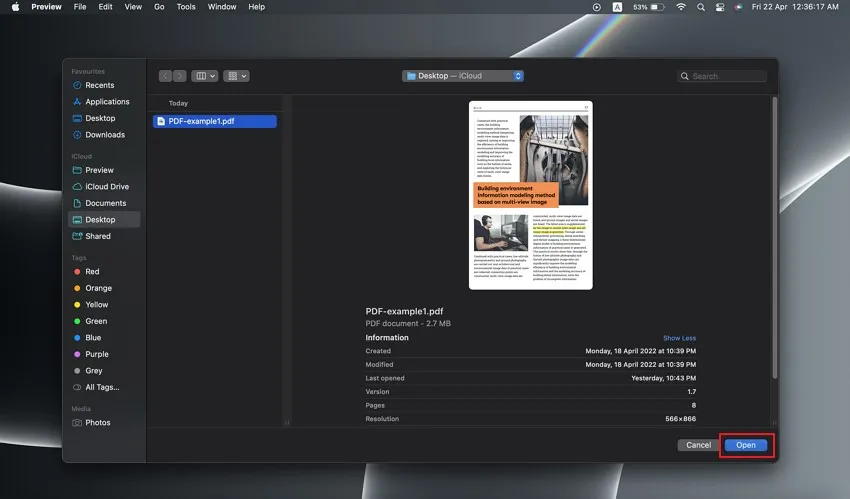
Step 2. Click the place where you want to add the image, select the image, and click the "Open" icon on the pop-up window. Now, you insert the picture to PDF successfully.
Step 3. You can click on the attachment icon and select "Copy", "Delete", "Note", and "Properties" to make changes. Once everything is OK, click "File" > "Save" to save changes.
Way 3. Add Image to PDF Via Inserting Image Field
If you prefer a fixed image field or want to ask others to upload the image to PDF, you can use the image field to do that.
Step 1. If you still do not have UPDF on your Mac, click the below button to download it. Run the UPDF and open the PDF on your Mac with it.
Windows • macOS • iOS • Android 100% secure
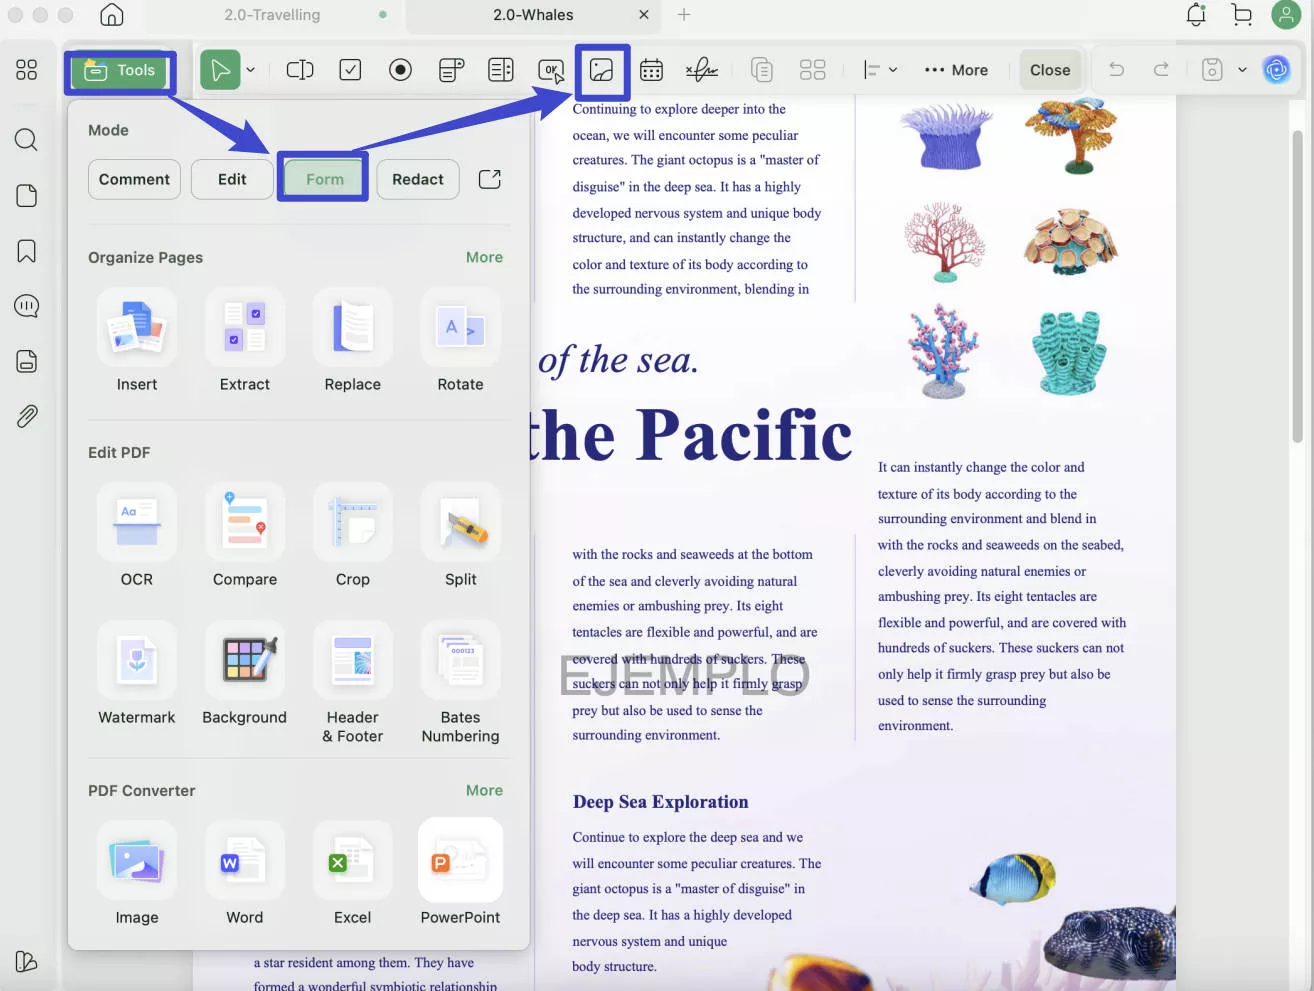
Step 2. Click "Tools" > "Form" > "Image Field" and draw to adjust the size of the image field you need.
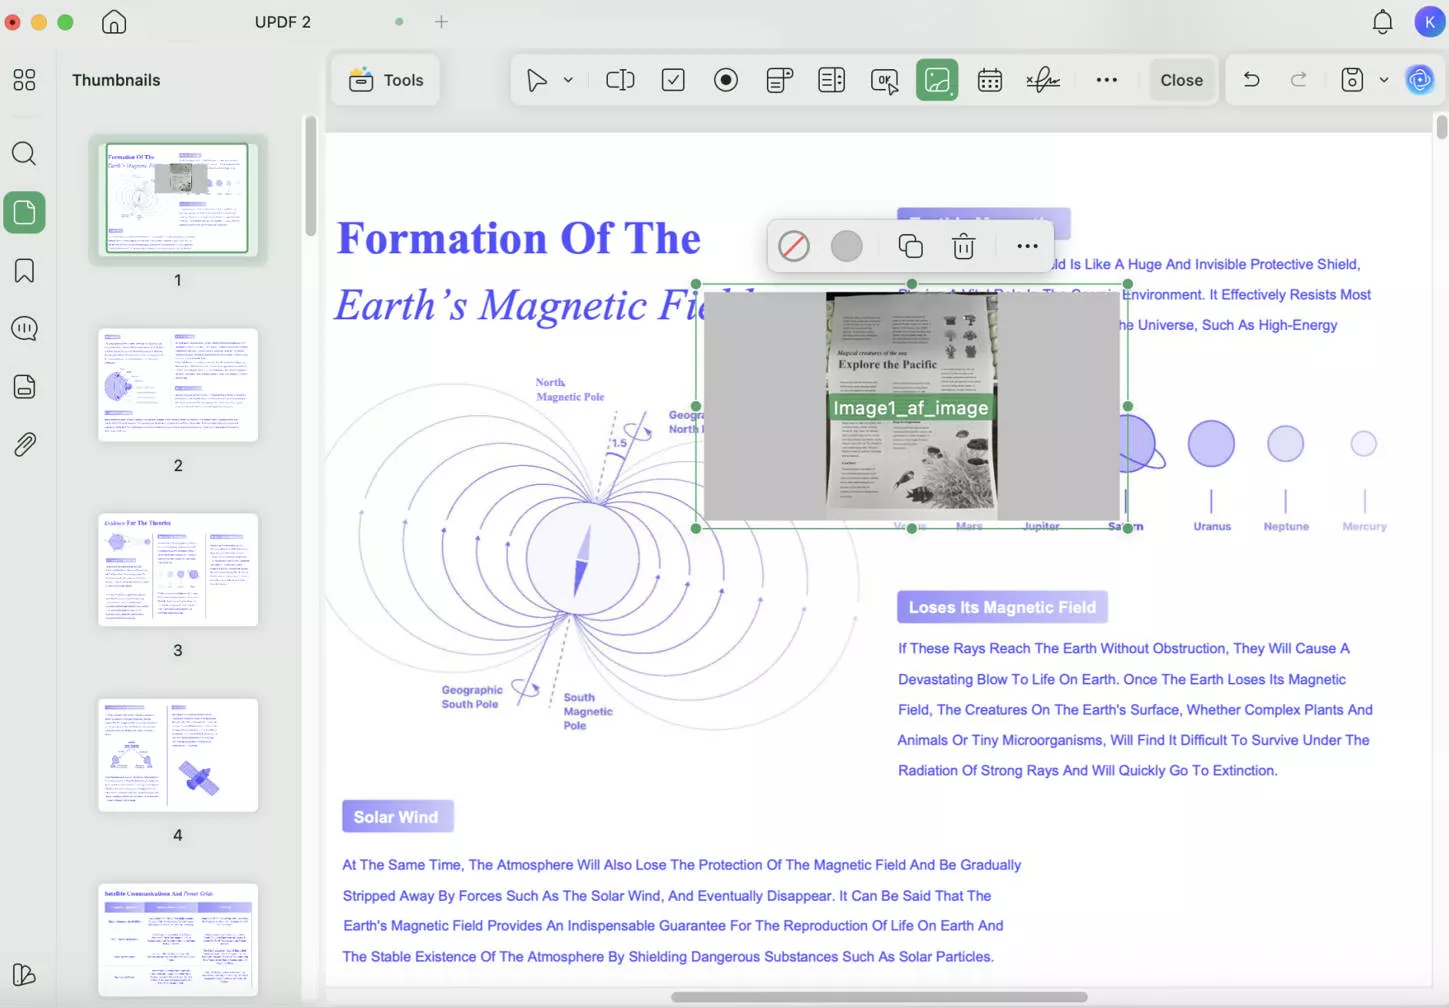
Step 3. Click on the "Properties" button to add the image on your own. If you want others to insert the image into the PDF, just save the PDF and share it with them. Then, they can click on the image field to upload the image there.
It is super easy to use UPDF to insert images into PDFs. And UPDF can offer more than inserting image feature, it allows you to use UPDF to summarize PDF, translate PDF, explain PDF, etc. And its PDF editing, annotating, converting, compressing, and more features can help you improve your PDF handling efficiency. To learn more about UPDF, read this review article. You can also download the UPDF free trial version via the below button to test its all features.
Windows • macOS • iOS • Android 100% secure
And only when you are satisfied with it, you can upgrade to pro. If you are those who are ready to buy UPDF Pro, you can click the below button to get a big discount.
Part 2. How to Insert Images to a PDF with Preview on Mac
You can add images to PDF on Mac using MacBook's Preview feature even though copy-paste of images is not allowed in this app. There is a hacky way to add images to PDF on Mac. You may follow the below steps to accomplish this with Preview on Mac -
- Locate the image to add to your PDF file. Right-click on the image and select "Open With" > "Preview" from the menu.
- When Preview opens, press "Command + A" on your Mac keyboard and select the entire image.
- Now you may press "Command + C" to copy the image. You can now press "Command + V" to paste the image, and the new copy of your image covers the original image. While both images look the same, the one that you just pasted has now become an object that can be pasted into a PDF.
- Copy this object image by pressing "Command + C".
- Next, find the PDF that you want to paste the image into in Finder. Open this PDF file in the Mac Preview tool. Scroll to the PDF page that you want to add your image to and paste the image by pressing "Command + V".
- You can now close the document and your changes will be saved.
For a more detailed guide on adding an image to a PDF with preview, just read this guide.
Conclusion
Indeed there are several ways on how to insert a picture in PDF on Mac. However, using the Preview feature to achieve this is quite hacky and cumbersome. UPDF stands out as the perfect PDF image editor which is extremely cost-effective and produces very high-quality results. In addition to the PDF editing options, UPDF also provides password protection and electronic signature features which makes it much more superior than other tools available in the app stores. UPDF is a great tool choice and makes PDF editing easy and enjoyable. Download it by clicking the below button and upgrade to UPDF Pro for exclusive features and level up your experience!
Windows • macOS • iOS • Android 100% secure
 UPDF
UPDF
 UPDF for Windows
 UPDF for Mac
 UPDF for iPhone/iPad
 UPDF for Android
 UPDF AI Online
 UPDF Sign
 Edit PDF
 Annotate PDF
 Create PDF
 PDF Form
 Edit links
 Convert PDF
 OCR
OCR PDF to Word
 PDF to Image
 PDF to Excel
 Organize PDF
 Merge PDF
 Split PDF
 Crop PDF
 Rotate PDF
 Protect PDF
 Sign PDF
 Redact PDF
 Sanitize PDF
 Remove Security
 Read PDF
 UPDF Cloud
 Compress PDF
 Print PDF
 Batch Process
 About UPDF AI
 UPDF AI Solutions
 AI User Guide
 FAQ about UPDF AI
 Summarize PDF
 Translate PDF
 Chat with PDF
 Chat with AI
 Chat with image
 PDF to Mind Map
 Explain PDF
 Scholar Research
 Paper Search
 AI Proofreader
 AI Writer
 AI Homework Helper
 AI Quiz Generator
 AI Math Solver
 PDF to Word
 PDF to Excel
 PDF to PowerPoint
 User Guide
 UPDF Tricks
 FAQs
FAQs UPDF Reviews
 Download Center
 Blog
Blog Newsroom
 Tech Spec
 Updates
 UPDF vs. Adobe Acrobat
 UPDF vs. Foxit
 UPDF vs. PDF Expert



 Enrica Taylor


 Grace Curry