 UPDF for Windows
 UPDF for Mac
 UPDF for iPhone/iPad
 UPDF for Android
 Nomostar
 UPDF AI Online
 UPDF Sign
 IvyCraft
 Edit PDF
 Annotate PDF
 Create PDF
 PDF Form
 Edit links
 Convert PDF
 OCR
OCR PDF to Word
 PDF to Image
 PDF to Excel
 Organize PDF
 Merge PDF
 Split PDF
 Crop PDF
 Rotate PDF
 Protect PDF
 Sign PDF
 Redact PDF
 Sanitize PDF
 Remove Security
 Read PDF
 UPDF Cloud
 Compress PDF
 Print PDF
 Batch Process
 About UPDF AI
 UPDF AI Solutions
 AI User Guide
 FAQ about UPDF AI
 Summarize PDF
 Translate PDF
 Chat with PDF
 Chat with AI
 Chat with image
 PDF to Mind Map
 Explain PDF
 PDF AI Tools
 Image AI Tools
 AI Chat Tools
 AI Writing Tools
 AI Study Tools
 AI Working Tools
 Other AI Tools
 AI Bookmark Generation
 AI Bookmark Summary
 AI Watermark Generation
 AI Background Generation
 AI Sticker Generation
 AI Stamp Generation
 AI Editing Suite
 UPDF Copilot
 AI Page Management
 AI Semantic Search
 PDF to Word
 PDF to Excel
 PDF to PowerPoint
 User Guide
 UPDF Tricks
 FAQs
FAQs UPDF Reviews
 Download Center
 Blog
Blog Newsroom
 Tech Spec
 Updates
 UPDF vs. Adobe Acrobat
 UPDF vs. Foxit
 UPDF vs. PDF Expert
Scan to PDF
UPDF allows you to scan anything with your iPhone, iPad, or iPod Touch camera and instantly convert it into a PDF file. You can also import files from the Photos app and add them to a UPDF folder. Additionally, it now supports scanning both sides of ID cards onto a single page of a PDF.
Here is how you can access this feature or you can watch the video below to learn more.
Here are the steps:
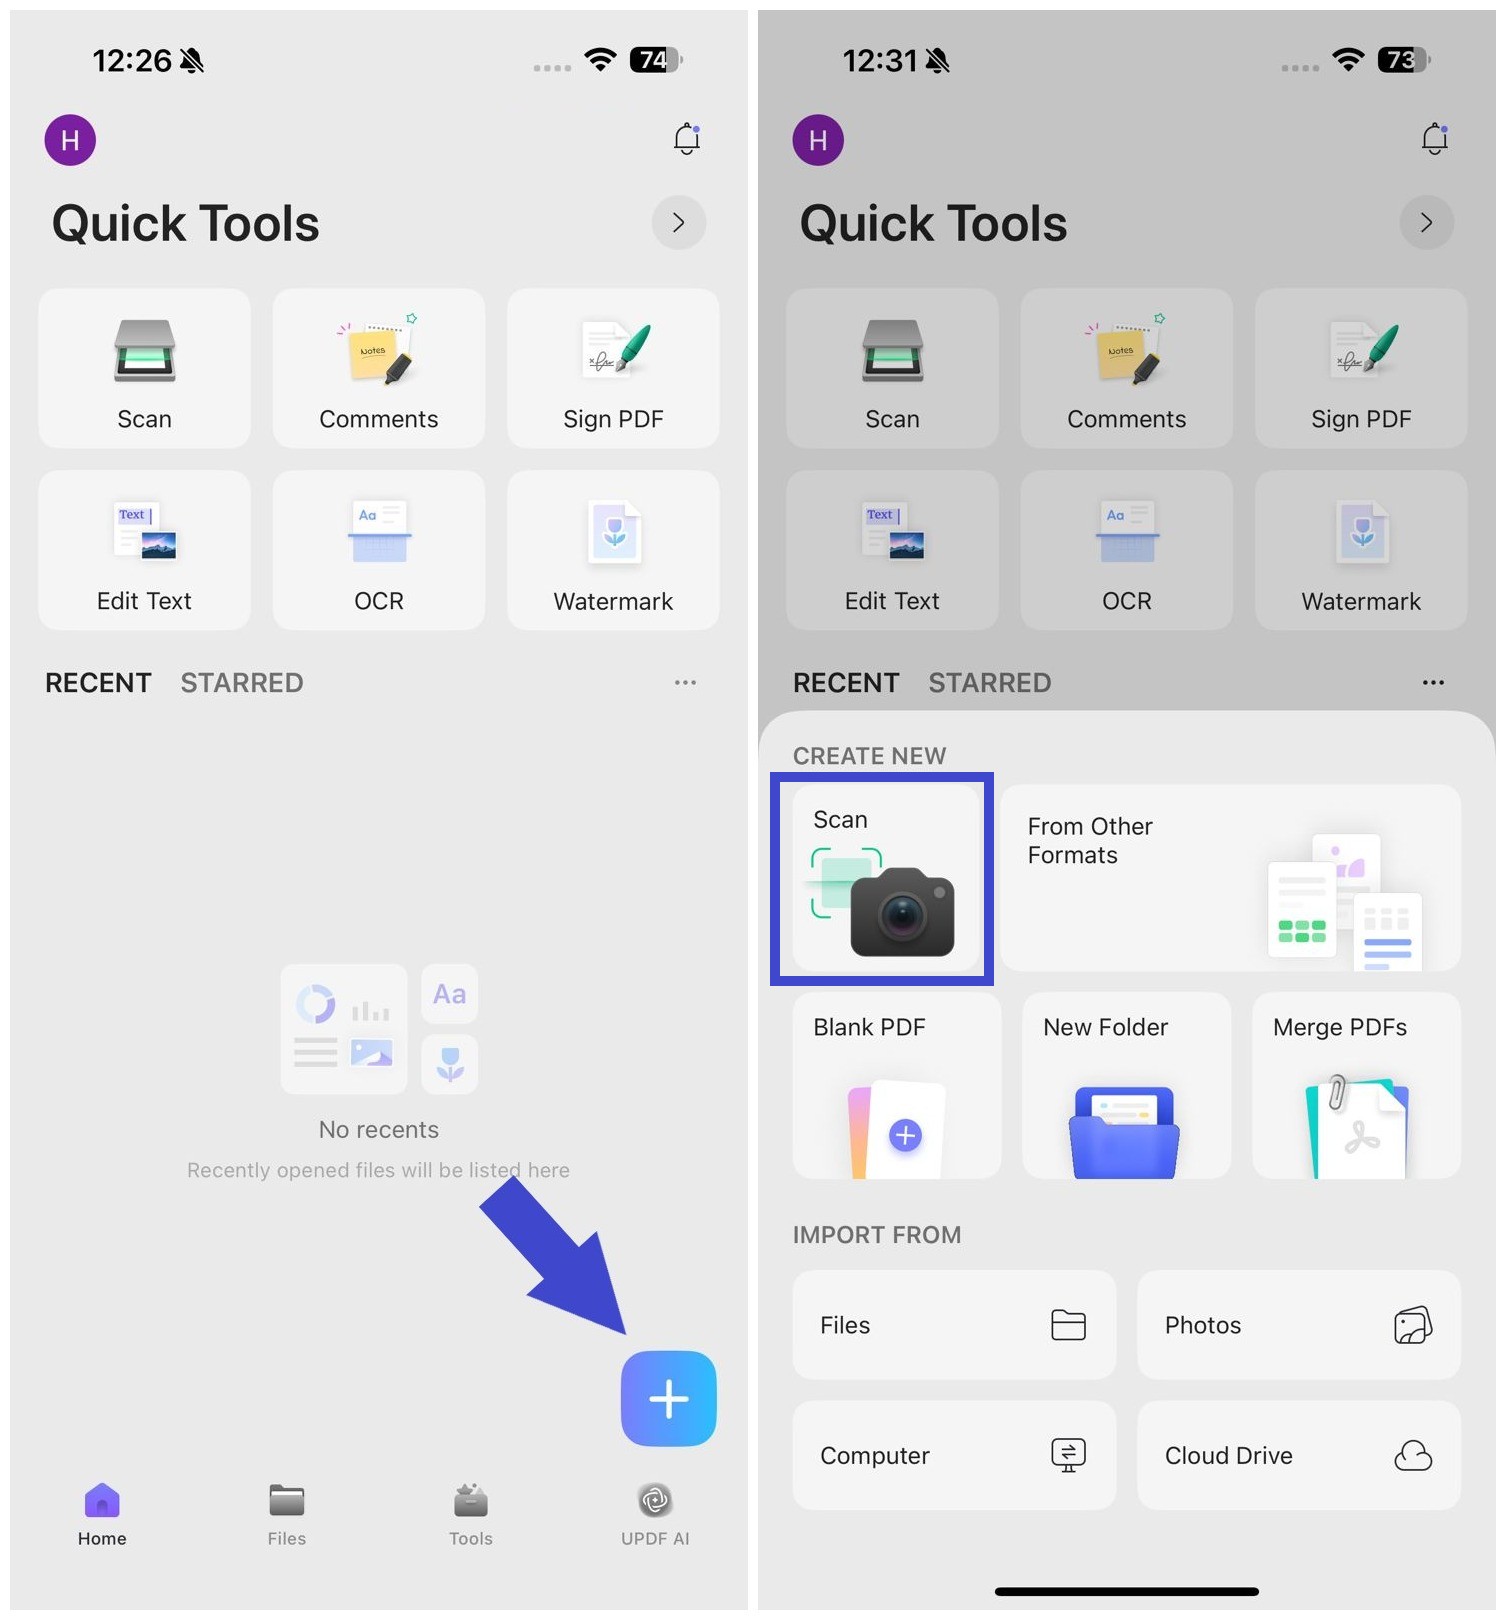
Step 1. Click the "+" icon and select "Scan".
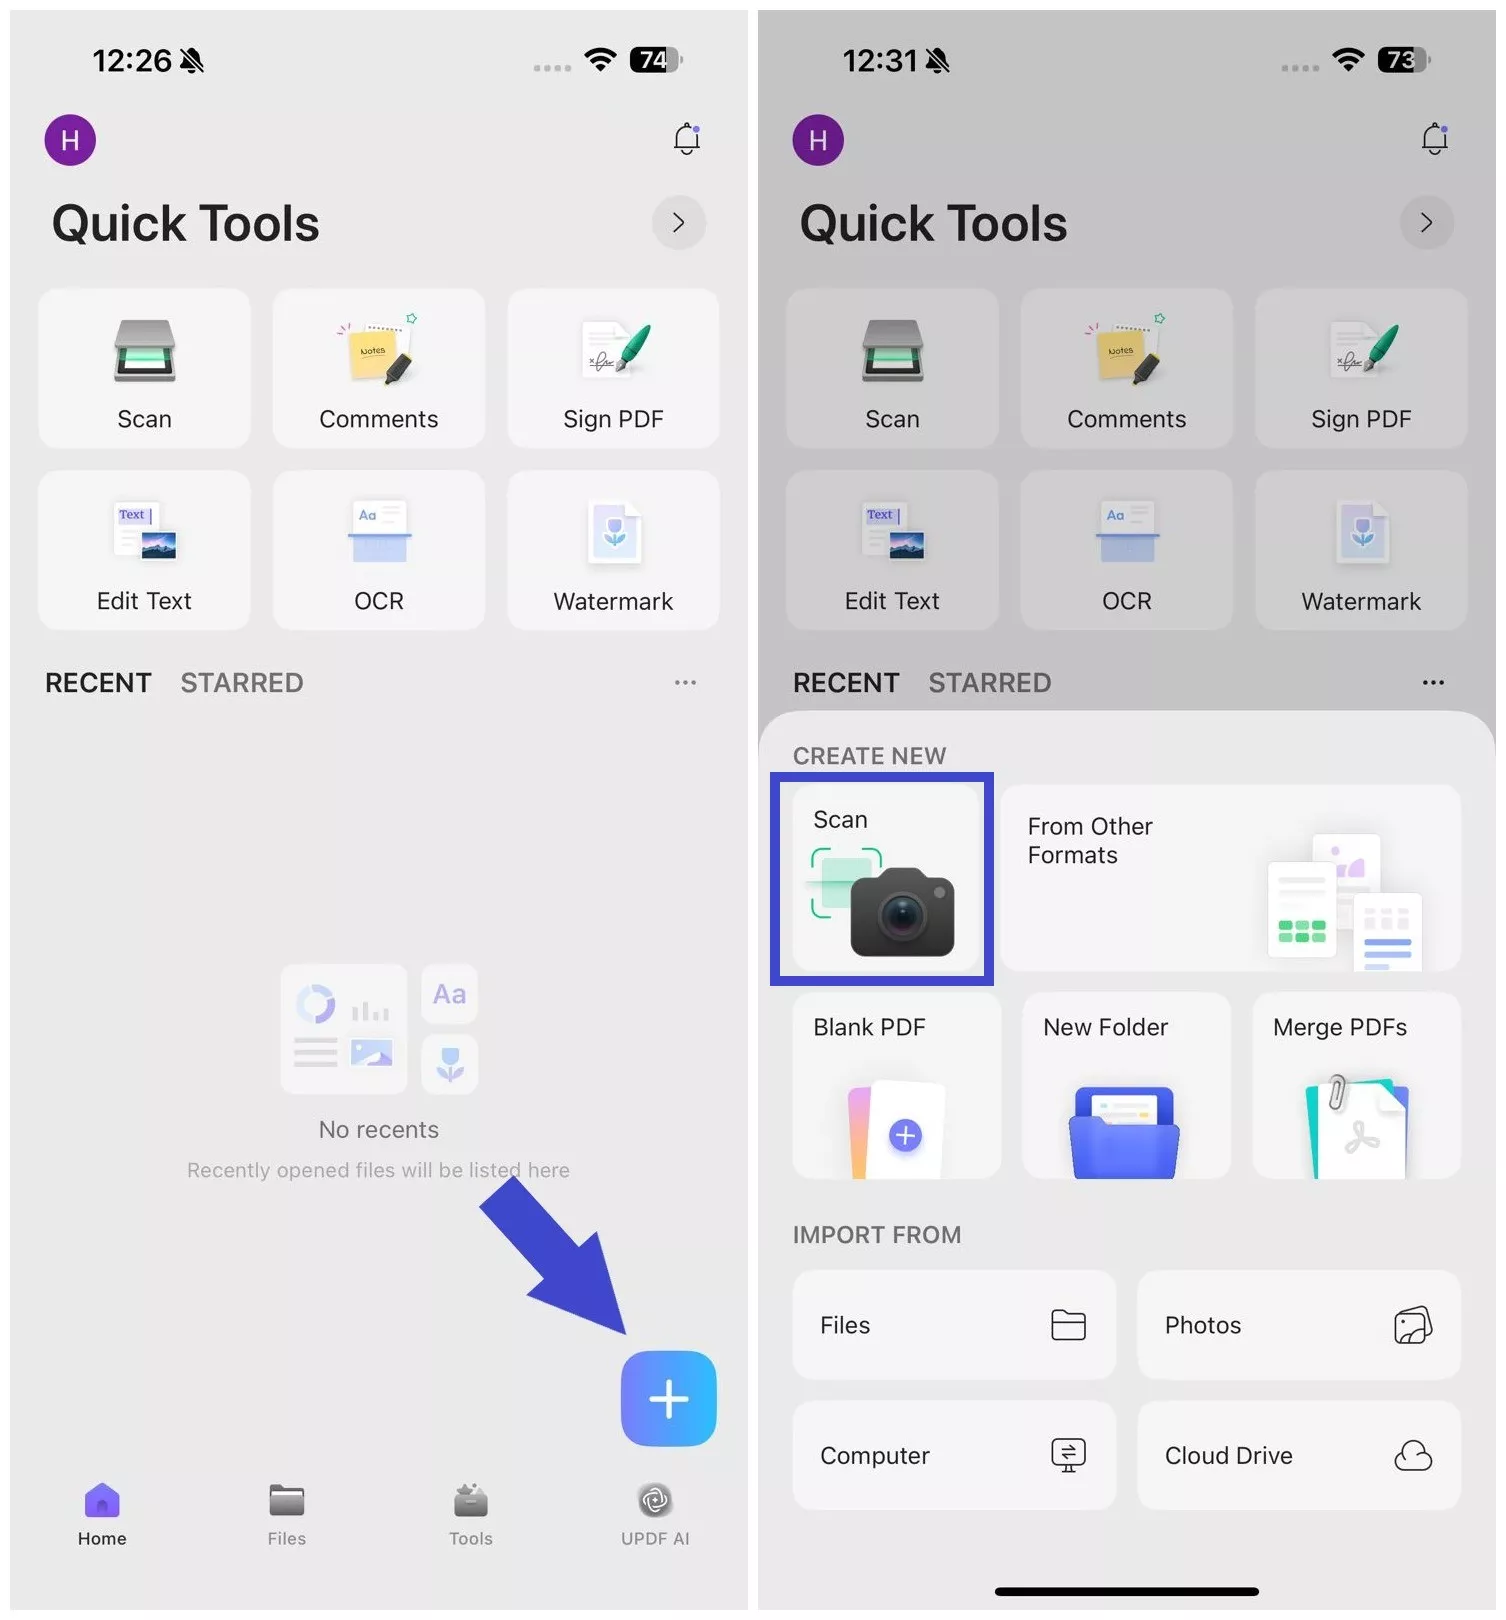
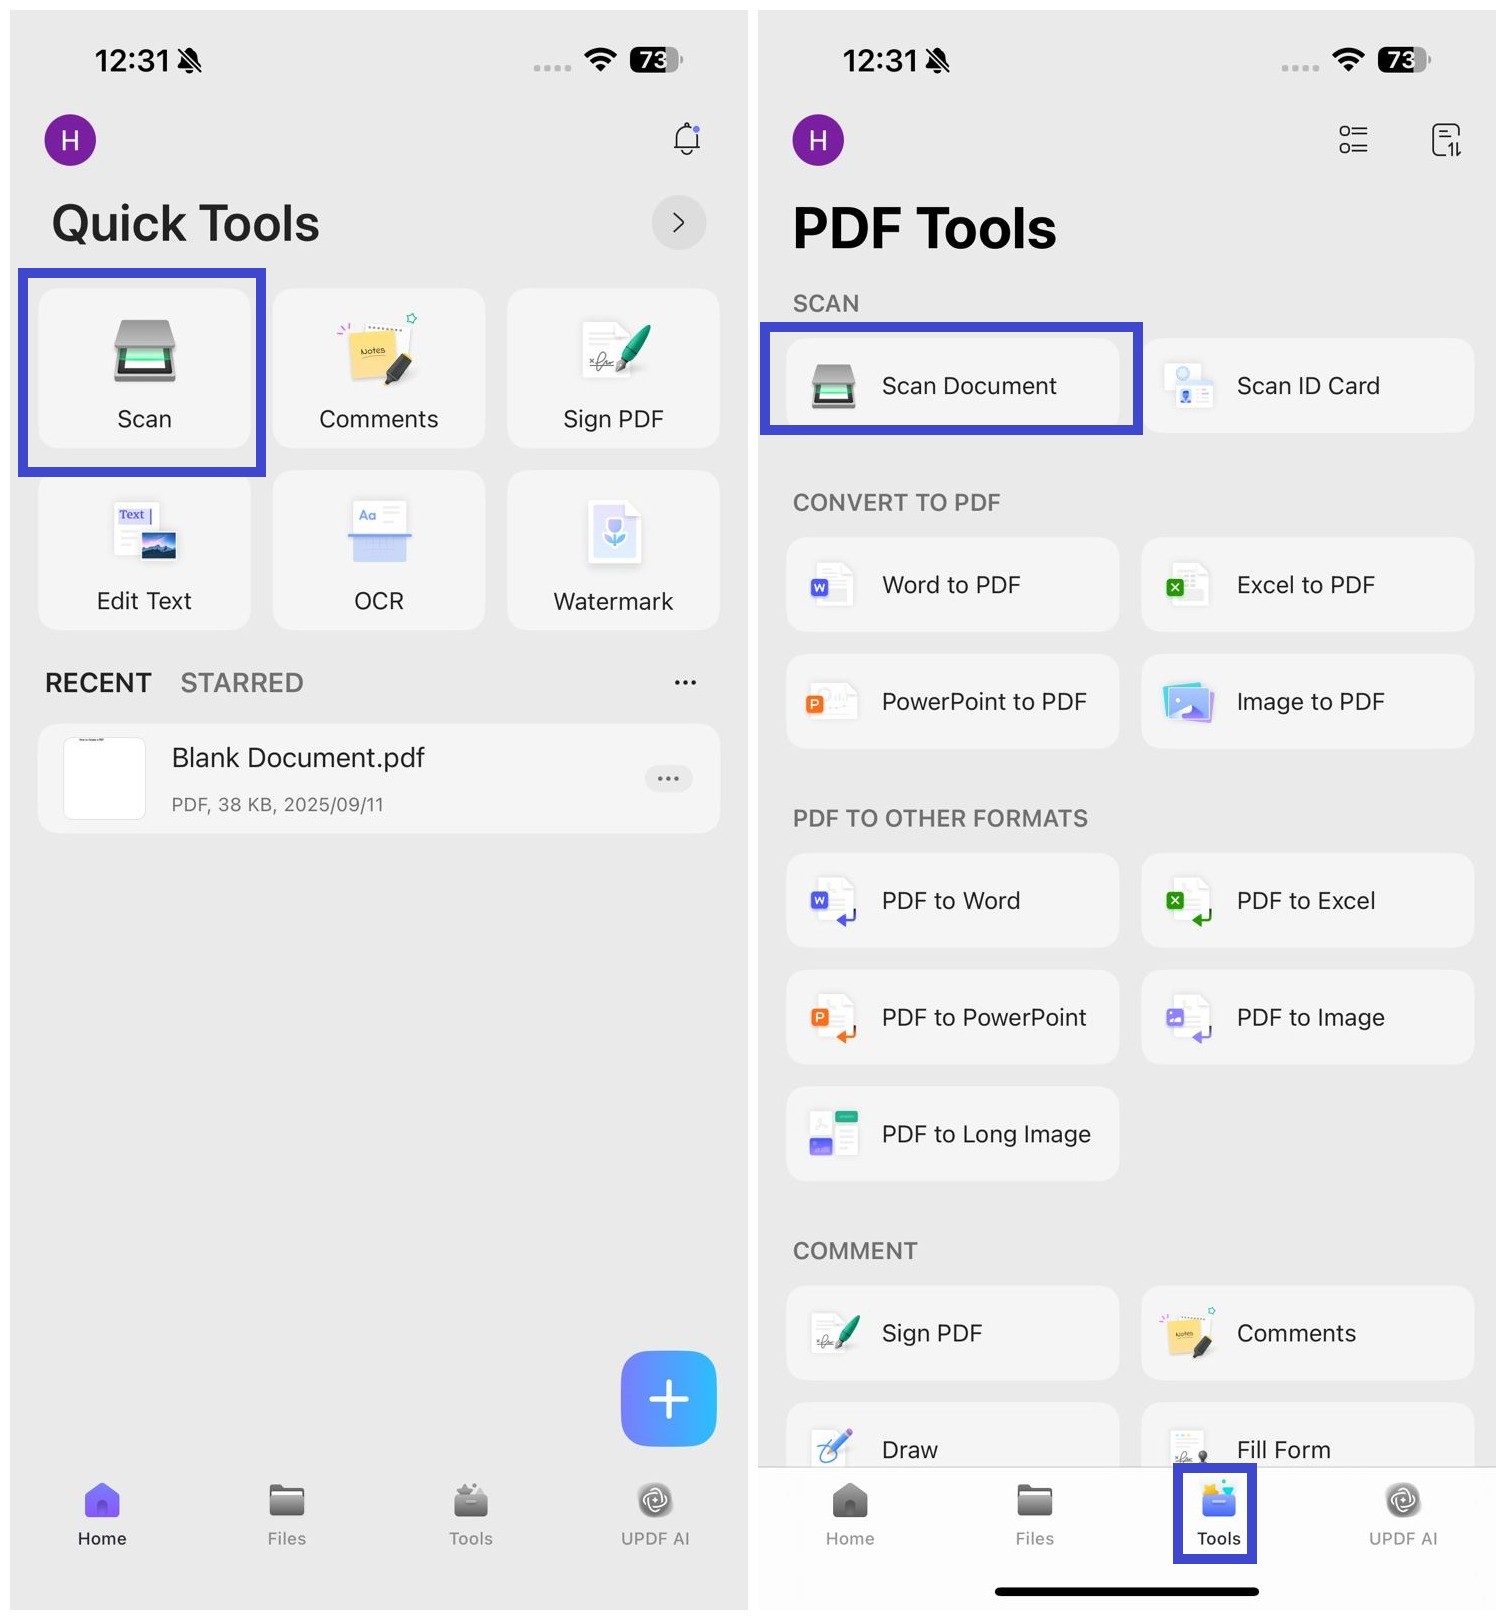
Alternatively, you can also click "Scan Document" from the app's main dashboard or tap "Tools > Scan Document".
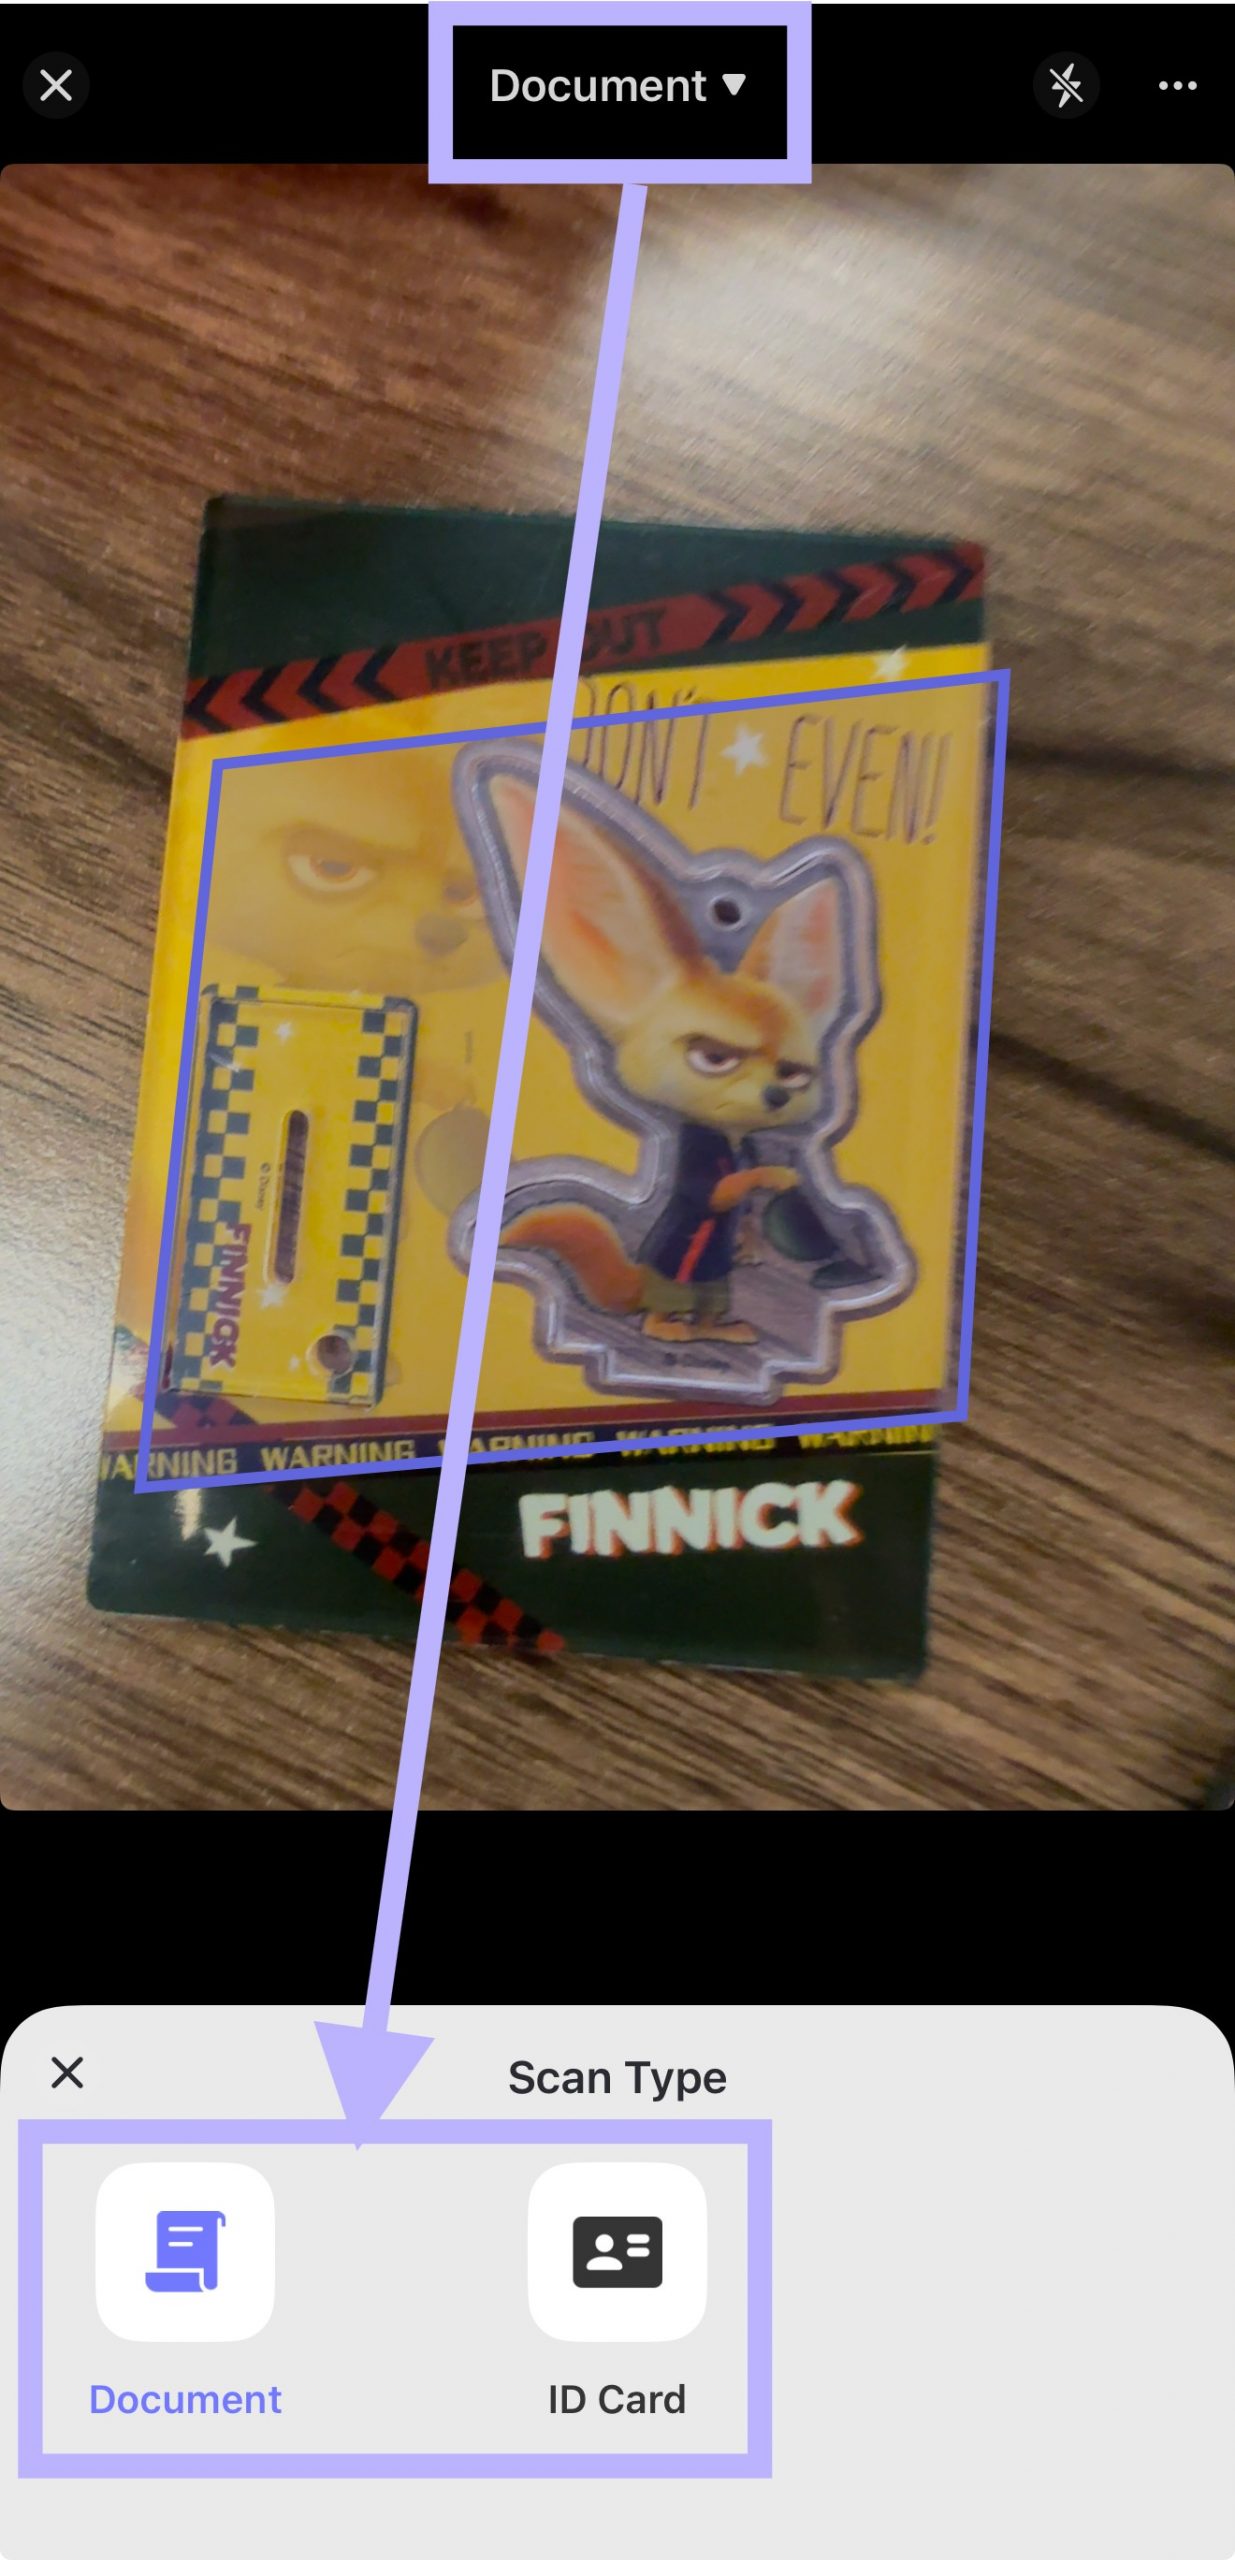
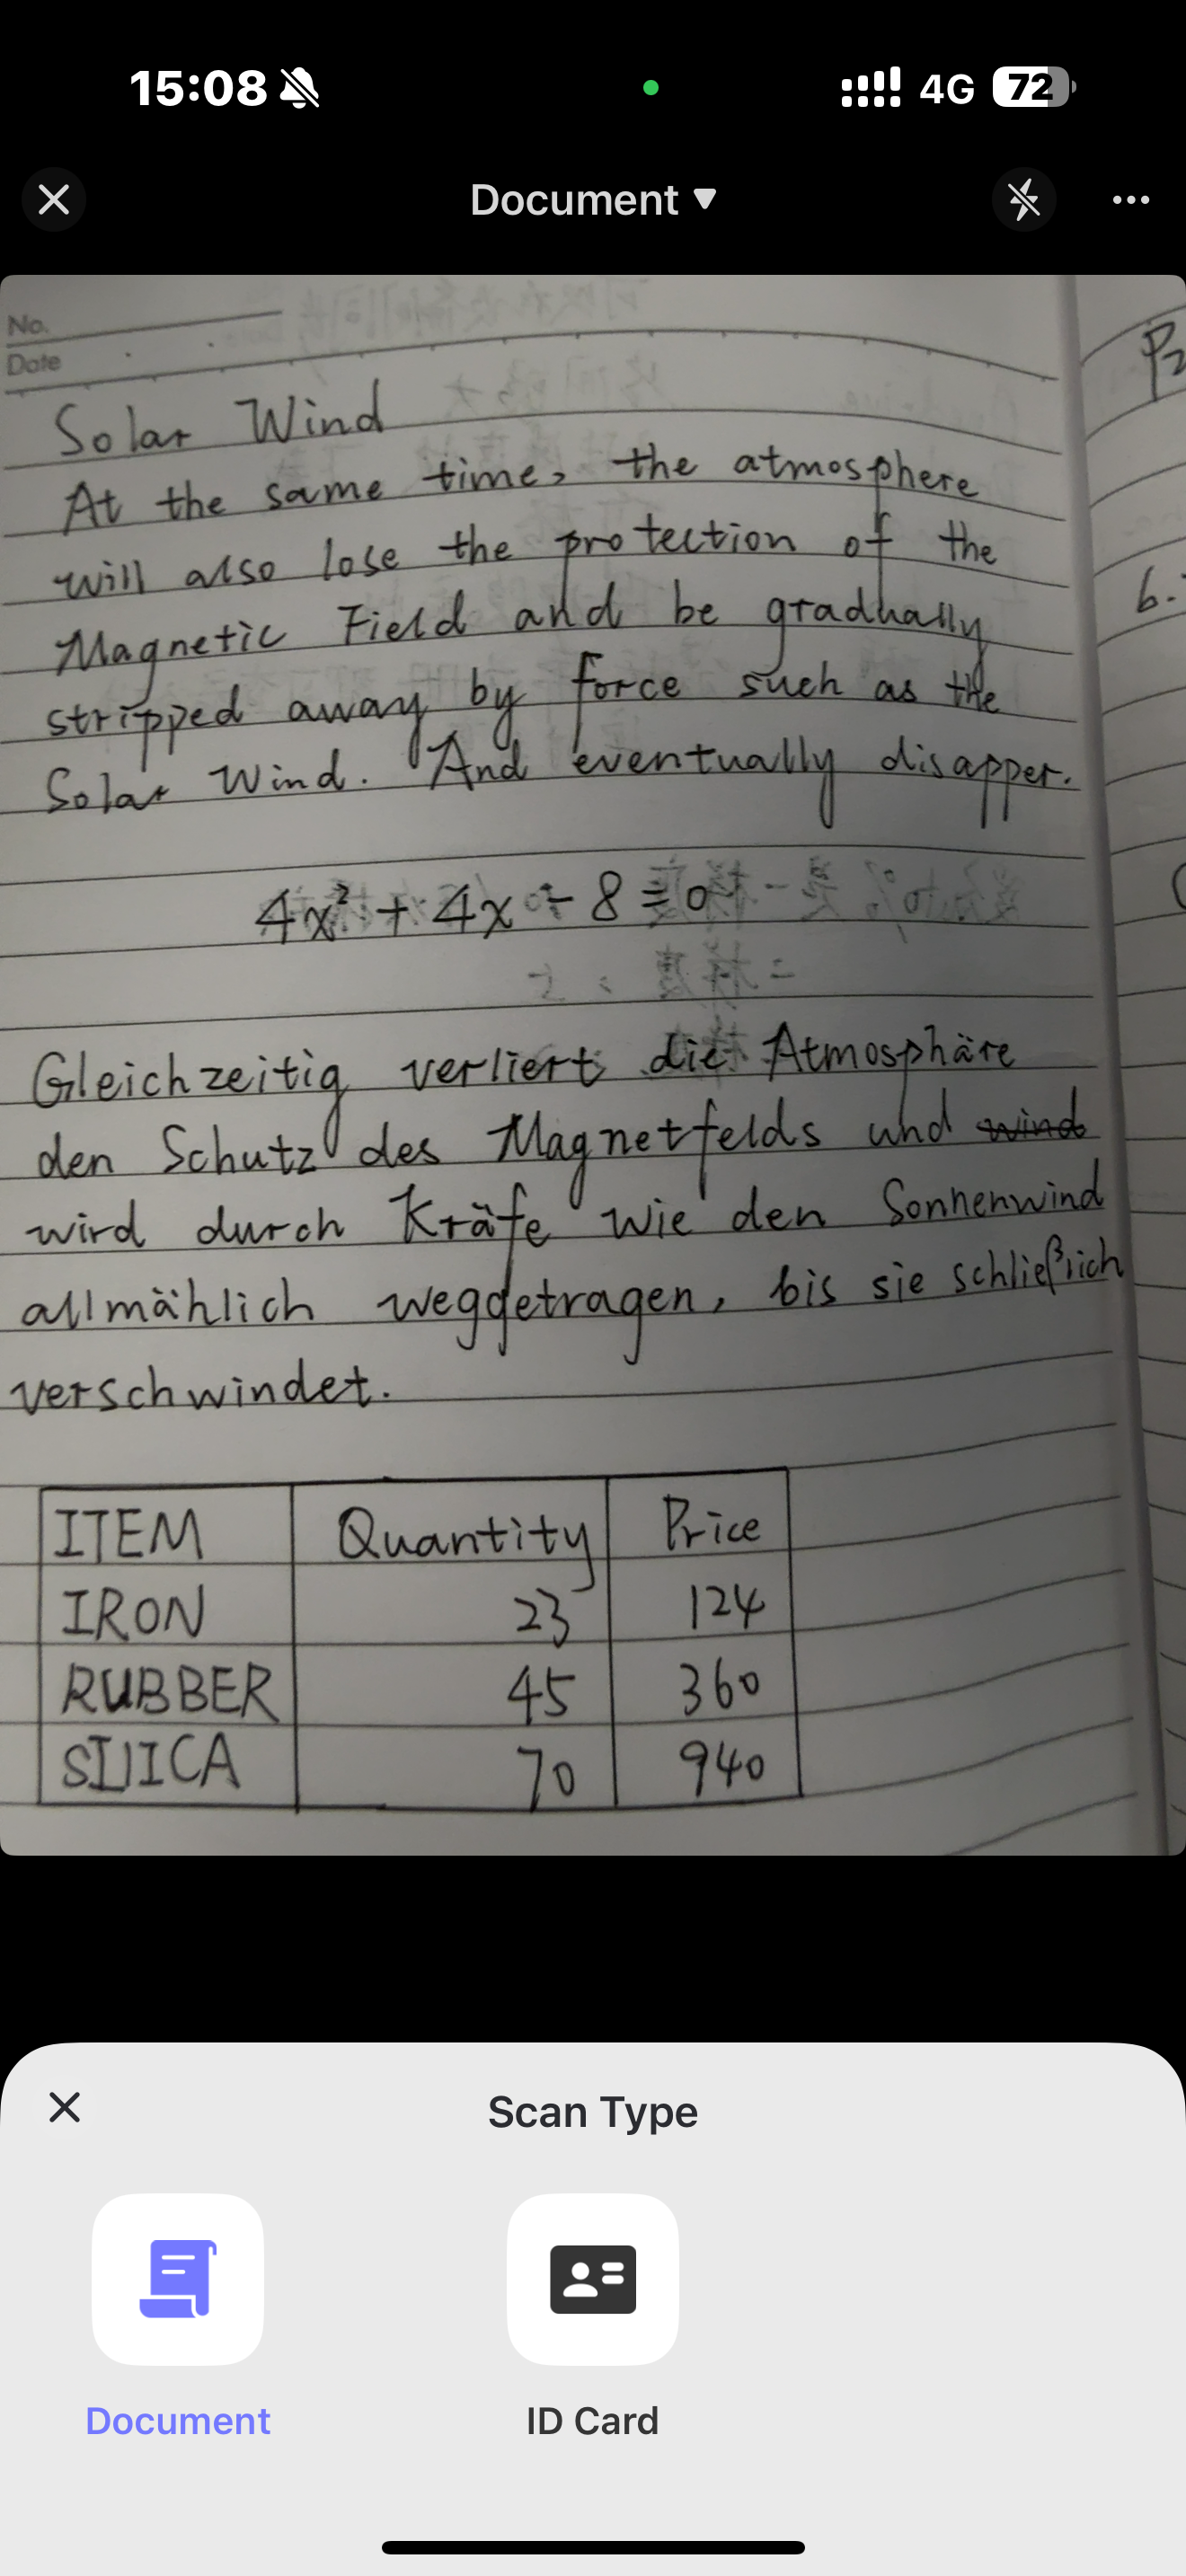
Step 2. Next, take a picture of your paper document. You can choose either an ID Card or a document using the scan type.
1. ID Card Mode
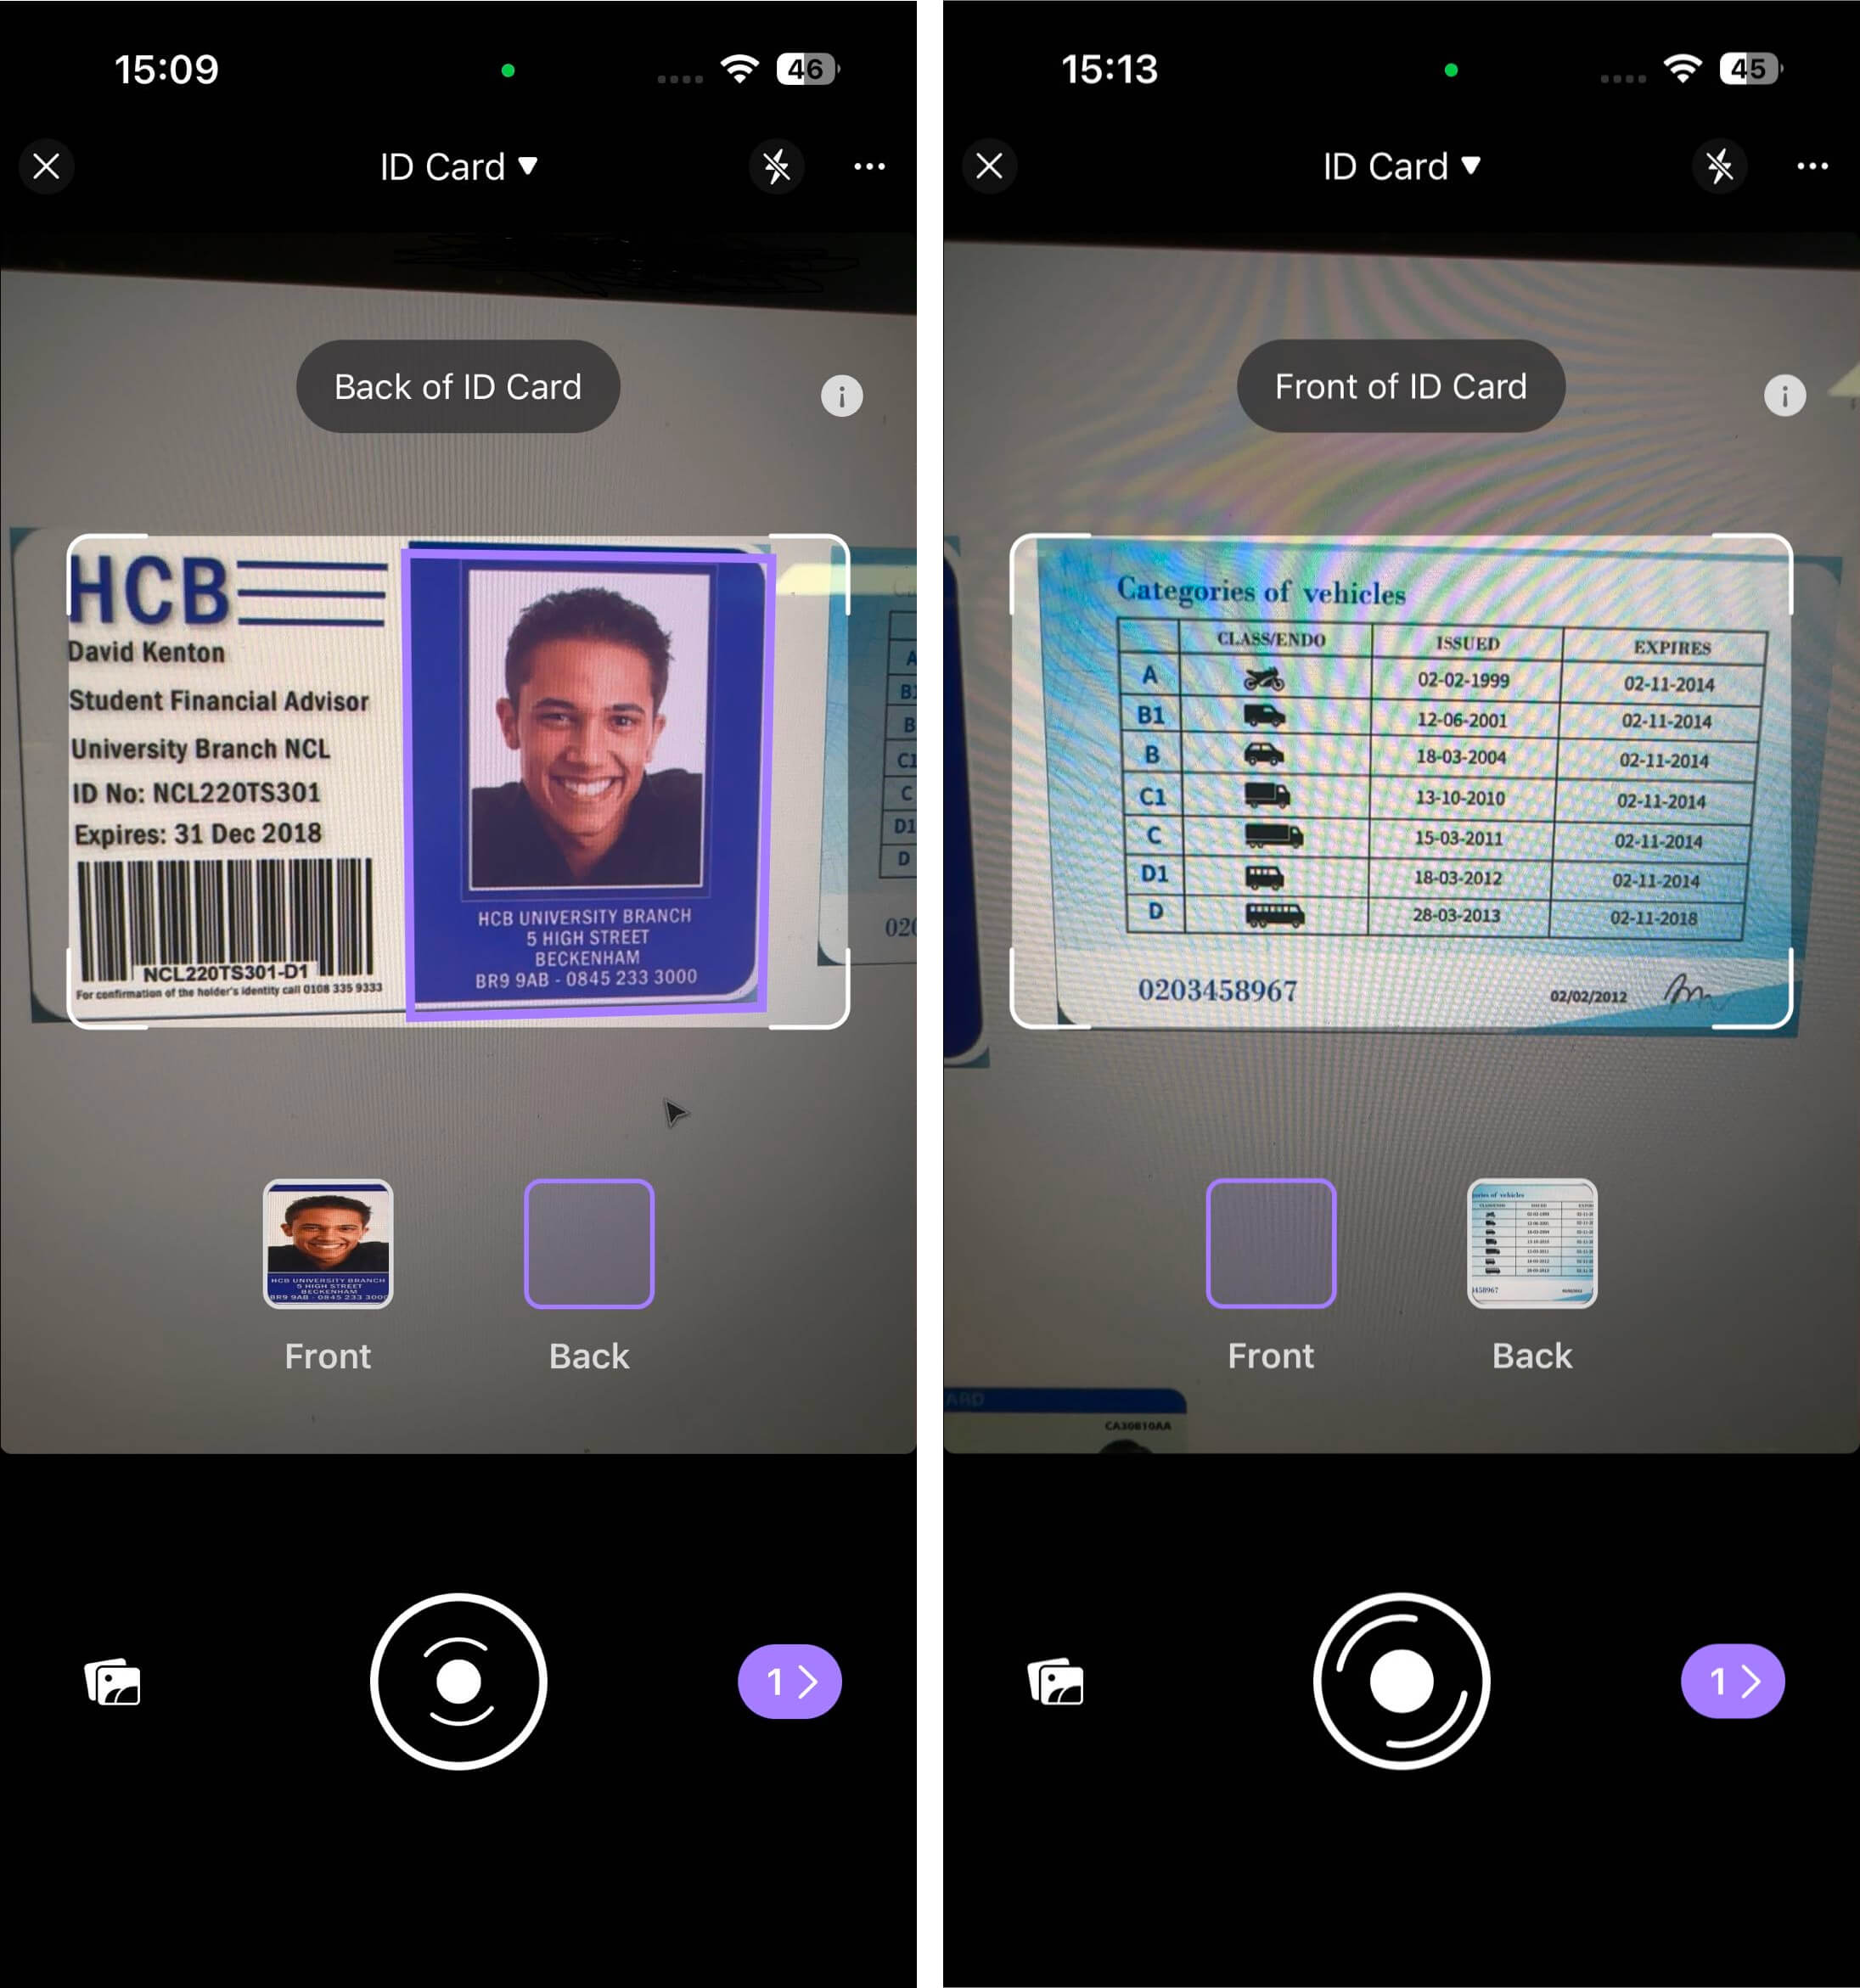
You have to capture two images, one of the front and the second of the back of your card. UPDF will put both sides on one page in a PDF. You can also use this mode to scan bank cards or driver's licenses.
Notice
- The top right corner has three dots that reveal the Auto-capturing option. You can enable or disable it based on your preferences.
- Right beside it is the Flash icon that enables and disables Flash.
- At the bottom left corner, you have a gallery icon that enables uploading already-captured images for scanning instead of capturing new ones.
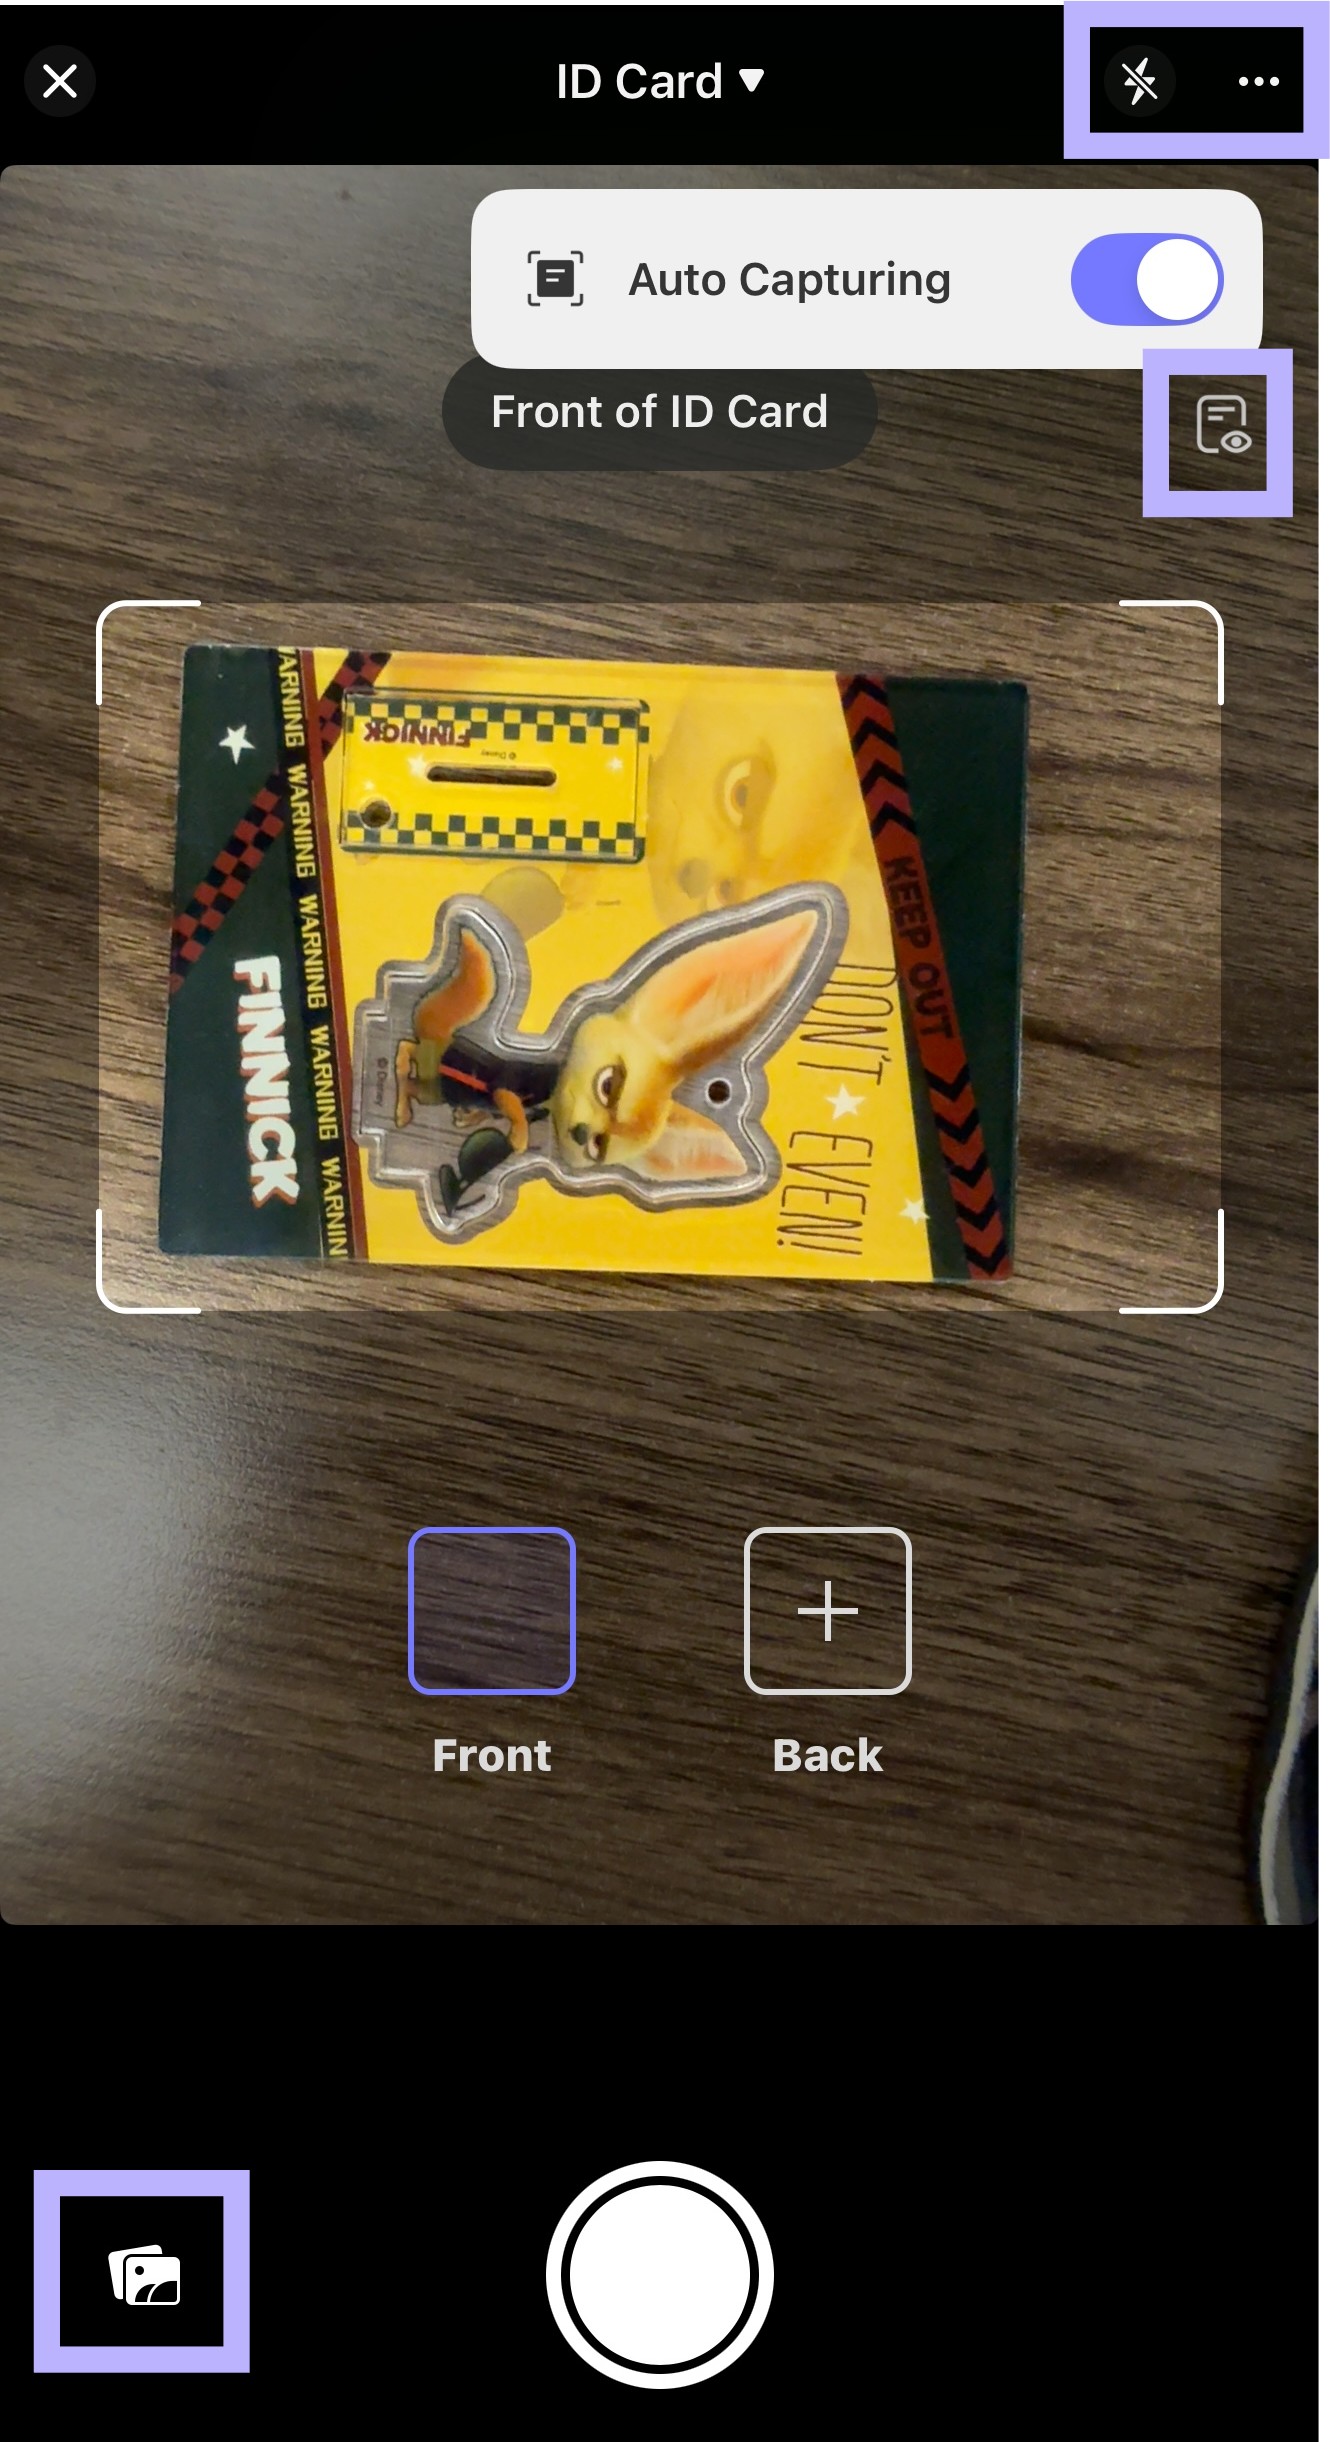
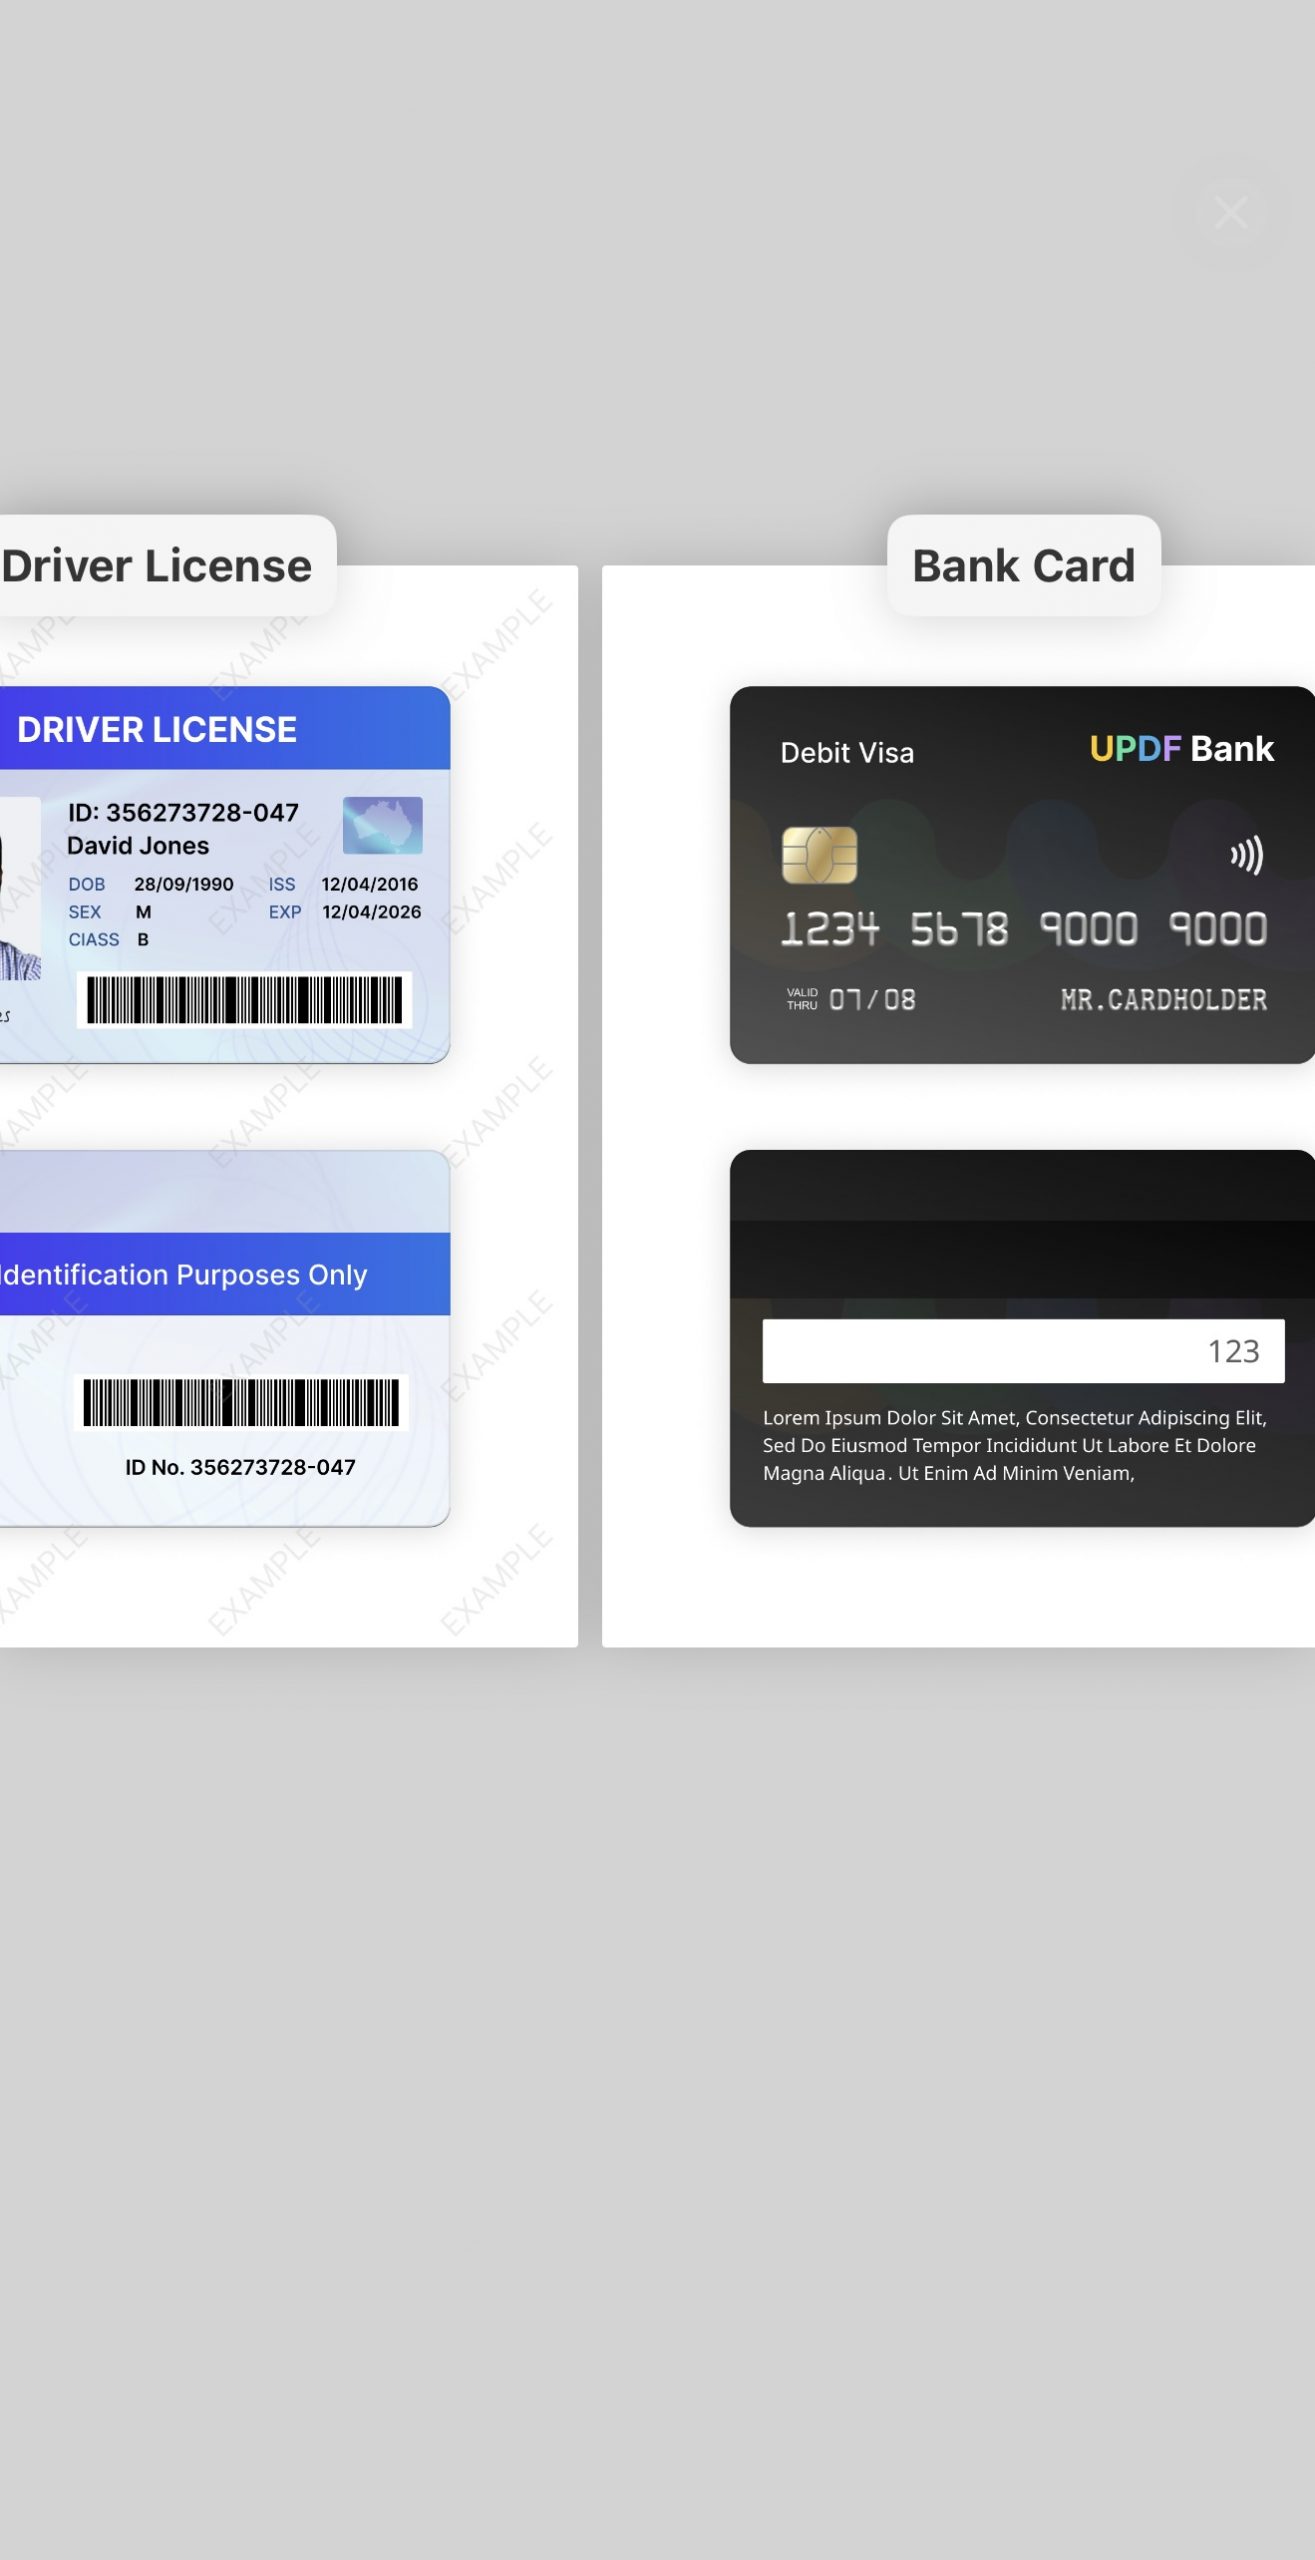
- You also get an info option, which reveals the format of how your cards will appear after the scan: Driver License, Identification Card, and Bank Card.
Follow the steps below to scan both sides of an ID Card/Driver License/Bank Card to one page:
Step 1. Choose the "ID Card" mode in UPDF and let UPDF capture your ID card through the camera. You have to capture the front and back sides of the ID card. Alternatively, you can select the pictures of your card from the gallery without scanning it.
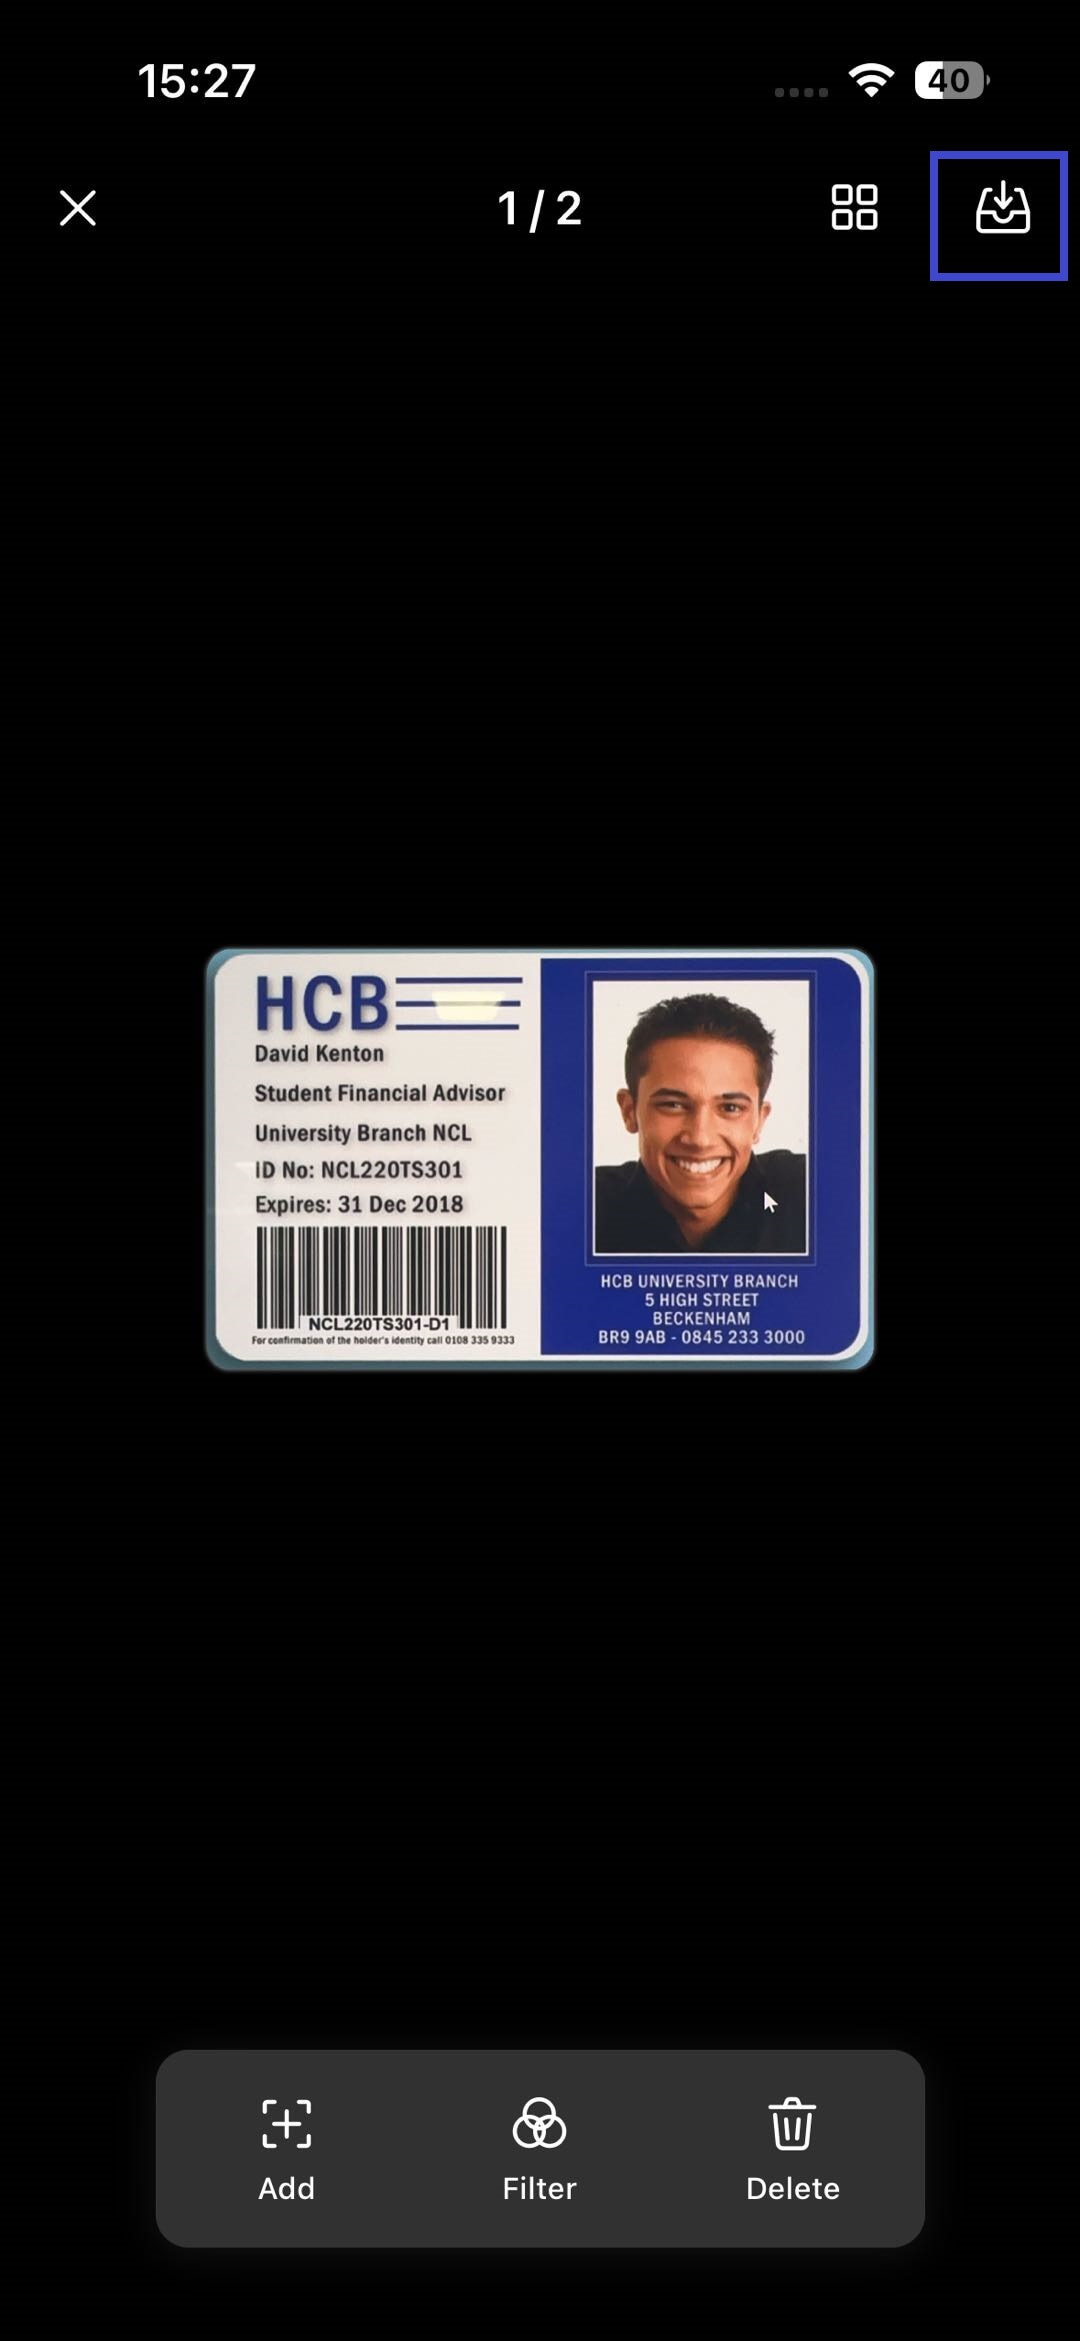
Step 2. Once both sides of your card have been successfully captured, UPDF will display the images. If any images are unsatisfactory, you can delete them and capture them again. If everything looks correct, click the "Download" icon in the top-right corner to save the images.
Step 3. After saving, UPDF will return to the Scanner section interface. Click the three-dot icon next to the images you just captured and select "Convert to PDF". Choose a place to save it.
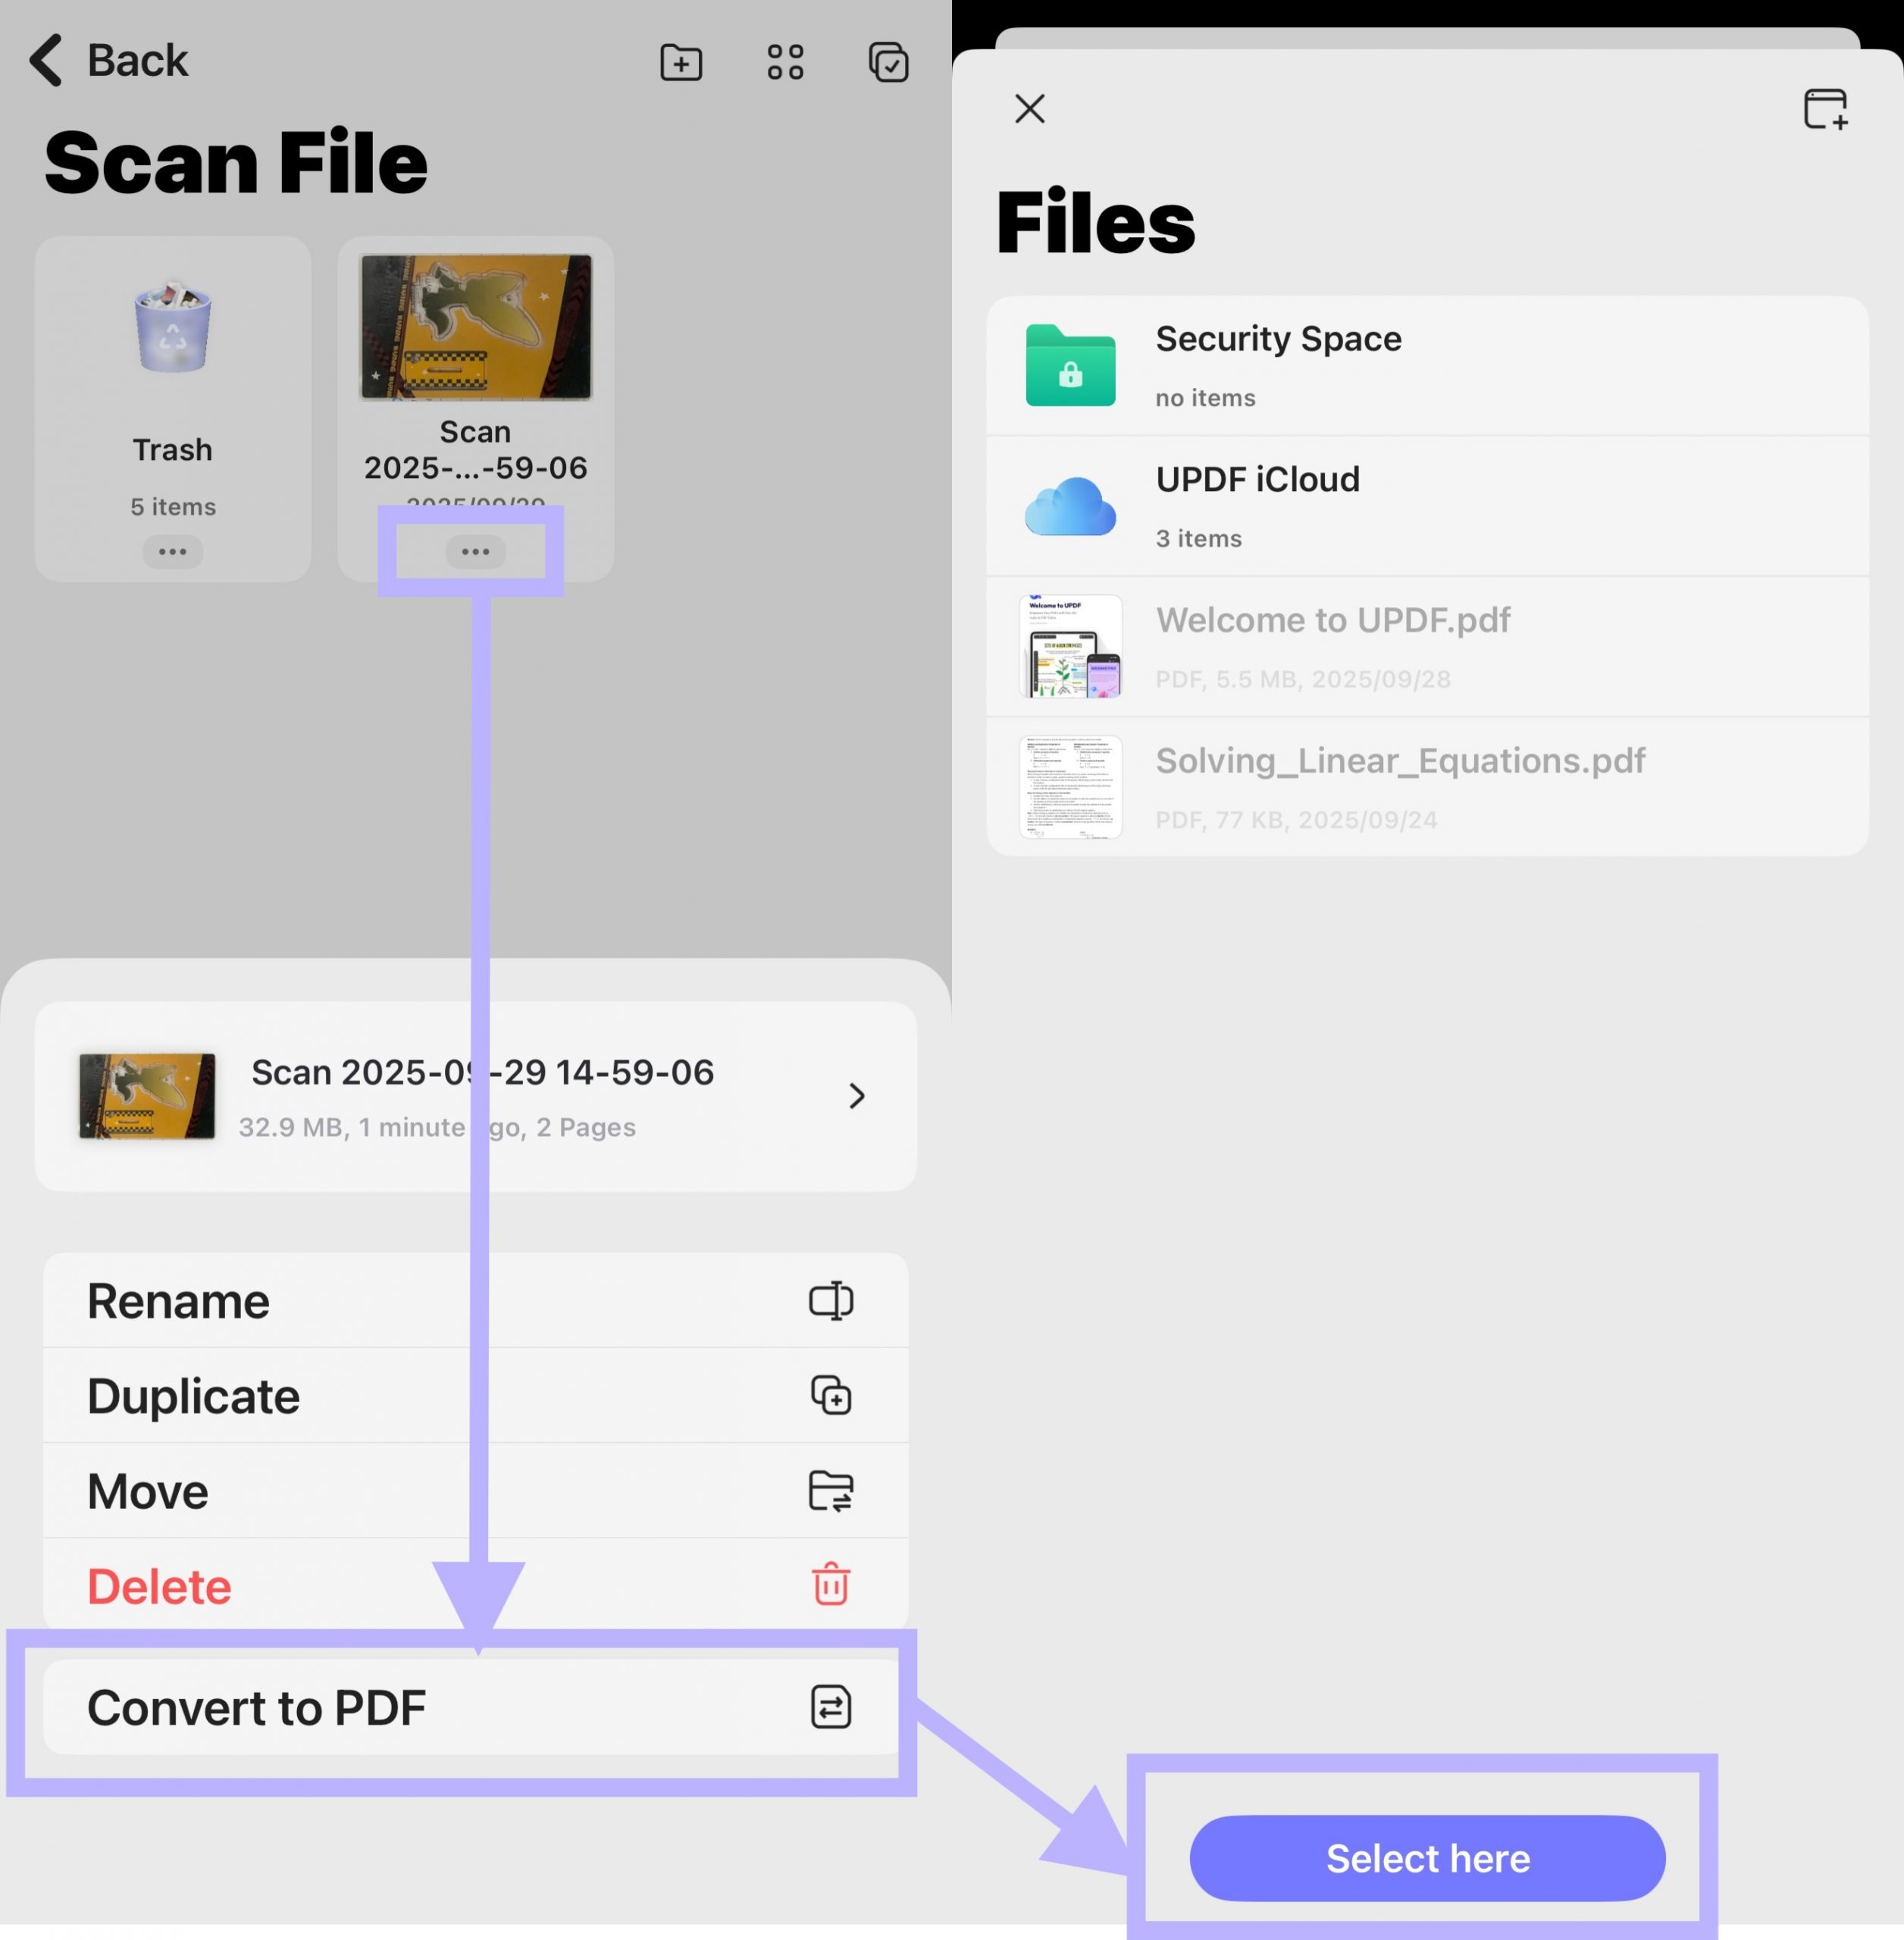
UPDF will then automatically convert the images into a single-page PDF. You can edit and print it with UPDF.

2. Document Mode
This mode allows you to capture paper documents and convert them into PDFs. Similar to the ID Card mode, you have the option to toggle the flash on or off.
Step 1. Click the "+" icon and select "Scan".
Alternatively, you can also click "Scan Document" from the app's main dashboard or tap "Tools > Scan Document".
Method 1. Take Photos
Follow the steps below to capture a paper document and convert it to a PDF:
Step 1. Click on the drop-down icon at the top and select the Document mode.
Step 2. Use your camera to capture the images of the paper document. You can click on the three dots in the top right corner to enable or disable the auto-capturing and auto-cropping features. Enabling both features is recommended to avoid manually adjusting the captured images.
- Auto-capturing: Automatically captures the document once it fits the scanning window.
- Auto-cropping: Crops out the excess background, focusing only on the document.

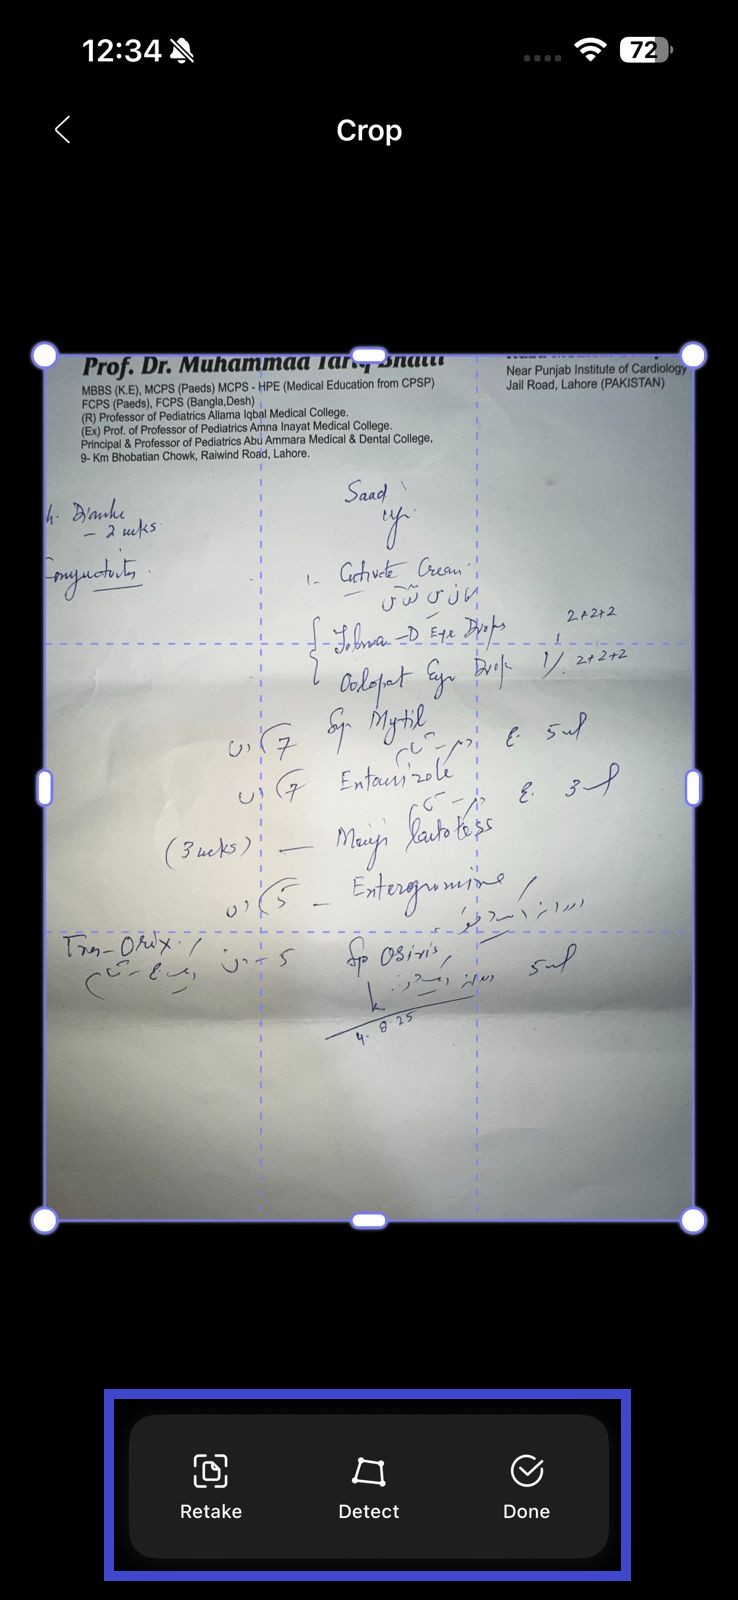
Step 3. Once captured, you can:
- Retake the image.
- Use Detect to let UPDF auto-detect the paper.
- Click Done to confirm the image.
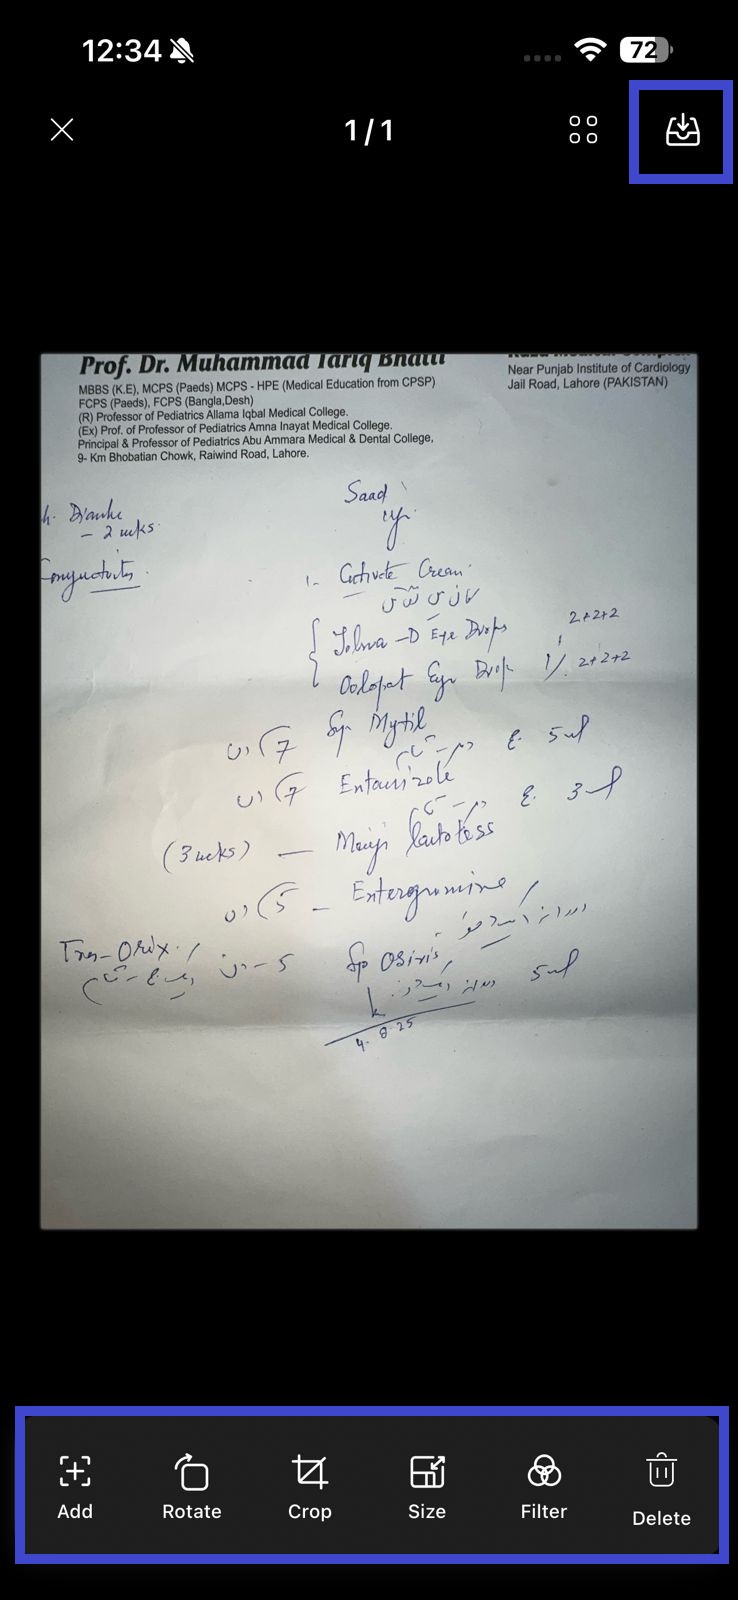
Step 4. Capture more images if the paper document has multiple pages. Once done, click the ">" icon.

Now, you get more editing options to customize the image before generating a PDF. You can:
- Add more pages
- Rotate
- Crop
- Resize
- Add filter
- Delete
Step 5. Once the document is ready, click the "Save" icon in the top right corner to save the scan file.
Step 6. After saving, UPDF will return to the Scanner section interface. Click the three-dot icon next to the scanned document you just captured and select "Convert to PDF". Choose a place to save it.
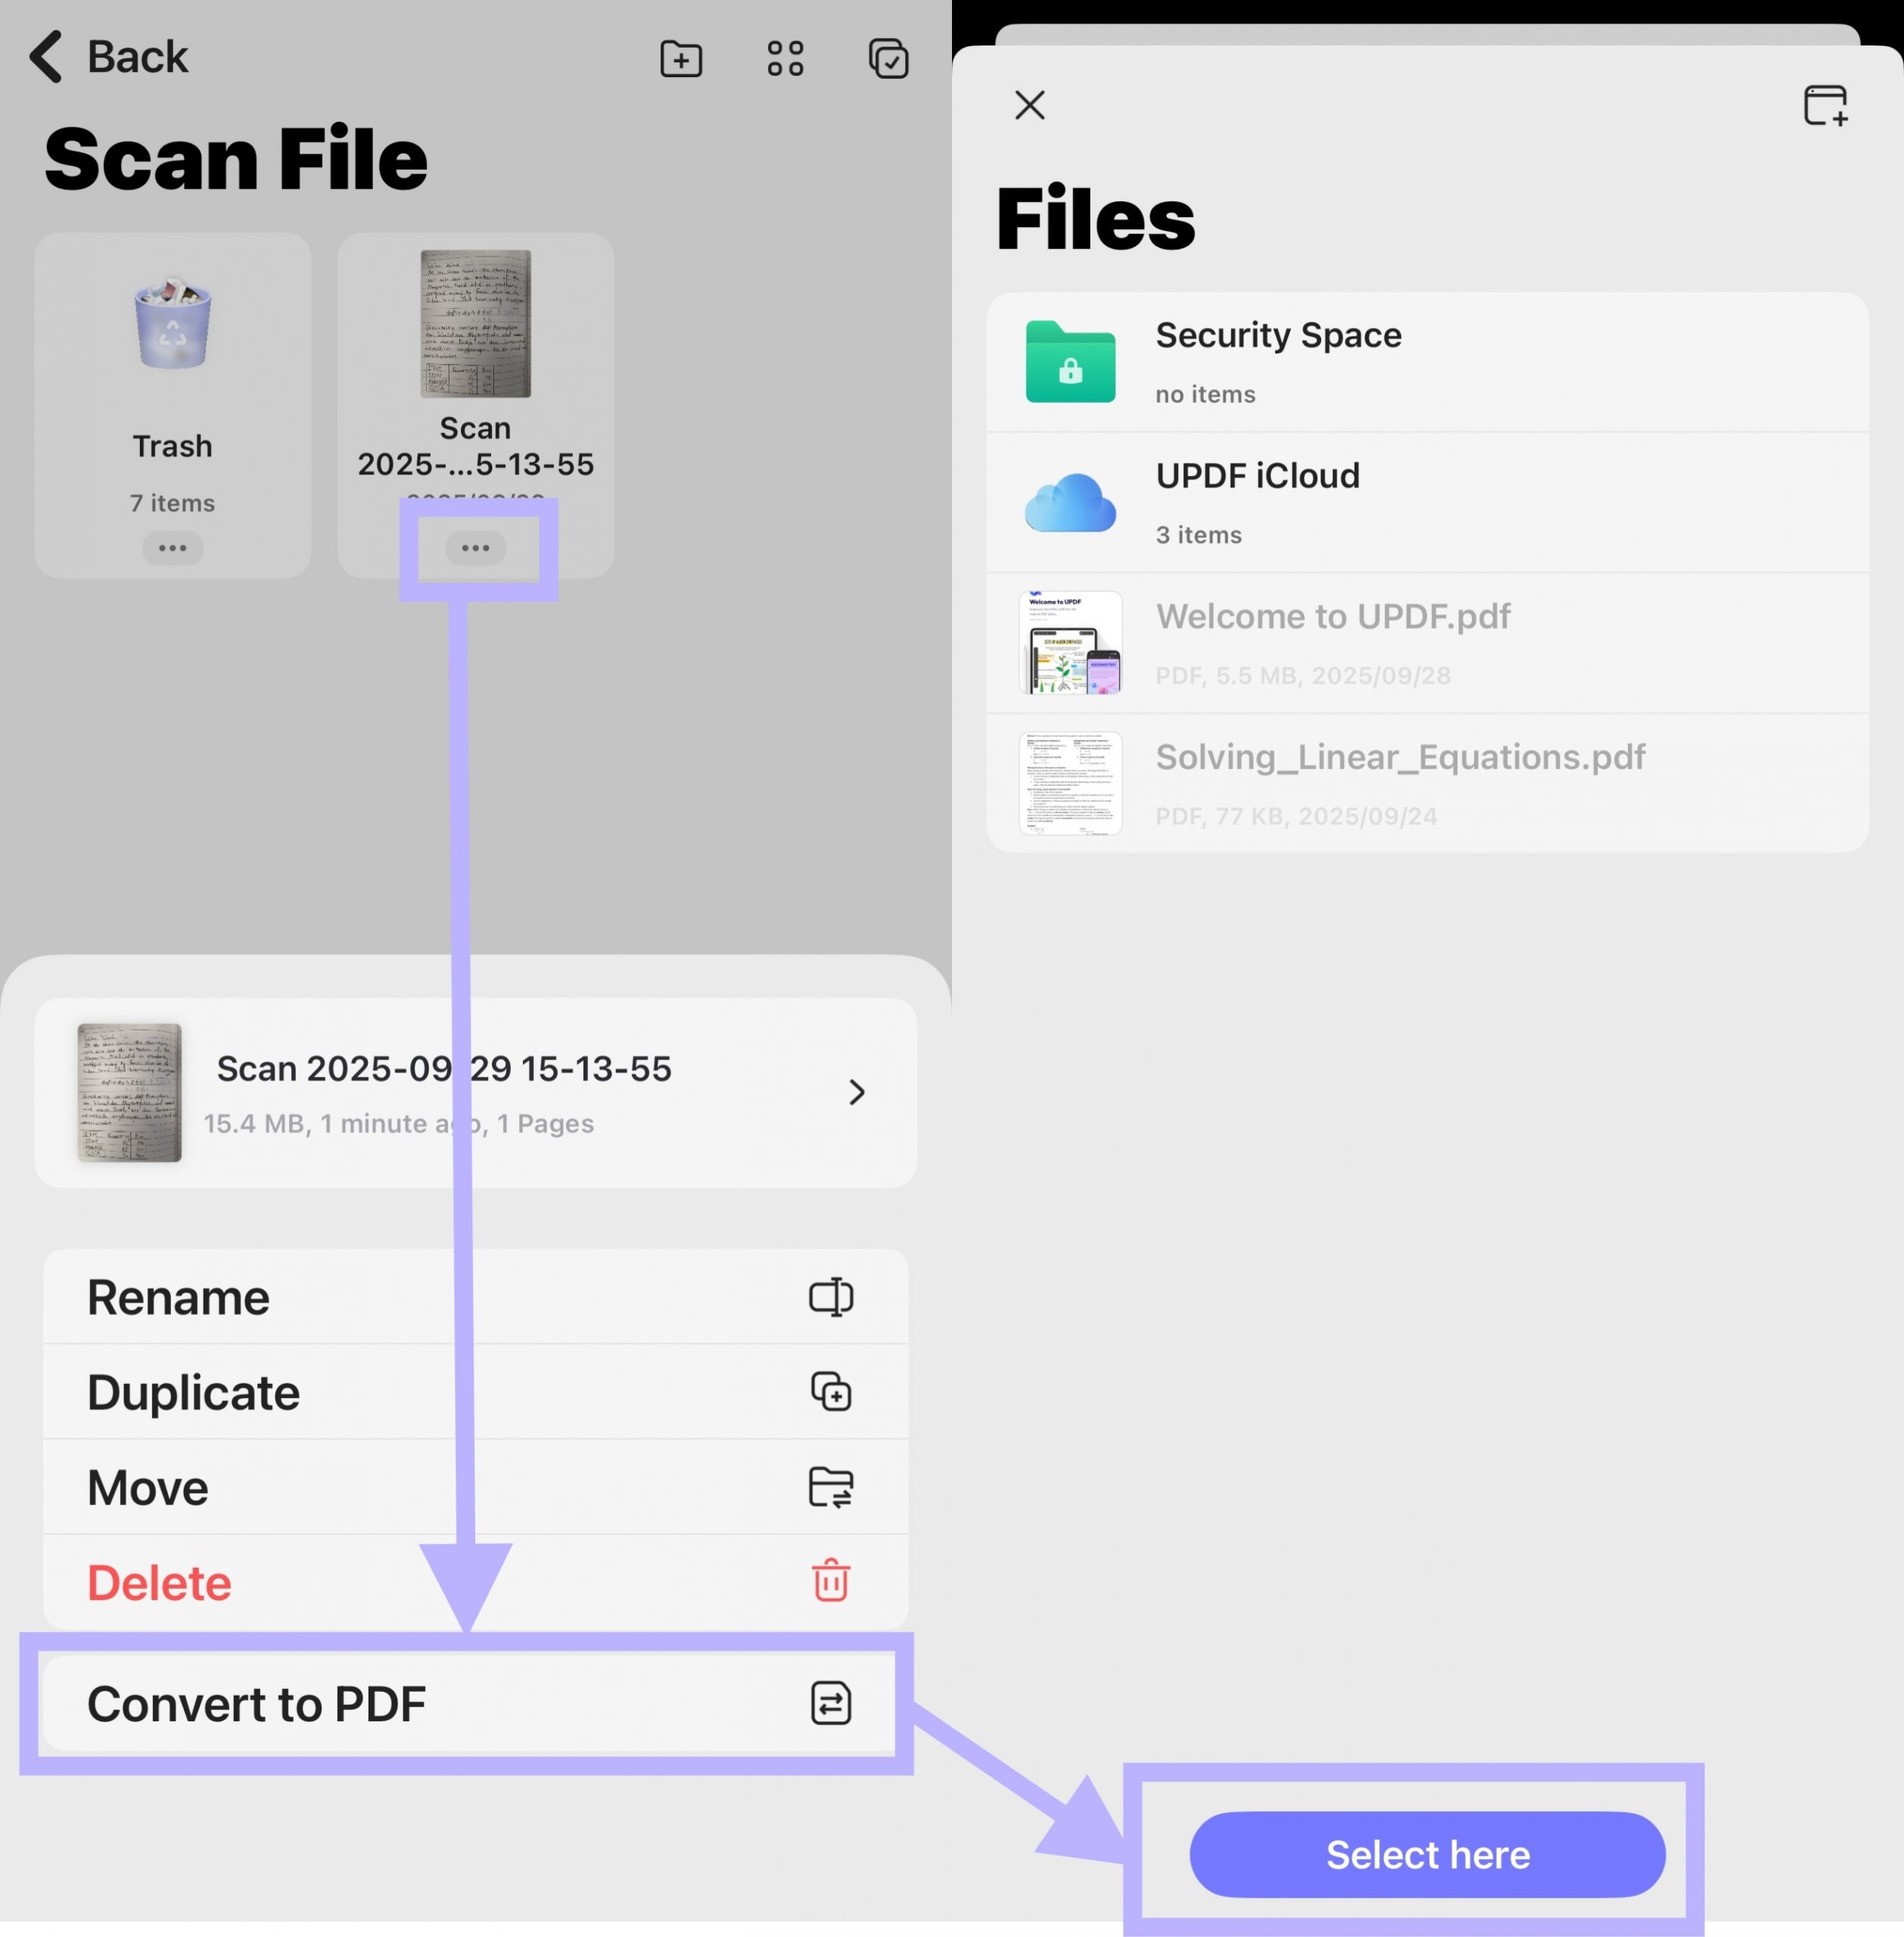
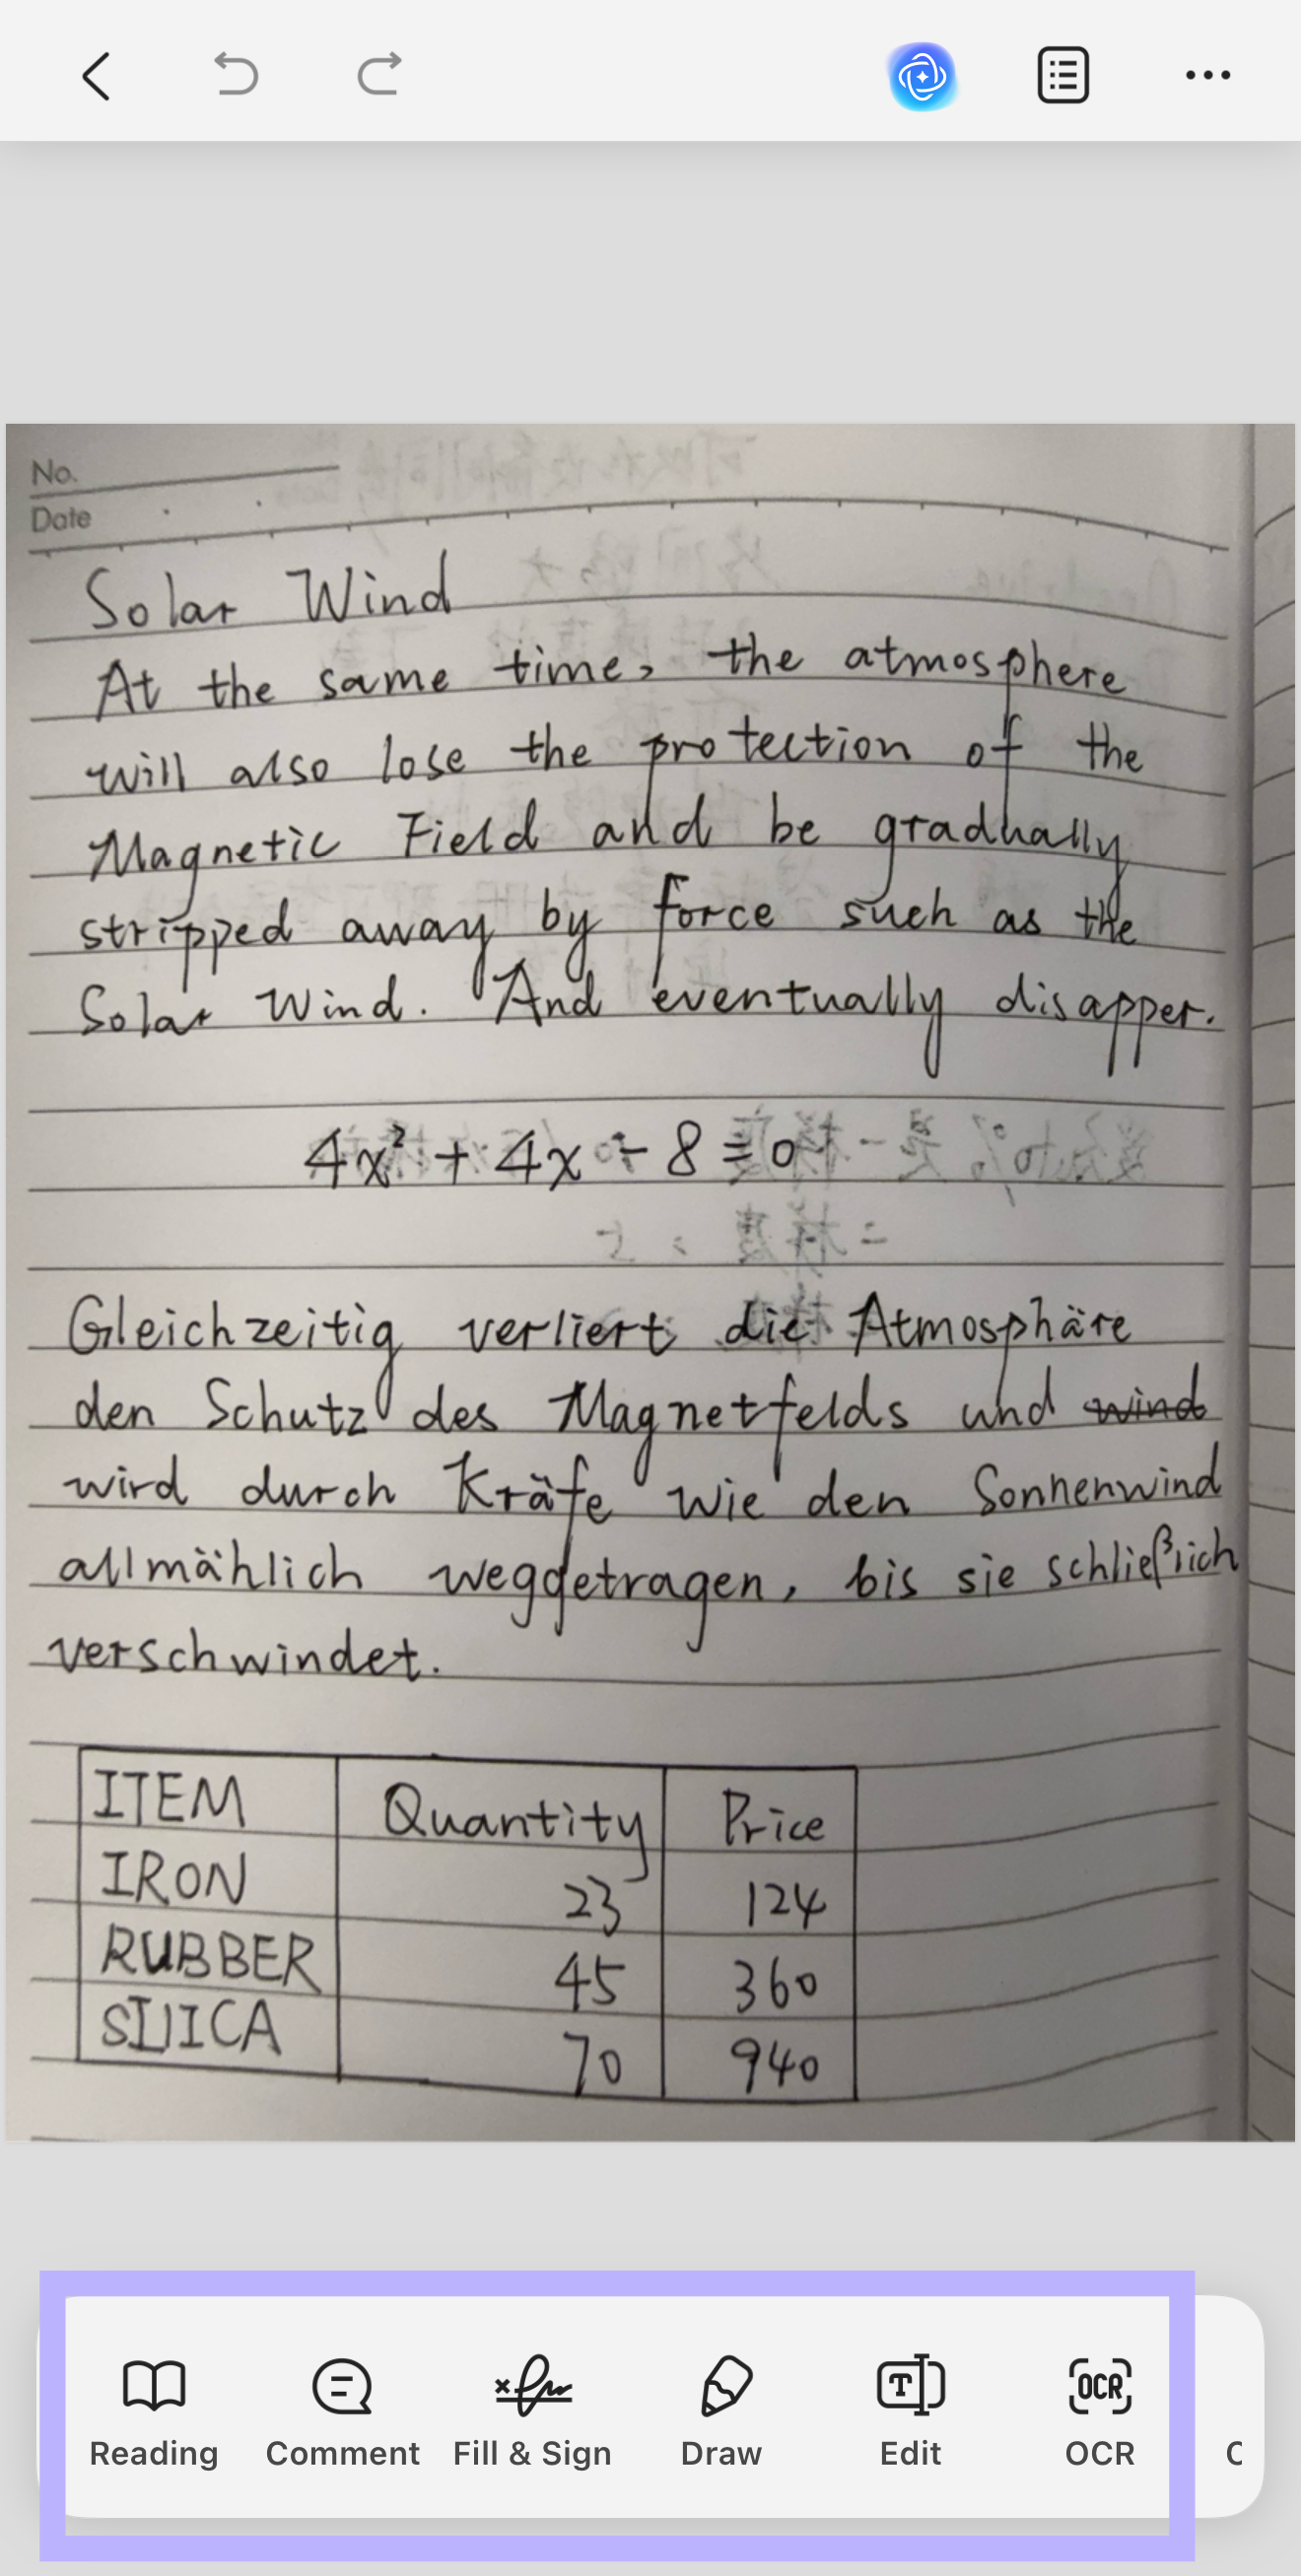
UPDF will then automatically convert the scanned document into PDF. You can edit and print it with UPDF.
Method 2. Select from the Gallery App
Step 1. Tap the Gallery app icon in the bottom-left corner under the Document mode.

Step 2. Select one or more images from your Photos or Albums section and tap Add on the top-right to import to UPDF.
Step 3. To save the image, tap the icon showing the number of active scans.
Step 4. Similar to step 4 introduced in method 1, you can now rotate or crop the image, add a filter, delete the scan, or add more images and scans to the queue.
Step 5. Finally, click the Download icon on the top right corner to add the files to UPDF. Follow the step 6 introduced in method 1, UPDF will automatically open the created PDF for you.