 UPDF for Windows
 UPDF for Mac
 UPDF for iPhone/iPad
 UPDF for Android
 UPDF AI Online
 UPDF Sign
 Edit PDF
 Annotate PDF
 Create PDF
 PDF Form
 Edit links
 Convert PDF
 OCR
OCR PDF to Word
 PDF to Image
 PDF to Excel
 Organize PDF
 Merge PDF
 Split PDF
 Crop PDF
 Rotate PDF
 Protect PDF
 Sign PDF
 Redact PDF
 Sanitize PDF
 Remove Security
 Read PDF
 UPDF Cloud
 Compress PDF
 Print PDF
 Batch Process
 About UPDF AI
 UPDF AI Solutions
 AI User Guide
 FAQ about UPDF AI
 Summarize PDF
 Translate PDF
 Chat with PDF
 Chat with AI
 Chat with image
 PDF to Mind Map
 Explain PDF
 PDF AI Tools
 Image AI Tools
 AI Chat Tools
 AI Writing Tools
 AI Study Tools
 AI Working Tools
 Other AI Tools
 PDF to Word
 PDF to Excel
 PDF to PowerPoint
 User Guide
 UPDF Tricks
 FAQs
FAQs UPDF Reviews
 Download Center
 Blog
Blog Newsroom
 Tech Spec
 Updates
 UPDF vs. Adobe Acrobat
 UPDF vs. Foxit
 UPDF vs. PDF Expert
Bleed is one of the most important print markings you can add to your documents. If you add bleed to PDF, you can be sure that no content is wasted after the document is printed and cut to the desired size. It works whether you are working on a document that will be printed or you are creating some graphics in PDF format.
Finding the right tool to add bleed to your PDF documents can be difficult. So, we gathered the 4 most effective tools, including both online and offline options.
Now, you can pick the one you want and use our detailed guide for an effortless usage experience.
And we also will introduce one PDF editor, UPDF which is helpful for those who need to edit PDF files frequently. You can click the below button to download UPDF and give it a try.
Windows • macOS • iOS • Android 100% secure
Part 1. How to Add Bleed to PDF in Acrobat?
Adobe Acrobat is the first method you can use to add bleed to your PDF documents. Its printer marks feature makes adding bleed straightforward. It offers style customizations and allows you to select page ranges or individual pages to add bleed.
Below are the steps to add bleed to PDF in Acrobat.
Step 1:
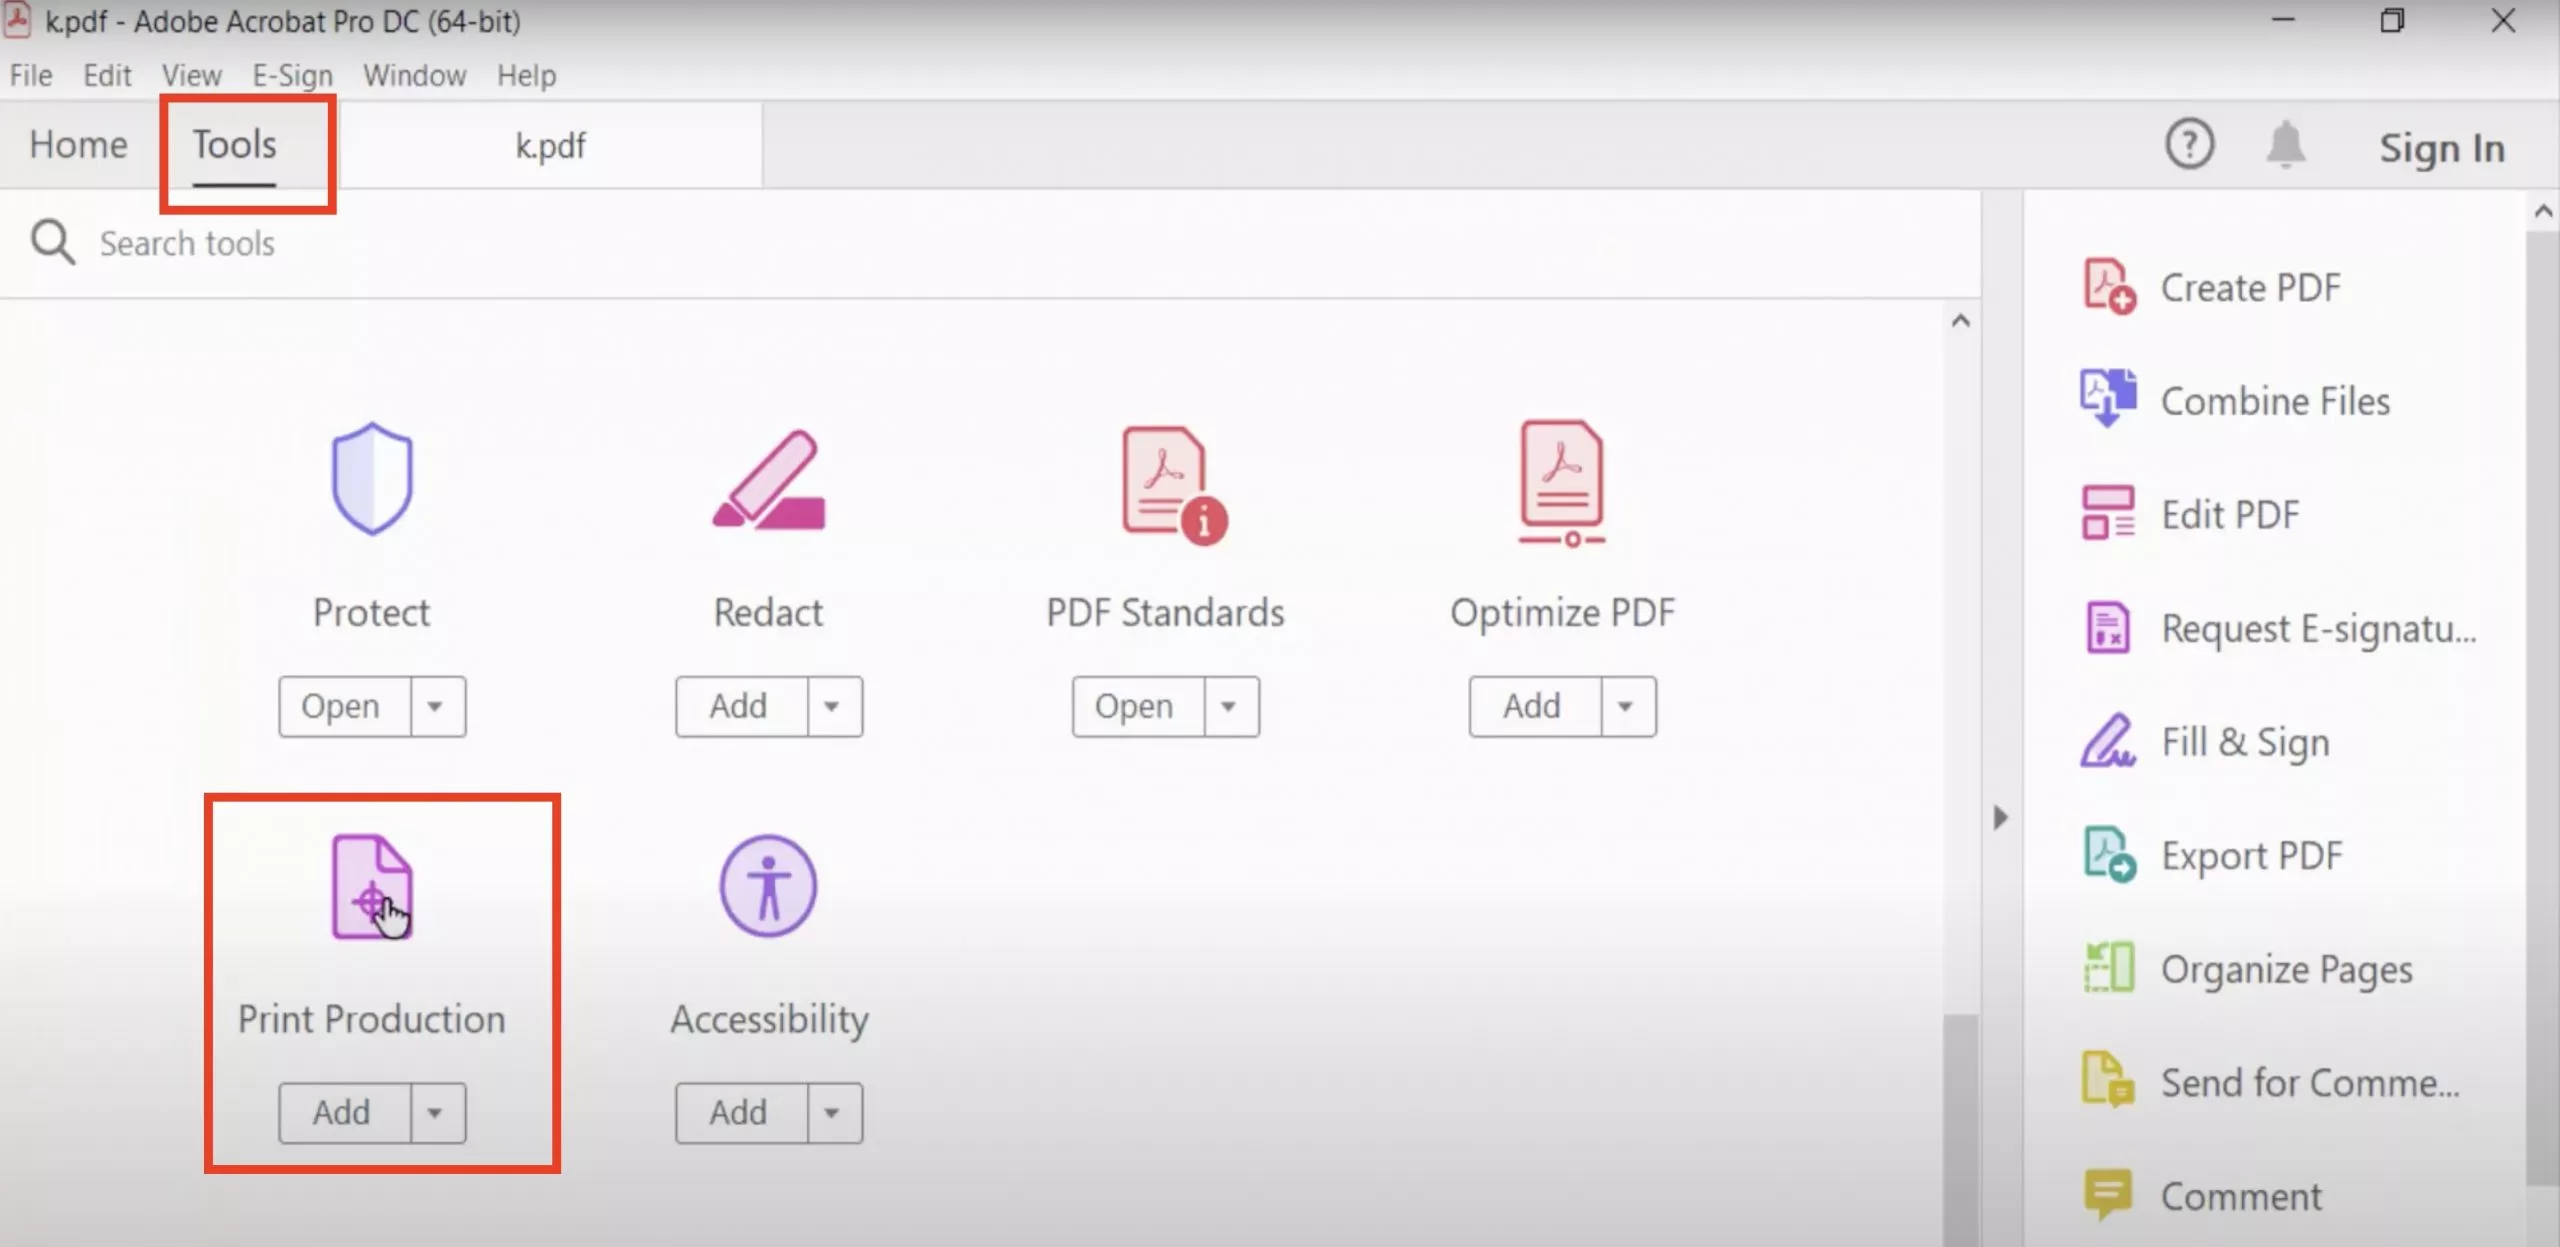
Open the Adobe Acrobat application on your computer with its desktop icon. Click “File” and choose “Open" to open the PDF to which you want to add bleed marks. When the PDF opens, click "Tools" and select "Print Production." This tool will show you features like print markings.
Step 2:
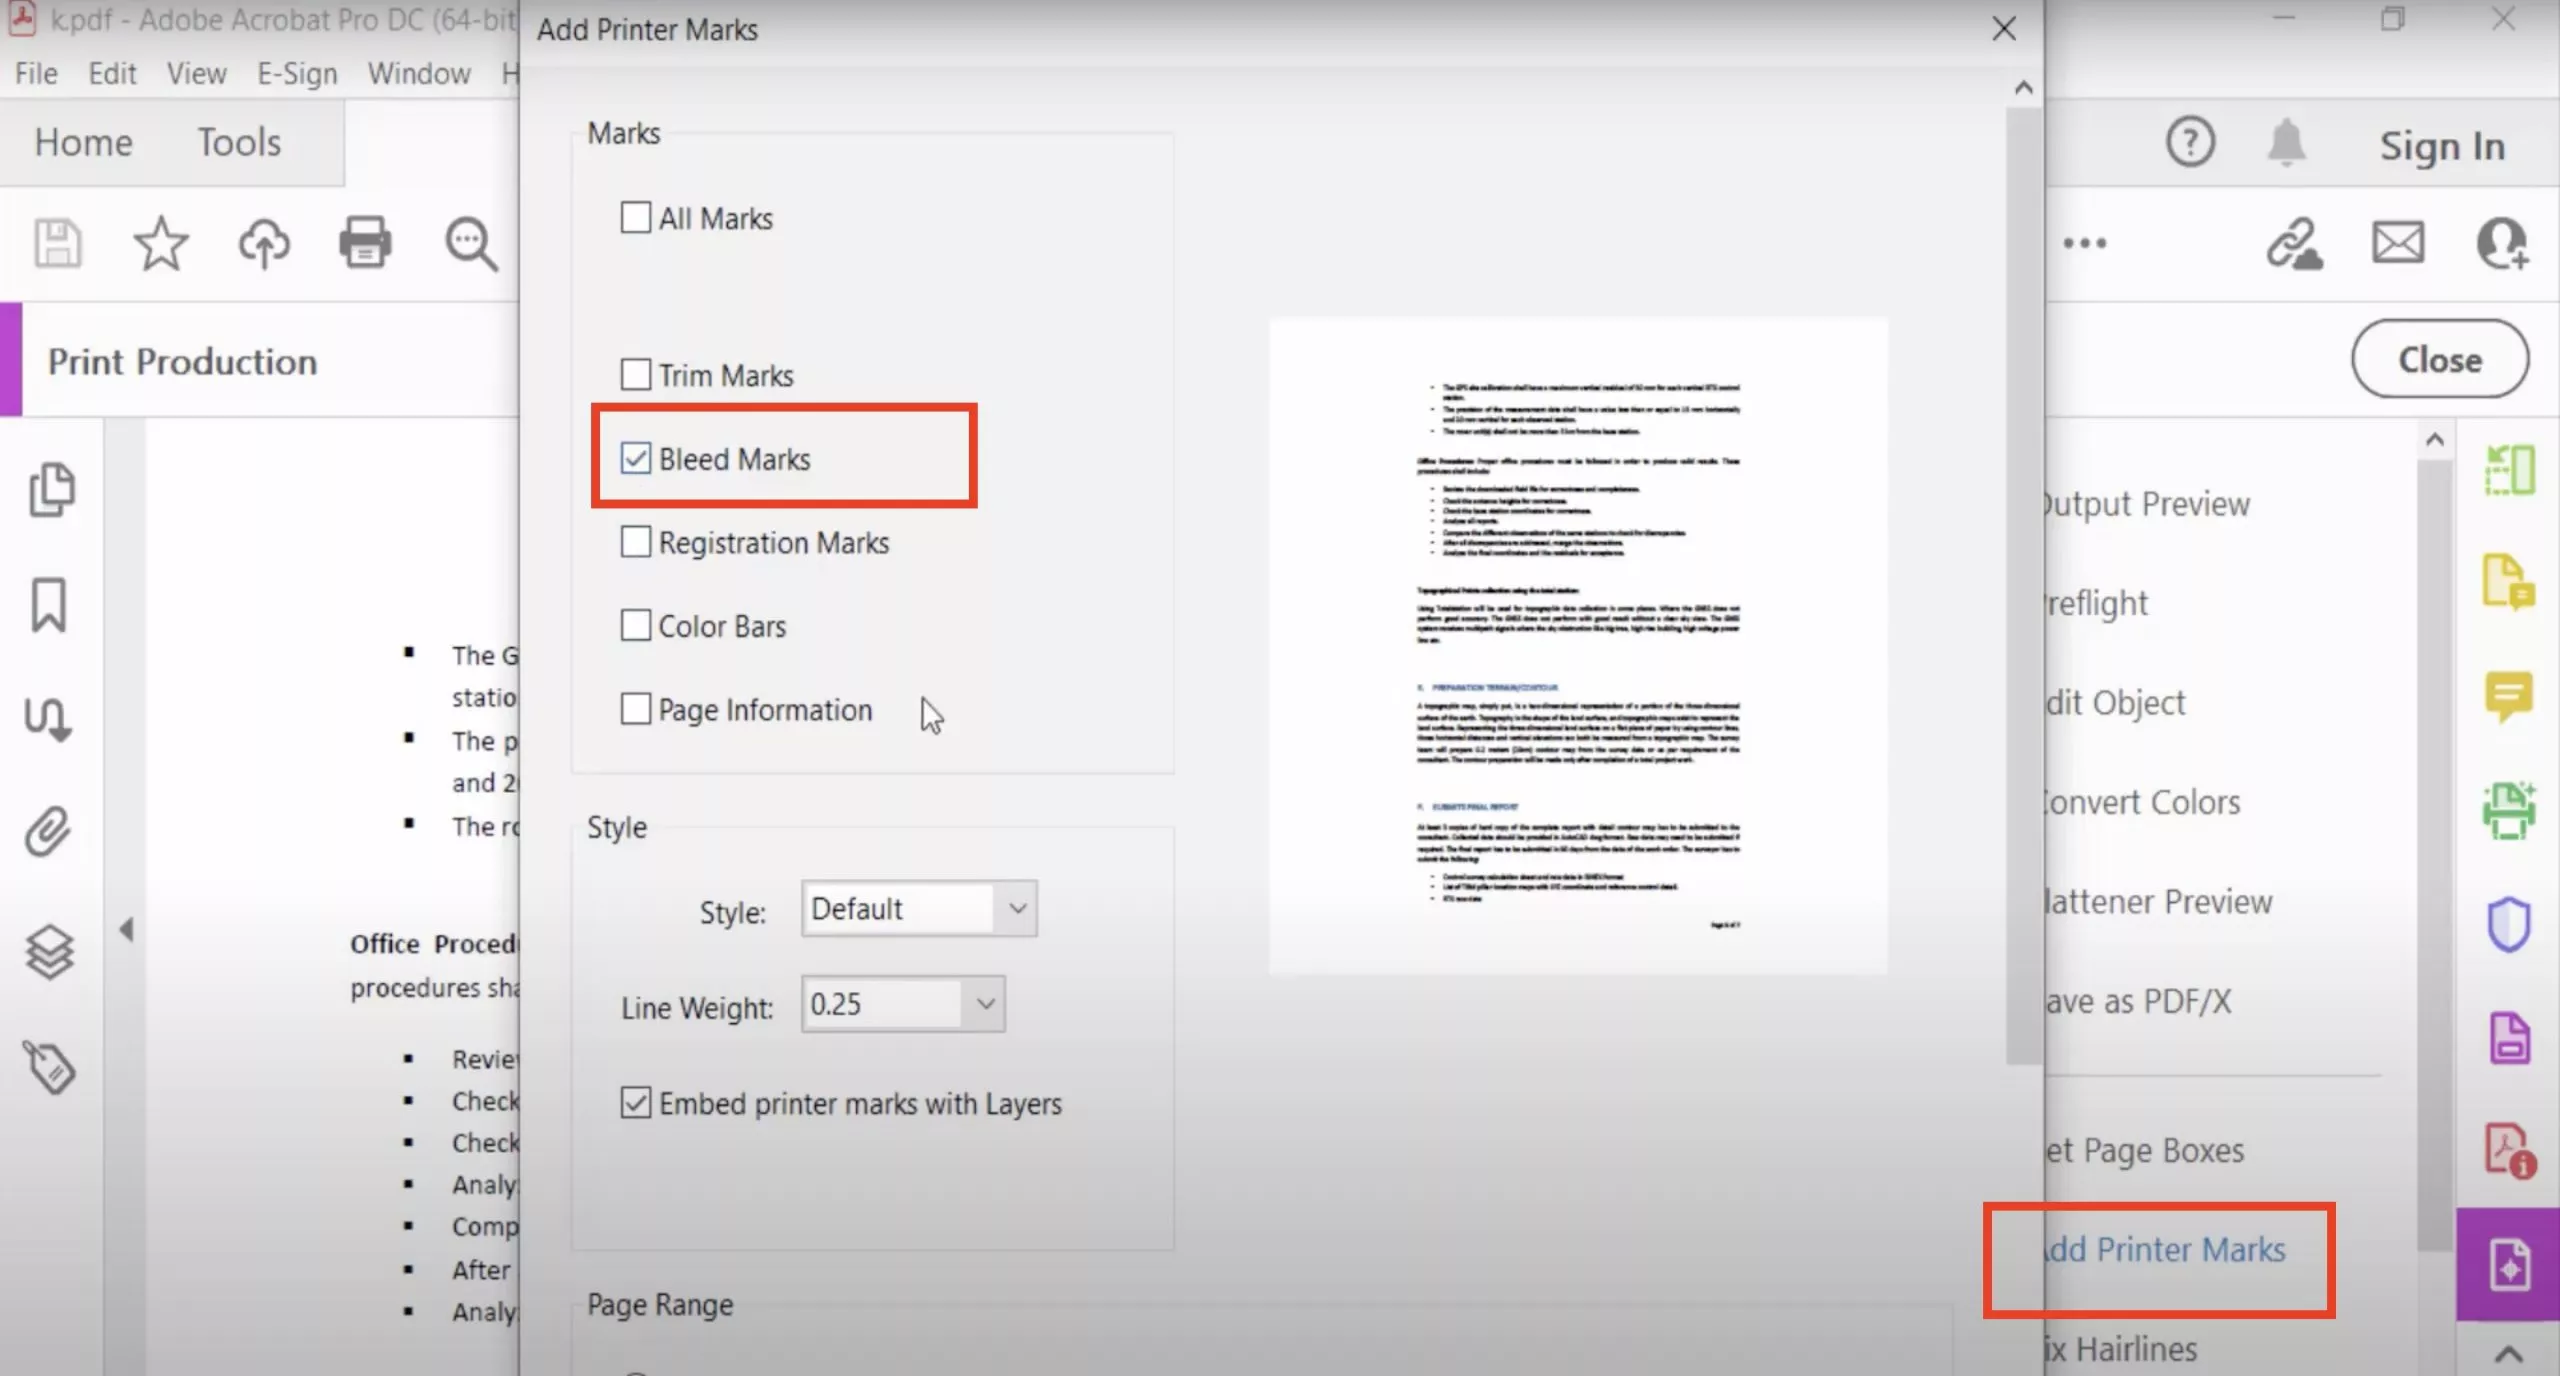
Move to the right menu pane and click “Add Printer Marks," which will open a popup menu. Here, you need to select "Bleed Marks" by marking it in its checkbox. Edit "Style” and “Page Range” as per your requirements and click “OK" to add bleed marks to the PDF.
Step 3:
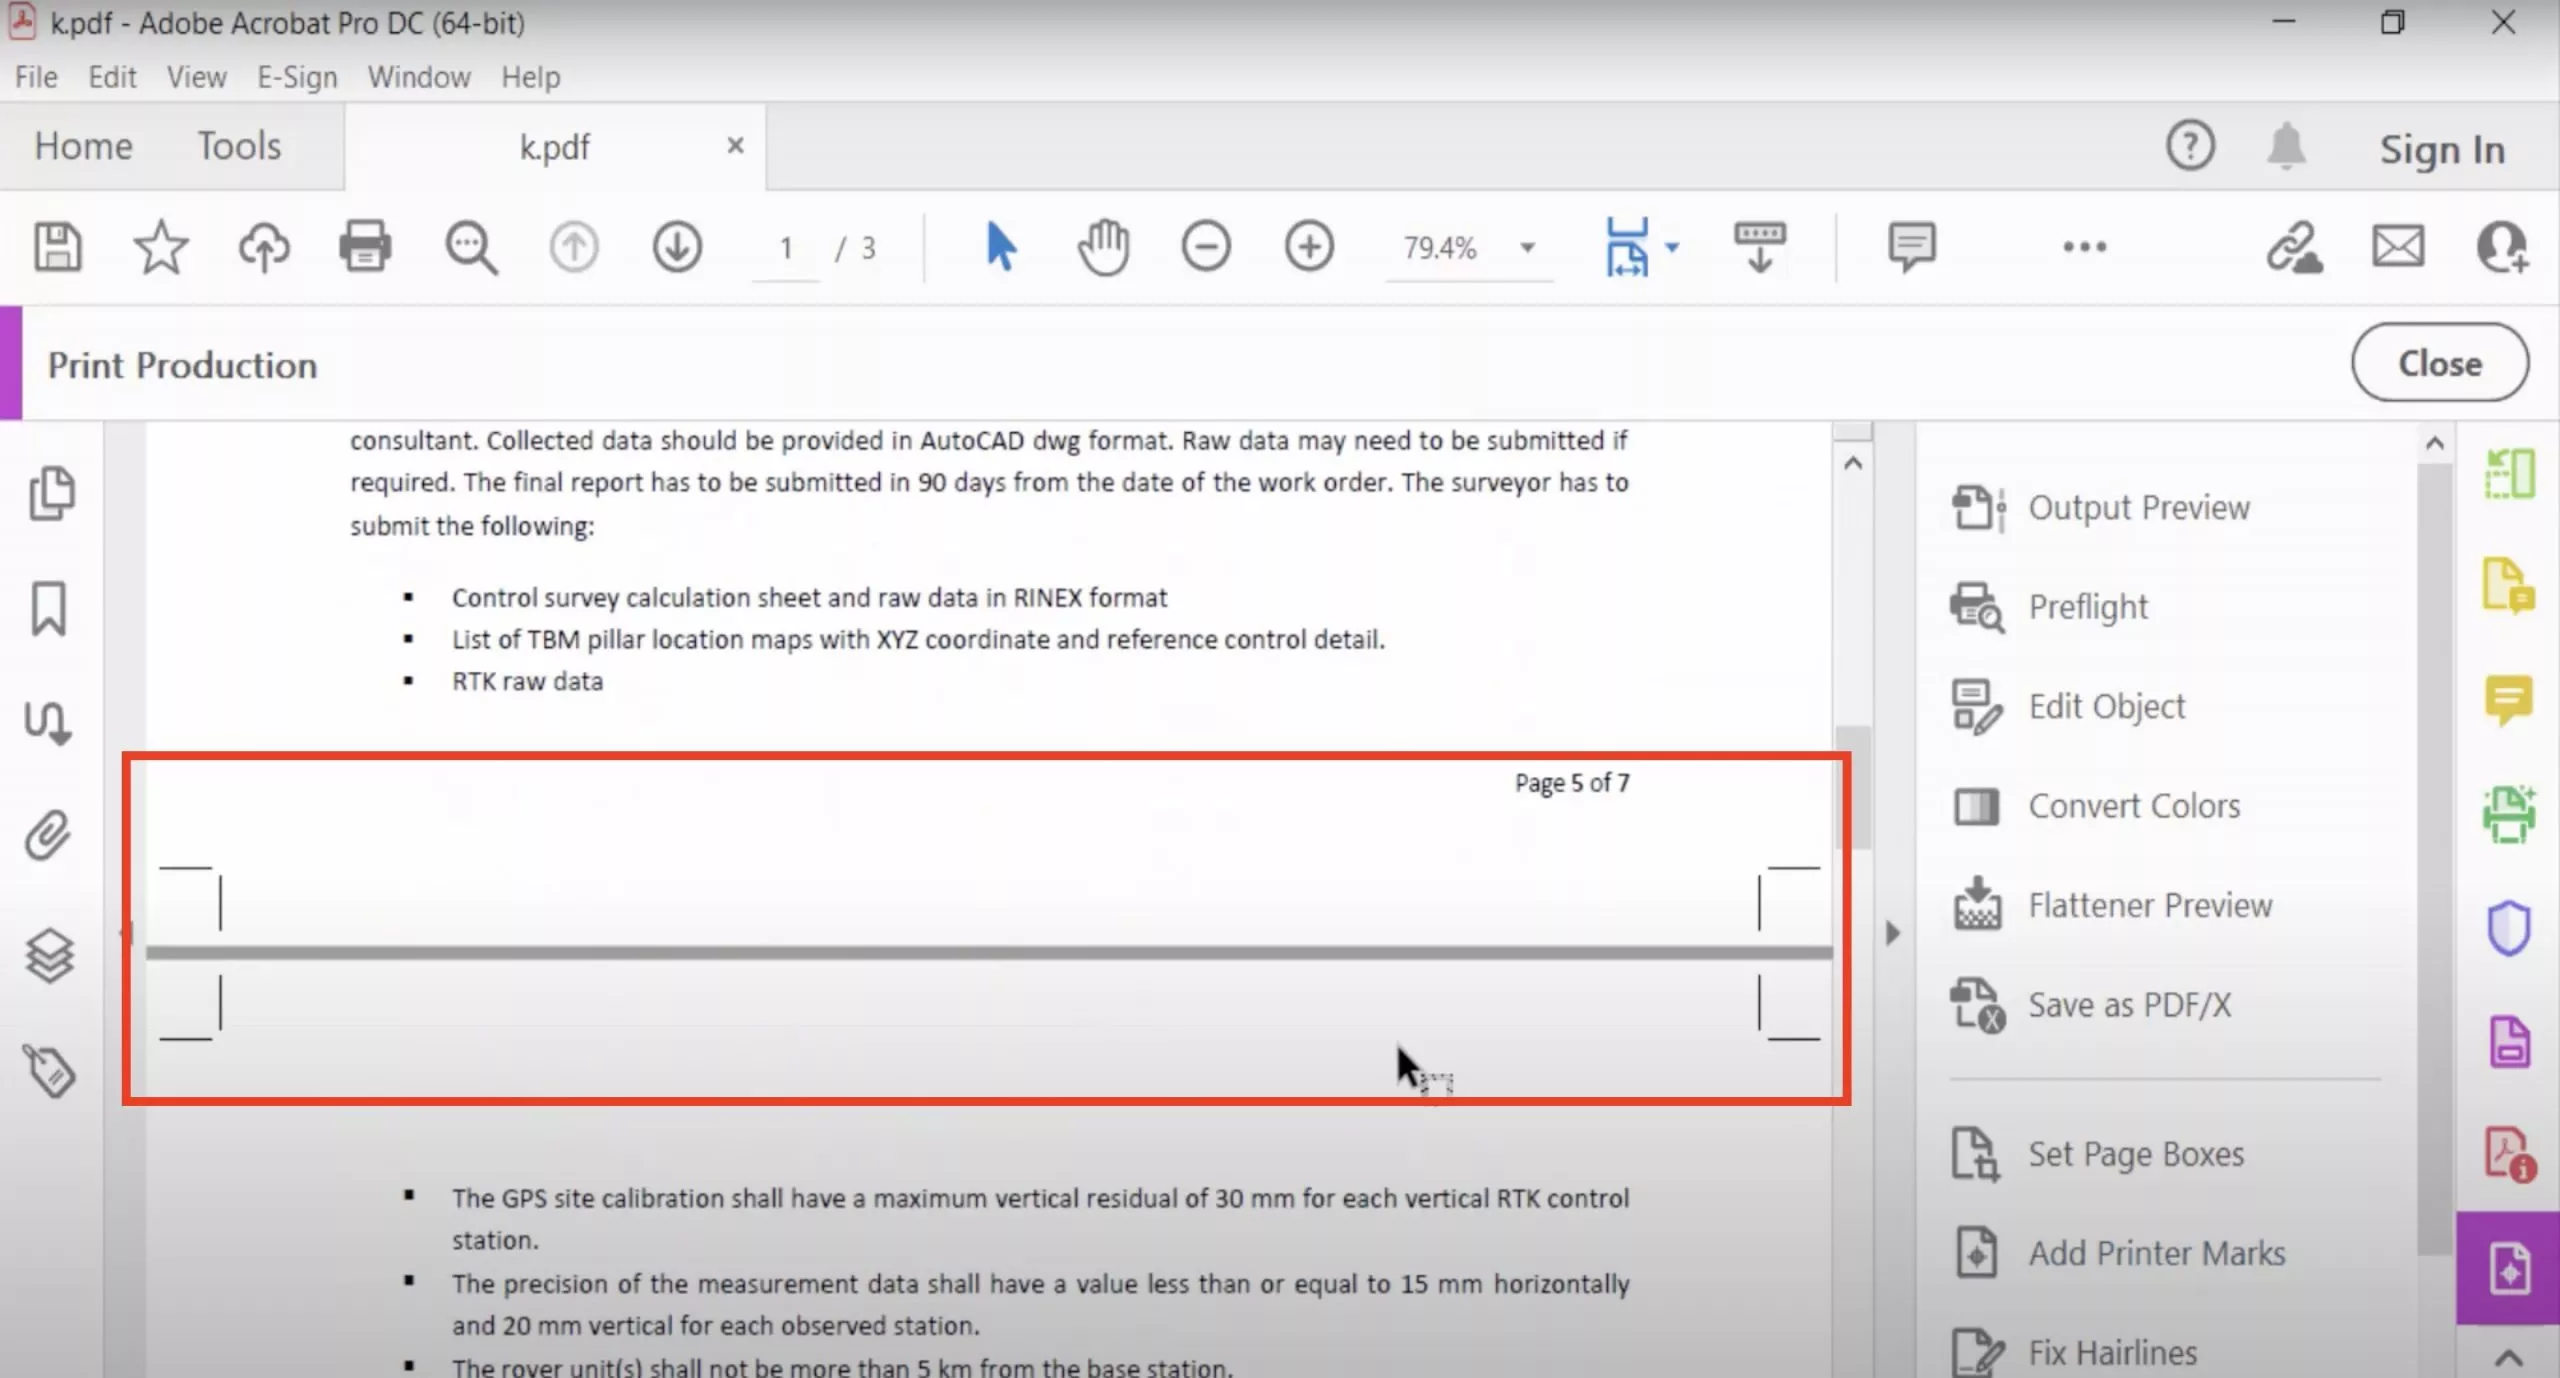
A popup will appear, mentioning that this cannot be undone. Authenticate by clicking "Yes," and on the next popup window, click "OK." Now, Adobe Acrobat will add bleed marks to your PDF document. Press "Ctrl + S” to save the document with these changes.
Also Read: What Are Crop Marks and How to Add Crop Marks in PDF
Part 2. How to Add Bleed to a PDF in Photoshop?
Photoshop is another software from Adobe, but it is mainly designed for image editing and graphics-related tasks. However, it does support opening PDF documents. When you do that, you can also use it to add bleed marks to your PDF content.
Note that there is no dedicated feature to add bleeds. You will need to manually adjust the canvas to add bleed marks with the following steps:
Step 1:
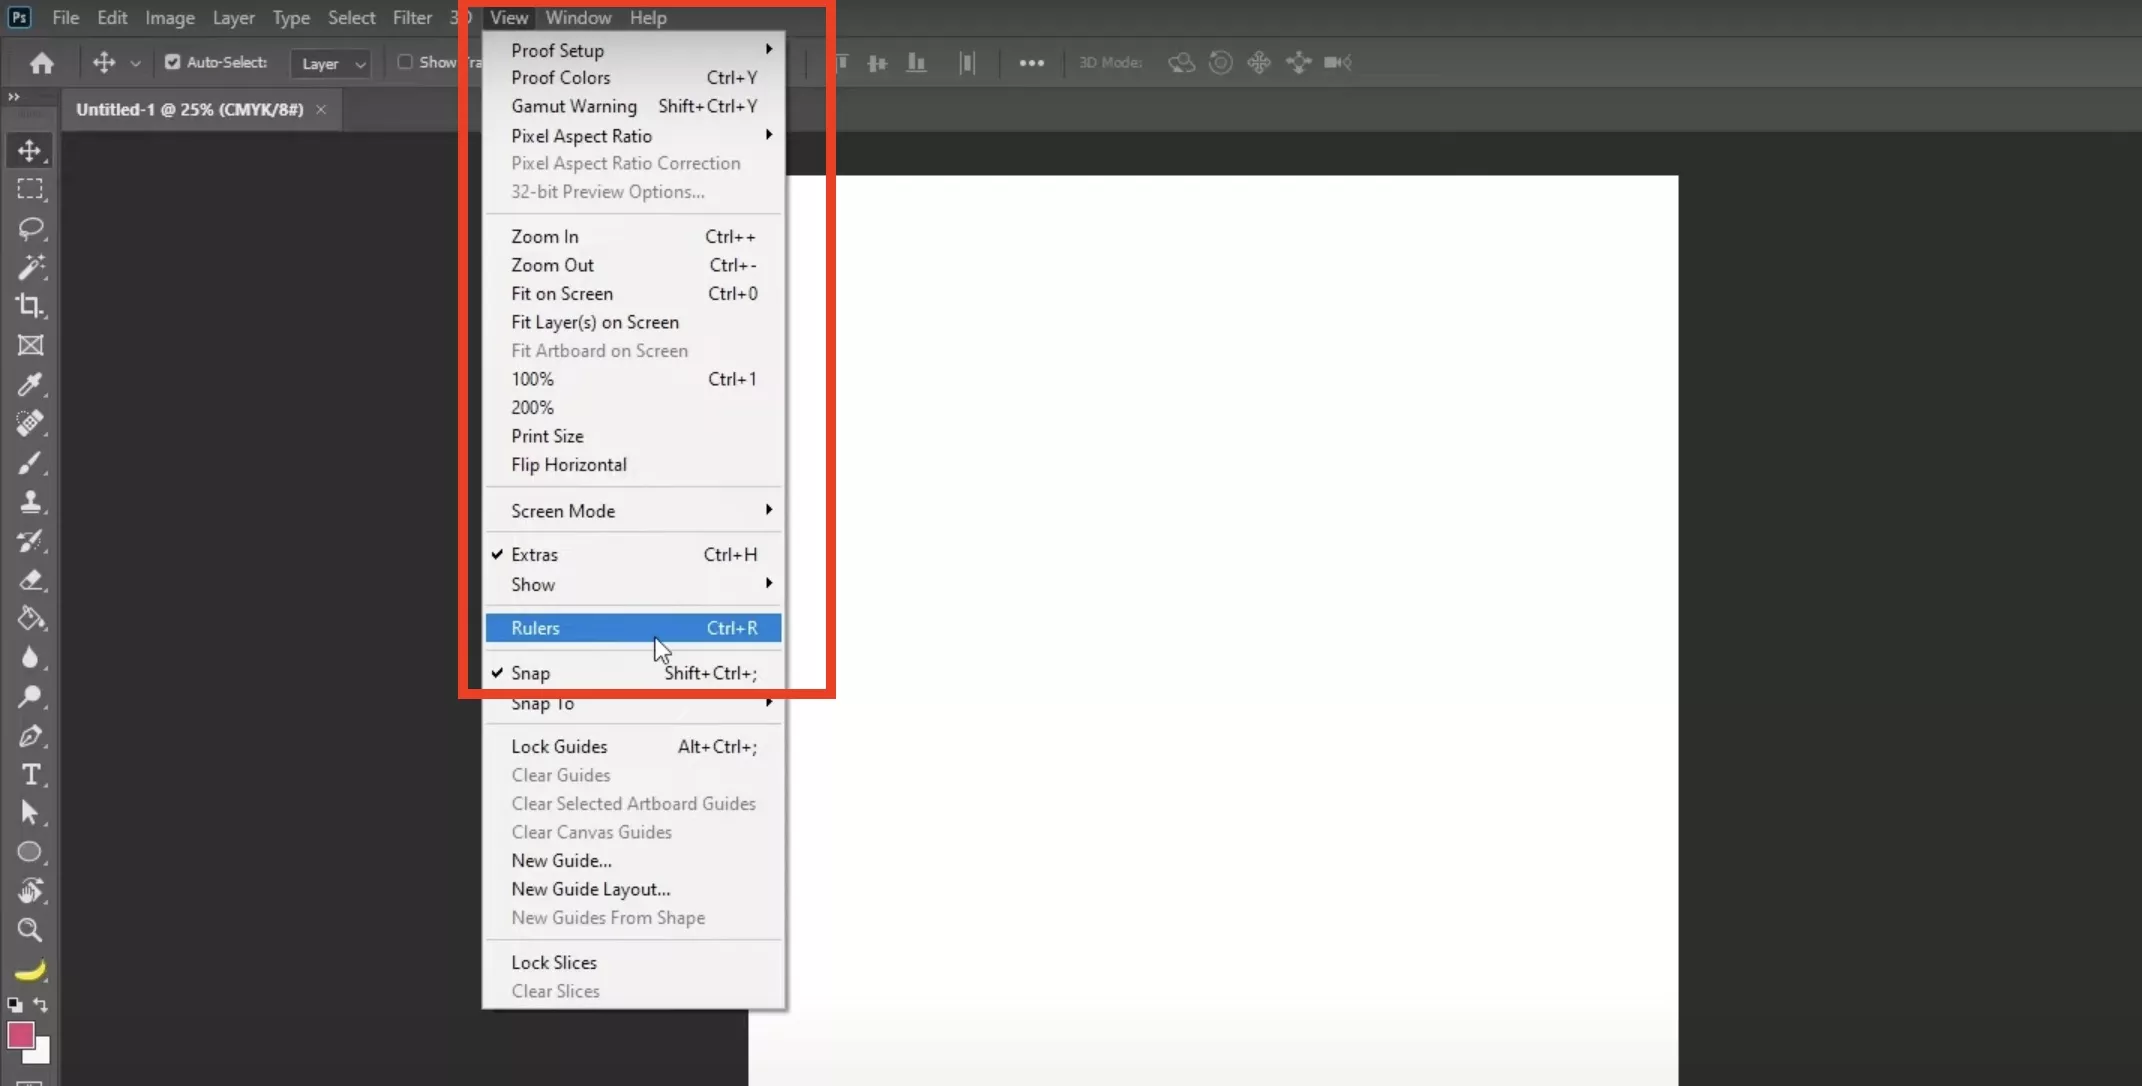
Start by running the Photoshop application software on your computer. When it opens, click "File" and then "Open" from the dropdown. Now, you can select the desired PDF from your files and click "Open” to open it in Photoshop. Enable rulers for the document by clicking “View” from the top and selecting “Rulers." After that, use your cursor to drag ruler guidelines to the boundary of your PDF pages.
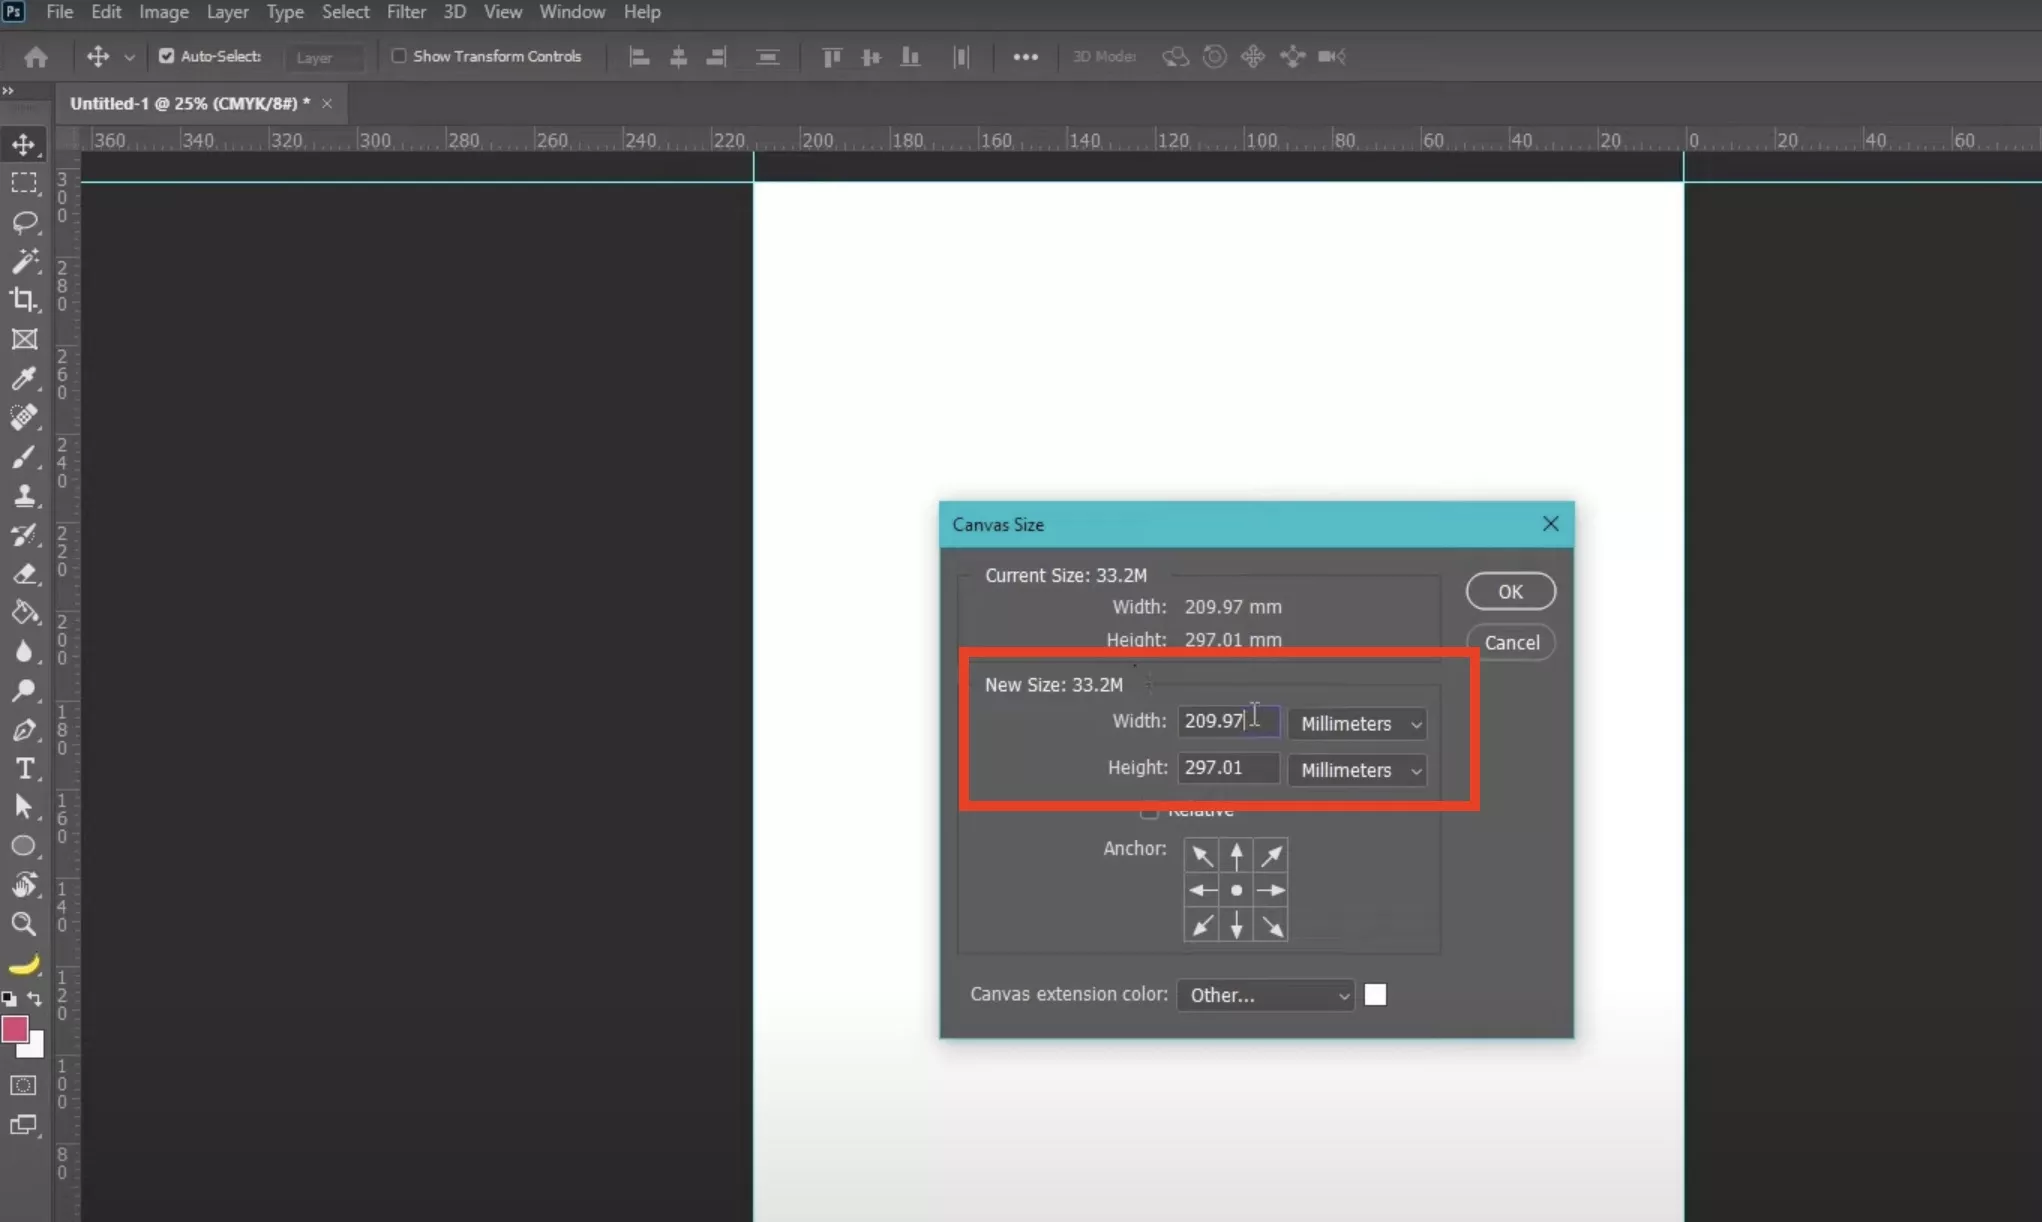
Step 2:
Next, click “Image" from the top and select "Canvas Size." This popup window will show you the canvas size. In the "New Size" section, add 6 mm to both length and width to get a bleed of 3 mm (about 0.12 in). Save by clicking “OK," and the bleed will appear around your page.
Step 3.
Now, Go to “File” > “Print”, choose “Microsoft Print to PDF”, check the “Corner Crop Marks”, click “Bleed” to enter the number and choose the Millimeters. Click on the “OK” and then, the “Print” to save the PDF with bleed.
Part 3. How to Add Bleed to a PDF in Illustrator?
Adobe Illustrator is a software designed to work on graphics and illustrations. It supports working with PDF documents and has a built-in feature of adding bleed to the pages. With Adobe Illustrator, you can add bleed to PDF offline by following these steps:
Step 1:
Start the Illustrator application on your computer by clicking its desktop icon. Now click "File" from the left top and select "Open”. Locate your PDF from the file explorer window and click to select it, then click "Open" to open that PDF document in Illustrator. Once your PDF opens in Illustrator, click "File" and select the "Document Setup” option.

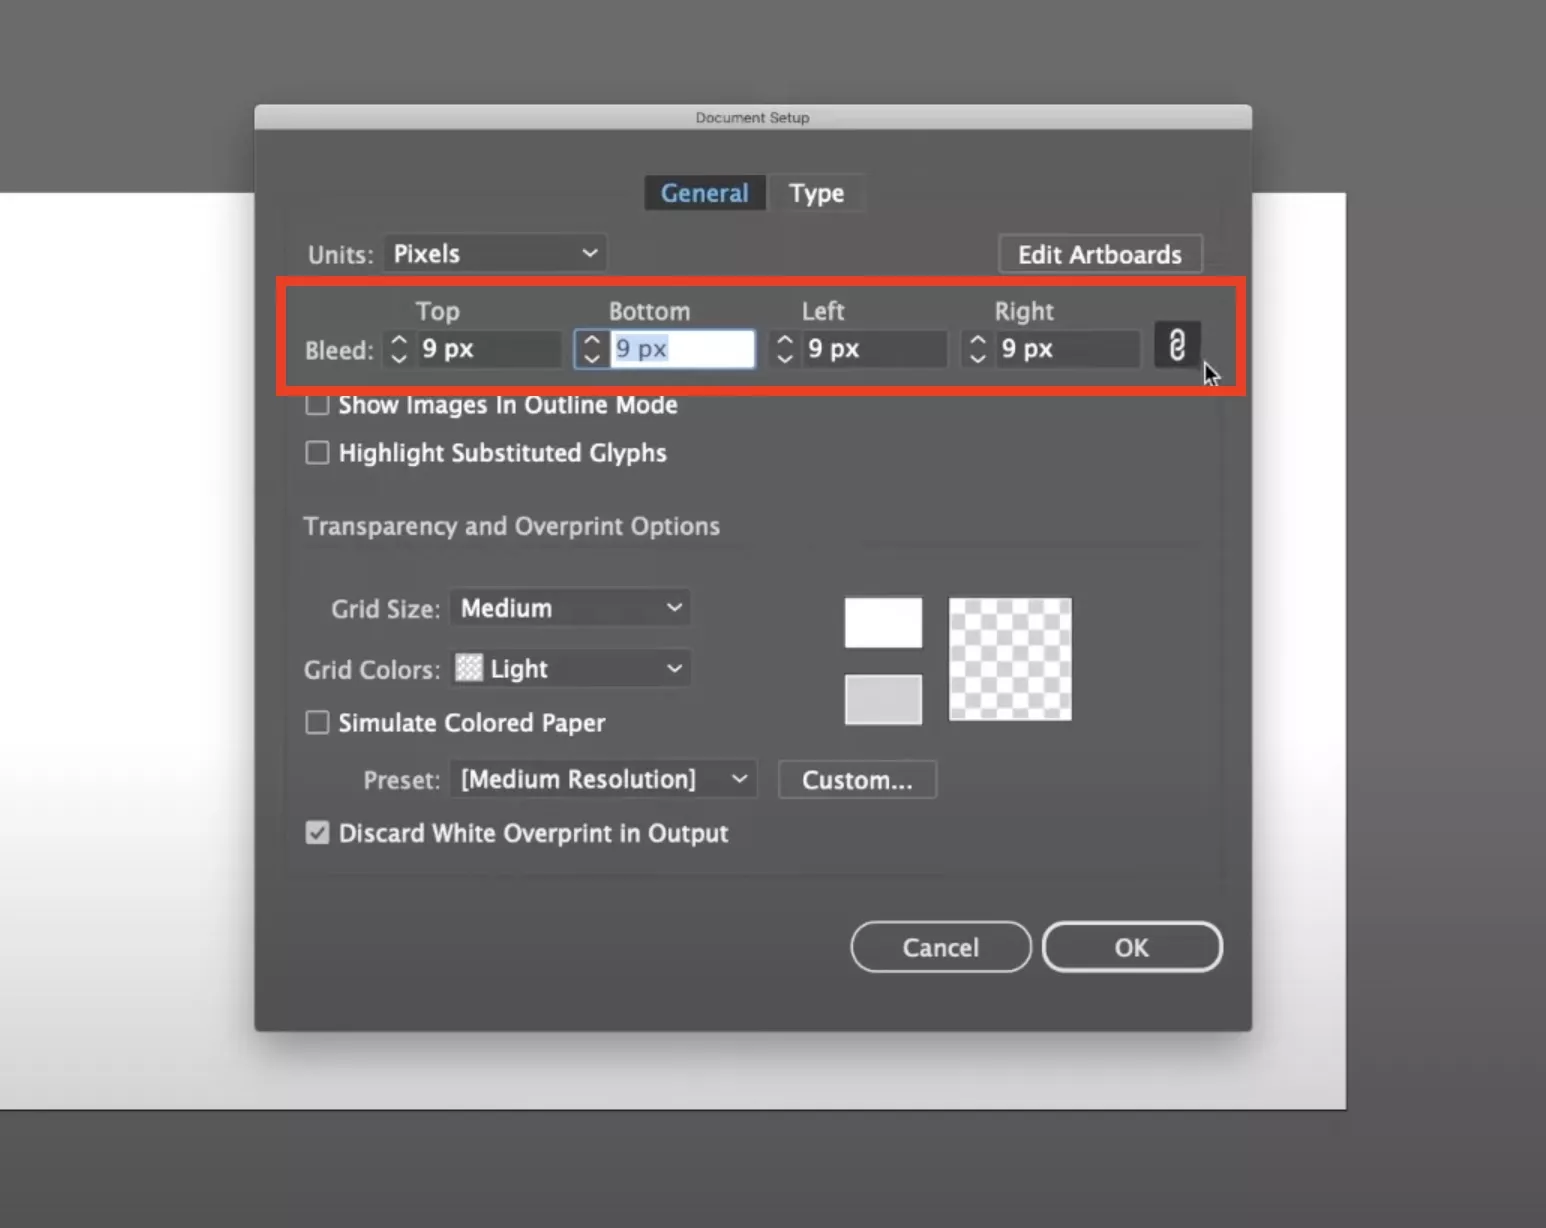
Step 2:
In the document setup popup, locate the “Bleed" option and type the number with the unit to add the bleed to the PDF. Here, you can select bleed for each side individually. Alternatively, click the “Link" button from the right to ensure all sides get the same bleed area. Click “OK” and Illustrator will add bleed to your PDF.
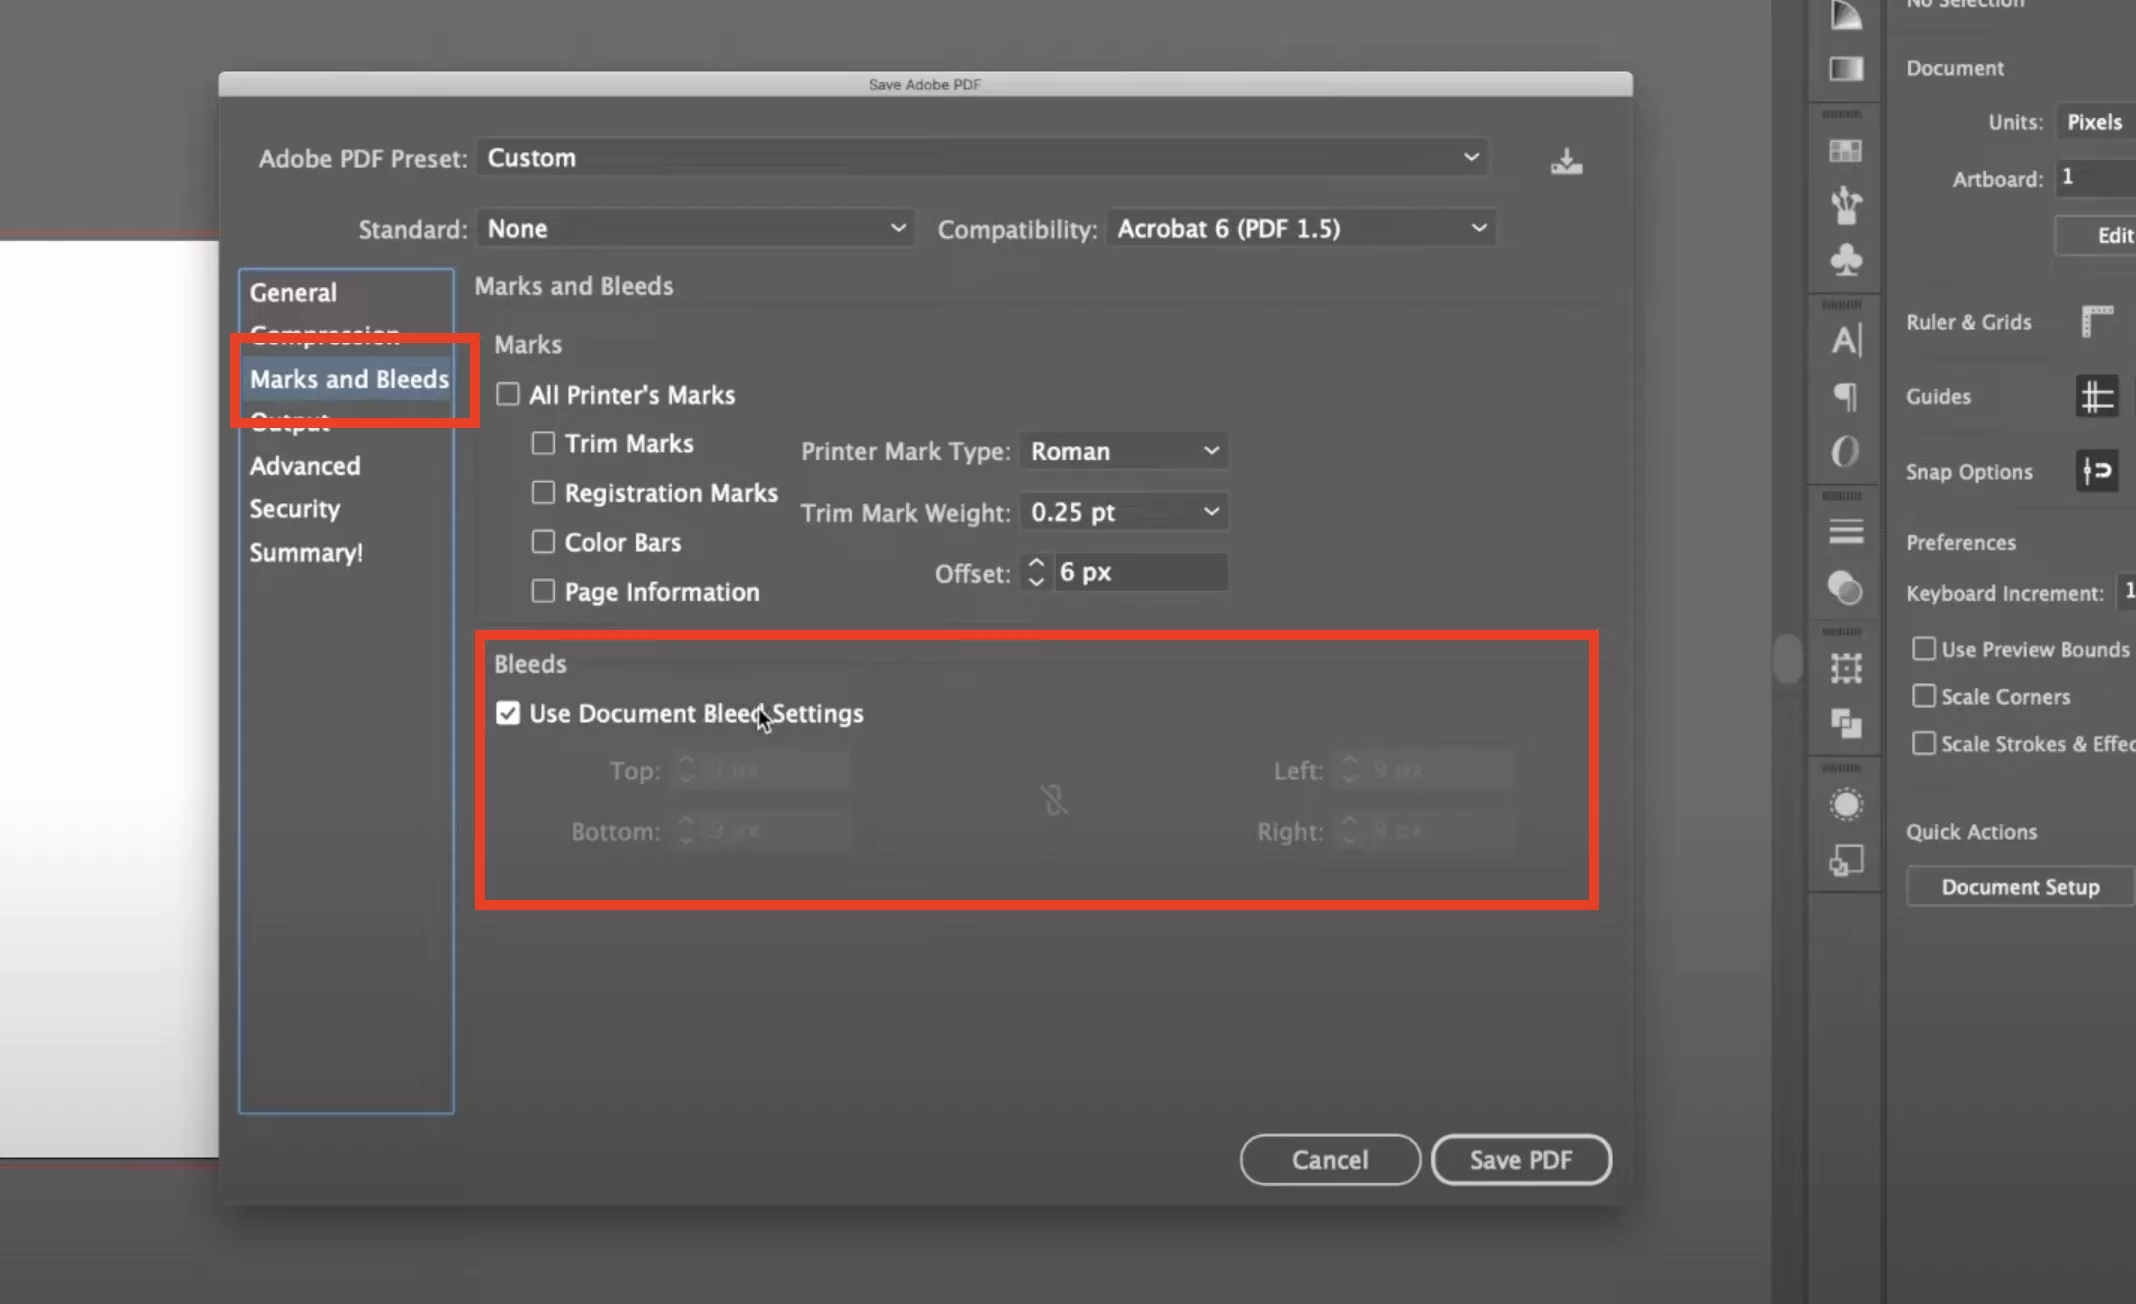
Step 3:
Now click "File" from the top and select "Save As”. You will choose the file format from the file saving popup as "PDF” and click “Save”. A new popup will open in Illustrator where you need to ensure that the “Use Document Bleed Settings" inside the "Bleeds” option under the “Marks and Bleeds” setting is checked. Now, click “Save PDF," and you will have added bleeds to your PDF with Illustrator.
Part 4. How to Add Bleed to PDF Online in Canva?
Sometimes, we need an offline tool installed on our device or are on the go. Having an online tool can be very helpful. When you need to add bleed to PDF, Canva is the online tool that can significantly help you with the following steps:
Step 1:
Open Canva in your browser and log in with your account. Now, click "Create a Design," select the "Import File" button, and select your PDF document from file storage. Click to select and click "Open” to upload it in Canva.

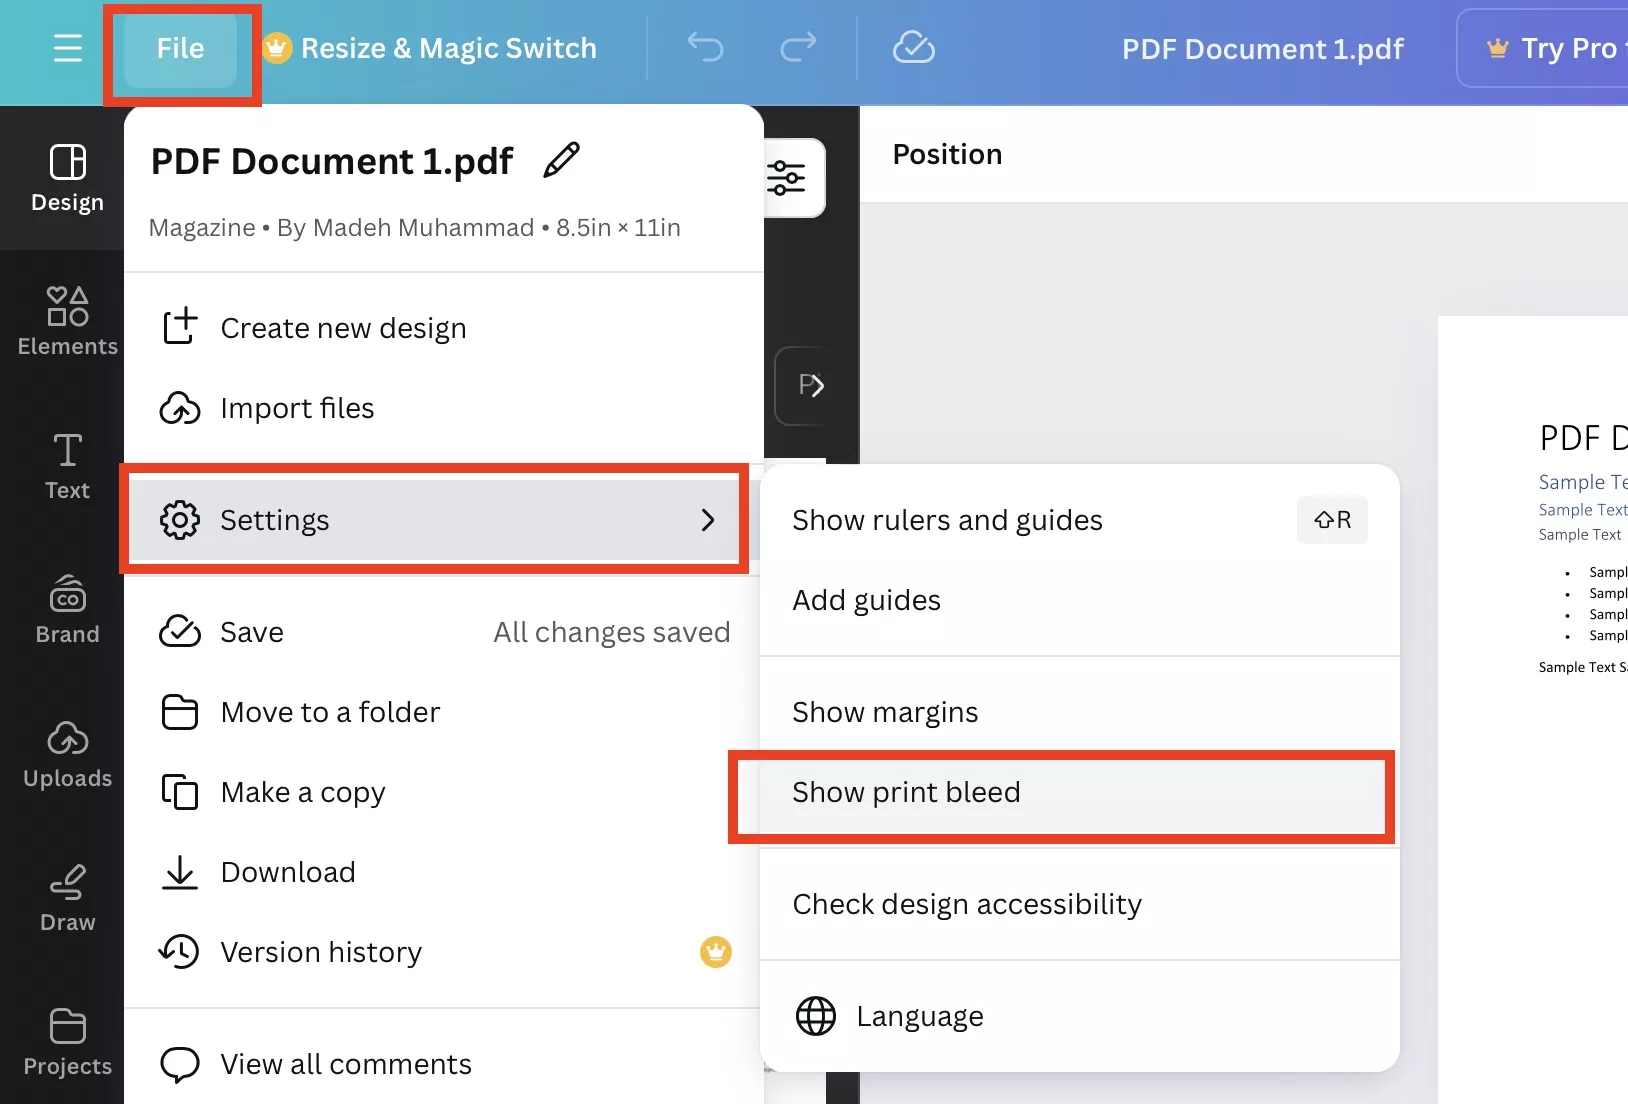
Step 2:
Click the most recent file from the "Recent Designs” section on the home page to open it in a new tab. Click “File" from the top right and move your cursor to "Settings." You will see the "Show Print Bleed” option in the popup. Click it and the bleed will be shown in a line across your document.
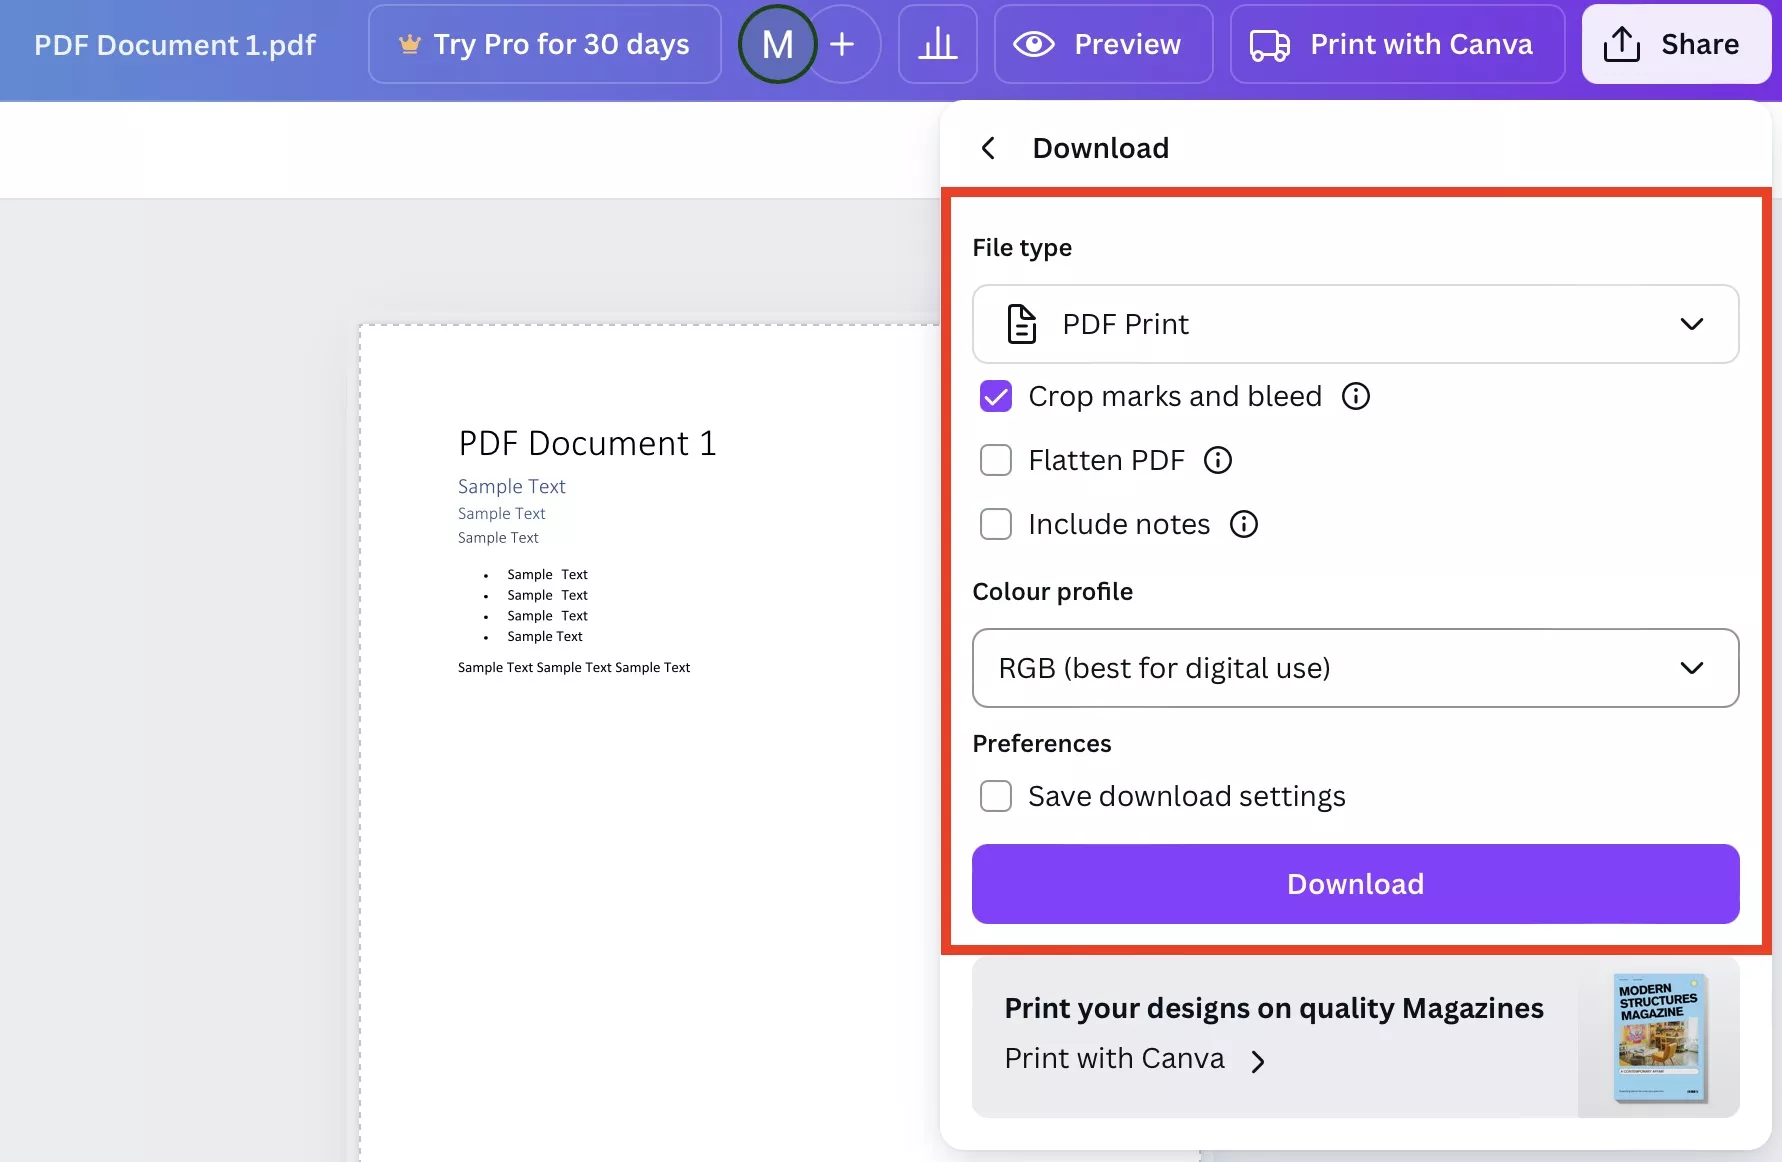
Step 3:
To save this document with bleed marks, click "Share" from the top right and select "Download” from the dropdown menu. Set the “File Type” to “PDF Print” and make sure that the “Crop marks and bleed" option is marked as checked. Now, you may click "Download” to save the PDF with bleed marks on your device.
Part 5. Bonus Tip: The Best PDF Editor
Working with PDFs means that you will need to edit them frequently, and the best option for that is UPDF. UPDF is a useful PDF software offering almost every capability you require. It provides many features, from built-in UPDF AI to UPDF Cloud and collaboration features.
However, today, we will be focusing on the PDF editing features it offers.
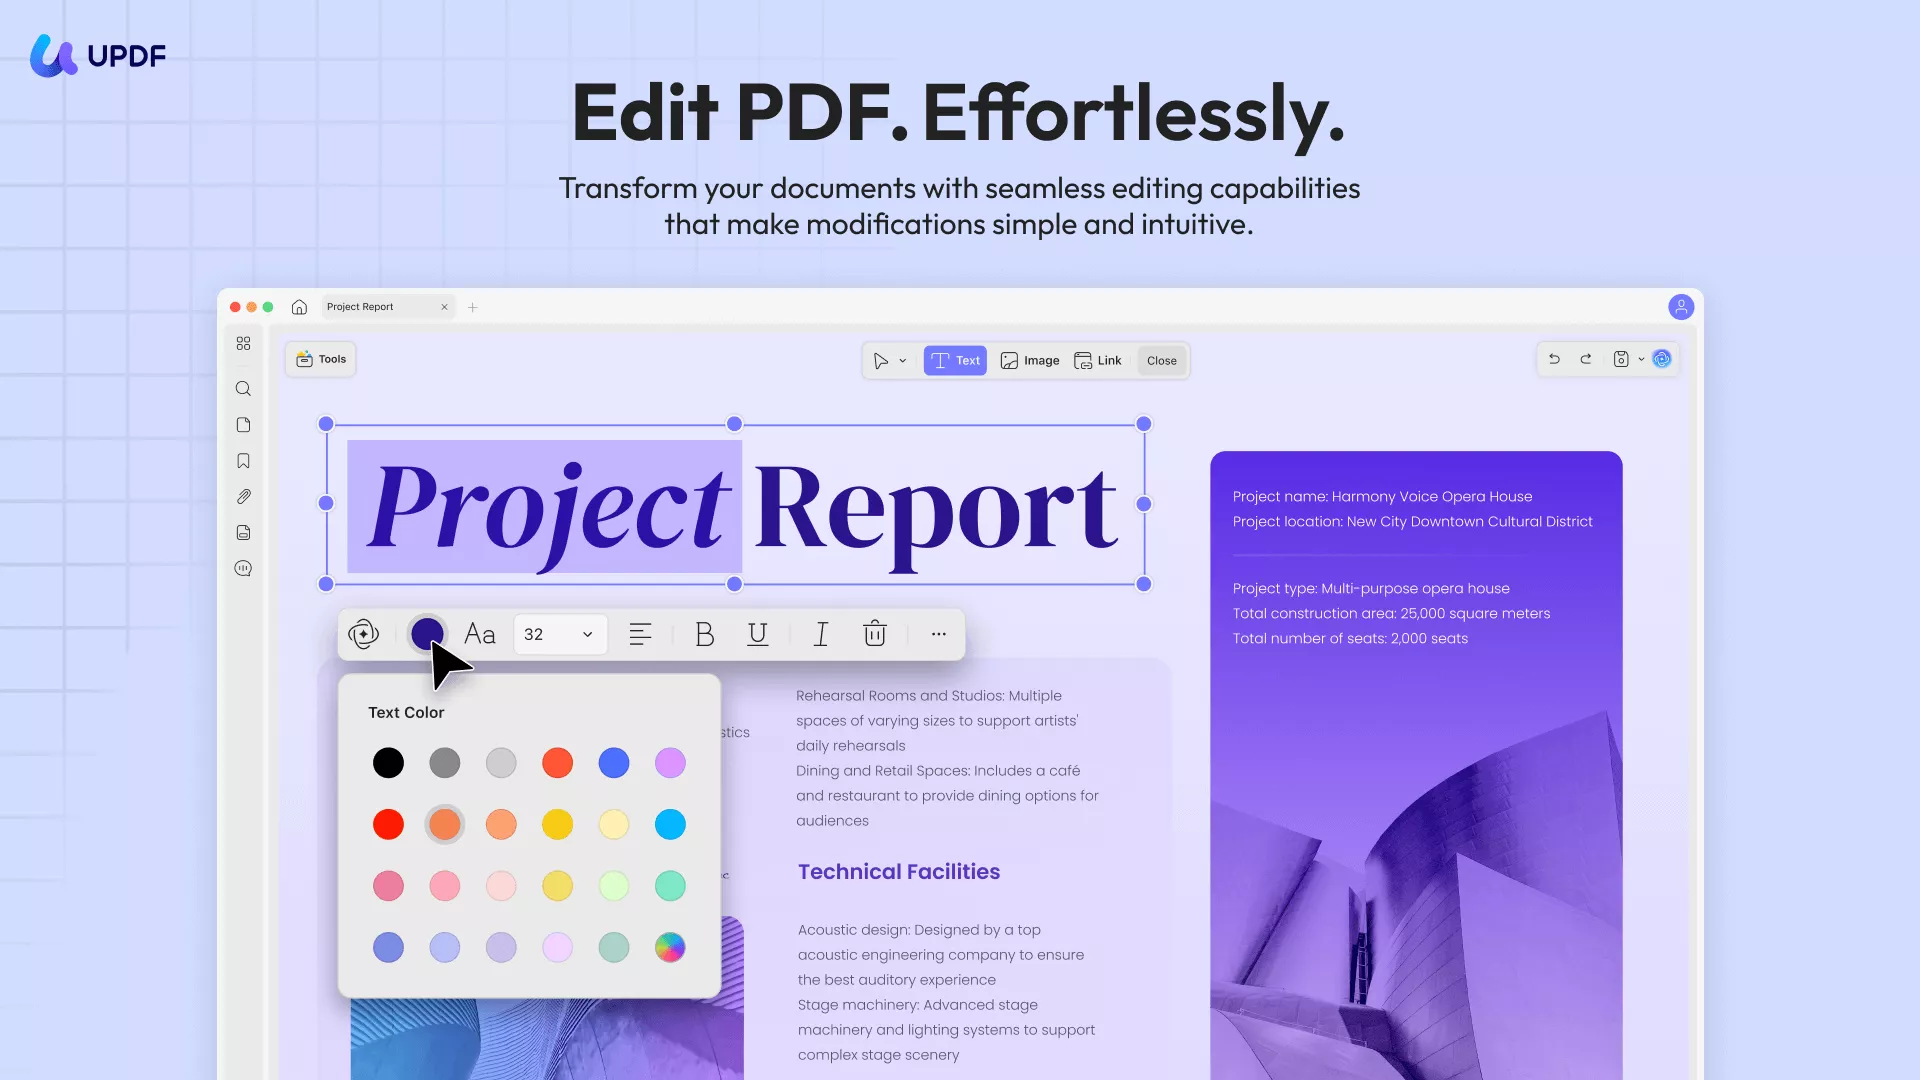
· Effortless Text Editing
Editing text in a PDF document with UPDF is as effortless as you are doing on any other text editor. UPDF automatically adjusts the font size and style according to the document. So, when you add or remove something, the overall feel of that document is not disturbed.
Moreover, it allows you to add new text to a PDF and change its color, style, font, size, and more. Hence, you get complete control over text editing in PDFs.
· PDF Image Editing
UPDF also offers exceptional image editing features in PDF documents. Clicking on any image makes it editable instantly, and you can rotate, flip, crop, or replace it. At the same time, clicking anywhere in the PDF allows you to add a new image and adjust it with the other contents of your document. When using UPDF, you can also extract images from PDF and save them to your computer.
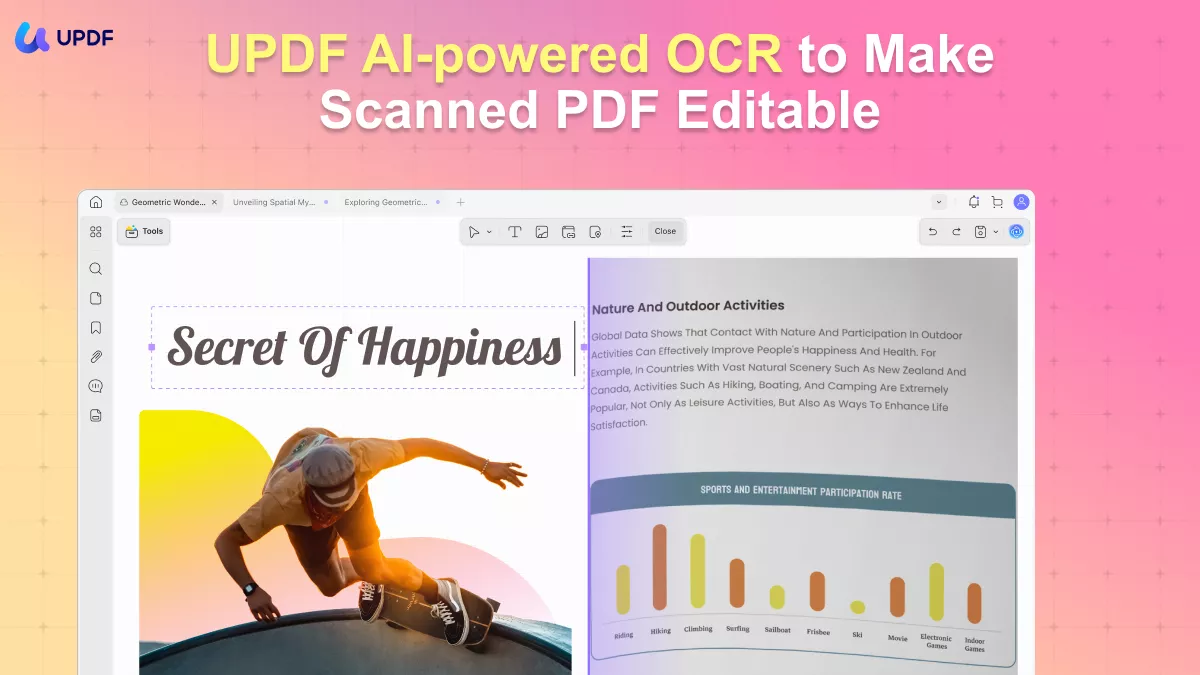
Apart from these editing features, UPDF allows you to annotate, protect, and organize your documents. It also offers OCR (38 language supported) and PDF conversion features. Moreover, UPDF supports Windows, Mac, iOS and Android, no matter what device you use, it's fully compatible. Hence, it is the most complete PDF tool you will ever need.
Learn more about UPDF's functionalities, you can watch the below video, read this review article from laptopmedia or download UPDF on your devices to try its PDF editing and other features. Purchase UPDF Pro to unlock more premium features for an even better experience.
Windows • macOS • iOS • Android 100% secure
Final Words
With the methods to add bleed to PDF discussed in this comprehensive guide, we are confident you know how to do it yourself. The best part is that you will never need to worry about some content getting cut off as the document is printed or published digitally.
Each of the methods mentioned above has its benefits, irrespective of your choice of Adobe Acrobat, Photoshop, Illustrator, or Canva. Using these guidelines, you are ready to face any project needing a bleed area.
Windows • macOS • iOS • Android 100% secure


 Lizzy Lozano
 Grace Curry
 Enrica Taylor
  Idham Wijaya
