UPDF for Windows
 UPDF for Mac
 UPDF for iPhone/iPad
 UPDF for Android
 Nomostar
 UPDF AI Online
 UPDF Sign
 IvyCraft
 Edit PDF
 Annotate PDF
 Create PDF
 PDF Form
 Edit links
 Convert PDF
 OCR
OCR PDF to Word
 PDF to Image
 PDF to Excel
 Organize PDF
 Merge PDF
 Split PDF
 Crop PDF
 Rotate PDF
 Protect PDF
 Sign PDF
 Redact PDF
 Sanitize PDF
 Remove Security
 Read PDF
 UPDF Cloud
 Compress PDF
 Print PDF
 Batch Process
 About UPDF AI
 UPDF AI Solutions
 AI User Guide
 FAQ about UPDF AI
 Summarize PDF
 Translate PDF
 Chat with PDF
 Chat with AI
 Chat with image
 PDF to Mind Map
 Explain PDF
 PDF AI Tools
 Image AI Tools
 AI Chat Tools
 AI Writing Tools
 AI Study Tools
 AI Working Tools
 Other AI Tools
 AI Bookmark Generation
 AI Bookmark Summary
 AI Watermark Generation
 AI Background Generation
 AI Sticker Generation
 AI Stamp Generation
 AI Editing Suite
 UPDF Copilot
 AI Page Management
 AI Semantic Search
 PDF to Word
 PDF to Excel
 PDF to PowerPoint
 User Guide
 UPDF Tricks
 FAQs
FAQs UPDF Reviews
 Download Center
 Blog
Blog Newsroom
 Tech Spec
 Updates
 UPDF vs. Adobe Acrobat
 UPDF vs. Foxit
 UPDF vs. PDF Expert
Before We Begin:
Windows • macOS • iOS • Android 100% secure
Screenshots play a major role when it comes to managing everyday tasks. They help record information, share project updates, and keep visual notes. Mac users find the built-in screenshot tool helpful, but when it stops working, even simple tasks get postponed. Minor changes in settings or even software updates usually cause screenshots to disappear or fail to save.
I will walk you through the main reasons why screenshot function stops working on Mac and show you detailed step-by-step methods to fix these issues. By the end, you will discover the best tool to capture screenshots on Mac easily.
Part 1. Why is My Screenshot Not Working on Mac?
If you notice screenshot is not working on Mac, it might be due to a minor technical problem or a change of settings. I have listed the most prevalent causes below:
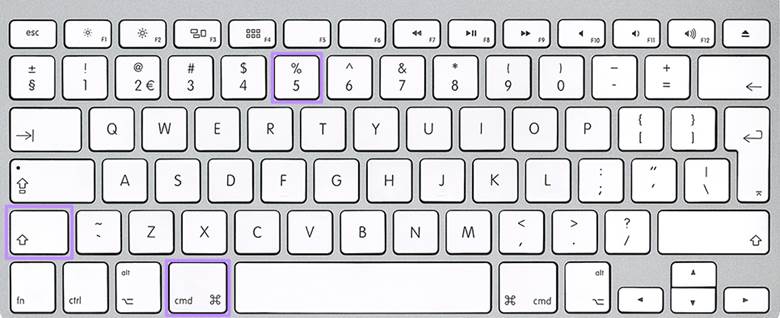
- Incorrect Keyboard Shortcuts: If you press the wrong keys, then screenshots will not work. For example, pressing “Command + Shift + 3” to capture a whole screenshot or “Command + Shift + 4” to capture a partial section of the screen will not work as intended.
- Changed Screenshot Settings: The Screenshot application in macOS allows users to change their screenshot settings. If “Save to” settings are changed, that screenshot may not end up where you expect it.
- macOS Updates or Compatibility Issues: After installing a new macOS update, some users report that screenshot shortcuts do not respond. This happens due to compatibility issues or incomplete update installations.
- Security or Permission Restrictions: In a few cases, security settings or “Screen Recording” permissions block screenshots, especially when capturing protected content.
As you are now aware of the common reasons, let’s head to the steps to fix these types of issues.
Also Read: How to Fix Finder Not Responding on Mac? (7 Ways)
Part 2. How to Fix “Screenshot Function Not Working on Mac”?
For Mac users facing screenshot issues, I have tested different methods and tools to find the most reliable fixes. Read below with detailed steps:
Fix 1. Use an Alternative Method to Screenshot
If you need to capture content from a PDF and the Mac’s built-in tool fails, the fastest solution is to use UPDF for Mac. It not only lets you screenshot instantly, but also provides a complete PDF editing toolkit, making it more than just a screenshot alternative.
With UPDF, you can edit text and images in PDFs, organize pages, add annotations, and even use AI to summarize or translate content.
Download UPDF for Mac now to follow these steps and take screenshots without any hassle:
Windows • macOS • iOS • Android 100% secure
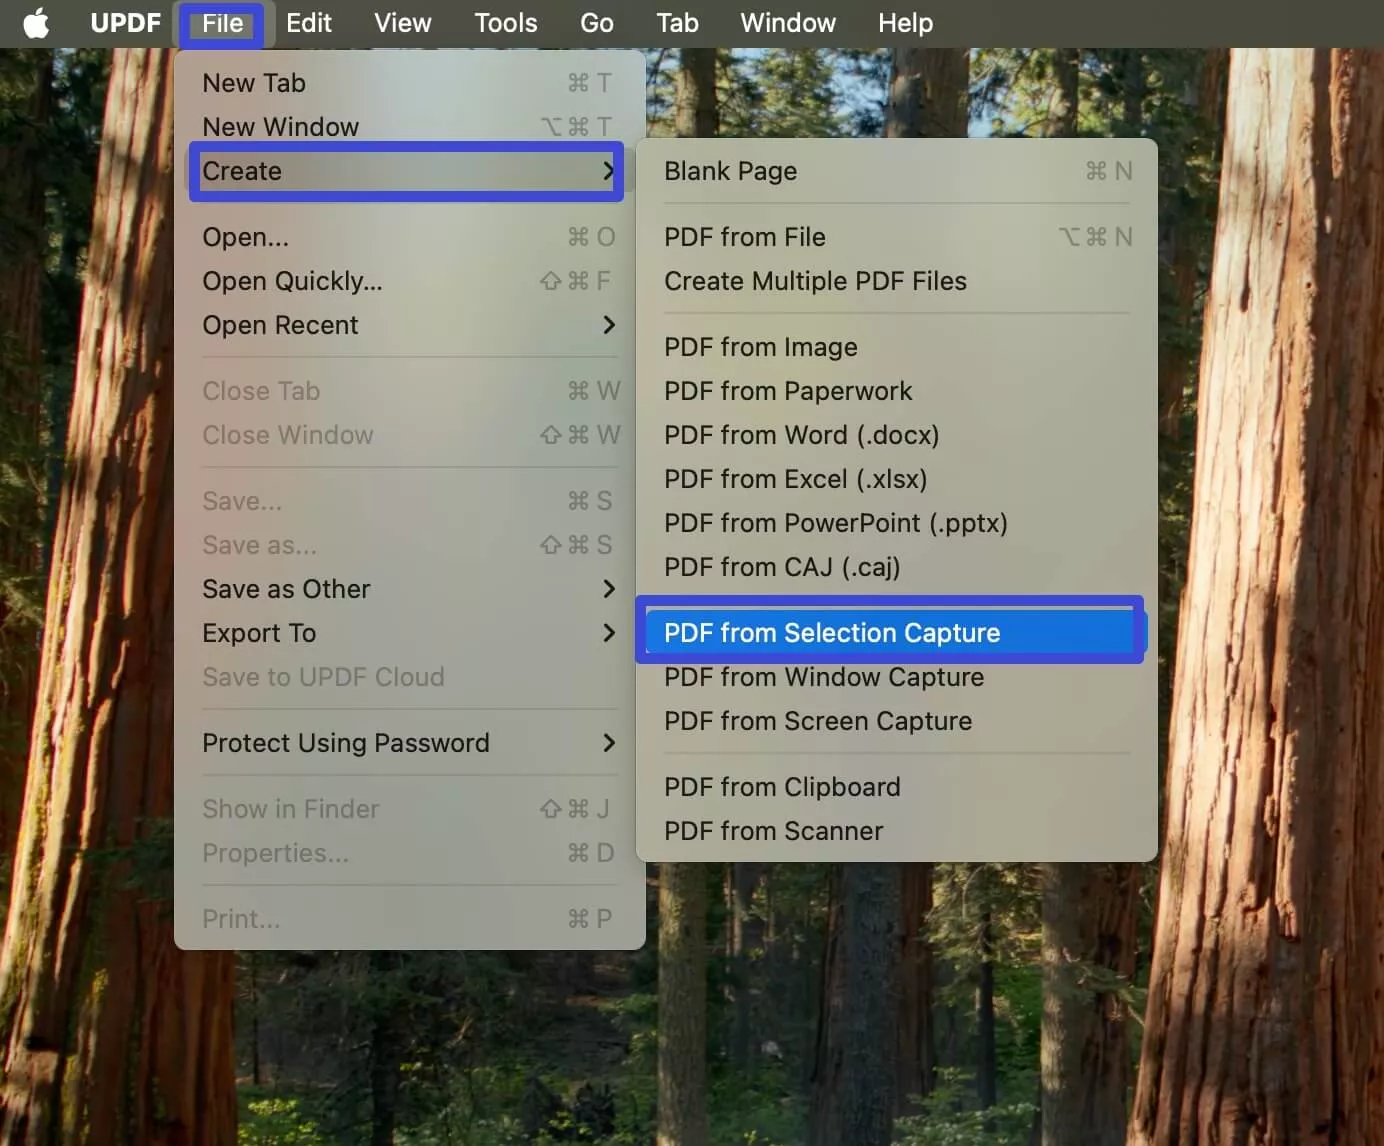
Step 1: Launch UPDF on your Mac and minimize the UPDF window. Then, click on the “File” tab and expand the “Create” drop-down menu. Choose “PDF from Selection Capture.”
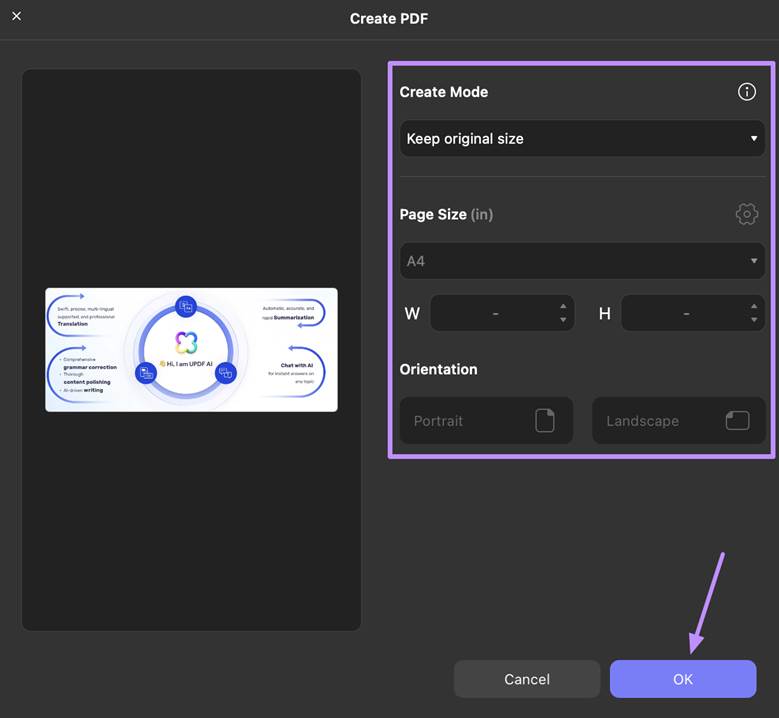
Step 2: Afterwards, select the area that you want to capture. A “Create PDF” window will open, apply the required settings such as “Create Mode,” “Page Size,” “Orientation,” and hit the “OK” button.
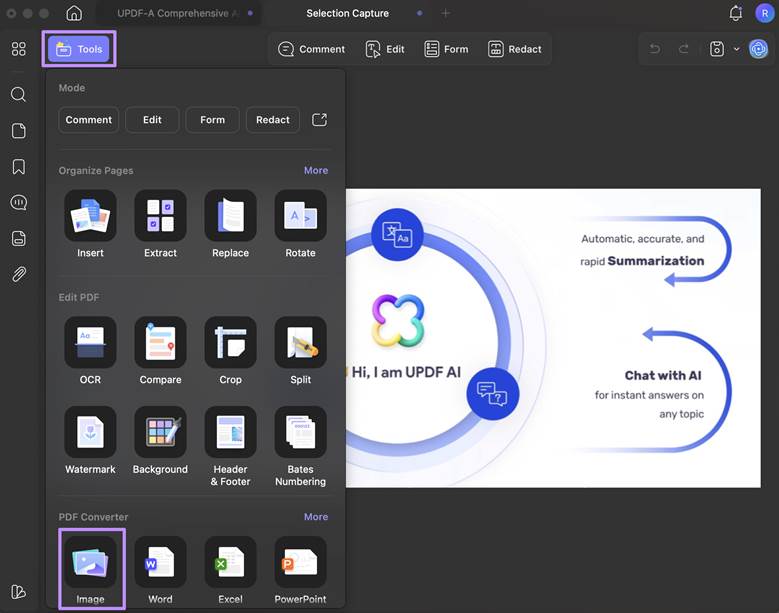
Step 3: Once the screenshot is captured, select “Tools” from the top left corner and choose “Image” under the “PDF Converter.” You might need to download the plugin if using it the first time.
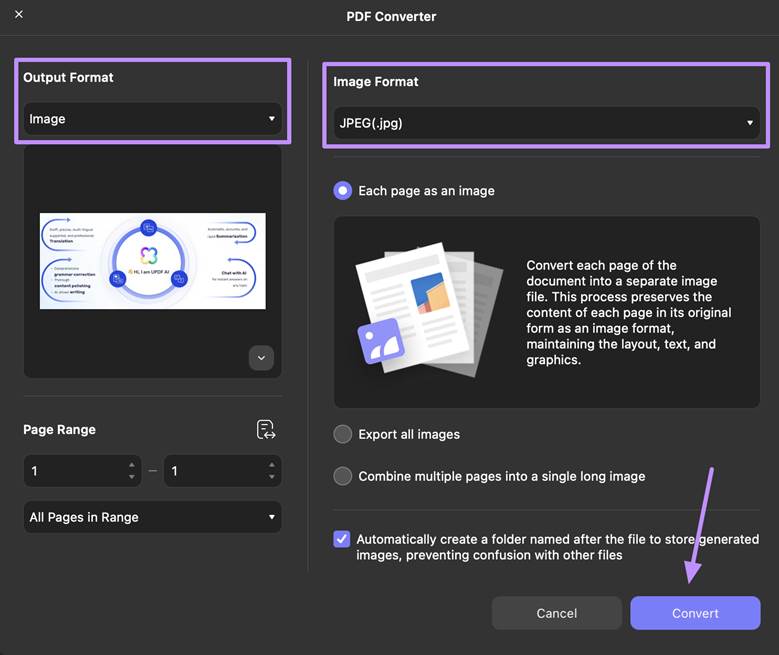
Step 4: In the “PDF Converter” window, choose “Image” as the “Output Format.” You can also select the required “Image Format” via the drop-down menu. Now, press the “Convert” button, select the location where you want to save the image and click on the “Save” button.
UPDF for Mac is more than just a screenshot tool; it offers advanced features that boost productivity for work, study, and everyday use.
Other Key Features of UPDF for Mac
- Convert PDF: Convert PDF in 14 different formats, such as Word, Excel, PowerPoint, and images and identify and extract text in 38 languages with AI-assisted OCR.
- Edit PDF: When editing PDFs, rotate, flip, crop, resize, extract or replace images directly in the document.
- Add Watermark: Place watermarks on PDFs, and customize text, image, or PDF watermarks with an adjustable size, opacity, and position.
- UPDF Cloud: Upload, store, edit and synchronize PDF files across devices.
- Sign PDFs: Add electronic or digital signatures using your keyboard, mouse, trackpad, or by uploading an image within the UPDF.
- Share PDF: Share your PDFs by generating shareable links, QR codes, or send them directly through email.
Want to see UPDF in action? Watch this demo video or check out this review article for a closer look. Don’t wait for screenshot glitches to slow you down. Purchase UPDF for Mac today and unlock all its features.
Fix 2. Change the Screenshot Saving Location
Sometimes the screenshot does not work on Mac simply because the files are being saved in a different folder. It may not be a problem at all, just that the save location is different from where you expected. Screenshots are automatically saved on the desktop, although this can be changed in the settings.
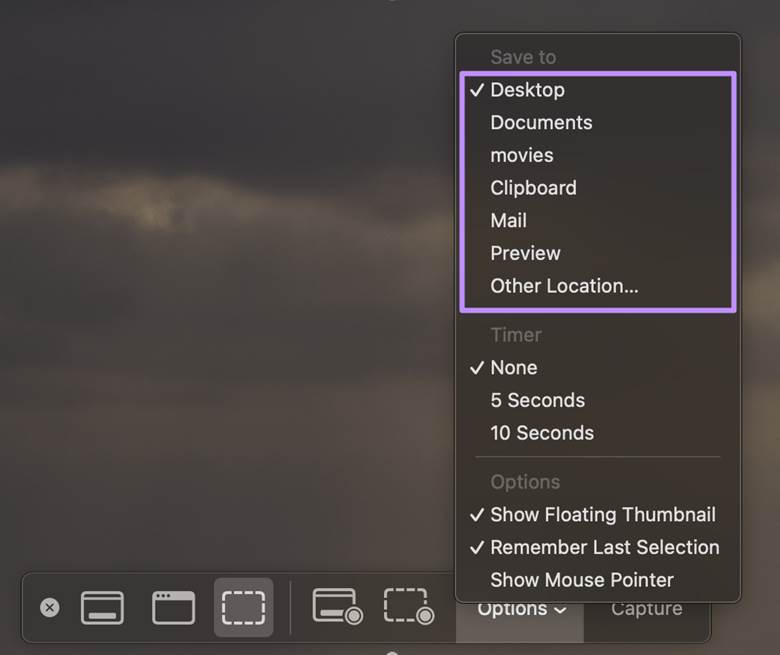
Step 1: Press “Command + Shift + 5” to open the Screenshot toolbar and click on “Options.”
Step 2: Under Save to, select the folder where you want your screenshots to be stored (for example, Desktop, Documents, or a custom folder. Try taking a new screenshot, and it should appear in the selected location.
Fix 3. Change Screenshot Settings
When you find the screenshot function not working on Mac, the possibility is that the feature has been turned off in some settings. macOS enables you to enable or disable certain screenshot shortcuts. Unless these are kept in check, your keyboard commands will not work.
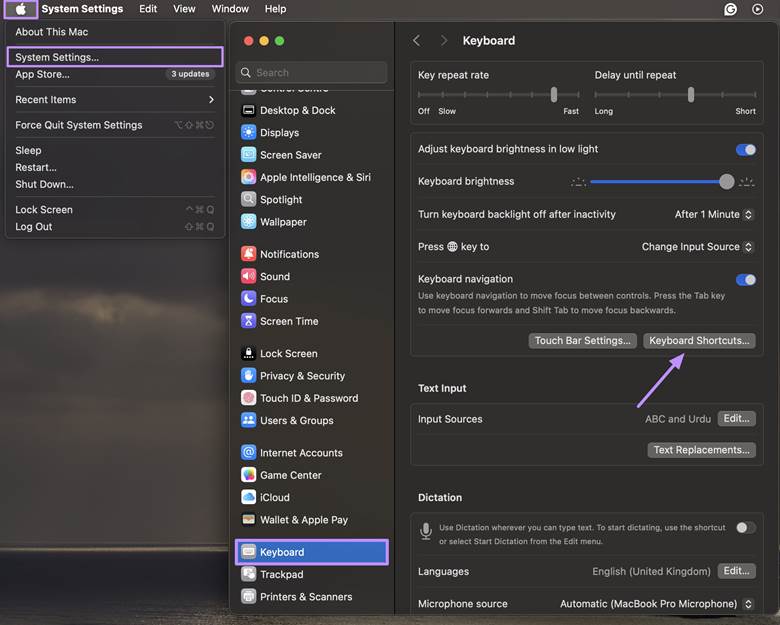
Step 1: Click on the Apple icon and choose “System Settings.” Then, select “Keyboard” from the left panel and hit the “Keyboard Shortcuts” button.
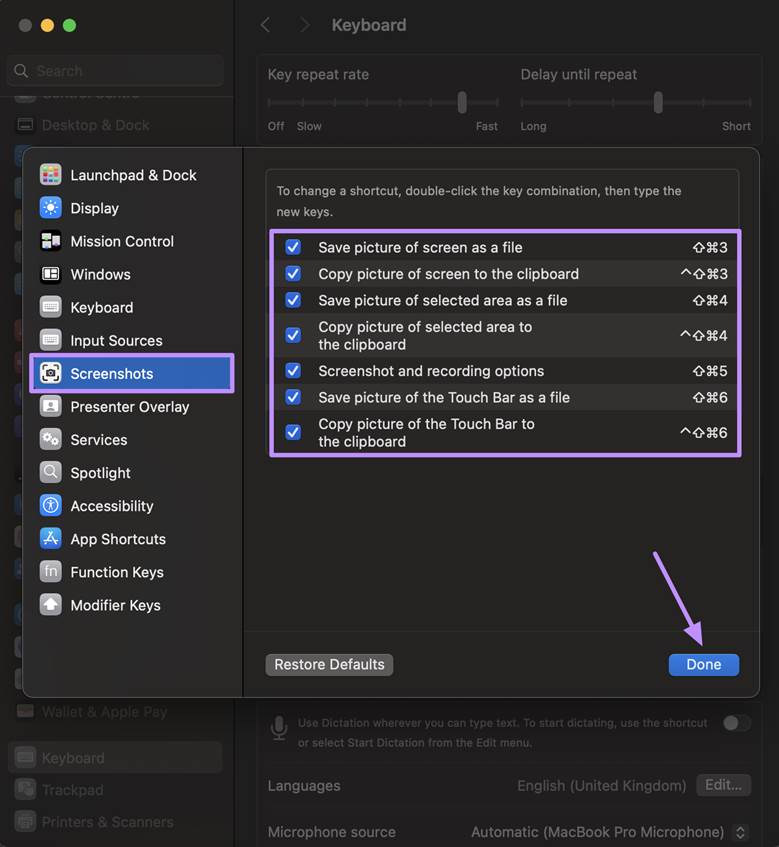
Step 2: Again, from the left panel, select “Screenshots” and check that all screenshot options are enabled. If they are unchecked, tick the boxes, press “Done” and try taking a screenshot again.
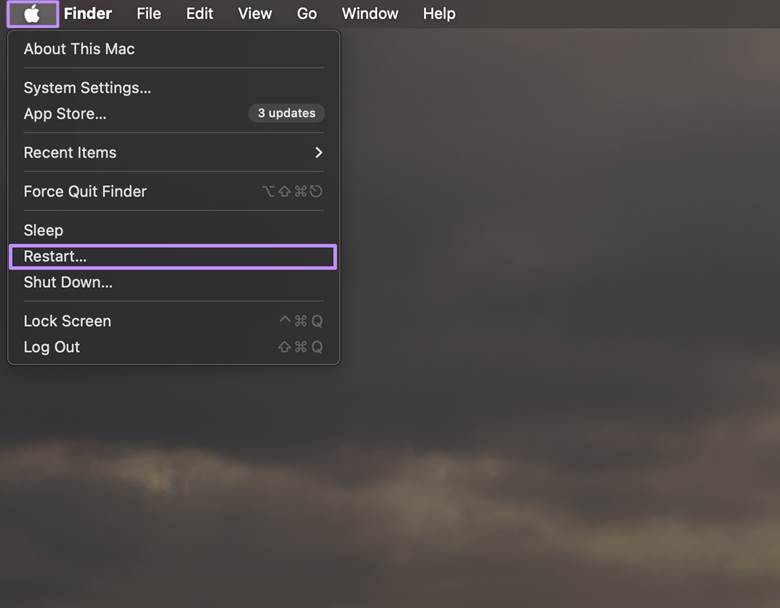
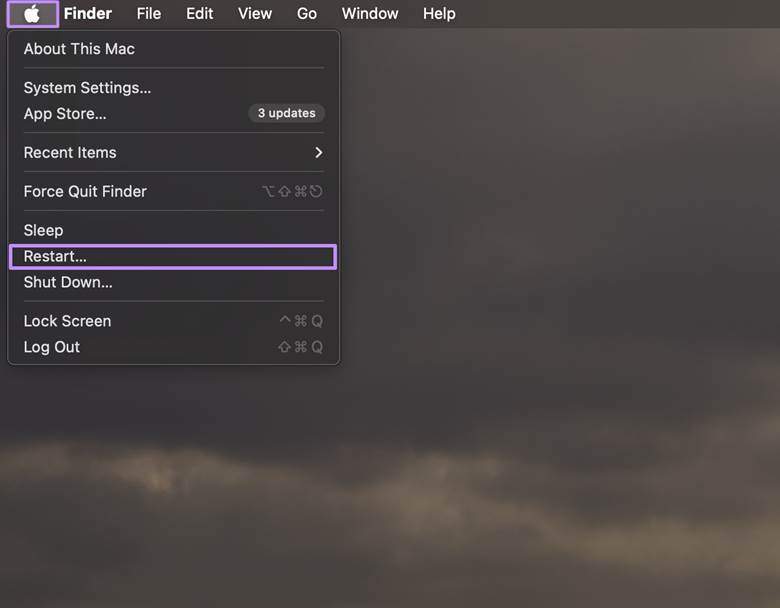
Fix 4. Restart Mac
The easiest way out is sometimes the best. When your screenshot functionality suddenly stops, it might be because of some minor system glitches. Restarting your Mac removes temporary files, reloads system processes, and generally solves minor problems like this.
For this, click the Apple icon at the top left corner, and choose the “Restart” option. Once your Mac boots back up, try taking a screenshot again.
Also Read: How to Fix Copy and Paste Not Working on Mac? 8 Fixes
Fix 5. Enter Safe Mode
Rebooting the Mac usually fixes the problem of screenshot not working, but when that is not true, third-party applications or background services may be disrupting the workings of the system. Therefore, booting in Safe Mode is another reliable way to troubleshoot the screenshot function not working on Mac.
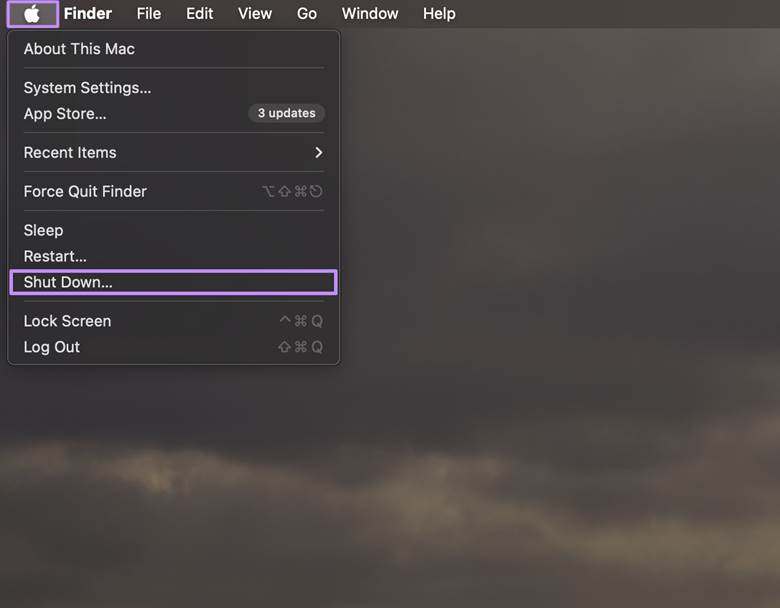
- For Apple Silicon (M1, M2, M3):
Access the Apple menu and click “Shut Down…” on your Mac. Afterwards, press and hold the power button until the startup options window appears. Now, select your startup disk, hold the “Shift” key, then click “Continue in Safe Mode.”
For Intel-based Macs:
Start by Restarting your Mac. Immediately hold the “Shift” key while it boots and release the key once you see the login window. You’ll now see “Safe Boot” in the menu bar.
Fix 6. Update macOS
A common query users ask is, why is my screenshot not working on Mac, especially after a recent update. Frequent updates often address minor errors, boost performance, and enhance security. So, updating your Mac to the latest software version may solve the problem.
Step 1: Click the “Apple” menu in the top-left corner of your screen. Select “System Settings” and choose “General” followed by “Software Update.”
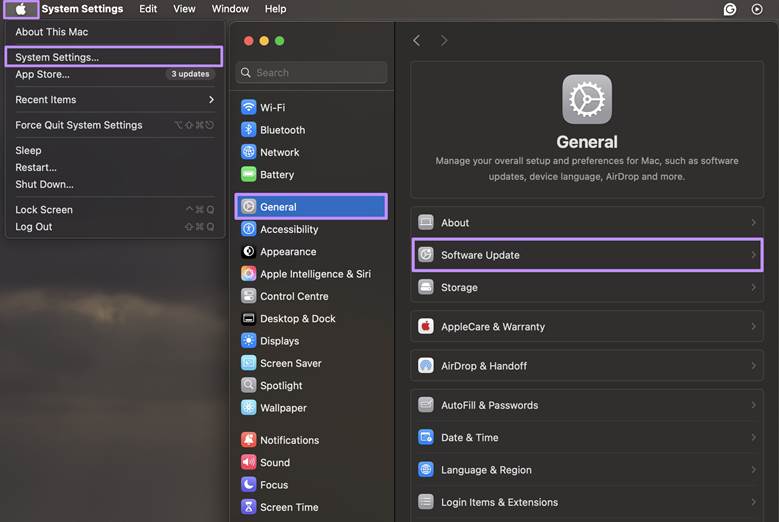
Step 2: Your Mac will check for available updates. If an update is available, click “Update Now” or “Upgrade Now.” Follow the on-screen instructions and allow your Mac to restart once the update completes.
Fix 7. Erase All Content and Settings
If the screenshot does not work on Mac even after restarting, you might need to reset the overall system settings settings.. Here, restoring Mac to its factory setting might help greatly. However, before you proceed, I suggest you backup all the important data because this method will erase all files, apps, and settings.
Step 1: Click the “Apple” and go to “System Settings.” Select General from the left sidebar and scroll down and click “Transfer or Reset.”
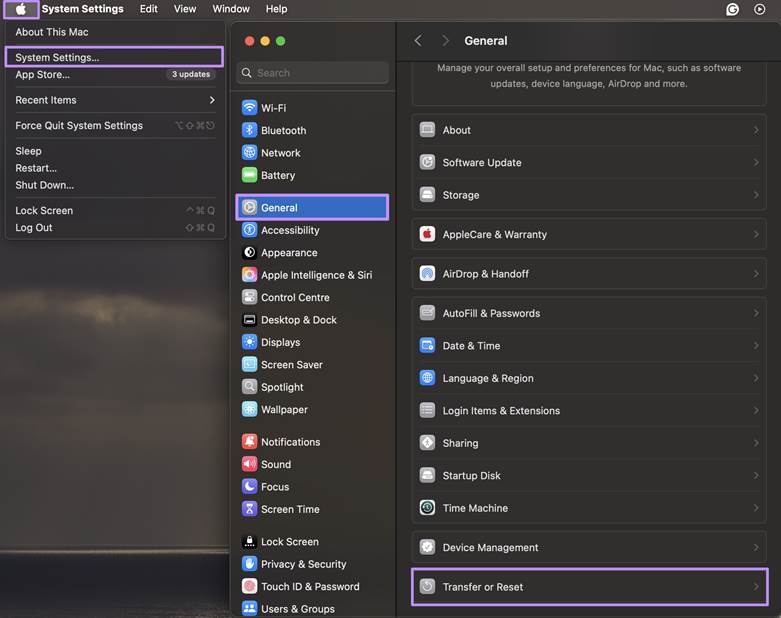
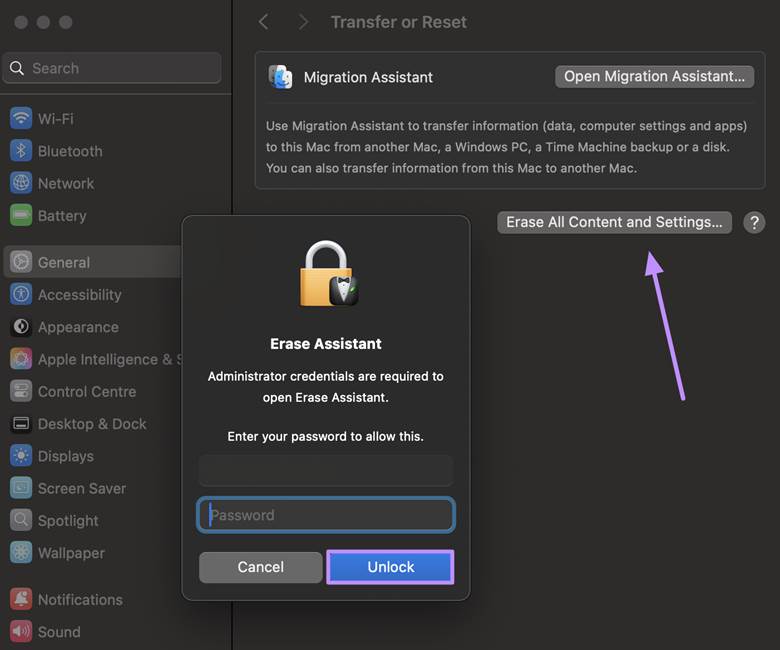
Step 2: Proceed with the “Erase All Content and Settings” option and enter administrator password and press the “Unlock” button. Follow the on-screen instructions to complete the process and your Mac will restart after restoring to factory settings.
Final Words
Many people find the problem of screenshots not working on Mac to be challenging, especially when taking a quick screenshot. Fortunately, the steps I mentioned above address everything from basic option changes to more complex solutions like deleting settings or updating macOS.
Want to explore a more convenient way to take screenshots? In this case, UPDF is worth trying. Download UPDF for Mac today from the official website or via the App Store, and enjoy smarter file management along with easy screenshot capturing.
Windows • macOS • iOS • Android 100% secure


 Delia Meyer
 Enola Davis
 Enrica Taylor