Excel is one of the most popular spreadsheet software and offers great data presentation capabilities. However, sometimes you need to print an Excel document in PDF format for better file sharing. So, you must know how to use the Excel print to PDF feature, but the issue here is that most people have varying requirements. No worry, Excel supports all of them and this guide will cover all those requirements and how you can use Excel printing features to get the PDF document that you need.
Before we dive in, if you're looking for a faster way to convert, merge, or split your Excel files into professional PDFs, try UPDF for free—a lightweight, all-in-one PDF power tool designed for seamless document management.
Windows • macOS • iOS • Android 100% secure
Part 1. How to Print One Sheet in Excel to PDF?
The most common use case is when you have only one sheet in the Excel document. While Excel's native printing feature works, it often leads to formatting issues like cut-off columns.
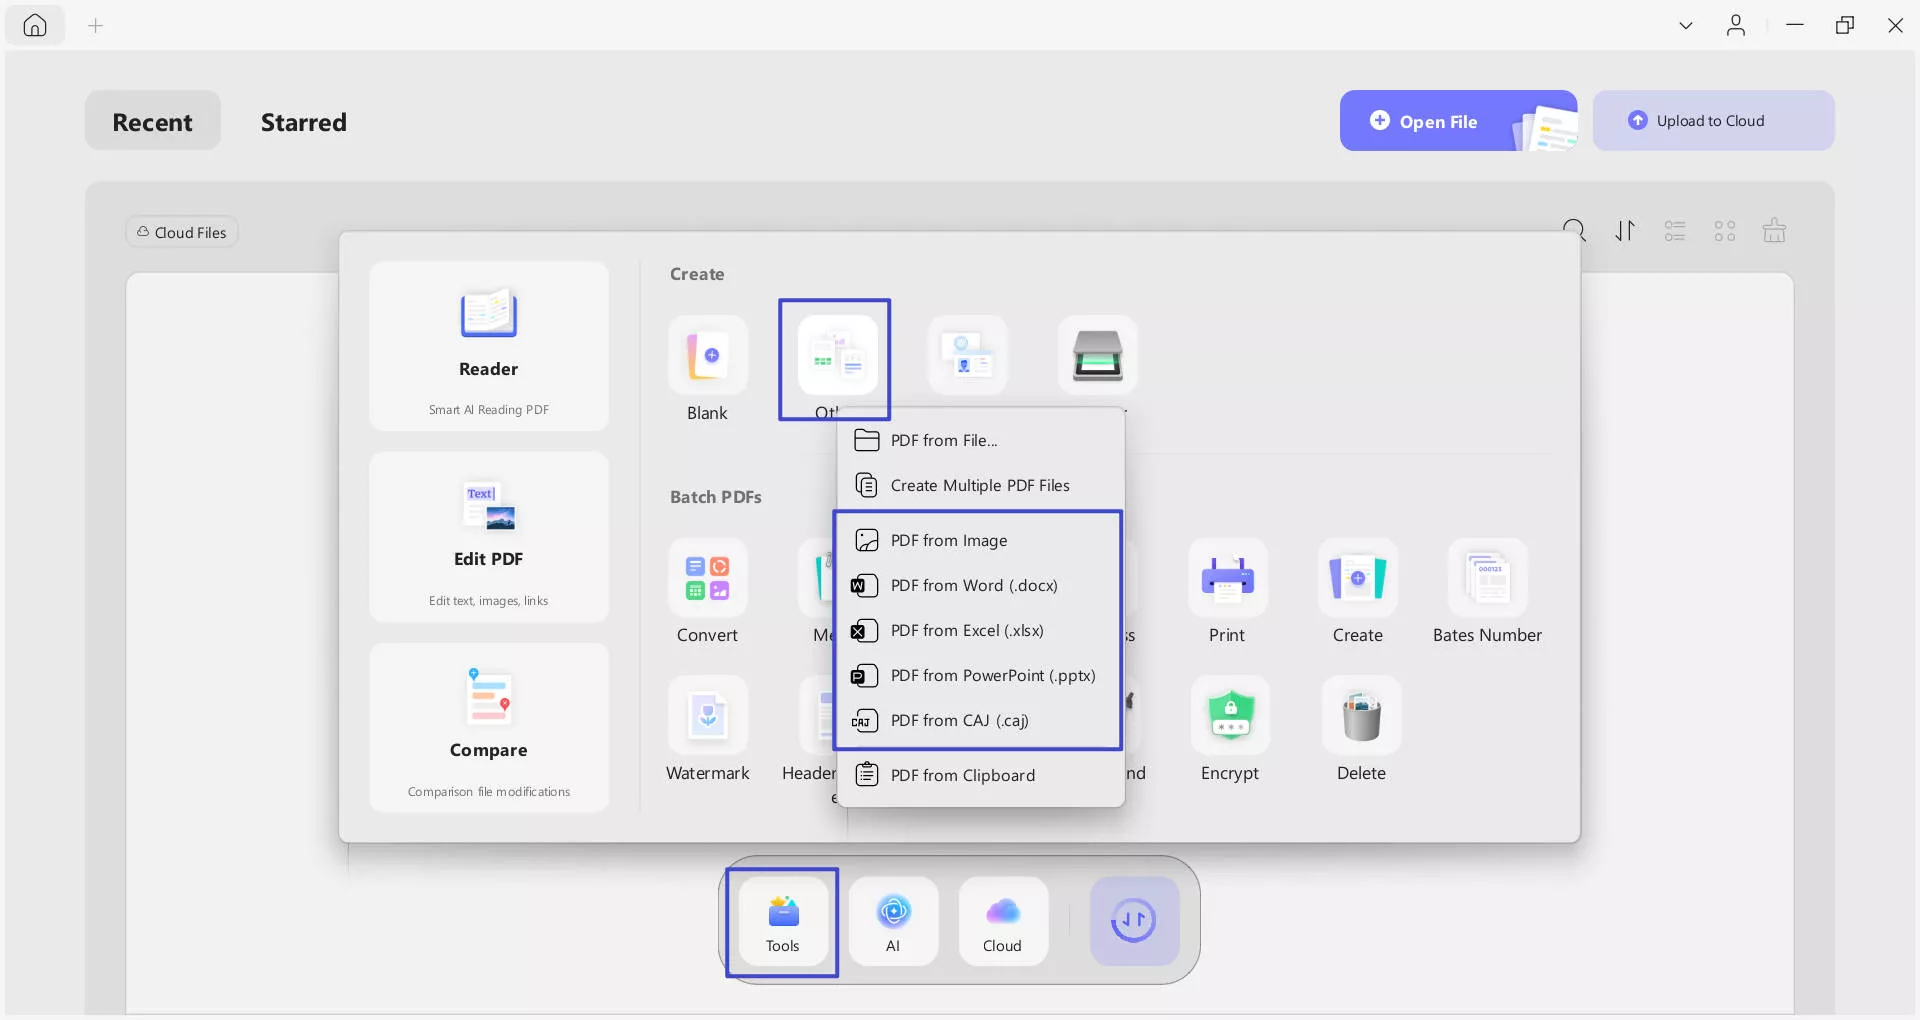
The Faster Way: Create PDF with UPDF Before using the traditional print method, consider using UPDF. It allows you to create a PDF from a single Excel file
directly with a simple drag-and-drop. This ensures 100% data integrity without navigating complex print settings. Download UPDF free trial to try the seamless conversion.
Windows • macOS • iOS • Android 100% secure
Steps for Excel Native Print:
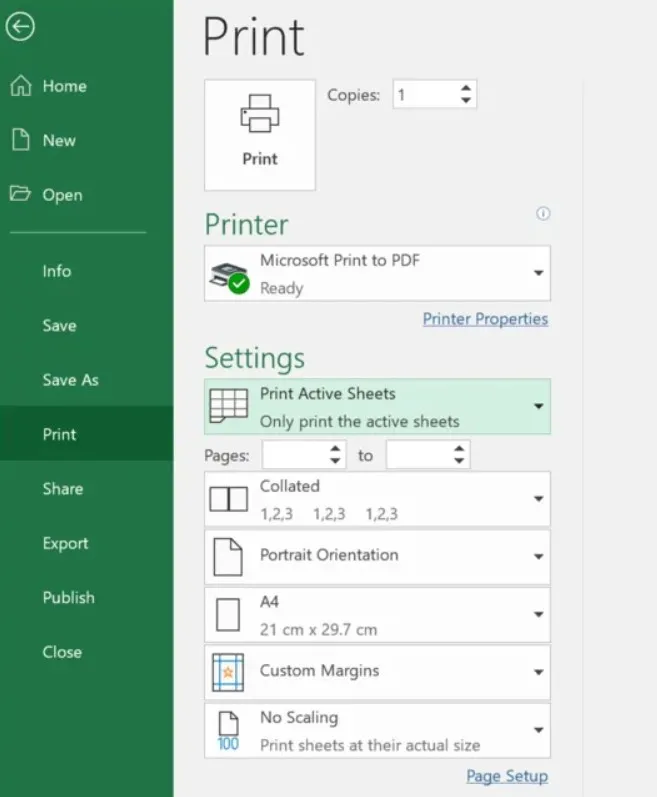
Steps: Double-click on your Excel file to open it in Microsoft Excel software on your PC. When the file loads you need to open sheet that you want printed and opening it will turn it into active state. Now you will click "File" > "Print" and in the printing settings you will choose "Print Active Sheets" from dropdown menu. Usually this option is selected by default. In the Printer option you will select "Microsoft Print to PDF" and click Print. Now save the PDF file on your PC by following on-screen steps and you will be done.
Part 2. How Can Excel Print Multiple Tabs to One PDF?
When there are multiple tabs/sheets in one Excel document then this method will be very useful. Instead of printing them to PDF individually and creating a lot of PDF documents you can get one PDF for all those tabs/sheets and the process is very similar to the previous method. The only additional thing you will do is selecting all the tabs/sheets that you want to print in PDF format and here are the steps for doing that.
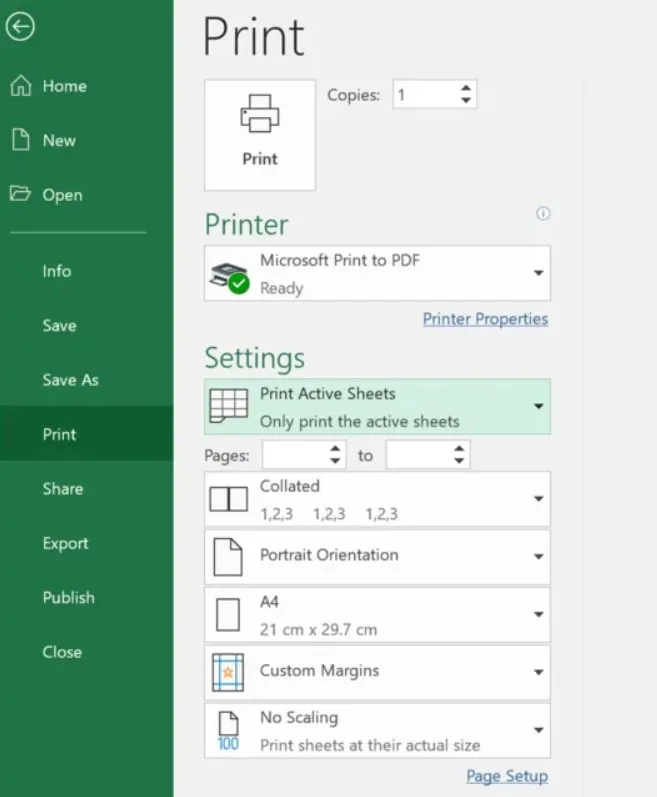
Steps: After you open Excel document in Microsoft Excel software, you will see Sheets present at bottom of your screen. Hold "Ctrl" button on keyboard and click all those sheets that you want to print to PDF. Now click "File" > "Print" and select "Microsoft Print to PDF". Ensure that "Print Active Sheets" is selected in Settings dropdown before you click Print. Now you only need to follow the file-saving steps and the selected tabs/sheets will be saved in one PDF document.
Part 3. How to Print Entire Workbook in Excel to PDF?
If you have an Excel document that contains multiple sheets of data and you want to print the whole workbook as one PDF then Excel can do that for you. Without going through any complicated steps you only need to select the right options when printing and you can get one PDF file made from all the spreadsheets in that Excel Workbook with the steps below:
Step 1: Open the Excel Workbook by double-clicking its file. Now MS Excel will open with the first sheet of that workbook being displayed. You need to click "File" > "Print" and select "Microsoft print to PDF" to ensure that you get a PDF file saved instead of getting a physical print-out of the document.

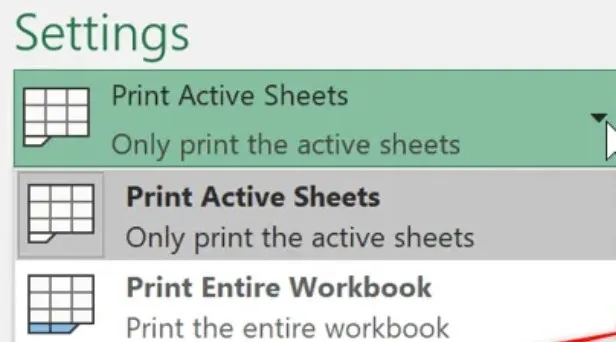
Step 2: The second step will be clicking the settings dropdown menu and selecting "Print Entire Workbook" When you click "Print" you will get a file explorer popup for saving that PDF on your PC. Save it and when you open it the single PDF document will contain all the spreadsheets from that Excel Workbook.
Part 4. How to Print the Selection Part in Excel to PDF?
Sometimes you don't need to print the whole workbook or the whole sheet. You only require printing PDF of selected cells, columns, or rows from the Excel spreadsheets and MS Excel has a built-in feature for that use case too. It involves one additional step of selecting the required data first and then choosing the right printing option. Below is a detailed guide on how to print selected parts in Excel to PDF.
Step 1: Step 1 will be opening the spreadsheet that contains the data that you want to print in PDF format and then selecting all the required data. You can click and drag to continuously select cells or hold "Ctrl" then click different cells, rows, or columns to select them.
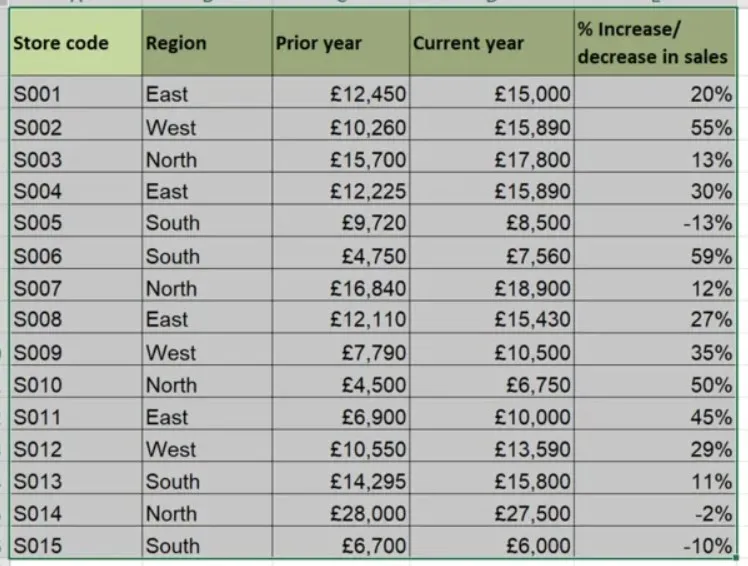
Step 2: Click "File" then click "Print" and select "Microsoft print to PDF" as the printer of choice. It will give you a PDF copy of contents instead of physically printing.

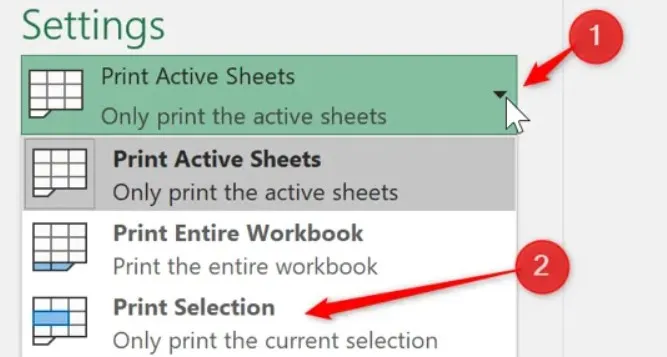
Step 3: The last Step is selecting "Print Selection" from settings dropdown before you click "Print". Now you can follow the PDF saving steps and you will be done.
Part 5. How to Batch Print Excel Files to PDF?
Do you have a lot of Excel files that you want to print to PDF? Printing them to PDF manually by opening and printing each one individually is incredibly inefficient. While Windows offers a basic batch print feature, it requires you to set "Microsoft Print to PDF" as your default printer first, or it may send files to a physical printer by mistake.
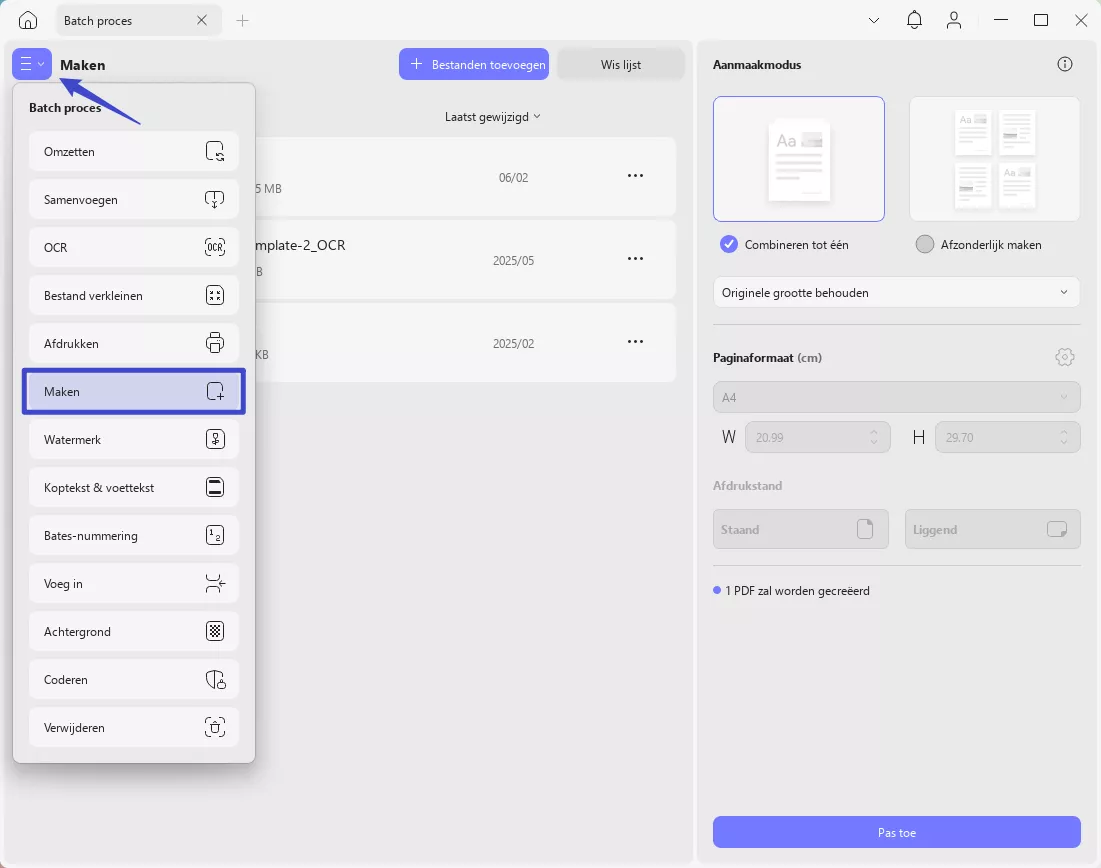
The Professional Choice: UPDF Batch Create For a more reliable and faster experience, use UPDF’s Batch Create feature. It allows you to convert dozens of Excel files into PDFs simultaneously without opening each document. You can even choose to combine them into one single PDF or keep them as separate files.
Windows • macOS • iOS • Android 100% secure
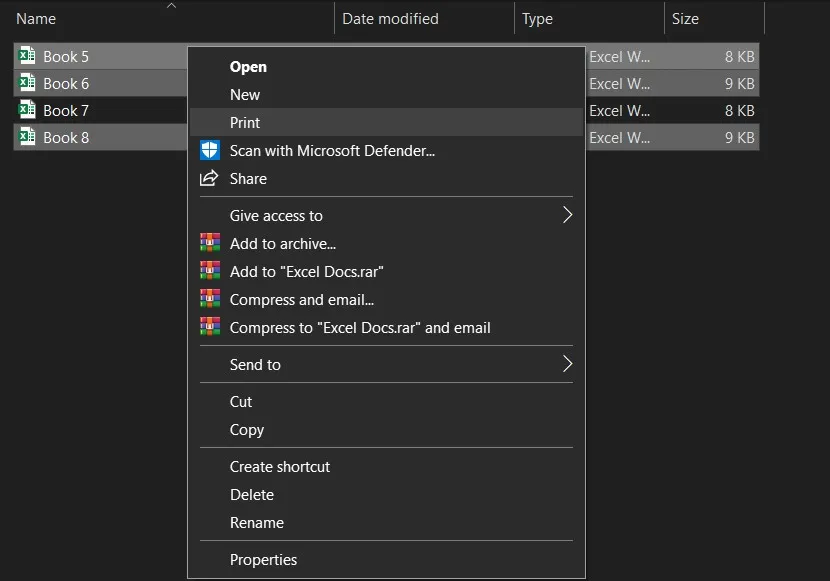
Step 1: Open the folder containing all Excel files and select them by pressing "Ctrl + A" for selecting all or hold "Ctrl" and click individual files if you don't want to select all. Now right-click on a selected file and click "Print". You will get printing options where you must select "Microsoft print to PDF" and proceed with file saving steps. This method will save a lot of your time by utilizing batch printing features.
Part 6. How to Print Multiple Excel Sheets to Multiple PDF Files
While Excel can print its workbooks or spreadsheets into PDF in the 5 previously mentioned ways, it cannot meet all your needs. For example, if you want to take a PDF print of specific pages or want to divide the whole document into smaller sections, that is not available in Excel and doing it manually will take a lot of time. That's where UPDF's creating and splitting features will be very useful.
UPDF is the best all-in-one PDF editor that can deal with many use cases with its advanced features like Organize PDF, UPDF AI, etc. That's why we recommend using UPDF to print multiple Excel sheets into multiple PDF files instead of doing it manually with Excel. Download UPDF to see what other things can be done with this amazing PDF editor.
Windows • macOS • iOS • Android 100% secure
Step 1: Start UPDF software on your PC by double clicking its desktop icon and once it is open, you will drag the Excel file and drop it in UPDF interface. UPDF will show you the Excel to PDF conversion message and when it is converted your Excel file will open in PDF reader view in UPDF. Click "Tools", find "Organize Pages" and choose "Extract" to get all page organizing features.

Step 2: Now if you want to get a PDF print of specific pages from the Excel document only then you may use "hold Ctrl + Click" method to select those pages then click "Extract". You will need to select a location on your PC to save those extracted pages as PDF.

Step 3: If you want to split huge Excel document into smaller parts then you may click "Split" button and set the number of pages per each split. Follow through with the file saving process and when you are done you will have multiple PDF pages of the Excel file converted into PDF format.

UPDF is much more capable with its other features so you may read the Laptopmedia review of UPDF to learn what you can do with it or watch the video tutorial about UPDF here to learn everything it is capable of.
Conclusion
With different Excel print to PDF options provided by Microsoft Excel, you can easily get the PDF document with Excel data that you need. However, sometimes you need to split bigger documents into smaller sections or want only selective pages in PDF format and that is simply not possible with Excel with great efficiency. The solution here is to use UPDF since its page-organizing capabilities make things much more efficient. Download UPDF to use its PDF features including page organizing to print Excel files to PDF format the way you want.
Windows • macOS • iOS • Android 100% secure
 UPDF
UPDF
 UPDF for Windows
 UPDF for Mac
 UPDF for iPhone/iPad
 UPDF for Android
 UPDF AI Online
 UPDF Sign
 Edit PDF
 Annotate PDF
 Create PDF
 PDF Form
 Edit links
 Convert PDF
 OCR
OCR PDF to Word
 PDF to Image
 PDF to Excel
 Organize PDF
 Merge PDF
 Split PDF
 Crop PDF
 Rotate PDF
 Protect PDF
 Sign PDF
 Redact PDF
 Sanitize PDF
 Remove Security
 Read PDF
 UPDF Cloud
 Compress PDF
 Print PDF
 Batch Process
 About UPDF AI
 UPDF AI Solutions
 AI User Guide
 FAQ about UPDF AI
 Summarize PDF
 Translate PDF
 Chat with PDF
 Chat with AI
 Chat with image
 PDF to Mind Map
 Explain PDF
 Scholar Research
 Paper Search
 AI Proofreader
 AI Writer
 AI Homework Helper
 AI Quiz Generator
 AI Math Solver
 PDF to Word
 PDF to Excel
 PDF to PowerPoint
 User Guide
 UPDF Tricks
 FAQs
FAQs UPDF Reviews
 Download Center
 Blog
Blog Newsroom
 Tech Spec
 Updates
 UPDF vs. Adobe Acrobat
 UPDF vs. Foxit
 UPDF vs. PDF Expert




 Enid Brown
  Engelbert White
 Lizzy Lozano
 Enrica Taylor
