 UPDF
UPDF
 UPDF for Windows
 UPDF for Mac
 UPDF for iPhone/iPad
 UPDF for Android
 Nomostar
 UPDF AI Online
 UPDF Sign
 IvyCraft
 Edit PDF
 Annotate PDF
 Create PDF
 PDF Form
 Edit links
 Convert PDF
 OCR
OCR PDF to Word
 PDF to Image
 PDF to Excel
 Organize PDF
 Merge PDF
 Split PDF
 Crop PDF
 Rotate PDF
 Protect PDF
 Sign PDF
 Redact PDF
 Sanitize PDF
 Remove Security
 Read PDF
 UPDF Cloud
 Compress PDF
 Print PDF
 Batch Process
 About UPDF AI
 UPDF AI Solutions
 AI User Guide
 FAQ about UPDF AI
 Summarize PDF
 Translate PDF
 Chat with PDF
 Chat with AI
 Chat with image
 PDF to Mind Map
 Explain PDF
 PDF AI Tools
 Image AI Tools
 AI Chat Tools
 AI Writing Tools
 AI Study Tools
 AI Working Tools
 Other AI Tools
 AI Bookmark Generation
 AI Bookmark Summary
 AI Watermark Generation
 AI Background Generation
 AI Sticker Generation
 AI Stamp Generation
 AI Editing Suite
 UPDF Copilot
 AI Page Management
 AI Semantic Search
 PDF to Word
 PDF to Excel
 PDF to PowerPoint
 Enterprise Solution
 Enterprise Sign
 Enterprise AI
 Enterprise Plan
 Enterprise User Guide
 Enterprise Webinar
 IT
IT Education
 Construction
 Financial Service
 Healthcare
 Insurance
 Legal
Legal Manufacturing
 Government
 Researchers & PhDs
 Solopreneurs & Freelancers
 Lawyers & Legal Professionals
 Real Estate Agents & Brokers
 Education Solution
 Customer Stories
 User Guide
 UPDF Tricks
 FAQs
FAQs UPDF Reviews
 Download Center
 Blog
Blog Newsroom
 Tech Spec
 Updates
 UPDF vs. Adobe Acrobat
 UPDF vs. Foxit
 UPDF vs. PDF Expert

Pictures help readers keep their eyes on PDFs longer than plain text. This is one of the main reasons that modern documents almost always contain pictures. However, you may search around and try many ways, but none of them is what you need. No worry, you can find the methods you need as this article will show different effective ways how to insert a picture in PDF on a Mac.
Part 1. How to Add Image to PDF on Mac With UPDF (3 Ways)
UPDF offers three image-related options for different purposes. Use the Image tool when you want the picture to appear directly on the PDF page, the Attach File tool when you want to embed the original image as a downloadable attachment, or an Image Field when you want another person to upload a picture while filling out a form. Download UPDF and follow the corresponding guide below.
Windows • macOS • iOS • Android 100% secure
Way 1. Insert a Picture on PDF on Mac Via Adding "Image"
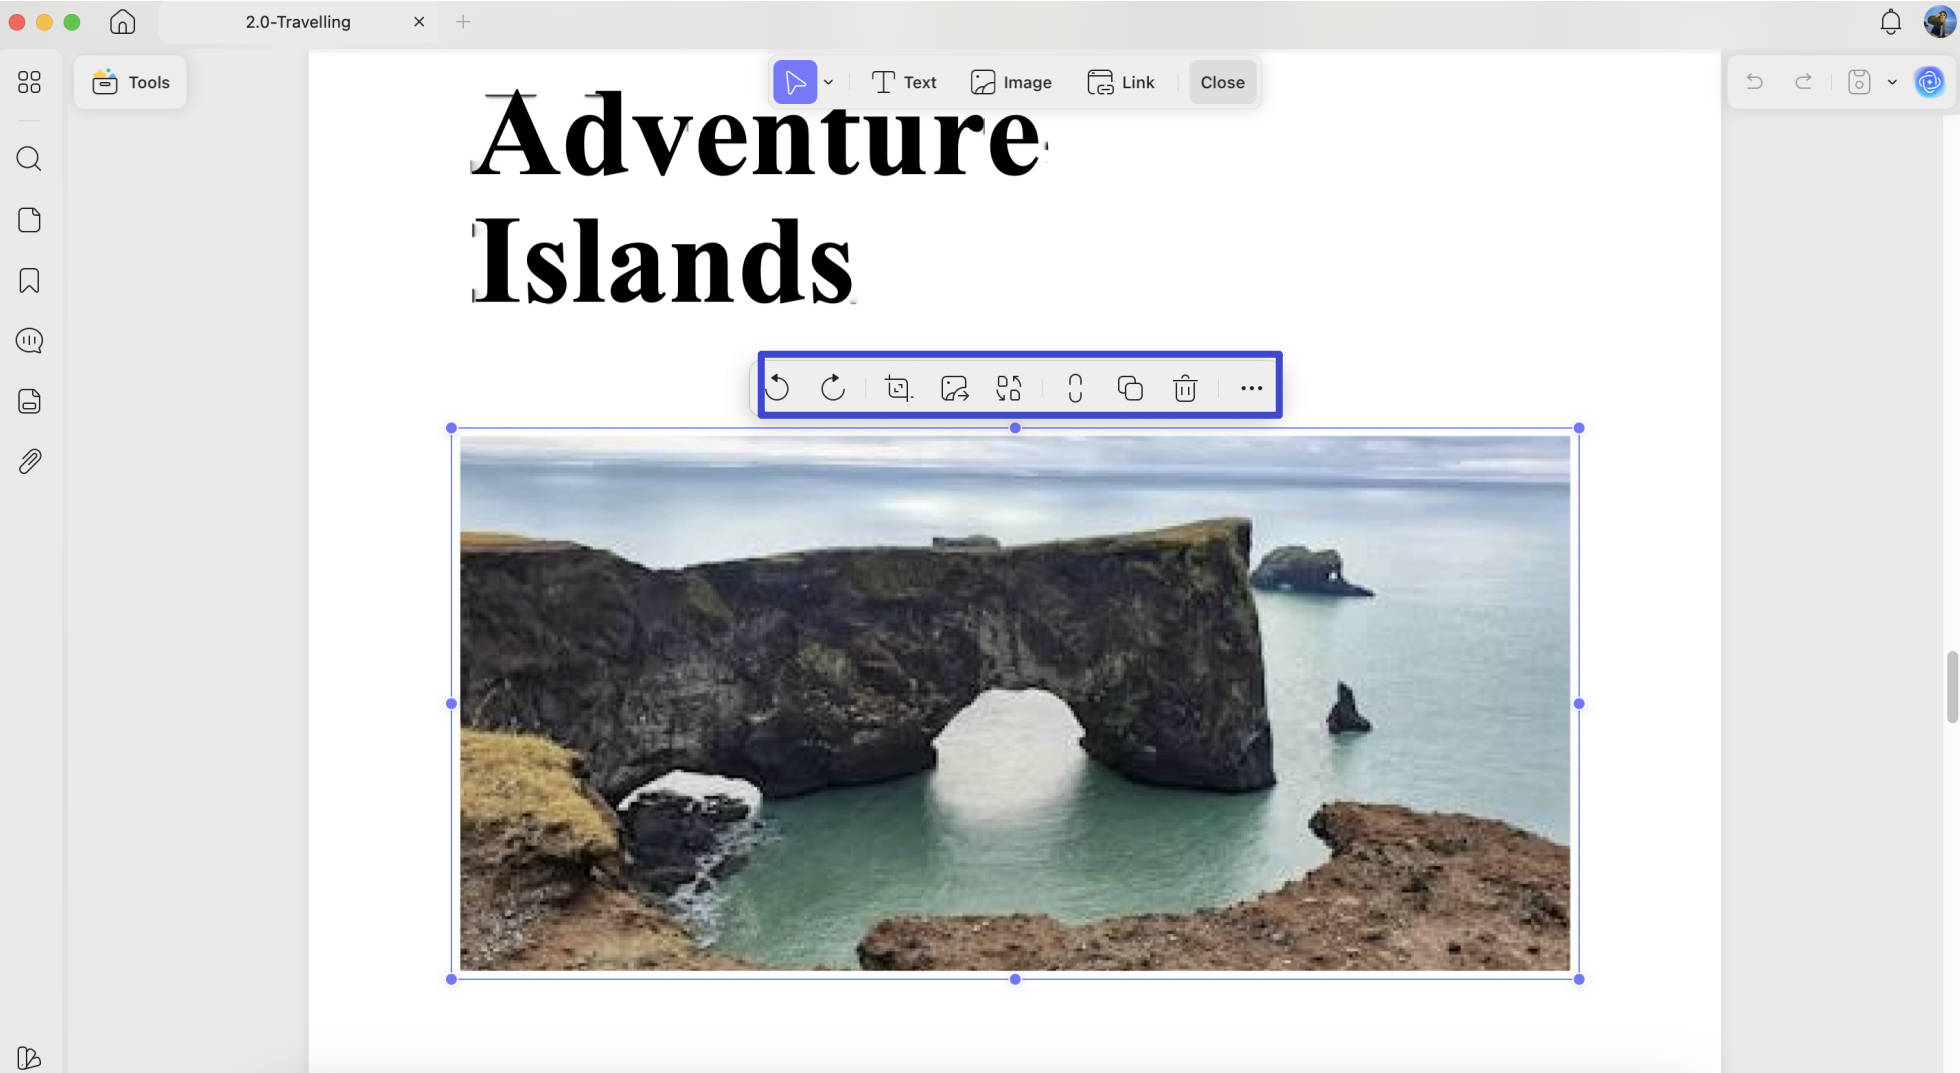
If you want the picture to appear directly on the PDF page, use UPDF's Image tool. After inserting it, you can resize, move, rotate, crop, replace, copy, or delete the image as needed. Just follow the below steps about how to use it.
Step 1. Download and launch UPDF on your Mac. Click "Open File" on the home screen, then select the PDF you want to edit from the file selection window.

Step 2. Now click on the "Edit" button in "Tools" on the left sidebar. We will use this section to add images to PDF Mac.
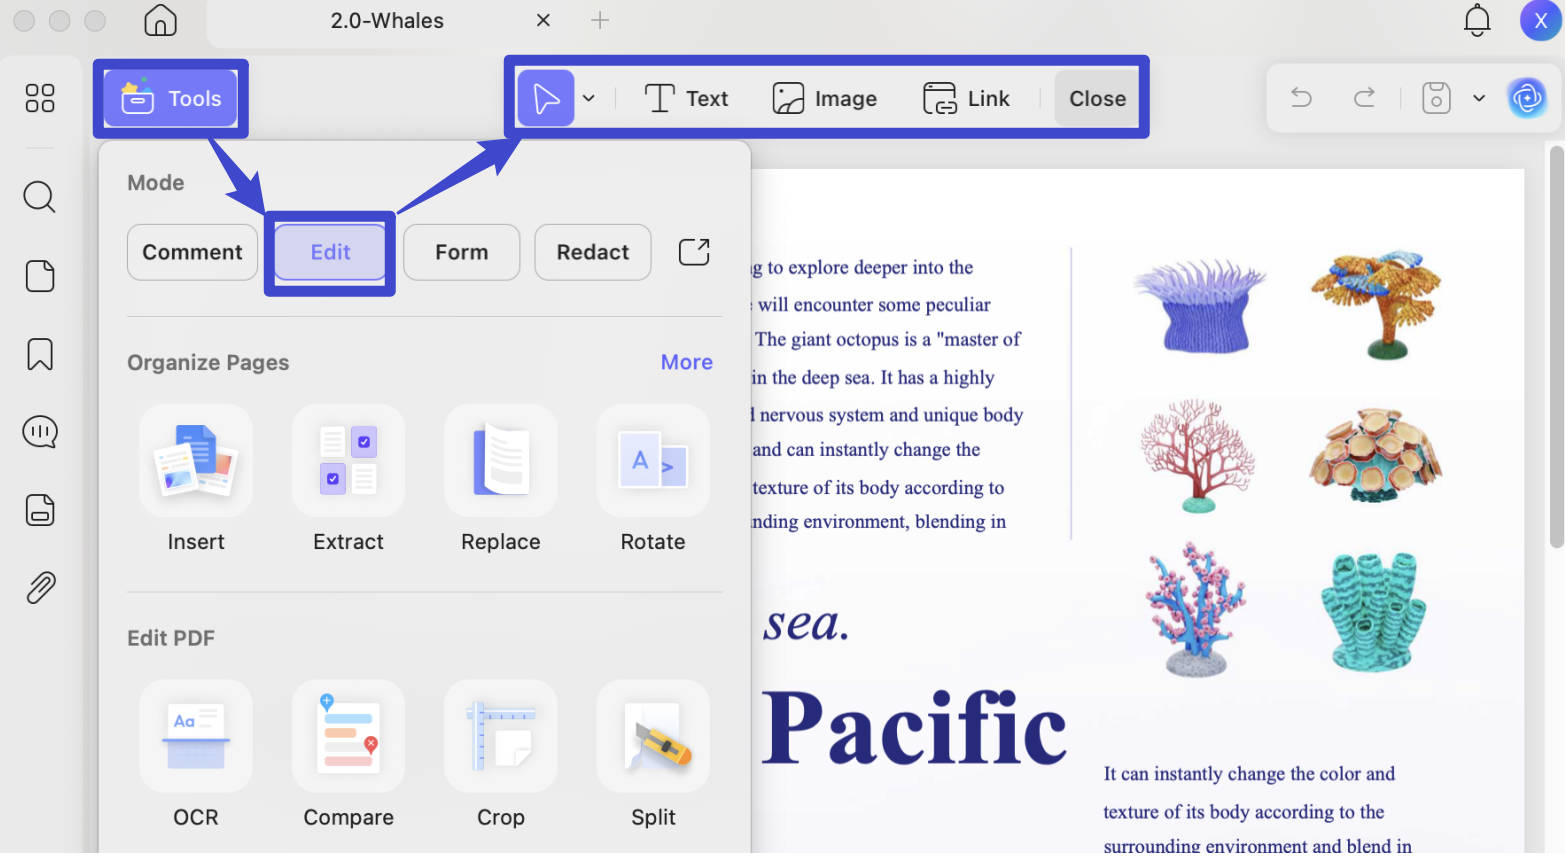
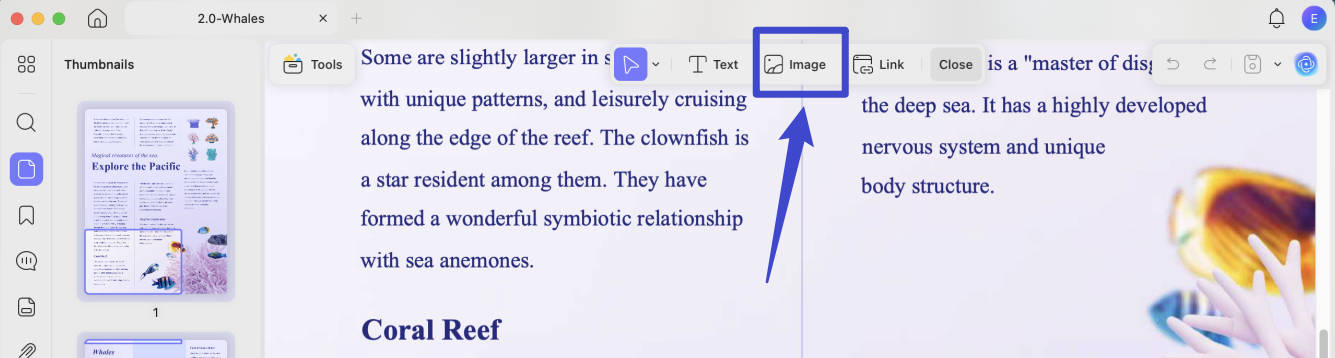
Step 3. Click the "Image" icon in the top toolbar, choose an image from your Mac, and then place it on the desired area of the PDF page. Alternatively, you can drag an image file directly from Finder into the PDF.
Step 4. Select the inserted image to resize, move, rotate, crop, replace, or delete it. When the image looks right, choose "File" > "Save," or use "Save As" if you want to preserve the original PDF.
Way 2. Attach an Image File to a PDF on Mac
Use this method when the image does not need to appear directly on the page but should remain embedded in the PDF as a separate file. UPDF places an attachment icon on the page; recipients can click the icon in a compatible PDF reader to open or save the image.
Step 1. Make sure you open the PDF with UPDF on Mac. Now, click "Comment" in "Tools" at the left side menu, find the "Attach File" icon, and click on it. You can select the attachment shape, color, and opacity.
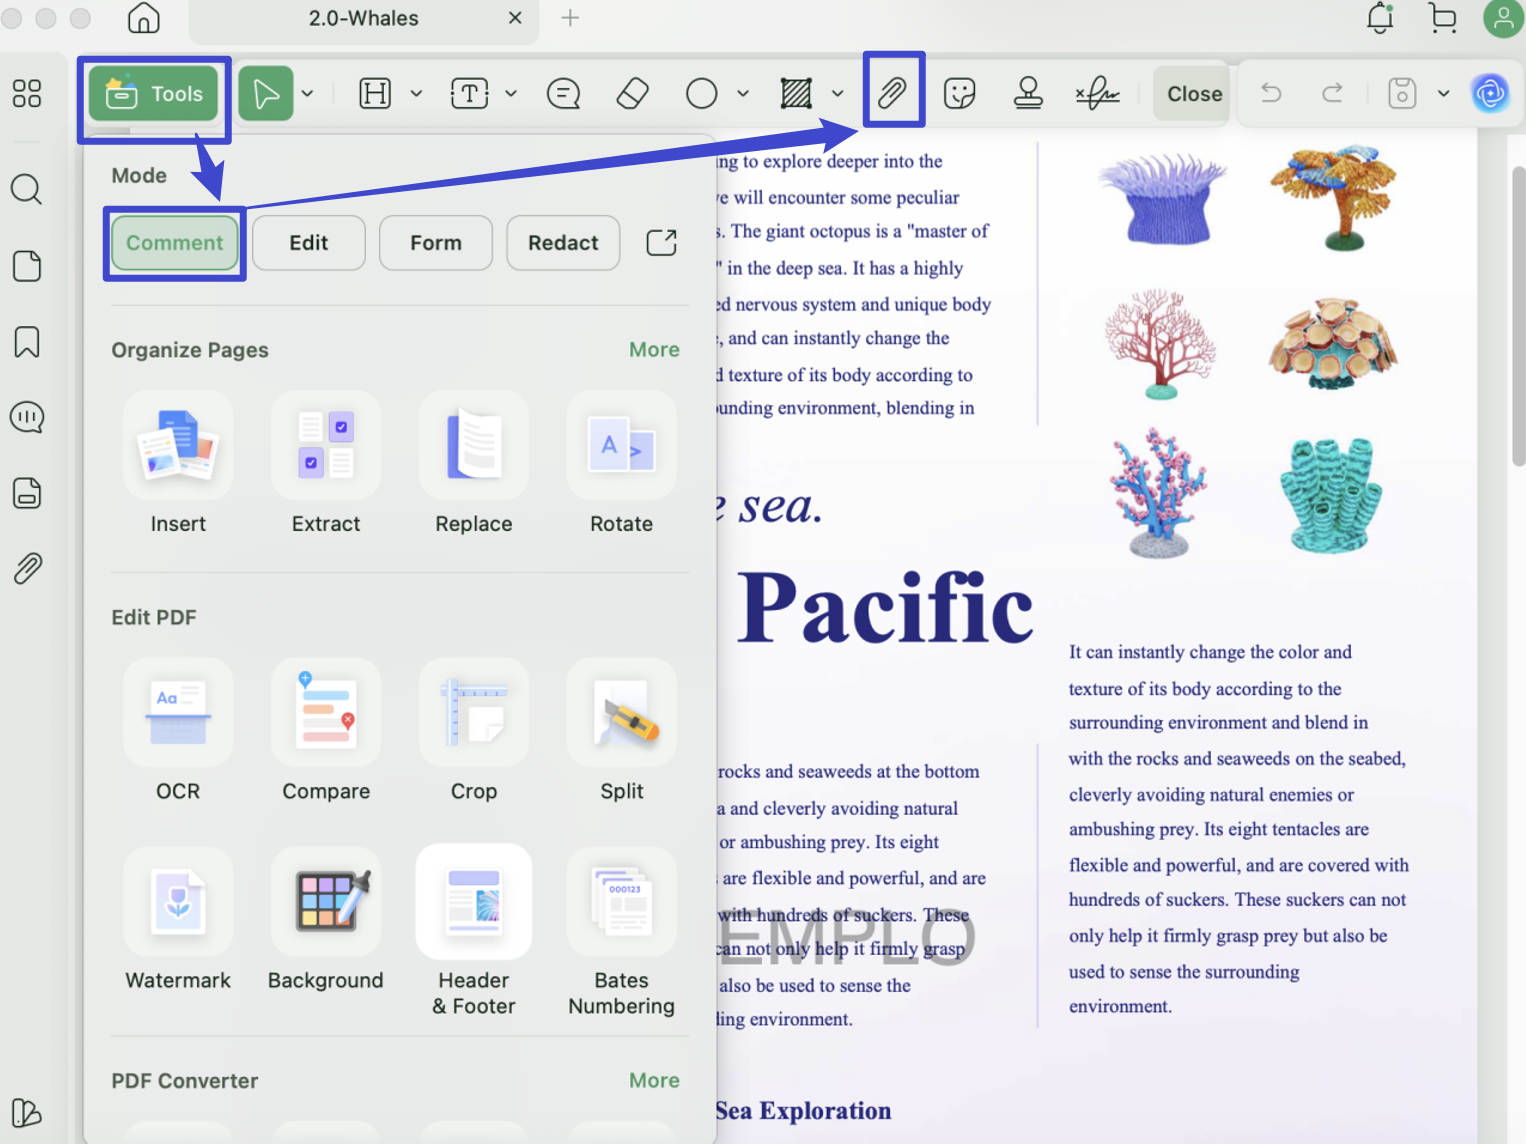
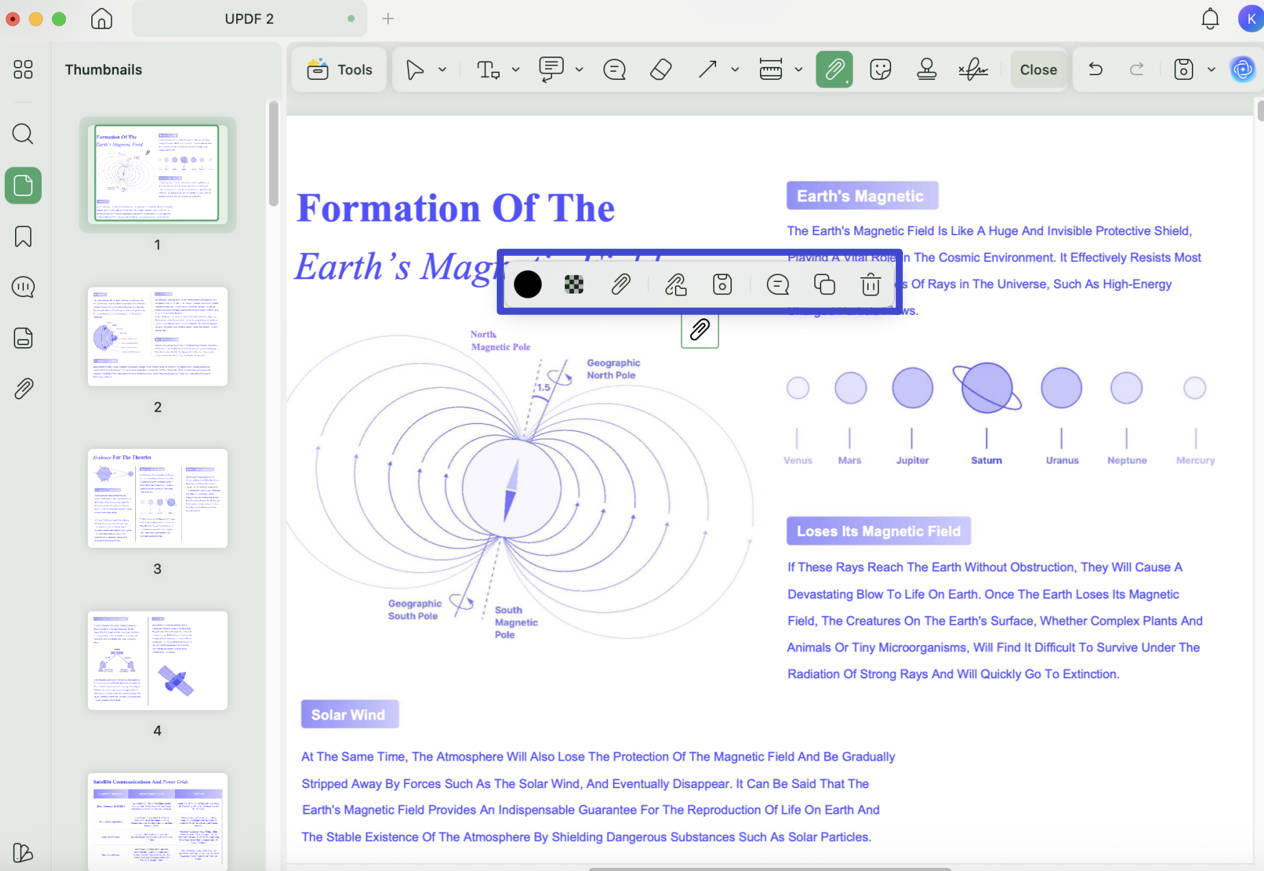
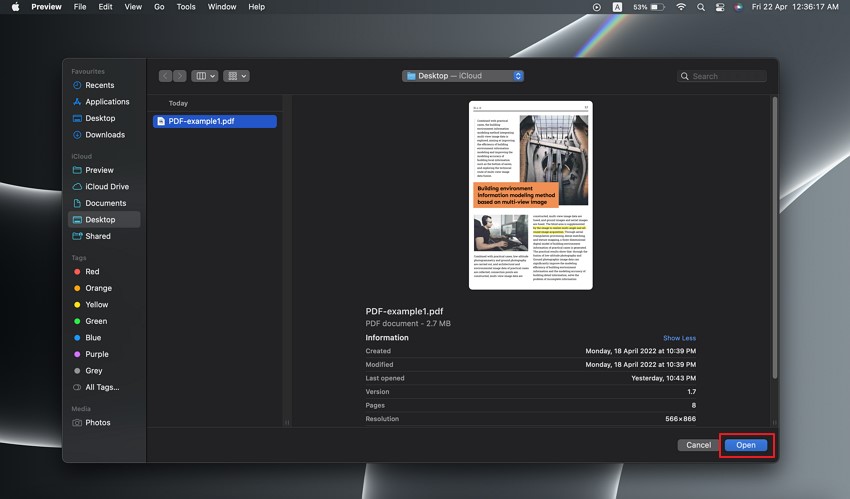
Step 2. Click the place where you want to add the image, select the image, and click the "Open" icon on the pop-up window. The image is now embedded as an attachment. A clickable attachment icon will appear on the PDF page.
Step 3. Click the attachment icon to open, save, move, copy, delete, or add a note to the attached file. If the PDF contains multiple attachments, open the Attachments panel to review and manage them. Finally, choose "File" > "Save."
Way 3. Add an Image Upload Field to a PDF Form on Mac
If you prefer a fixed image field or want to ask others to upload the image to PDF, you can use the image field to do that.
Step 1. If you still do not have UPDF on your Mac, click the below button to download it. Run the UPDF and open the PDF on your Mac with it.
Windows • macOS • iOS • Android 100% secure
Step 2. Click "Tools" > "Form" > "Image Field" and draw to adjust the size of the image field you need.
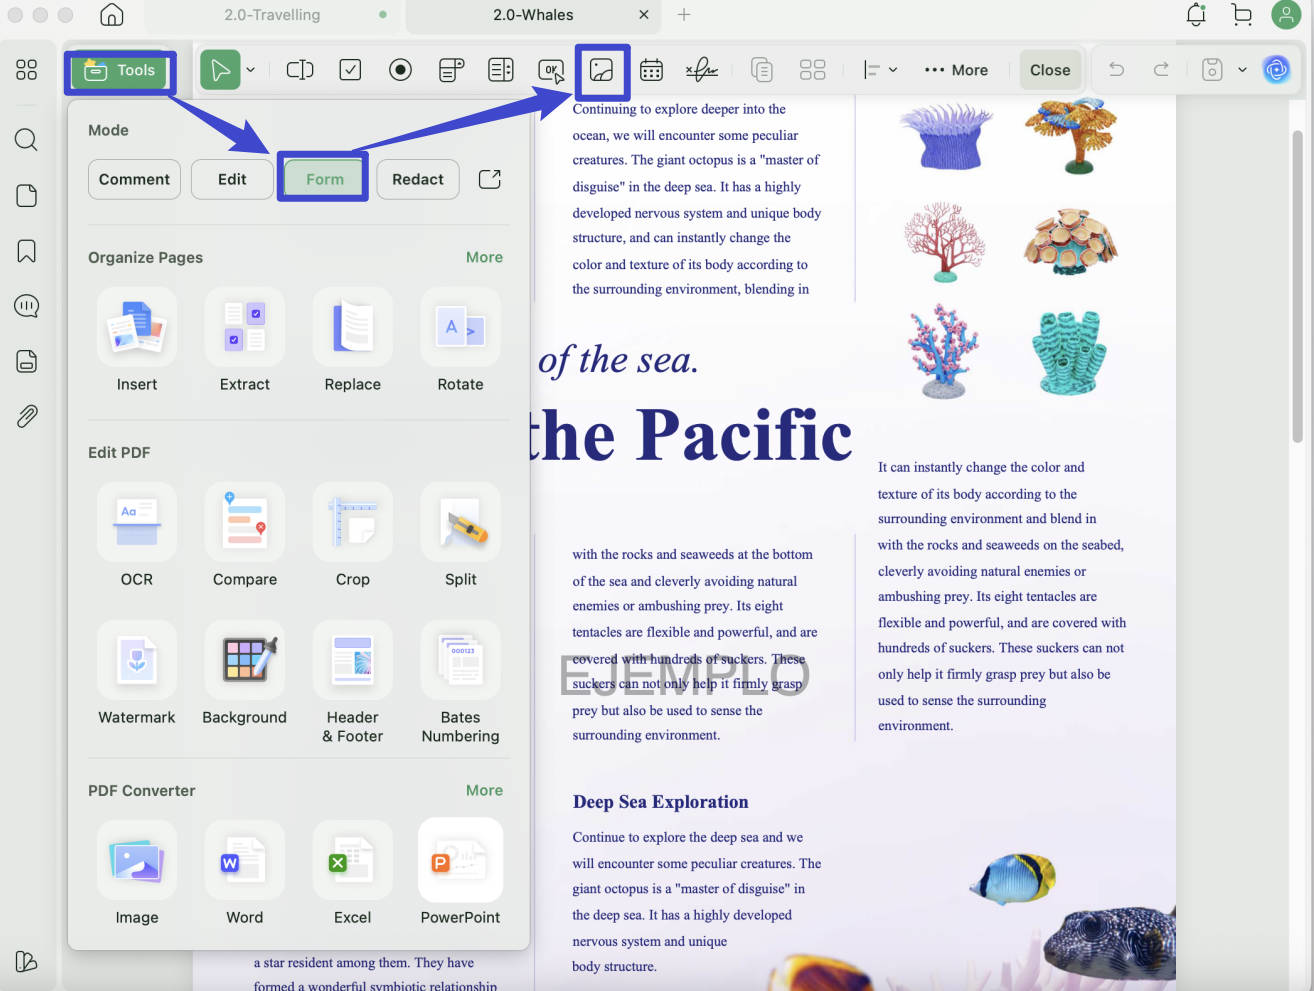
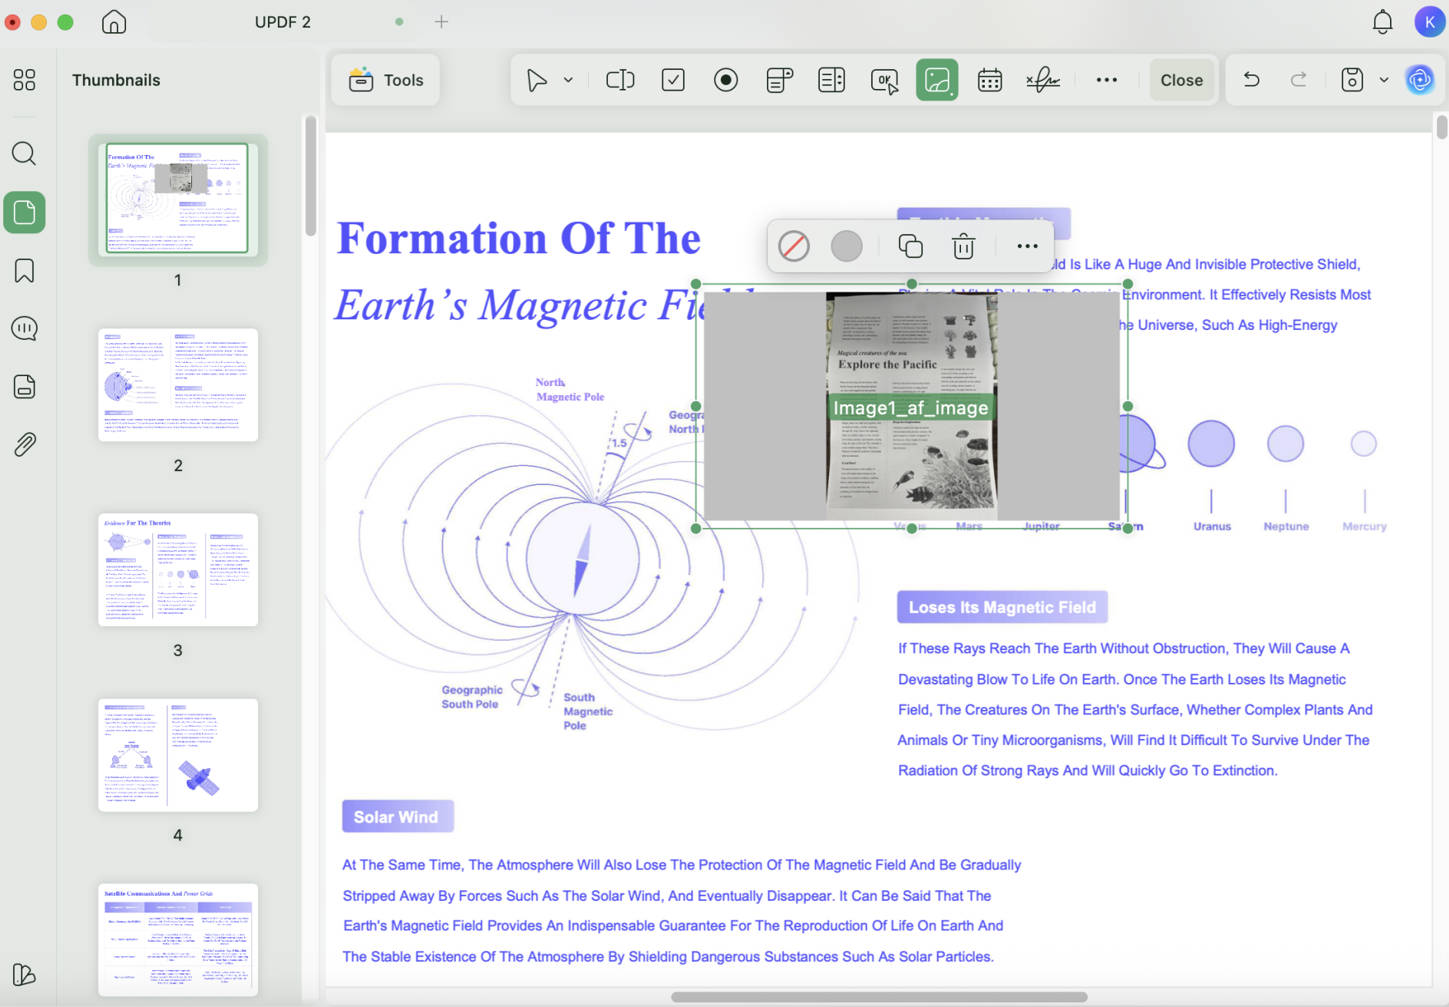
Step 3. Click on the "Properties" button to add the image on your own. If you want others to insert the image into the PDF, just save the PDF and share it with them. Then, they can click on the image field to upload the image there.
It is super easy to use UPDF to insert images into PDFs. Beyond inserting images, UPDF can help you edit surrounding text, crop or replace pictures, add image watermarks, reduce the PDF file size, and protect the finished document with a password. To learn more about UPDF, read this review article. Download the free trial to test the workflow before deciding whether to upgrade.
Windows • macOS • iOS • Android 100% secure
The image should fit the page without pushing the surrounding content out of place. The video below gives you an on-screen reference.
Part 2. How to Insert Images to a PDF with Preview on Mac
You can add images to PDF on Mac using MacBook's Preview feature even though copy-paste of images is not allowed in this app. There is a hacky way to add images to PDF on Mac. You may follow the below steps to accomplish this with Preview on Mac -
- Locate the image to add to your PDF file. Right-click on the image and select "Open With" > "Preview" from the menu.
- When Preview opens, press "Command + A" on your Mac keyboard and select the entire image.
- Now you may press "Command + C" to copy the image. You can now press "Command + V" to paste the image, and the new copy of your image covers the original image. While both images look the same, the one that you just pasted has now become an object that can be pasted into a PDF.
- Copy this object image by pressing "Command + C".
- Next, find the PDF that you want to paste the image into in Finder. Open this PDF file in the Mac Preview tool. Scroll to the PDF page that you want to add your image to and paste the image by pressing "Command + V".
- You can now close the document and your changes will be saved.
For a more detailed guide on adding an image to a PDF with preview, just read this guide.
FAQs
Q1: Does UPDF add a watermark when I save a PDF with an inserted image?
UPDF’s free version allows you to test its PDF editing tools, but it may add a trial watermark when you save the edited document. Upgrade to UPDF Pro if you need to export the PDF without the trial watermark.
Q2: Why did my PDF become much larger after I added a picture?
High-resolution images can significantly increase a PDF’s file size. Before inserting the picture, crop unnecessary areas and avoid using a resolution much higher than the final display size. After editing, UPDF’s “Reduce File Size” feature lets you choose a quality level and save a smaller copy.
Q3: Can I use the same UPDF account to edit PDFs on both Mac and Windows?
Yes. A UPDF license can be used across supported desktop and mobile platforms, subject to the device limit of the purchased plan. Sign in with the same UPDF account on each device to access the licensed features.
Conclusion
UPDF and Preview both provide ways to add a visible picture to an existing PDF page, but they suit different needs. Preview can work for an occasional basic edit, although its copy-and-paste process is indirect. UPDF offers a more straightforward image-editing workflow, with controls for resizing, positioning, rotating, cropping, and replacing pictures. It also provides separate options for embedding an image as an attachment or creating an image upload field in a fillable form. Download UPDF and choose the workflow that matches the result you need..
Windows • macOS • iOS • Android 100% secure






 Enid Brown
 Delia Meyer
 Enrica Taylor