There are many different reasons why you might need to crop a signature from a PDF. For example, if you are worried about privacy, and you only need a signature from a PDF, but the PDF contains sensitive information, then cropping the signature can help protect that private information. Also, removing unnecessary parts of a PDF can help reduce the file size, so if you only need the signature part of a PDF, you can crop the PDF to only include the signature.
But what is the best way to easily crop signatures from PDF? In this article, we will show you three ways to use UPDF to easily and quickly crop signatures from a PDF. UPDF has tools that allow you to crop pages and images so that you can easily crop a signature from a PDF. Click the button below to download UPDF so you can follow along with the tutorial in the next section!
Windows • macOS • iOS • Android 100% secure
Part 1. How to Crop a Signature from PDF Using Cropping Pages?
This first method works best if you need the signature on a PDF to be either in PDF or image format. Follow the steps below to use the "Crop" feature in "Tools" on UPDF to crop a signature in PDF.
Before you read through the tutorial, make sure you download UPDF to start your free trial today.
Step 1 - Open PDF with UPDF
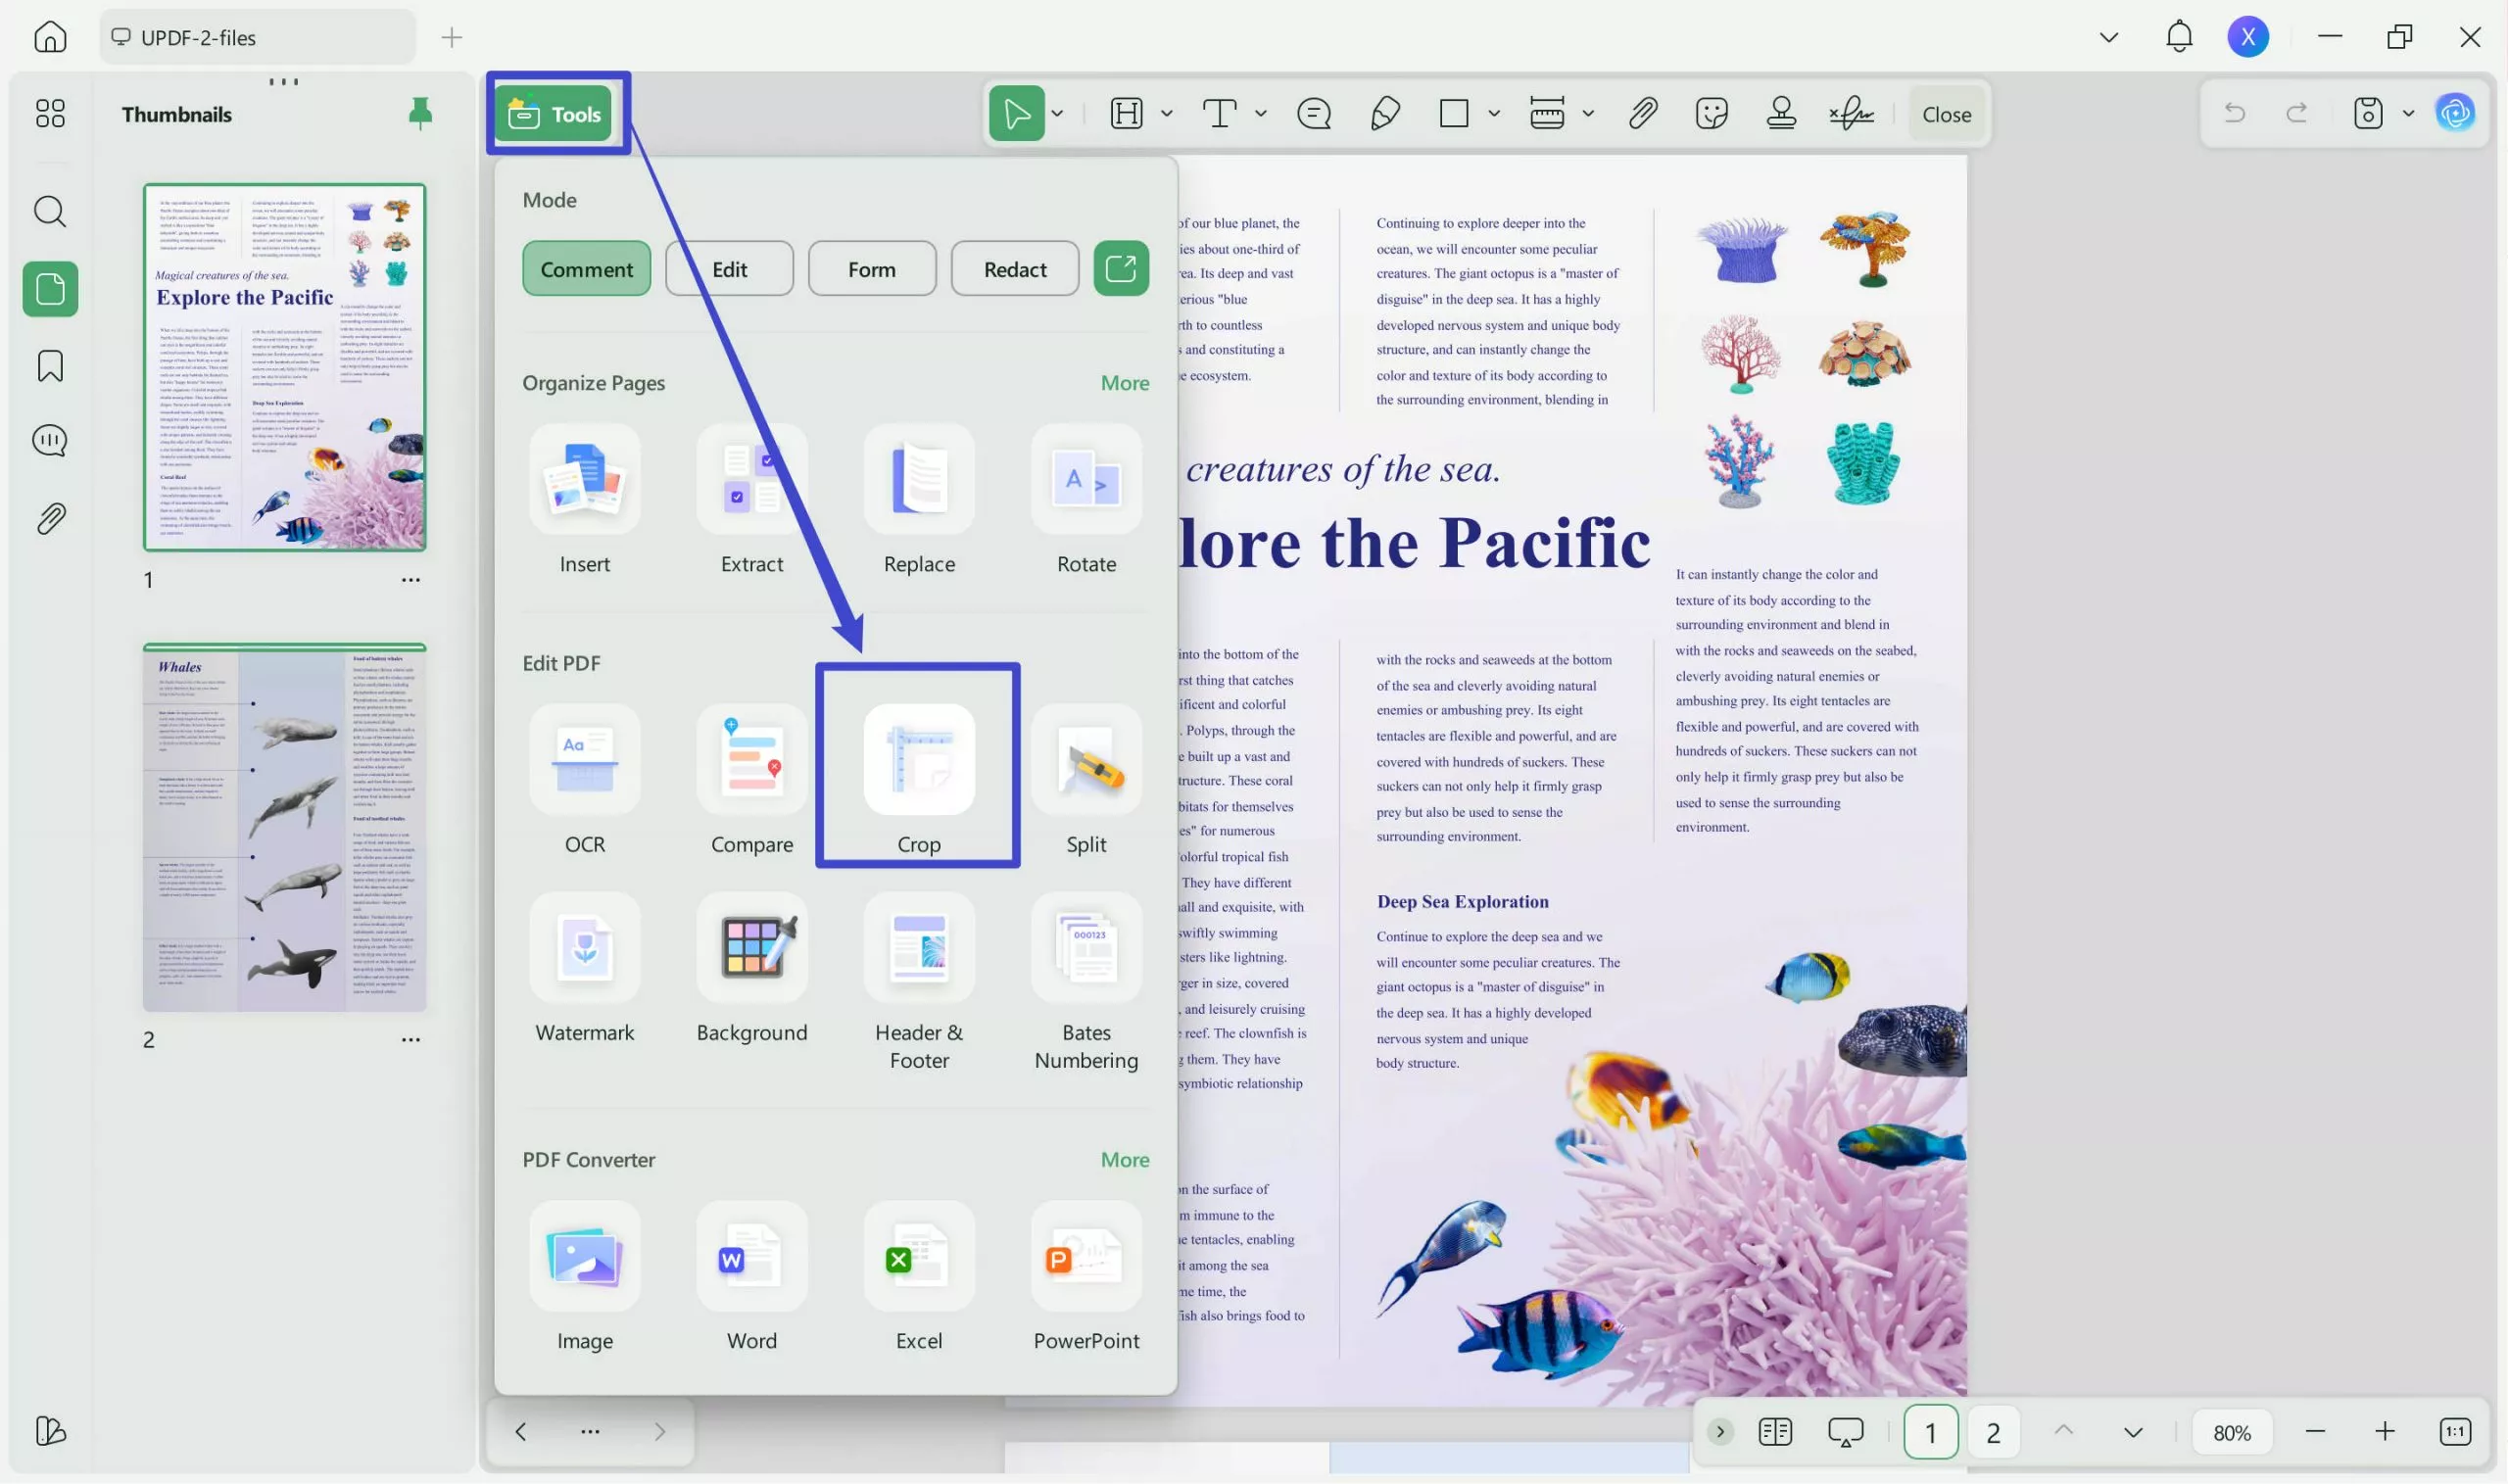
Open UPDF, and then upload your PDF by dragging and dropping it into the "Open File" box on the main interface of UPDF. You can also click the "Open File" button and select the PDF that you want to crop. From the tools on the left side select "Crop".
Step 2 - Crop PDF Signature
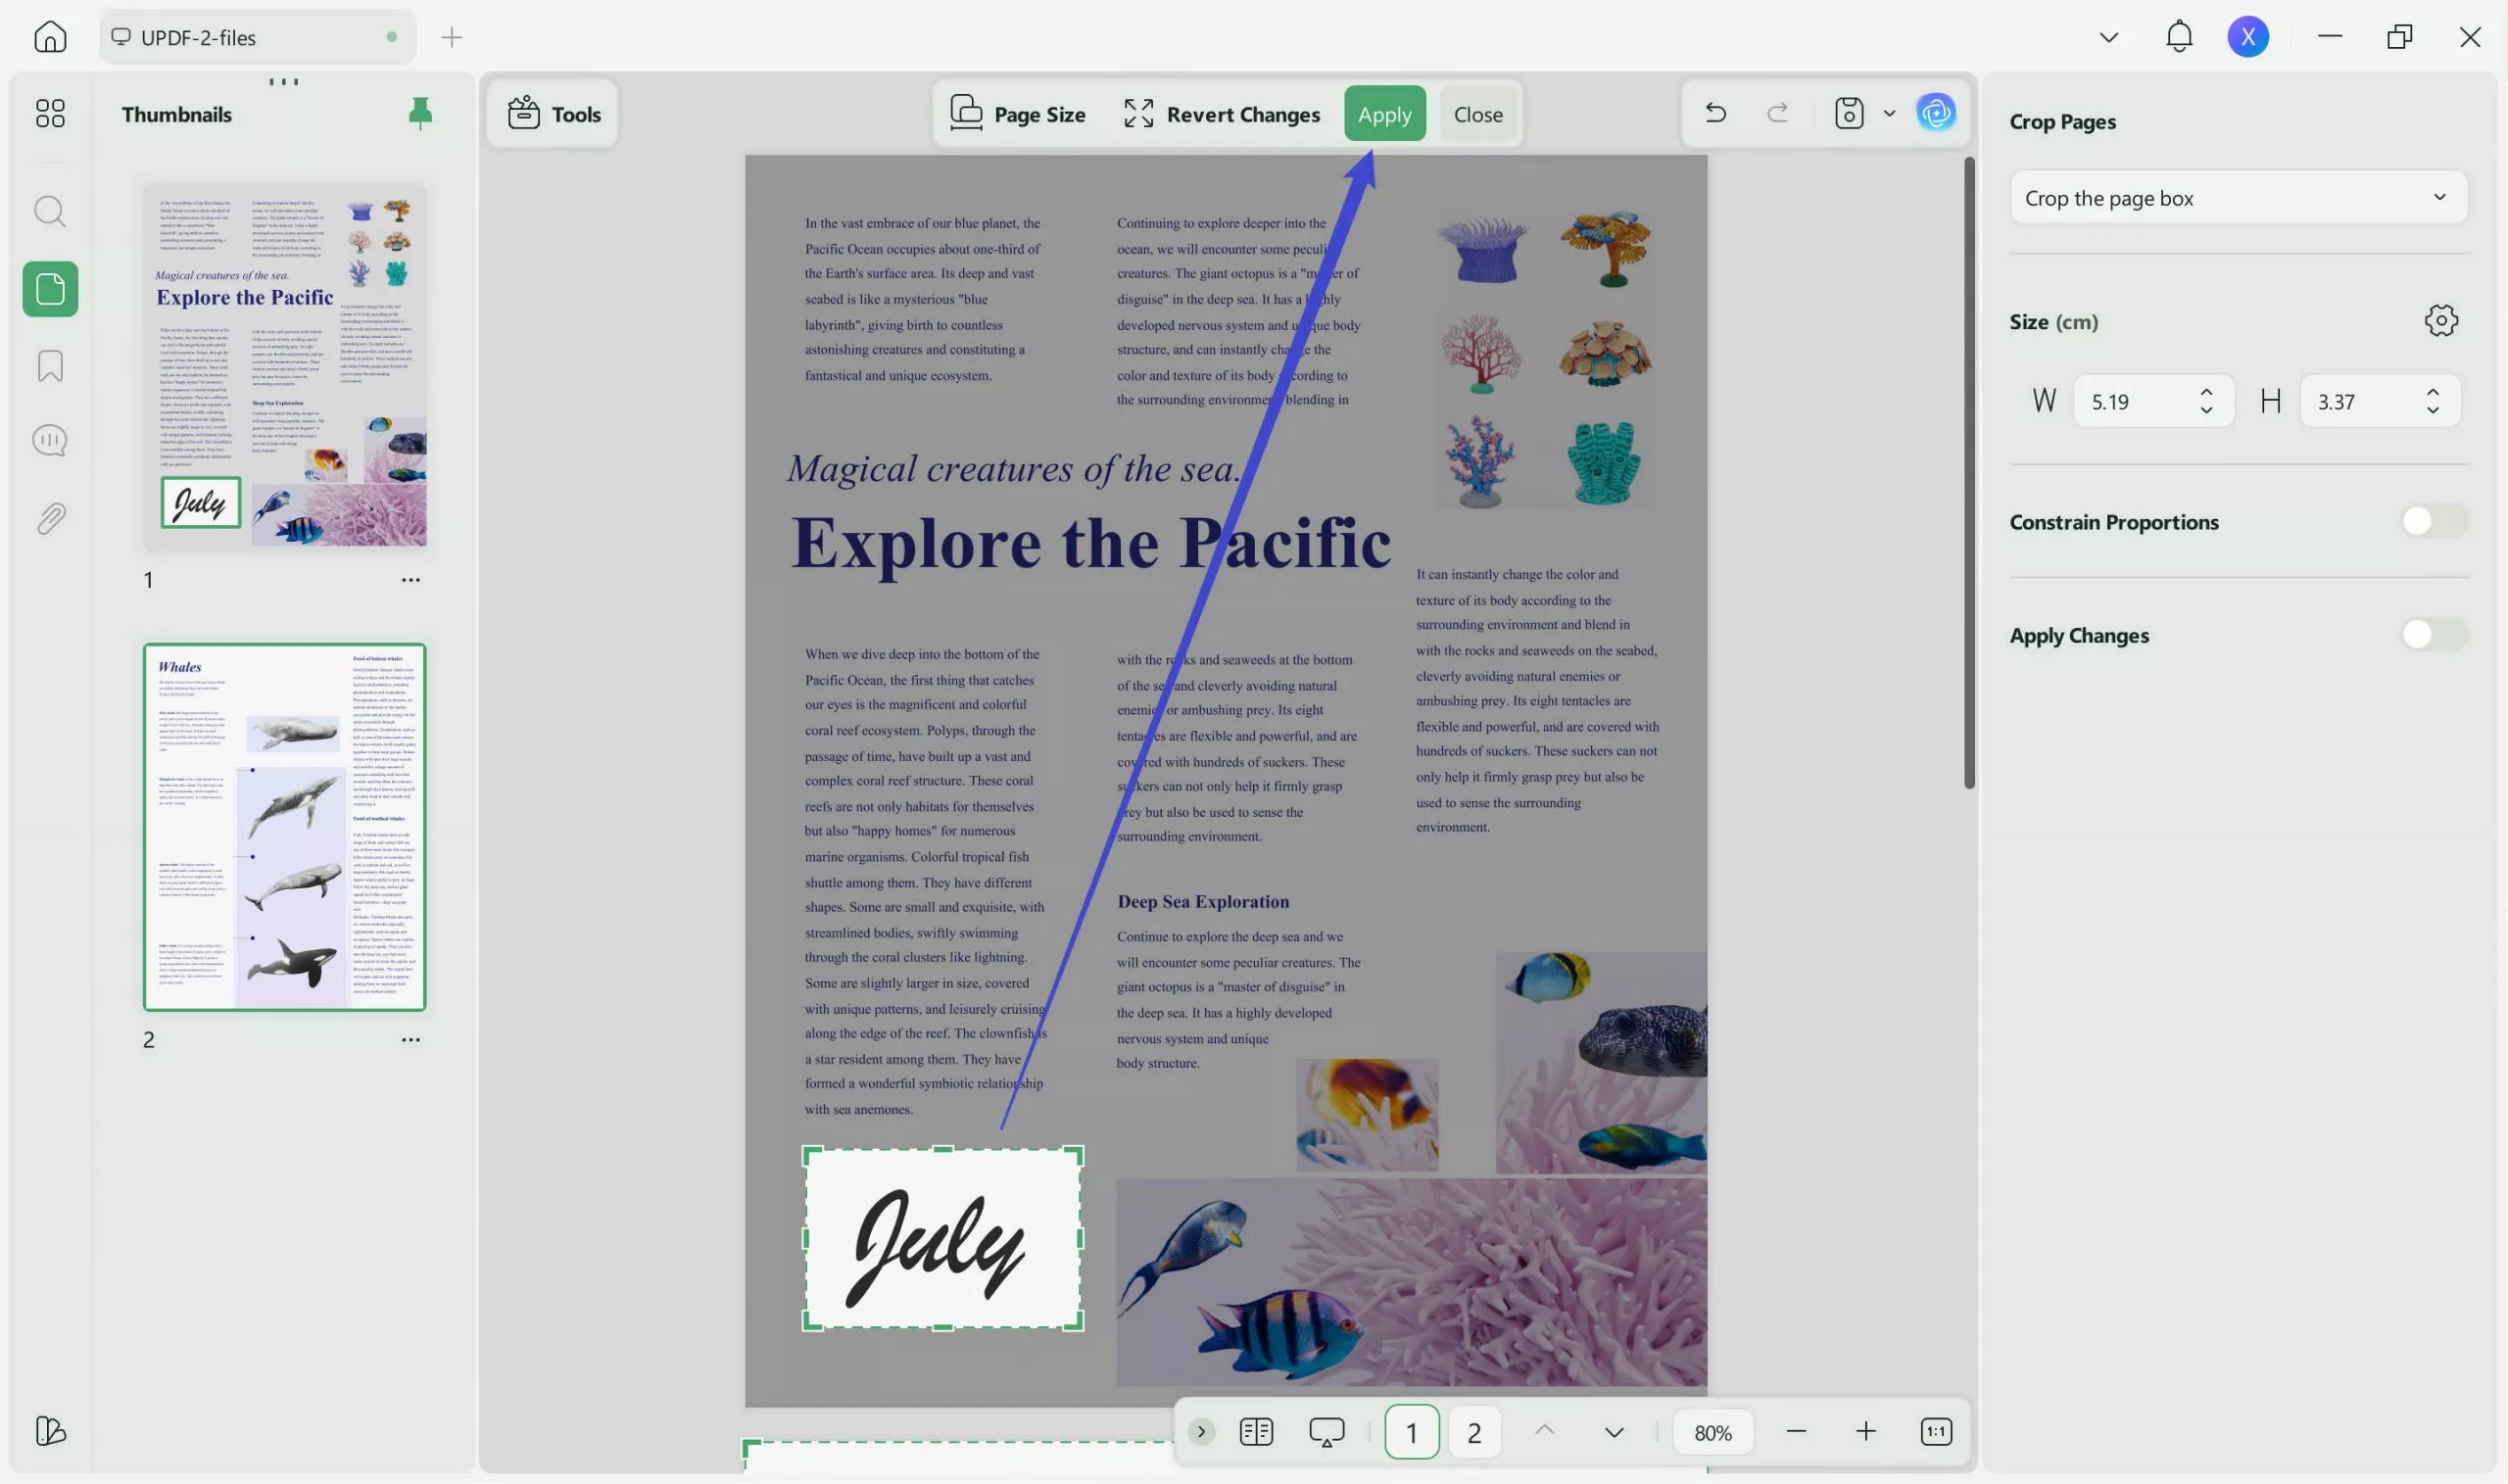
You can now crop your documents so that it only includes the signature that you need. do this by adjusting the dotted purple lines on each side of the PDF until you are happy with their placement. Then select "Apply".
Step 3 - Extract Signature
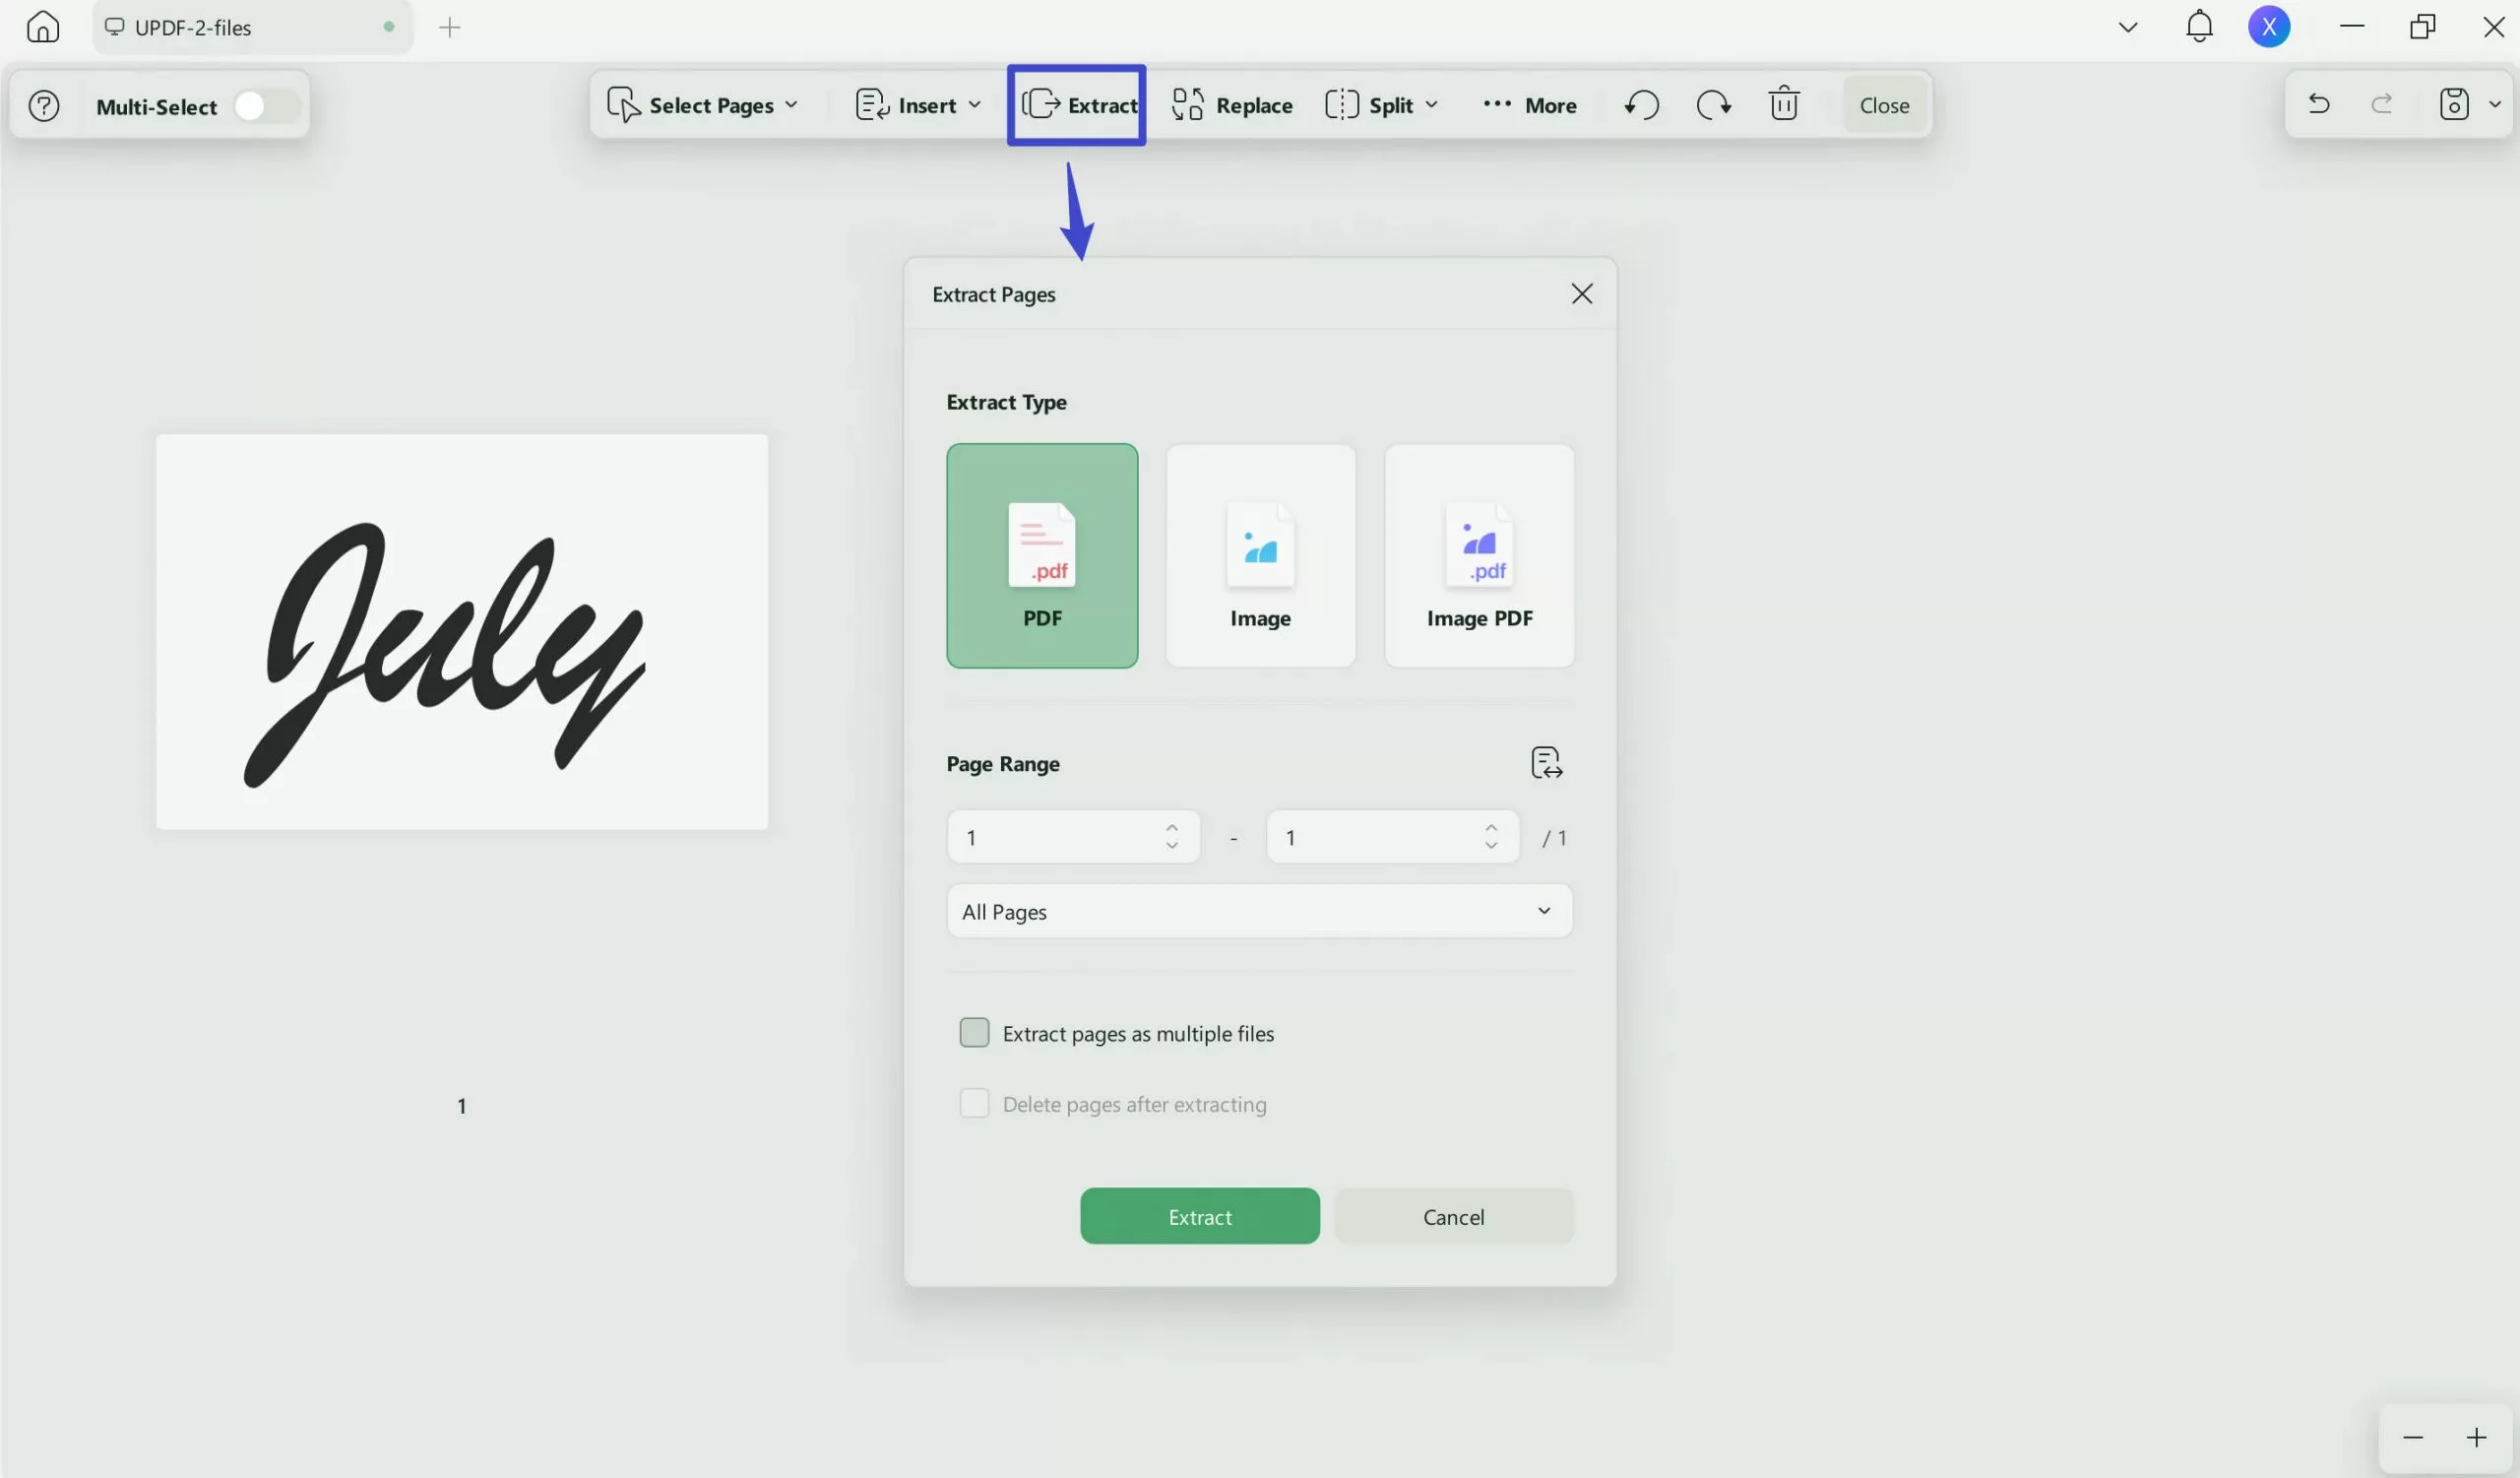
Now you will have only the signature. If you need the signature saved in PDF format and it has many other pages in the PDF, you can click "Organize Pages" > "Extract" on the left side menu. Click the "Extract" button, and choose a location to save your signature PDF file. After saving, your cropped signature will open in a new window in UPDF, and you can now make any other edits or adjustments you need.
Step 4 - Export as an Image
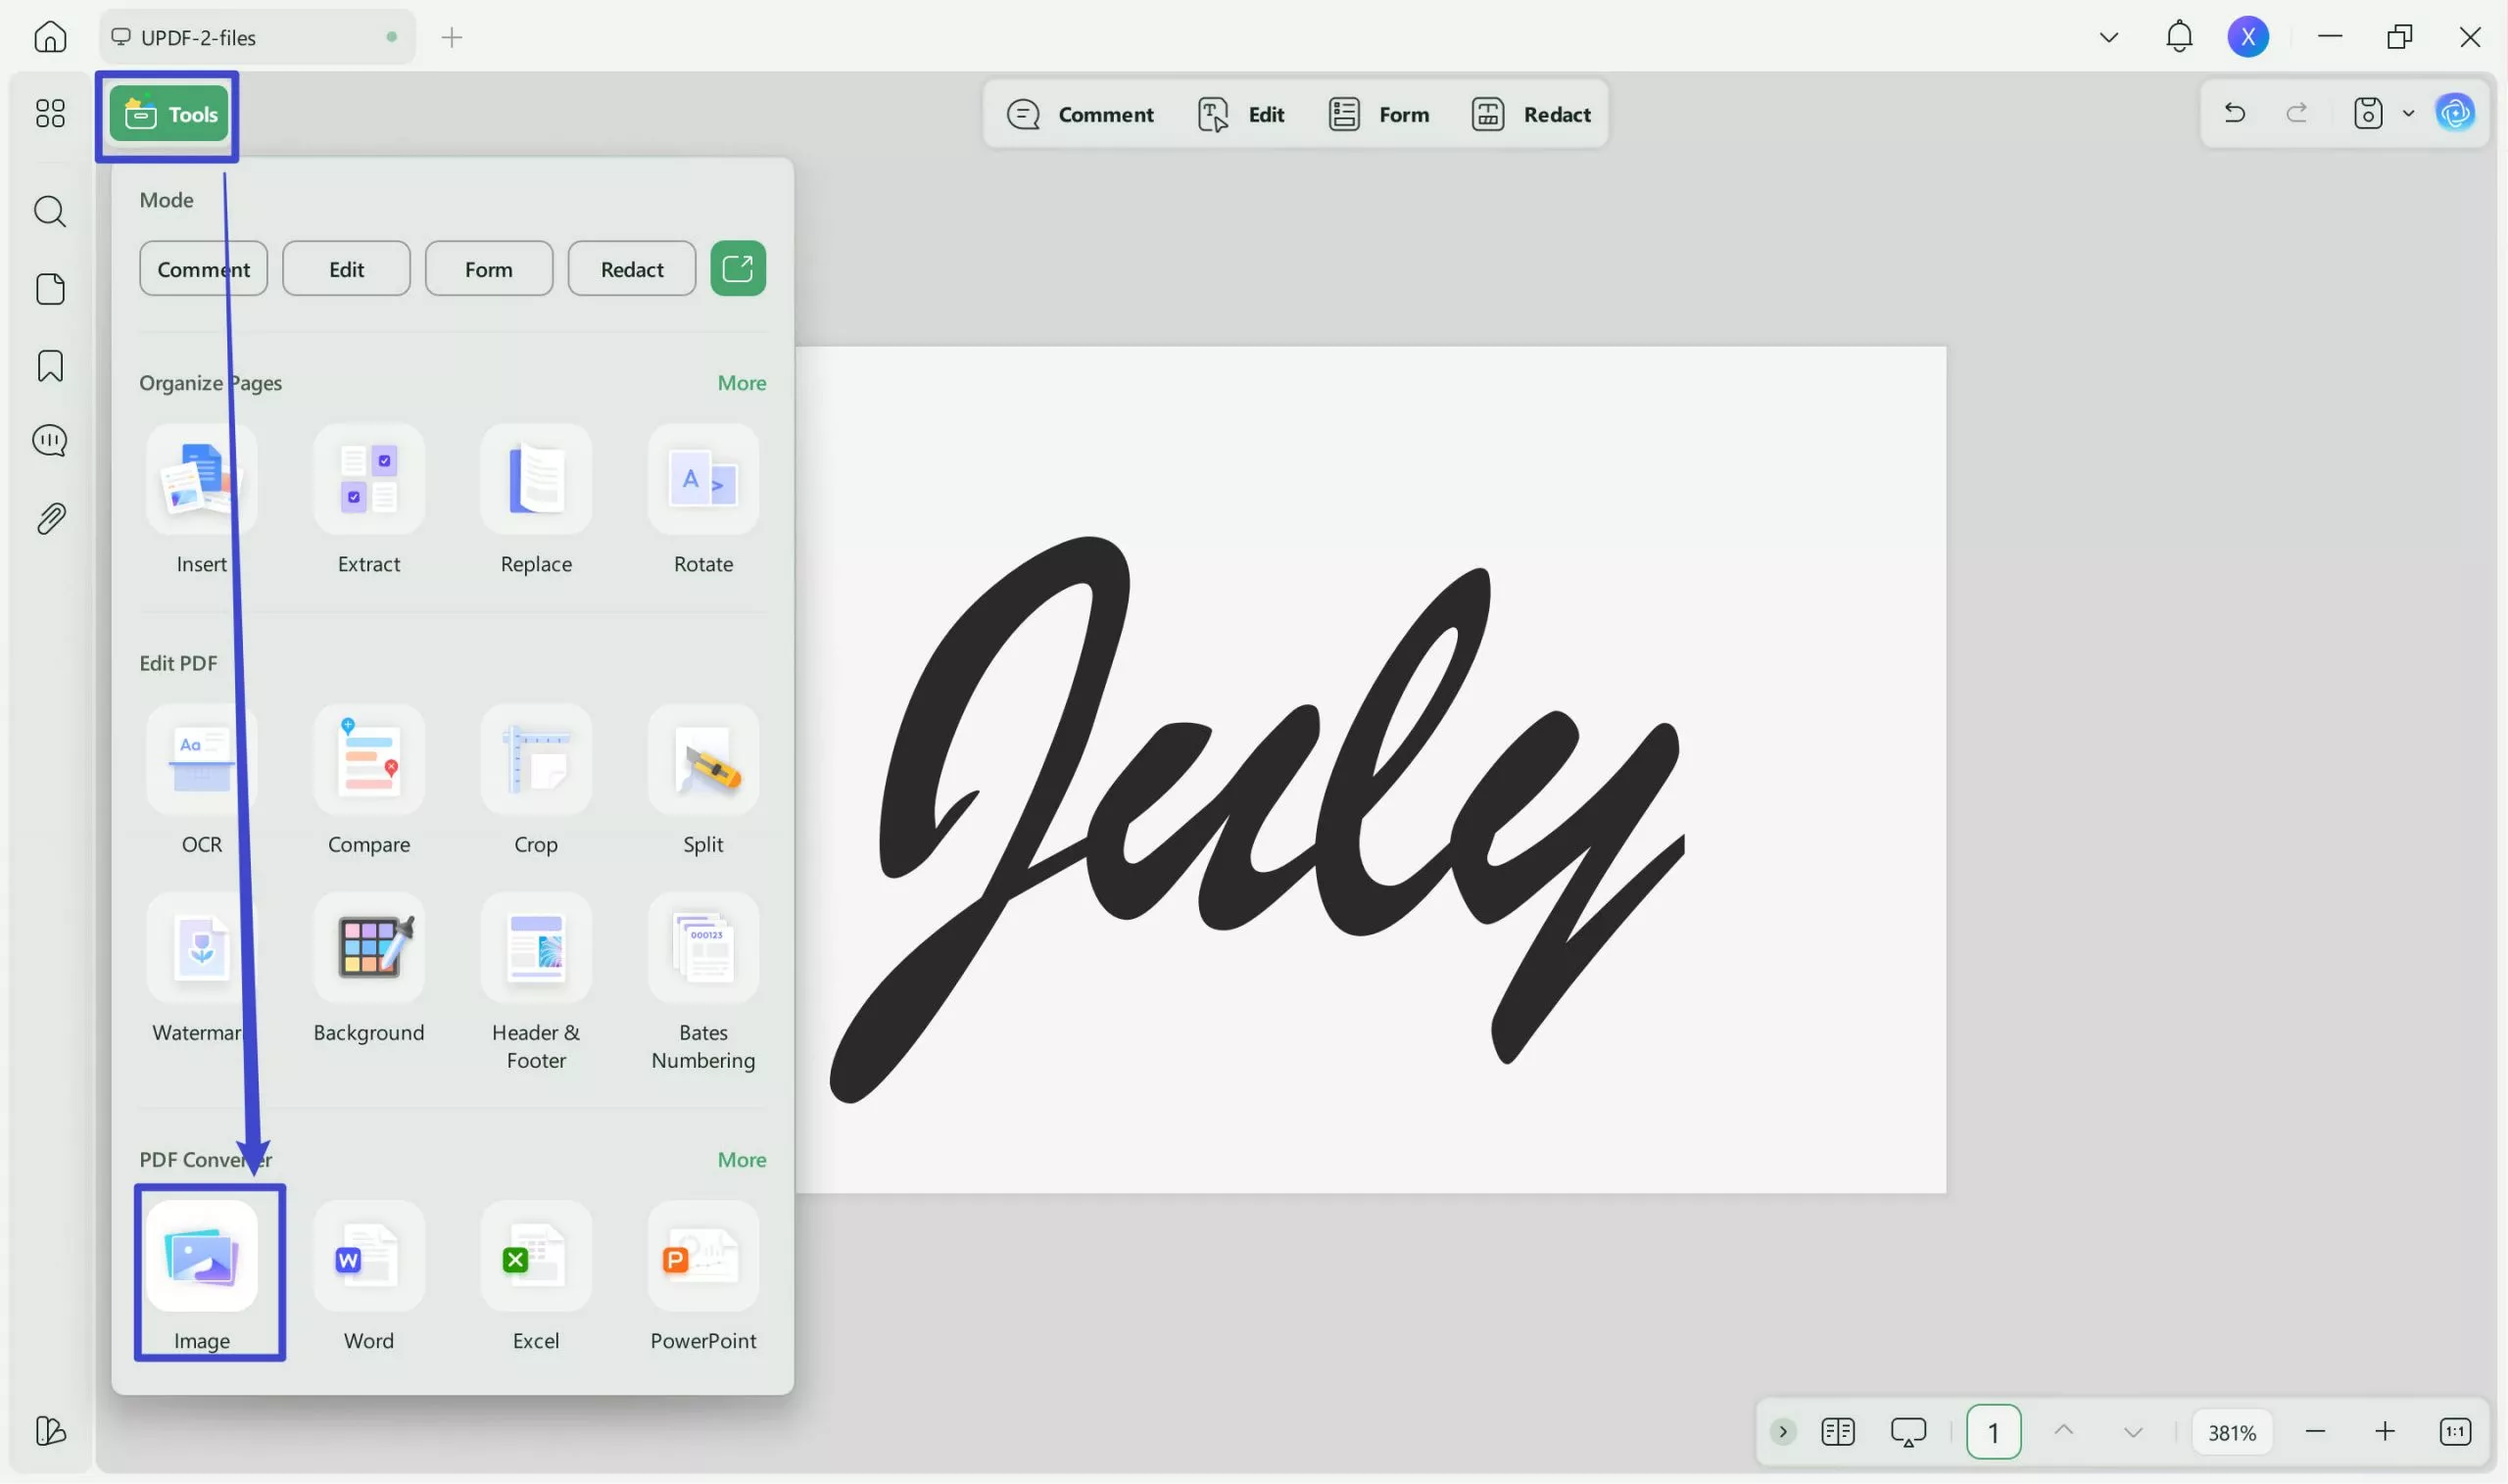
If you need the signature as an image file, then you can export your PDF to your preferred image format. To do this, select "Tools" from the left menu, choose "Image", and select your preferred image format. Choose a location to save your file, and click "Save". now you have your cropped signature as an image file.
Part 2. How to Crop a Signature from PDF Using Cropping Image?
If you are working with a PDF that has an image signature, you can use UPDF to crop the signature with the image cropping tool. Follow the steps for this method, but make sure you click the button below first to download UPDF.
Windows • macOS • iOS • Android 100% secure
Step 1 - Open PDF with PDF
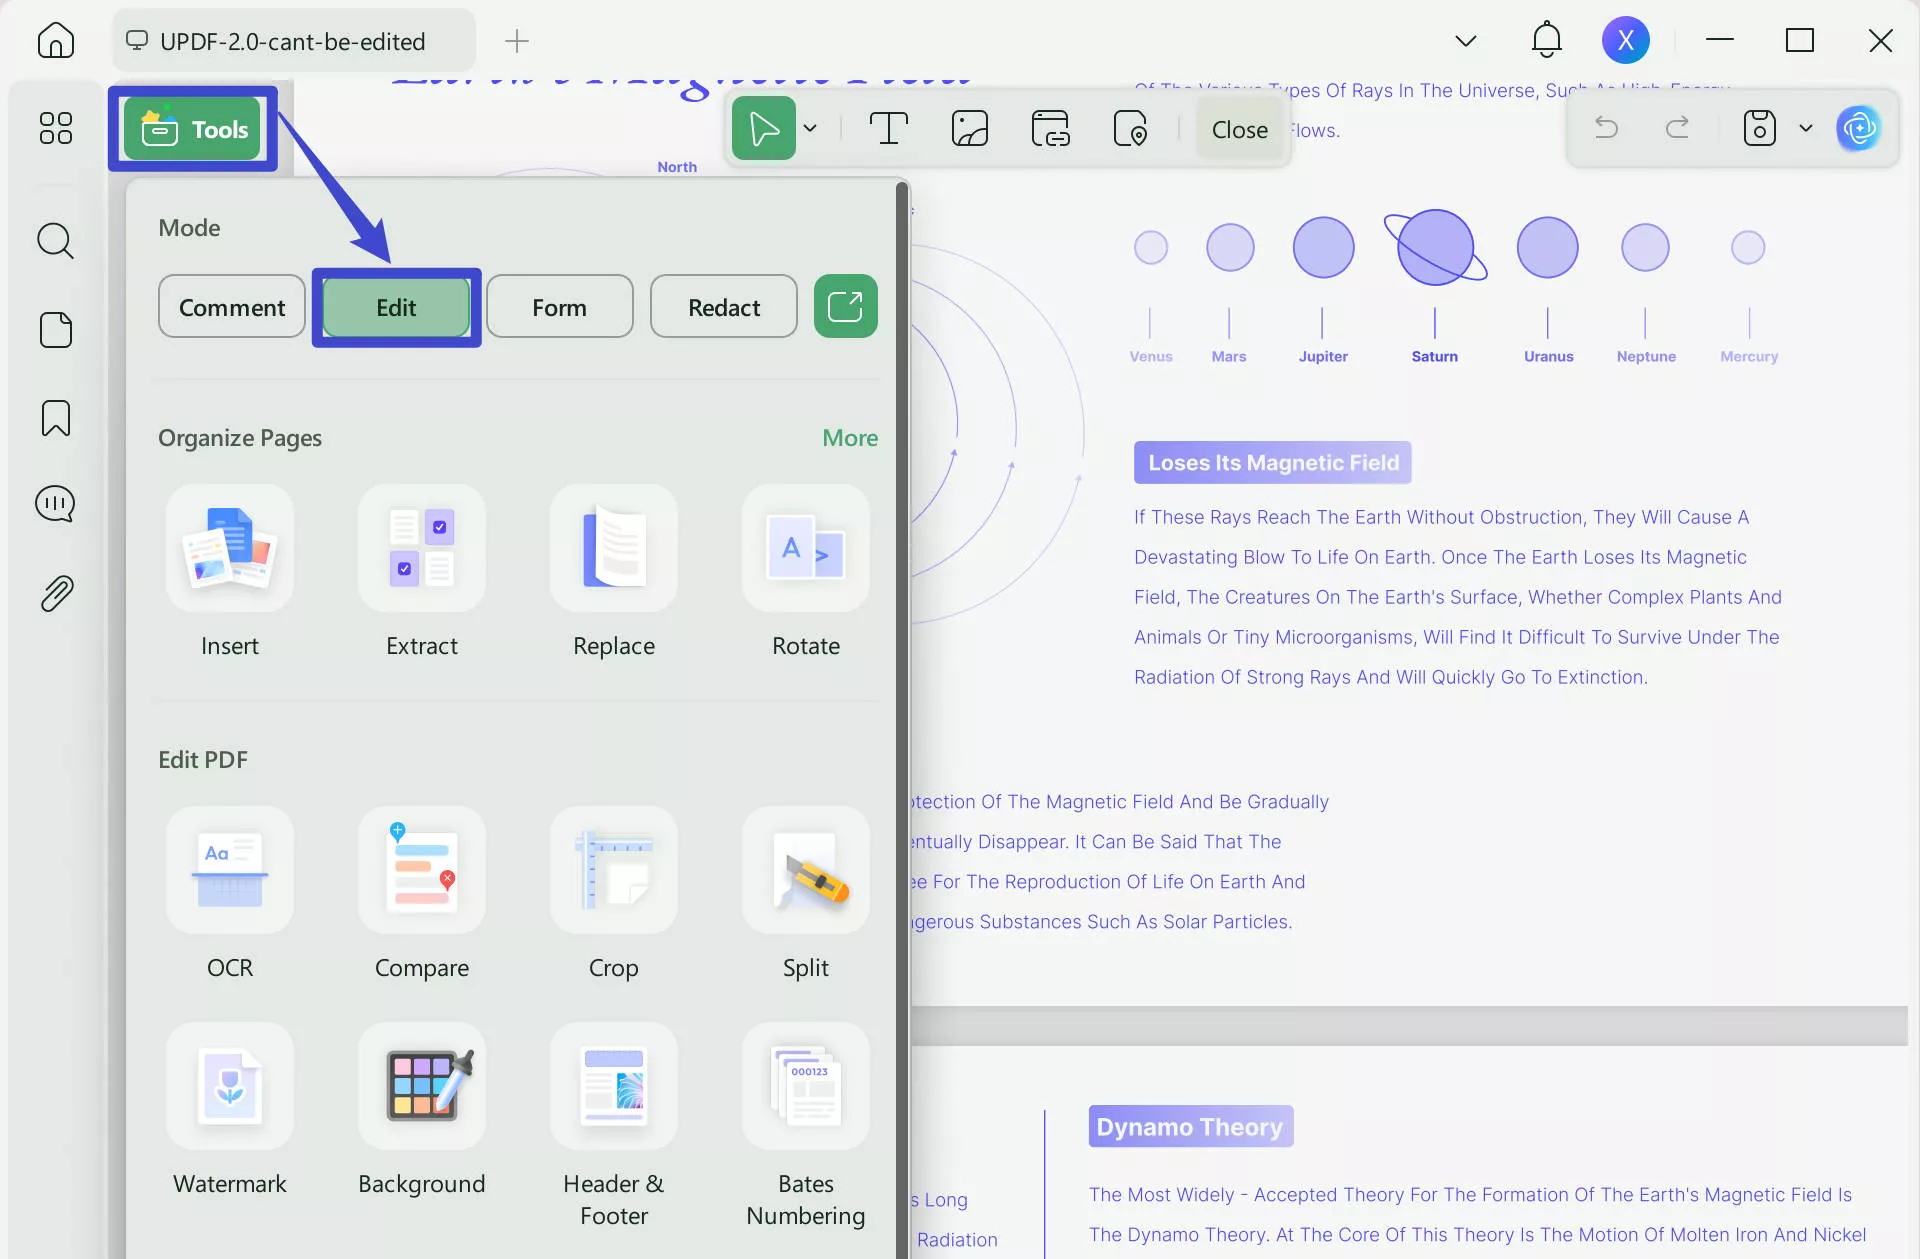
Open your signature PDF by dragging and dropping it into the "Open File" area of the main UPDF interface. Then, from the tools on the left side, select "Edit" in "Tools", and then select the signature image file.
Step 2 - Crop Signature Image
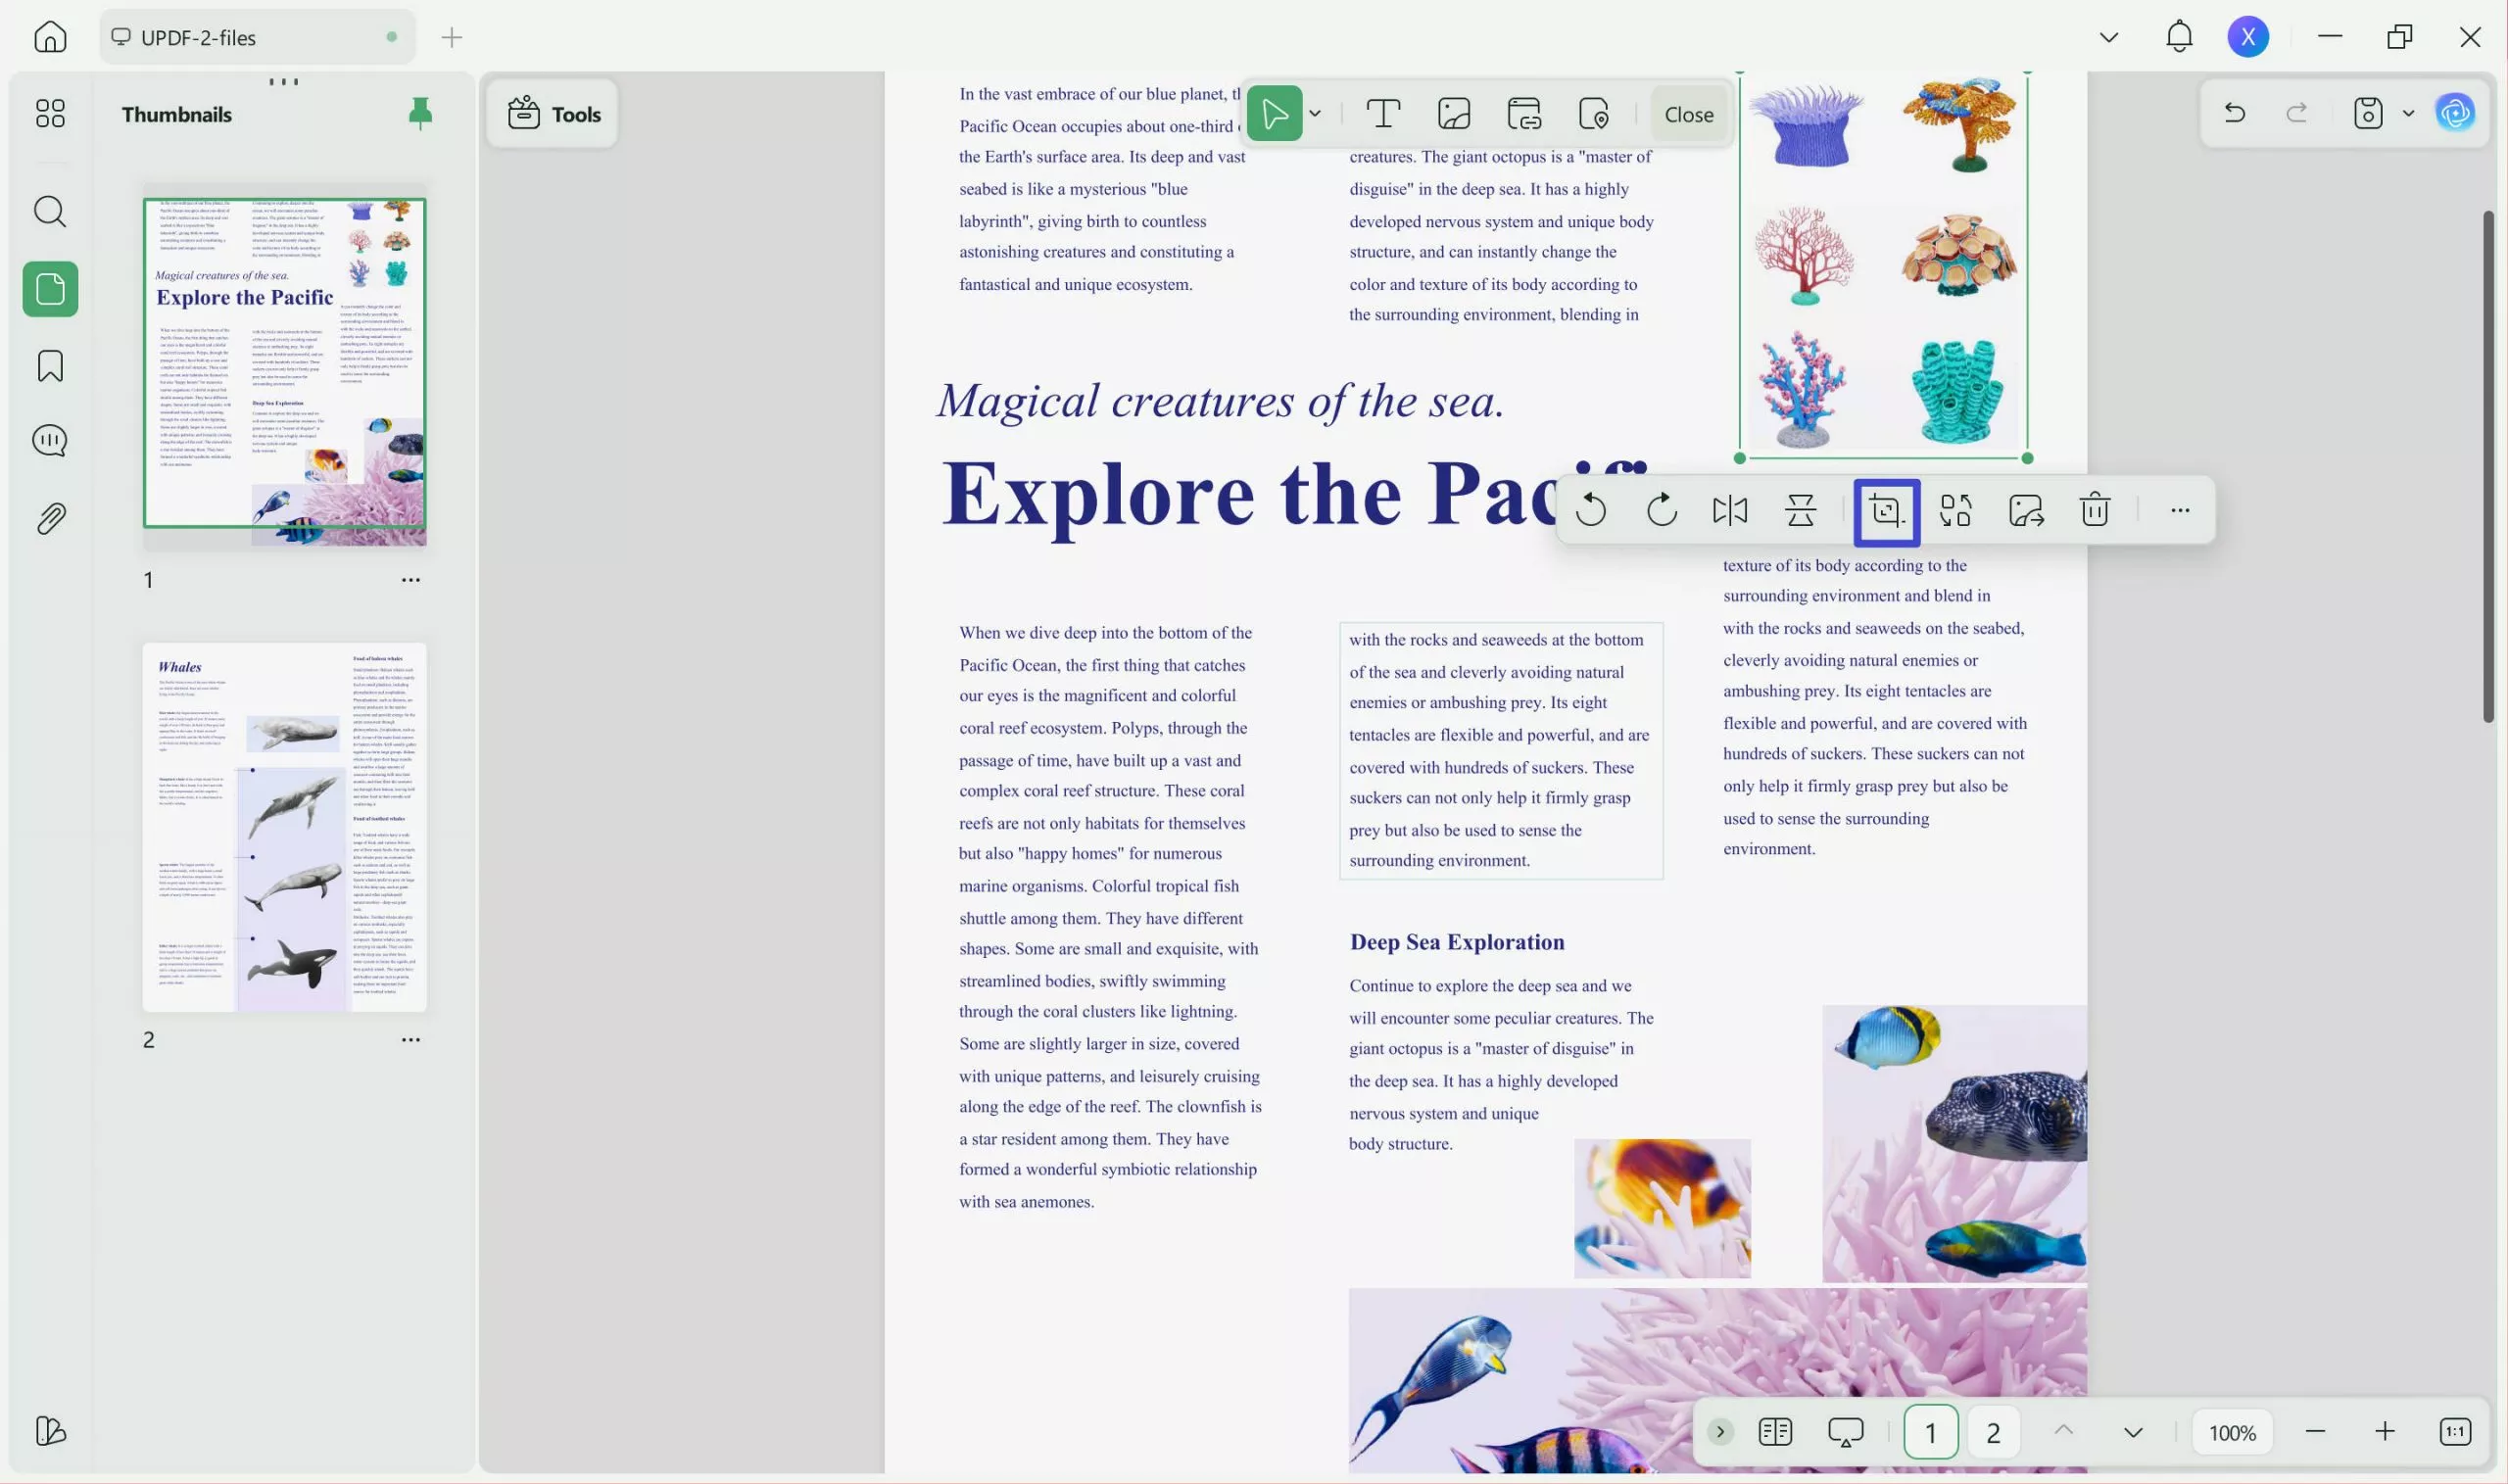
After you have clicked on the signature image, select the "Crop Image" tool. Adjust the sides of the signature image so that you are satisfied with the cropped signature.
Step 3 - Extract Signature Image
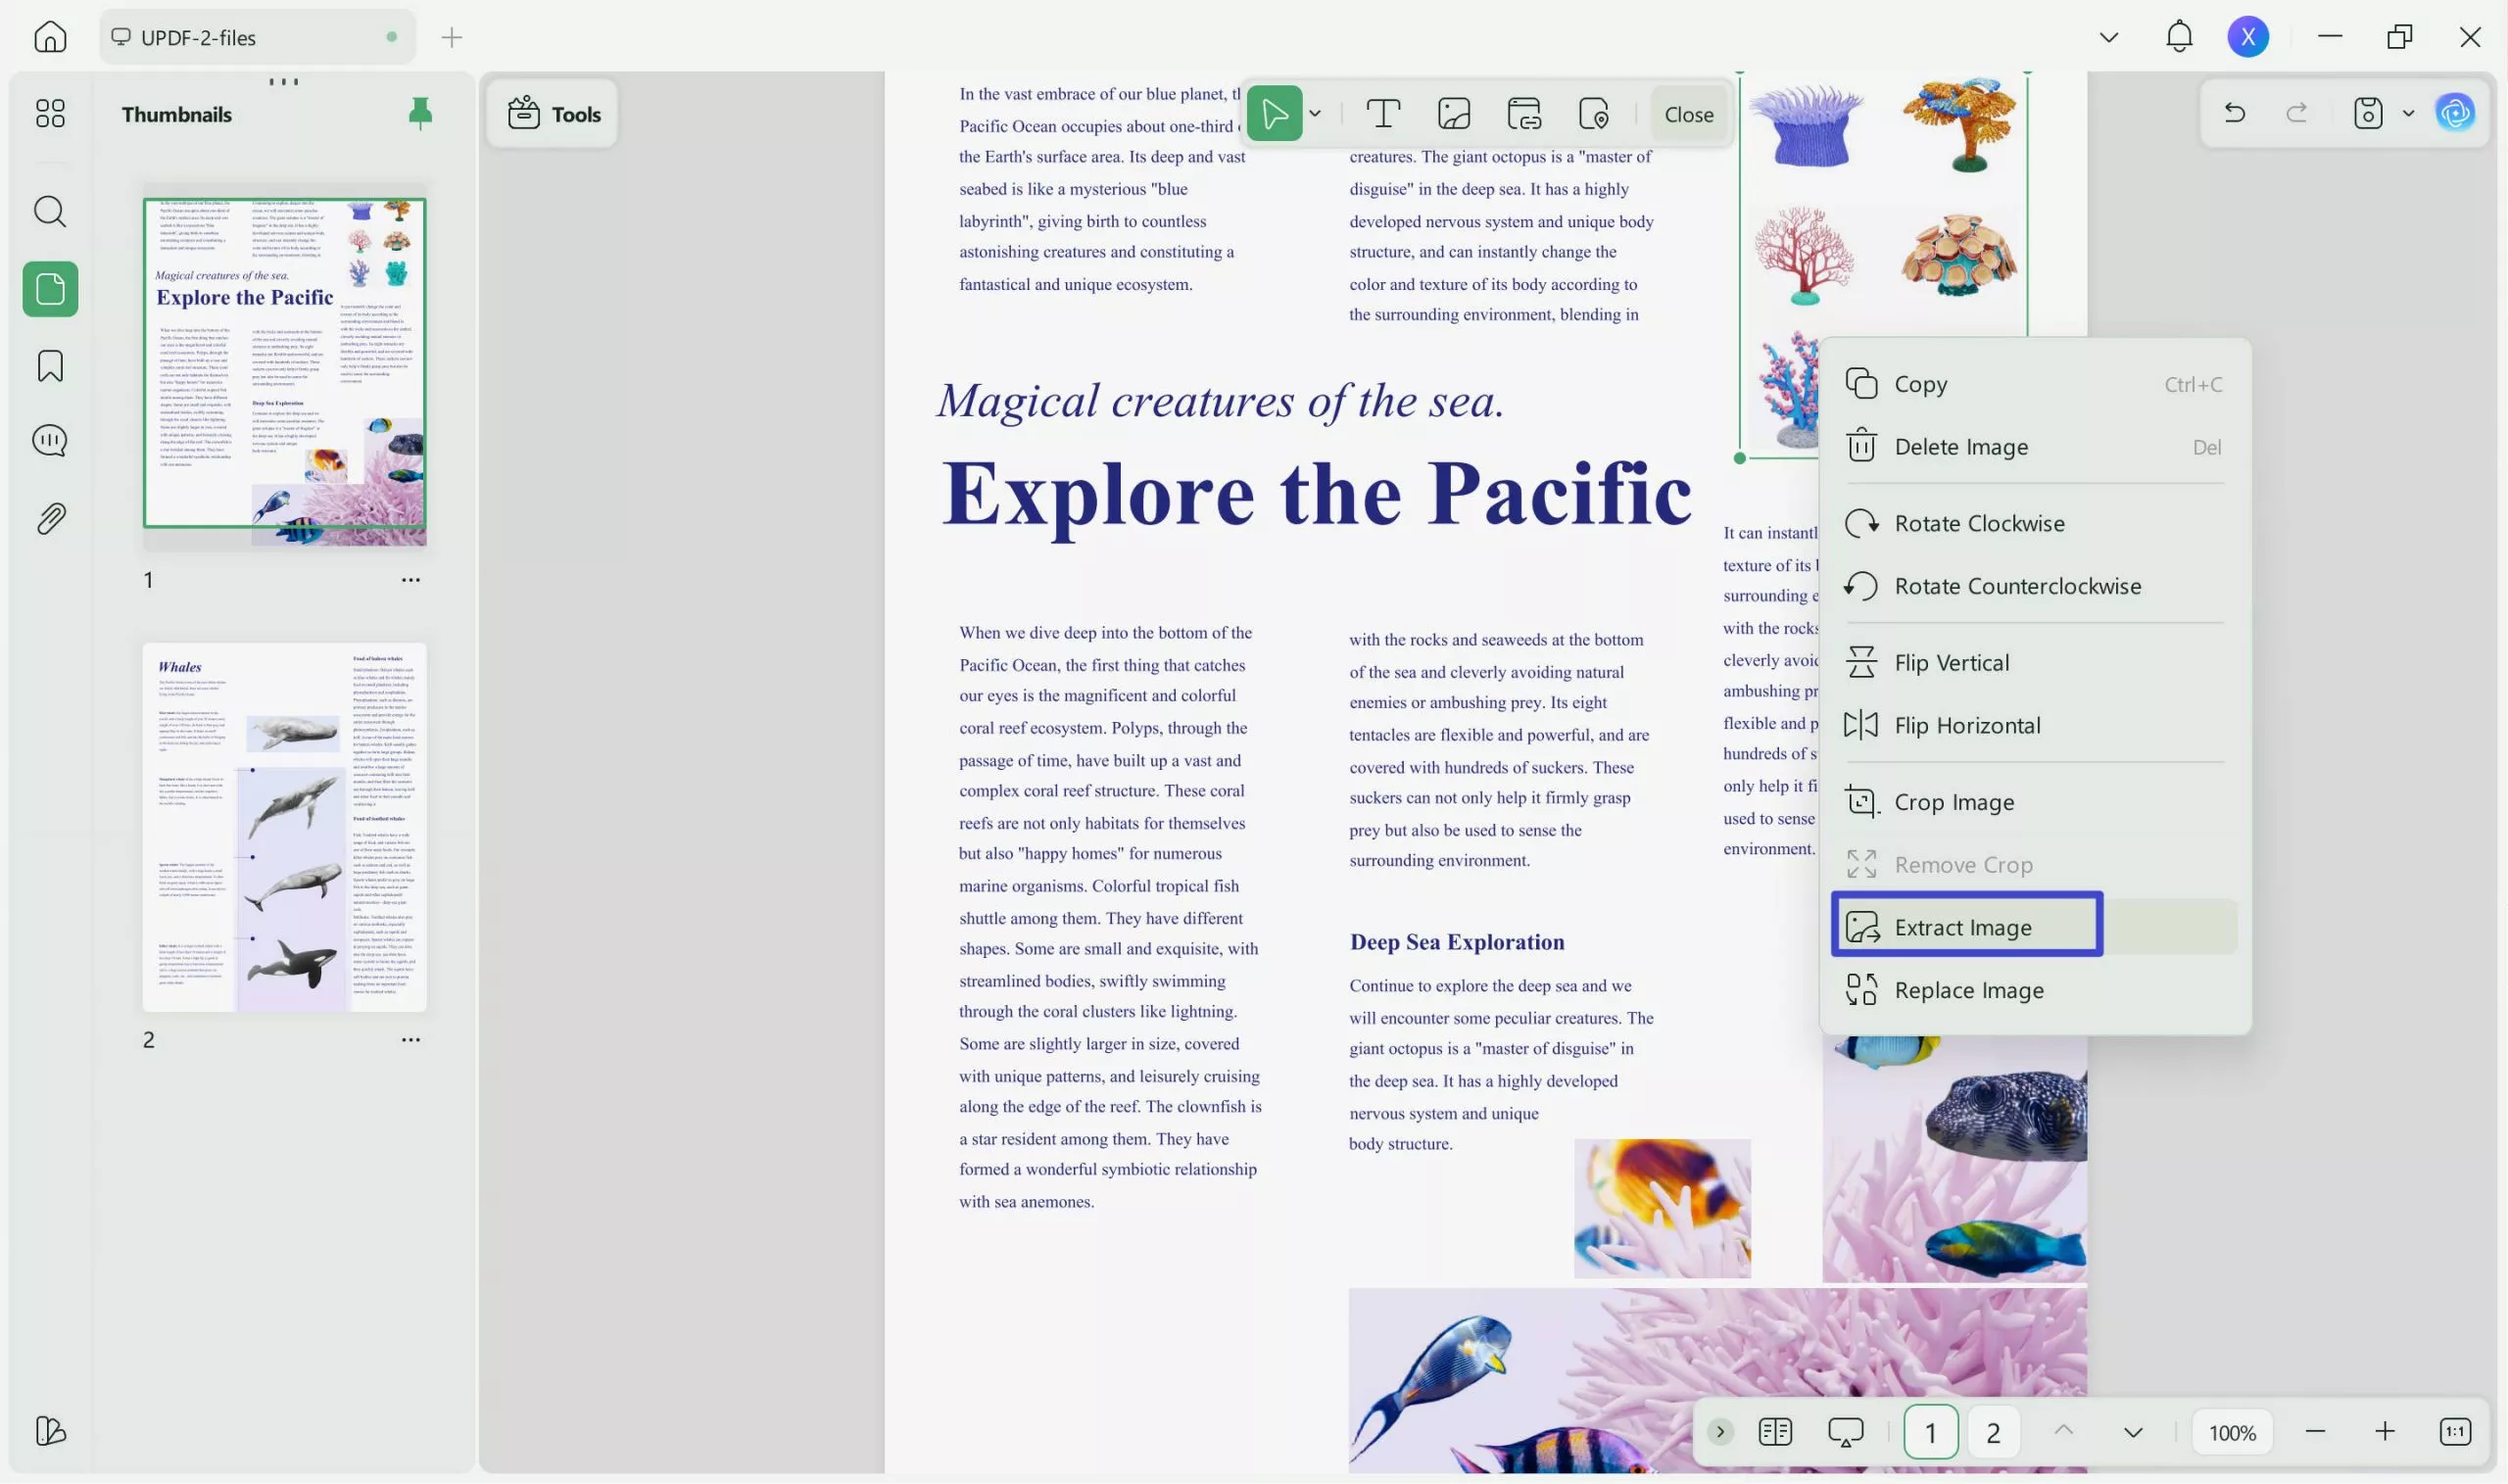
If you're happy with the document with the new crop signature, you can just save your PDF. however, if you want to save just the signature image as an image, you can right-click on the image, and choose "Extract Image". Select a location for your image file and click "Save".
Bonus Tip
Part 3. How to Crop a Signature from PDF Using Screenshot?
You can also use the screenshot feature in UPDF to crop a signature from a PDF. However, the process is different whether you are using Windows or Mac. Follow the steps below for the screenshot method for Windows and Mac separately.
On Windows:
Step 1 - Take a Screenshot
On a Windows computer, you can use the default method of taking a screenshot. To do this, you just need to click the "PrtSc" button on your keyboard. This should bring up a few different ways to take a screenshot, such as screenshotting the entire window, or just selecting a portion of the screen for the screenshot.
Step 2 - Upload Image to UPDF
You can now upload your image to UPDF by dragging and dropping it into the "Open File" box on the main UPDF interface. This will automatically convert your screenshot image file to a PDF file. Then, you can select "Crop Pages" from the left-hand side to crop your screenshot to crop your PDF to just the signature.
Adjust the sides of the image so that they are just around the signature, and then click "Crop" in "Tools". From here you can make any other edits or changes to the cropped signature, or you can save your PDF file or export it as image.
On Mac:
Step 1 - Take a Screenshot with UPDF
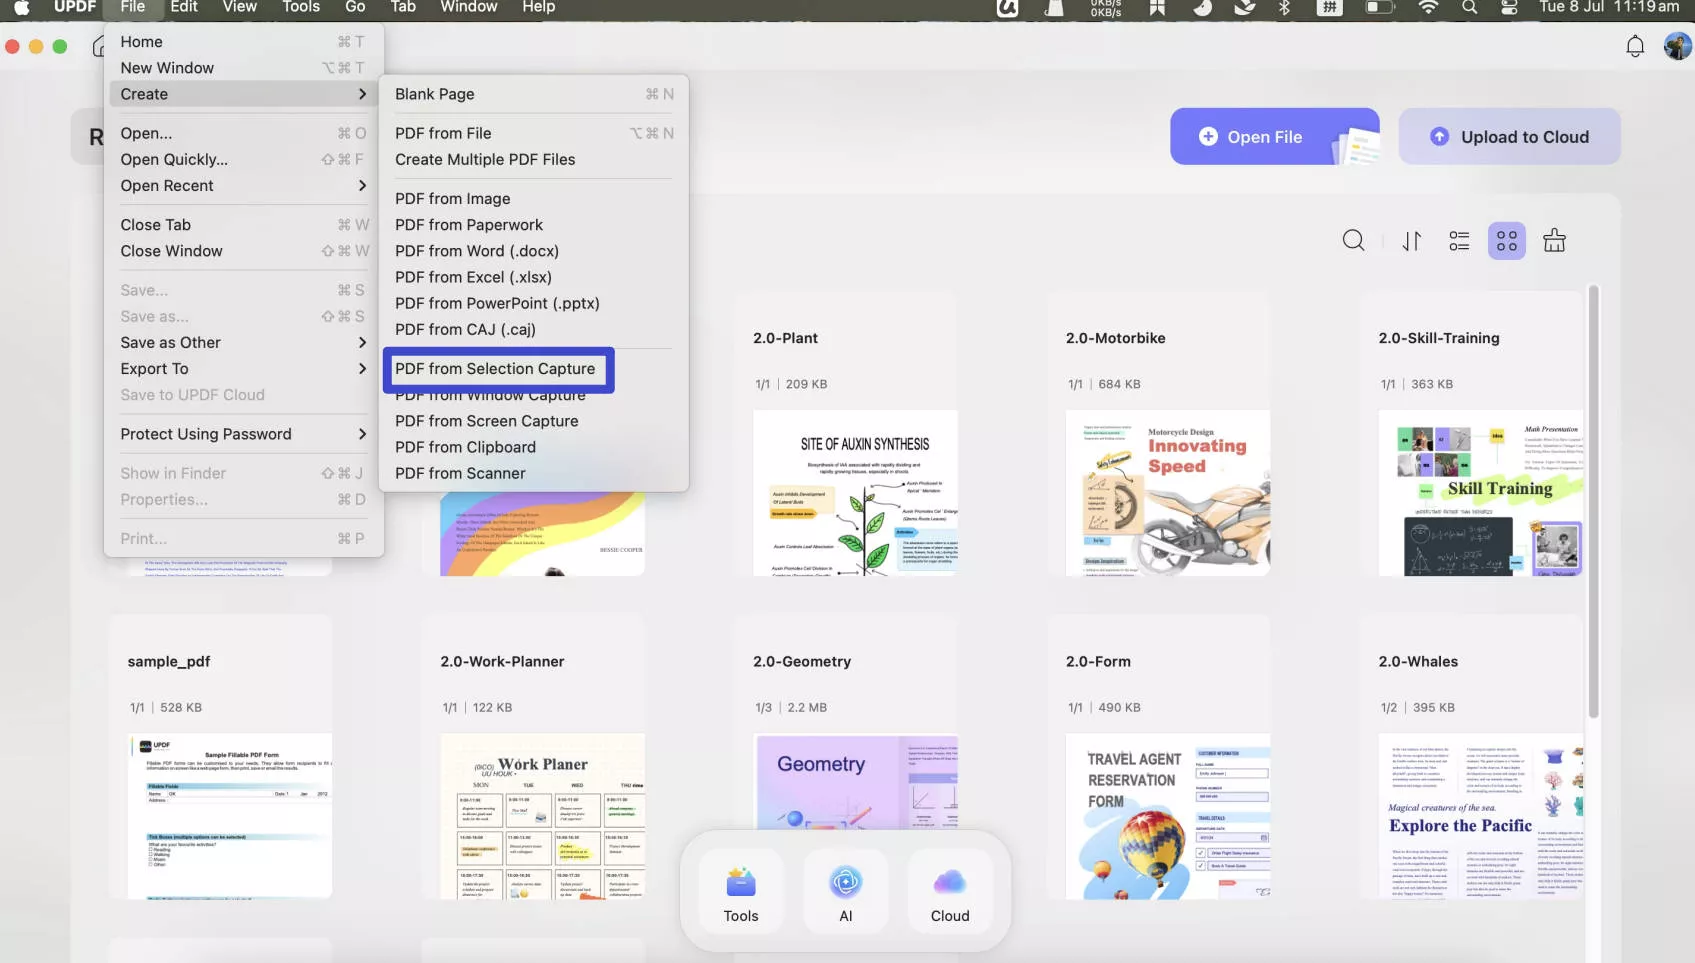
If you have a Mac, you can use UPDF to directly take a screenshot. To do this, open UPDF, open PDF with UPDF, then select "File" > "Create". There are three different screenshot options to help you create a PDF from a screenshot on your Mac. You need to choose "PDF from Selection Capture". Now, drag your cursor to only select the signature area.
Step 2 - Edit and Export Cropped Signature
Your signature screenshot will open as a PDF in UPDF. You can then either save the PDF, or export the signature as a different file type by selecting "Tools" on the left side to find "PDF Converter", and choosing your preferred file type.
Part 4. FAQS About Cropping Signature from PDF
Q1. How to Crop Signature from PDF with Adobe
To crop a signature from a PDF with Adobe, select the "Edit PDF" tools from the main menu. Then, click to select the signature on your PDF, right click to select "Crop". Select the options per your needs, click "OK". Now, drag the side of the signature image to crop.
Q2. How to Crop Signature from PDF Online?
You can use Adobe's online PDF crop tool. Simply navigate to the tool online, choose the PDF that you want to crop the signature from, or drag and drop the file into the PDF crop tool. After the PDF is uploaded to the online tool, you will have to sign into your Adobe Acrobat account. Once you have logged into your account, Adobe will automatically add a border to your document. You can then adjust the different sides of the border to your preferences, focusing on the signature that you need to crop from the document. Then select "Crop" to crop your PDF and save the file.
Wrapping Up
In this article, we have discussed three different quick and easy methods on how to crop signatures from PDF using UPDF. You can use UPDF's "Crop" tool to adjust the size and shape of your PDF page so that it only includes a signature. If your PDF contains the signature as an image, then you can use UPDF's image cropping tool. Finally, you can use a screenshot of a signature, and then crop the screenshot to include just the signature that you need. This article also includes two bonus tips on using Adobe to crop a signature from a PDF, but you must have an Adobe license to use these methods.
In addition to its cropping features, UPDF has many other tools to help you design, customize, read, annotate, and organize your PDFs. This includes editing tools to add text or images to your PDF, annotation tools to highlight important text, digital signatures, or sticky notes with comments. UPDF also has powerful AI features that allow you to generate, explain, summarize, and translate content in your PDF.
Ready to try all of UPDFs amazing features today? Click the button below to download the UPDF and start your free trial right now!
Windows • macOS • iOS • Android 100% secure
 UPDF
UPDF
 UPDF for Windows
 UPDF for Mac
 UPDF for iPhone/iPad
 UPDF for Android
 UPDF AI Online
 UPDF Sign
 Edit PDF
 Annotate PDF
 Create PDF
 PDF Form
 Edit links
 Convert PDF
 OCR
OCR PDF to Word
 PDF to Image
 PDF to Excel
 Organize PDF
 Merge PDF
 Split PDF
 Crop PDF
 Rotate PDF
 Protect PDF
 Sign PDF
 Redact PDF
 Sanitize PDF
 Remove Security
 Read PDF
 UPDF Cloud
 Compress PDF
 Print PDF
 Batch Process
 About UPDF AI
 UPDF AI Solutions
 AI User Guide
 FAQ about UPDF AI
 Summarize PDF
 Translate PDF
 Chat with PDF
 Chat with AI
 Chat with image
 PDF to Mind Map
 Explain PDF
 Scholar Research
 Paper Search
 AI Proofreader
 AI Writer
 AI Homework Helper
 AI Quiz Generator
 AI Math Solver
 PDF to Word
 PDF to Excel
 PDF to PowerPoint
 User Guide
 UPDF Tricks
 FAQs
FAQs UPDF Reviews
 Download Center
 Blog
Blog Newsroom
 Tech Spec
 Updates
 UPDF vs. Adobe Acrobat
 UPDF vs. Foxit
 UPDF vs. PDF Expert





 Enola Davis
  Engelbert White

 Lizzy Lozano
 Enrica Taylor