Sensitive information has never been more…well, sensitive in the digital age.
It doesn't matter if you are a professional with deep insight into client data or an average Joe who values personal privacy–everyone needs to know how to strategically conceal parts of a document.
For Mac users, it's important to know how to redact in Preview.
You may not be aware that Preview, the built-in macOS application, is not just an application that can be used to view various types of documents. It also has some neat functionality that lets you redact confidential information from a document.
To help you out, we're going to go through a step-by-step guide on how you can quickly and effectively black out sensitive information using Preview.
Part 1. How to Redact in Preview? Step by Step
Conveniently, Preview on macOS makes it easy to redact text without having to grab a Sharpie. Just before you start, make sure you understand that redaction is permanent.
Windows • macOS • iOS • Android 100% secure
If you persist using Preview for PDF redaction, here's how to redact a PDF in preview:
Step 1: Duplicate your document.
Remember, redaction is permanent. To safeguard against accidental loss of important information, the first step is to duplicate your document. This way, you preserve the original content before you make any changes. Simply right-click your document in Finder, select "Duplicate," and a copy will be created. For demonstration, we will duplicate a document named "whitepaper".
Step 2: Open your document with the Preview App.
With the duplicate saved, open the your PDF in Preview. Right-click the file, then hover over Open With and choose Preview. The document will open in a new Preview window, where you will have the ability to edit the document.
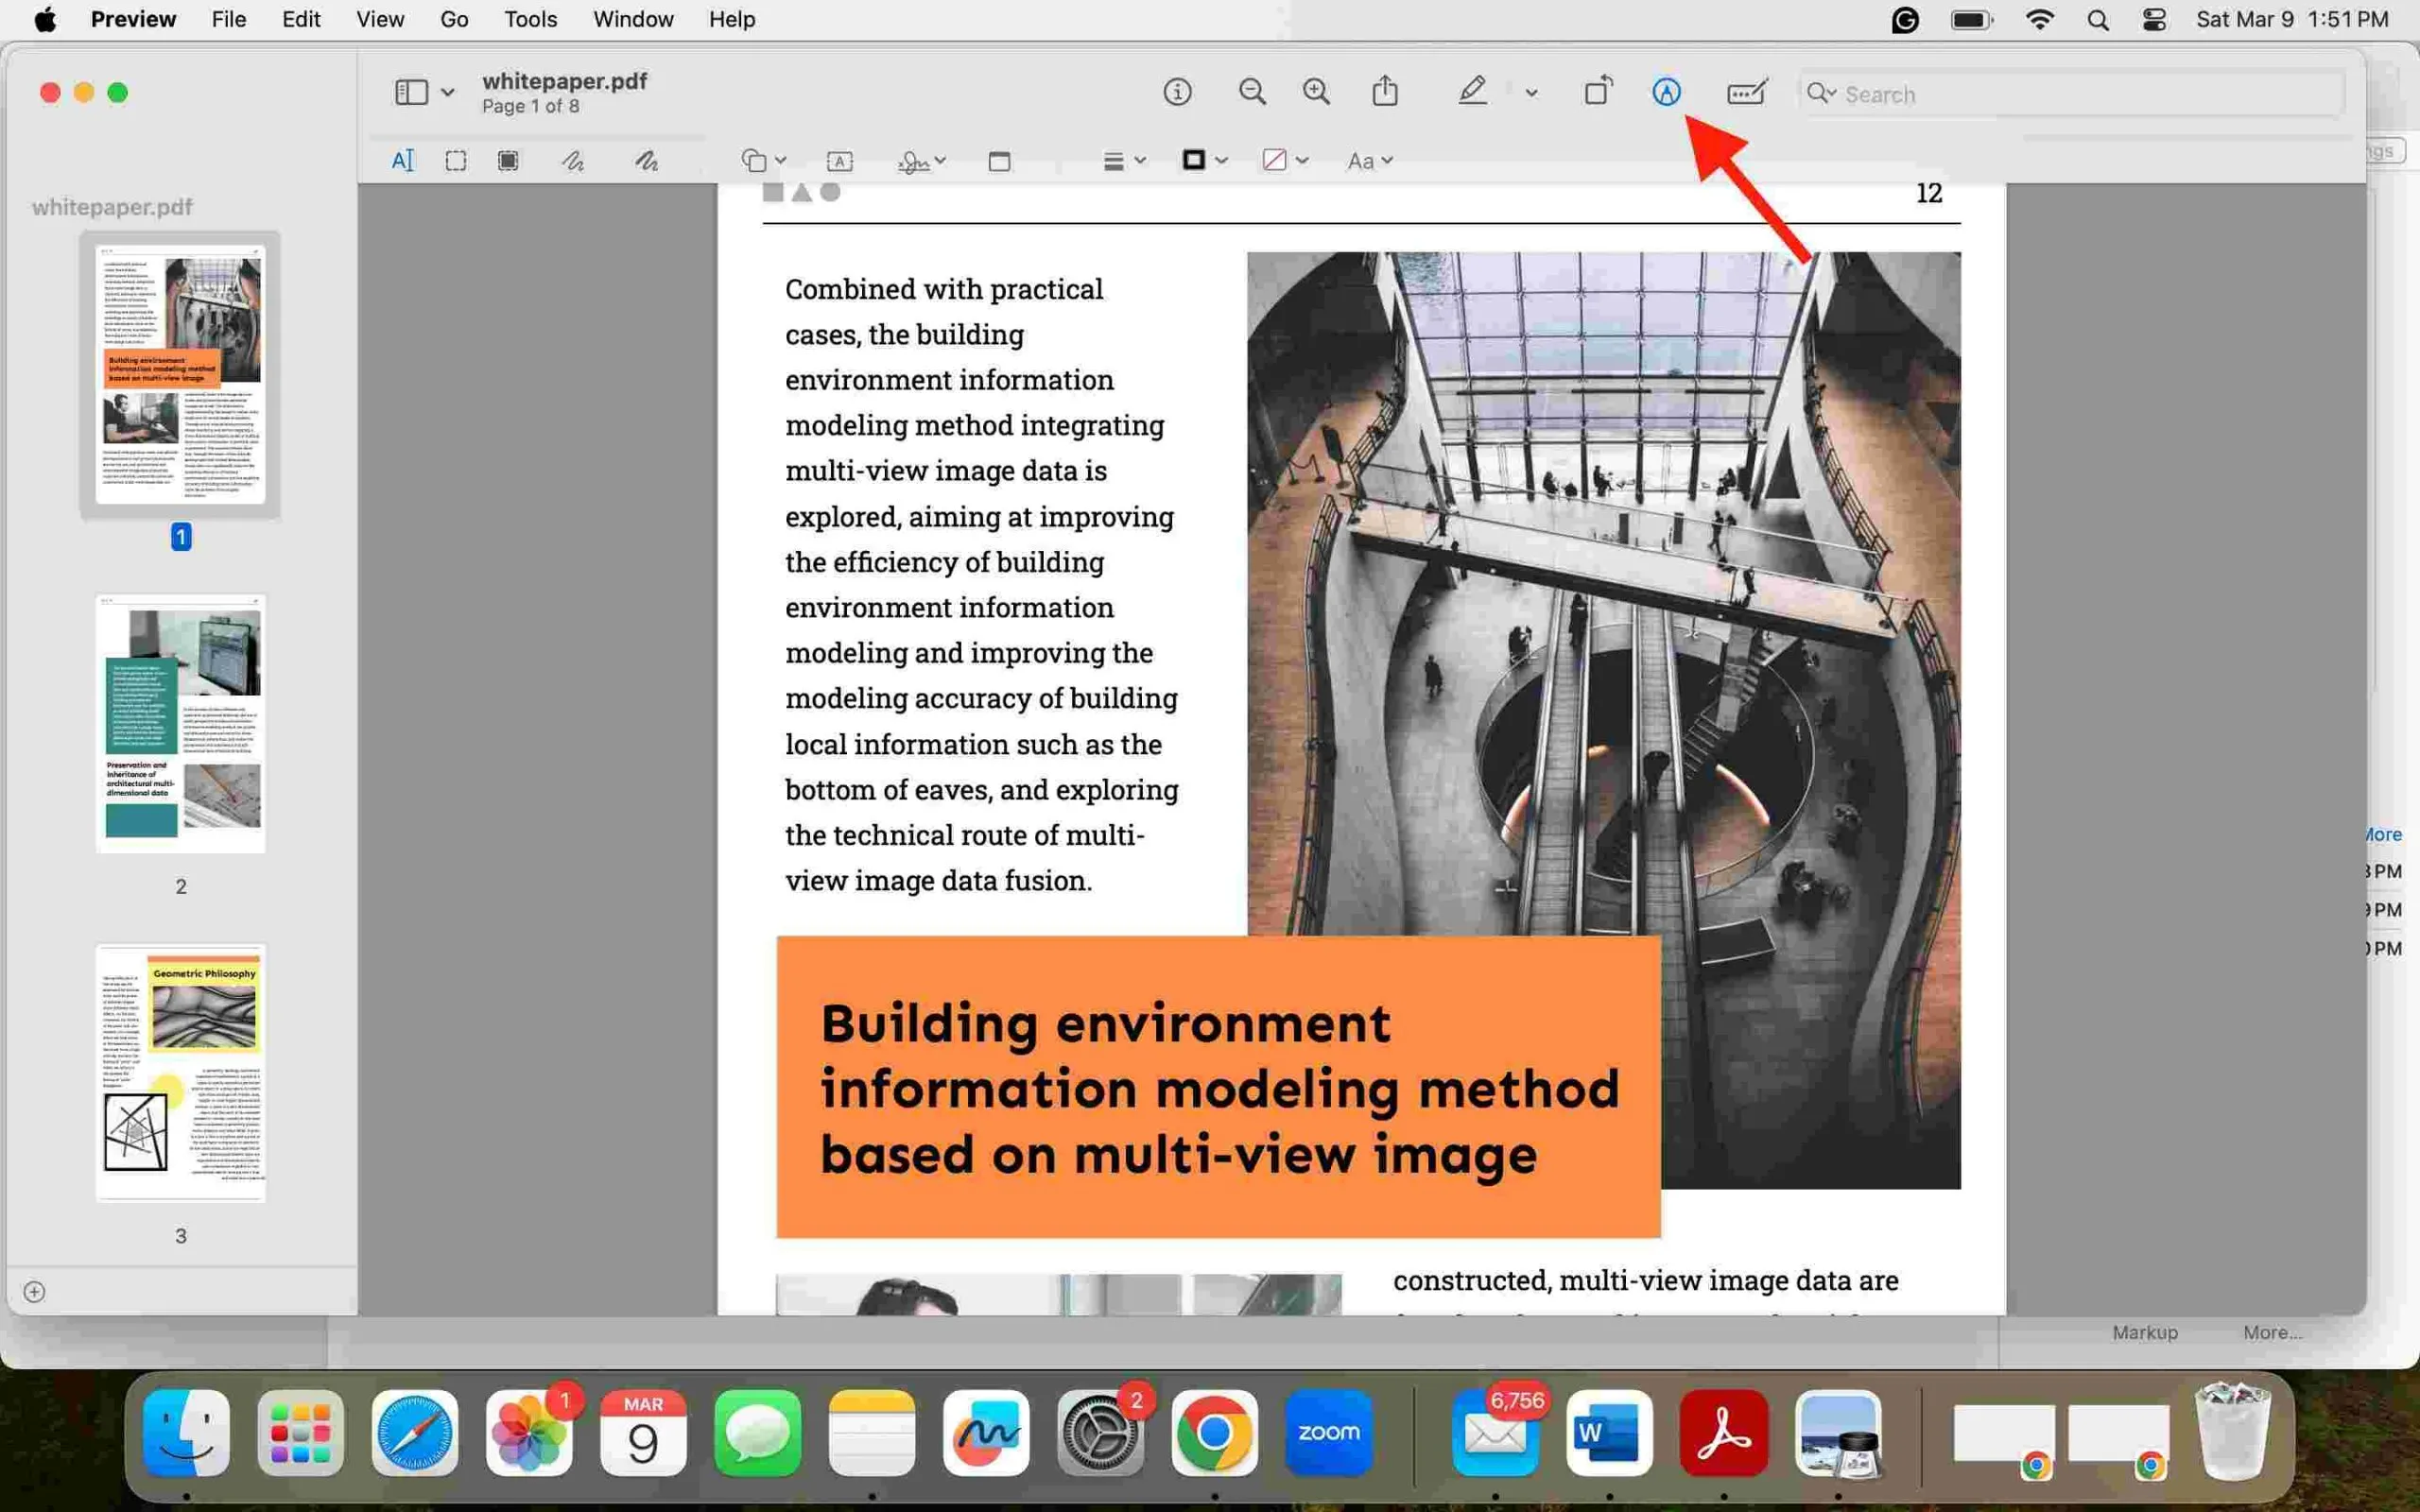
Step 3: Open the Markup Toolbar.
To use the Redaction tool, you will have to open up the Markup Toolbar first. Click on the blue icon to display the Markup Toolbar.
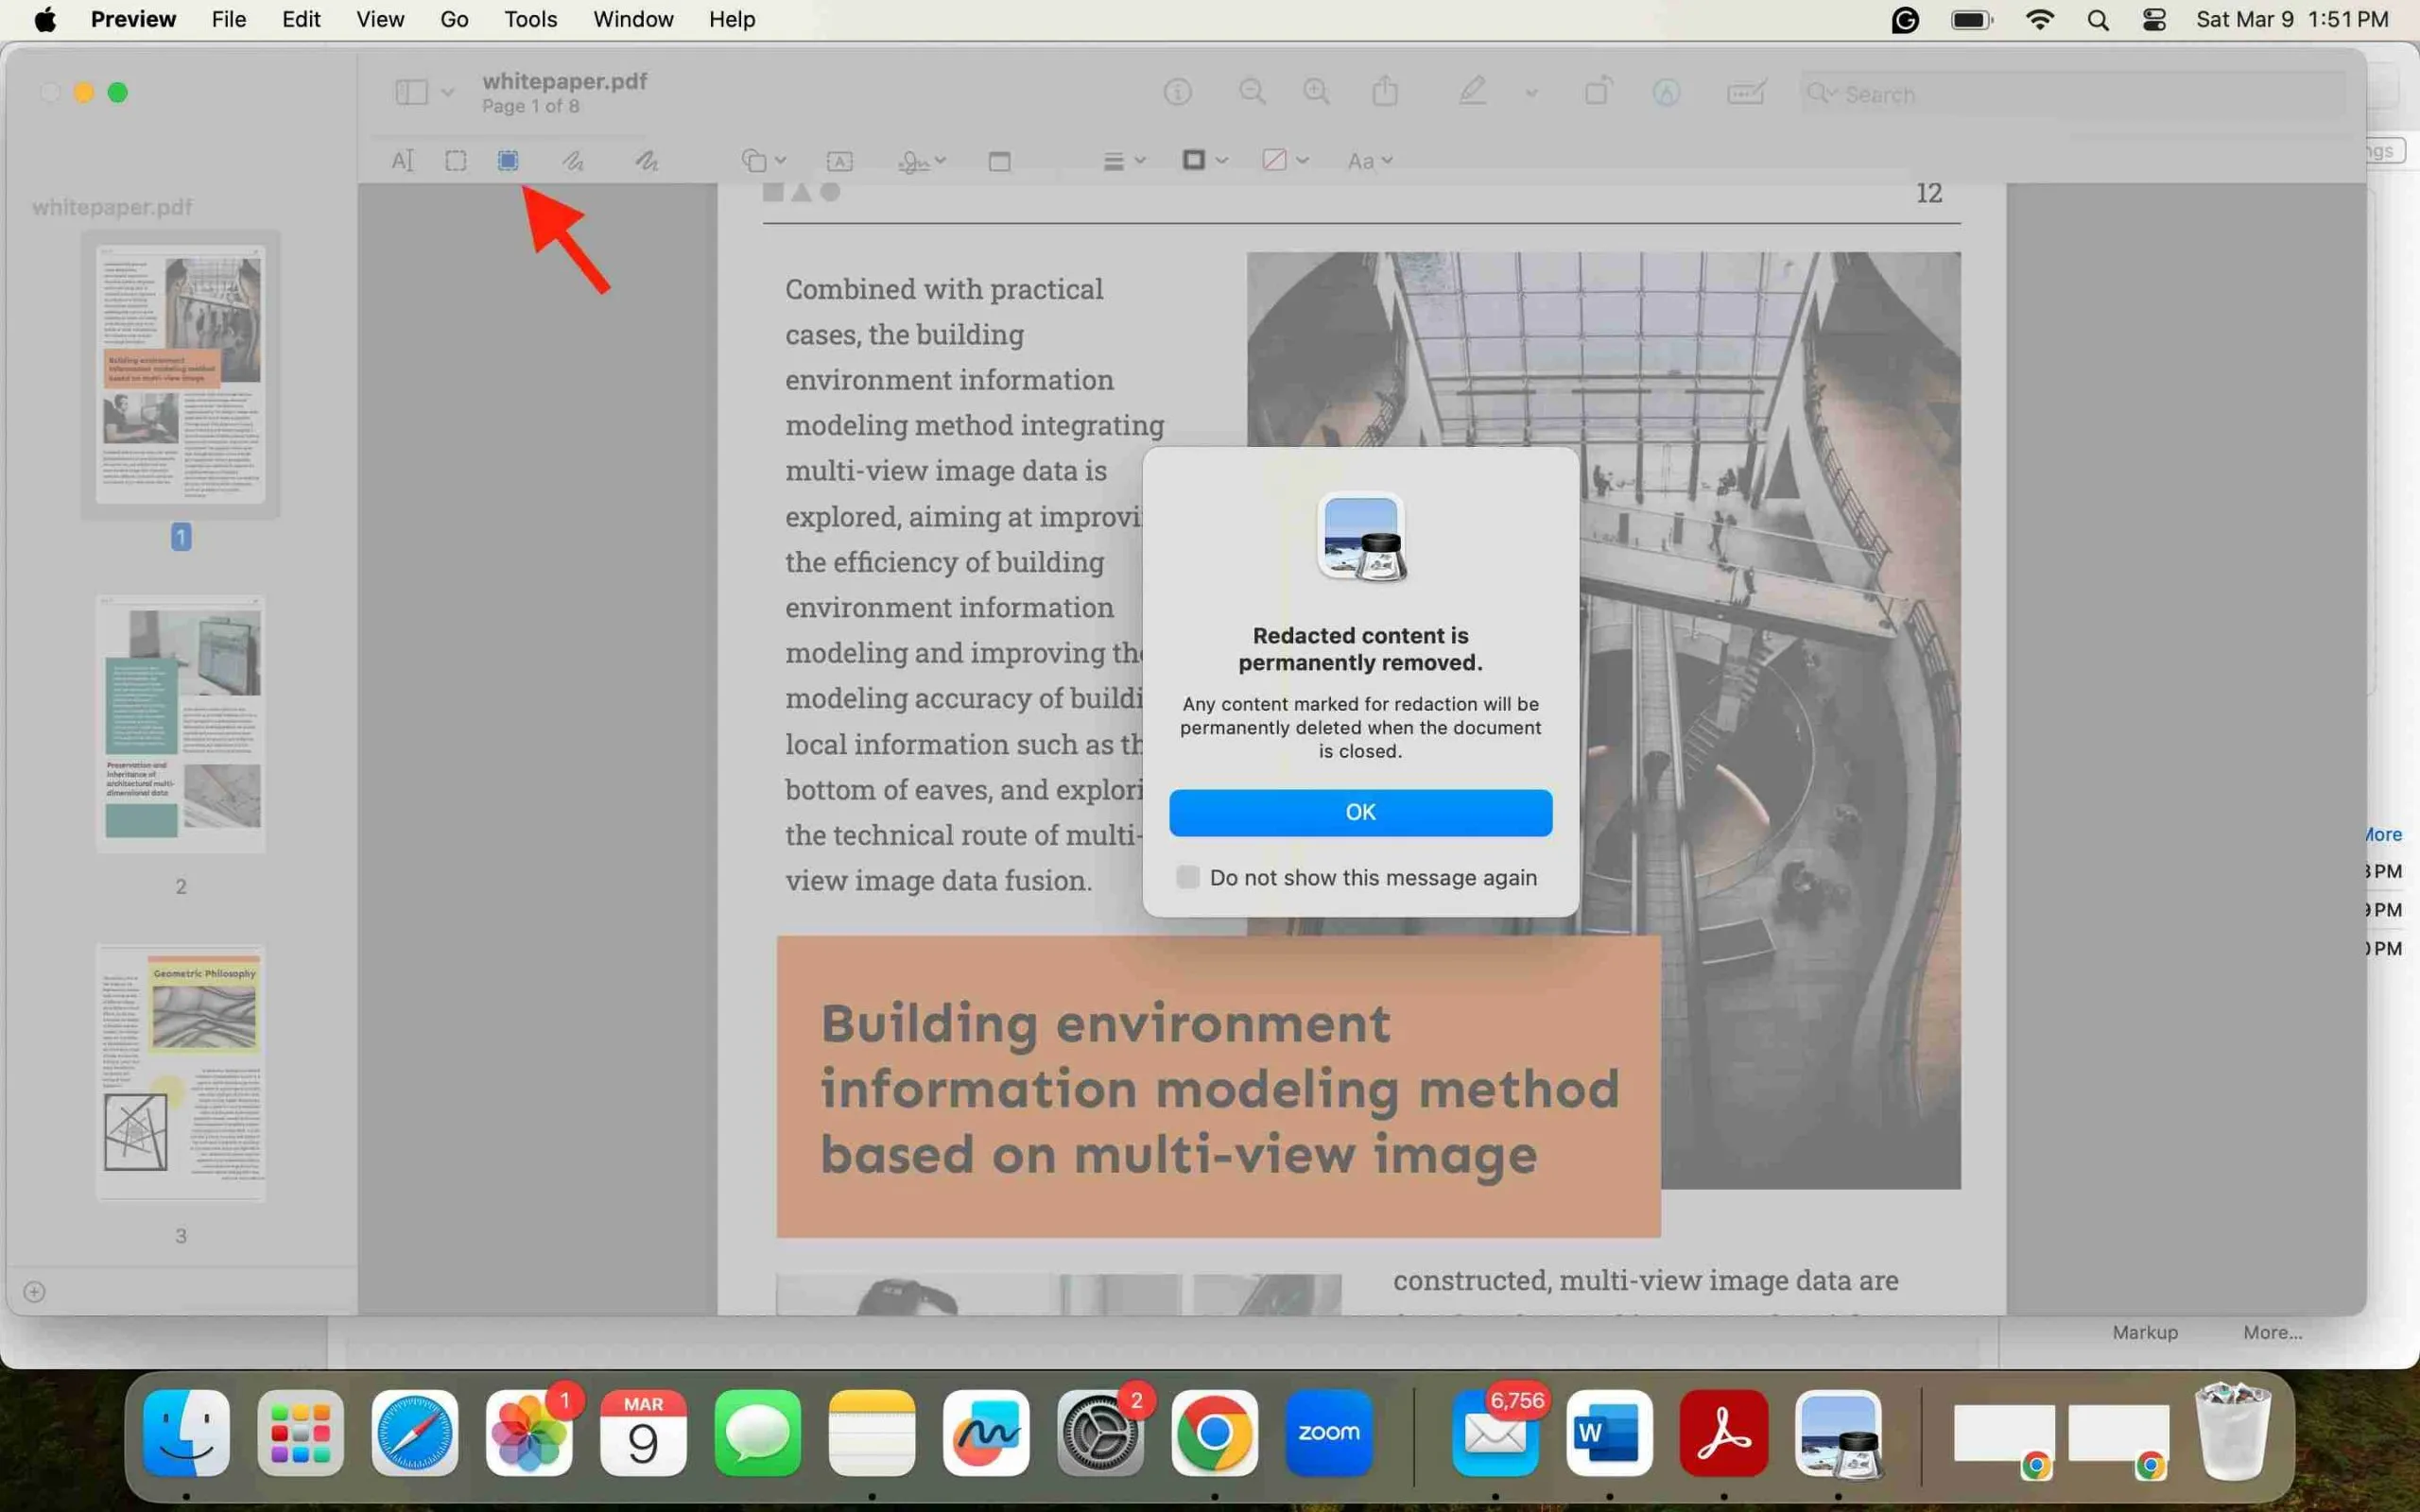
Step 4: Select the Redaction tool.
The redaction tool is represented by a filled-in square icon located third from the left within the Markup Toolbar. Activating it allows you to click-and-drag to select/redact parts of the document. When clicked, a warning will also pop up alerting the user to the permanence of the action once a document is saved.
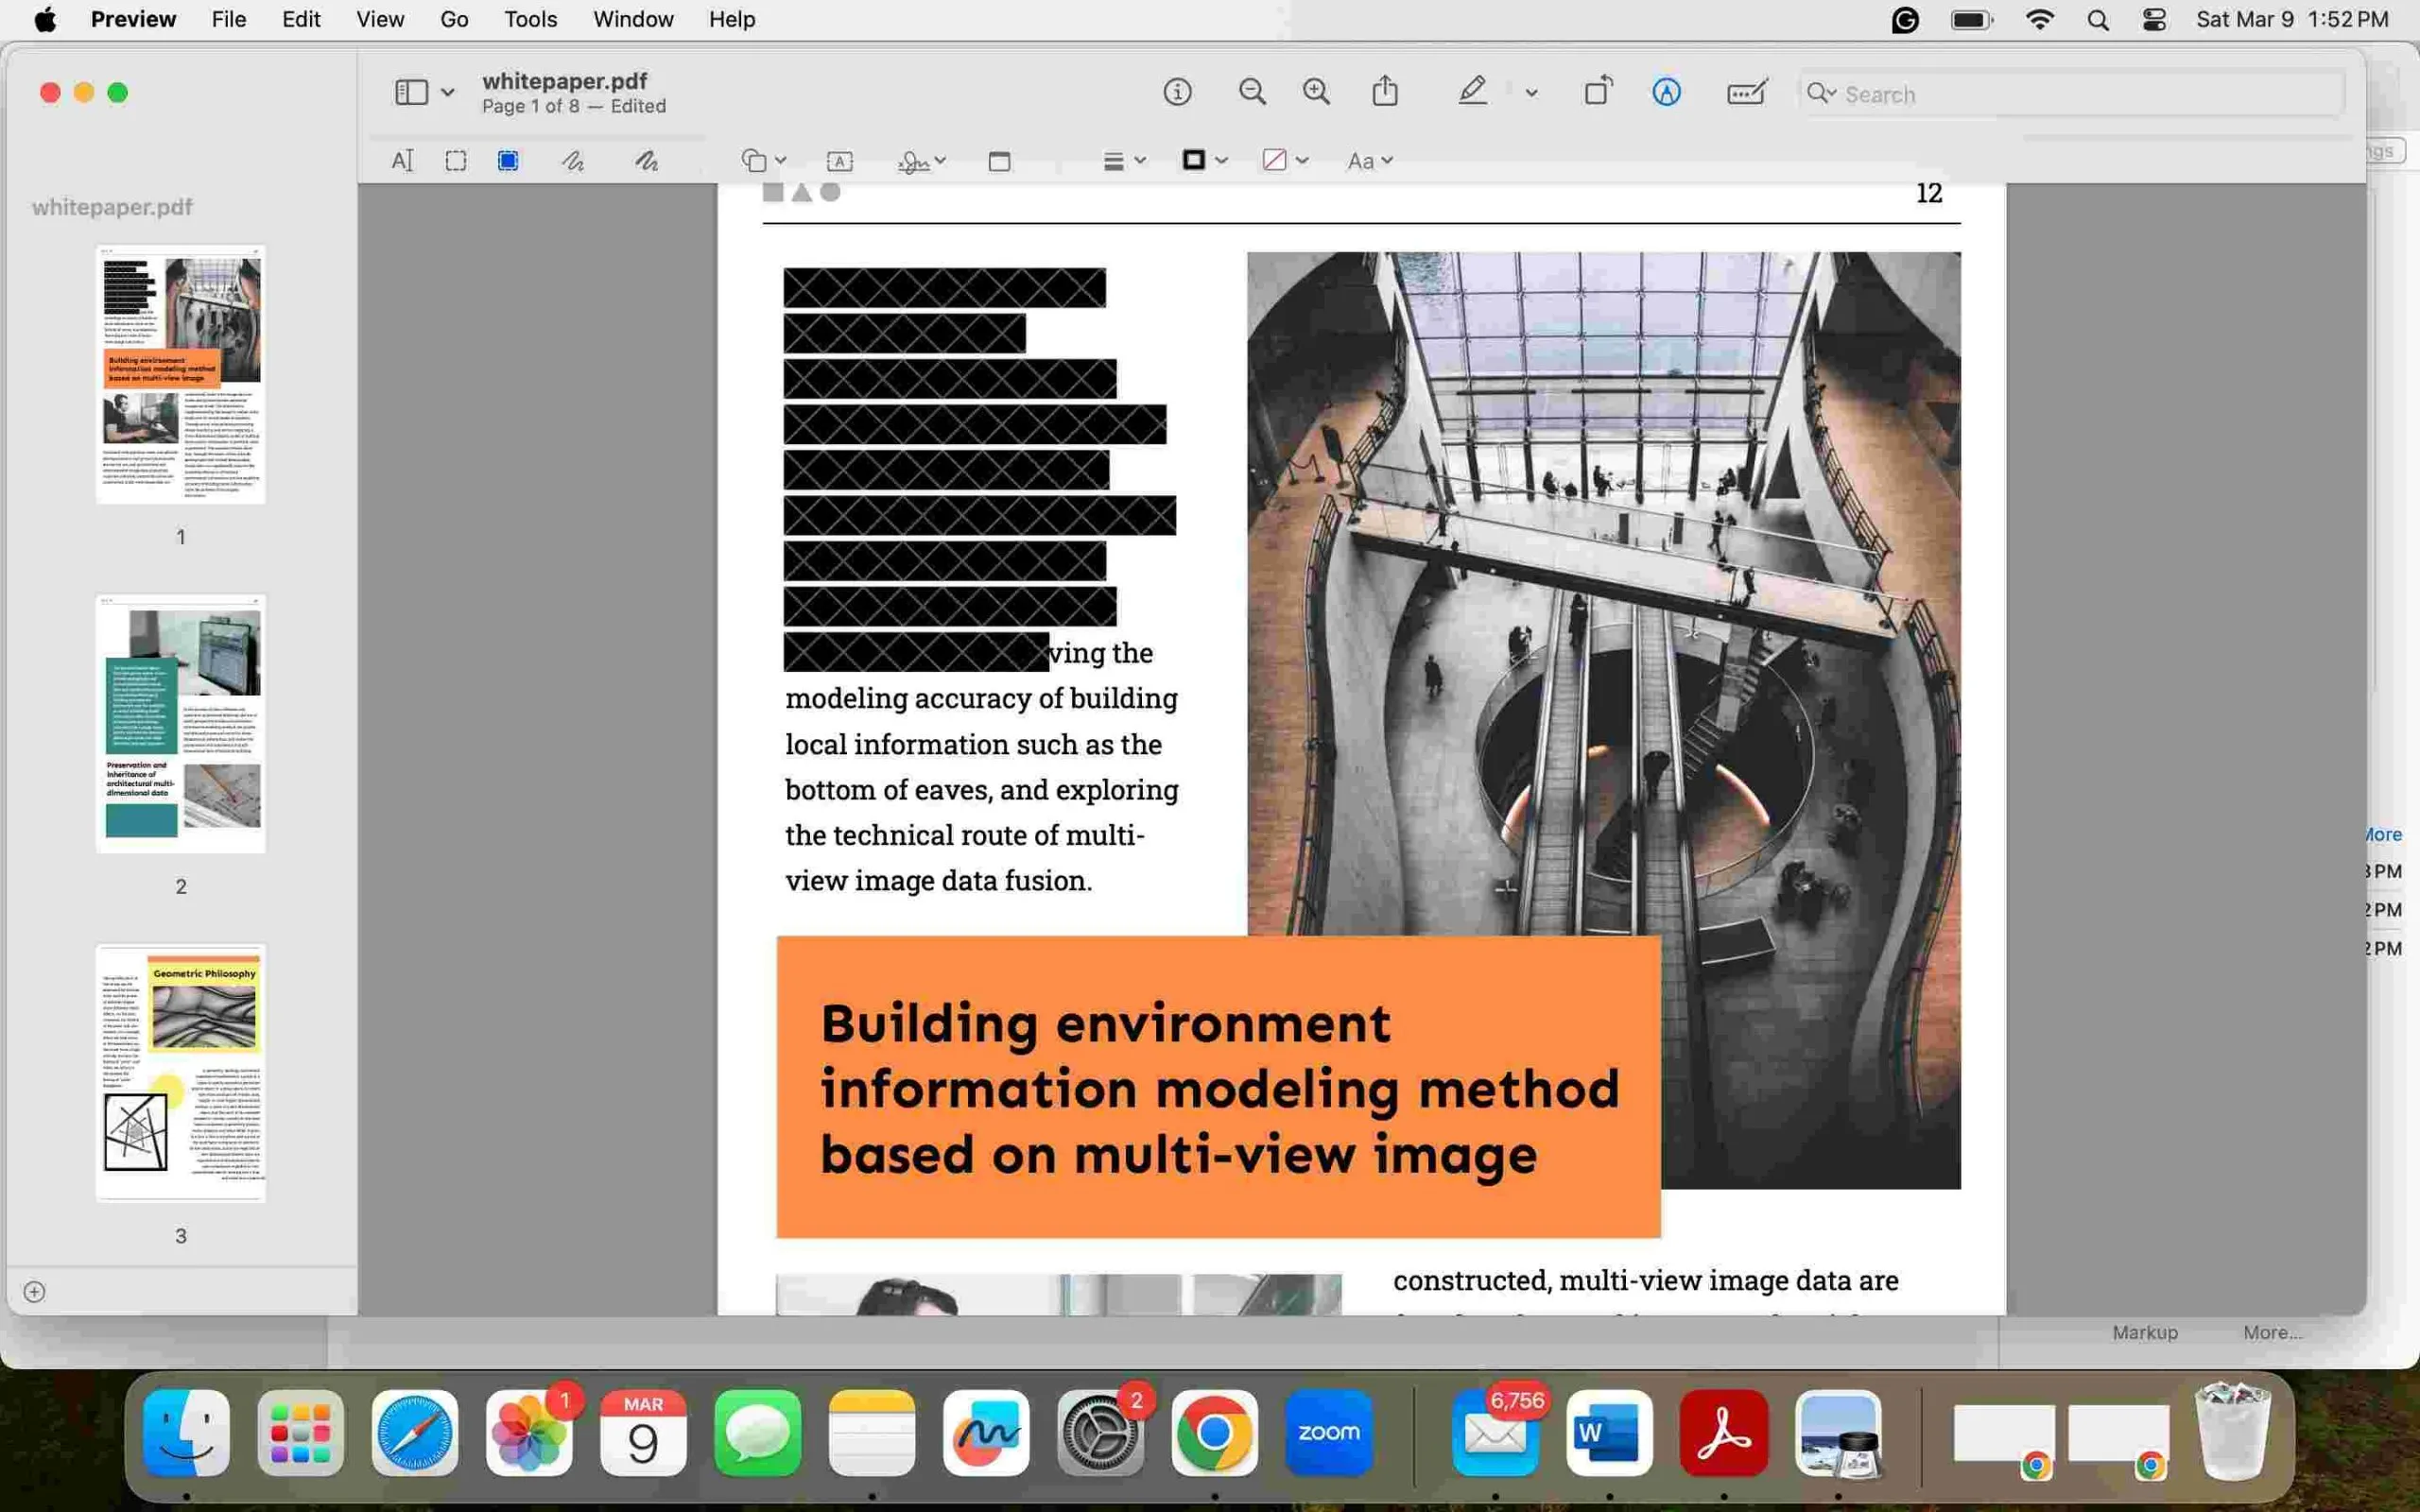
Step 5: Implement the redaction.
To redact, click and drag your cursor across the segments you wish to conceal, whether text or images. For instance, in our example, we're targeting text in the document's upper left corner. This tool is versatile, allowing you to obscure any part of your document, including images, ensuring comprehensive privacy protection.
Step 6: Save your changes.
When you are certain you have adequately redacted any and all areas meant for redaction, go ahead and save your document. This is the step that makes your redactions permanent, so they are no longer reversible.
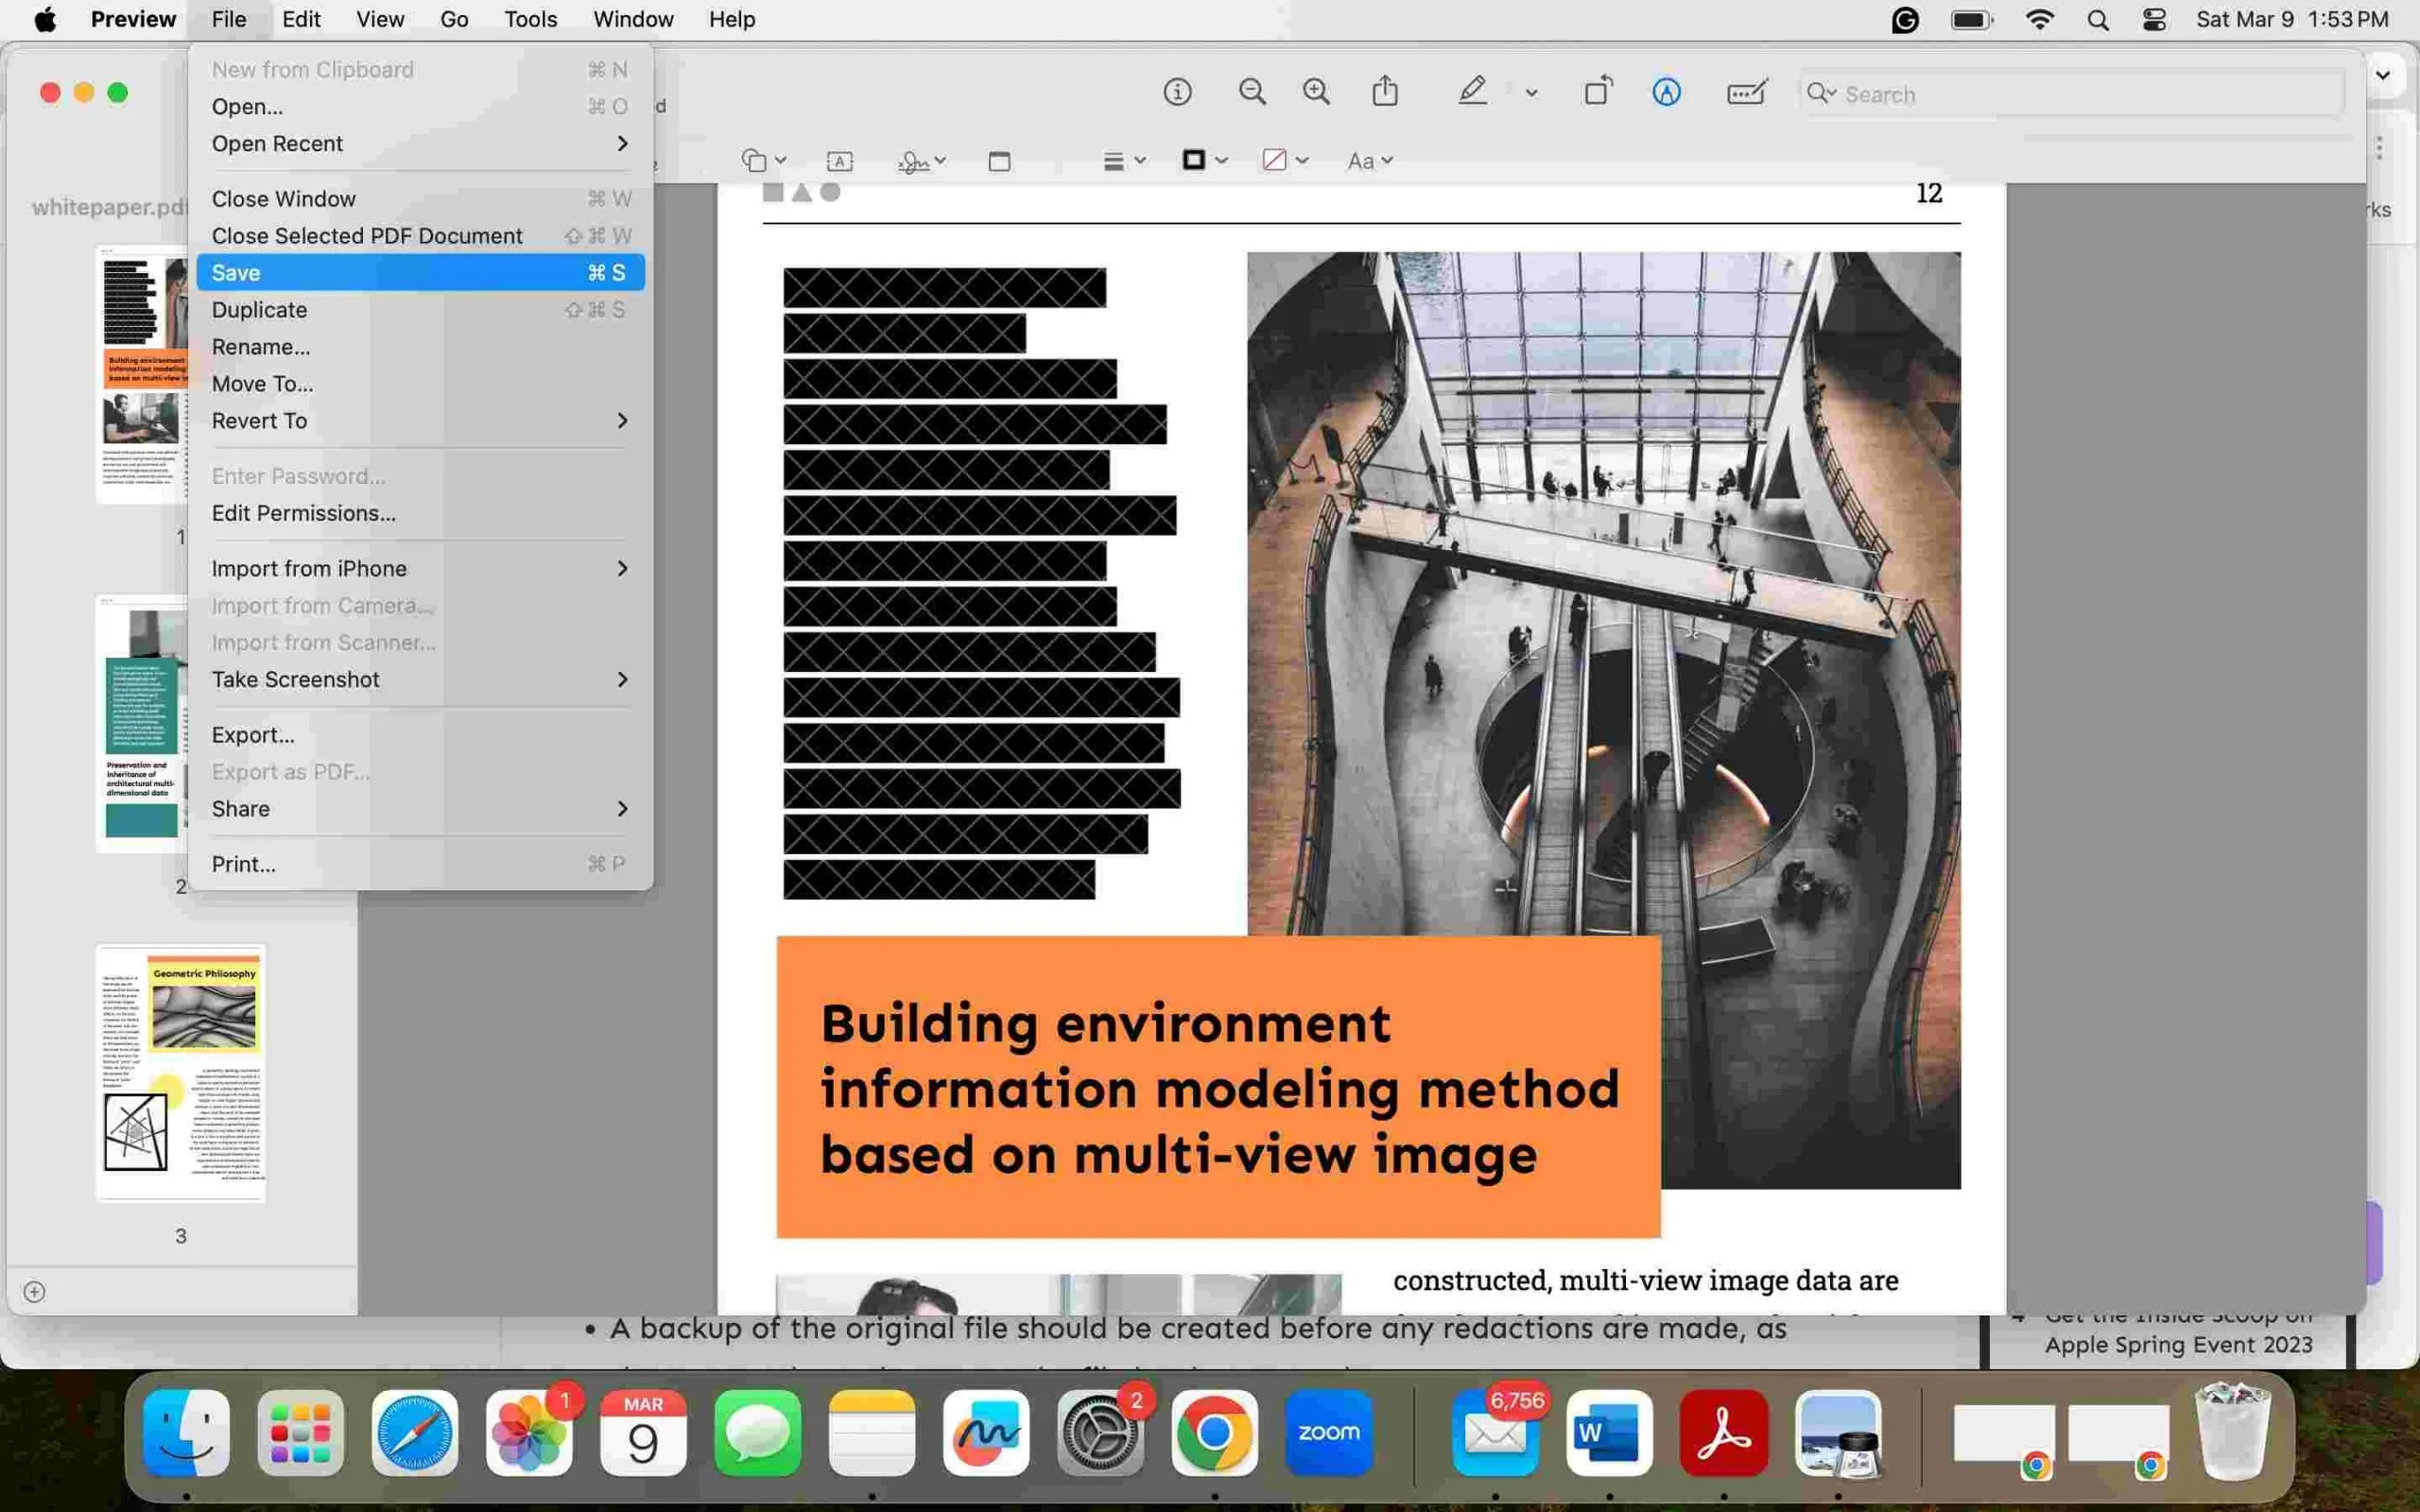
By following these steps, you will now know how to use the redact tool in Preview and have confidence that sensitive contents in your document are safely obscured.
Part 2. Why is Mac Preview Redact Not Working?
Encountering issues while attempting to redact information using the Preview app on your Mac can be frustrating. Several factors might be contributing to these difficulties, and understanding them can help resolve the problem. Here are a few common reasons why redaction might not be working as expected:
- Outdated macOS Version: Redaction features require macOS 11 Big Sur or later. If your system is running on an older version, specifically macOS 10.14 or earlier, the redact function will not be available.
- Incorrect Document Opening Method: It's crucial to open your document directly with the Preview app. Utilizing the markup tool via the "Quick Look" preview will not provide access to the redaction tools.
- Document Restrictions: If you're working with a digitally signed PDF, the document is locked against modifications, including redaction. This security measure prevents changes to ensure the integrity of the signed content.
- Limitations with Image-based Text: While the Preview app allows for image redaction, extracting specific text from an image for redaction poses a challenge. The tool's design doesn't accommodate the nuanced recognition needed to isolate and redact text within images effectively.
Identifying the root cause of your redaction issue is the first step toward finding a solution.
Part 3. How to Fix Mac Preview Redact Not Working?
Redaction challenges in Mac Preview can be really frustrating, but they're not the be all and end all. While we highly recommend using alternative applications, we also offer tips for those determined to soldier on with Preview. Here's what you can do:
Fix 1. The Most Effective Way - Use Preview Alternative
For those requiring immediate redaction capabilities without the hassle, we highly recommend UPDF as an alternative to Mac Preview. UPDF not only addresses the limitations encountered in Preview but also expands your editing and document management capabilities.
This comparison outlines the differences in features between Preview for Mac and UPDF, showcasing why UPDF might be the superior choice for your PDF handling needs.
| Feature | Preview for Mac | UPDF |
| Redaction Features | Allows you to redact texts or images | Allows you to redact part of the contents, redact the page, find the content and redact |
| Platform Support | Mac | Windows, Mac, iOS, Android |
| Read PDF | (Basic) | (Advanced, with bookmarks and slideshow display) |
| Edit PDF | Add, Delete, Extract, Rotate, Crop, and Replace Images; Add and Edit Text | |
| OCR | Convert Scanned Documents into Searchable and Editable PDFs | |
| Convert PDF | Convert PDF to JPG/PNG/TIFF | Extensive: Convert PDF to Word/PPT/Excel/CSV/RTF/GIF and more |
| Organize PDF | Insert, Rotate, Crop, and Delete Pages | More Extensive: Insert, Delete, Rotate, Crop, Extract, Replace, Merge, Split |
| Protect and Share PDF | Add Open Password | More Options: Set Permissions Password, Send by Email, Share via Link |
| Create PDF | Create PDF from photos | More Options: Create from Capture, Scan, Other File Types |
| Print PDF | ||
| Form Handling | Fill out Form | Create and Edit PDF Forms |
| PDF Compression |
Redacting documents efficiently is crucial, and UPDF offers a straightforward solution. Here's how you can utilize UPDF for your redaction needs:
Step 1: Download UPDF.
Begin by downloading UPDF via the UPDF official website or the button below. It provides versions for various operating systems, ensuring compatibility with your device.
Windows • macOS • iOS • Android 100% secure
Step 2: Open your PDF with UPDF.
With UPDF installed, locate the PDF you wish to redact. Right-click the file, select 'Open With,' and choose UPDF.
Step 3: Access the redaction tools.
Navigate to "Tools" in the left-column menu toolbar in UPDF and click on the Redact tool. A prompt will appear, reminding you that redaction is irreversible. Acknowledge the warning to proceed.
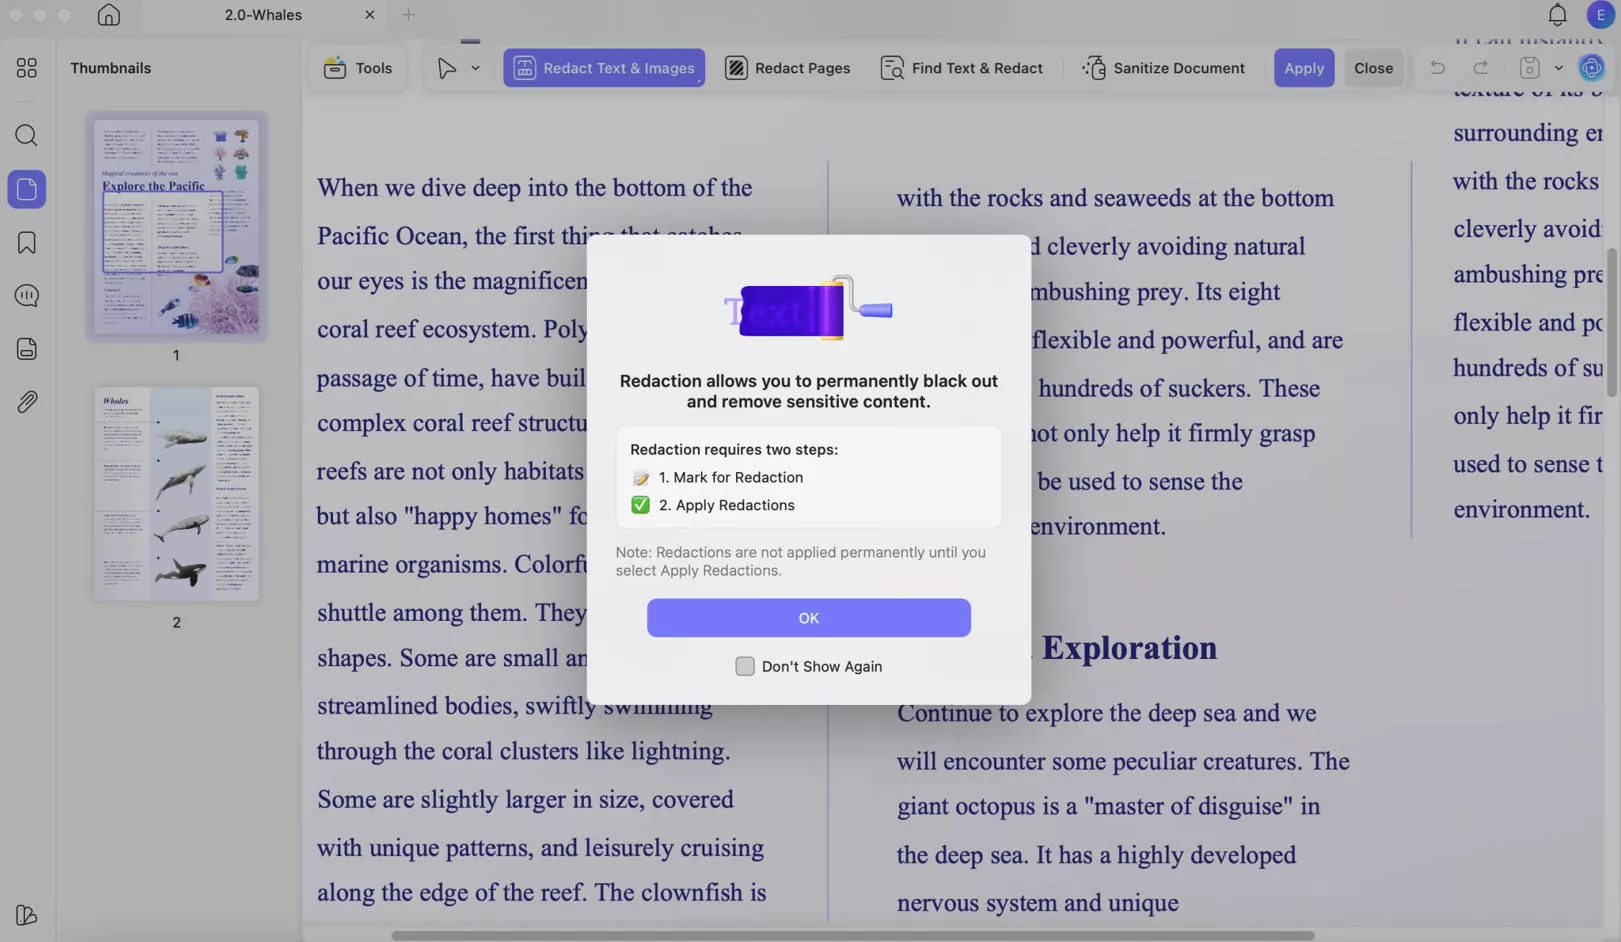
Step 4: Start redacting.
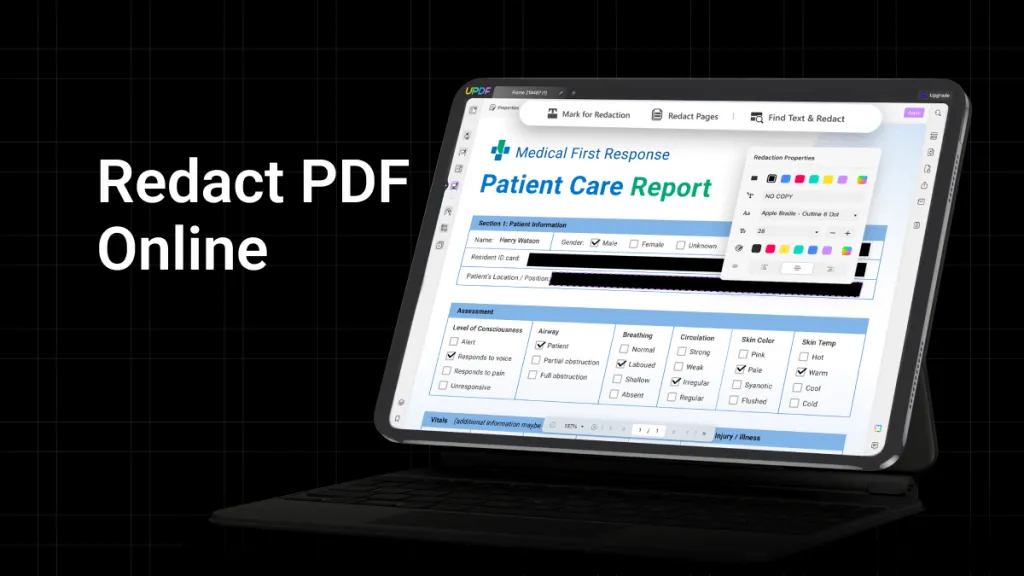
UPDF presents three redaction tools at the top toolbar: Mark for Redaction, Redact Pages, and Find Text & Redact. Unlike Mac Preview, UPDF includes options for redacting entire pages or searching for specific text to redact.
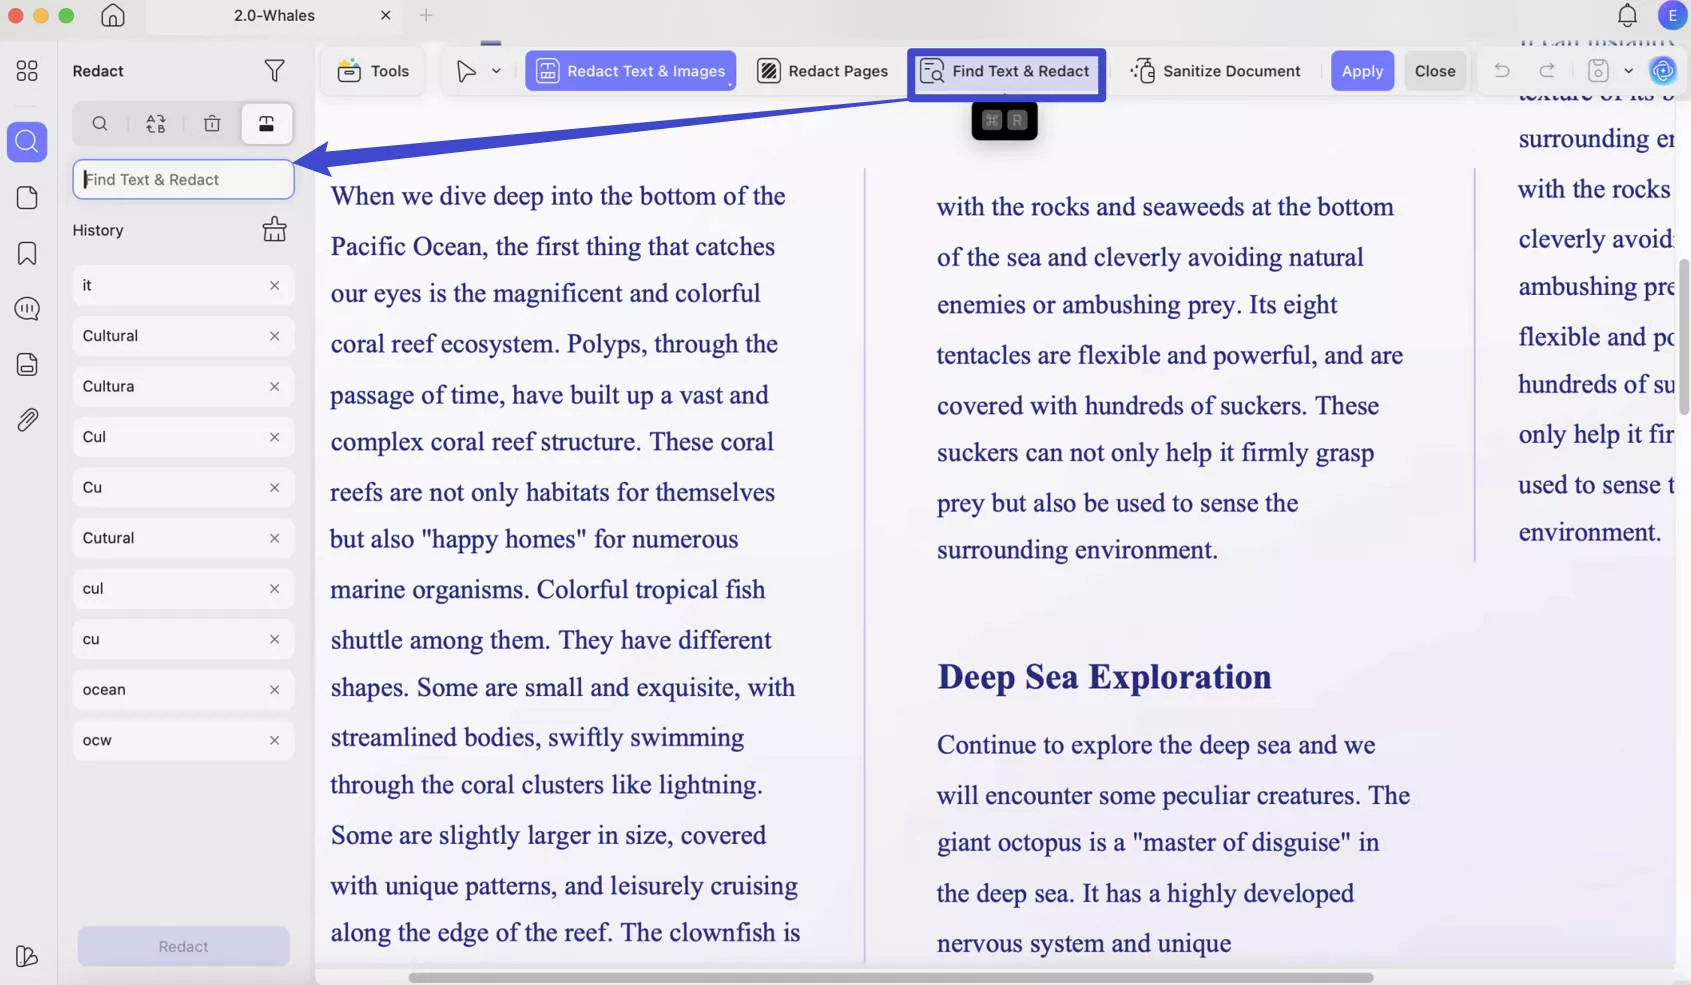
Select 'Redact Text & Images' to activate the cursor for covering text. Drag the cursor over the text in the upper left corner, or any section you intend to hide, ensuring it's completely covered.
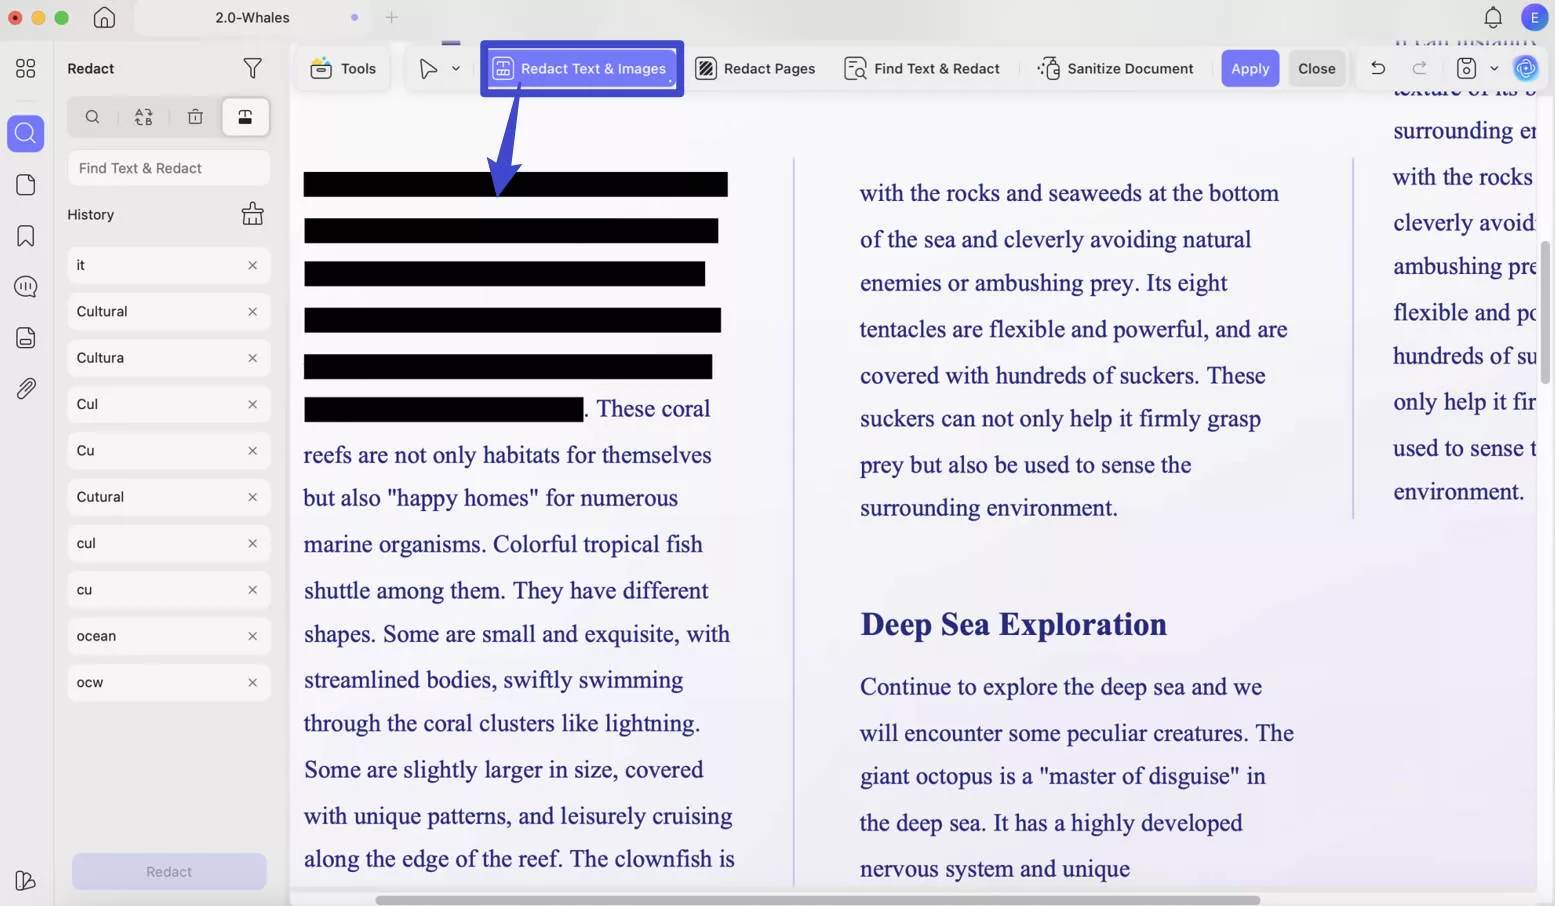
Step 5: Save your redacted PDF.
After completing the redaction process, go to the narrow next to "Save" and select "Save as..." to save your document. Saving applies the redactions permanently to your PDF.
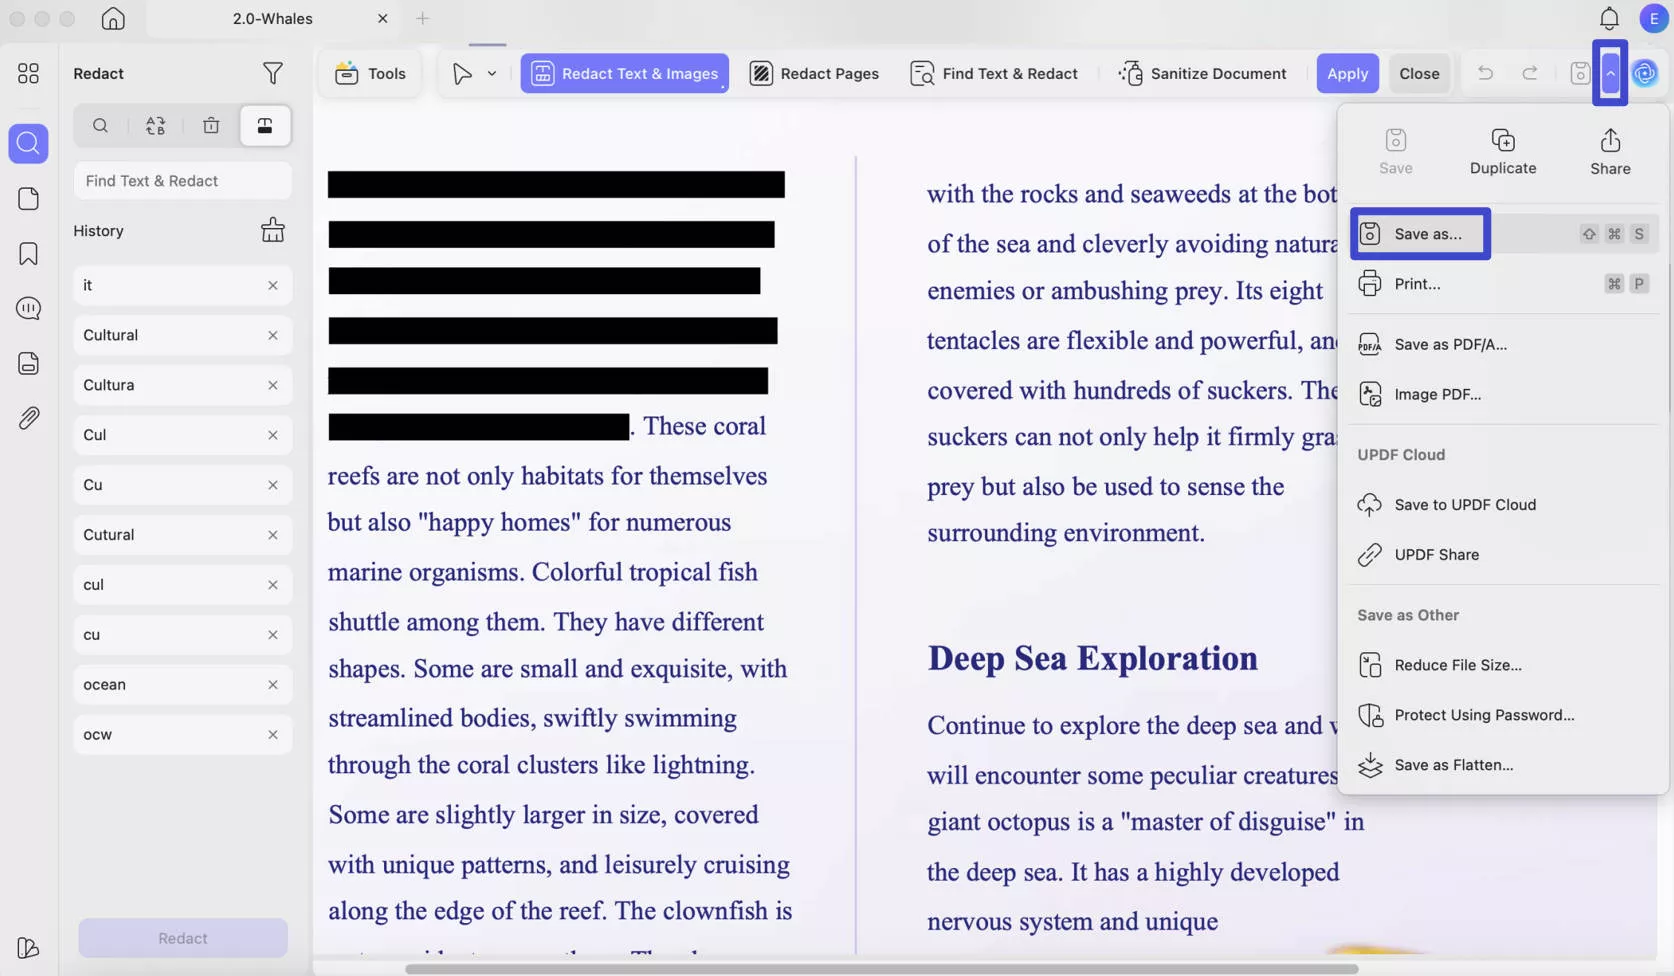
There you have it – redacting PDF documents is straightforward with UPDF, backed by awesome tools for all of your document management needs.
For more information about UPDF's capabilities, read an in-depth review where you can learn about all the different features that UPDF offers.
You can also watch a video tutorial to see for yourself how UPDF can make your life a whole lot easier:
So why wait? Click the download button below and start enjoying the ease and efficiency it brings to handling PDFs. And if you like UPDF, you can click the below picture to upgrade to pro at a big discount.
Windows • macOS • iOS • Android 100% secure
Fix 2. Update Your MacOS Version
Unfortunately, the Preview app on Mac is only available if you are running on macOS 11 or newer. If you're running an older version of the platform (say, macOS 10.14 or lower), you're out of luck. The step to solving this problem is an easy one, though: update your macOS. Once your system is using the current macOS version available, redaction capabilities will be enabled in Preview. After you've updated your macOS, restart your system for the changes to take effect and check to see if redaction is accessible.
Fix 3. Ensure Correct Document Opening Method in Preview
Opening the document correctly in Preview is essential. When using the "Quick Look" feature, you're just peeking into a document, and that particular view doesn't support redaction. You need to actually open the document in the Preview app in order to access the redaction tools. So, if you're not able to locate a redaction tool icon, go back to the step-by-step guide and pay close attention to Step 2 to make sure you are opening the document correctly.
Final Thoughts
All in all, knowing how to redact in Preview is key to document security and privacy.
We've gone over redacting information effectively with Preview's tools. It's all about carefully and permanently concealing what you don't want seen.
Master these processes and you can rest assured your documents are secure. And that just emphasizes how important the right to privacy is in our communication nowadays.
For those who are more advanced, and those who run into trouble with Preview, UPDF is a great alternative. It has the best of both worlds and much much more beyond redaction.
 UPDF
UPDF
 UPDF for Windows
 UPDF for Mac
 UPDF for iPhone/iPad
 UPDF for Android
 UPDF AI Online
 UPDF Sign
 Edit PDF
 Annotate PDF
 Create PDF
 PDF Form
 Edit links
 Convert PDF
 OCR
OCR PDF to Word
 PDF to Image
 PDF to Excel
 Organize PDF
 Merge PDF
 Split PDF
 Crop PDF
 Rotate PDF
 Protect PDF
 Sign PDF
 Redact PDF
 Sanitize PDF
 Remove Security
 Read PDF
 UPDF Cloud
 Compress PDF
 Print PDF
 Batch Process
 About UPDF AI
 UPDF AI Solutions
 AI User Guide
 FAQ about UPDF AI
 Summarize PDF
 Translate PDF
 Chat with PDF
 Chat with AI
 Chat with image
 PDF to Mind Map
 Explain PDF
 Scholar Research
 Paper Search
 AI Proofreader
 AI Writer
 AI Homework Helper
 AI Quiz Generator
 AI Math Solver
 PDF to Word
 PDF to Excel
 PDF to PowerPoint
 User Guide
 UPDF Tricks
 FAQs
FAQs UPDF Reviews
 Download Center
 Blog
Blog Newsroom
 Tech Spec
 Updates
 UPDF vs. Adobe Acrobat
 UPDF vs. Foxit
 UPDF vs. PDF Expert



 Enrica Taylor
 Enola Davis
 Enola Miller