It's no fun trying to find your way around a long PDF without a table of contents to help you skip to the relevant section. An easily navigable table of contents transforms cumbersome PDFs into user-friendly resources. If you've been wondering how to link table of contents to pages in PDF, you're in the right place. This guide walks you through the simple steps to create and link a table of contents in your PDF, along with alternative methods for convenient navigation. Read on to learn how to make coworkers rave about how easy your PDFs are to navigate.
Part 1: Two Methods for How To Link Table of Contents to Pages in PDF
There's that one person in every office who makes their reports a huge text dump that's hard to read in the first place, and even harder to skim through when you need to reference something in it.
Don't be that person.
We're here to show you how to make a beautiful table of contents with each entry hyperlinked to the relevant page. Make your reports and documents the ones everyone reads and links back to because you've made the reading process so easy.
How to link pages to a table of contents in UPDF
We'll assume you've already got a document prepared and just need to know how to link pages to table of contents in PDF. If not, why not grab something from our template library so you can follow along with the process? After that, download UPDF and use it to link pages to a table of contents in PDF. UPDF is a comprehensive PDF editor that can edit all elements in PDFs.
Windows • macOS • iOS • Android 100% secure
Step 1. Open your PDF in UPDF: You can do this by going to Open File > Open, or by dragging the document straight into UPDF.
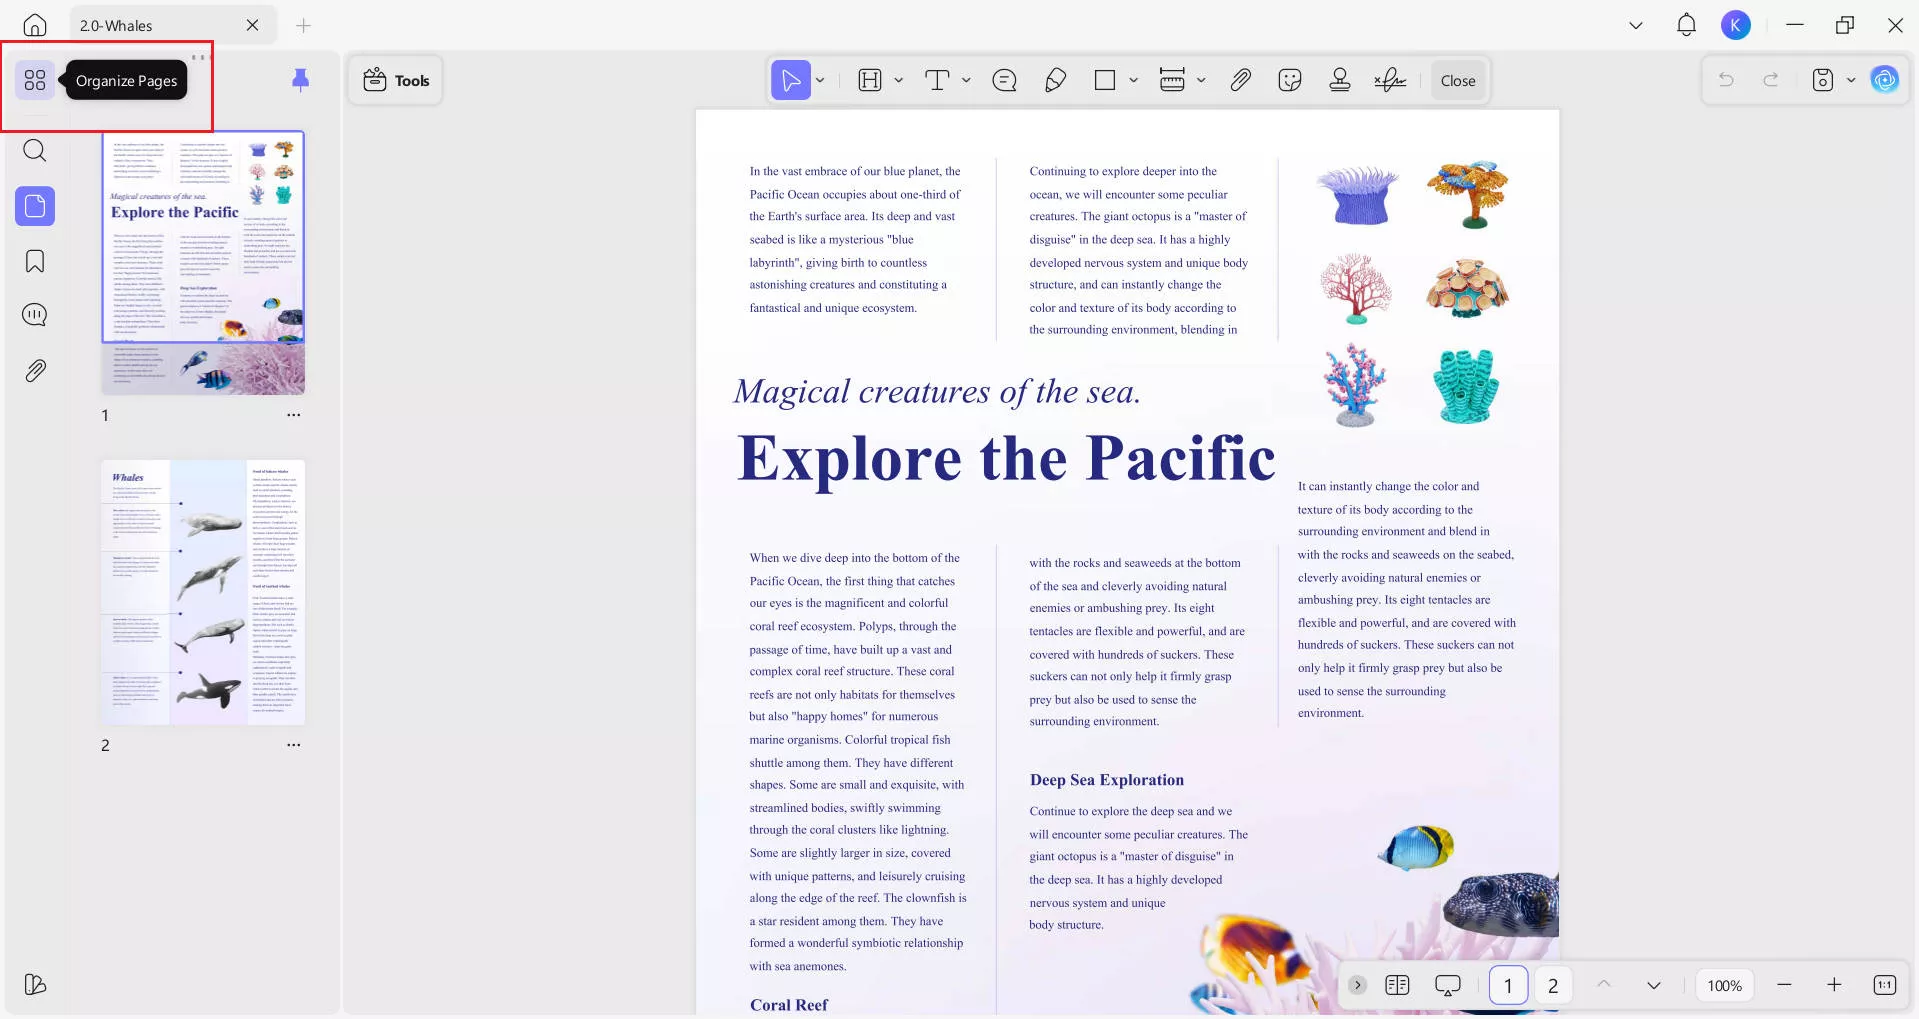
Step 2. Access the insert tool: Go to Organize Pages and then choose Insert.
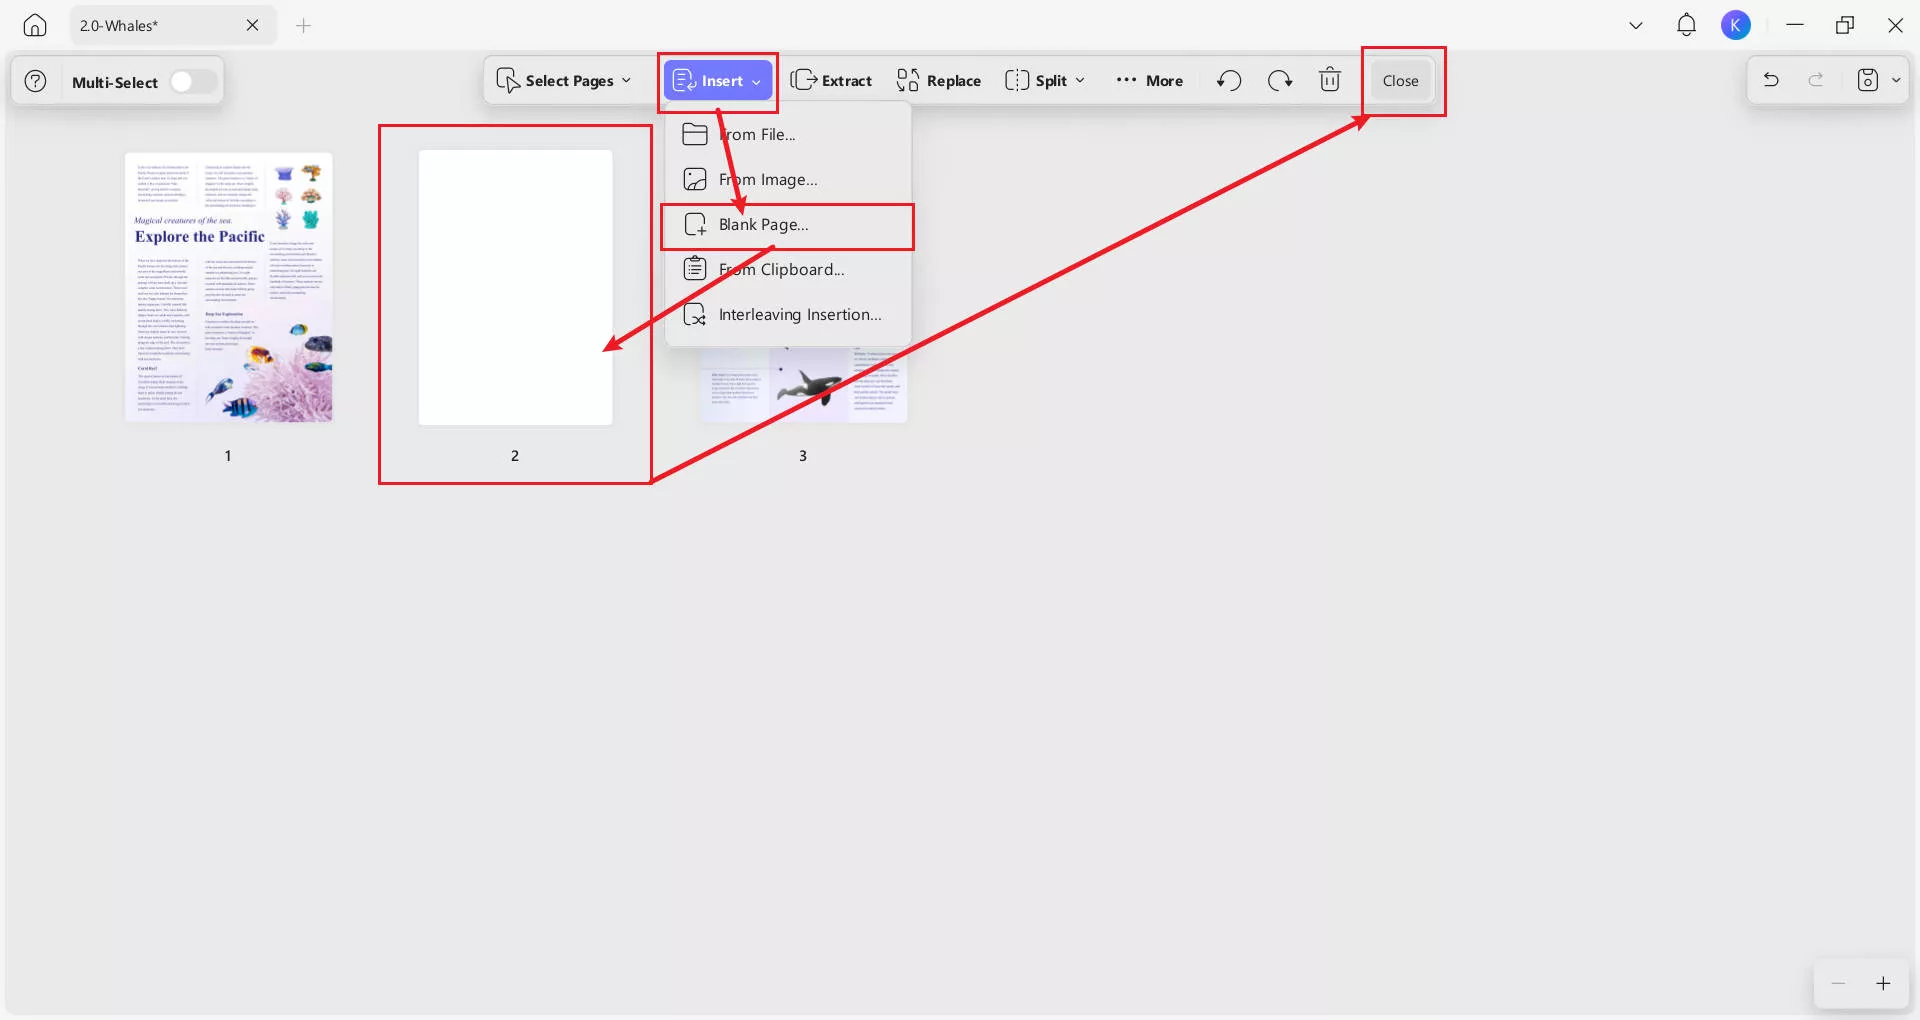
Step 3. Insert a blank page: Choose Blank Page from the Insert menu, then drag the page to the correct location in your document. Once done, choose Close to exit this mode.
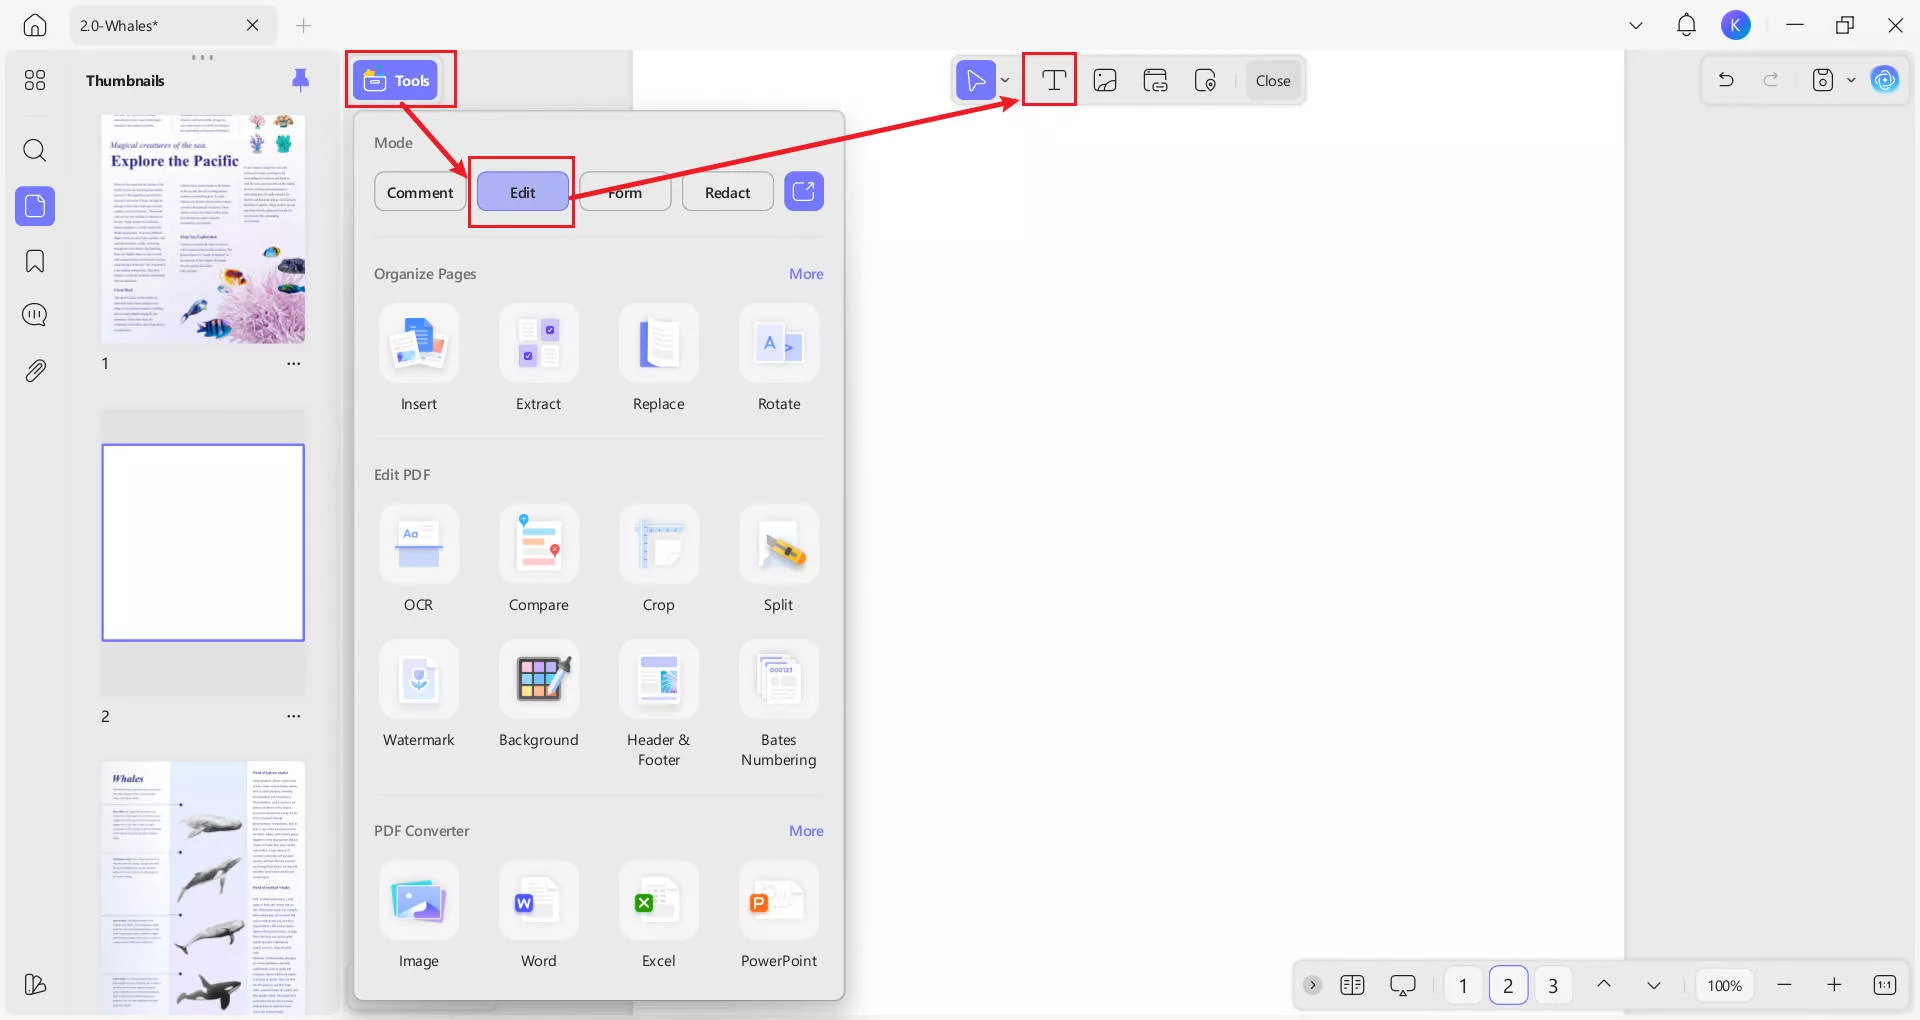
Step 3. Open the text editing tools: Go to Edit PDF, then choose Text on the top menu.
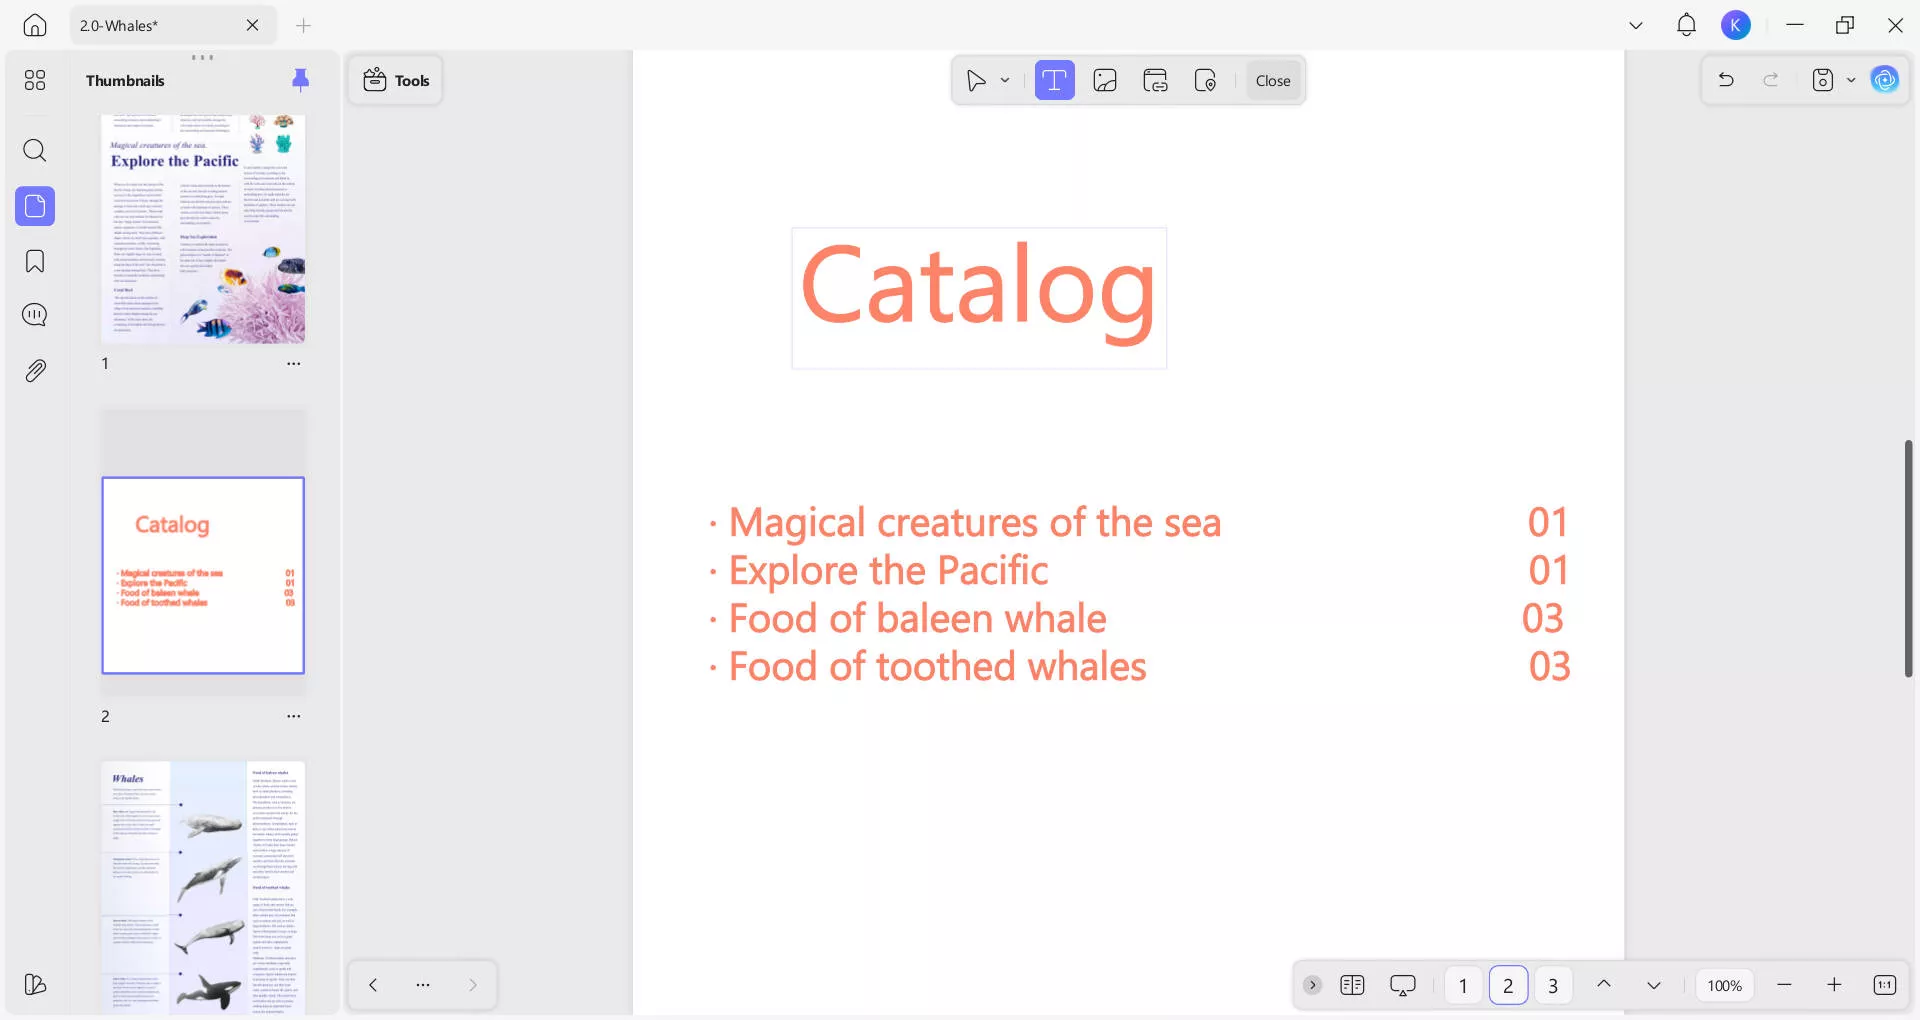
Step 4. Design and make your table of contents: You can now click anywhere on the blank page and begin typing your table of contents. Add page numbers, a description of page contents, and any other information you like. Adjust formatting to match the rest of your document.
Step 5. How to add hyperlink in PDF table of contents: Choose Insert & Edit Link Page from the menu, insert the correct page number. If you don't want to show the rectangle, in the Visible Rectangle module, you can slide the control to Off.
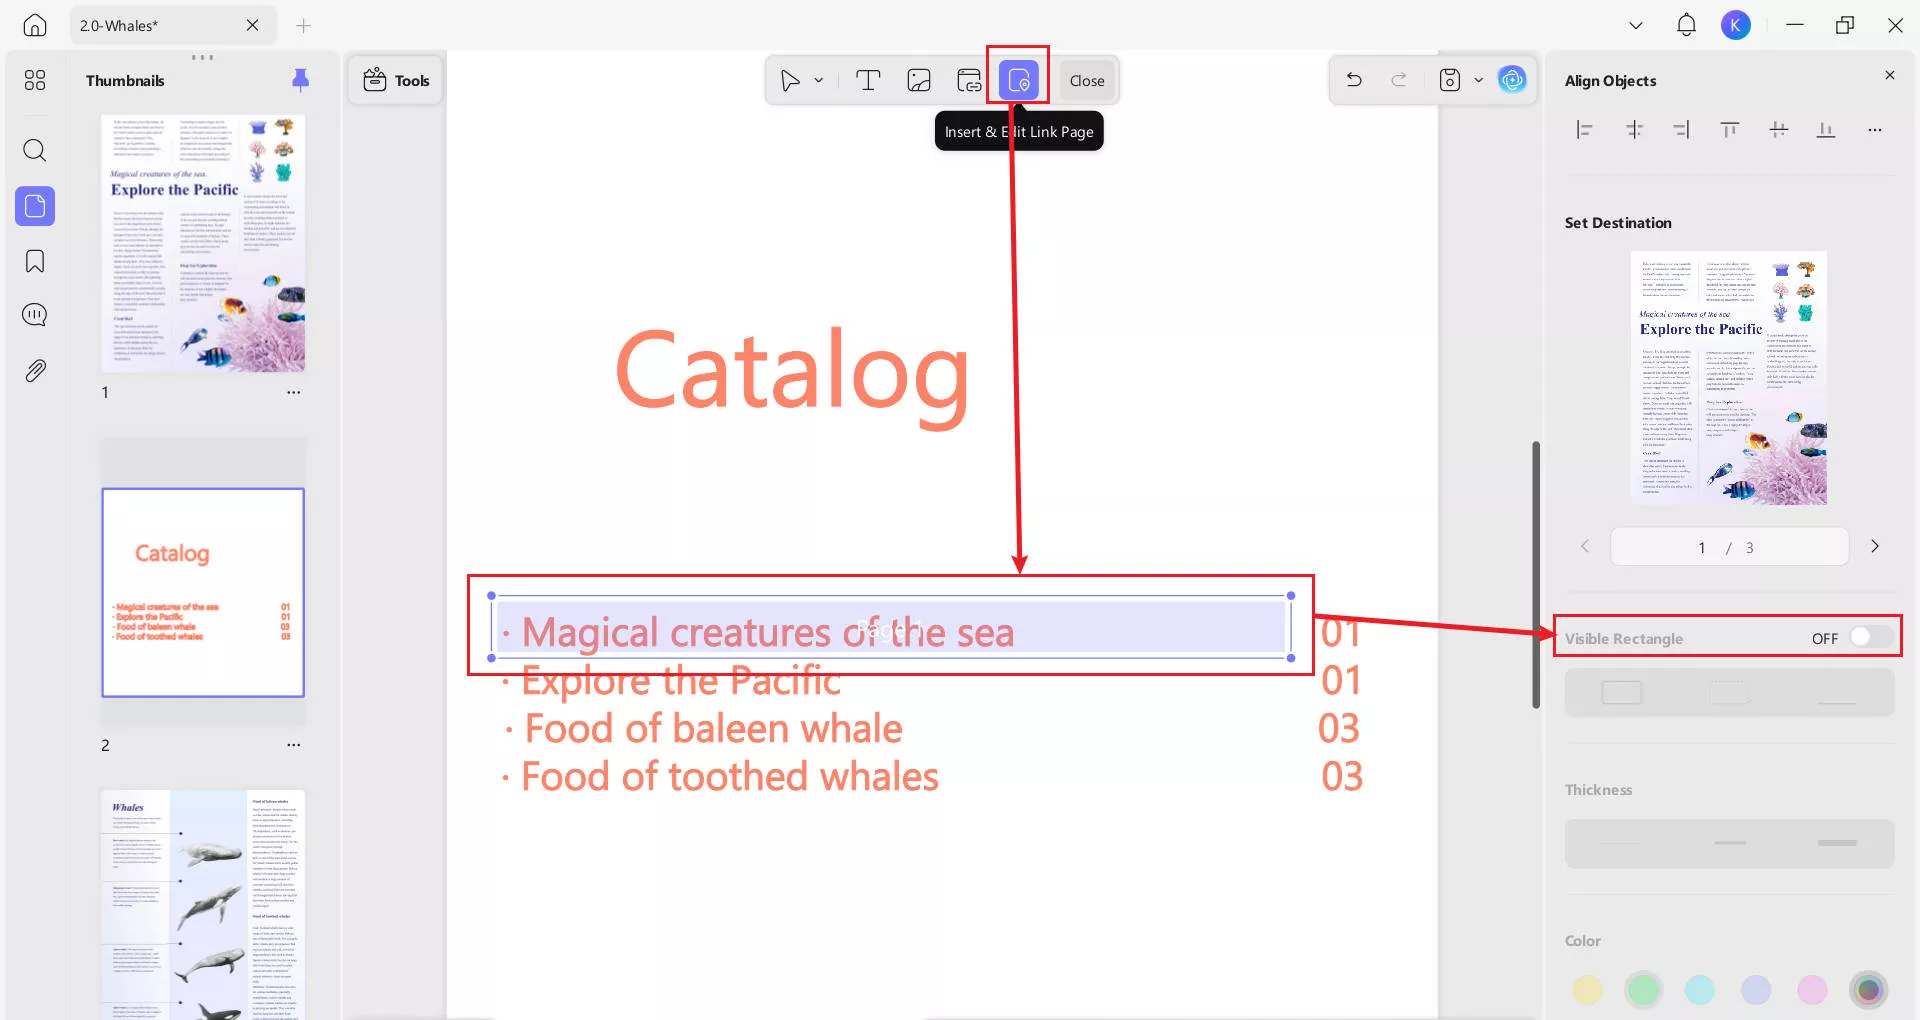
Step 5. Repeat: Now you just need to go through the process for each entry in turn, linking to the appropriate pages.
The process for adding a table of contents to any document is simple in UPDF. It's just a matter of inserting a blank page, adding the required information, and creating links between the contents page and other pages of your PDF.
UPDF offers two distinct methods for linking a table of contents to the relevant pages. We'll look at the second method in the next section.
With UPDF you also get full control over the formatting of your table of contents. You can add images and section breaks as needed, or additional information panels. So why not download it for a free trial?
Windows • macOS • iOS • Android 100% secure
Part 2: Convenient Page-Linking Without Making a Table of Contents
UPDF users have another option that achieves the same effect without creating a table of contents. With the bookmark tool, you can redirect readers to specific pages, just as with the table of contents method.
How to make a clickable contents page using bookmarks
Step 1. Open File: Using UPDF, open the file you want to create bookmarks for.
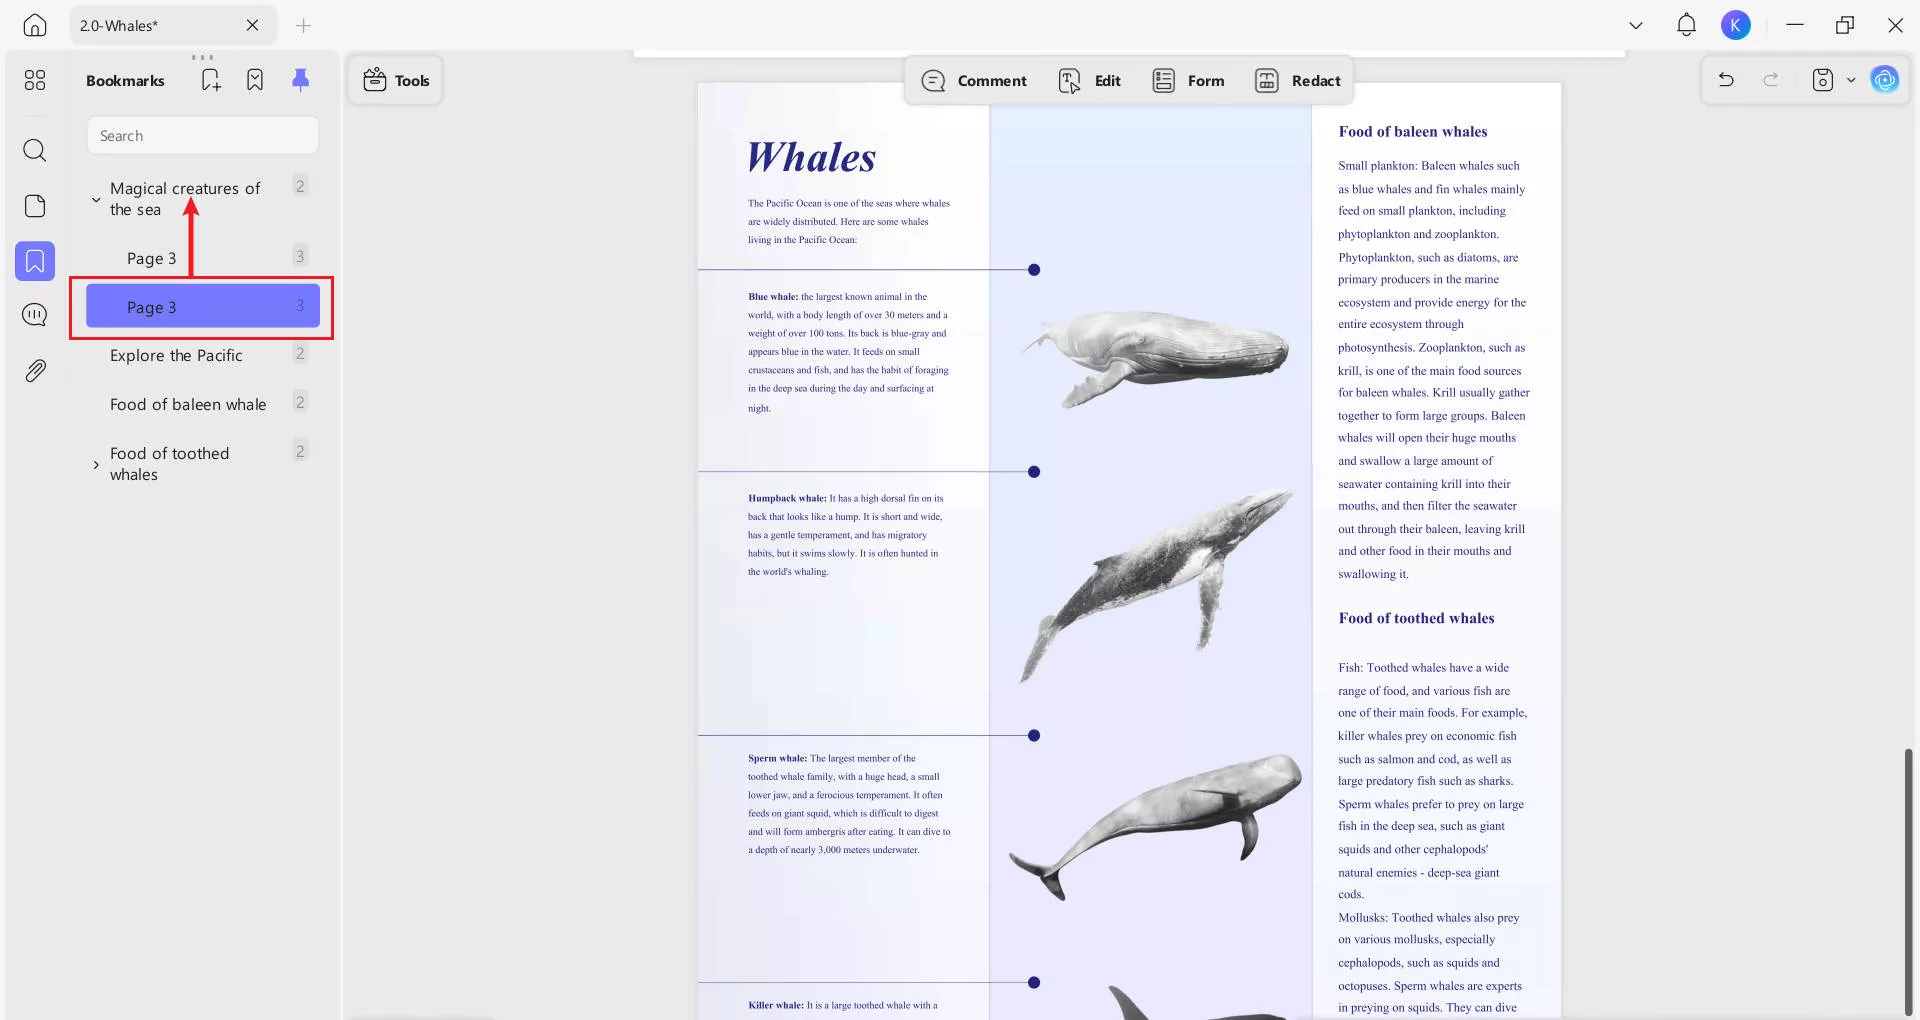
Step 2. Access the Bookmark Panel: Click the bookmark icon in the left corner of your screen, this will open a sidebar allowing you to work with bookmarks.
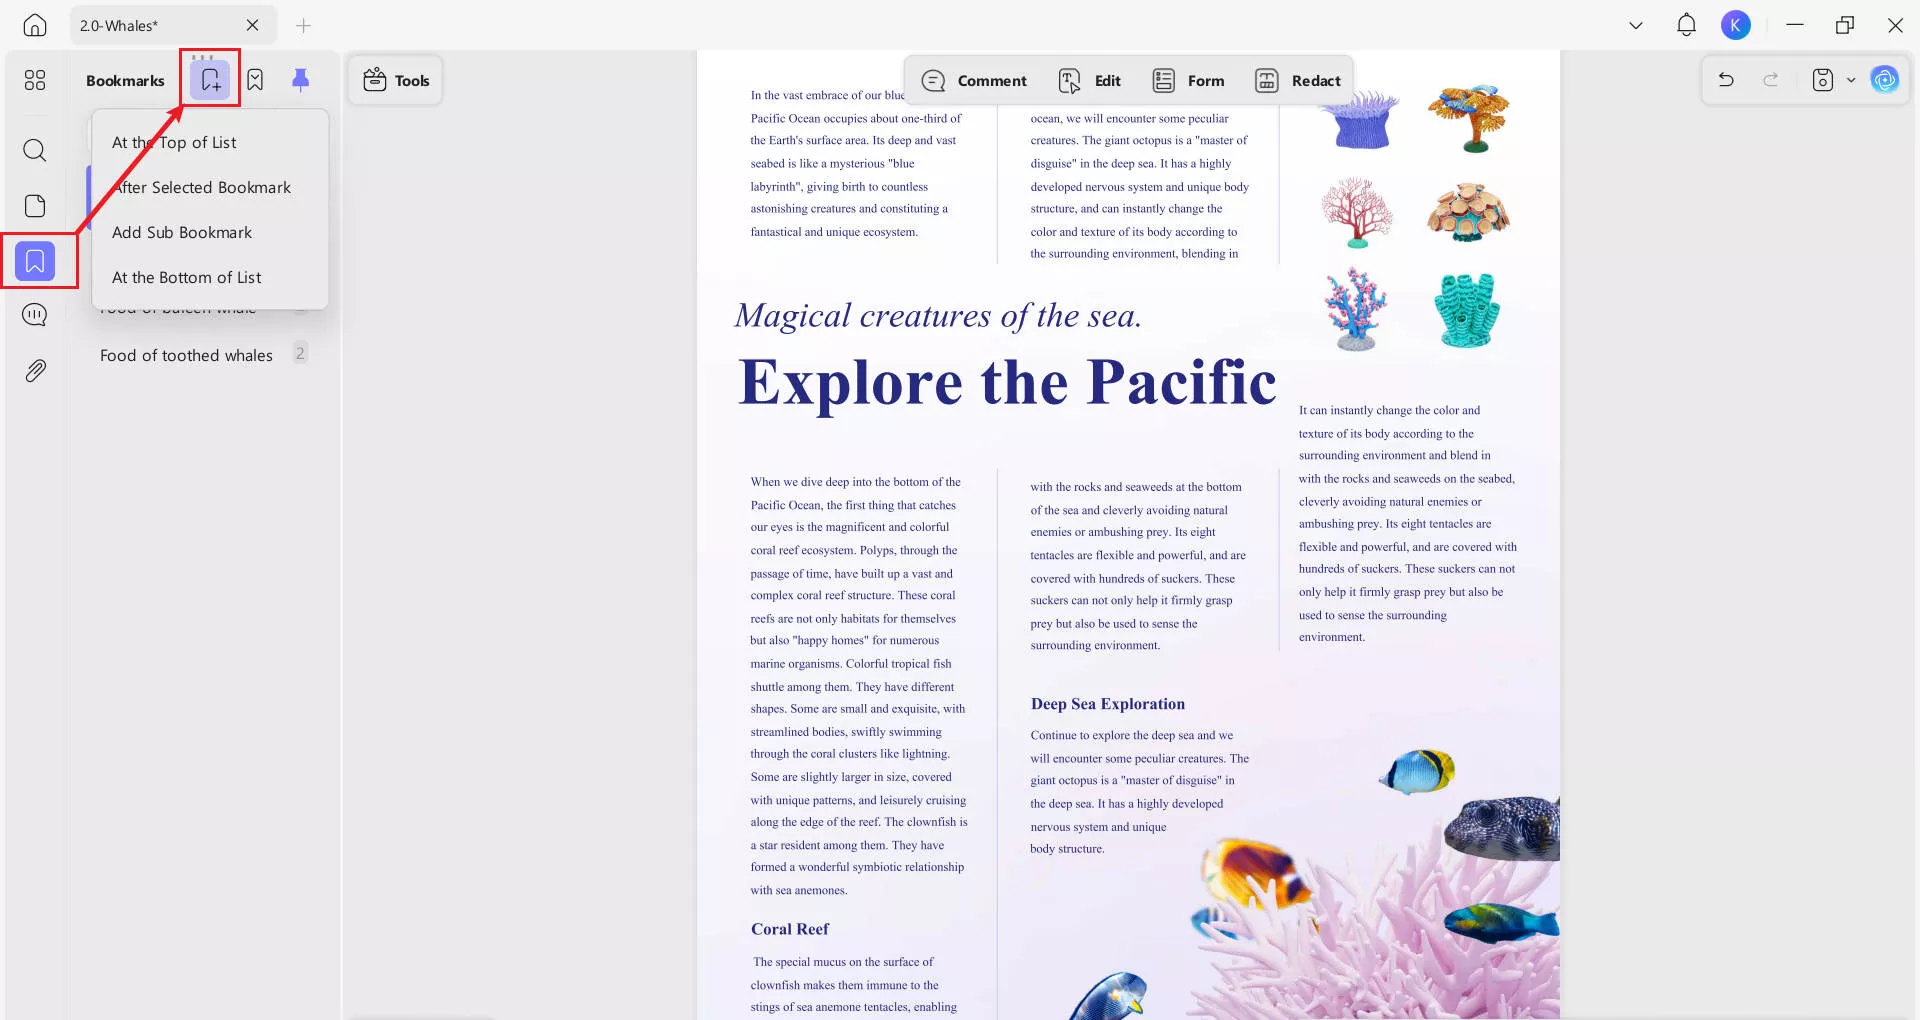
Step 3. Add Bookmarks: Go to the page you want to bookmark, and click "+" button. UPDF will make a bookmark labeled with the appropriate page number.
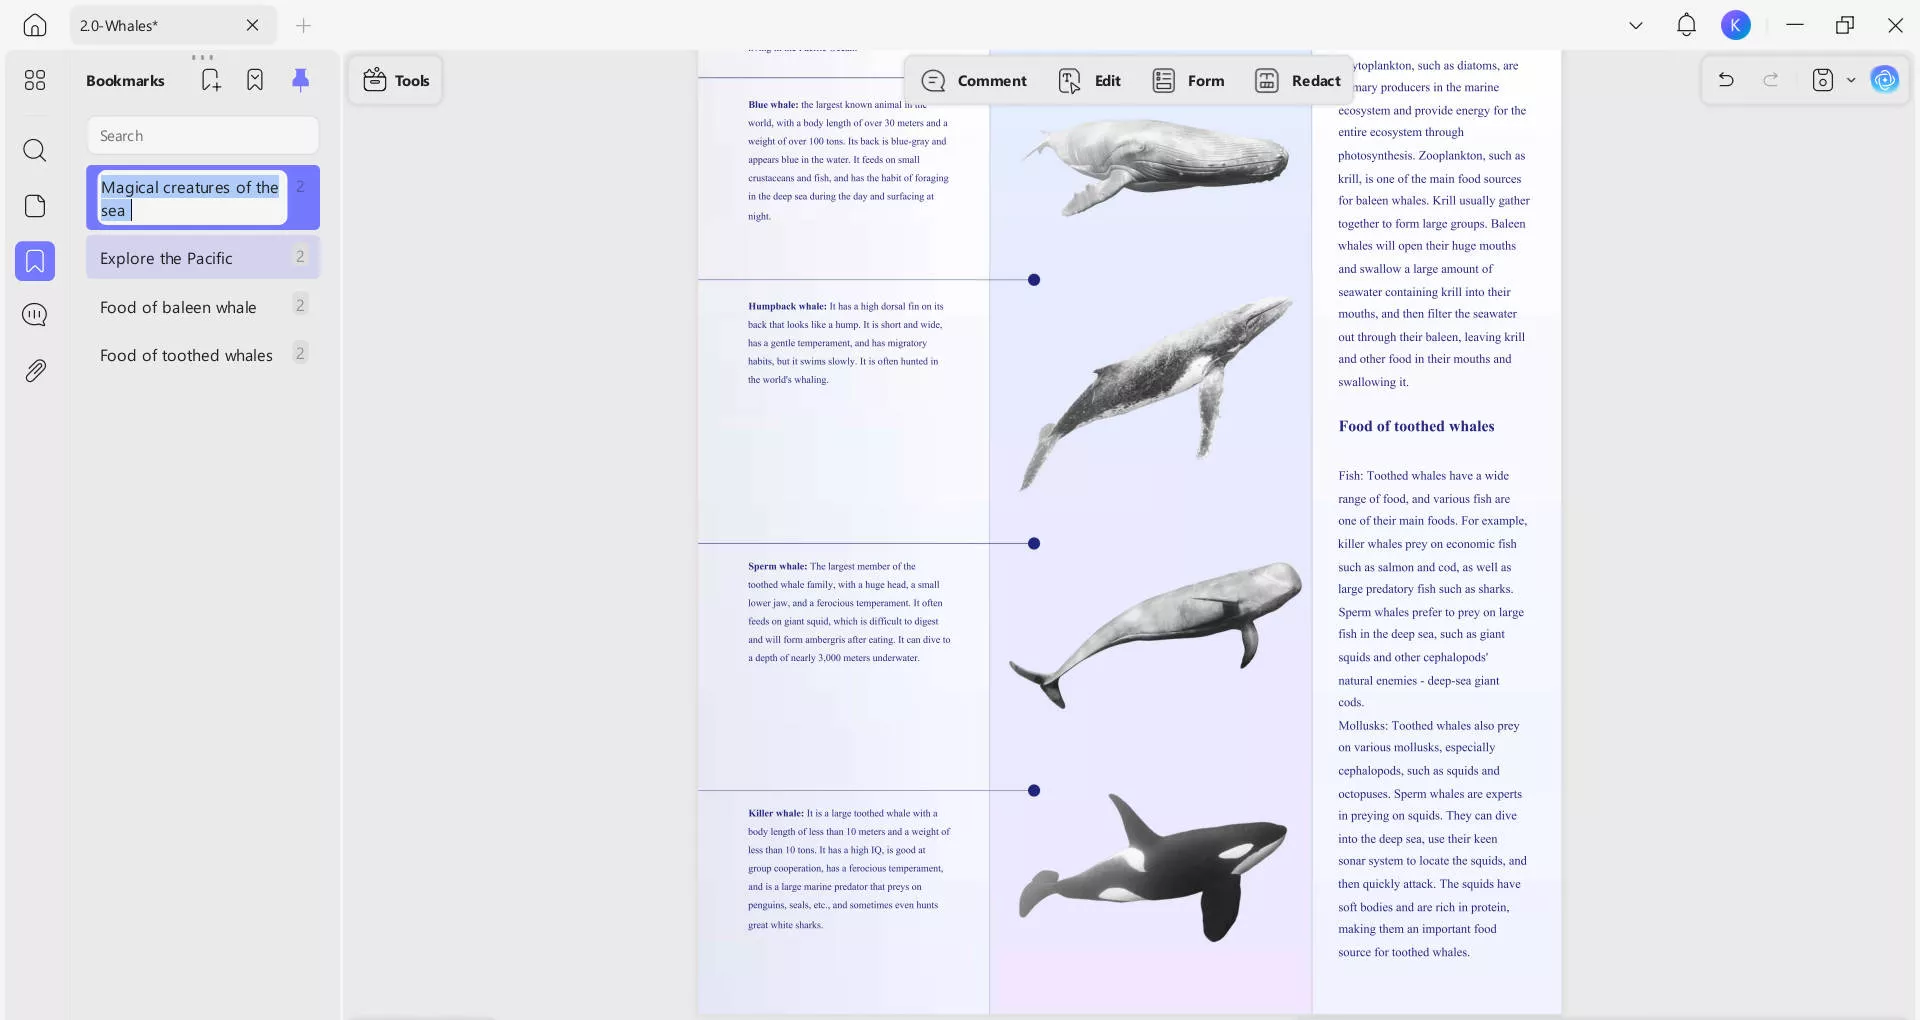
Step 4. Edit Bookmarks: Double-click on the bookmark name to rename it.
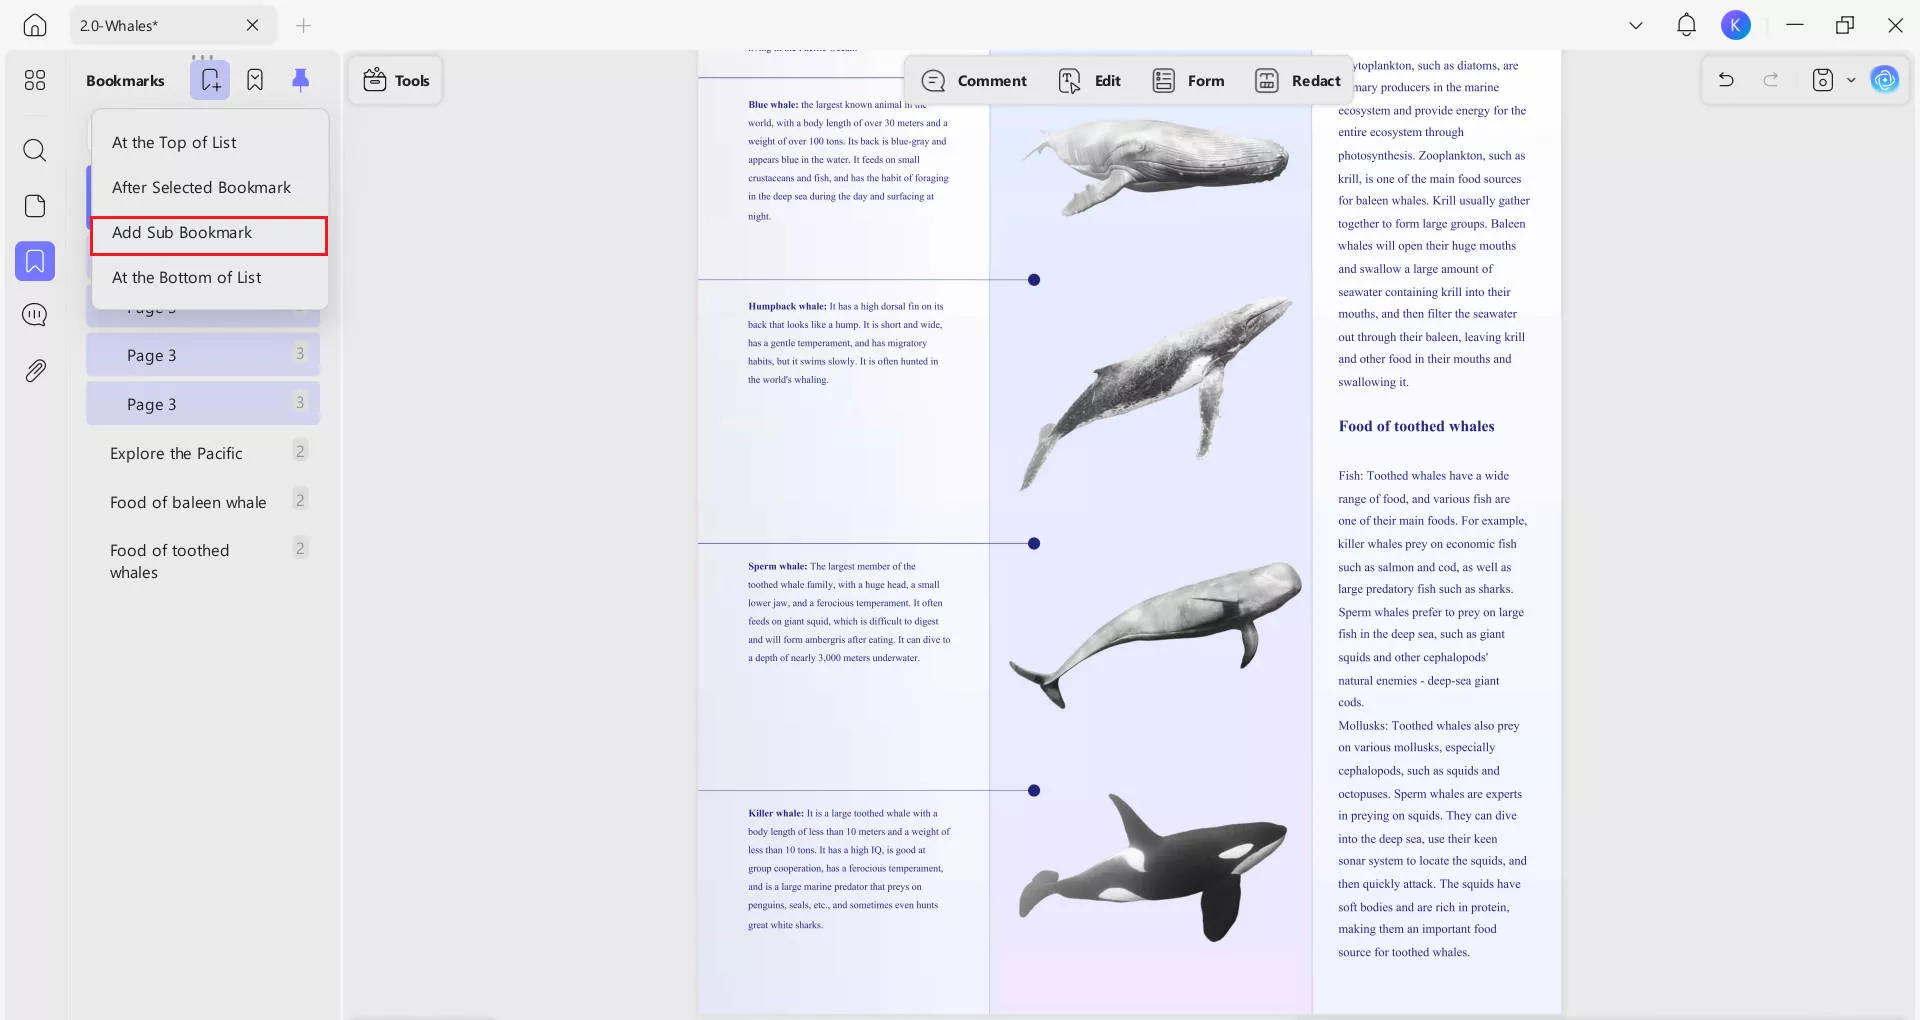
Step 5. Create Sub Bookmarks: If you wish to create sub bookmarks, for sections within chapters, for example, simply right-click on the parent bookmark, and select Add Sub Bookmark.
Step 6. Arrange Bookmarks: New bookmarks appear at the bottom of the relevant section. You can simply drag and drop them to the correct position.
Part 3: Beyond the Contents Page. UPDF's Other Features
As well as letting you link effortlessly between sections of your document, UPDF is an all-round PDF management tool capable of handling all your PDF needs.
- Customizable View Settings: Change background color for more accessible reading that's easier on the eyes. Choose from single and double page viewing, with page and scrolling view options. Read more about PDF accessibility here.
- OCR Capability: Use Optical Character Recognition technology to turn images containing writing into editable, searchable text. You can even use OCR to translate pictures between languages.
- Password Protection: With UPDF you can password-protect documents to prevent unauthorized access. You can also set passwords for printing, editing, and commenting permissions.
- AI Assistant: Our GPT-5 powered AI assistant can translate, summarize, and explain documents for you. It also works as a chatbot to help you with idea generation, rewriting, and other tasks.
- Convert: UPDF makes file conversion easy. Convert smoothly between PDF and Word, Excel, PowerPoint and beyond. 14 supported file types, with no loss of formatting.
- Other Features: UPDF also makes editing, organizing, and annotating PDFs easy. Modify many files at the same time with batch processing. Compress files for efficient storage and easy sharing. Use UPDF Cloud to access your files anywhere. Create digital forms and sign them securely with digital or electronic signatures.
Part 4: FAQs About Linking Table of Contents to Pages in PDF
1. How to link the table of contents to pages in Google Docs?
Adding a table of contents to a Google Doc is quick and easy if you've used the Styles menu to add headings and subheadings throughout. Place the cursor where you want your table of contents. Go to Insert > Table of Contents. Choose from the available formats If you change your document after inserting the table of contents, simply right-click on the table and select Update Table of Contents to automatically add or change sections as needed.
2. How do I add a table of contents in Pages?
Pages creates a table of contents in the sidebar automatically. It's based on paragraph styles, so you'll need to apply Heading formatting to your chapter or section titles if you want them to show in the contents. When you export a document in either PDF or EPUB format from Pages, the table of contents will be included, so that reading apps like UPDF which support navigation can display it.
3. How do I add a table of contents in PDFs?
UPDF is the best option for adding a user-friendly contents page to your PDF. We've covered two methods above, in Part 1 and Part 2 of this article. We also have a step-by-step guide that shows you how to automatically create a PDF table of contents.
Conclusion
A linked table of contents or an organized bookmark system enhances the readability and navigability of your PDF documents. UPDF makes it simple to add these features, even without prior PDF editing experience. As well as simplifying the process of creating a contents page, UPDF offers everything you need for creating and editing professional-looking documents. Give it a try today.
Windows • macOS • iOS • Android 100% secure
 UPDF
UPDF
 UPDF for Windows
 UPDF for Mac
 UPDF for iPhone/iPad
 UPDF for Android
 UPDF AI Online
 UPDF Sign
 Edit PDF
 Annotate PDF
 Create PDF
 PDF Form
 Edit links
 Convert PDF
 OCR
OCR PDF to Word
 PDF to Image
 PDF to Excel
 Organize PDF
 Merge PDF
 Split PDF
 Crop PDF
 Rotate PDF
 Protect PDF
 Sign PDF
 Redact PDF
 Sanitize PDF
 Remove Security
 Read PDF
 UPDF Cloud
 Compress PDF
 Print PDF
 Batch Process
 About UPDF AI
 UPDF AI Solutions
 AI User Guide
 FAQ about UPDF AI
 Summarize PDF
 Translate PDF
 Chat with PDF
 Chat with AI
 Chat with image
 PDF to Mind Map
 Explain PDF
 Scholar Research
 Paper Search
 AI Proofreader
 AI Writer
 AI Homework Helper
 AI Quiz Generator
 AI Math Solver
 PDF to Word
 PDF to Excel
 PDF to PowerPoint
 User Guide
 UPDF Tricks
 FAQs
FAQs UPDF Reviews
 Download Center
 Blog
Blog Newsroom
 Tech Spec
 Updates
 UPDF vs. Adobe Acrobat
 UPDF vs. Foxit
 UPDF vs. PDF Expert





 Enrica Taylor
 Enya Moore
 Delia Meyer
 Lizzy Lozano