 UPDF for Windows
 UPDF for Mac
 UPDF for iPhone/iPad
 UPDF for Android
 UPDF AI Online
 UPDF Sign
 Edit PDF
 Annotate PDF
 Create PDF
 PDF Form
 Edit links
 Convert PDF
 OCR
OCR PDF to Word
 PDF to Image
 PDF to Excel
 Organize PDF
 Merge PDF
 Split PDF
 Crop PDF
 Rotate PDF
 Protect PDF
 Sign PDF
 Redact PDF
 Sanitize PDF
 Remove Security
 Read PDF
 UPDF Cloud
 Compress PDF
 Print PDF
 Batch Process
 About UPDF AI
 UPDF AI Solutions
 AI User Guide
 FAQ about UPDF AI
 Summarize PDF
 Translate PDF
 Chat with PDF
 Chat with AI
 Chat with image
 PDF to Mind Map
 Explain PDF
 PDF AI Tools
 Image AI Tools
 AI Chat Tools
 AI Writing Tools
 AI Study Tools
 AI Working Tools
 Other AI Tools
 PDF to Word
 PDF to Excel
 PDF to PowerPoint
 User Guide
 UPDF Tricks
 FAQs
FAQs UPDF Reviews
 Download Center
 Blog
Blog Newsroom
 Tech Spec
 Updates
 UPDF vs. Adobe Acrobat
 UPDF vs. Foxit
 UPDF vs. PDF Expert
Are you looking for a way to edit large PDF documents quickly? Then, the answer you’ve been seeking is find and replace. Adobe Acrobat provides this useful tool for text editing, though it could be confusing for those without prior knowledge.
In this blog, we’ll provide easy-to-follow guides on finding and replacing text in Adobe Acrobat. Additionally, if you require a powerful and cost-effective alternative to Acrobat, we’ll introduce you to UPDF, a versatile tool to help you easily manage PDFs. If you’d like to try out UPDF for yourself, you can do so using the link below.
Windows • macOS • iOS • Android 100% secure
Part 1: How to Use Acrobat to Find and Replace
Adobe Acrobat’s find-and-replace tool is quick and easy to use when you need to replace text in PDF documents. It should be noted, however, that this method allows you to replace text one word at a time rather than replacing multiple words at once. While this is great for smaller documents, working with larger ones can become time-consuming. Below is a step-by-step guide on locating and using the find and replace tool in Adobe Acrobat.
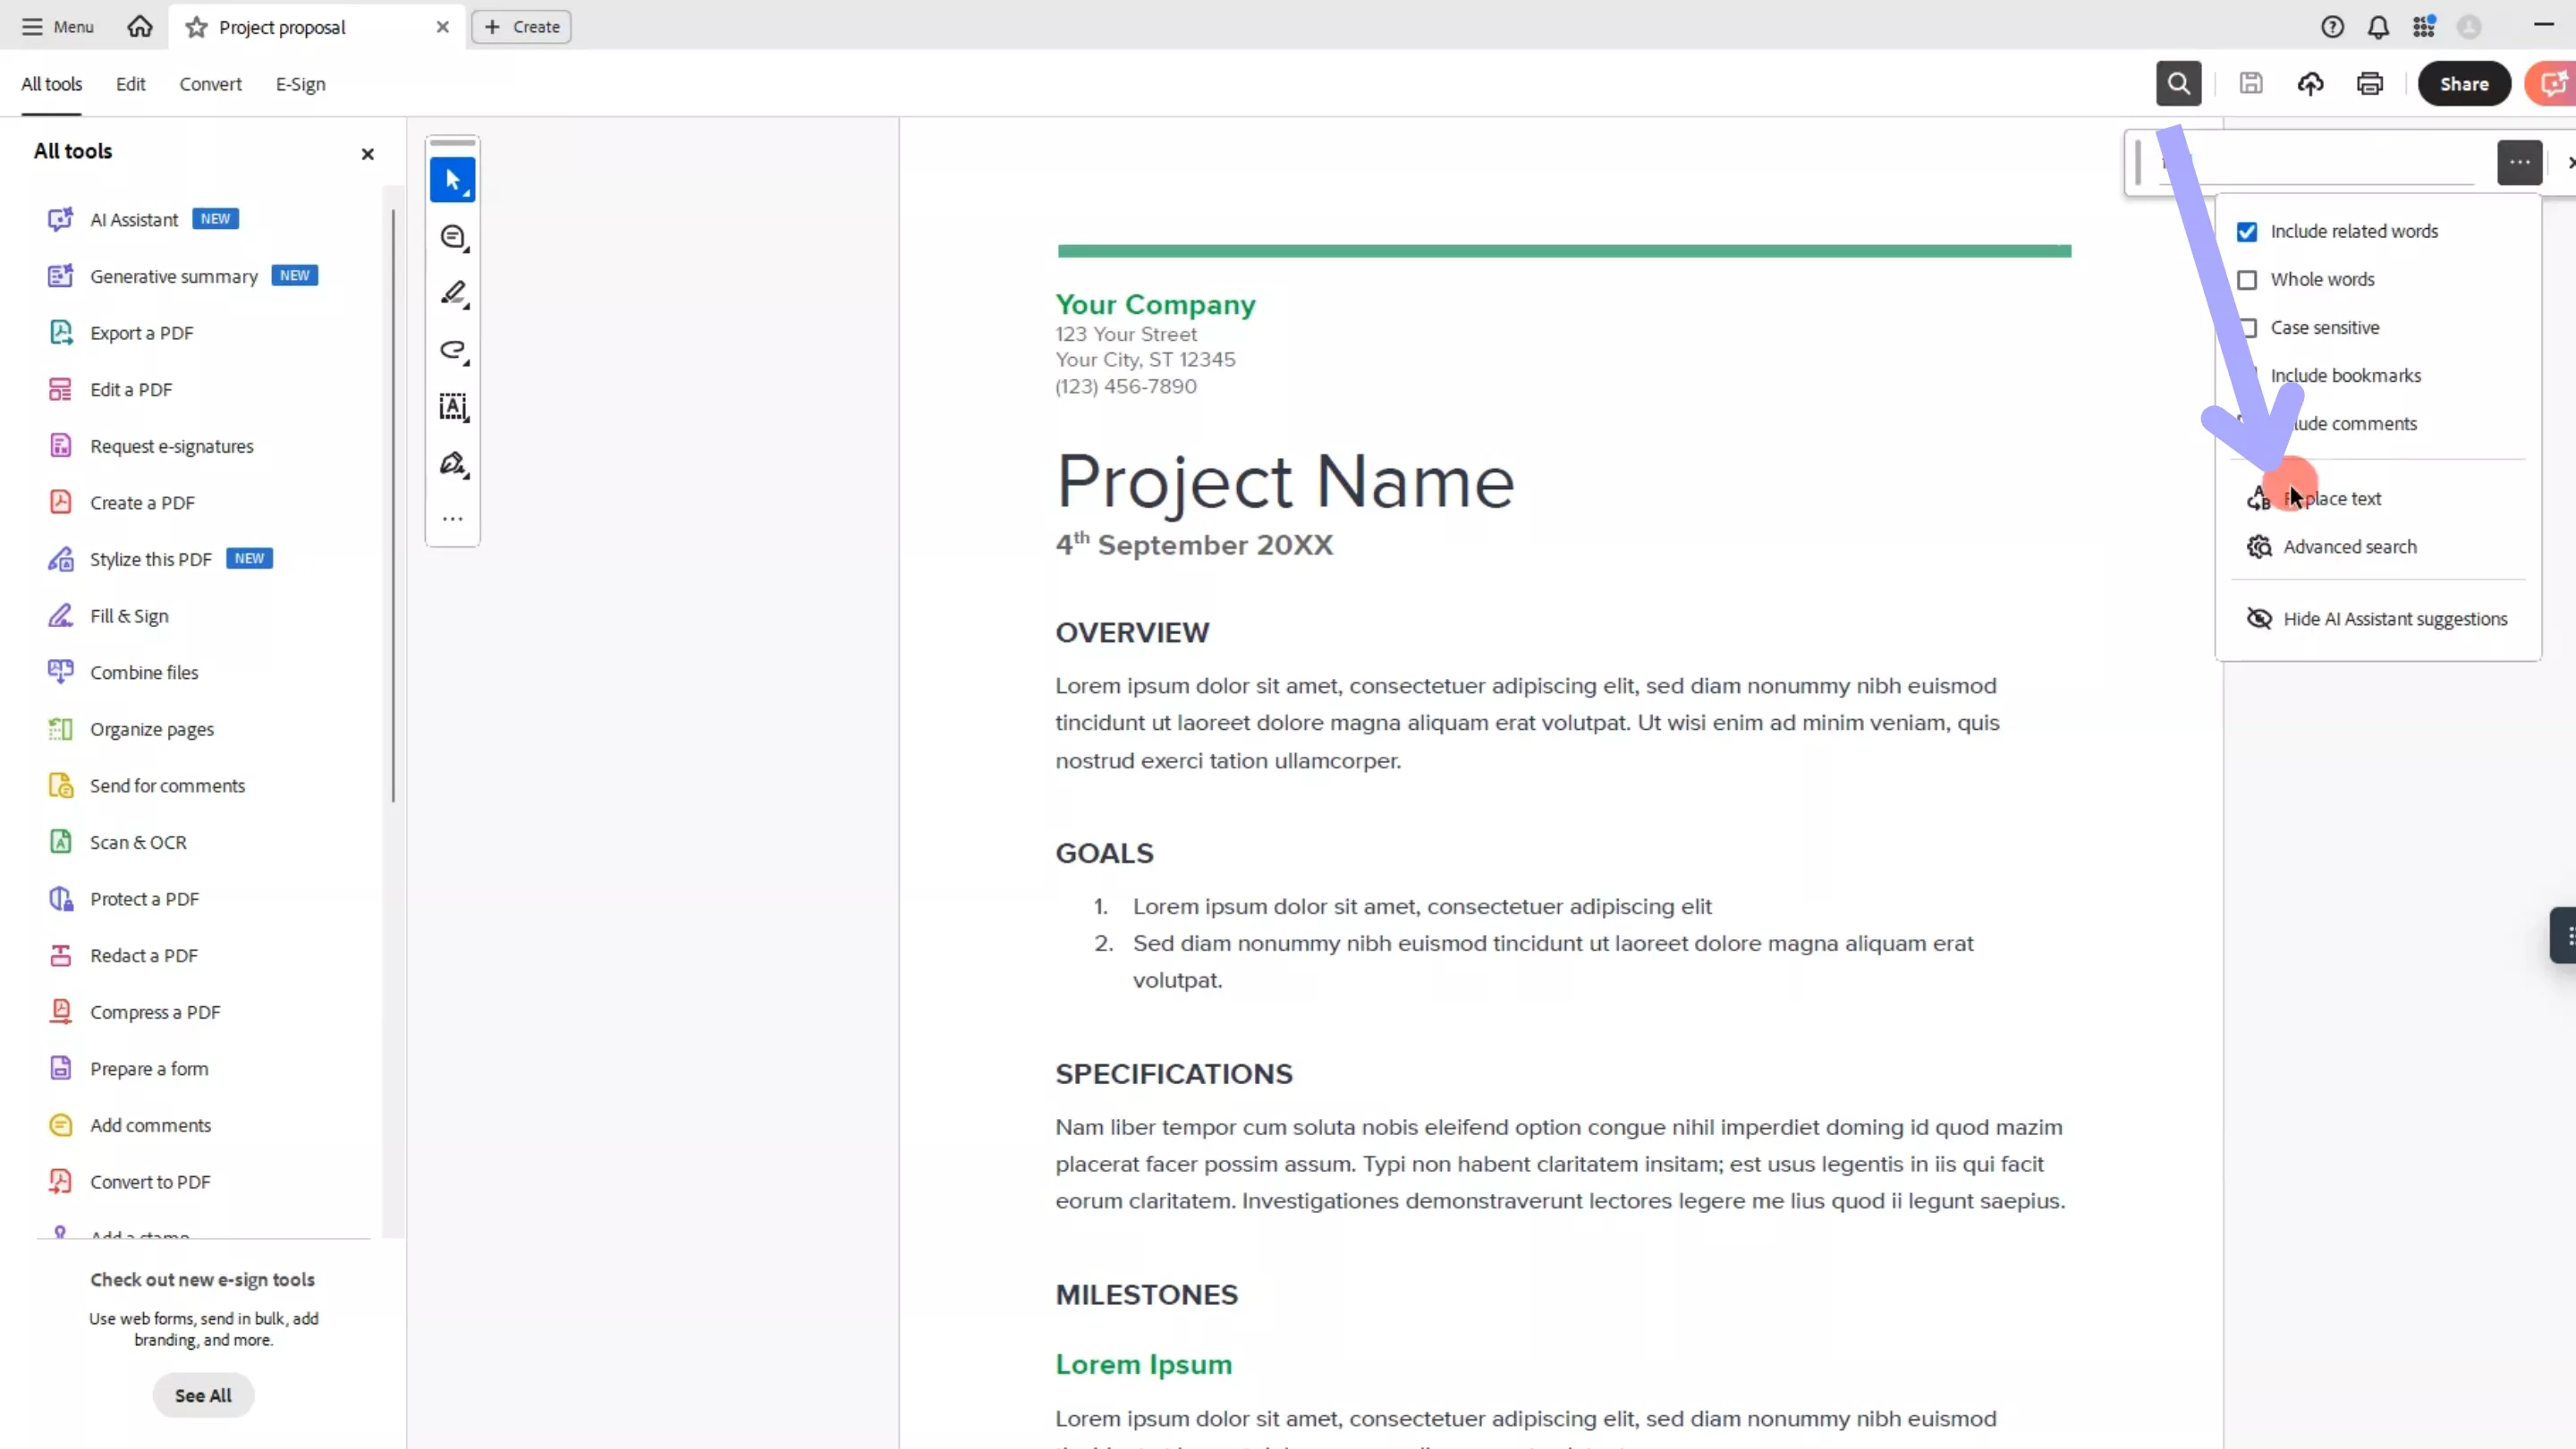
Locating the Find and Replace Tool
You’ll see a “Magnifying glass” icon at the top right of your screen; alternatively, you can press “Ctrl+F” on your keyboard. Next, click the three dots and choose “Replace text.”
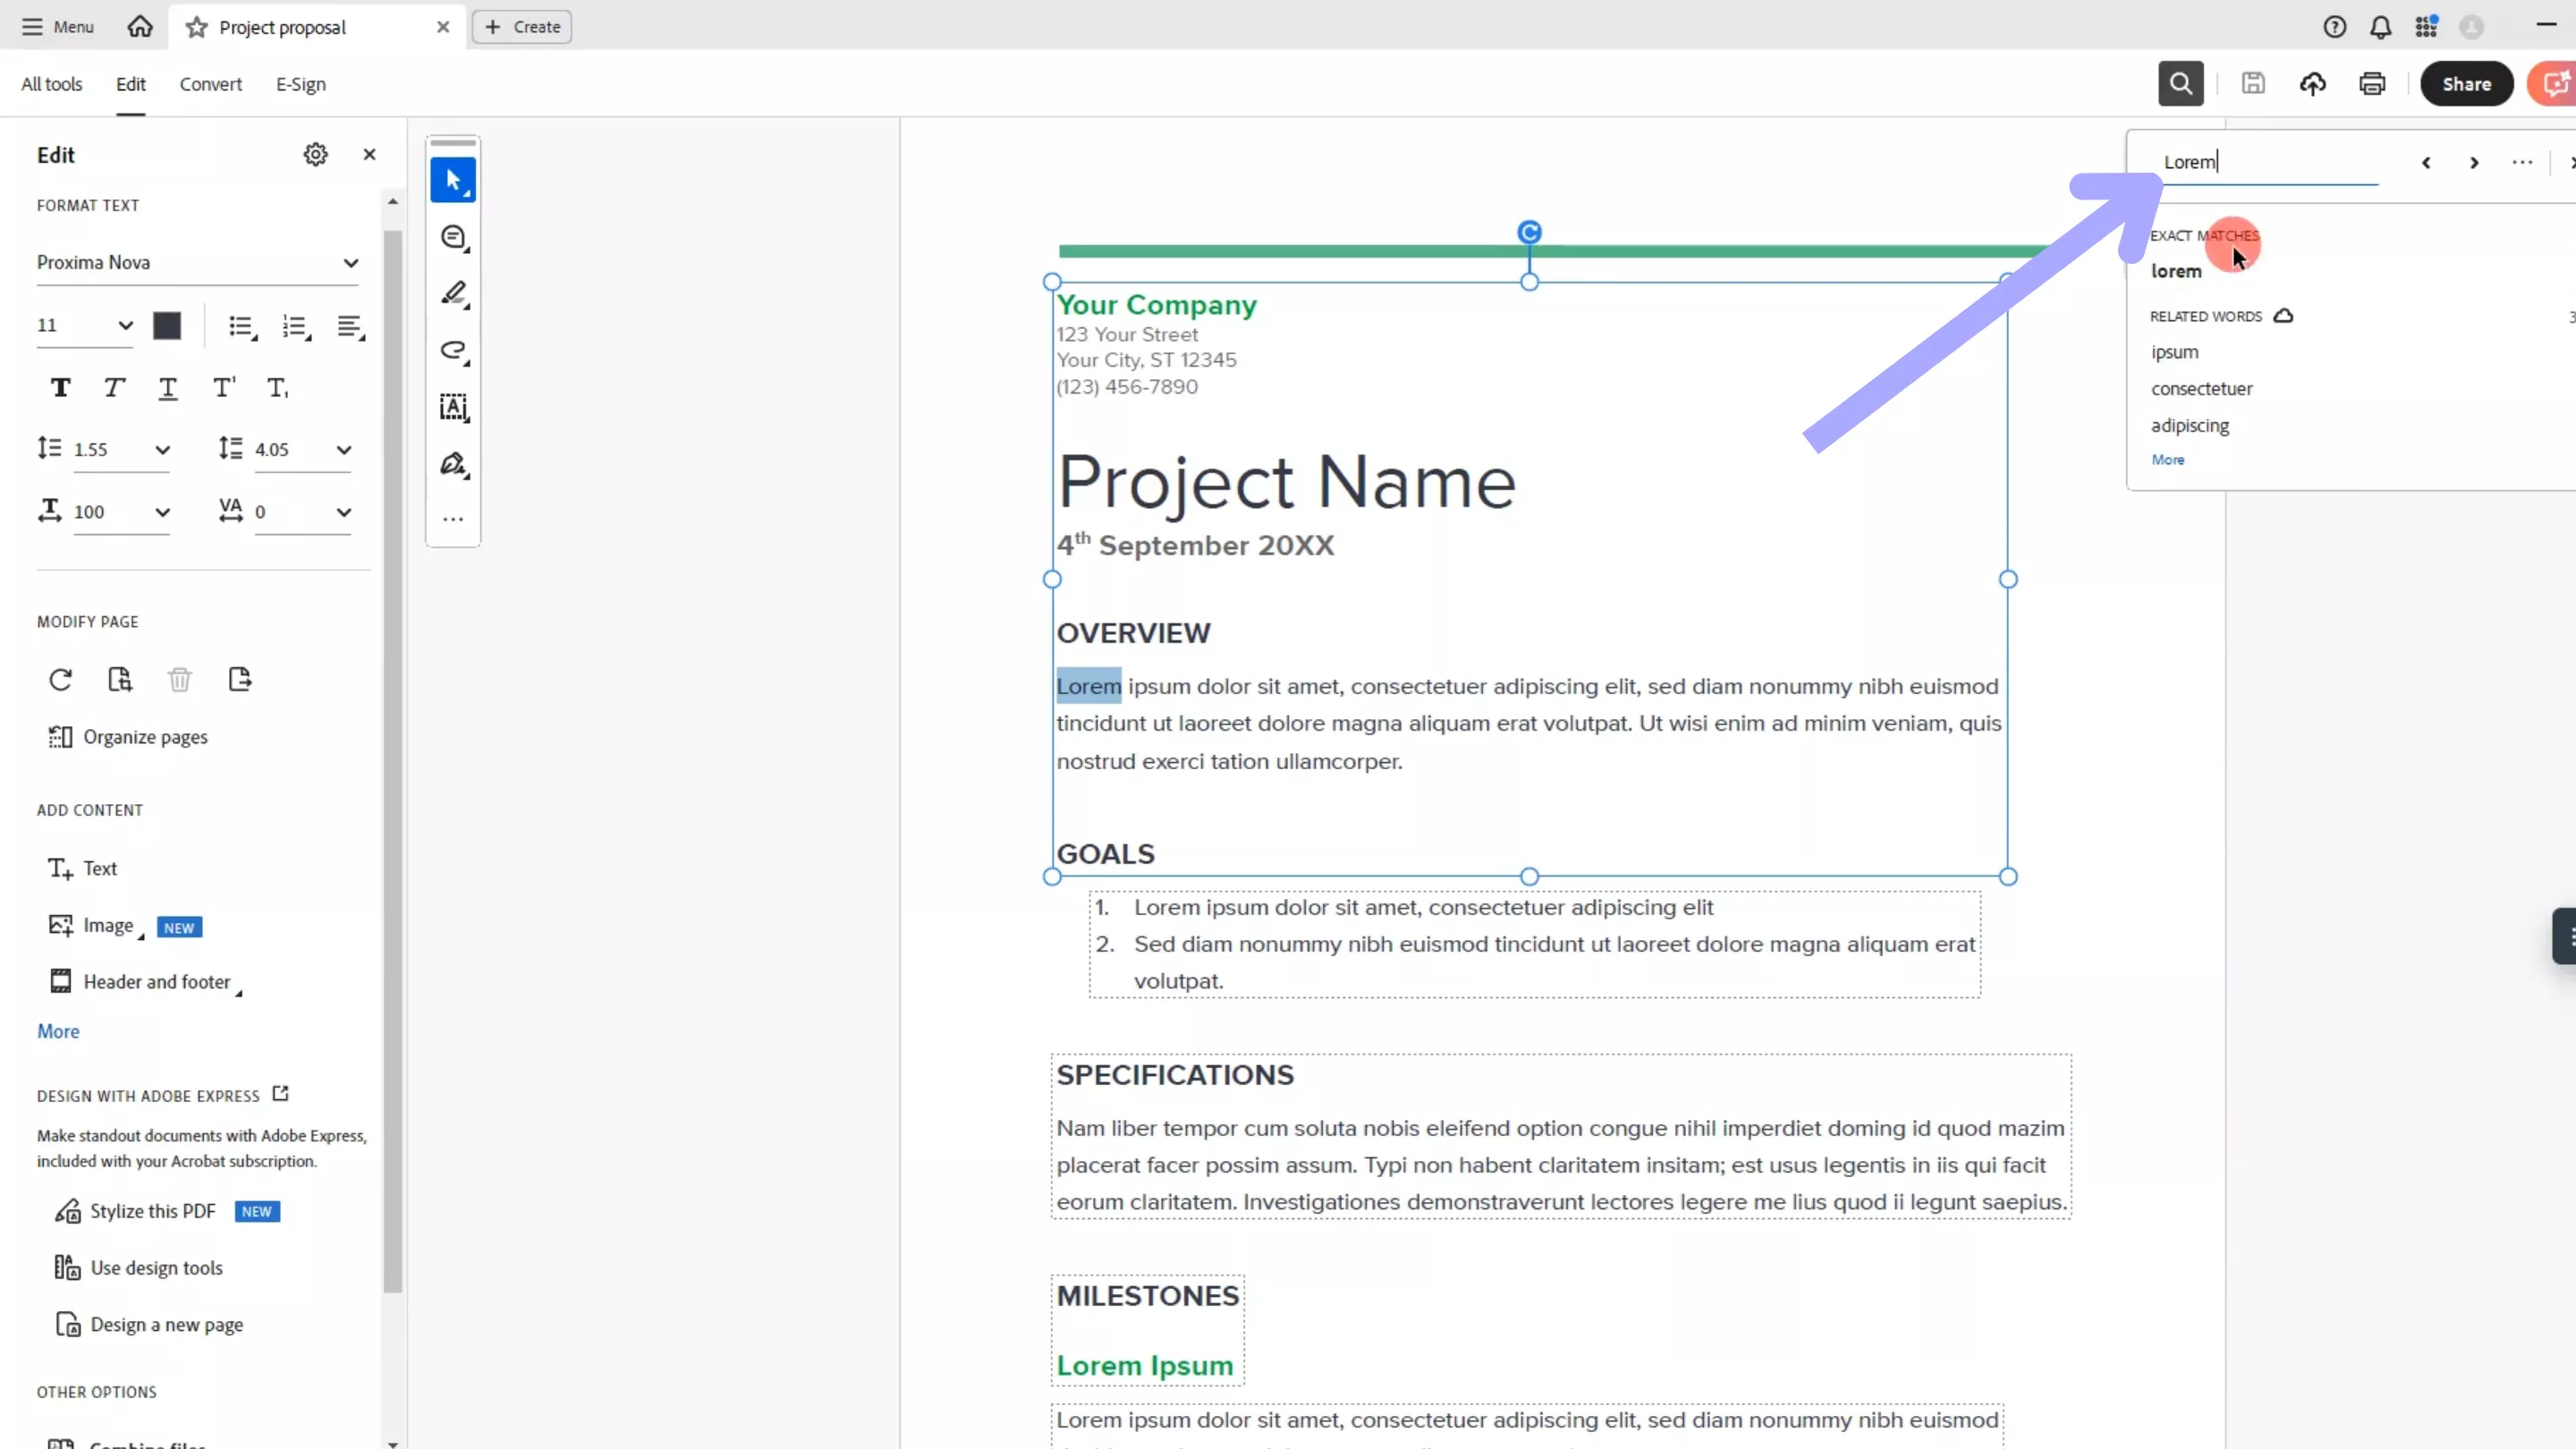
Input Your Word
This step is simple: just type in the word you’d like to replace.
Replacing the Word
In the second box underneath your original word, input the word you’d like it to be replaced with. Lastly, click “Replace” to replace the first instance of the selected word, continue to hit “Replace” to replace the next one, and so on.

Part 2: How to Use Acrobat to Find and Replace All?
If you’re working with a large PDF document or just want the luxury of replacing all words at once, Adobe Acrobat alone doesn’t provide this feature. To achieve this, you’ll need to use Acrobat to convert your document into a Word file, use Word's find and replace tool, then convert the document back to PDF, as seen below.
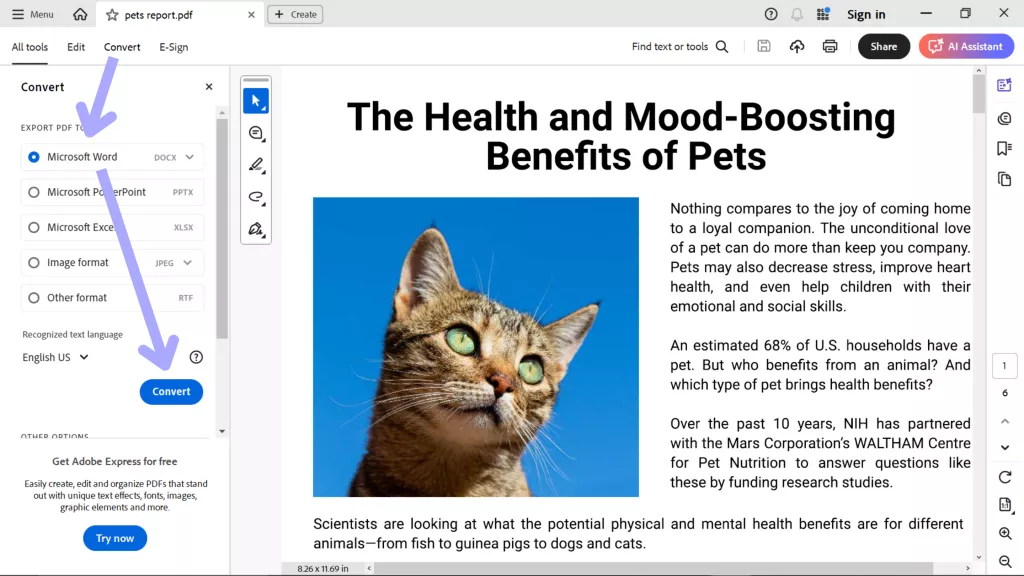
Converting Your PDF to Word
Open the PDF you’d like to work with in Adobe Acrobat. Next, click “Convert” at the top left of your screen, ensure the “Microsoft Word” option is checked, and hit the blue “Convert” button.
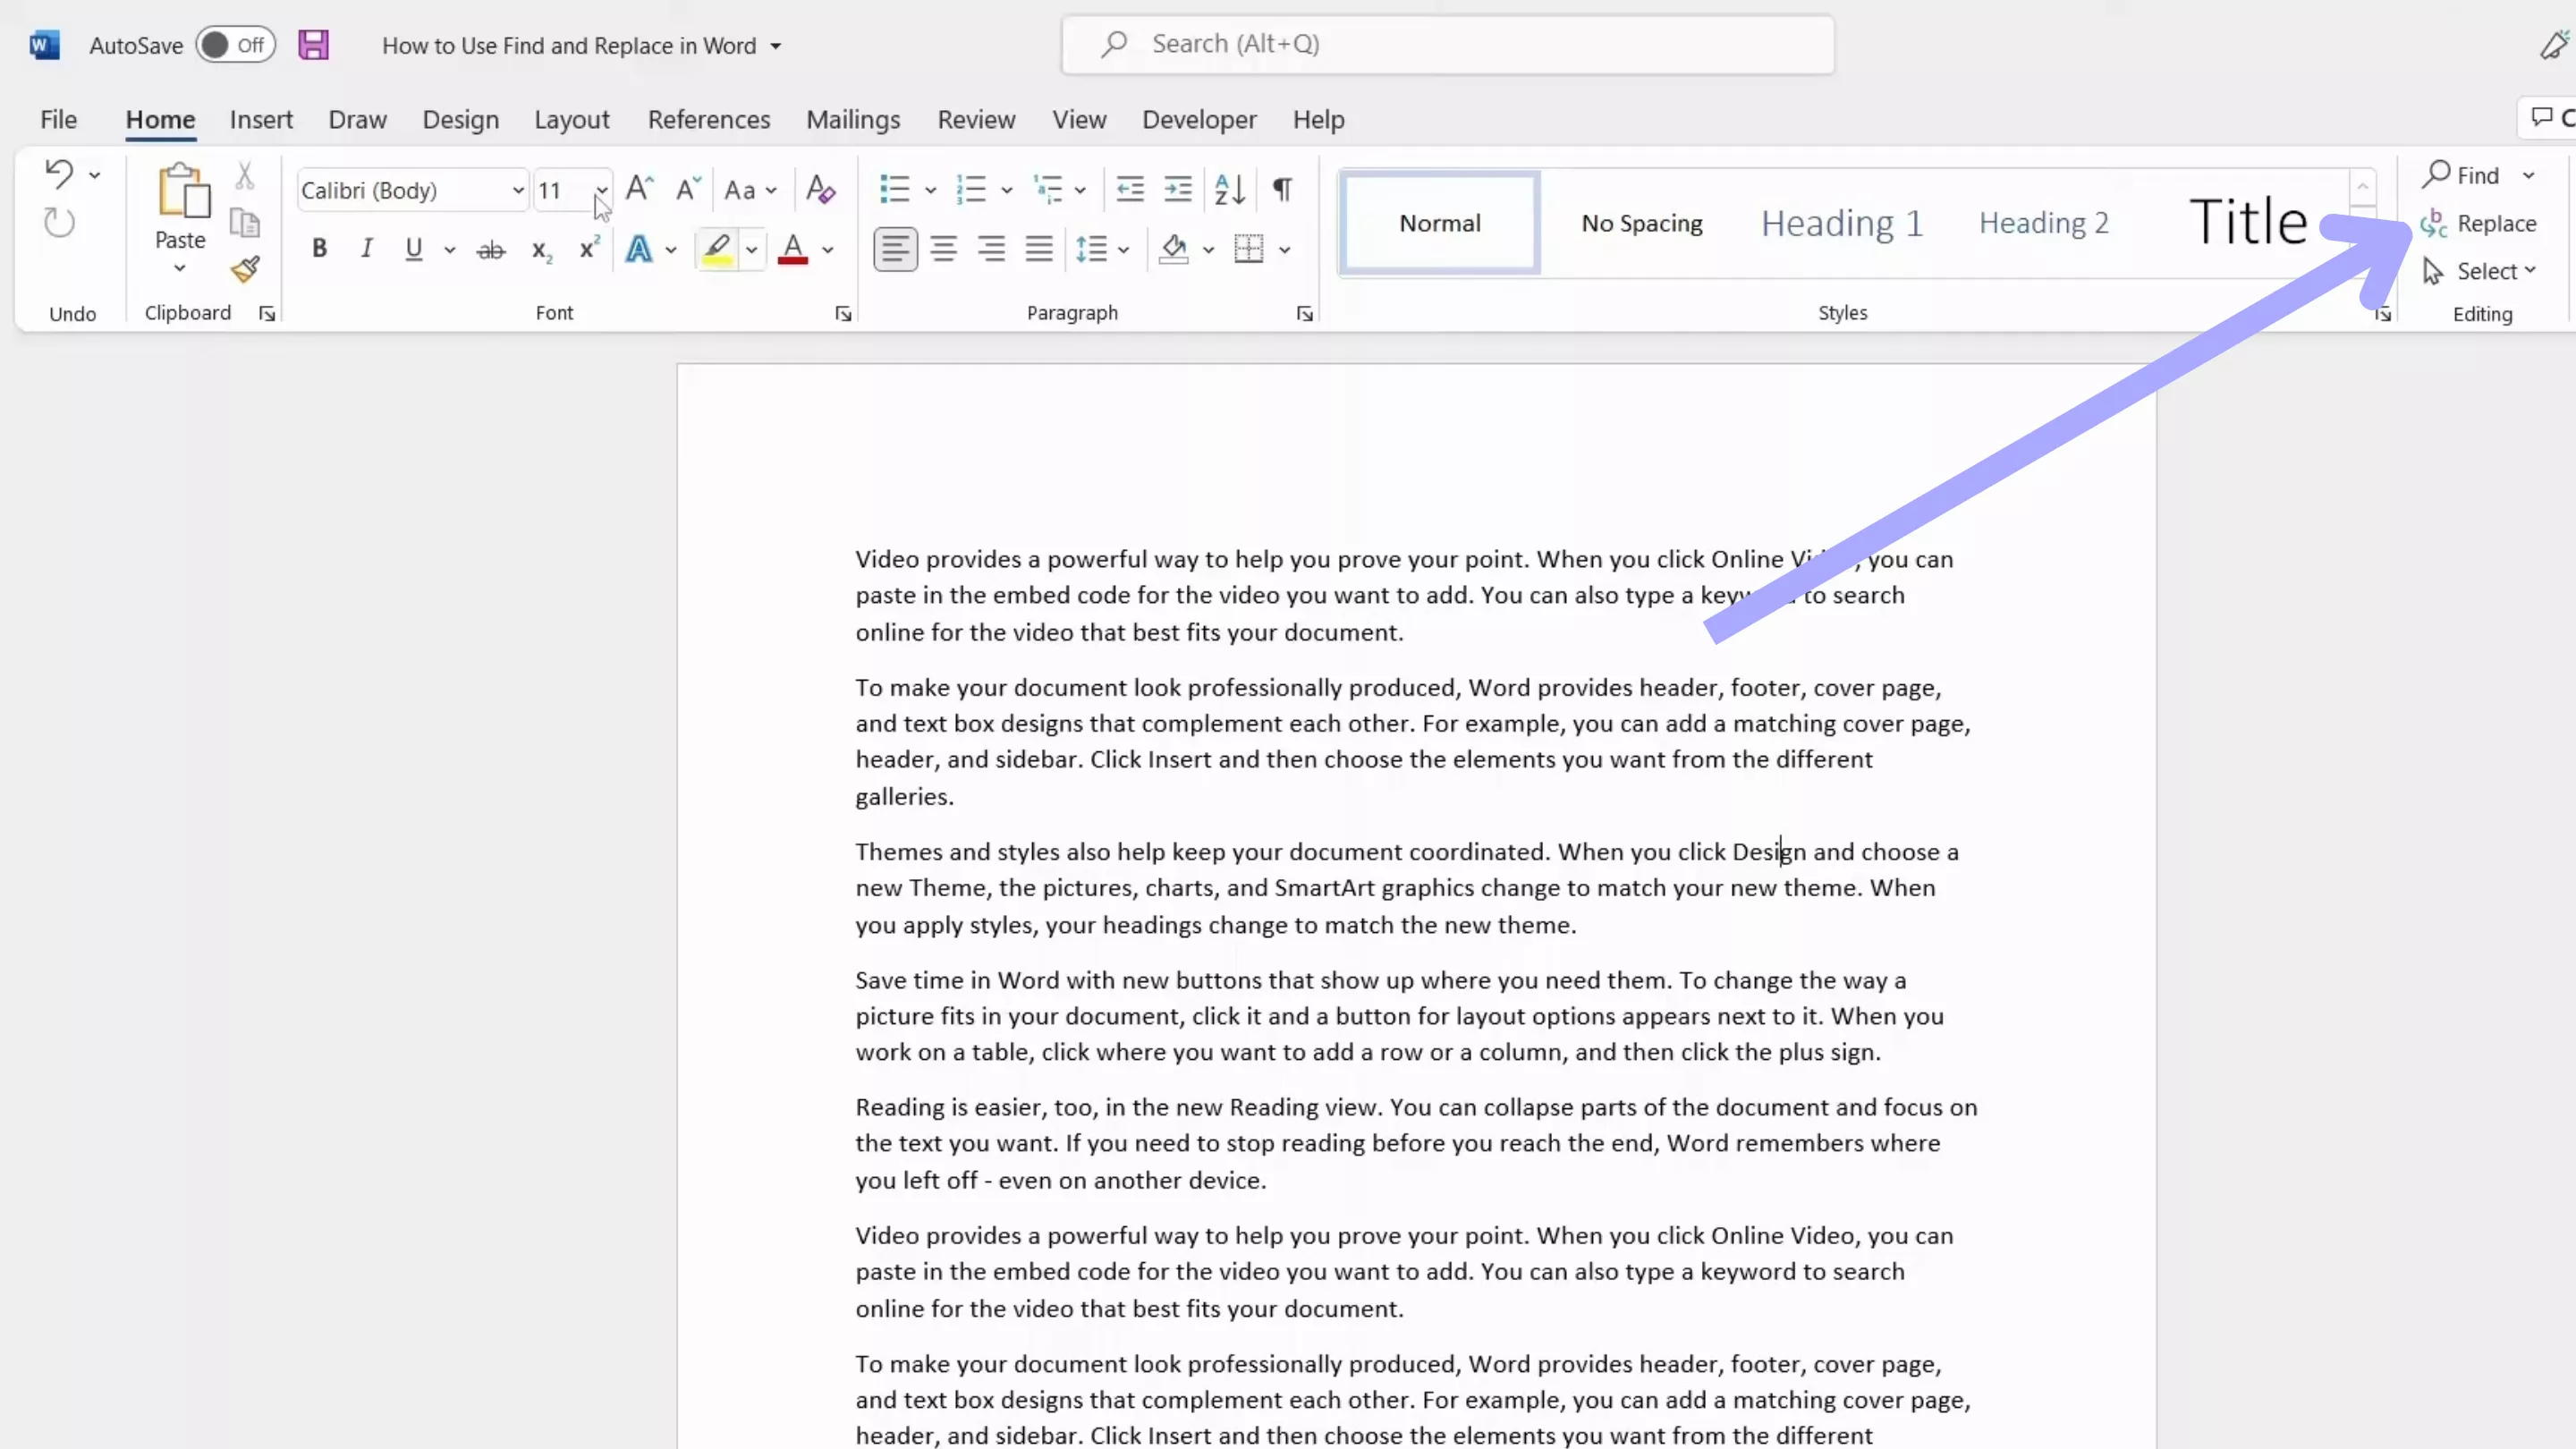
Locating the Find and Replace Tool in Word
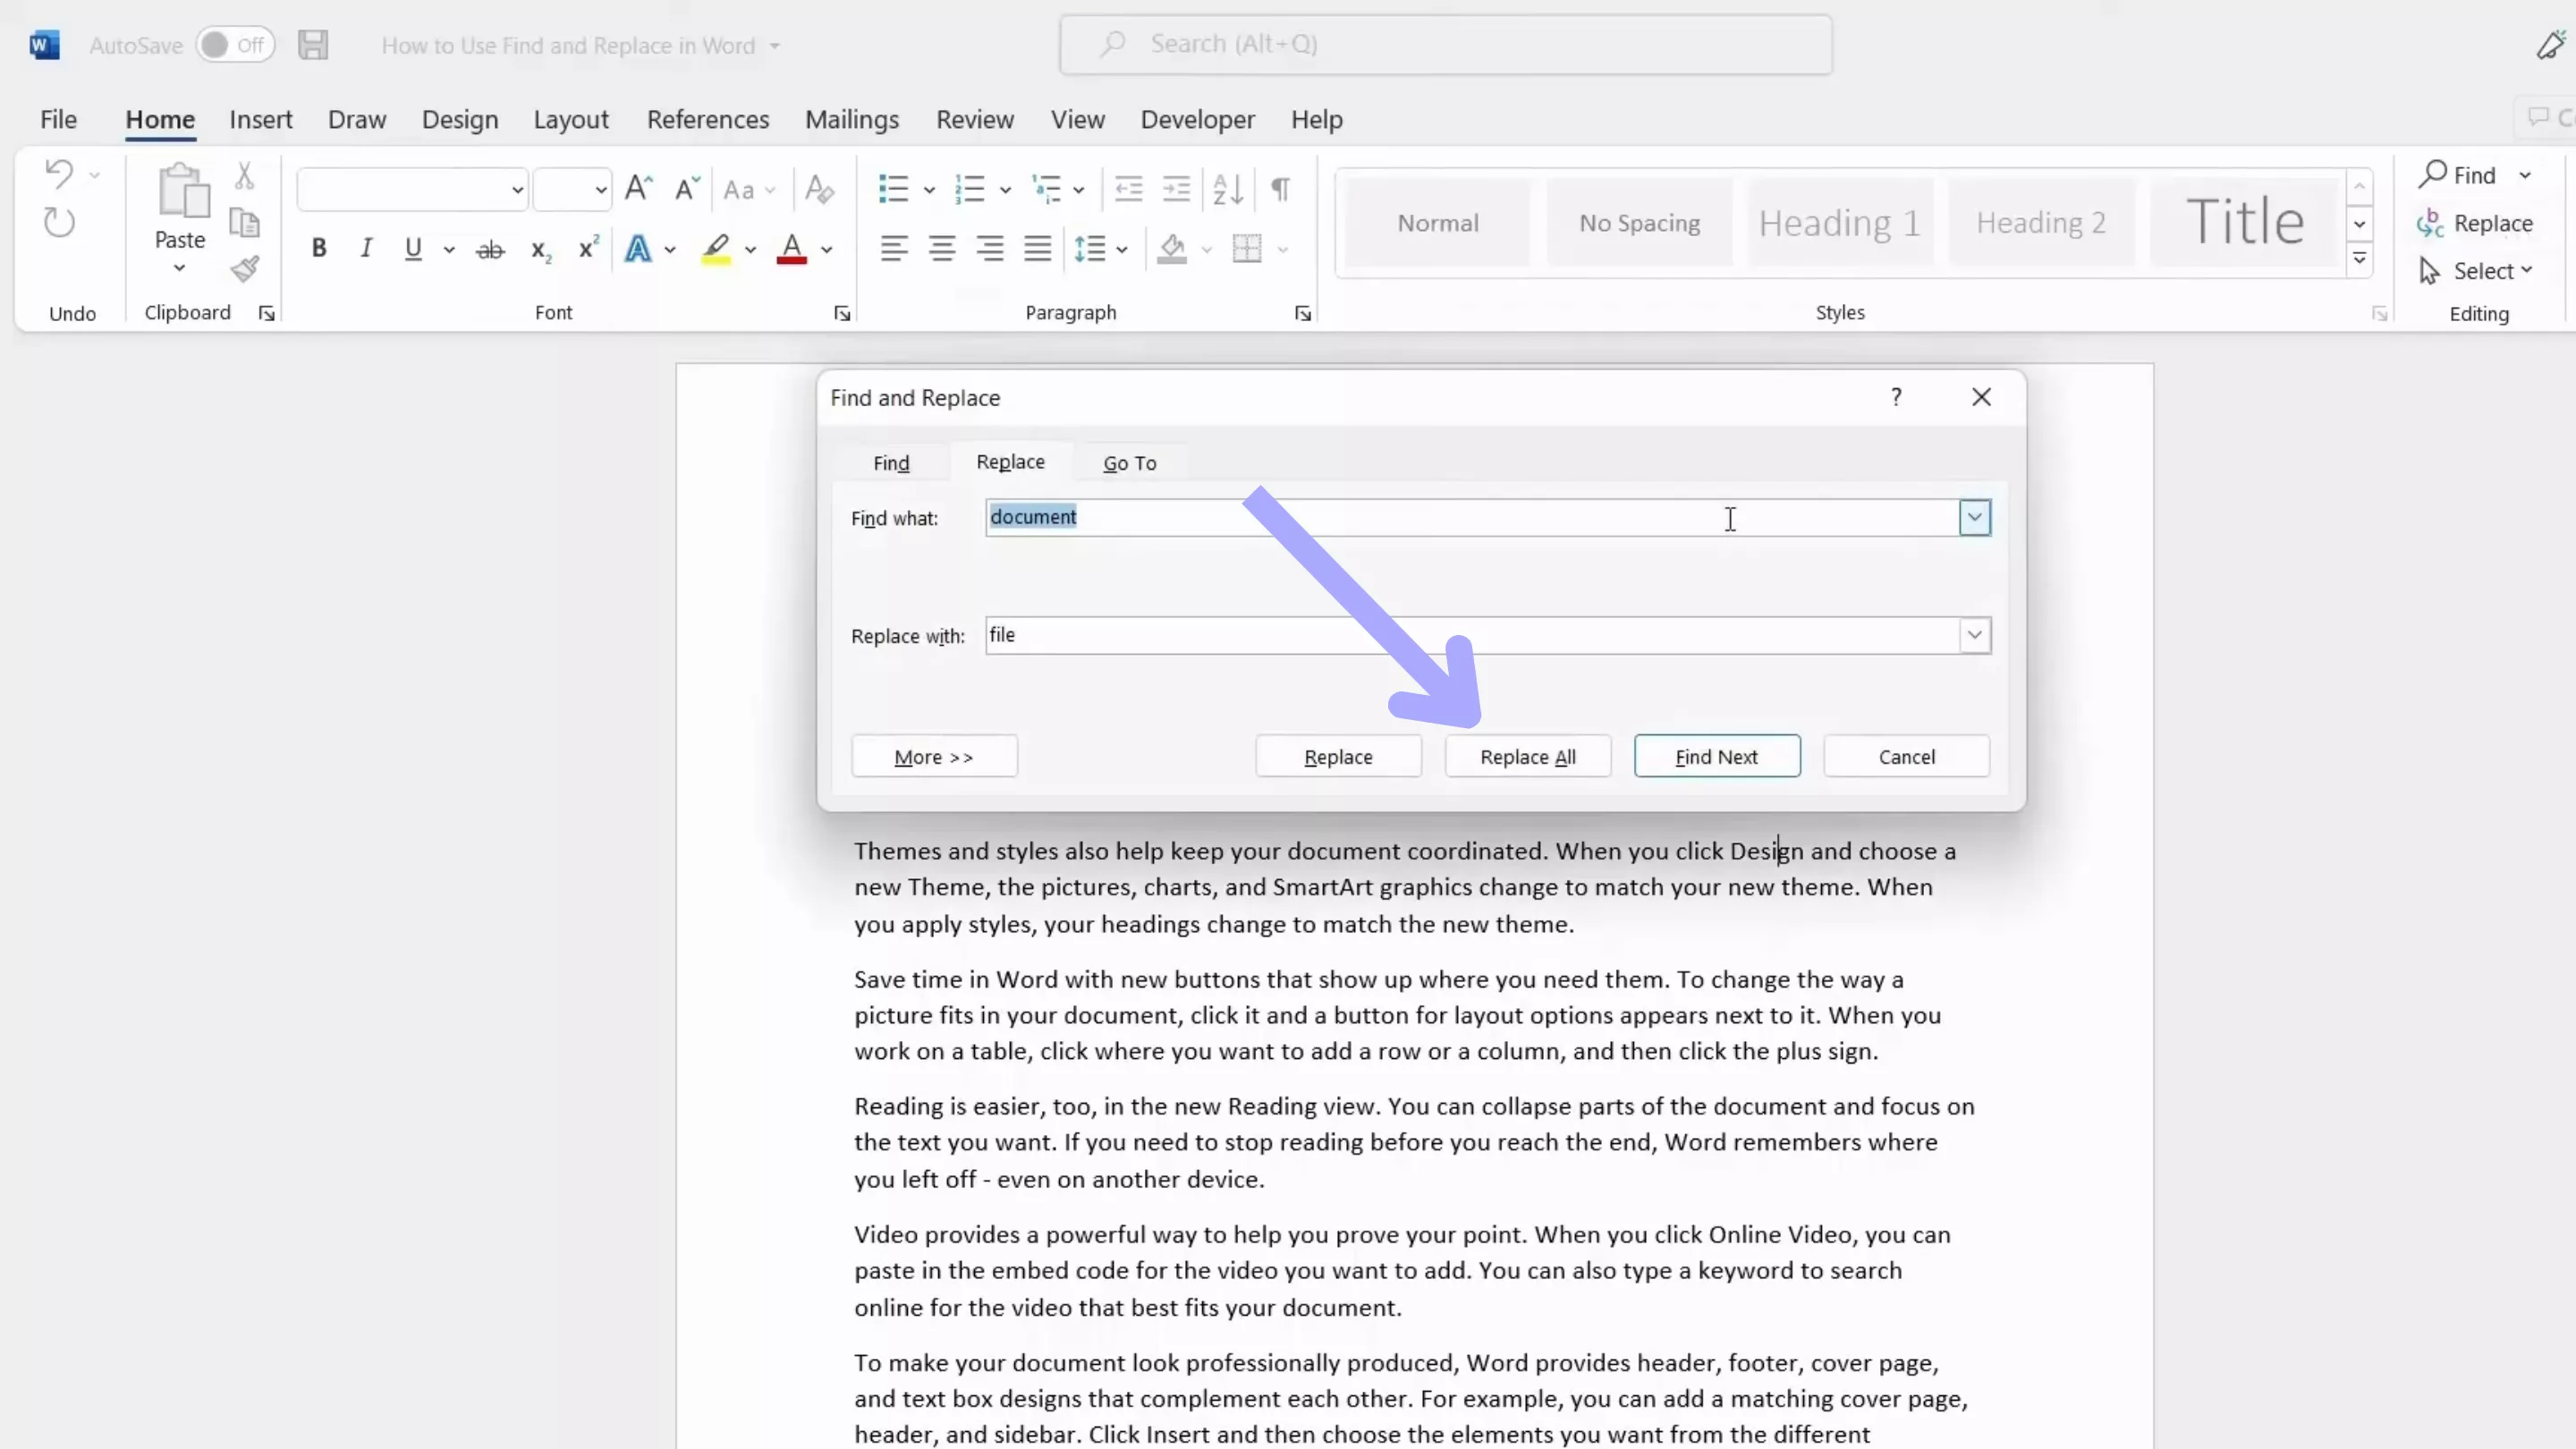
Open your newly converted document in Microsoft Word, and on the right-hand side of your toolbar, you’ll see “Replace.” Click this to bring up a new window.
Replacing Your Text
Make sure “Replace” is selected from the three options at the top of this new window. Type in the word you’d like to replace in the “Find what” text box and the word you’d like to replace it with in the box labelled “Replace with.” Next, click “Replace All” to replace every instance of the original word.
Converting Back to PDF
Once you’re happy, click “File” followed by “Save As” and pick “Download as PDF” to return the document to its original PDF format.
Part 3: FAQS About Finding and Replacing with Adobe Acrobat
Q1. How to Find and Replace in Multiple PDF Files?
As of this writing, there is no method for finding and replacing text across multiple PDF documents using Adobe Acrobat. You would need to open each document individually and perform the find-and-replace process one by one.
Q2. How to Find and Replace Text in PDF Online Free?
If you want to find and replace text in a PDF without downloading software, there are several online tools available. However, most sites require a subscription to use the find and replace feature. Here’s a quick guide on how to use these online tools.
- Head to the PDF site of your choice and upload your document.
- Enter the text you’d like to replace in the find and replace text box, as well as the text you’d like to replace it with.
- Download the updated PDF.
Q3. Why Can’t I Find and Replace with Adobe Acrobat?
If you’re using the free Adobe Acrobat Reader, you won’t have access to the find and replace feature. This tool is only available in the paid version of Acrobat.
Part 4: The Best Adobe Acrobat Alternative
If you find Adobe Acrobat too expensive or are just looking for a more cost-effective alternative, we have the perfect solution. UPDF is a powerful, feature-rich tool that costs one-sixth of the price of Acrobat without sacrificing any of its key features. It's an excellent choice for those looking to save on their PDF editing needs.
Windows • macOS • iOS • Android 100% secure
Beyond just pricing, UPDF stands out with its incredibly intuitive interface, making it easier to navigate and use effectively, even if you’re not tech-savvy. Just click the button below to download UPDF and give it a try.
Get to know how seamlessly you can trace the specific words to update them in just a few taps:
Step 1. Install UPDF and Import the Regular PDF File
Start by installing UPDF on your operating system and access the PDF you want to modify.
To do so, click the "Open File" button from the homepage where you will get a pop window having a list of documents. Choose the desired file and continue on the next window to find and replace text in PDFs.
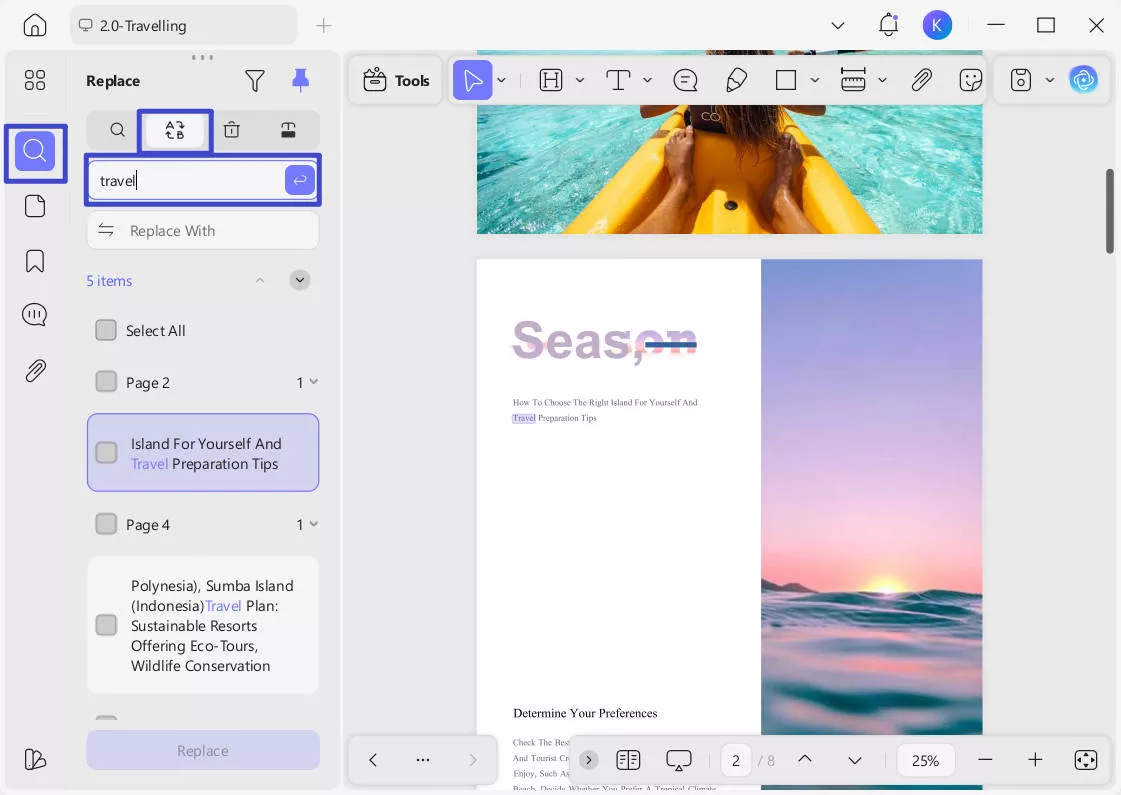
Step 2. Find the Word Using Search Icon or Ctrl + F Key
After the file is there, find a word in PDF that you desire to replace by tapping the "Search" icon from the top left corner of the screen. Upon reaching a side panel, click "Find Text & Replace", enter the word you desire to alter and press the Enter key to search.
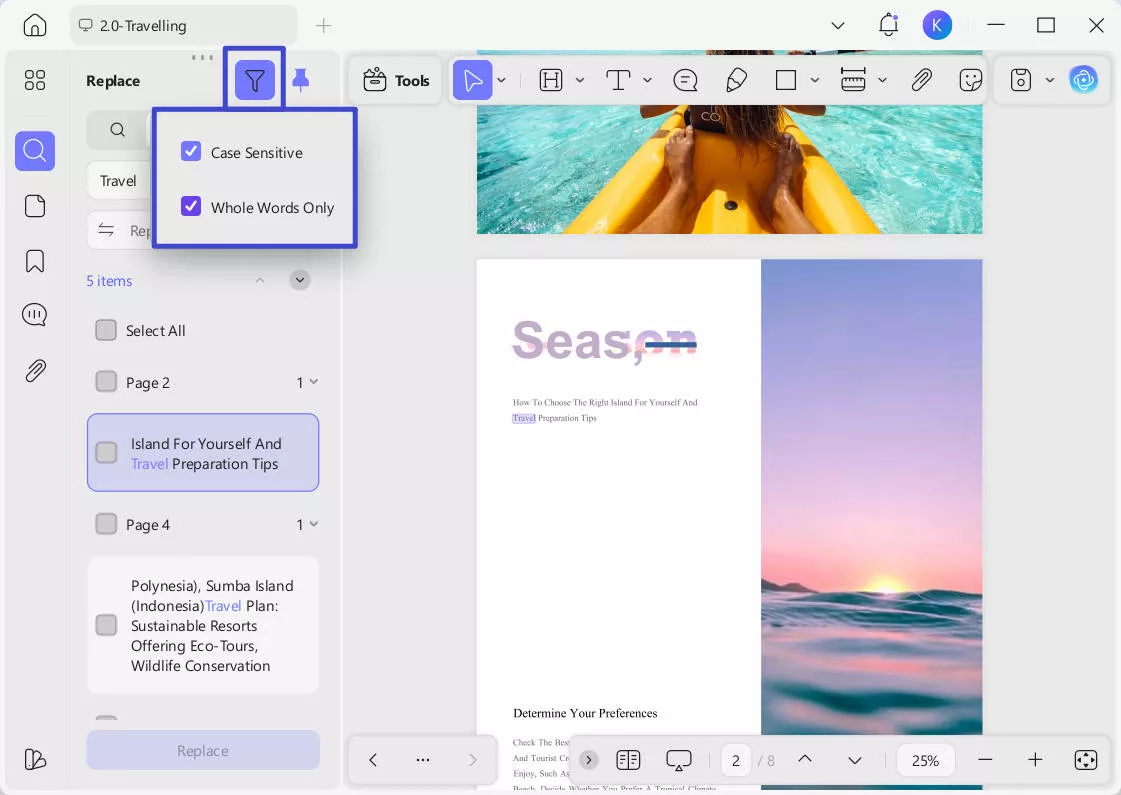
To get more precise results, you can click the "Filter" icon above and check "Case Sensitive" or "Whole Words Only".
Step 3. Replace the Specific Word With UPDF Editing Tool
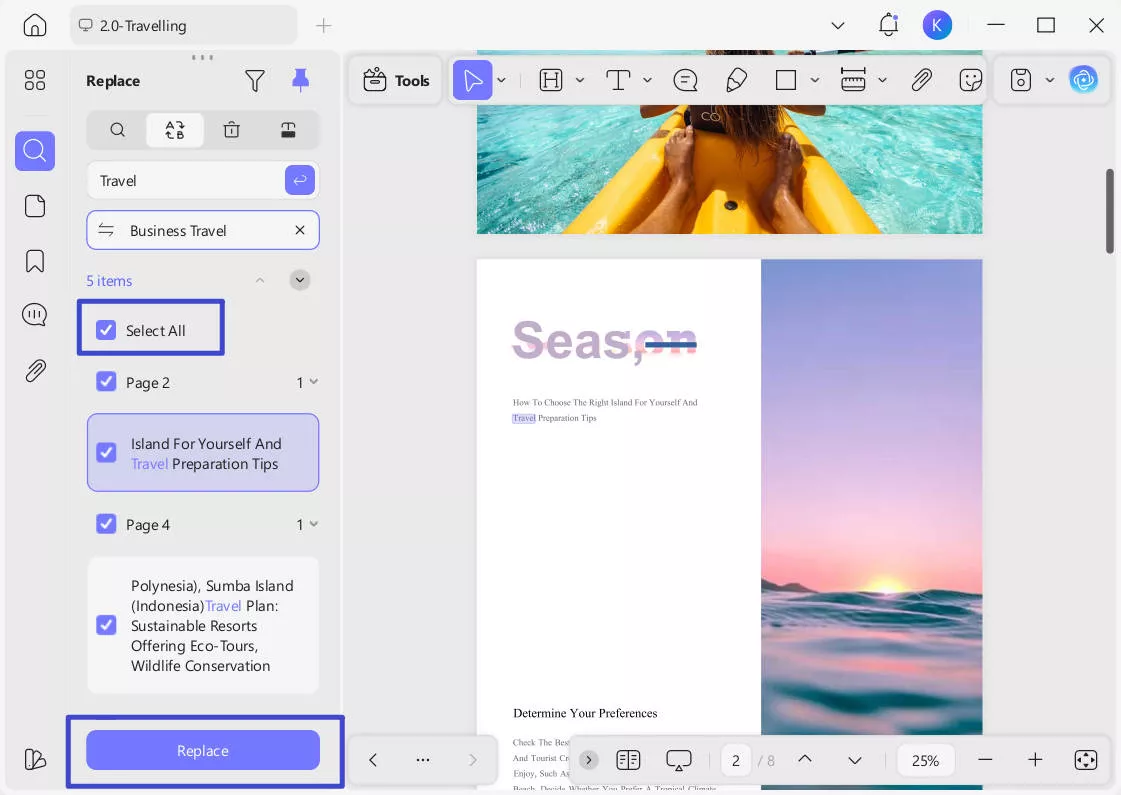
Then, you will get a list of highlighted words that you can easily replace then. Once you've confirmed that all the target words have been found, you can proceed to replace them. To do this, click on the "Replace With" input box and enter new text to replace. Check the items to replace below, or click "Select All" for all text. Then click "Replace" to begin.
Understanding The Steps to Find and Replace in a Scanned PDF
When it comes to updating the text in a scanned PDF, the procedure is different from regular files. Here is how you can find and replace text in PDF with UPDF's OCR functionality.
Step 1. Access the Scanned File on the Main Interface and Perform OCR
Open the scanned file within UPDF and hit the "Tools" > "OCR" from right of screen to make text edit and searchable.

Step 2. From the pop-up window, UPDF OCR provide you with 3 different options of OCR Text Recognition type, which include Editable PDF, Text and Picture Only, and Searchable PDF Only.
- Searchable PDF Only: In this mode, the page image is preserved, and the recognized text is added in an invisible layer
beneath it. This keeps the document visually almost identical to the original. - Editable PDF: This mode preserves the background images and illustrations from the original document and places the recognized text on top. As a result, the file size is usually larger than those created with the "Text and Pictures Only" mode. Visually, the output may look slightly different from the original.
- Text and pictures only: This mode saves the recognized text and images, resulting in a smaller PDF file. However, the appearance may differ slightly from the original document.
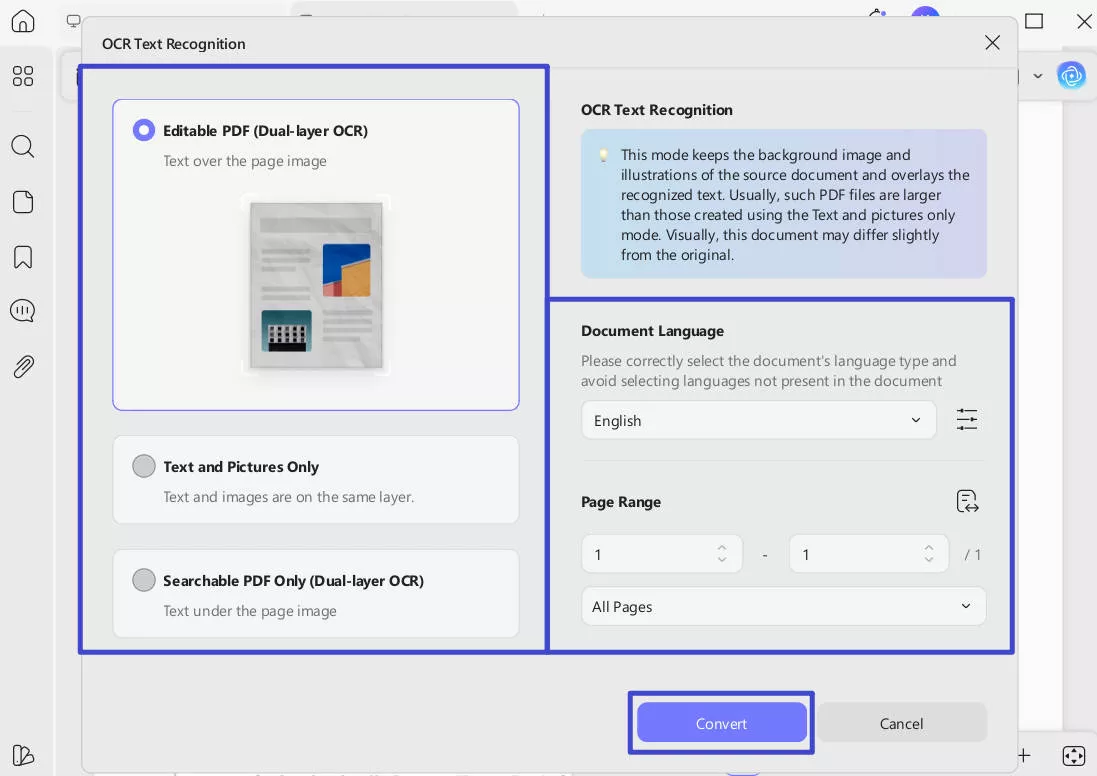
Choose your desired mode based on your need. To achieve more accurate OCR results, you need to correctly select the language you want to recognize, such as English.
Step 3. You can also click the Layout Settings option next to the language to access more customization options.
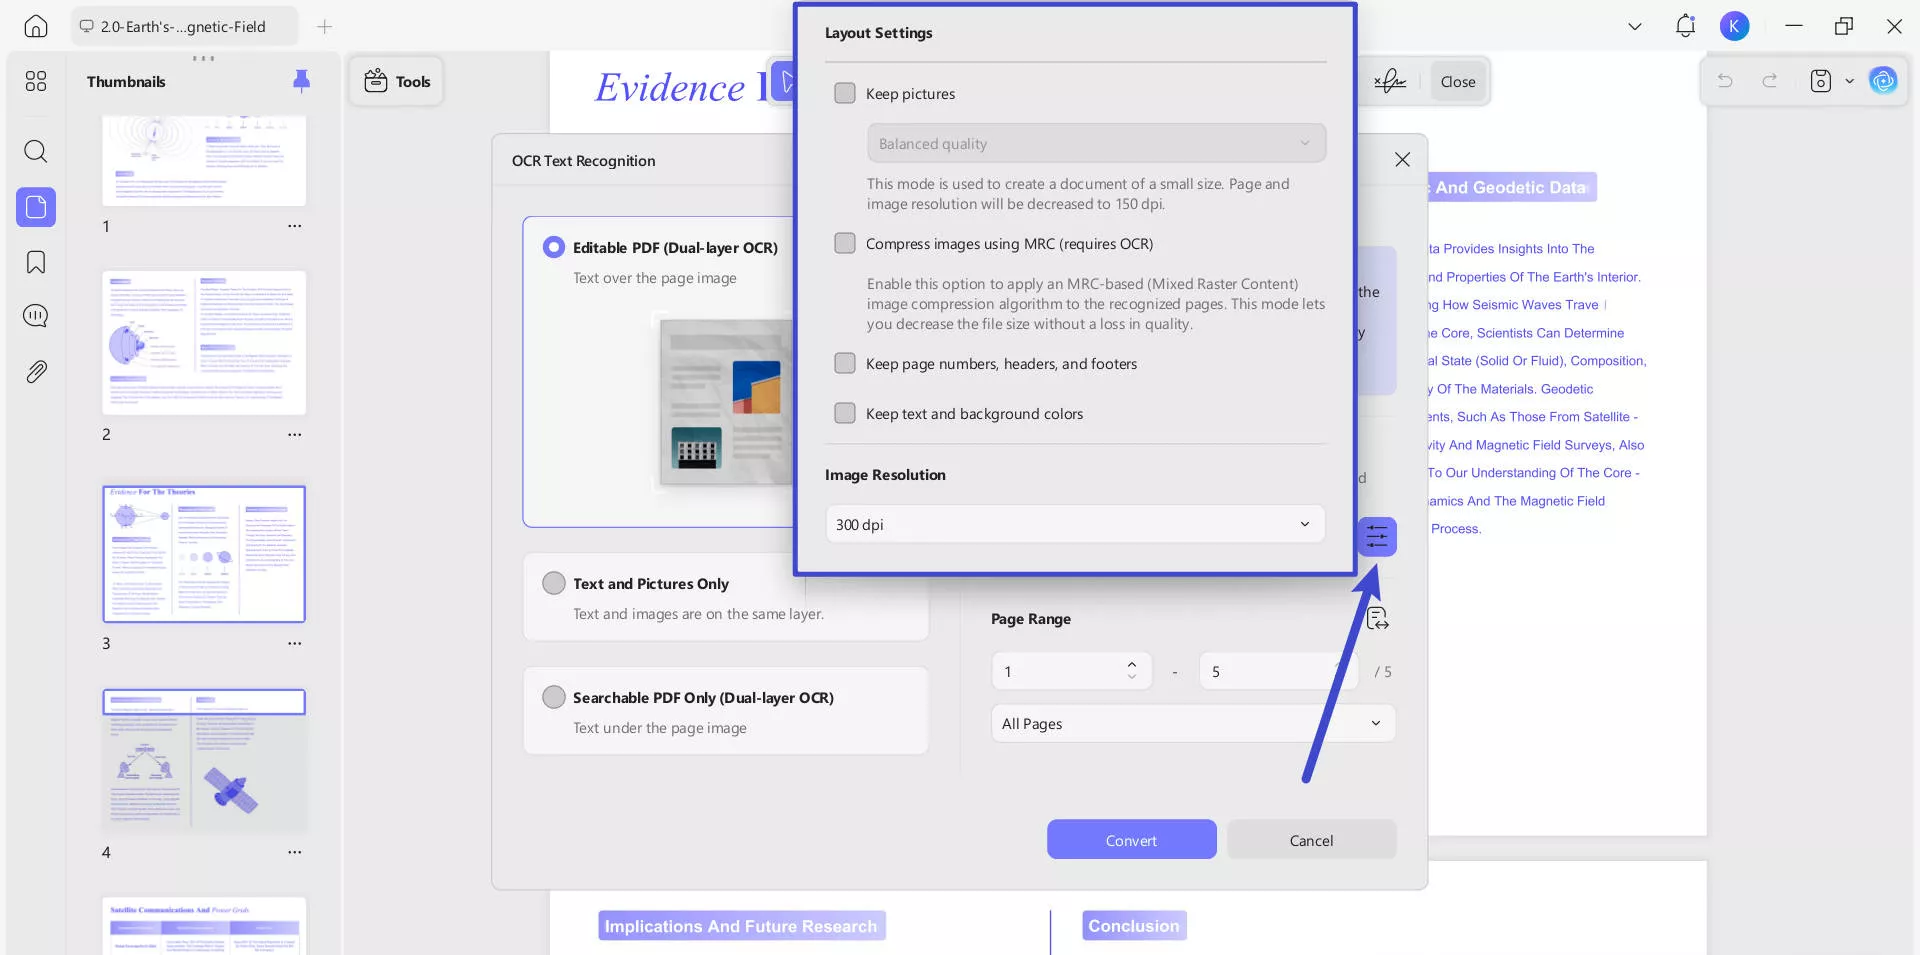
- Keep pictures: Keeps images in the output document. It provides Low / Balanced / High quality. You can controls image quality to balance between file size and clarity.
- Compress images using MRC (requires OCR): Uses Mixed Raster Content compression to reduce file size without losing visible quality (only works after OCR).
- Keep page numbers, headers, and footers: Preserves these layout elements in the output.
- Keep text and background colors: Maintains original colors for better visual fidelity.
- Image Resolution (last image): Lets you choose the output resolution:
- 72 dpi: Low quality (smallest file, screen-only use).
- Automatic: Software decides.
- 300 dpi: High quality (best for print).
- 150 dpi: Medium quality (smaller file).
Step 4. Once done, press the "Convert" button to start recognizing the text for further modifications.
Step 5. Search the Certain Word and Replace it With Edit Tool
UPDF will prompt you to save the OCRed file to your device. Once saved, UPDF will immediately perform OCR and automatically open the new OCRed file in a separate window. The scanned document is now editable and searchable. You can now search in the scanned document and replace contents in the document by following the steps mentioned above.

Windows • macOS • iOS • Android 100% secure
Apart from assisting you finding and replacing texts in your PDF file, whether you need to view PDFs, edit documents, annotate, convert, or anything else, UPDF has your needs covered with a host of amazing features such as:
- PDF Editing: Edit text, images, and links in existing or newly created documents.
- Annotation Tools: Add highlights, notes, and more to your PDFs.
- Convert PDFs: Convert your PDFs to Word, Excel, PowerPoint, or Images, or vice versa.
- AI Assistant: summarization, explanation, translation, mind-map generation, understanding documents and interactive chat.
- Cloud Syncing: Backup your documents to Cloud storage and access them anywhere on any device.
These are just a few of the many features UPDF has to offer. If you’d like to learn more about UPDF and how it compares to Adobe Acrobat, check out this in-depth review. Or if you’d prefer, check out the video below to learn why UPDF is the best PDF editor on the market.
UPDF is available on Windows, Mac, Android, and iOS, and can be downloaded for free. If you’re happy with UPDF, consider upgrading to the pro version for full access to all of UPDF's features.
Final Thoughts
In summary, we’ve discussed two efficient ways to find and replace Adobe Acrobat text with the guides featured above. While Acrobat offers basic find and replace features, you’ll have to convert to Word for larger PDF documents to replace all text.
If you’re looking for a cheaper alternative to Adobe Acrobat, we recommend switching to UPDF for all your PDF needs. UPDF is fast and reliable, has a budget-friendly price, and offers many amazing features. Why not try UPDF for yourself by clicking the download link below?
Windows • macOS • iOS • Android 100% secure


 Engelbert White
 Enrica Taylor

 Enola Miller
