Do you want to get rid of the annoying white margins in your PDF documents and make your PDF documents look more professional and appealing? Do you want to save paper and ink when printing your PDF documents? If you answered yes to any of these questions, then this guide is for you.
In this guide, we will teach you how to remove margins from PDF documents in a few easy steps. By following this guide, you can optimize your PDF documents and enjoy a better viewing and printing experience! Let's get it!
How to Remove Margin from PDF
If you want to remove margins from PDF documents, you need a powerful and reliable tool. One of the best tools that you can use is UPDF, an AI-integrated PDF editor that allows you to annotate, edit, convert, OCR, protect, fill, sign, summarize, translate, and explain PDFs. It also has a handy feature that lets you crop pages in PDFs and remove margins easily and efficiently.
To use UPDF for removing margins from PDF documents, you just need to follow these simple steps:
Step 1. Download and Launch UPDF
Download UPDF by clicking the "Free Download" button and the installation process is quite simple.
Windows • macOS • iOS • Android 100% secure
Launch UPDF and open the PDF document that you want to remove the margin from.
Step 2. Enable "Crop" Option
Click on the Tools and select "Crop" button on the main interface's left toolbar.
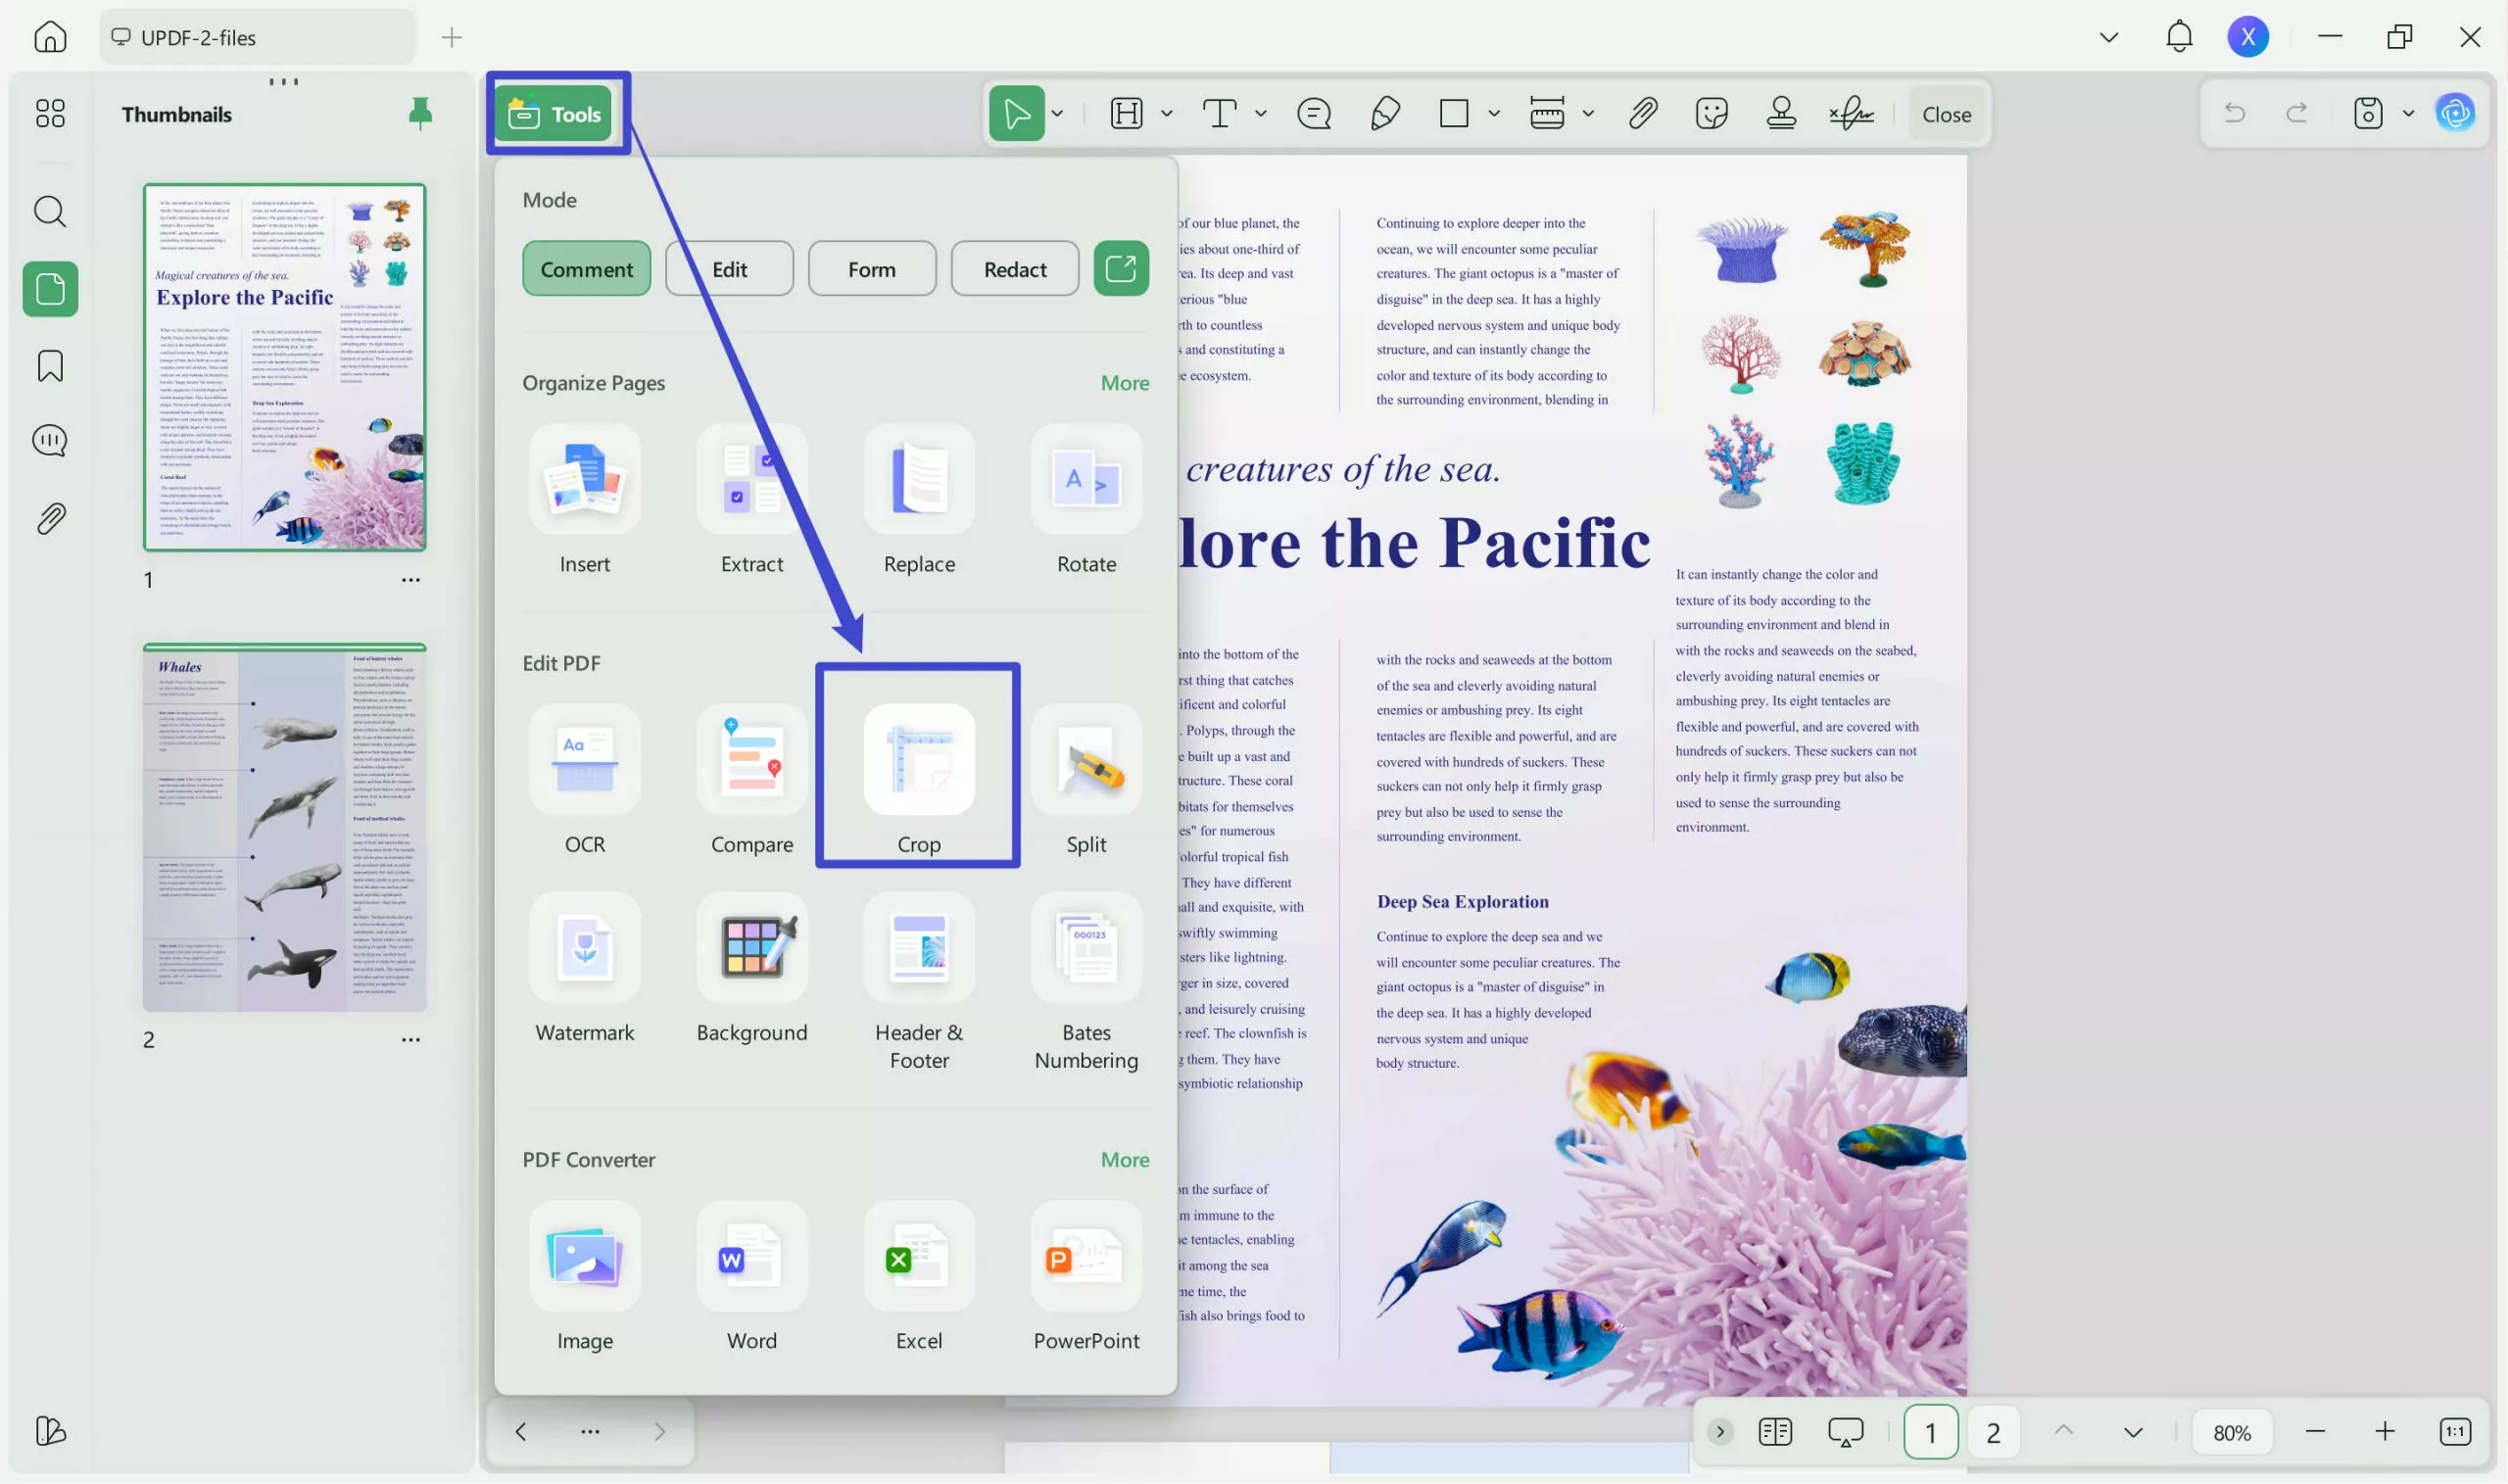
Step 3. Set Margin Control for Your PDF
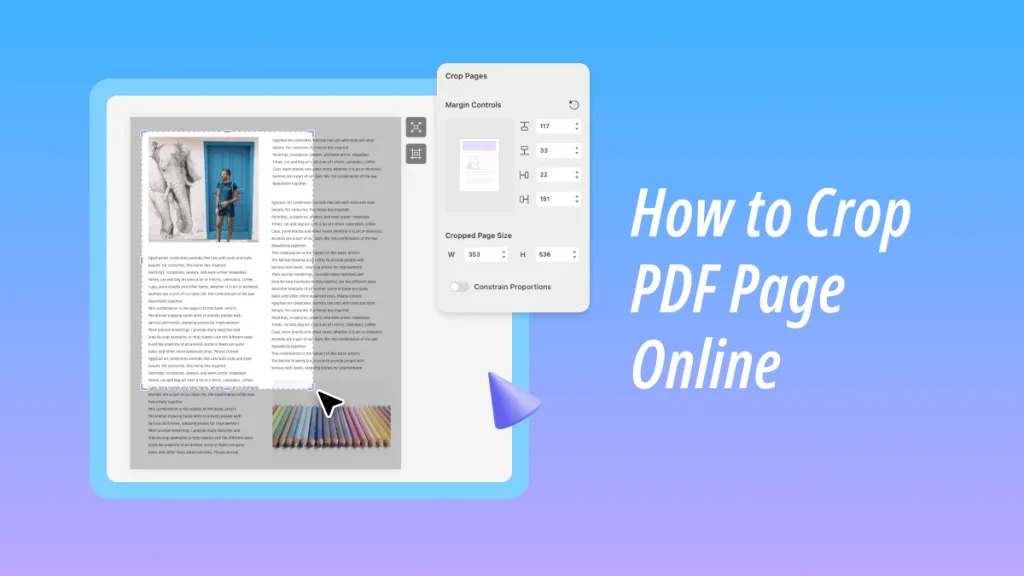
You will enter into the new interface where you can adjust the cropping area for your PDF pages.
- You can drag the corners or sides of the cropping box to crop the margin.
- Enter the exact values for the top, bottom, left, and right margins in the fields below.
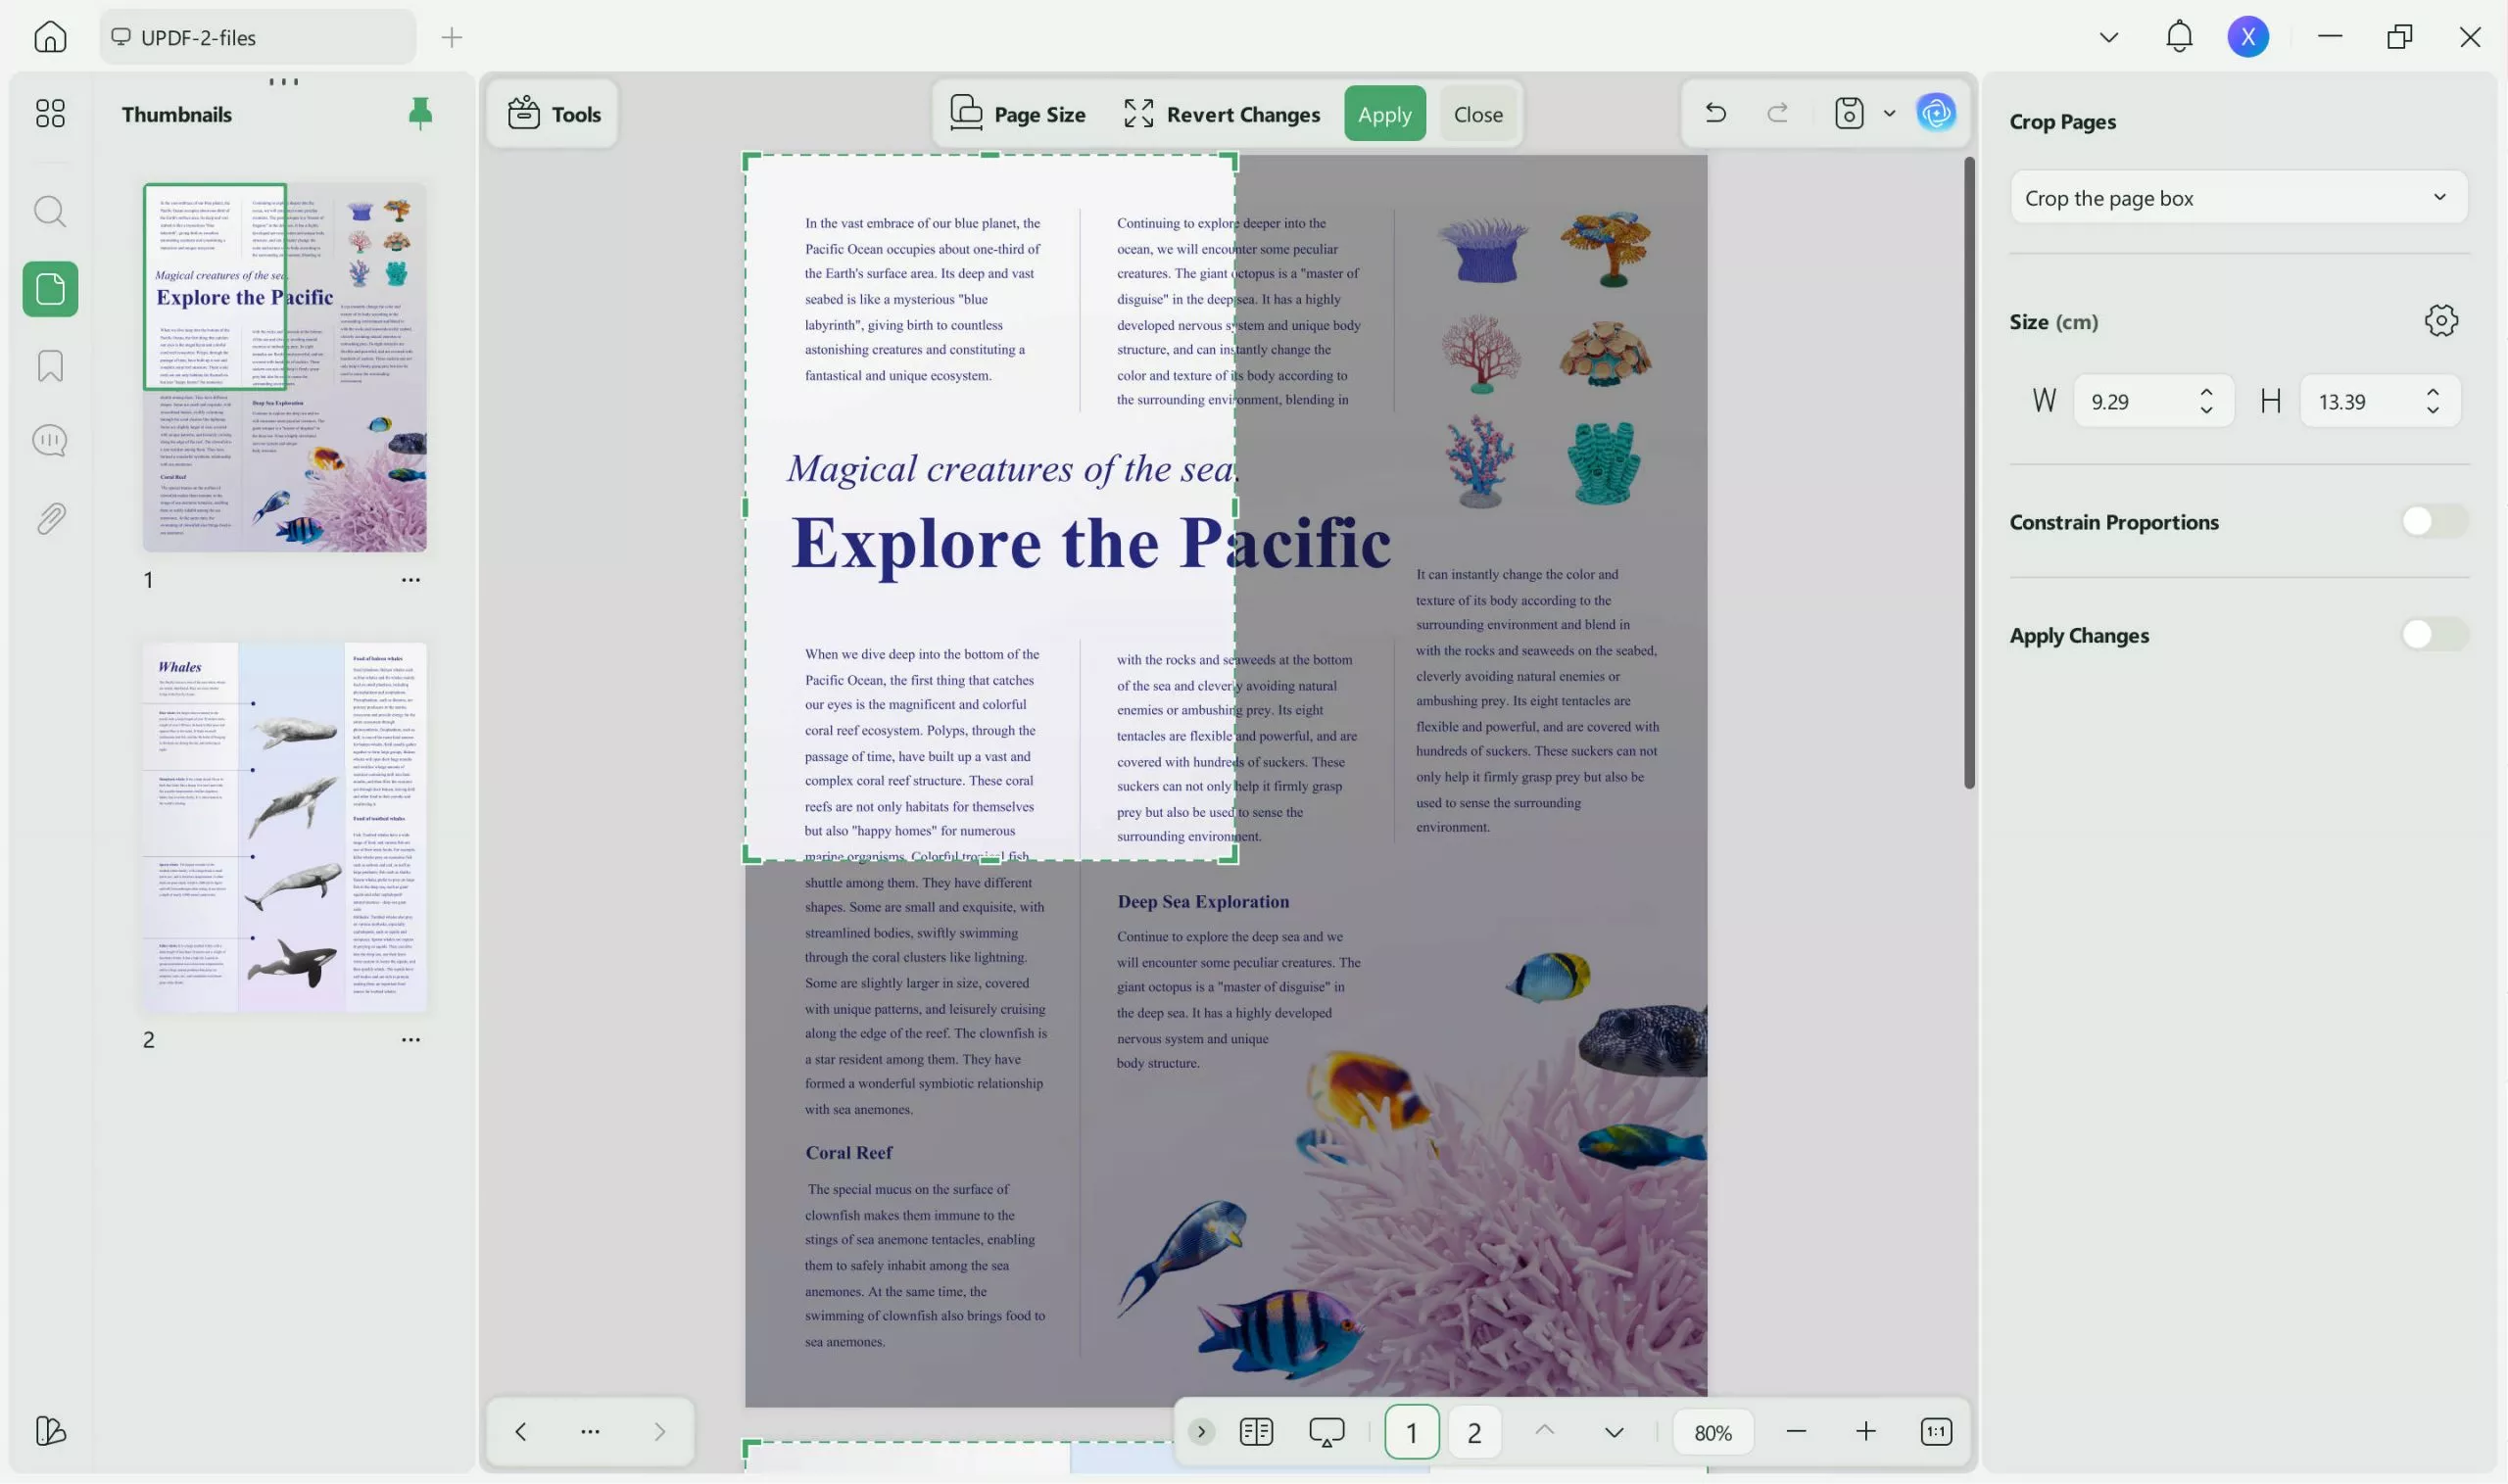
Step 4. Remove Margin from PDF
You can preview the cropped pages from the thumbnails section before applying them. Once you are satisfied with your cropping settings, click the "Crop" button to confirm them.
You can also choose to apply the cropping settings to a single page, all pages, or a custom page range in your PDF document.
- To crop the current single page, simply click the "Crop" button located in the top-right corner.
- To select the page range, click the "Apply Changes" option located in the top-left corner, toggle it on, and select the page range. After selecting the page range, click "Crop" to apply.
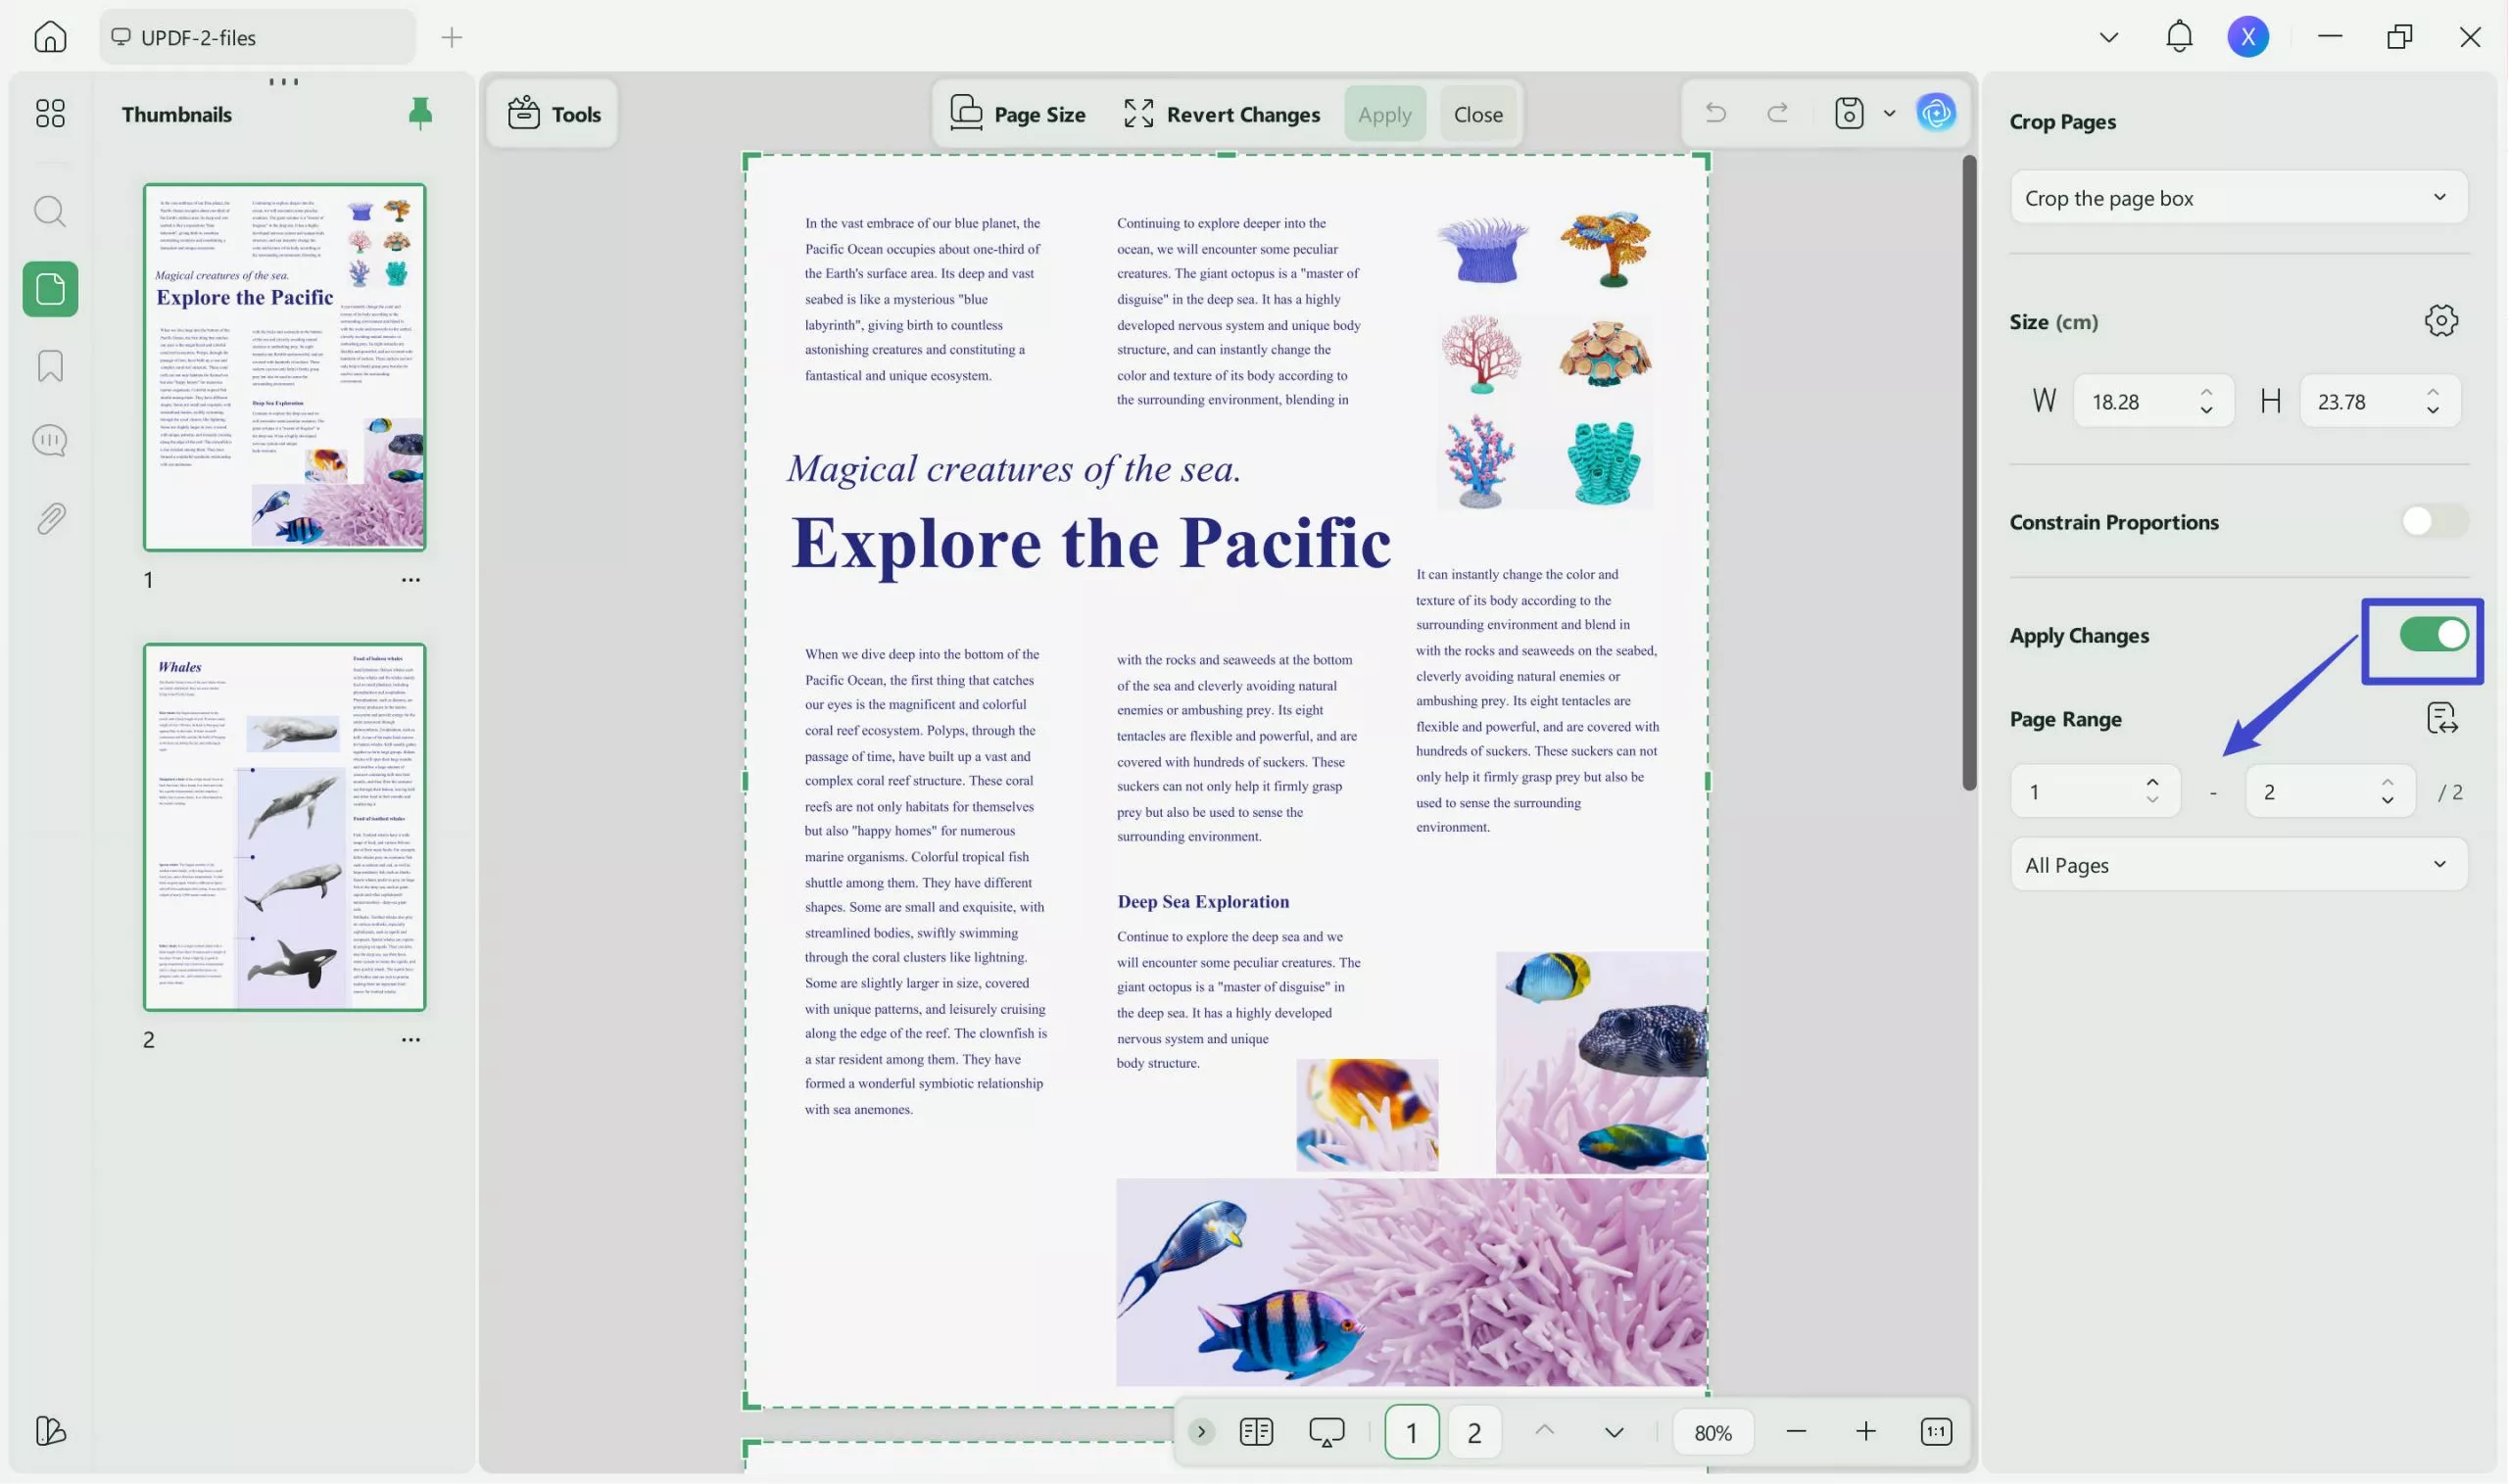
Your PDF document will be cropped and saved with no margins by pressing "Ctrl + S".
That's it! You have successfully removed margins from your PDF document using UPDF. You can now enjoy a better viewing and printing experience with your PDF document. If you upgrade UPDF to Pro now, you can have an exclusive discount.
How to Recover Margins from the PDF after Removing Them?
There are some users that also want to restore the original margins later for different purposes. UPDF allows you to remove margins from PDF files with a few simple steps, and also offers a tool to revert them. Here's how you can do it yourself:
How to Revert Margins from PDF
- To restore margins in a PDF file, open it with UPDF and click on the "Crop" button in Tools on the left to enter the proper mode.
- If you want to restore only the current page, go to the page and click on the "Revert Changes" icon from the right panel. This will undo any cropping actions that you have applied to the PDF file and bring back the original margins.
- You can also choose to revert all pages by clicking on the "Undo".
- After reverting the changes, you can save the PDF file with the restored margins by clicking on the "Save" option. You can also use the "Save as" option to save the PDF file as a different document with a different name.
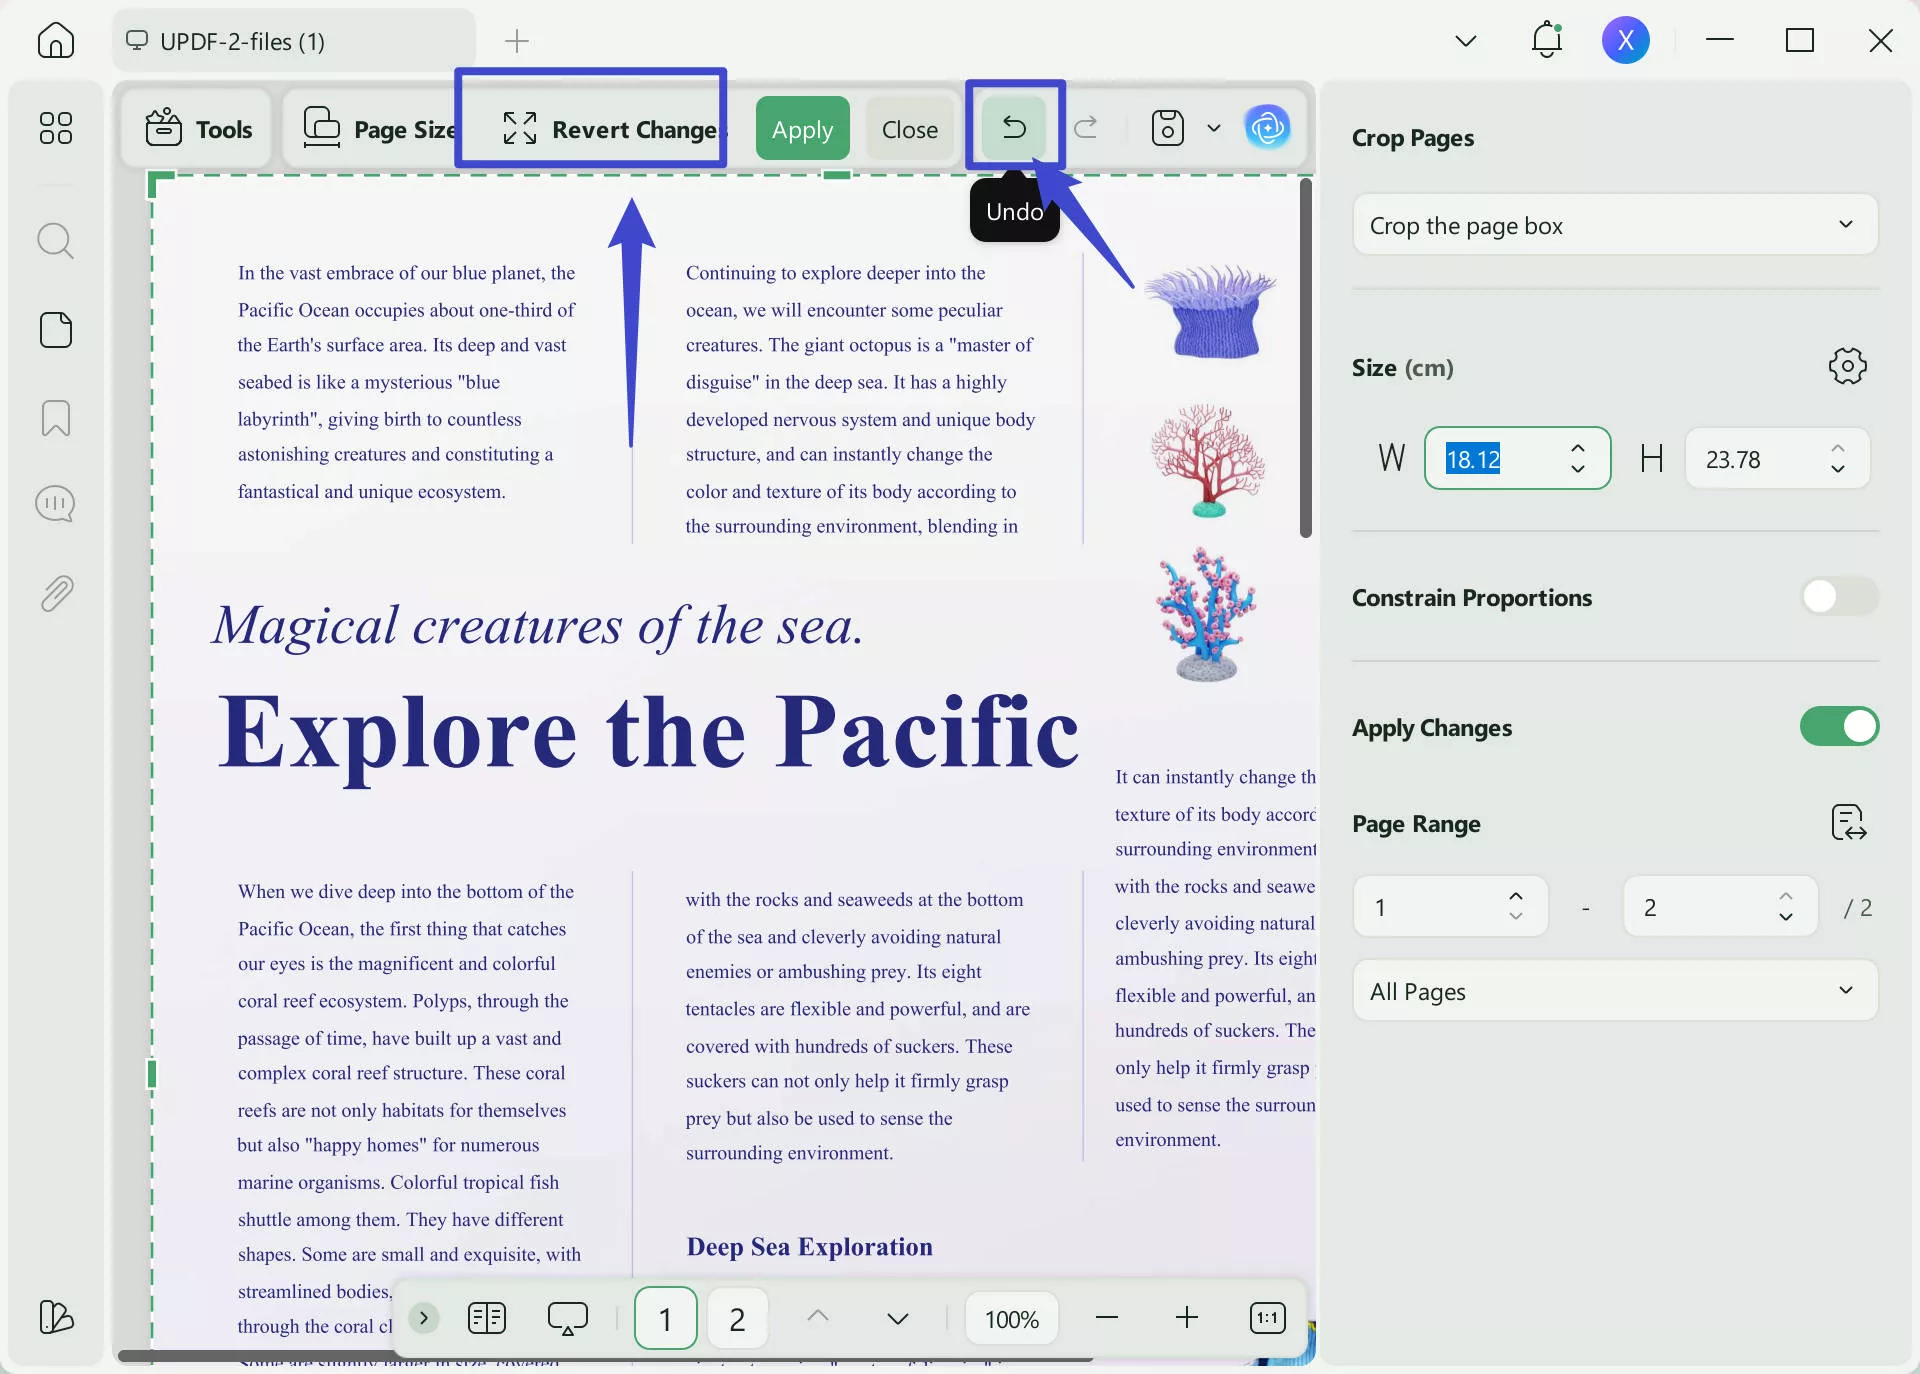
By using UPDF, you can easily remove and restore margins in PDF files according to your needs swiftly!
How to Remove Margin from PDF Permanently without Being Restored
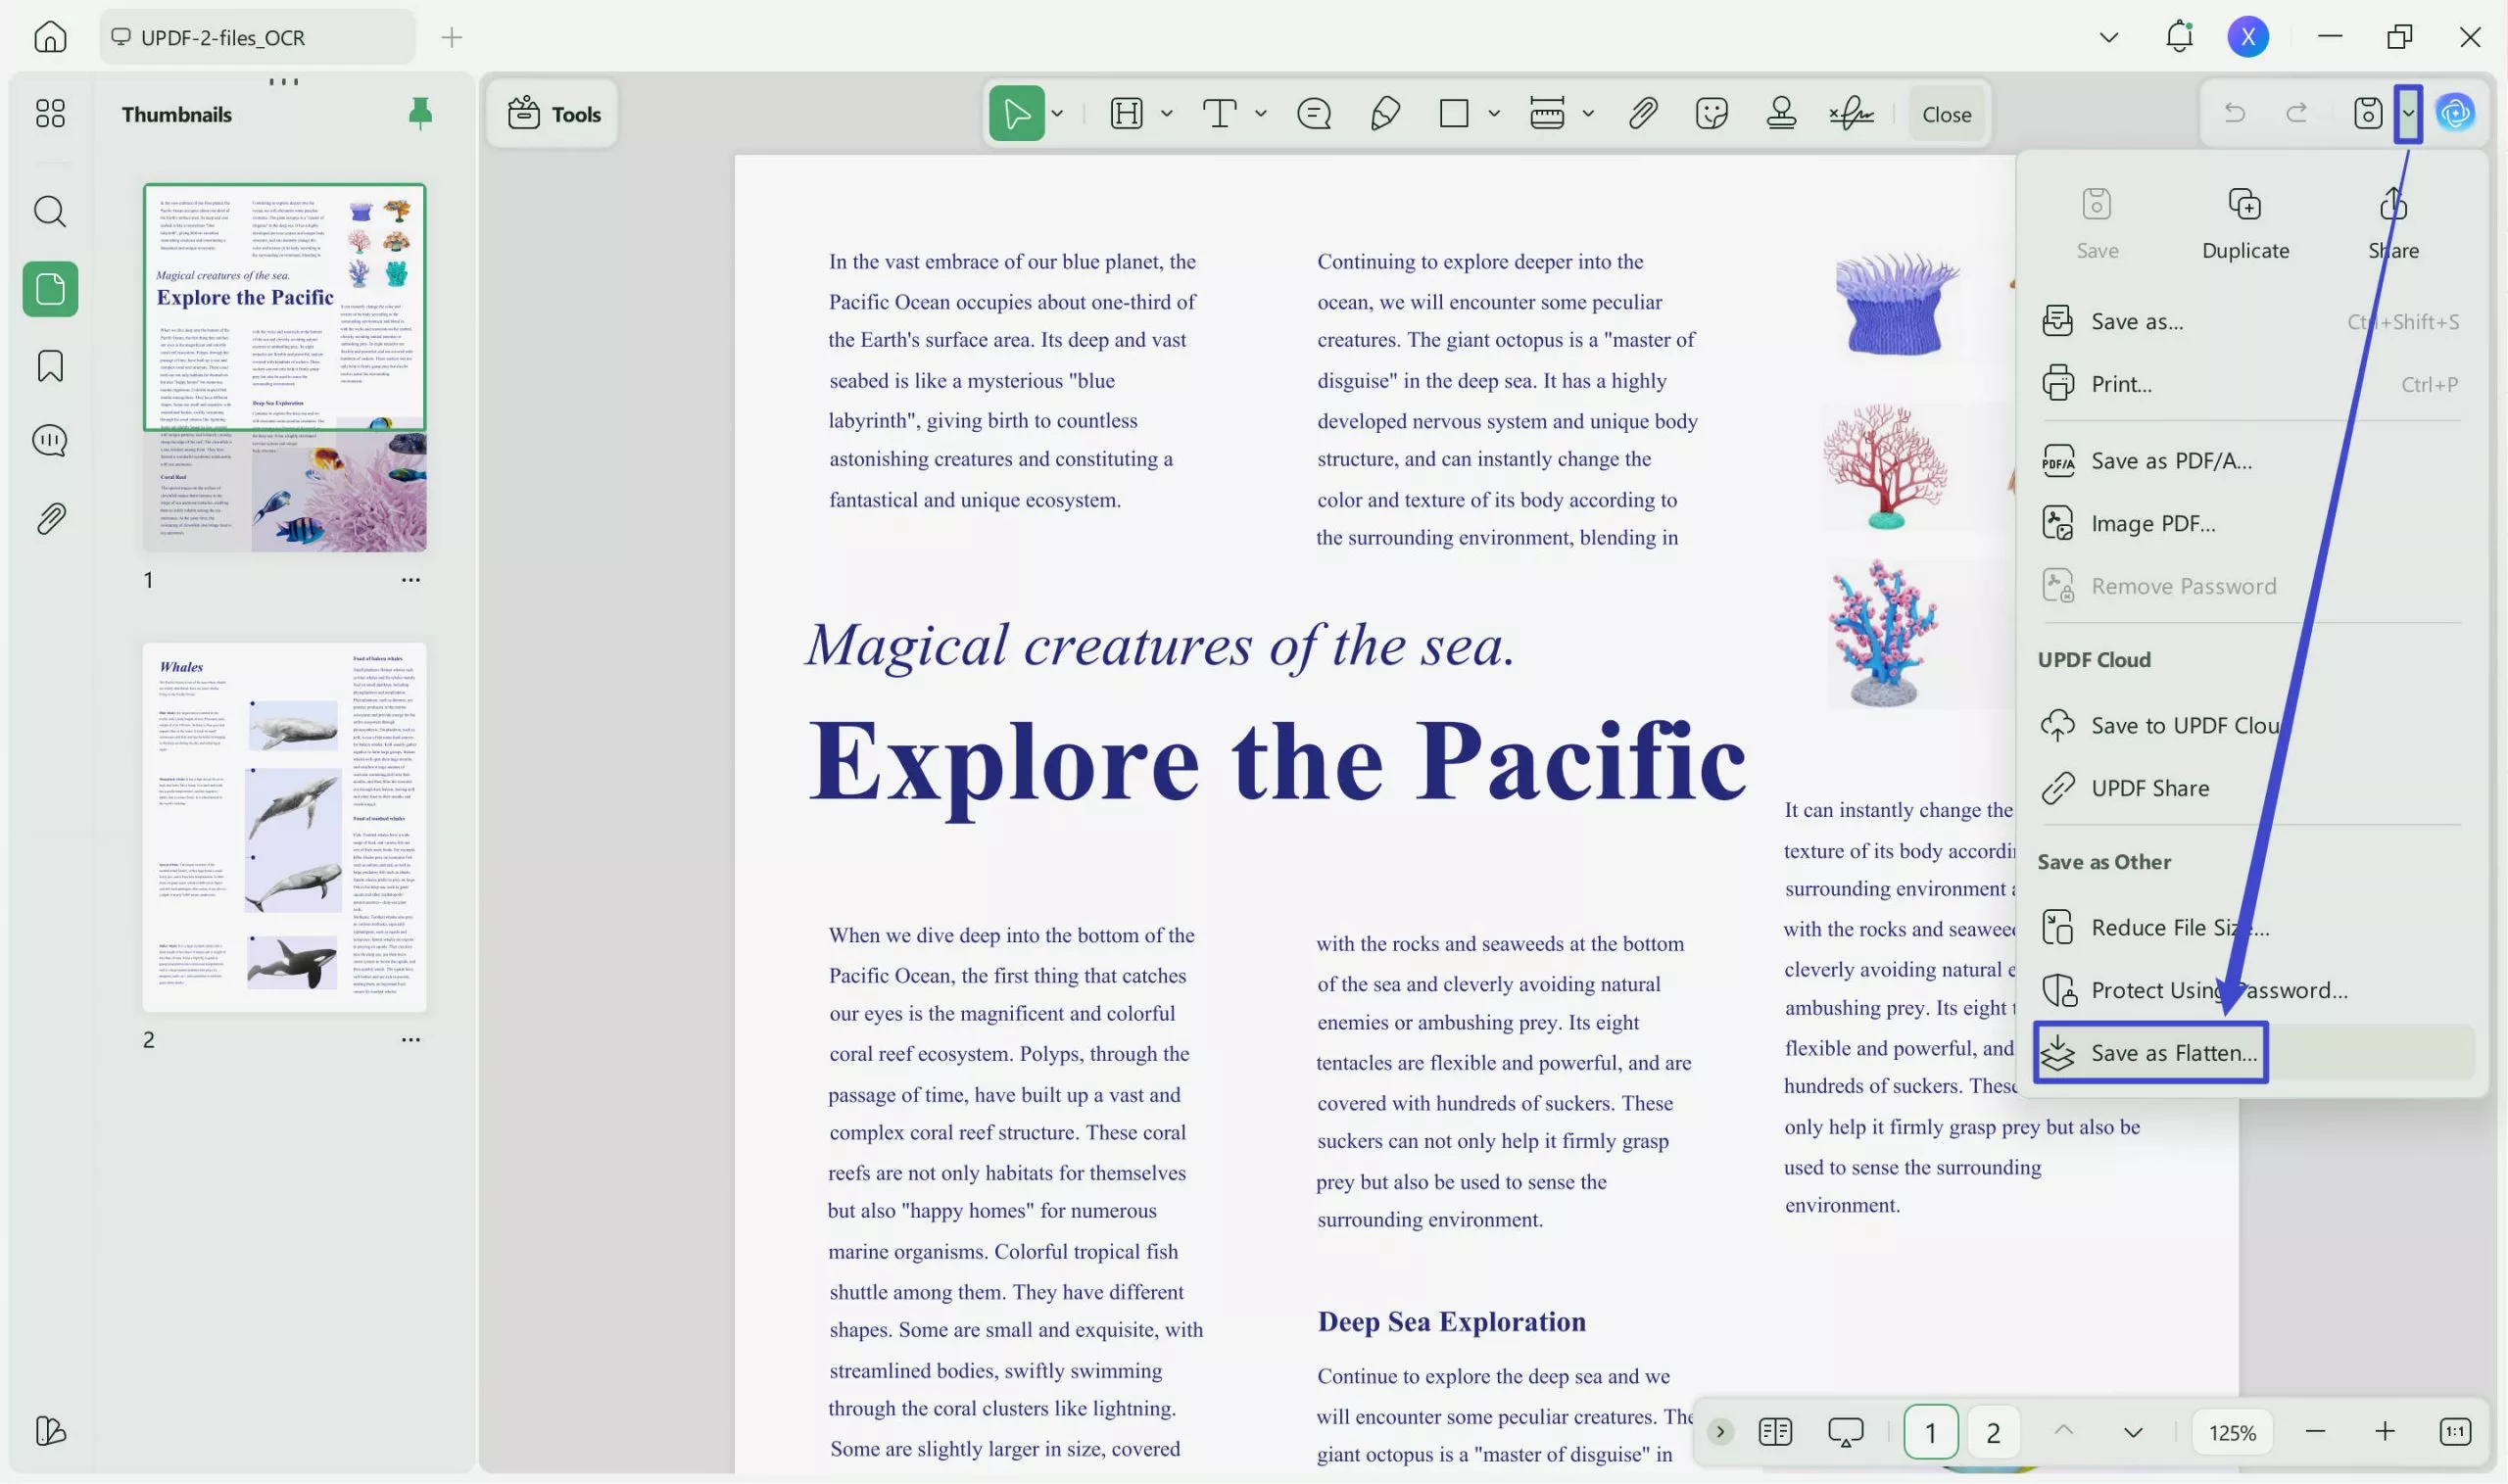
Also, if you want to keep the margin changes permanent and you want to prevent others from reverting it, you can use the UPDF's flatten tools to flatten the cropped page. This tool can make the cropped pages permanent and uneditable. Here's how to do it:
- To flatten the cropped pages, click on the The narrow next to save icon from the right panel and select "Save as Flatten".
- In the new pop-up window, there are several options available and select "Cropped Pages".
- This will merge all the layers of the PDF file into one and prevent further editing and removal of margins.
Why You Need to Remove White Margins from PDF?
Have you ever noticed those blank spaces surrounding the content in PDFs? Those are called white margins. While they're added for layout purposes, there are times when you'd want to bid them farewell!
- Smart Printing: Tired of wasting paper and ink? By ditching white margins, you can fit more onto each page, trimming down your print jobs and expenses. Say hello to efficient printing!
- Device Harmony: Imagine reading a PDF on your phone, then on your tablet. White margins can mess up the experience, making it harder to read. Removing them ensures smooth viewing on different devices.
- Play with Edits: Need to scribble notes, slap on a signature, or toss in comments? With margins gone, you get a clean canvas to work with.
These are some of the many reasons that you may want to use to remove margin from PDF.
Why UPDF is the Best PDF Margin Remover?
UPDF is a powerful and versatile PDF editor that can help you crop and flatten PDF pages with a few simple steps. UPDF also allows you to revert the changes if you want to restore the original margins. It also has many advanced features which makes it the best option. Here are some reasons and features why UPDF is the best PDF margin remover:
Best Removing Margin Functionality
UPDF works great on margin remover. It lets you adjust the page area for cropping by using your mouse or setting the margin controls and cropped page size. You can also choose to crop only the current page or apply the changes to all pages.
Cloud Integration
UPDF allows you to access and edit your PDF files from any device or location. You can upload your PDF document to UPDF Cloud storage services. Moreover, grab this chance to share your PDF files with others via a link, which can easily be shared on social media platforms such as Facebook, Twitter, and LinkedIn.
AI Features
UPDF flawlessly integrates AI features to enhance document productivity and optimize writing in PDF format. You can use UPDF AI to summarize, translate, and explain PDFs with natural language processing.
Best Set of Editing Tools
It lets you edit text, images, links, annotations, forms, and more in your PDF files. You can also use UPDF to protect your PDF files with passwords, encryption, and digital signatures. You can use UPDF to fill and sign PDF forms with ease. You can also use UPDF to convert scanned or handwritten PDFs into editable text with optical character recognition (OCR).
Conversion Functionalities
Another exclusive functionality of UPDF is that it allows you to convert PDF files to other formats such as Word, Excel, PowerPoint, HTML, etc., and create PDF files from other formats or from scratch!
UPDF also offers other tools that can help you with various tasks such as merging, splitting, rotating, cropping, flattening, compressing, and extracting PDF files. This surely proves that UPDF is one of the best PDF margin removers out there!
Wrap Up!
PDF margins can be troublesome for many reasons. They can waste paper and ink when printing, reduce the display and readability of the document on different devices and limit the space for editing or modifying the document. However, you can easily remove margins from PDF files using UPDF, the best PDF margin remover.
UPDF is an AI-powerful PDF editor that can also help you edit, annotate, convert, OCR, protect, fill, sign, summarize, translate, and explain PDFs. With this how-to-remove margins in the PDF guide, you'll surely be unstoppable! Try it now and begin to handle your documents easily!
Windows • macOS • iOS • Android 100% secure
 UPDF
UPDF
 UPDF for Windows
 UPDF for Mac
 UPDF for iPhone/iPad
 UPDF for Android
 UPDF AI Online
 UPDF Sign
 Edit PDF
 Annotate PDF
 Create PDF
 PDF Form
 Edit links
 Convert PDF
 OCR
OCR PDF to Word
 PDF to Image
 PDF to Excel
 Organize PDF
 Merge PDF
 Split PDF
 Crop PDF
 Rotate PDF
 Protect PDF
 Sign PDF
 Redact PDF
 Sanitize PDF
 Remove Security
 Read PDF
 UPDF Cloud
 Compress PDF
 Print PDF
 Batch Process
 About UPDF AI
 UPDF AI Solutions
 AI User Guide
 FAQ about UPDF AI
 Summarize PDF
 Translate PDF
 Chat with PDF
 Chat with AI
 Chat with image
 PDF to Mind Map
 Explain PDF
 Scholar Research
 Paper Search
 AI Proofreader
 AI Writer
 AI Homework Helper
 AI Quiz Generator
 AI Math Solver
 PDF to Word
 PDF to Excel
 PDF to PowerPoint
 User Guide
 UPDF Tricks
 FAQs
FAQs UPDF Reviews
 Download Center
 Blog
Blog Newsroom
 Tech Spec
 Updates
 UPDF vs. Adobe Acrobat
 UPDF vs. Foxit
 UPDF vs. PDF Expert




 Lizzy Lozano

 Delia Meyer