Compressing photos into an archive format like ZIP is one of the best ways to share large photos or multiple photos via email or social media apps. But while it may be easy to compress the photos on your computer, it may not be so on your iPhone or iPad without a dedicated app.
Here will share with you how to ZIP photos on iPhone or iPad using two easy-to-use and very fast solutions.
How to ZIP Photos on iPhone and iPad With UPDF (The Powerful Way)
The best app to use to ZIP photos on your iPhone 16 is UPDF for iOS. It is easy to zip or unzip photos on iPhone and iPad. Just download the UPDF on your iPhone via the below button, then, follow the below guide to zip photos on iPhone/iPad.
Windows • macOS • iOS • Android 100% secure
Step 1: Import Photos into UPDF
The first thing you want to do is import the photos into UPDF.
Open UPDF on your iPhone or iPad and then tap on the "+" symbol on the bottom right.
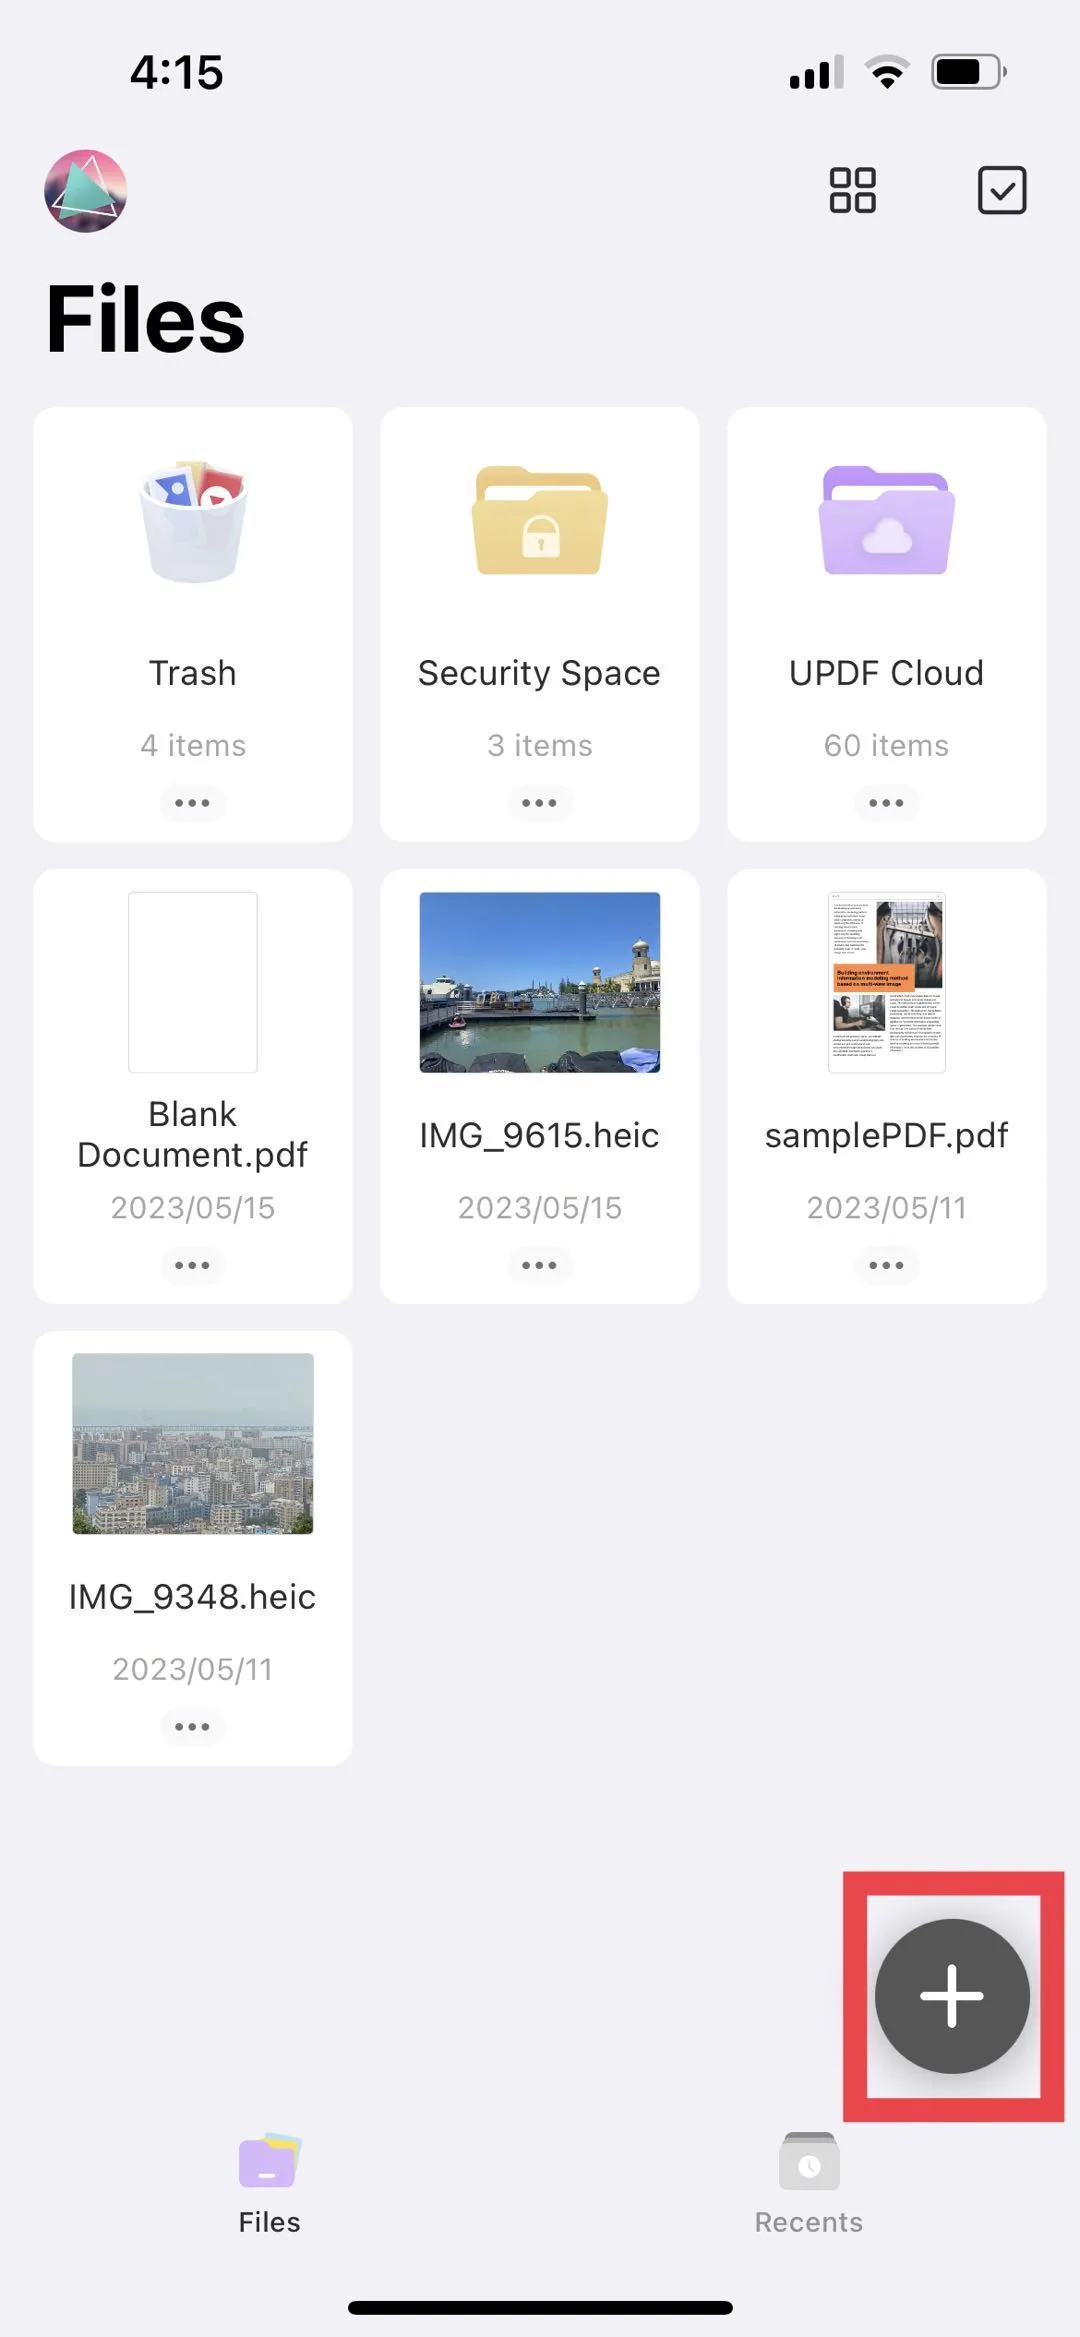
Choose "Photos" or "Files" as the source of the photos you want to import.
Tap on each photo to select it and then tap "Add" to import the selected photos into the app.
Step 2: Select the Photos for ZIP
Once all the photos have been successfully imported into the app, you are now ready to begin zipping them.
Tap on the checkbox icon at the top and then tap on the photos you want to add to the archive.
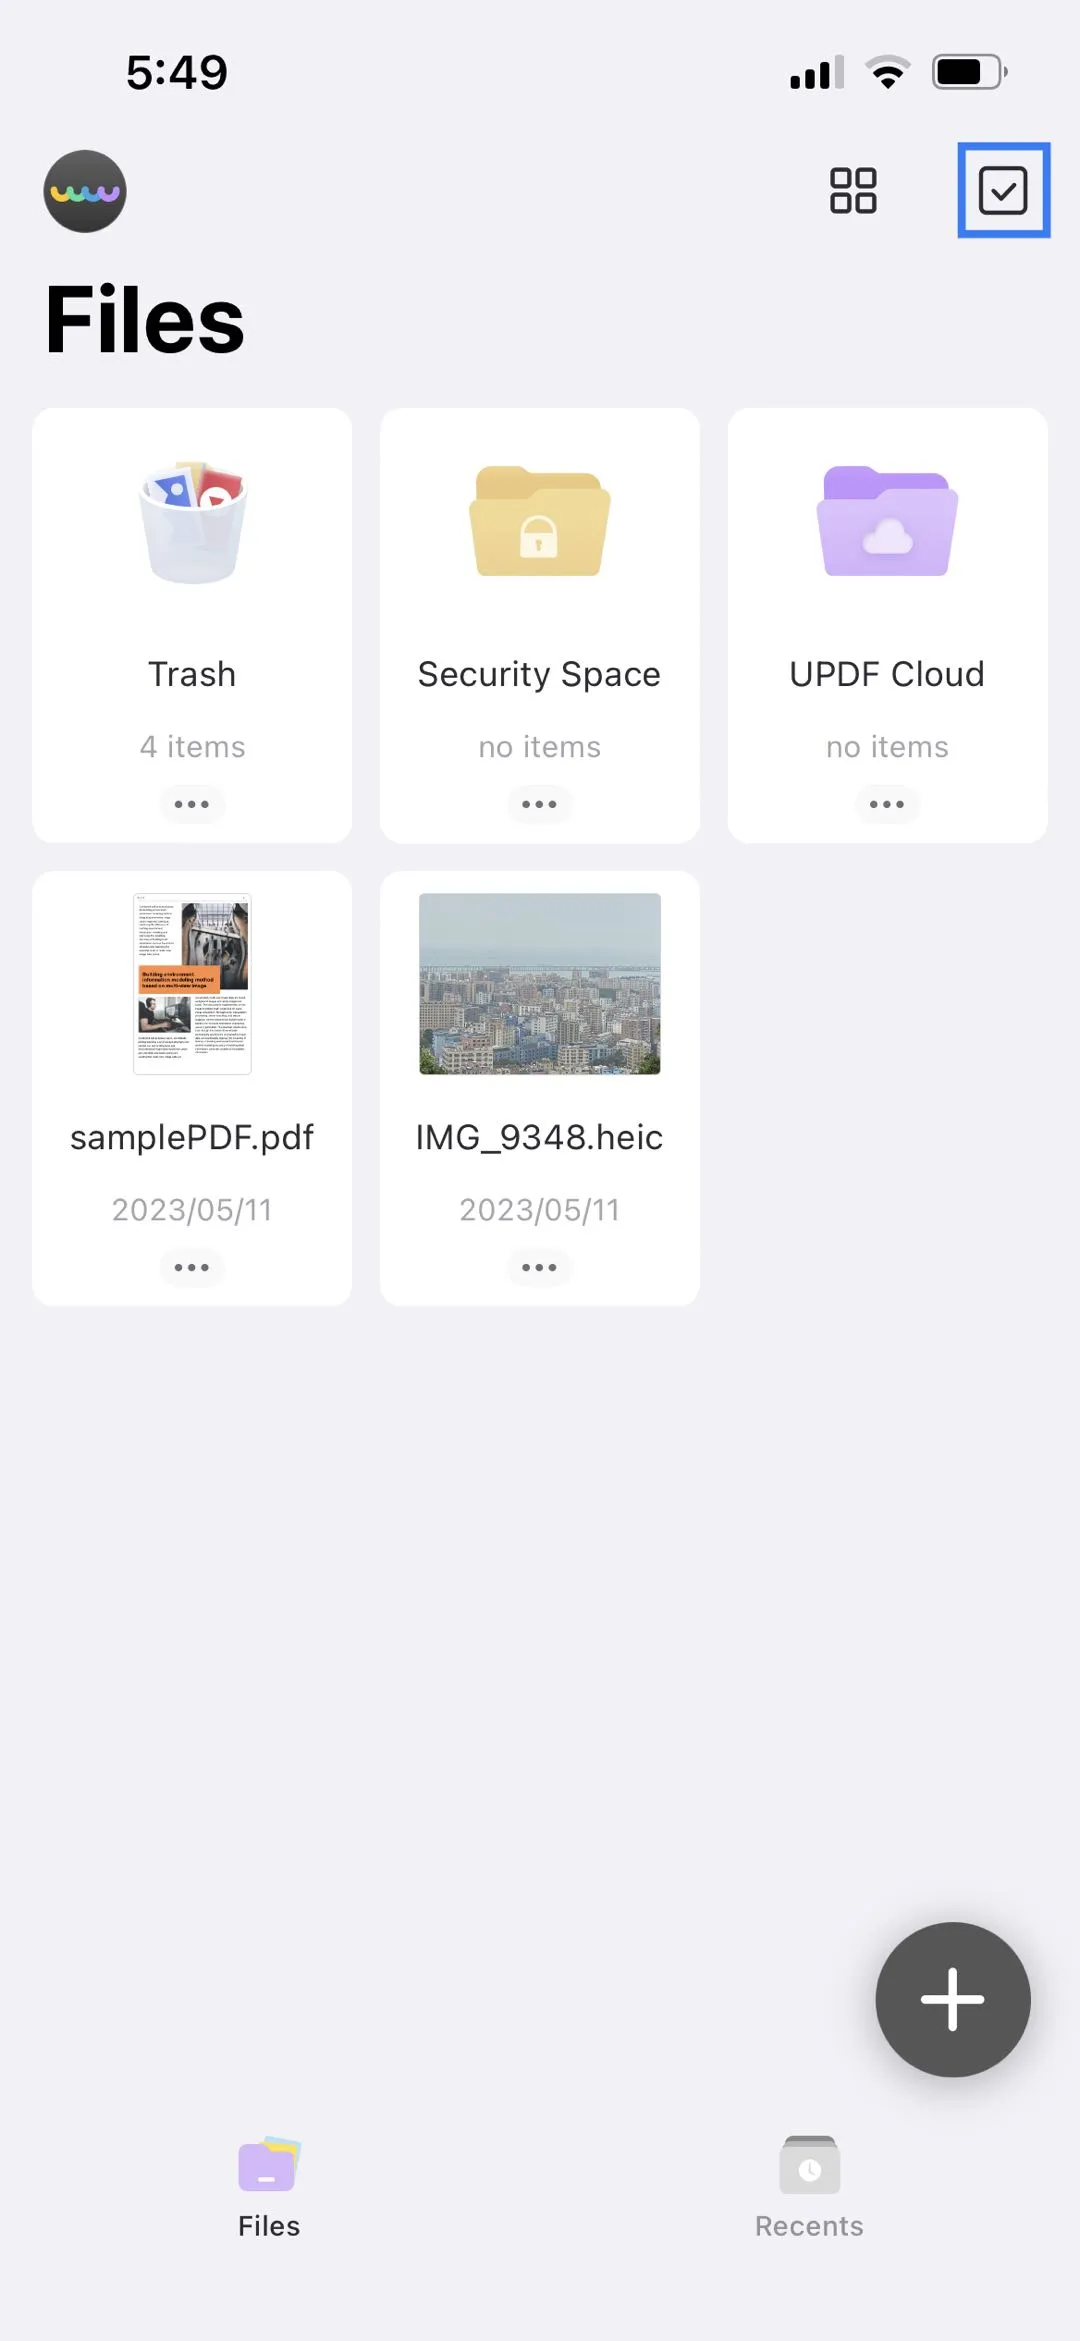
Step 3: ZIP Photos on iPhone
Now just tap on "More" from the options in the bottom menu.
Then, select "Compress" to ZIP the photos that you have selected and save them as an archive file. This archive file will be much easier to share.
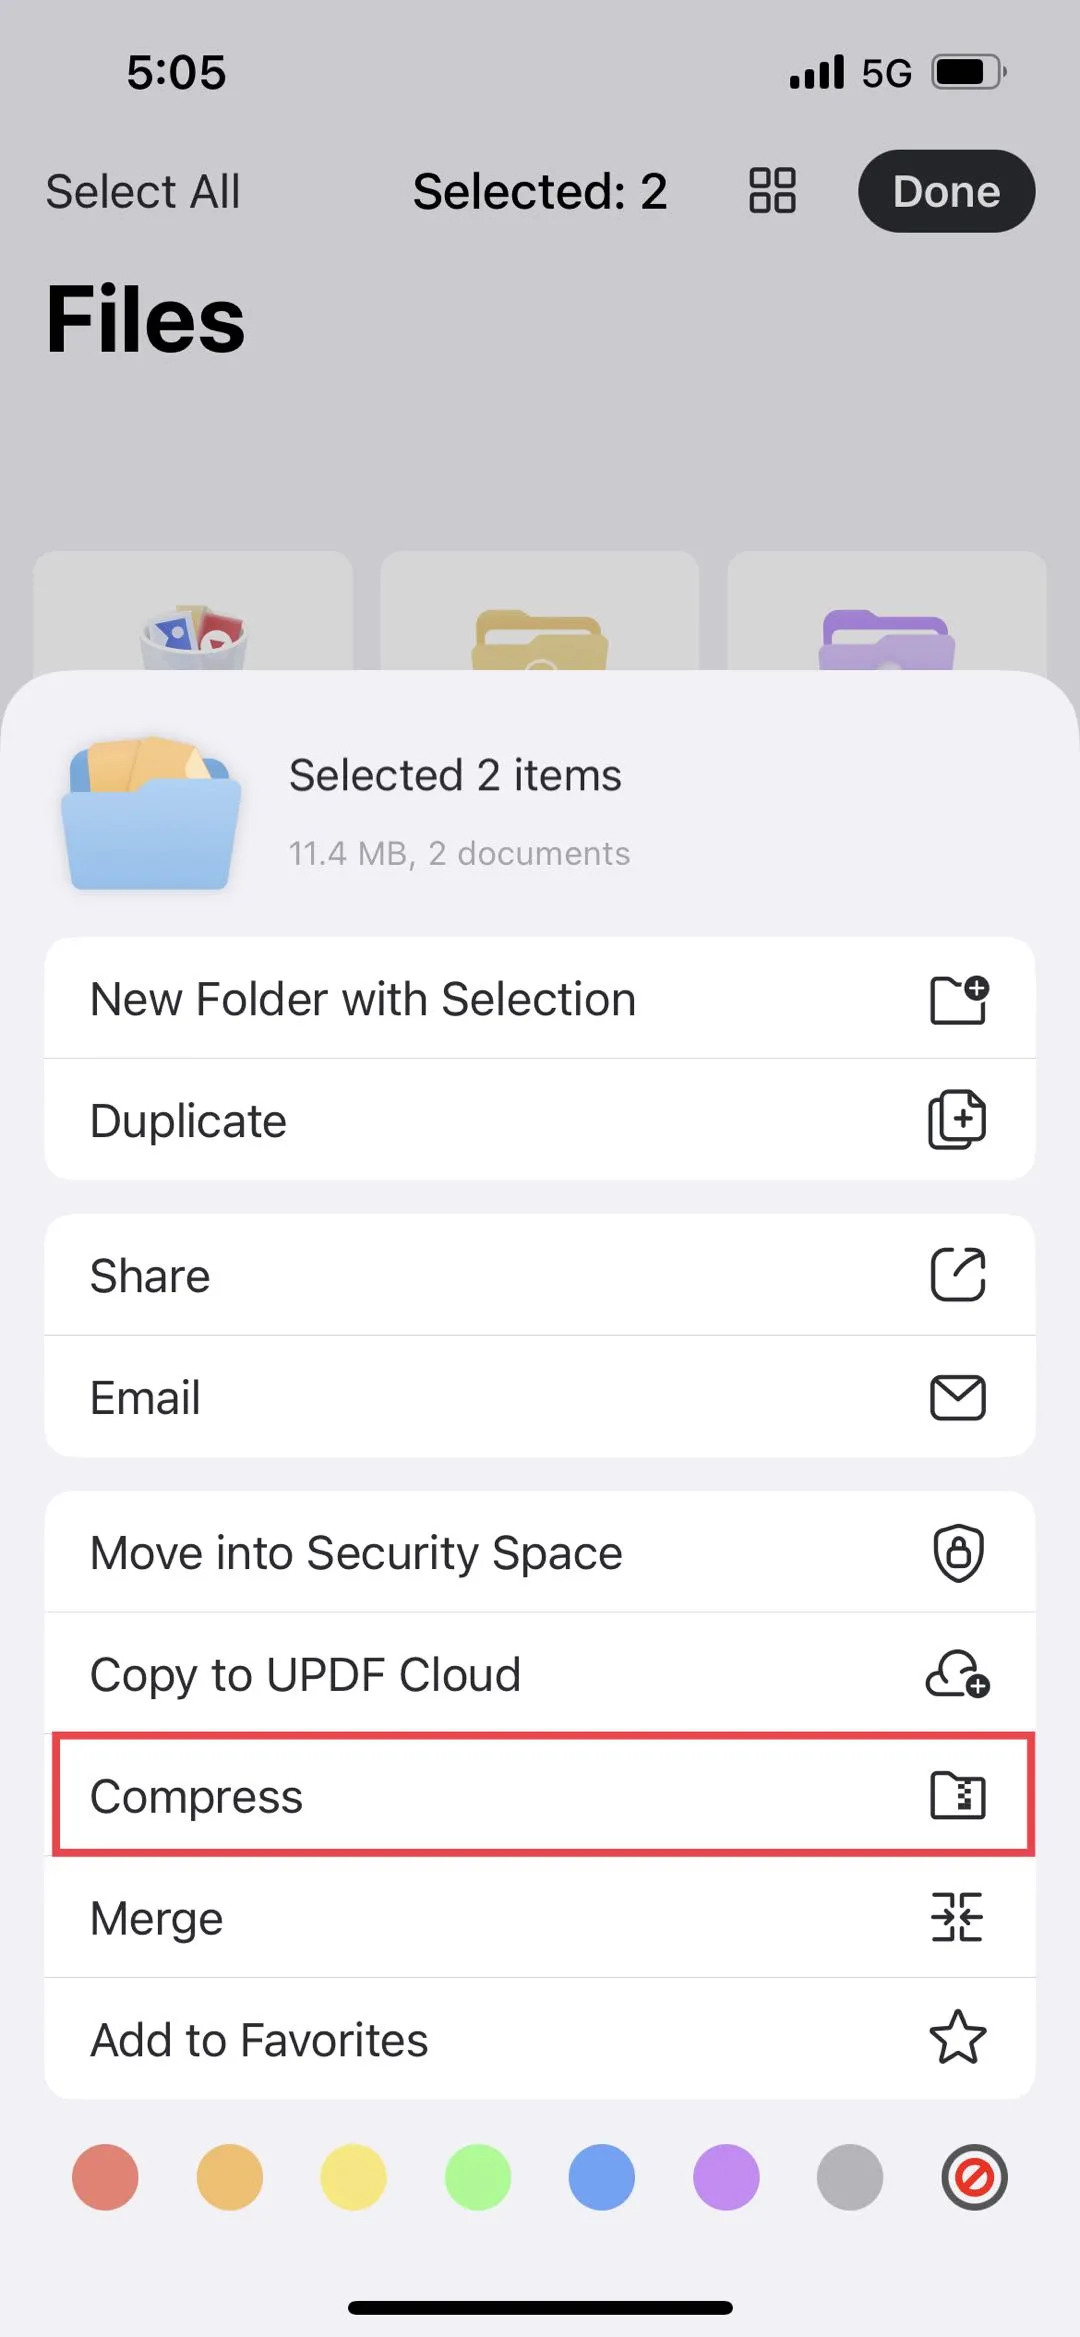
The above are the steps on how to create a ZIP file of photos on an iPhone and iPad. Easy, right? If you want to zip photos on an iPhone or iPad, you should use UPDF for the iOS app. You will be surprised.
UPDF is more than just a way for you to organize the files on your device. The following are just some of the things that it can do:
- UPDF AI features can help you summarize, translate, explain, chat, and more.
- It makes the sharing of images very easy. You can zip your photos on iPhone and iPad and then easily share them via email or social media.
- It is also a complete document manager, allowing you to keep all the files on your iPhone organized. You can easily access and manage all documents including PDF, Word, Excel, Images, and more.
- You can import data into UPDF from your computer, Files App, and Photos App.
- It can edit the text and images in PDF. It can let you copy, delete, rotate, crop, extract, and replace the images. Changing the font, size, and style of text is also easy.
- Annotating PDFs can also be easily done in UPDF. Adding text, shapes, and notes to PDF, and using different pens to draw PDF is a great experience in UPDF.
- UPDF is also one of the best ways to protect the files on your device. You can use Face ID and passcode to protect sensitive documents.
- UPDF can create PDFs by scanning a photo or any other type of document including photos, notes, whiteboards, receipts, and more.
Want to learn more? You can read this UPDF review article, watch the below video guide, or download the free trial version via the below button to test it on your own.
Windows • macOS • iOS • Android 100% secure
How to Create a ZIP File of Photos on an iPhone/iPad With Files?
If you are those who do not want to download one another app to create ZIP files of photos on an iPhone or iPad with Files, then, you can use Files. It is a little bit complex. So just follow the below guide to create a ZIP file for your photos:
Step 1. Open the Photos app on your iPhone or iPad. Tap on the "Select" icon on the top. Select the photos you need.
Step 2. Select the "Upload" icon at the left bottom corner, and choose "Save to Files"
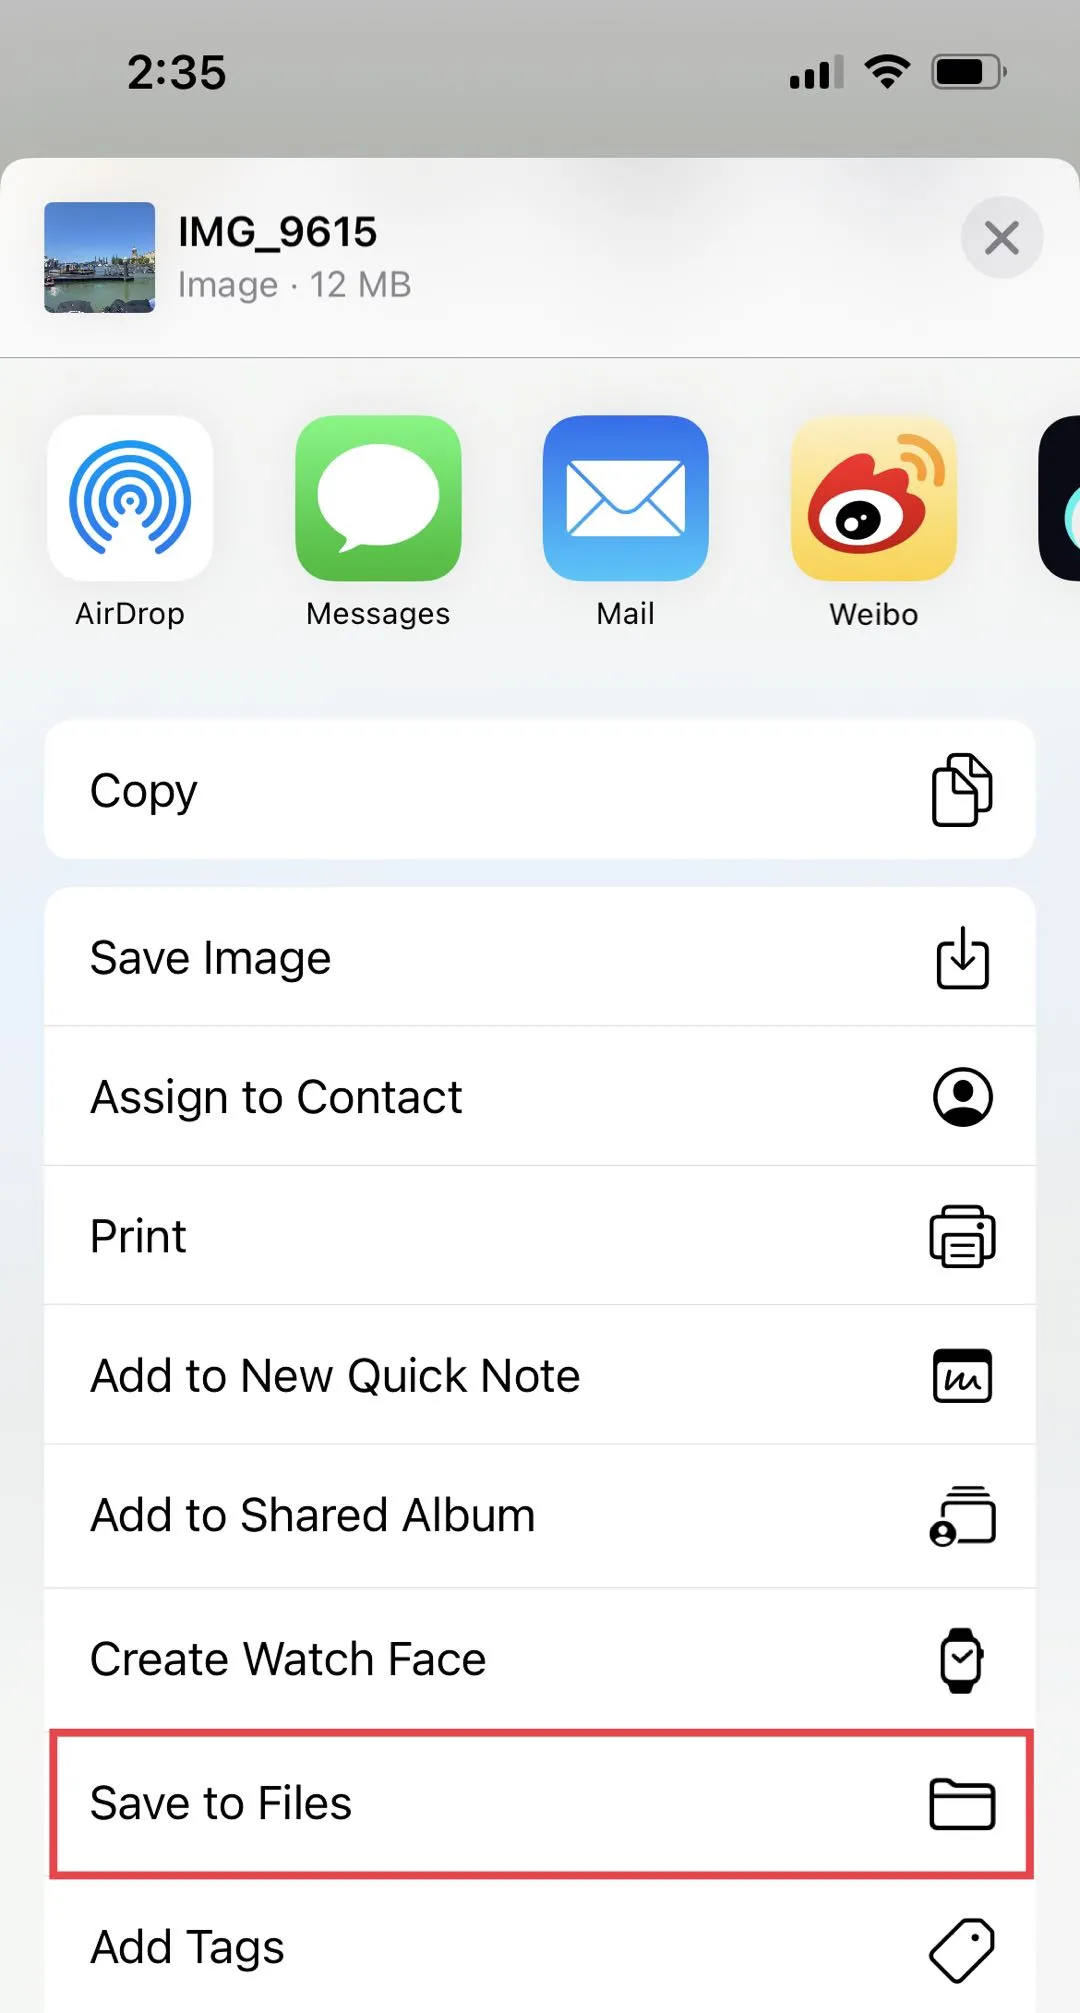
Step 3. Now, you can save the photos to the files you want. Go to the "Files" app and find the folder that has the photos you need.
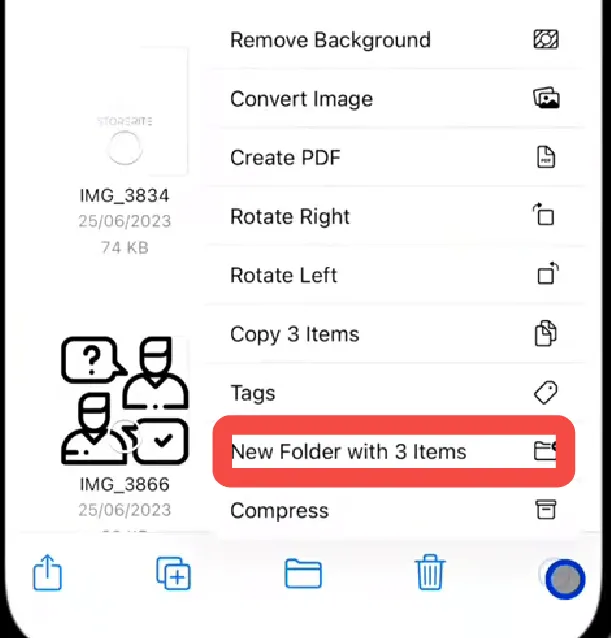
Step 4. Tap on the three dots, choose "Select", tap to select all photos, go to the bottom menu, tap on three dots, and select "New Folders with...items". You can rename the folder name here.
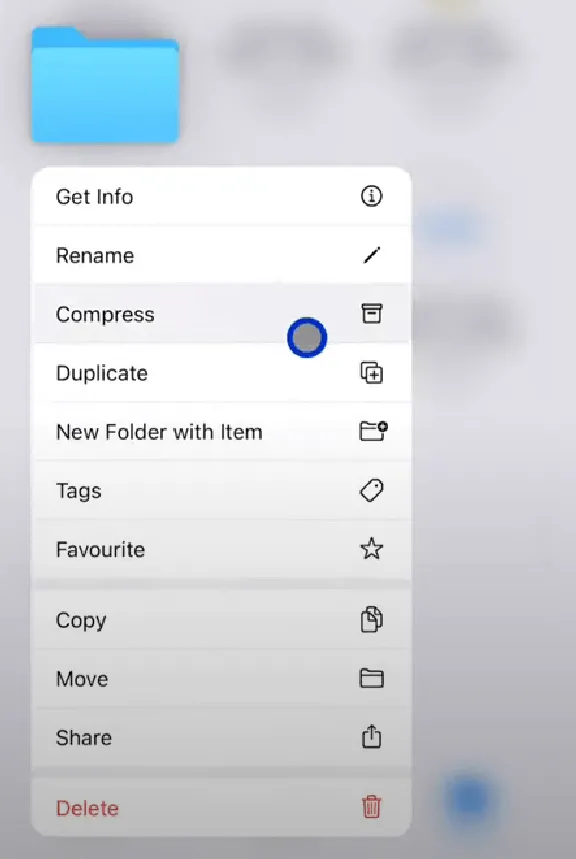
Step 5. Long press the folder, then, select the "Compress" icon to create a ZIP file for your photos.
Also Read: How to Zip a Video on iPhone and iPad
Final Thoughts
Now, you know how to zip photos on iPhone or iPad. You can select one method from these two ones. However, we recommend you to use UPDF for iOS as it is much easier to use and much more powerful to use as it has AI features to help you improve your working efficiency and its PDF editing features to help you handle your work document. Just click the below button to test its all features now.
Windows • macOS • iOS • Android 100% secure
 UPDF
UPDF
 UPDF for Windows
 UPDF for Mac
 UPDF for iPhone/iPad
 UPDF for Android
 UPDF AI Online
 UPDF Sign
 Read PDF
 Annotate PDF
 Edit PDF
 Convert PDF
 Create PDF
 Compress PDF
 Organize PDF
 Merge PDF
 Split PDF
 Crop PDF
 Delete PDF pages
 Rotate PDF
 Sign PDF
 PDF Form
 Compare PDFs
 Protect PDF
 Print PDF
 Batch Process
 OCR
OCR UPDF Cloud
 About UPDF AI
 UPDF AI Solutions
 FAQ about UPDF AI
 Summarize PDF
 Translate PDF
 Explain PDF
 Chat with PDF
 Chat with image
 PDF to Mind Map
 Chat with AI
 User Guide
 Tech Spec
 Updates
 FAQs
FAQs UPDF Tricks
 Blog
Blog Newsroom
 UPDF Reviews
 Download Center
 Contact Us






 Delia Meyer
 Enid Brown
 Lizzy Lozano