 UPDF for Windows
 UPDF for Mac
 UPDF for iPhone/iPad
 UPDF for Android
 UPDF AI Online
 UPDF Sign
 Edit PDF
 Annotate PDF
 Create PDF
 PDF Form
 Edit links
 Convert PDF
 OCR
OCR PDF to Word
 PDF to Image
 PDF to Excel
 Organize PDF
 Merge PDF
 Split PDF
 Crop PDF
 Rotate PDF
 Protect PDF
 Sign PDF
 Redact PDF
 Sanitize PDF
 Remove Security
 Read PDF
 UPDF Cloud
 Compress PDF
 Print PDF
 Batch Process
 About UPDF AI
 UPDF AI Solutions
 AI User Guide
 FAQ about UPDF AI
 Summarize PDF
 Translate PDF
 Chat with PDF
 Chat with AI
 Chat with image
 PDF to Mind Map
 Explain PDF
 PDF AI Tools
 Image AI Tools
 AI Chat Tools
 AI Writing Tools
 AI Study Tools
 AI Working Tools
 Other AI Tools
 AI Bookmark Generation
 AI Bookmark Summary
 AI Watermark Generation
 AI Background Generation
 AI Sticker Generation
 AI Stamp Generation
 AI Editing Suite
 UPDF Copilot
 AI Page Management
 AI Semantic Search
 PDF to Word
 PDF to Excel
 PDF to PowerPoint
 User Guide
 UPDF Tricks
 FAQs
FAQs UPDF Reviews
 Download Center
 Blog
Blog Newsroom
 Tech Spec
 Updates
 UPDF vs. Adobe Acrobat
 UPDF vs. Foxit
 UPDF vs. PDF Expert
Spending my time on research using a Mac was overwhelming since I needed to switch between various applications. In the quest to find a solution, I discovered the built-in Mac feature of splitting the screen, which assisted me in working on two windows at a time.
To further boost my research, I used the split-screen feature with Safari for research and UPDF for article reviews and taking organized notes (click the button below to download). If you’re in the same situation as I was and want to know how do I split screen on Mac, this guide will walk you through each step.
Windows • macOS • iOS • Android 100% secure
Part 1. How to Split Screen on Mac for Multitasking?
Many corporate workers and content creators frequently ask how to Split Screen on Mac to make their multitasking faster. I will show them how I easily split the screen on a Mac, which made working much easier without manually switching between applications. Additionally, I’ll guide you on how to adjust windows and how to switch between applications on a Mac, which will keep you focused and organized.
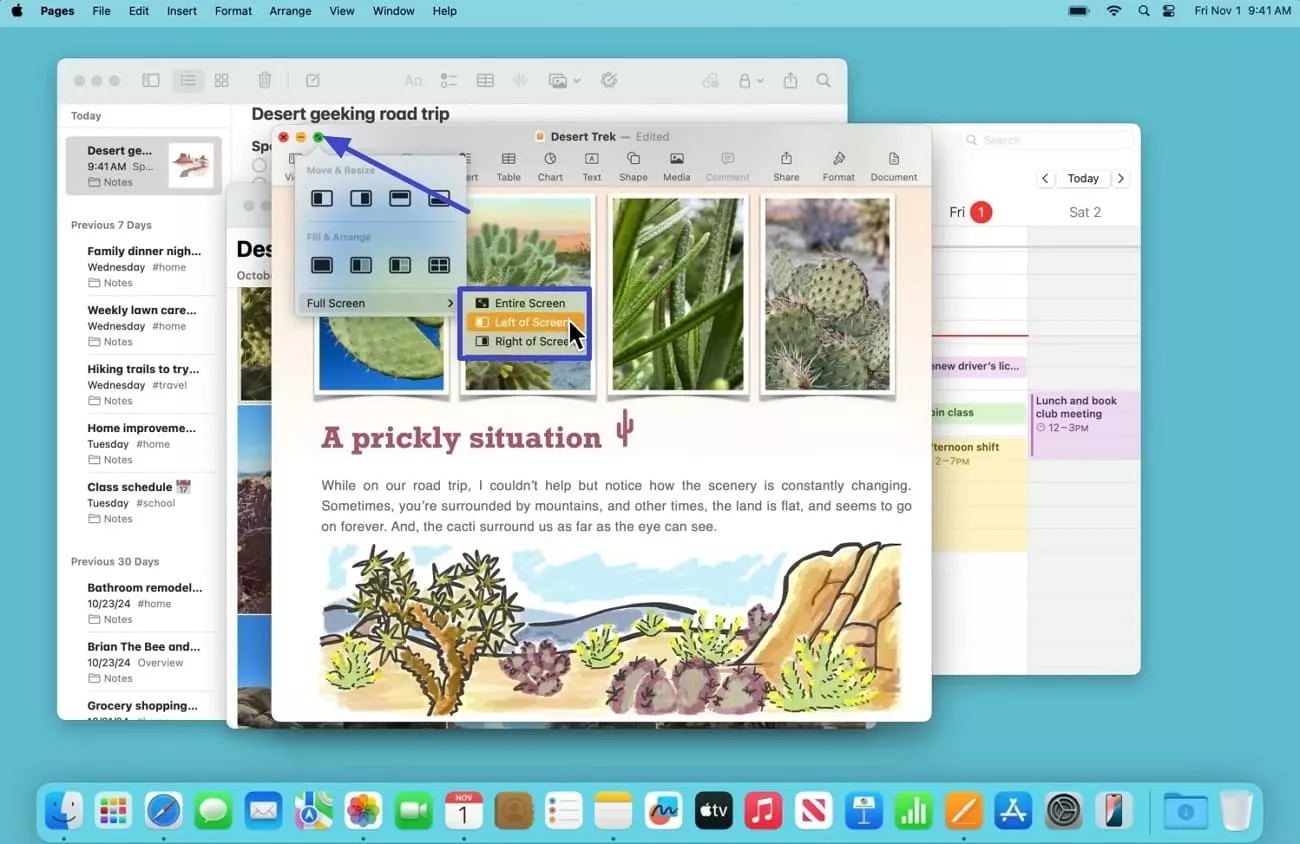
Step 1. Start by holding the pointer over the “Green Button” in the upper left corner of an app window and holding your pointer over “Full Screen.” Next, hit “Left of Screen” to split the screen.
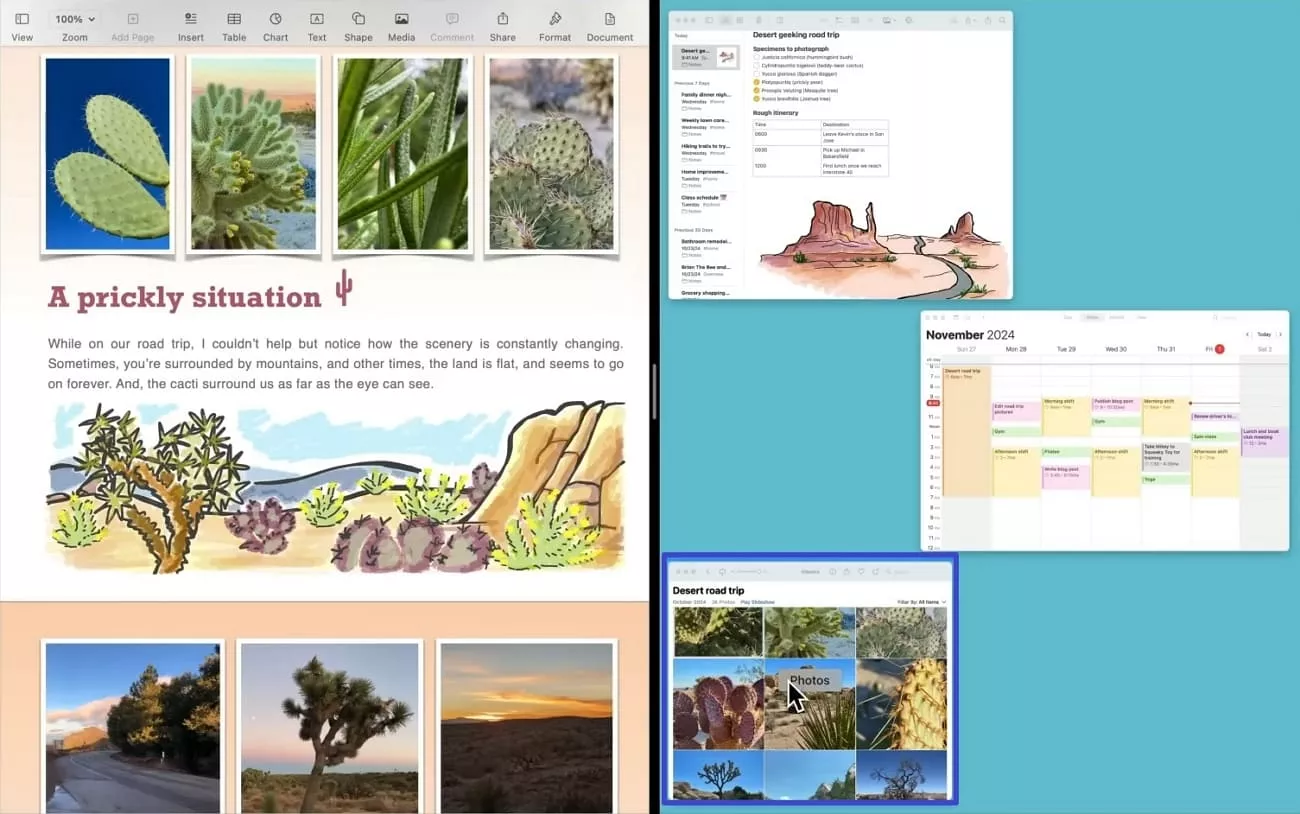
Step 2. On the opposite side of the window, you’ll see the applications that are available for use in split view. Select any "App" to split it and display it side-by-side with your other app window.
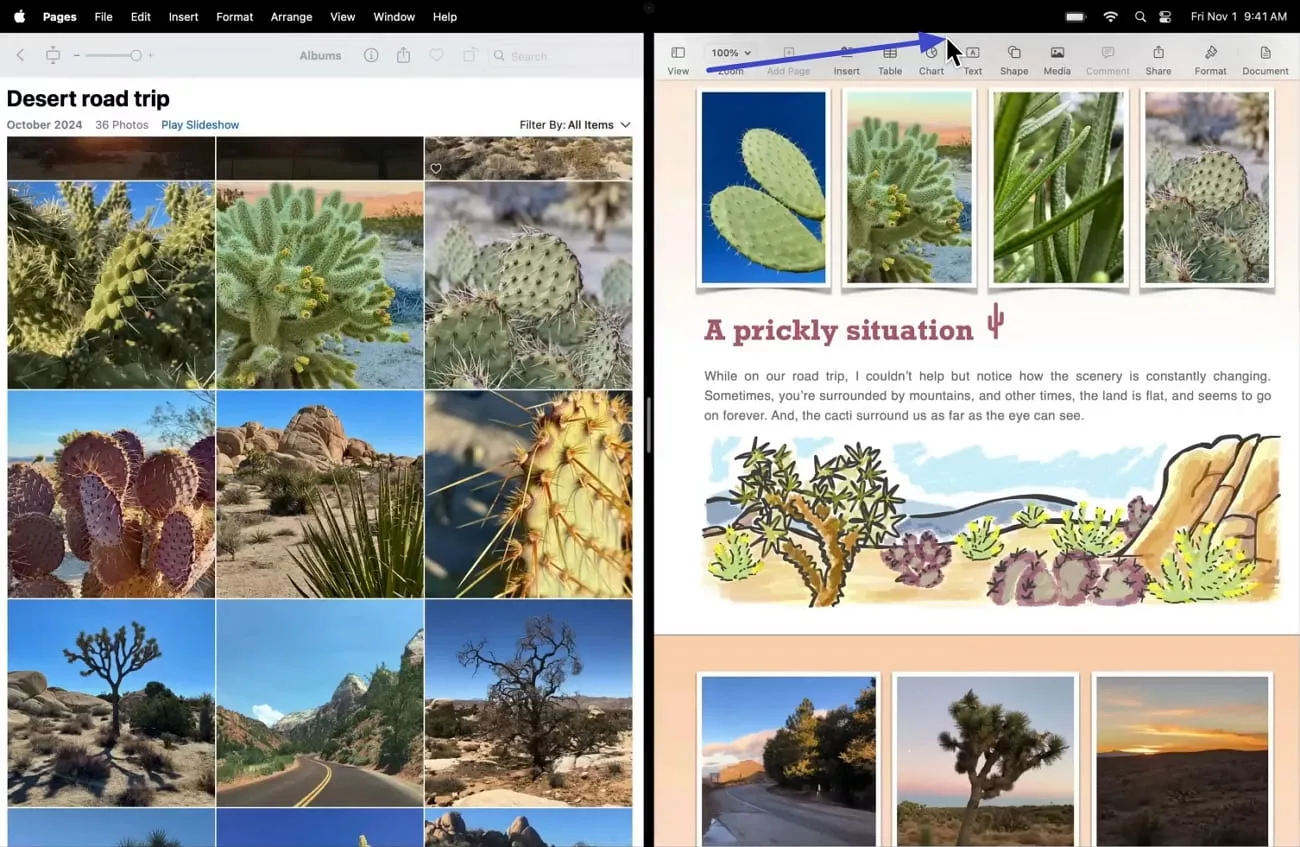
Step 3. To switch the positions of your app windows, move the cursor to a window’s toolbar and drag it across to the opposite side.
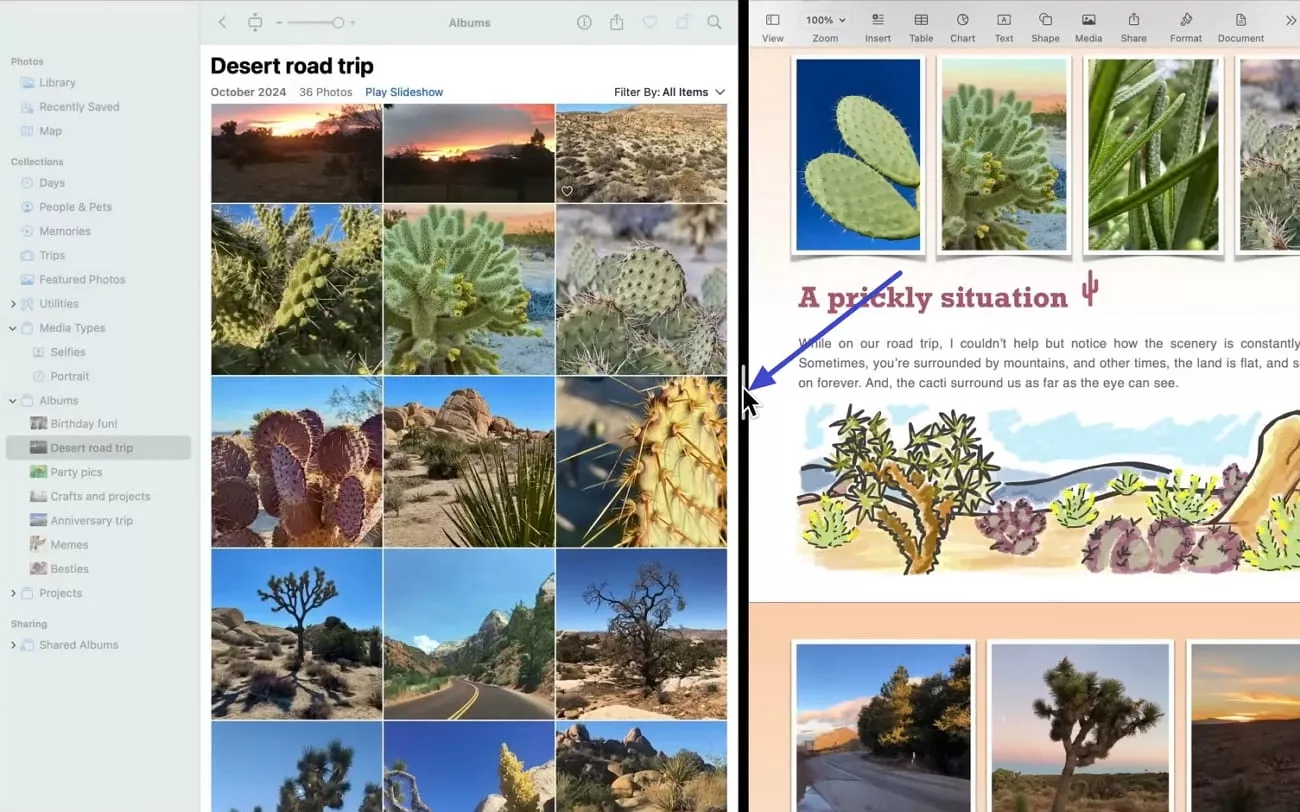
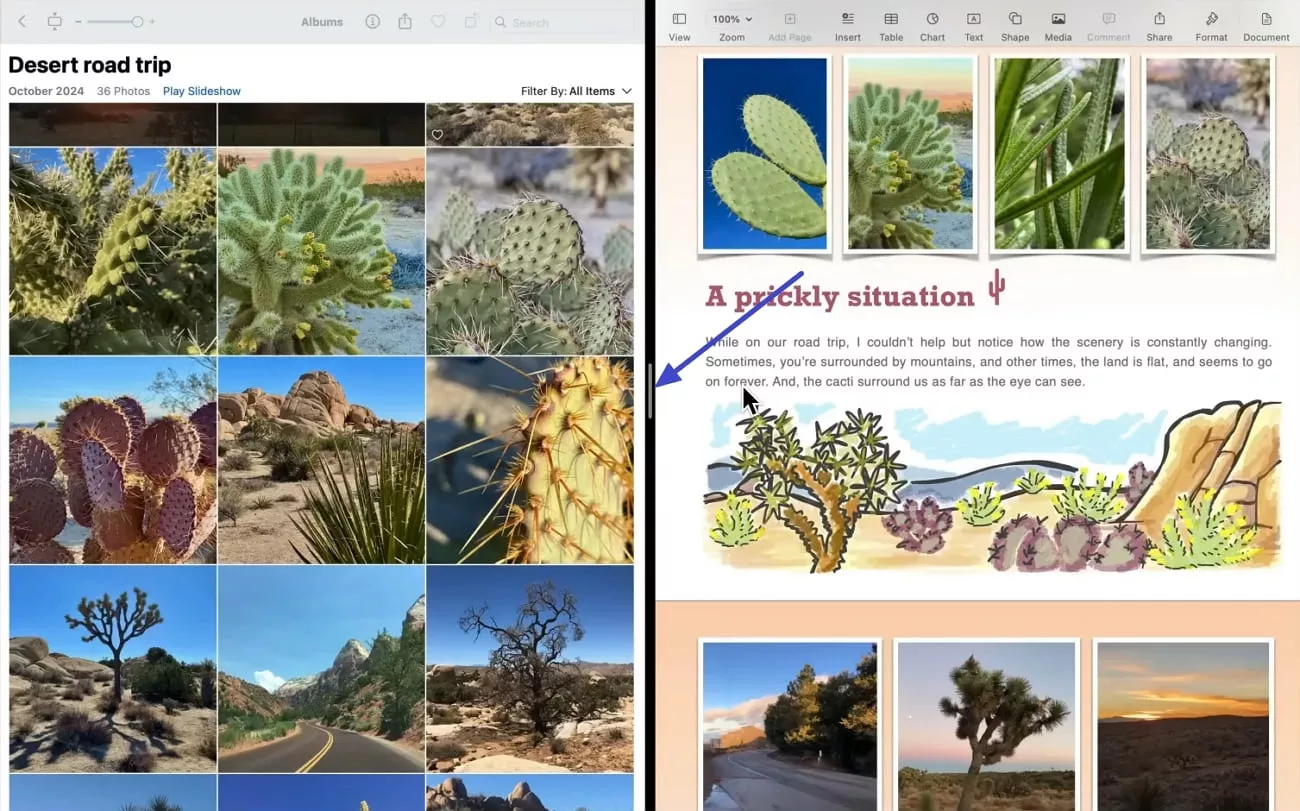
Step 4. Make one window bigger by moving the pointer over the “Separator Bar” in the middle. Then, drag it towards the left or right to make one window bigger.
Step 5. Now, double-click your “Separator Bar” to recenter your split-view windows.
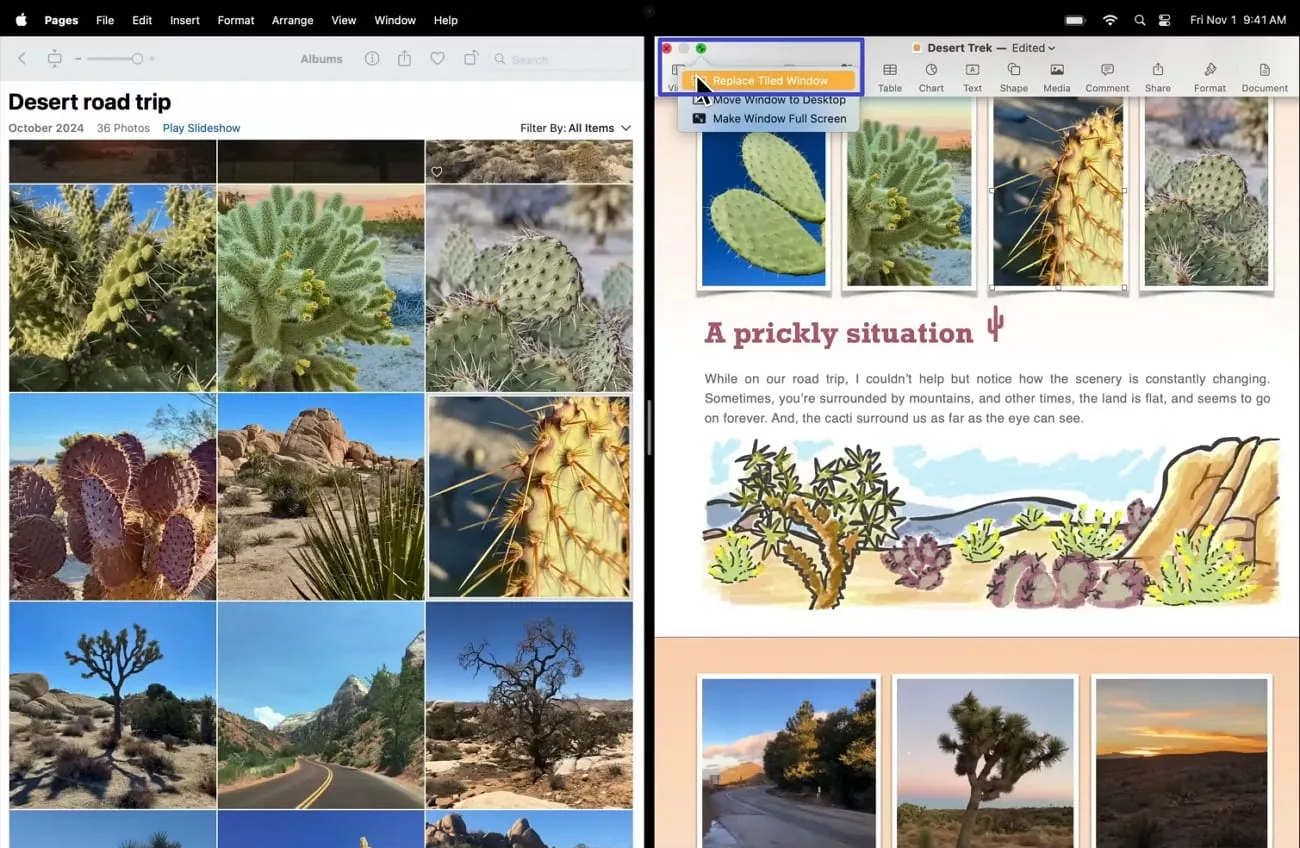
Step 6. To switch from one app to another, press the toolbar in the app window you want to switch out. Hover your pointer over the "Green Button" in the top left corner of the app. Next, select "Replace Tiled Window" and choose another app you'd like to use.
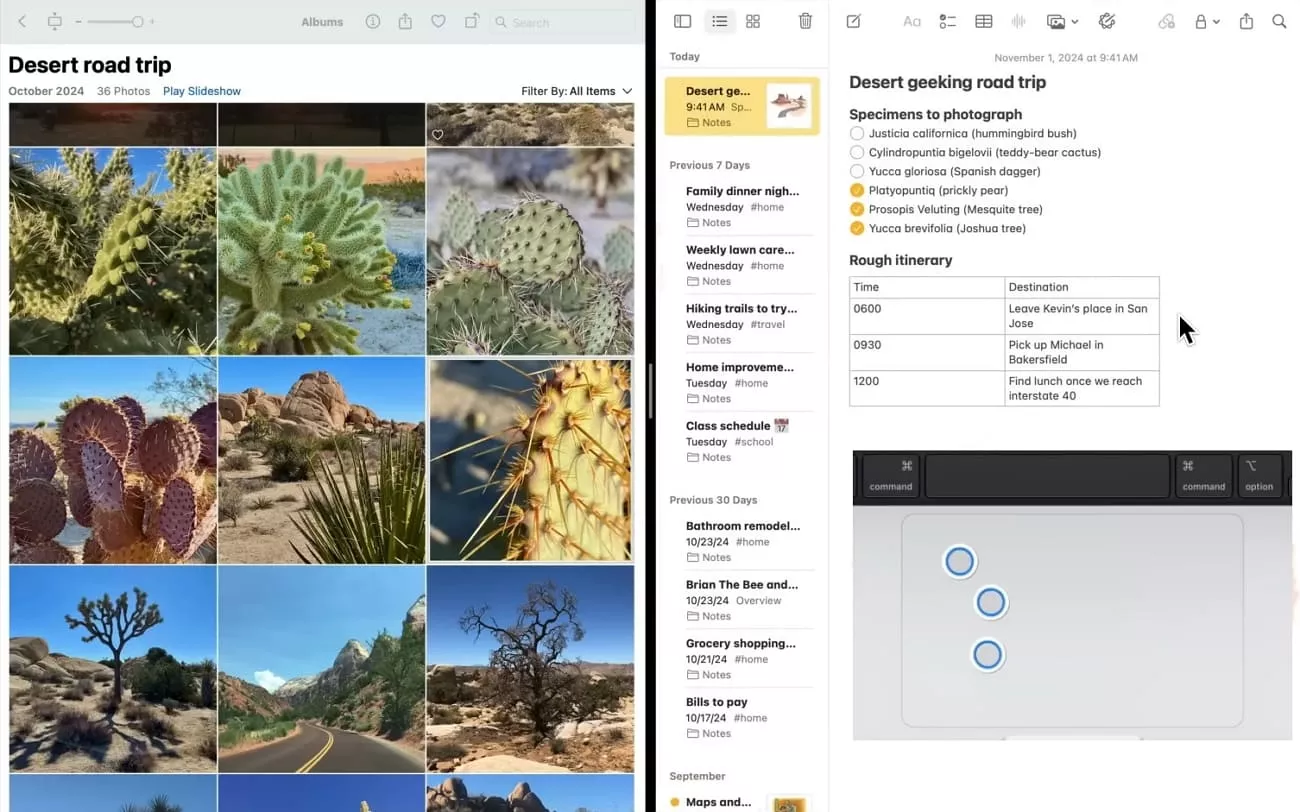
Step 7. Switch to another split view space by moving your pointer to the corresponding window. Then, swipe to the left or right with three or more fingers on the trackpad to shift to the other split window space.
Tip:
Part 2. How to Exit Split Screen Mode?
Now that I’ve guided on how do I split screen on Mac and how to switch between apps and split spaces, let’s take a look at the next steps. After completing any task in which you used two windows simultaneously, you're wondering how to exit split screen mode to restore single screen mode. Below, I have mentioned the step-by-step guide for you to exit split-screen mode.
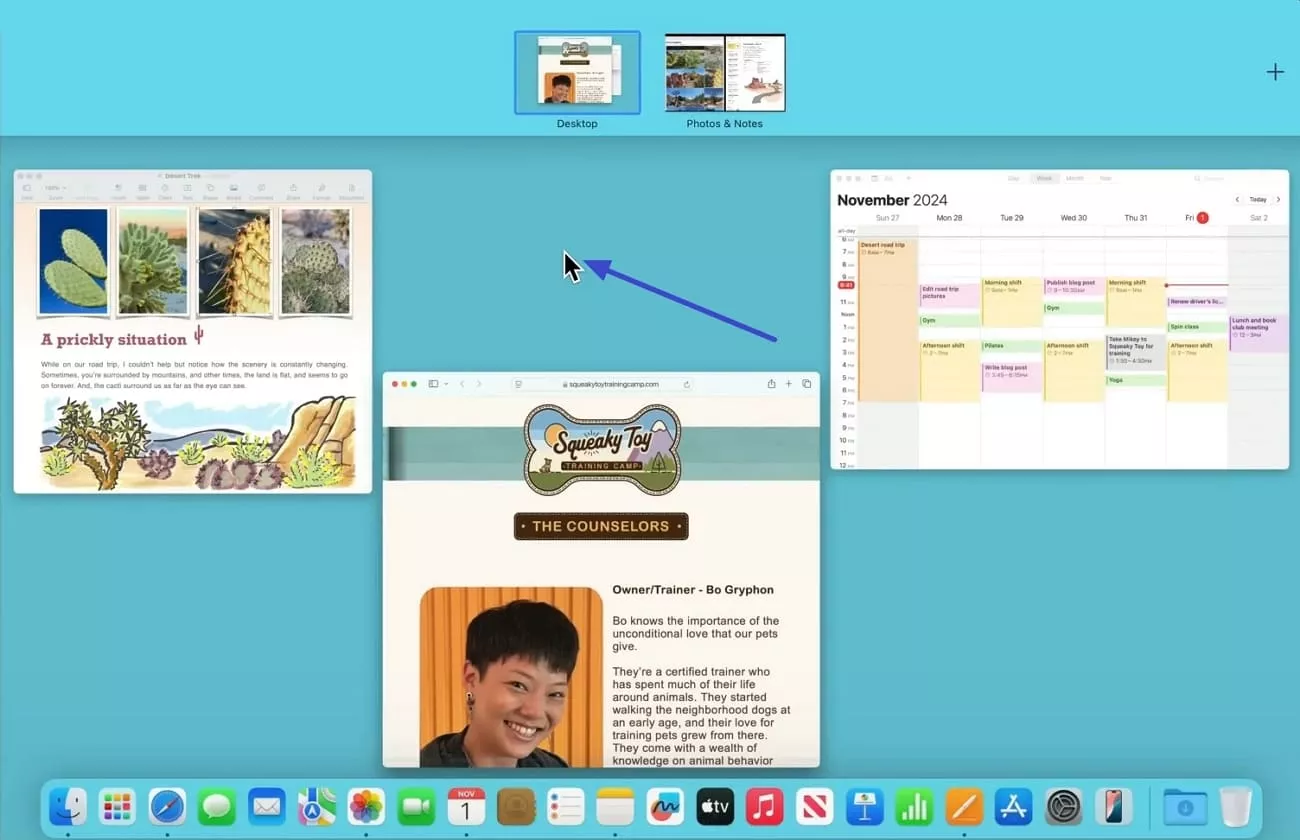
Step 1. To exit split-screen mode, swipe up 3 or 4 fingers on the trackpad to enter the “Mission Control.”

Step 2. Next, hover the pointer over the space and press the “Expand” button to expand the split screens.
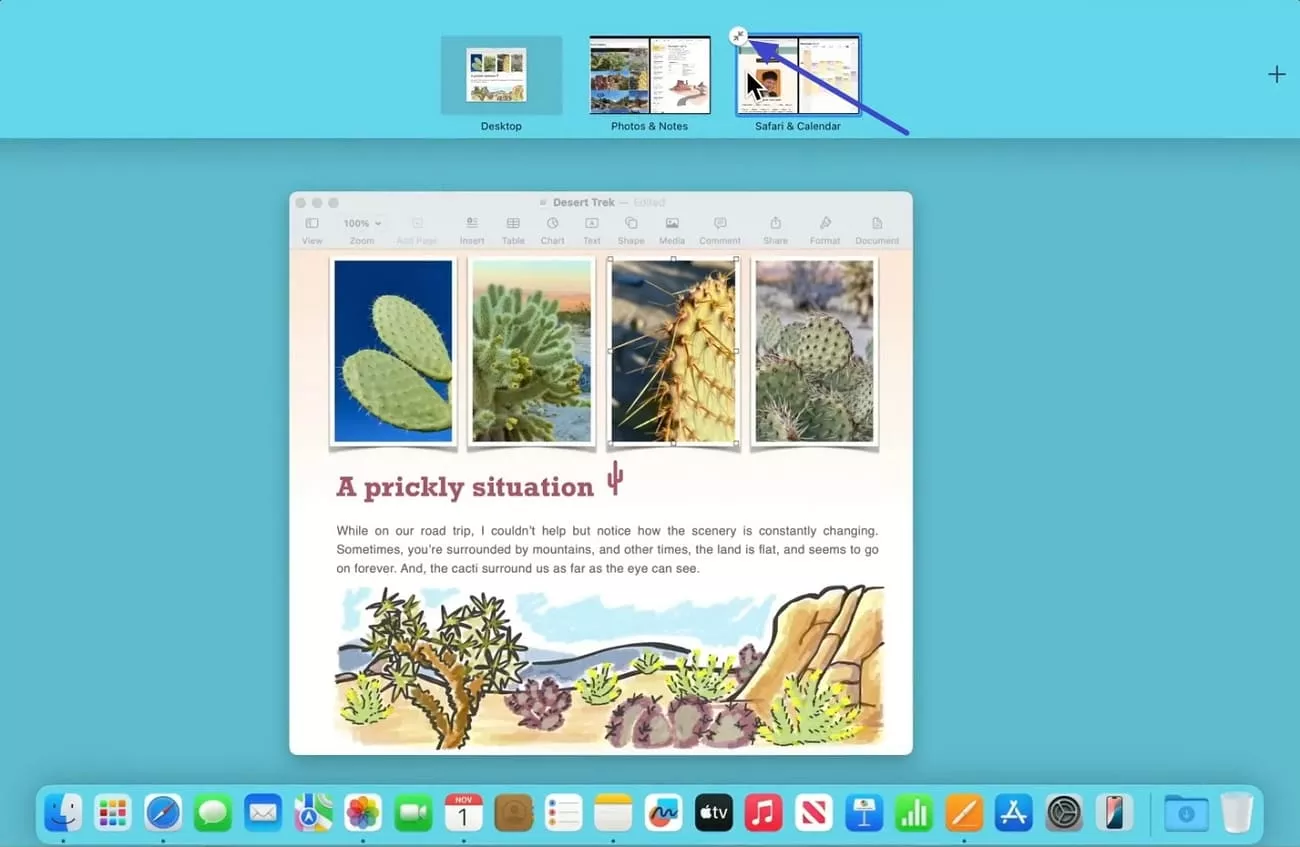
Step 3. Lastly, click your “Desktop” space to exit split screen mode and continue using your standard Mac screen.
Part 3. Bonus Tip: Boost Multitasking with UPDF on Mac
Now that you completely know how to split screen on Mac, let’s discuss how you can make your documentation easy by splitting the screen. I activated the split-screen mode on my Mac that allowed me to do research and edit my PDFs simultaneously. To edit PDFs, I used UPDF for Mac, which is powered by GPT-5 and DeepSeek (R1), and it helped me complete my pending tasks quickly.
Windows • macOS • iOS • Android 100% secure
Key Features
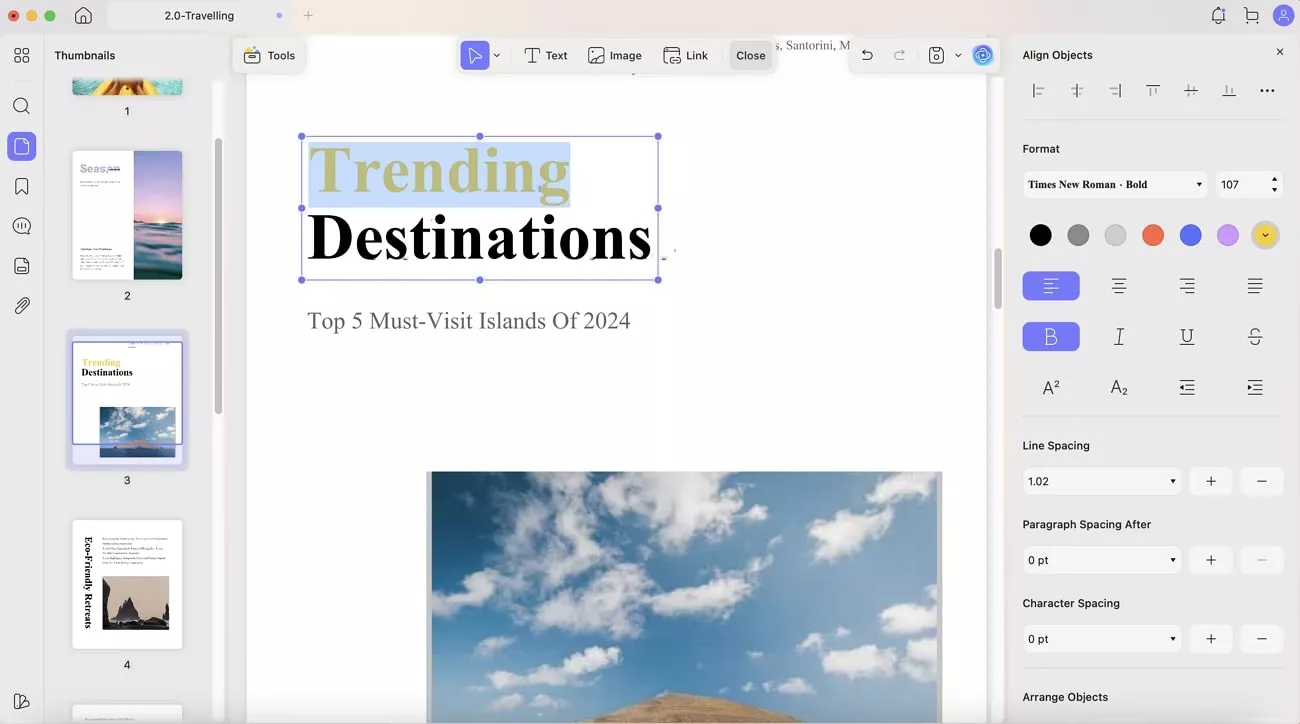
- Edit or Annotate PDF Side-by-Side: UPDF offers extensive text editing features that allow me to change the text color, size, style, and adjust line spacing.
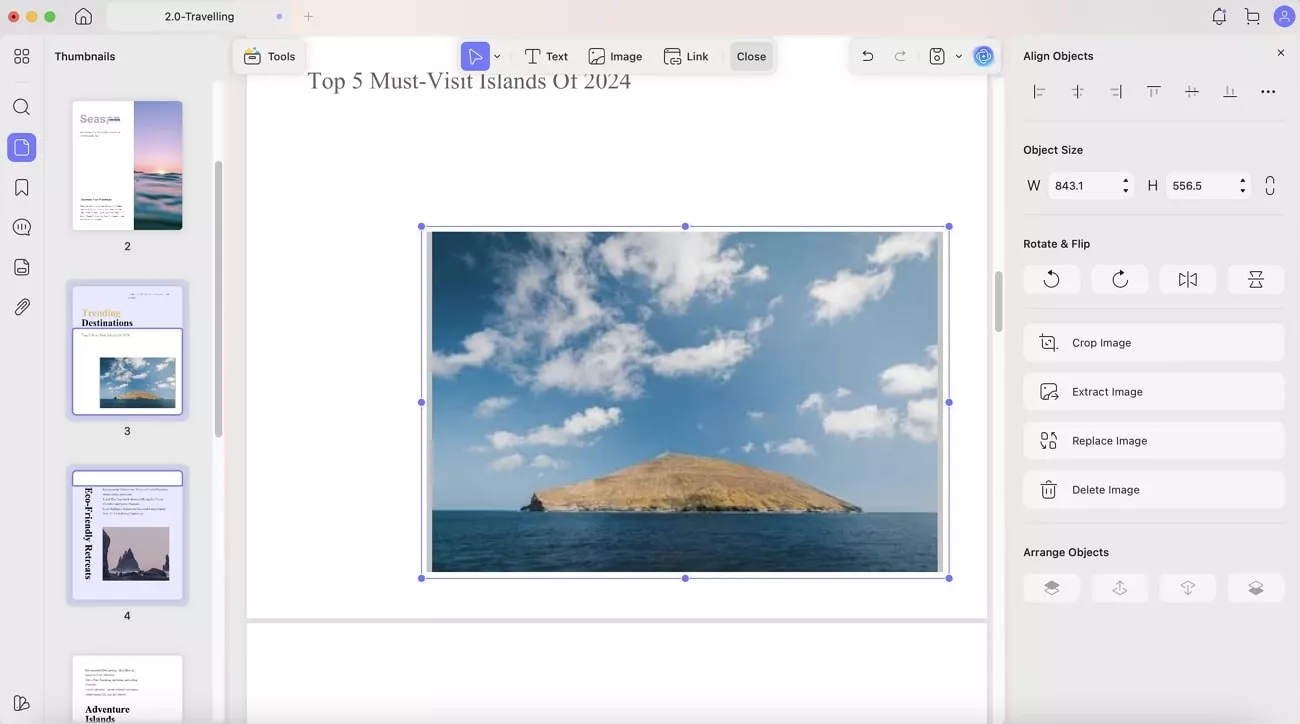
Also, I can rotate images, change image size, crop unnecessary portions, replace images, and more with this tool.
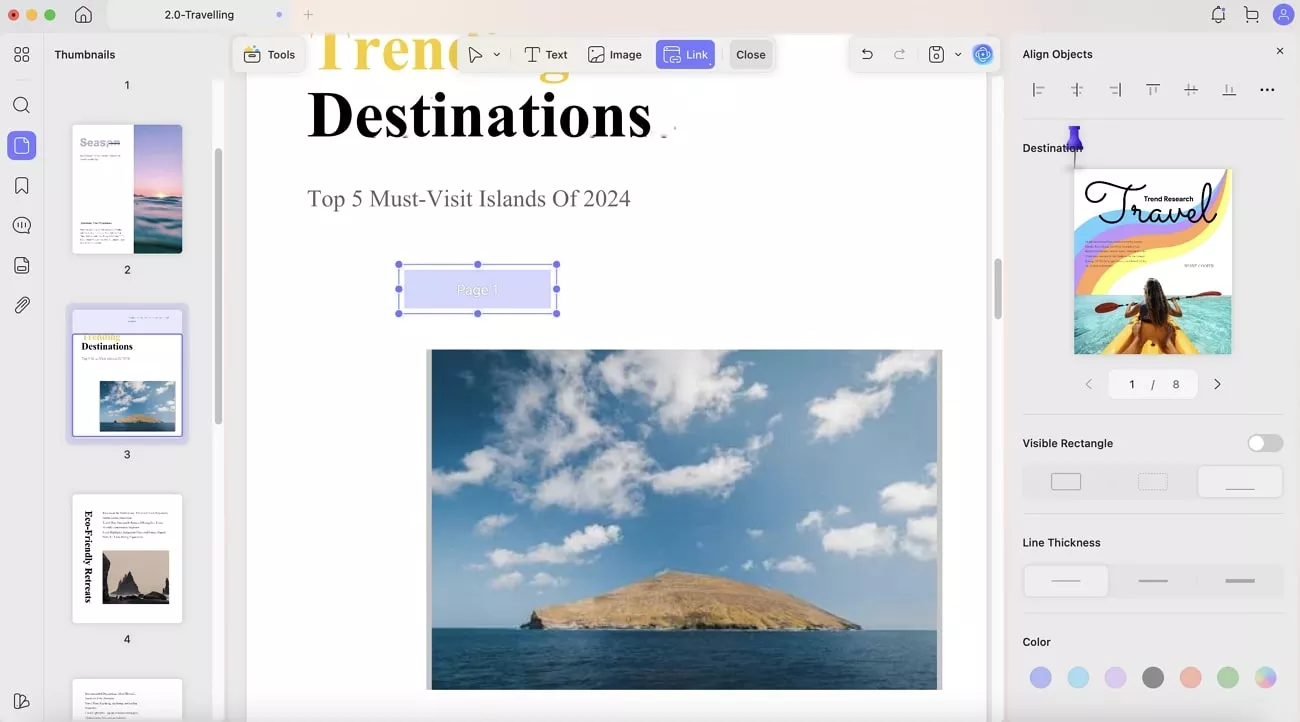
UPDF also allows me to insert links to the articles and blogs for access to the content available on the internet.
Additionally, UPDF offers annotation features that allow me to highlight and add sticky notes to the text, along with signatures and more.

- Read Aloud PDFs: While working in other windows, I simply access the Text to Speech feature to listen and understand the PDF content.

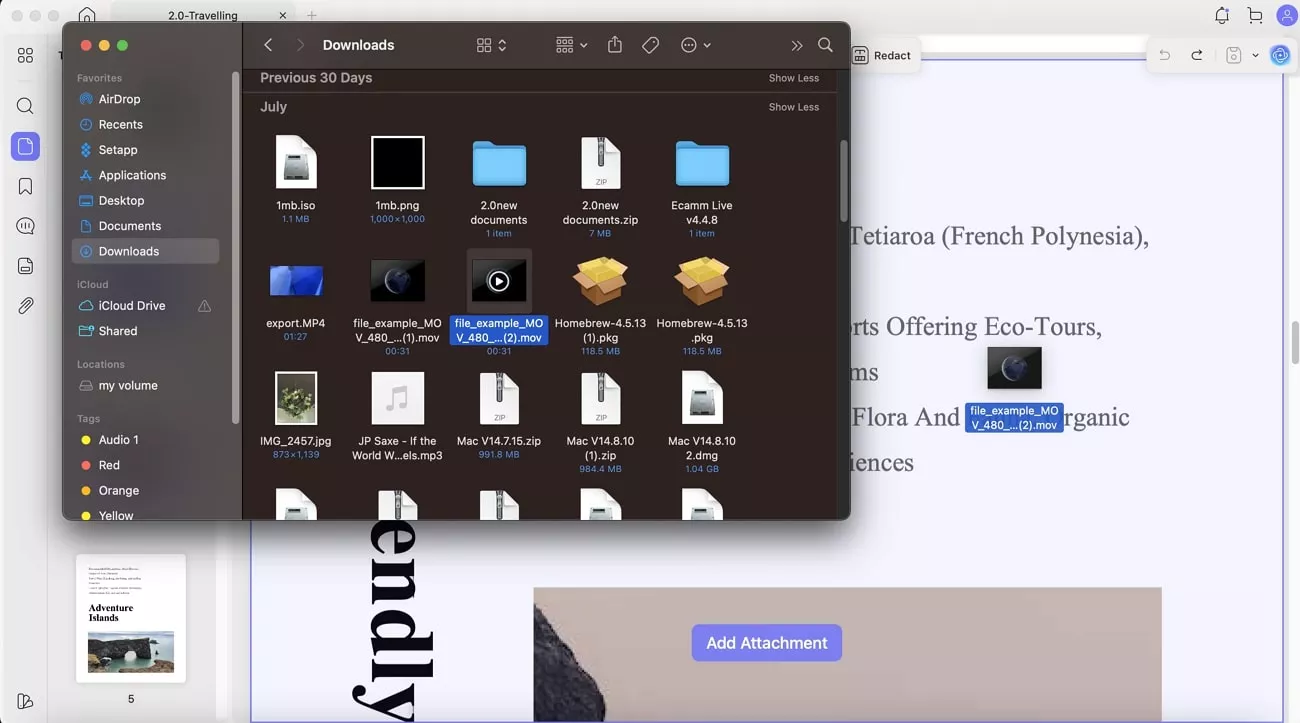
- Insert Items into PDFs: I can drag content from other apps into the Thumbnails or Content Area in UPDF, and they are placed on the page. This makes it easy for me to customize documents visually and compile multiple assets into one file.
Windows • macOS • iOS • Android 100% secure
- Convert Files to PDF: This tool allows me to drag other file types, such as Word documents, images, or text snippets, into UPDF to convert them into PDF format.

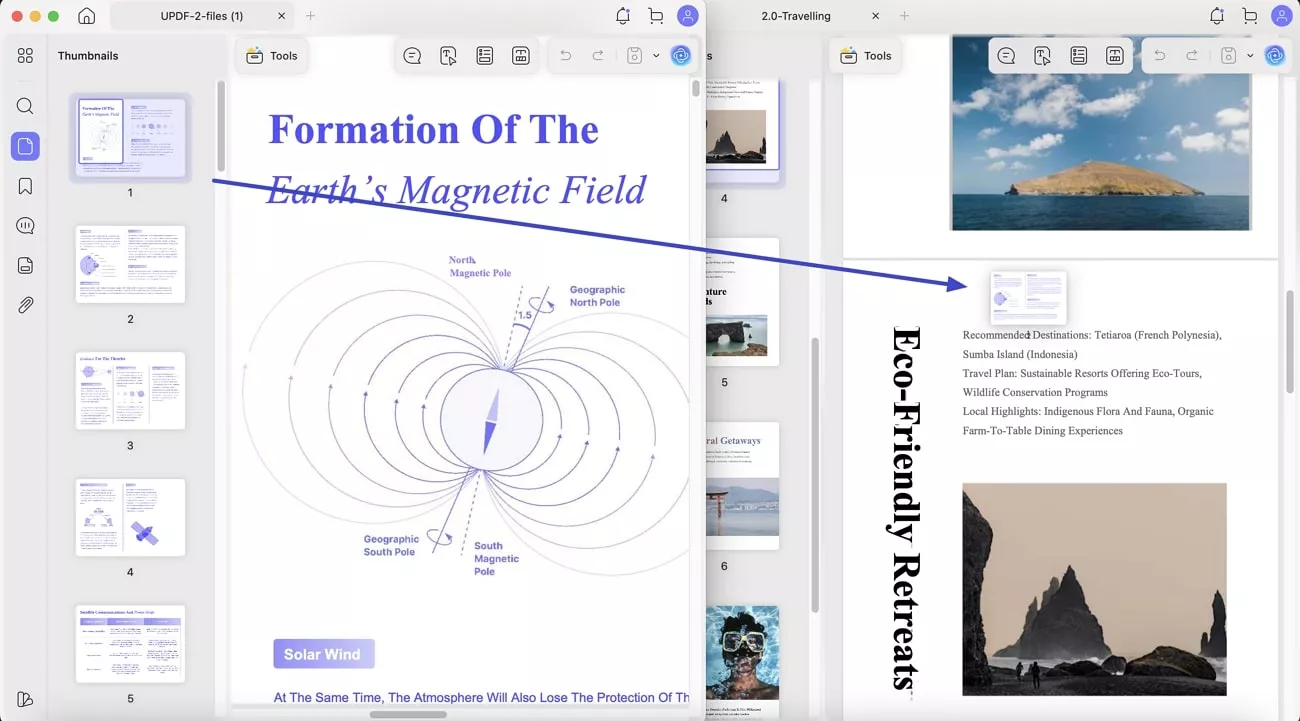
- Organize Pages: While editing a document, I drag pages between different PDFs in the Page or Thumbnail view. I can also insert new pages from a PDF file, an image, or a blank page in the PDF file.
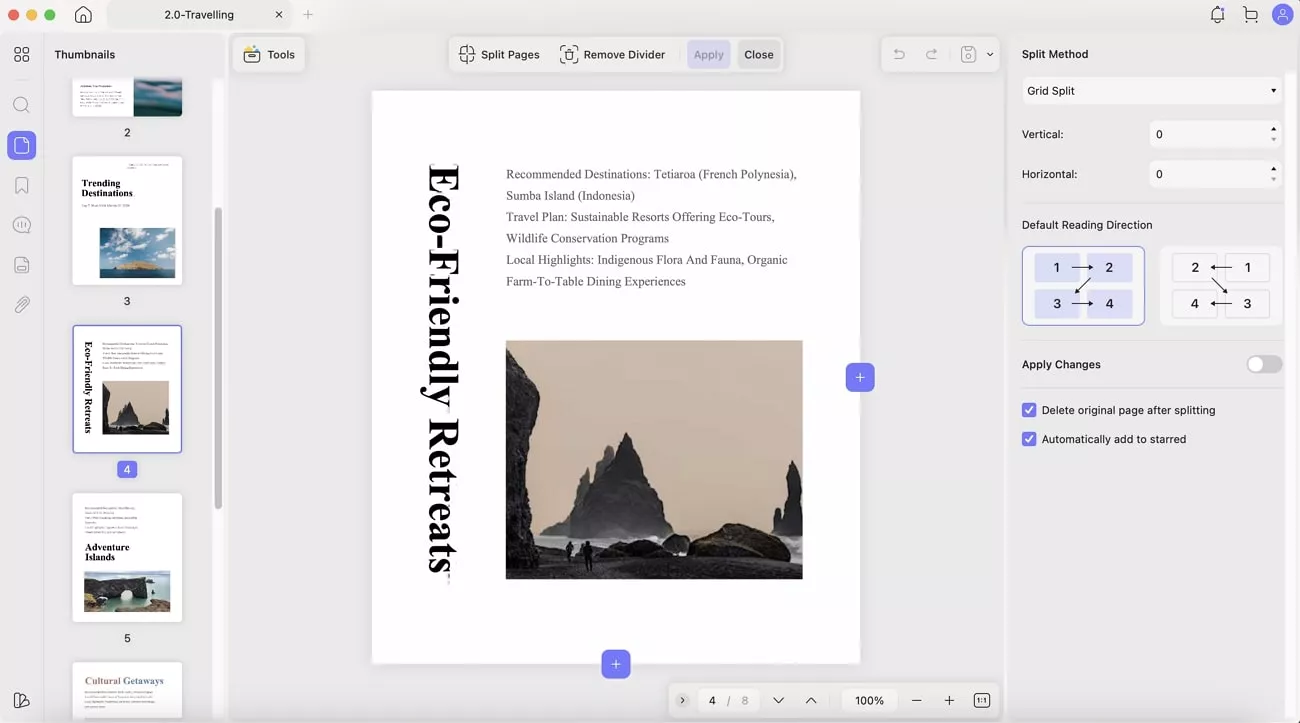
I can easily split the document by the number of pages, the size of pages, and top-level bookmarks.
Conclusion
To conclude, in this article, I provided a detailed guide on how do I split screen on Mac to work on multiple apps simultaneously. This smart combination of a browser and a PDF editor in split view made it easy for me to edit my PDFs without inaccuracies. However, if you’re looking for such a tool to use in a split-view model, I would recommend using UPDF.
Windows • macOS • iOS • Android 100% secure


 Enola Miller
 Enrica Taylor
 Lizzy Lozano
