 UPDF for Windows
 UPDF for Mac
 UPDF for iPhone/iPad
 UPDF for Android
 Nomostar
 UPDF AI Online
 UPDF Sign
 IvyCraft
 Edit PDF
 Annotate PDF
 Create PDF
 PDF Form
 Edit links
 Convert PDF
 OCR
OCR PDF to Word
 PDF to Image
 PDF to Excel
 Organize PDF
 Merge PDF
 Split PDF
 Crop PDF
 Rotate PDF
 Protect PDF
 Sign PDF
 Redact PDF
 Sanitize PDF
 Remove Security
 Read PDF
 UPDF Cloud
 Compress PDF
 Print PDF
 Batch Process
 About UPDF AI
 UPDF AI Solutions
 AI User Guide
 FAQ about UPDF AI
 Summarize PDF
 Translate PDF
 Chat with PDF
 Chat with AI
 Chat with image
 PDF to Mind Map
 Explain PDF
 PDF AI Tools
 Image AI Tools
 AI Chat Tools
 AI Writing Tools
 AI Study Tools
 AI Working Tools
 Other AI Tools
 AI Bookmark Generation
 AI Bookmark Summary
 AI Watermark Generation
 AI Background Generation
 AI Sticker Generation
 AI Stamp Generation
 AI Editing Suite
 UPDF Copilot
 AI Page Management
 AI Semantic Search
 PDF to Word
 PDF to Excel
 PDF to PowerPoint
 User Guide
 UPDF Tricks
 FAQs
FAQs UPDF Reviews
 Download Center
 Blog
Blog Newsroom
 Tech Spec
 Updates
 UPDF vs. Adobe Acrobat
 UPDF vs. Foxit
 UPDF vs. PDF Expert
JPG is the most commonly used format for image files. In digital photography, social media posts, and other website platforms, JPG image format can be easily found. Even with a little compression, JPG files do not lose their high quality. Moreover, many professionals prefer the JPG format as it can capture realistic details and vibrant colors.
However, if you want to share or save your image in a PDF format instead of JPG, this article will introduce powerful software. By continuing to read this article, you can learn how to convert JPG to PDF efficiently.
Way 1: How to Convert JPG to PDF
UPDF is a powerful tool that can manage and adjust your files efficiently on every major operating system. If you have multiple PDF or image files, you can easily edit and organize them according to your preference. You can crop the files and resize them within a few clicks. Moreover, you can also apply the OCR feature to turn your scanned images into editable ones.
Windows • macOS • iOS • Android 100% secure
Apart from the editing tools of UPDF, you can also use the Create PDF feature to gather all your image files effectively. After converting them, you can save them in a PDF file.
Converting JPG format into a PDF version is super simple in UPDF, only 2 steps are needed to help you do the job.
On desktop
Step 1: Click the "File" Tab to Open JPG Document
Choose "Tools > Other > PDF from Image" to open the file that you want to convert into PDF format.
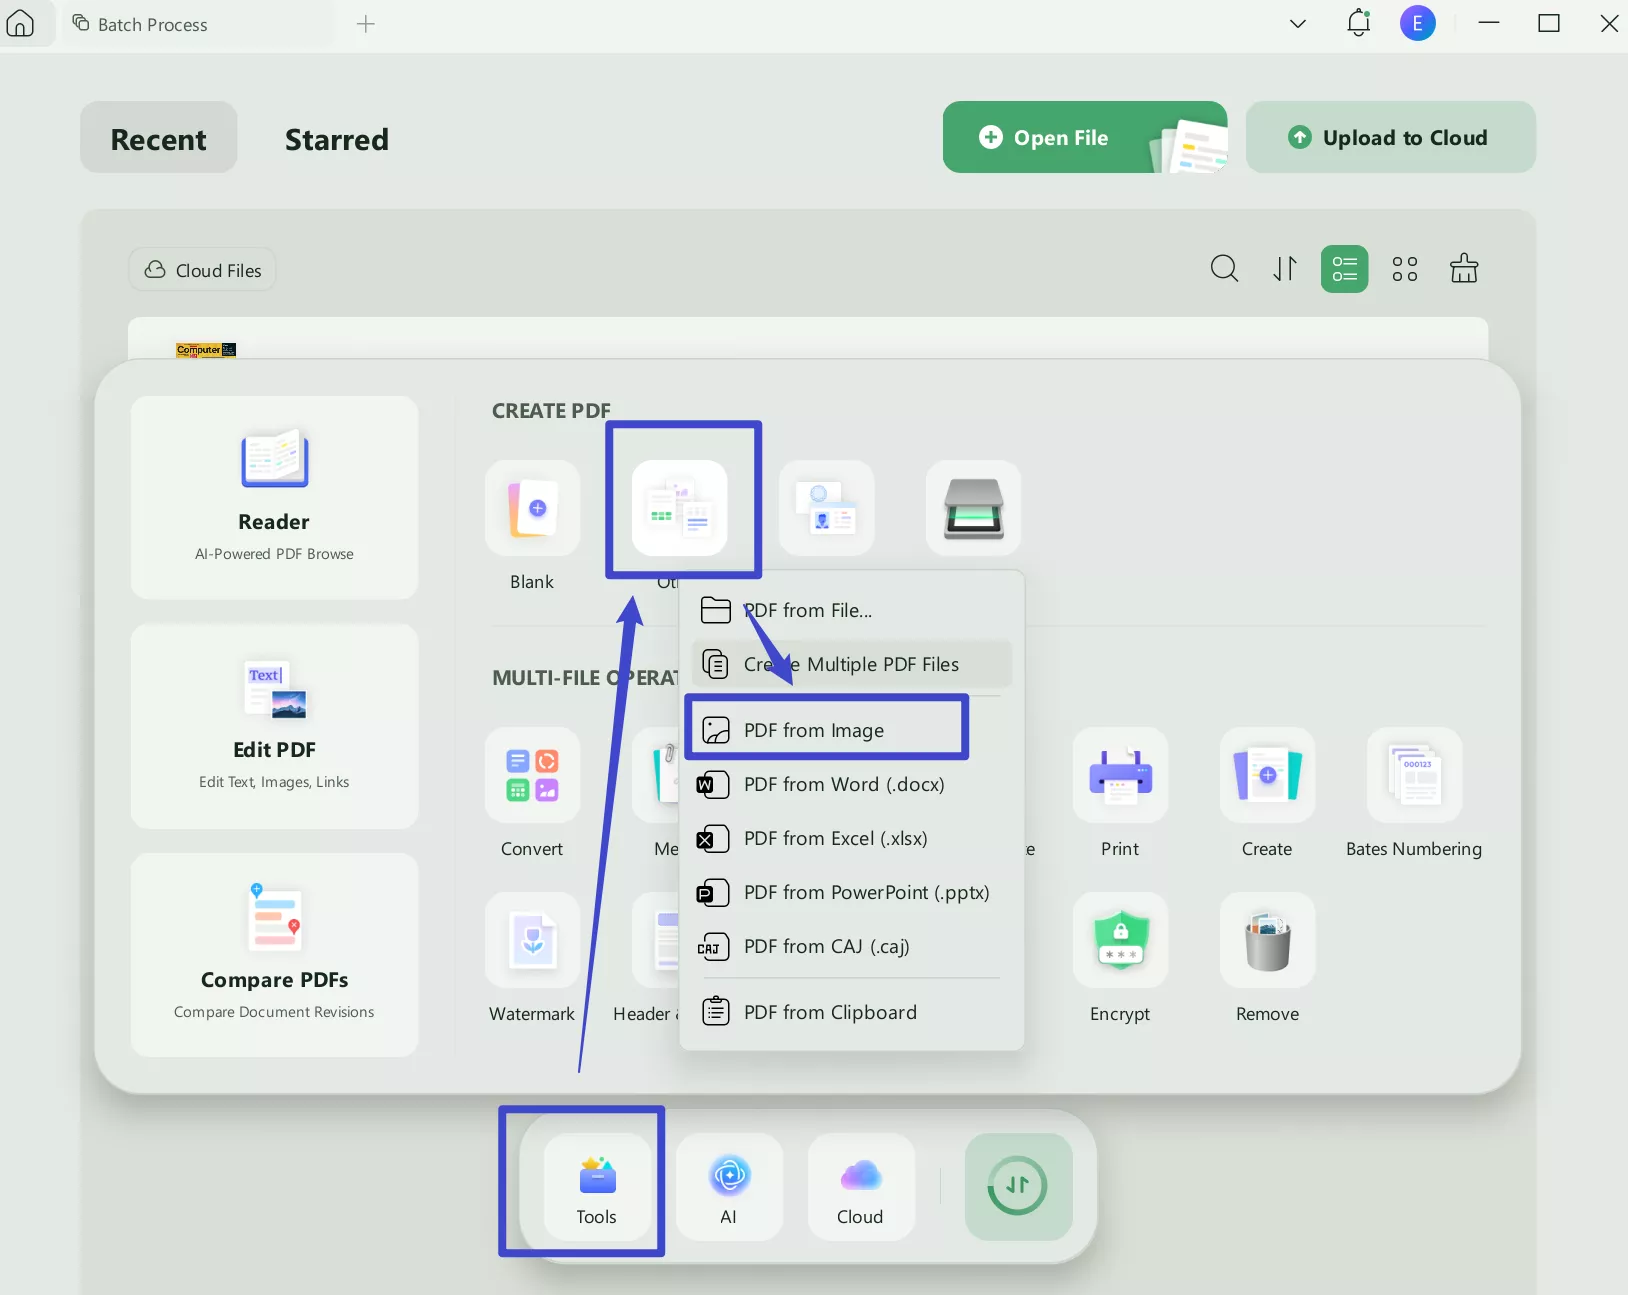
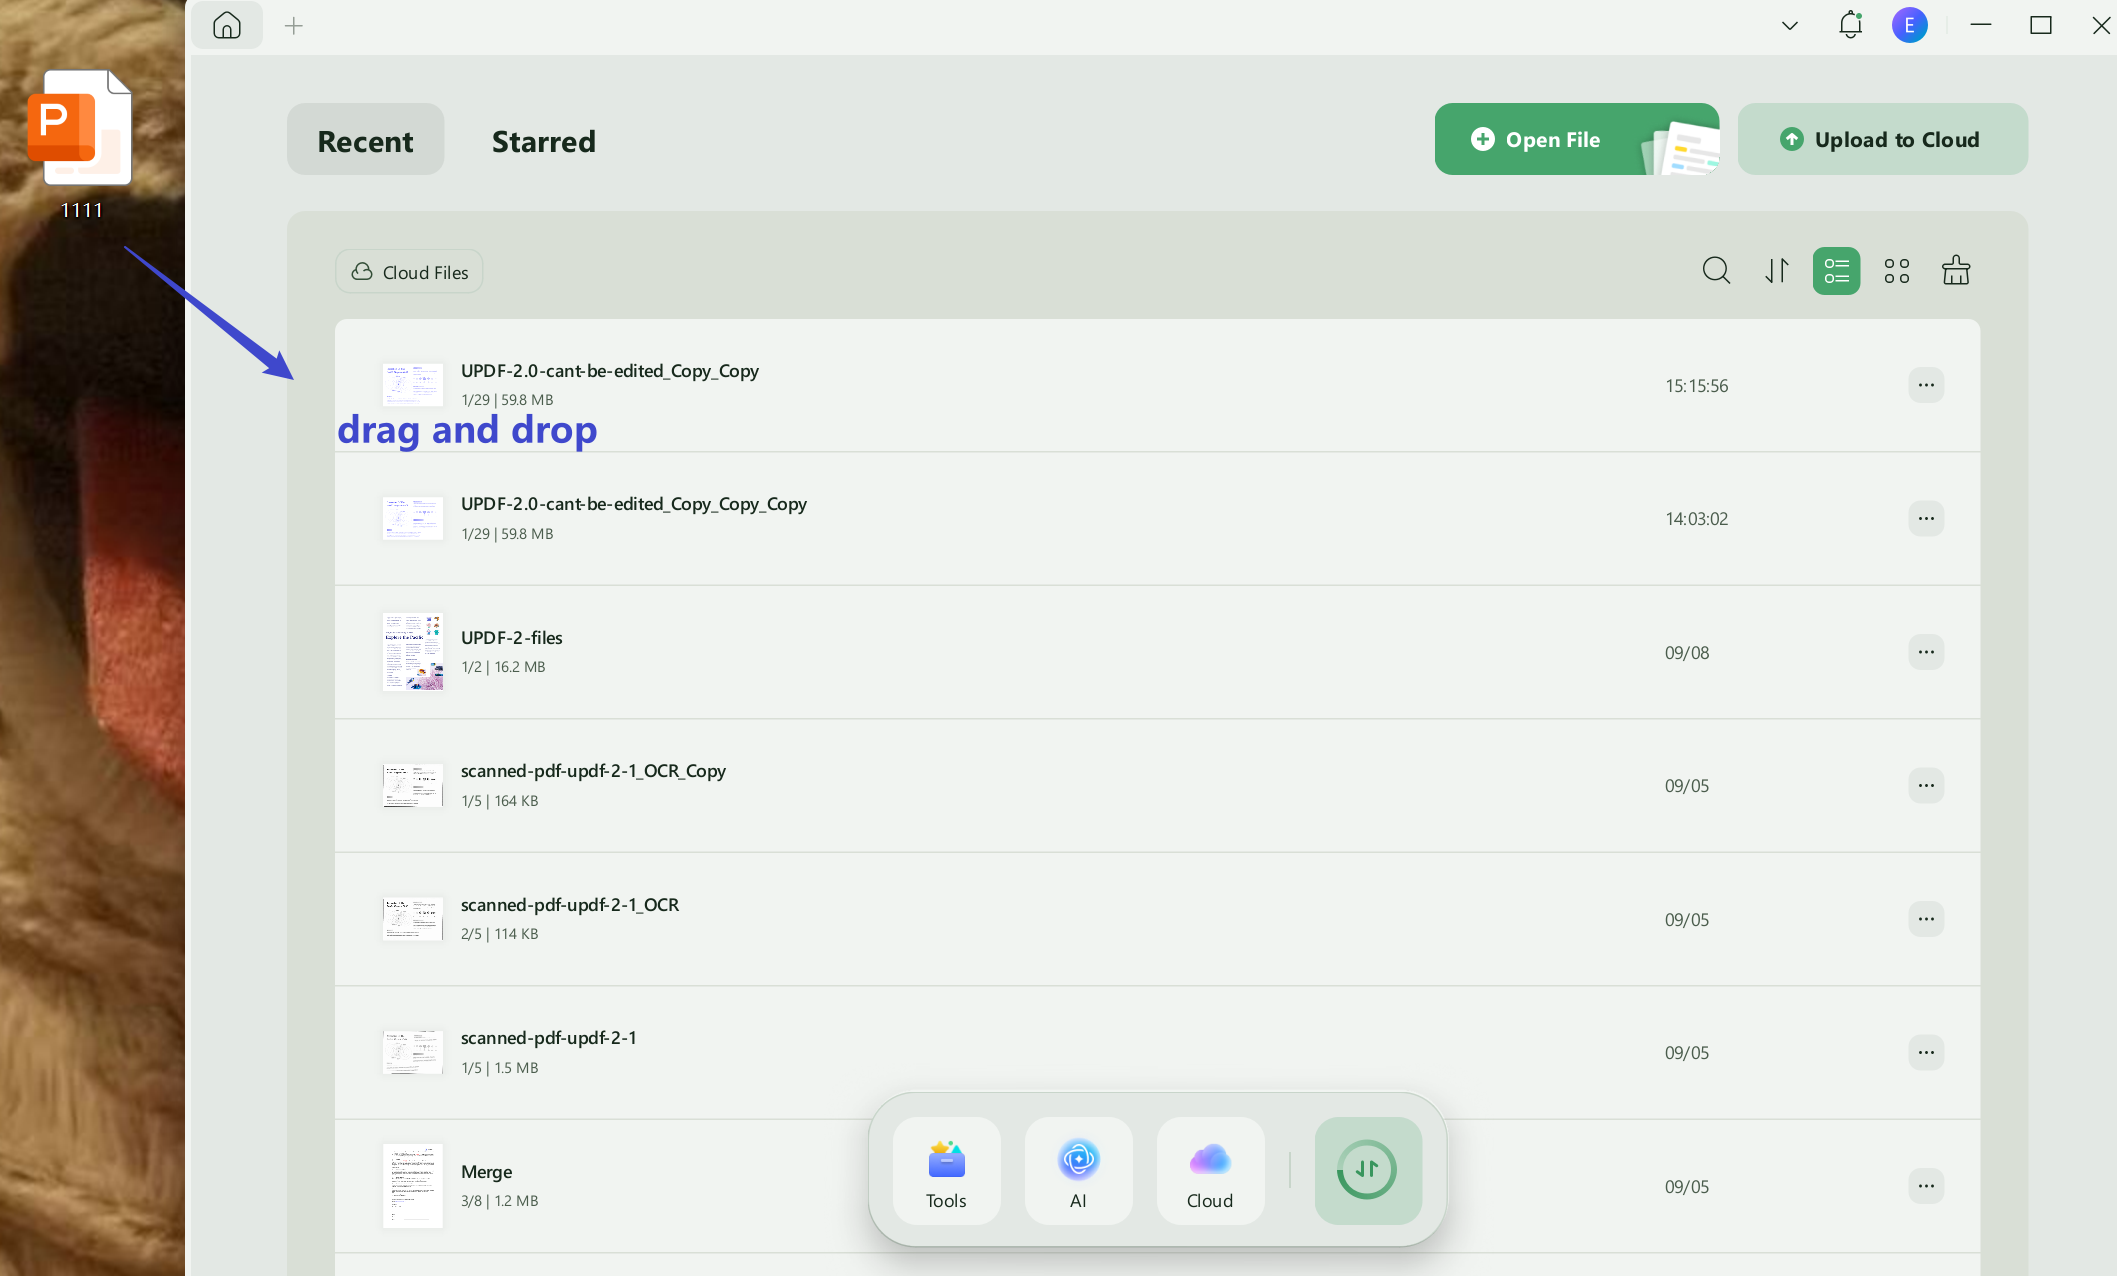
You can also simply drag and drop files in the main interface section which will be much more time-saving for you.
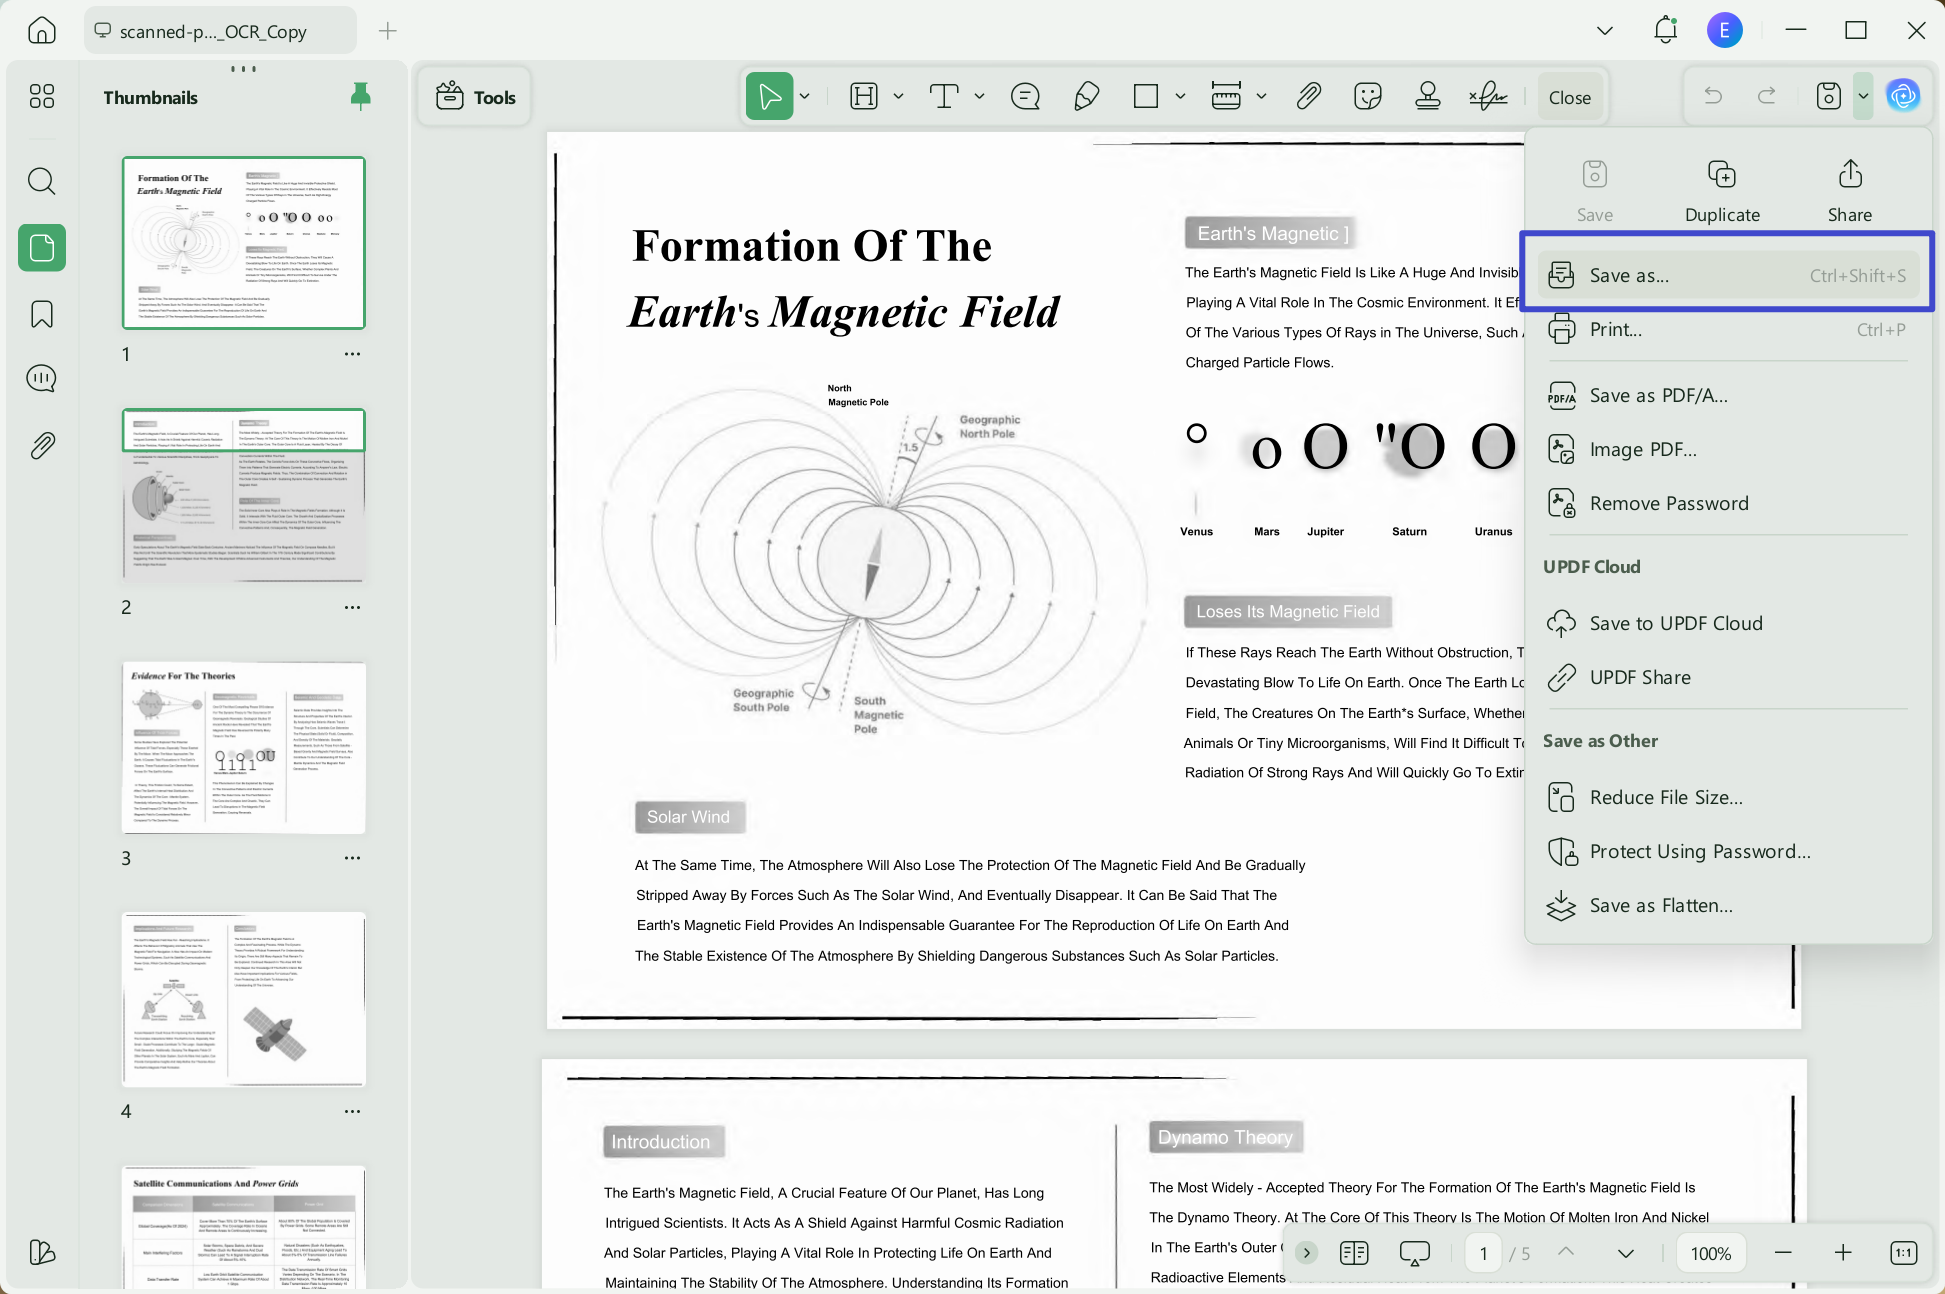
Step 2: Save the Converted PDF File
After the conversion of the JPG into PDF, you may need to save it as a separate file on your computer. Choose "Save as" in the right panel, and then select "Save" to store the PDF document.
On mobile
Step 1. After downloading UPDF on your phone, tap “Tools” and choose "Image to PDF".
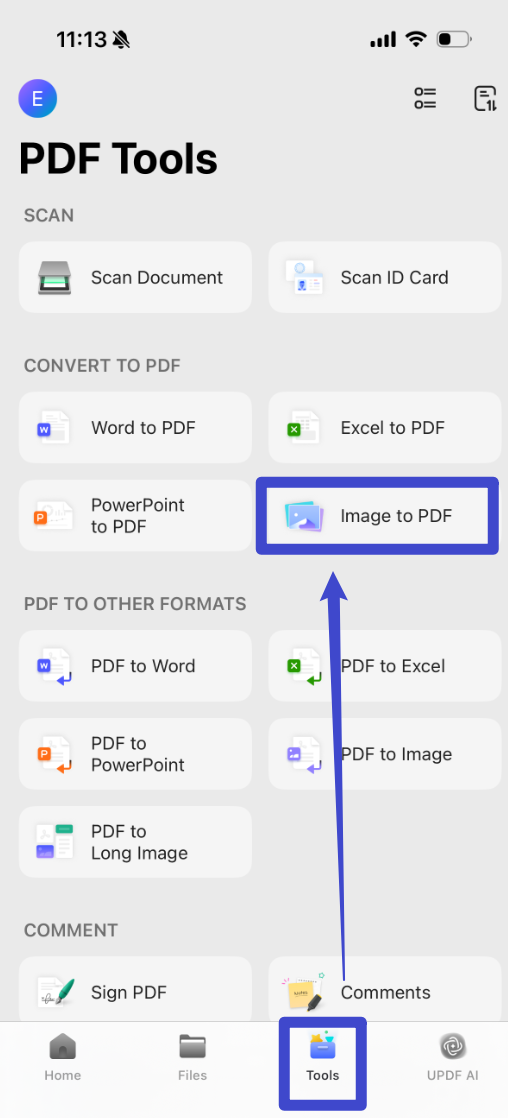
Step 2. Select the image you want to convert to PDF, the converted file will be saved on your UPDF automatically within few seconds.
The steps mentioned comprise the whole procedure for converting JPG to PDF, isn't it simple enough for users? UPDF also allows you to convert JPG to PowerPoint, JPG to Excel, Image, Word, and other format. Download it today and enjoy the journey with UPDF!
Windows • macOS • iOS • Android 100% secure
For a more detailed guide, you can watch the video below.
Also Read: How to Convert Image to PDF
Way 2. How to Convert Multiple JPGs to a PDF
UPDF is an easy-to-use tool through which you can efficiently convert JPG to PDF free. Here are some simple ways that you can use for the conversion of a JPG file to a PDF:
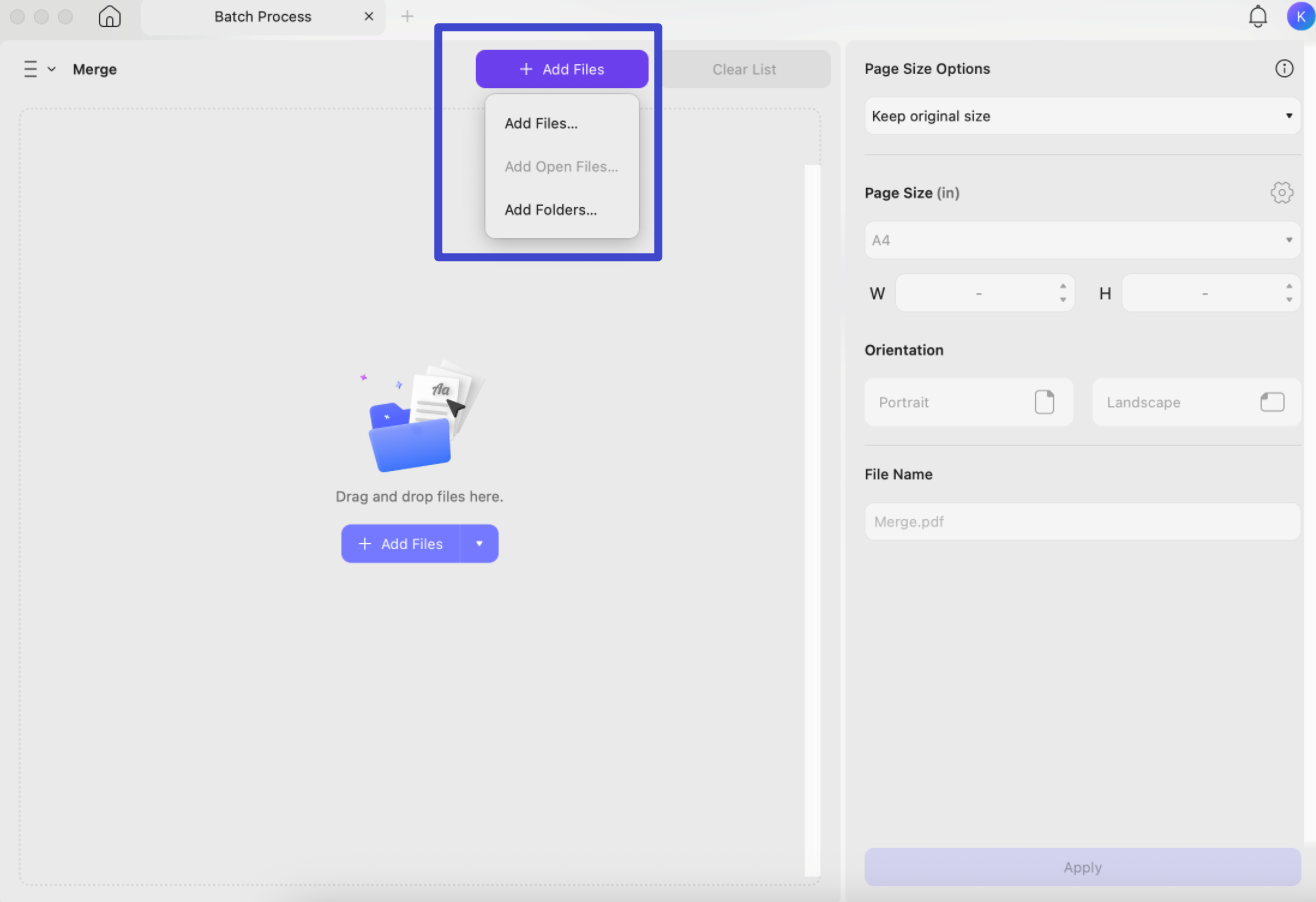
Step 1: Navigate to Combine Feature
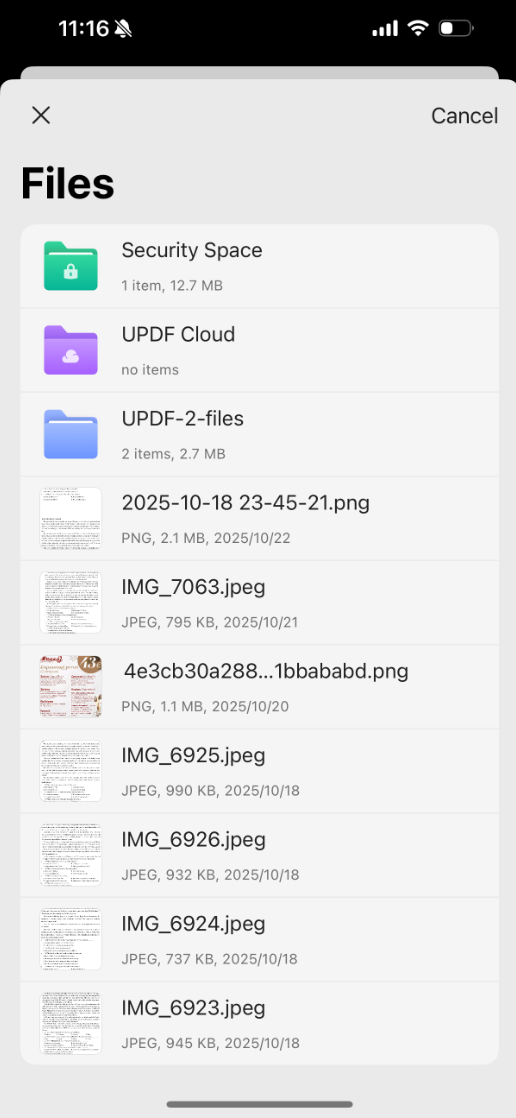
Launch UPDF and click on the "Tools > Merge" option. Afterward, you can easily drag and drop the image files or use the "Add File" button to proceed. Moreover, you can also upload the folder of images by clicking on the "Add Folders" option.
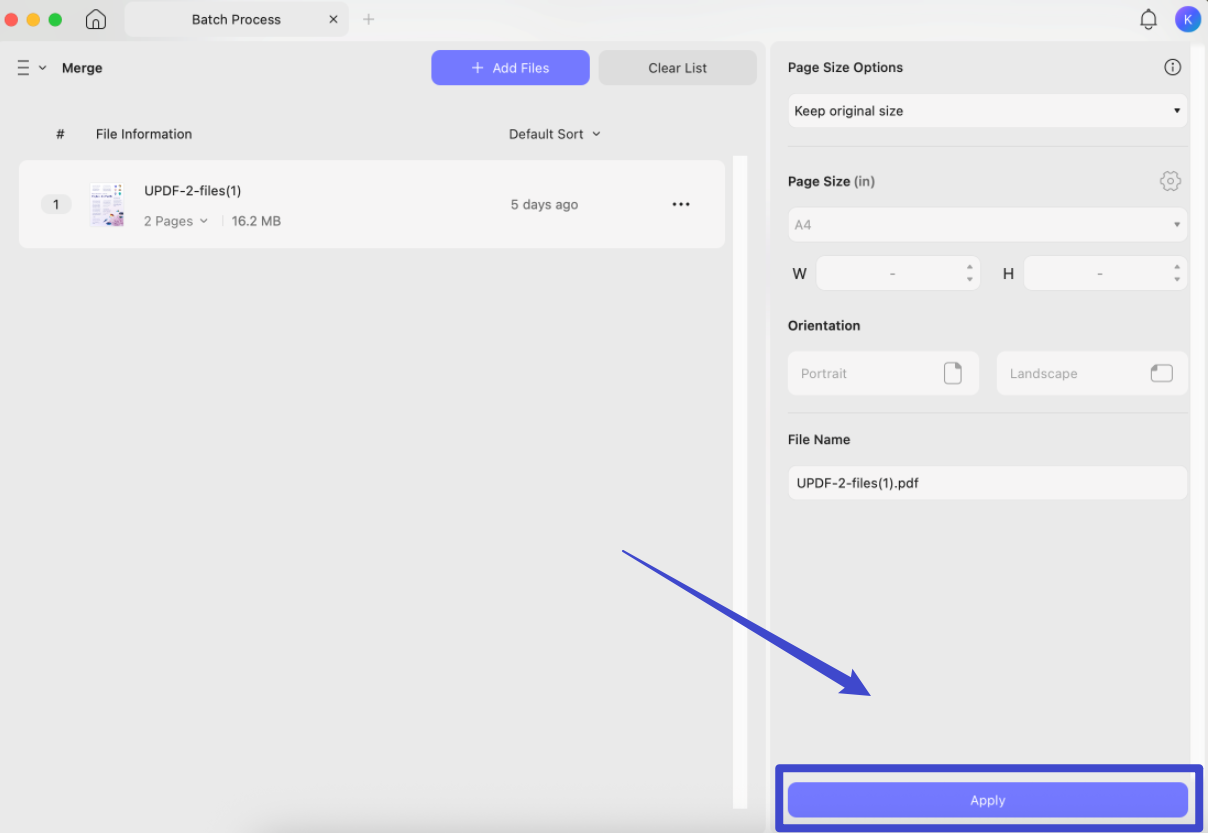
Step 2: Reorder the Image Files and Change JPG to PDF
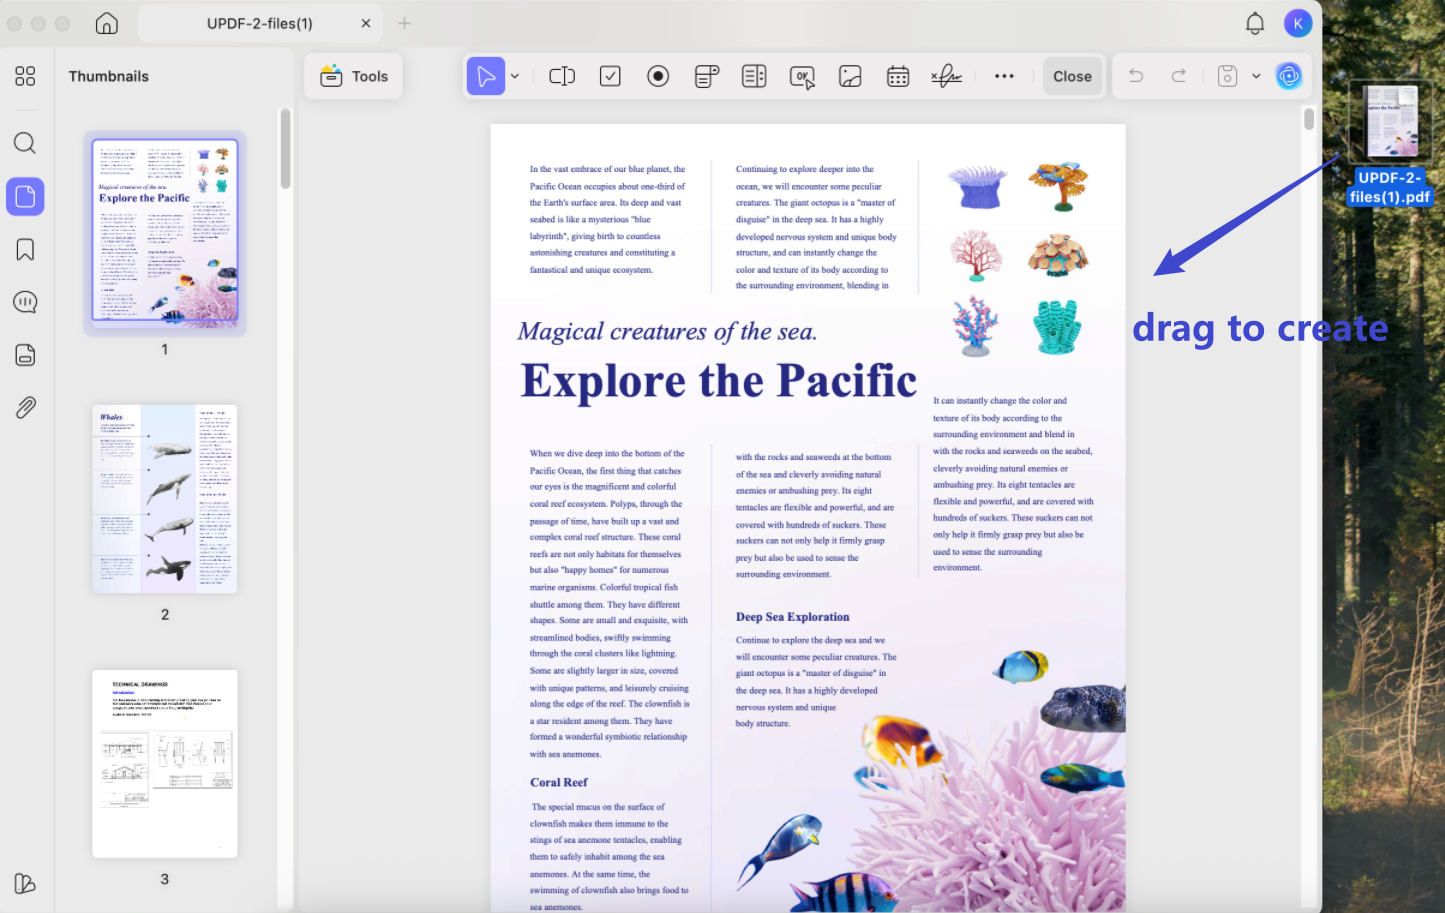
Once you have imported your image files from your system, you can reorder them. After rearranging the files, click on the "Apply" button. Now select the location on your system where you want to save the document full of images and rename your file.
Note: If you want to remove any particular file, just click on the "Three-Dot" icon given adjacent to each file. From there, select "Remove File." You can also click on the "Clear List" option to remove the complete list. Try it yourself now.
Windows • macOS • iOS • Android 100% secure
Way 3. How Do You Make JPG to PDF with Editable Text?
If you have a JPG image with text and want to convert it into PDF so you can archive it longer, UPDF will be worth it. It is capable of turning your JPG image into a PDF with the help of Optical Conversion Recognition technology known as OCR. Without further delay, you should follow these steps and learn the simplest method of turning JPG into PDF with OCR.
Step 1: Access UPDF and Import the JPG File to Initiate the Process
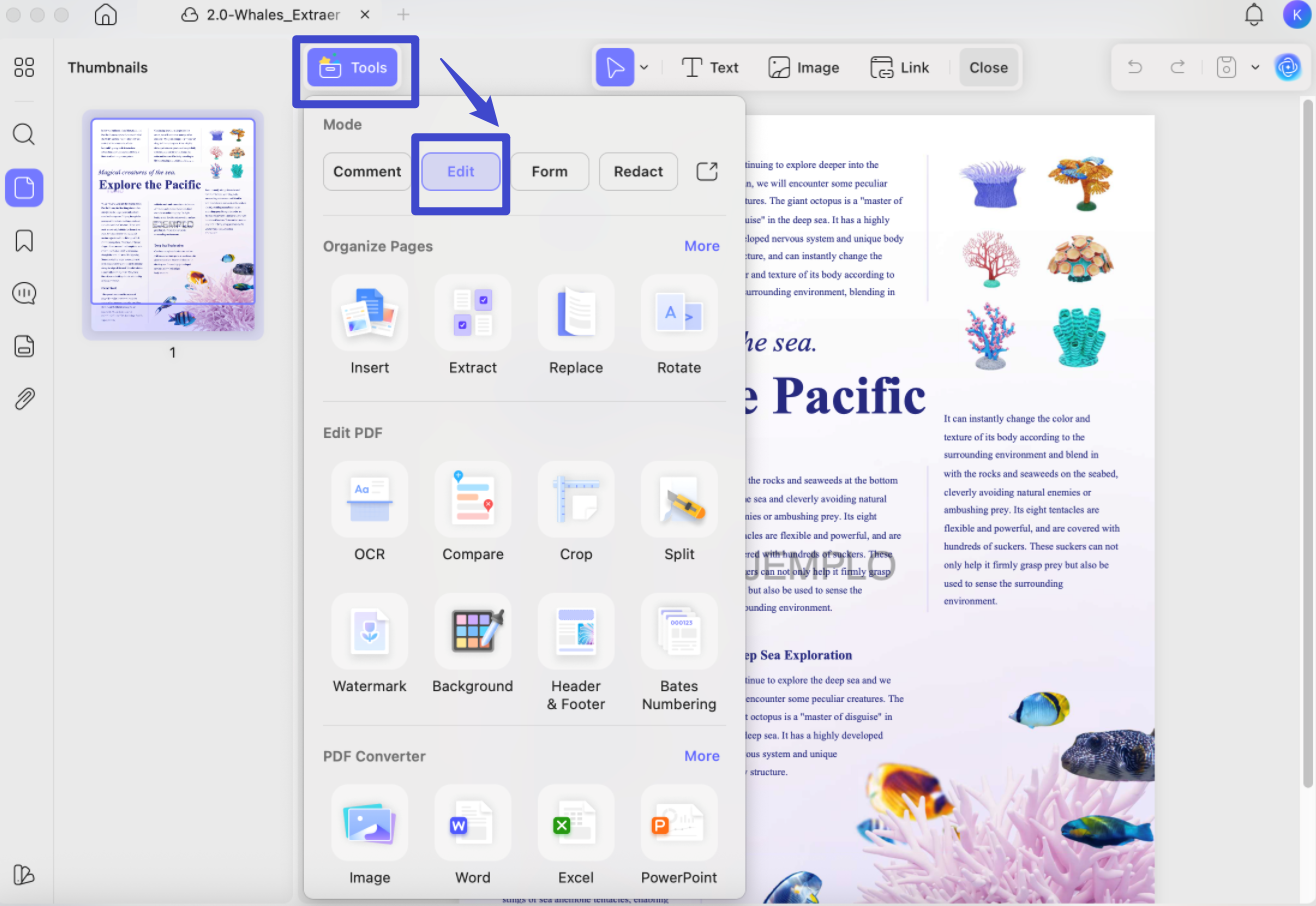
Launch the latest version of UPDF on your desktop and access its intuitive home screen. Upon getting access to the main interface, hit the "Tools" option from the bottom bar and get an extended menu. From that list, place your cursor on the "Other" option and choose to proceed with "PDF from Image." Now, keep browsing your file manager until you find the JPG file to move further. Alternatively, simply drag the image into the UPDF interface to create a PDF from JPG.
Step 2: Utilize the OCR Technology and Adjust Parameters
As you import the JPG file to UPDF, approach the right-side toolbar and pick the top-most icon, "Recognize Text Using OCR." Once you tap it, a pop-up screen will appear where you have to choose the "Searchable PDF" option. After selecting, move to the "Layout" and proceed with the "Text Over the page Image" option from the drop-down list.
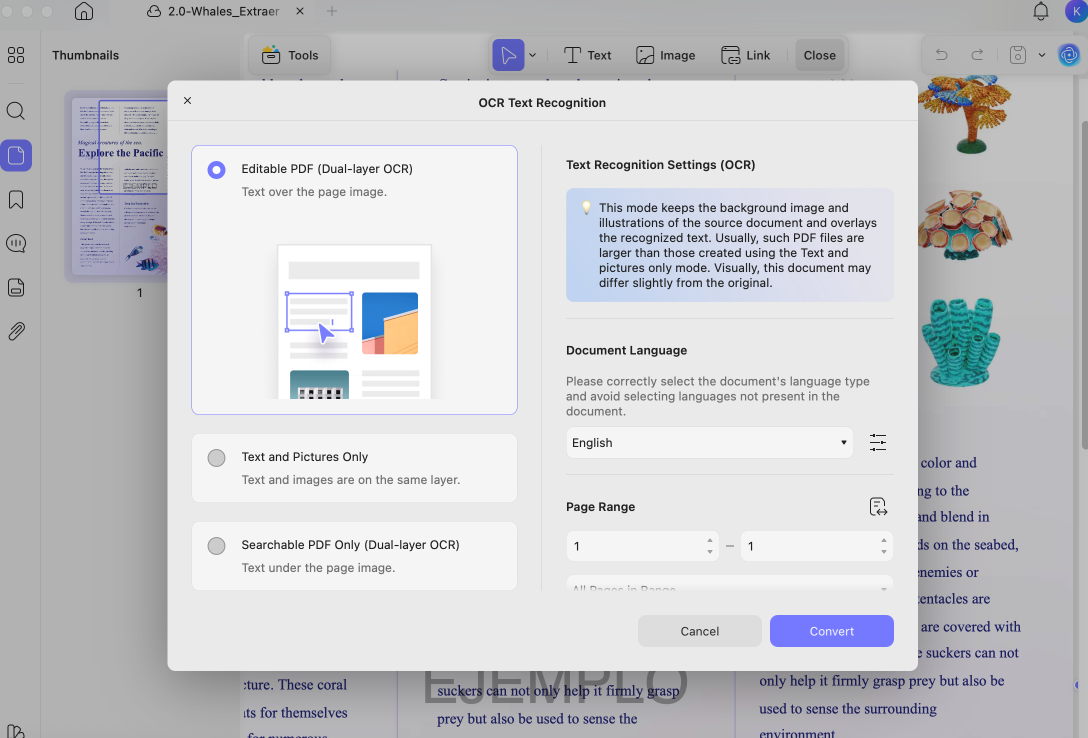
Step 3: Perform OCR and Choose a Destination for Your File to Export
Look for any other parameter adjustment required, and if all is set, just click the "Convert" button. Pressing that button will give you another screen to confirm the file export destination. Since the location path is assigned, hit the "Save" button, and the file will automatically move into your system.
The editable document will be reopened in UPDF, and now you can feel free to go to the "Edit" mode and begin to make changes to the text on the PDF file, which is just converted from your JPG file.
So far, you have observed the most straightforward way of using OCR, which amazes users with high-end results. If you still haven't downloaded UPDF, hit the "Free Download" button below and enjoy its exclusive features.
Windows • macOS • iOS • Android 100% secure
Bonus
Reasons Behind the Conversion of JPG to PDF
The conversion from JPG to PDF can bring various advantages. To learn the potential benefits of this conversion, proceed to the following section:
- Improved Organization: Managing separate JPG files can be hectic and time-consuming. It can be a great hassle if you have to share or edit each JPG file separately. Hence, by combining and converting JPG files to PDF, you can easily organize them without wasting time.
- Quick to Share: PDF files are straightforward and quick to share. They are lightweight and can be easily attached to emails. Moreover, PDFs can be easily downloaded and opened without any hassle.
- Highly Secured: If you have personal pictures and want to secure them, you can add password protection on PDF files. Through this high security, no one would be able to see your confidential images.
- High Resolution: The best thing about PDF format is that it supports lossless compression. So, even after reducing the file size, PDF format preserves the high resolution of images efficiently.
- Easy to Print: PDFs do not require special software for printing. They can be easily downloaded and printed without compromising the original quality of images. Thus, this format ensures that the image looks the same on paper as it does on screen.
Why Use UPDF to Convert JPG to PDF
You should explore and try the UPDF tool, as it is one of the best available tools for conversion. In this section, we will highlight the main points that can convince you to use UPDF to convert JPG to PDF.
1. Batch Conversion
UPDF supports batch conversion so that you can convert multiple files at the same time. Along with high-quality conversion, UPDF ensures to increase in your work productivity through batch conversion.
2. Faster Processing Speed
With advanced capabilities, UPDF has a faster speed than renowned tools like Adobe Acrobat. Within a few seconds, you can convert your image file to PDF efficiently.
3. One Account Required
By using one account of UPDF, you can use this platform on all four devices such as Windows, Mac, Android, and iOS. Thus, you don't have to create separate accounts for UPDF to use on each platform.
4. More Distinct Features
Along with the converting features, UPDF contains several advanced options. You can edit, annotate, organize, and combine your files and images on this tool. It also offers an OCR PDF function through which you can make the text in images searchable and editable. Moreover, you can add signatures and watermarks to your PDFs through this software. Try it now
Windows • macOS • iOS • Android 100% secure
Also Read: Top Image to PDF Converters
FAQs on Converting from JPG to PDF
1. Can I Convert Multiple JPG Files to a Single PDF?
Yes, you can easily convert multiple JPG files to PDF format through UPDF. To do so, open UPDF and choose the "File > Create > PDF from Image" feature. After importing all the JPG files, hit the "Yes" button to convert them into a PDF file.
2. Does PDF Format Affect the Original Image Quality?
No, PDF format offers lossless conversion through which it preserves the image's original quality. Thus, a PDF file is a great format to store images for a long time without damaging them.
3. How to Convert JPG to PDF Online?
Almost all the online tools have similar interfaces and styles for their tools with some minor changes in the button names. Here are the general steps that you can follow to convert JPG to PDF online:
- Step 1: Access any online PDF tool through your web browser and locate its "JPG to PDF" feature.
- Step 2: Afterward, click the "Add File" button and upload your JPG file. Once done, hit the "Convert" button and wait for the process to end. Afterward, you can download the image instantly.
4. Is It Safe to Convert JPG to PDF Online?
No, using online tools to convert JPG to PDF is not safe. First, you would require a stable internet connection to execute the conversion. Moreover, there are certain malware attacks on online platforms that can put your files at a security risk. Therefore, you should use a reliable desktop tool like UPDF to convert JPG to PDF without any security issues.
Conclusion
JPG is a popular image format that is widely used in digital photography. However, if you want to share or download your image file more efficiently, you should convert JPG to PDF. By reading this guide, you have learned about an all-rounder tool known as UPDF that can convert various JPG files to PDFs proficiently. Without ad interruptions or security risks, you can perform the file conversion on UPDF efficiently. Download it from the button below, and you can get free conversions twice a day.
Windows • macOS • iOS • Android 100% secure


 Enola Miller
 Enid Brown
 Enya Moore
