PDF files have become the most used way of sharing documents in this digital age. Today these documents are used in various fields of life like education and business. Some of those fields require users to annotate those PDF documents. Although it is not very difficult, knowing the right tool and the process of how to annotate PDF on Windows is the key.
This post will cover the top tool choices for annotating PDFs on Windows 11/10/8/7, along with their detailed step-by-step guides.
Part 1. How to Annotate a PDF on Windows Via UPDF?
The best tool for annotating your PDF documents on Windows computers is UPDF because of its experience and features. UPDF brings you a complete set of tools you will need to markup, edit, share, view, and even organize your PDF documents. Download and try it for free now.
Windows • macOS • iOS • Android 100% secure
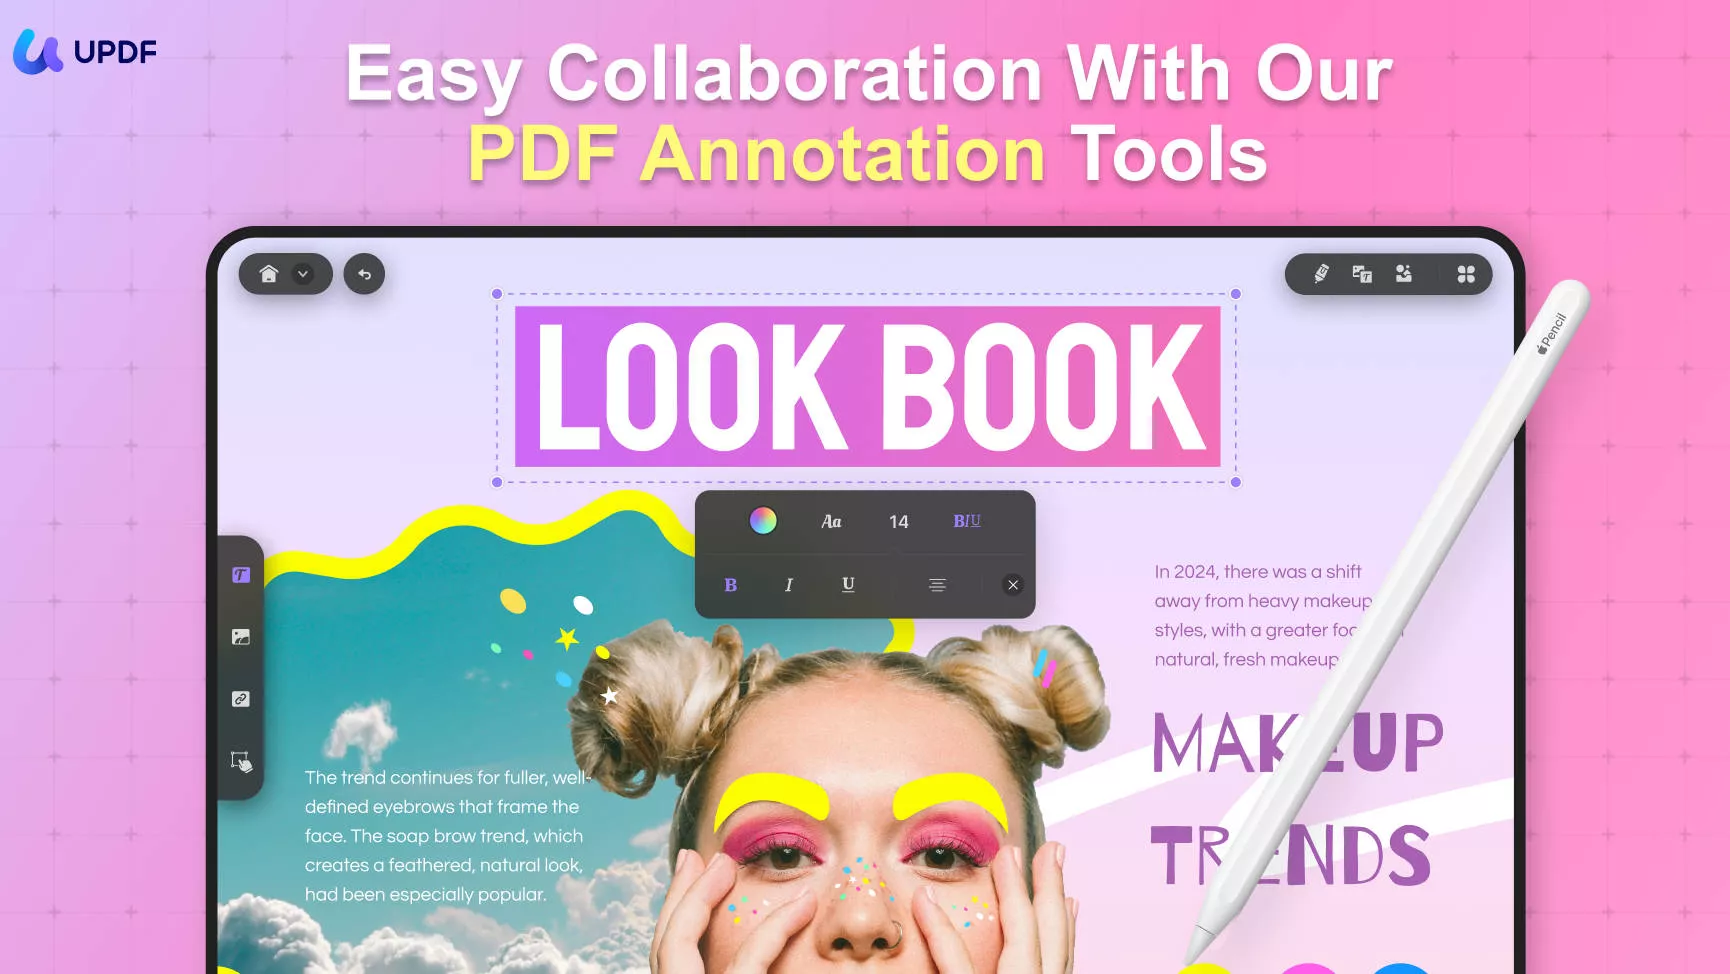
Those include features like annotating PDFs where you can:
- Add text comment
- Sticky notes
- Pencil
- Highlight text
- Strikethrough text
- Add shapes
- Add stickers and do much more.
Hence, you get a premium PDF annotating experience here. Things don't stop here since the process for annotating on Windows with UPDF is also very simple with the following steps below:
Step 1. Open PDF in UPDF on Windows
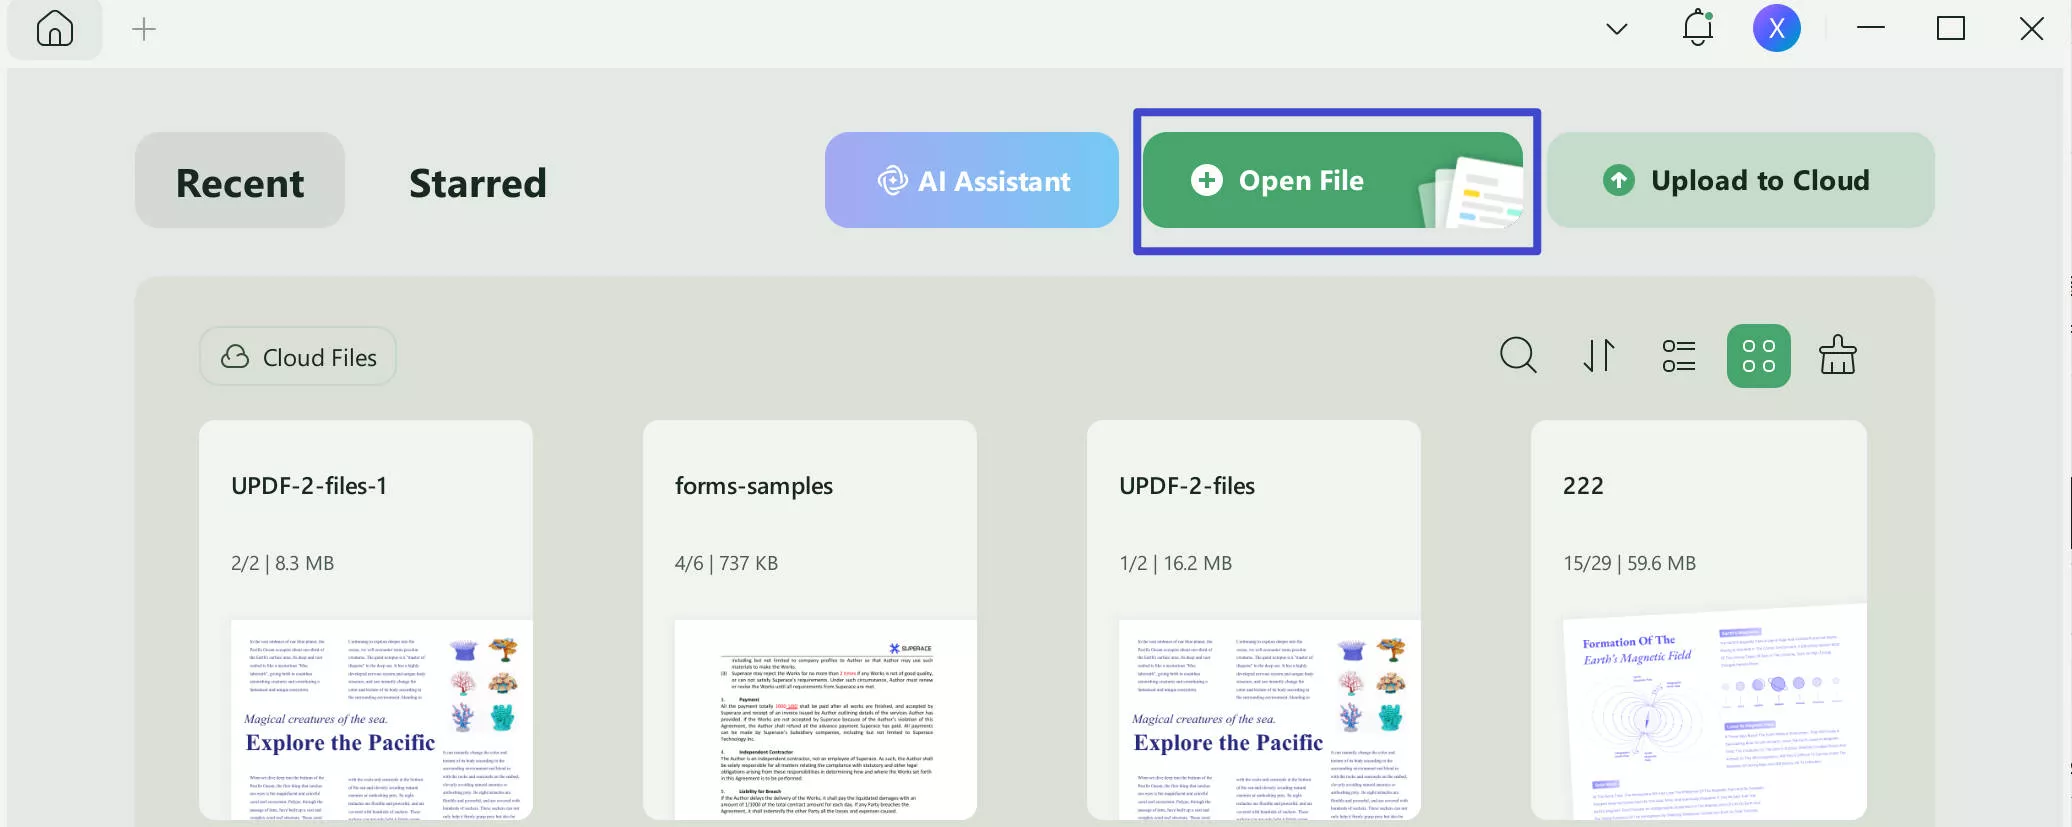
Double-click the UPDF icon to open UPDF, then click "Open File" on top to open the browse window. Find your PDF document from PC storage and double-click to open it. If you previously opened that in UPDF, you could look for the document in the Recent list.
Step 2. Annotate PDF on Windows with Various Tools
2.1 Four Text Markup Tools
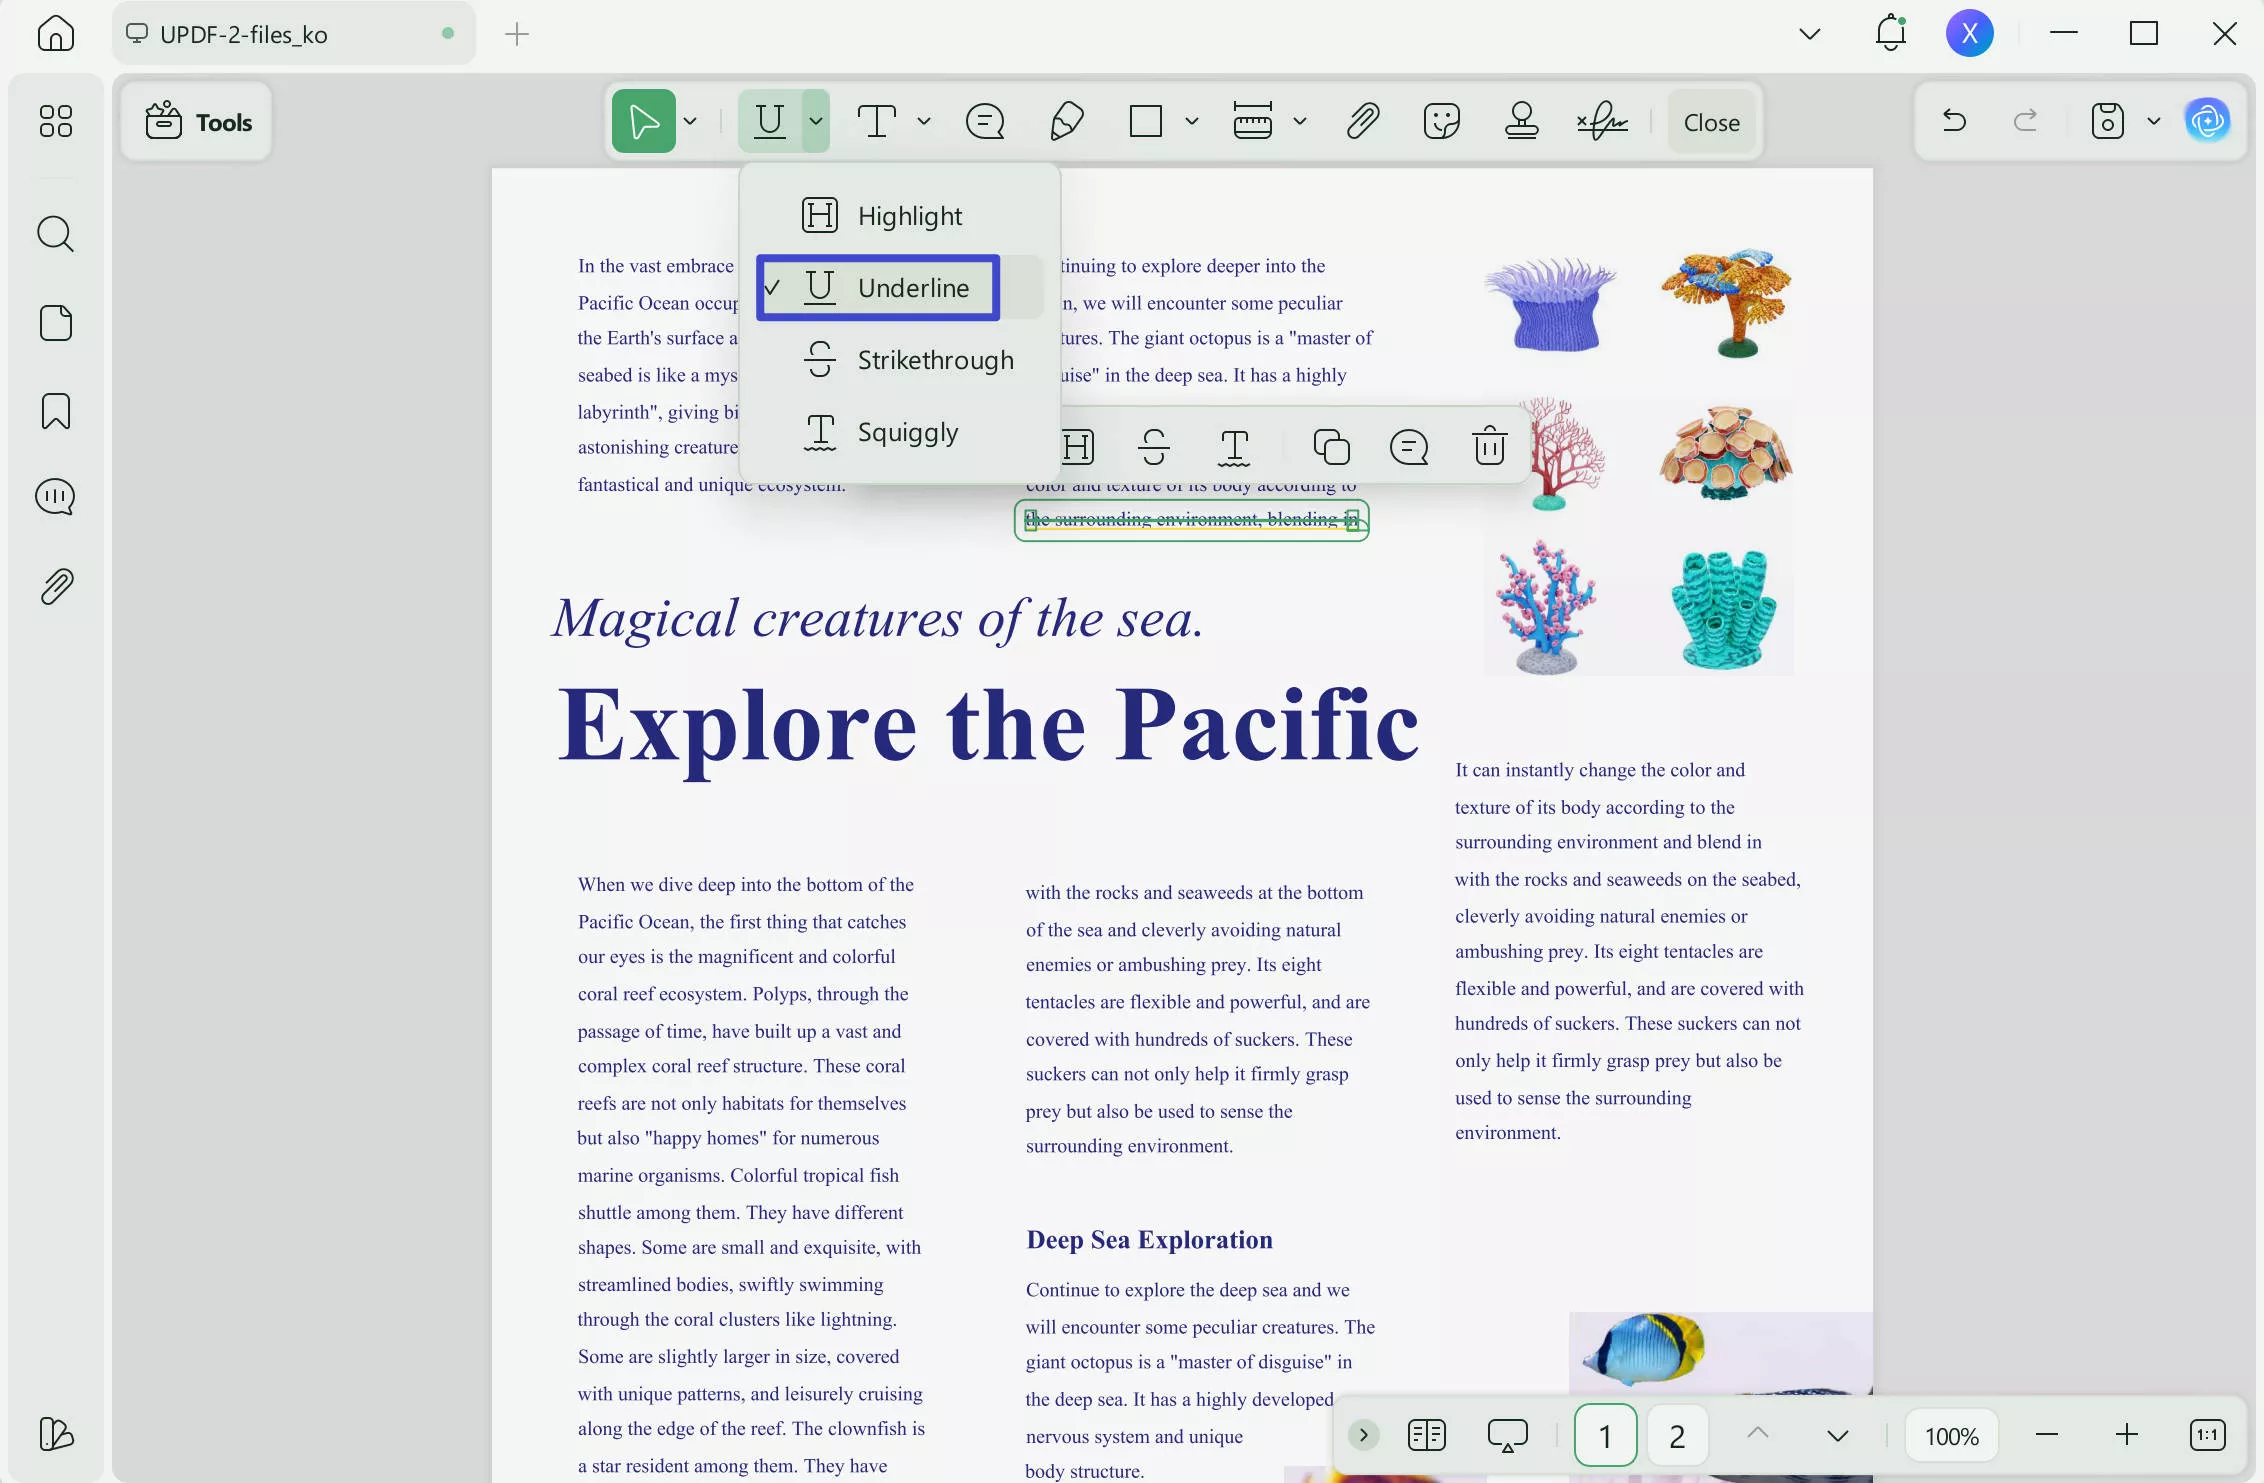
Click "Comment" in "Tools" from the left pane, and you will get all the annotation features on the top panel. With the help of text markup tools, you can highlight, underline, or strikethrough the text. Moreover, UPDF allows you to draw a squiggly line to make your text more prominent.
In this example, we will select the "Underline" feature. Click it, hold it, and drag the cursor over any text to easily underline it. You can use these text markup tools in various colors UPDF provides or create your own using the color code.
2.2 Four Comment and Notes Tools
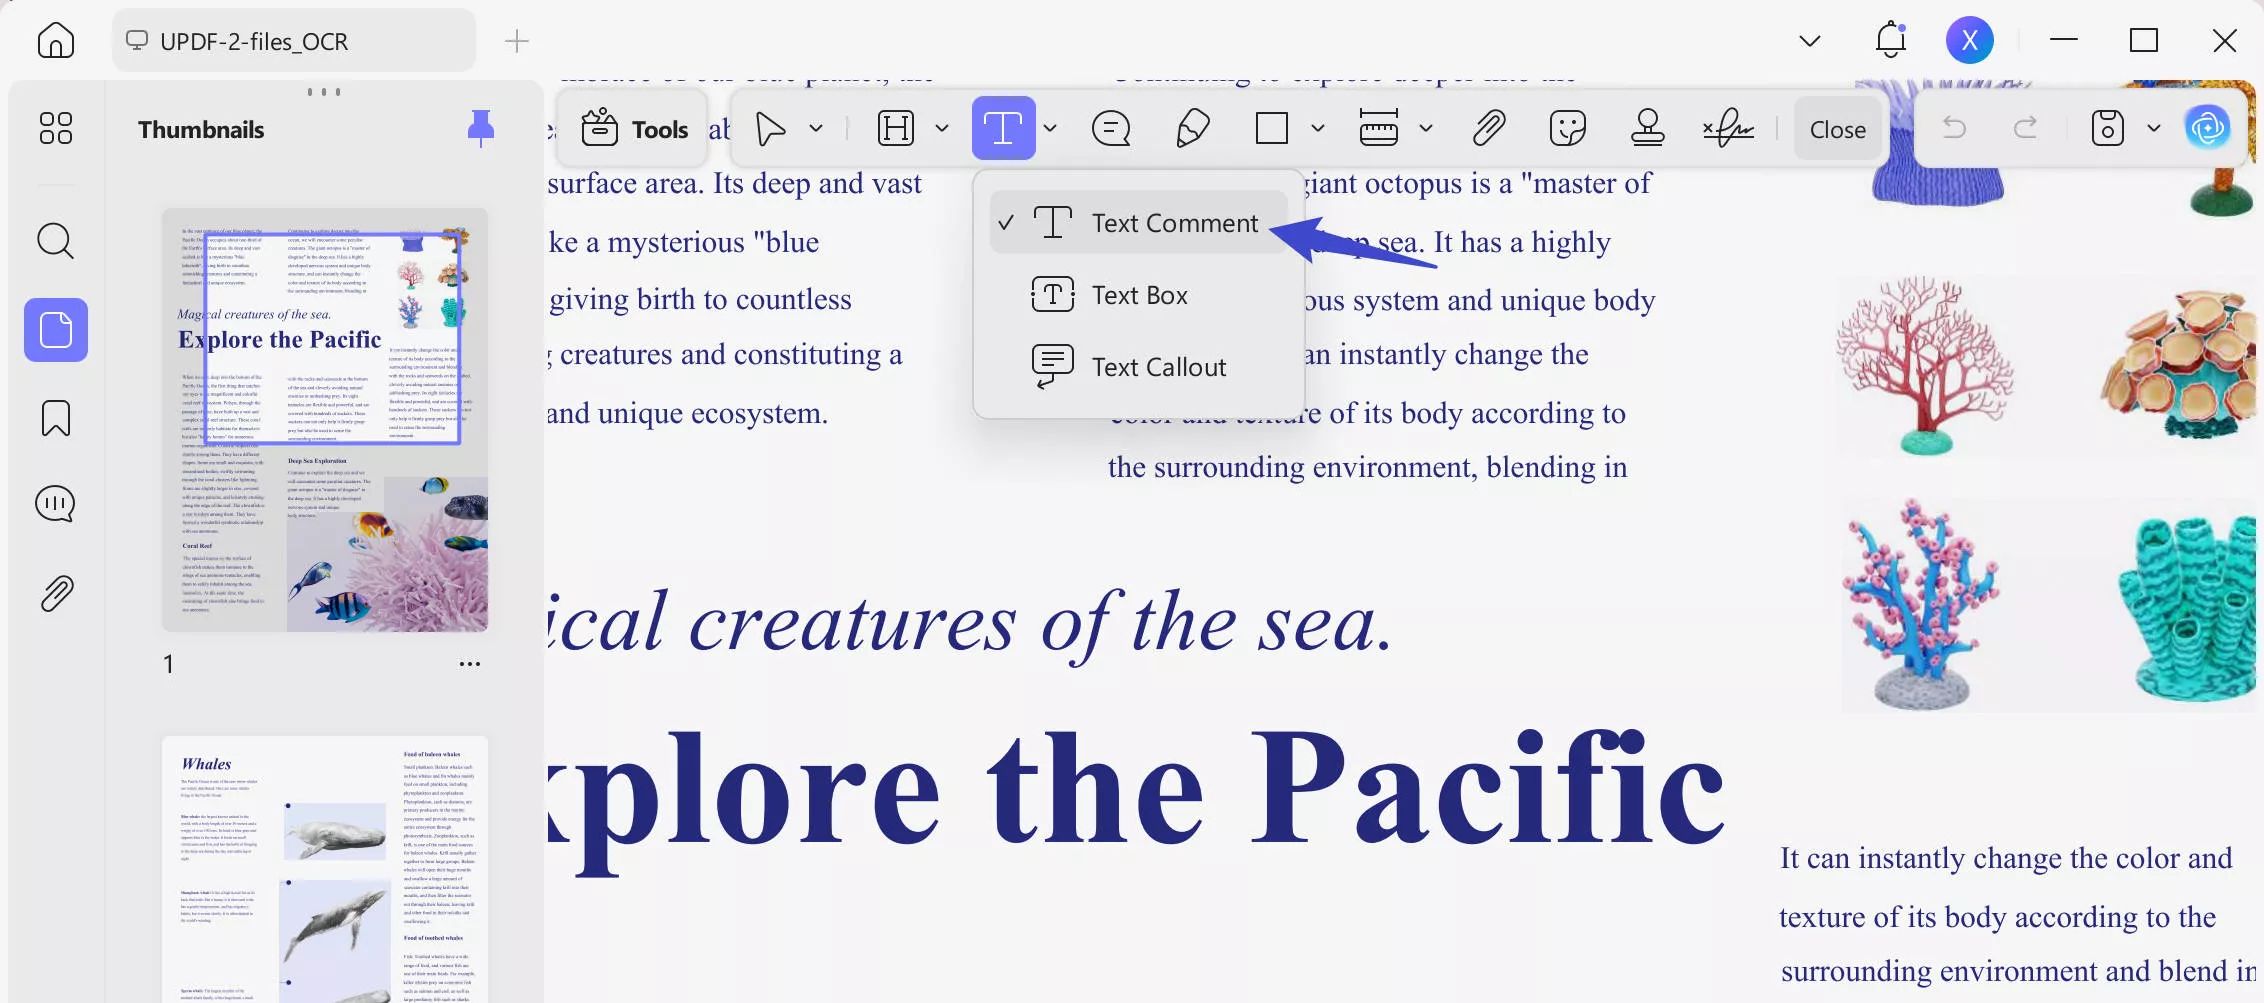
UPDF also provides 4 types of comment tools, including Sticky Notes, Text Boxes, Text Comments, and Text Callouts, to add additional information or highlight any mistakes present in your document. You can also adjust the properties of these tools before adding them to your document.
If you want to add a text comment to your document, click the "Text Comment" option represented by a simple "T" and click on the PDF where you want that text to appear. Start typing, and you can change color, font, size, and other technicalities.
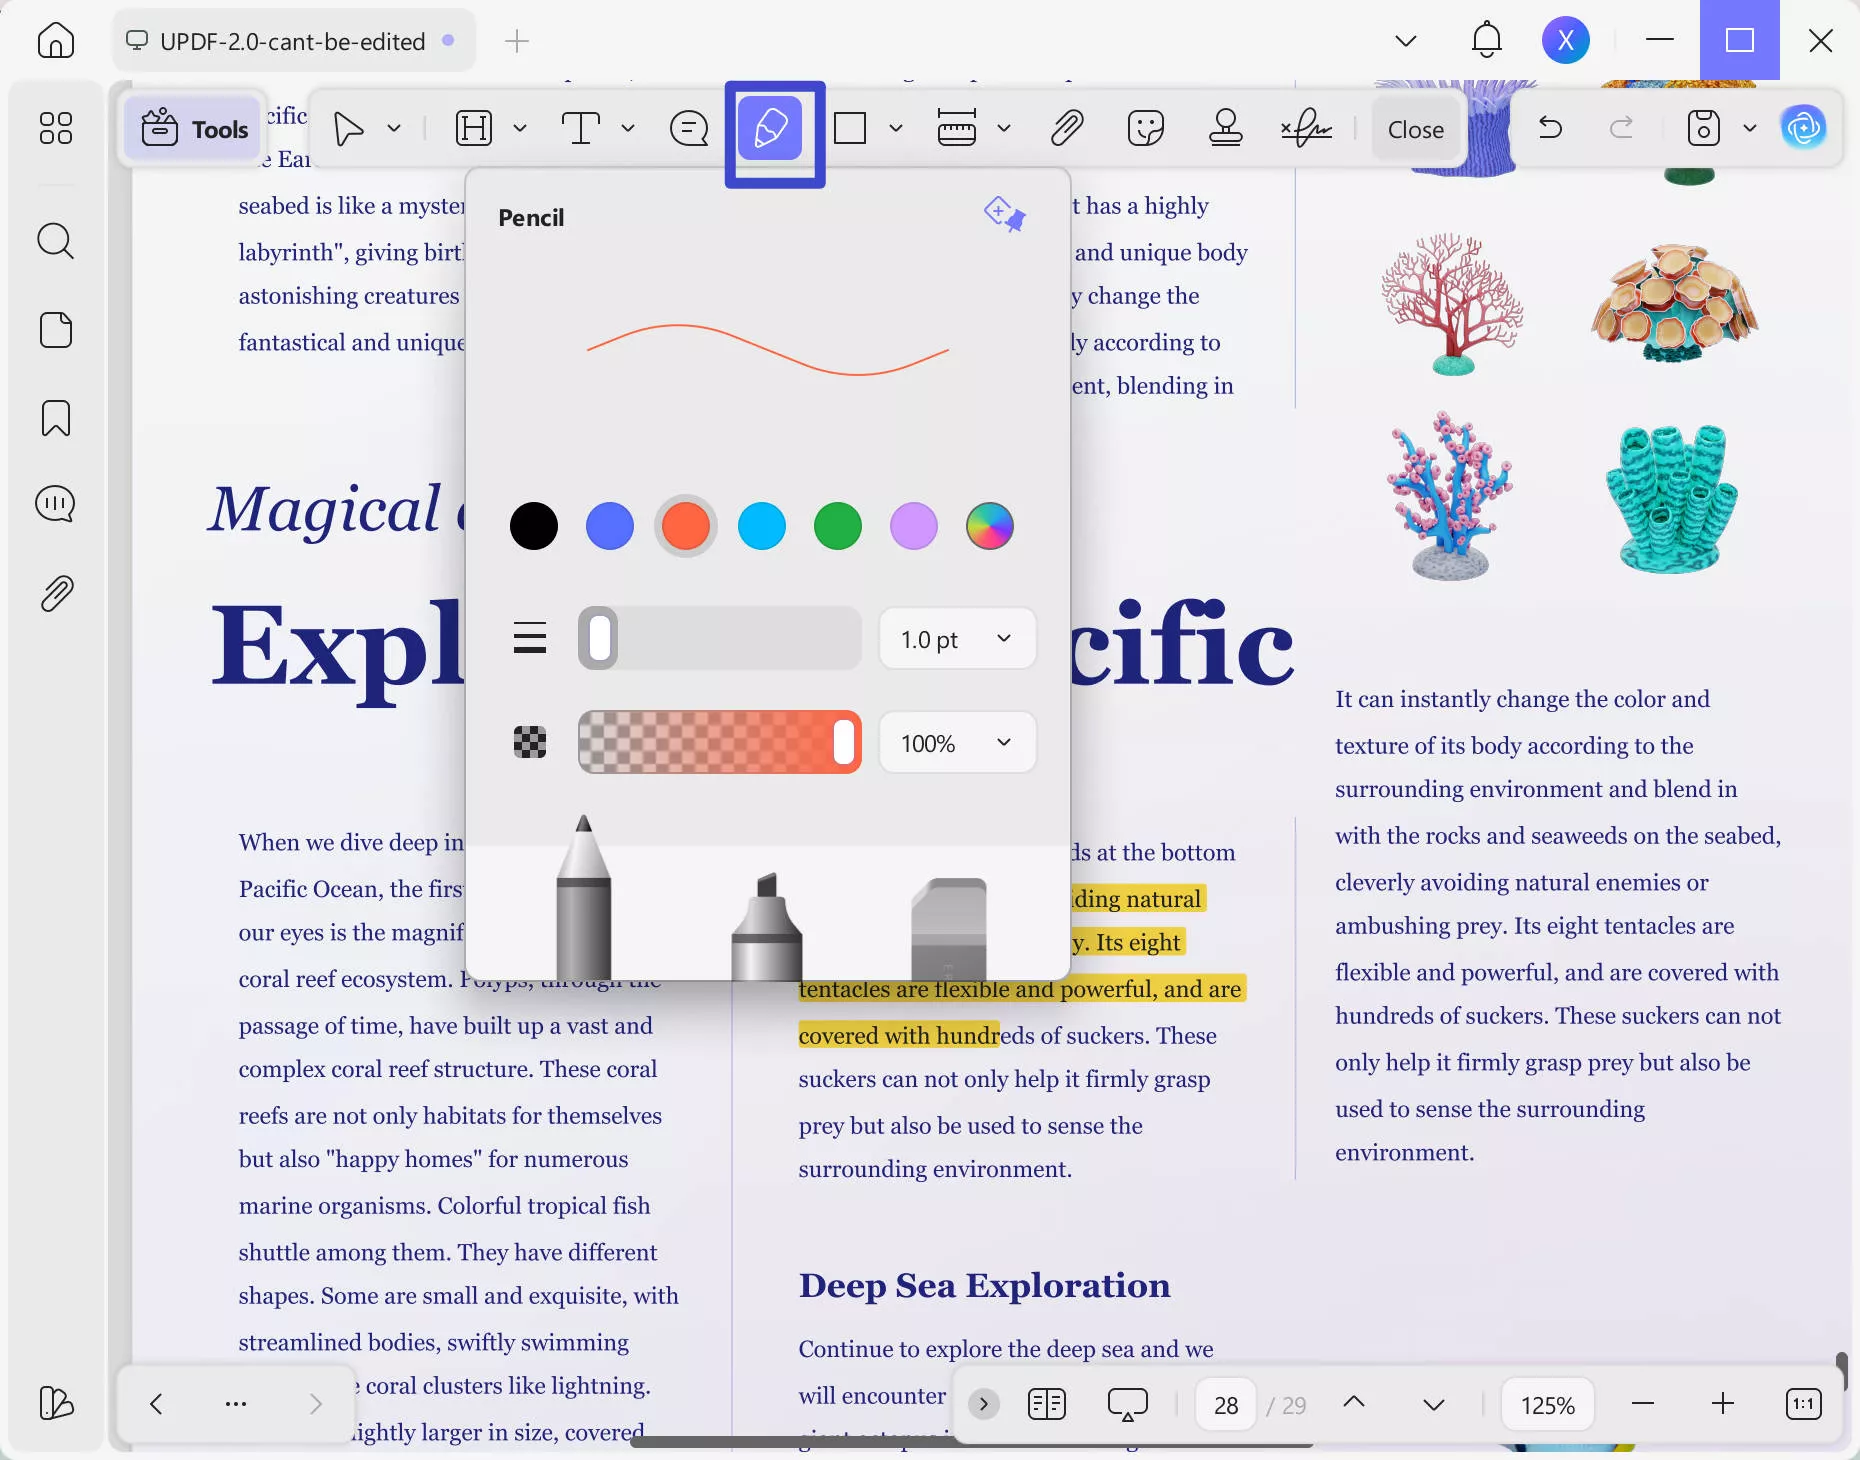
2.3 Pencil Tool to Draw
The pencil tool is quite helpful if you want to add engaging hand drawings to your document. You can also adjust the opacity and thickness of the Pencil tool along with the color.
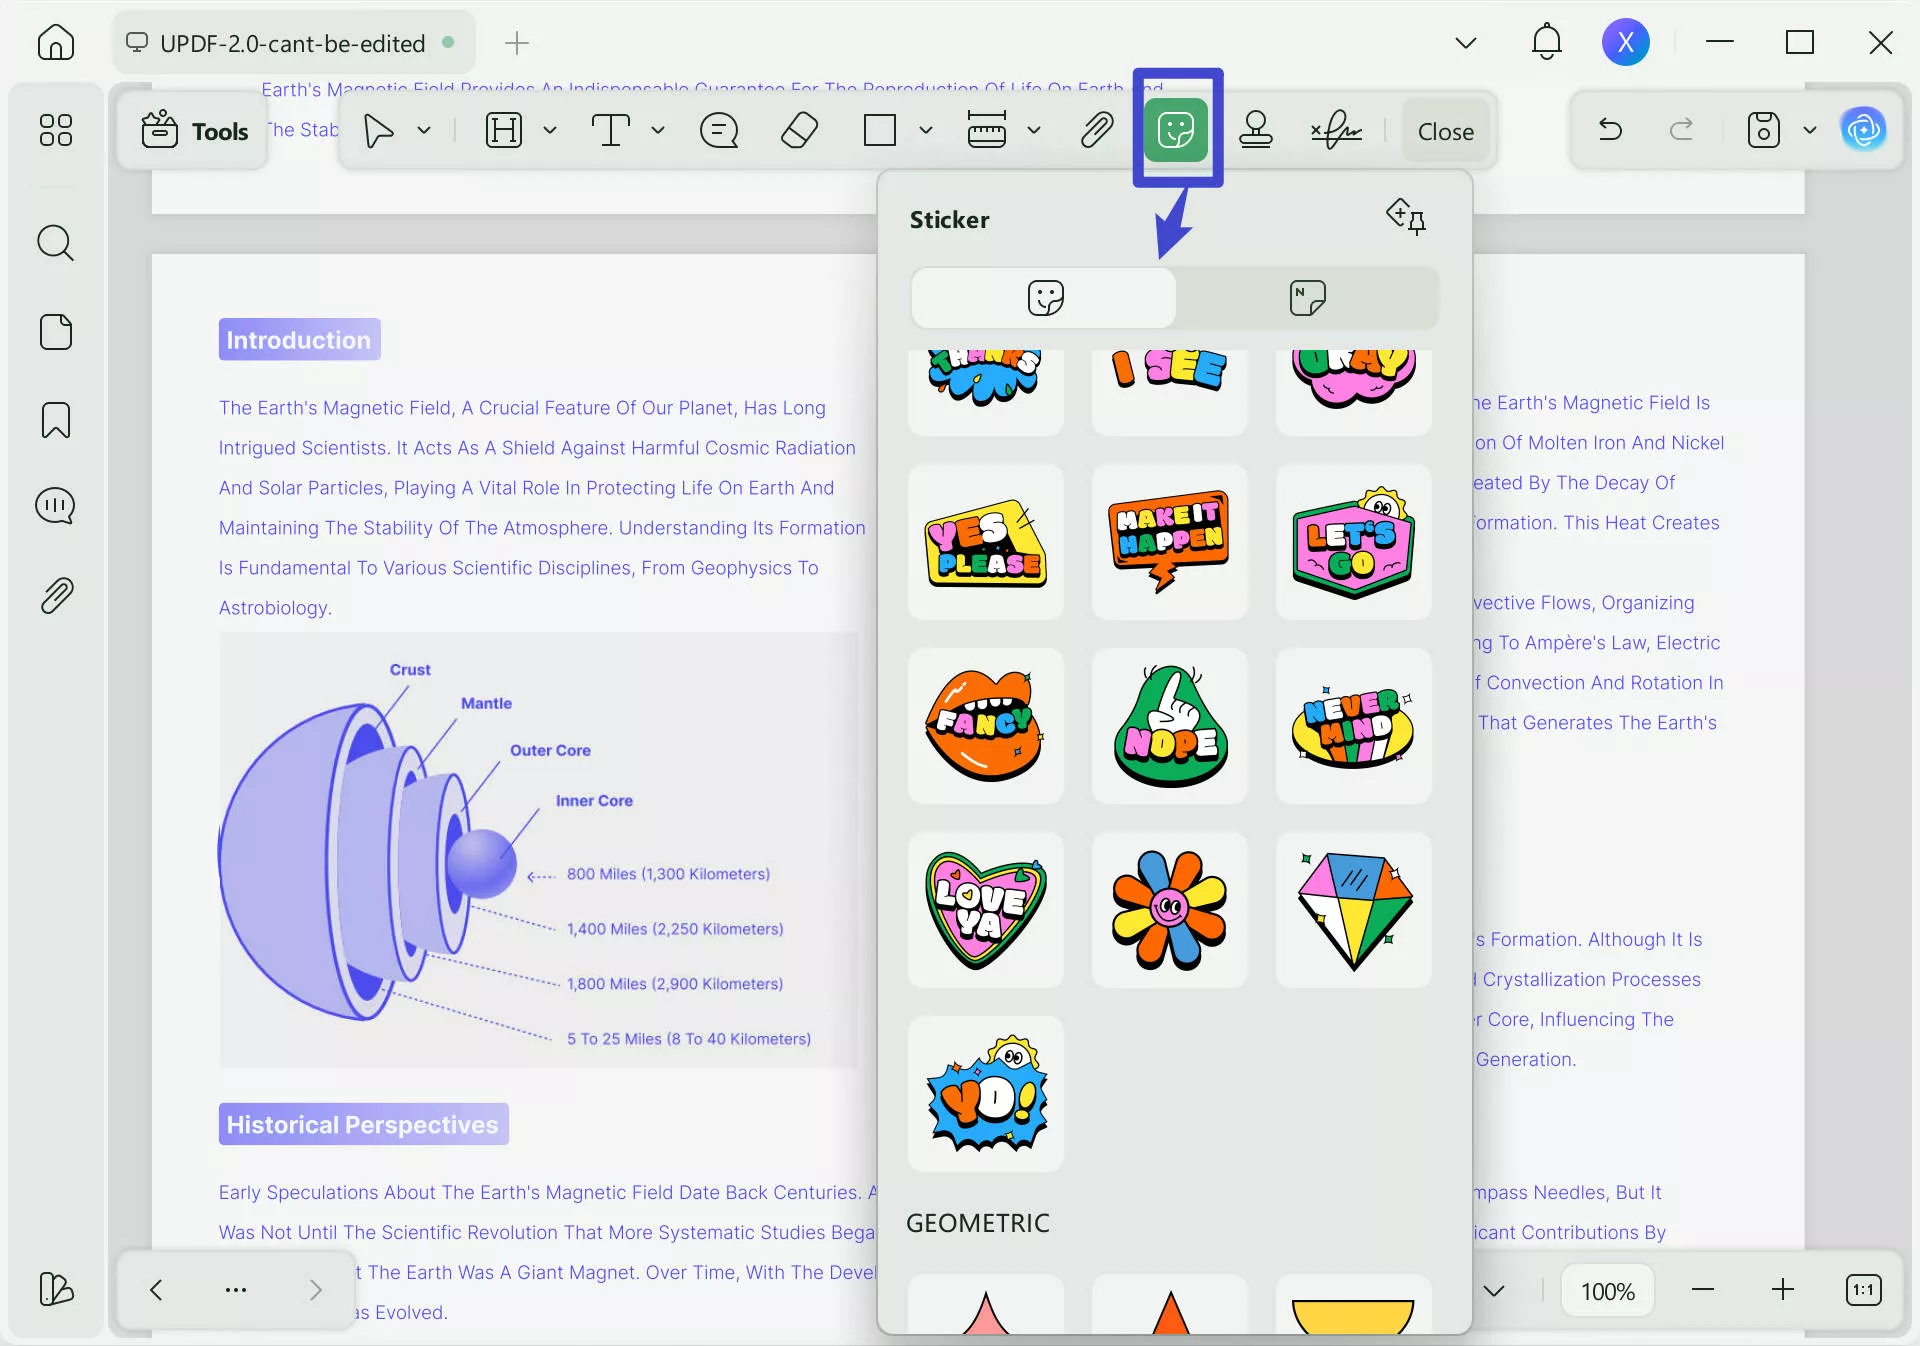
2.4 100+ Stamps and Stickers
To make your document more engaging and attractive, you can use the Stickers tool of UPDF, which consists of more than 100 unique options. Furthermore, you can use the Stamp tool to confirm the status of your document, such as Draft and Reviewed. It even allows you to import your company's custom stamps to apply to the document.
Step 3. Save the File after Annotating
Once you complete all annotations, click "File" from the top and go down to save. Click it, and the work will be saved on the same PDF document. Press the "Control & S" buttons together to save your work.
If you want to learn how to annotate PDF on Windows more quickly, please watch the video below. But first of all, click the download button to install UPDF on your Windows device. It doesn't require any information and is 100% secure. What's more exciting? It is now on sale and you can get an exclusive 61% off offer now. Get it now and you can use one premium account on 4 devices, including Windows, Mac, iOS, and Android.
Windows • macOS • iOS • Android 100% secure
Part 2. How to Annotate a PDF on Windows Via Microsoft Edge?
Microsoft Edge will be a good option if you don’t have a PDF editor or viewer installed on your PC. Edge is the built-in browser that comes with Windows, and it can open PDFs, annotate them, and search through those documents. So, instead of downloading a PDF editing tool, you can quickly use Edge for your basic annotation requirements.
However, it does not support in-depth editing and annotating tools like UPDF, Acrobat, or other tools. Regardless, the process of annotation here is very simple with the following 4 easy steps:
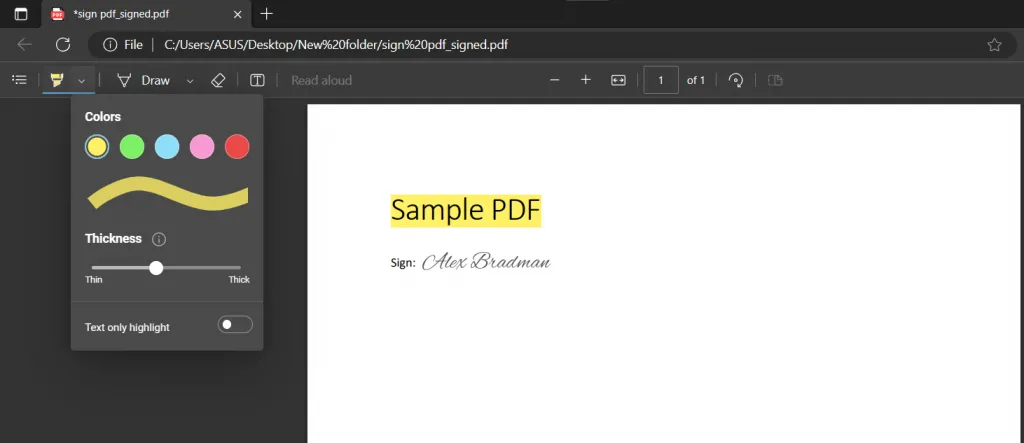
1. Open PDF in Edge and highlight
Double-click the PDF file, and it will open in Microsoft Edge automatically if you don’t have any other PDF viewer or editor installed. If it does not happen, "right-click" and choose the "open with" option. There you can select Edge to open that PDF once or permanently.
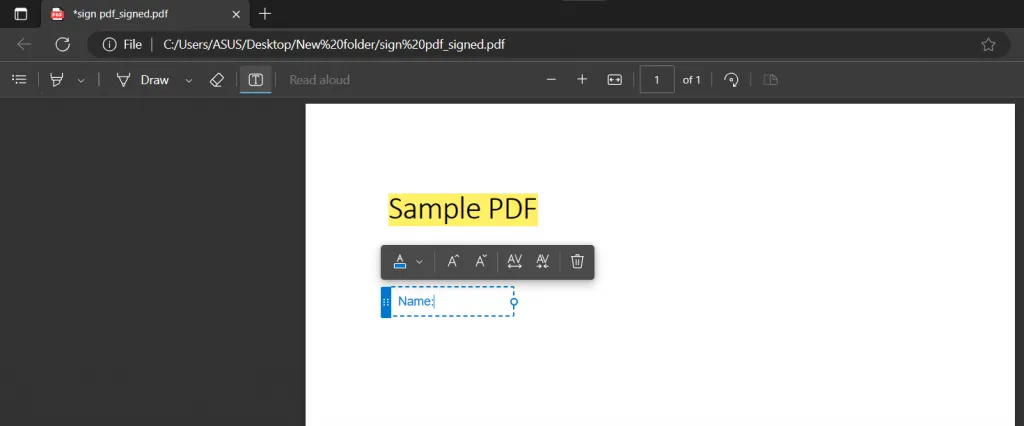
2. Click Add text
Microsoft Edge PDF viewer has its interface simply designed. It contains all the tools and features on top for an easy experience. In this example, we will start with adding text. Click the "T" button present on the left side. Click anywhere and add text.
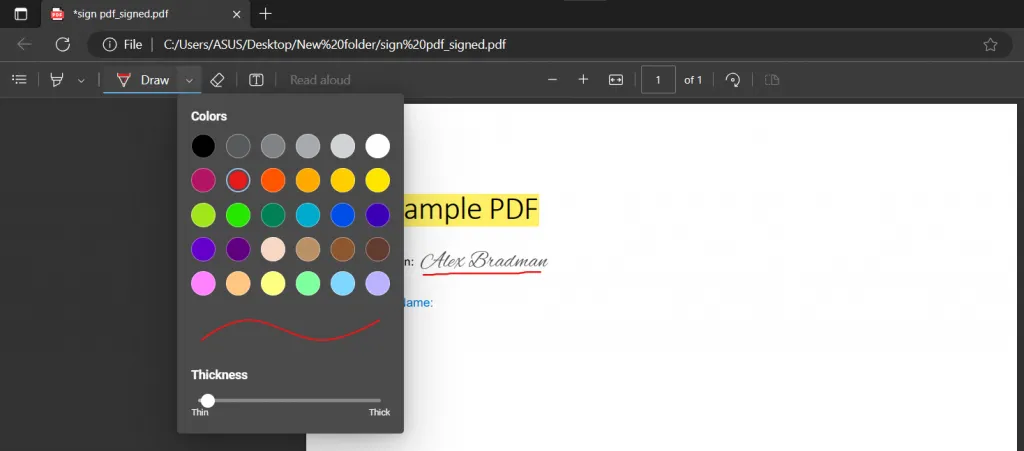
3. Click draw for freehand notes.
Similarly, you can draw and highlight your PDF documents. Click "Draw" and start drawing on the PDF document with the cursor icon. Similarly, click the "Highlighter icon" and strike the cursor anywhere on the document to highlight that portion. You can use the dropdown arrow to edit how you can draw and highlight.
4. Save your work
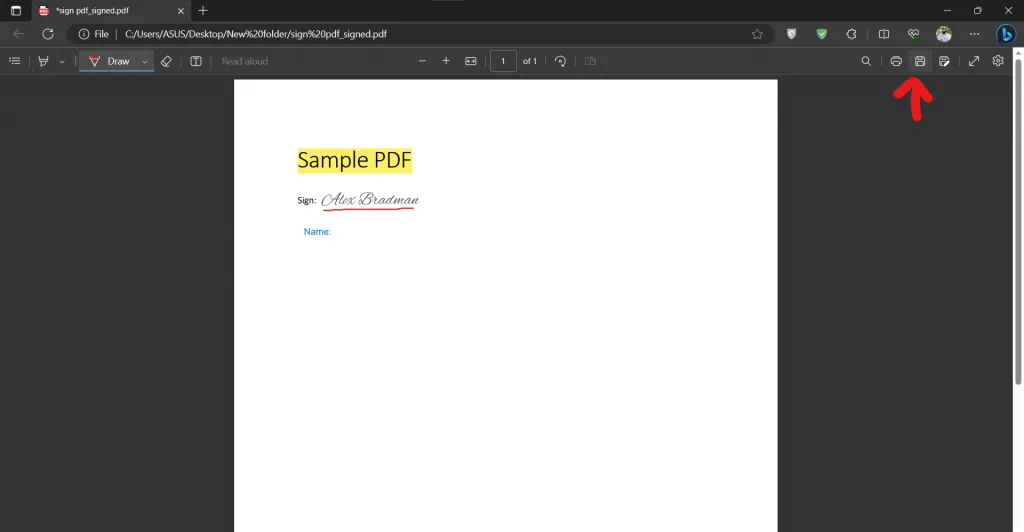
After annotating, you can locate the "Save" button on the right side. Click it, and your work will be saved in that document. You can press "Control & S" for the same function. Use the "Save As" feature if you want to save that work in another document and don’t want to edit the original one.
Part 3. How to Markup a PDF on Windows Via Adobe Acrobat?
If you have a history of working with PDF documents, you might be familiar with Adobe Acrobat. It is an old and very famous suite of PDF tools that has been a go-to option for people for years. It offers a complete experience with different tools like the paid Pro version, and free reader version, and now it has also introduced the latest free online version.
Adobe Acrobat also brings you an in-depth PDF editing experience; however, we will focus on annotating. It allows you to annotate PDF documents using the Adobe Acrobat tool and its online version. So, below are the detailed steps to use both versions of Adobe Acrobat.
Way 1. Via Windows Adobe Acrobat
If you are using the paid version of Adobe Acrobat for editing and viewing your PDF files, you can use it to add annotations. Like UPDF, it also brings many annotation features like drawing, highlighting, text comments, etc.
However, if you are unfamiliar with the tool, it may take some learning curve to get used to it due to the outdated interface. Also, remember that it is not the cheapest option for you to choose.
1. Click the file to open the PDF.
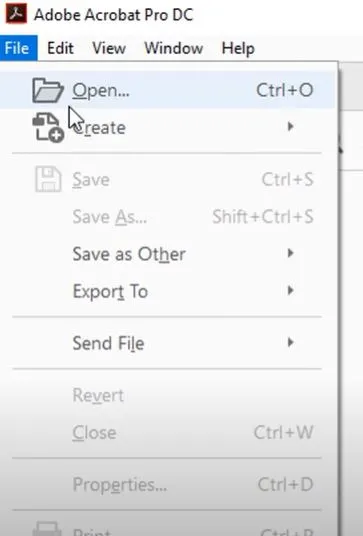
Double-click the Acrobat application icon on your PC from the desktop, taskbar, or start menu by searching for it. Click the "File" tab to go for the "Open" option. Now you need to locate that PDF using the browse window, and once you find it, "double click" to open it in Adobe Acrobat.
2. Select Comment in Tools
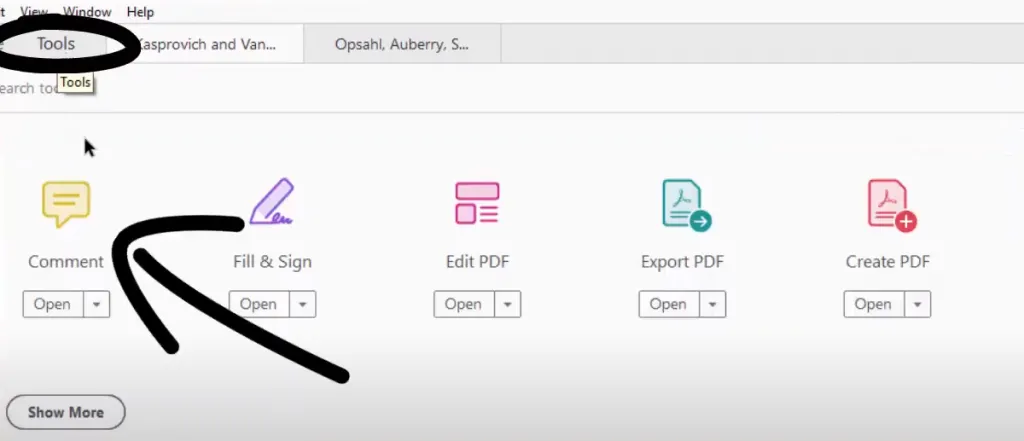
On the top left, you will see different PDF tabs, and there will be a "Tools" tab there. Click it, and it reveals multiple things that Adobe Acrobat can do. In this guide, we will select "Comment" since you want to annotate your PDF file.
3. Click highlight to highlight text and add notes.
It will show you multiple annotation tools like strikethrough, underline, text comment, highlight, pencil, etc. However, we will only explain highlighting in this example since the experience is the same as other features. So, click "Highlight" and hold and drag the cursor over any text. It will not only highlight that text for you, but you can also add comments for that highlight.
4. Save your work
The third row on top shows you different basic PDF tools, the first of which is the "Save" button. Click it and save all your annotations in that PDF file.
Way 2. Via Adobe Acrobat Online
Adobe is not only an offline tool but also an online version available, which is free to use. While both come from the same source, the experience of using both versions differs greatly. So, here are the steps to follow on Adobe Acrobat Online for annotating your documents.
1. Click edit and select Add comments.
Go to Adobe Acrobat Online Website and "Sign in" before you go to the home tab. There you will see the "Edit" tab. Click it, then select "Add Comments,". It is present in the "Edit a PDF" column. Now it will make you upload a PDF by selecting it in the browse window. Locate and double-click that PDF to open it on the online website.
2. Click add comments and type comment.
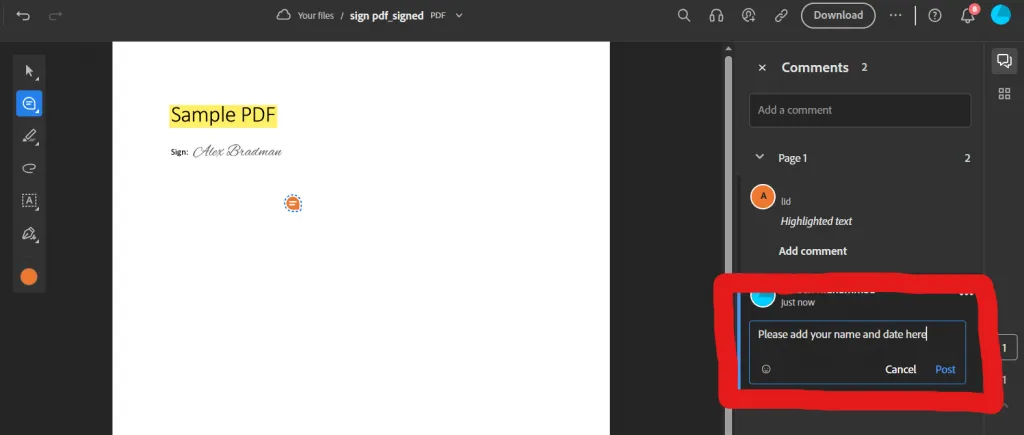
On the left side of your PDF page, you will see annotation options. Select "Add Comments" only. Click anywhere else on your PDF document to add a comment at that location. Now you will see a column on the right side where you will type the comment and post it by clicking "Post."
3. Click download
After making all desired annotations, click "Download", and Adobe Acrobat Online will download the updated PDF document that contains all your annotations. If you want to collaborate, click the "Share" or "Link" buttons for easy sharing.

With these simple steps, you can add comments in Adobe Acrobat Online for free and without installing any tool on your PC.
Also Read: How to Add Comments in PDF in a Few Minutes
FAQ about Annotating PDF on Windows
1. How do I annotate a PDF in Windows with a pencil?
If you want to annotate your PDF with a pencil, you can use the Comment tool of UPDF PDF annotator. First, you have to open your PDF file by tapping on the "Open File" button and add your required document. Next, access the "Comment" tool from the left panel and tap on the "Pencil" from the top toolbar to start drawing on your document.
2. How do I annotate a PDF in Chrome Windows 11?
There are multiple ways to annotate a PDF in Chrome on Windows 11. You can get help from online tools like Sejda or Chrome extensions like Markup Hero. Moreover, you can convert your PDF into Google Docs to annotate the content.
3. How do I annotate a PDF on Windows 10?
Annotating a PDF document on Windows 10 is quite easy if you use a tool specially designed for this purpose and your operating system. We recommend you use the UPDF PDF annotator to mark your document's crucial details.
Final Words
We hope you have learned the most efficient ways how to annotate PDFs on Windows. Whether you use Windows 10 or the latest 11, these methods will work the same for you and help you enhance your collaboration efficiency. Annotating PDF documents is required in education, personal, and professional usage, and with the methods discussed here, your productivity will significantly increase regardless of the use case.
Sometimes, you don't need to only annotate the PDF documents on Windows; there are other editing needs. So, instead of other tools, try UPDF and see how it improves your PDF experience. From viewing to editing, organizing, and sharing, UPDF comes with every feature you need. This way, it unlocks your full potential for working on PDF documents. If you want to learn more about this amazing software, read the comprehensive UPDF review on wccftech.
Windows • macOS • iOS • Android 100% secure
 UPDF
UPDF
 UPDF for Windows
 UPDF for Mac
 UPDF for iPhone/iPad
 UPDF for Android
 UPDF AI Online
 UPDF Sign
 Edit PDF
 Annotate PDF
 Create PDF
 PDF Form
 Edit links
 Convert PDF
 OCR
OCR PDF to Word
 PDF to Image
 PDF to Excel
 Organize PDF
 Merge PDF
 Split PDF
 Crop PDF
 Rotate PDF
 Protect PDF
 Sign PDF
 Redact PDF
 Sanitize PDF
 Remove Security
 Read PDF
 UPDF Cloud
 Compress PDF
 Print PDF
 Batch Process
 About UPDF AI
 UPDF AI Solutions
 AI User Guide
 FAQ about UPDF AI
 Summarize PDF
 Translate PDF
 Chat with PDF
 Chat with AI
 Chat with image
 PDF to Mind Map
 Explain PDF
 Scholar Research
 Paper Search
 AI Proofreader
 AI Writer
 AI Homework Helper
 AI Quiz Generator
 AI Math Solver
 PDF to Word
 PDF to Excel
 PDF to PowerPoint
 User Guide
 UPDF Tricks
 FAQs
FAQs UPDF Reviews
 Download Center
 Blog
Blog Newsroom
 Tech Spec
 Updates
 UPDF vs. Adobe Acrobat
 UPDF vs. Foxit
 UPDF vs. PDF Expert




 Grace Curry

 Enrica Taylor
 Delia Meyer
 Enya Moore