UPDF for Windows
 UPDF for Mac
 UPDF for iPhone/iPad
 UPDF for Android
 Nomostar
 UPDF AI Online
 UPDF Sign
 IvyCraft
 Edit PDF
 Annotate PDF
 Create PDF
 PDF Form
 Edit links
 Convert PDF
 OCR
OCR PDF to Word
 PDF to Image
 PDF to Excel
 Organize PDF
 Merge PDF
 Split PDF
 Crop PDF
 Rotate PDF
 Protect PDF
 Sign PDF
 Redact PDF
 Sanitize PDF
 Remove Security
 Read PDF
 UPDF Cloud
 Compress PDF
 Print PDF
 Batch Process
 About UPDF AI
 UPDF AI Solutions
 AI User Guide
 FAQ about UPDF AI
 Summarize PDF
 Translate PDF
 Chat with PDF
 Chat with AI
 Chat with image
 PDF to Mind Map
 Explain PDF
 PDF AI Tools
 Image AI Tools
 AI Chat Tools
 AI Writing Tools
 AI Study Tools
 AI Working Tools
 Other AI Tools
 AI Bookmark Generation
 AI Bookmark Summary
 AI Watermark Generation
 AI Background Generation
 AI Sticker Generation
 AI Stamp Generation
 AI Editing Suite
 UPDF Copilot
 AI Page Management
 AI Semantic Search
 PDF to Word
 PDF to Excel
 PDF to PowerPoint
 User Guide
 UPDF Tricks
 FAQs
FAQs UPDF Reviews
 Download Center
 Blog
Blog Newsroom
 Tech Spec
 Updates
 UPDF vs. Adobe Acrobat
 UPDF vs. Foxit
 UPDF vs. PDF Expert
Create PDF on Windows with UPDF
UPDF for Windows creates PDF files from various sources such as Word, Excel, PowerPoint, and images saved on your device. Additionally, this version brings enhanced functionality by allowing you to generate PDFs directly from the clipboard and scanned paper. Even if it's paperwork, you can now create multiple PDFs at once without any hassle.
Try it now by clicking the download button below.
Windows • macOS • iOS • Android 100% secure
Additionally, UPDF supports batch creation, allowing you to create single or multiple PDFs from various files in supported formats.
- Create a PDF from a File
- Create a PDF from a Blank page
- Create Multiple PDFs Simultaneously
- Create PDF from Scanner
- Create PDF from Clipboard
- Create PDF Portfolios
Method 1. Create a PDF from a File
Option 1. Create a PDF from a Word/Excel/PowerPoint/CAJ/TXT
There may be times when you have a document in a different format and need to convert it into a PDF. In such cases, simply access UPDF and import your file through Open File to automatically open your document into a PDF. Alternatively, follow the stepwise guide below to create a PDF from Word/Excel/PowerPoint/CAJ/TXT:
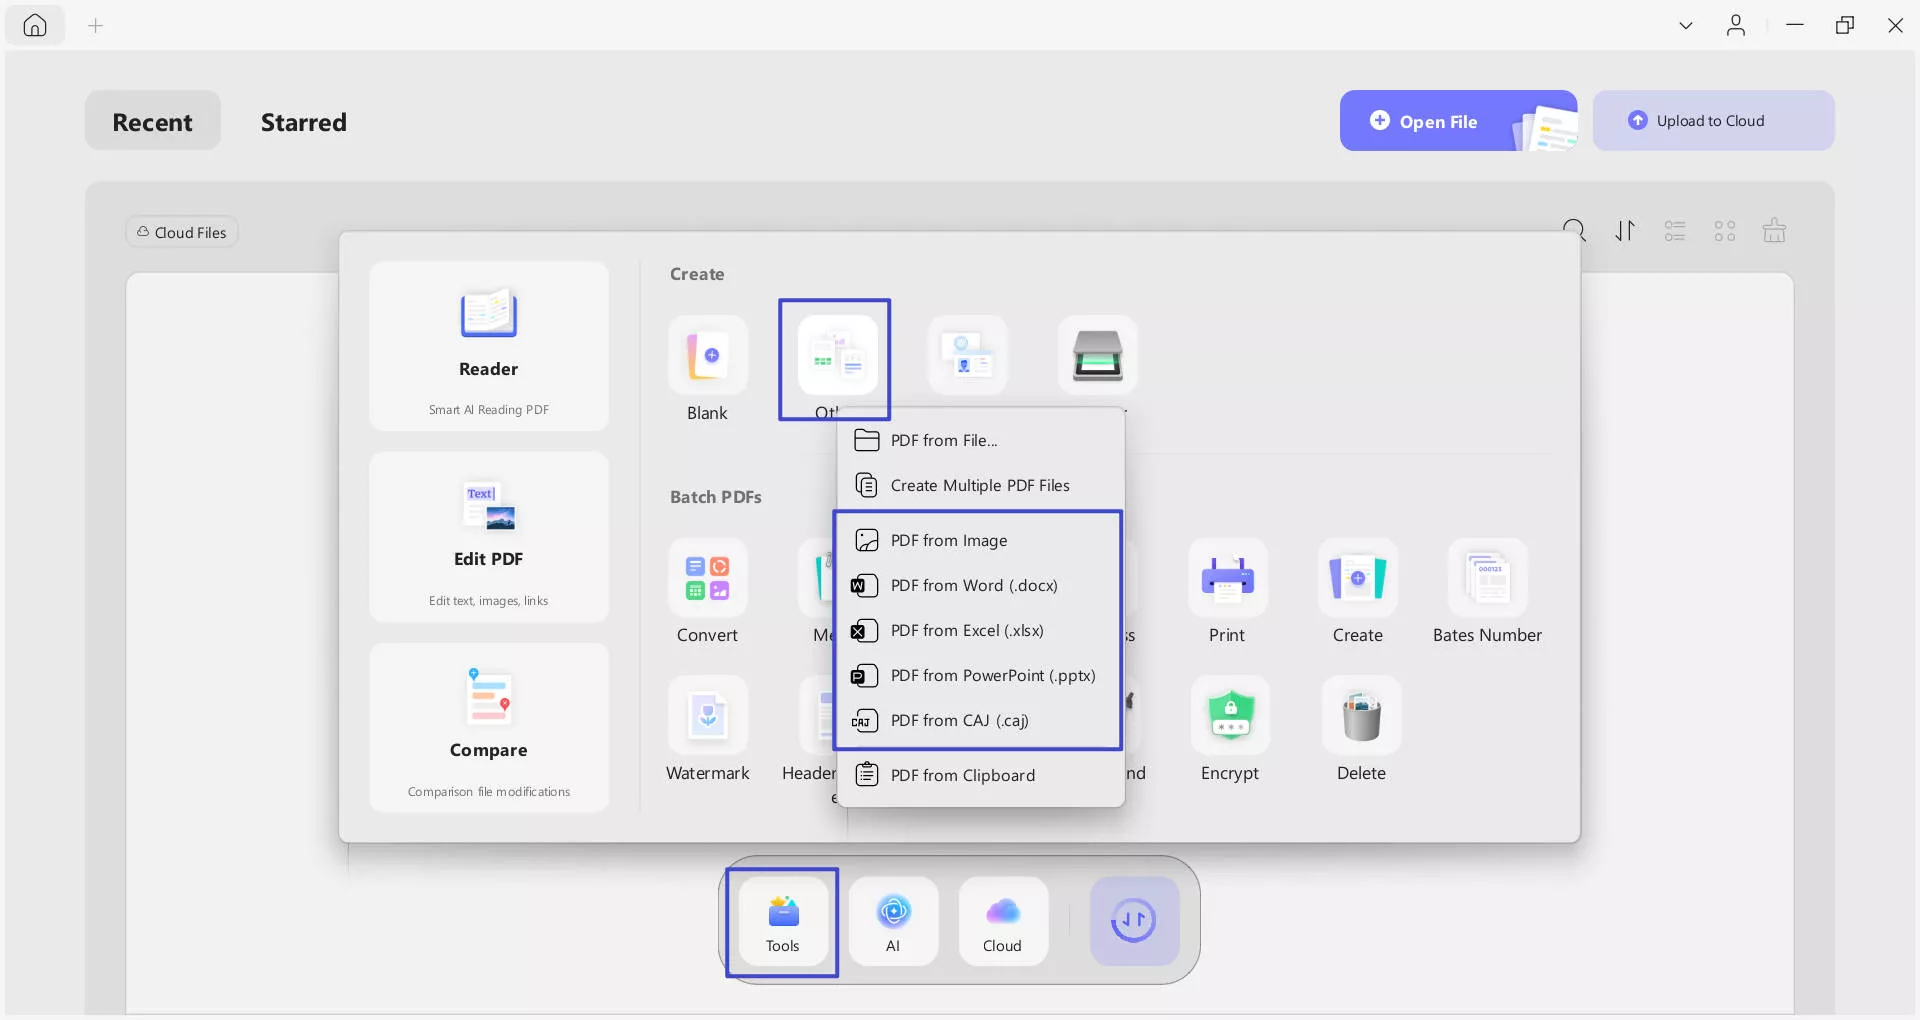
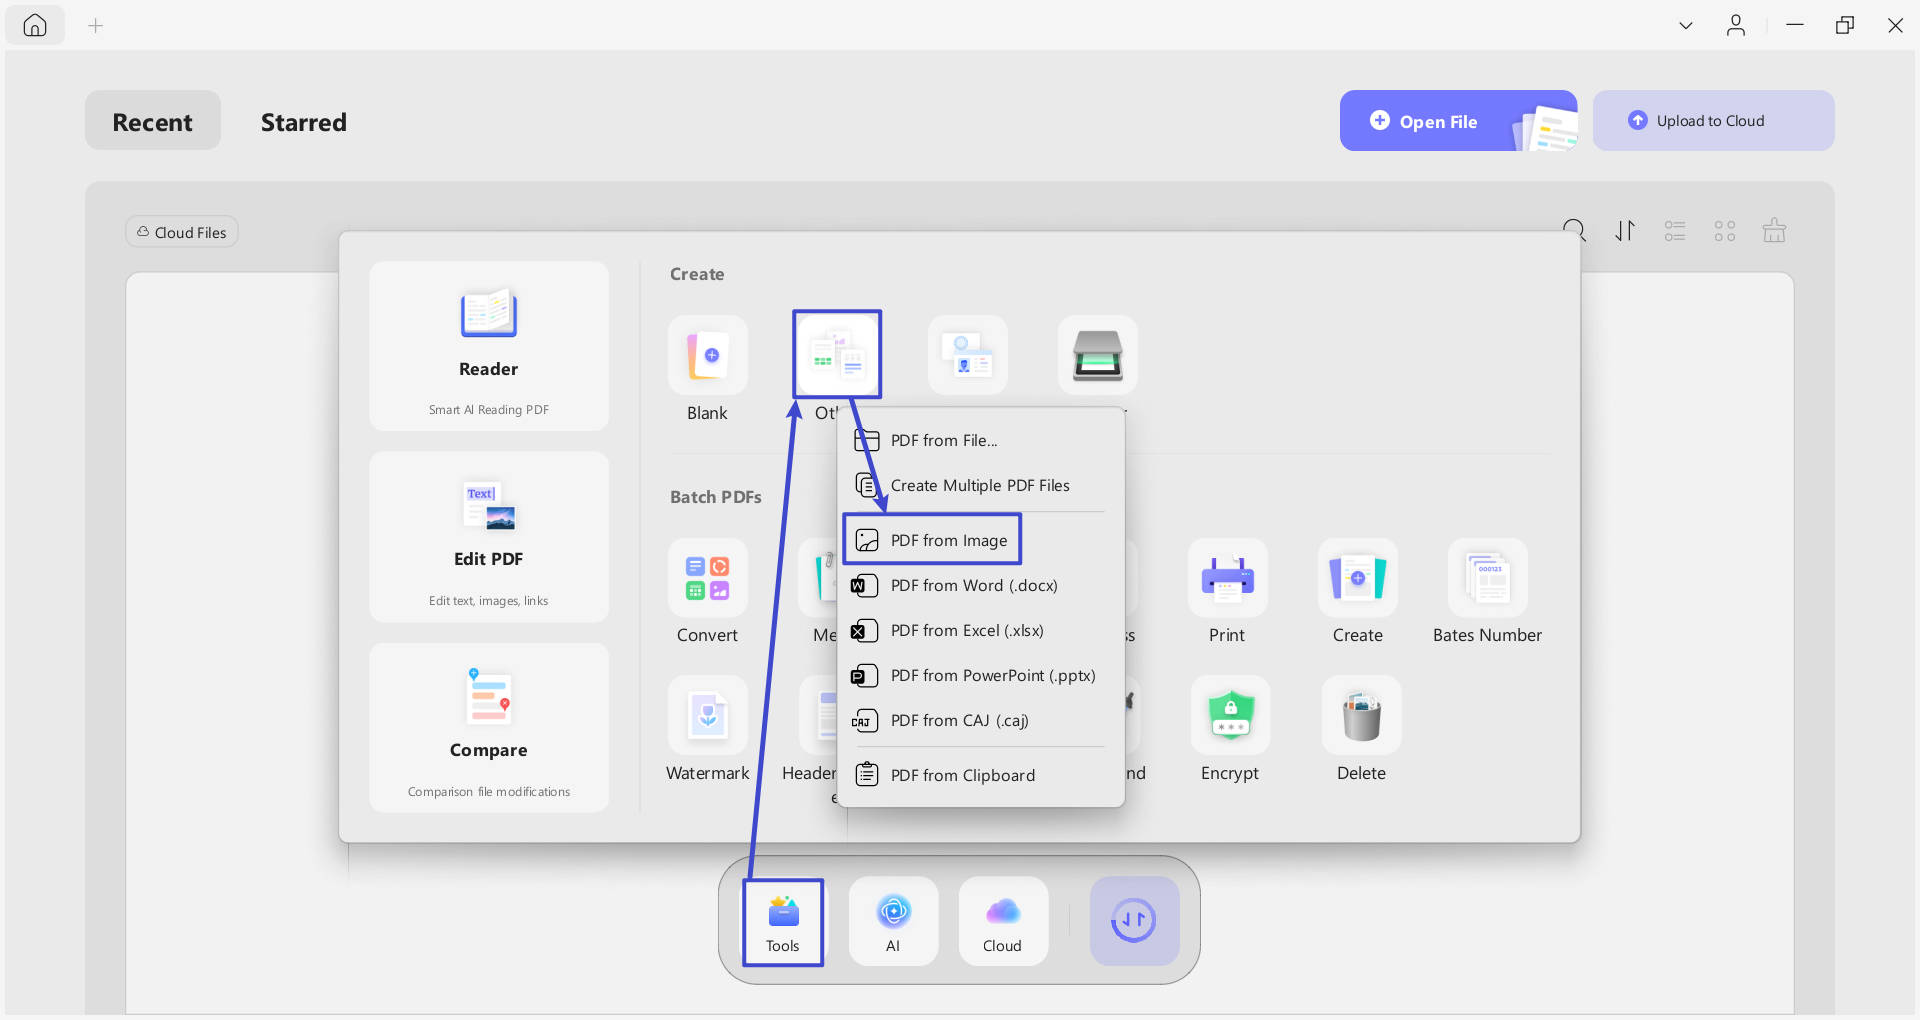
- Open UPDF and click the "Tools" button below, then select "Other" in the pop-up window.
- Choose the option from the provided list: PDF from Image, PDF from Word, PDF from Excel, PDF from PowerPoint, PDF from CAJ.
- You'll be prompted to select a document from your device. Choose and click the "Open" button, then UPDF will automatically convert the selected file into a PDF. Simply select a location to save it.
- Alternatively, you can directly drag and drop the file you want to convert into a PDF using UPDF version.
Option 2. Create from Images
UPDF supports several image formats, including JPG, PNG, BMP, TIF and other formats.
which can easily be converted into PDF files. Follow the steps below to create a PDF from your images:
- Open UPDF and click the "Tools" button below, then select "Other" in the pop-up window.
- From the provided list, choose the PDF from Image option.
- You'll be prompted to choose the document source to convert to PDF. Choose the Image File from your device. If you select multiple images, check the Combine into Single Document option, set the page sizes, and press Apply button to create.
- Conversely, if you choose to Generate a PDF Per File, these images will be turned into several separate PDFs. You can save a location to save them one by one, once UPDF automatically opens them.
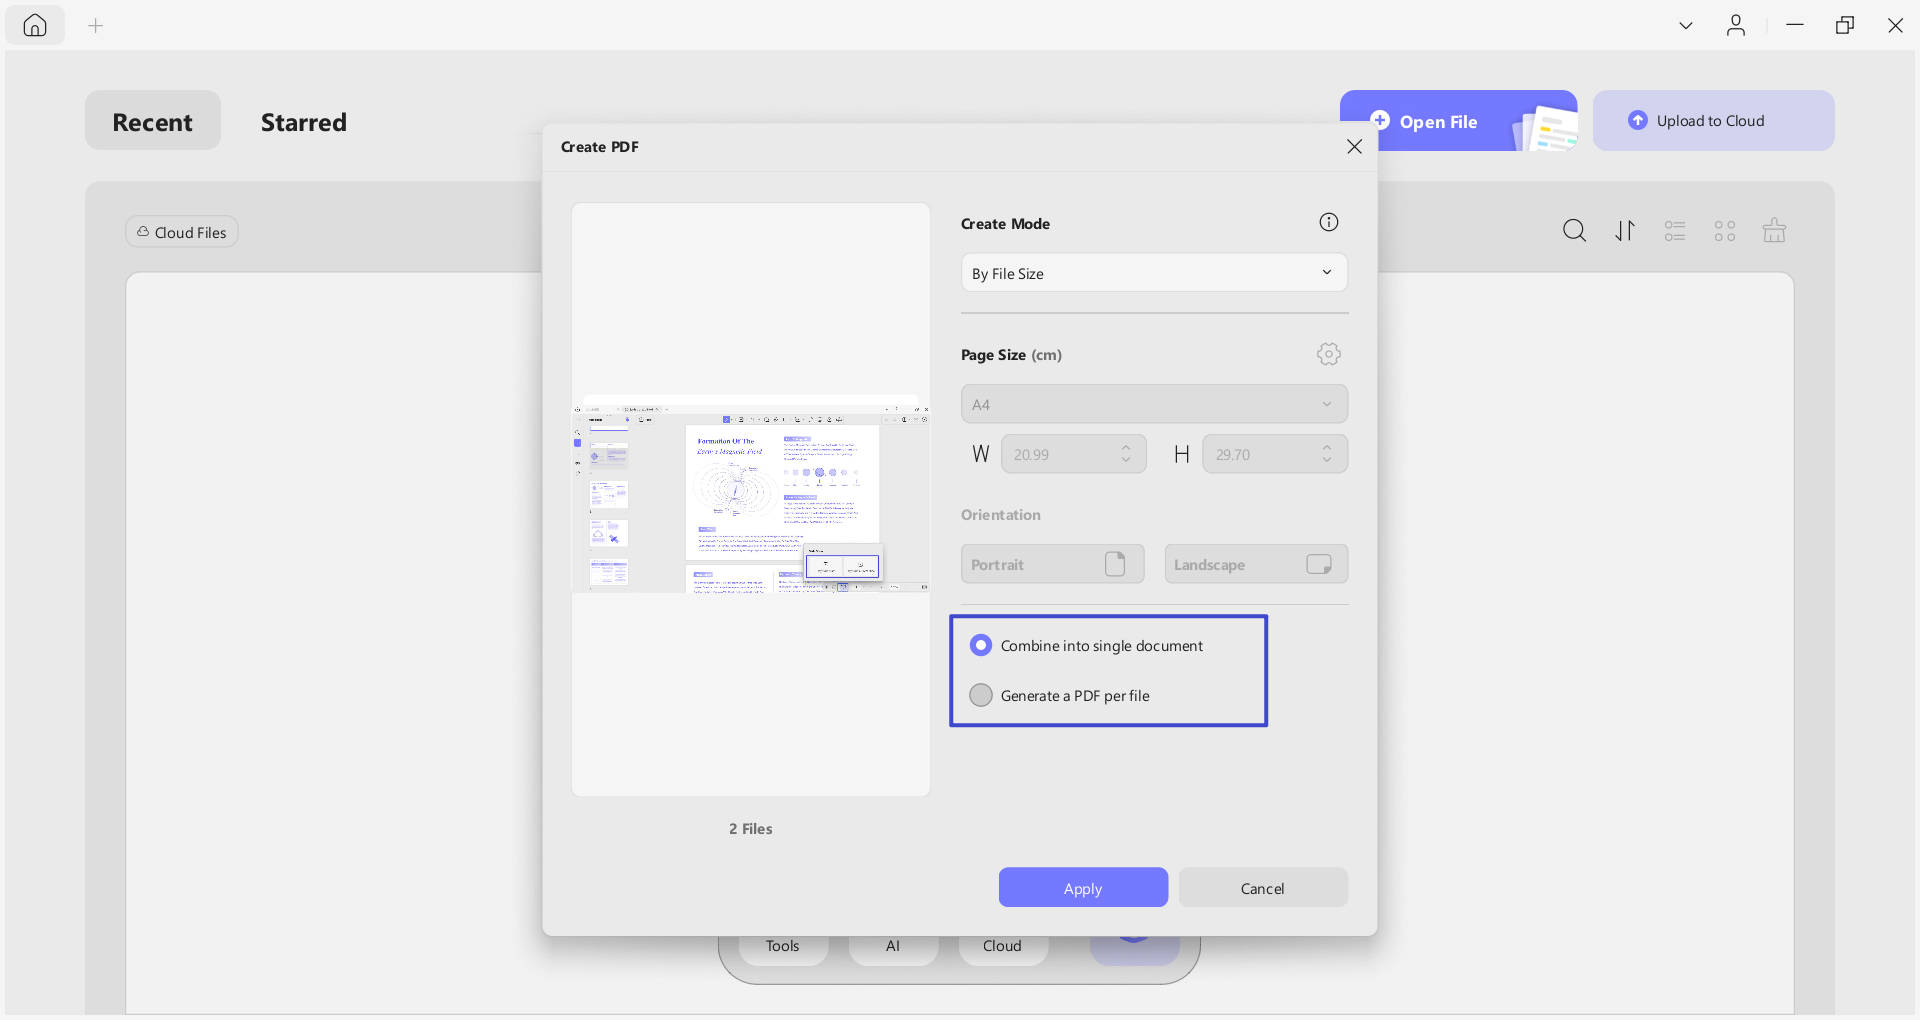
- When all the imported images are converted into a PDF, they can be further extracted, split, and removed through the Organize Page tool. You can choose a location to save this document as a PDF/A or Image-based PDF.
Method 2. Create a PDF from a Blank page
You can also create a PDF file from a blank page. Creating a PDF from a blank page is a simple procedure can may be accomplished with UPDF. This method is excellent for producing a new PDF document from scratch without utilizing an existing one as a starting point. Steps to create a blank page:
- Access the UPDF software and extend the menu for Tools from the main interface.
- From the given options, choose the Blank option to create one.
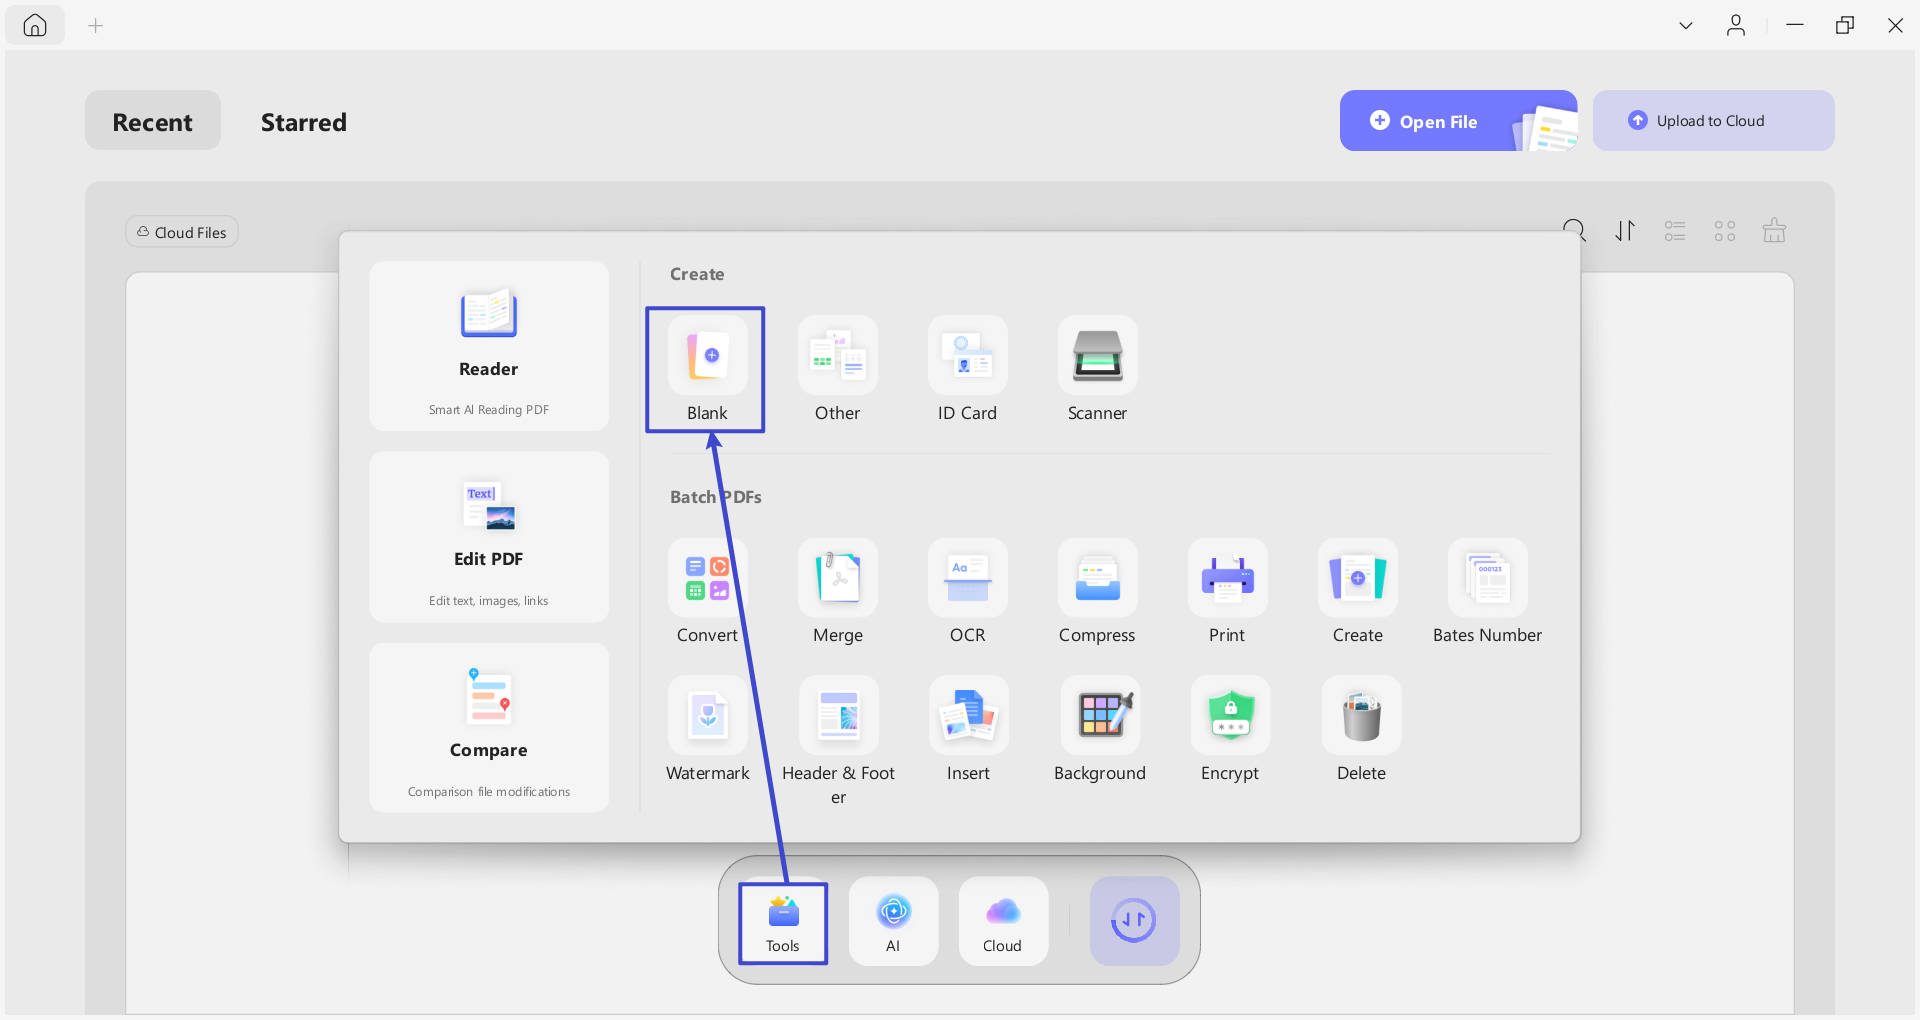
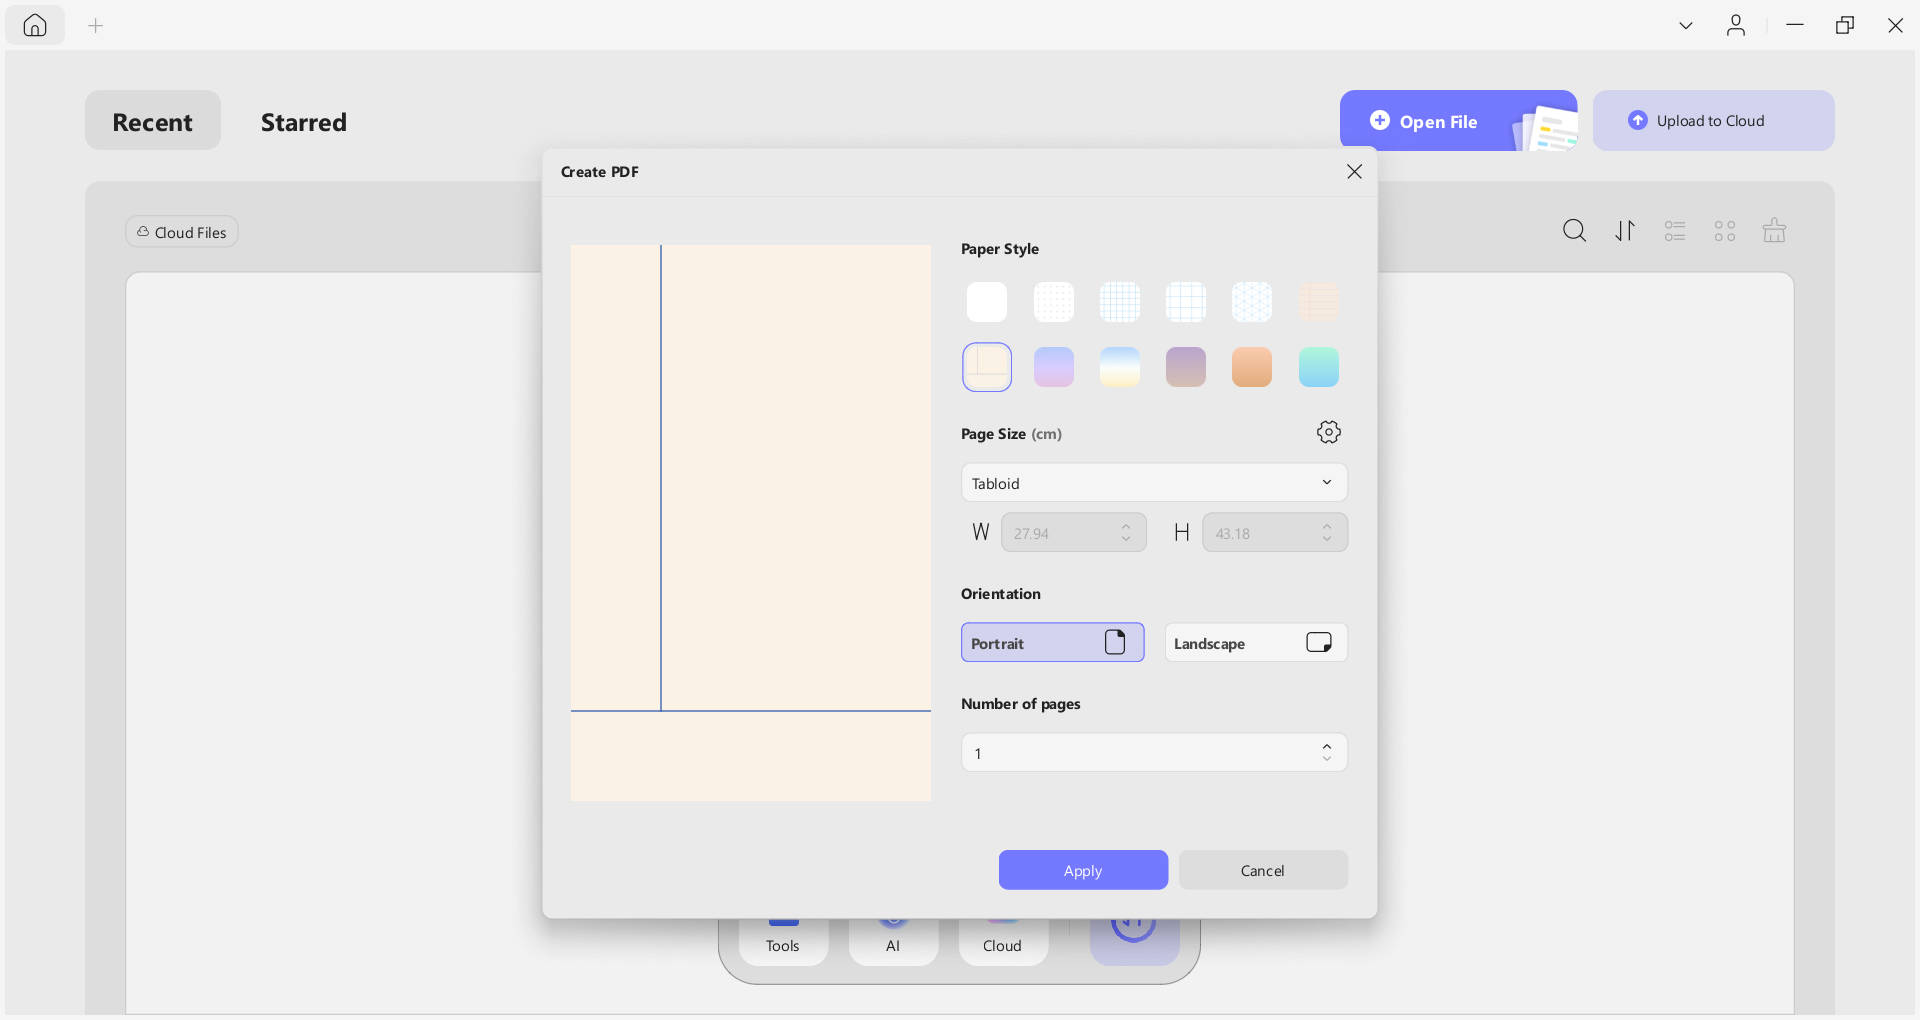
- A small window will pop up to allow you to customize the page style, including Number of Pages, Page Size, Orientation, Width, Height, and Paper Style.
Number of pages: Enter a specific number to customize the number of pages.
Page Size: Choose among Custom (enter the width and height you want), or from the options including A0-A8, B0-B8, C5E, Comm10E, DLE, and more.
Orientation: Portrait or landscape.
Paper Style: Paper Style: There are various options available for you to choose, including Blank, Dotted, Lined, Grid, Graph, and more.
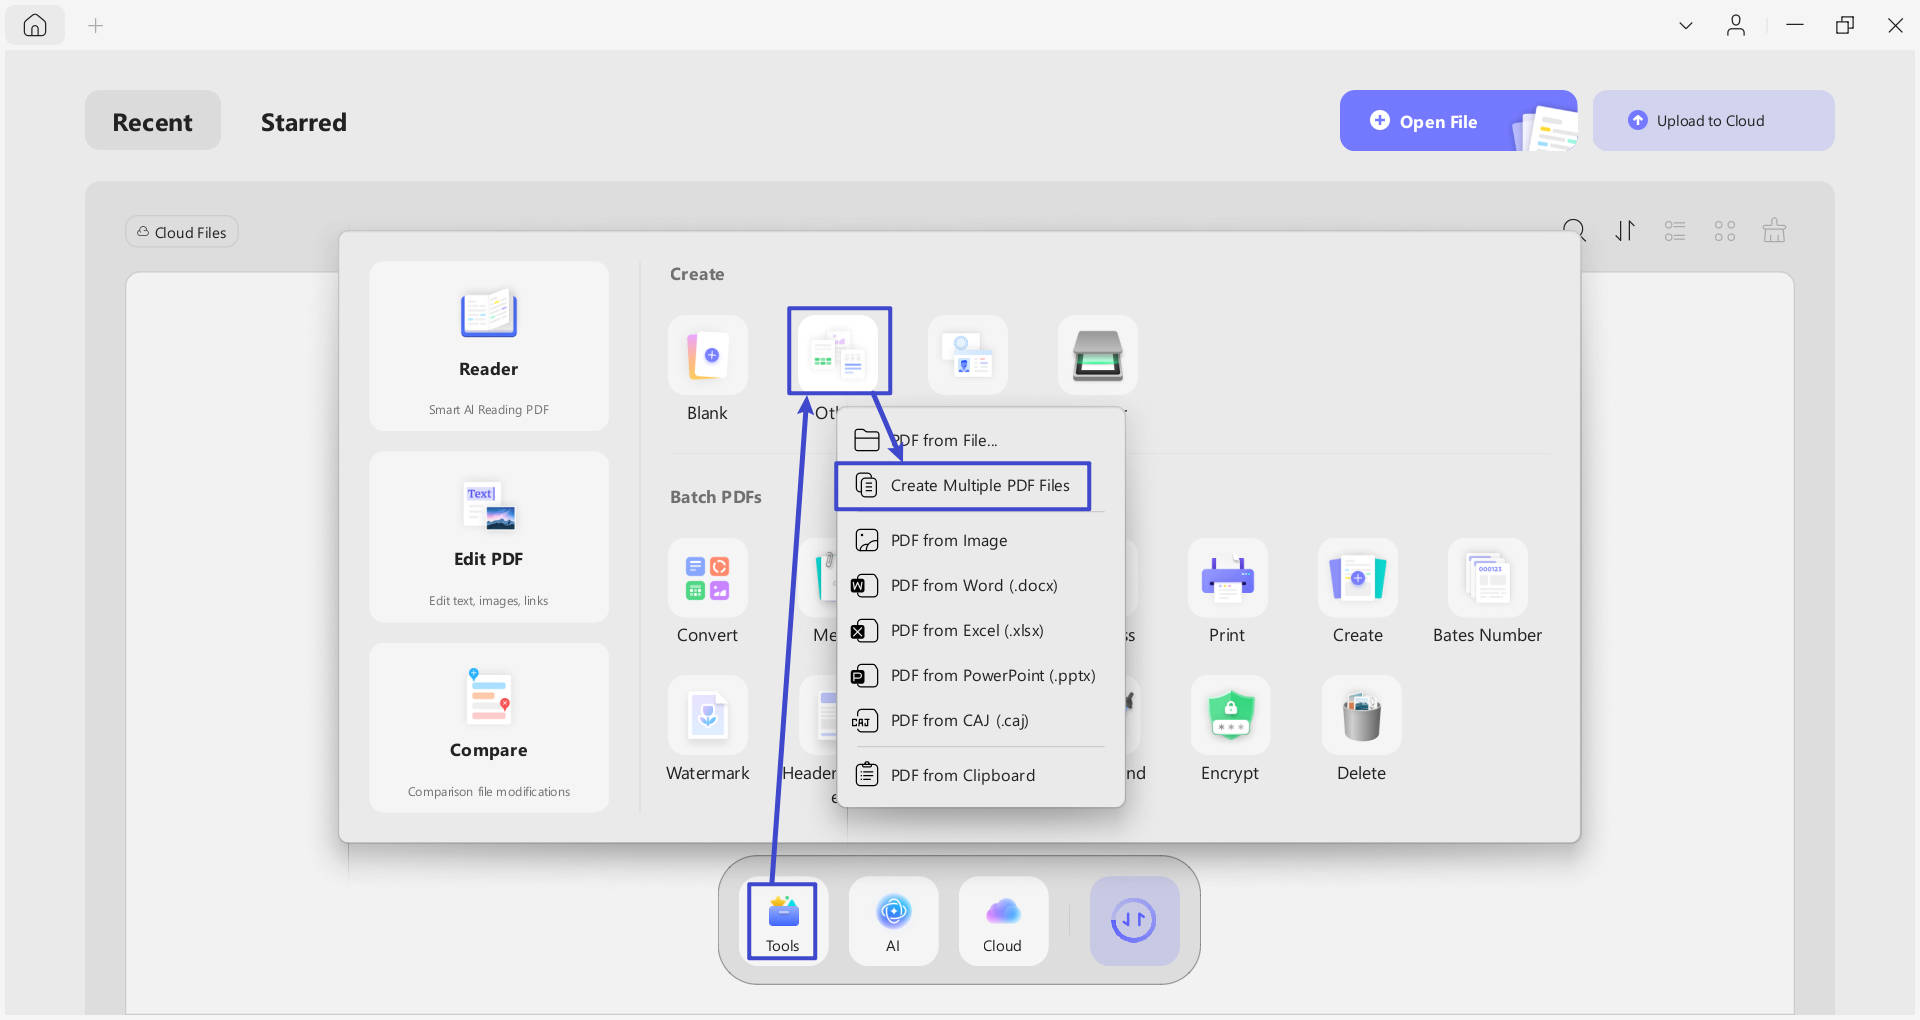
Method 3. Create Multiple PDFs Simultaneously
If you want to skip the hassle of creating multiple PDFs one by one, UPDF has covered you with its batch PDF creation feature. It enables the creation of multiple PDFs at a time without any complex procedure. Let's have a look at the steps.
Notice: This feature allows users to create multiple PDFs from images, Word, Excel, TXT, and other supported file formats. Users can select multiple formats simultaneously. Additionally, UPDF can generate more than 100 PDFs from the selected files.
- Once you’ve opened UPDF version, navigate to the Tools option from main page.
- Now, access the menu for Other and choose Create Multiple PDF Files option from the list.
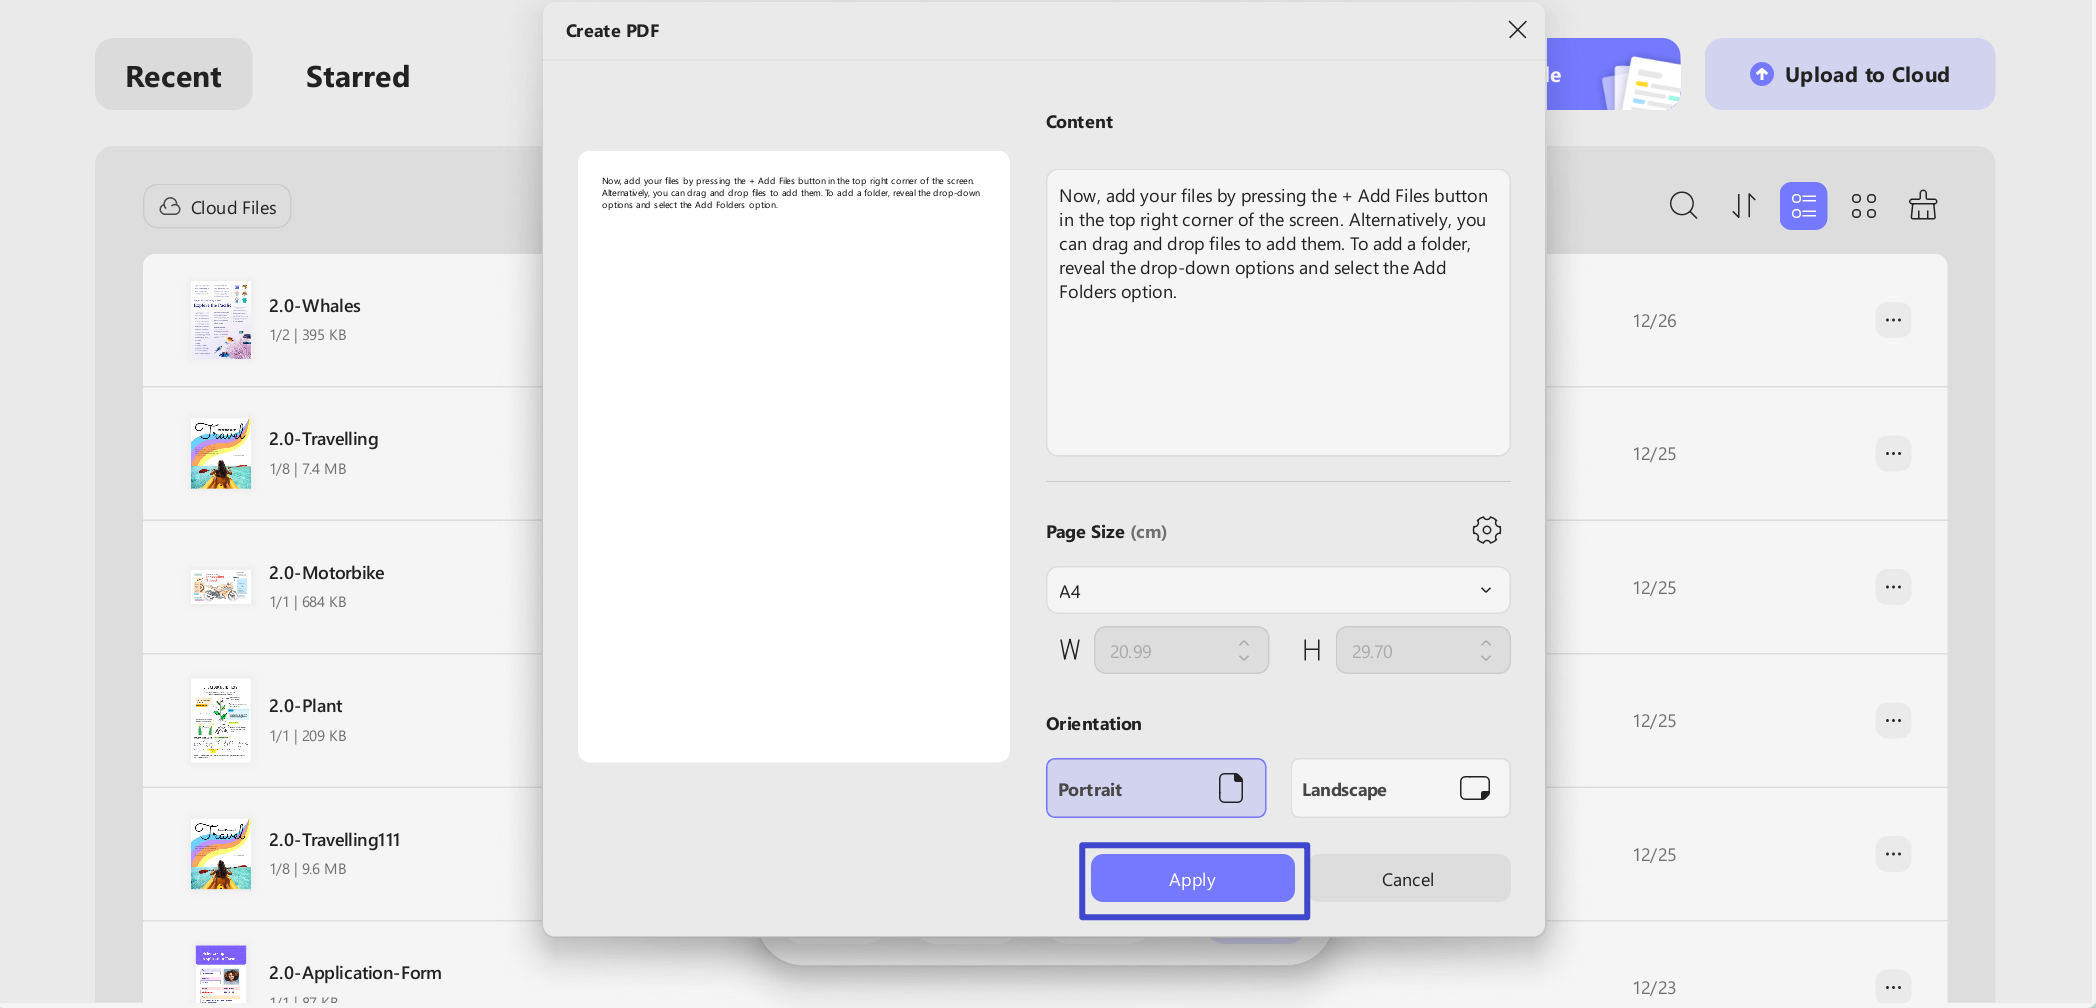
- Now, add your files by pressing the + Add Files button in the top right corner of the screen. Alternatively, you can drag and drop files to add them. To add a folder, reveal the drop-down options and select the Add Folders option.
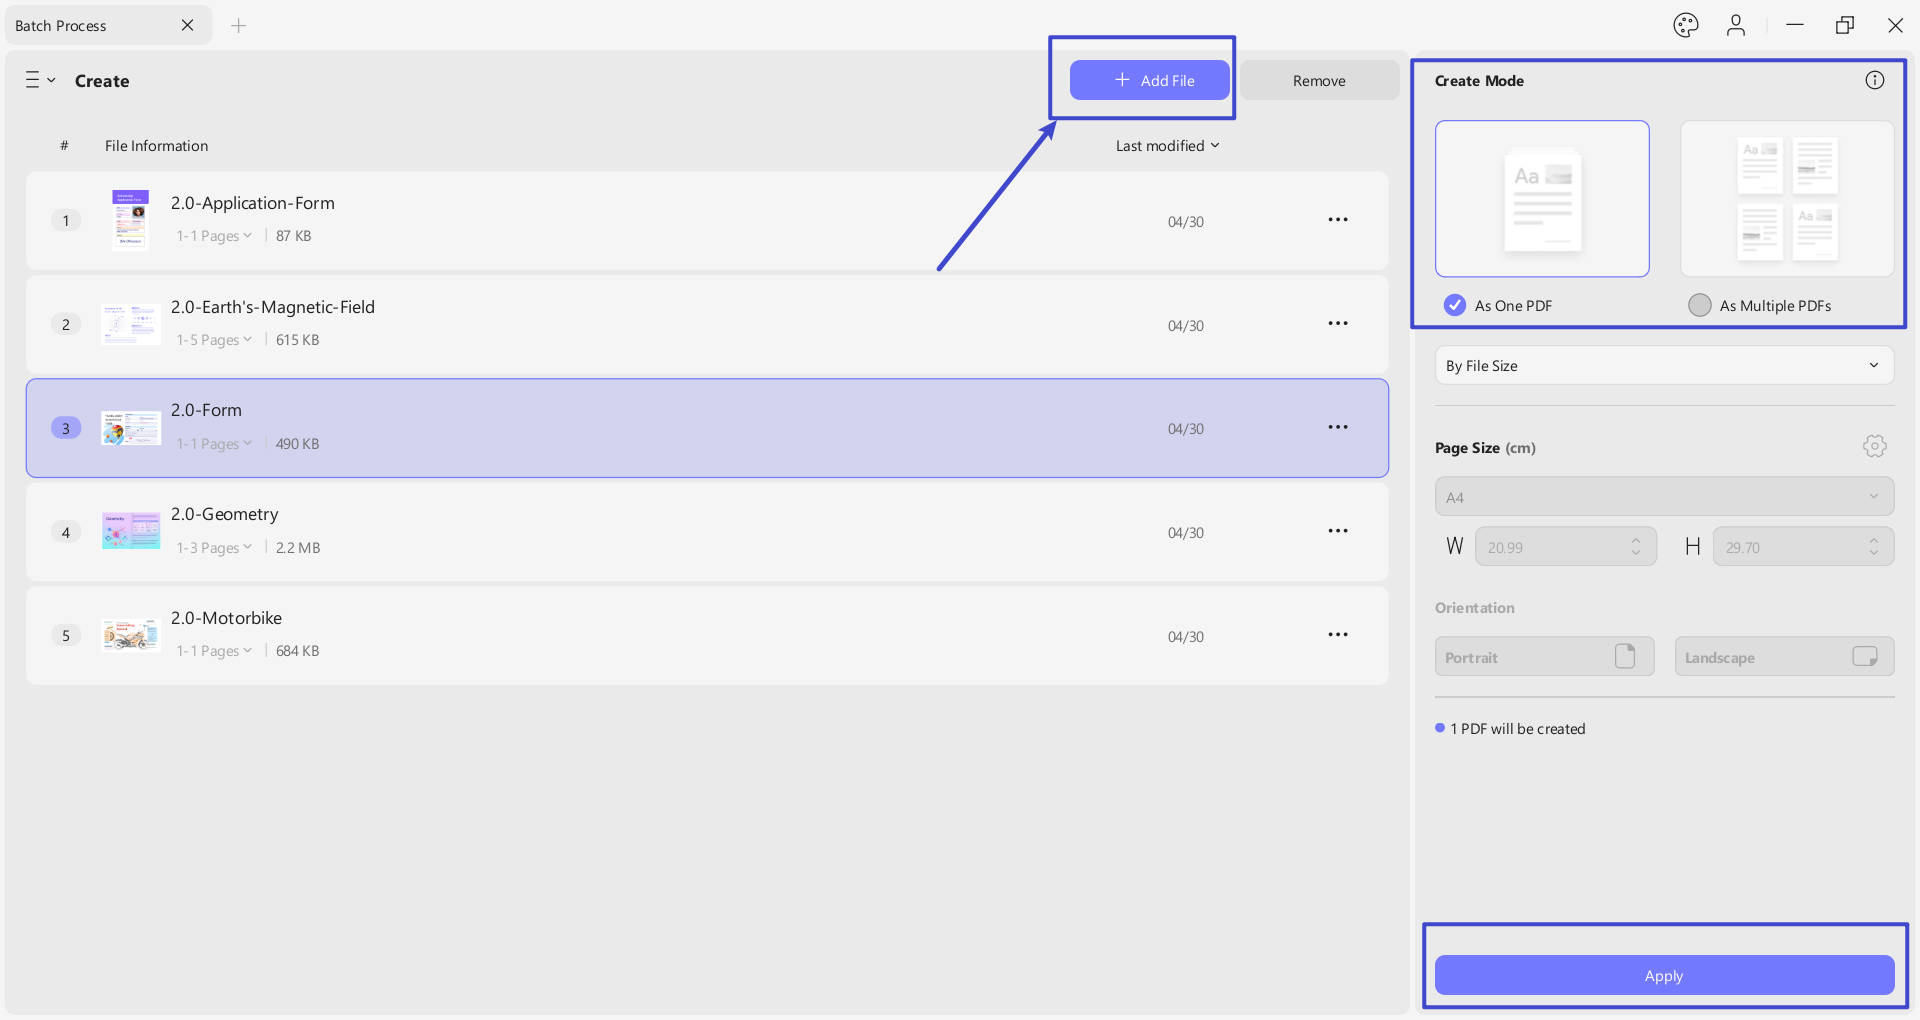
- Then, choose whether you want to create As One PDF or As Multiple PDF files.
- After this, adjust the Page Size from the options or customize it manually by inserting the Width and Height.
- Next, adjust your page Orientation from options including Portrait or Landscape. Once all the adjustments are made, press the Apply button to start the creation process.
- Lastly, choose a location to save the created PDFs. All the PDFs you have created will open up in different tabs; you can work on them how you want.
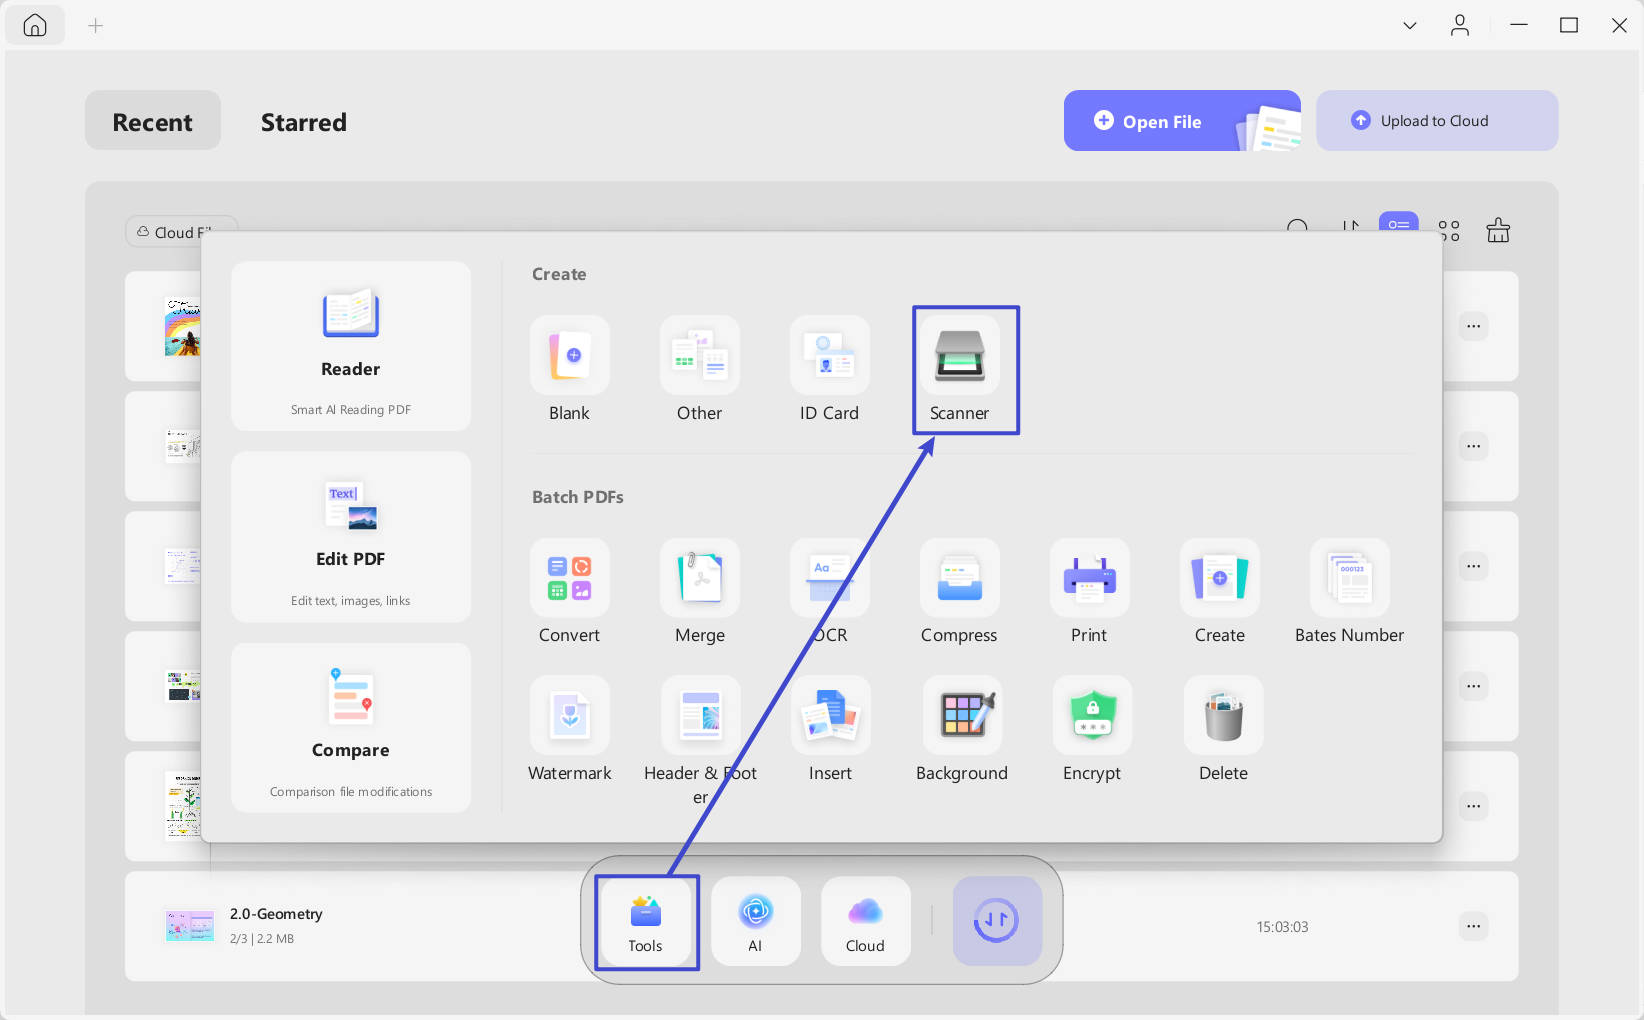
Method 4. Create PDF from Scanner
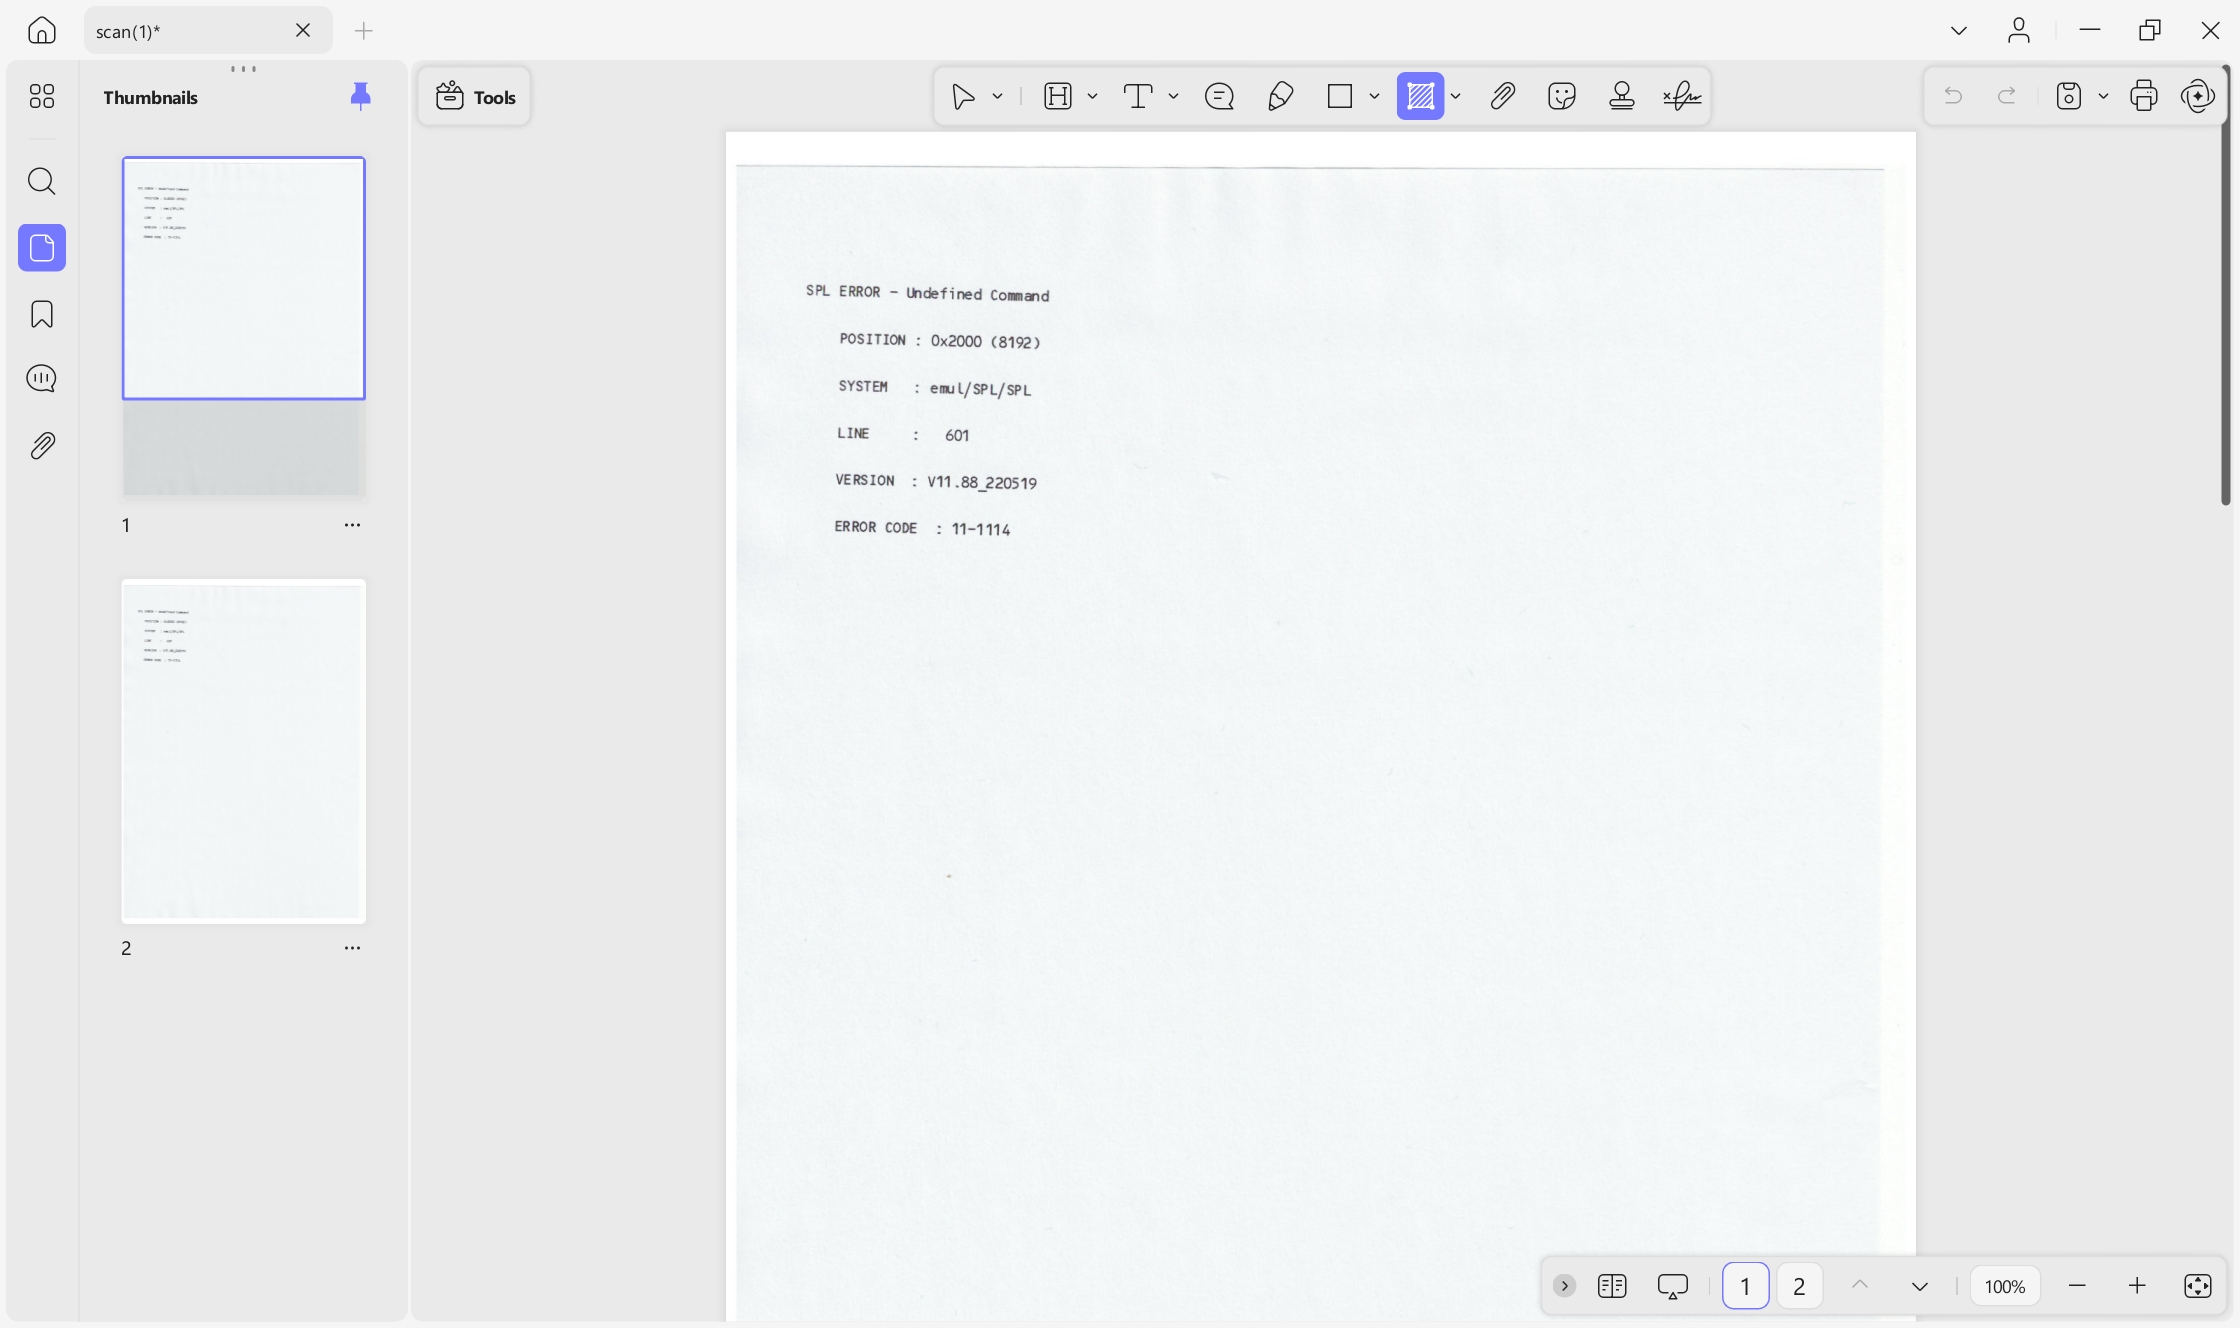
Aside from the above methods, UPDF for Windows also supports creating PDFs from scanners. Wondering how can you create one? We have got you covered with a step-by-step guide. Before moving toward the how-to guide, you must ensure that your computer is connected to your scanner.
Step 1. Launch UPDF and navigate to the Tools tab. Select Scanner from the Create menu. As mentioned earlier, ensure that your computer is already connected to a scanner.
Step 2. Decide if you want to scan more pages and click OK.
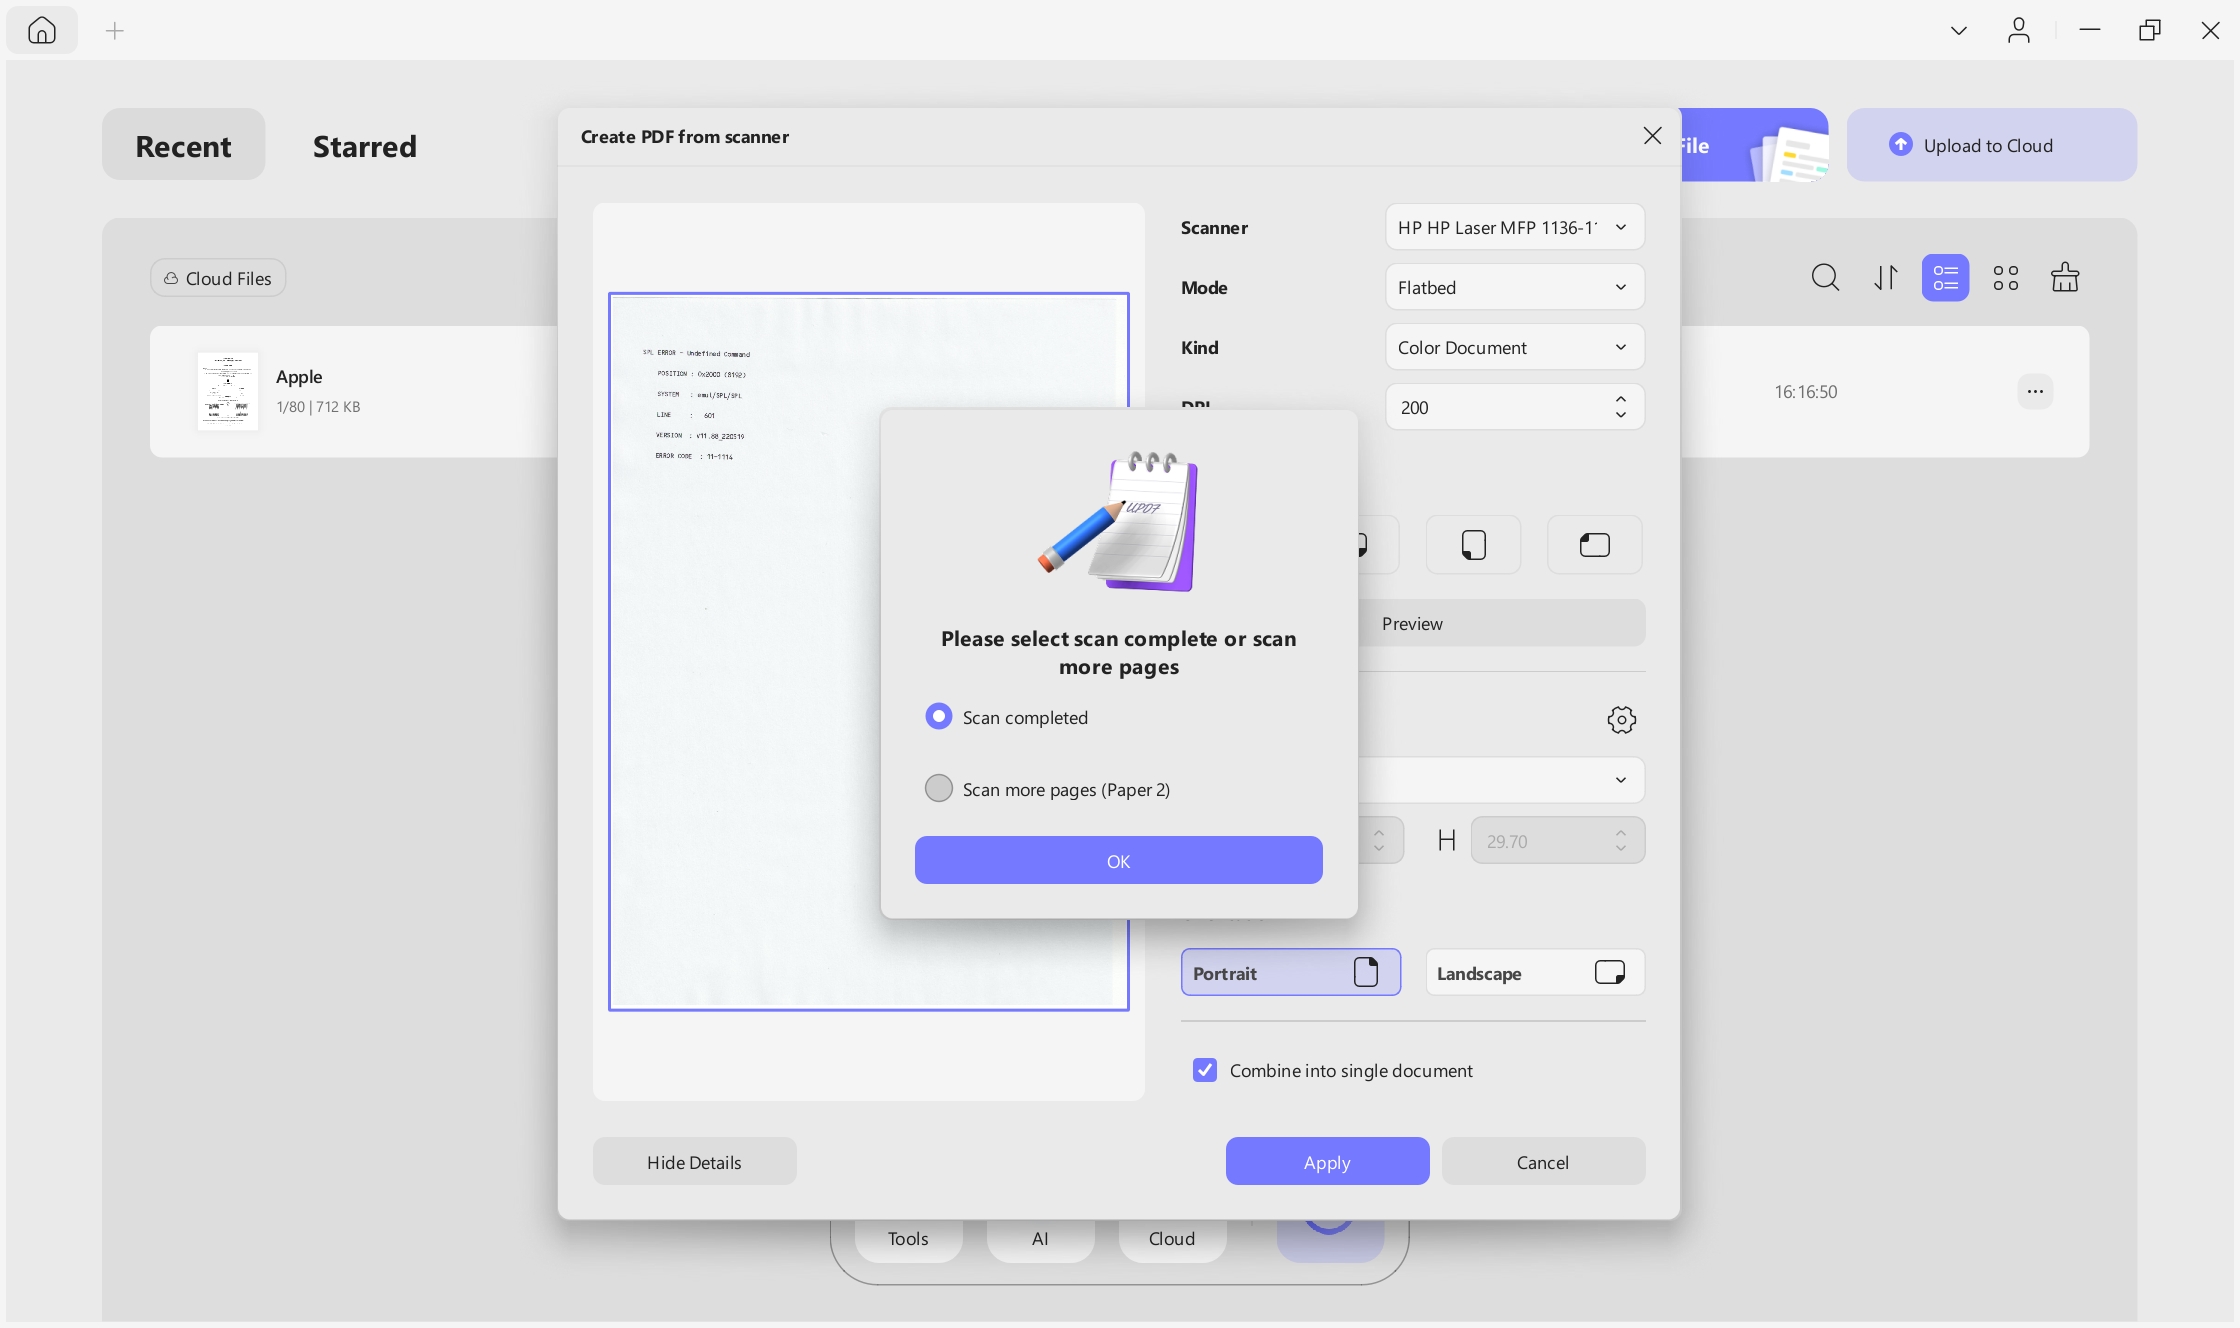
Step 3. Adjust the scan settings according to your requirements. Note that there are two modes to choose from: Flatbed and Document Feeder. The scan settings will change based on the mode you select.
Flatbed: This type of scanner has a flat glass surface on which you place your document face down. The scanning mechanism moves underneath the glass to capture the image of the document.
Where to Place the Document: Lift the scanner lid, place your document face down on the glass surface, aligning it with the guides (usually marked with arrows or a corner guide), and then close the lid before starting the scan.
Document Feeder: This refers to an Automatic Document Feeder (ADF) that can be found on some scanners. It allows you to load multiple pages into a tray, and the scanner will automatically feed each page through the scanning mechanism.
Where to Place the Document: Place the stack of documents into the feeder tray, aligning them with the guides. Ensure the pages are correctly oriented and not stapled or clipped together. The feeder will pull each page through for scanning sequentially.
You can tweak the following parameters:
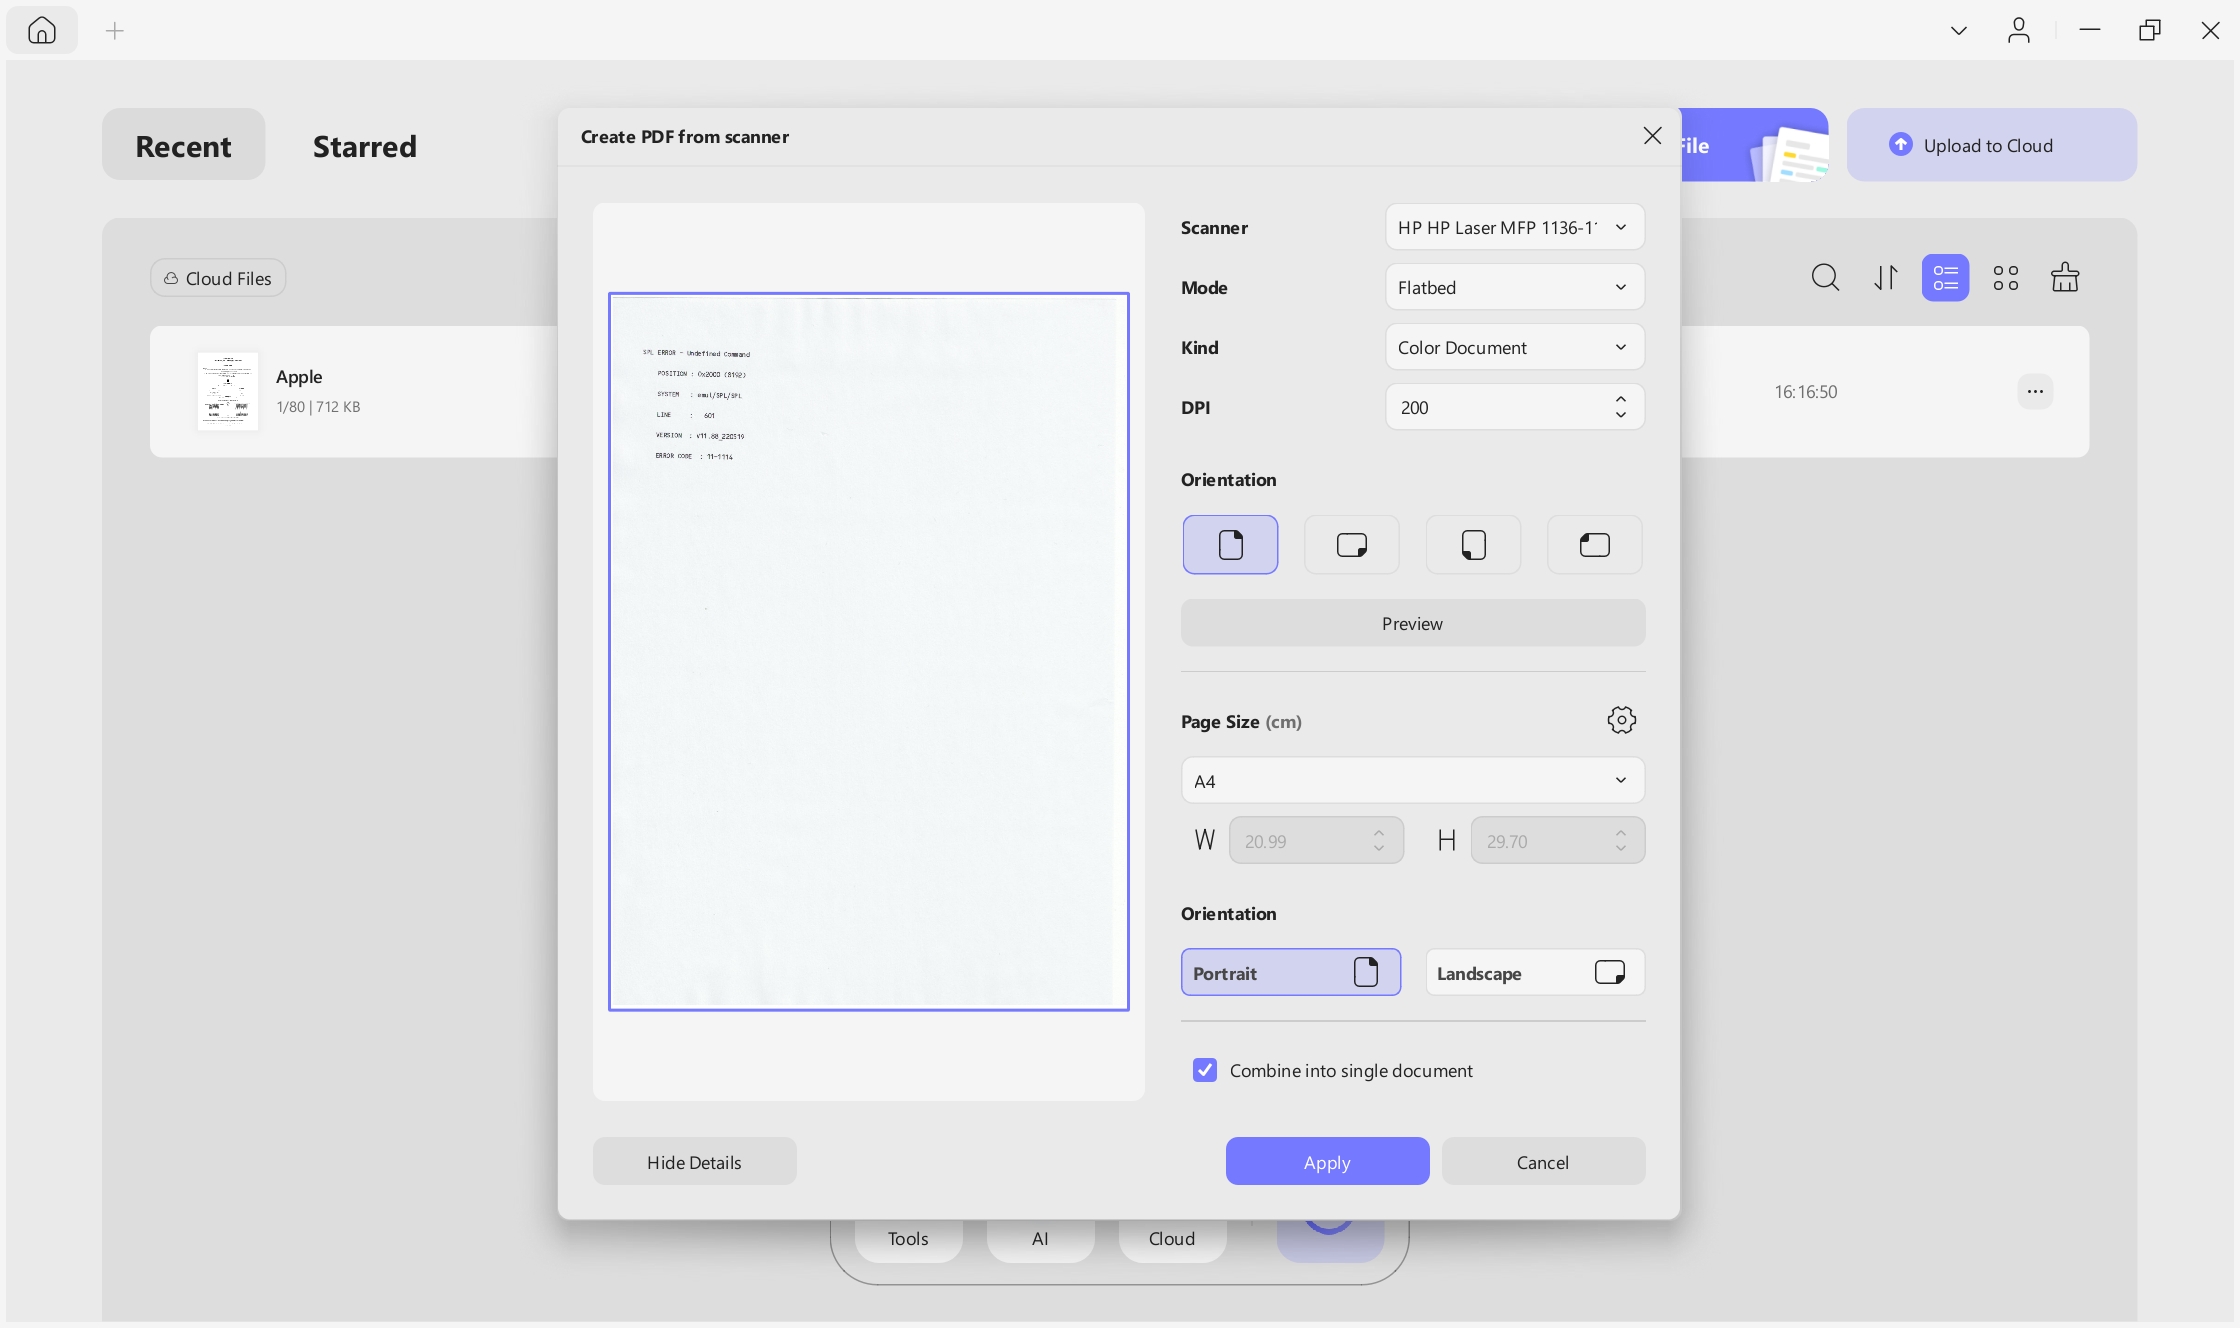
- Kind: Whether you want your document to be colored or grayscale. Colored documents are mostly professional presentations, whereas agreements, research papers, etc., are mostly in grayscale.
- Paper Size: Here, you can select a paper size, either by choosing a preset option or by customizing it manually. You can enter the width and height or crop it using the preview window on the left.

- Orientation: Four orientations are available. You can choose to create PDFs with upright pages, leftwards, rightwards, or downward-directed orientations. You can also checkmark Double Sided depending on your requirements.
Step 4. You can also decide if you want to Combine into a single document or Perform OCR after creation.
- Checkmark the Perform OCR after creation option to turn the PDF that you are creating into an editable format, or it will be an image-based PDF.
Step 5. After selecting the settings, click Apply to view the scanning result. UPDF will automatically open the PDF you just created.
Method 5. Create PDF from Clipboard
Besides creating PDF from files and scanner, UPDF offers the ability to create PDFs from the clipboard, enabling you to instantly turn copied text, screenshots into professional PDF files. Here are the stpes below.
- First, copy the content you want to create as a PDF file to the clipboard.
- Launch UPDF, then navigate to the Tools option from the Home page.
- Next, go to the "Others" menu, and select "Create PDF from Clipboard" from the list.

- Then, UPDF will then automatically arrange the clipboard content into PDF format. Just select the Apply button to finalize the creation.
Method 6. Create PDF Portfolios
A PDF Portfolio combines multiple files into one PDF while preserving their original formats—such as documents, spreadsheets, presentations, emails, drawings, and multimedia. All files remain accessible and editable within the portfolio. This makes PDF Portfolios very versatile and an ideal choice for educational materials, project collaborations, and even professional portfolios.
Here are the stpes to help you create a PDF Portfolio:
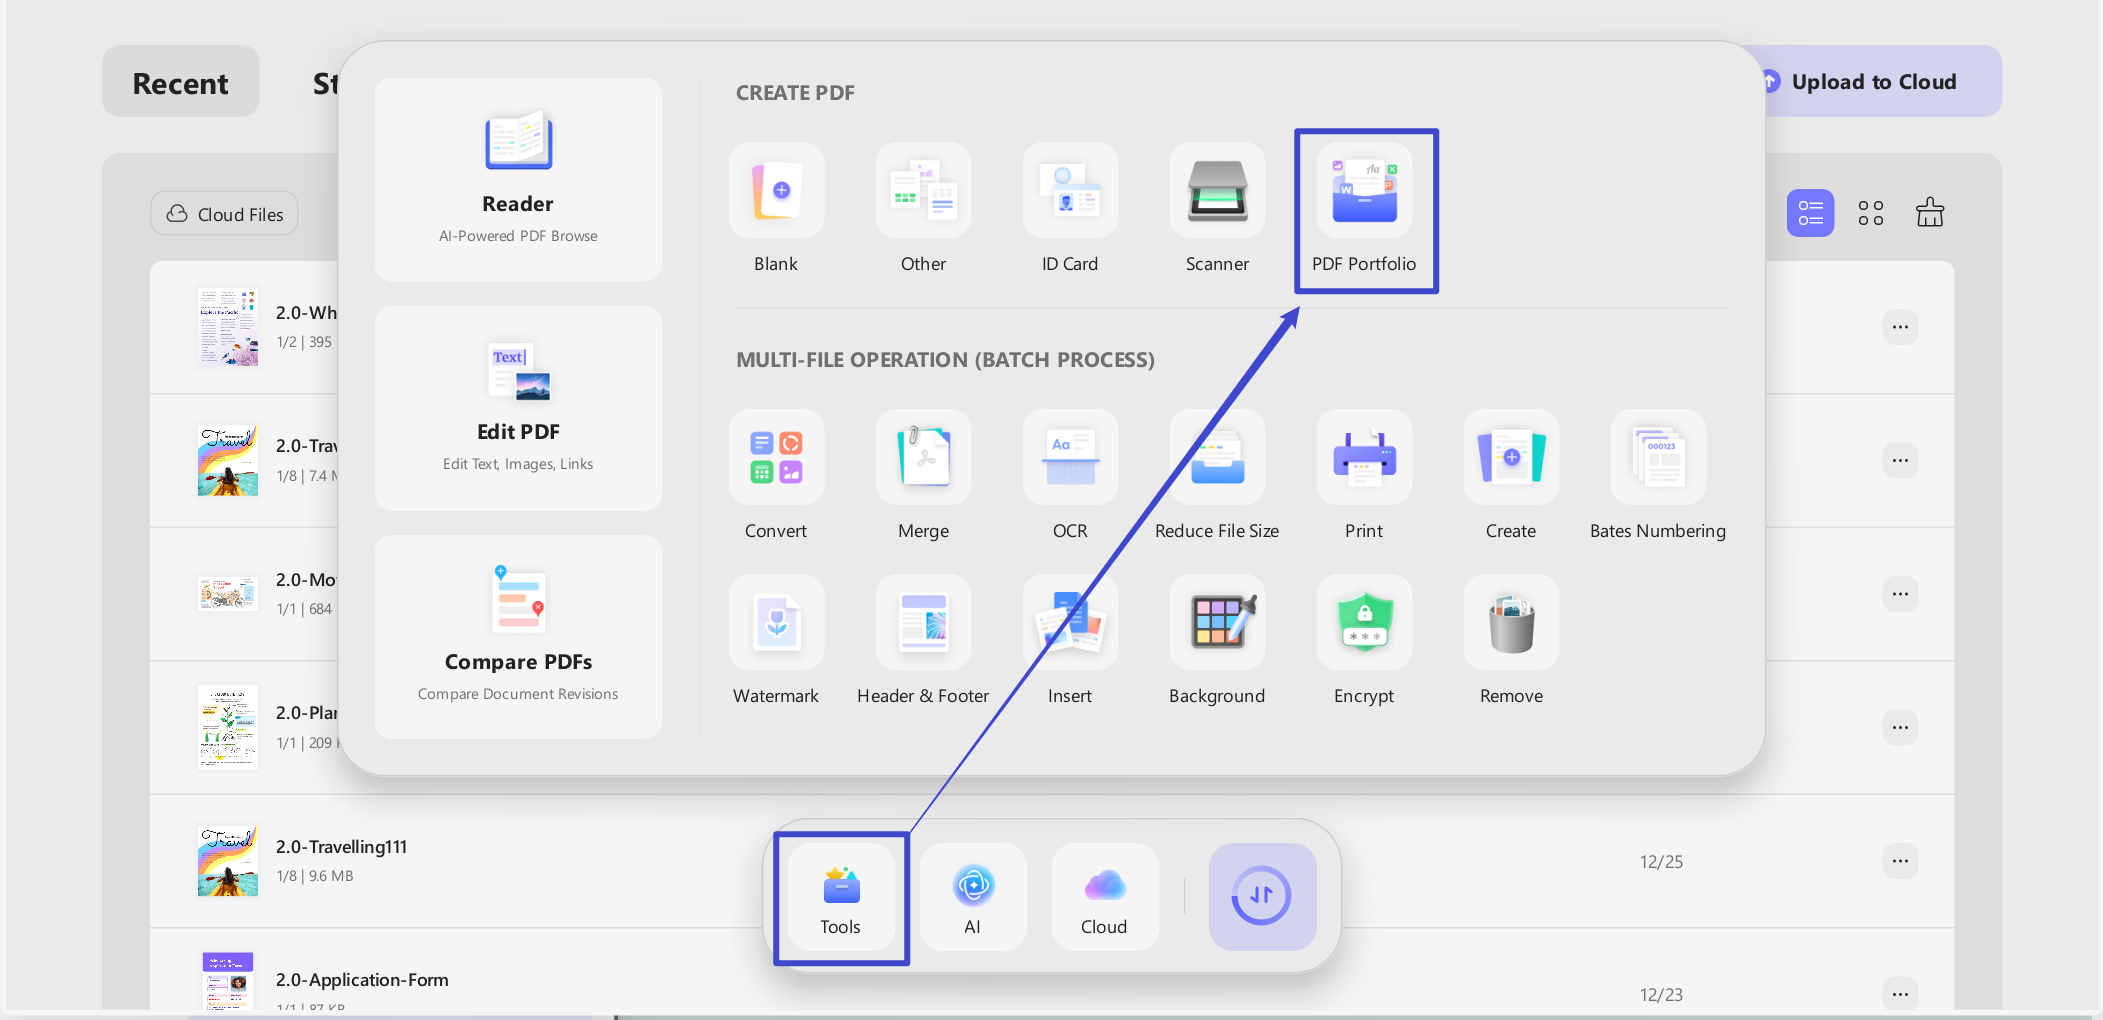
- Launch UPDF and click Tools.
- Under Create PDF, select "PDF Portfolio."
- Add files to the portfolio: select individual files one by one, or choose an entire folder to include all files at once.
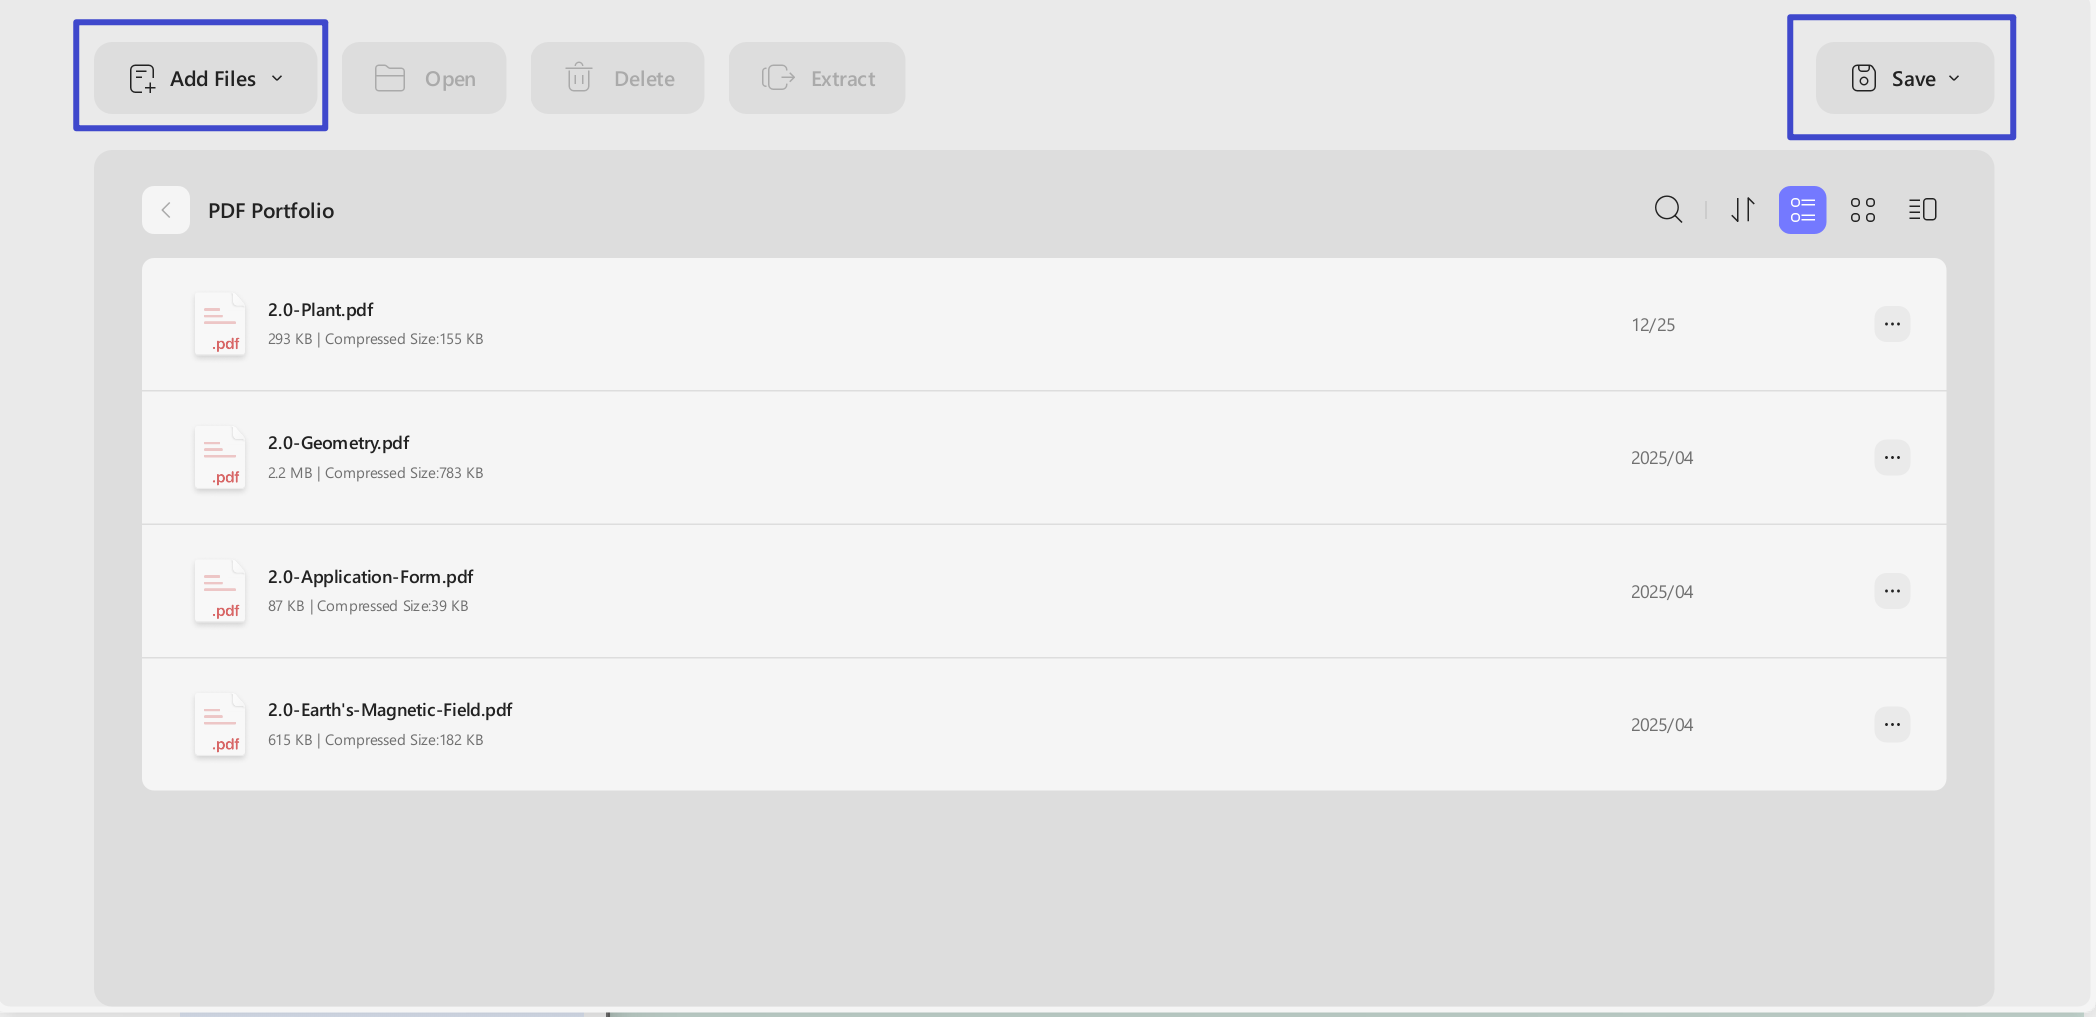
- Click "Save" and choose a location to store the PDF Porfolio.
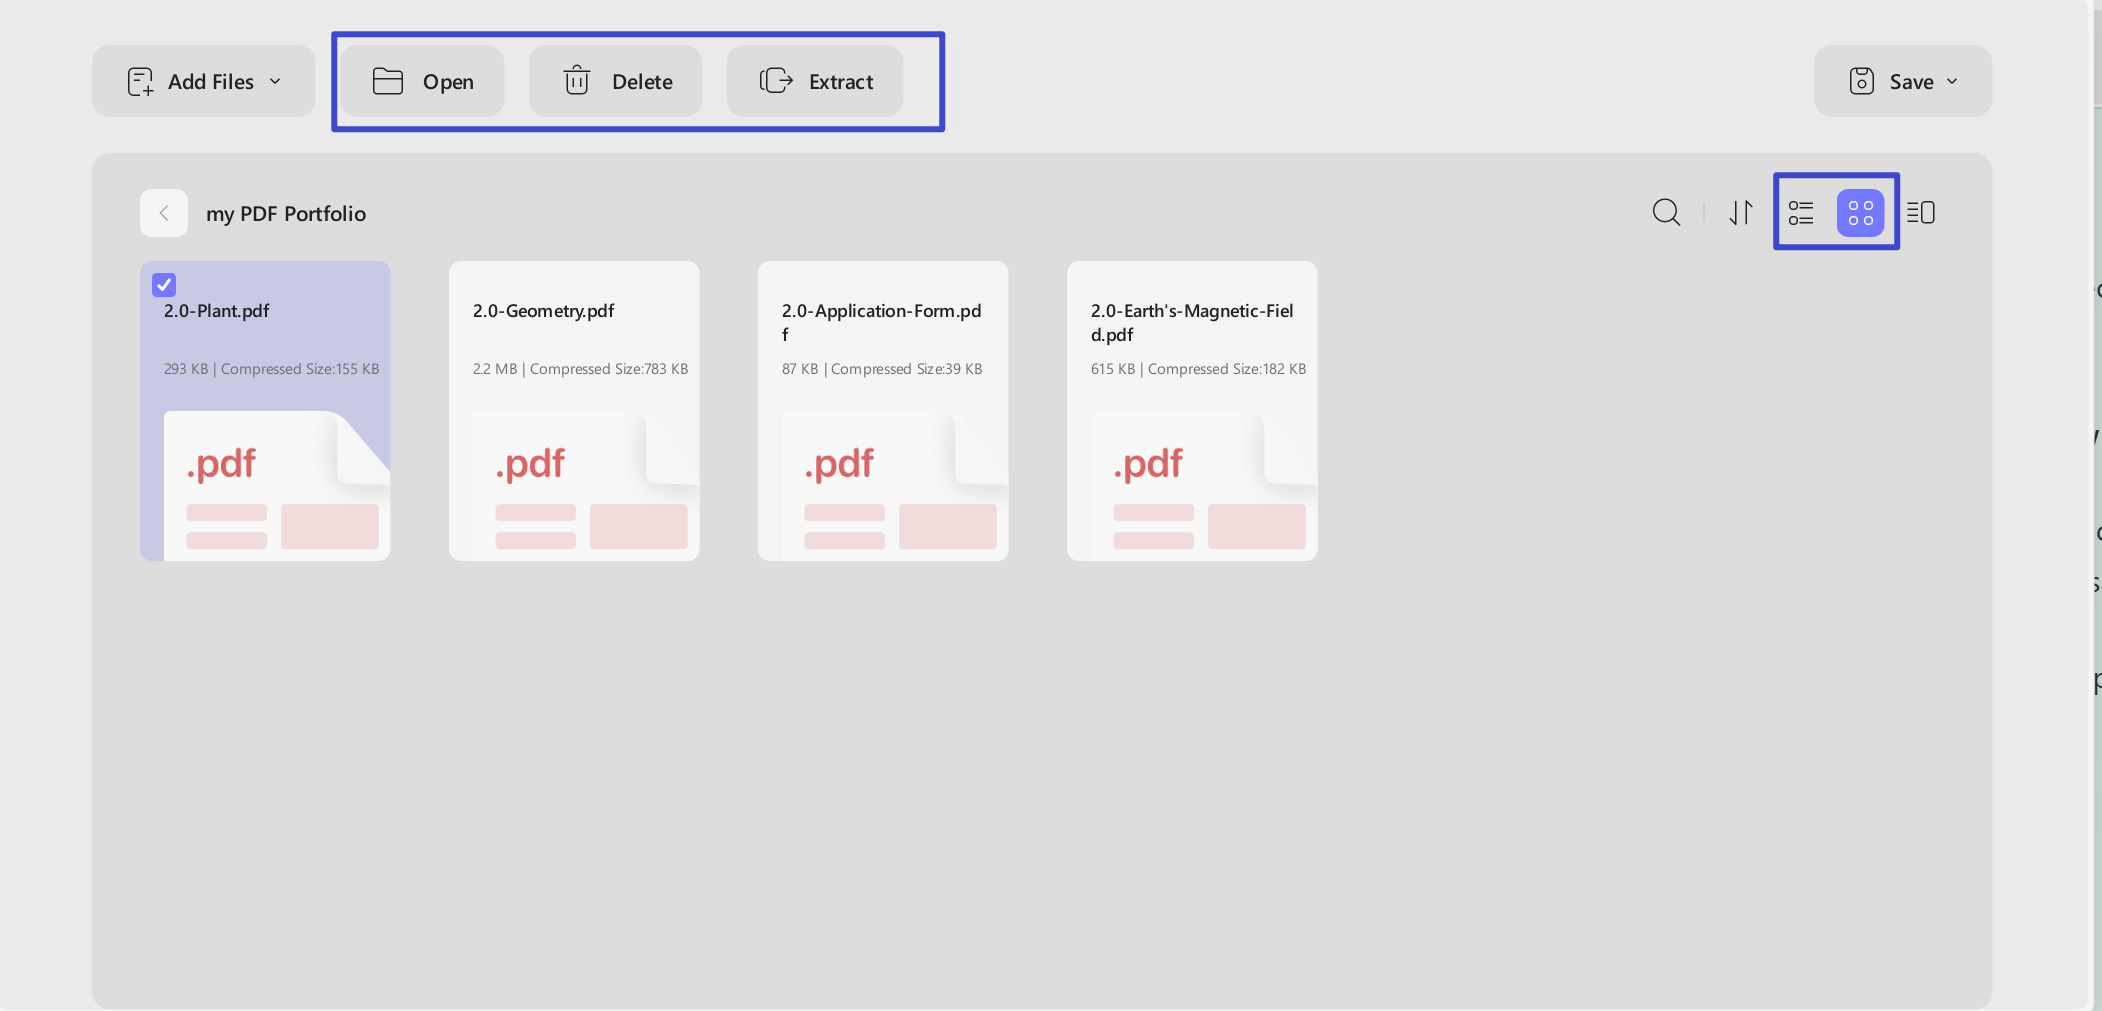
How to create a PDF Portfolio
After creating the PDF Portfolio, you can open it directly in UPDF and manage its contents efficiently.
- Switch between List View and Thumbnail View to browse files
- Use the search feature to quickly locate specific documents, even in large portfolios with hundreds or thousands of files
- Select any individual file to: view it, delete it and extract it from the portfolio seperately.