 UPDF for Windows
 UPDF for Mac
 UPDF for iPhone/iPad
 UPDF for Android
 Nomostar
 UPDF AI Online
 UPDF Sign
 IvyCraft
 Edit PDF
 Annotate PDF
 Create PDF
 PDF Form
 Edit links
 Convert PDF
 OCR
OCR PDF to Word
 PDF to Image
 PDF to Excel
 Organize PDF
 Merge PDF
 Split PDF
 Crop PDF
 Rotate PDF
 Protect PDF
 Sign PDF
 Redact PDF
 Sanitize PDF
 Remove Security
 Read PDF
 UPDF Cloud
 Compress PDF
 Print PDF
 Batch Process
 About UPDF AI
 UPDF AI Solutions
 AI User Guide
 FAQ about UPDF AI
 Summarize PDF
 Translate PDF
 Chat with PDF
 Chat with AI
 Chat with image
 PDF to Mind Map
 Explain PDF
 PDF AI Tools
 Image AI Tools
 AI Chat Tools
 AI Writing Tools
 AI Study Tools
 AI Working Tools
 Other AI Tools
 AI Bookmark Generation
 AI Bookmark Summary
 AI Watermark Generation
 AI Background Generation
 AI Sticker Generation
 AI Stamp Generation
 AI Editing Suite
 UPDF Copilot
 AI Page Management
 AI Semantic Search
 PDF to Word
 PDF to Excel
 PDF to PowerPoint
 User Guide
 UPDF Tricks
 FAQs
FAQs UPDF Reviews
 Download Center
 Blog
Blog Newsroom
 Tech Spec
 Updates
 UPDF vs. Adobe Acrobat
 UPDF vs. Foxit
 UPDF vs. PDF Expert
Learning how to insert checkboxes in Excel is simpler than many users might think. This article will explore a few easy methods to insert checkboxes in Excel. This will empower you to collect user input effortlessly. Start exploring with us and unlock the potential of this user-friendly and visually appealing feature.
Other than Excel sheets, users can also make use of PDF forms to collect data. For this purpose, you may need to add checkboxes to know about the choice of the people while gathering information. At the end of this article, we will discuss how to insert a checkbox in PDF via UPDF for effective data collection. If you also want to try these features, download UPDF by hitting the "Free Download" button.
Windows • macOS • iOS • Android 100% secure
Part 1. How to Insert Checkbox in Excel With Developer Tab?
With the power of the Developer Tab, you can customize and automate your Excel workbook the way you want. Users can seamlessly add checkboxes in an Excel workbook to streamline their workflow, track progress, or create dynamic to-do lists. To carry out this task, follow the steps below:
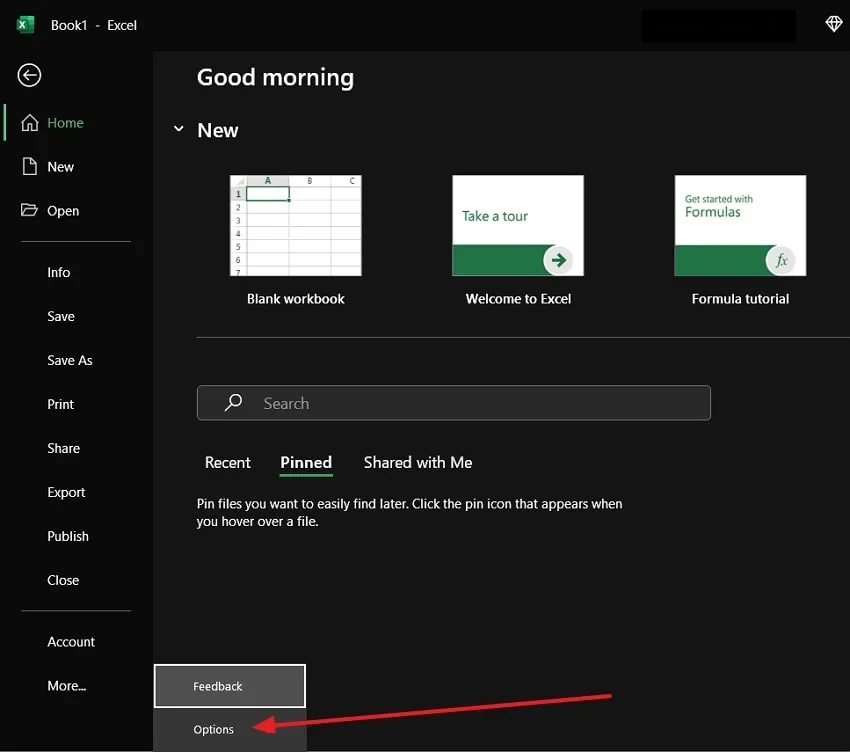
Step 1: On your device, open the desired spreadsheet with Excel. In case you do not see a “Developer” tab, you will first need to enable it. To do so, hit the “File” tab and then select “More” from the drop-down menu and head to “Options”. This will open the “Excel Options” window.
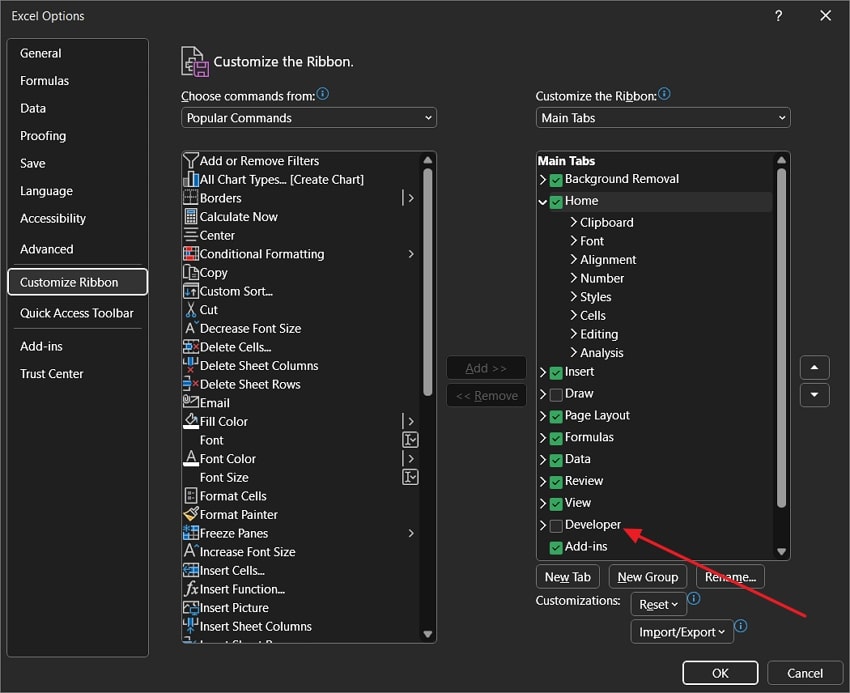
Step 2: Then, from the left sidebar, click on the "Customize Ribbon" option and then select "Main Tabs" from the "Customize the Ribbon" section. Following this, tick a checkbox next to the Developer.
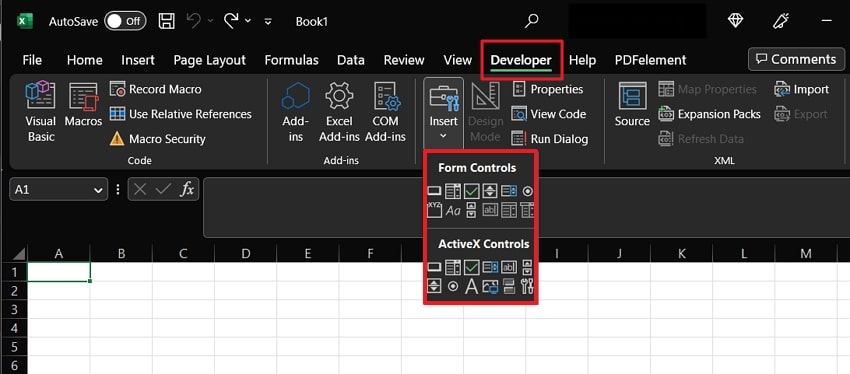
Step 3: After the “Developer” tab is enabled, click on it. Now, in the “Controls” group, press the “Insert” option to open a menu. Now, under the “Form Controls,” select the check box and click anywhere on your sheet where you want to add it. Crop it and adjust it to the required position.
Also Read: Top 20 Task Tracker Excel Templates to Free Download
Part 2. How to Insert Checkbox in Excel Without Developer Tab?
As a default, Microsoft Excel does not provide a direct way to insert checkboxes without enabling the Developer tab. However, there are 4 alternative methods available that help you how to put a checkbox in Excel without the need for the Developer tab. Although these methods require some extra steps, they can still make your work more effective.
Way 1: How to Add Checkboxes in Excel Using Google Sheets
In Google Sheets, users can easily add checkboxes to their cells for interactive functionality. These checkboxes can be checked or unchecked, representing the values TRUE and FALSE. To learn how to insert checkboxes in Excel without the Developer tab using Google Sheets, head to the steps below:
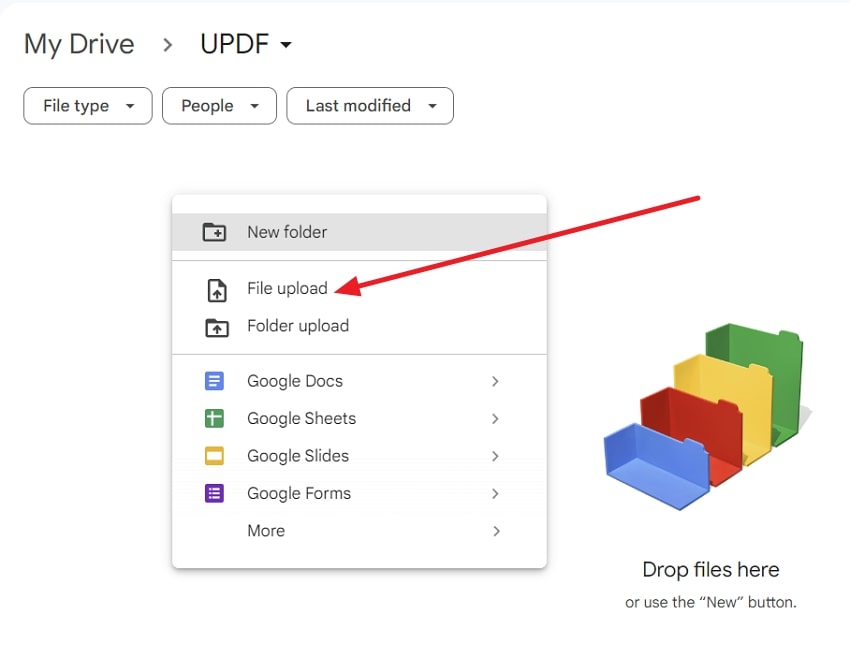
Step 1: To utilize this way, you will have first to explore your Google Drive and then upload the Excel file there and make any changes you want. You can simply right-click on your Drive's space, select the "File Upload" option, and then choose your file and upload it.
Step 2: Continuing this, open the Excel sheet uploaded on Google Drive. Now, select any cell to add a check box. Then head to the "Insert" tab, and from the drop-down list, choose the "Checkbox" option. It will be inserted into your selected cell.

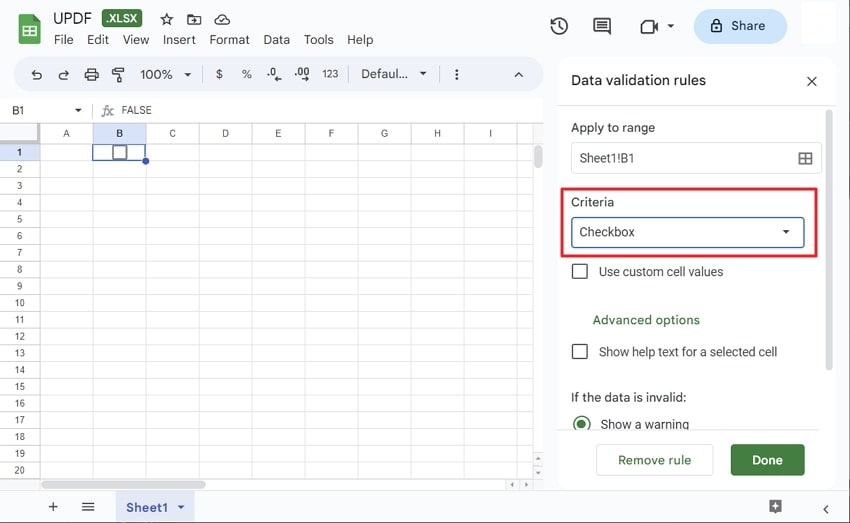
Step 3: In addition to the previous step, you can also add it by selecting the "Data" tab and choosing the "Data Validation" option. Now, press the "+Add Rule" button and customize the range based on needs. However, from the "Criteria" drop-down list, select "Checkbox" and press the "Done" button to apply the changes.
Way 2: How to Put a Checkbox in Excel Via WPS
Excel spreadsheets can work with different software programs. However, WPS Office is the best choice because it's easy to use and costs nothing. To understand how to insert a checkbox in Excel using WPS, follow these steps:
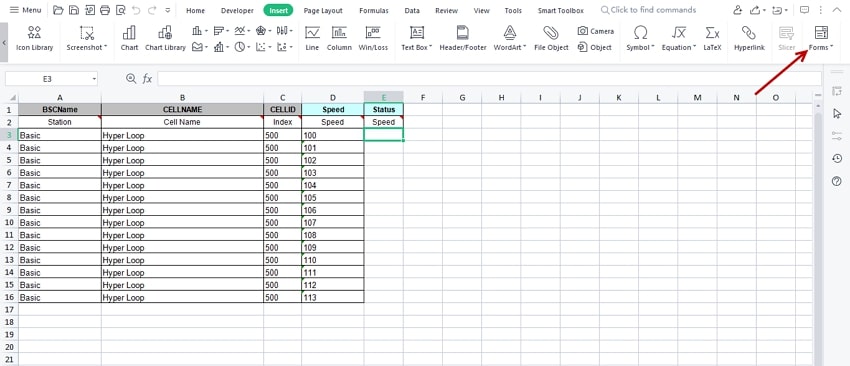
Step 1: Before moving forward, have WPS installed on your device. Then, open the required Excel with WPS software. After opening the file, navigate to the "Insert" tab at the top of the Window. Within the "Insert" tab, locate the "Forms" tool. You can find this tool on the right side of the menu.
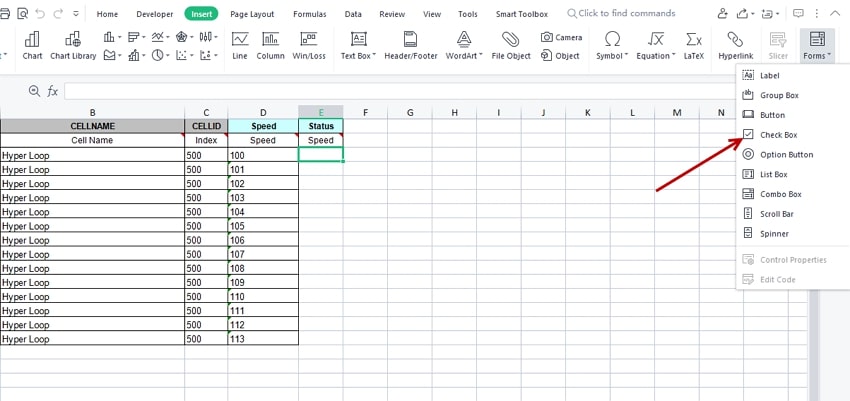
Step 2: Select the row where you want to place the checkbox. Afterward, return to the "Forms" tool and click on it to open a drop-down menu containing different form-related options. Now, locate and choose the "Checkbox" option. By selecting this option, you will be given the option to insert a checkbox in the selected row of your Excel spreadsheet.
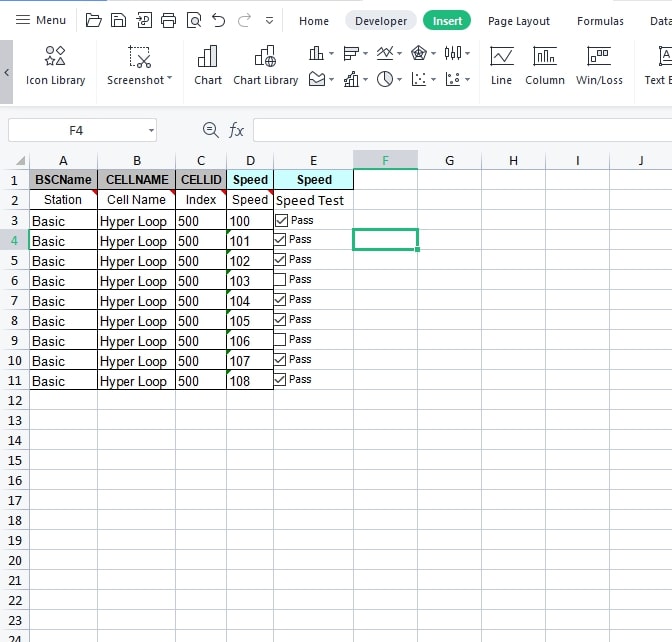
Step 3: A checkbox symbol will appear once you have chosen the "Checkbox" option. Next, click on the specific cell within the selected row where you want the checkbox to be created.
Way 3: How to Insert a Checkbox in Excel With Checkbox Pictures
Adding checkbox pictures to an Excel sheet is a creative way to enhance functionality and visual appeal. Following a few simple steps mentioned below, you can easily insert checkbox images:
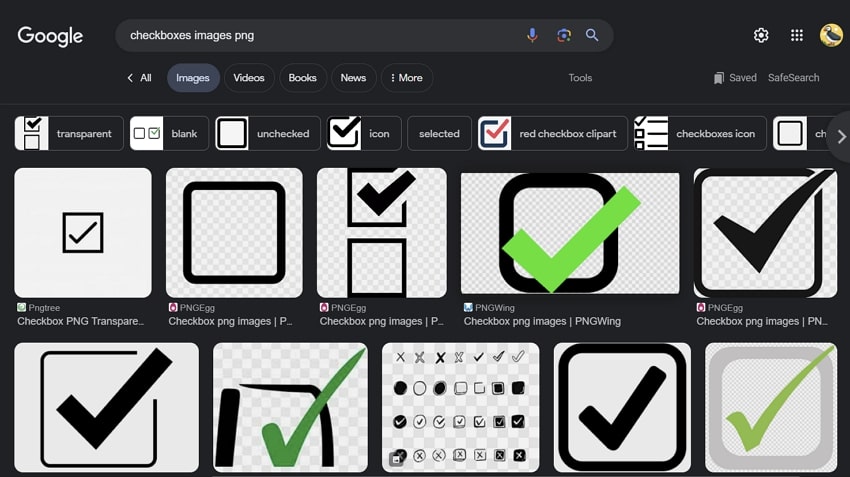
Step 1: Head to your device web browser and search for checkbox images. They can either be with a tick mark or a cross. Download or screenshot those images and save them on your device.
Step 2: Following this, open the Excel app with your required file. Head to the "Insert" tab and choose the "Illustrations" option. From the menu, select "Pictures" and then locate the image you just downloaded and import it to your Excel file.

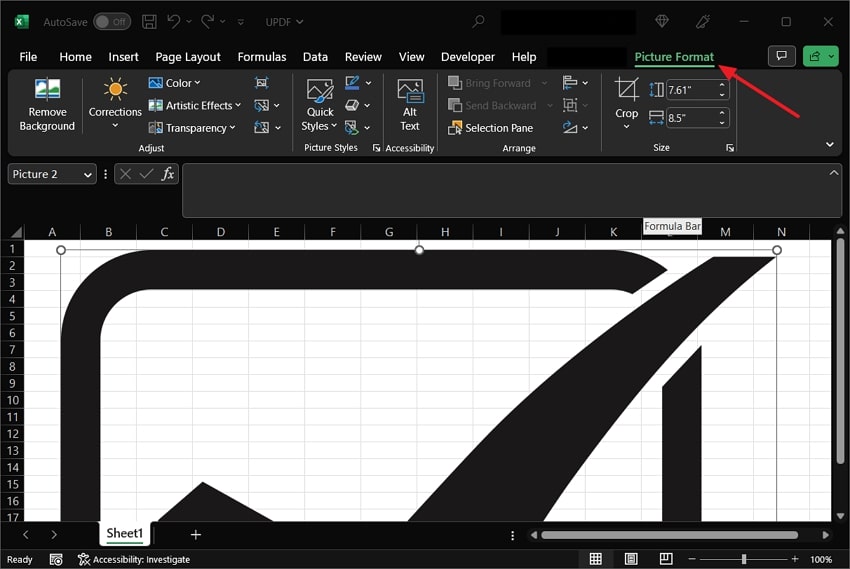
Step 3: You can now crop the image through the "Picture Format" tab and adjust it in the required cell. Using this way, you can also add multiple checkbox images to your Excel file.
Way 4: How to Insert a Checkbox in Excel Via Inserting Symbol
This, by far, is the most productive way related to how to make checkboxes in Excel sheets to make them more professional. However, you insert various symbols into your workbooks to make them look creative. Start by following the instructions provided below:
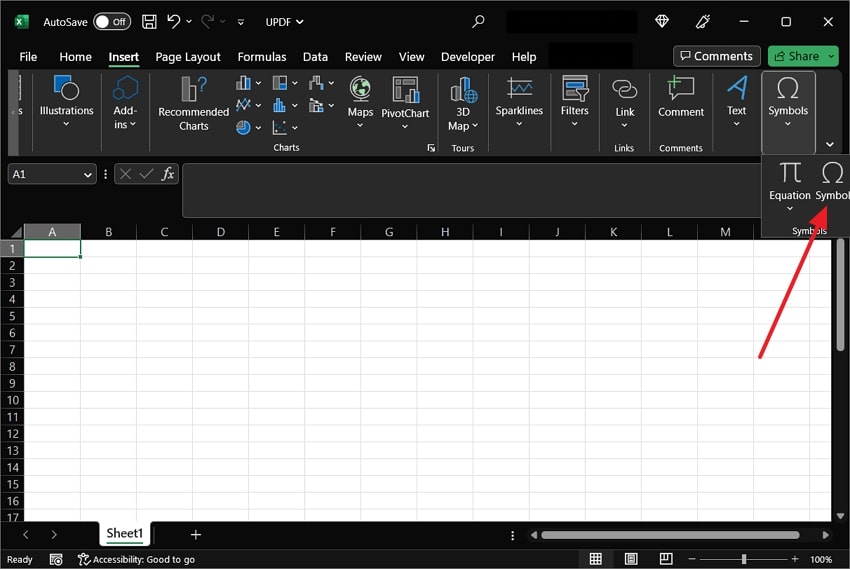
Step 1: In the Excel app, with the desired file open, click the "Insert" tab. Now, you will see a "Symbol" option on the extreme right side. Click it and select the "Symbol" option from the menu.
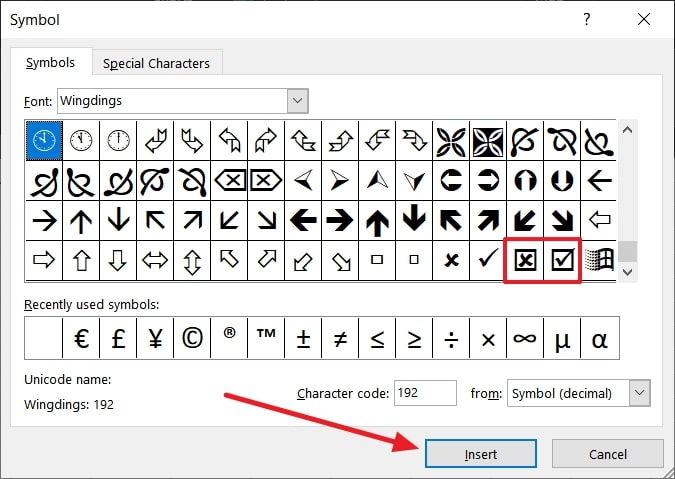
Step 2: Under the "Symbol" section, choose "Wingdings" as your "Font." Move the scroll bar at last, and you will see the symbols with tick and cross checkboxes. From both these, select the symbol based on needs and then tap the "Insert" button. Once added, you can drag the cell and set it at any position. You can also double-click on the added checkbox to edit it.
Part 3. How to Insert Checkbox in Excel Before Converted From PDF?
UPDF is an exceptional tool for handling and transforming PDF files into Excel format. With its reliability and versatility, UPDF stands out as a top choice. It provides many innovative features, enabling you to effortlessly edit PDF files while seamlessly converting them into Excel spreadsheets. With UPDF, you can effortlessly insert checkboxes into your PDF documents before converting them.
UPDF is a multipurpose AI tool that can help you insert a checkbox in PDF and then convert it into Excel format. This tool has a "Prepare Form" feature for adding the checkbox in your required PDF survey files. Furthermore, it allows you to customize the checkbox’s functionality, style, and action for proper personalization.
Step-by-Step Guide to Insert Checkbox in PDF and Convert in Excel
You can add the checkbox in the PDF file with this easy-to-use tool. Below are the steps to insert a checkbox conveniently in a PDF file and then convert it into an Excel file.
Step 1: Download UPDF and Import the Required PDF File
First of all, download the UPDF toolkit on your Windows PC or MacBook and install it by following the on-screen instructions. After this, click the "Open File" button and import the required PDF file in which you want to add checkboxes.
Windows • macOS • iOS • Android 100% secure
Step 2: Choose the Prepare Form Option to Insert Checkbox
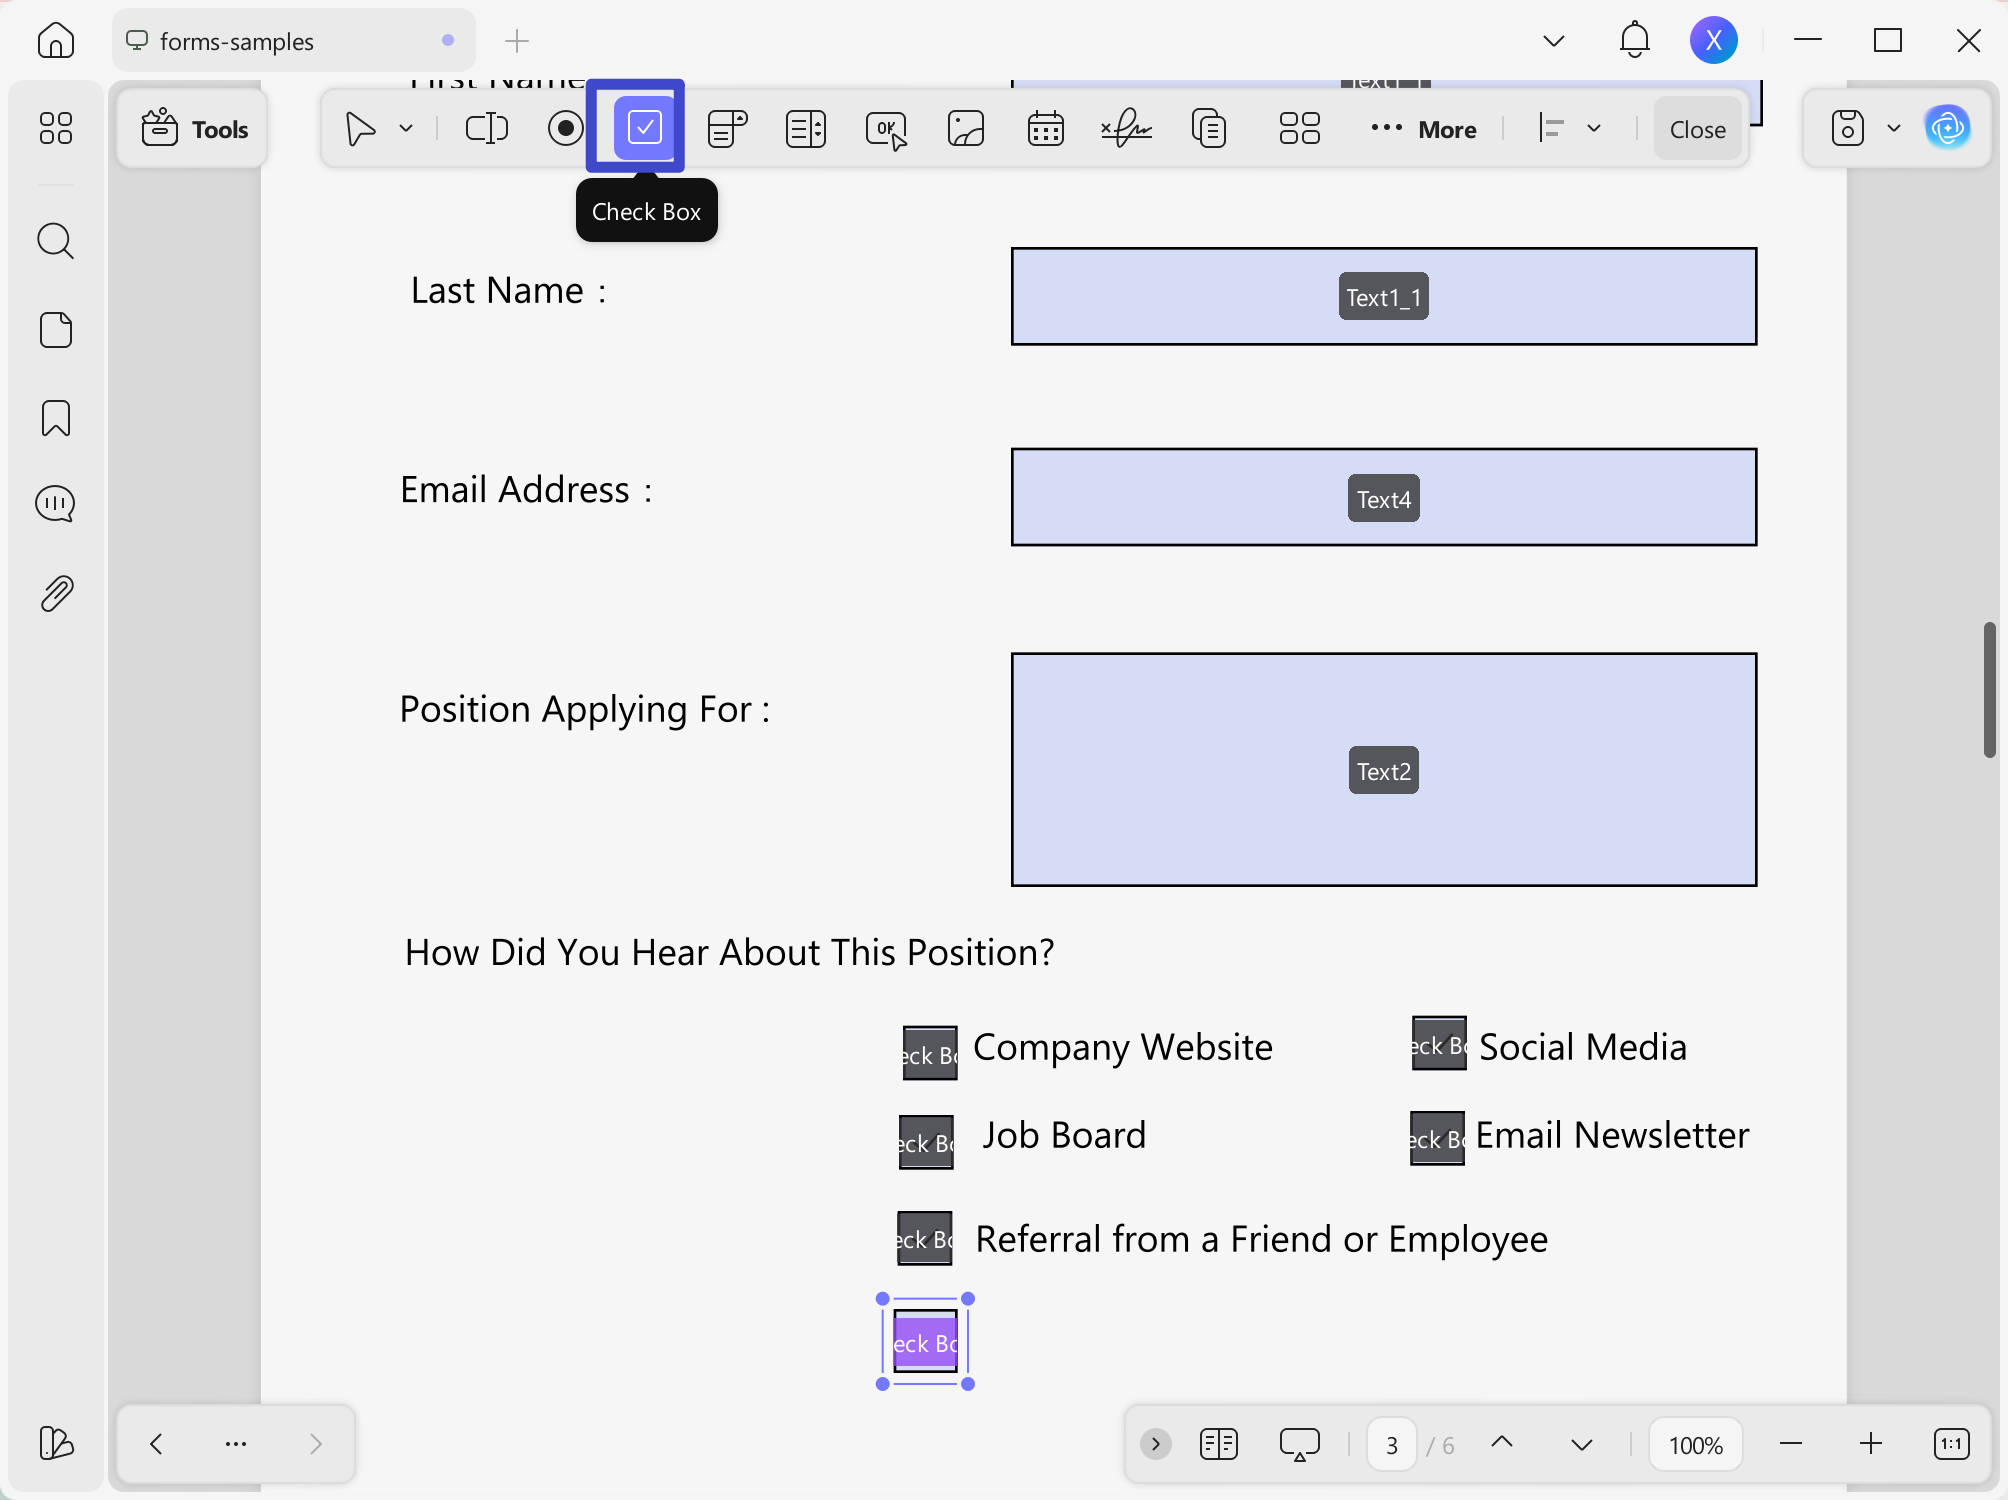
Now, navigate towards the left side panel and select the "Form" in "Tools" option. Next, choose the "Checkbox" icon from the top of the editing window. Later, place this checkbox in the required area of the PDF file by clicking on that particular place.
Step 3: Adjust the General Setting of the Checkbox
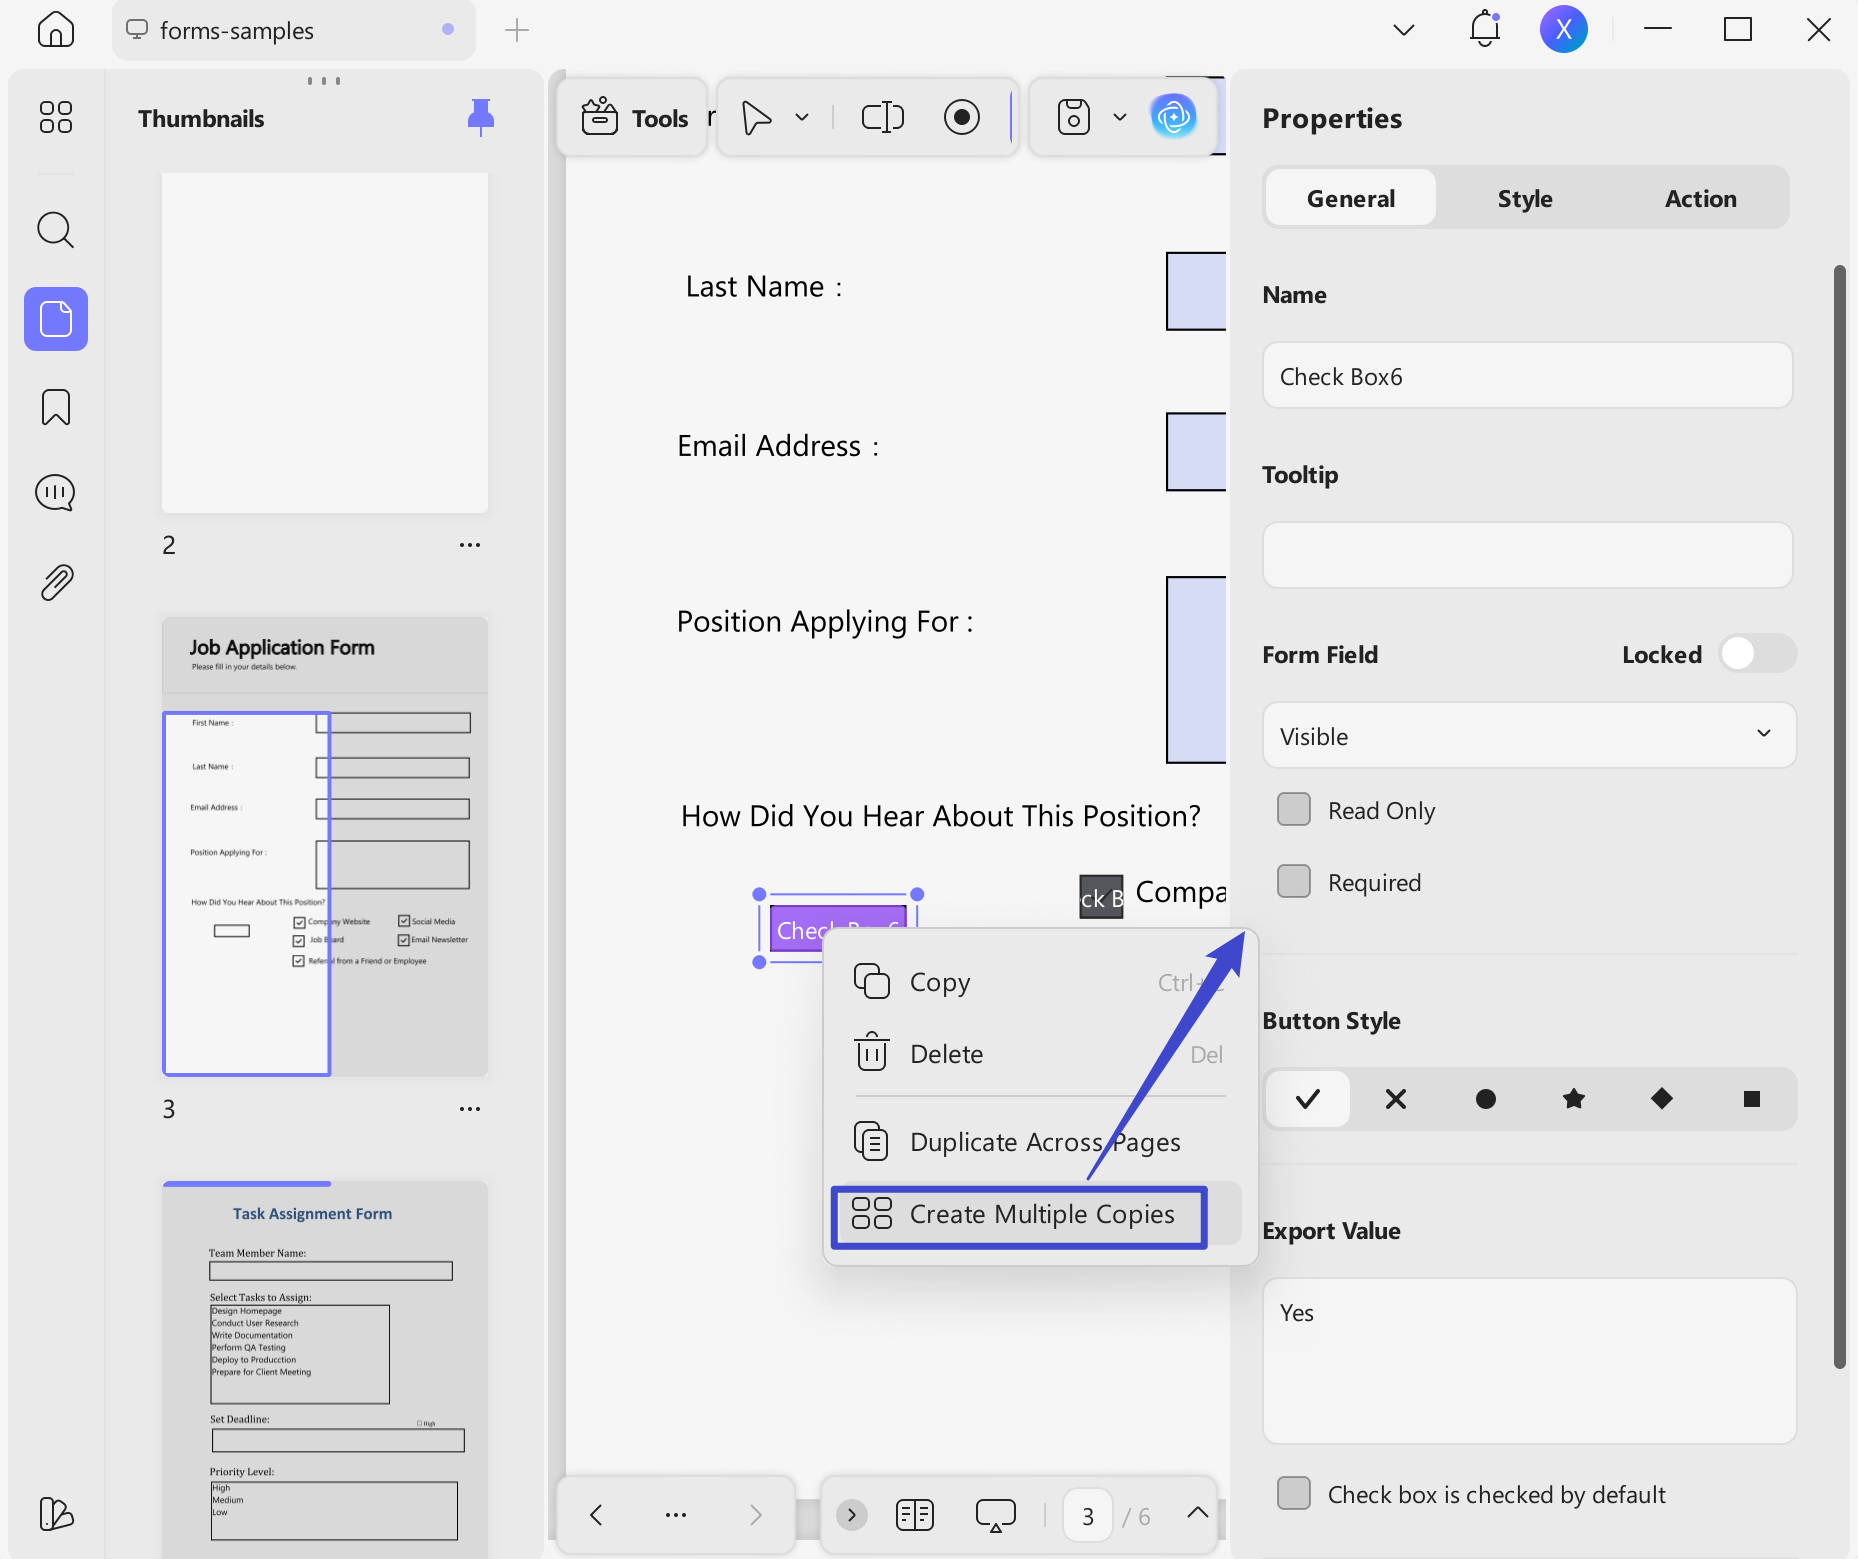
After this, right-click on the checkbox and select "Show Field Properties" from the obtained list. Now, choose the "Button Style" and "Name" of the checkbox after clicking on the "General" tab. Also, you can select the visibility of "Form Filed" from these settings.
Step 4: Adjust the Style and Action Setting of the Checkbox
Then, click the "Style" tab to customize the border and text color of the checkbox. Here, you can also resize the checkbox according to your requirements. Next, hit the "Action" tab to choose the trigger and in-response action of the checkbox.
Step 5: Convert Your PDF File to Excel Format
Once you have adjusted all the checkbox settings, move toward the right sidebar and click the "Tools" option. Later, choose the "Excel" option that will open a pop-up window. On this pop-up window, choose the "Output Format" and "Page Ranges" according to your preferences. Following this, hit the "Apply" button to convert PDF into Excel format.
Tips:
You can use UPDF to add a checkbox in PDF and get access to unlimited features of this tool by purchasing it at a 60% discount. After purchasing this tool, you can simultaneously use it on all platforms, including Windows, iOS, Android, and Mac. You don't have to pay separately to use this tool on different devices like other tools. Also, you can use this tool on 4 devices at the same time. With its advanced features, you can insert a checkbox and customize it according to your needs. To get further information on this tool, watch the video below.
Conclusion
To conclude, the answer to how to insert a checkbox in an Excel query is very simple and effective. This enhances your spreadsheets and makes them more interactive. Using any of the 5 easy methods outlined in this article, users can quickly add checkboxes to their Excel sheets and improve the functionality of their data.
Additionally, if you need to add checkbox images to PDF files, customize them, or convert files to Excel format, we recommend using UPDF. Are you curious to learn more about this efficient PDF converter? Just go through the review on How-To Geek to compel yourself to know why you need to purchase this PDF management tool. This tool allows you to easily edit PDF files, including adding checkboxes to PDF and customizing their appearance.
Windows • macOS • iOS • Android 100% secure


 Enid Brown
 Engelbert White
 Enola Davis