 UPDF for Windows
 UPDF for Mac
 UPDF for iPhone/iPad
 UPDF for Android
 UPDF AI Online
 UPDF Sign
 Edit PDF
 Annotate PDF
 Create PDF
 PDF Form
 Edit links
 Convert PDF
 OCR
OCR PDF to Word
 PDF to Image
 PDF to Excel
 Organize PDF
 Merge PDF
 Split PDF
 Crop PDF
 Rotate PDF
 Protect PDF
 Sign PDF
 Redact PDF
 Sanitize PDF
 Remove Security
 Read PDF
 UPDF Cloud
 Compress PDF
 Print PDF
 Batch Process
 About UPDF AI
 UPDF AI Solutions
 AI User Guide
 FAQ about UPDF AI
 Summarize PDF
 Translate PDF
 Chat with PDF
 Chat with AI
 Chat with image
 PDF to Mind Map
 Explain PDF
 PDF AI Tools
 Image AI Tools
 AI Chat Tools
 AI Writing Tools
 AI Study Tools
 AI Working Tools
 Other AI Tools
 AI Bookmark Generation
 AI Bookmark Summary
 AI Watermark Generation
 AI Background Generation
 AI Sticker Generation
 AI Stamp Generation
 AI Editing Suite
 UPDF Copilot
 AI Page Management
 AI Semantic Search
 PDF to Word
 PDF to Excel
 PDF to PowerPoint
 User Guide
 UPDF Tricks
 FAQs
FAQs UPDF Reviews
 Download Center
 Blog
Blog Newsroom
 Tech Spec
 Updates
 UPDF vs. Adobe Acrobat
 UPDF vs. Foxit
 UPDF vs. PDF Expert
Setting up a printer on a Mac should be straightforward, but it often turns into a confusing process. Sometimes the printer isn’t detected, the connection fails, or the setup steps don’t seem clear. That’s why many users search for how to add printer to mac and look for a simple, reliable method. Whether you’re connecting a wireless printer, USB device, or a shared network printer, getting it right the first time can save a lot of frustration.
In this guide, I’ll walk you through the easiest ways to add and set up a printer on your Mac, along with tips to fix common issues. Make sure to read till the end, because once your printer is ready, tools like UPDF can make your workflow even smoother. You can scan documents directly on your Mac or iOS device and manage them easily in one place.
Windows • macOS • iOS • Android 100% secure
Part 1. How To Add Printer To Mac
If you’re setting up a new device or trying to fix a connection issue, understanding how to add printer to mac properly can save you a lot of time. In most cases, macOS detects printers automatically, but depending on whether you’re using a wireless, USB, or network printer, the setup steps may vary. I usually follow the methods below to make sure everything connects smoothly.
Method 1: Add Printer Automatically (Recommended)
The easiest way to add a printer is to let macOS detect it automatically. This works for most modern printers connected via Wi-Fi or USB.
- Turn on your printer and make sure it’s connected to the same Wi-Fi network as your Mac.
- On your Mac, go to System Settings (or System Preferences) > Printers & Scanners.
- Click the “+” (Add Printer) button.
- Your Mac will scan for available printers.
- Select your printer from the list and click Add.
Once added, the printer is ready to use immediately. macOS will usually install the correct driver automatically.
Method 2: Add Printer Manually (If Not Detected)
Sometimes the printer doesn’t show up automatically. In that case, I add it manually.
- Open Printers & Scanners.
- Click the “+” button.
- Switch to the IP tab.
- Enter the printer’s IP address (you can find this on the printer display or network settings).
- Choose the correct protocol (usually IPP or AirPrint).
- Click Add.
This method is especially useful for office or network printers.
Method 3: Add Printer Using USB Connection
If you’re using a wired printer, the process is even simpler.
- Connect the printer to your Mac using a USB cable.
- Turn on the printer.
- Your Mac should detect it automatically.
- If prompted, click Download & Install to install drivers.
After installation, the printer will appear in your printer list.
Method 4: Add Shared Printer (From Another Mac or Network)
If your printer is shared on a network, you can add it easily.
- Open Printers & Scanners.
- Click Add Printer.
- Look under the Default or Windows tab.
- Select the shared printer.
- Click Add.
Common Issues And Quick Fixes
Even after following the steps, you might face some issues. Here’s what I usually check:
- Make sure both the Mac and printer are on the same Wi-Fi network
- Restart the printer and your Mac
- Update macOS to ensure compatibility
- Remove and re-add the printer if it’s not responding
So, once you understand how do I add a printer to my mac, the process becomes very straightforward. Whether you’re using wireless, USB, or network printers, macOS provides simple tools to connect them quickly and reliably.
Part 2. Bonus Tip: How To Scan With Your Printer On Mac
Once I’ve set up printing, the next thing I usually need is scanning. Many modern printers come with built-in scanners, and macOS makes it easy to scan documents directly. However, when I need better control over my scanned files—like organizing, converting, or sharing them—I prefer using a tool like UPDF.
UPDF is an all-in-one PDF editor that simplifies document handling. I can scan documents into PDF format on my Mac or mobile device, and then convert them into formats like JPG or PNG if needed. It also supports UPDF Cloud, which lets me sync files across devices. On mobile, I can even connect with Dropbox to keep everything backed up. Once my scans are ready, I can quickly share them via email, a link, or even a QR code.
Windows • macOS • iOS • Android 100% secure
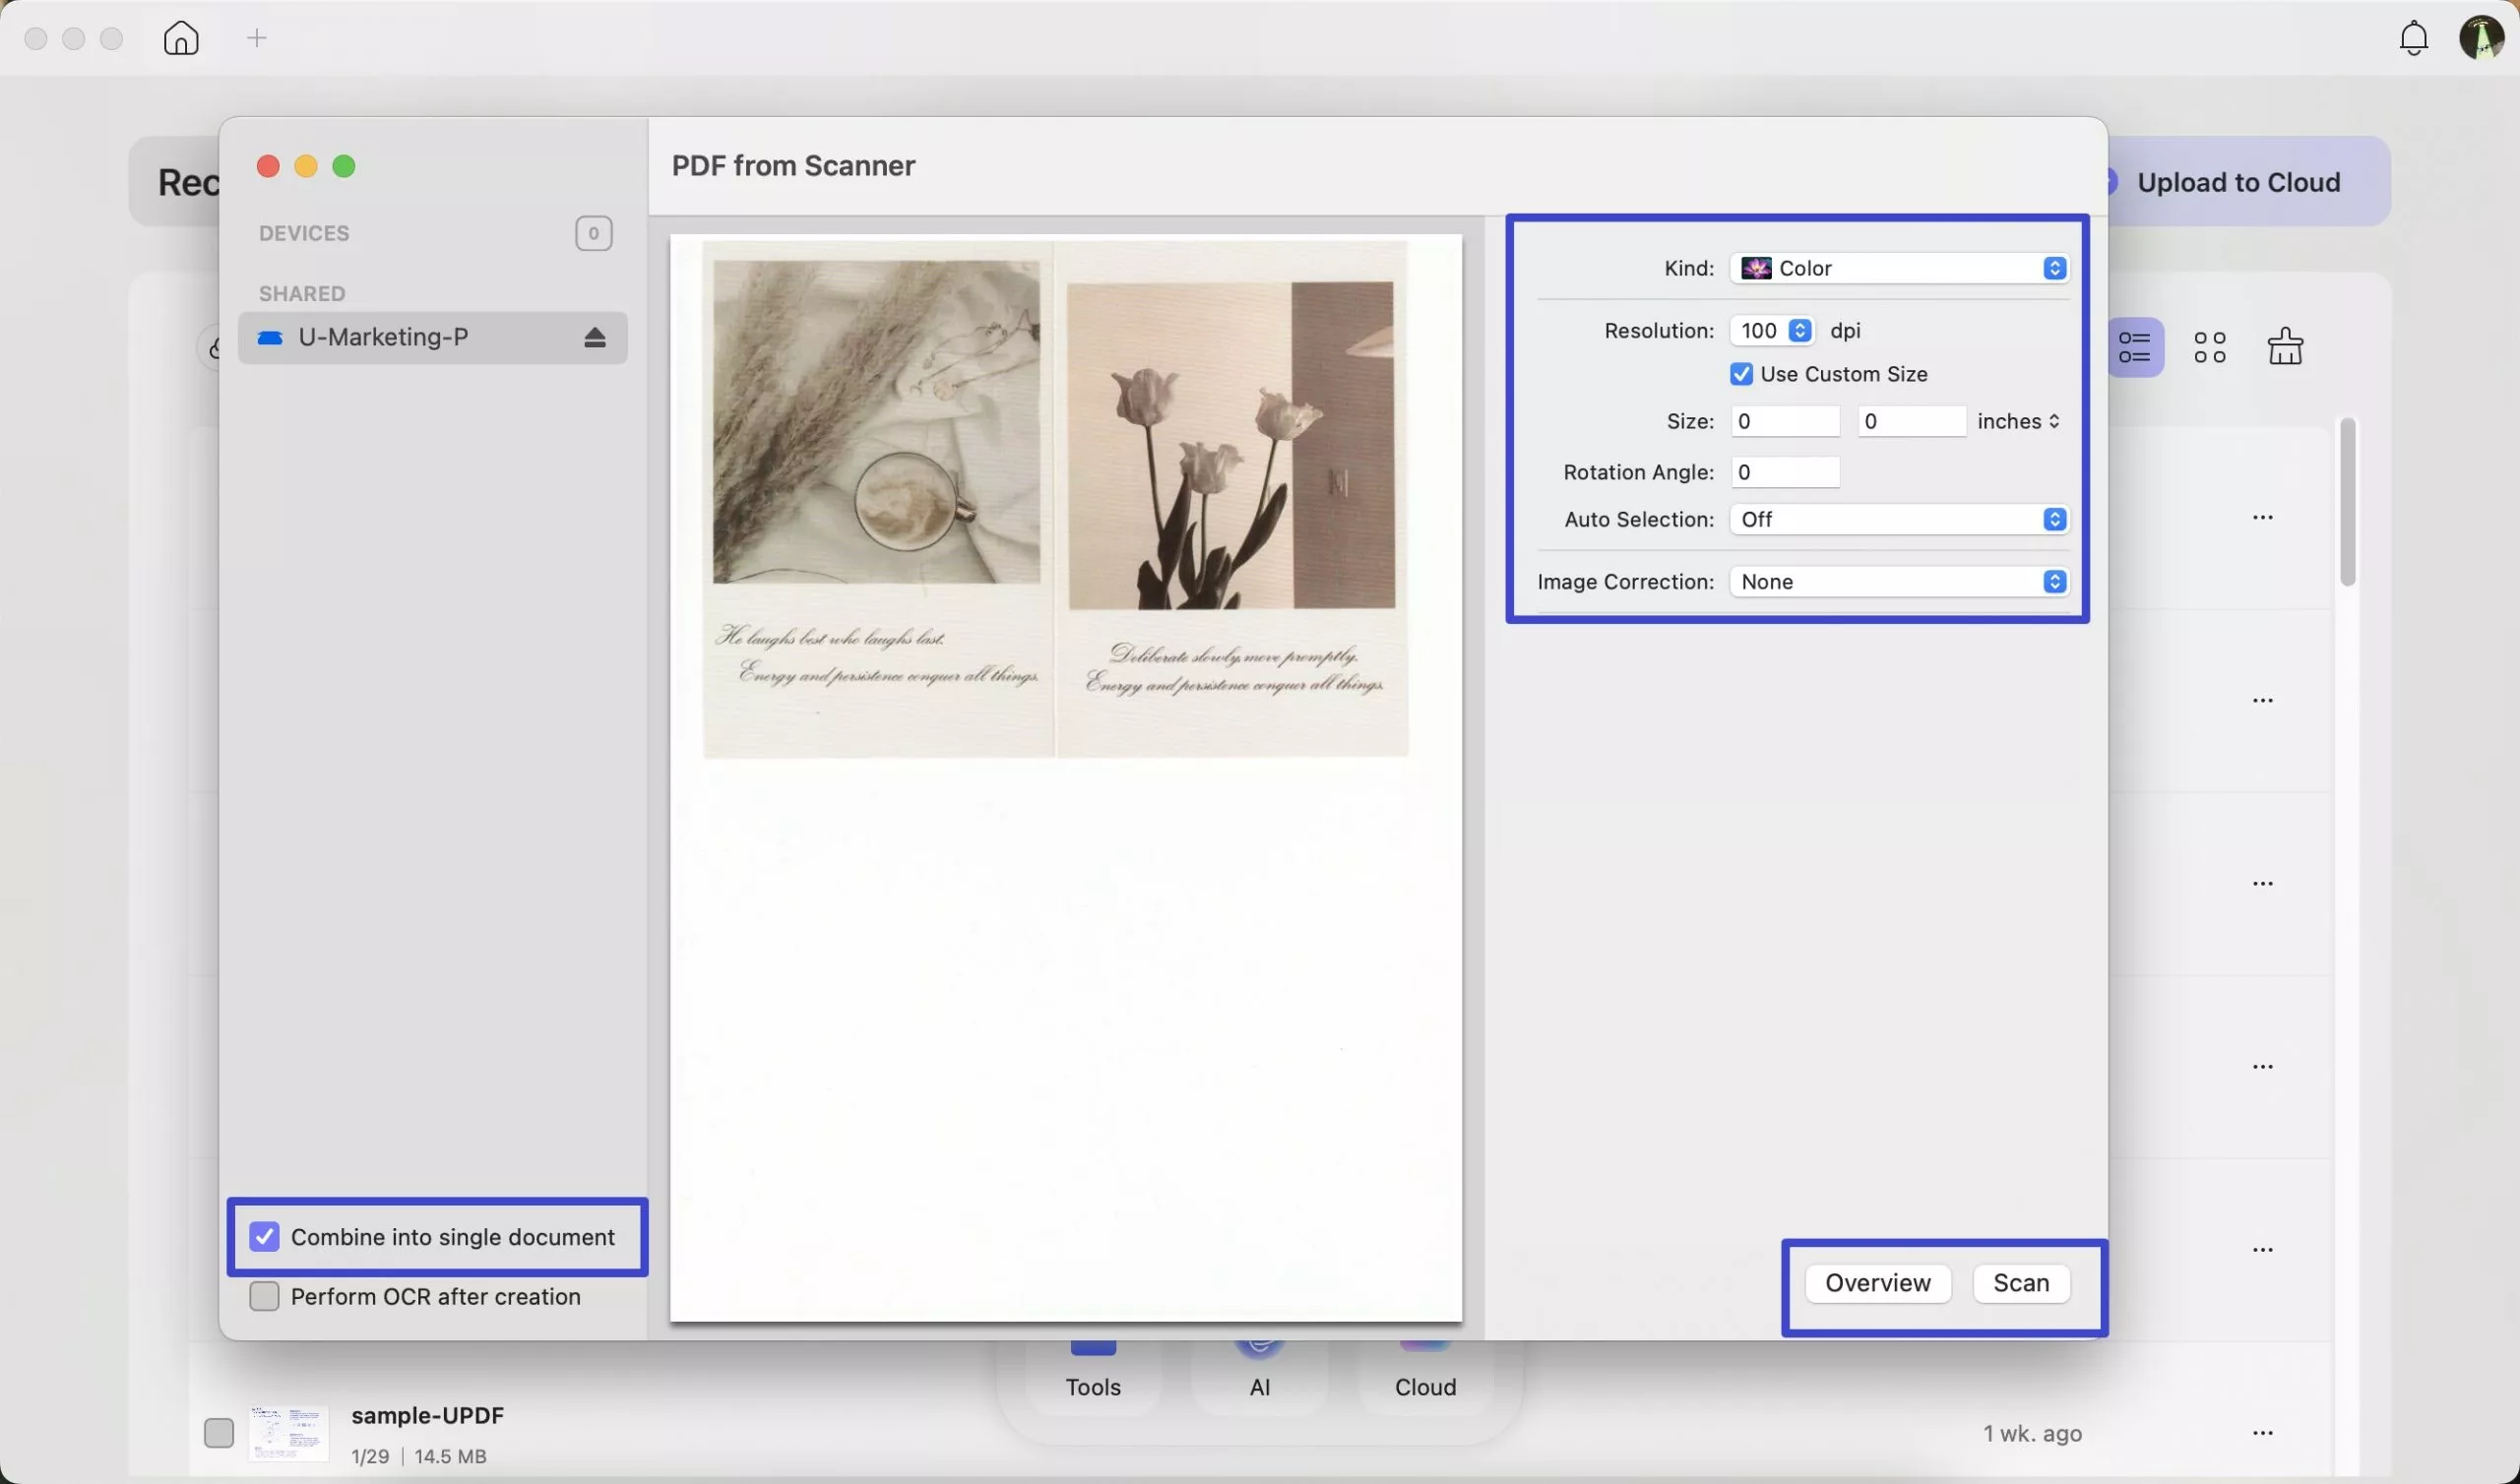
Step 1: Customize, Preview, And Scan
Once I open the scan feature in UPDF, I first adjust the settings based on my needs. I can choose the scan mode, resolution, and color options depending on whether I’m scanning text documents or images. This customization ensures the output looks clear and professional.

If the document contains printed text, I can also enable OCR after scanning. This allows UPDF to convert the scanned content into searchable and editable text, which is extremely useful for reports or forms.
Step 2: Select The Scanning Area And Capture
Next, I position the document properly and select the area I want to scan. UPDF detects the edges automatically, but I can fine-tune the selection if needed. Once everything looks right, I proceed with the scan.
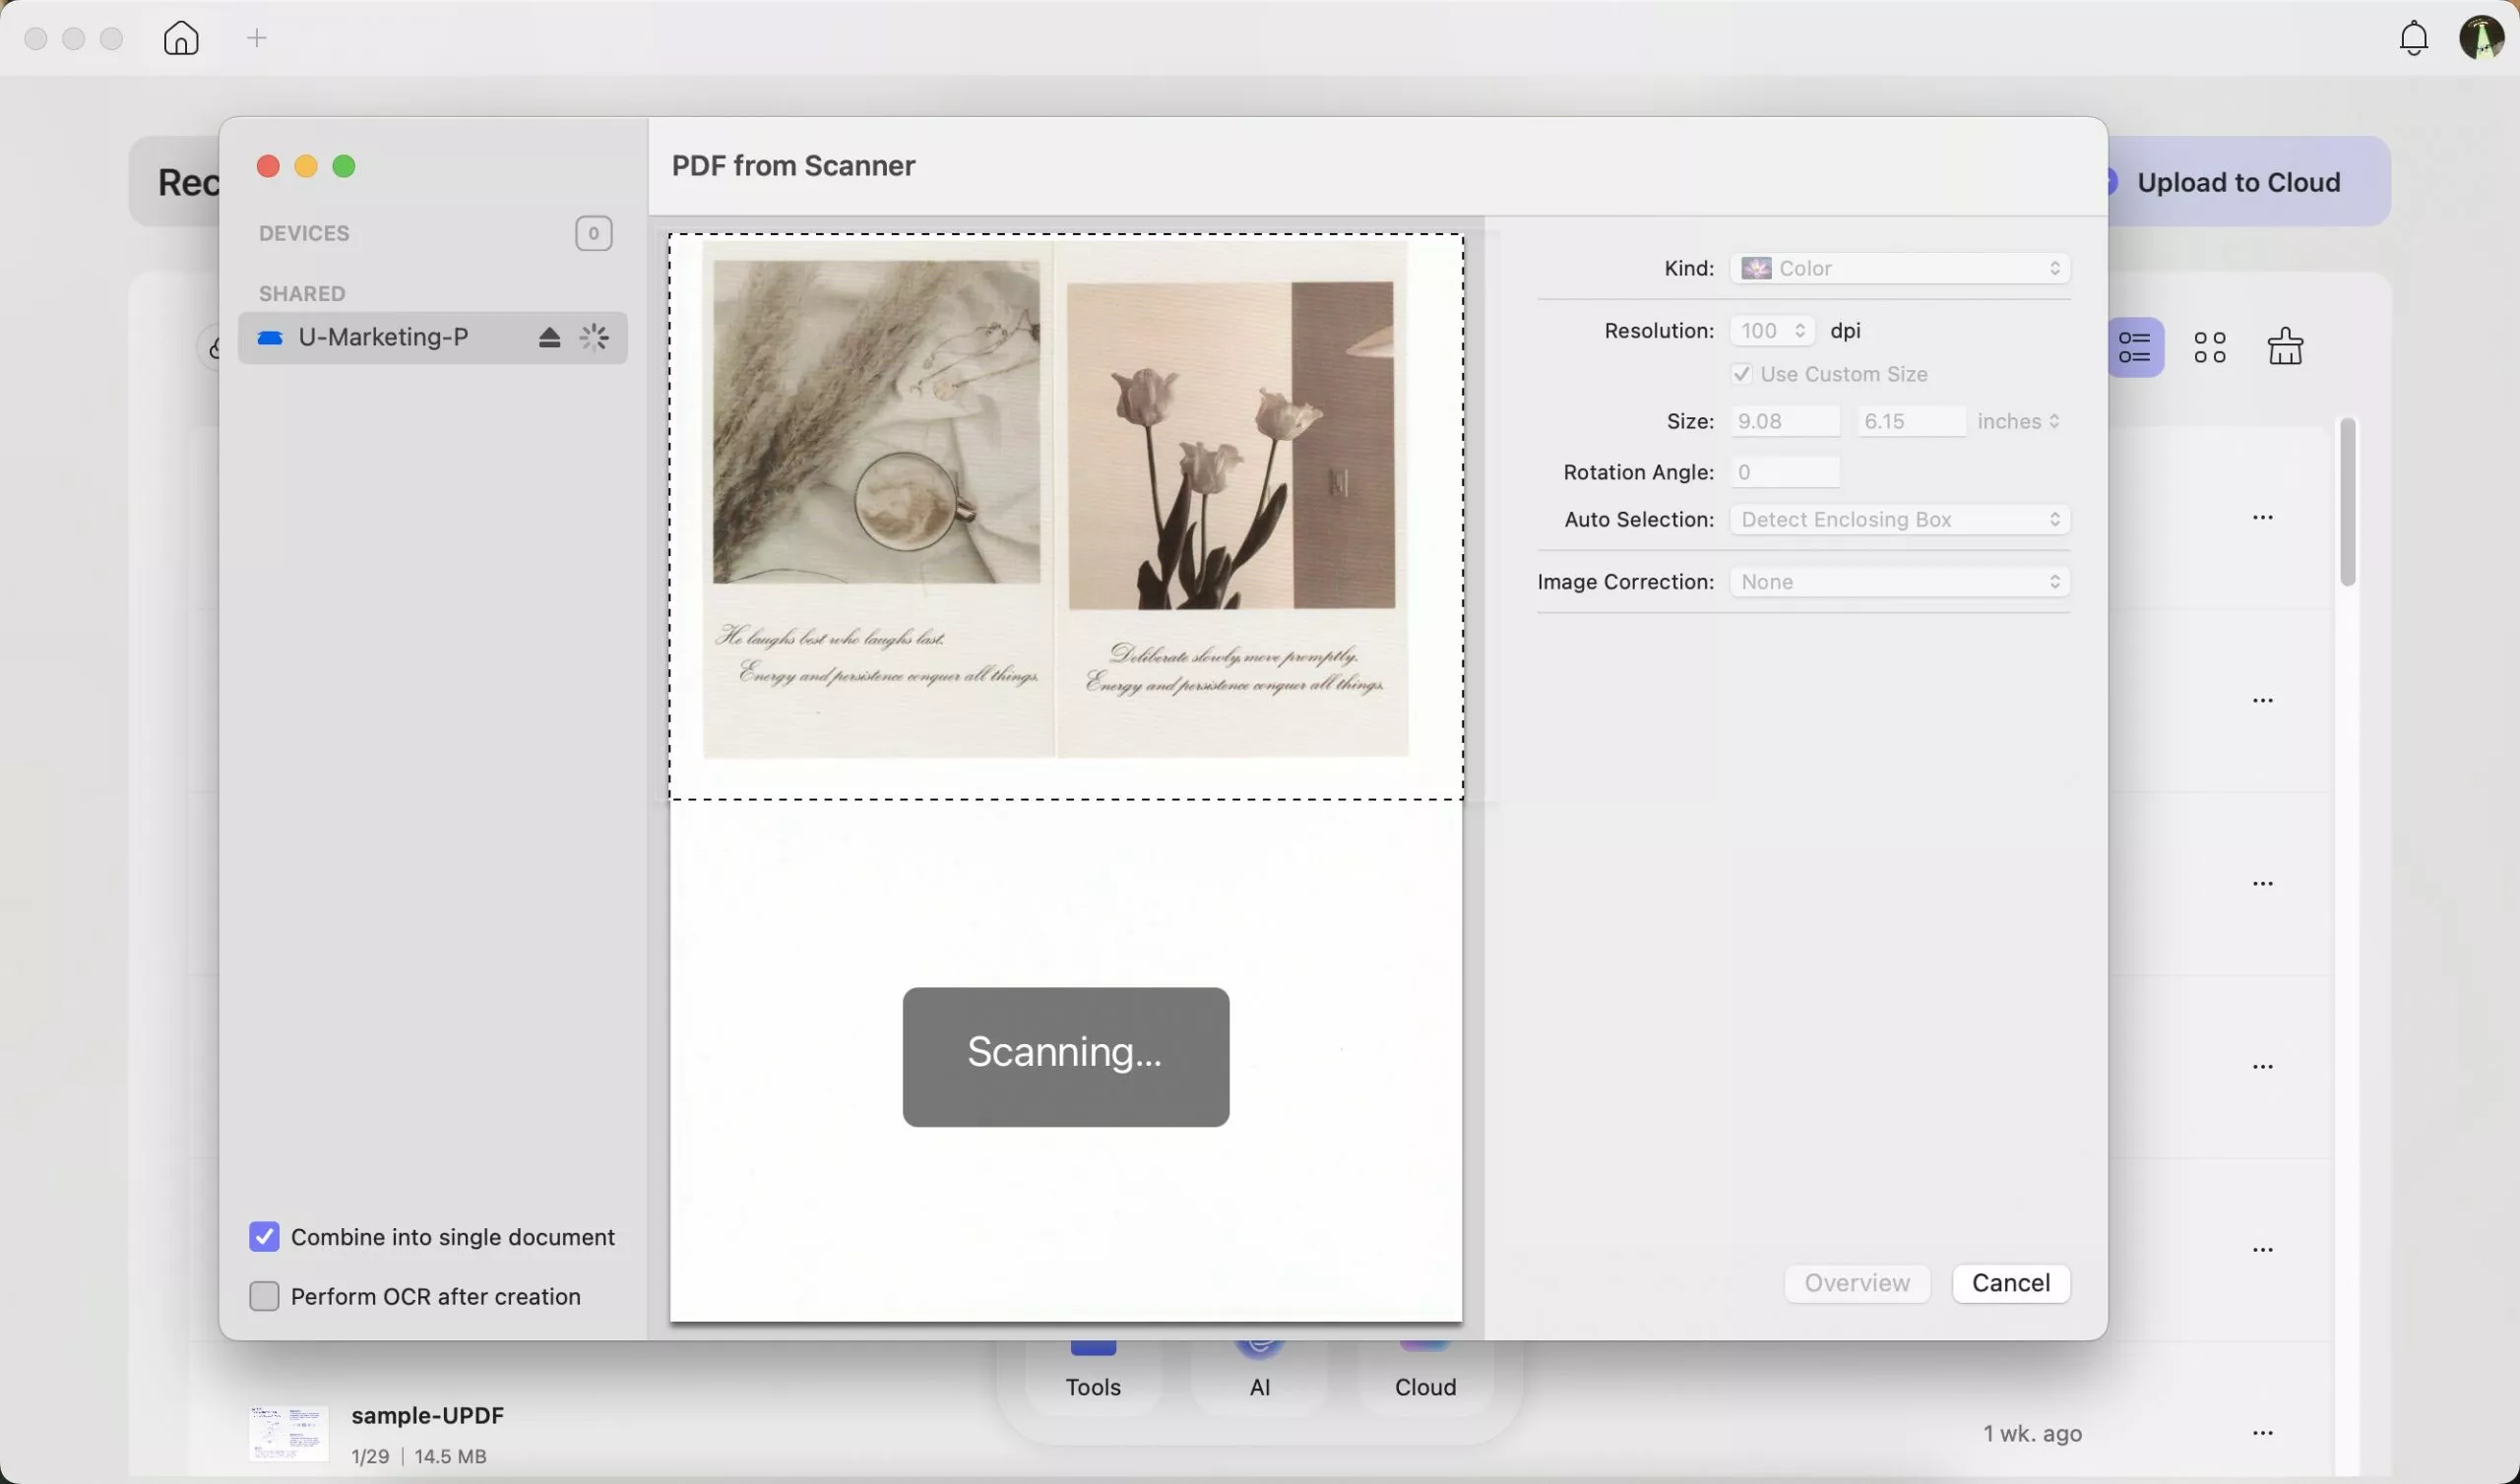
The process is quick, and within a few seconds, the document is captured with good clarity.
Step 3: Review And Save As PDF
After scanning, I review the result to make sure everything is clear and aligned. If needed, I can adjust brightness, contrast, or orientation before saving. Once satisfied, I save the document as a PDF.
Saving as PDF keeps the formatting consistent and makes the file easy to share or store.
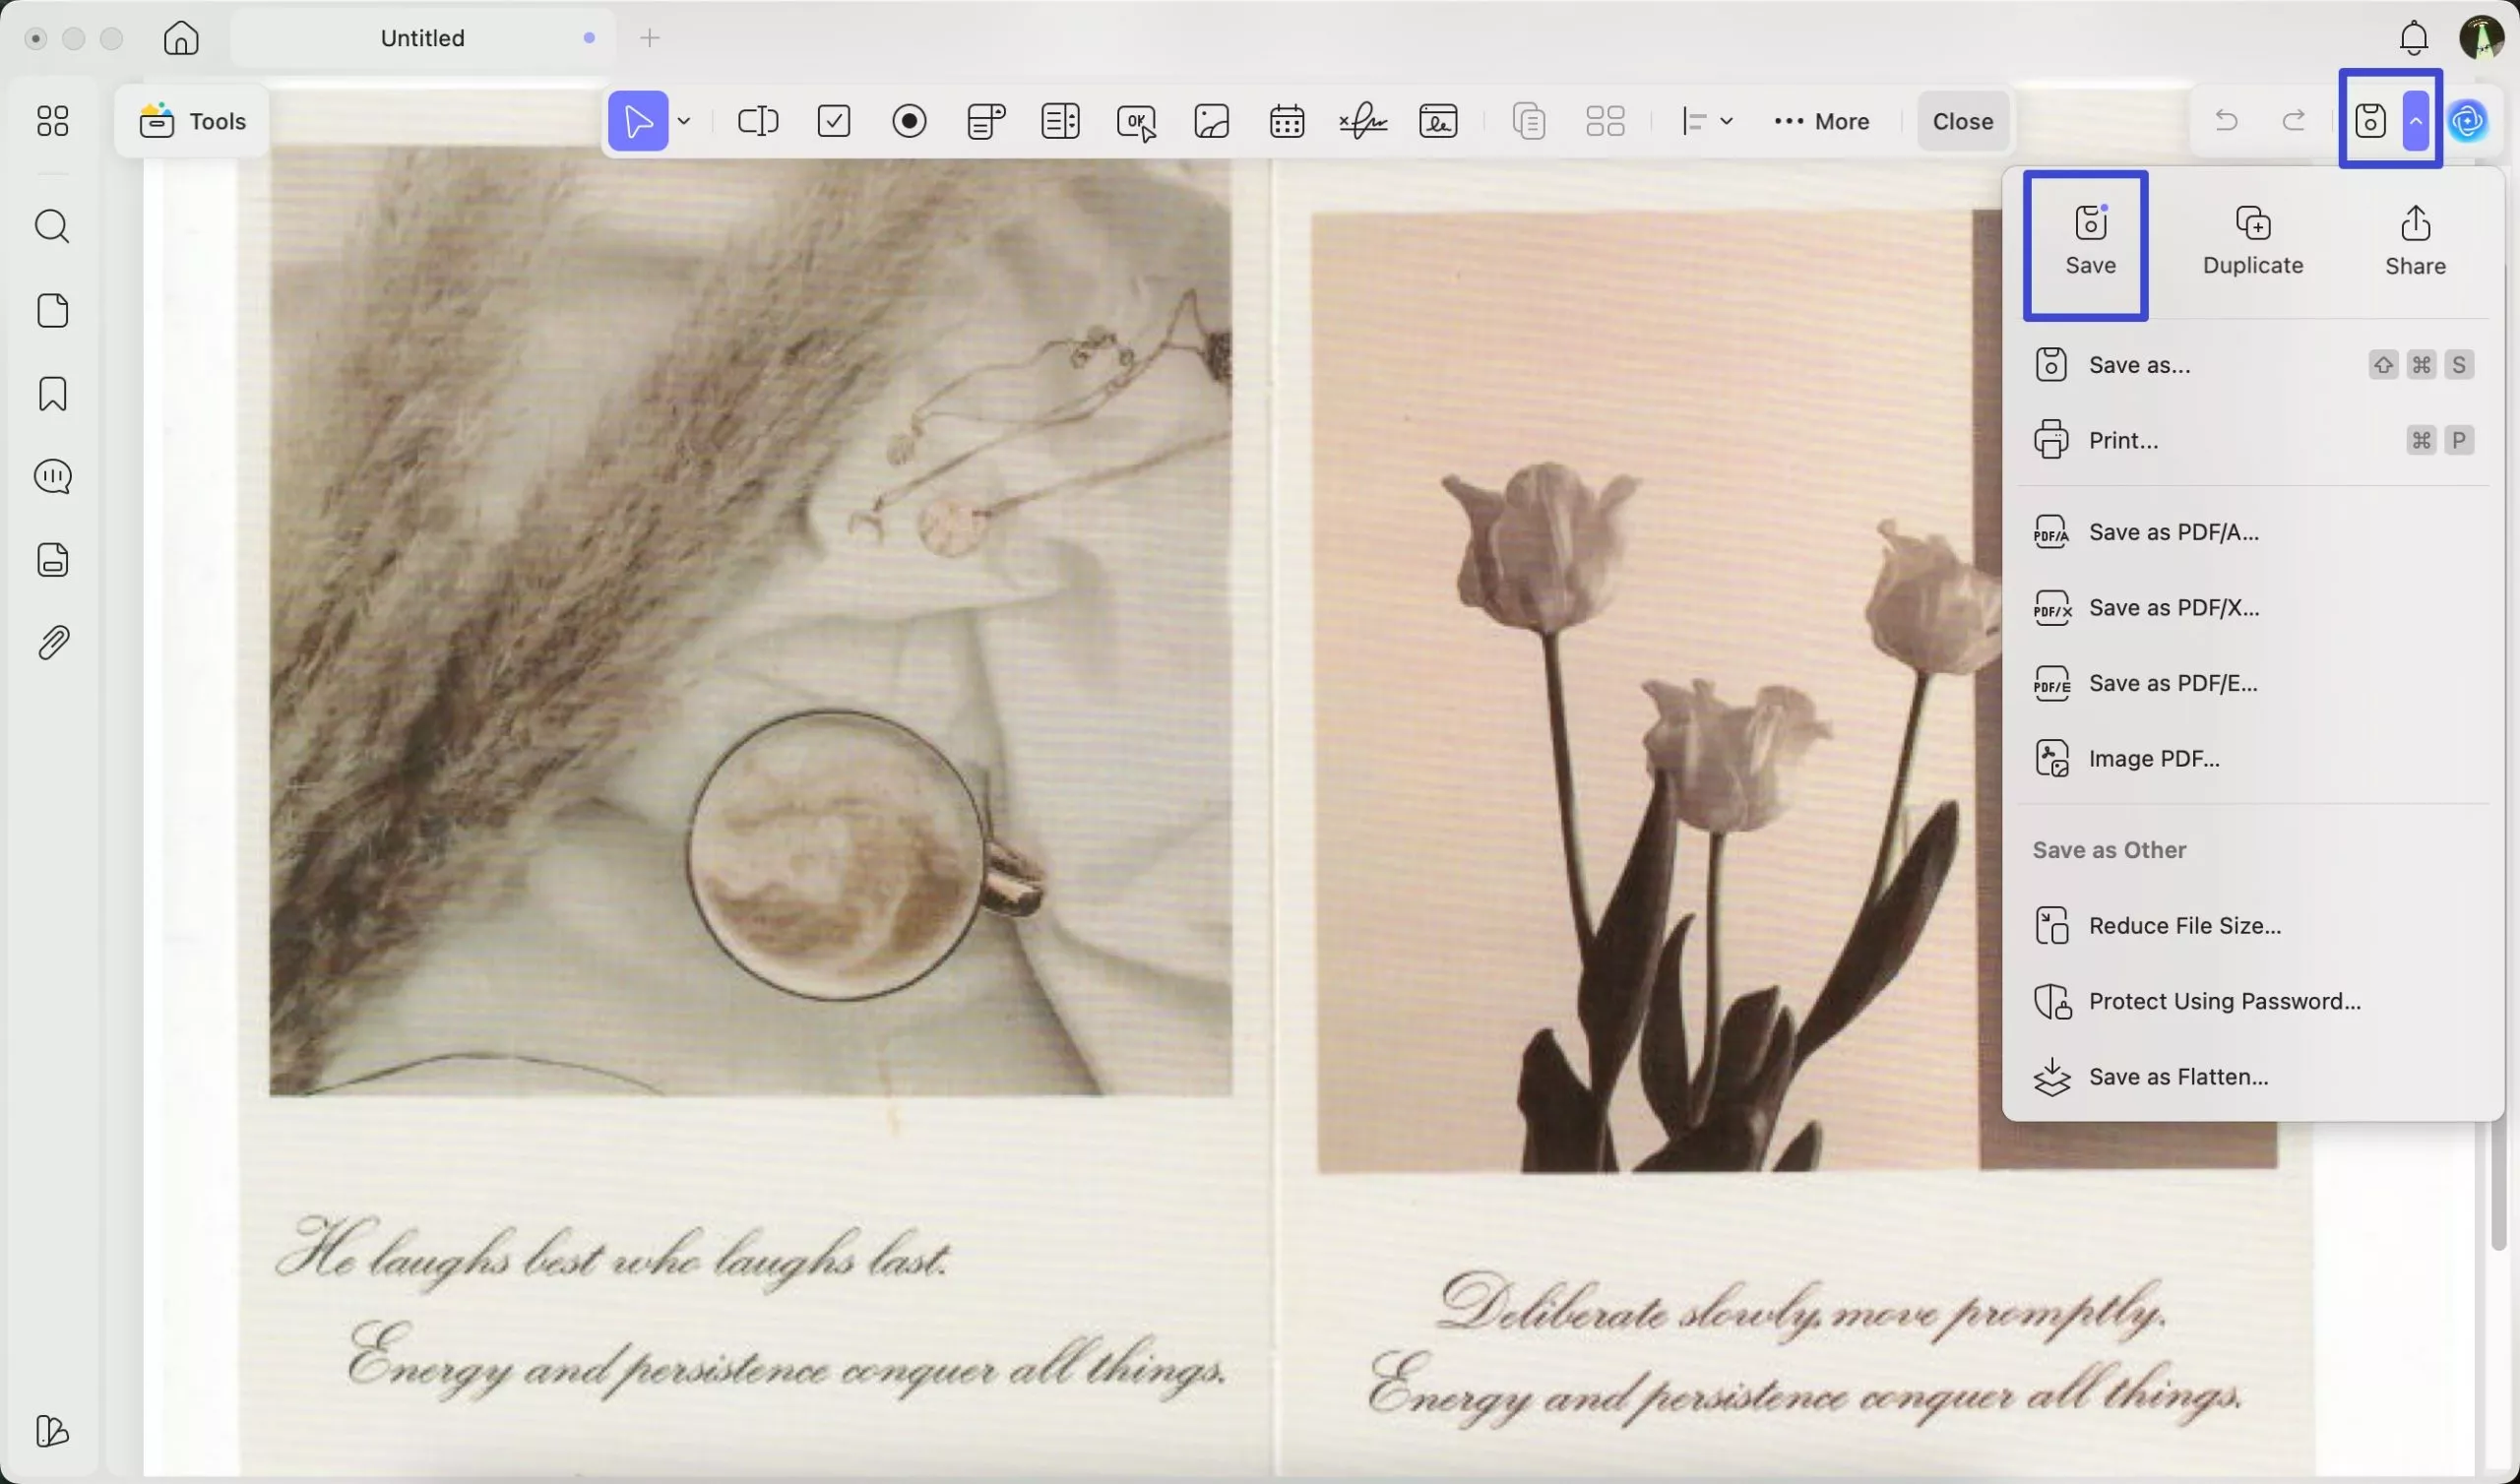
Step 4: Convert To Other Formats (Optional)
If I need the file in a different format, UPDF makes it easy to convert the scanned PDF into formats like JPG or PNG. This is helpful when I need to upload images or share visuals instead of documents.
Step 5: Share, Sync, Or Generate Link/QR Code
Once the document is ready, I can quickly share it. UPDF allows me to upload the file to UPDF Cloud, sync it across devices, or generate a shareable link or QR code. This makes it easy to send documents without attaching large files manually.
Windows • macOS • iOS • Android 100% secure
Part 3. Scan On Mobile With UPDF (iOS & Android)
Sometimes I don’t have access to my computer, so I use UPDF on my phone to scan documents on the go. It works smoothly on both iOS and Android, and the workflow is just as simple.
You can download the app from:
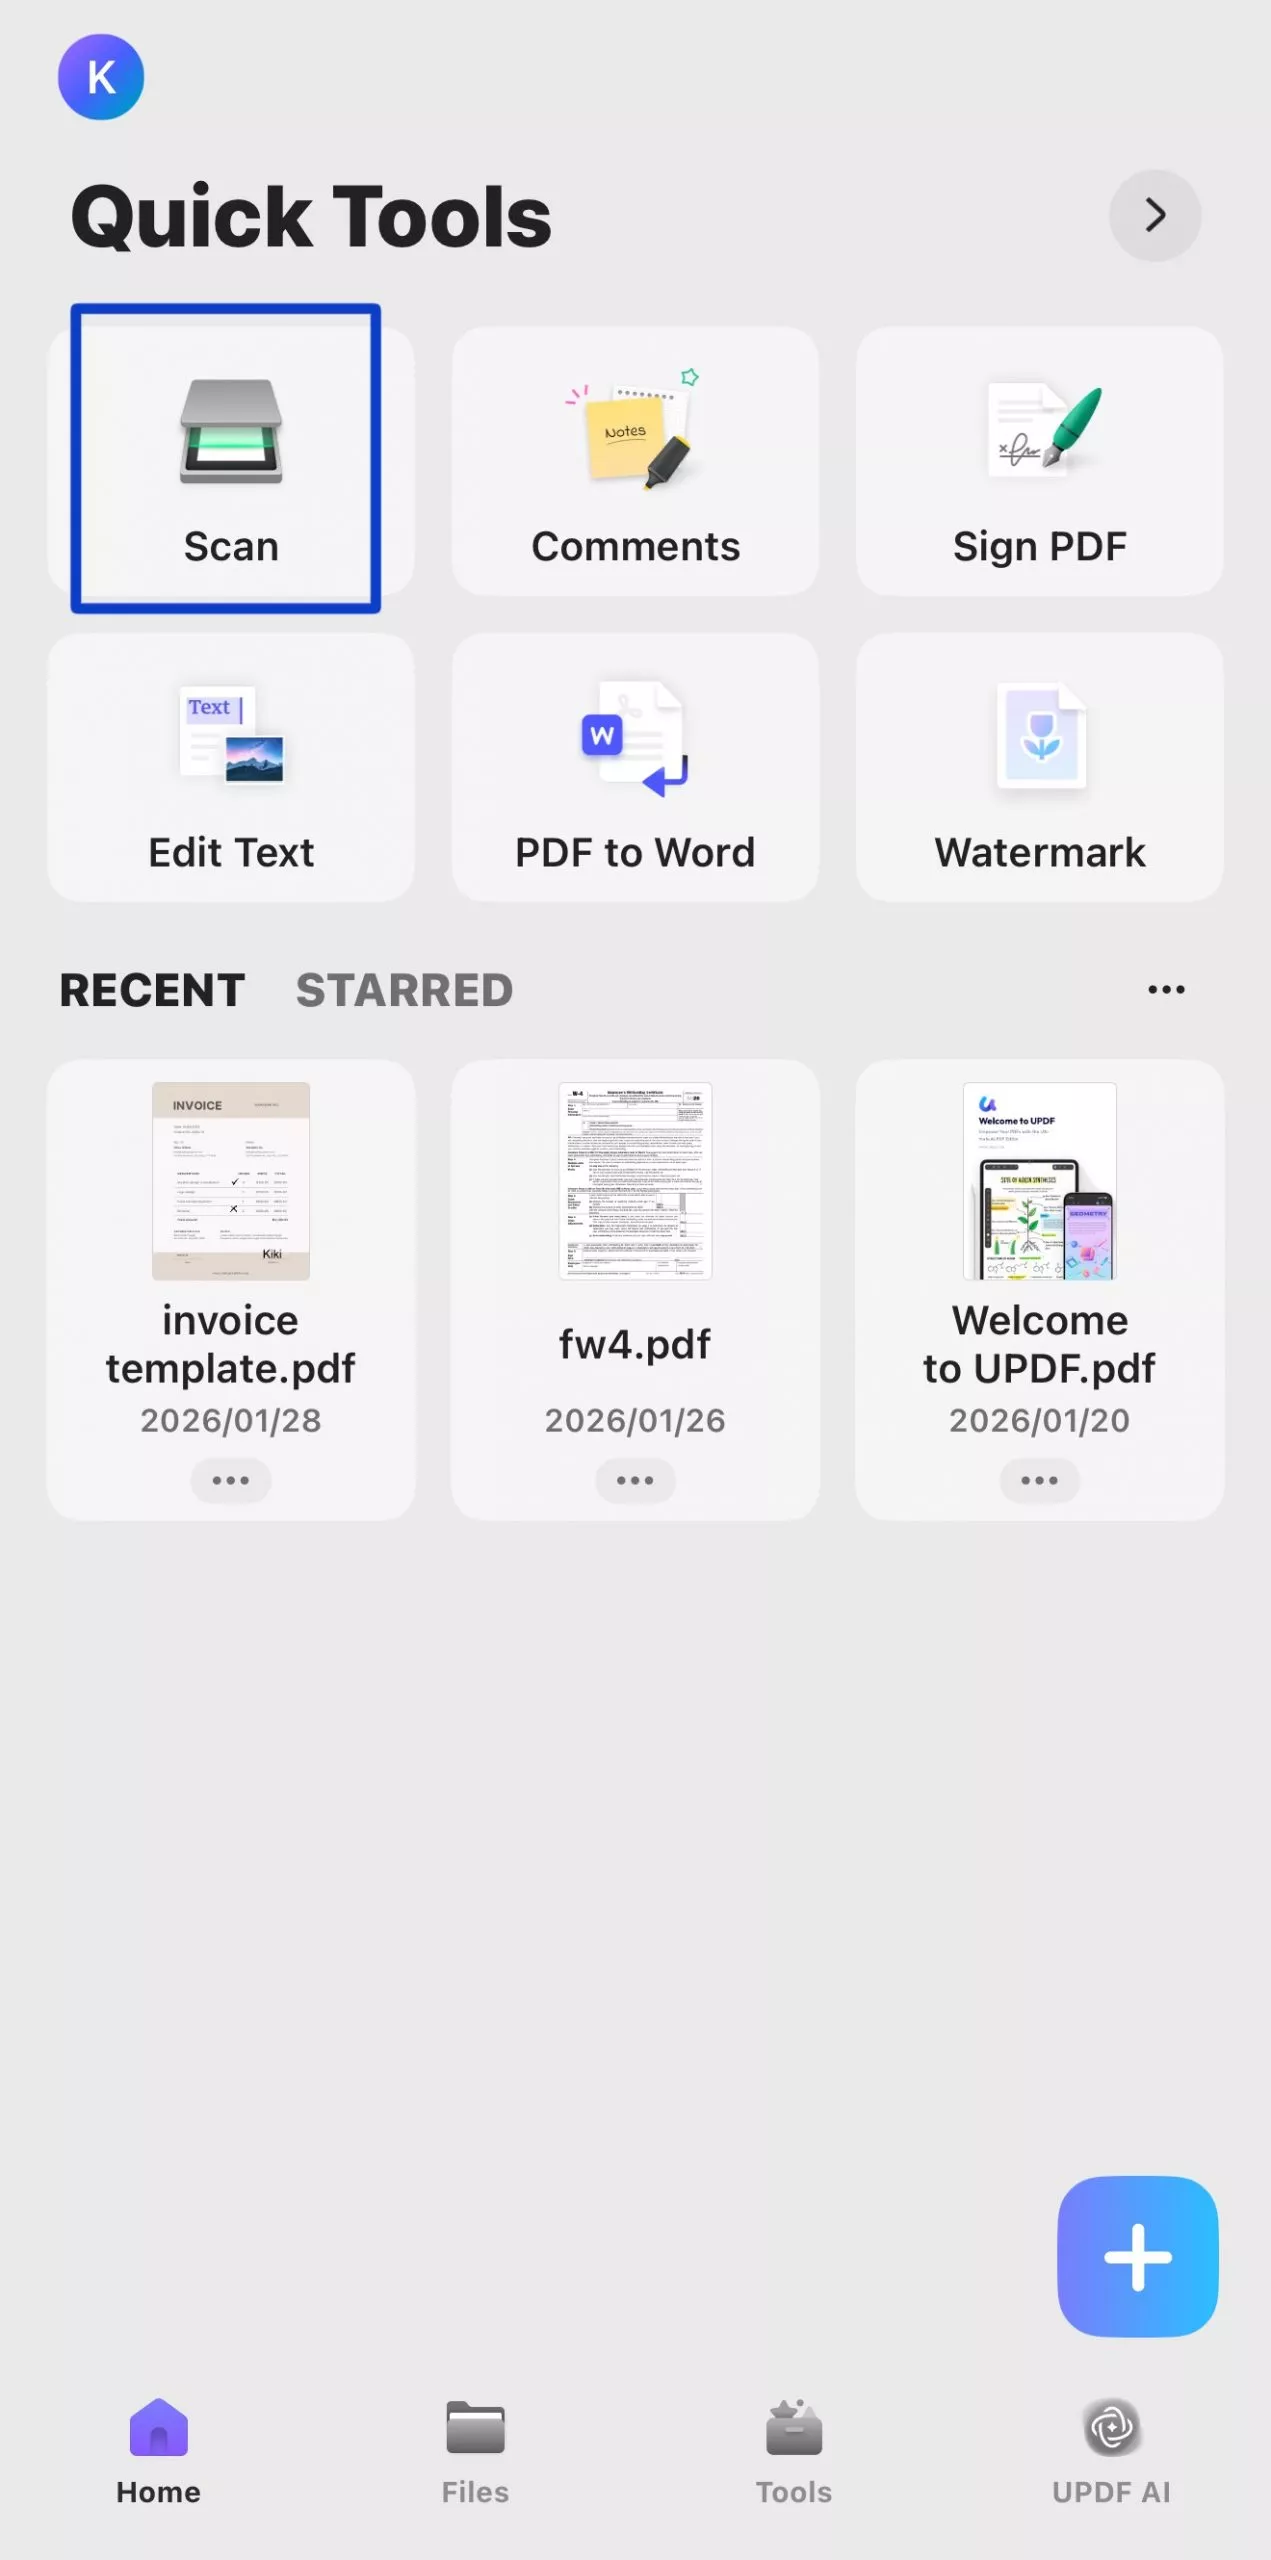
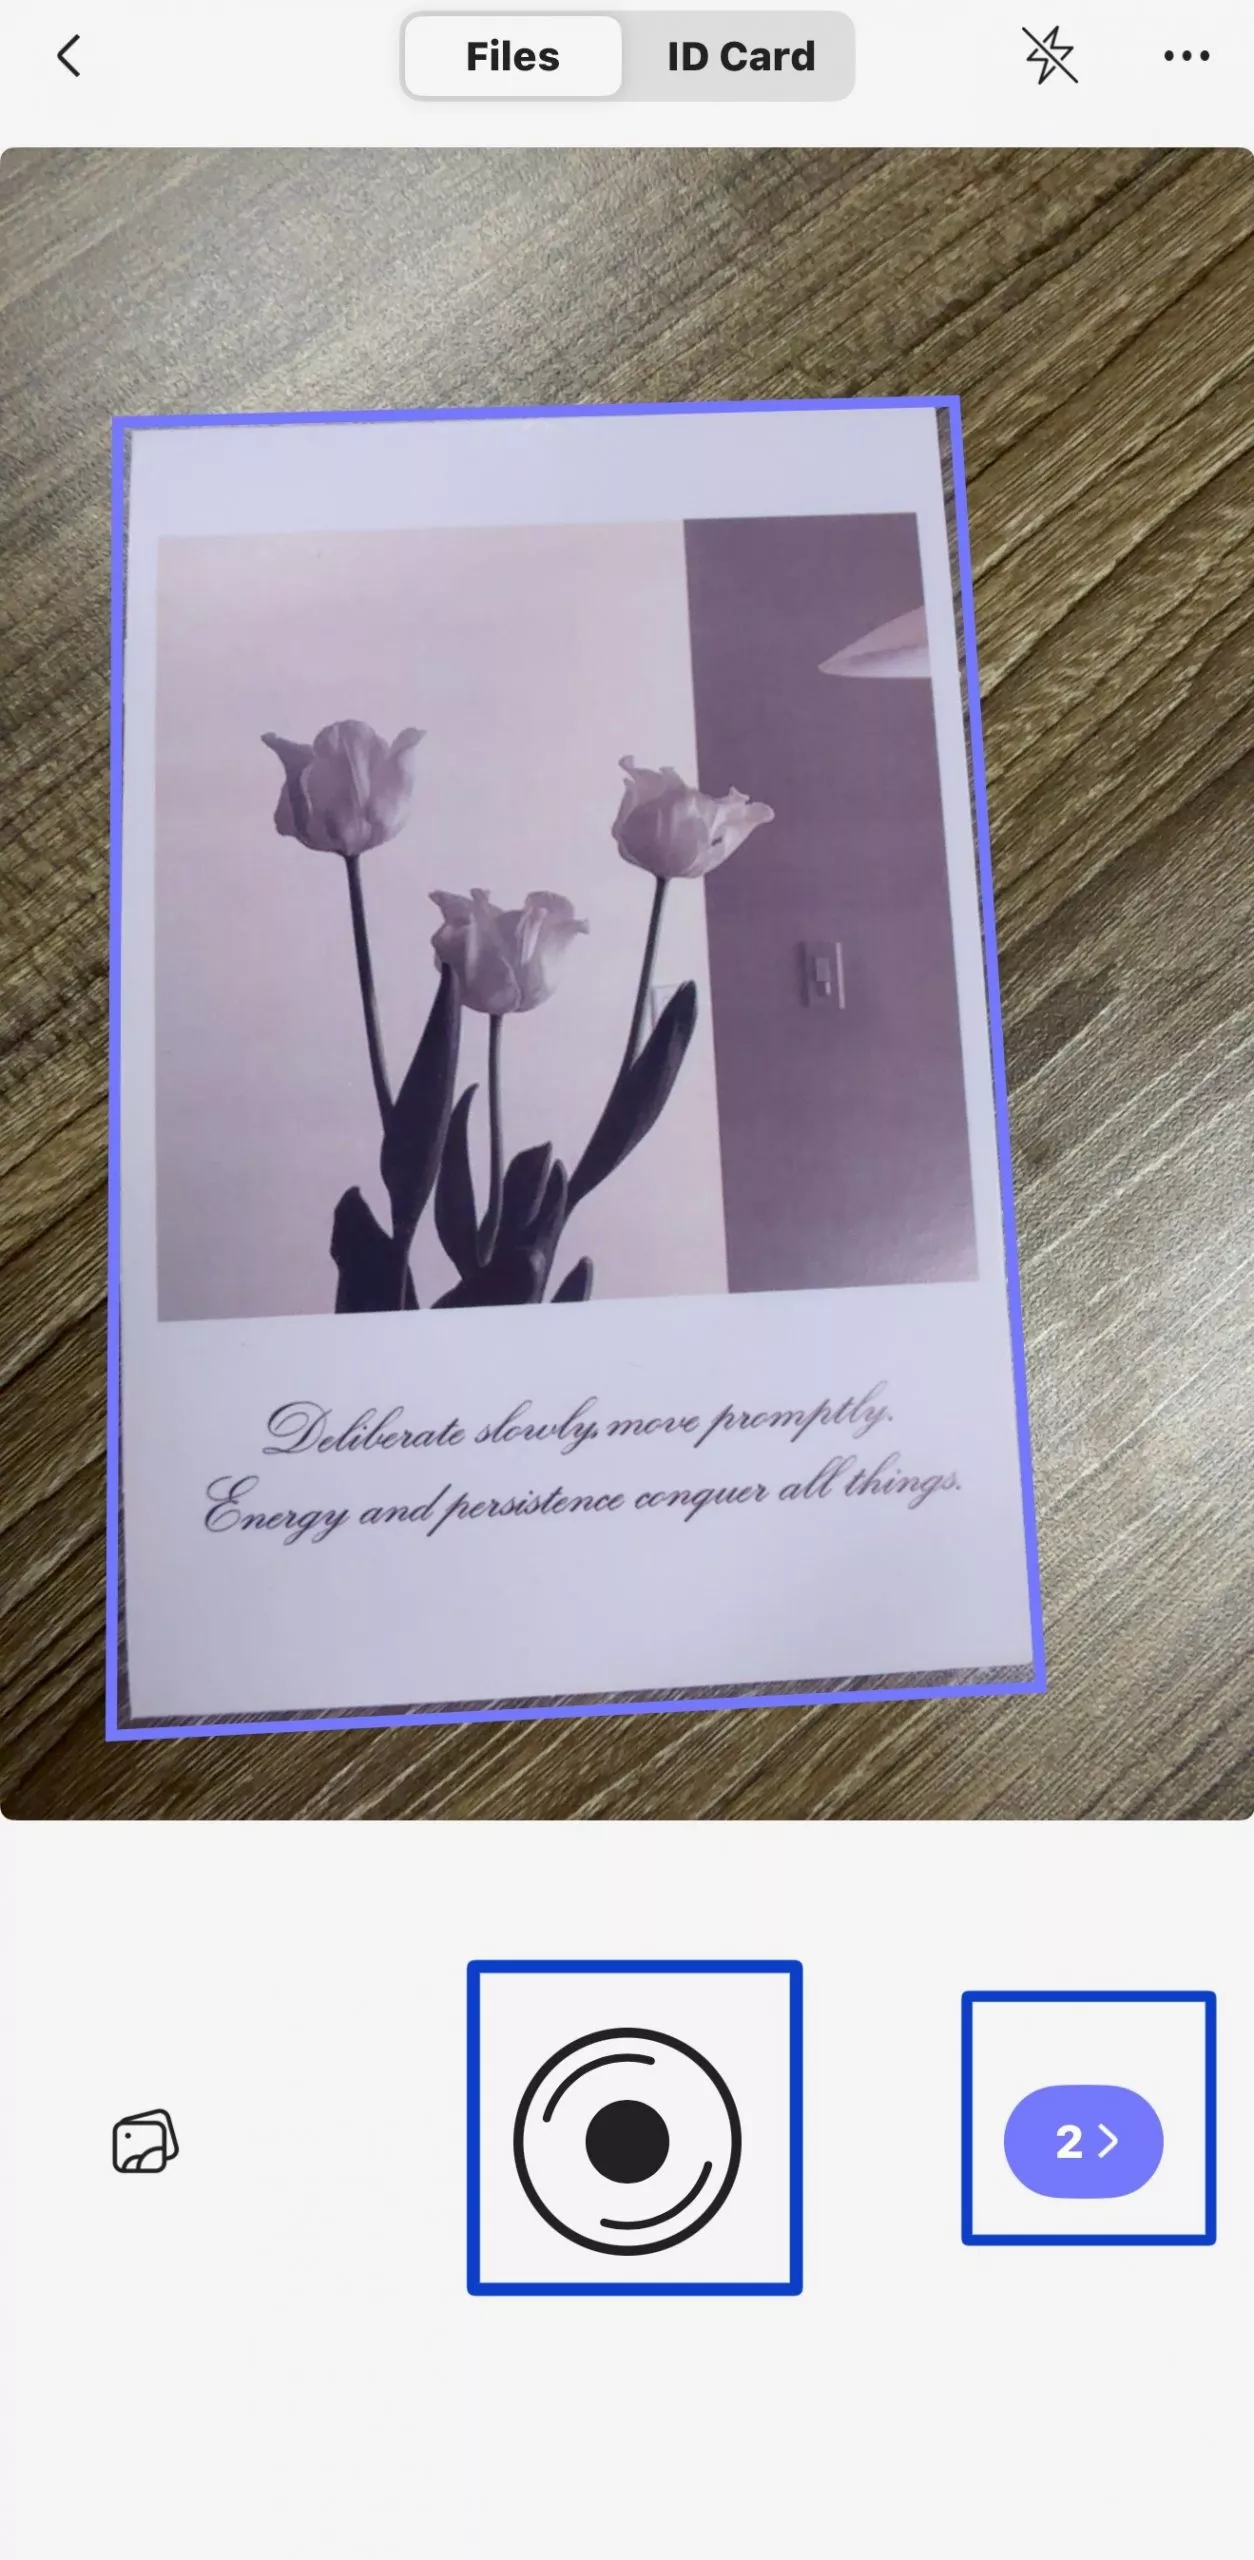
Step 1. Open UPDF And Start Scanning
Open the UPDF app on your mobile device. On the home screen, tap the “Scan” option under Quick Tools to start scanning your document.
Step 2. Adjust Scan Settings And Capture
Before scanning, I usually adjust the settings for better results. You can enable Auto Capturing and Auto Cropping from the top menu.

Once everything is set, point your camera at the document and tap the capture button to scan.
Step 3. Capture Multiple Pages
If you need to scan more than one page, keep tapping the capture button. After scanning all pages, tap the arrow icon to move to the editing screen.
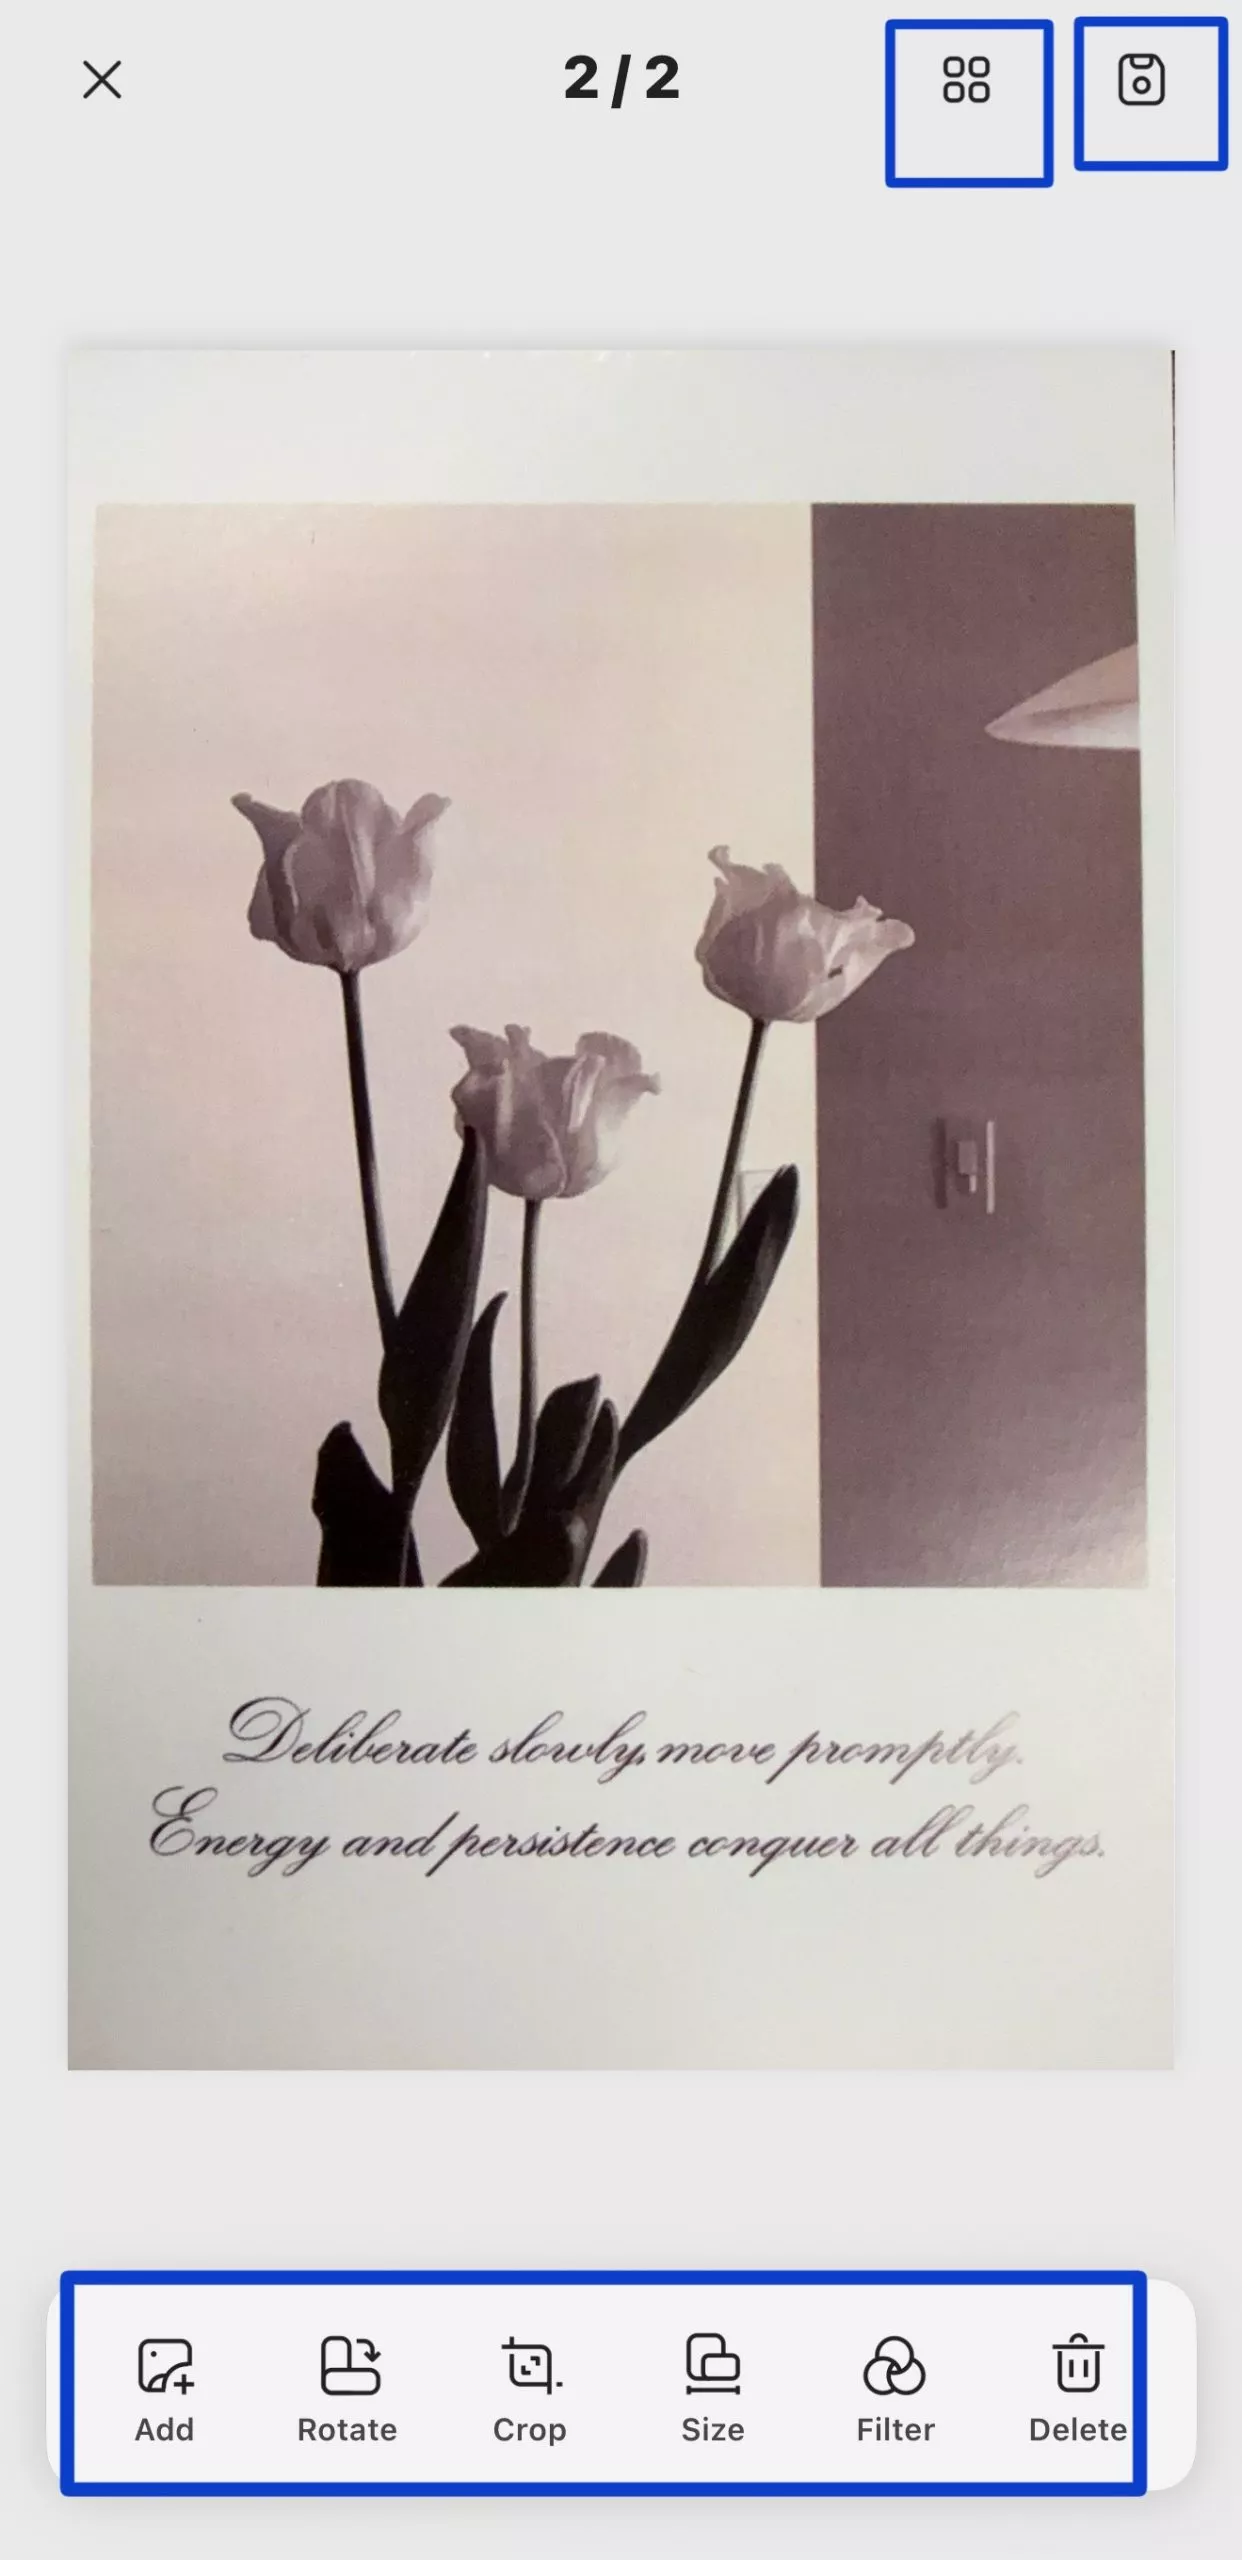
Step 4. Edit And Adjust Your Scans
Now, I review the scanned pages and make adjustments if needed. You can:
- Rotate pages
- Crop the scan
- Adjust size
- Apply filters (Photo, B&W, Color, Grayscale)
If the scan isn’t perfectly aligned, you can manually adjust the edges and resize the document for better accuracy. This step is especially useful for documents that weren’t captured straight.
Step 5. Organize And Save Scanned Files
After editing, you can organize your scanned pages. Select the pages you want and tap Done to confirm.
You can also add more images, import from photos, or upload files if needed.
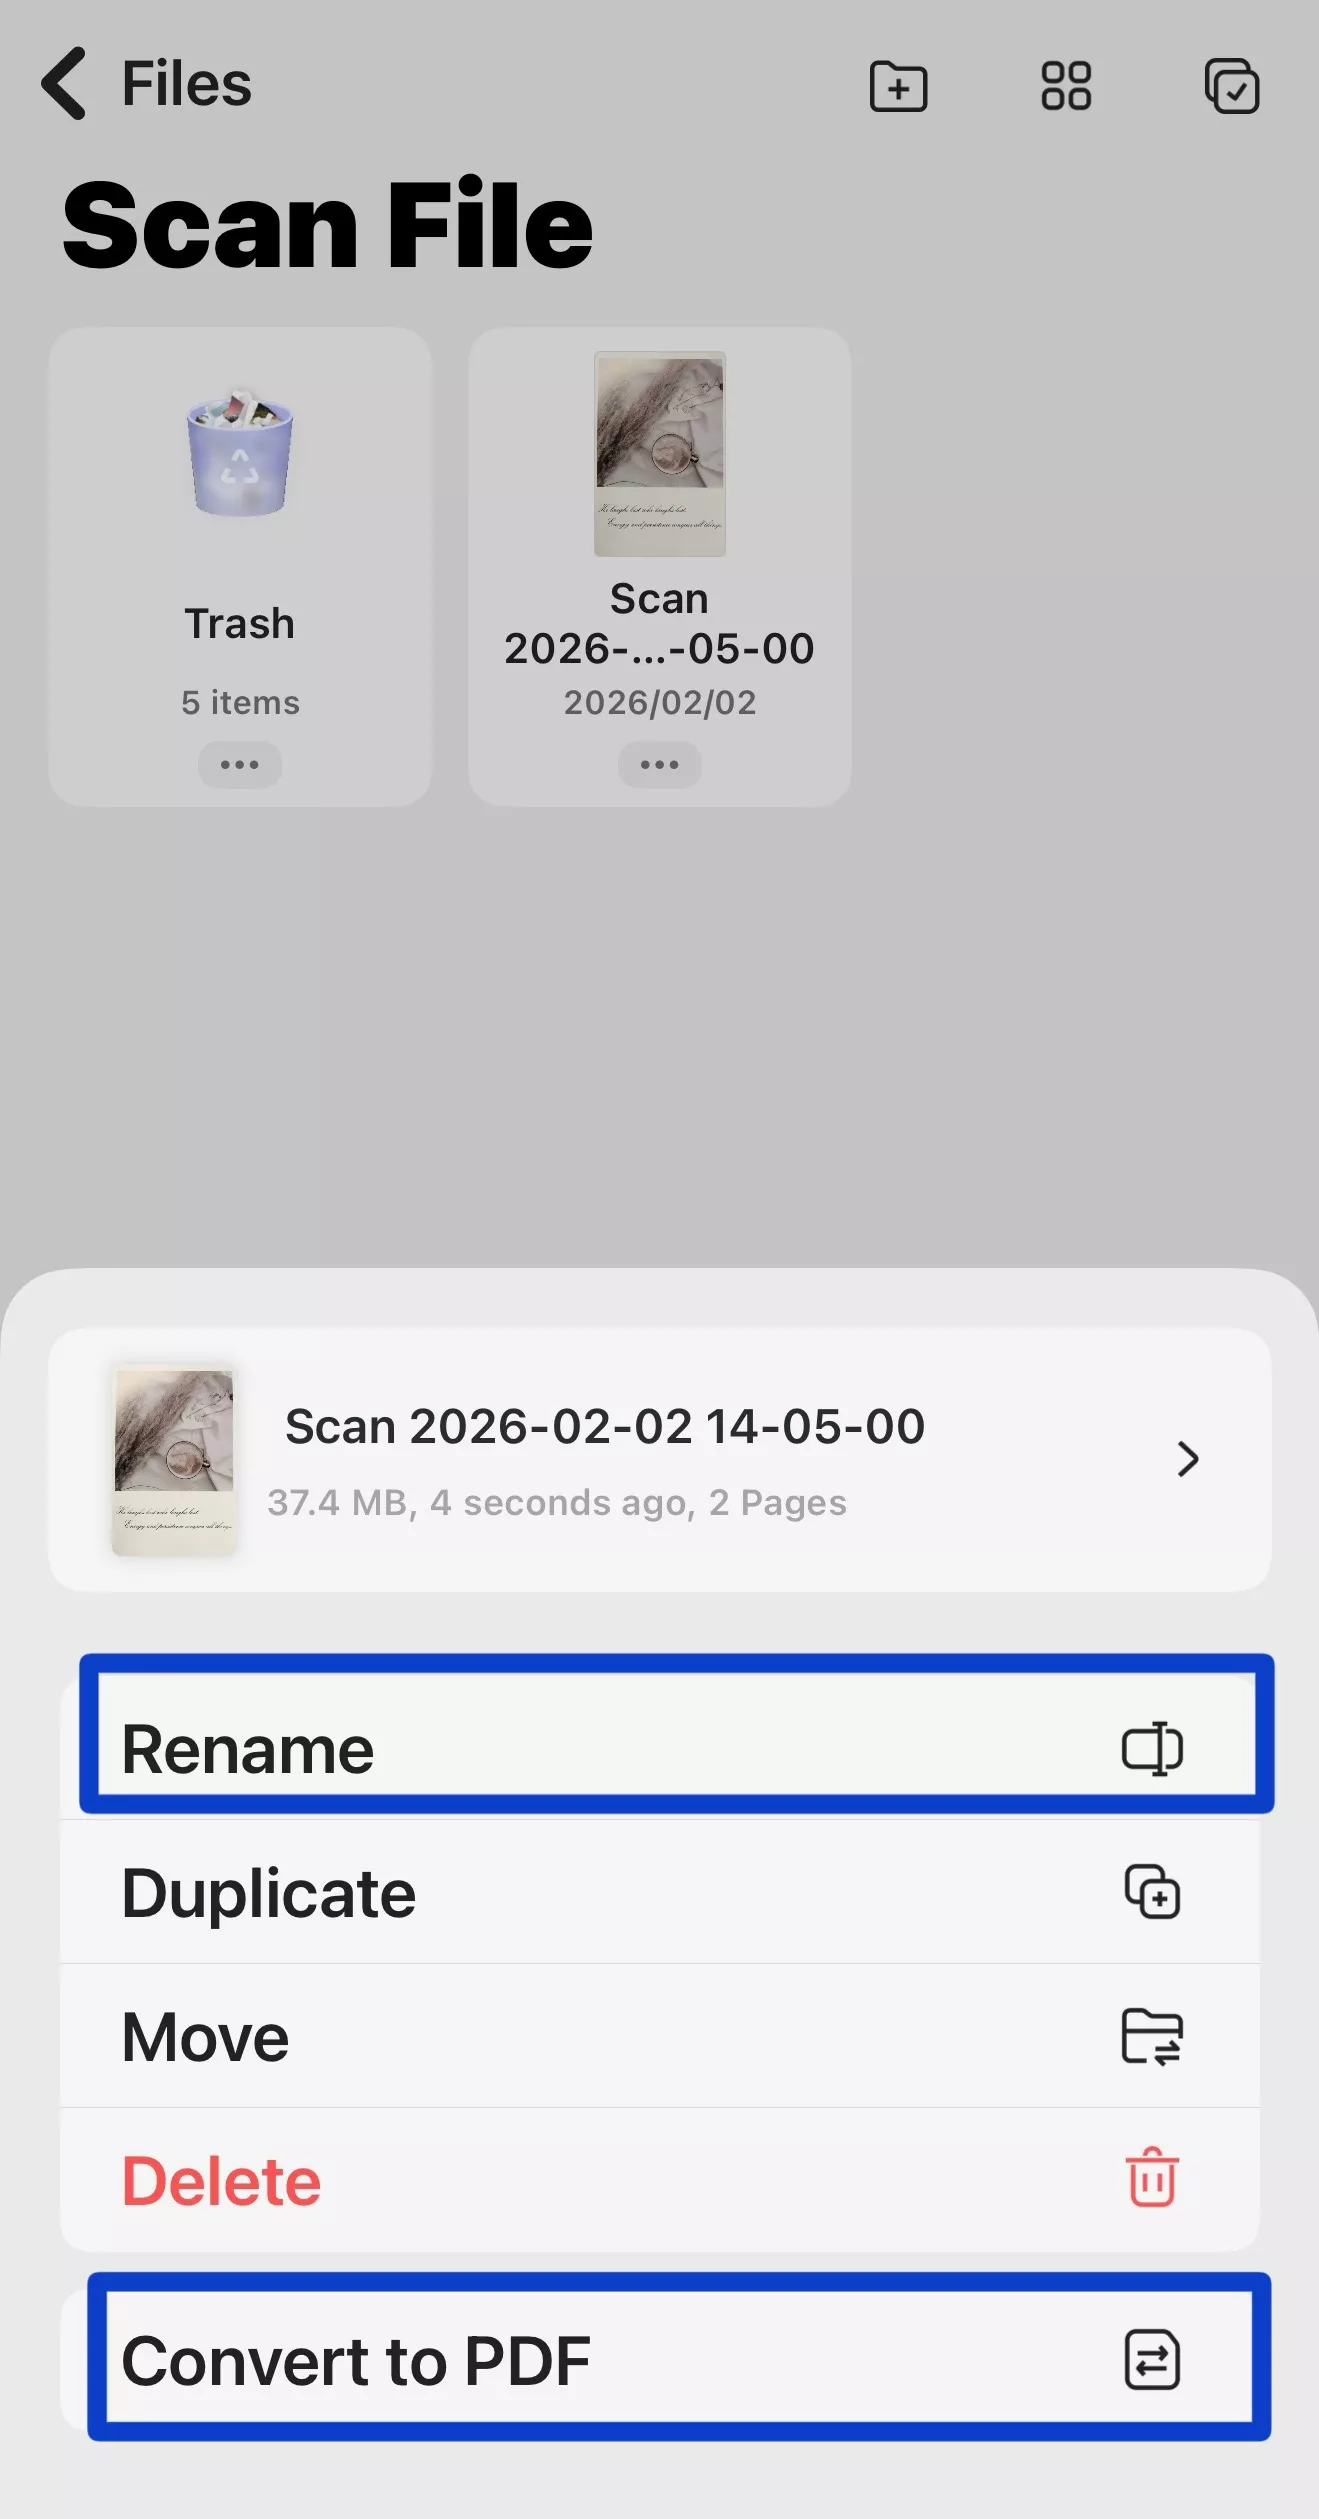
Step 6. Convert To PDF And Manage Files
Once everything looks good, convert your scanned images into a PDF. You can also rename, move, or manage your files directly inside UPDF.
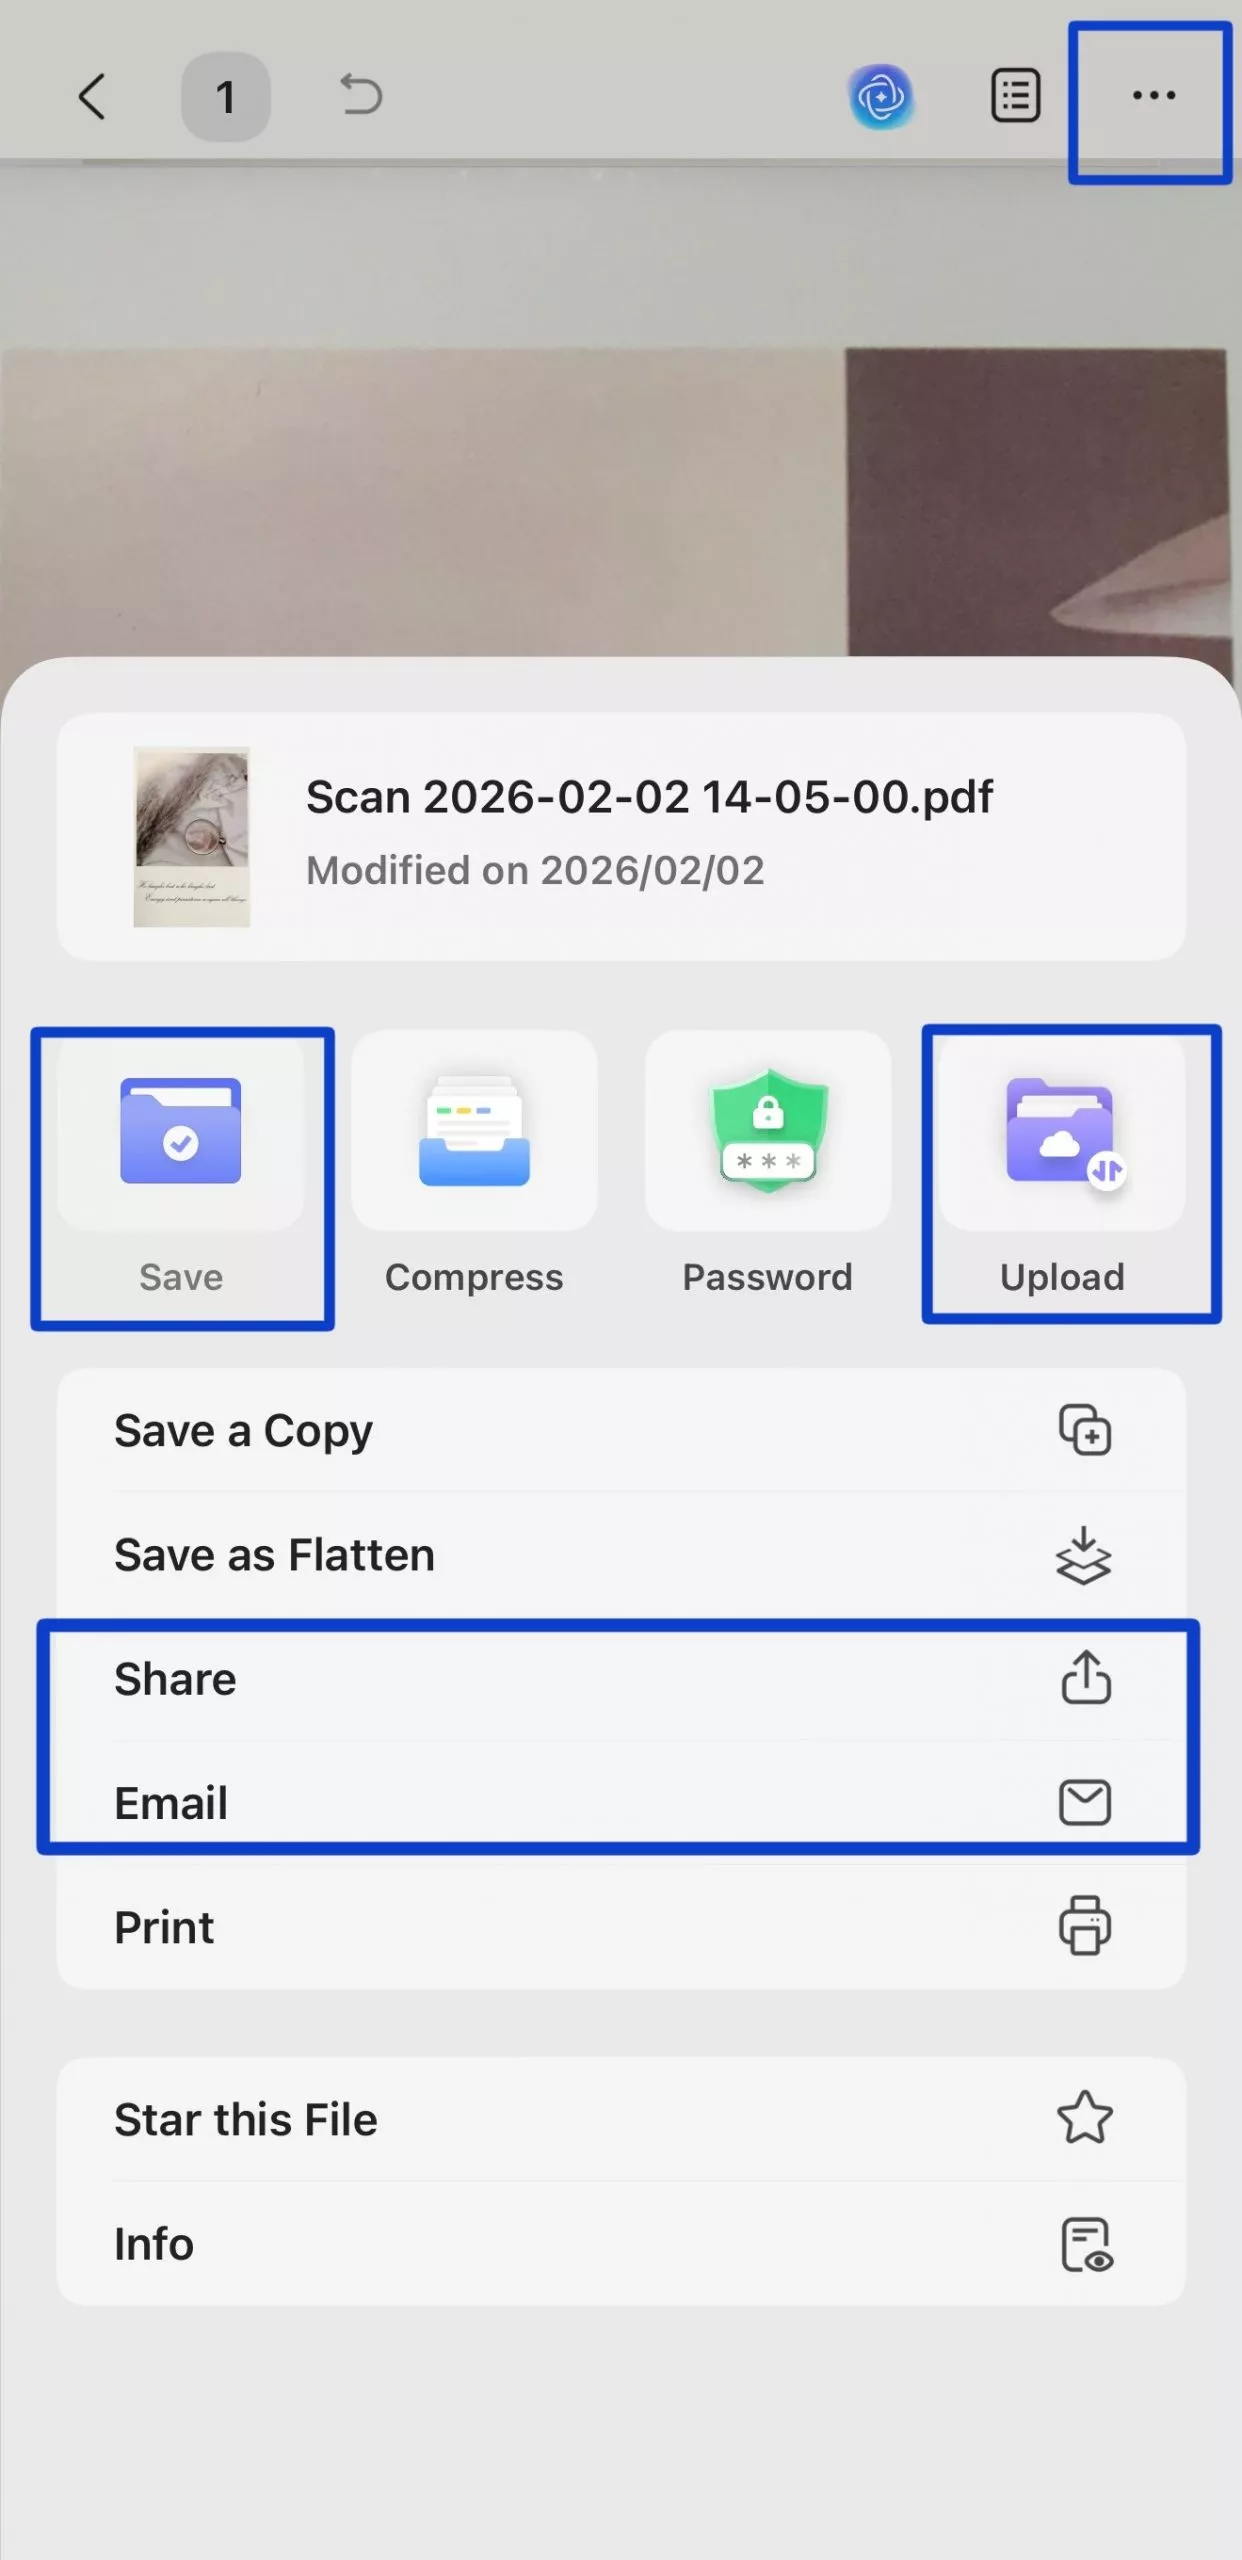
Step 7. Save, Upload, And Share
Finally, open the scanned PDF and tap the three-dot button. From here, I usually:
- Save the file locally
- Upload it to UPDF Cloud. This allows you to access the same document on Mac, Windows, iOS, or Android without transferring files manually.
- Send it through email
This makes it easy to access the document from any device.
Windows • macOS • iOS • Android 100% secure
Part 4. FAQs
Q1. Why Is My Mac Not Letting Me Add A Printer?
If your Mac isn’t allowing you to add a printer, it’s usually due to connection or system issues. The most common reason I see is that the printer and Mac are not connected to the same Wi-Fi network. Sometimes, the printer may also be turned off or not fully initialized.
I usually try restarting both the Mac and the printer first. Another quick fix is to remove the printer from the list and add it again. If it still doesn’t appear, updating macOS or resetting the printing system can often resolve the issue.
Q2. How To Connect Mac To HP Printer?
Connecting an HP printer to a Mac is generally simple, especially with modern wireless models. I first make sure the printer is connected to the same Wi-Fi network as my Mac. Then I go to System Settings > Printers & Scanners and click the Add Printer option.
In most cases, the HP printer shows up automatically, and I just select it and click Add. For newer HP printers, AirPrint usually handles everything without requiring additional drivers. If the printer doesn’t appear, I use the HP setup utility or check the printer’s control panel to reconnect it to Wi-Fi.
Q3. How To Install Printer Driver In MacBook?
In most situations, macOS installs printer drivers automatically when I add a new printer. However, if the driver isn’t available, I download it directly from the printer manufacturer’s website.
After downloading, I install the driver file and then go back to Printers & Scanners to add the printer again. Sometimes, I need to manually select the correct driver from the list during setup. Keeping macOS updated also helps because Apple frequently includes updated printer drivers in system updates, which makes installation much easier.
Conclusion
Setting up a printer on macOS becomes much easier once you understand the right steps. Whether you’re using a wireless, USB, or network printer, learning how to add printer to mac helps you avoid common setup issues and get printing quickly.
I’ve found that once the connection is properly configured, the process becomes smooth and reliable for everyday tasks. If you’re still unsure, following a clear method for how do I add a printer to my mac can save time and prevent frustration.
Beyond printing, managing your documents efficiently is just as important. That’s why I often use UPDF to scan, edit, convert, and share files across devices. It keeps everything organized and professional. If you want a complete workflow from scanning to sharing, I recommend trying UPDF for your daily document needs.
Windows • macOS • iOS • Android 100% secure


 Enola Davis
 Enrica Taylor

 Enola Miller