Microsoft Excel files are good for their spreadsheet capabilities since data can be formatted and arranged in cells, rows, and columns. However, these files can cause errors when importing data, especially with large lists. That’s where methods to convert Excel to CSV can be very helpful. CSV files have data separated by commas, so they remove the excessive formatting from an Excel spreadsheet. Hence, most of the issues with importing data are resolved.
1. Convert XLSX to CSV Without Losing Data Via UPDF
There are many things to take care of when converting your Excel file to a CSV file; the most important among them is your data integrity. You may compromise on anything, but the data must stay the same during this conversion. UPDF is our best recommendation as your XLS to CSV converter.
Windows • macOS • iOS • Android 100% secure
UPDF is a leading PDF editor and organizer tool with an extensive feature list for working on PDF documents and others. One of the best things about it is its reliable and quick working conversion feature that makes things much better for you. Above all, the experience of converting your Excel files with UPDF is very smooth since it only takes 2 steps.
Apart from this conversion, there are multiple reasons to go for UPDF for this conversion. One is the UPDF cloud, where you can manage all your documents. It makes document organizing and sharing much easier. Additionally, UPDF is available at extremely cheap and market-competitive prices that anyone can afford it. Special discounts are also available for teachers and students.
Here are the steps to work on UPDF when converting your Excel file to CSV.
1. Open the Excel File
You can open UPDF differently, but the easiest is double-clicking the desktop icon. As you do that, the tool will immediately open, and you will see the home page interface. Now go to the file location of your Excel document and drag that document into UPDF's interface.
As you release the click, UPDF will start uploading the document, and within a moment, it will open in the tool, ready for you to convert. If you want to edit the Excel file right now, you can make them using UPDF’s editing features.
2. Export as CSV
The next and final step will be exporting that file to CSV. You need to go to "Export PDF" and open the present inside the right vertical tab. Clicking on this option will reveal multiple options from where you need to select "CSV."
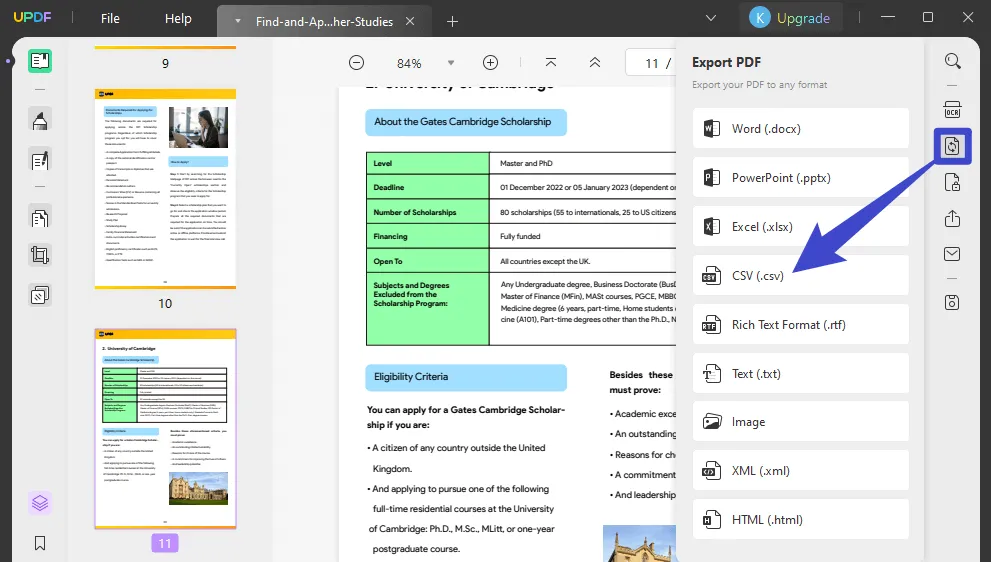
Now you will see a new window that allows you to customize your output. Simply click the "Export" button in the light purple color present at the bottom of that new window.
Windows • macOS • iOS • Android 100% secure
2. Convert Excel to CSV File With Opening Via Microsoft Excel
Microsoft Office brings a suite of useful tools for multiple applications with a wide range of features. Surprisingly, the XLS file you create in Microsoft Excel can be converted to a CSV file with the help of Microsoft Excel.
However, you may lose some data integrity during this process, but the chances are very low. This method is a good option for anyone who is not trying to use an online tool and wants the best privacy and safety for this conversion. Microsoft is already known for its safety and reliability, and since this conversion happens offline, you will never face any privacy issues.
Before you begin this process, note that following steps correctly in Excel are very important. You must follow all the steps for this XLS to CSV conversion.
1. Select “Save As”
When you finish editing the contents in your Microsoft Excel, you can go to “File” and choose “Save as”, then, choose one location to save.
2. Update “Save As Type”
Now, you can go to choose “CSV” in the “Save as type” part. Click “Save” to convert Excel to CSV successfully.
3. Convert Excel to CSV Online? (Without Opening)
Converting your files on the go can be a little challenging if you don’t know the right tools. Knowing which tools are best for your use case will make this conversion extremely easy for you. Online tools are not developed for any specific device; they work on any device with an internet connection.
The tool that we will be discussing here is Zamzar. The leading online document conversion tool makes hundreds of conversions possible without any problems. The conversions here are quick and reliable, and being a leading tool, it also ensures privacy and safety for your documents since you are uploading them online.
The process of converting your documents from Excel format to CSV format is very simple. Below are the quick steps to follow on Zamzar for this conversion.
1. Upload the Excel file to Zamzar.
The process begins when you upload your Excel file to the Zamzar website. You can open its XLS to CSV converter on any web browser and upload the file. With Zamzar, getting files from your device or cloud storage and converting them to the desired format is possible.
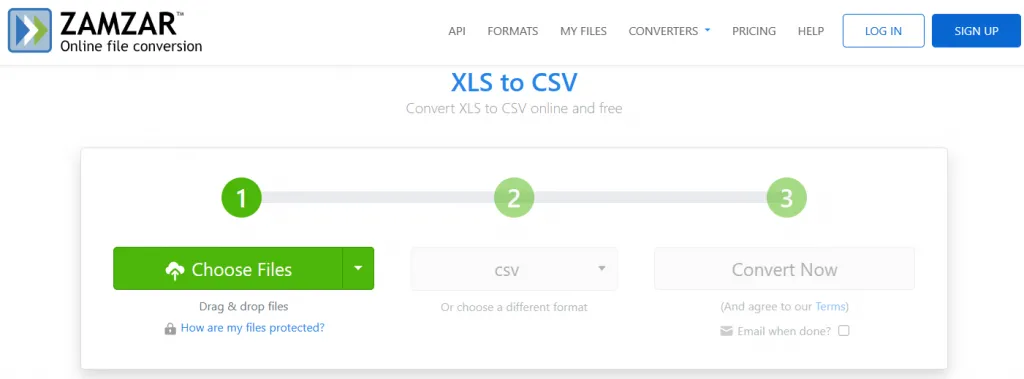
2. Instant conversion with Zamzar
The next step is instant conversion. When your file completes uploading, the “Convert Now" button will become green, and clicking it will start conversion. This conversion can take a few seconds, depending on the file size and data in it. So, you must patiently wait for that period.
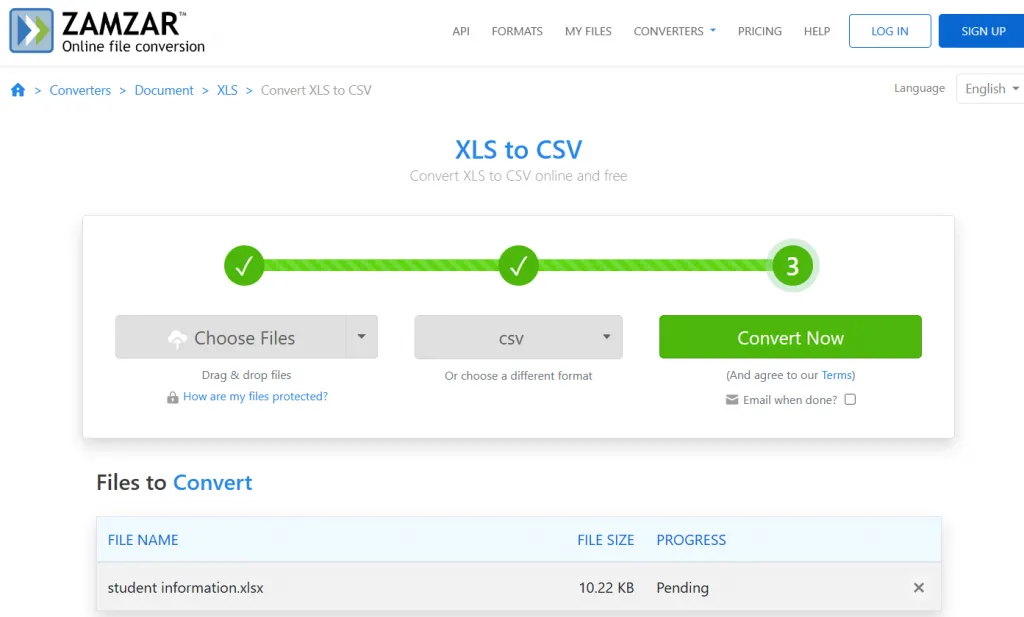
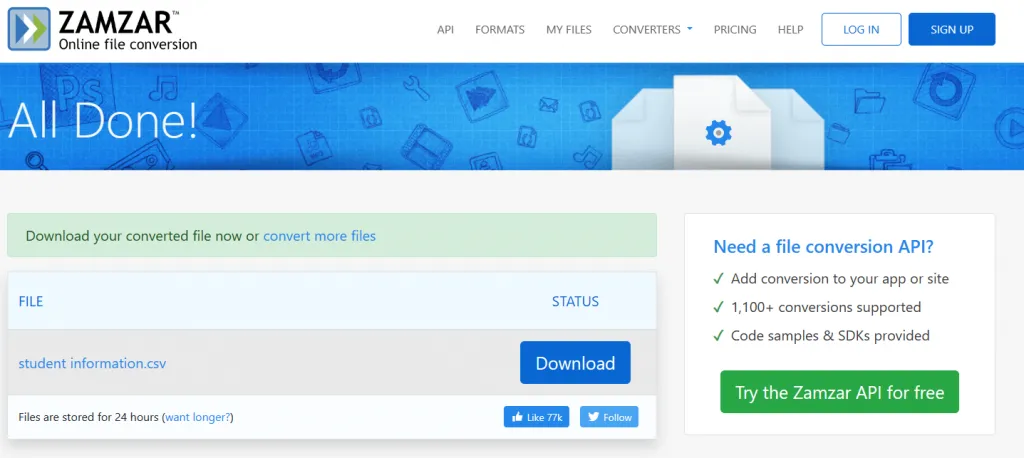
3. Download
When the conversion completes, you will move to a new screen showing the converted file and a download button. So, hit that "Download" button next to your file, and the downloading will immediately start. Shortly, you will have that CSV file on your device's storage.
4. Convert Excel to CSV in Bulk
Sometimes you need to convert Excel files to CSV files in bulk amounts. Converting one by one can be a hectic job, and it will take a lot of time but using tools like CloudConvert can ease the process for you. You can upload multiple files to this tool and select the same or individual conversion formats for these files. The conversion is done with a click of one button, and you can instantly download the files.
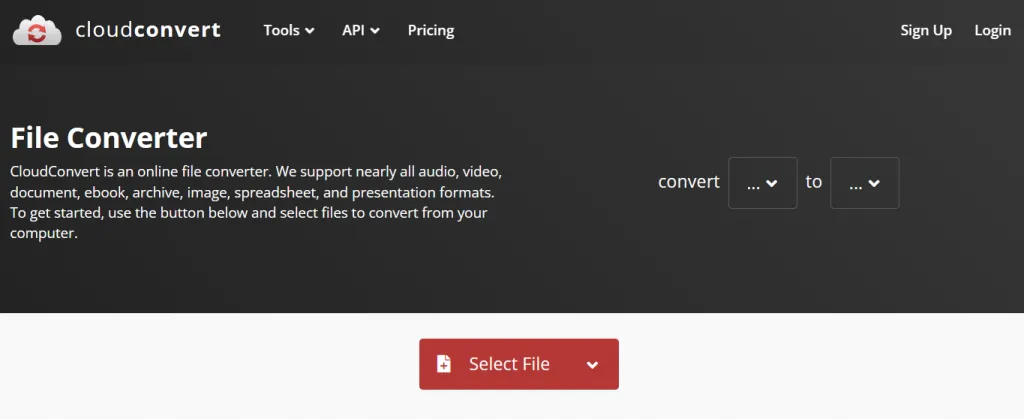
1. Add all your Excel files.
Open the CloudConvert website and upload your first Excel file by pressing the red “Select file" button. You may add some files from cloud storage and offline storage. It also supports accessing files from URLs. After the first file uploads, you can click the black "add more files” button and add multiple files together.
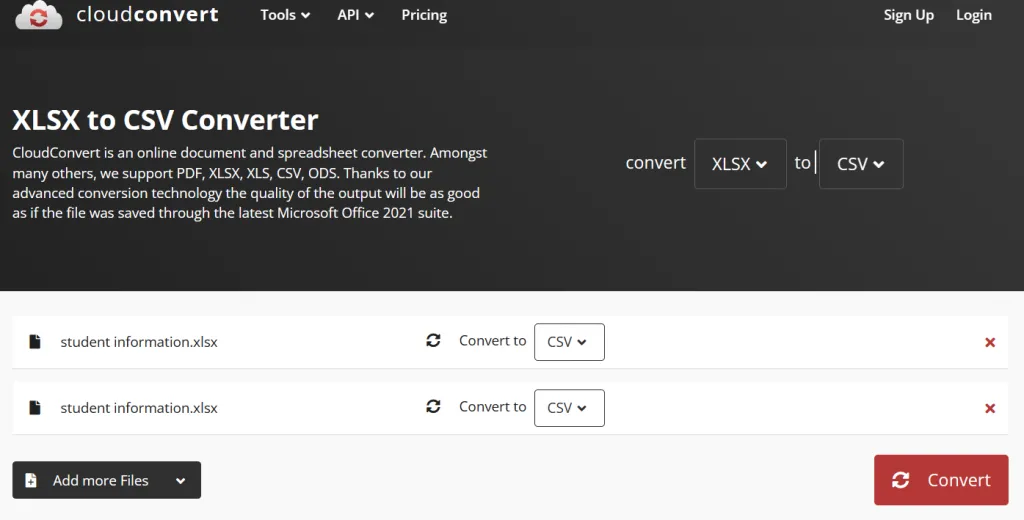
2. Set conversion preferences and Convert.
Once you upload the files, ensure that the convert section on top shows "XLSX” to “CSV." If not, you can set them from the dropdown menus. After setting these preferences, click the red "Convert" button, and your files will instantly convert to CSV.
3. Download converted CSV files.
As a file converts, a "download" button appears next to it. All files will take different times for conversion, so you can click the download button for any file as soon as it appears. That way, you will easily download your files to your computer's storage.
Final Words
If you dig deeper into CSV files, you can find that CSV files allow importing 100MB of data for importing contacts. In contrast, a text file or Excel spreadsheet only allows 2MB. That’s just one example, and multiple others state that CSV files make importing and using data in various applications much simpler and error-free.
While you can use any of the above-discussed methods for converting your Excel files to CSV format, going for the most efficient one will be better. Focus on getting the best experience and data integrity from your chosen method. From the options discussed above, UPDF offers the best quality user experience, data integrity, and other features to make this conversion convenient.
On top of everything, its competitive pricing and special user discounts make it an even better choice for you.
Windows • macOS • iOS • Android 100% secure
 UPDF
UPDF
 UPDF for Windows
 UPDF for Mac
 UPDF for iPhone/iPad
 UPDF for Android
 UPDF AI Online
 UPDF Sign
 Edit PDF
 Annotate PDF
 Create PDF
 PDF Form
 Edit links
 Convert PDF
 OCR
OCR PDF to Word
 PDF to Image
 PDF to Excel
 Organize PDF
 Merge PDF
 Split PDF
 Crop PDF
 Rotate PDF
 Protect PDF
 Sign PDF
 Redact PDF
 Sanitize PDF
 Remove Security
 Read PDF
 UPDF Cloud
 Compress PDF
 Print PDF
 Batch Process
 About UPDF AI
 UPDF AI Solutions
 AI User Guide
 FAQ about UPDF AI
 Summarize PDF
 Translate PDF
 Chat with PDF
 Chat with AI
 Chat with image
 PDF to Mind Map
 Explain PDF
 Scholar Research
 Paper Search
 AI Proofreader
 AI Writer
 AI Homework Helper
 AI Quiz Generator
 AI Math Solver
 PDF to Word
 PDF to Excel
 PDF to PowerPoint
 User Guide
 UPDF Tricks
 FAQs
FAQs UPDF Reviews
 Download Center
 Blog
Blog Newsroom
 Tech Spec
 Updates
 UPDF vs. Adobe Acrobat
 UPDF vs. Foxit
 UPDF vs. PDF Expert



 Enya Moore
 Enola Davis
 Delia Meyer
 Enola Miller