UPDF for Windows
 UPDF for Mac
 UPDF for iPhone/iPad
 UPDF for Android
 UPDF AI Online
 UPDF Sign
 Edit PDF
 Annotate PDF
 Create PDF
 PDF Form
 Edit links
 Convert PDF
 OCR
OCR PDF to Word
 PDF to Image
 PDF to Excel
 Organize PDF
 Merge PDF
 Split PDF
 Crop PDF
 Rotate PDF
 Protect PDF
 Sign PDF
 Redact PDF
 Sanitize PDF
 Remove Security
 Read PDF
 UPDF Cloud
 Compress PDF
 Print PDF
 Batch Process
 About UPDF AI
 UPDF AI Solutions
 AI User Guide
 FAQ about UPDF AI
 Summarize PDF
 Translate PDF
 Chat with PDF
 Chat with AI
 Chat with image
 PDF to Mind Map
 Explain PDF
 PDF AI Tools
 Image AI Tools
 AI Chat Tools
 AI Writing Tools
 AI Study Tools
 AI Working Tools
 Other AI Tools
 AI Bookmark Generation
 AI Bookmark Summary
 AI Watermark Generation
 AI Background Generation
 AI Sticker Generation
 AI Stamp Generation
 AI Editing Suite
 UPDF Copilot
 AI Page Management
 AI Semantic Search
 PDF to Word
 PDF to Excel
 PDF to PowerPoint
 User Guide
 UPDF Tricks
 FAQs
FAQs UPDF Reviews
 Download Center
 Blog
Blog Newsroom
 Tech Spec
 Updates
 UPDF vs. Adobe Acrobat
 UPDF vs. Foxit
 UPDF vs. PDF Expert
If you are looking for an effective tool that aids in the process of highlighting areas in PDFs, we are here to help.
In this article, UPDF will be introduced. We will focus on how to use its features to help you highlight an area in PDF easily.
UPDF provides a complete experience with a range of user-friendly features.
When you need to highlight content in your PDFs, UPDF offers the basic highlighting which goes line-by-line and adds highlights in the form of shapes. The best one is its area-highlighting feature.
You can download UPDF on your device for free now to experience its features. For a limitless experience, you can purchase the UPDF Pro version at a very low price.
Windows • macOS • iOS • Android 100% secure
When you opt for UPDF to highlight areas in your PDF documents, you can try 2 different methods depending on the operating system you are using.
Here we will discuss both these methods in detail with their step-by-step guides:
Way 1. Highlight Area in PDF via Highlight
The first method is using the area highlight feature in UPDF. This feature is currently available for the macOS version of UPDF only where holding the shift key on your keyboard allows highlighting the whole area instead of highlighting line-by-line.
Below are steps you can follow to use the area highlighting feature in UPDF:
Step 1:
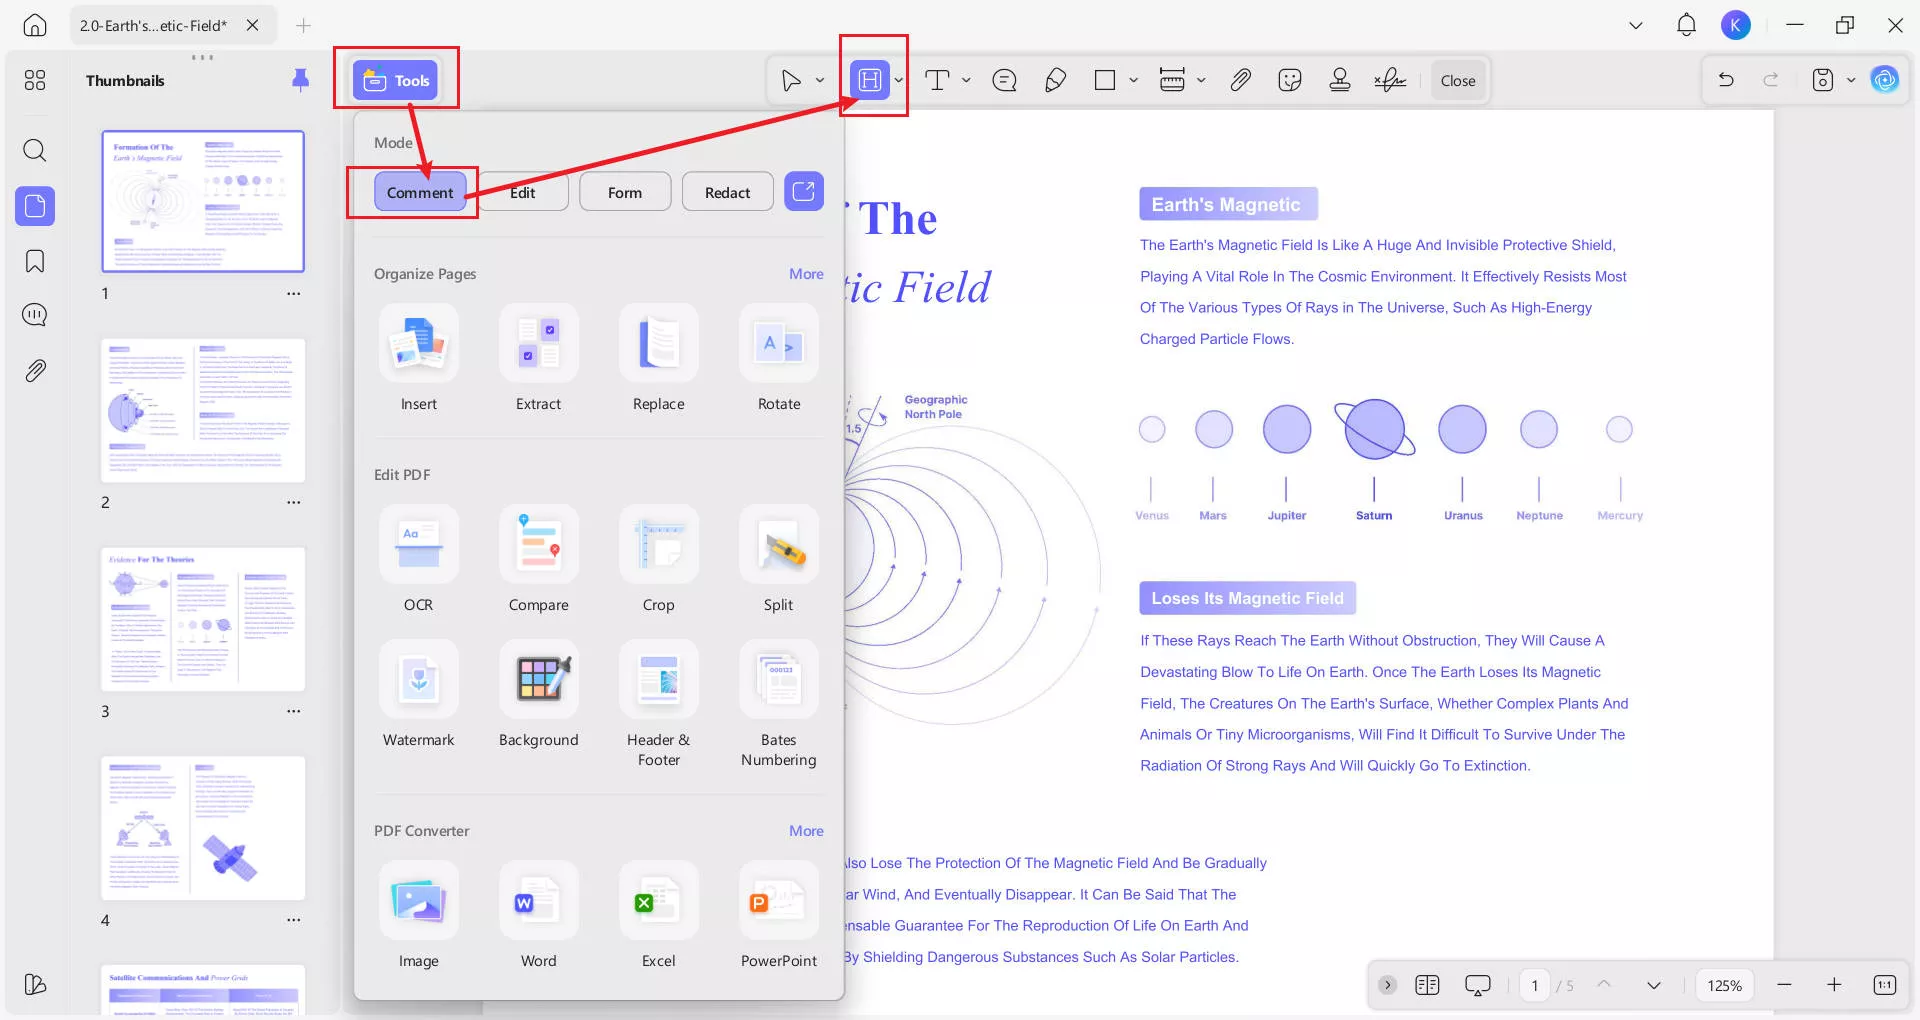
Click the icon of UPDF on your computer to run it and click the "Open File" button from the home screen to select and open the PDF file you want to highlight. Now, click on the file name in the file explorer window to select it and click the "Open" button from the bottom right to open it in UPDF.
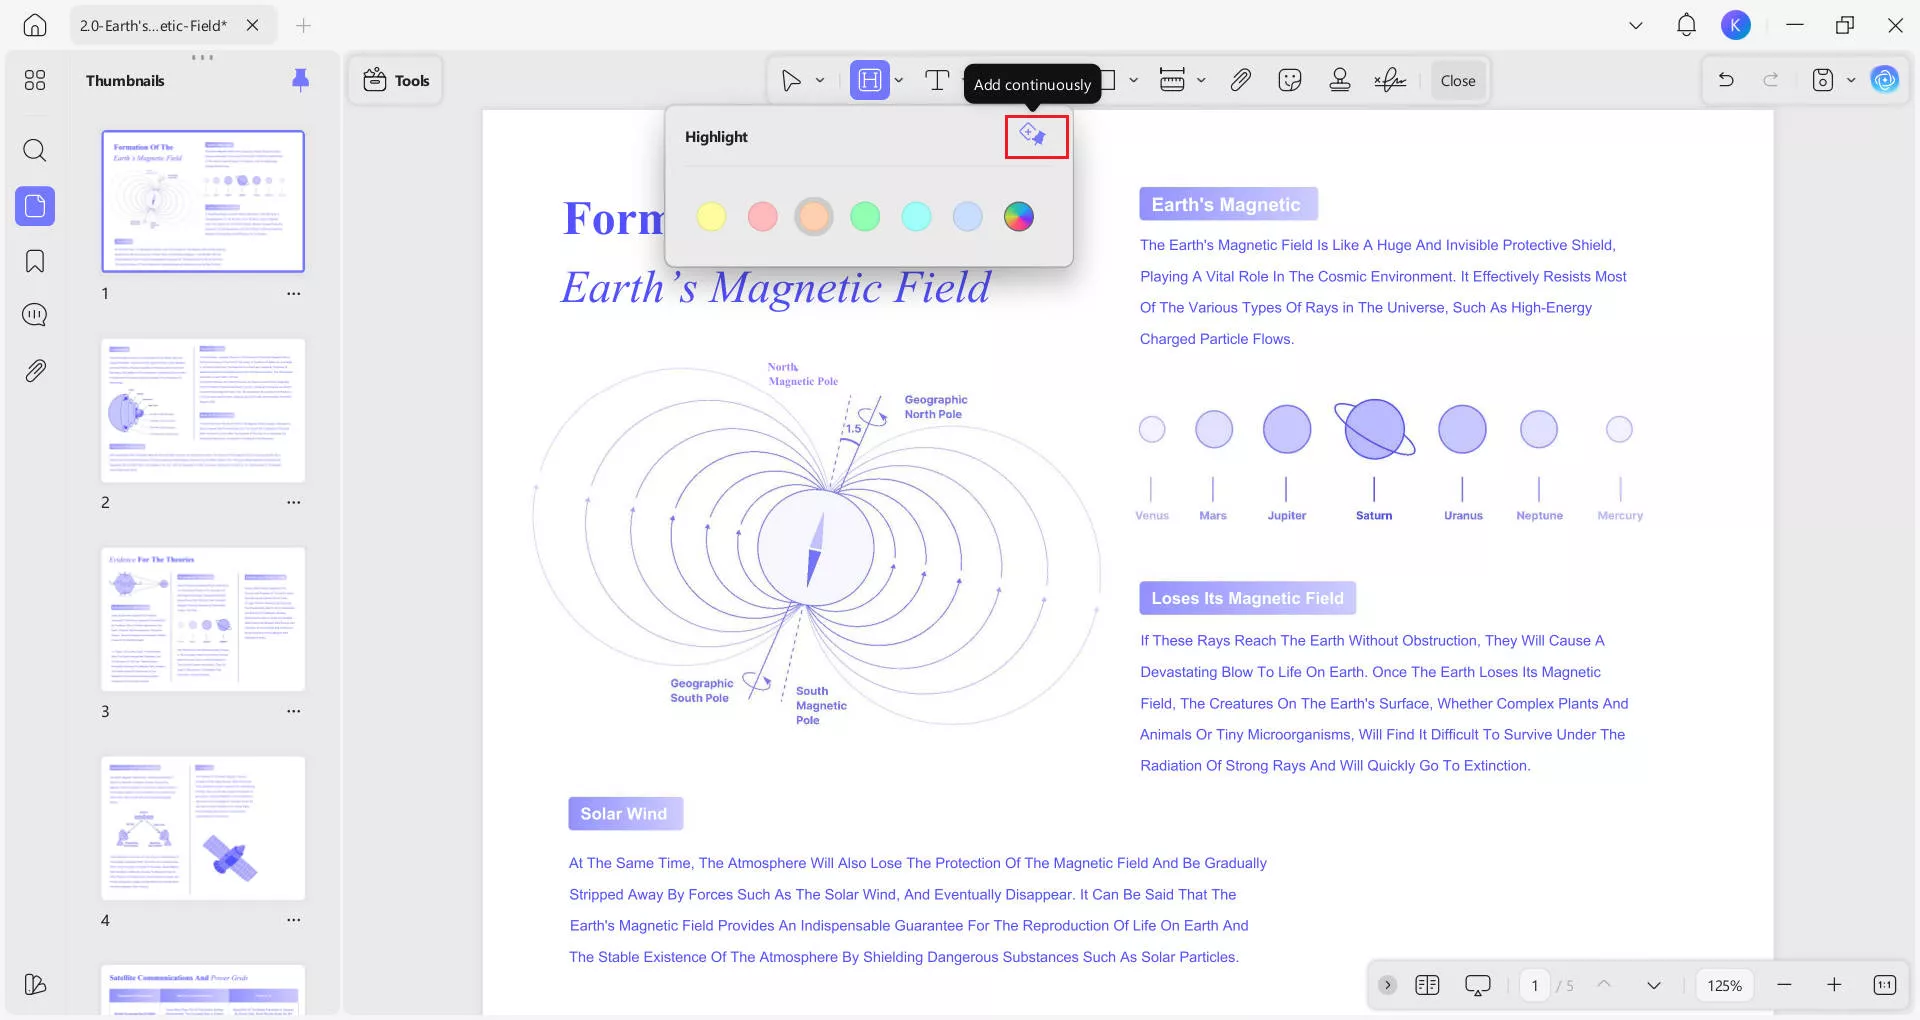
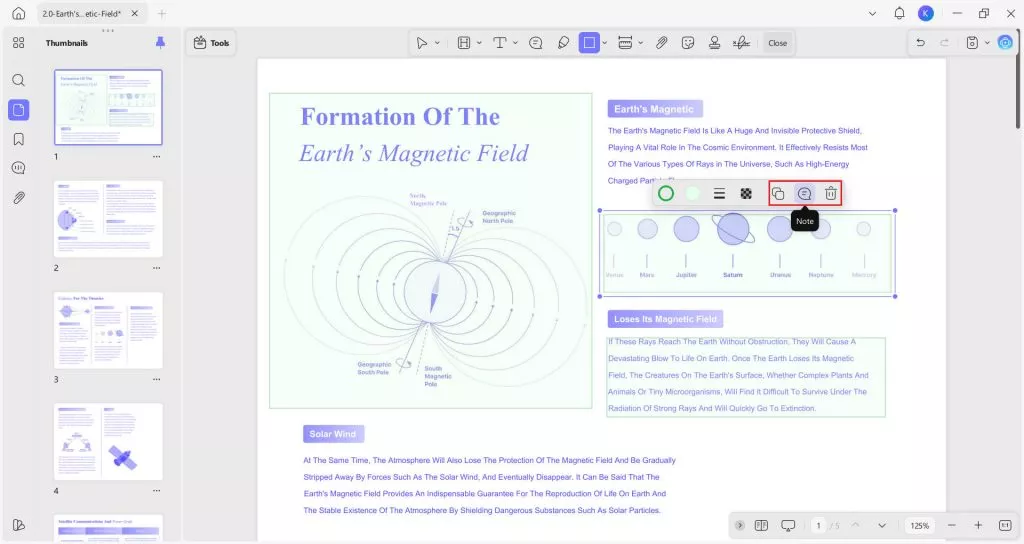
Now, Click "Comment" from the "Tools" menu pane and click the "Highlight” option from the top menu. You may also pick your preferred color from the pallet appearing when you click “Highlight”.
Step 2:
Now, you need to "Click + Drag" your cursor over the area you want to highlight. If you don't want to interrupt your workflow to add highlights one by one, you can click "Add continuously" in the "Highlight" menu pane to keep selecting text and highlighting continuously.
Way 2. Highlight Area in PDF via Shapes
Now, if you are not on macOS or want to try some unique shapes for highlighting content like circles, etc. you can use this method.
Here we will explain how you can use Shapes in UPDF to highlight specific areas in a PDF.
Step 1:
Start the UPDF app on your PC by double-clicking its desktop icon and then you will click the "Open File” button from the home page of UPDF. Now, click a PDF to select and click “Open” to open it in UPDF.
Once your PDF opens you will click “Comment” from the "Tools" menu and then click the "Rectangle" button, where you can select the border color, fill color, line thickness, and most importantly opacity. If you click the dropdown arrow next to the "Rectangle" icon, a popup will appear where you may select the shape.
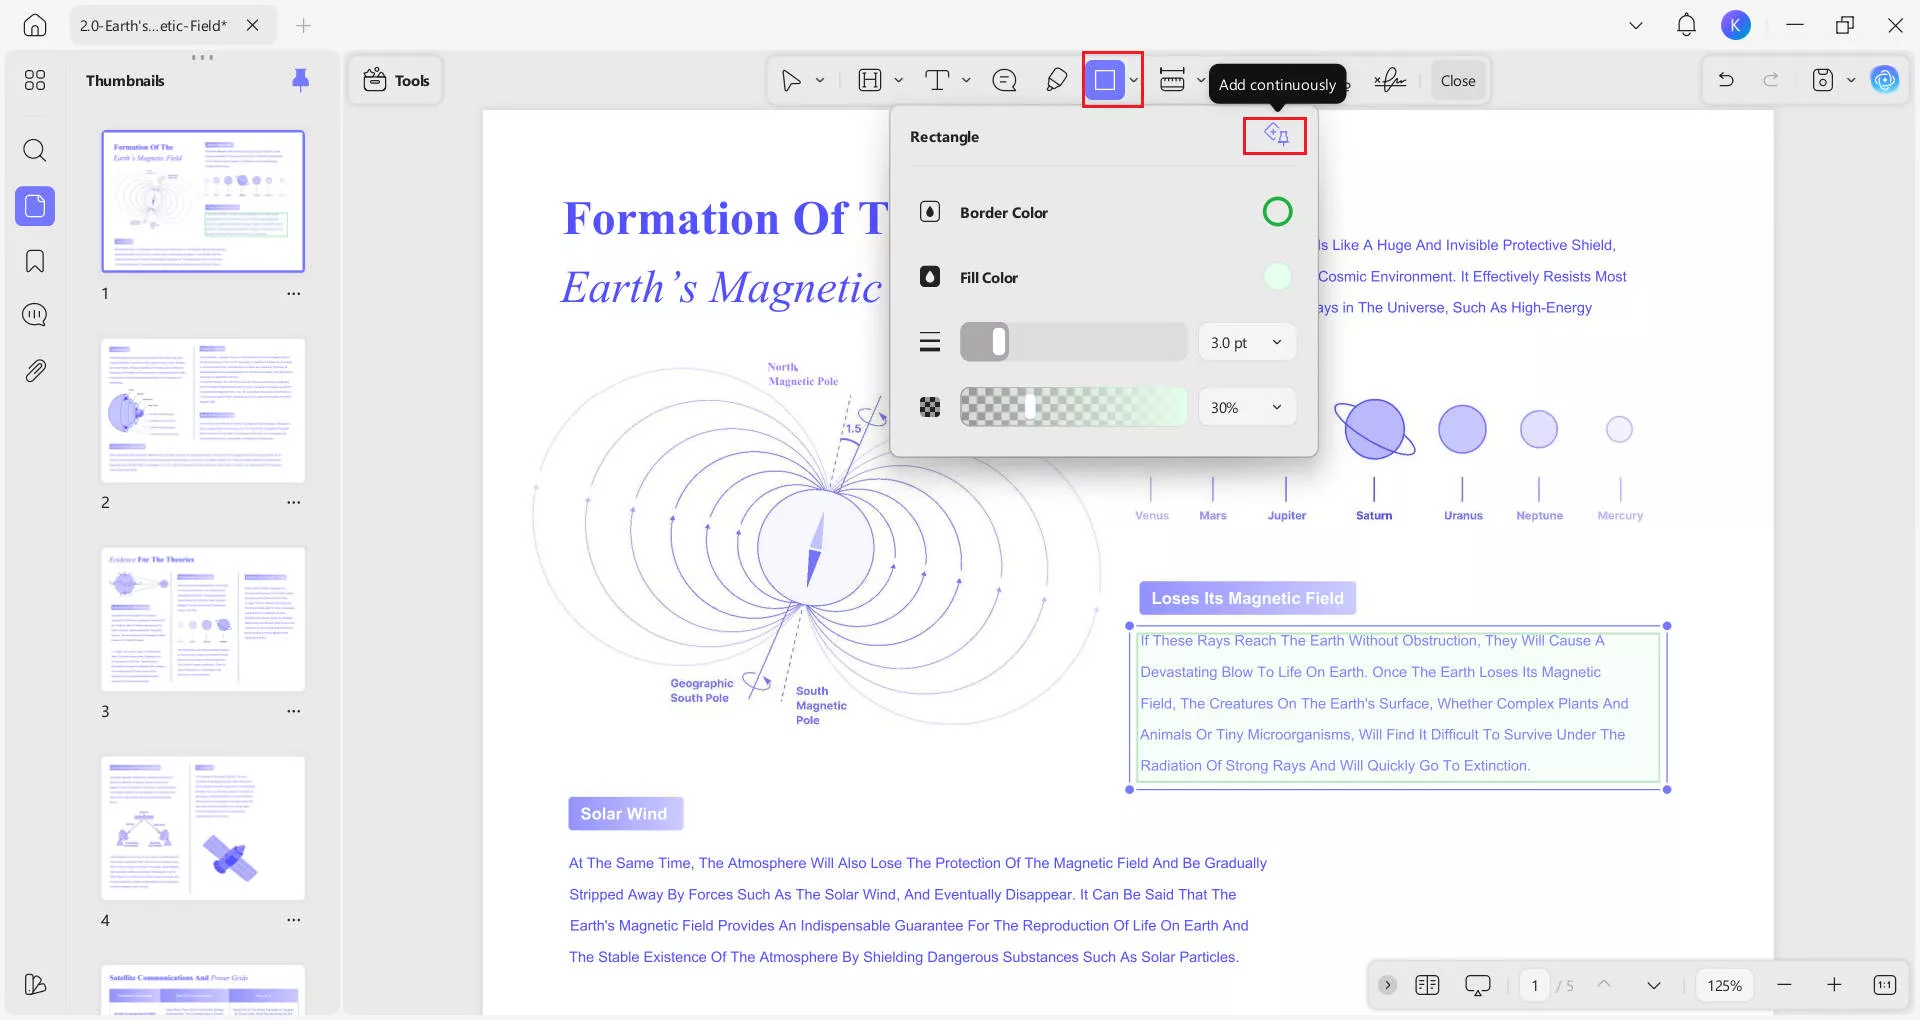
Note: The higher the opacity of the shape, the less content will be visible through it. So, we recommend keeping the opacity of your shape between 25-45%.
Step 2:
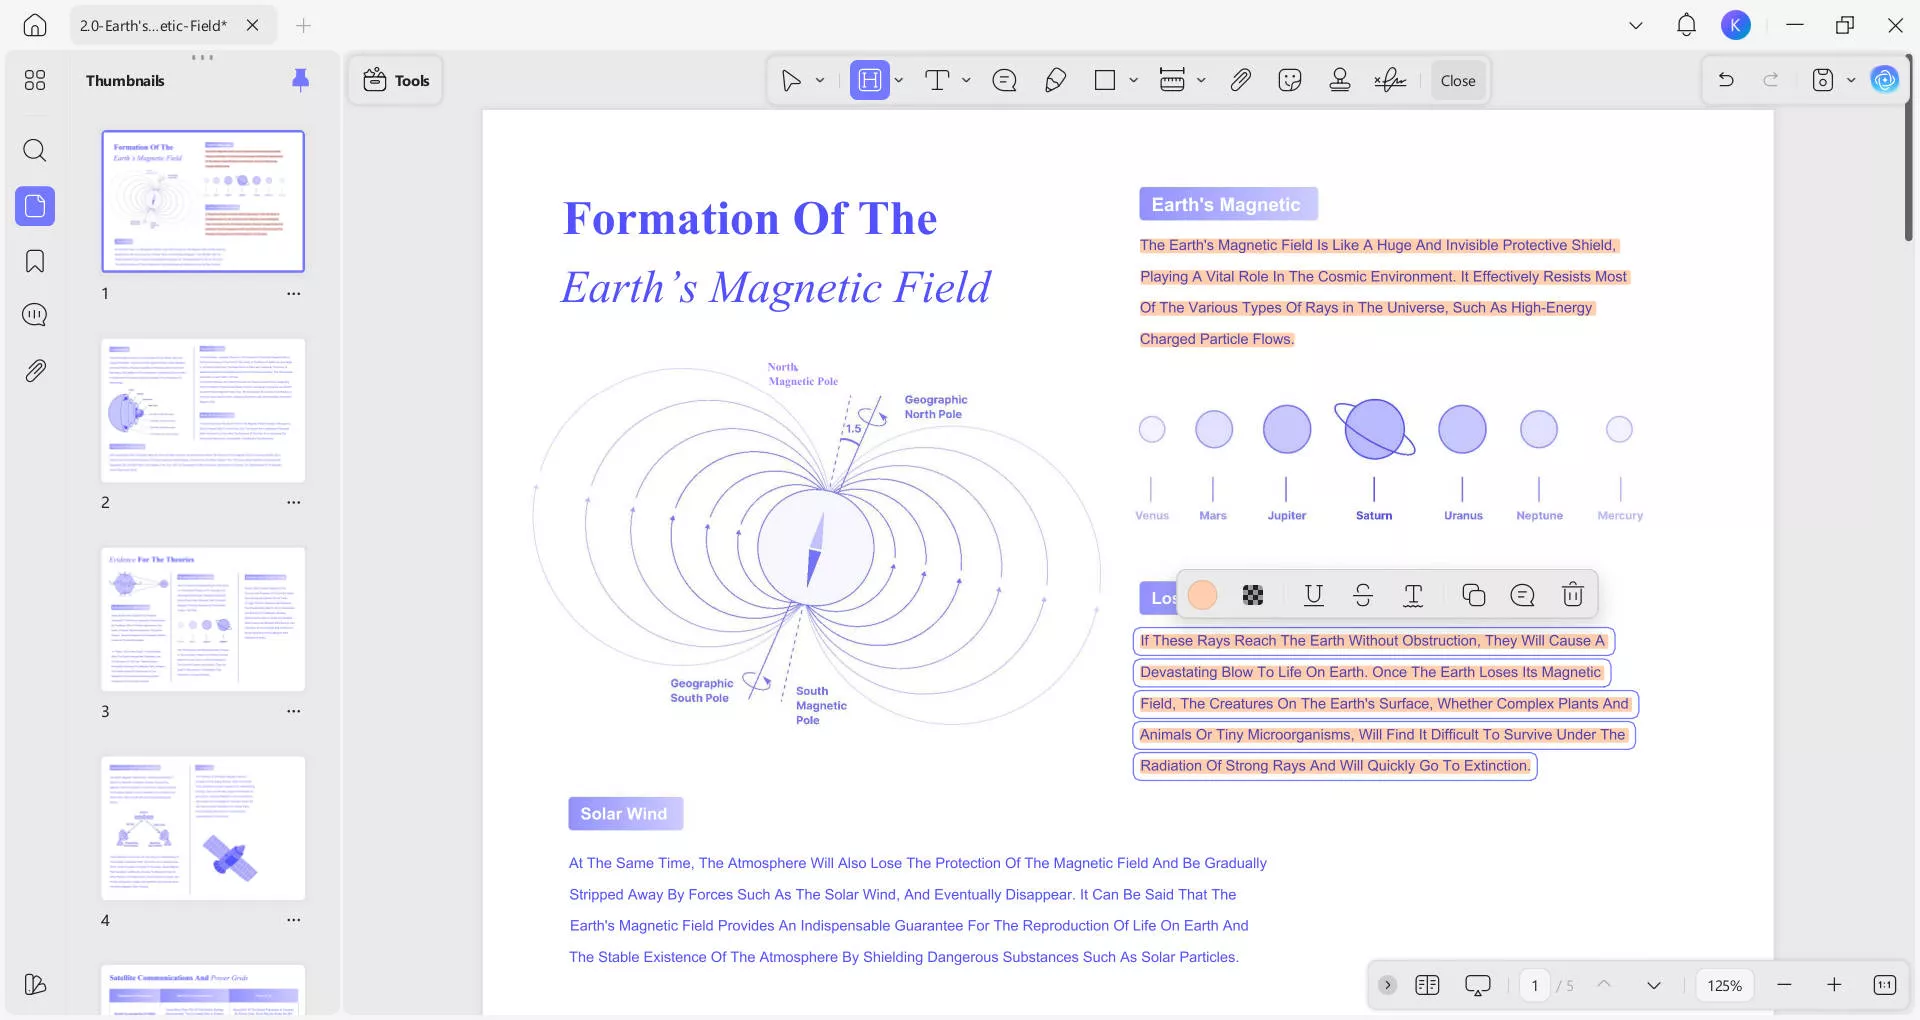
With the same "Click+Drag" action as in the previous method, you can add your shape to the PDF content. Since it will be a colored shape with "Low opacity", it will display as a highlighting effect when viewing PDFs. Tap to select the highlighted shapes—you can then copy, add notes, delete, or adjust settings to fit your workflow.
With these two methods, you can very easily highlight any area in your PDFs. Similarly, UPDF makes other PDF tasks very simple and efficient for its users. To get a hands-on experience of UPDF you may download it on your Windows PCs, Macs, and smartphone/tablet devices for free. And you to know all the features that UPDF offers by watching the below video.
Windows • macOS • iOS • Android 100% secure
Conclusion
Understanding how to highlight area in PDF documents can greatly improve your workflow. With the above two methods, you can highlight area in PDF easily.
Choosing the right tool depends on your specific needs and budget. With the right tool, highlighting areas in PDFs becomes a quick and simple task, making your document management more efficient and effective.
So, if you are looking for a tool that meets all the above requirements then you must download and try UPDF free version without any trial period.
Windows • macOS • iOS • Android 100% secure


 Enid Brown
 Lizzy Lozano
 Enrica Taylor