 UPDF for Windows
 UPDF for Mac
 UPDF for iPhone/iPad
 UPDF for Android
 UPDF AI Online
 UPDF Sign
 Edit PDF
 Annotate PDF
 Create PDF
 PDF Form
 Edit links
 Convert PDF
 OCR
OCR PDF to Word
 PDF to Image
 PDF to Excel
 Organize PDF
 Merge PDF
 Split PDF
 Crop PDF
 Rotate PDF
 Protect PDF
 Sign PDF
 Redact PDF
 Sanitize PDF
 Remove Security
 Read PDF
 UPDF Cloud
 Compress PDF
 Print PDF
 Batch Process
 About UPDF AI
 UPDF AI Solutions
 AI User Guide
 FAQ about UPDF AI
 Summarize PDF
 Translate PDF
 Chat with PDF
 Chat with AI
 Chat with image
 PDF to Mind Map
 Explain PDF
 PDF AI Tools
 Image AI Tools
 AI Chat Tools
 AI Writing Tools
 AI Study Tools
 AI Working Tools
 Other AI Tools
 PDF to Word
 PDF to Excel
 PDF to PowerPoint
 User Guide
 UPDF Tricks
 FAQs
FAQs UPDF Reviews
 Download Center
 Blog
Blog Newsroom
 Tech Spec
 Updates
 UPDF vs. Adobe Acrobat
 UPDF vs. Foxit
 UPDF vs. PDF Expert
As a corporate professional, I encountered a draft watermark on my Word document that made it look unprofessional. Many people wonder how to remove the draft watermark in Word and end up finding the process confusing and tricky. That is when I started searching for a method to remove it easily and restore my document's appearance.
Therefore, I want to share simple methods to remove draft watermarks directly in Word. As a bonus point, I'll also introduce an alternative solution with UPDF, which allows users to remove watermarks quickly and without hassle.
Windows • macOS • iOS • Android 100% secure
Part 1. How To Remove the Draft Watermark In Word?
A draft watermark in Word often appears on documents and gives the impression of unprofessionalism to anyone using it. Let me share some of the easiest methods to remove a watermark in Word on Mac and Windows devices.
Removing The Draft Watermark in Word on Mac
First off, follow the steps below to learn how to remove draft from Word using your Mac device:
Step 1. Once you open a draft watermark file in Word, hit the “Design” tab in the bar above.
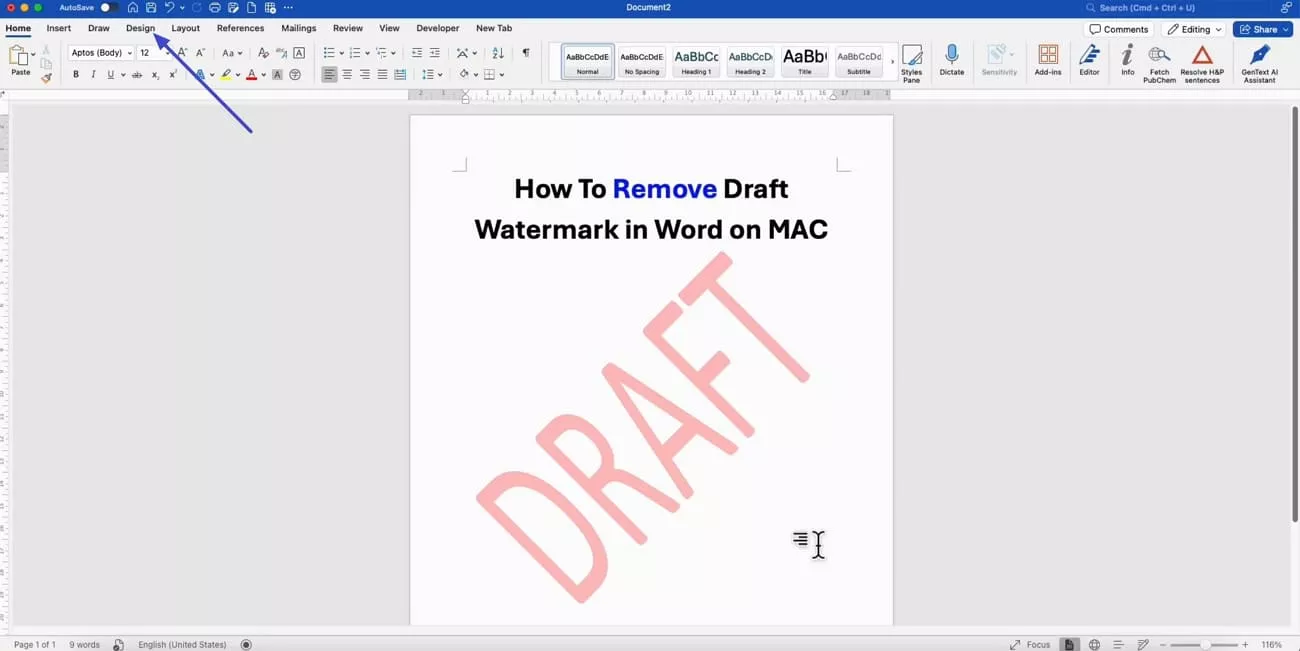
Step 2. Press the “Watermark” option in the left corner to view a pop-up window. Next, choose the “No Watermark” option and hit the “OK” button to remove the draft watermark from the Word document.

Removing The Draft Watermark in Word on Windows
Once you know the easiest way to remove the draft watermark using a Mac, let’s see how you can do it on Windows. Windows users can remove locked and unlocked watermarks in Word using different methods. Now, I’ll share multiple methods to remove the draft watermark in Word using a Windows PC.
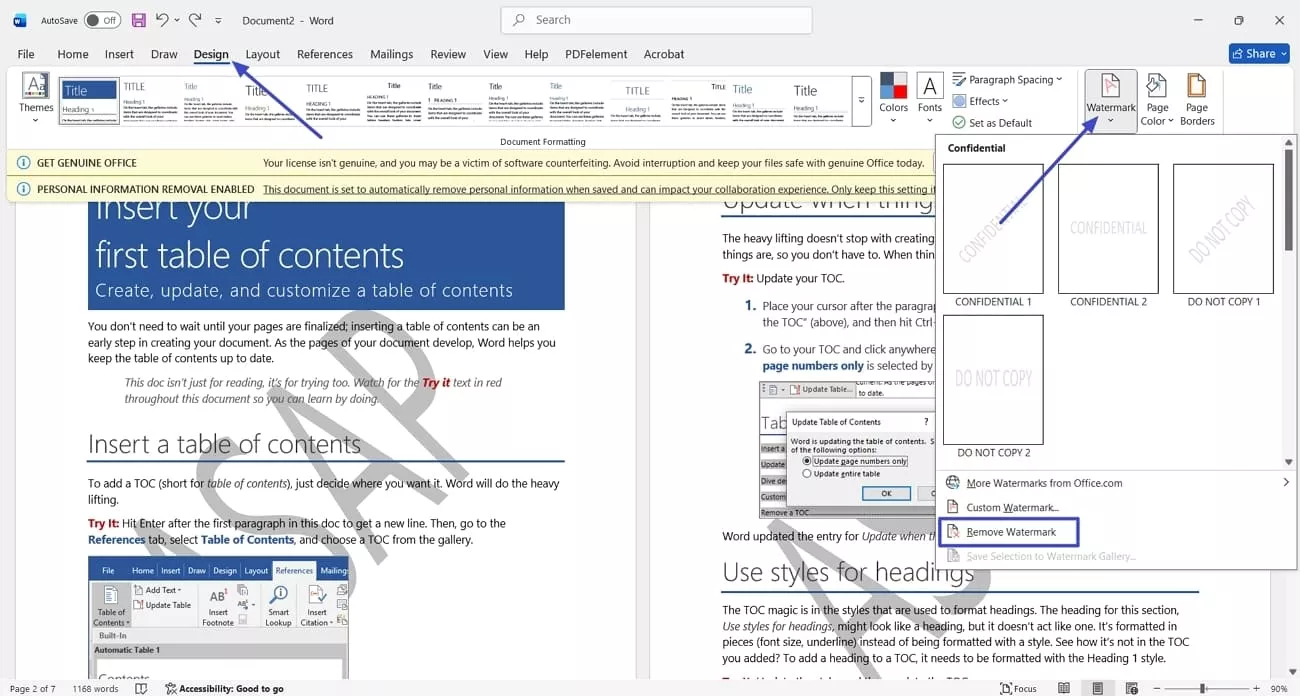
Method 1. Using Default Watermark Tool
Follow the steps below with me to learn how to remove draft from Word document using the default tools:
Instructions. First, open the draft watermark document in Word and press the “Design” tab. Next, hit the “Watermark” option and press the “Remove Watermark” option from the drop-down menu. This way, you can easily remove any unlocked watermarks.
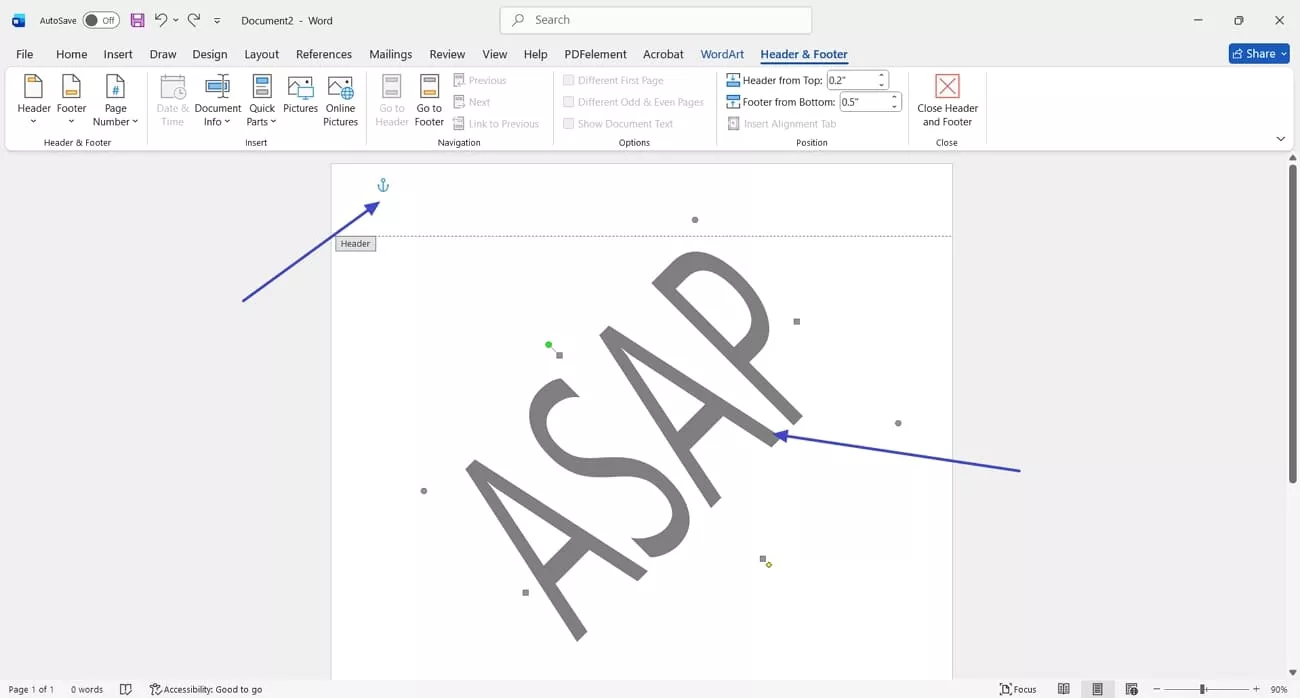
Method 2. Using The Header and Footer Tool
Some Windows users encounter a disabled Watermark option in Word. Thus, go through the steps below to use another method to remove draft watermarks from a Word file:
Instructions. Begin by opening the document with a draft watermark in Word. Next, double-click on the “Header” area and press the watermark to make it selectable. Once selected, simply press the “Delete” key on your keyboard, and the watermark will be deleted.
Method 3. Removing Locked Watermarks
Next, follow the steps below to see how to remove the draft watermark in Word that is locked within an image format:
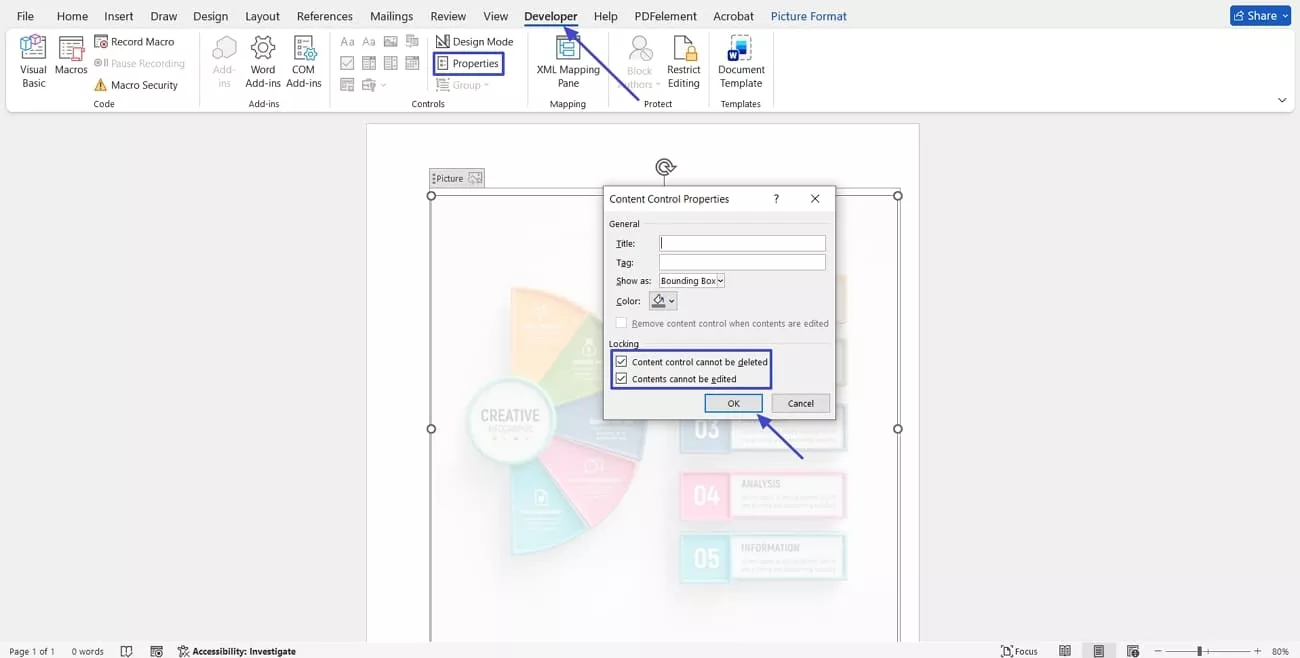
Step 1. After opening the Word document, double-click the “Header” area and choose the image-based watermark.
Step 2. Next, hit the “Developer” tab and press the “Properties” option in the “Controls” section to view a pop-up. Uncheck both options under the “Locking” section and hit the “OK” button. You can simply press the “Delete” key to delete the watermark.
Part 2. Alternative Method: Remove the Draft Watermark with UPDF
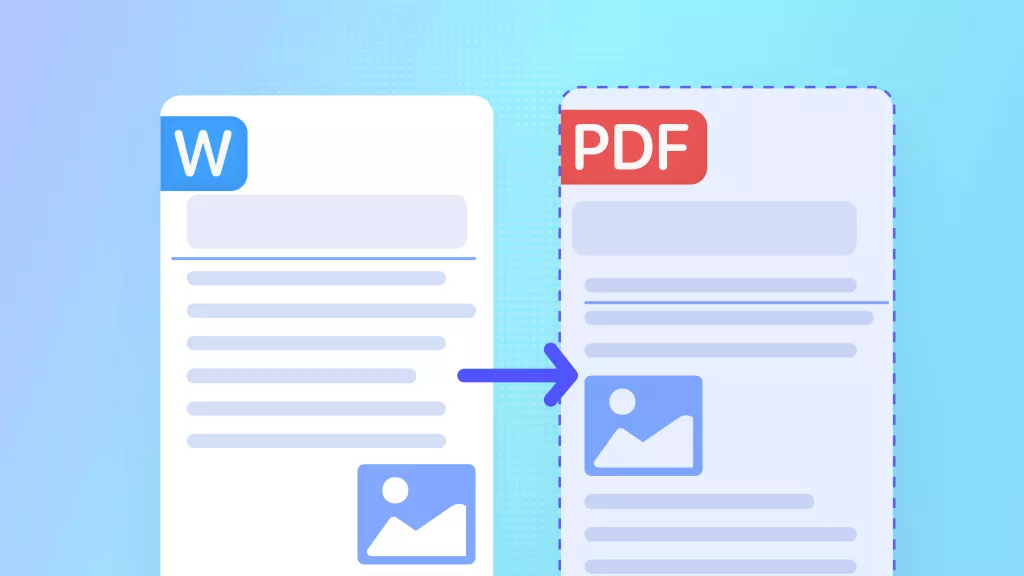
After learning how to remove draft from Word, I realized that the default methods are confusing and fail to work properly. UPDF solves this problem easily by allowing me to upload or drag my Word file, automatically converting it into a PDF. From there, I can remove text, an image, or part of a scanned document's watermark without wasting time or struggling.
Moreover, UPDF provides a comprehensive set of tools for managing documents efficiently after conversion. I can edit, annotate, merge, or compress files directly in the program. It also supports OCR for scanned files, page translation, and batch processing. Using UPDF keeps everything organized, saves time, and ensures my documents always look professional and polished.
Windows • macOS • iOS • Android 100% secure
How to Remove Draft Watermark With UPDF
After exploring UPDF, I found that it can remove draft watermarks from any document format. Now, I’ll share the guide for removing the different watermarks using UPDF.
Method 1. For Text Watermark
Follow the steps below to learn how to remove draft from Word document using UPDF:
Step 1. Import Word File to UPDF
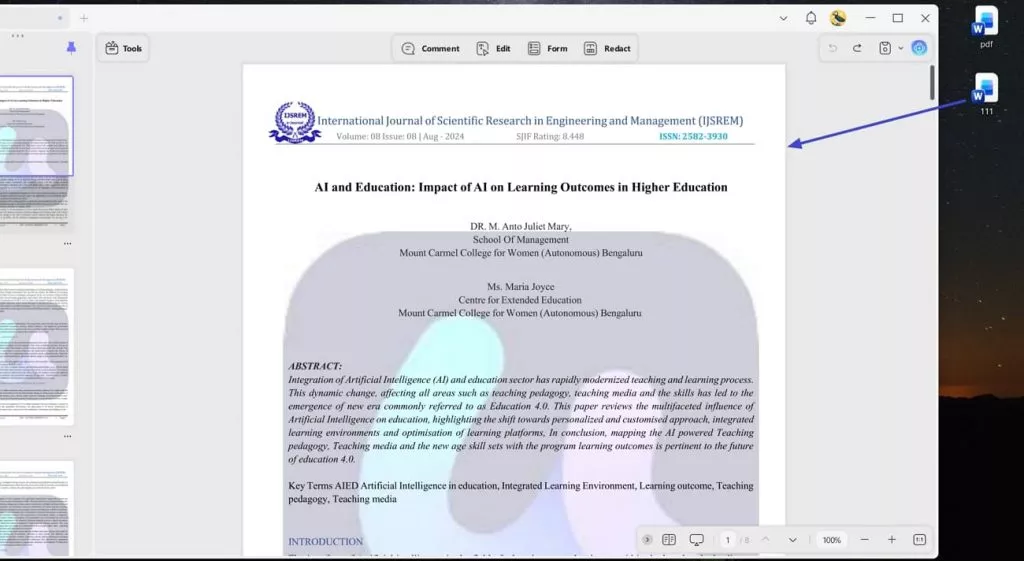
First, drag and drop your Word file into the UPDF, and it will automatically convert your Word file into the PDF format.

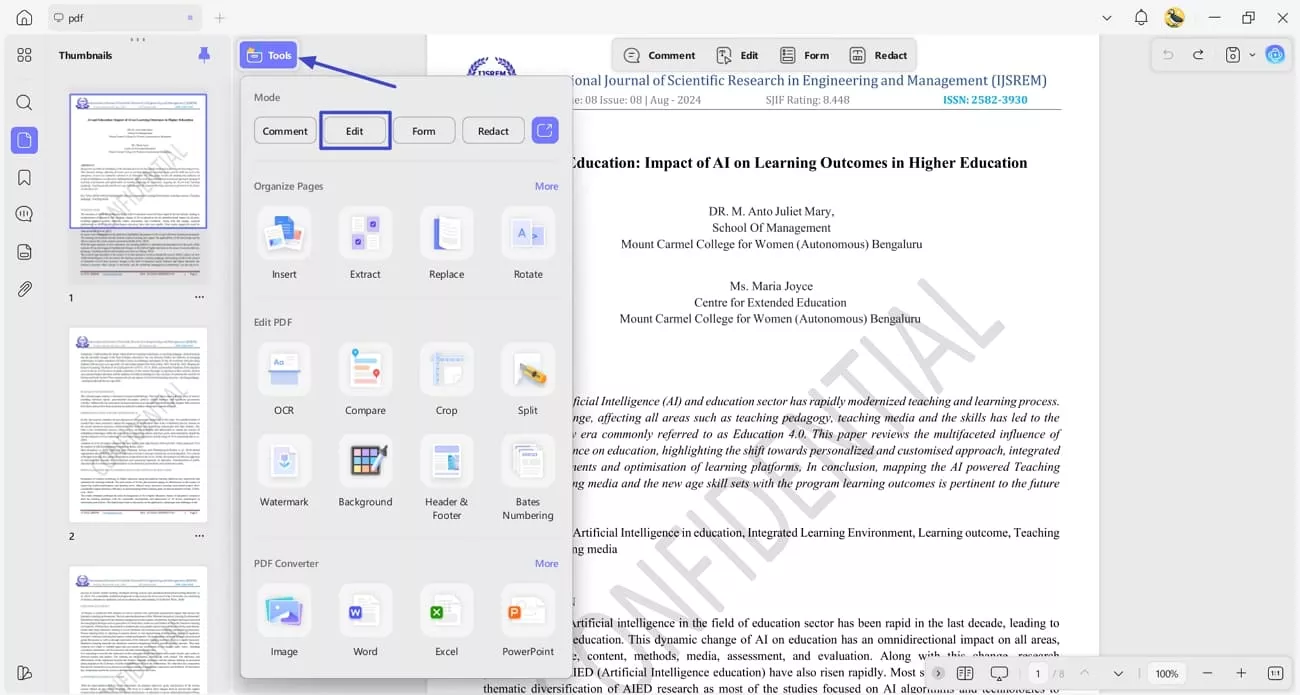
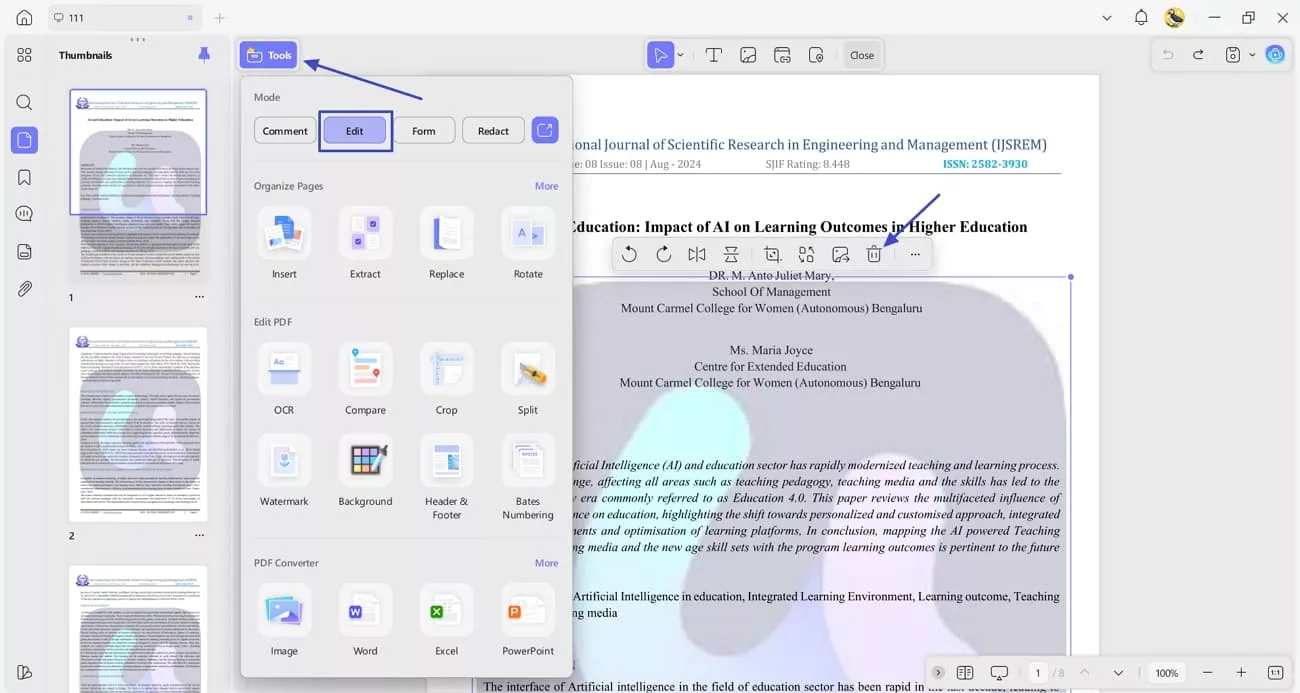
Step 2. Access PDF Editing Interface
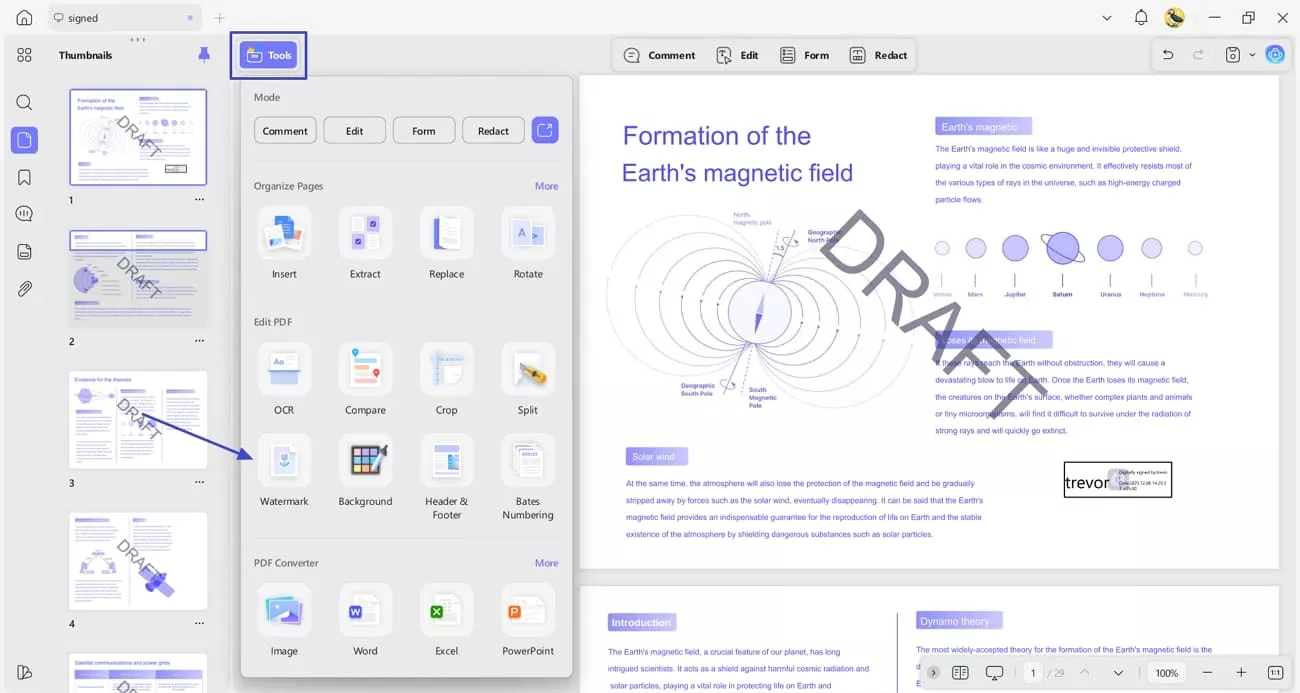
Next, hit the “Tools” option on the left side and hit the “Edit” option to enter the editing interface.
Step 3. Remove Text Watermark
Lastly, choose the watermark characters and right-click to view the context menu. After that, hit the “Delete” option to delete the watermark.
Method 2. For Image Watermark
Next, go through the steps below to remove an image-based watermark from the Word file using UPDF:
Step 1. Import Image-Based Watermark Word File
First, drag and drop the Word file into UPDF to automatically convert it into the PDF format.
Windows • macOS • iOS • Android 100% secure
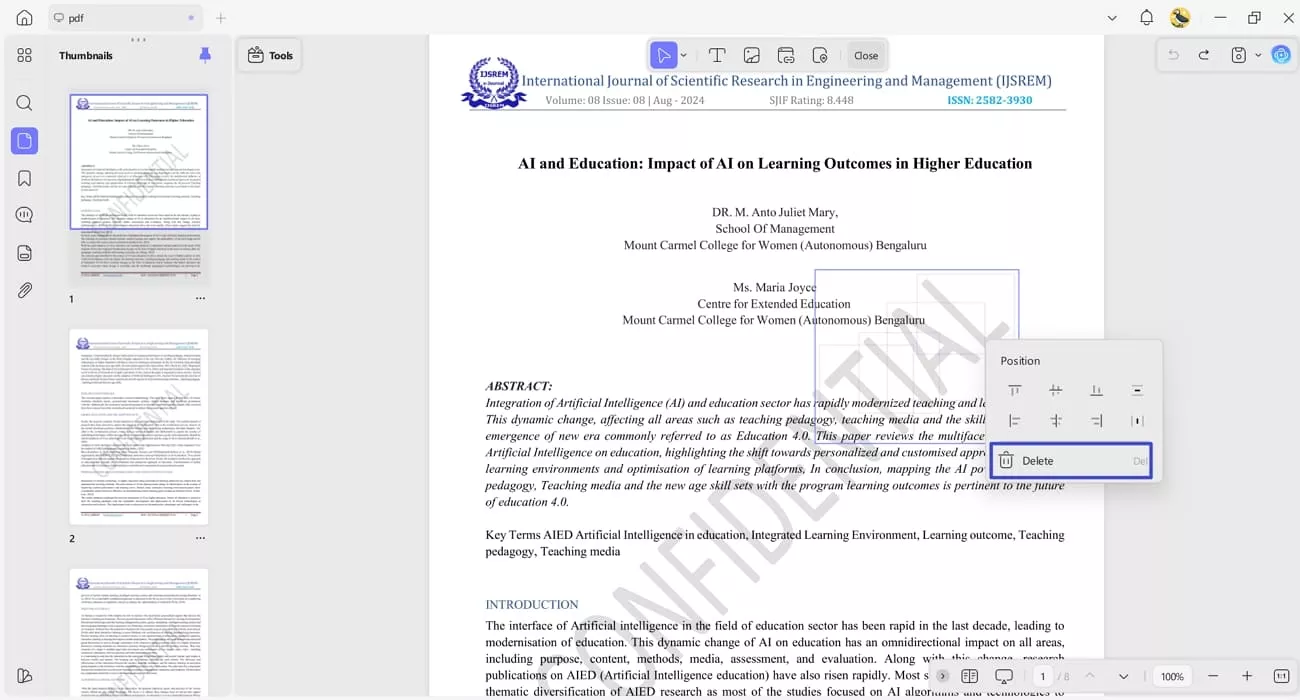
Step 2. Access Editing Tool and Delete Image Watermark
Next, hit the “Tools” option and press the “Edit” option to access the PDF editing interface. Afterwards, choose the image watermark and hit the “Delete” icon in the floating pop-up.
Method 3. For Scanned Word File’s Watermark
When a Word file is scanned rather than digitized, the watermark becomes part of the image itself. Follow the steps below to resolve this issue and remove the draft mark without compromising the document’s clarity.
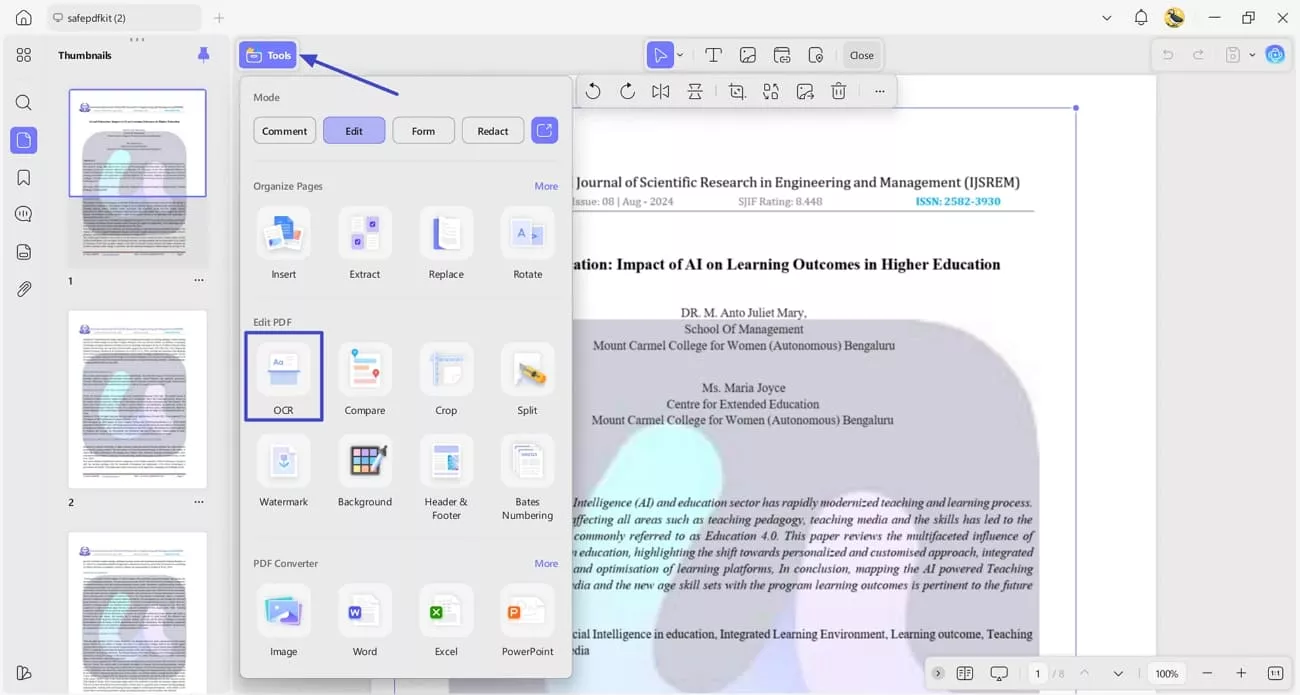
Step 1. Import Word File and Access OCR Tool
Once you import the scanned Word file into UPDF, hit the “Tools” option and press the “OCR” button to view a pop-up window.
Windows • macOS • iOS • Android 100% secure
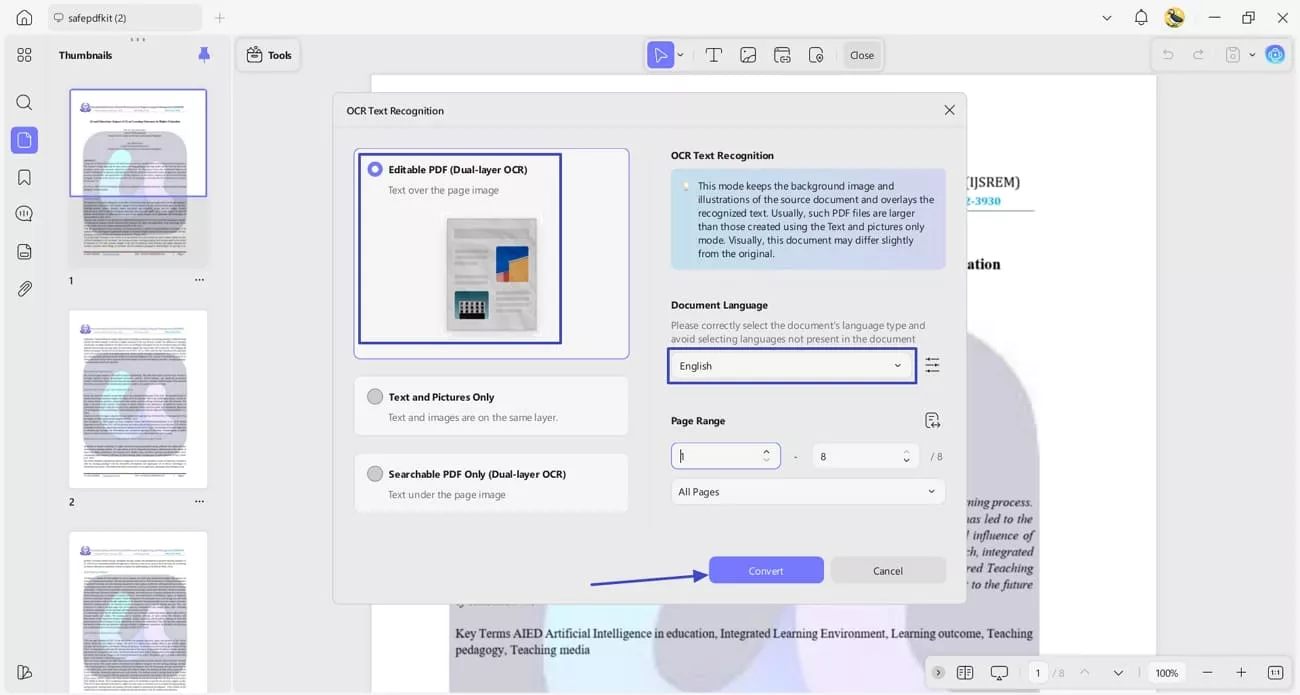
Step 2. Start OCR Process
Next, choose the “Editable PDF” option and choose the original language used in the document. Afterwards, hit the “Convert” button to begin the OCR process.
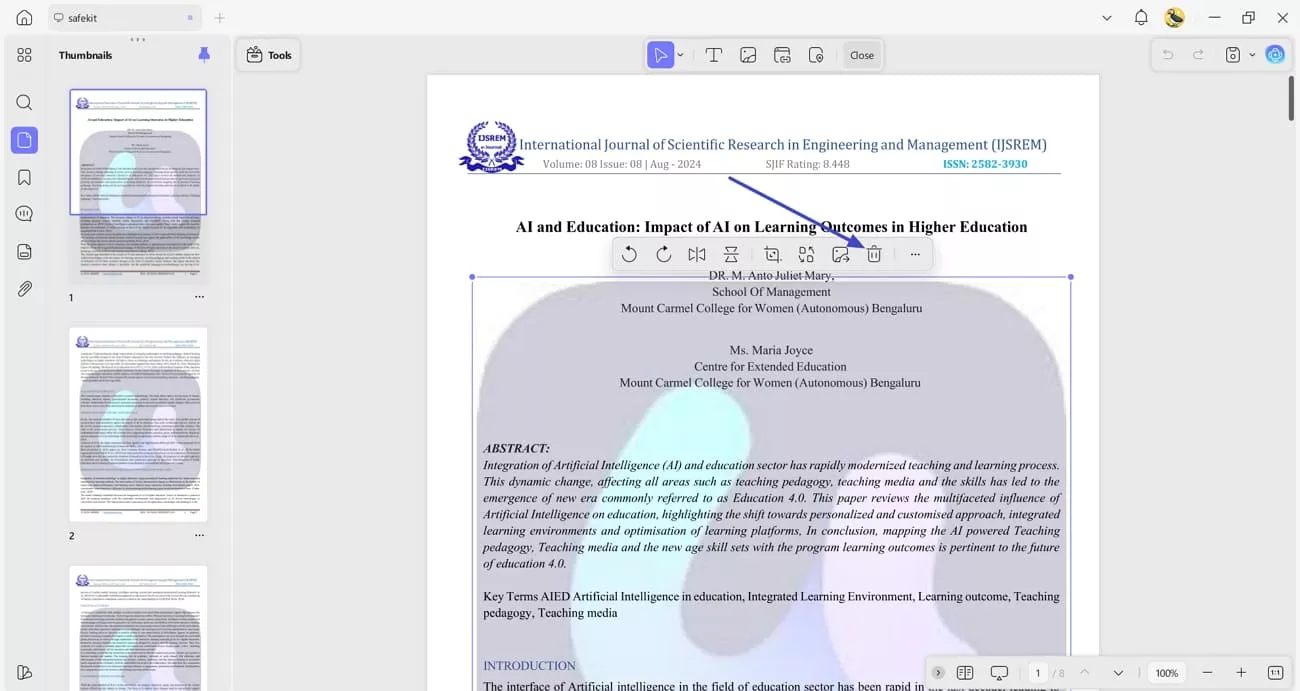
Step 3. Choose Watermark and Delete It
Last, access the Editing interface and hit the “Delete” icon in the floating pop-up after selecting the watermark.
Bonus Tip: Removing Watermark From PDF
Many users like me also deal with watermarks in PDF files and struggle to remove them. After learning how to remove the draft watermark in Word, follow the steps below to do this with PDF files using UPDF:
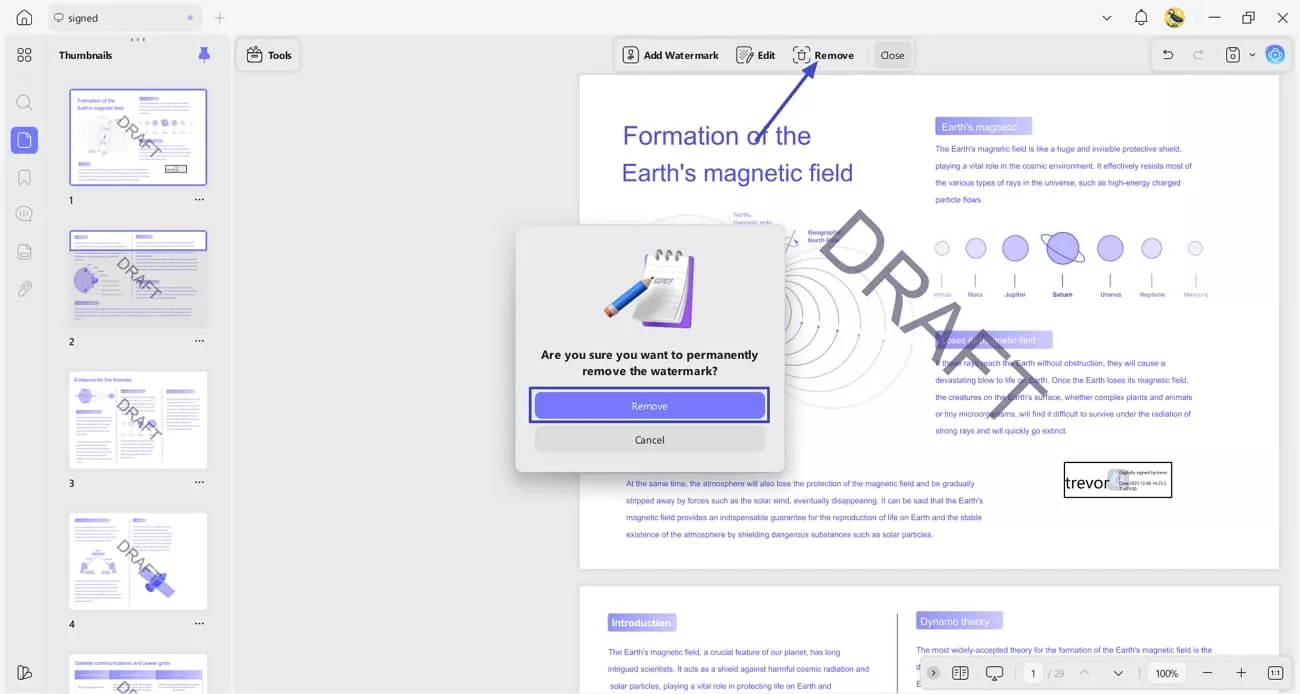
Step 1. Open PDF File and Access Watermark Tool
Once you open the PDF with a watermark, hit the “Tools” option on the left side and press the “Watermark” option to enter the new interface.
Windows • macOS • iOS • Android 100% secure
Step 2. Remove Watermark From PDF
Next, hit the “Remove” option in the bar above and press the “Remove” button again in the confirmation pop-up to permanently delete the watermark from the PDF.
Other Key Features of UPDF
- Create PDF From Other Documents: With UPDF, I can easily convert any file format to PDF by importing it. I can choose a custom Page Size and Page Orientation for my PDF.

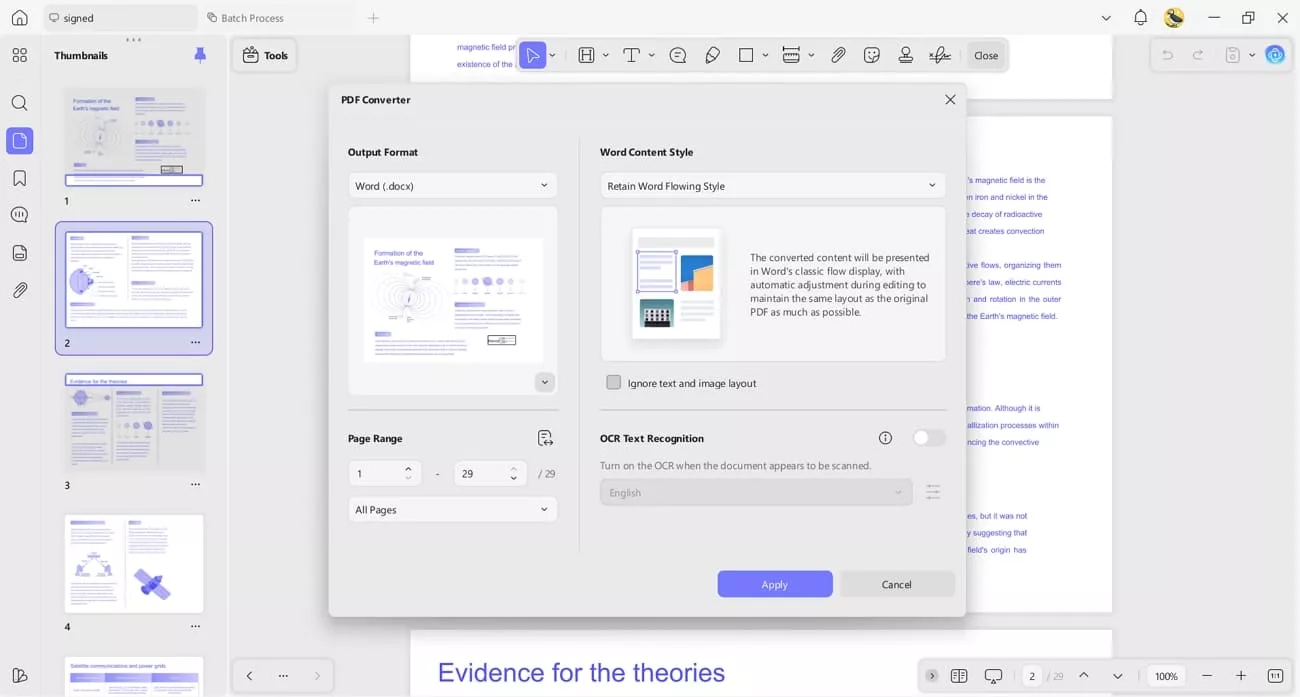
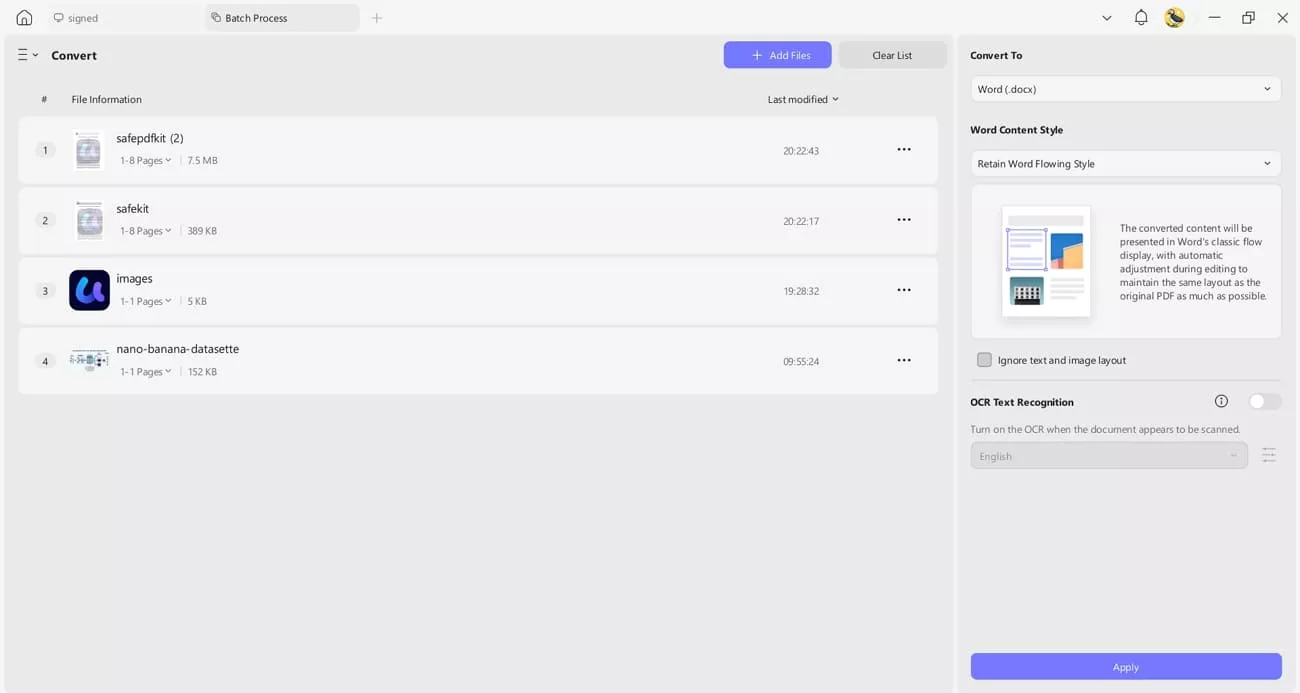
- Convert PDF: I can also convert PDF to many other formats. While converting, I can also perform OCR in three modes, supporting more than 38 languages.
The batch conversion feature in UPDF lets me convert 200+ files in a single go.
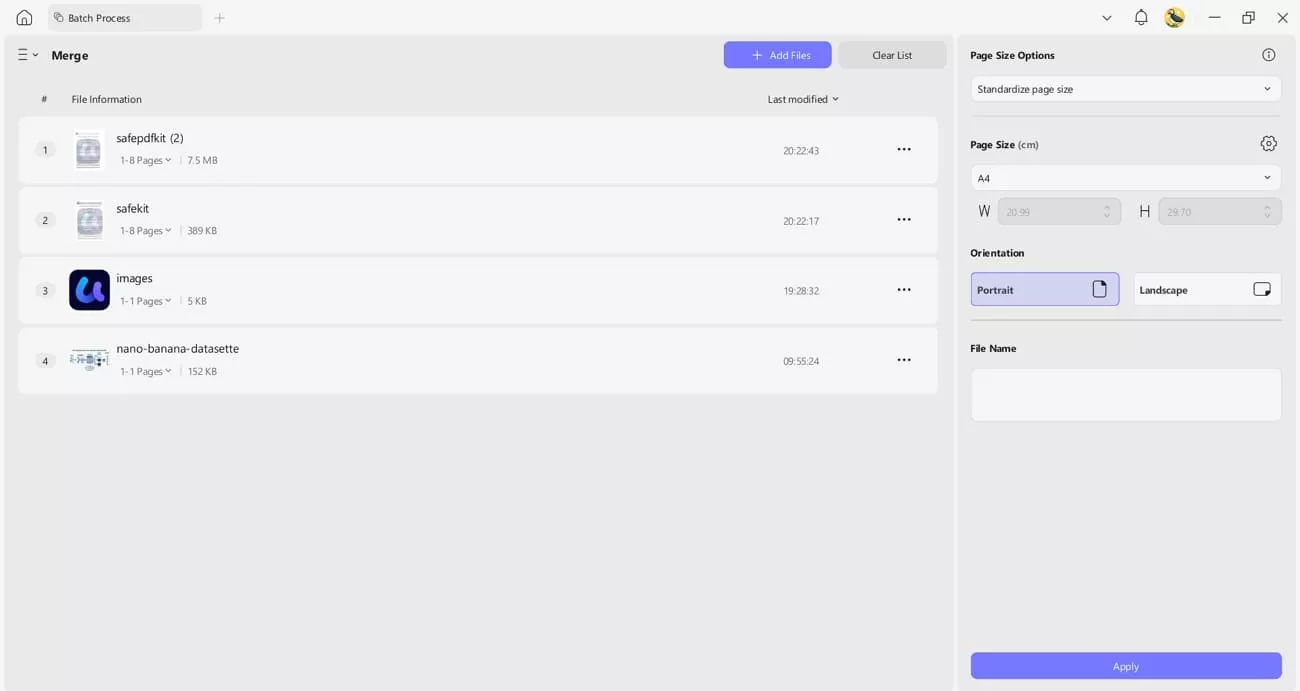
- Batch Merge: This feature lets me combine multiple files at once and offers an Add Files button to import as many documents as I want. It also lets me set my preferred page size and orientation to ensure the merged file looks exactly as I need.
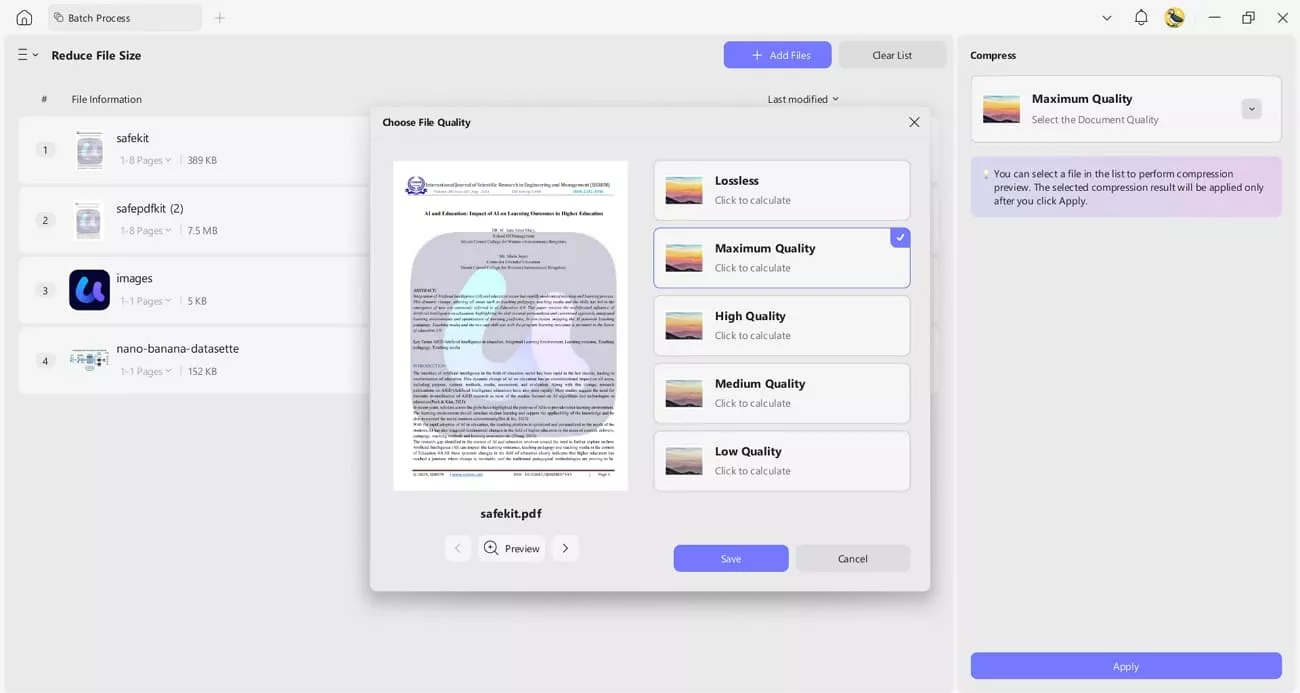
- Compress PDF Files: UPDF lets me compress PDFs to reduce storage usage without losing any important content. It shows the estimated file size before compression and lets me choose the best quality option.
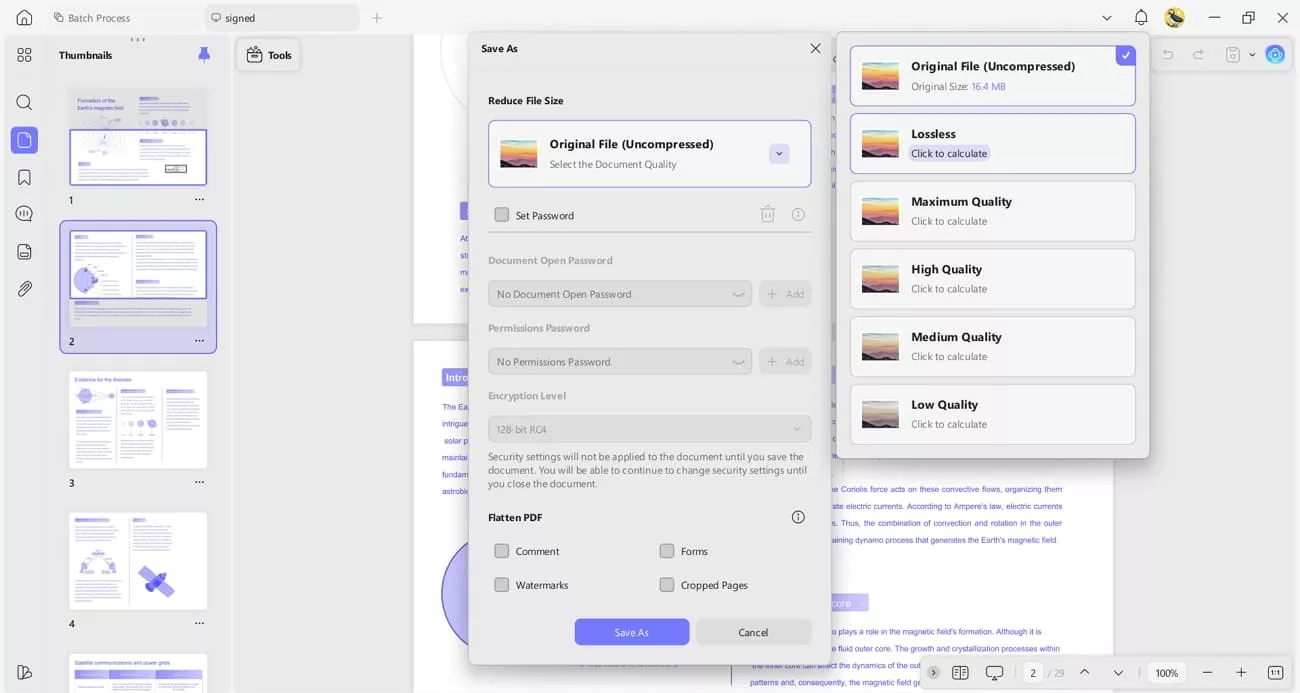
With the batch compress feature, I can shrink multiple PDFs at once, and the Preview button helps me compare the original quality before finalizing the compression.
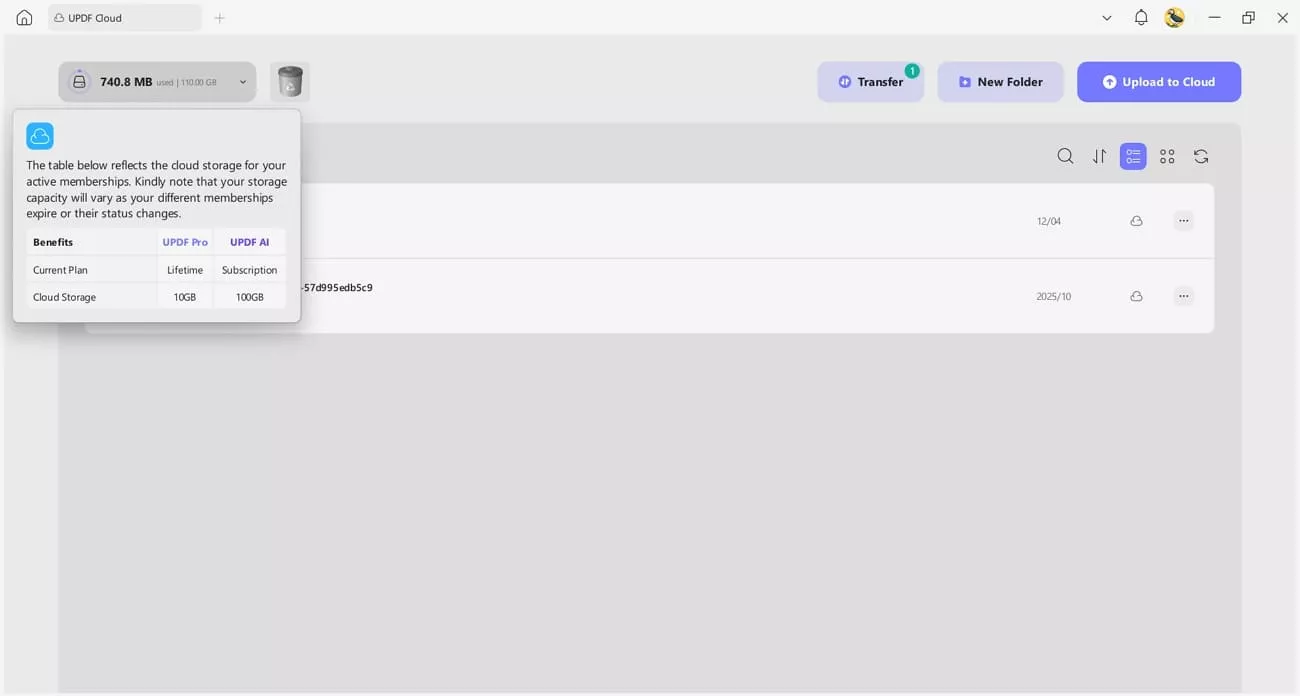
- UPDF Cloud: It lets me sync my files, signatures, and edits across all my devices, so I can pick up my work anywhere without losing progress. This keeps everything consistent and up to date in real time, making document management much smoother.
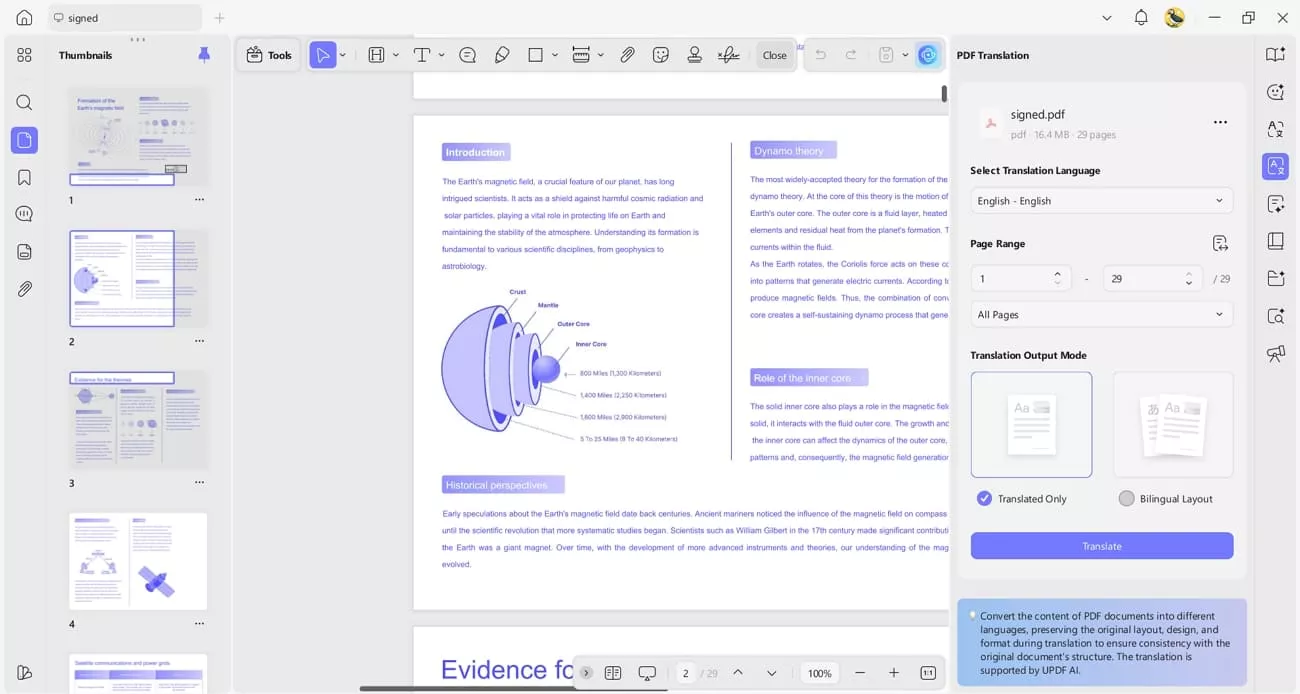
- Translate Entire Document: UPDF also lets me translate an entire document or page by page, supporting more than 14 languages while preserving the original layout. This makes it easy to understand or share content in different languages without disrupting the formatting.
Click the button below to download UPDF and get started. If you need more advanced features, you can upgrade to a paid plan to unlock additional benefits. UPDF also includes a 30-day money-back guarantee for your peace of mind.
Windows • macOS • iOS • Android 100% secure
Conclusion
In conclusion, this guide explores how to remove the draft watermark in Word on Mac, Windows, and scanned documents. Word’s tools can still feel confusing or fail at times, so having a step-by-step approach helps you fix the issue without stress. For the best experience when handling watermarks, I recommend UPDF to remove text, image, and scanned watermarks and keep your document clean without any hassle.
Windows • macOS • iOS • Android 100% secure


 Enola Miller
 Delia Meyer

 Enid Brown
-Reddit