Converting TIFF to JPG can become necessary for some situations. TIFF files are known to be of high quality, but they also have a very large file size. At the same time, they are not as widely compatible with different devices as the JPG images.
On the other hand, JPG images are not bad in terms of image quality, but they have a very small file size. Moreover, they are compatible with most devices, platforms, and tools available. Hence, making them the better option whether you consider daily use or practicality overall.
That is why this guide shares different online and offline methods to convert your TIFF images into JPG format.
Part 1. Convert One TIFF Format to One JPG without Lossing Quality
When you want to convert TIFF format to JPG format, one of the most crucial things to be careful of is the image quality. Luckily, when you use UPDF for the conversion you do not need to worry about it. With UPDF, the whole process is streamlined thanks to its user-friendly interface.
Moreover, it is free to convert for 2 files per day. You can click the below button to download UPDF to use and follow the below steps.
Windows • macOS • iOS • Android 100% secure
Step 1: You will start the process by opening the UPDF application on your computer by double-clicking its “Desktop icon”. When the UPDF application runs on your computer, you can select the TIFF image from your computer and “Drag and Drop" it into the UPDF interface.
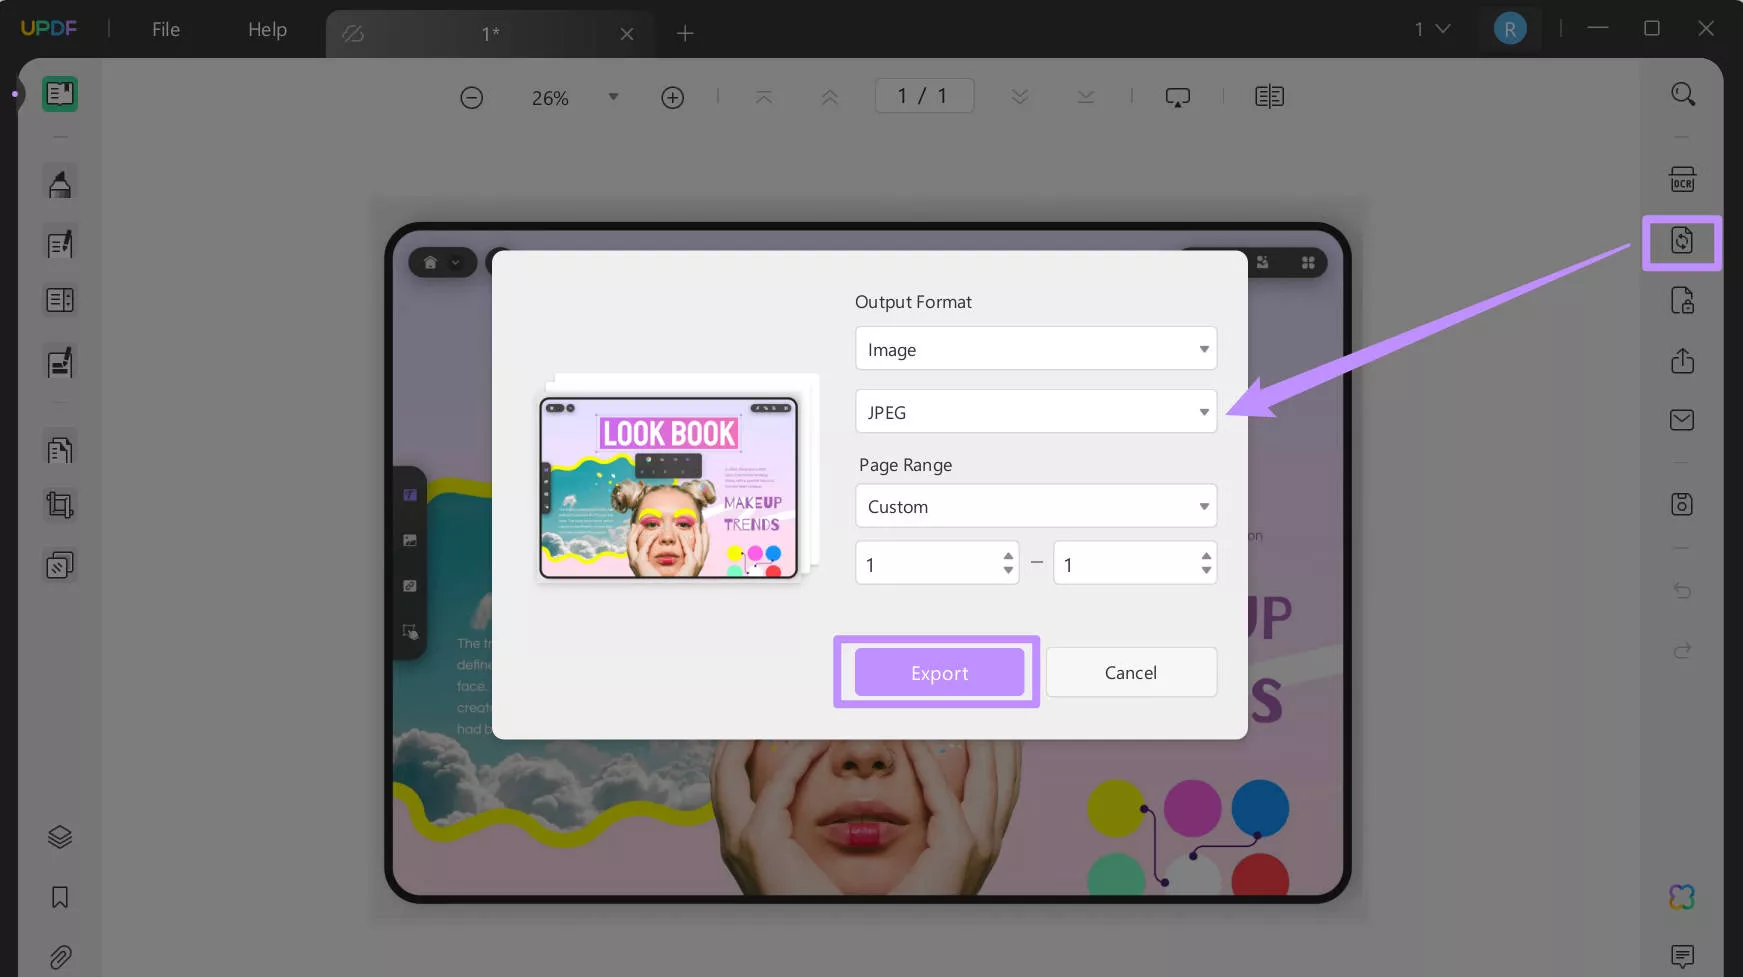
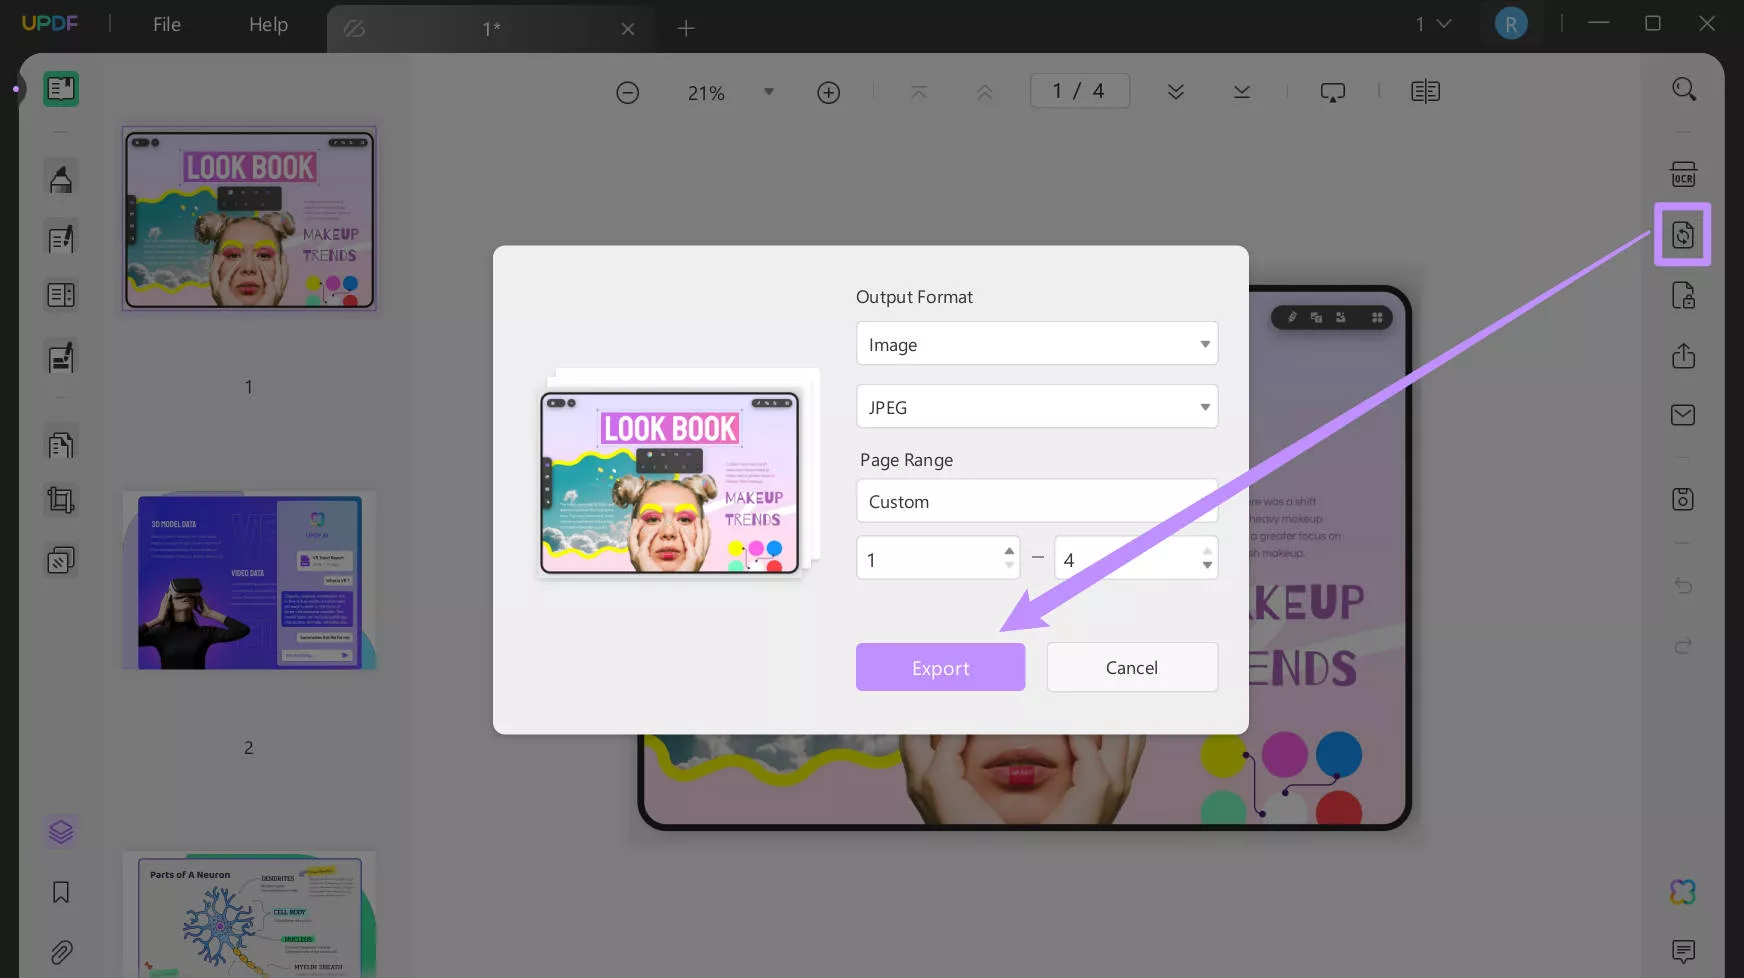
Step 2: Your TIFF image will now open in the UPDF interface. Click the "Export PDF” button and select “Image”. Now, a popup will appear with image exporting settings. Here you need to select “JPG" from the dropdown list under the "Output Format” option.
Finally, click “Export” and now you can select any location on your offline storage to export the image as JPG and click “Save”.
Part 2. Mass Convert TIFF to JPG Without Losing Quality
With the previous method, you can only convert TIFF images to JPG format individually. However, if you have a lot of TIFF images that you want to convert to JPG format in one go, UPDF can help you with that too. However, that is only possible when the paid version of UPDF.
The free version only allows 2 free conversions per day and purchasing UPDF pro removes that limit. This method involves converting multiple TIFF files into one file with UPDF and then converting them into JPG format. Hence, it will give you the experience of mass conversion rather than converting images individually.
So, purchase UPDF now and unlock the mass conversion feature for effortless conversion from one format to another.
After purchasing UPDF Pro, you only need to download its application and log in with your account to access all its premium feature!
Windows • macOS • iOS • Android 100% secure
Below are the steps you can follow for converting multiple TIFF images into JPG format with UPDF.
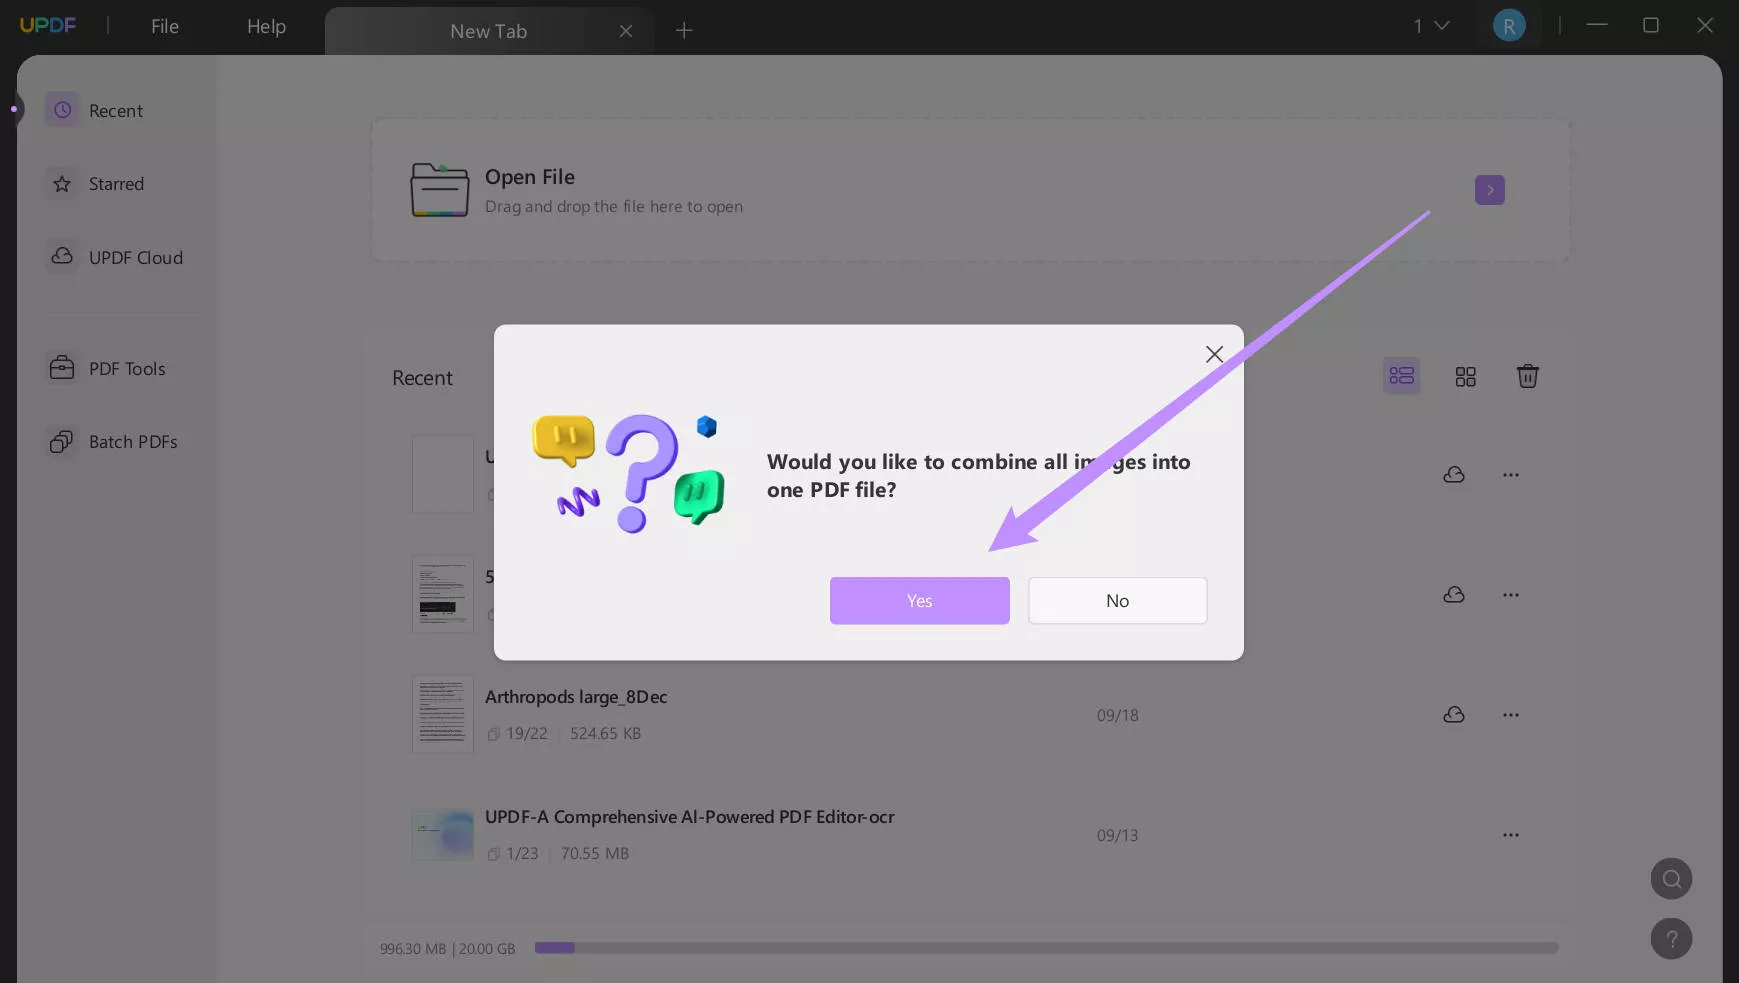
Step 1: Open the UPDF application on your computer. Once UPDF opens, select all the “TIFF files” you want to convert and “Drag and Drop" them into the UPDF interface. UPDF will ask if you want to convert them into one PDF and you need to click “Yes”. Now, all the TIFF images will open in UPDF with one PDF page for each image.
Step 2: Now, you need to click “Export PDF" from the right side of the UPDF interface and select "Image”. In the export settings popup, you must select “JPG” from the dropdown list under the “Output Format” option and click “Export”.
The last thing is selecting a location in the file explorer window to save the exported files and clicking "Save”. All your TIFF images will be converted into JPG images with this method in one step with a mass conversion experience.
UPDF is not only good for that. It provides a lot of other unique and attractive features that you can learn about in the video below. The features of UPDF make it one of the best competitors to Adobe Acrobat and you can learn how it compares to Adobe by reading this expert review at Guiding Tech.
Part 3. Other Methods to Convert TIFF to JPG
Sometimes you need a tool that works online on devices like smartphones, or you do not have time to install software. Or, you might be looking for online solutions that are free.Then, you can use the methods introduced here.
However, they are some limitations in file size, file numbers, and features.
Way 1. Via CloudConvert
CloudConvert is our first pick for converting TIFF images to JPG format. It is an online converter that supports more than 200 different file formats for converting to other formats.
When converting your TIFF images, you can enjoy a batch conversion experience. Moreover, it has optional image conversion settings where you can select options like output quality, orientation, etc.
It also shows a preview of the converted image before you download it. So, if you plan to use CloudConvert for your conversions, here are the steps that you will need to follow.
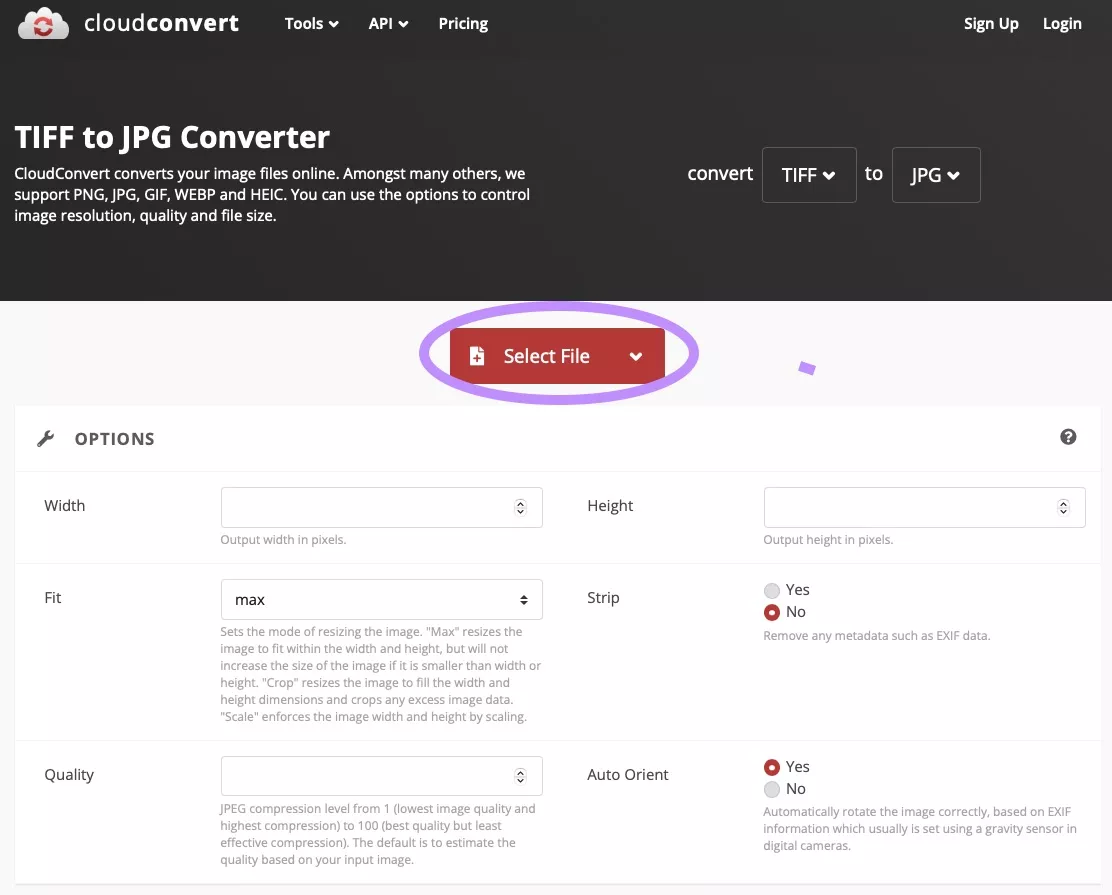
Step 1: Open your browser and go to CloudConvert TIFF to JPG online converter. Click the “Select File” button and select the TIFF images from your offline storage. Click “Upload" after selecting an image to upload it to CloudConvert for conversion. Now click the “Convert” button to begin the conversion process.
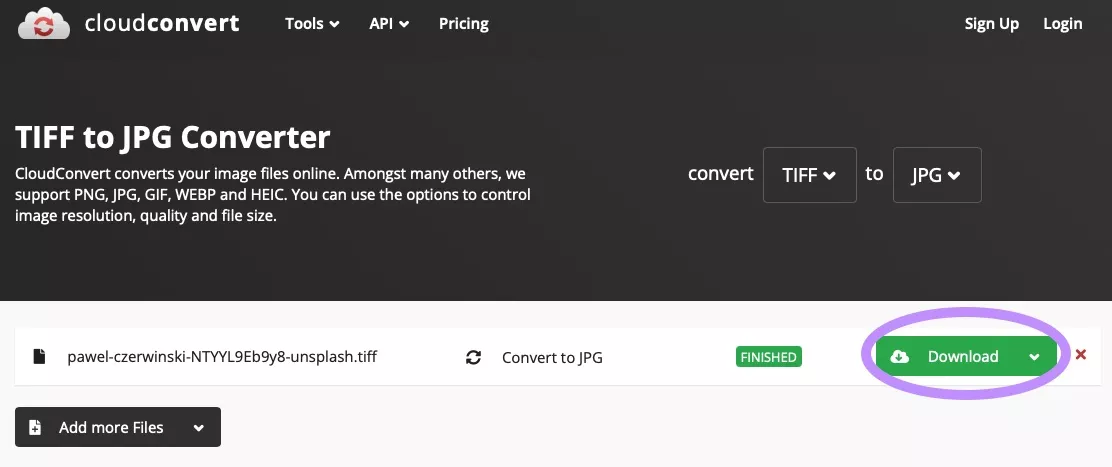
Step 2: CloudConvert will now start processing your file with a “Waiting/Uploading” status showing against the image with a progress bar. Wait until the image processing is complete and you see the “Download” option along with the image preview. Now, you can click “Download” and save the JPG image to your offline storage.
Way 2. Via FreeConvert
The next online tool you can use for this conversion is FreeConvert. It supports multiple file conversion options including TIFF to JPG.
FreeConvert ensures user security by maintaining 256-bit SSL encryption and it deletes the files automatically after a few hours, so nothing is permanently stored on their servers.
When converting your images you will get a batch conversion feature with advanced image conversion settings. However, the maximum size allowed for free users is 1GB which can be increased if you sign up for one of their plans.
One of the major downsides of this online converter is that it has irritating ads on the website. It will ask you to disable your adblocker if you are using one.
Below are the steps to use FreeConvert for converting TIFF images to JPG format.
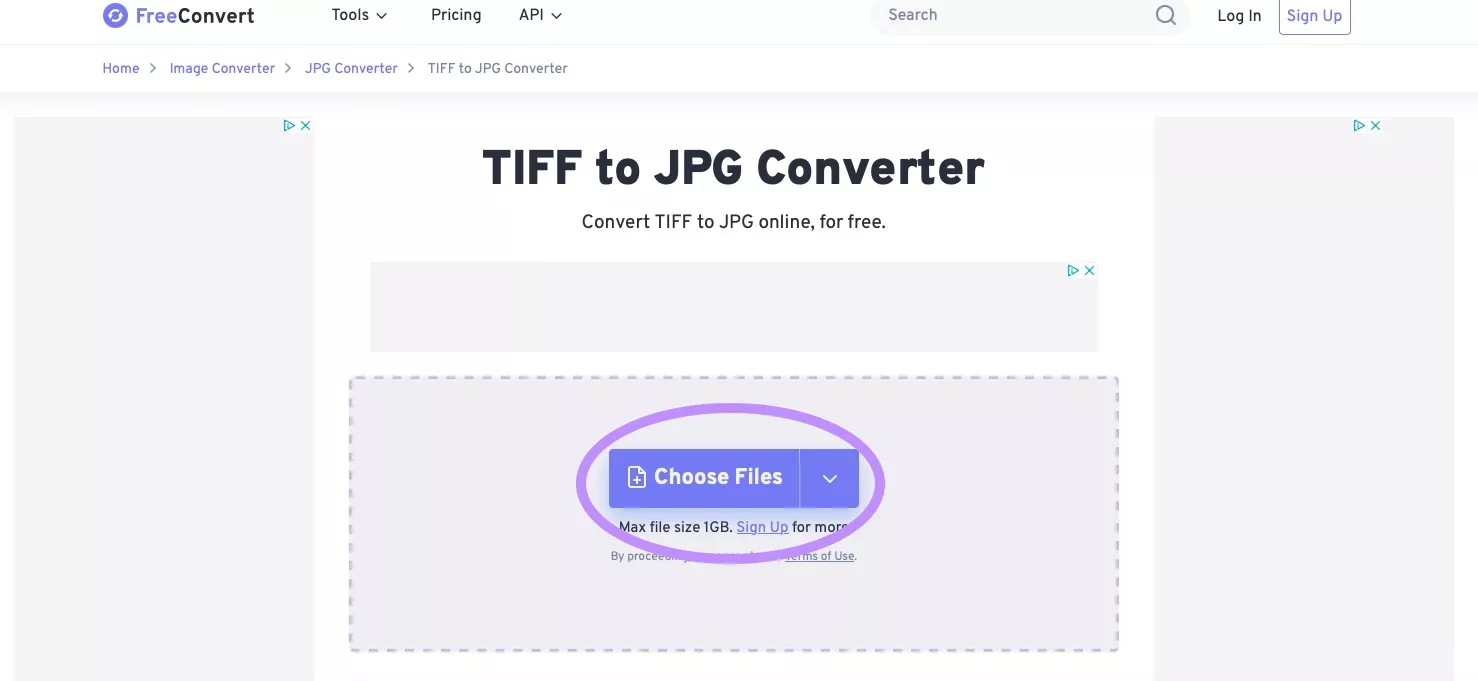
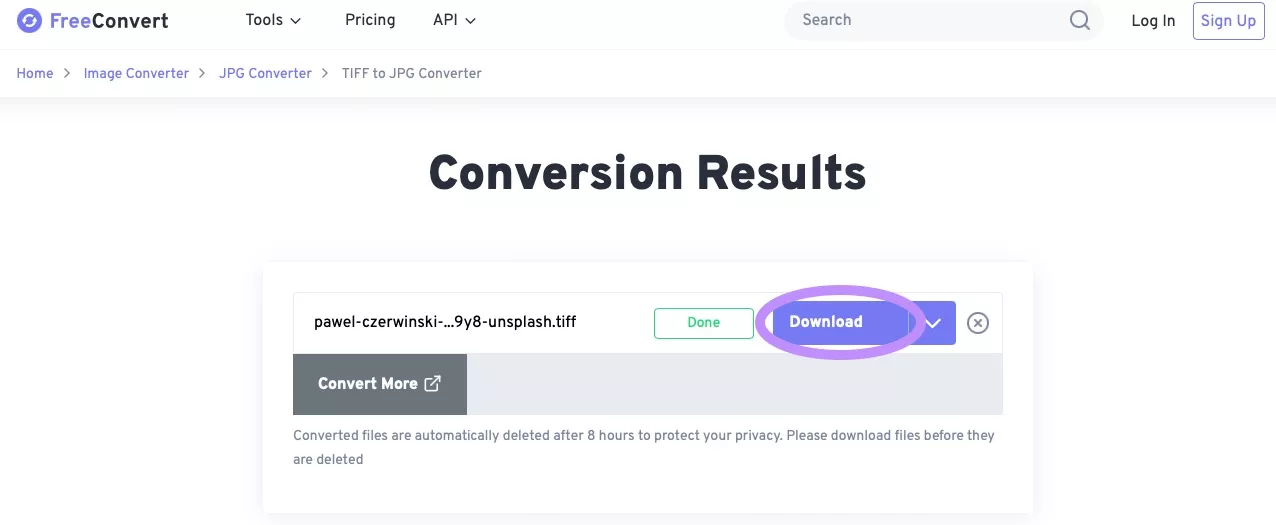
Step 1: Open your browser on your device and go to FreeConvert TIFF to JPG Converter Online. Here you need to click the "Choose Files” button and select “From Device”. Now, select the TIFF image from your File Explorer and click “Upload” to upload it to FreeConvert. As the file is available on the website click “Convert” making sure that the “Output” format is set to “JPG”.
Step 2: Now, you can see the progress of “Uploading” and “Converting” your image. Once this progress bar converts to “Done”, the “Download” button will become clickable. So, you can click “Download” and save the converted JPG file on your offline storage.
Final Words
If you have TIFF image files, then you might be looking for effective methods to convert TIFF into JPG. With the methods discussed in our guide, we hope that your problem is solved.
UPDF not only supports converting images individually, but it also offers mass conversion features that will save you a lot of time. So, download UPDF on your gadgets right now for an effortless experience of converting TIFF files to JPG.
Windows • macOS • iOS • Android 100% secure
 UPDF
UPDF
 UPDF for Windows
 UPDF for Mac
 UPDF for iPhone/iPad
 UPDF for Android
 UPDF AI Online
 UPDF Sign
 Edit PDF
 Annotate PDF
 Create PDF
 PDF Form
 Edit links
 Convert PDF
 OCR
OCR PDF to Word
 PDF to Image
 PDF to Excel
 Organize PDF
 Merge PDF
 Split PDF
 Crop PDF
 Rotate PDF
 Protect PDF
 Sign PDF
 Redact PDF
 Sanitize PDF
 Remove Security
 Read PDF
 UPDF Cloud
 Compress PDF
 Print PDF
 Batch Process
 About UPDF AI
 UPDF AI Solutions
 AI User Guide
 FAQ about UPDF AI
 Summarize PDF
 Translate PDF
 Chat with PDF
 Chat with AI
 Chat with image
 PDF to Mind Map
 Explain PDF
 Scholar Research
 Paper Search
 AI Proofreader
 AI Writer
 AI Homework Helper
 AI Quiz Generator
 AI Math Solver
 PDF to Word
 PDF to Excel
 PDF to PowerPoint
 User Guide
 UPDF Tricks
 FAQs
FAQs UPDF Reviews
 Download Center
 Blog
Blog Newsroom
 Tech Spec
 Updates
 UPDF vs. Adobe Acrobat
 UPDF vs. Foxit
 UPDF vs. PDF Expert



 Lizzy Lozano
 Enola Miller
