 UPDF for Windows
 UPDF for Mac
 UPDF for iPhone/iPad
 UPDF for Android
 UPDF AI Online
 UPDF Sign
 Edit PDF
 Annotate PDF
 Create PDF
 PDF Form
 Edit links
 Convert PDF
 OCR
OCR PDF to Word
 PDF to Image
 PDF to Excel
 Organize PDF
 Merge PDF
 Split PDF
 Crop PDF
 Rotate PDF
 Protect PDF
 Sign PDF
 Redact PDF
 Sanitize PDF
 Remove Security
 Read PDF
 UPDF Cloud
 Compress PDF
 Print PDF
 Batch Process
 About UPDF AI
 UPDF AI Solutions
 AI User Guide
 FAQ about UPDF AI
 Summarize PDF
 Translate PDF
 Chat with PDF
 Chat with AI
 Chat with image
 PDF to Mind Map
 Explain PDF
 PDF AI Tools
 Image AI Tools
 AI Chat Tools
 AI Writing Tools
 AI Study Tools
 AI Working Tools
 Other AI Tools
 PDF to Word
 PDF to Excel
 PDF to PowerPoint
 User Guide
 UPDF Tricks
 FAQs
FAQs UPDF Reviews
 Download Center
 Blog
Blog Newsroom
 Tech Spec
 Updates
 UPDF vs. Adobe Acrobat
 UPDF vs. Foxit
 UPDF vs. PDF Expert
When I needed a quick digital backup of my passport, I struggled to get a clean, organized copy on my iPhone. Taking photos alone didn’t give me the quality or control I needed, and managing multiple documents became messy. I started exploring ways to scan and store my passport digitally in a secure manner.
In this article, I’ll share how I learned how to scan passport with iPhone and store it for easy access. I’ll show how I used UPDF to scan and convert my passport to make it easy to access and add to iPhone Wallet.
Windows • macOS • iOS • Android 100% secure
Part 1. How To Scan a Passport With an iPhone?
Once I started researching how to scan passport on iPhone, I found that many apps I tried were either slow or produced messy files. That’s when I discovered UPDF, which let me handle official documents without worrying about poor scans or lost files. Its interface makes it simple to start a scan, review the document, and organize everything right from my iPhone.
What really impressed me about UPDF App is that it lets me edit and redact sensitive information before uploading it anywhere. I can create folders, rename scanned documents, and store everything in one place to manage multiple important files. With UPDF App, my passport scans are always accessible and ready whenever I need them.
Key Advantages
After I discovered UPDF app, I explored it thoroughly and found out why this tool stands out among all the tools in the market. Let me share some key advantages of using UPDF for scanning files on an iPhone.
- Importing Saved Passport Photos with Flash Support
It lets me import saved passport images from my Photos app and turn them into a clean PDF instantly. When capturing new scans, I can enable flash to capture clearer details in low-light conditions.
- Scan Both Sides onto a Single PDF Page
UPDF App can merge scans of both sides of an ID card and a passport into one PDF page. It keeps all important information together, making the files more compact for later review.
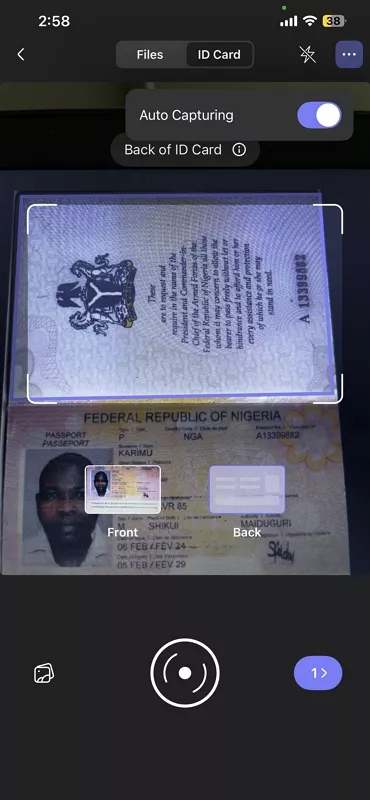
- Auto-Capturing and Auto-Cropping
UPDF App automatically detects my passport’s edges and captures the scan as soon as my camera stabilizes. It then auto-crops the background and aligns the document perfectly without any manual effort. This combo saves me from blurry shots and messy borders, giving me a professional scan every time.
- Editing Options Before PDF Conversion
Before saving the scan as a PDF, I can rotate, crop, resize, or use filters to improve clarity. These features let me customize each document, so it is perfectly readable and refined.
- Sync Scanned Documents via UPDF Cloud
After scanning, I can send documents to UPDF Cloud to reach them from any device, including Mac, iOS, Android, and Windows. This function makes it easy to manage important documents across multiple platforms without losing them.
If you find UPDF’s scanning and document management features helpful and want to unlock even more productivity, I recommend upgrading to a premium plan. Upgrading gives you access to advanced tools and removes any limitations you might hit with the free version. For a special saving, use the coupon code “ENARTICLE” at checkout to get a discount on your purchase. Head over to UPDF’s official pricing page and secure your premium access today.
Windows • macOS • iOS • Android 100% secure
Guide to Scan a Passport With an iPhone Using UPDF App
Having discussed the advantages of using UPDF App, adhere to the steps below to see how to scan passport with iPhone using this app:
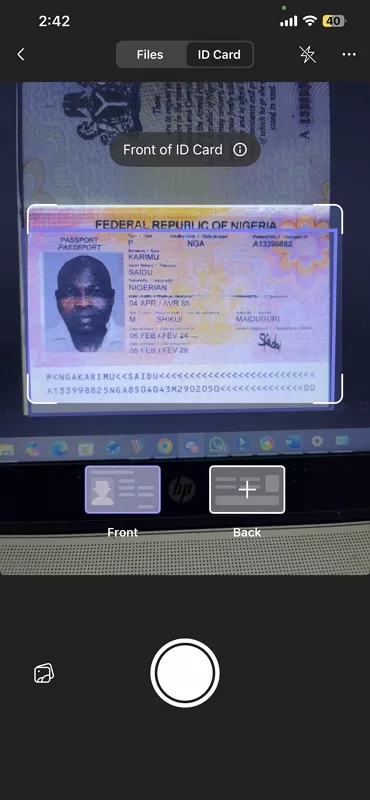
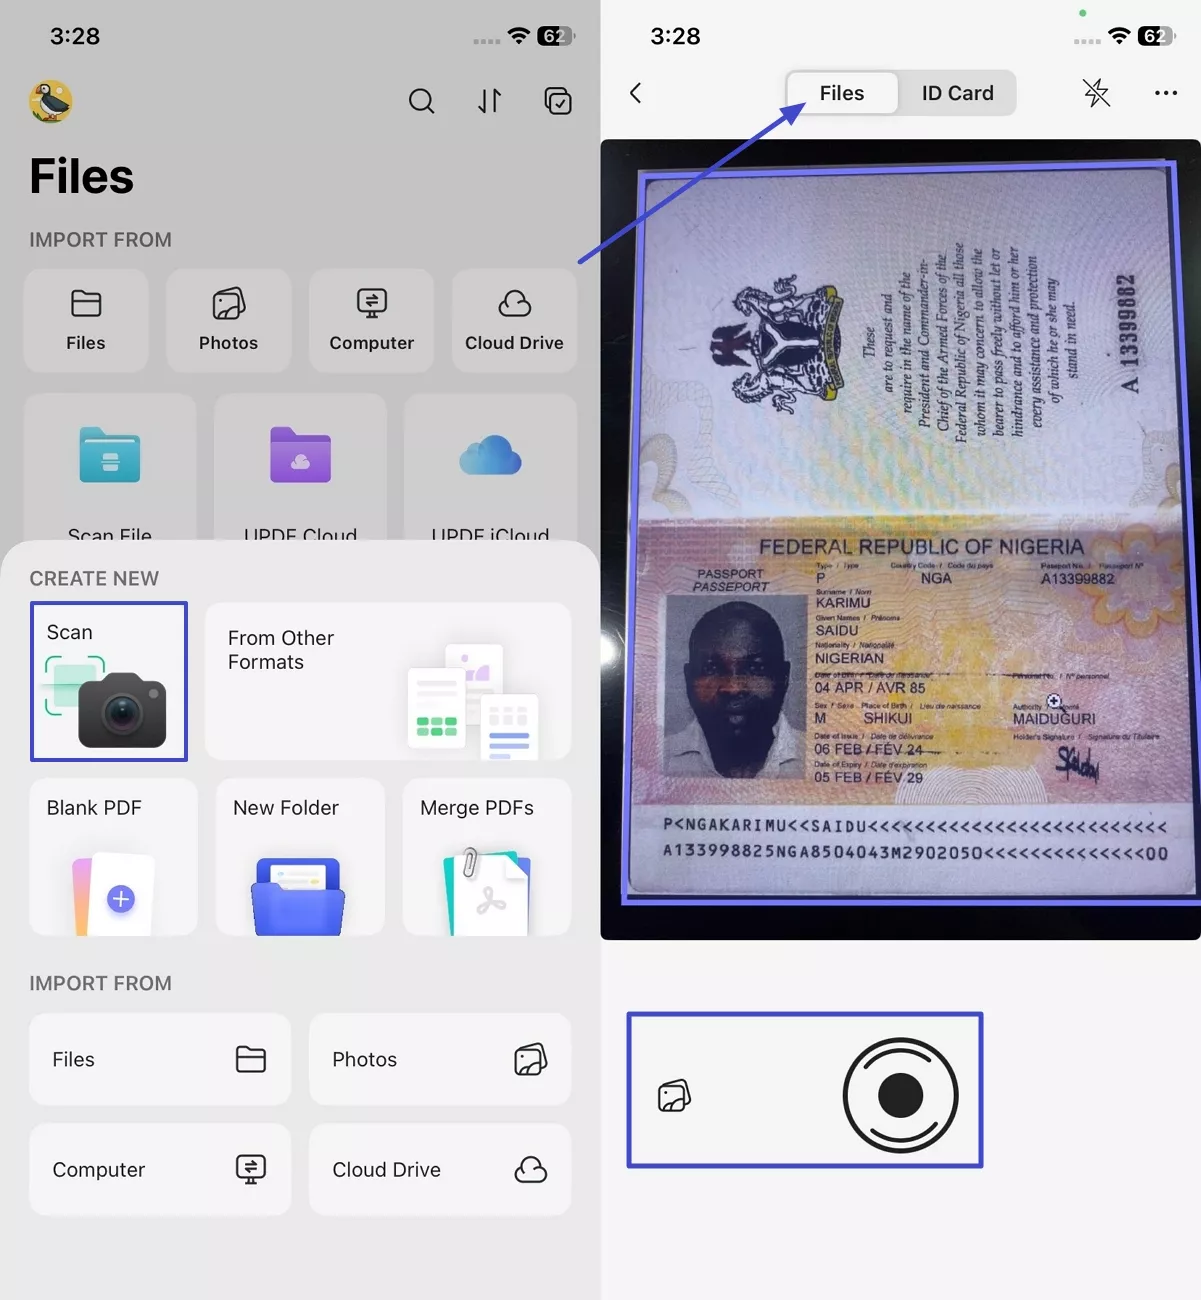
Step 1. Access Scan Tool and Choose ID Card Mode
Once you open the app, tap on the “Scan” tool and select the “Files” mode on the camera screen. Next, use the “Capture” button to take a picture of the document. You can also tap on the “Gallery” option to import the image of your passport for scanning.
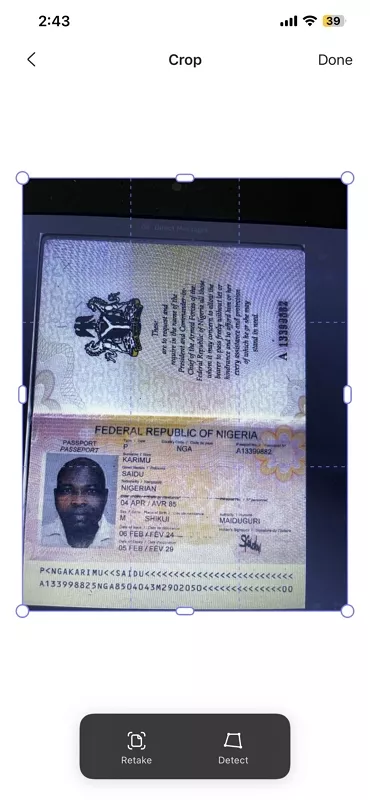
Step 2. Adjust The Document and Convert to PDF
Afterwards, access the scanned image, select the “Crop” or “Rotate” controls to adjust the size and tap on the “Save” option on the top right corner.
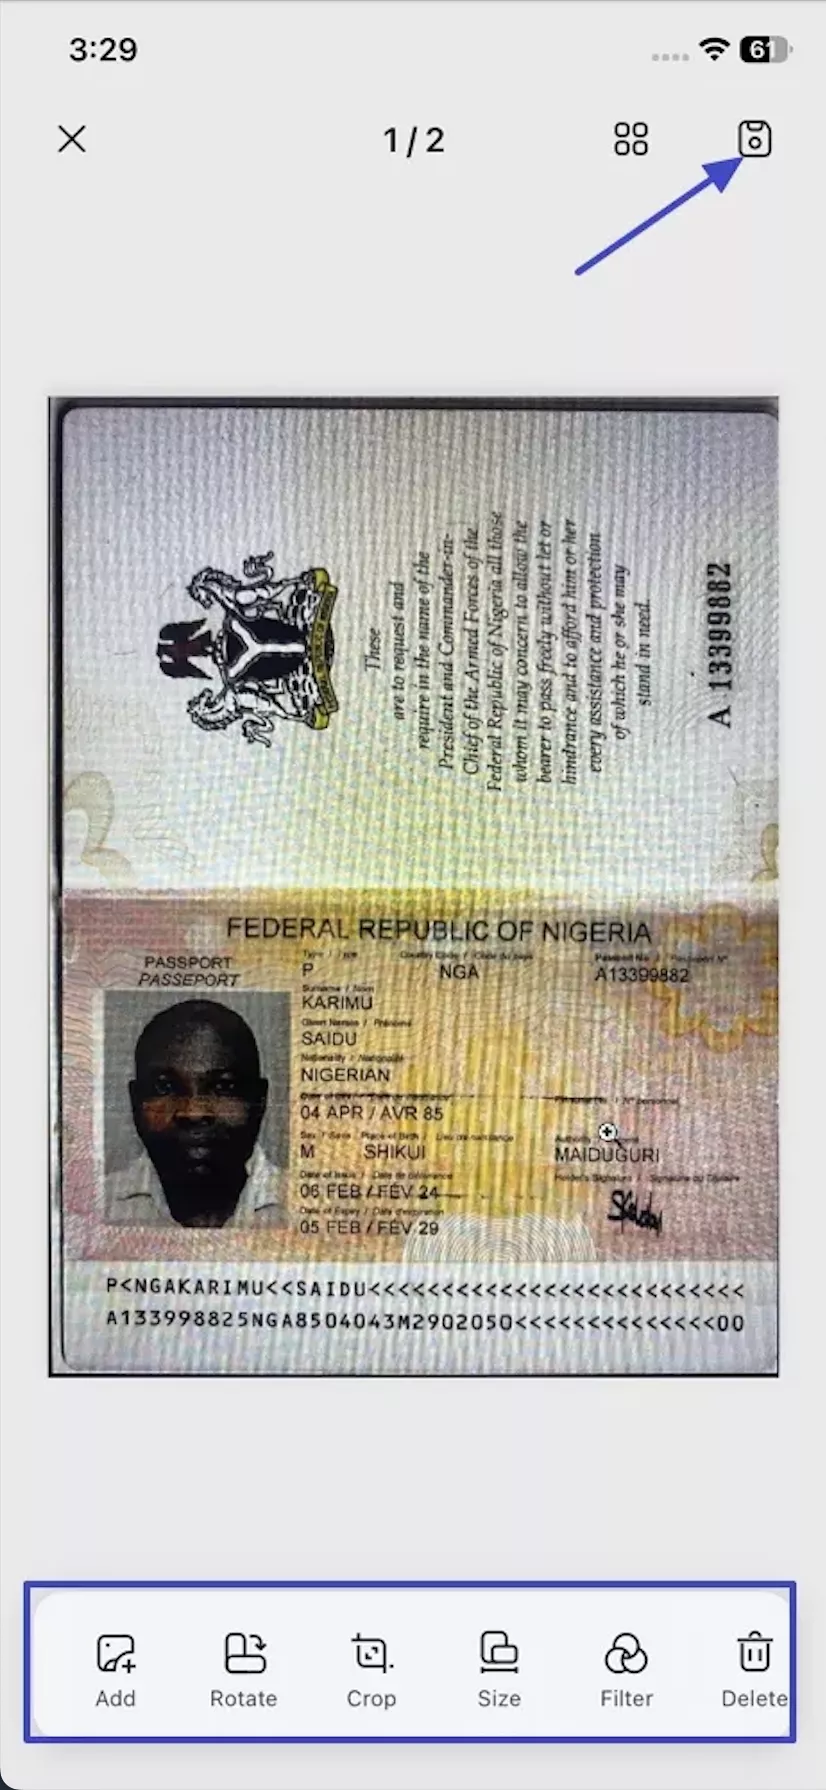
Once finished, UPDF automatically opens the scanned document and suggests the OCR tool. Simply click to proceed, and your scan or image will be converted into an editable PDF.
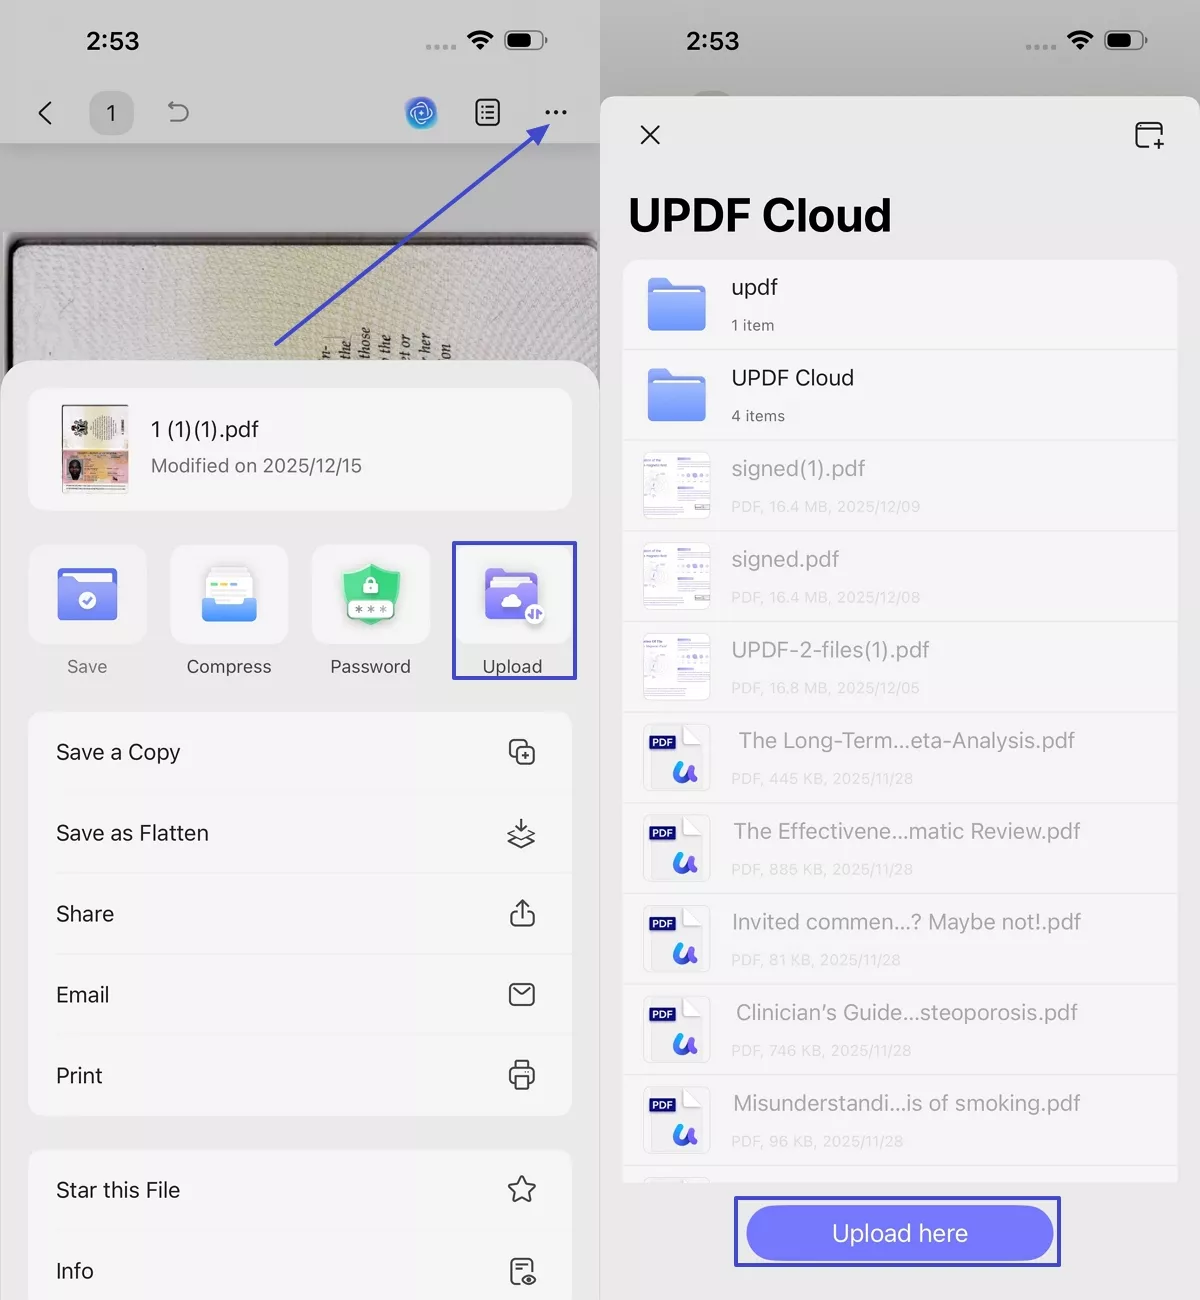
Step 3. Save PDF to UPDF Cloud
Once the scanned file is converted to PDF, use the “Three-Dots” icon in the top right corner and tap on the “Upload” option. Then, choose the folder and use the “Upload Here” option to upload the PDF to Cloud.
Windows • macOS • iOS • Android 100% secure
Part 2. How To Add a Passport To an iPhone (USA)?
After I learned how to scan passport on iPhone, I started using those scans as a quick backup whenever I traveled. Forgetting my physical passport at the airport taught me fast that a random scan isn’t enough. That’s when Apple’s new Digital ID for Wallet caught my attention, because it finally gives eligible U.S. travelers a verified and secure way to store their ID directly on an iPhone.
I need to require a few things to use, like a real and valid U.S. passport, a phone or a watch that is supported by Apple. Once these conditions are met, I can set everything up confidently without worrying about unclear scans or misplaced documents.
New Apple Updates
- Secure Digital ID Creation: Creates a Digital ID from a physical U.S. passport and stores it inside Apple Wallet for convenient use.
- TSA Checkpoint ID Display: Lets a traveler present identification at selected TSA checkpoints directly through an iPhone or Apple Watch during domestic trips.
- On‑Device Security Protection: Keeps the Digital ID encrypted within dedicated security hardware, which blocks unauthorized system access and strengthens overall identity protection.
- Biometric Authentication Control: Requires a successful Face ID check before the Digital ID appears to prevent unauthorized viewing and sharing attempts.
- Selective Sata Sharing: Allows the traveler to present only necessary ID details to supported readers, which helps reduce unnecessary exposure of personal information.
Steps to Add a Passport to iPhone
Next, follow the steps below to add passport to iPhone and set it up properly for secure use.
Step 1. Before moving forward, make sure your iPhone is updated to iOS 26.1.
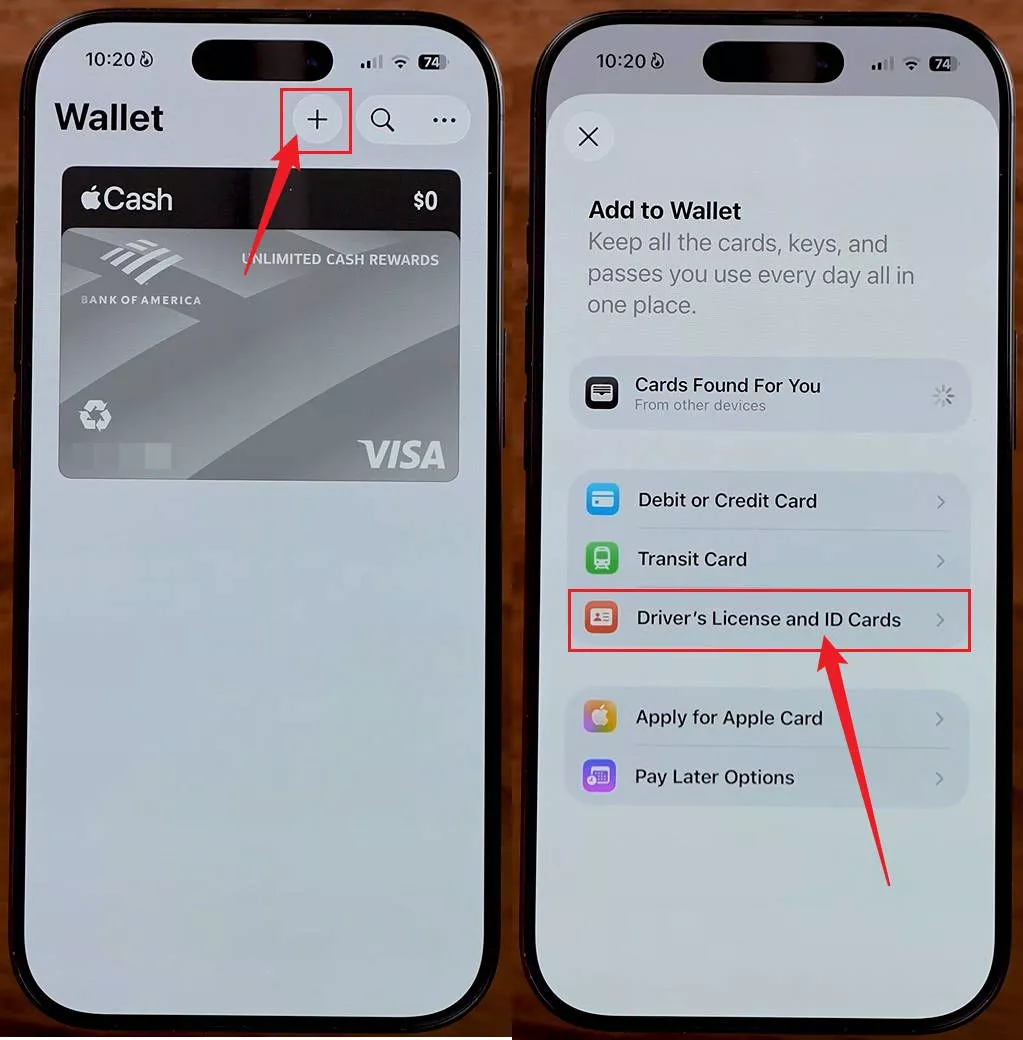
Step 2. Next, open the “Wallet” app and hit the “+” icon in the top corner to add a new ID. Afterwards, hit the “Driver’s License and ID Cards” option to proceed further.
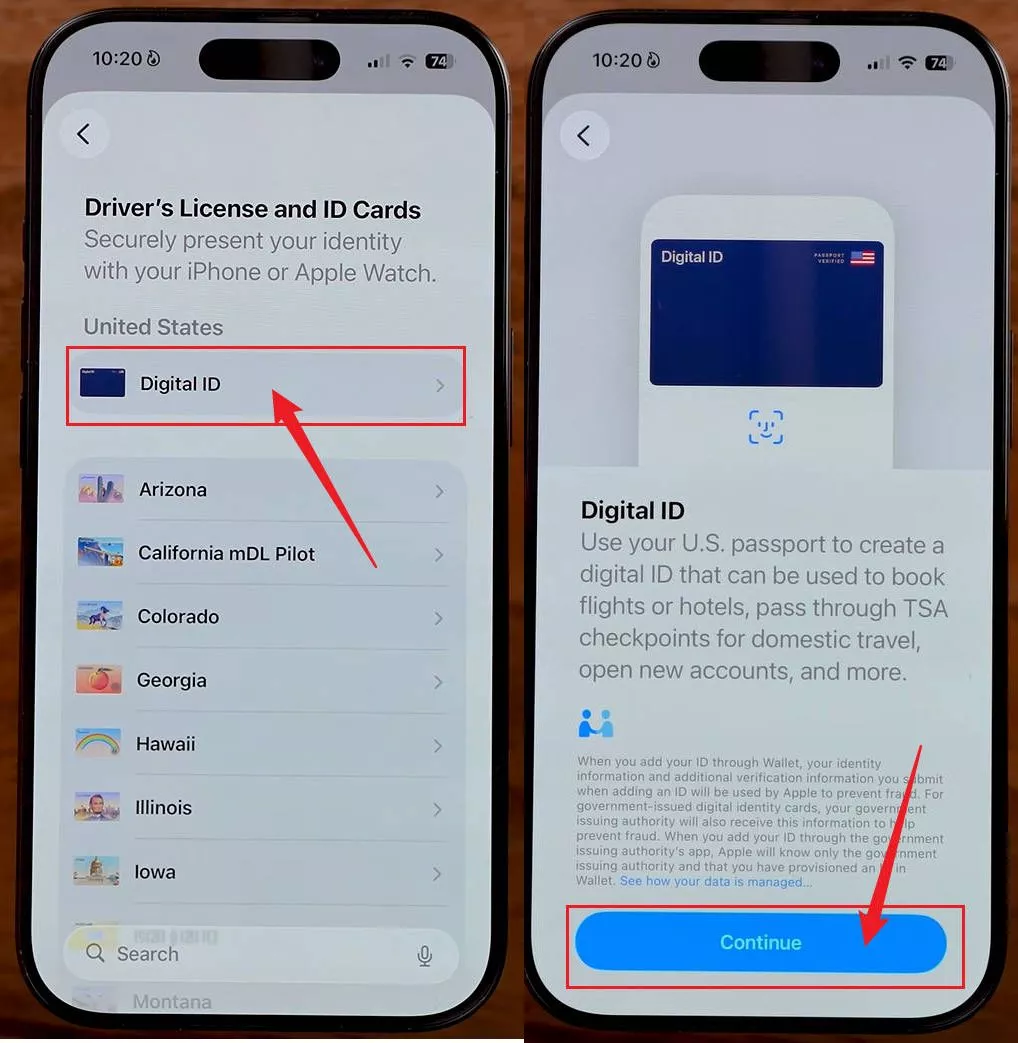
Step 3. Now, tap on the “Digital ID” option and hit the “Continue” option to begin the process of scanning.
Step 4. Find the barcode on your U.S. Passport and put your iPhone on the back. Once it read the Chip, press the “Continue” button to proceed further.
Step 5. For verification, you’ll need to take a live photo of yours and follow the guided movements of your head for fraud prevention.
Step 6. Next, tap on the “Share Anonymously” or “Don’t Share” option based on your decision on sharing your Passport with Apple. This way, your Passport will be automatically saved in your Wallet.
Important Early‑Rollout Tip
Conclusion
In conclusion, I’ve shared how to scan passport with iPhone, including organizing and securing the digital copies for easy access. These steps have made managing important travel documents much simpler and less stressful. For anyone looking for a reliable tool to scan, edit, and store passport scans efficiently, I highly recommend UPDF.
Windows • macOS • iOS • Android 100% secure


 Enola Miller
 Enrica Taylor

