Stamps are useful in reflecting the status of the PDF. For example, an "Approved" stamp means the person has approved the PDF. Similarly, Revised, Reviewed, and Confidential are a few other popular stamps used for PDFs. To add stamps to PDF on Mac, you need a PDF annotator tool that supports adding stamps. That's what we will cover today. So, this guide talks in detail about the best way to easily add standard or customized stamps to PDFs on Mac.
Part 1. How to Add Revised/Reviewed/Approved/Confidential Stamps to PDF on Mac
You can add Revised, Reviewed, Approved, and similar stamps using a PDF annotator tool with a dedicated stamp feature. This is where UPDF comes into action.
UPDF for Mac is a powerful PDF reader and annotator tool. It provides an intuitive interface to read PDFs and then add different types of pre-designed stamps to PDFs. With just 3 simple clicks, you can add Revised, Reviewed, Approved, Confidential, and a wide range of other pre-designed stamps.
The key features of UPDF are as follows:
- Click-based interface to read and annotate PDF with stamps.
- Add 15 types of pre-designed stamps, including Revised, Reviewed, Approved, Confidential, Witness, and similar others.
- Automatically add accurate names and dates to the stamps.
- Easily adjust the size and position of the stamp in the PDF.
- Create up to 40 customized stamps with different styles and text.
- Upload and add image-based stamps to the PDF.
Get this practical PDF tool for free and add customized stamps to your PDFs now.
Windows • macOS • iOS • Android 100% secure
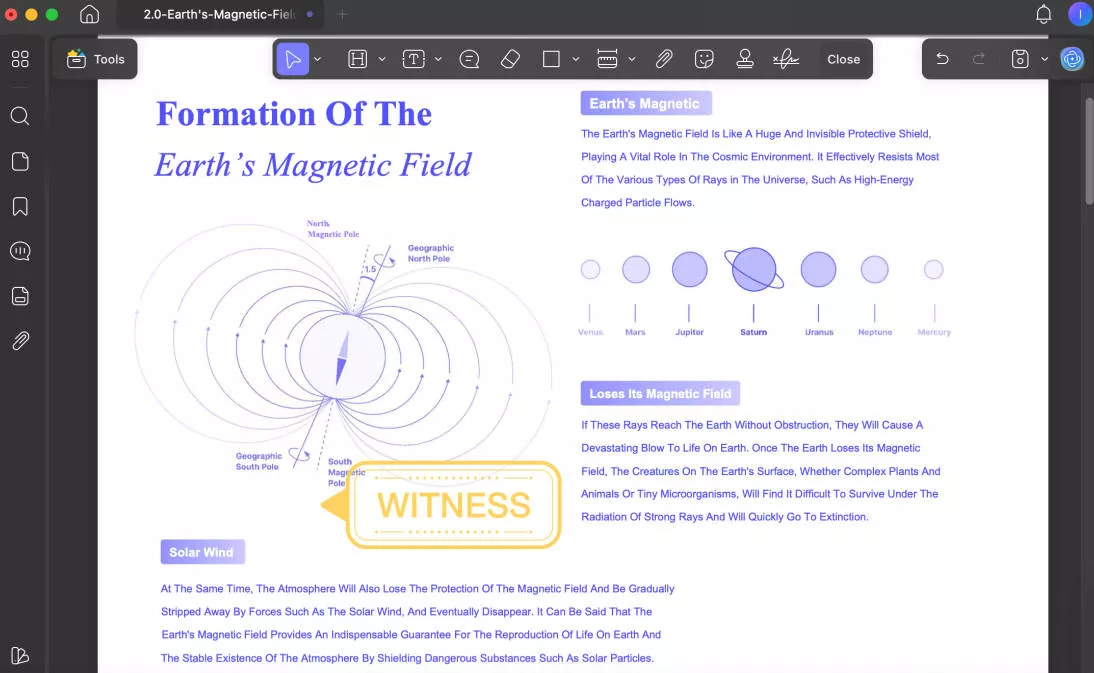
In short, UPDF is a dedicated PDF tool to add stamps to PDFs on Mac effortlessly. Besides adding stamps, UPDF is a comprehensive PDF editor that allows you to edit PDF content or do other customizations, like convert, compress, organize, or protect PDFs.
Follow the below steps to learn how to add a stamp to PDF on Mac:
Step 1. Download and launch UPDF and click "Open File" to open the PDF.
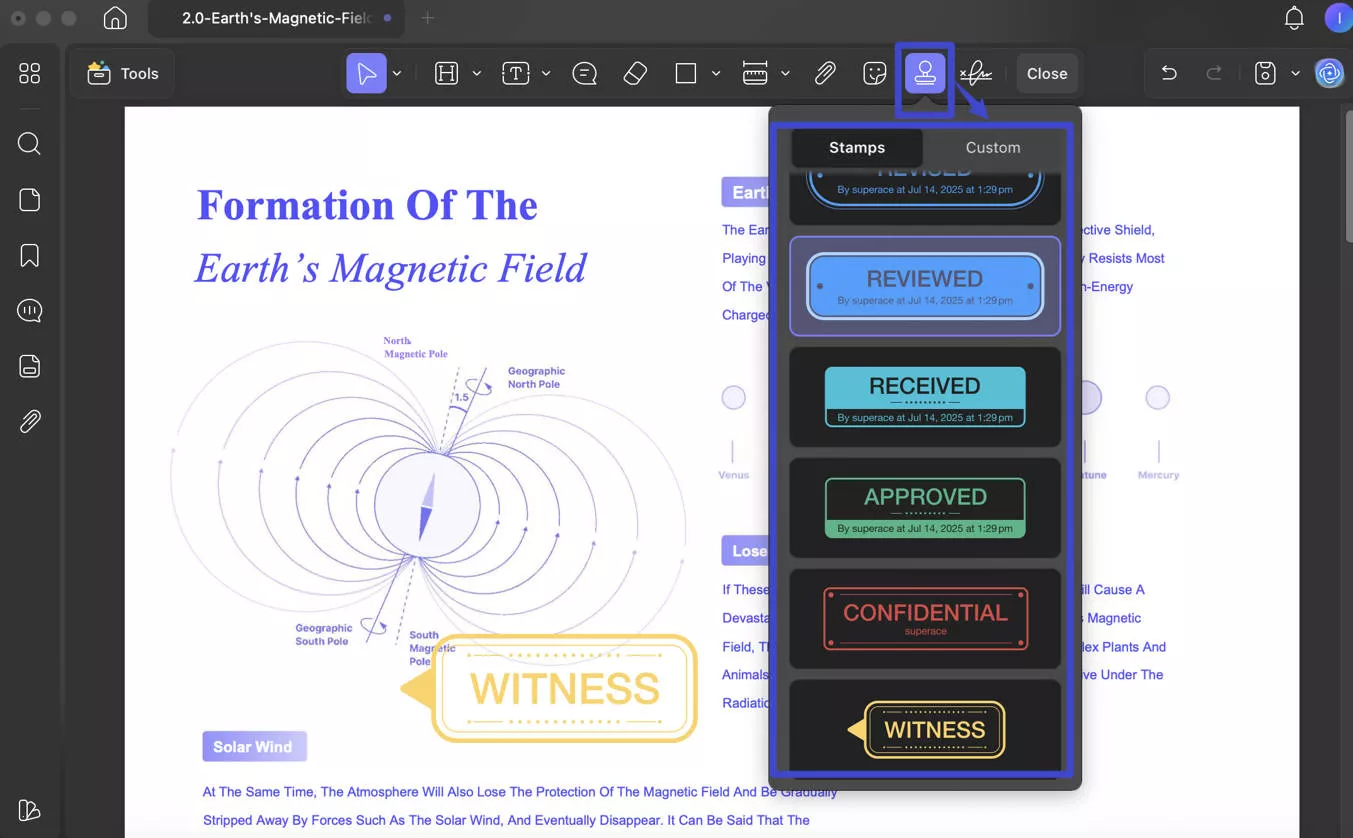
Step 2. Tap the "Comment" icon in "Tools" from the left sidebar and then tap the "Stamps" icon from the top menu bar.
Step 3. Select the stamp you want to insert and then drag and drop it into the right location in the PDF. Once done, save the file.
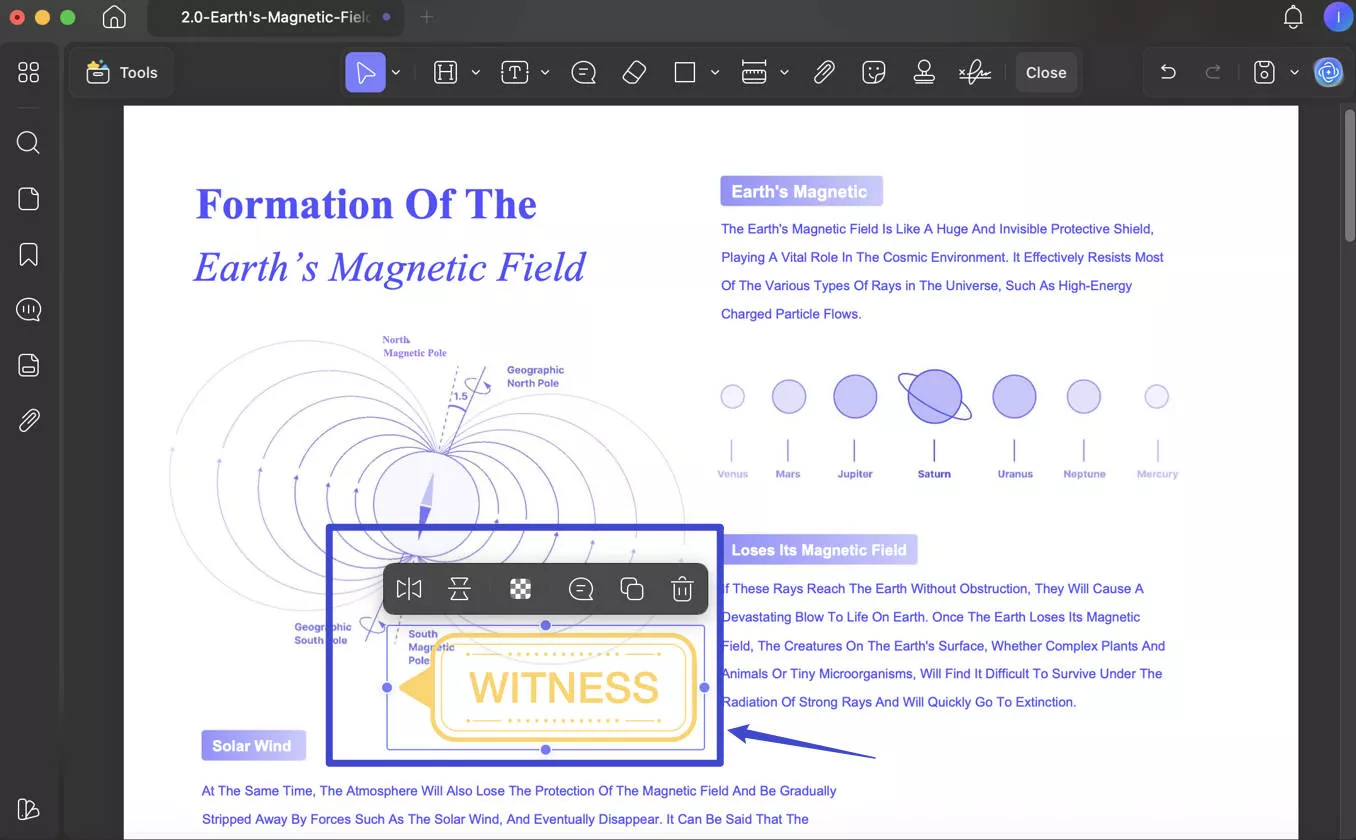
Step 4. Once the stamp is inserted into a PDF, you have the ability to edit it. You can resize it by dragging the purple dashed box, and reposition the stamp by clicking and moving it to the desired location.
This way, the simple yet powerful approach with UPDF allows you to address whether can you date stamp a PDF on Mac and add signature stamp in PDF. So, why think more? Download UPDF and get PDFs stamped right away.
Windows • macOS • iOS • Android 100% secure
Part 2. How to Custom an Image/Text Stamp and Add to Your PDF on Mac
Other than adding pre-designed or common stamps, you can also use UPDF to create an image/text stamp and add it to your PDF on Mac. Here's how to do it:
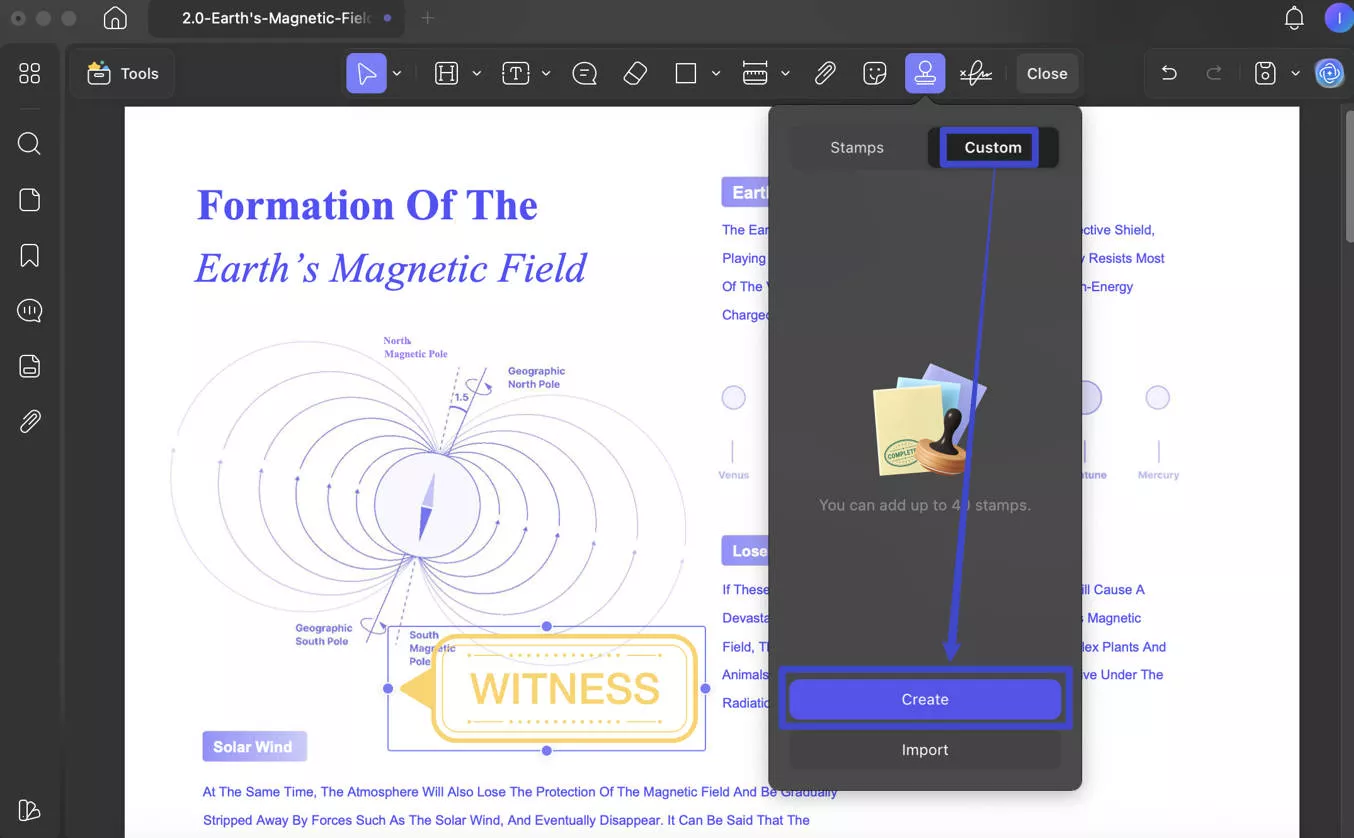
Step 1. Open the PDF with UPDF. Choose "Comment" in " Tools". Click the "Stamps" icon and then tap "Custom".
Step 2. Click the "Import" button to import an image to use as a stamp.
Step 3. Click the "Create" button to create a custom text-based stamp. Once clicked, use the next window to specify the text, style, and stamp design. Once done, click "Create" and place the stamp in the PDF.
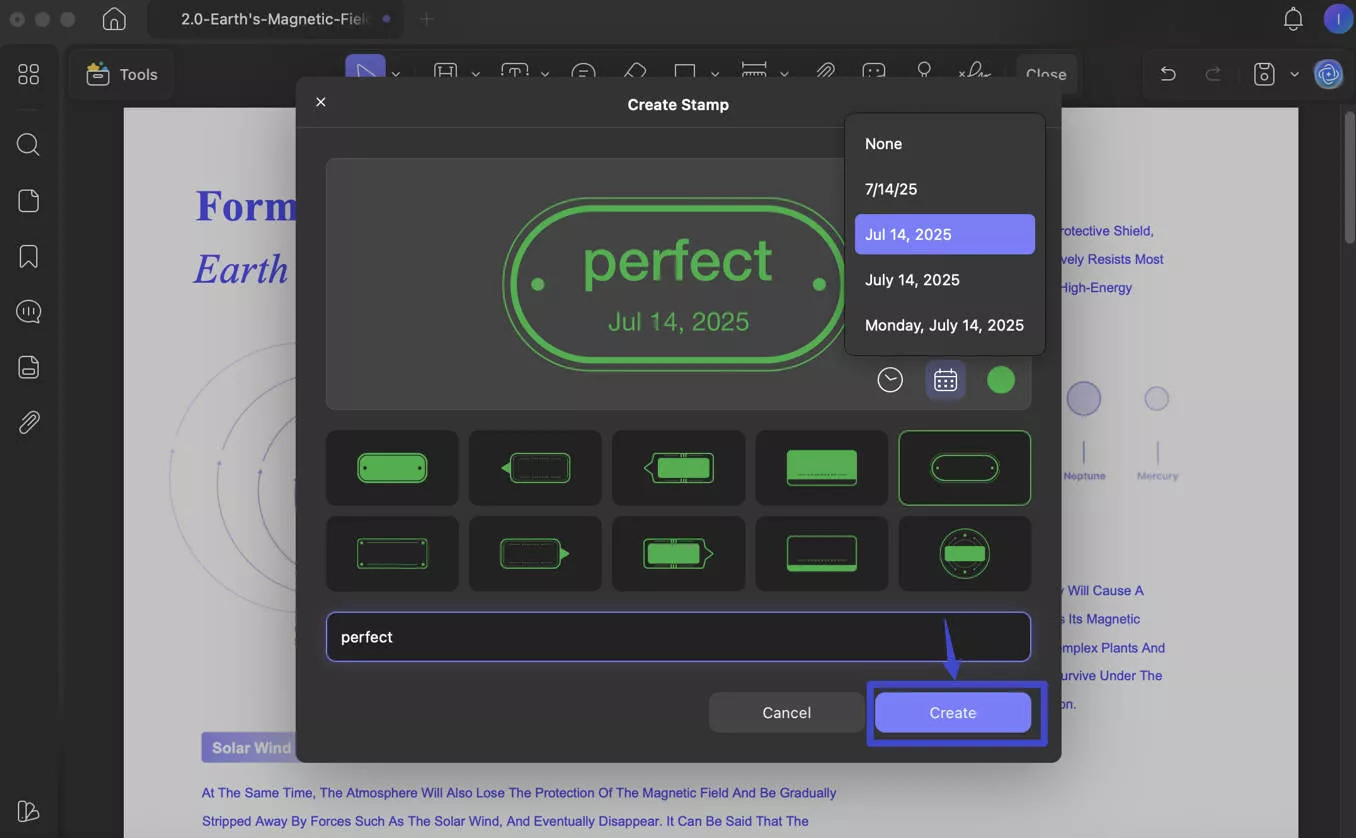
That's it! This way, UPDF again offers a quick way to customize an image/text stamp and add it to your PDF on Mac. In short, UPDF is a one-stop tool to quickly add stamps to PDF on Mac without any hassle.
Part 3. Are There Other Ways to Add Stamps to PDF on Mac?
Besides UPDF, you can also add stamps to PDF on Mac using a few other ways. Following are three other ways to insert stamps to PDF on Mac:
1. Using Preview
Preview is a built-in application on Mac to view a wide range of file formats, including PDF. You can use it to add stamps to PDFs on Mac. However, it requires creating a stamp from scratch. Here's how to use Mac Preview to add stamps:
Step 1. Open the PDF with Preview.
Step 2. Click Markup Toolbar > Shapes and add a box to the PDF.
Step 3. Change the border color of the box.
Step 4. Adjust the thickness of the border, like rough, smooth, etc.
Step 5. Insert the text in the box by double-tapping it.
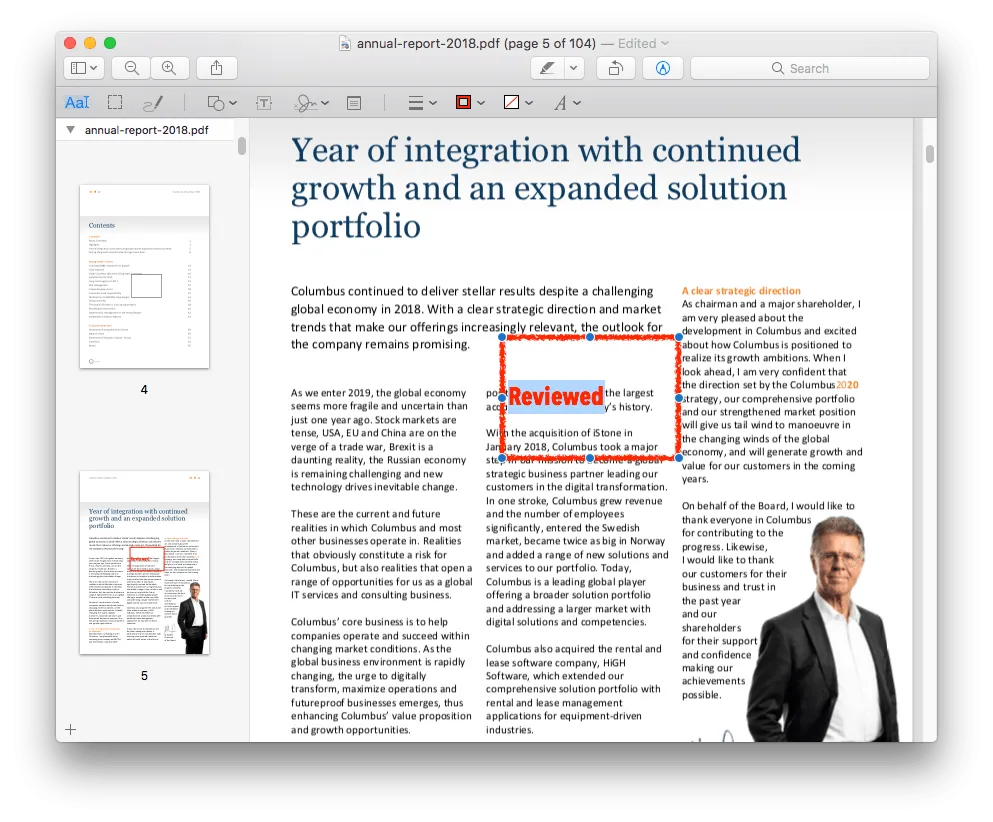
Step 6. Adjust the text style by clicking the text properties icon from the top.
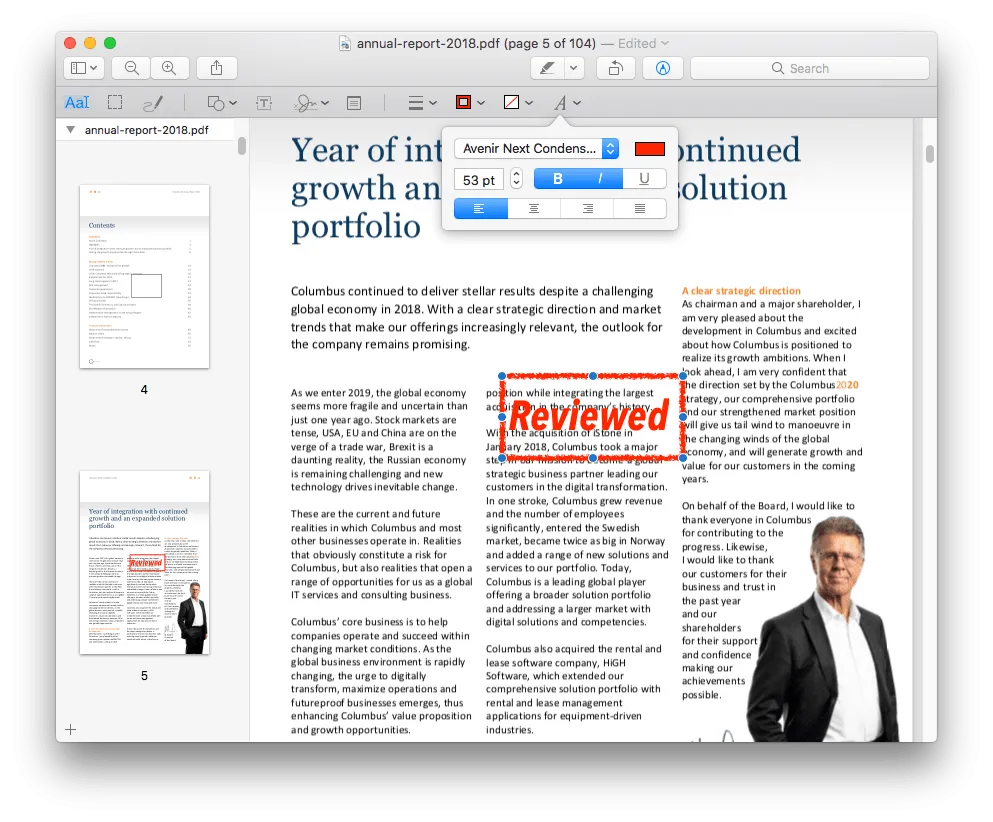
Step 7. Lastly, place the stamp at the right location in the PDF and save the file.
This way, you can use Preview to add a stamp to PDF on Mac. You can also use the above steps to address whether can you date stamp a PDF on Mac. However, there are a few limits to using this method:
- No dedicated stamp feature
- Require manual creation of stamps every time
- No option to save the customized stamp
2. Using Google Docs
Google Docs is a web-based tool to access PDFs. It is also useful in adding stamps to PDFs on Mac. However, it also does not have a built-in feature and requires you to add a stamp as an image. Follow the below steps to learn how to use Google Docs to add a stamp to PDF on Mac:
Step 1. Go to the Google Drive website and sign in to your Google account.
Step 2. Click "New" and upload the PDF.
Step 3. Right-click the uploaded PDF and tap Open with > Google Docs.
Step 4. Once the PDF loads in Google Docs, click Insert > Image > Upload from computer. Afterward, upload the stamp image you want to insert.
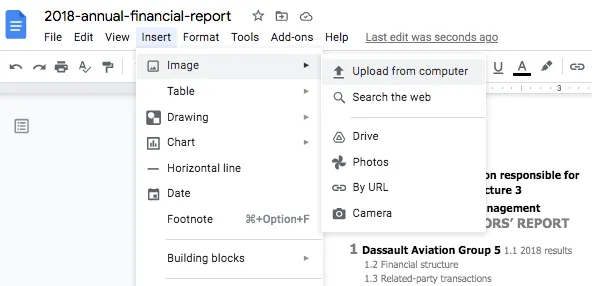
Step 5. Position the stamp in the right location and click File > Download as PDF to save the stamped PDF back to your Mac.
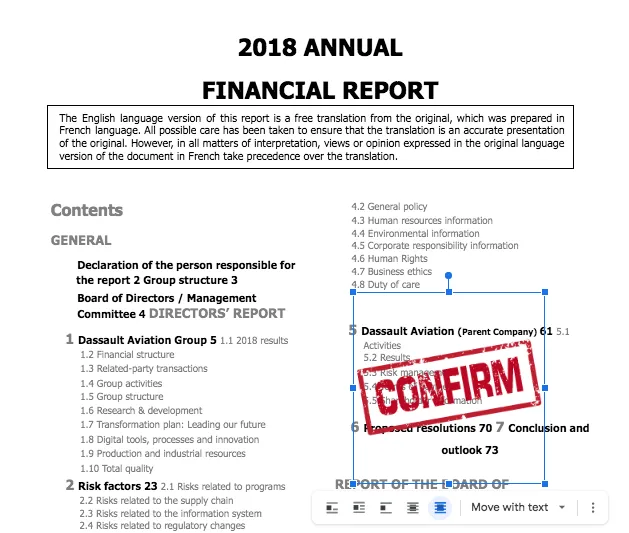
This way, Google Docs offers another intuitive way to add stamps to PDFs on Mac. However, you will face the following limits with this tool:
- No dedicated stamp feature
- Need a pre-designed stamp to insert
- No option to save the customized stamp
- Time-consuming to create a stamp from scratch
3. Using Online Tools
Besides the above two methods, there are many online PDF tools you can use to add stamps to PDFs on Mac. However, most of them don't support adding predefined stamps. You can use them to add stamps as a watermark. Let's take iLovePDF as an example and see how to add stamp to PDF on Mac with iLovePDF:
Step 1. Go to the iLovePDF website and click "Select PDF file" to upload the PDF.
Step 2. Specify the stamp text and customize the text font, position, and other settings. Once done, click the "Add watermark" button.
Step 3. Lastly, download the PDF file.
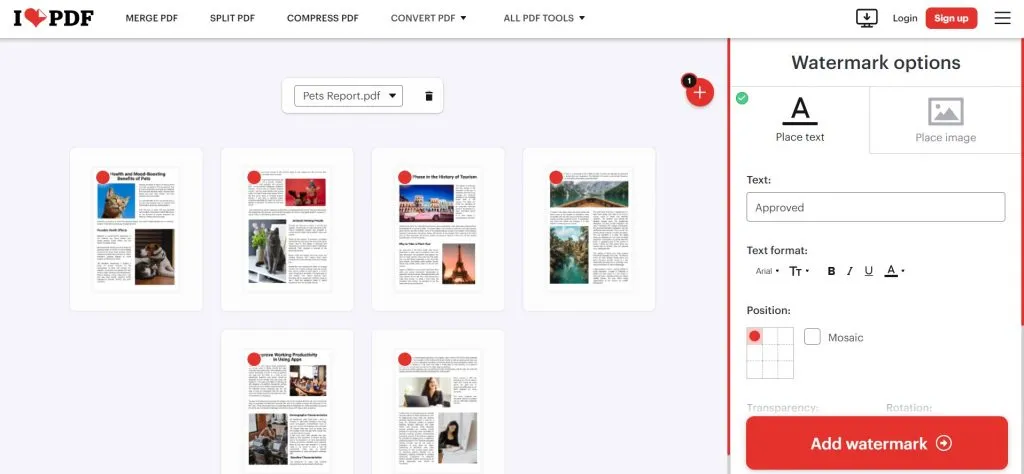
This way, you can use the watermark feature of iLovePDF to add a stamp to PDF on Mac. However, it also comes with a few limits, as follows:
- No dedicated stamp feature
- No option to save the customized stamp
- Time-consuming to create a stamp from scratch
- Unable to customize the stamp style
Conclusion
Adding stamps to PDFs is a popular method for providing remarks on documents. In this guide, we delve into the various ways to add stamps to PDFs on Mac. However, UPDF stands out as the only software offering a dedicated stamp feature. Its user-friendly interface allows for easy addition of different types of stamps, and its intuitive approach to creating customized image/text stamps makes it the premier tool for viewing and stamping PDFs. In conclusion, download UPDF and follow the aforementioned steps to effortlessly add stamps to PDFs on Mac. Additionally, UPDF is currently offering a significant discount, allowing users to unlock all premium features by upgrading to the pro version.
Windows • macOS • iOS • Android 100% secure
 UPDF
UPDF
 UPDF for Windows
 UPDF for Mac
 UPDF for iPhone/iPad
 UPDF for Android
 UPDF AI Online
 UPDF Sign
 Edit PDF
 Annotate PDF
 Create PDF
 PDF Form
 Edit links
 Convert PDF
 OCR
OCR PDF to Word
 PDF to Image
 PDF to Excel
 Organize PDF
 Merge PDF
 Split PDF
 Crop PDF
 Rotate PDF
 Protect PDF
 Sign PDF
 Redact PDF
 Sanitize PDF
 Remove Security
 Read PDF
 UPDF Cloud
 Compress PDF
 Print PDF
 Batch Process
 About UPDF AI
 UPDF AI Solutions
 AI User Guide
 FAQ about UPDF AI
 Summarize PDF
 Translate PDF
 Chat with PDF
 Chat with AI
 Chat with image
 PDF to Mind Map
 Explain PDF
 Scholar Research
 Paper Search
 AI Proofreader
 AI Writer
 AI Homework Helper
 AI Quiz Generator
 AI Math Solver
 PDF to Word
 PDF to Excel
 PDF to PowerPoint
 User Guide
 UPDF Tricks
 FAQs
FAQs UPDF Reviews
 Download Center
 Blog
Blog Newsroom
 Tech Spec
 Updates
 UPDF vs. Adobe Acrobat
 UPDF vs. Foxit
 UPDF vs. PDF Expert



 Grace Curry
 Enrica Taylor
 Enola Davis
