 UPDF for Windows
 UPDF for Mac
 UPDF for iPhone/iPad
 UPDF for Android
 Nomostar
 UPDF AI Online
 UPDF Sign
 IvyCraft
 Edit PDF
 Annotate PDF
 Create PDF
 PDF Form
 Edit links
 Convert PDF
 OCR
OCR PDF to Word
 PDF to Image
 PDF to Excel
 Organize PDF
 Merge PDF
 Split PDF
 Crop PDF
 Rotate PDF
 Protect PDF
 Sign PDF
 Redact PDF
 Sanitize PDF
 Remove Security
 Read PDF
 UPDF Cloud
 Compress PDF
 Print PDF
 Batch Process
 About UPDF AI
 UPDF AI Solutions
 AI User Guide
 FAQ about UPDF AI
 Summarize PDF
 Translate PDF
 Chat with PDF
 Chat with AI
 Chat with image
 PDF to Mind Map
 Explain PDF
 PDF AI Tools
 Image AI Tools
 AI Chat Tools
 AI Writing Tools
 AI Study Tools
 AI Working Tools
 Other AI Tools
 AI Bookmark Generation
 AI Bookmark Summary
 AI Watermark Generation
 AI Background Generation
 AI Sticker Generation
 AI Stamp Generation
 AI Editing Suite
 UPDF Copilot
 AI Page Management
 AI Semantic Search
 PDF to Word
 PDF to Excel
 PDF to PowerPoint
 User Guide
 UPDF Tricks
 FAQs
FAQs UPDF Reviews
 Download Center
 Blog
Blog Newsroom
 Tech Spec
 Updates
 UPDF vs. Adobe Acrobat
 UPDF vs. Foxit
 UPDF vs. PDF Expert
Managing multiple PDF files can be frustrating, especially when you need to make the same changes across all of them. Whether it’s adding watermarks, inserting Bates numbers, or updating headers and footers, doing it one by one is time-consuming and inefficient.
This is where UPDF comes in as a powerful solution. With its batch edit PDFs feature, you can apply changes to multiple PDFs at once, saving time and effort while keeping your documents consistent.
I will now show you step-by-step how to batch edit PDF files using UPDF. From adding and removing elements in bulk to finding and replacing text across multiple files, you’ll learn everything you need to streamline your workflow. Just download UPDF and follow the guide below.
Windows • macOS • iOS • Android 100% secure
Part 1. How to Batch Add Bates Numbering, Watermark, Headers and Footers, Pages, and Backgrounds?
In case you often need to apply changes like adding Bates numbering, watermarks, headers, and footers, pages, or backgrounds to multiple PDFs, doing it manually can waste hours. UPDF makes it extremely easy to batch add all these elements in just a few clicks.
The software ensures consistency across all your documents while saving you valuable time. So, download UPDF today and make your PDF management easier with its amazing features. Below, I’ll walk you through step-by-step guides for each batch edit PDF feature.
Batch Add Bates Numbering in PDFs
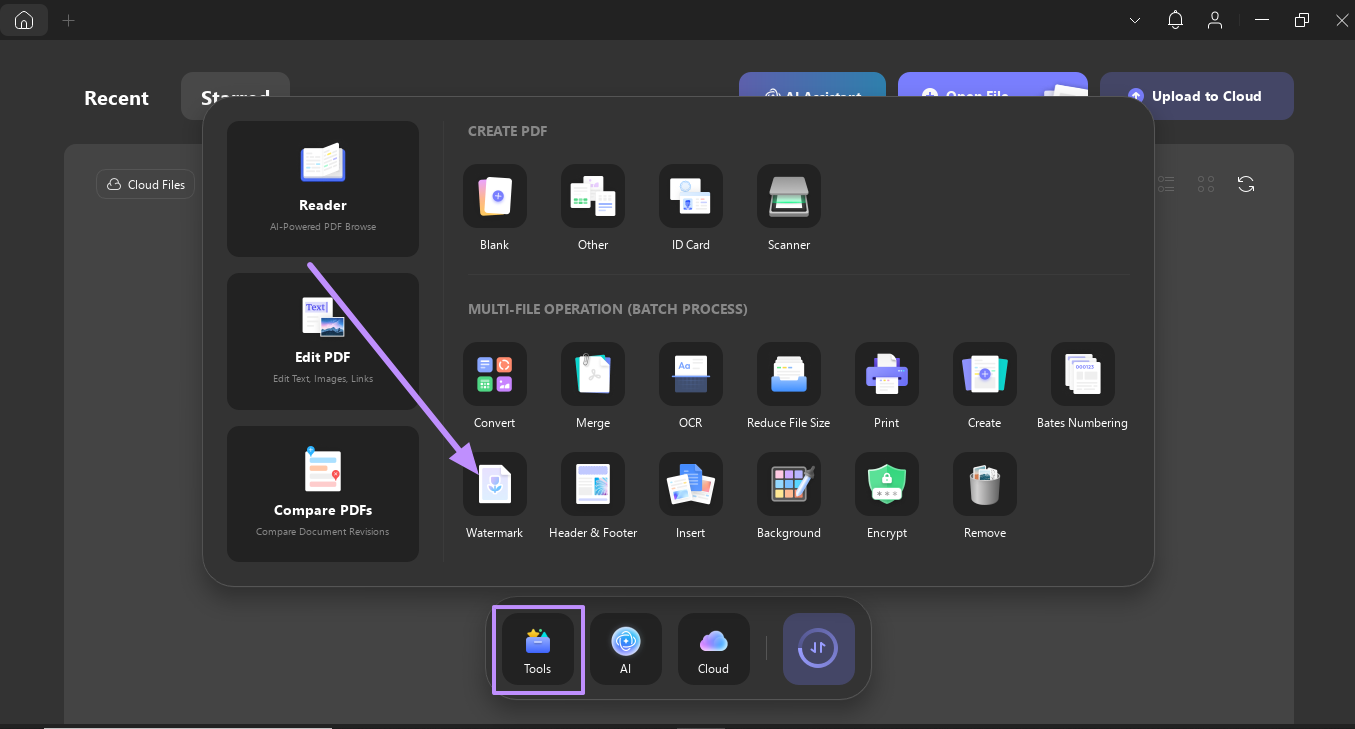
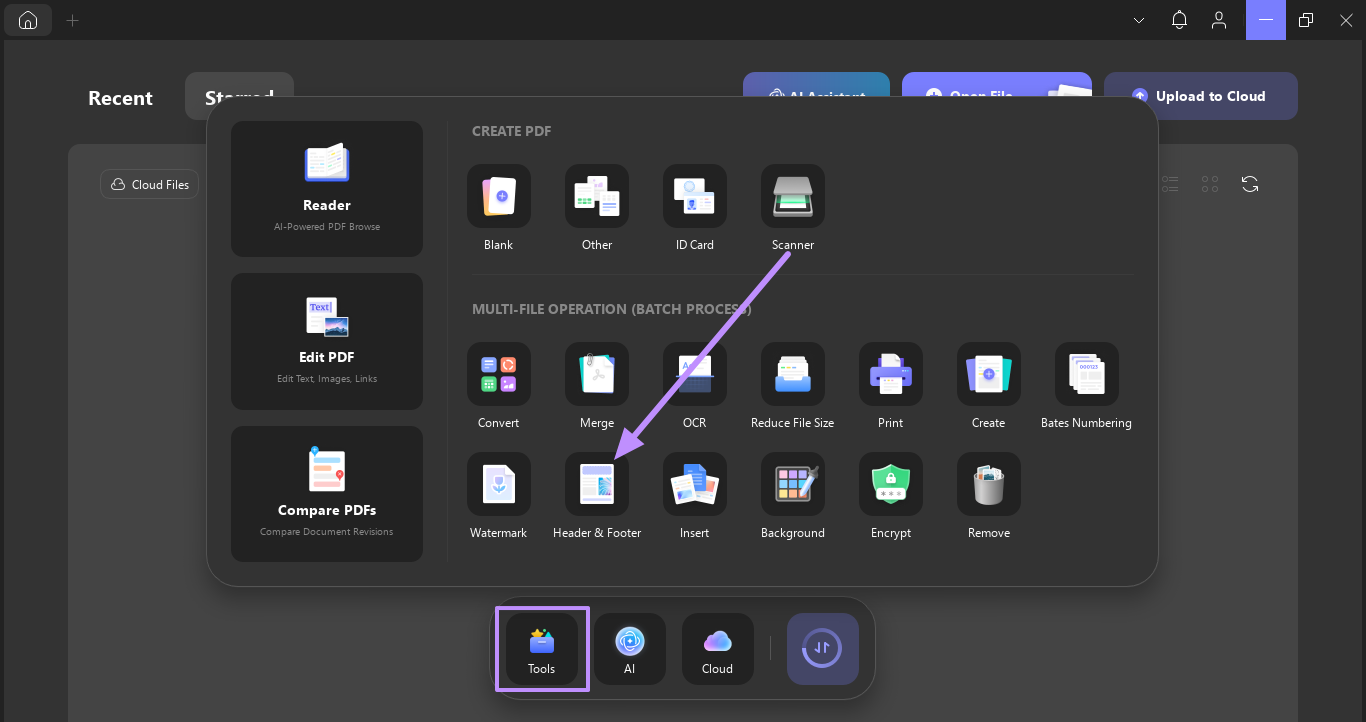
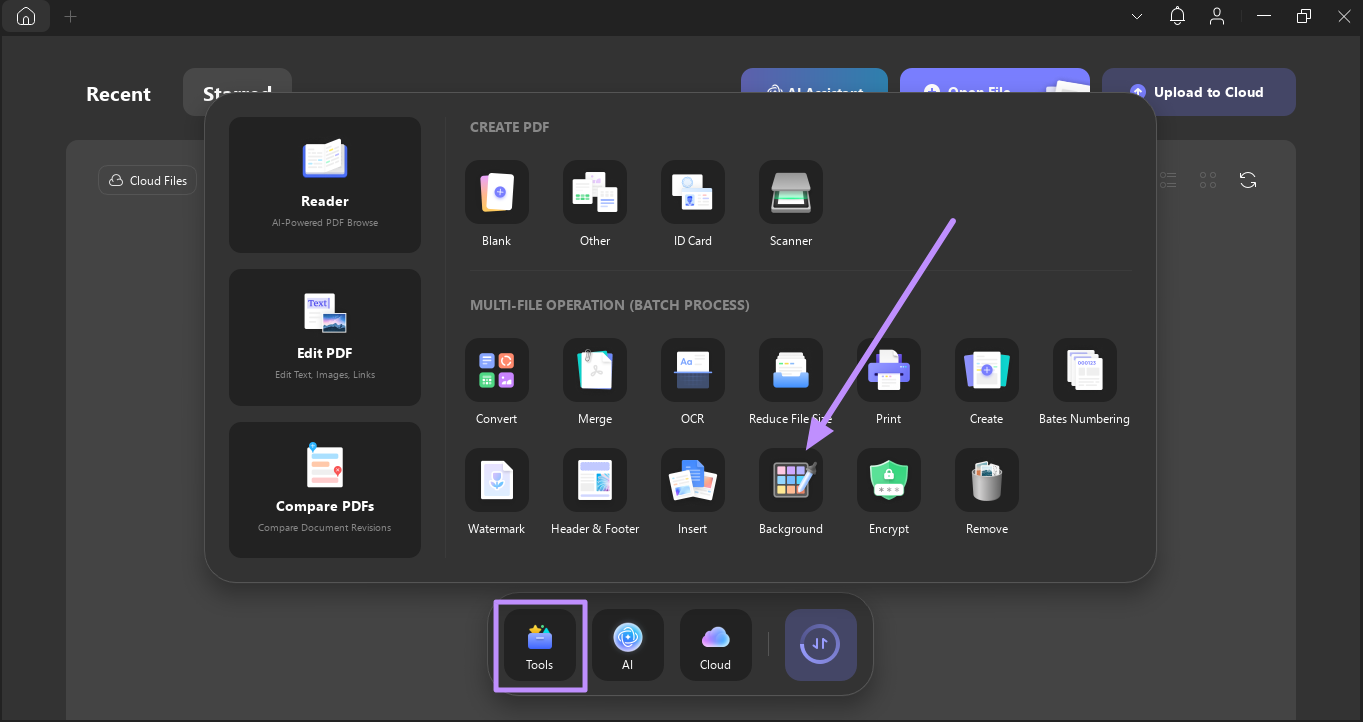
Step 1. First, launch UPDF software on your PC and access the Tools tab. From the available tools, tap on the Bates Numbering option.

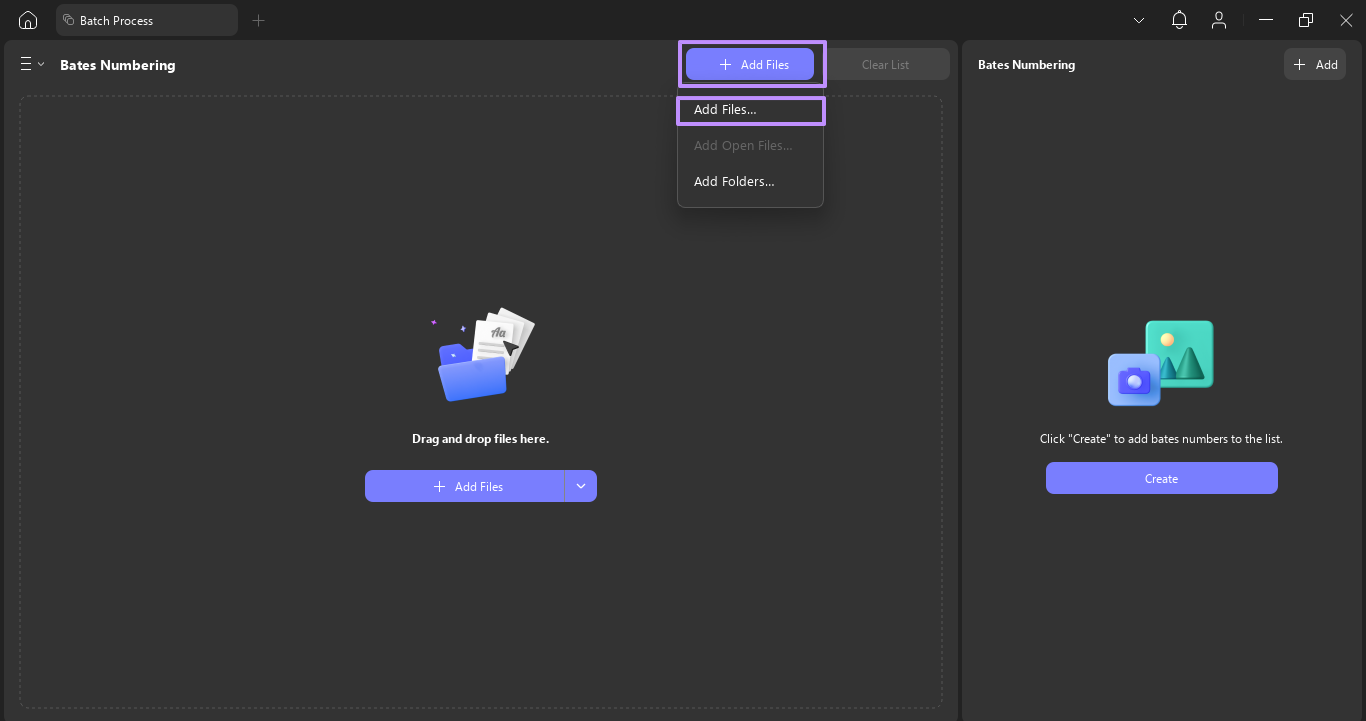
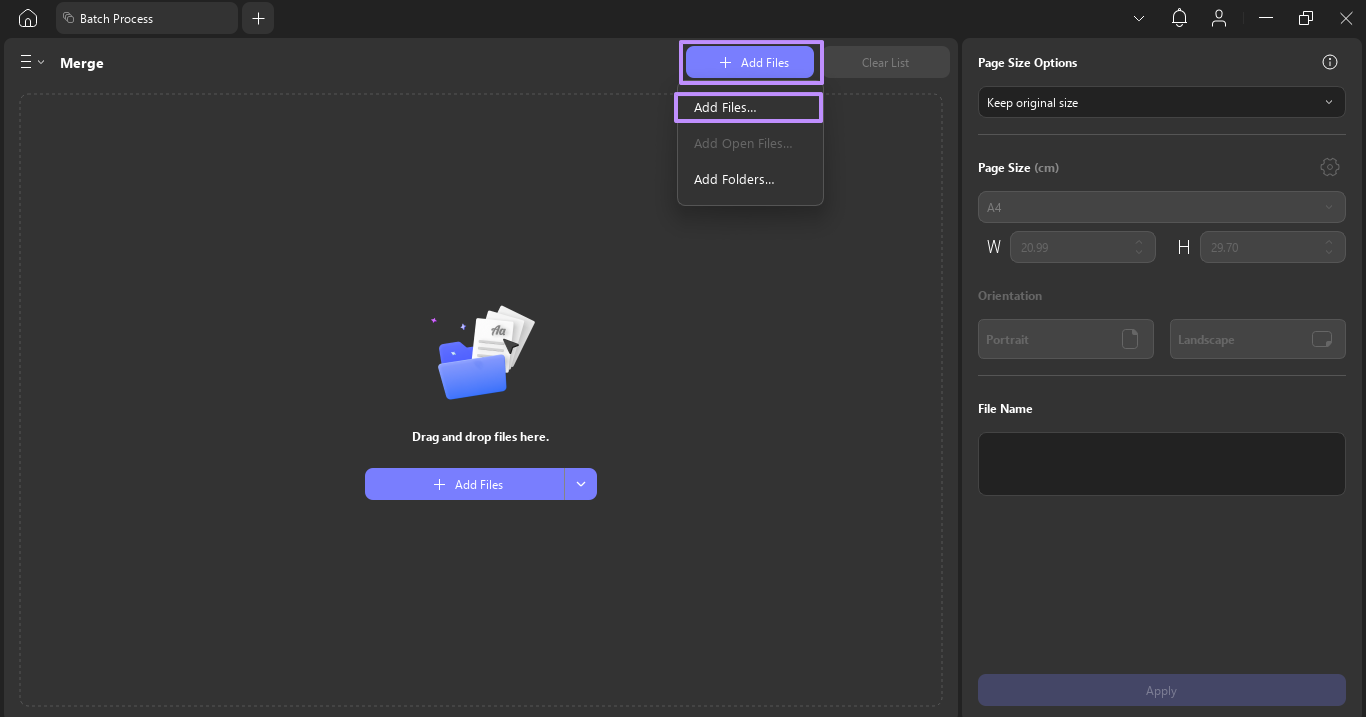
Step 2. In the following Bates Numbering window, click on the +Add Files button and pick the Add Files option from the pop-up menu.
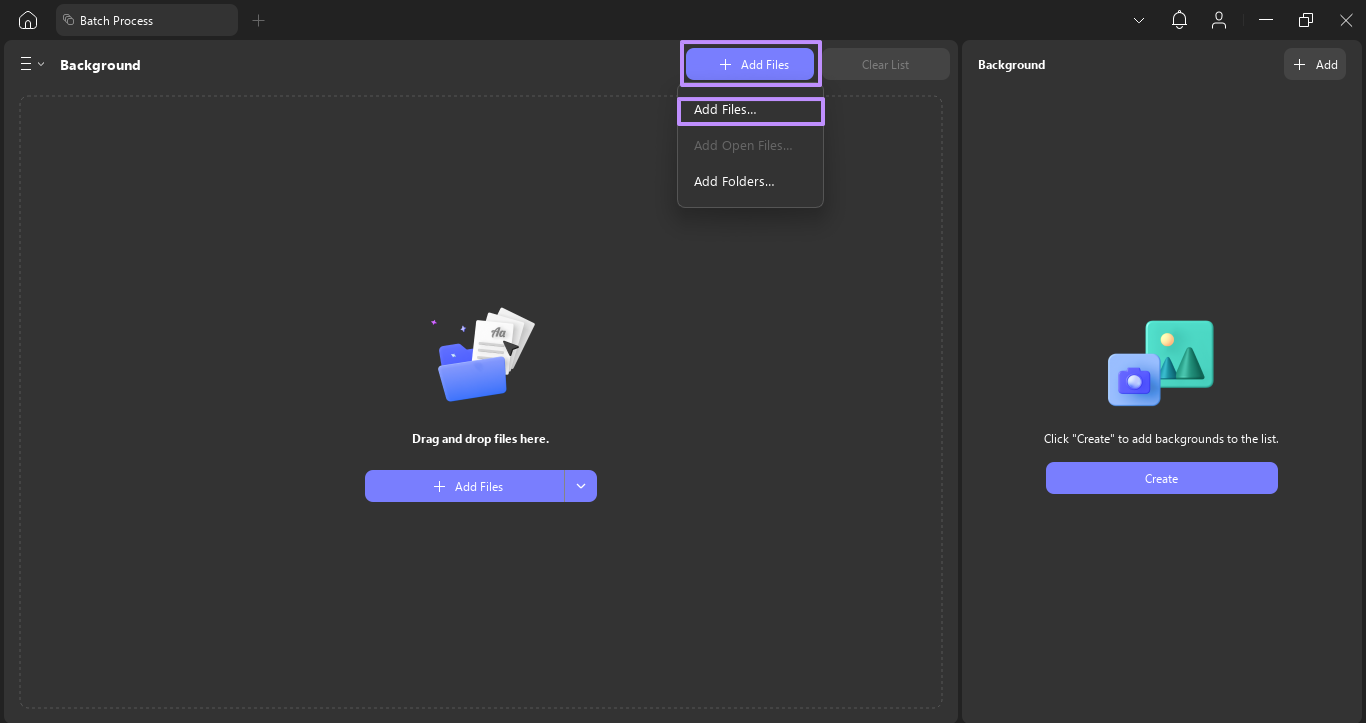
Step 3. After adding the files, head to the right-side panel and tap Create.

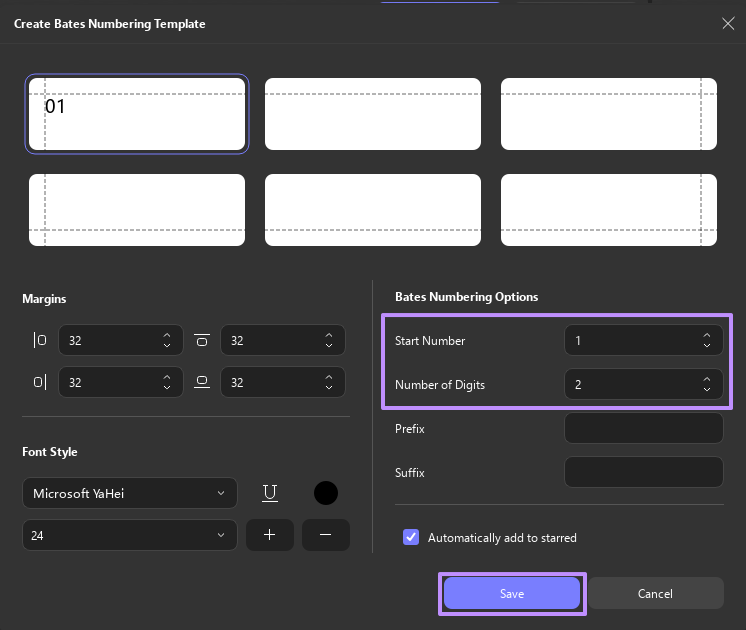
Step 4. Now, specify the Start Number and Number of Digits under the Bates Numbering Options. Once you do that, hit the Save button.
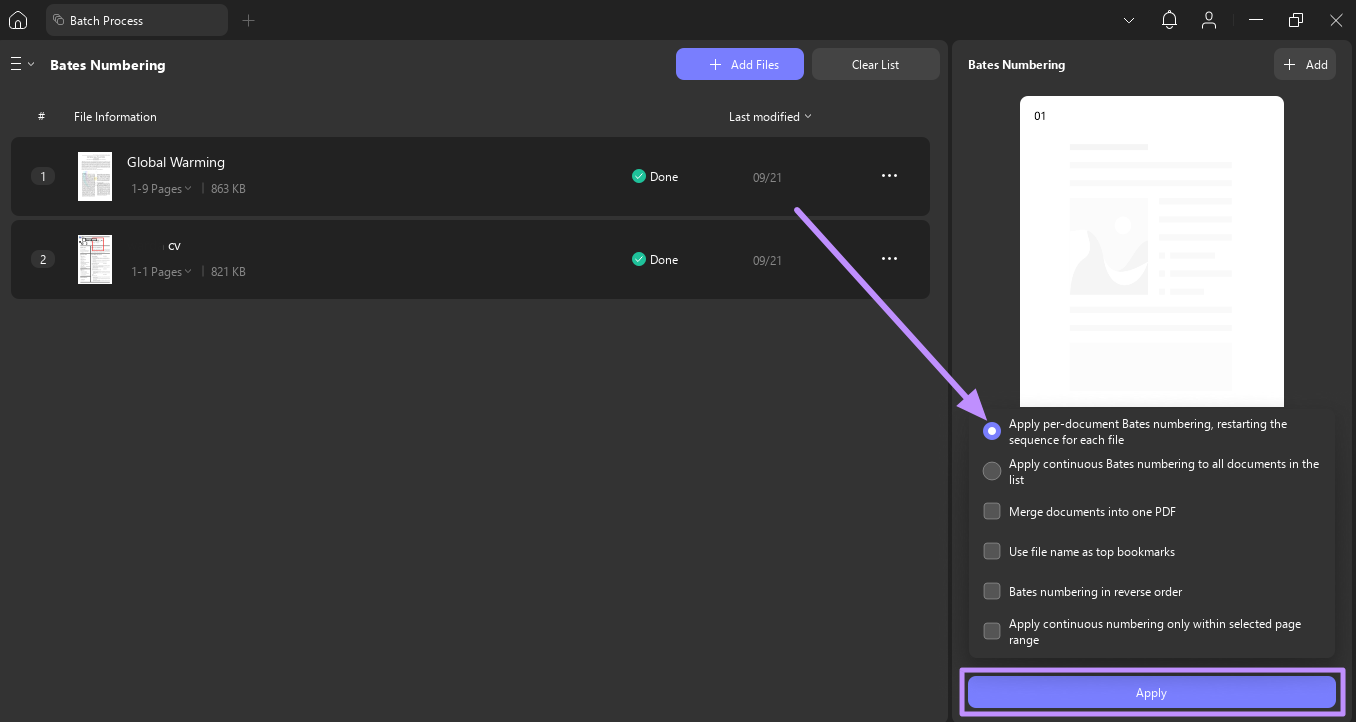
Step 5. As you save the Bates numbering, toggle the Apply per-document Bates numbering, restarting the sequence for each file option. After that, press the Apply button to save both PDFs with Bates numbering.
Batch Add Watermark to PDFs
Step 1. Open the Tools section and choose the Watermark option from the available tools.
Step 2. Moving on, hit the +Add Files button and select the Add Files option to add your desired PDF files for batch watermark addition.
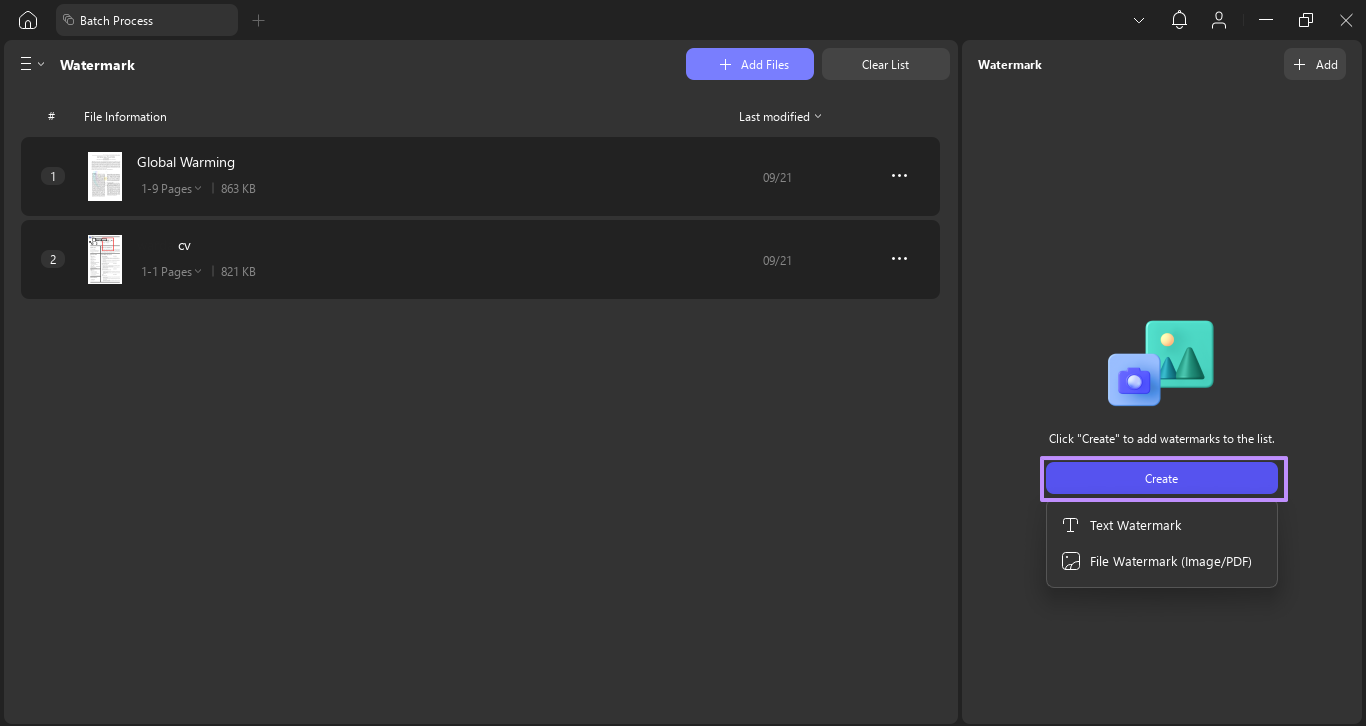
Step 3. As you import the files, hit the Create button and pick an option you like for applying watermarks. Let’s say you’ve chosen the Text watermark.

Step 4. In the Create Watermark Template, add text for the watermark, and you can also change its font style and color. After that, press the Settings button and adjust the Size, Spacing, and Layer of the watermark. Once done with that, hit the Save button to finalize the changes.

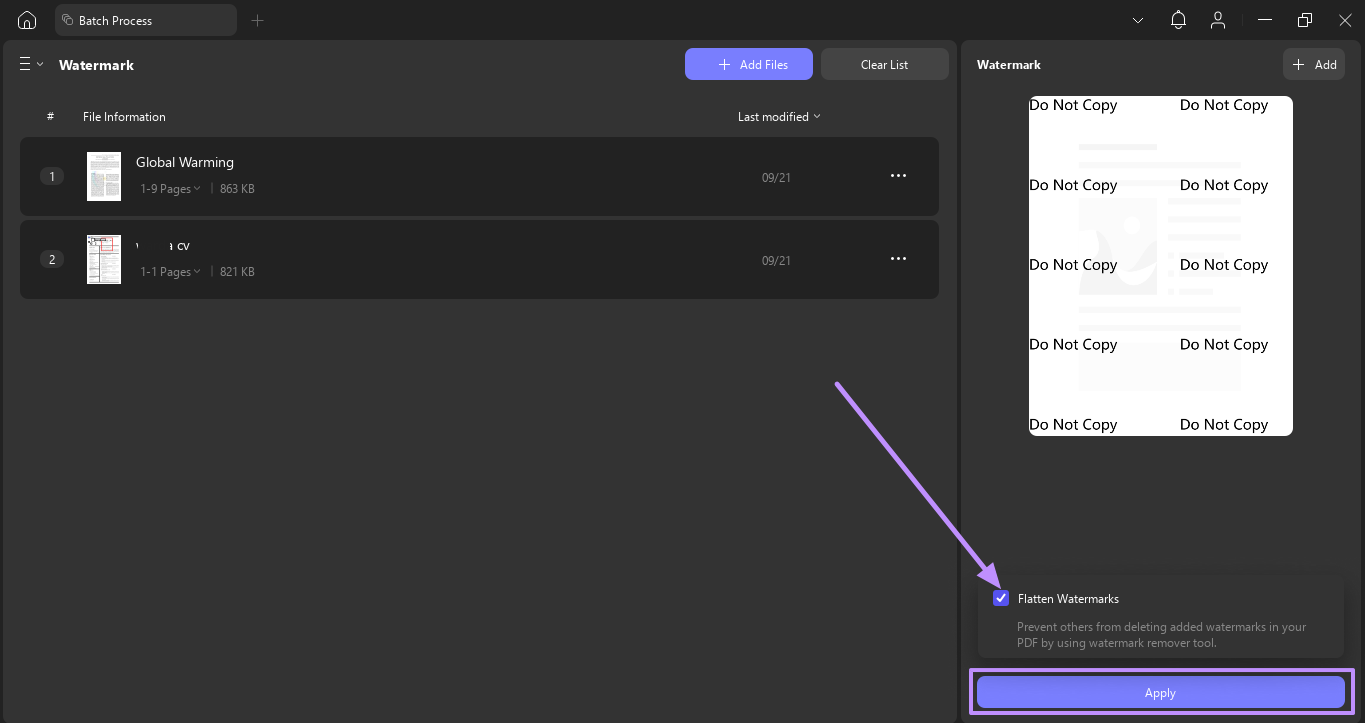
Step 5. After you add the watermark, check the Flatten Watermarks box and select the Apply option to save the files with the watermark.
Batch Add Headers and Footers
Step 1. After heading to the Tools tab, pick the Header & Header feature to access the batch process window.
Step 2. Afterward, press the +Add Files button and pick the Add Files option from the small menu that appears.
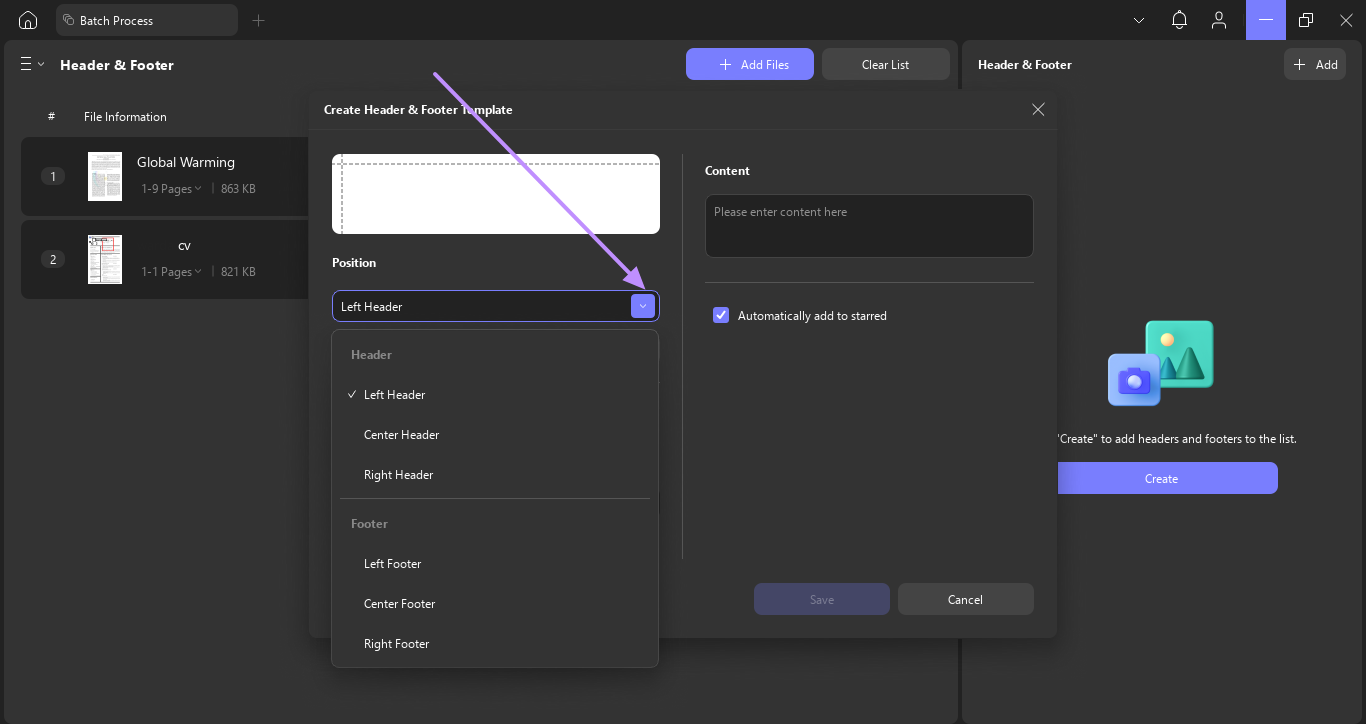
Step 3. When you import the PDFs, tap on the Create button and choose a header or footer style, such as Text.
Step 4. In the Create Header & Footer Template, extend the Position drop-down menu and select footer or header.
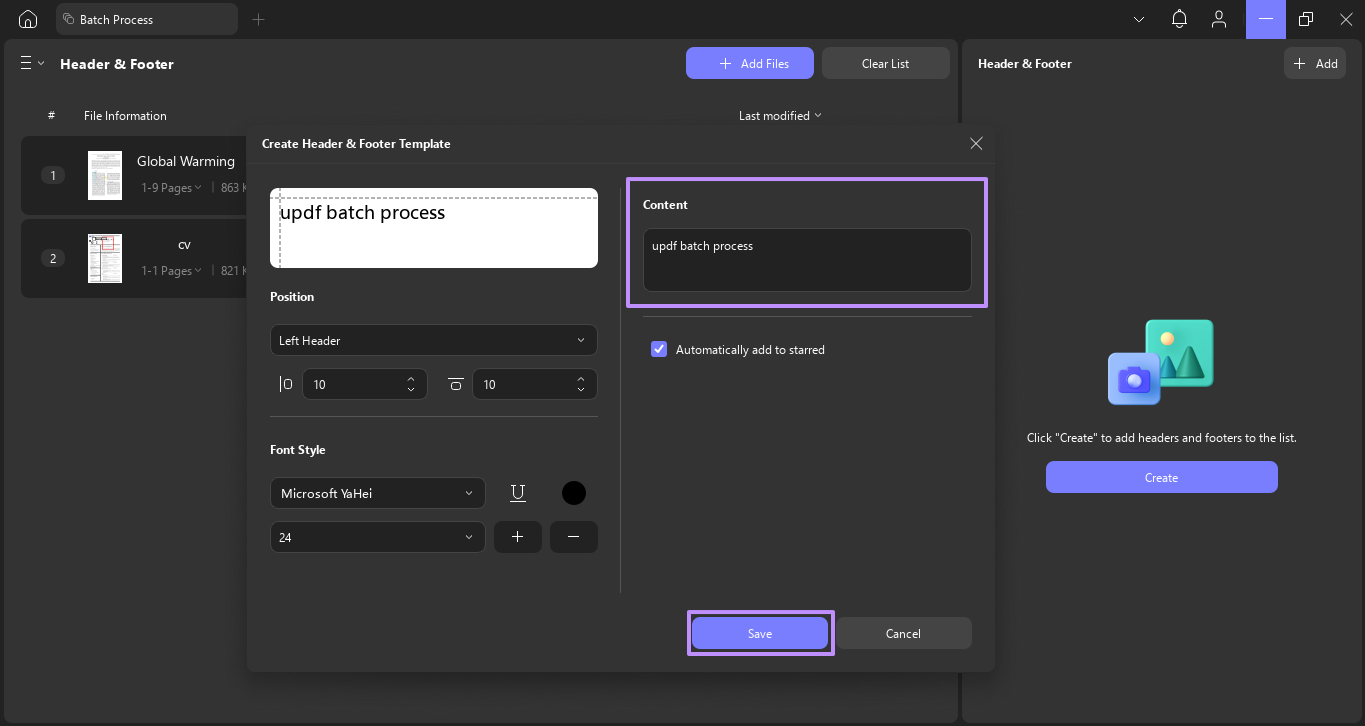
Step 5. Now, enter the text for the header & Footer under the Content box. When done adding the content, press the Save button.
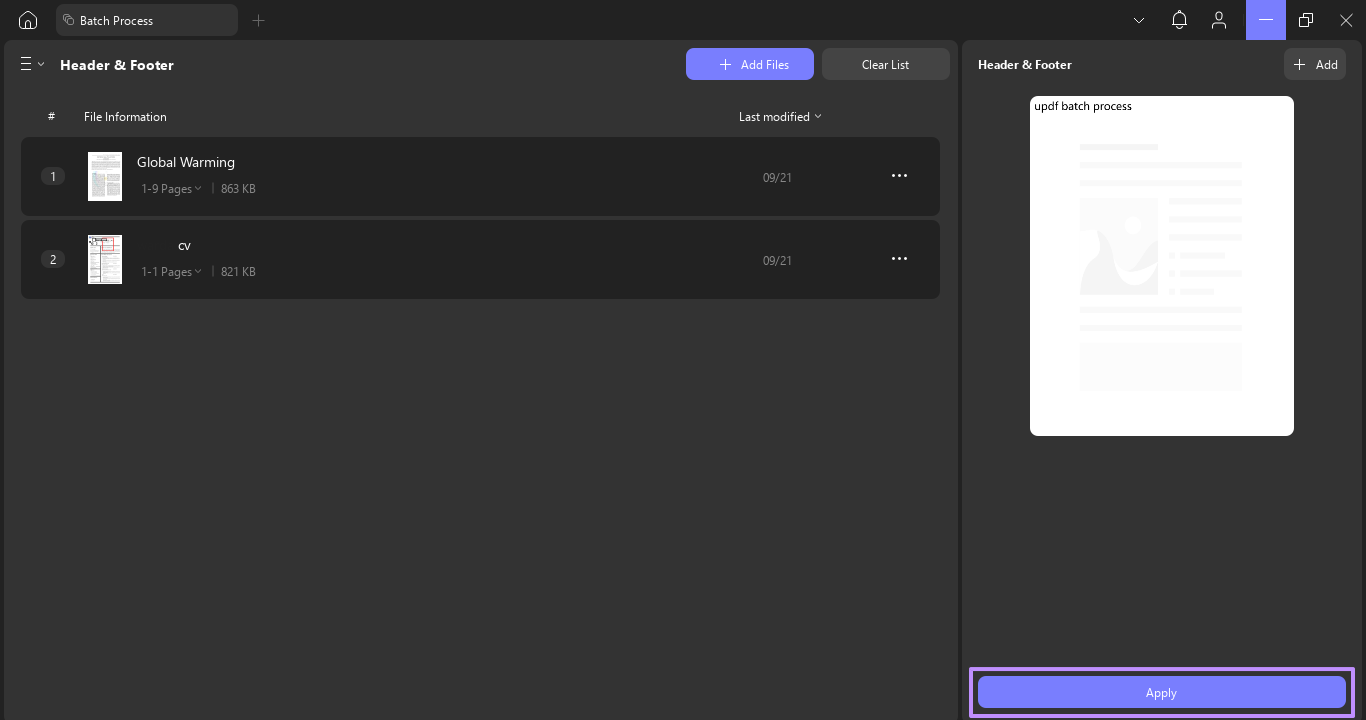
Step 6. Once you save the content, hit the Apply button to save the PDFs with header & footer in your desired folder.
Batch Add Pages to PDFs
Step 1. Open the Tools section on UPDF’s main interface and select the Insert feature.
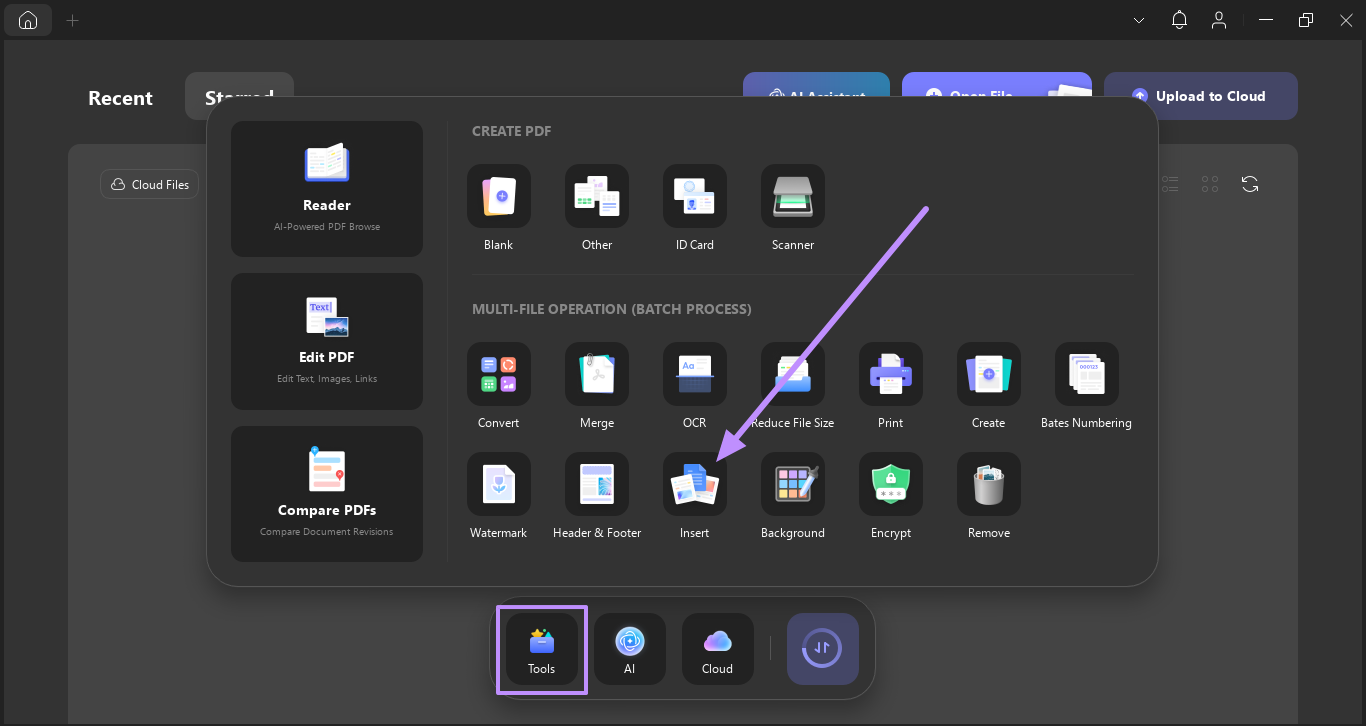
Step 2. Now, click on the +Add Files button and choose the Add Files option.
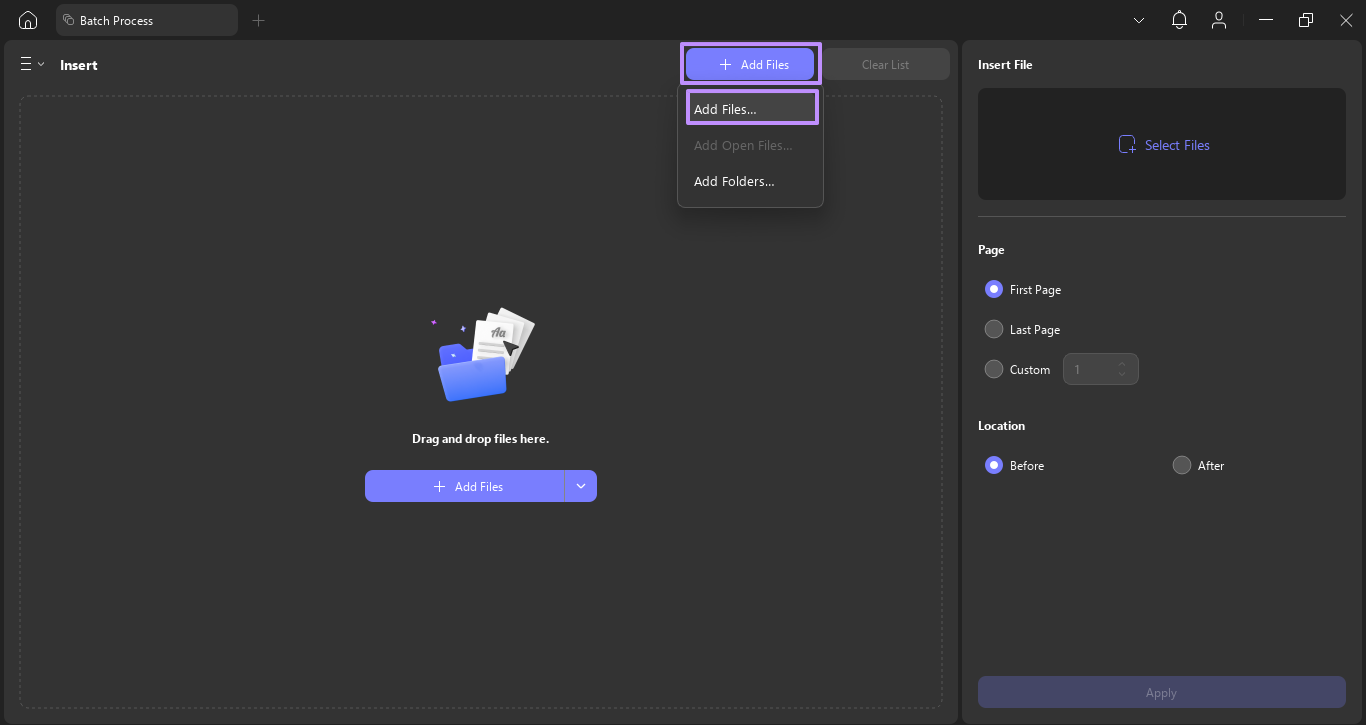
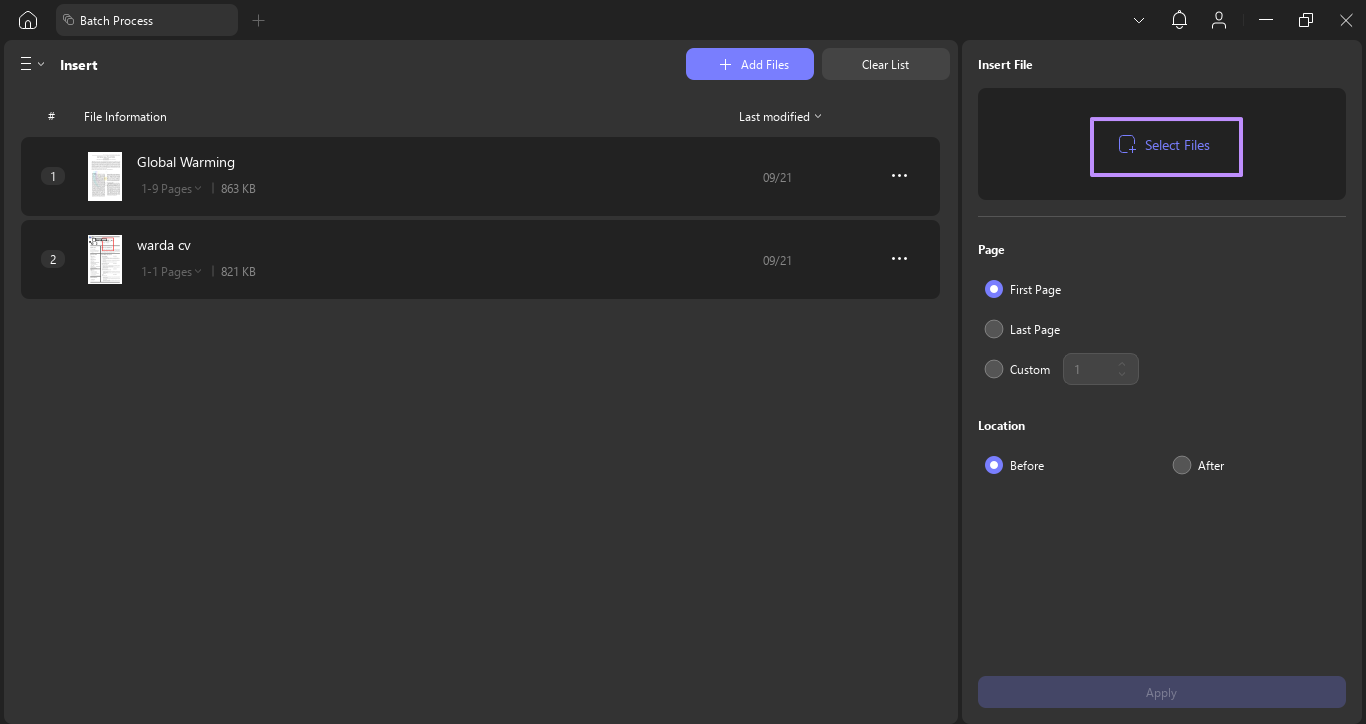
Step 3. In the Insert window, click on the Select Files button and choose the PDF or image file you want to insert as a page into the selected PDFs.
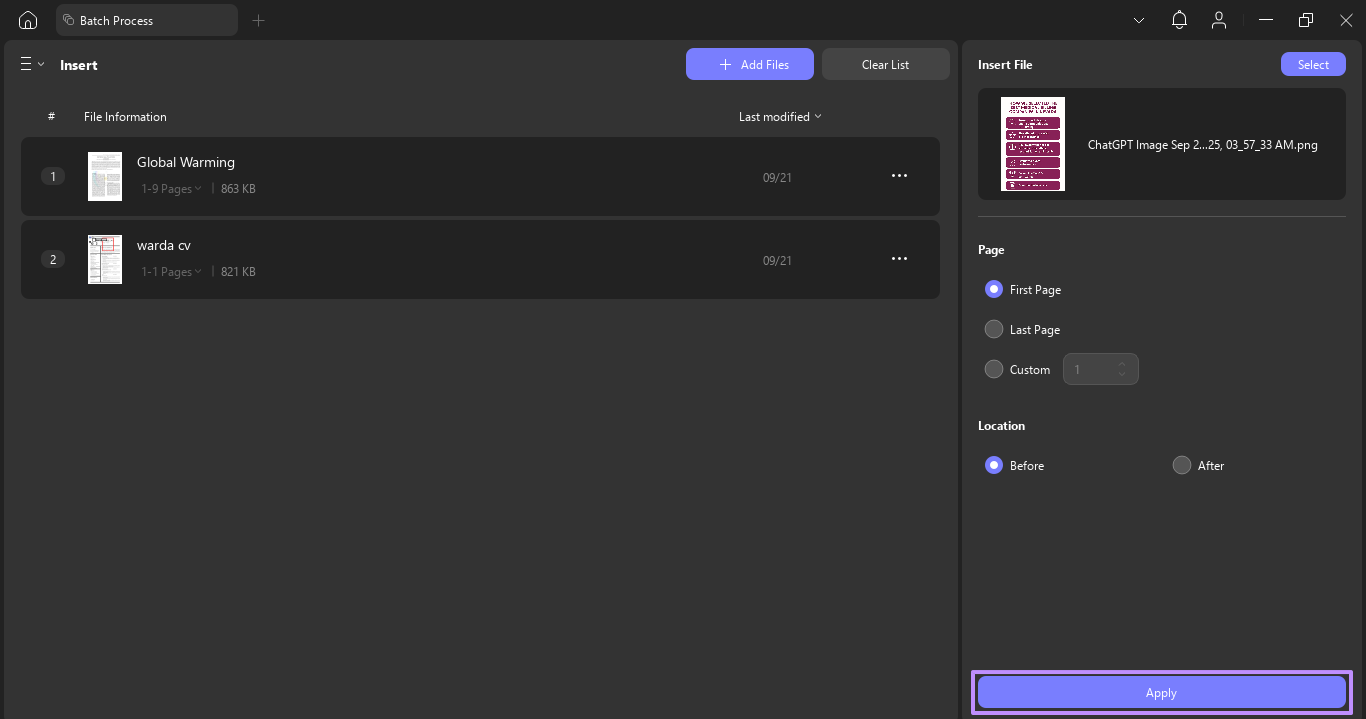
Step 4. After selecting the files, adjust the placement settings, such as inserting pages before or after specific pages in your documents. At last, hit the Apply button to confirm.
Batch Add Backgrounds to PDFs
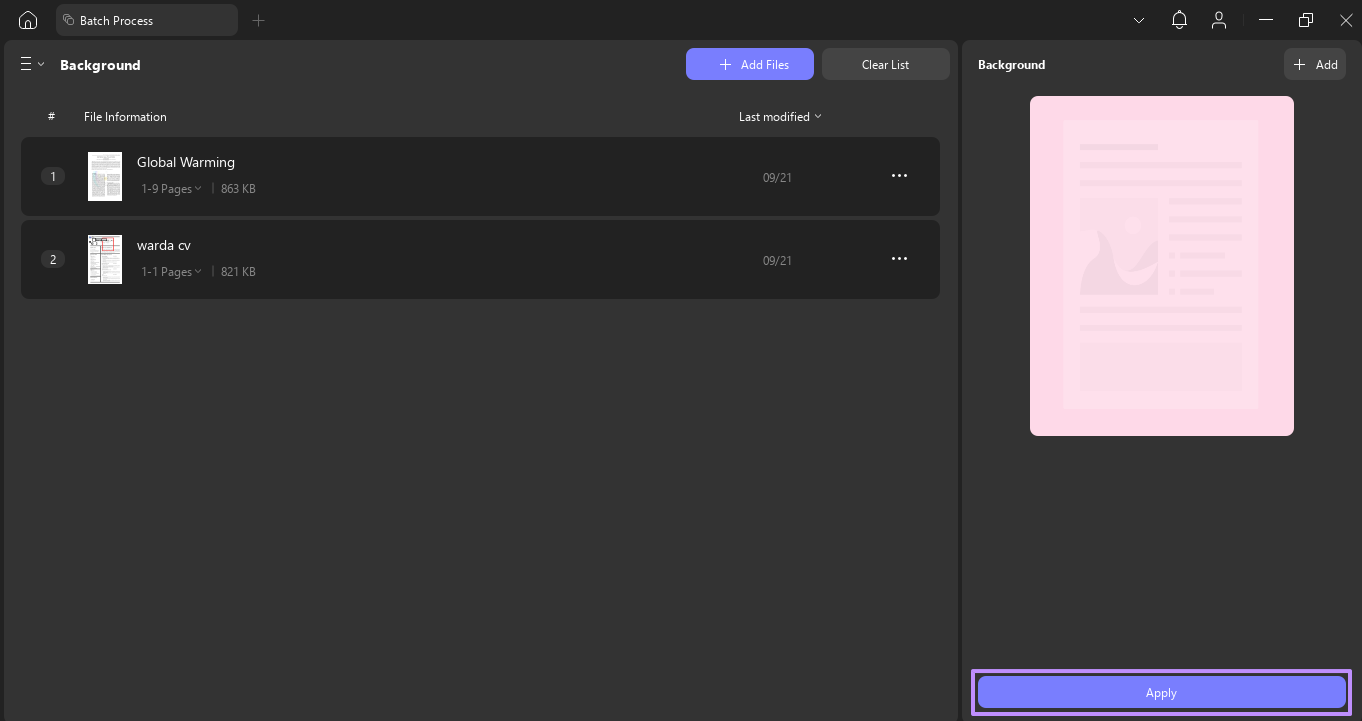
Step 1. In the Tools section, pick the Background option to move to the next window.
Step 2. Now, hit the +Add Files button and choose the Add Files option to import the files you want to add a background to.
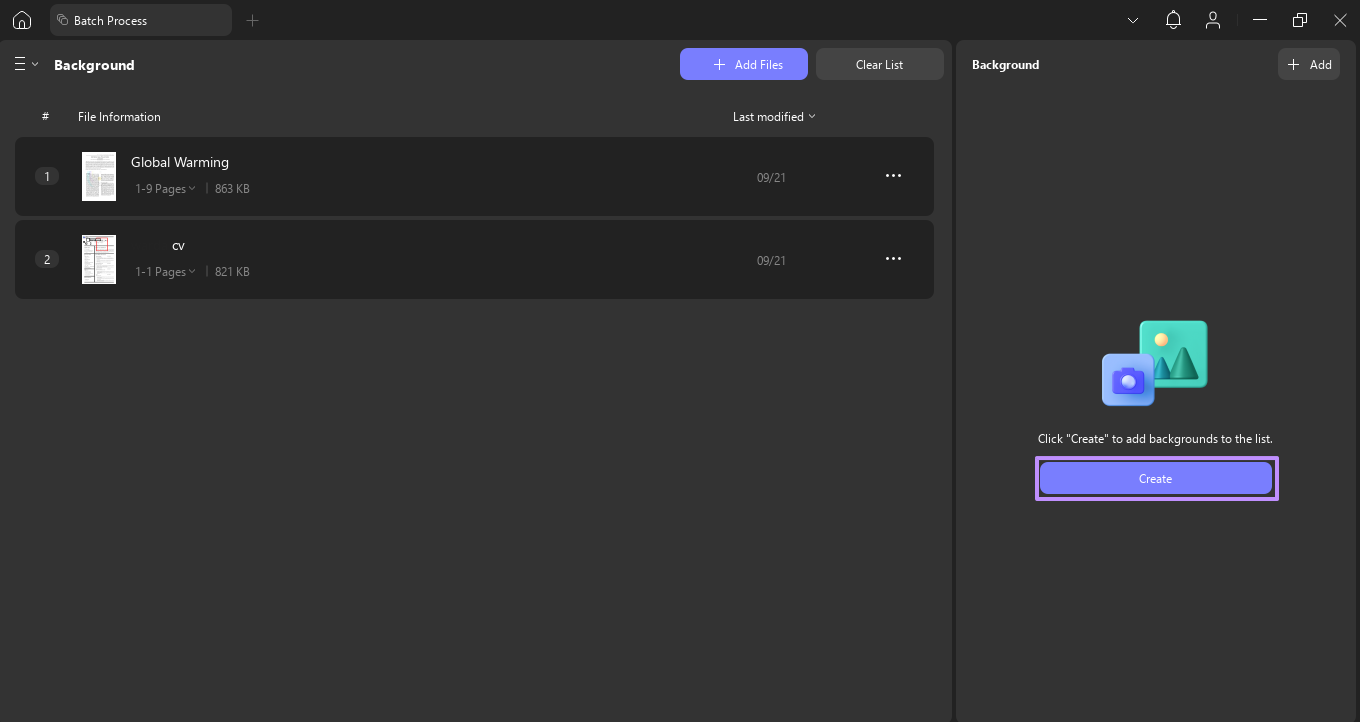
Step 3. After importing the files, press the Create button to access the Create Background Template.
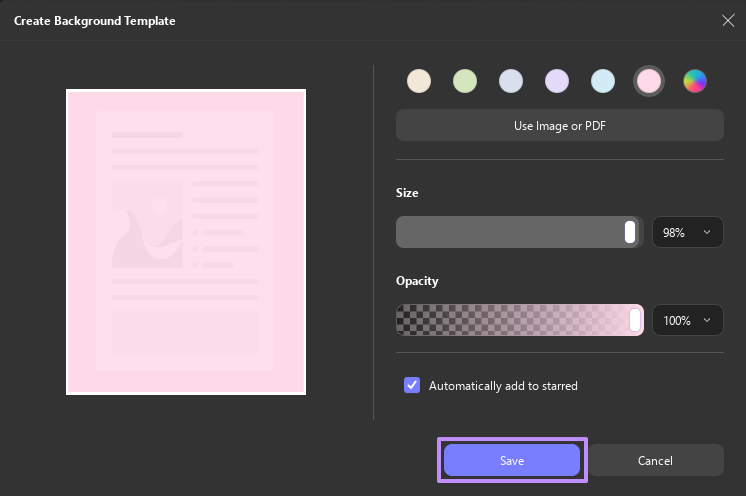
Step 4. Move on by choosing your desired color, Size, and Opacity for the background. Upon doing so, hit the Save button.
Step 5. After you choose the background, press the Apply button on the right-side panel to save the PDFs with backgrounds.
Part 2. How to Batch Remove Watermarks, Markups, and More?
Sometimes, instead of adding elements, you might need to remove unwanted content from multiple PDFs. Doing this file by file can be time-consuming and lead to errors. Luckily, UPDF makes it effortless to batch remove different elements in one go. You can also batch remove the following elements with the batch edit PDF feature within UPDF:
- Watermarks
- Backgrounds
- Headers & Footers
- Bates Numbering
- Text Markups
- Measurements
- Signatures & Stamps
- Form Fields
- Digital Signatures
Therefore, you must download UPDF and use its Batch Remove feature to delete multiple elements within your PDFs simultaneously. Follow the provided step guide to remove elements from multiple files at once using UPDF’s Batch Remove feature.
Windows • macOS • iOS • Android 100% secure
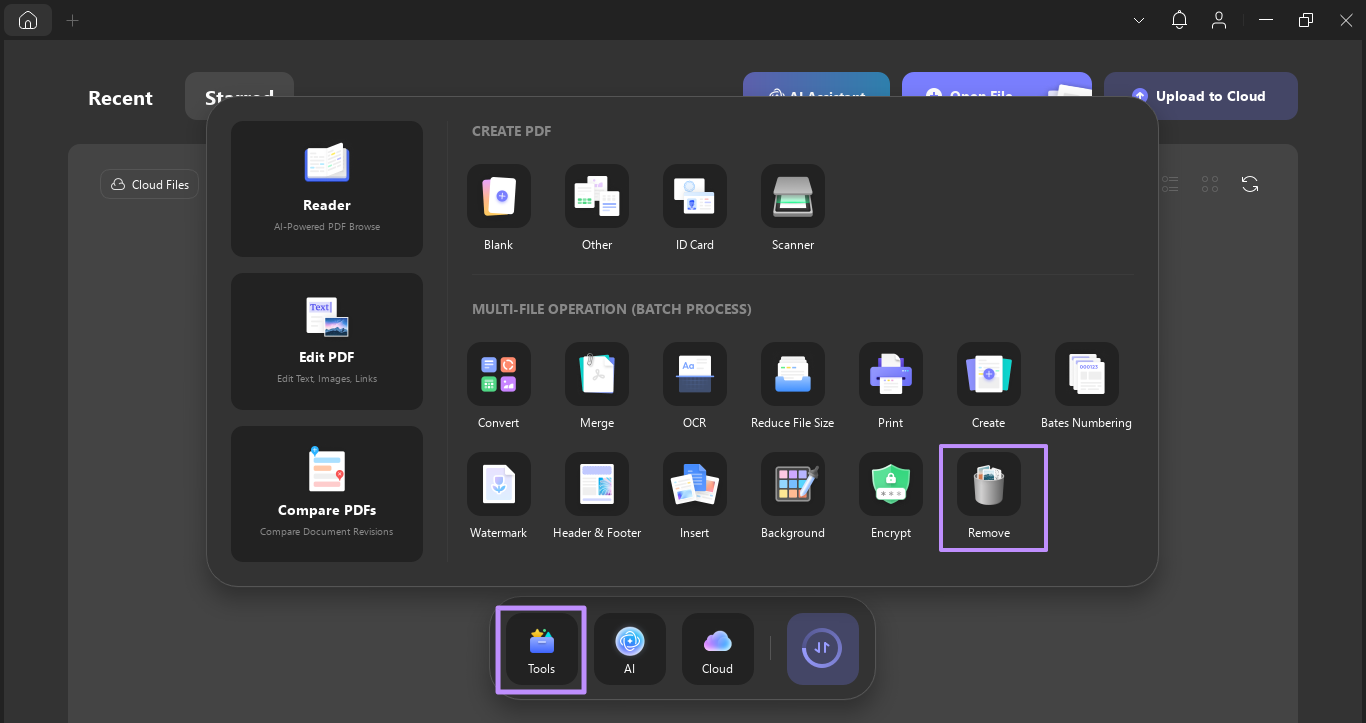
Step 1. Launch the latest version of UPDF on your PC and open the Tools section. Then, choose the Remove tool under the Batch Process section.
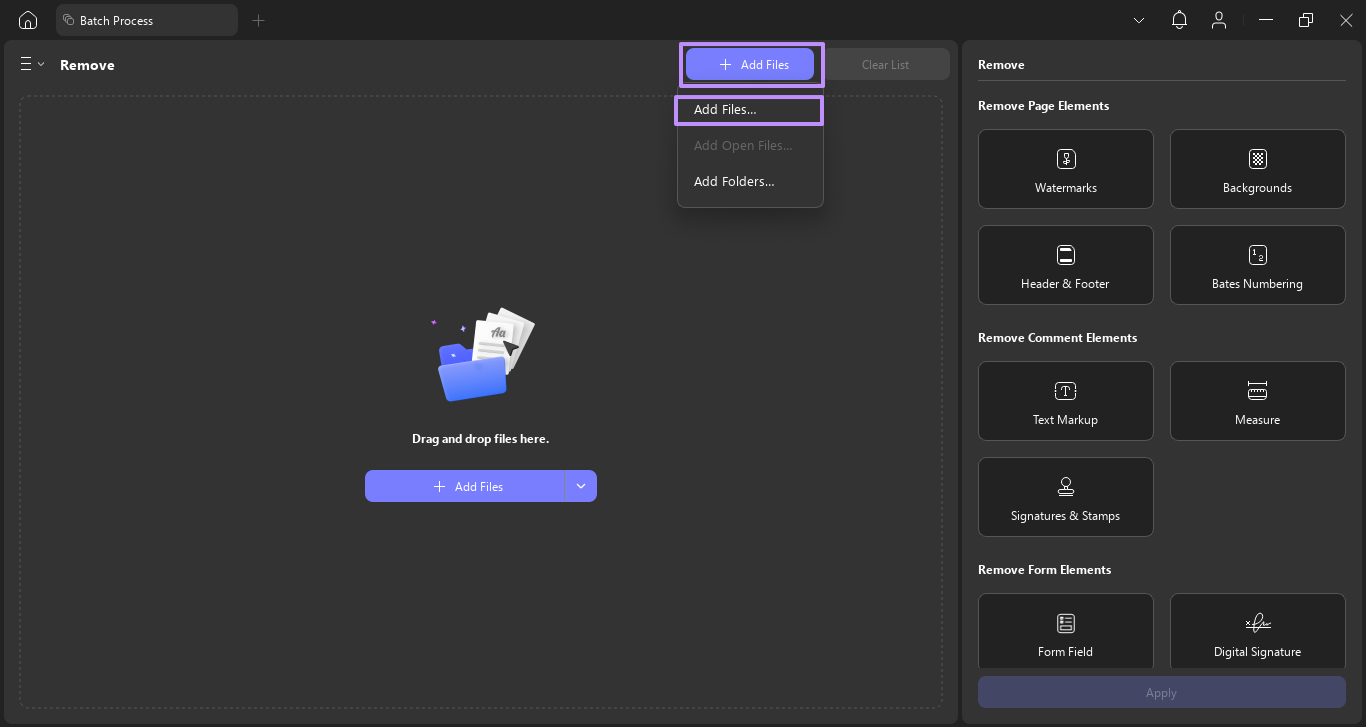
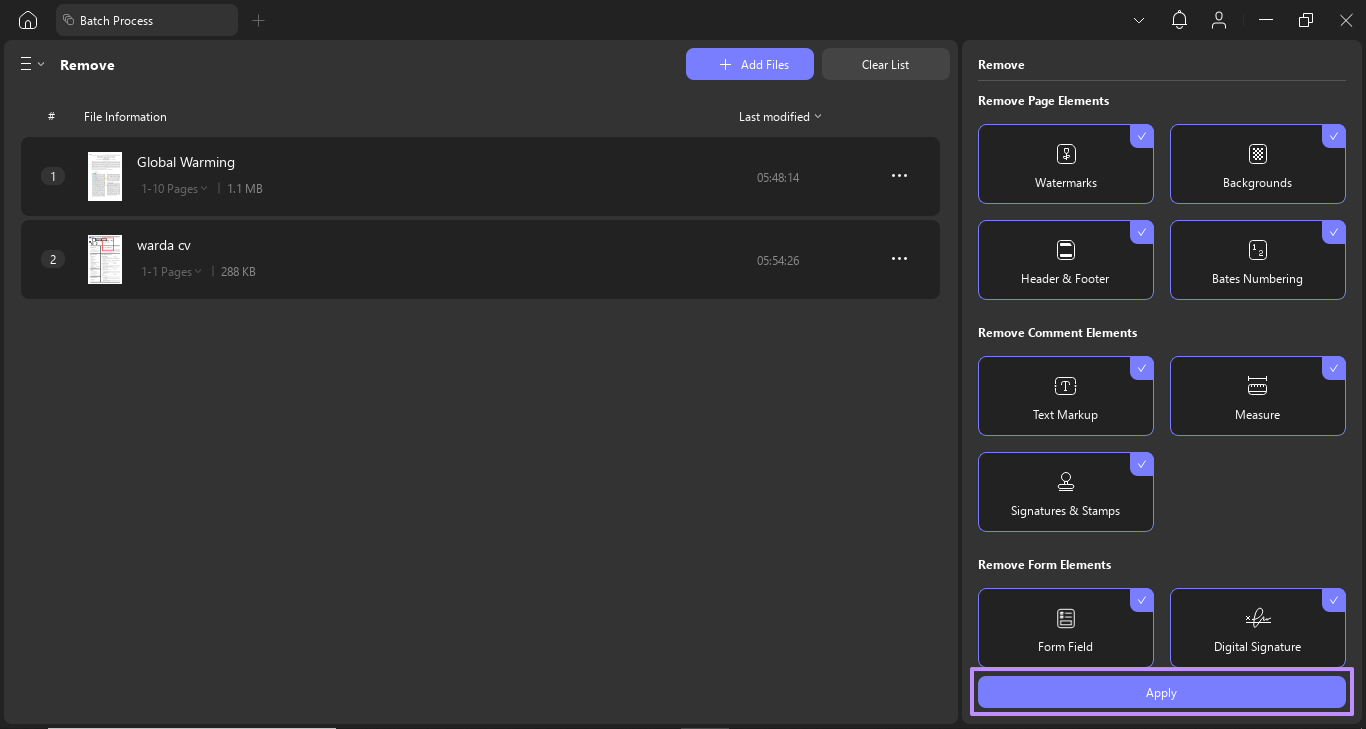
Step 2. After choosing the Remove tool, press the +Add Files button on top and pick the Add Files option.

Step 3. Once the files are imported, select the elements you want to remove from the right-side panel (such as watermarks, backgrounds, headers, footers, Bates numbering, or annotations). After selecting the items, tap on the Apply button to remove the chosen elements from your PDFs.
Part 3. How to Batch Find and Replace Text?
Readers also have the need to update the text across multiple PDF documents. But manually updating the PDFs one by one takes a lot of time. UPDF also solves this problem by letting users merge multiple PDFs into a single one and then use its Find & Replace Text feature to make changes across all documents at the same time.
After editing, you can then easily split the combined document into separate PDFs while preserving their original names. You must download UPDF and try its Find & Replace Text feature now. After downloading UPDF, follow the given step guide to batch find and replace text in multiple PDFs using the batch edit PDF.
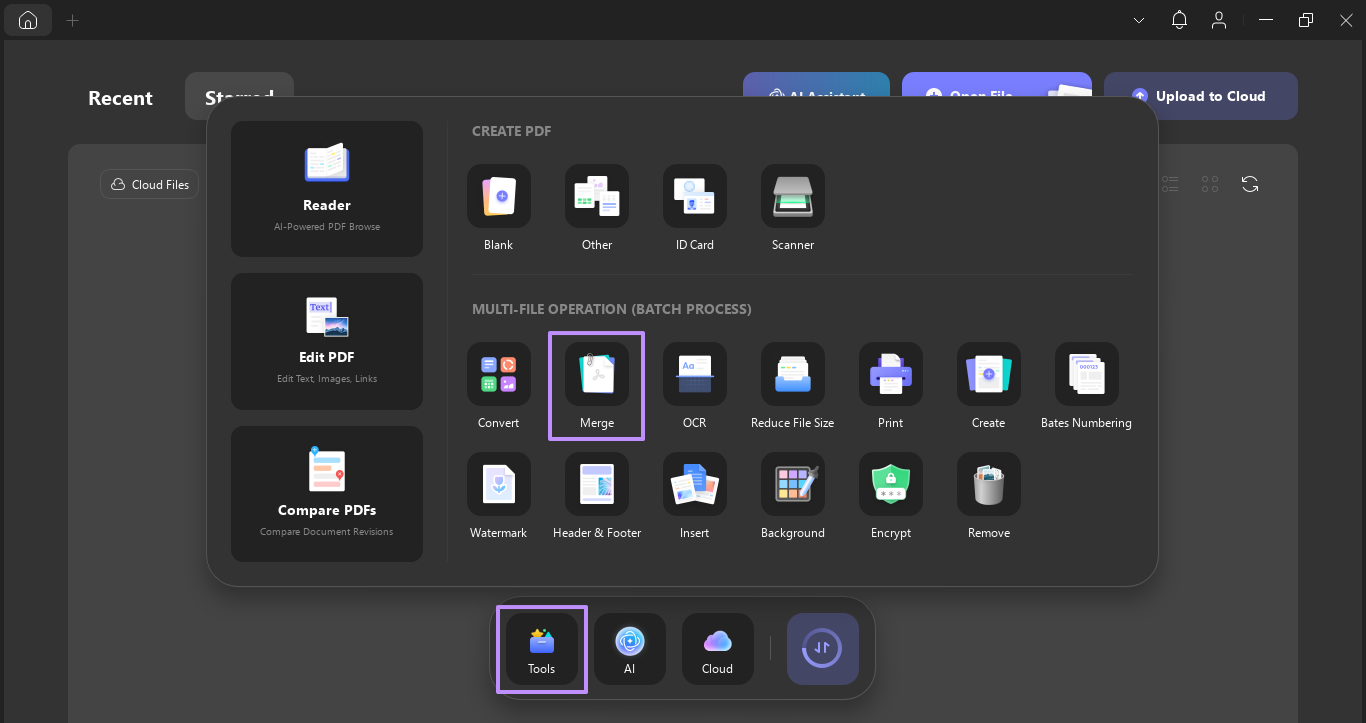
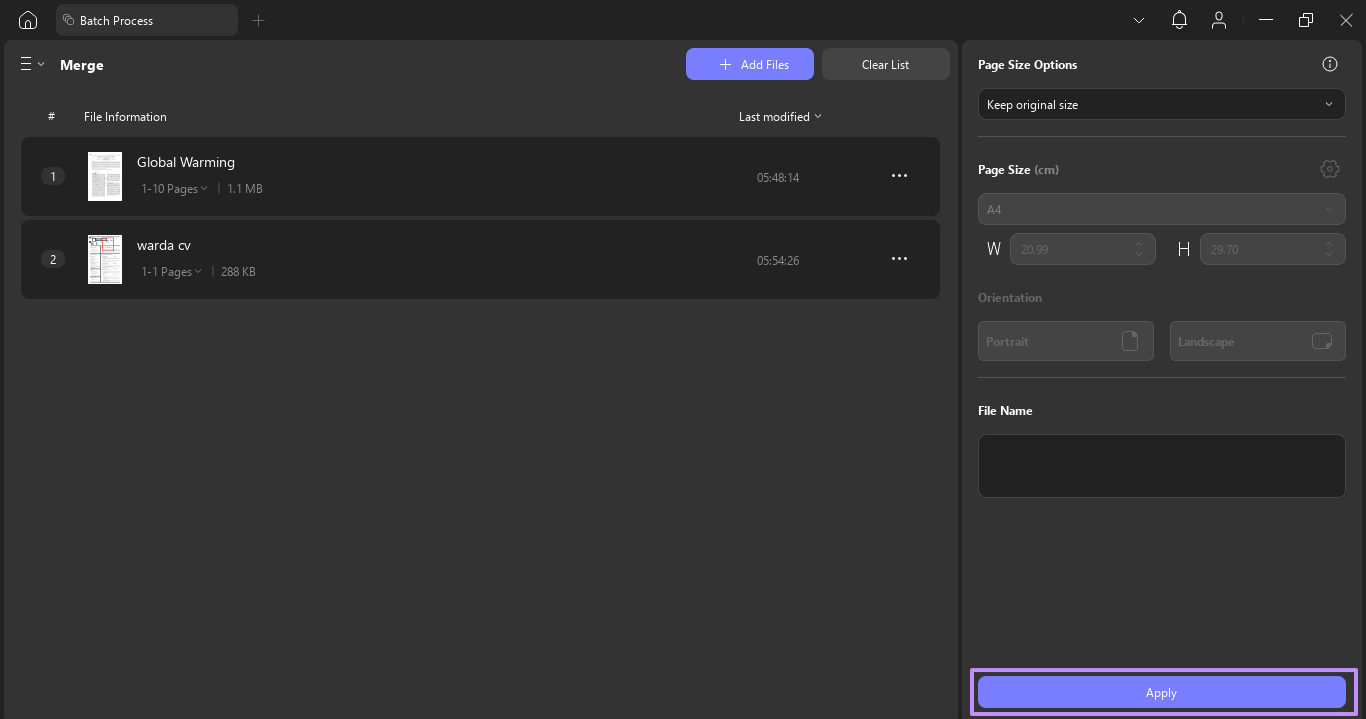
Step 1. On the main interface of UPDF, hit the Tools tab and select the Merge feature under the Batch Process section.
Step 2. Here, press the +Add Files button and select the Add Files option from the small menu to add the files.

Step 3. In the Merge window, hit the Apply button to confirm the process of merging and saving the merged file to your device.
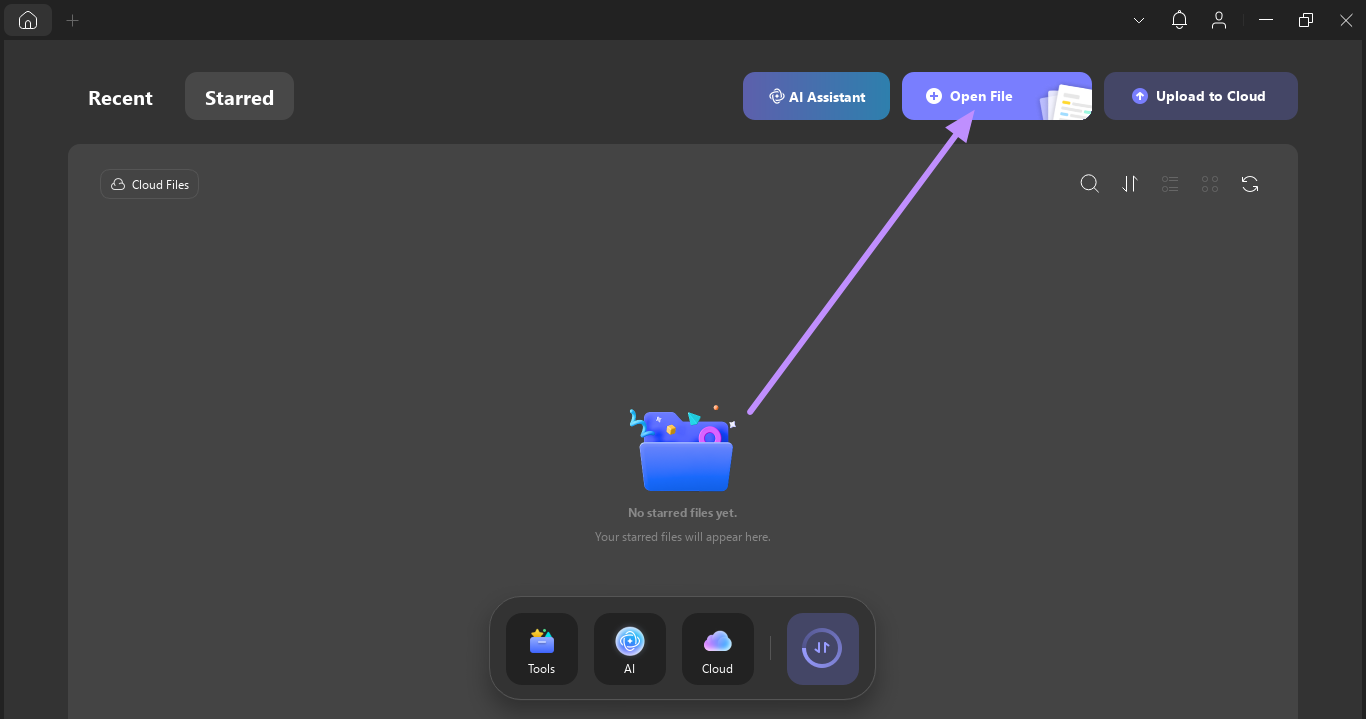
Step 4. After merging the file, again open UPDF and hit the Open File button. Then, choose the merged PDF to open it within the UPDF reading interface.
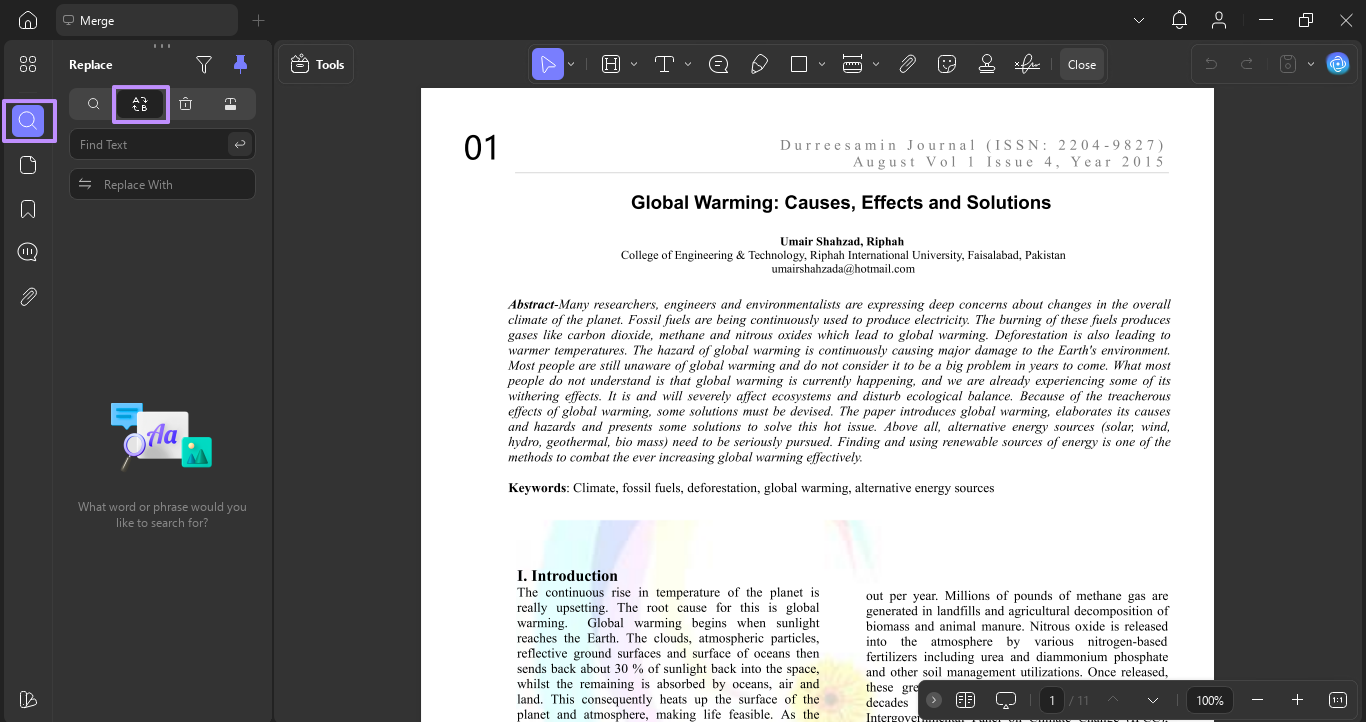
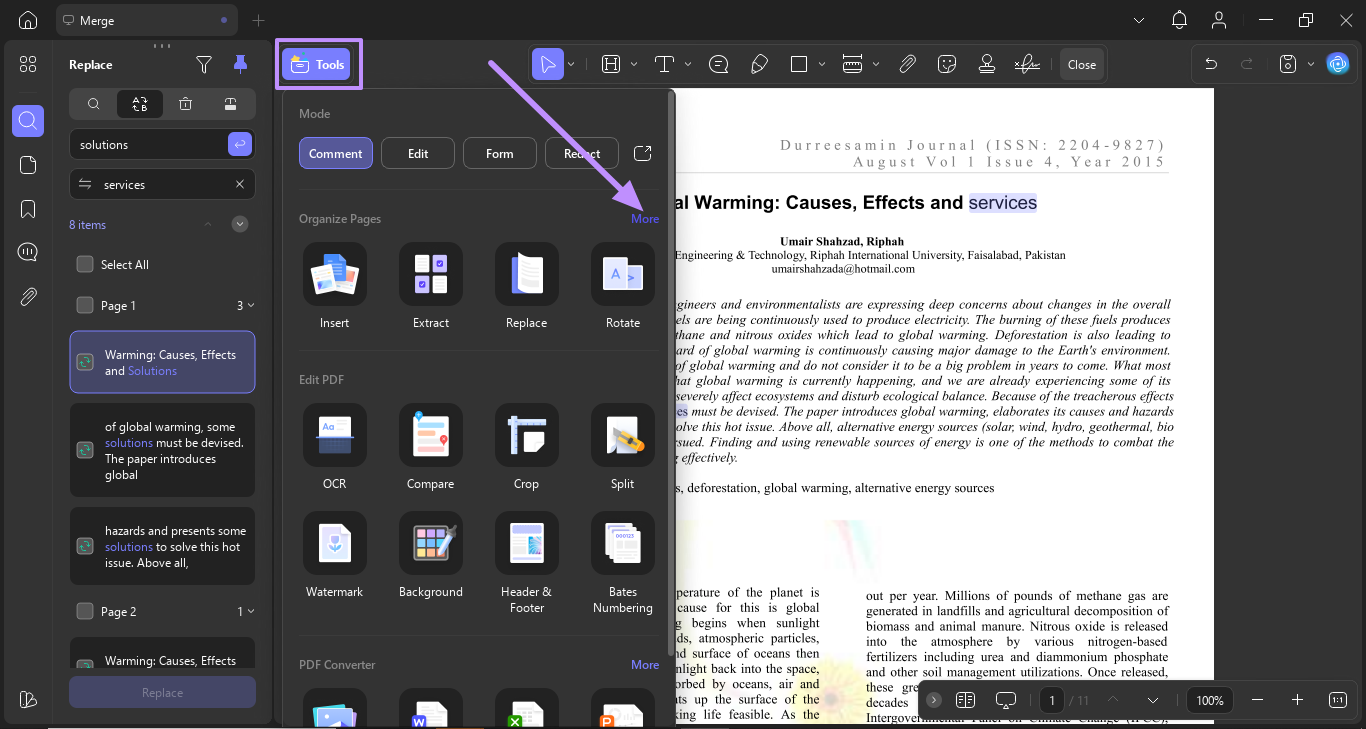
Step 5. Once you open the merged PDF, head to the Search icon on the left-side vertical toolbar and tap on the Find Text & Replace feature.
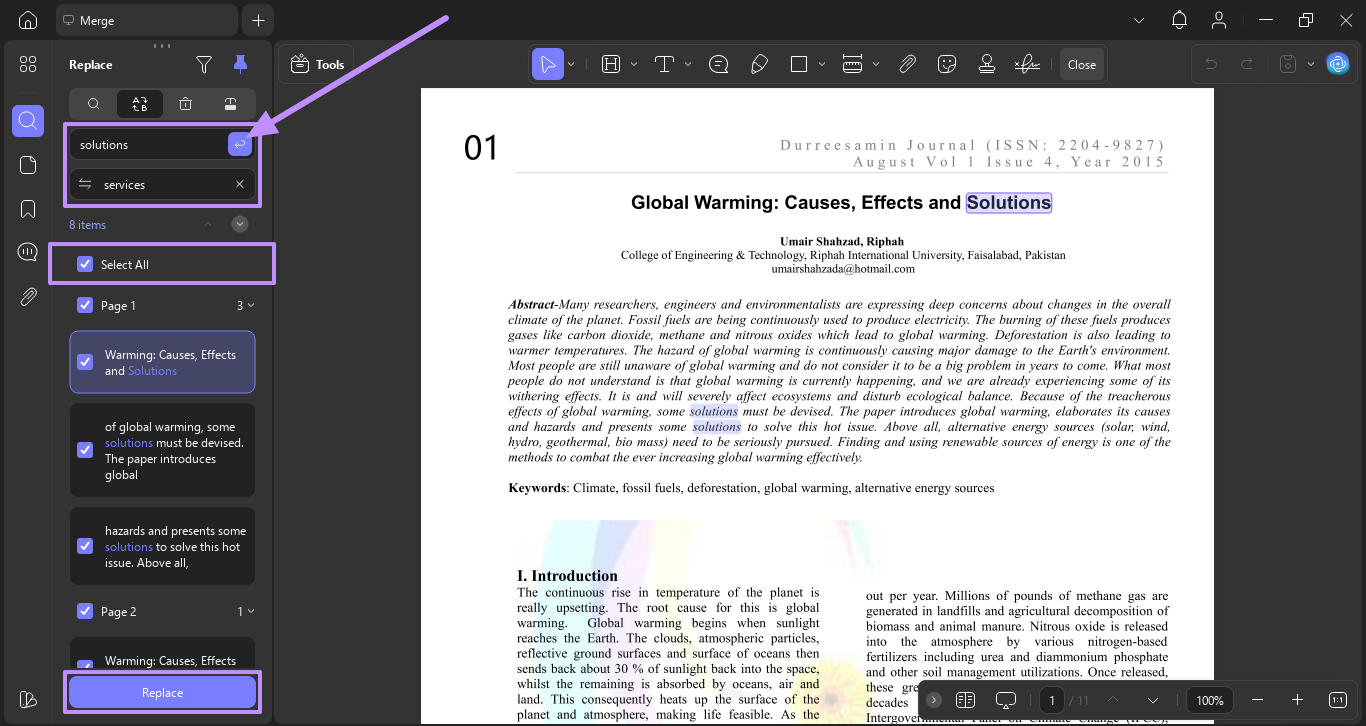
Step 6. Now, enter the text you want to replace in the Find Text field, and then type the new text in the Replace with field. Once you do this, hit the Send arrow icon to find the results. Then, check the Select All box and hit the Replace button.
Step 7. After replacing the text, navigate to the Tools section and click More under the Organize Pages.
Step 8. In the presented window, tap the Split button and choose the Split by Top-Level Bookmarks option.
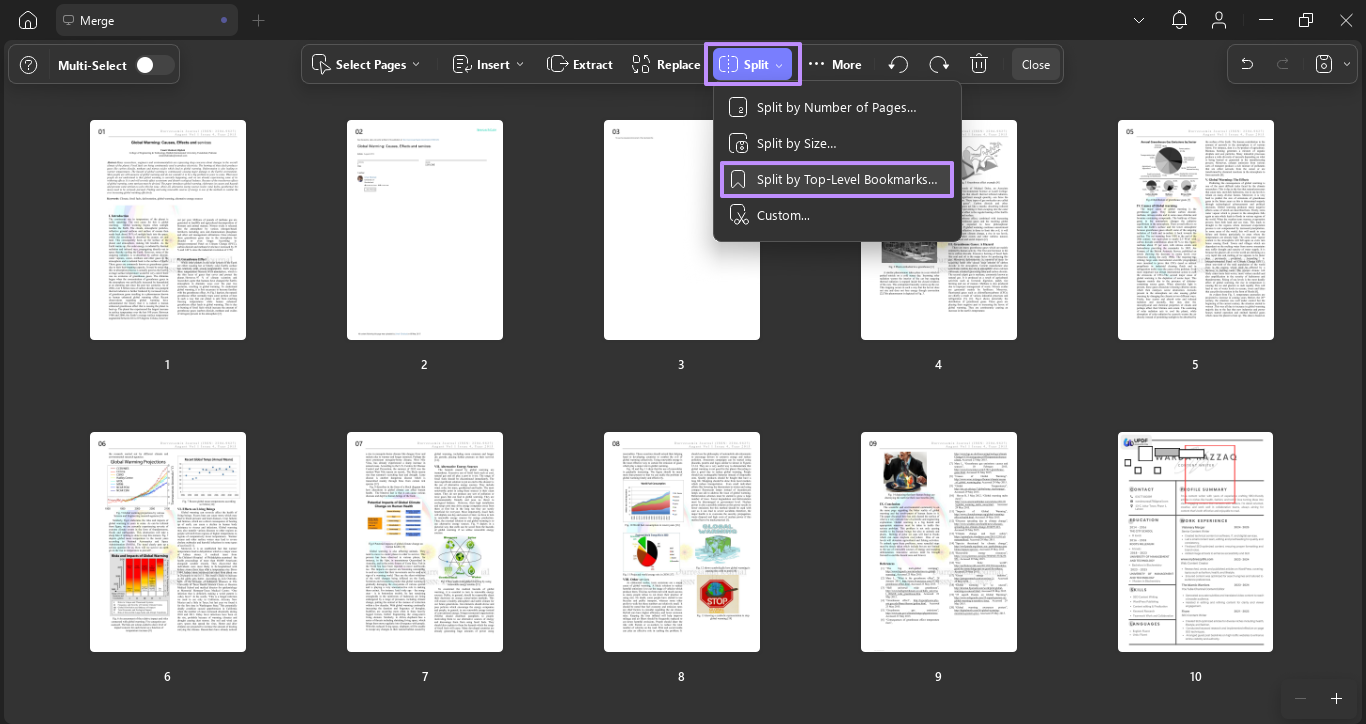
Step 9. Finally, press the Split button to split the merged PDF back into individual files.

Apart from the batch edit PDF feature, UPDF offers many other powerful tools that make it a complete PDF solution. Next is a detailed breakdown of its 7 top features:
- Convert: Using the Convert feature, you get the option to transform PDFs into different file formats, including PPT, Word, and others.
- Create: You can convert Word, Excel, PowerPoint, images, and other formats into high-quality PDFs with just a few clicks.
- Reader: UPDF offers a PDF reader with multiple viewing modes, such as single-page, two-page scrolling, and fit-to-window.
- AI Assistant: UPDF’s built-in AI assistant can generate summaries, translations, and even answer your queries about the content regarding explanation.
- Compare PDFs: This compare feature allows you to open PDFs side by side and highlight differences between them.
- OCR: With the OCR feature, you get the ability to convert scanned or image-based PDFs into an editable and searchable format.
- Encrypt: UPDF lets you protect your documents by setting open passwords or restricting access to certain features like printing or editing.
To learn more about UPDF 2.0 features in detail, read this article by Apple Insider or watch the video.
Conclusion
All in all, users often need to perform editing or remove elements from multiple PDF-based documents. But, doing those processes one by one is a time-consuming task that can reduce productivity. That’s when you must use UPDF to batch edit PDFs in a few simple steps. Using UPDF, users can add and remove multiple elements to various PDFs at once, as well as use the Find & Replace Text feature to update content. So, download UPDF today and simplify your entire PDF management workflow with ease. After testing, you can upgrade to pro version at a very low price.
Windows • macOS • iOS • Android 100% secure


 Nls Jansen
 Enid Brown
 Lizzy Lozano
 Enola Miller